


Moonbug
-
Posts
1,028 -
Joined
-
Last visited
Content Type
Profiles
Forums
Gallery
Events
Posts posted by Moonbug
-
-
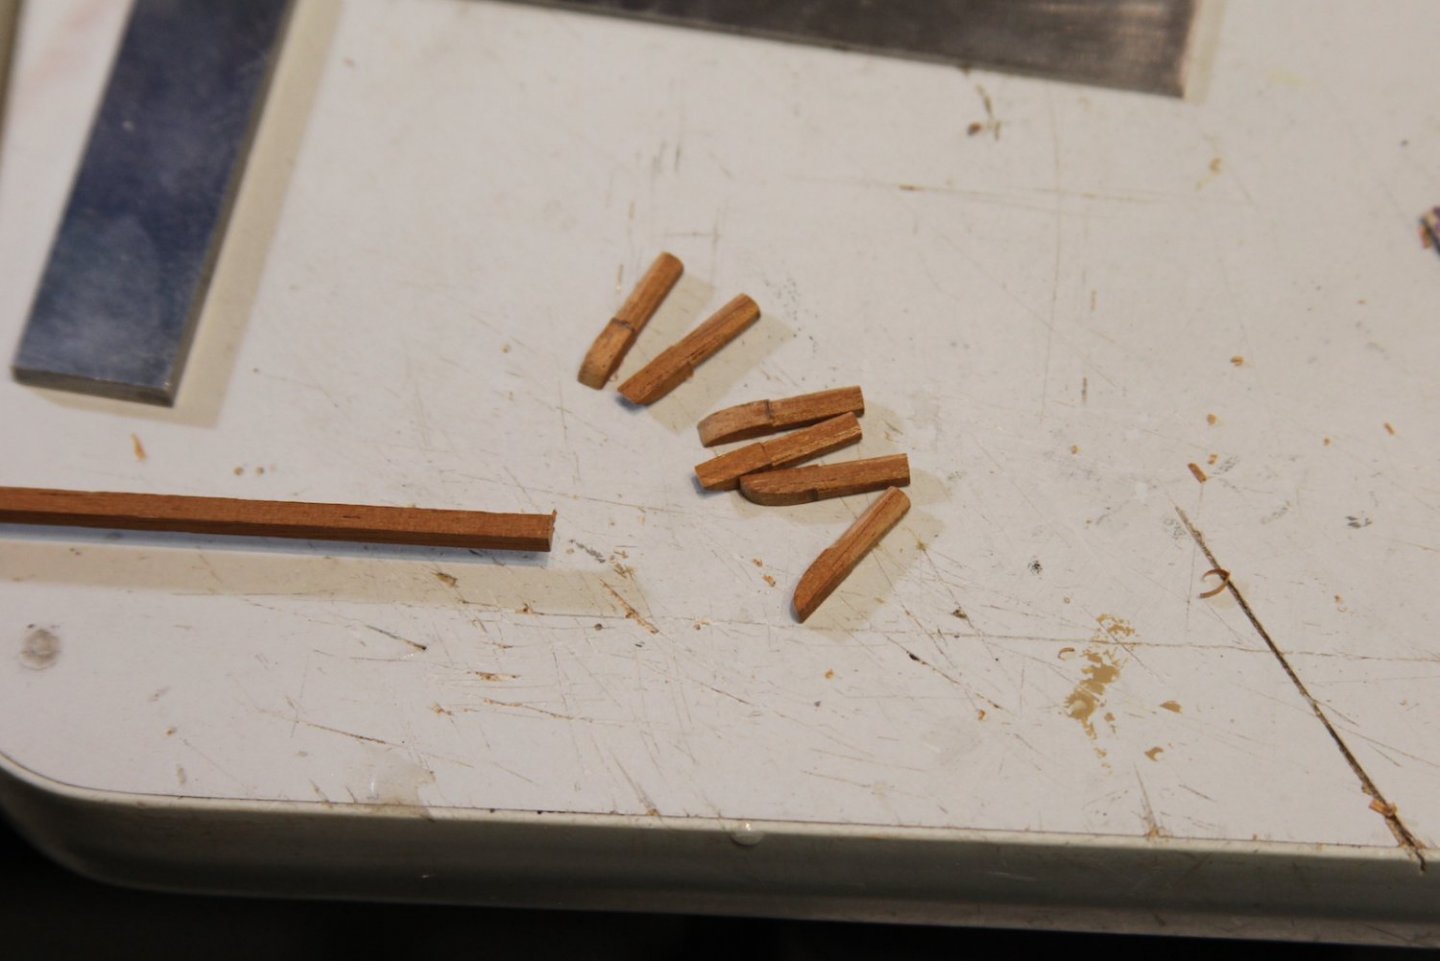
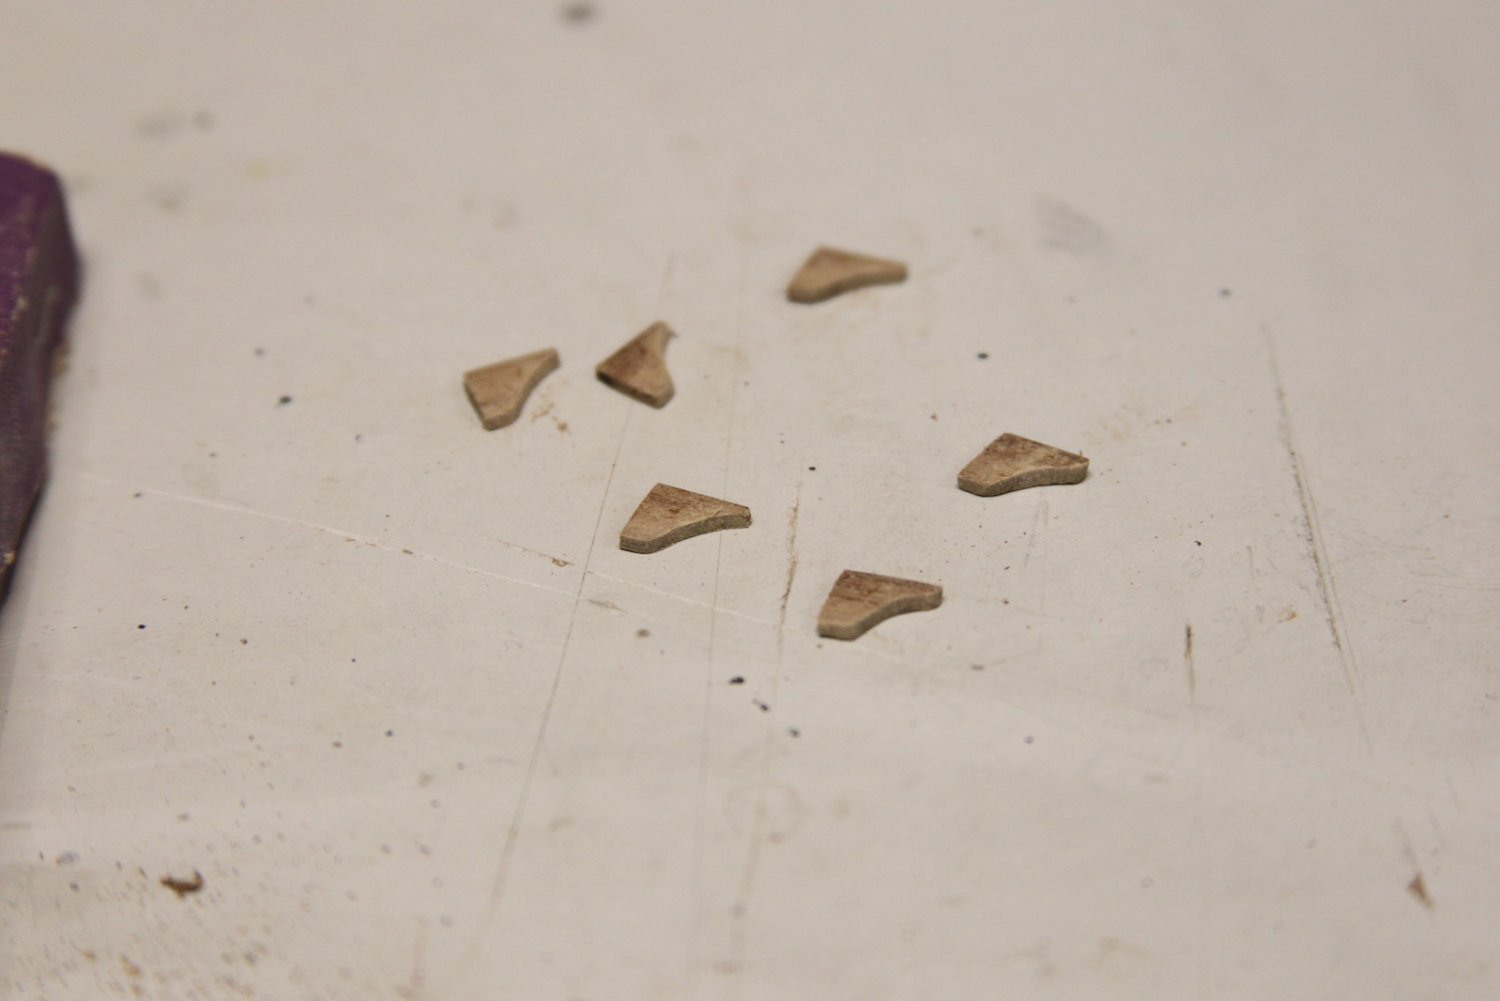
I started cutting and shaping the swivel gun mounts out of 3mm x 3mm mahogany that I have lying around. I don't really want to paint them, and I want them to stand out a little bit but compliment the rest of the subdued color scheme I have going. I shaped them based on FFM with the octagonal top and sized to fit my 'scale guy' once mounted. More on that later.
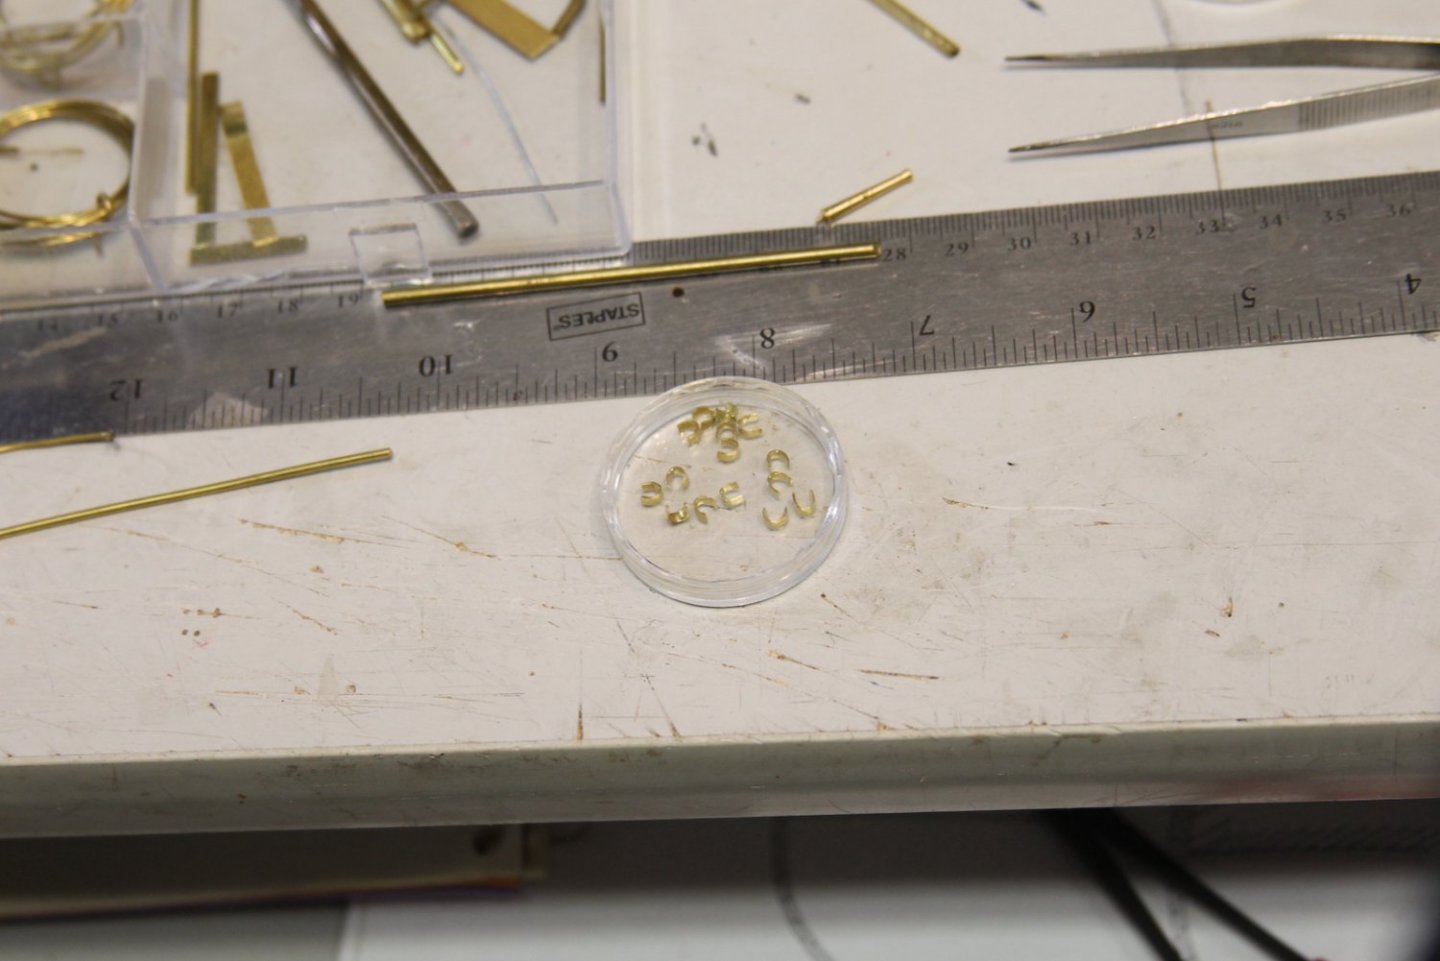
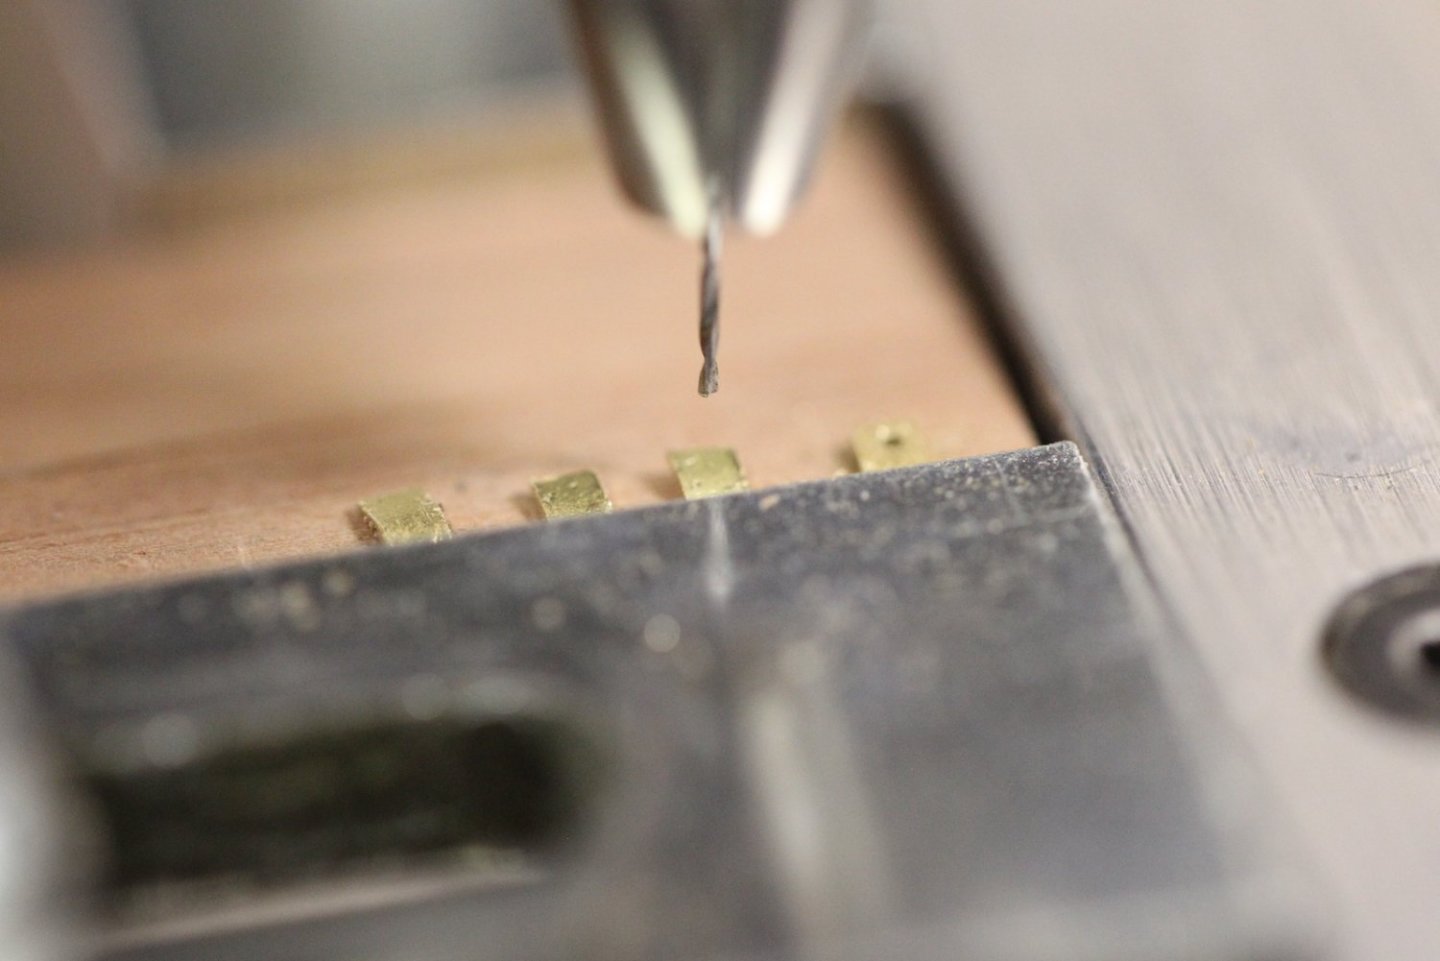
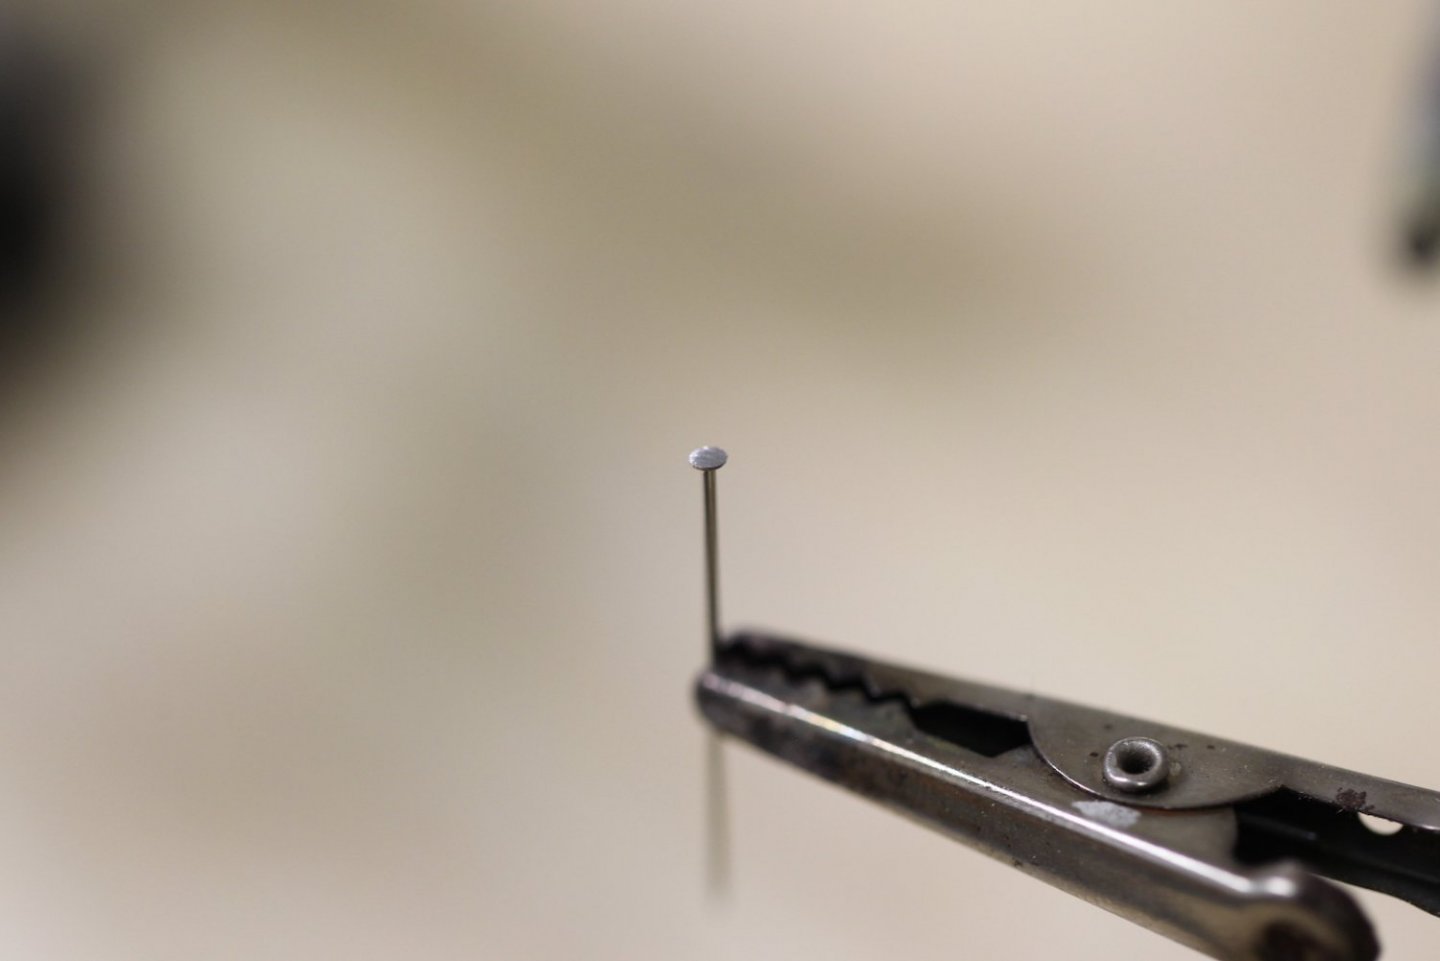
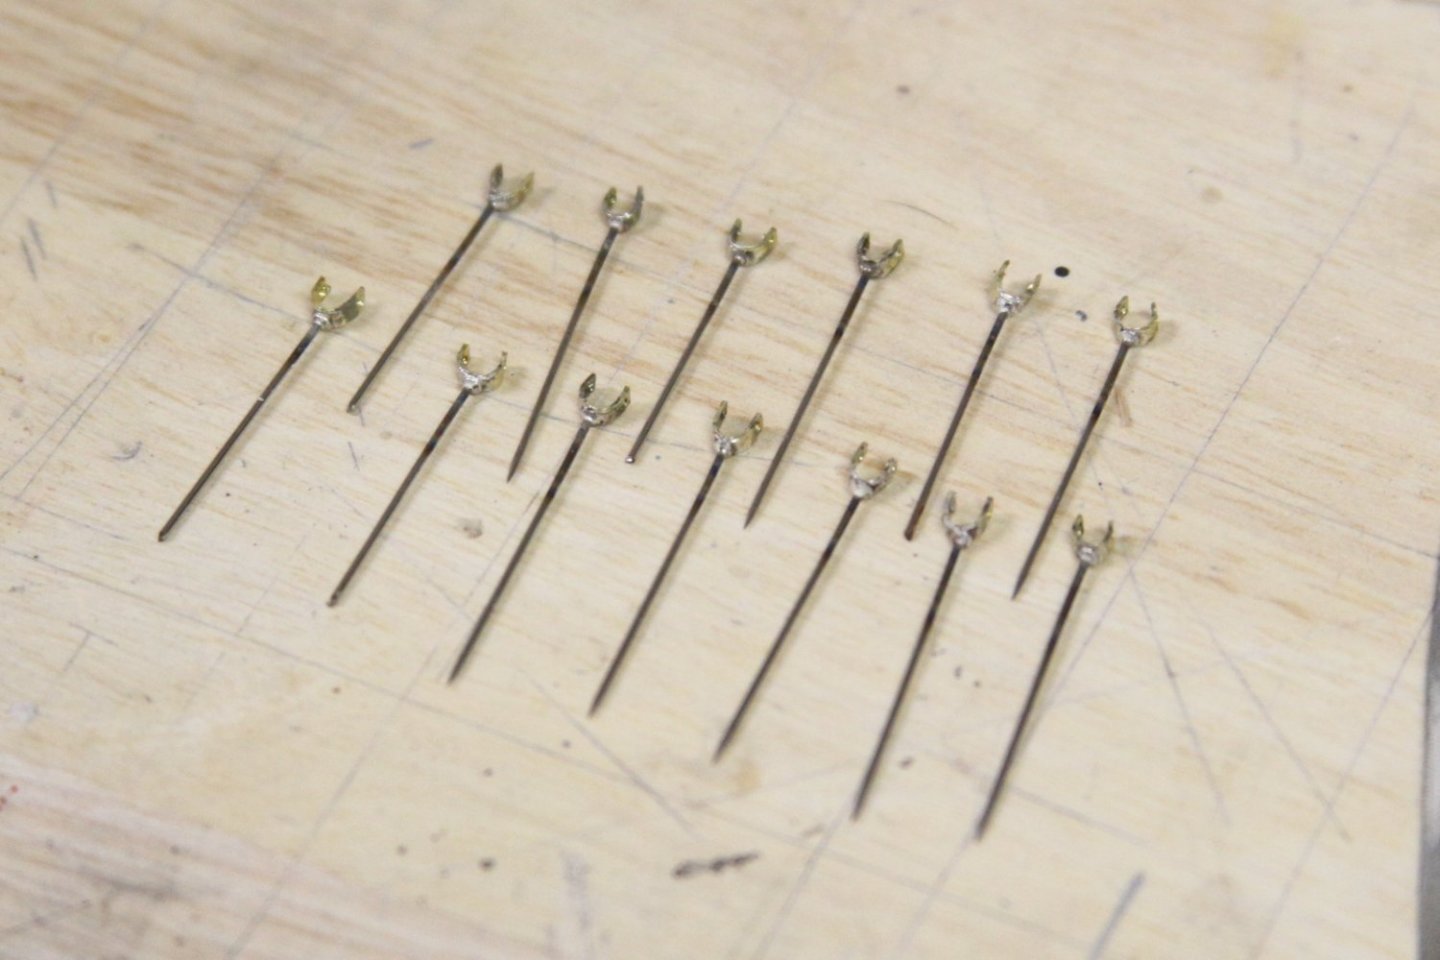
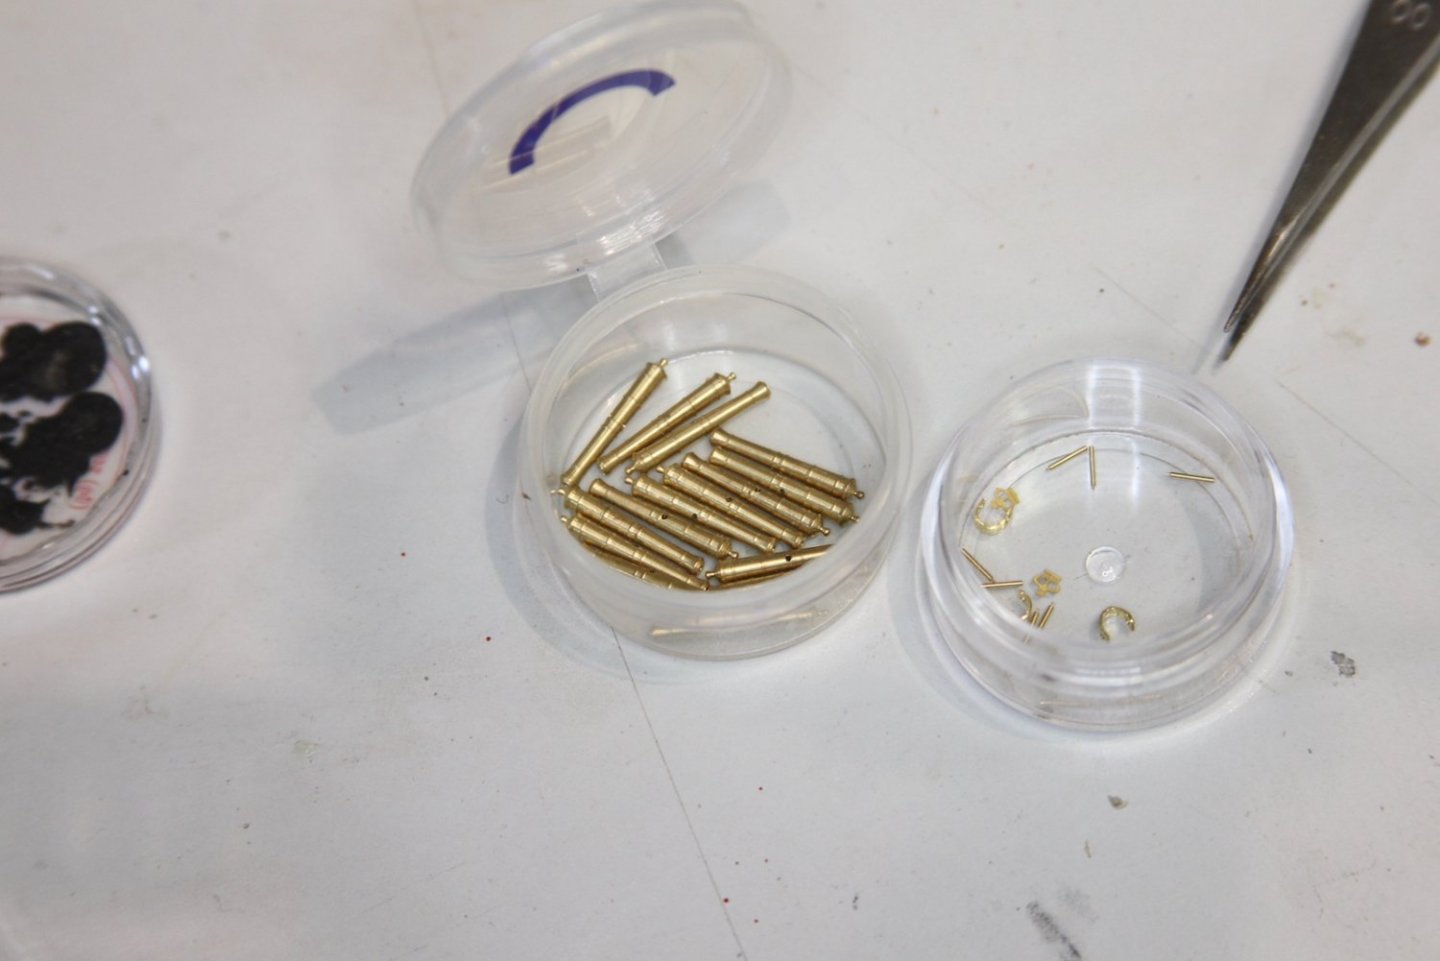
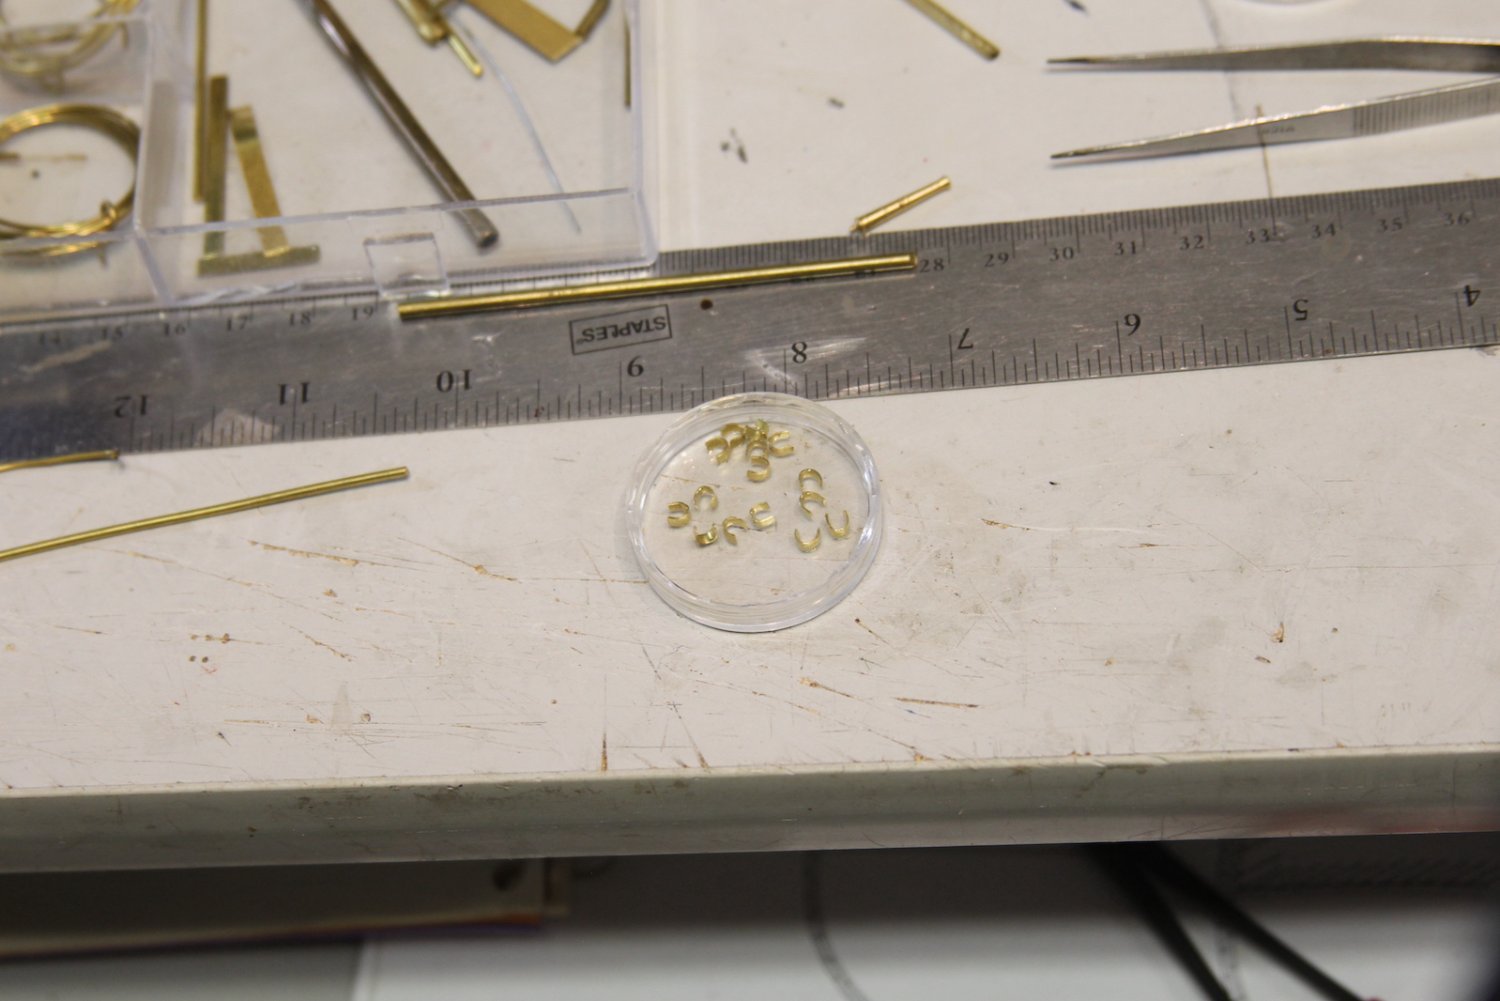
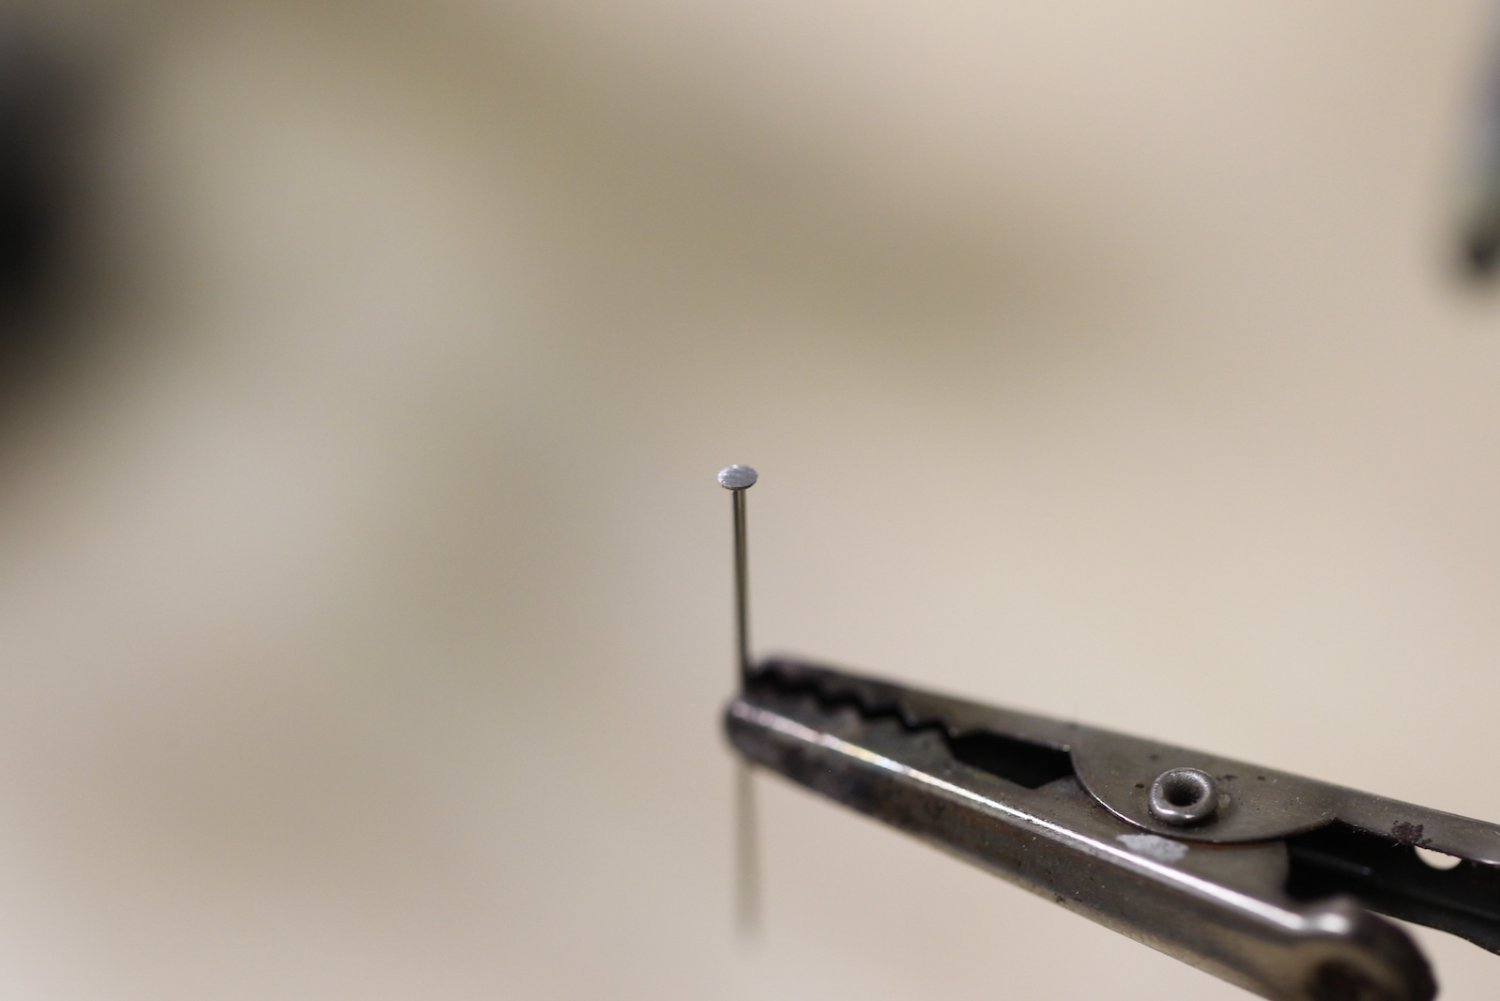
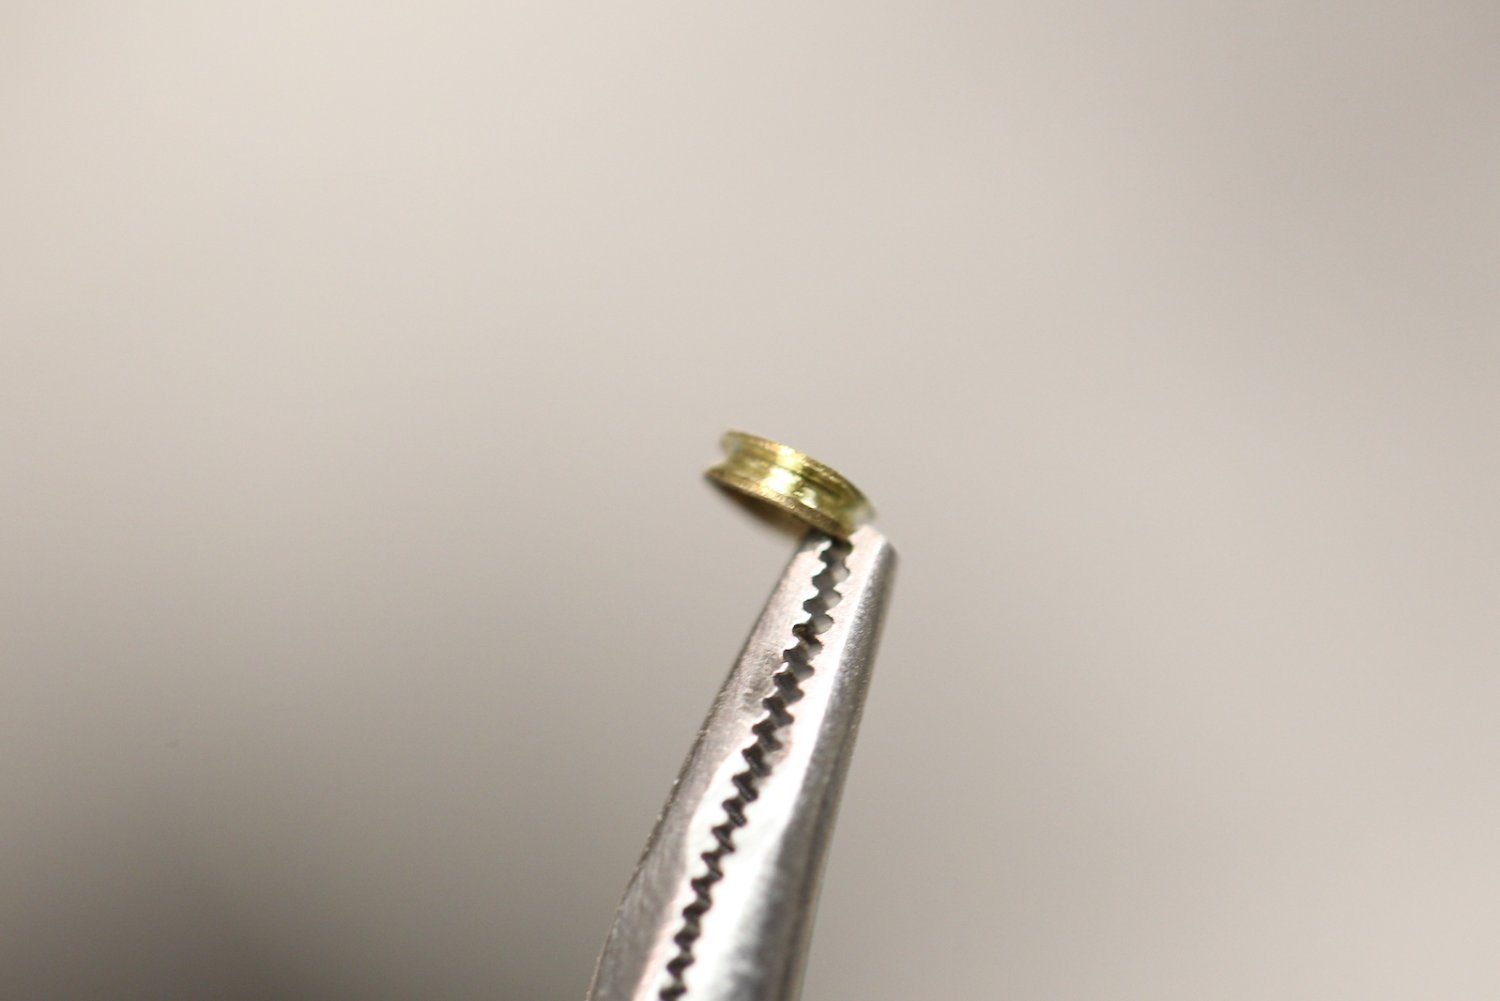
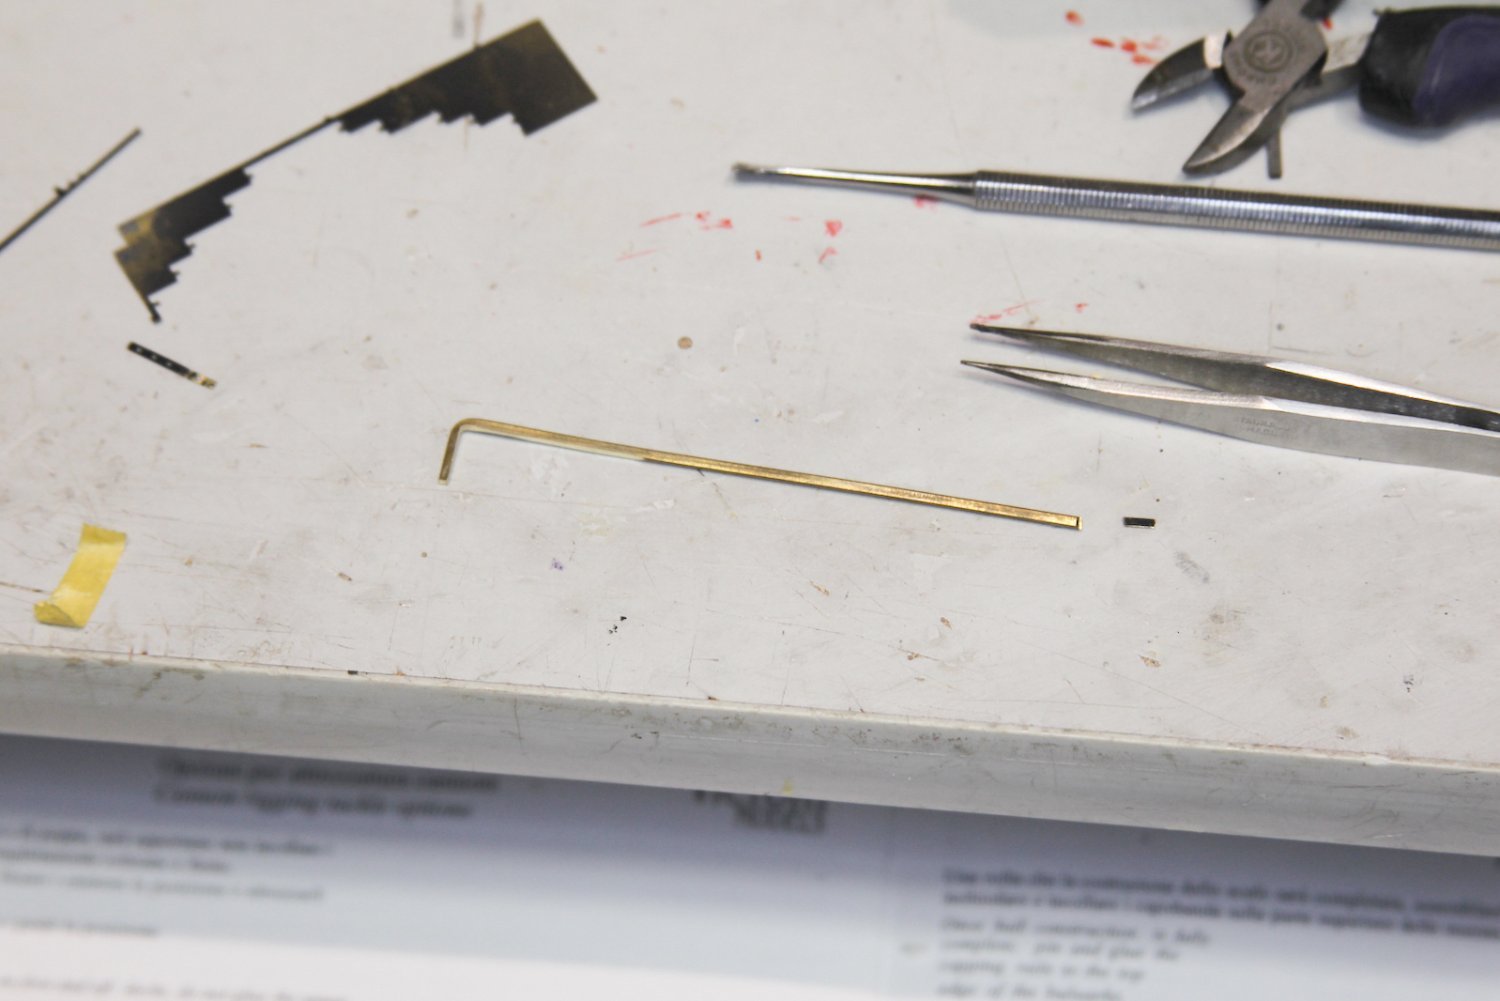
But of course this got me thinking about how to handle the swivel guns themselves. First, I cut some brass brackets, shaped them and drilled out bolt holes. They're then mounted to pinheads that have been sanded down flat to form a solder-able surface.
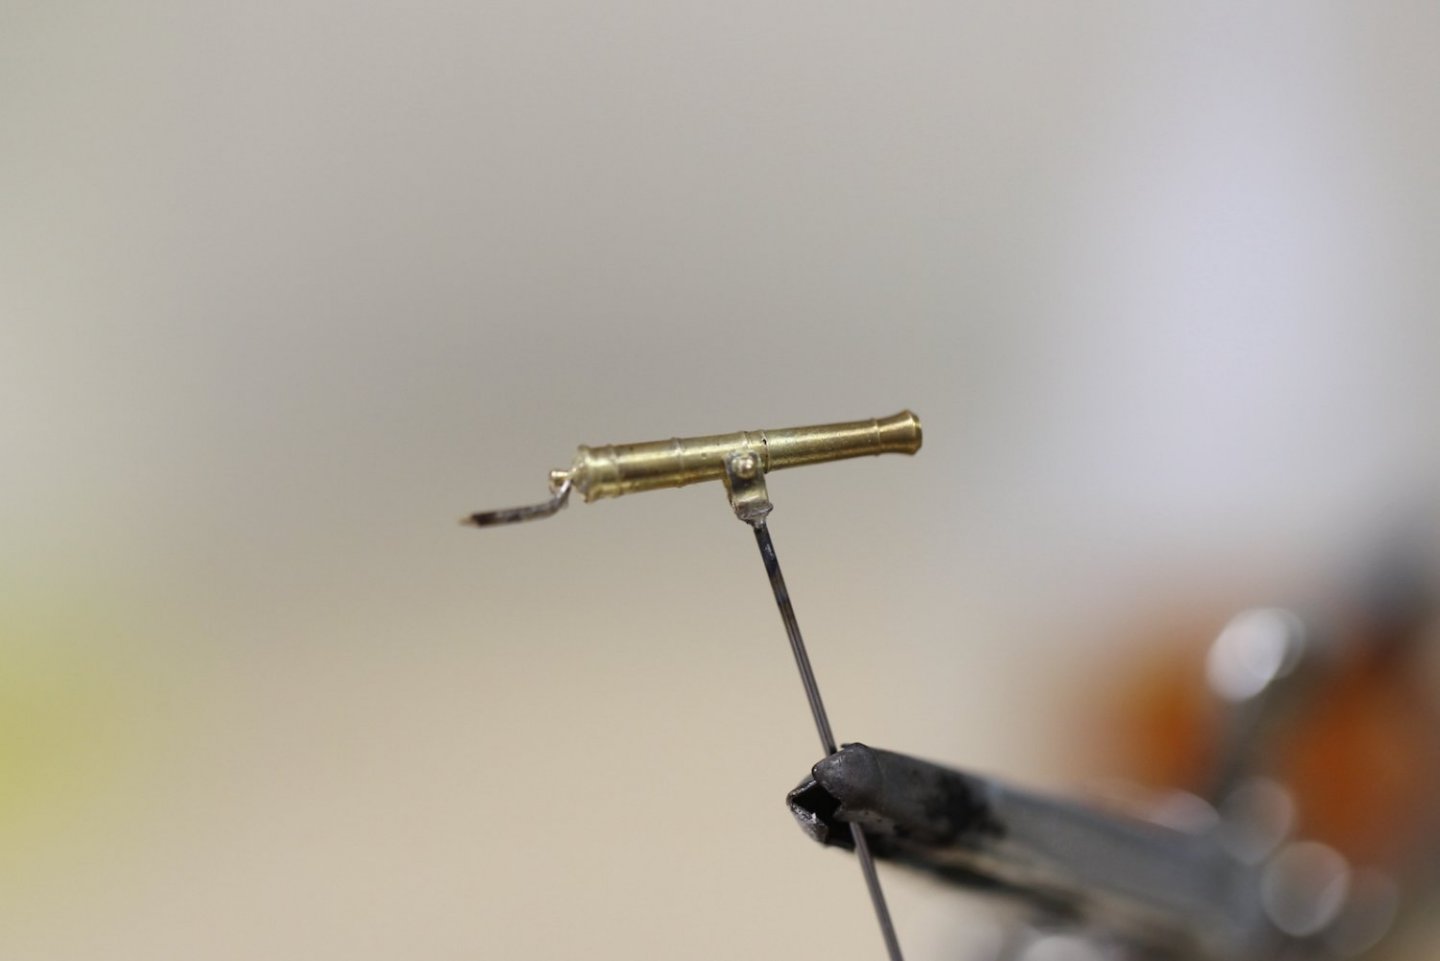
For the actual guns, I have these really sweet looking turned brass guns from Syren that I'm going to use instead of the molded die cast kit guns.
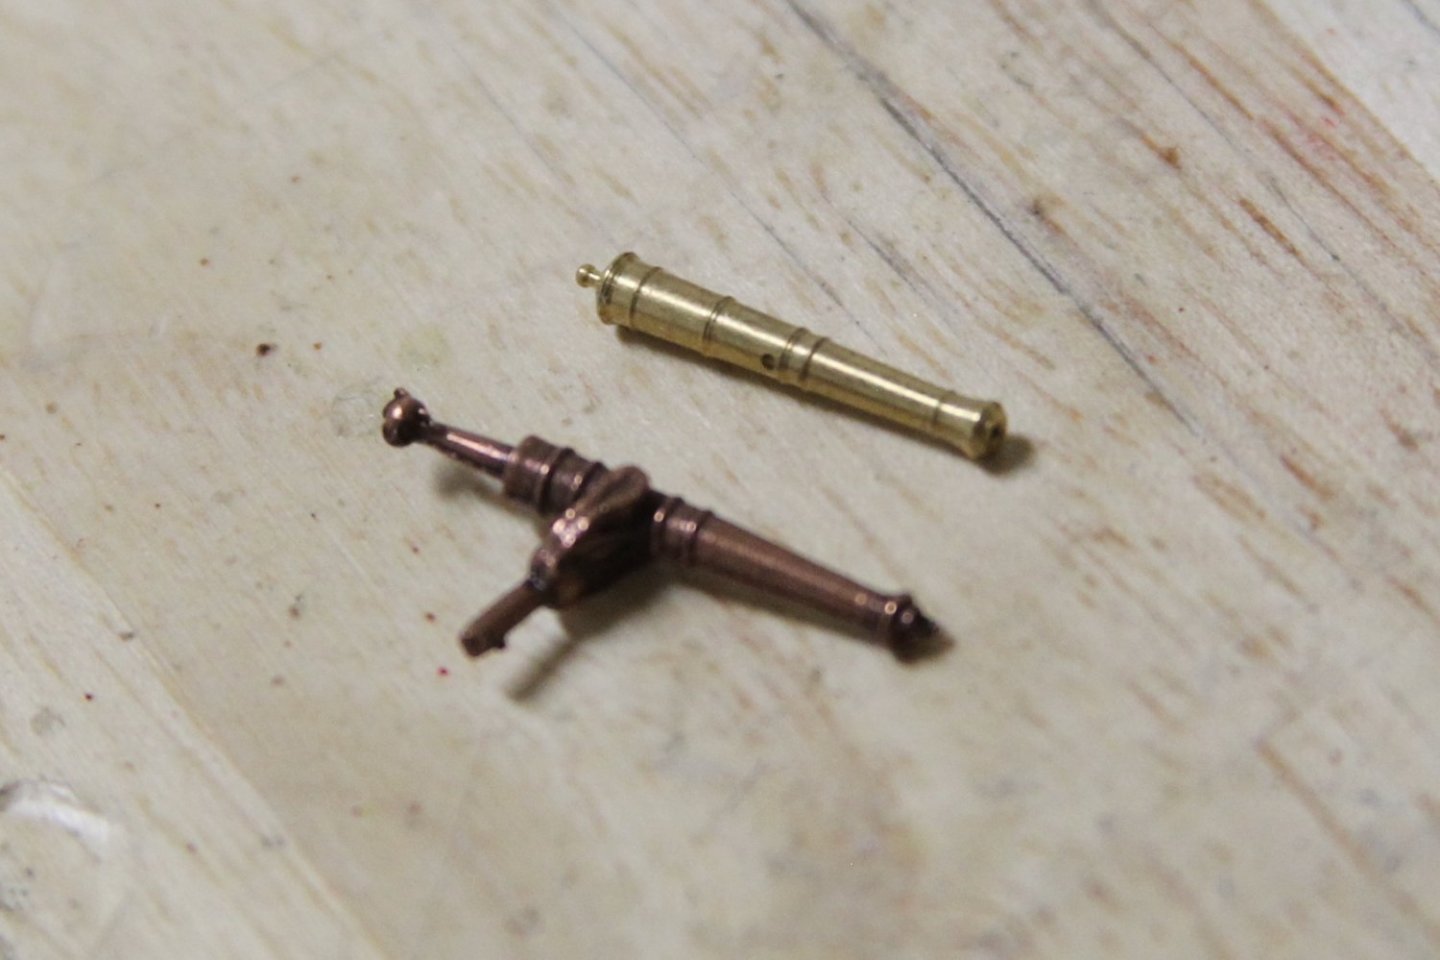
However - one of things that is accurate about the kit guns is the way in which the rear handle extends back. I briefly considered hacking off the breach button from the brass one and trying to extend a handle back - but quickly realized this was beyond my capabilities without the entire thing looking like crap. So I opted for the secondary style that you sometimes see in which the handle extends from the rear of the gun. I know it's not ideal - but it's what I think I can achieve. Here's a good representation from @AON's Bellerophon build:
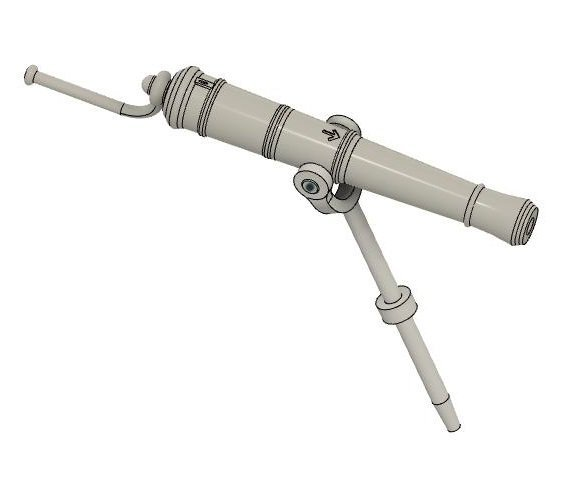
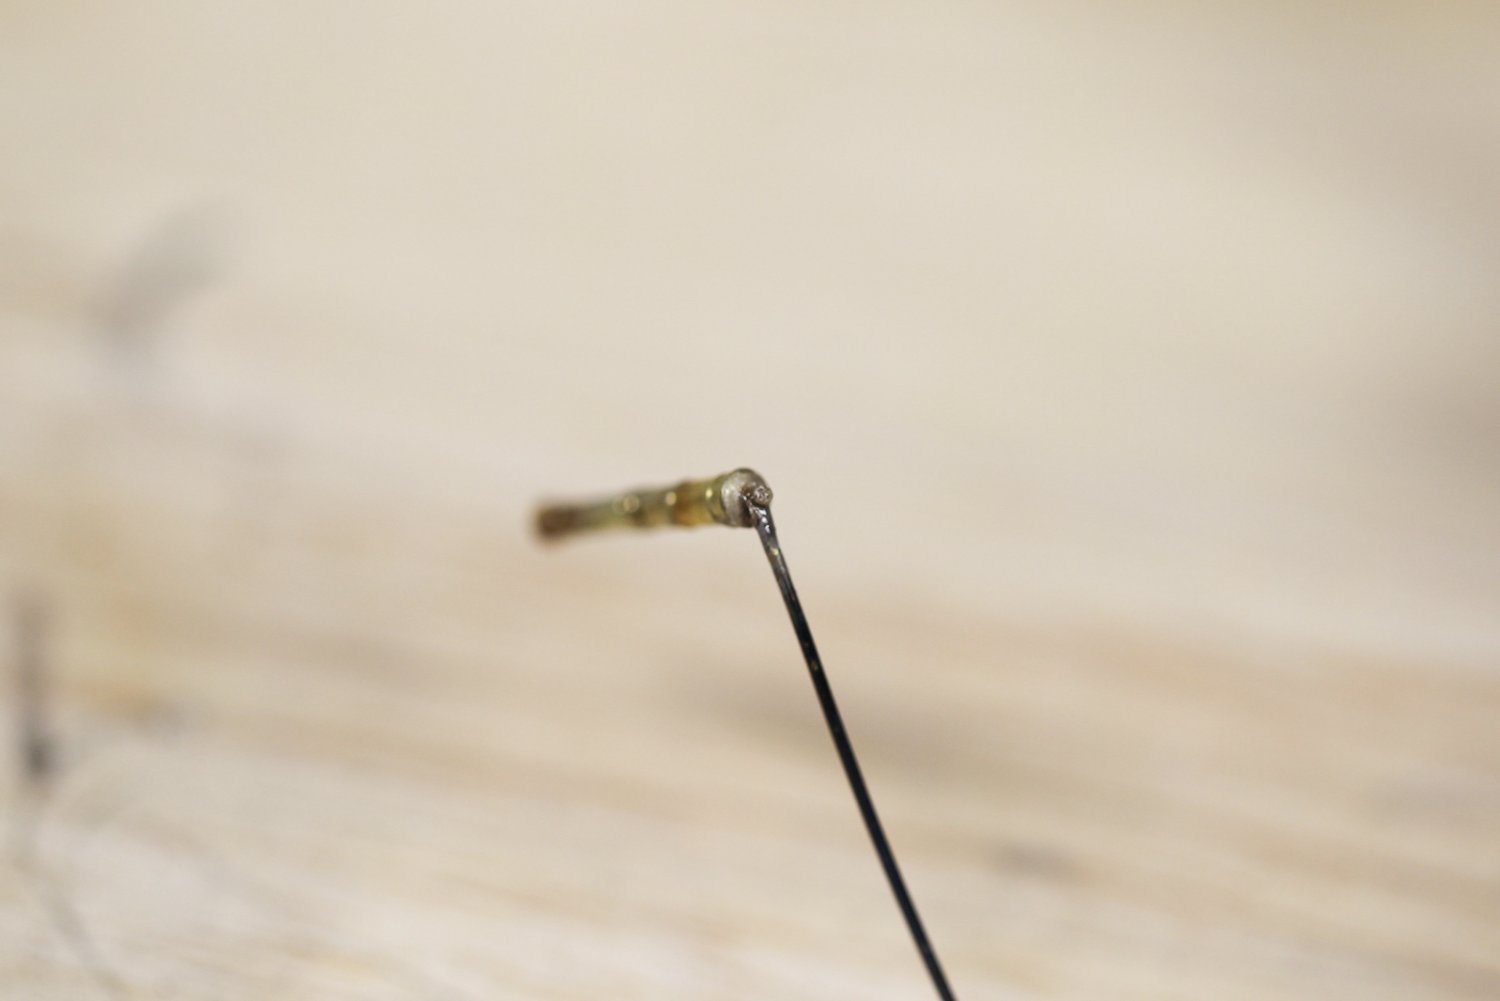
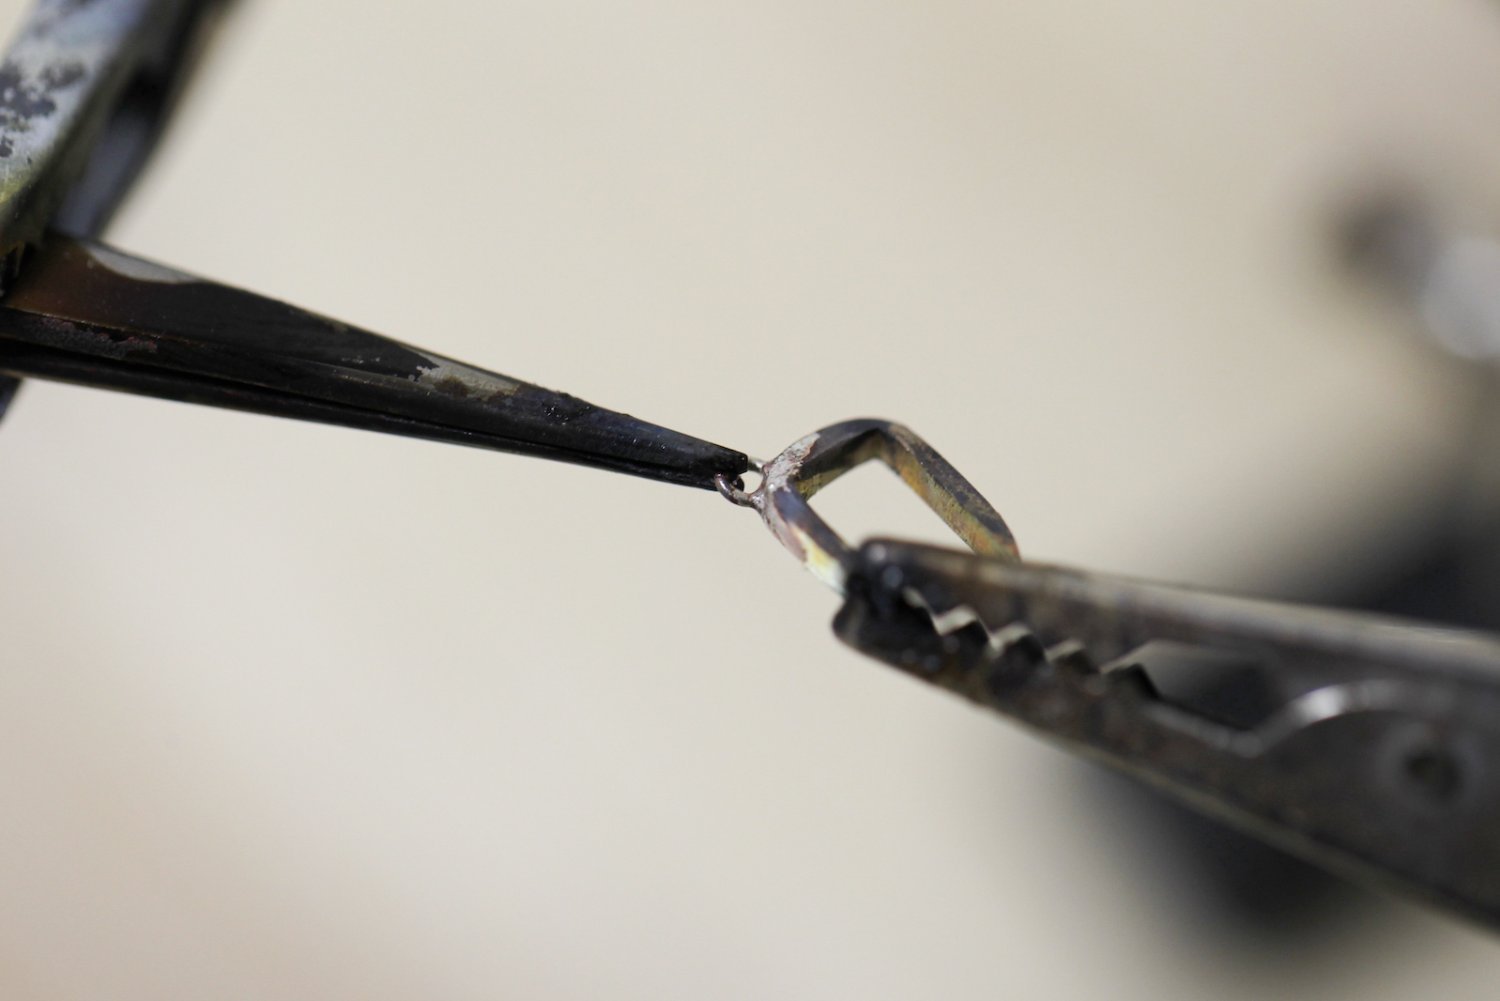
After a lot of attempts at trying to get the handle to "loop" around the button, it was just too small of a scale and everything I did once again looked like crap. My first working attempt was to try and mount/solder it to the bottom of the gun instead:
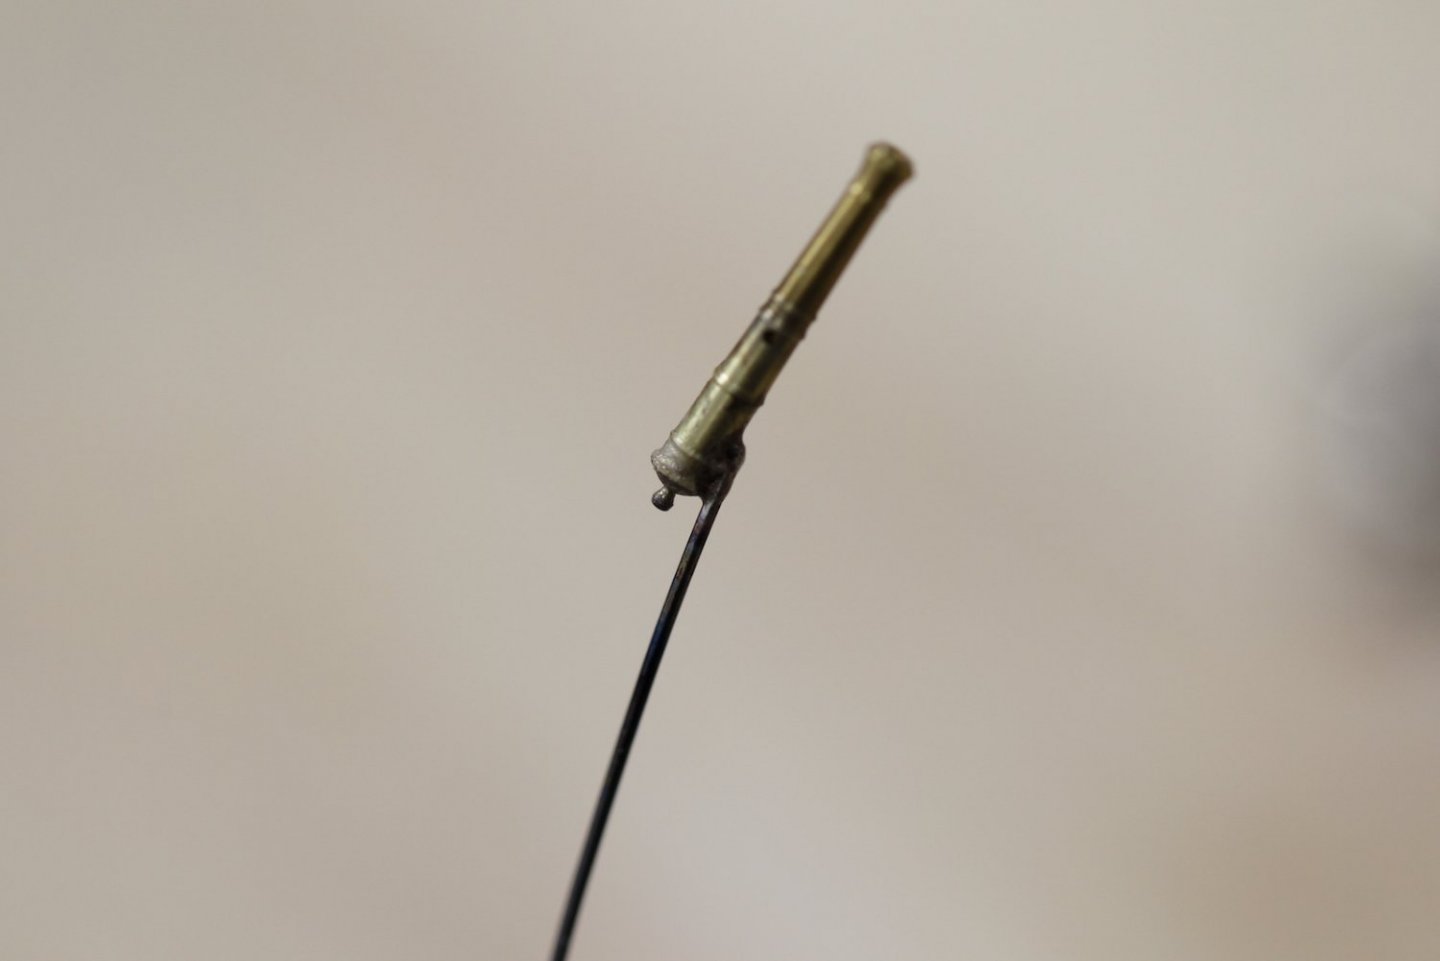
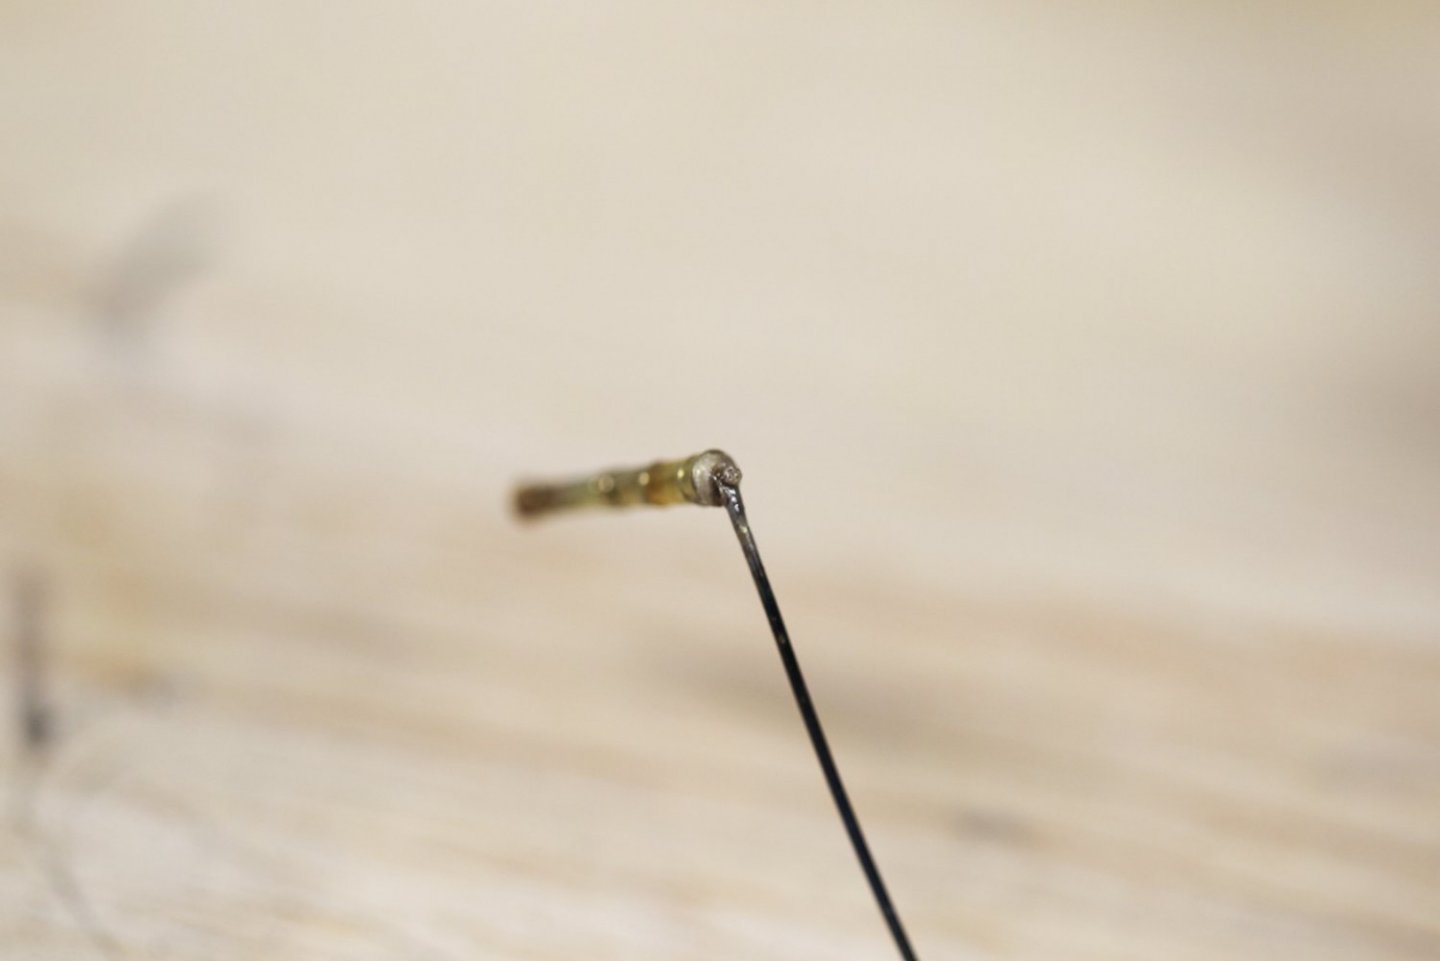
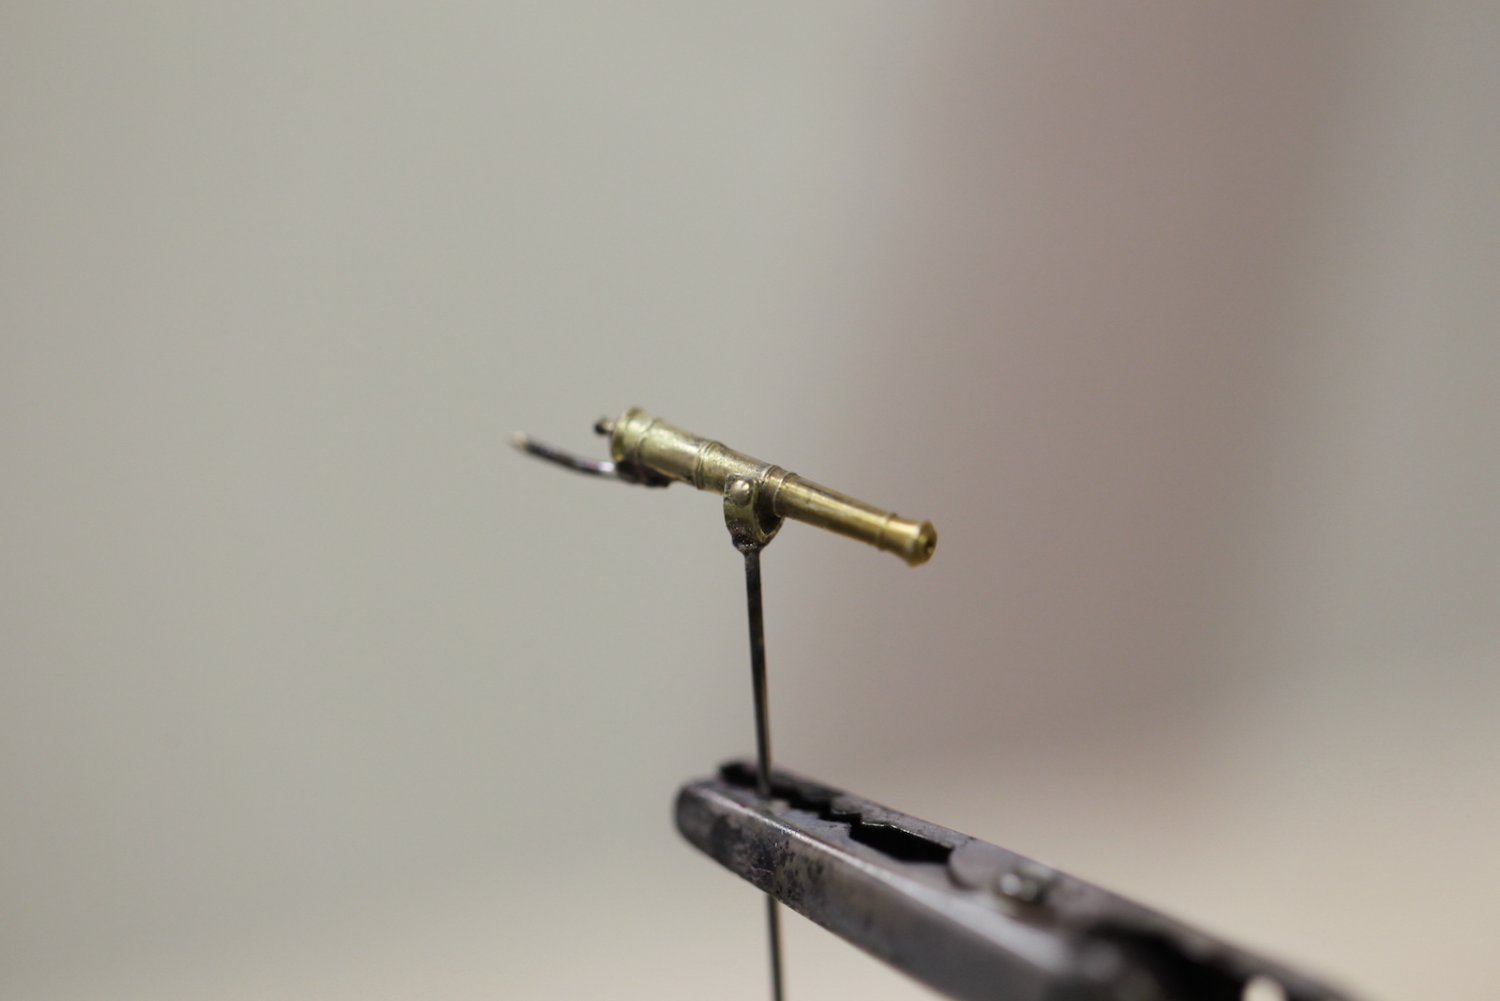
At first, I felt like this was acceptable. Mostly since at the end of the day, the combination of the very small scale and the bottom of the gun not being visible made this passable. Then, of course the more I looked at it the more annoyed with it I got. So I tried again - this time, taking the wire handle, flattening the end, and cutting a small groove in the end with the smallest cut pin file I could find. That groove allowed me to solder it to the rear of the gun and kind of "simulate" the loop over the button.
Here's a comparison of the two tries:

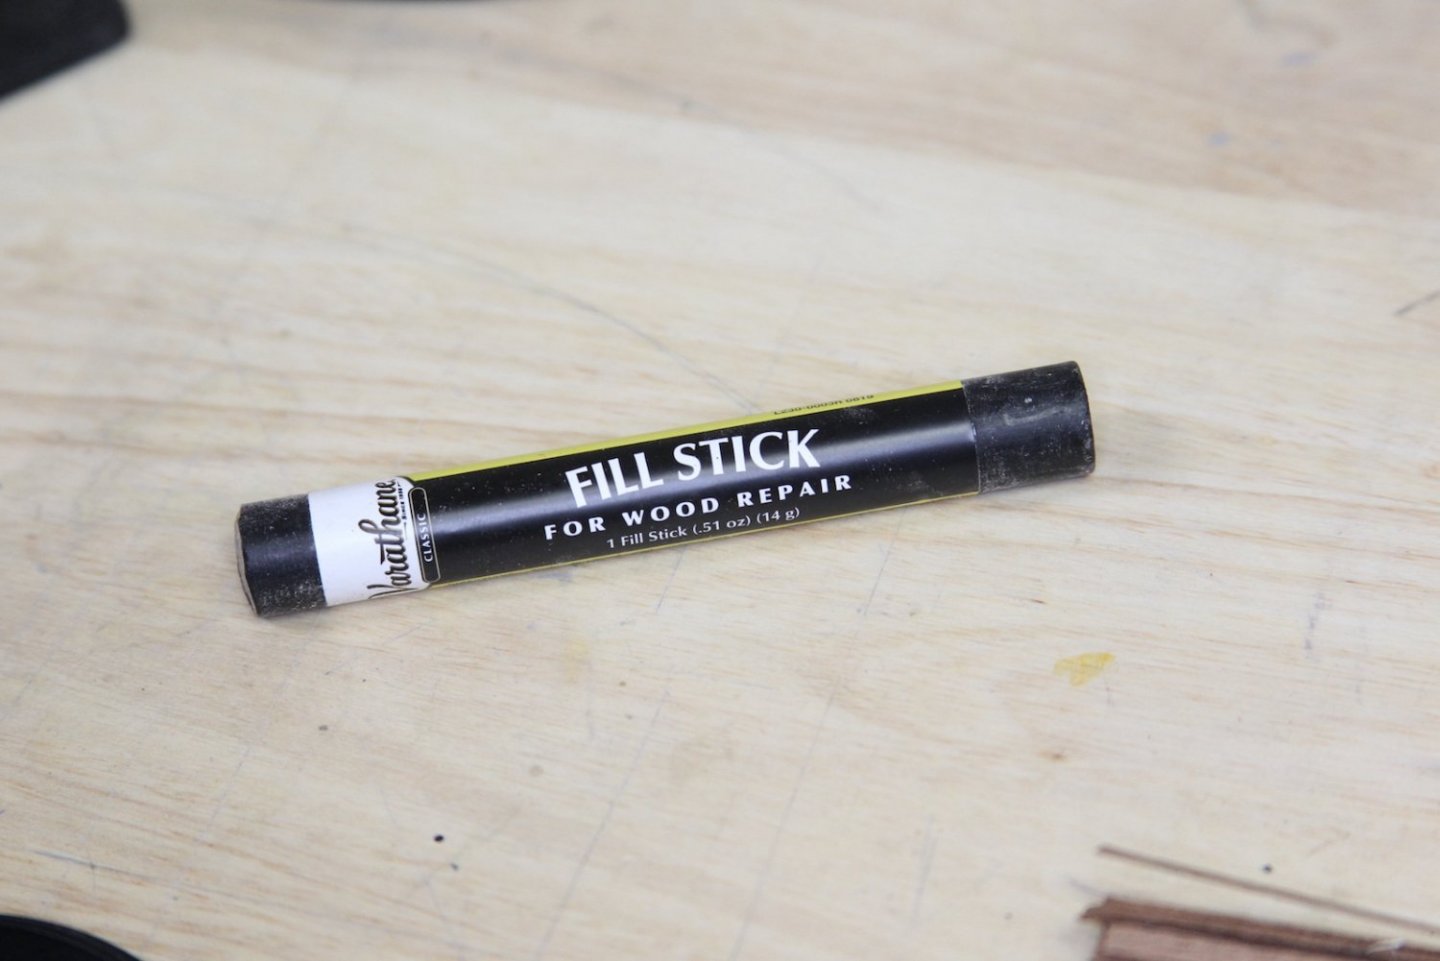
Following the idea of my hatch railing stanchion tops, I created the "knob" at the end of the handle by taking a small amount of this ebony wood filler and rolling it into a ball. Still have to work on getting the size acceptable, so I'm not sold on this technique.
I still need to do some work on the blackening and finishing touches, as this doesn't look great for a final product (and the knob is way too big) but here's basically what the guns will look like.
-
I love Vallejo paints - very easy to work with, especially when mixing is involved.
And you're right of course about paints represented in photos - with most of today's automatic cameras (and phones) the color temperature is automatically and independently adjusted with every shot - so even photos taken of the same subject in the same light can have slightly different color temperatures - which changes the look of the paint in the image. I'd say unless you're using a top-end SLR camera with manual ISO settings and looking at it on a VERY good (and calibrated) monitor - the eye is always the best judge.
")
-
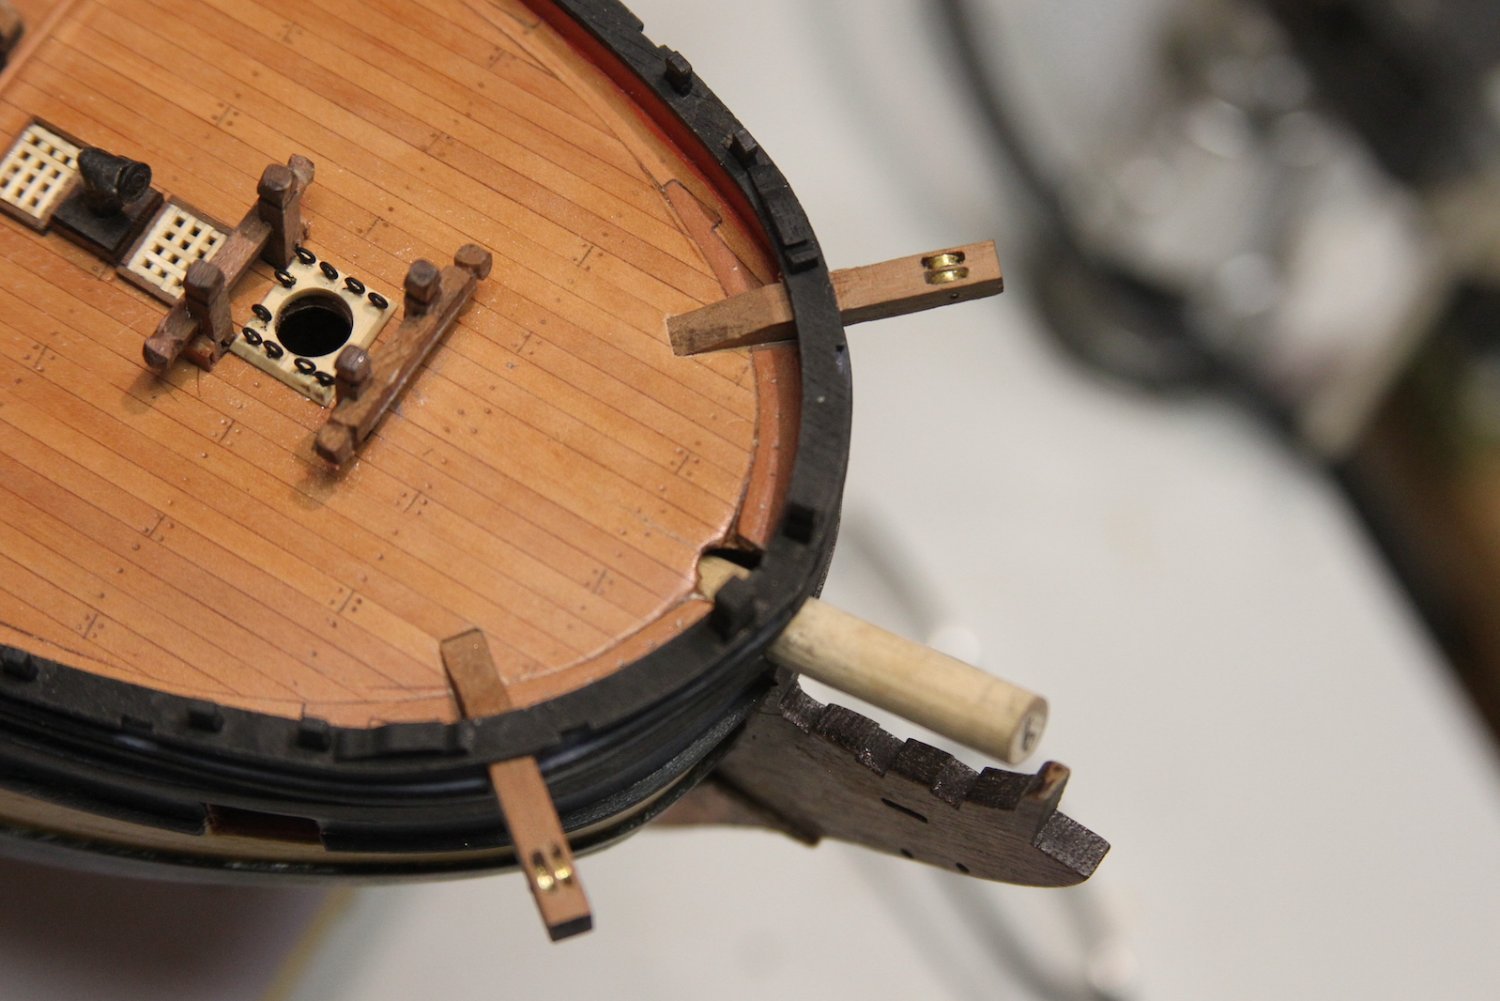
Uh... nothing to see here... just flipping some catheads over... 🤦🏼♂️
Thanks again @Blue Ensign and @chris watton!
- mtaylor, yvesvidal, Blue Ensign and 4 others
-
 7
7
-
1 hour ago, Blue Ensign said:
angled end should be deck down
Oh crap! Ha! Thanks gents - I was so excited about the sheaves I totally botched that.
Love having this forum around.
- mtaylor and chris watton
-
2
-
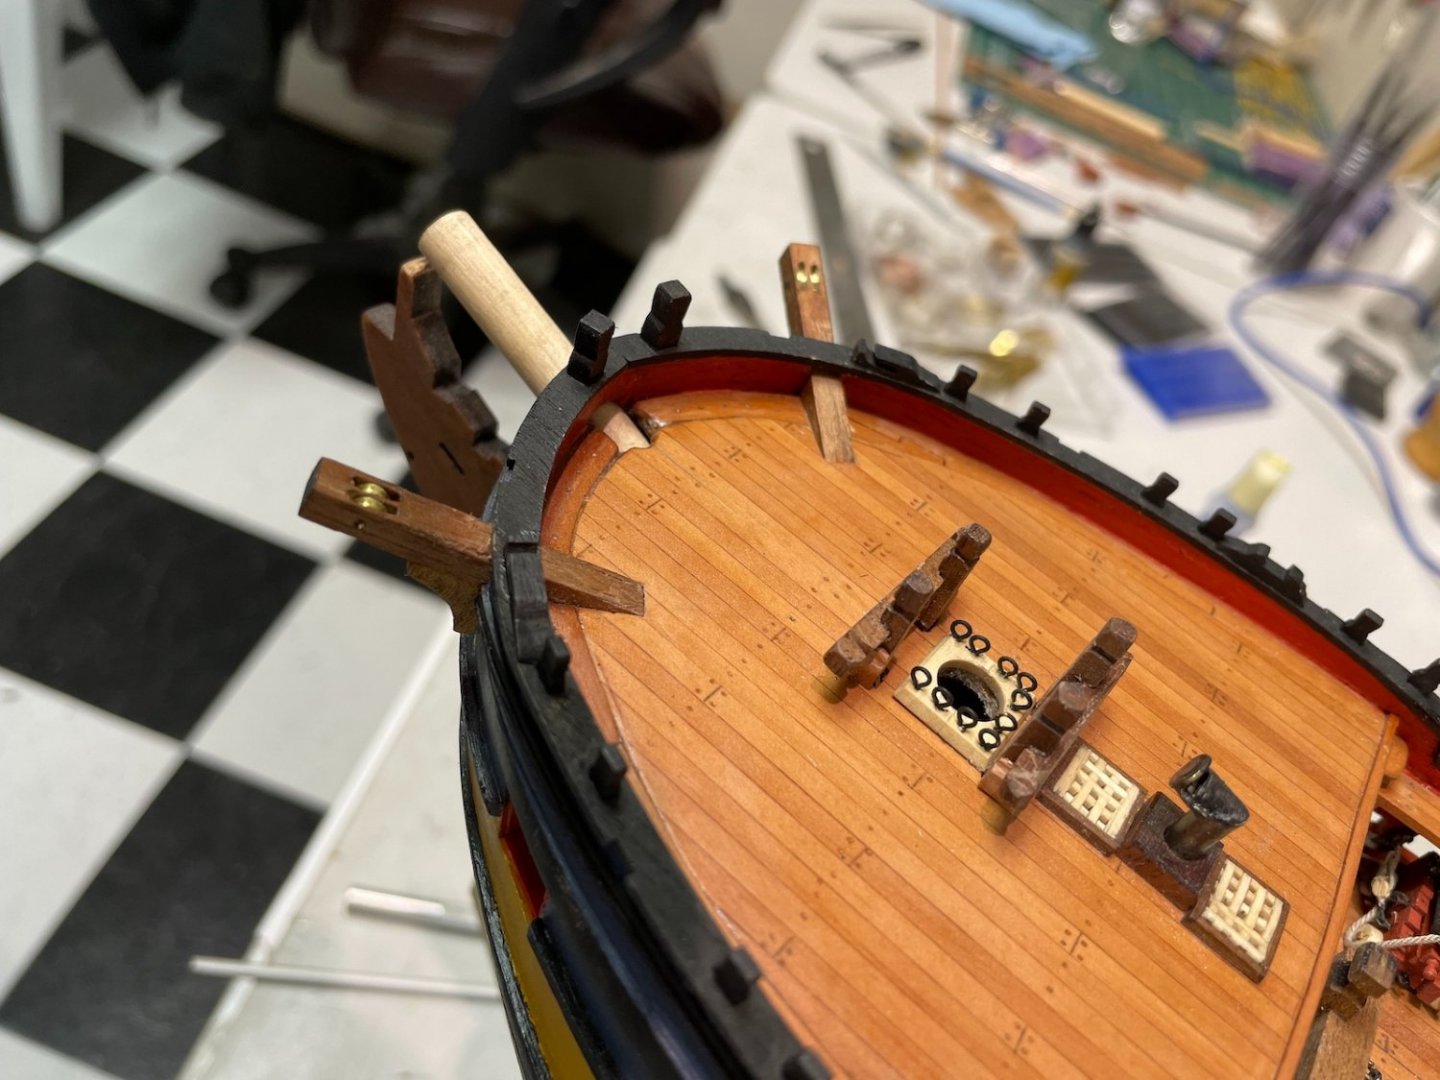
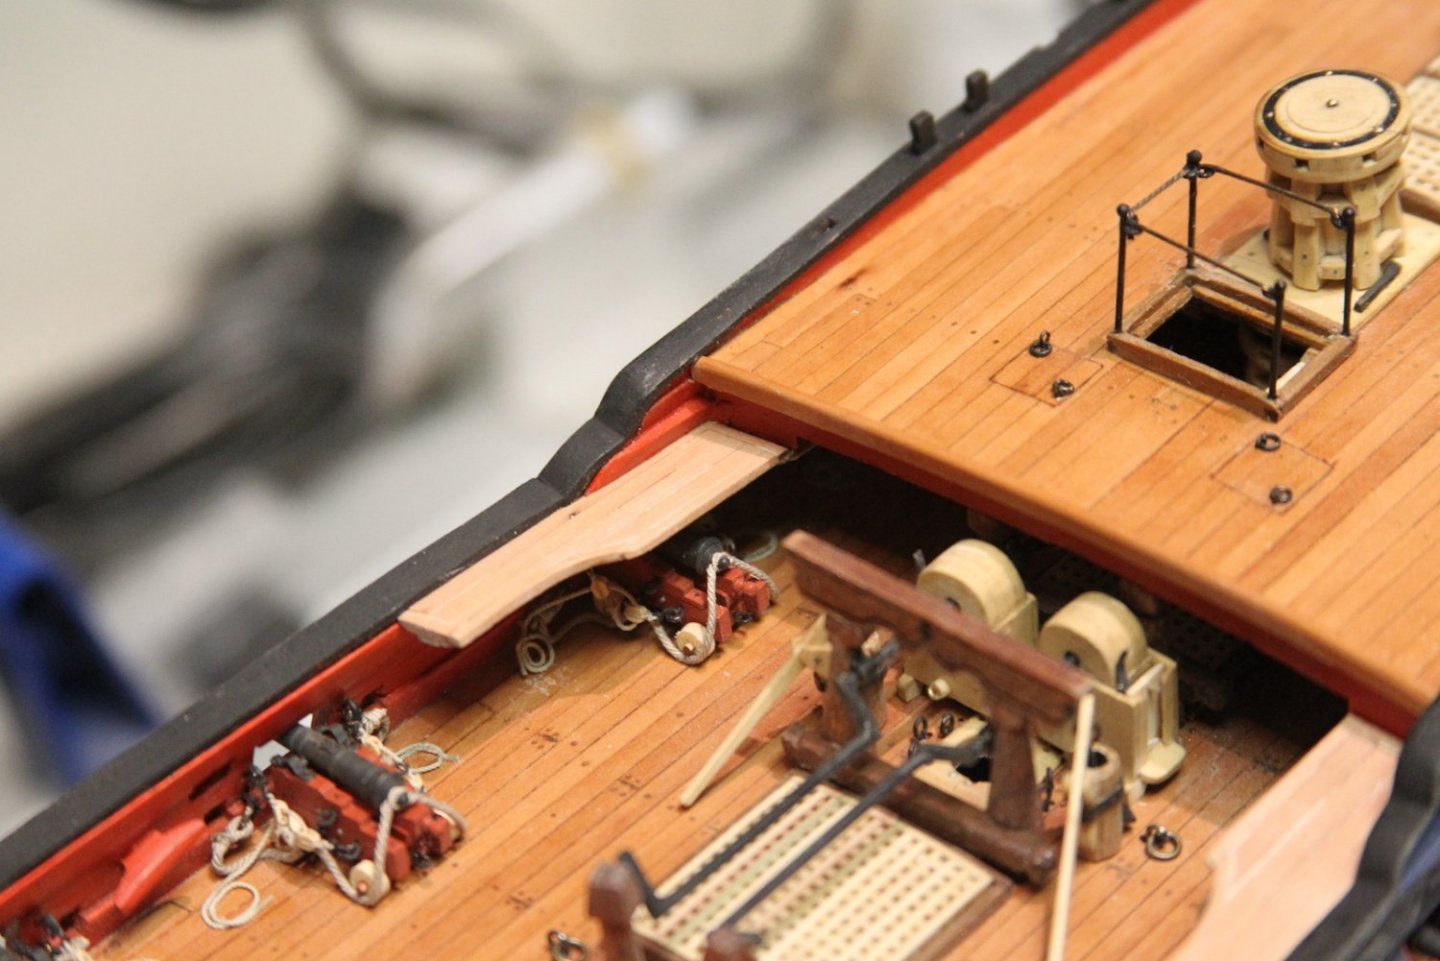
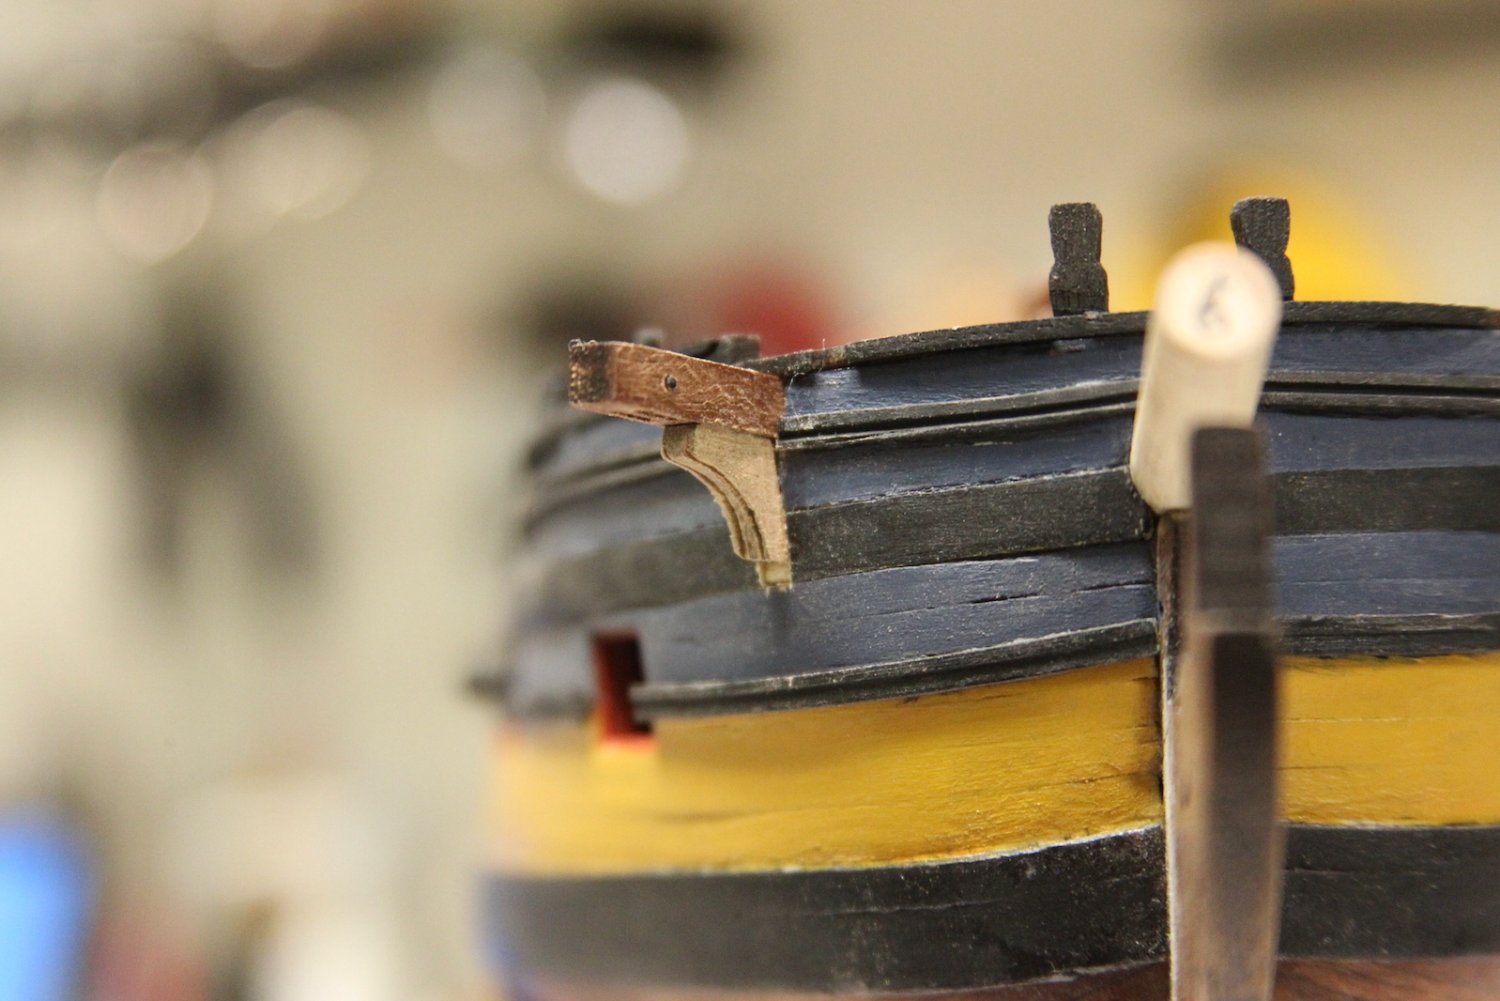
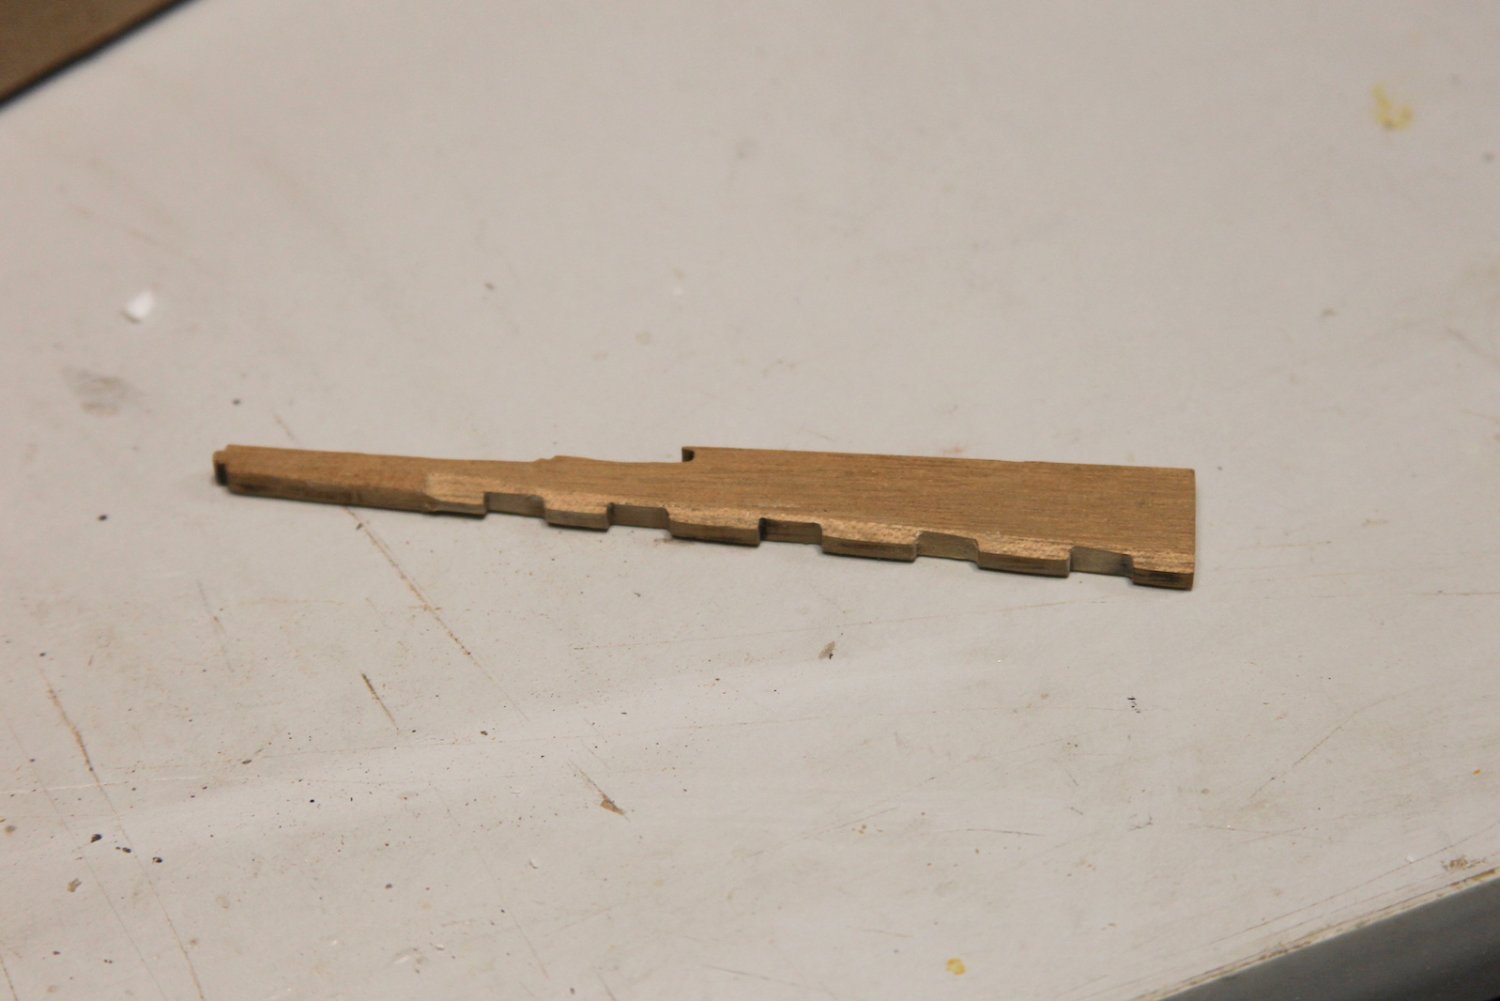
I took on the task of the catheads the last couple of days with some level of trepidation. They seem pretty straightforward, but getting them to look like the submerge into the deck has been haunting me a bit. Really, any time I go back and take a chunk out of the deck it makes me nervous. As others have noted, the catheads that came with the kit seemed a little odd to me - they appeared to be under scale but a fair amount, and also there were no sheaves!
First, I measured out the angles I'd need off the bow and identified where I'd need to cut through the bulwarks as well as carve out the deck. Once again in the 'failed to look far enough ahead' category, this happens to line up right where my scarph joints on the margin plank are. Oh well - hopefully that won't be super noticeable to most folks.
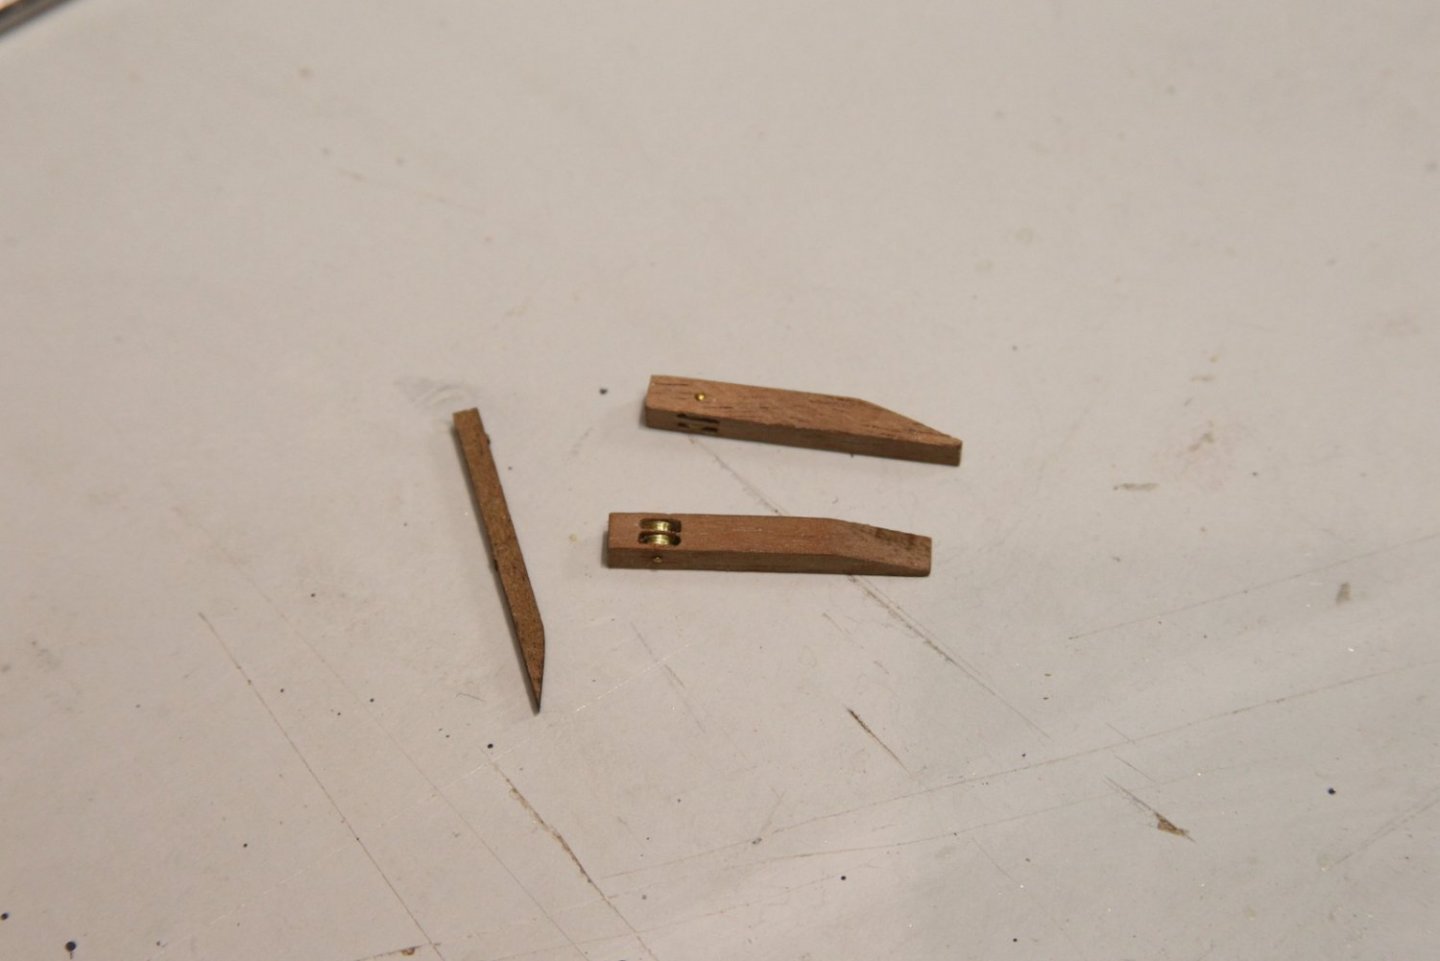
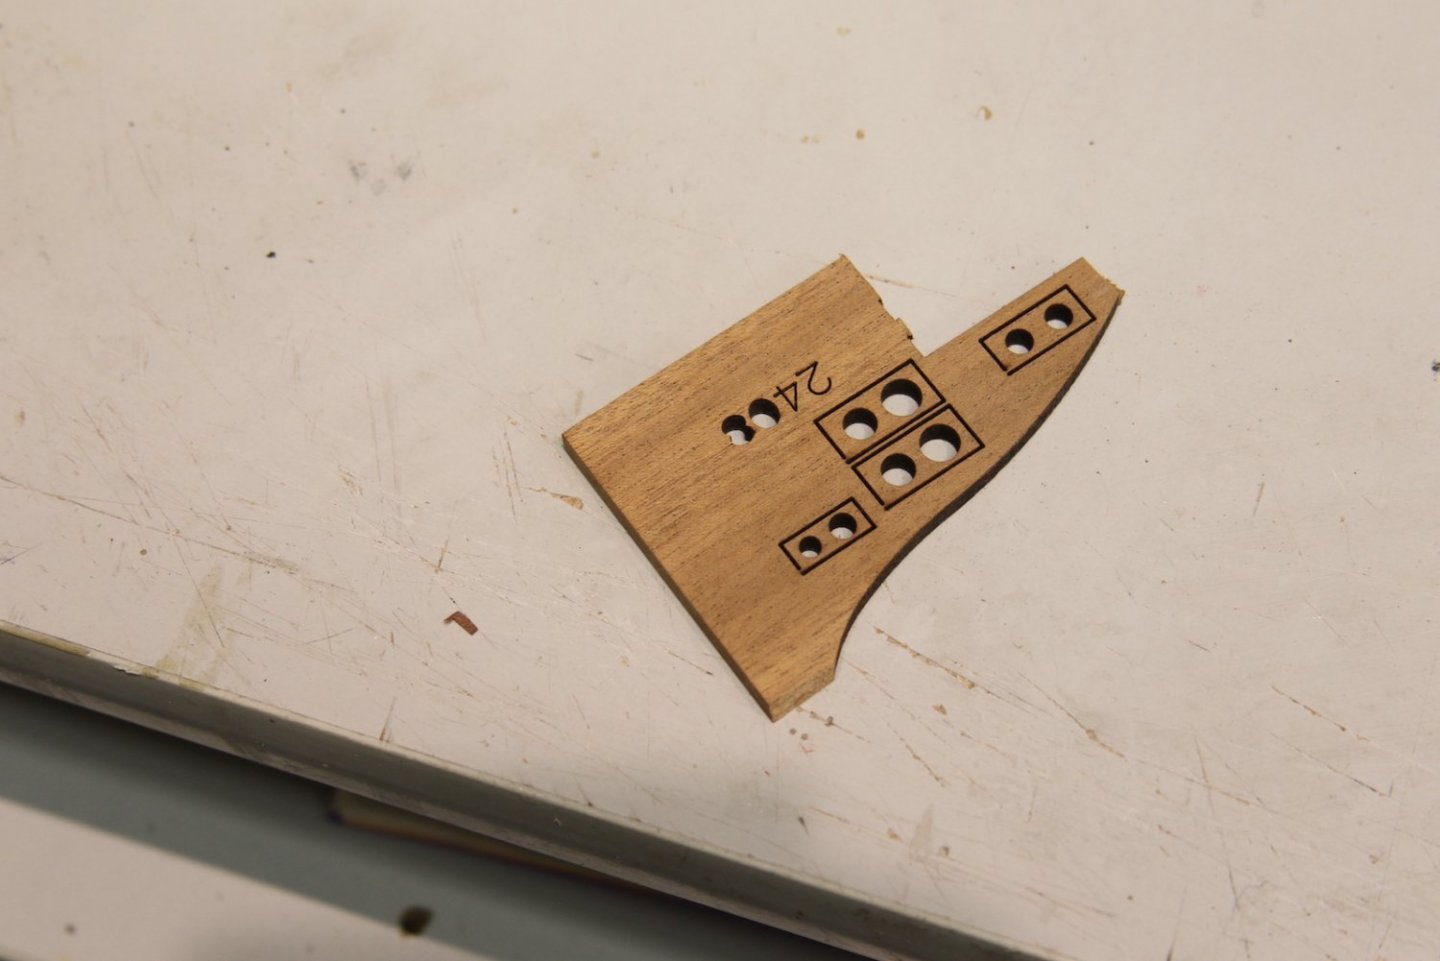
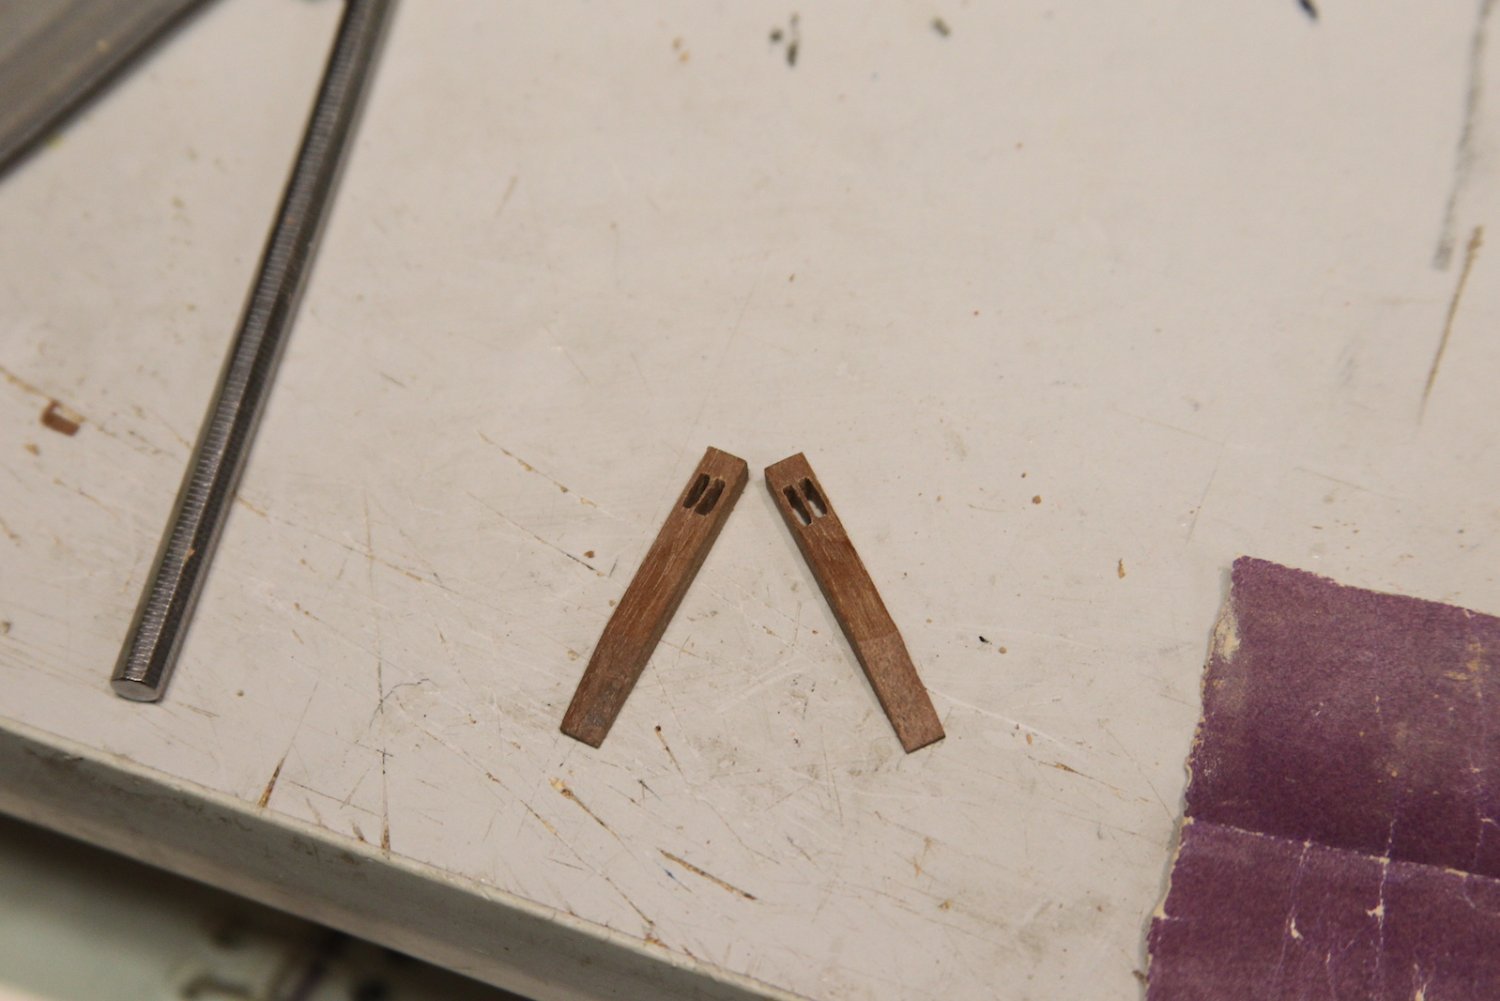
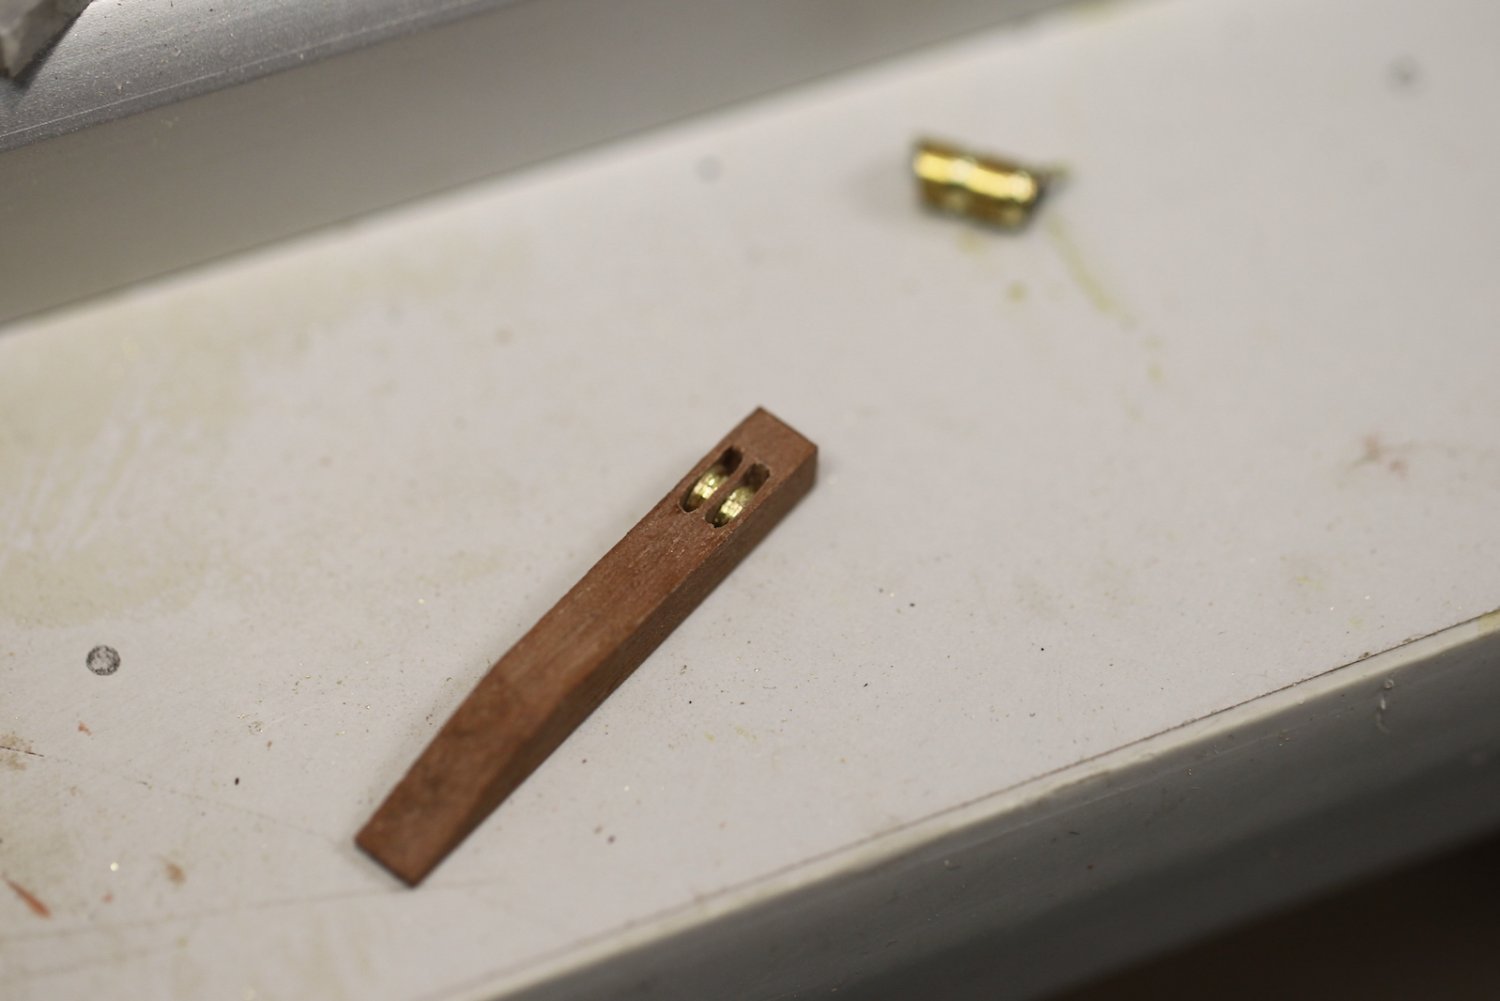
For the catheads themselves, I started with a couple of 5 x 5mm pieces of walnut, measured them out and a shaped them. I'm not so ambitious as to have created all the sheaves out of metal (I prefer simulating most of them with just drilled holes and carved lives between). But I felt it was necessary with the cathead sheaves as they are very visible, but also will need to be functional later when I rig the anchors.

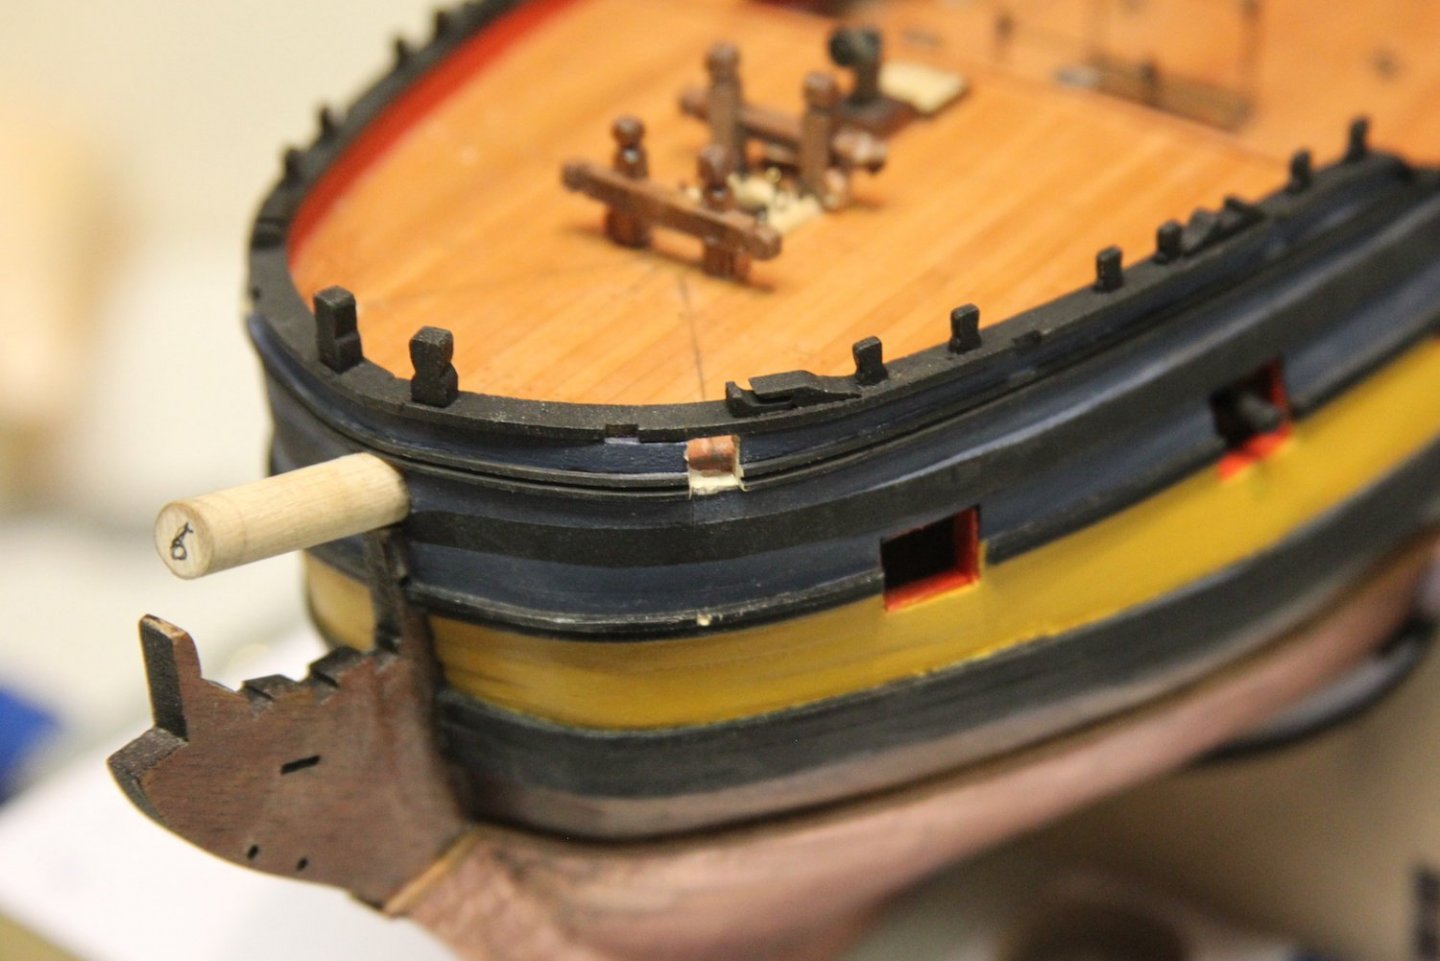
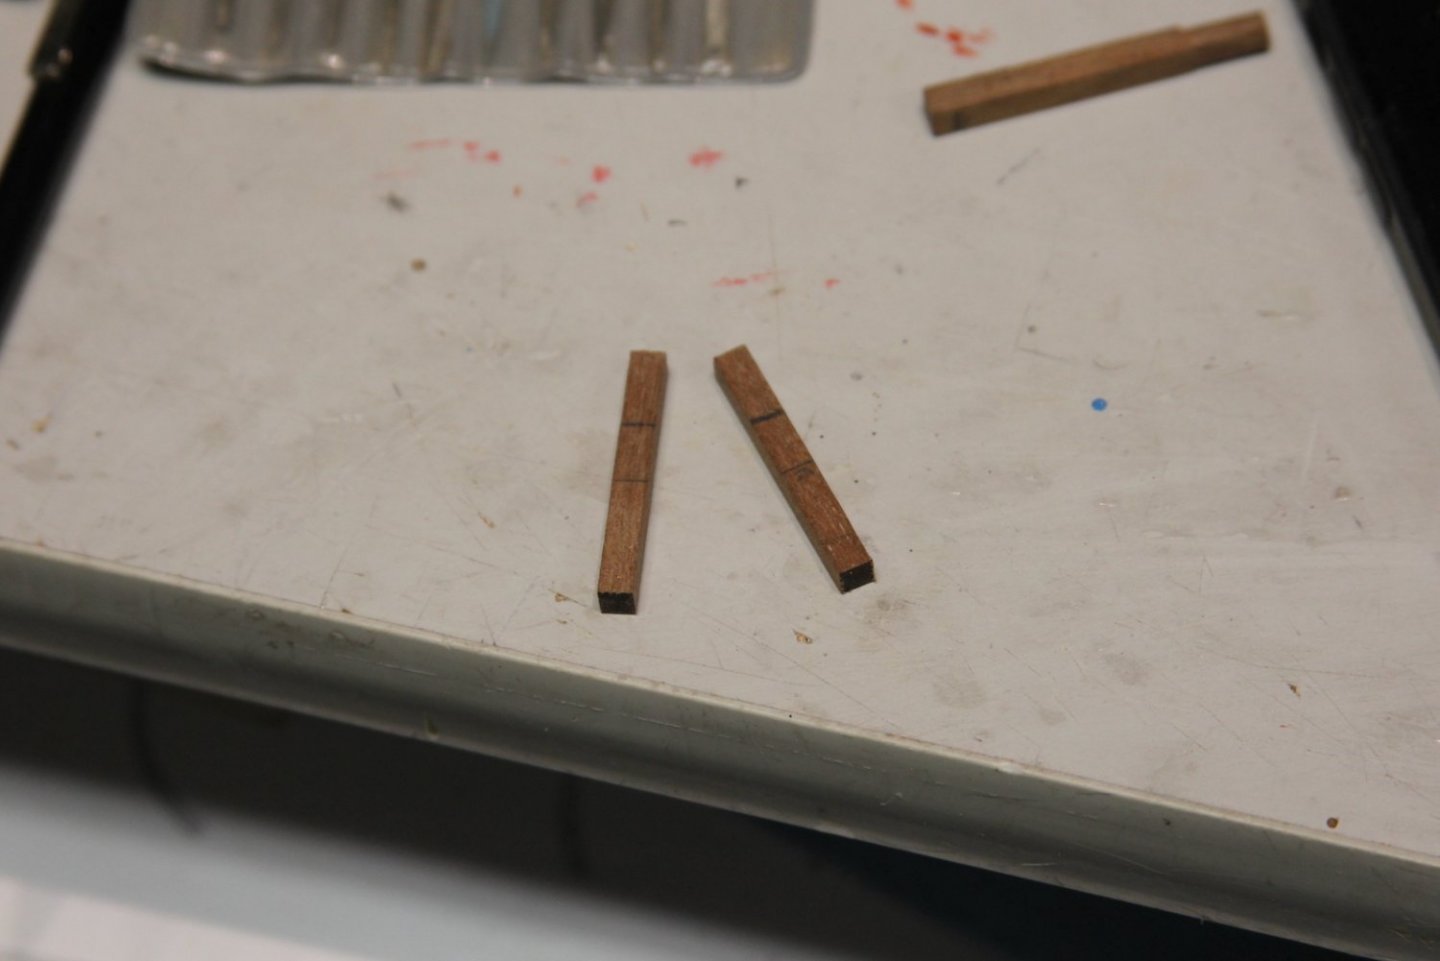
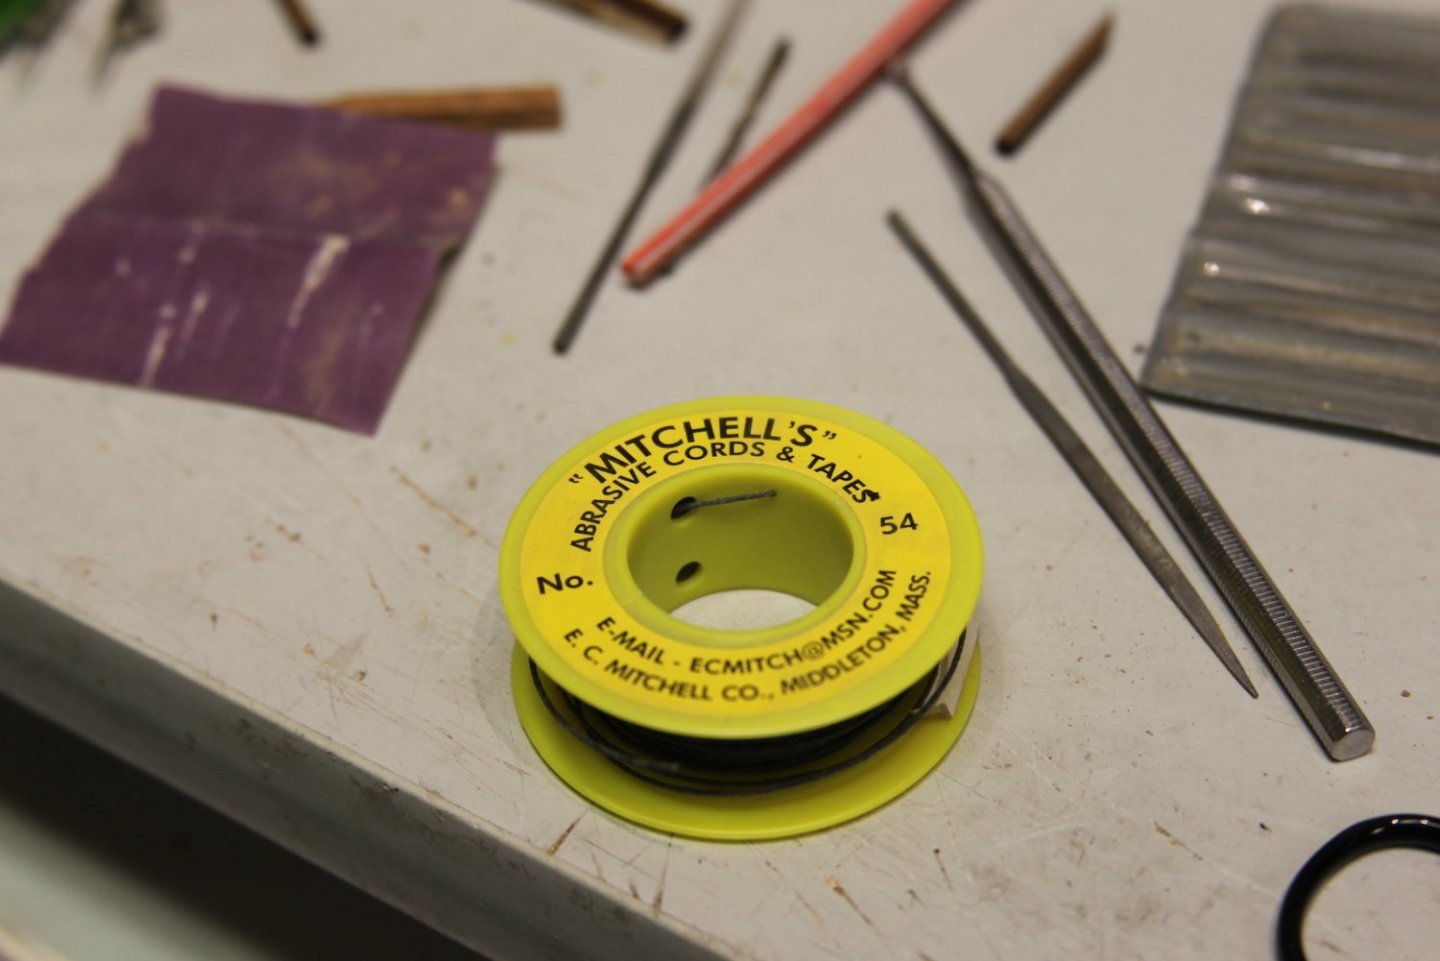
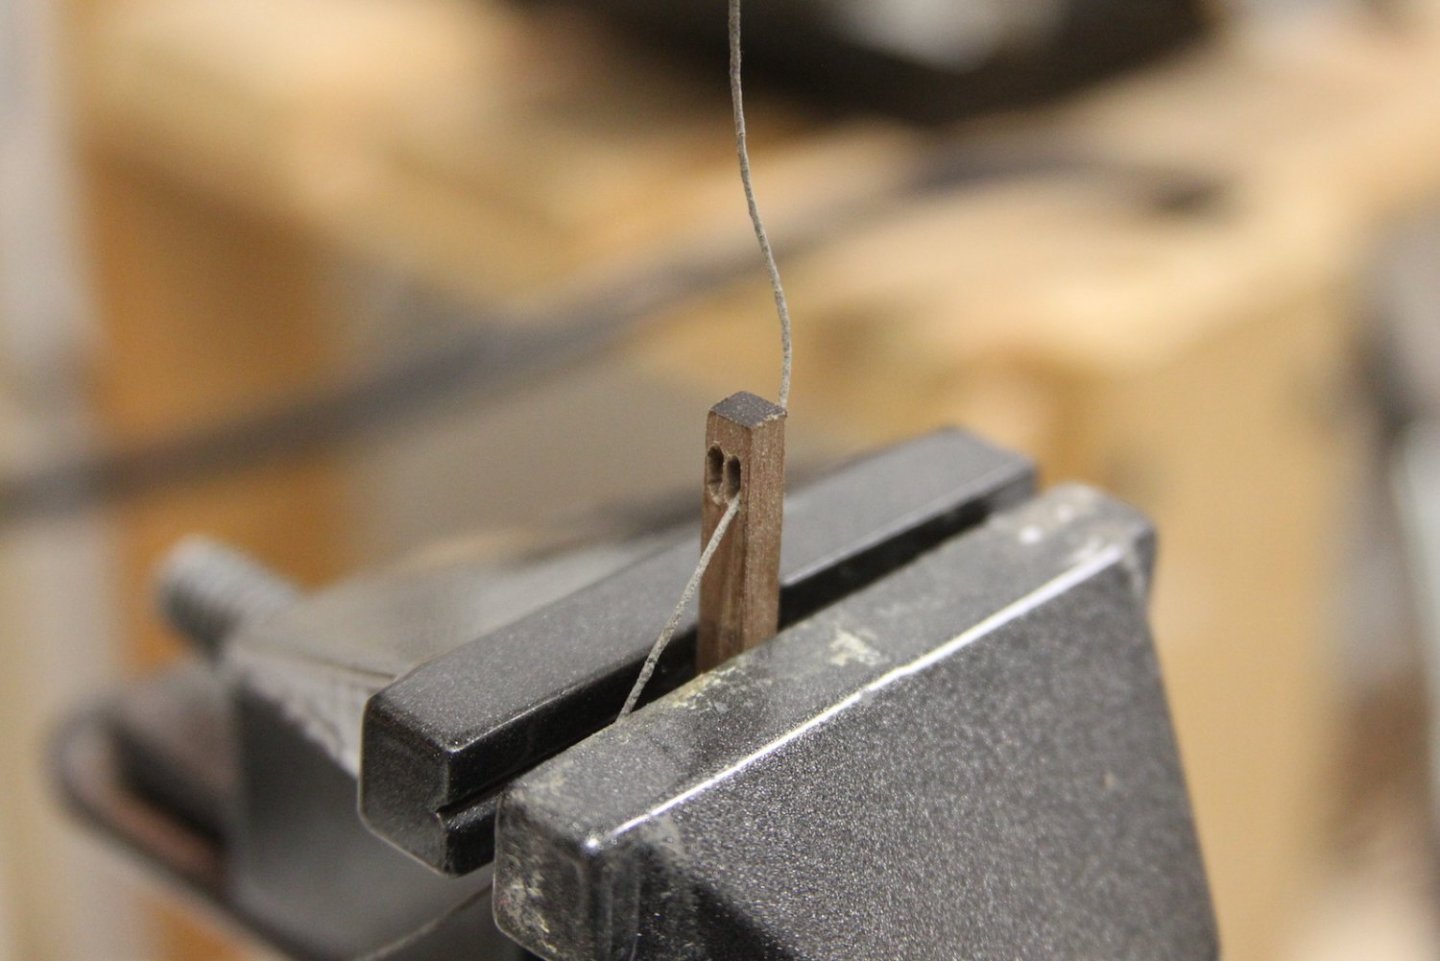
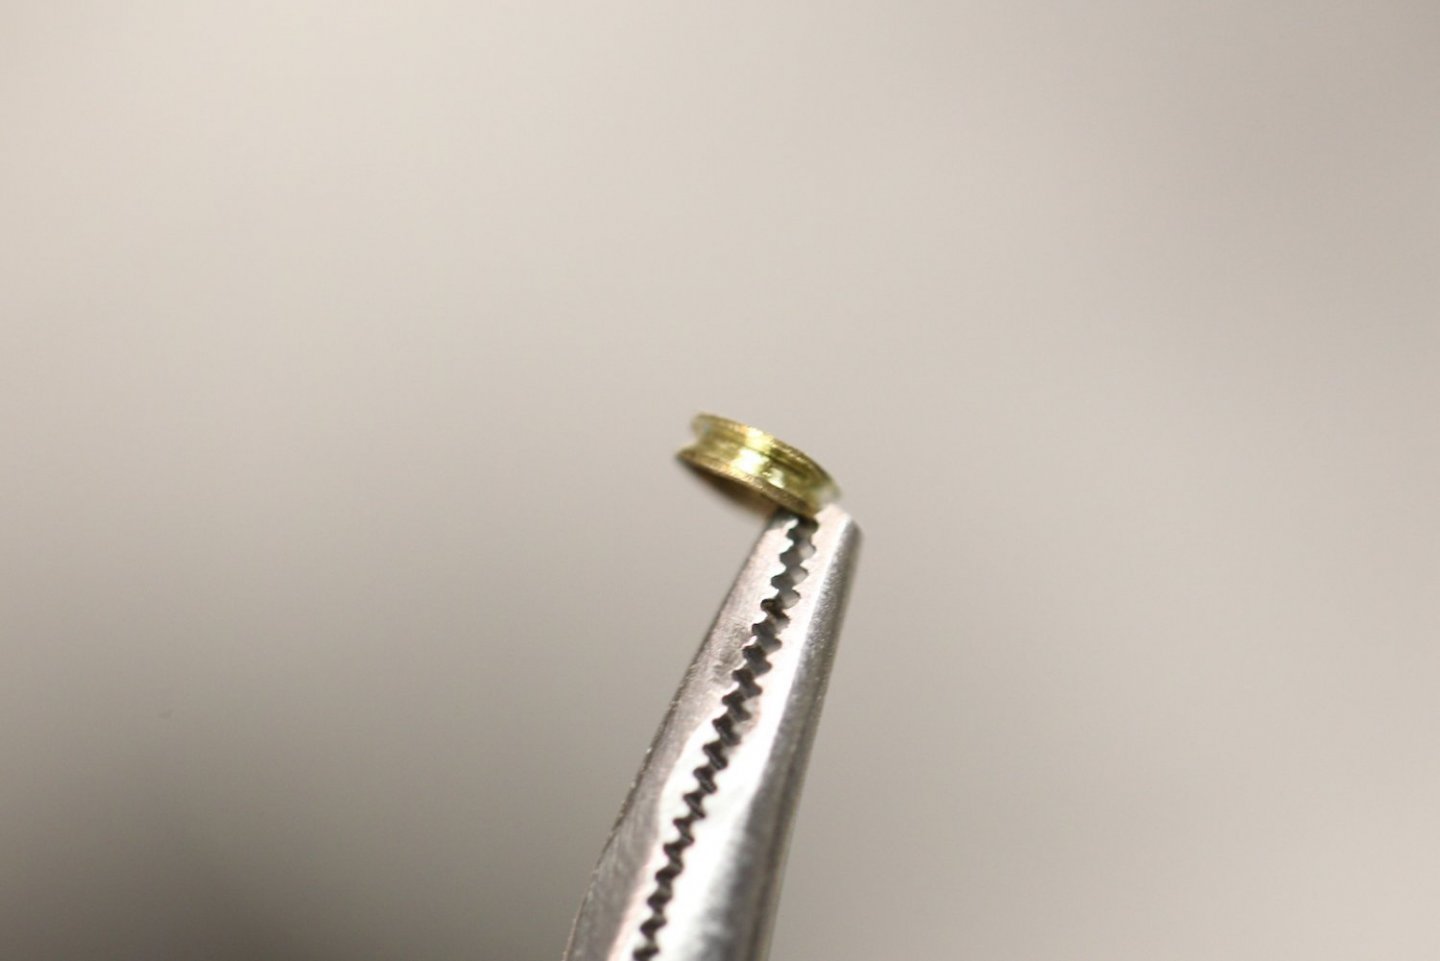
I drilled out a series of holes for the sheaves, then used this handy sanding string to size them out. The the metal sheaves I actually chose a brass TUBE instead of a brass rod and carved out the groove on the lathe. I chose the tube because it's SUPER difficult for me to get a nice hole drilled through the brass. I just can't seem to get a strong enough drill bit that holds up without bending or snapping off. The cutting the sheave from a tube means I only had to drill through the wood to place the bolt/pin.

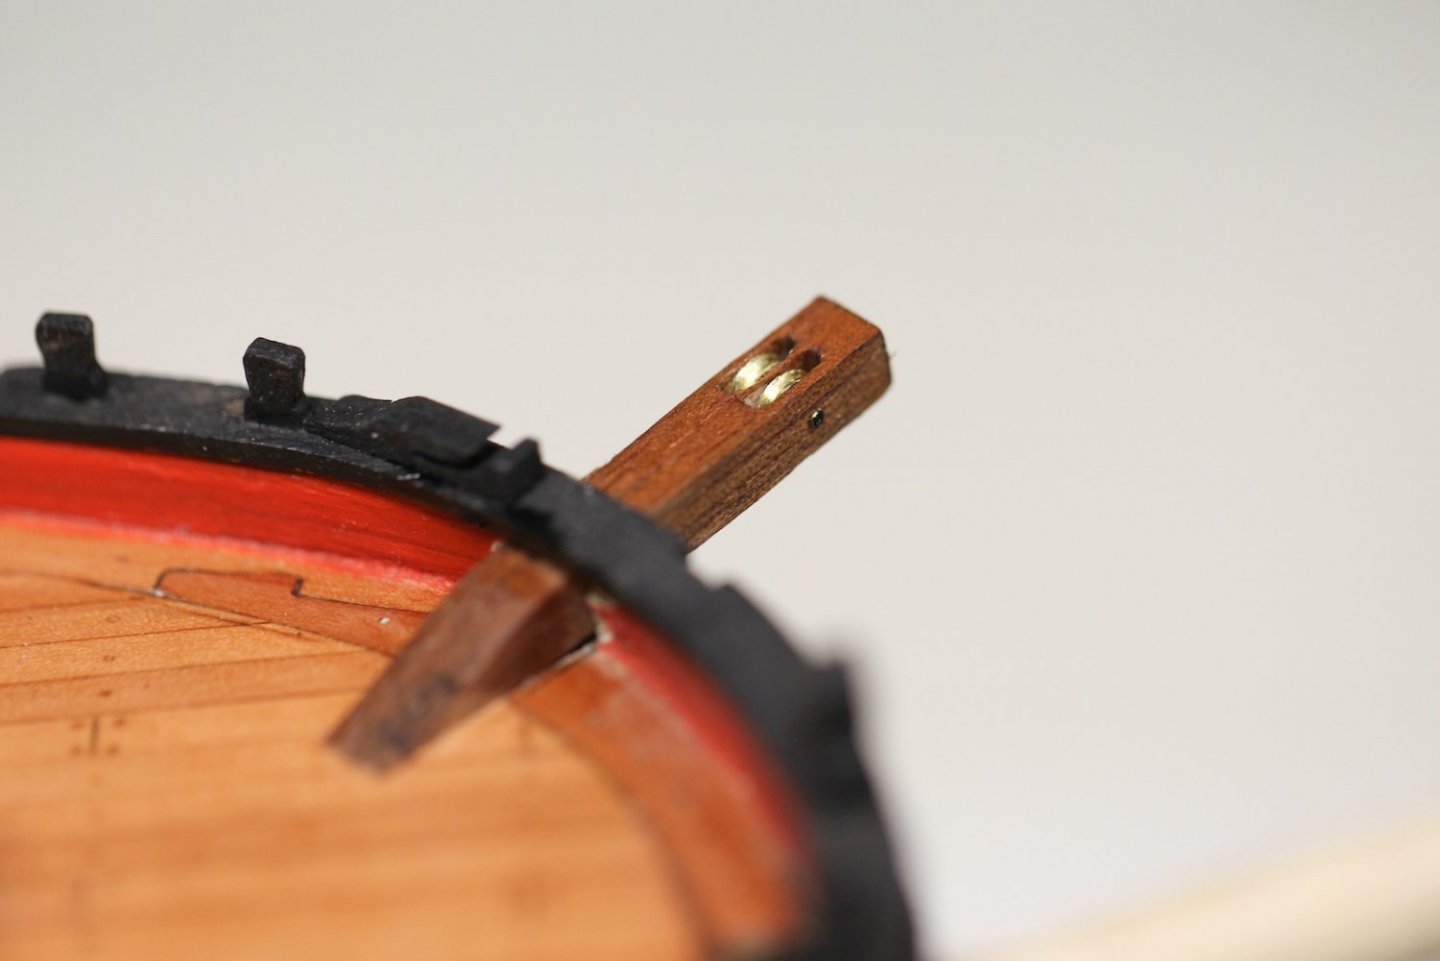
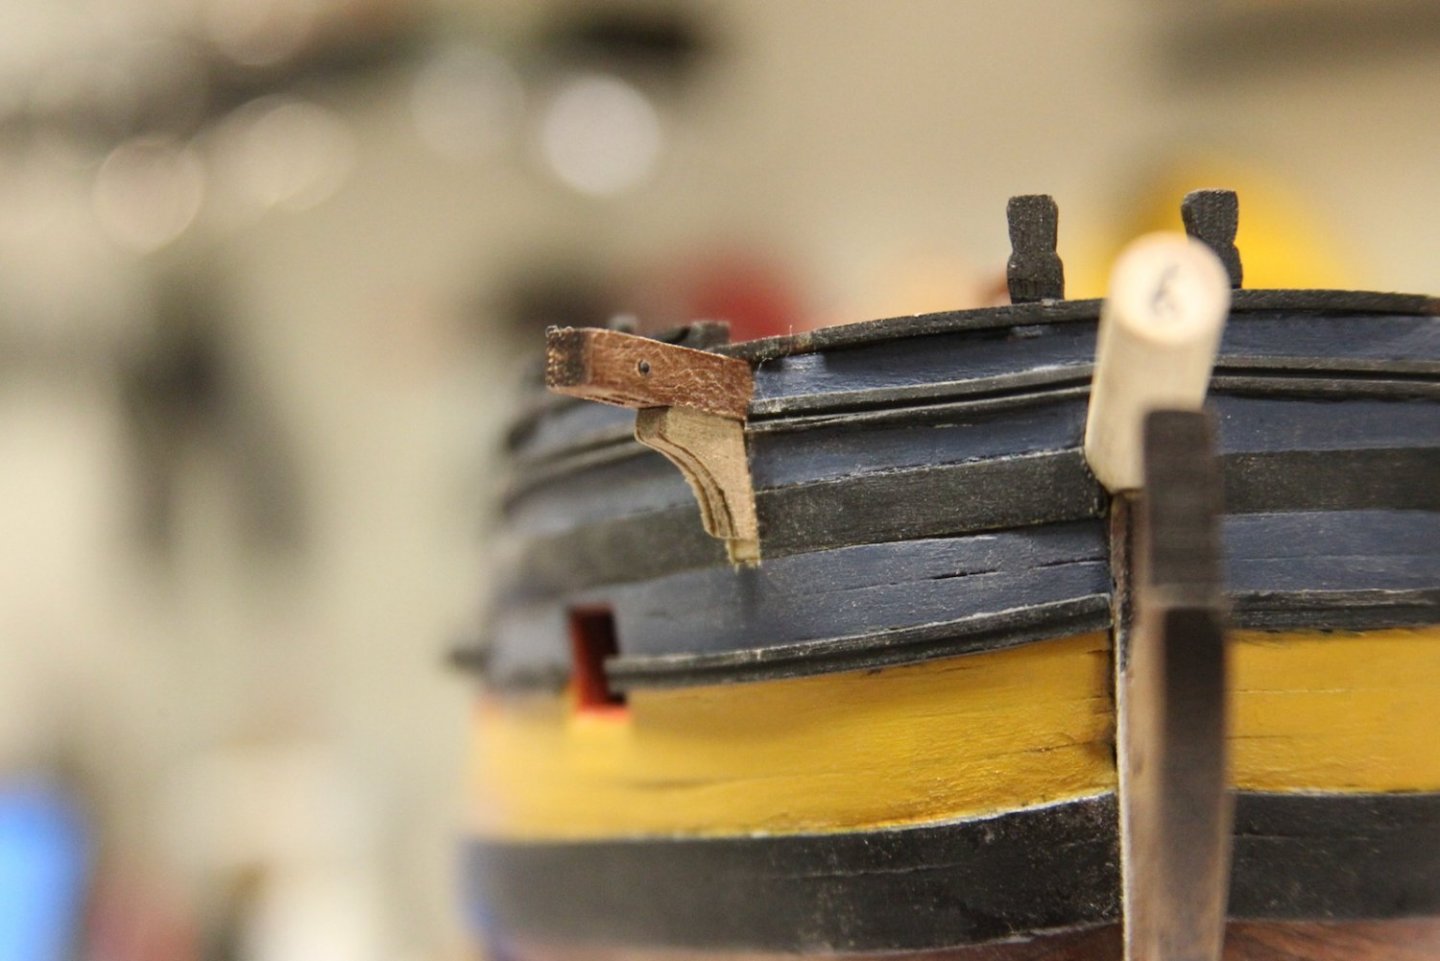
Here are the assembled catheads and comparison between the kit version on the left and the scratch ones. I actually feel like I kinda nailed it getting the catheads to look like they go down into the deck. Pretty happy with the result. Incidentally, it was WAY easier adding that bolt on the side without having to drill out the brass.


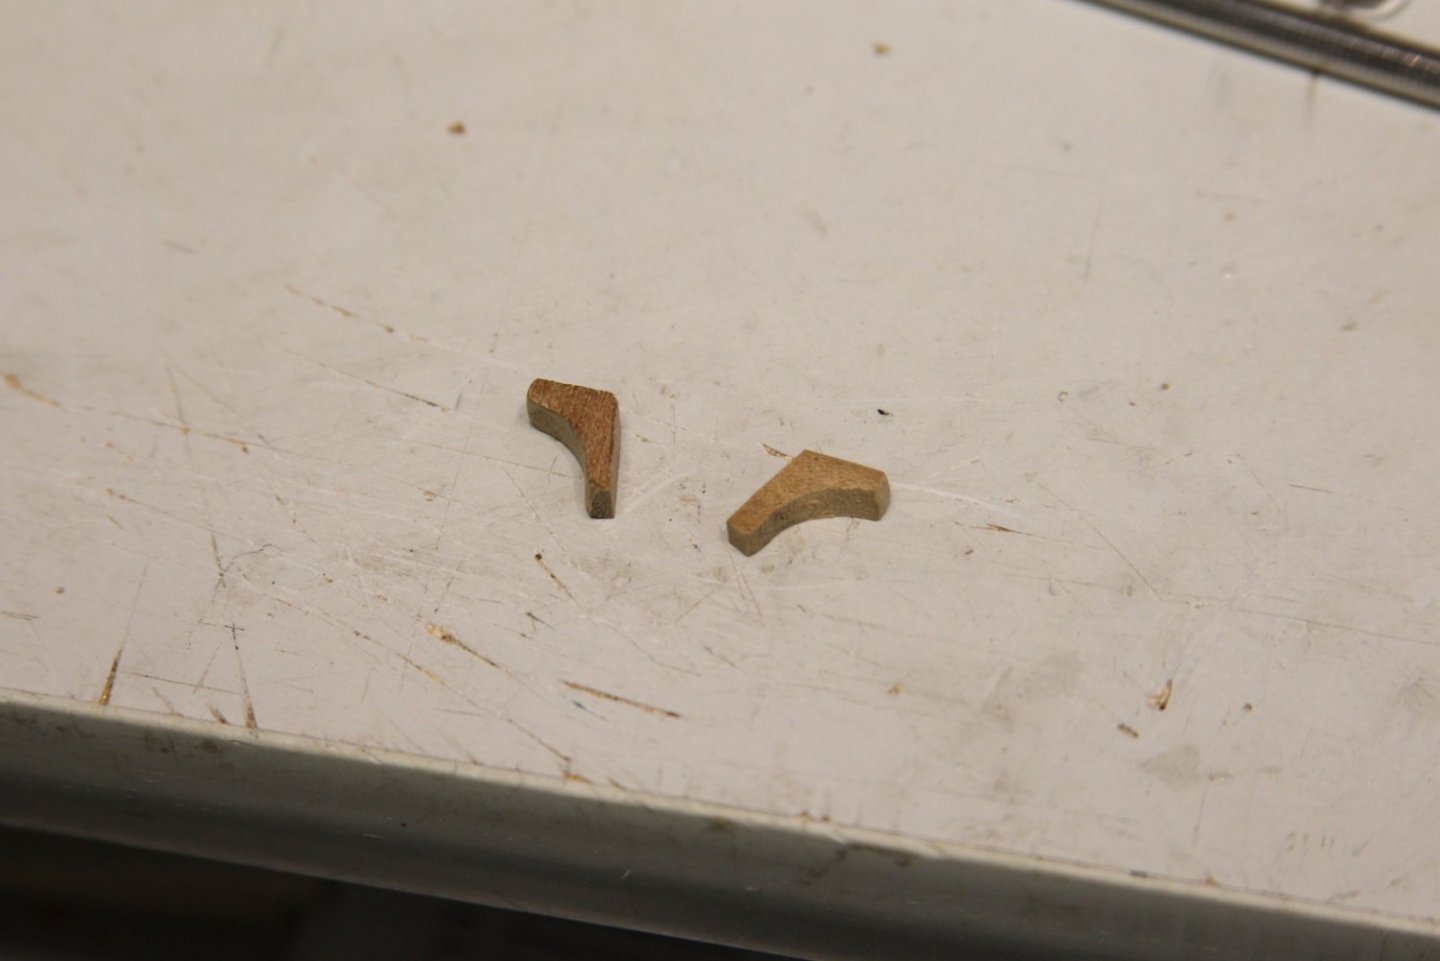
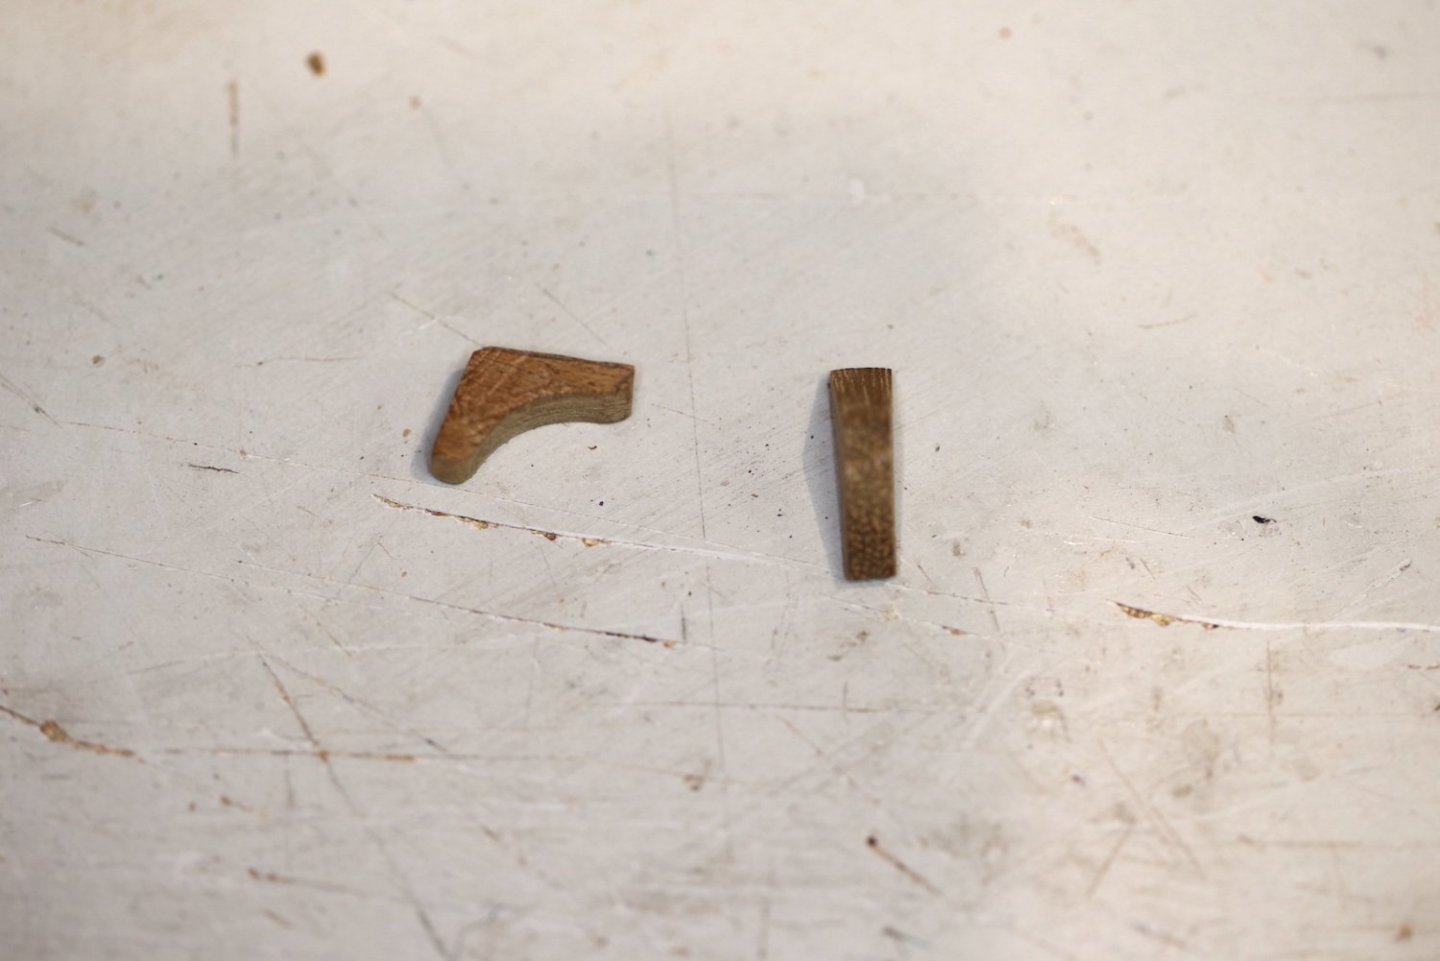
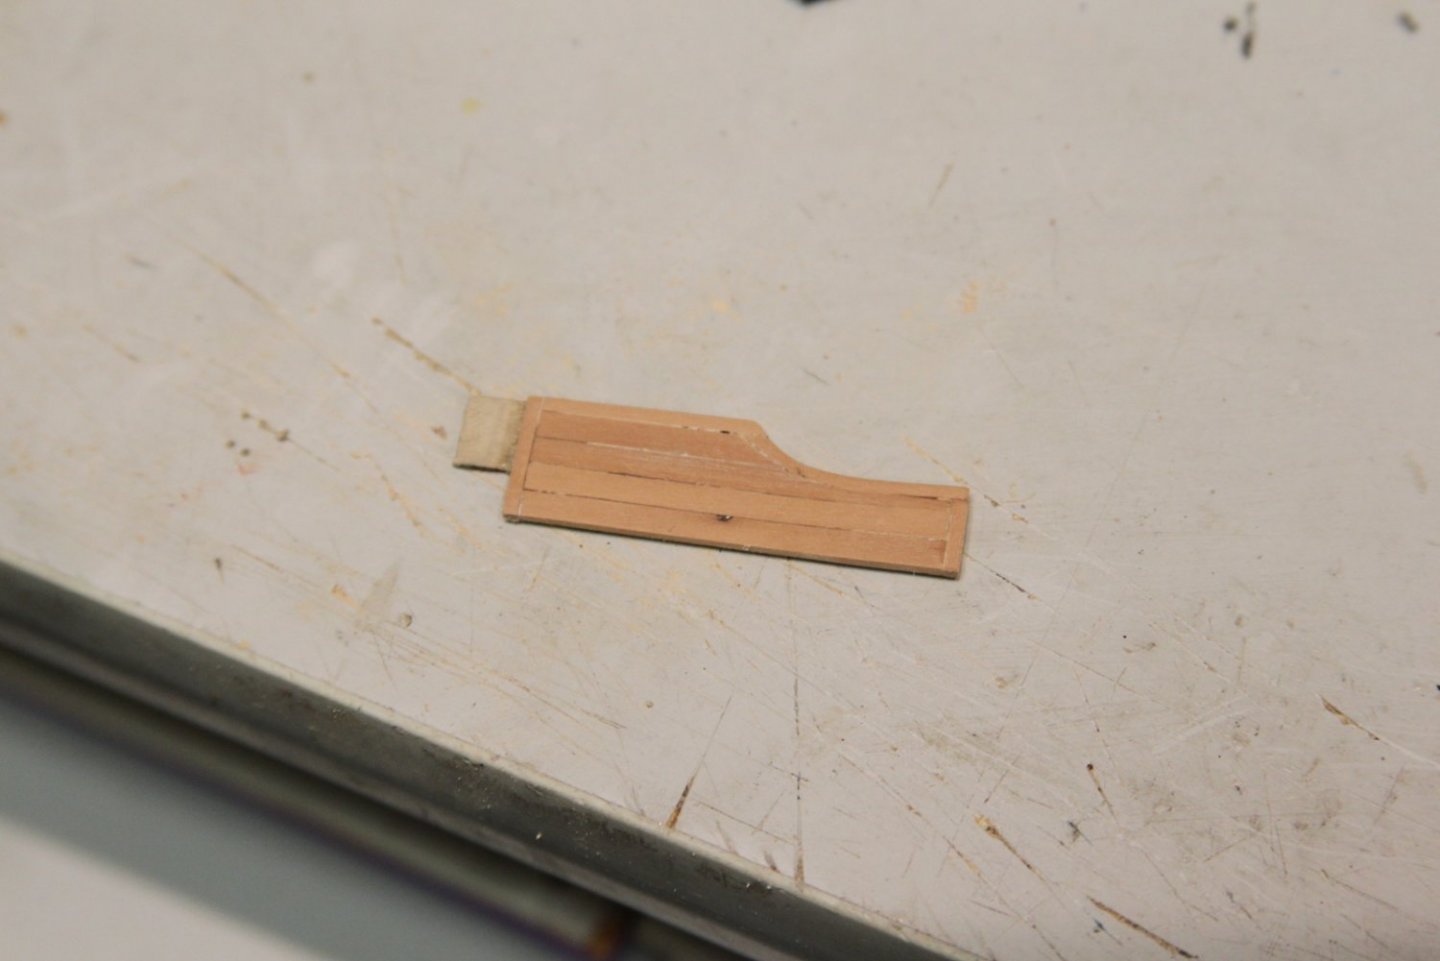
Obviously because the kit catheads were small, so were the knee / braces. I cut mine out of a scrap walnut from the laser cut pieces and shaped it to the hull. I also tapered it from the cathead down to it's base as it will eventually need to become the decorative headwork on the bow. Final touches include scraping some grooves.
- chris watton, CiscoH, yvesvidal and 5 others
-
8
-
I'm having fun checking in. There's a lot more going on with this endeavor than I anticipated (of course). Very cool.
- thibaultron, FriedClams, mtaylor and 6 others
-
9
-
Hey there Ray,
I'm a little late to the party here - but my opinion is that if the hull / decks are decent, it can actually be a pretty good re-build for a newcomer. Framing and planking the hull is often one of the most difficult aspects of a build for a beginner. In this case, you can bypass that - do some research here on the forum to determine how deep down that rabbit hole you want to go - and go from there. Although the Victory is ambitious, I think it's eminently doable.
The other thing to consider is budget - you'll find lots of sources here for research, materials, and no shortage of advice and encouragement. Good luck with whatever you decide.
Two cents from another retired MSgt.
-
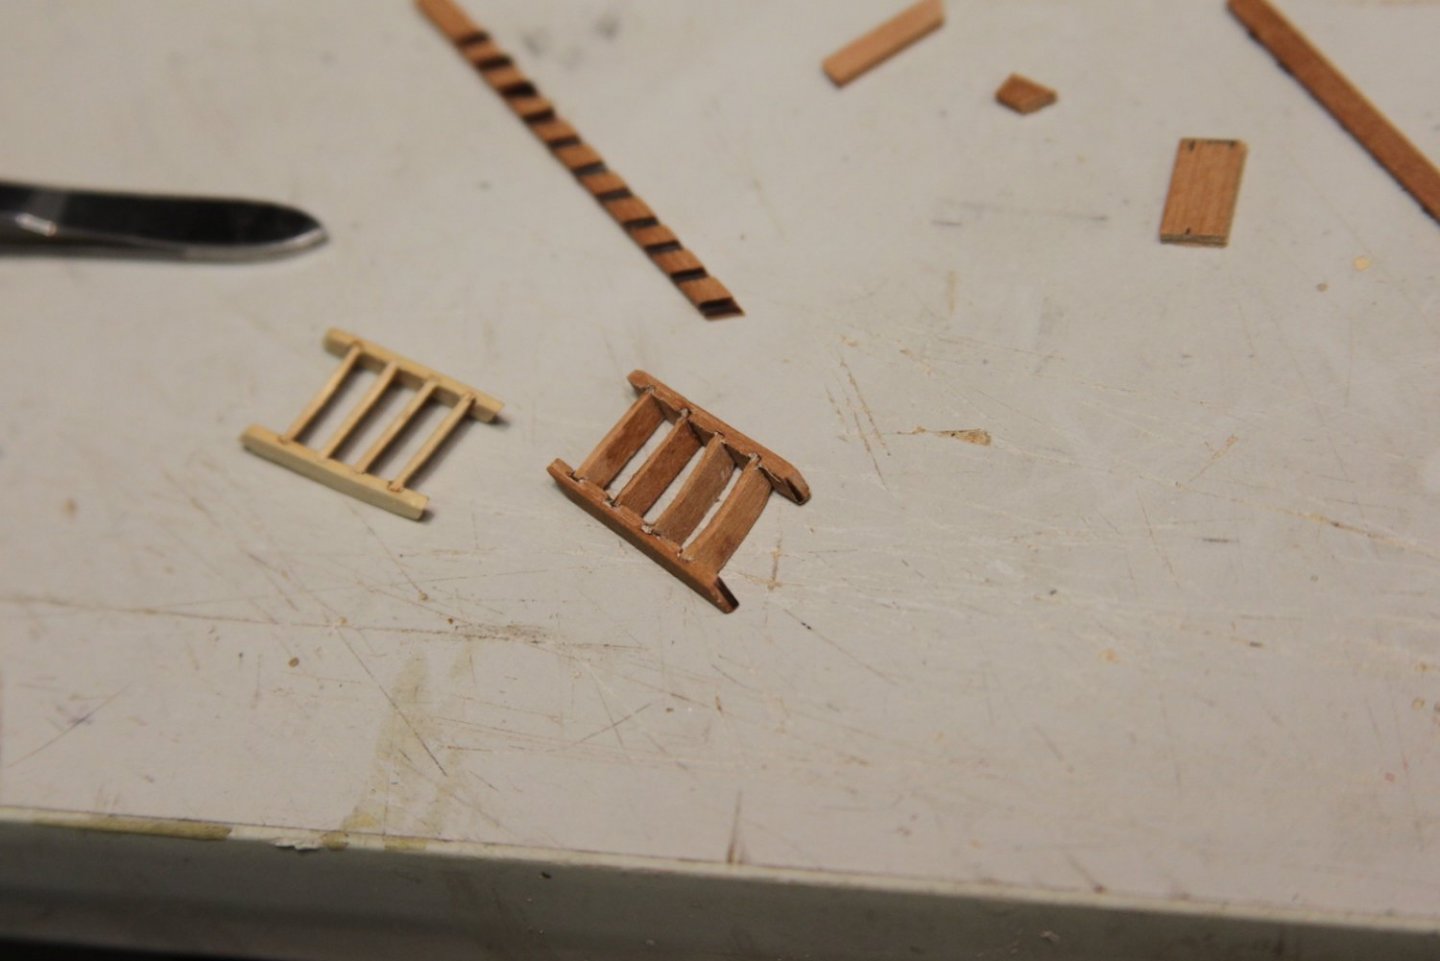
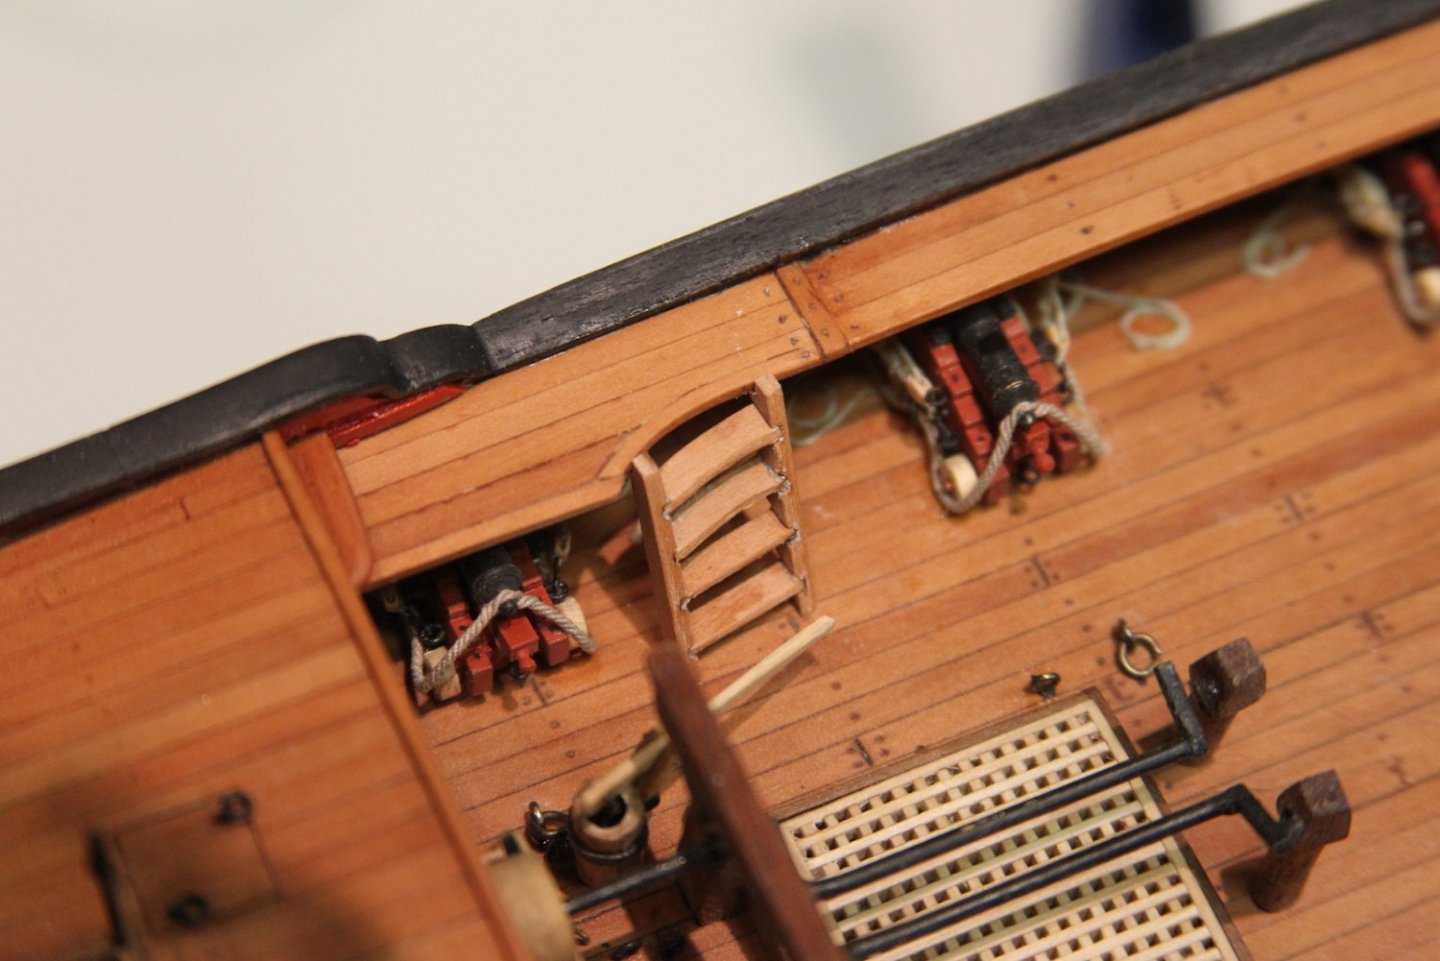
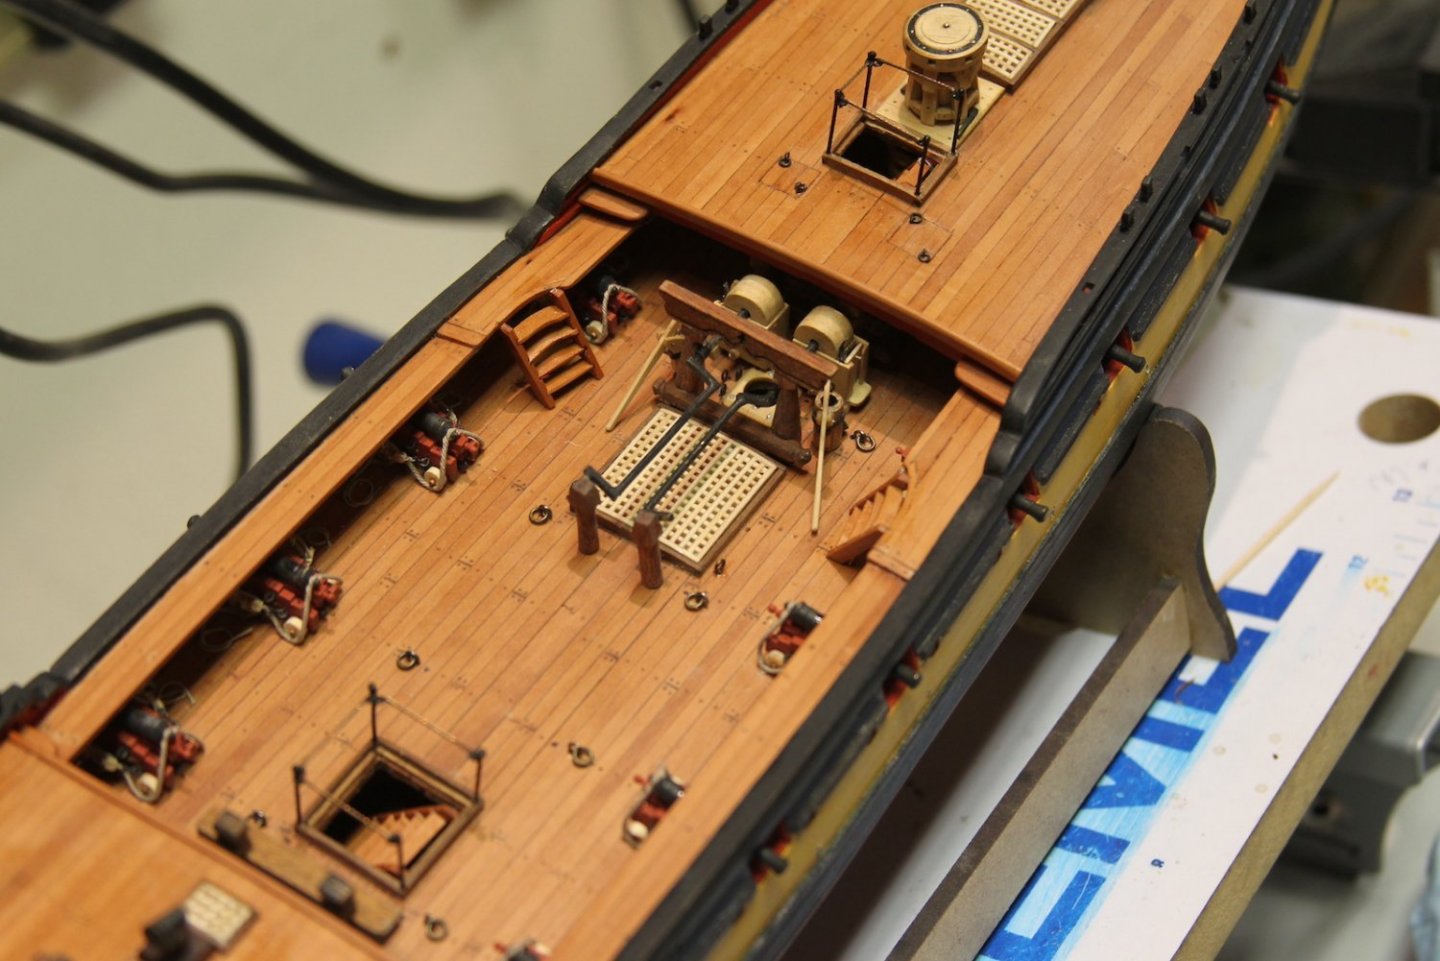
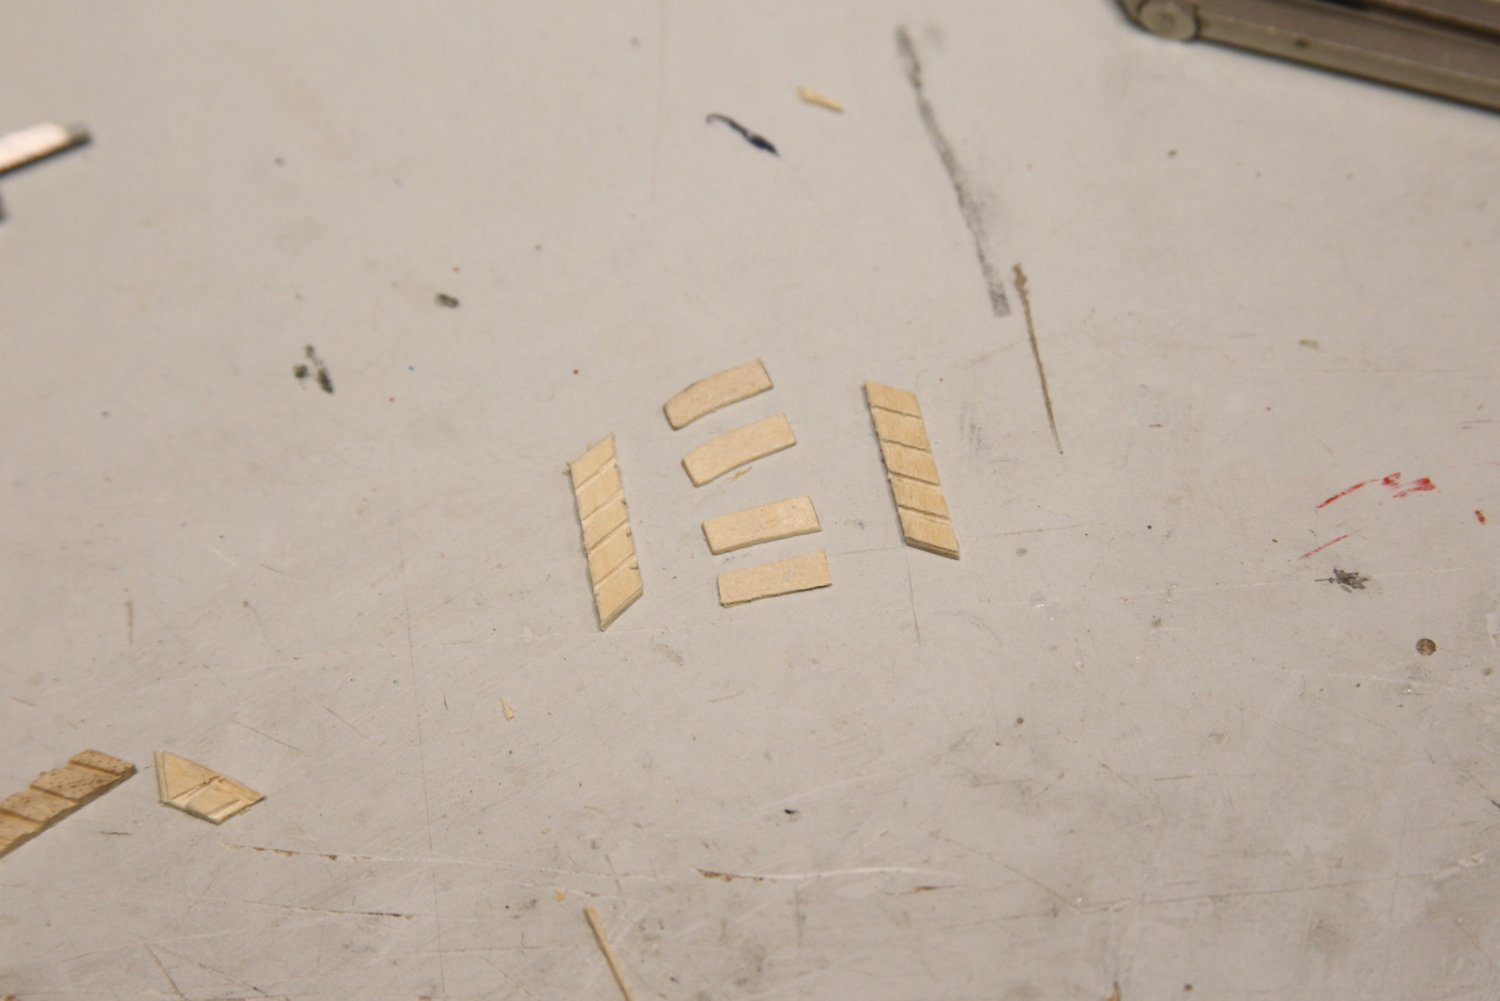
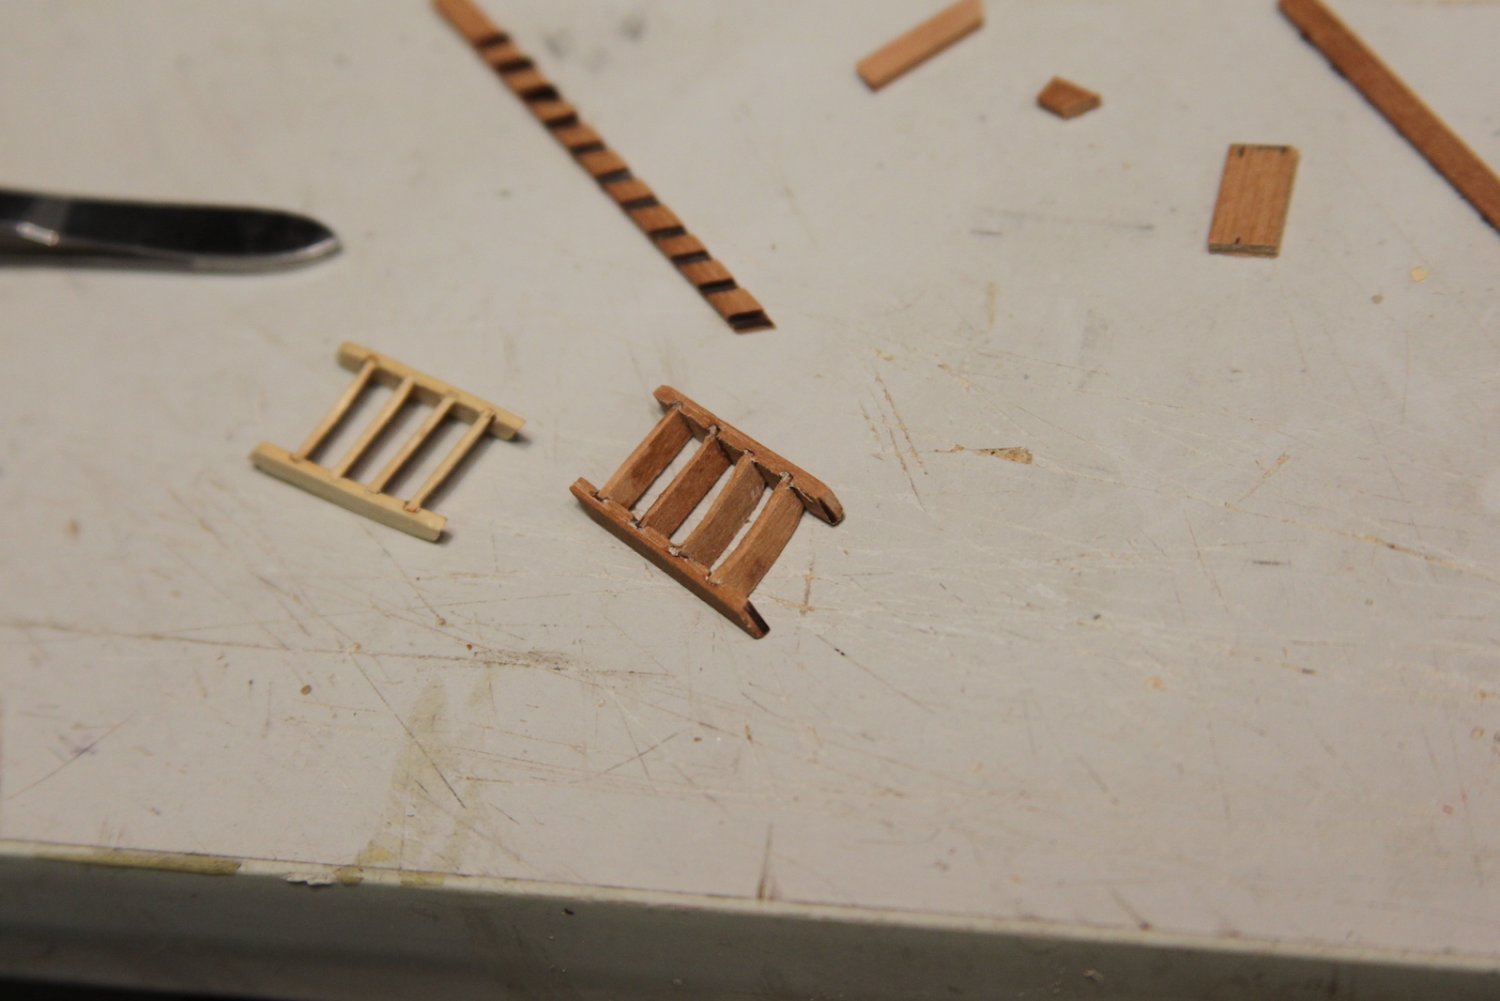
For the ladders in the waist I attempted the slight curve/twist that is reflected in the FFM. Wow - what a challenge. I started out using the pieces of basswood that I typically used for ladders. However, this wood caused two significant problems. First, it was too soft to shape/sand in the ways that I needed to create the curve that gradually diminishes from top to bottom. And second - the lighter color just looked weird to me. So - fail on try #1.
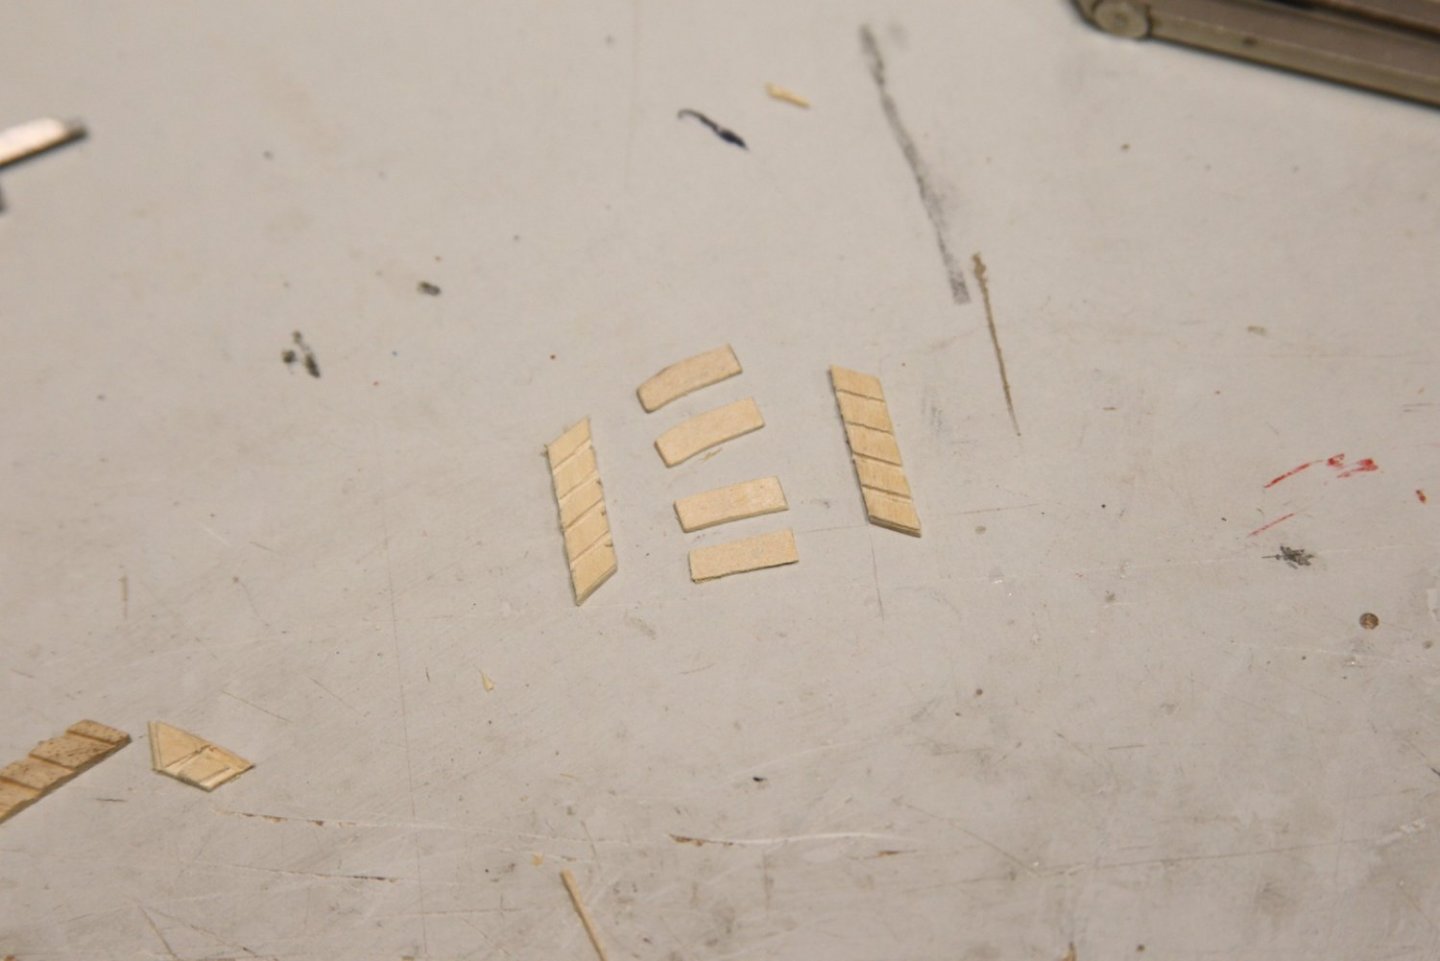
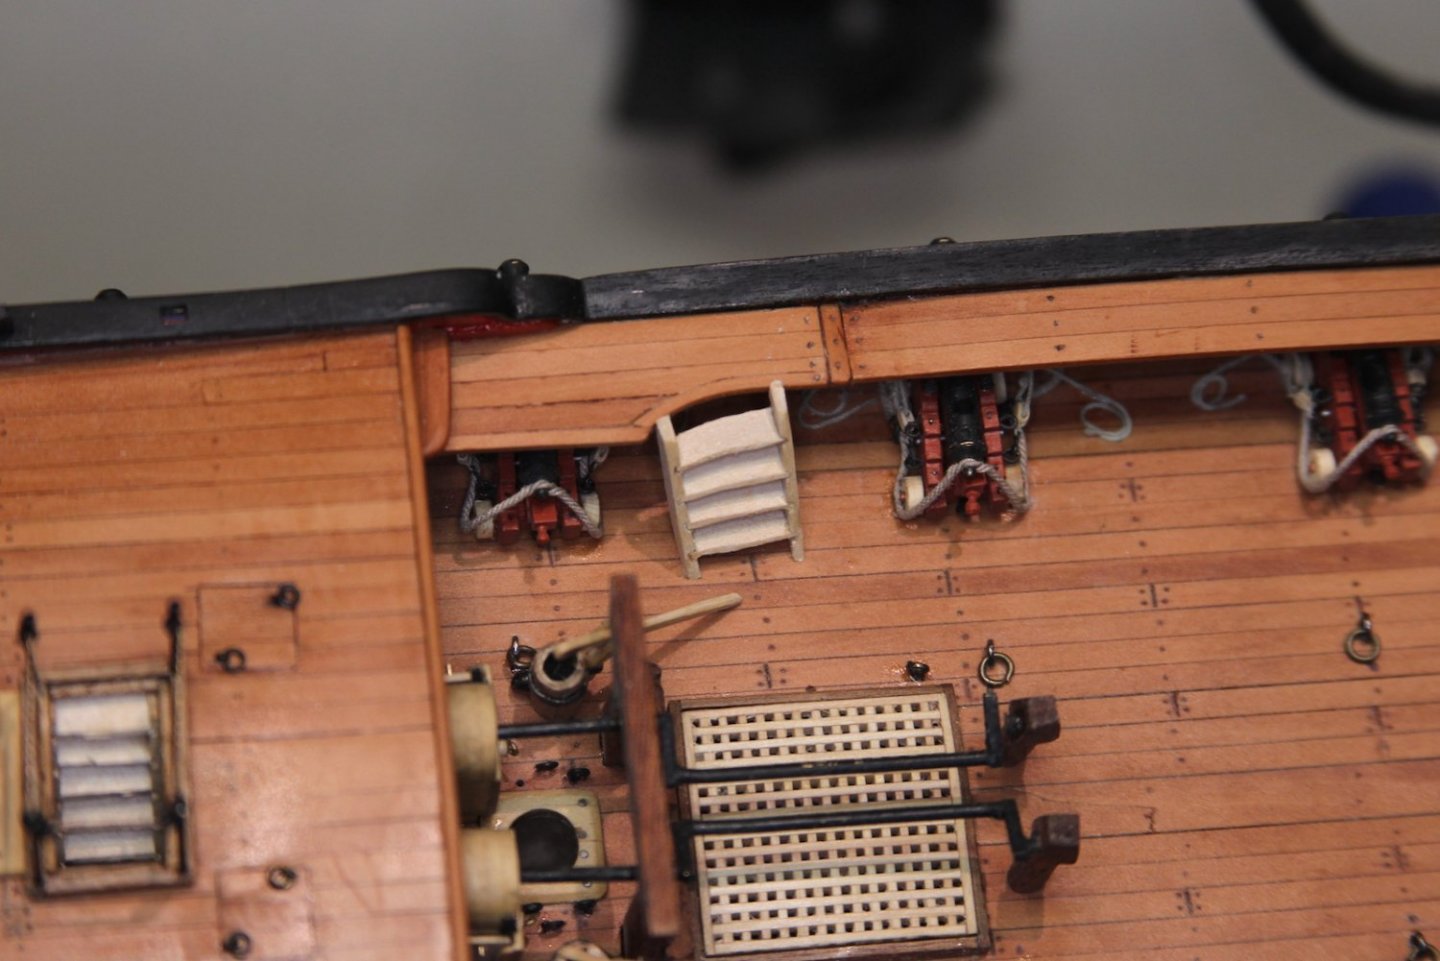
For try #2 I went with Swiss Pear - same material as the deck. This solved both problems. I was able to sand and shape the denser wood, and it looked much better not contrasting with the deck. I like the contrast for the deck furniture, not so much for the ladders. But then this presented a THIRD problem - I had already done the hatchway ladders in the lighter color. The only alternative of course was to re-do those as well. I think this second attempt also produced ladders & steps that are bit more to scale as well.
-
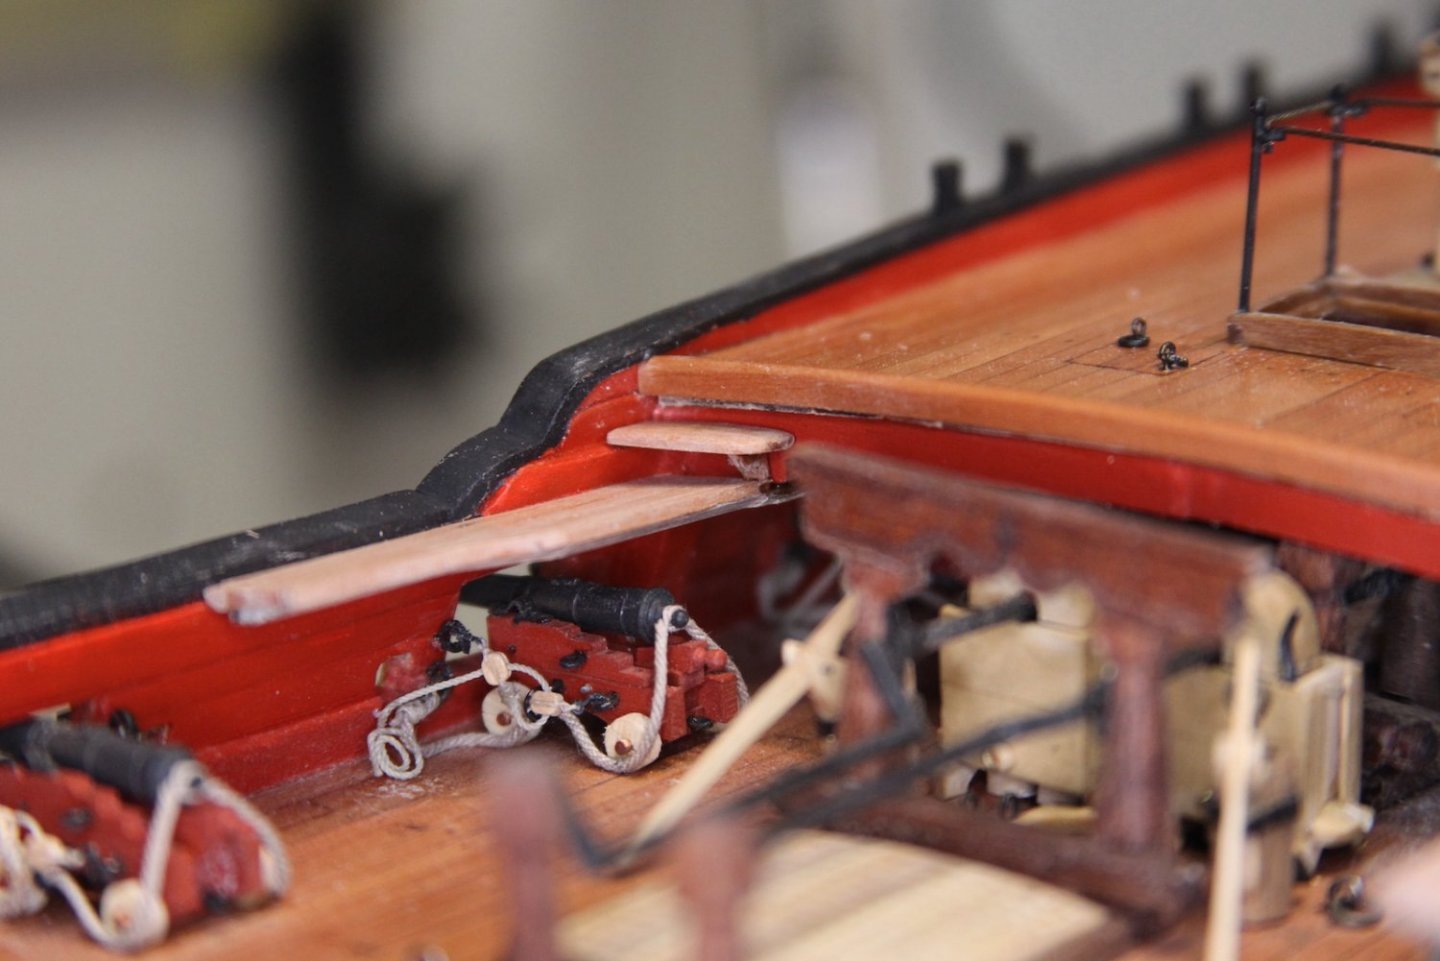
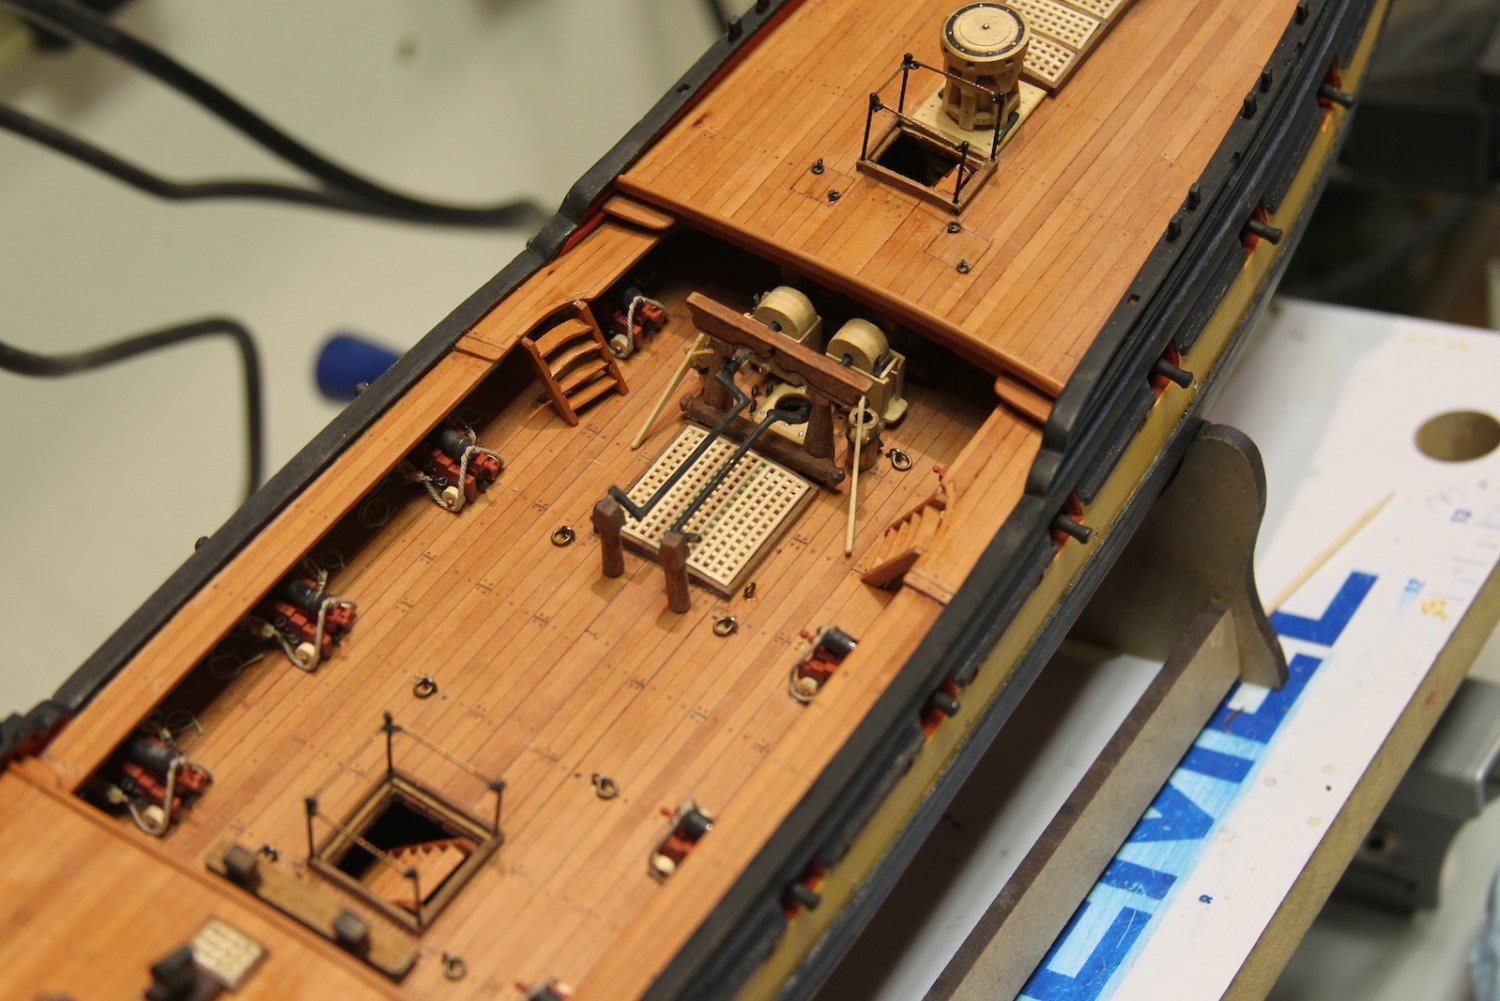
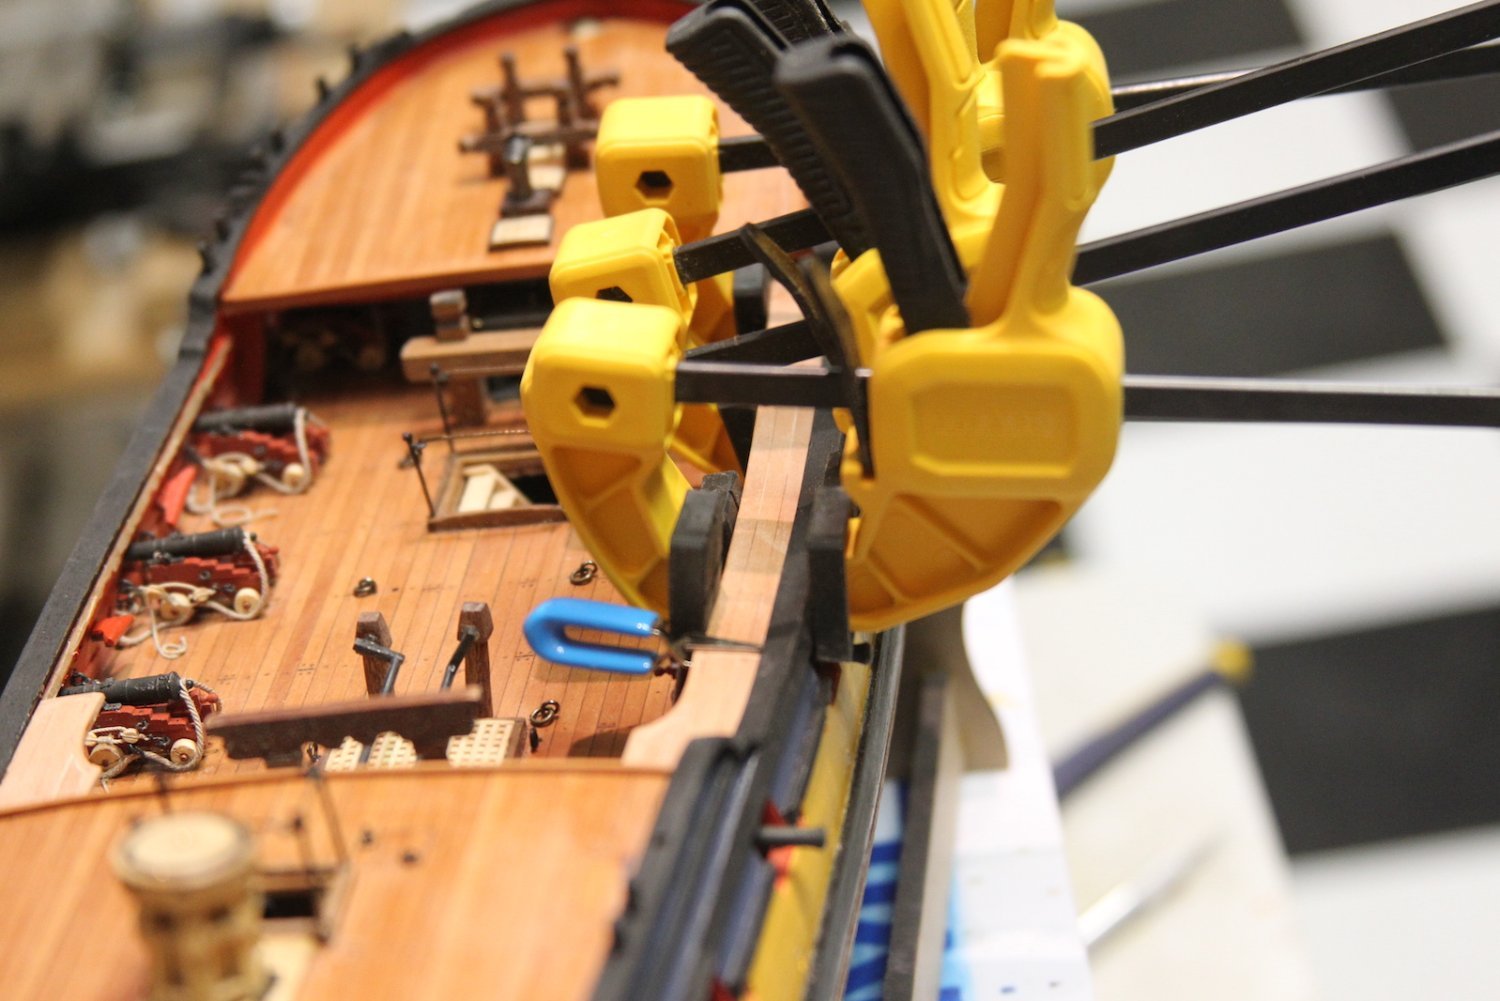
Put the gangways and gangboards together. Pretty straightforward stuff with only a couple of wrinkles. I used the false deck templates, then extended the planking all the way across the waist. Then I discovered an issue: once again because my deck planking is thick - the step up from the gangway to the other decks was not feasible for a sailor to navigate. So I added an additional step up. The rest of the gangboards, etc, is nothing earth-shattering.


-
Hey there Masa - off to a good start. I will say - you can never have too many of those Dewalt clamps, I use them ALL the time. 🙂
-
Thanks for the comments everyone, much appreciated.
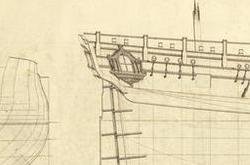
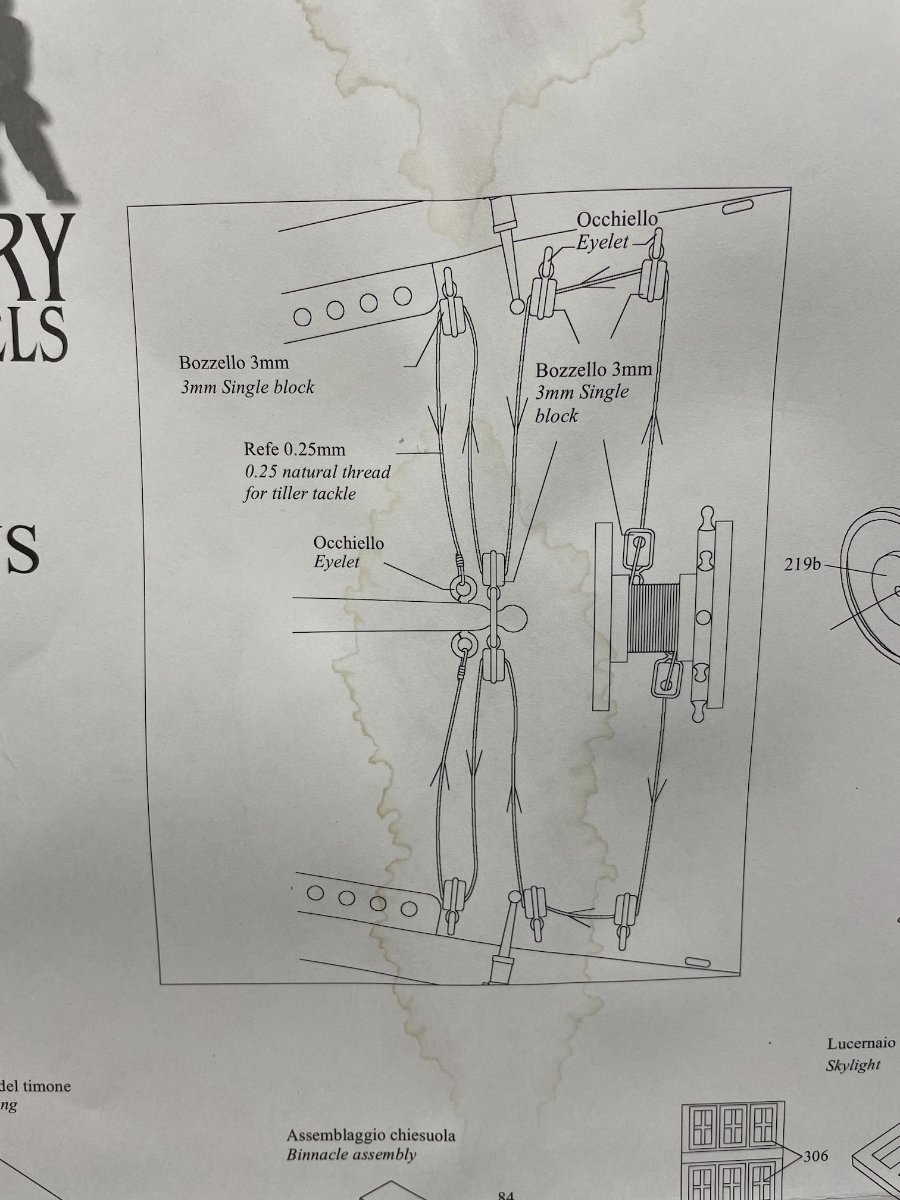
1 hour ago, AJohnson said:Is the way the ropes are attached to the tiller arm from the plans?
Hey Andrew, great question. The plans show it differently (see below) - and closer to what you're illustrating. But I took this simpler method (linked) from Dan Vadas' Vulture as he was more closely following Antscherl's Swan FFM books. I'm definitely no expert either - so I have been erring on the side of what other Swan builder's have done; mostly Dan and @Blue Ensign.
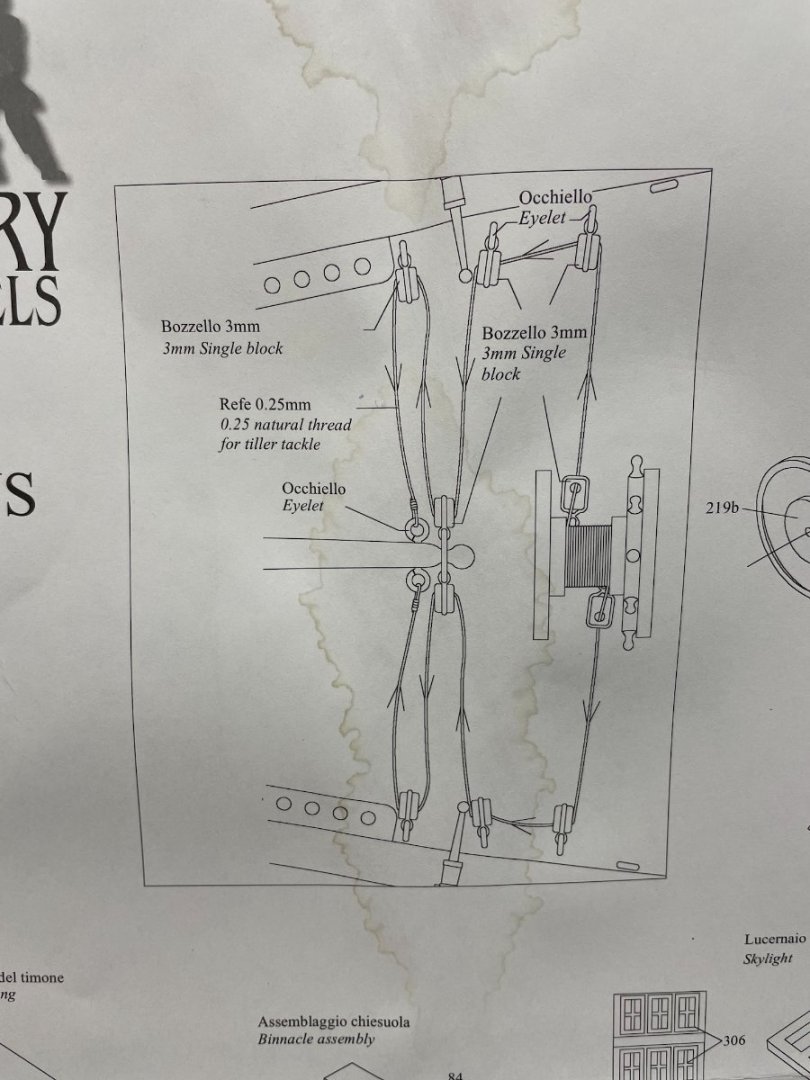
But I do notice on your plans what I mentioned before - how the heck could a helmsman fit in between that binnacle and wheel? I'm guessing there were no fat helmsmen...
-
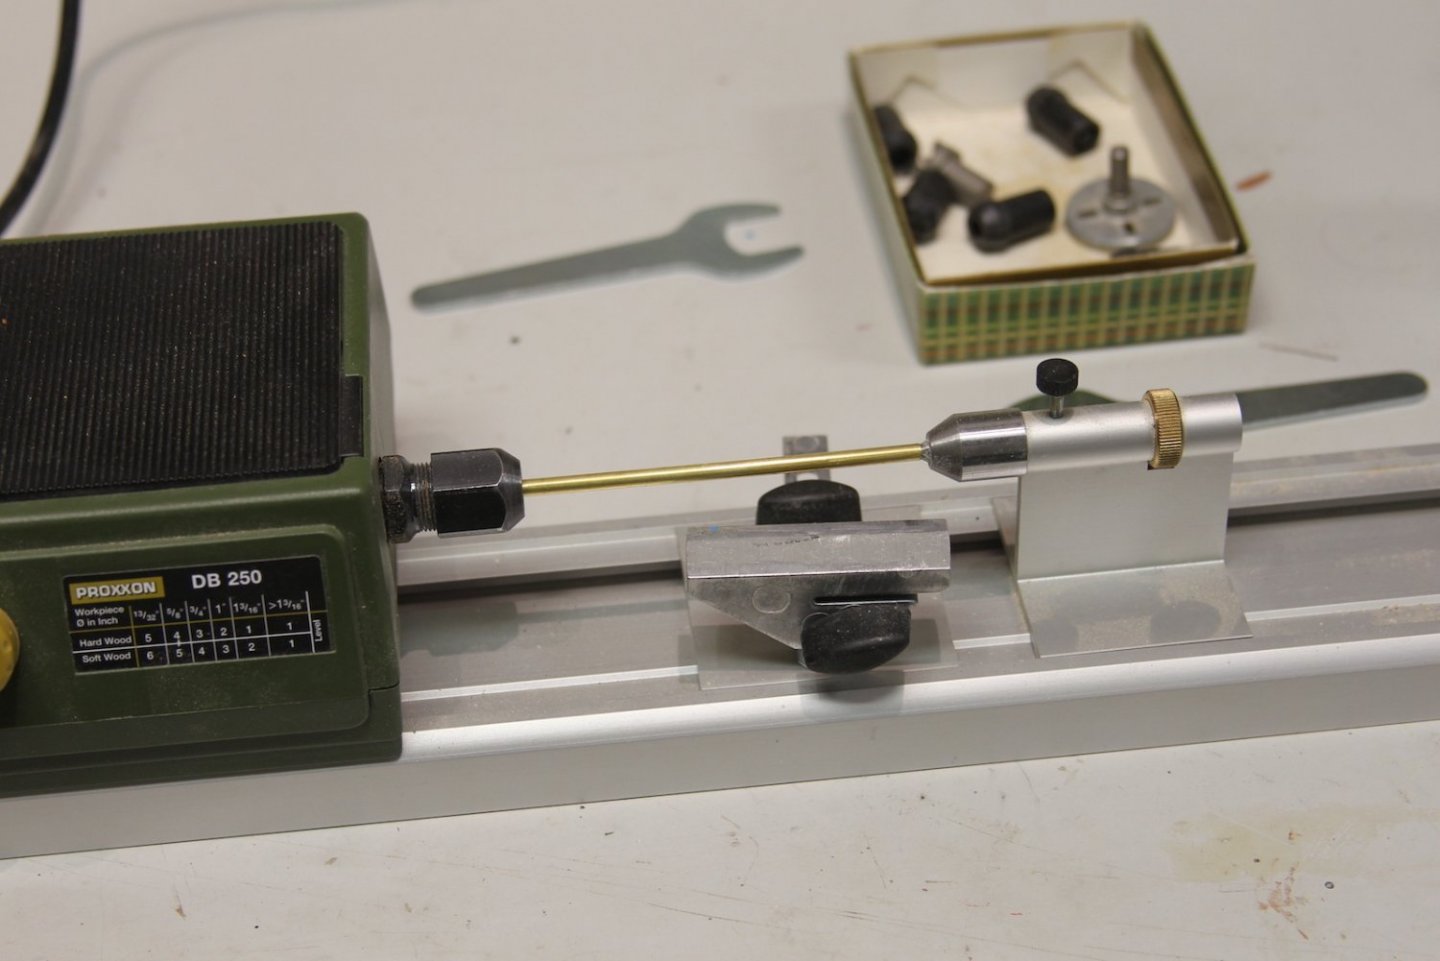
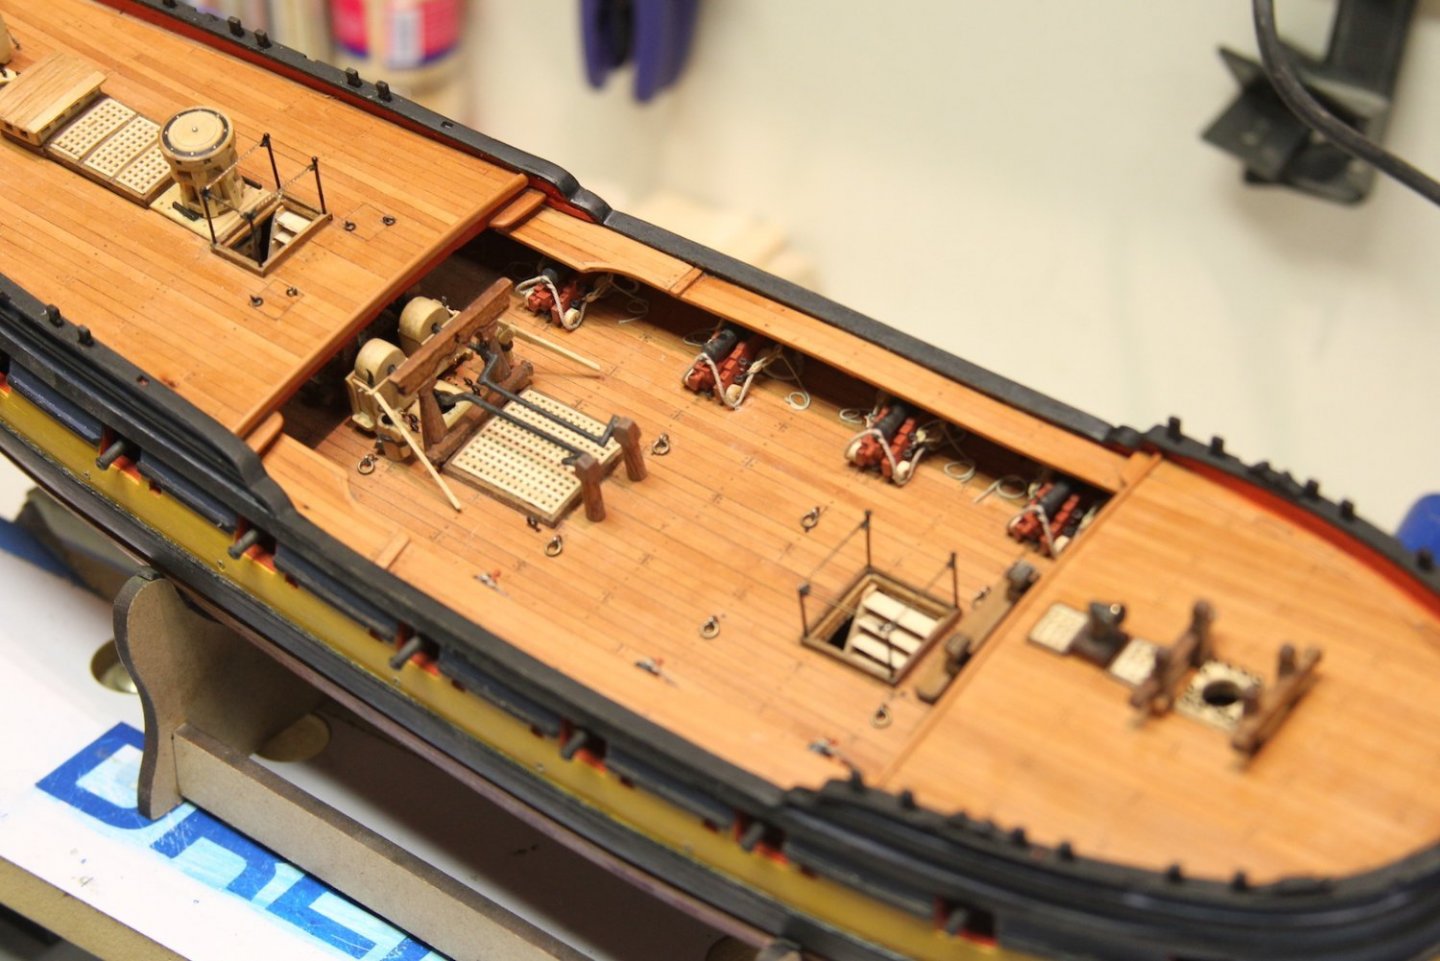
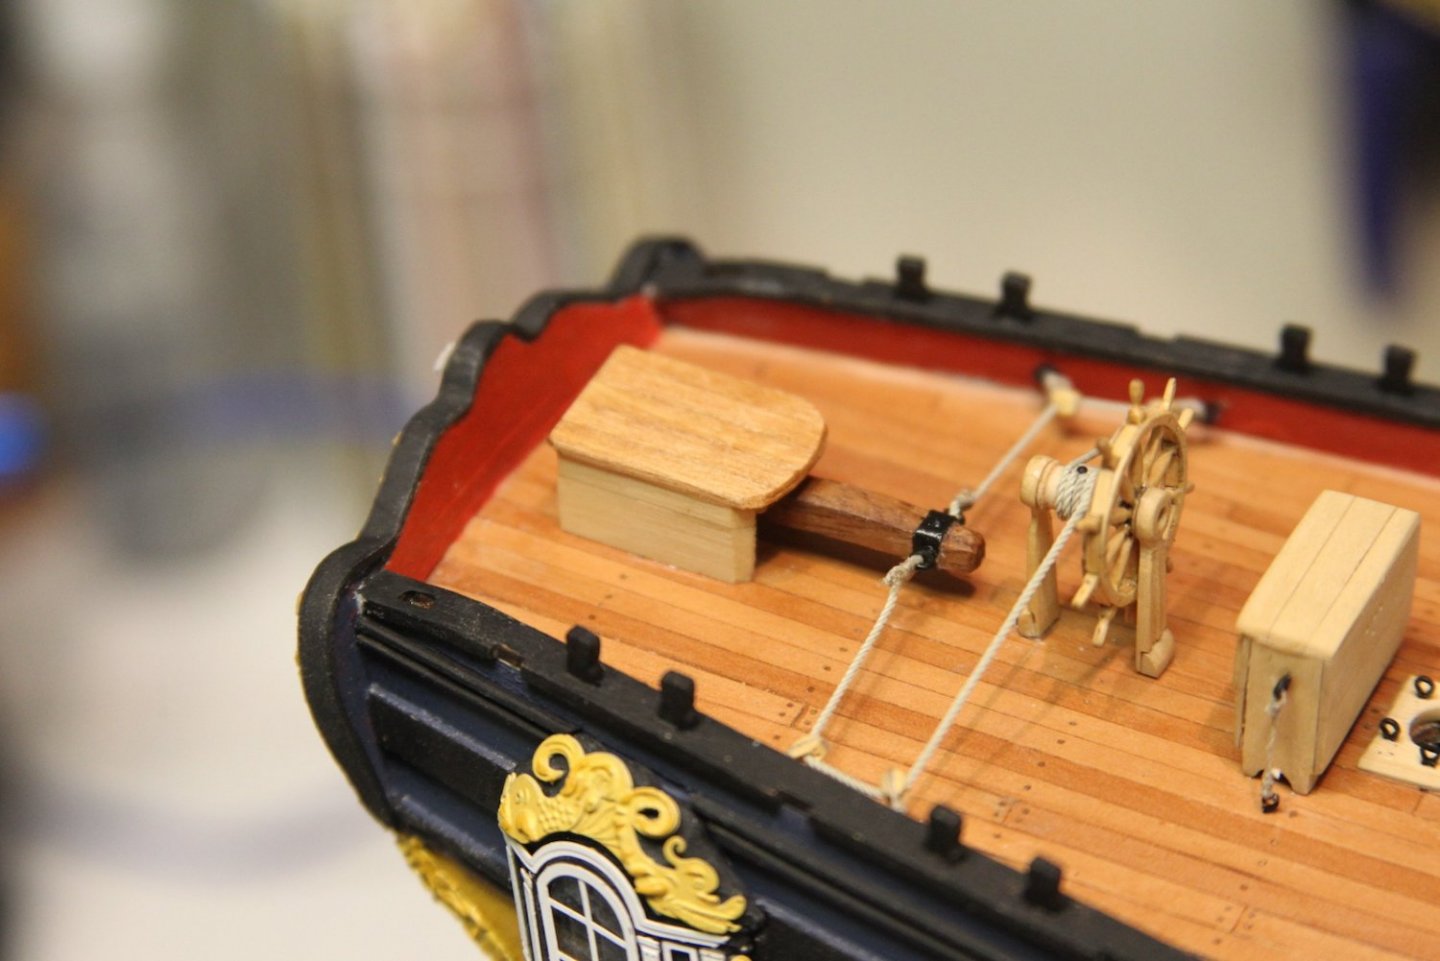
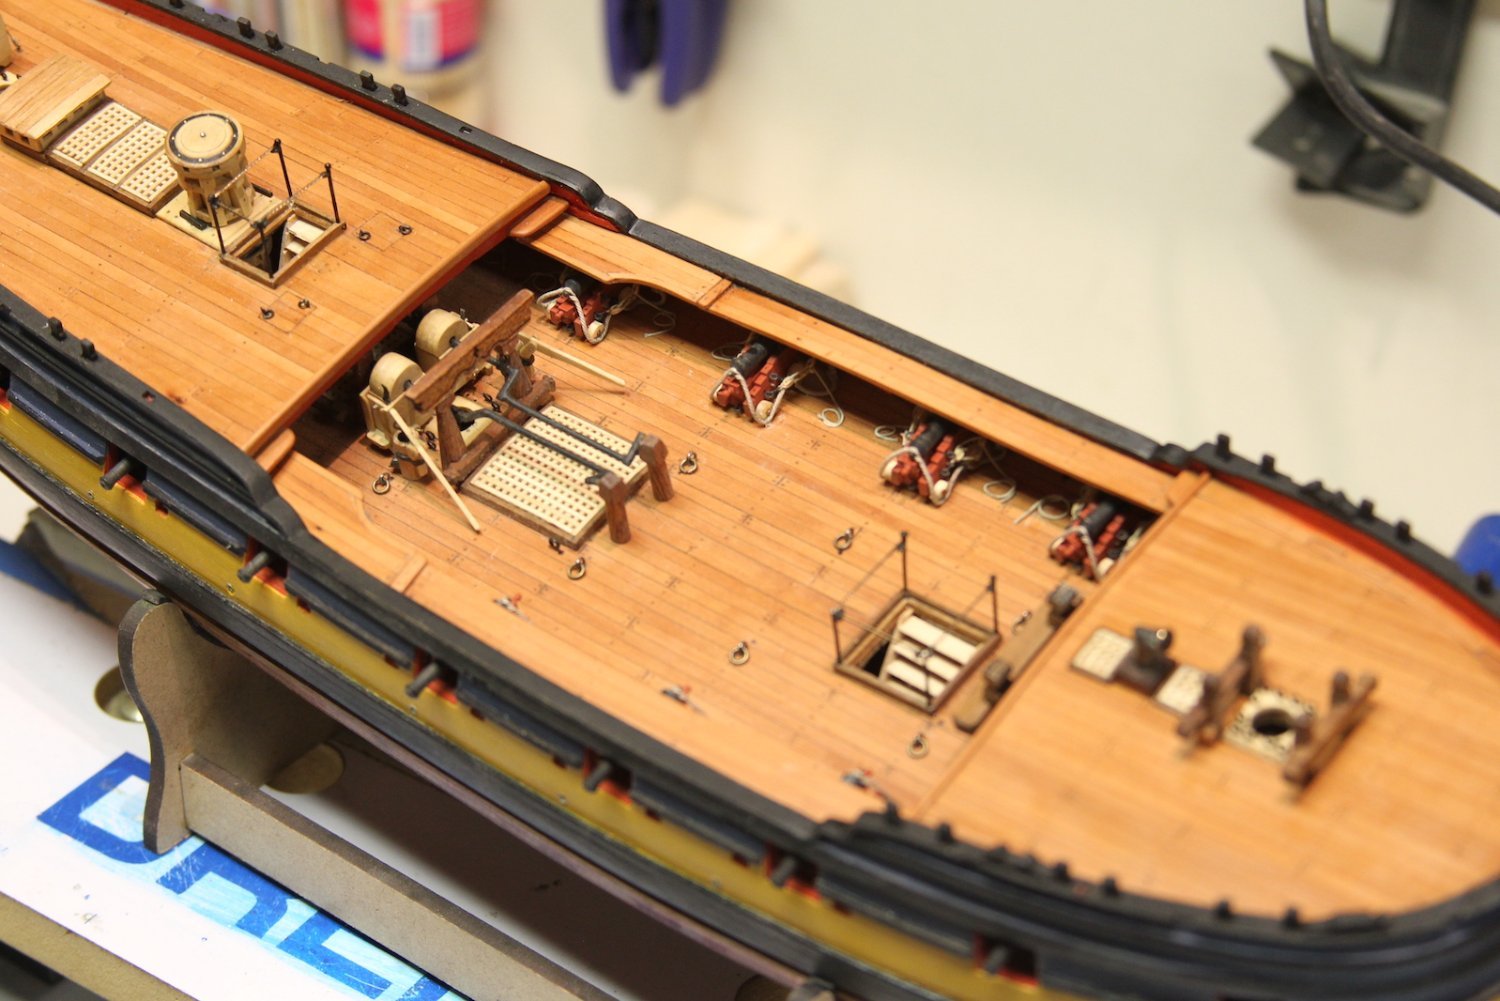
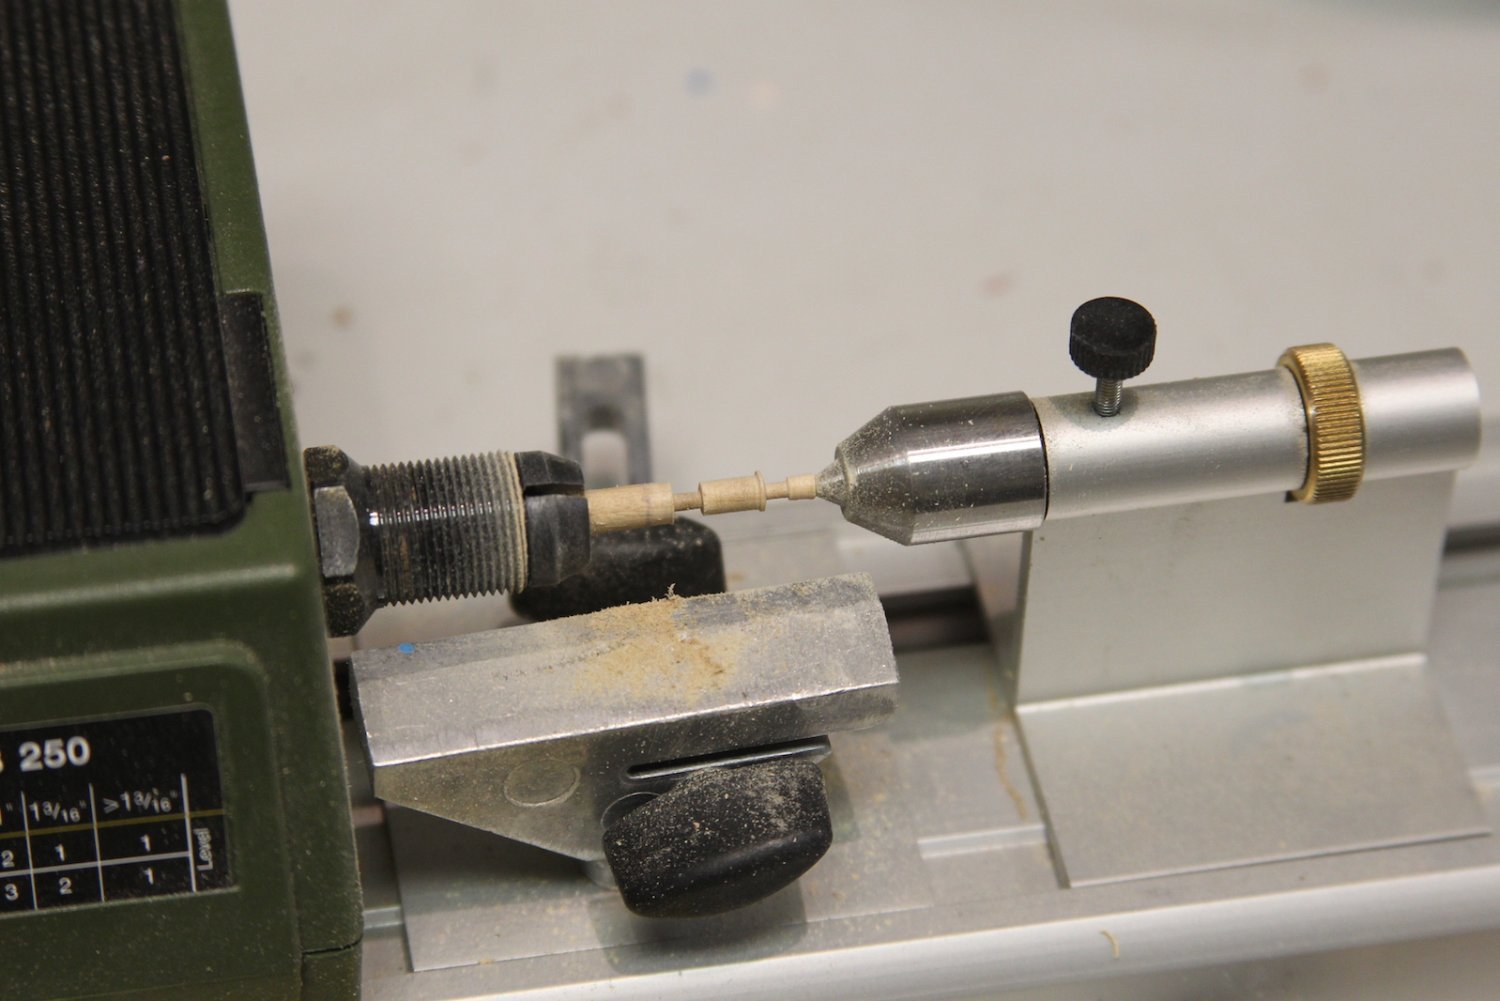
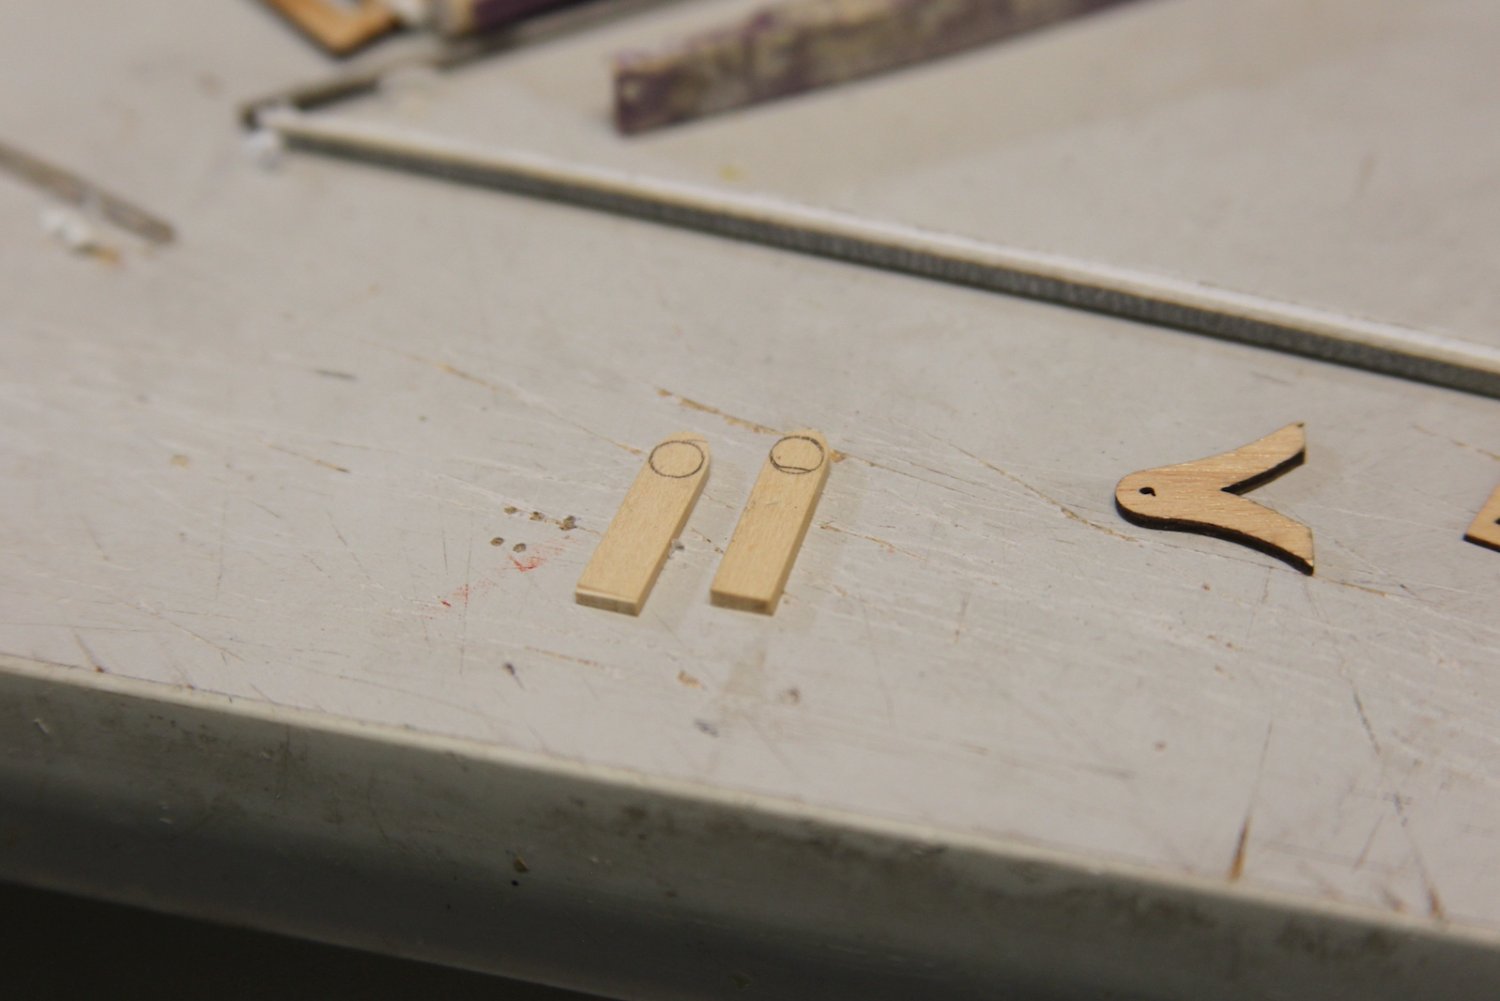
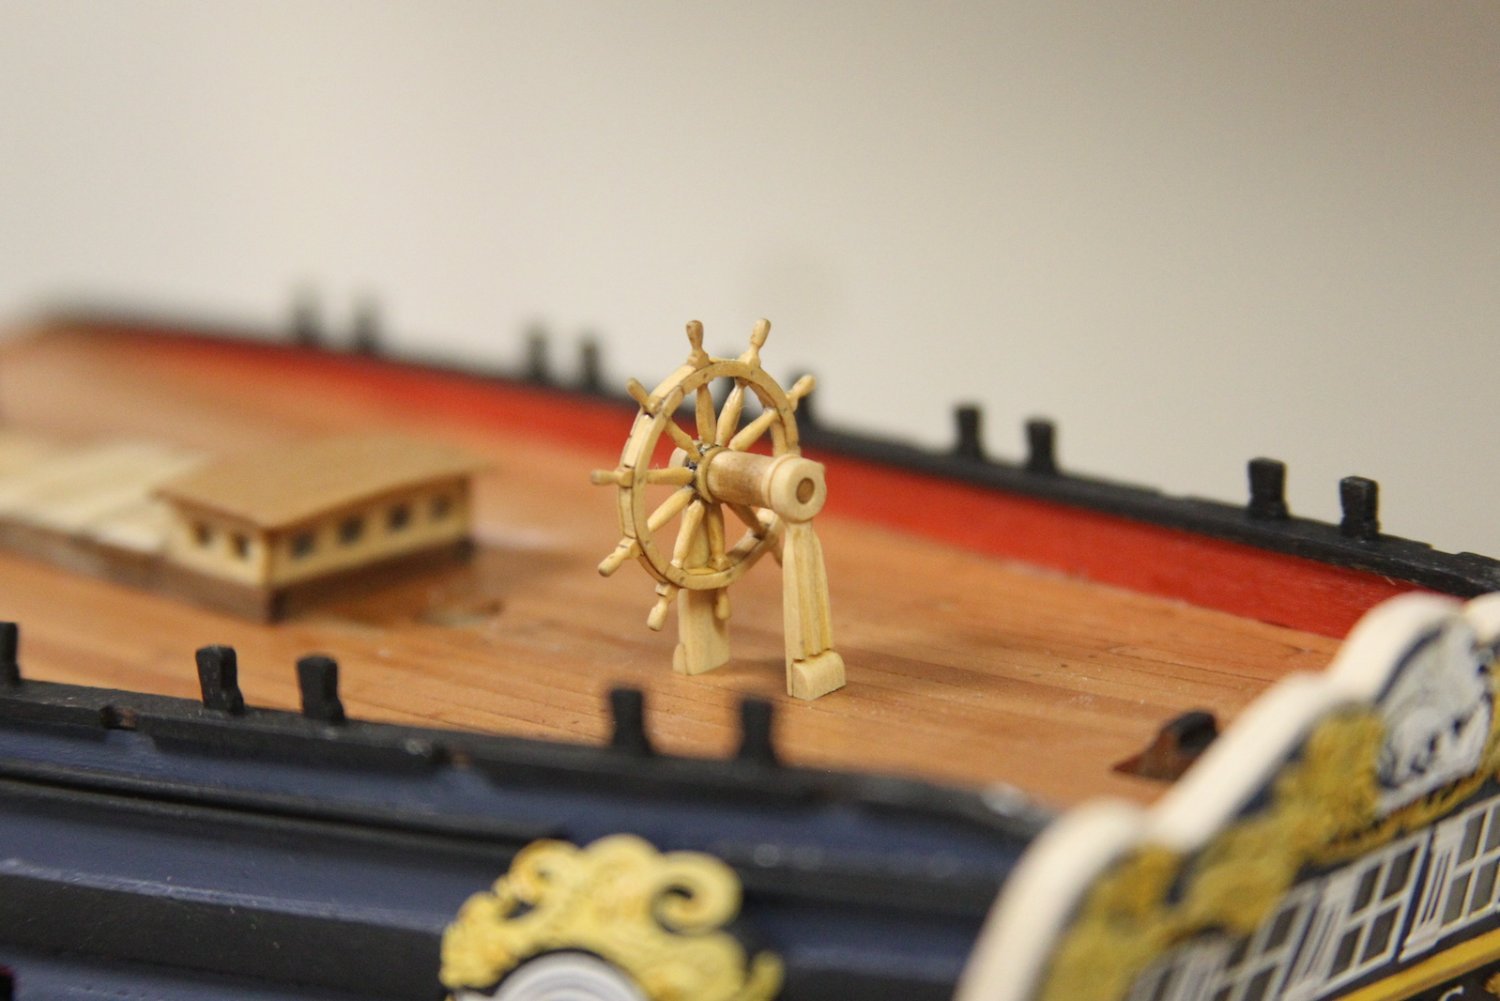
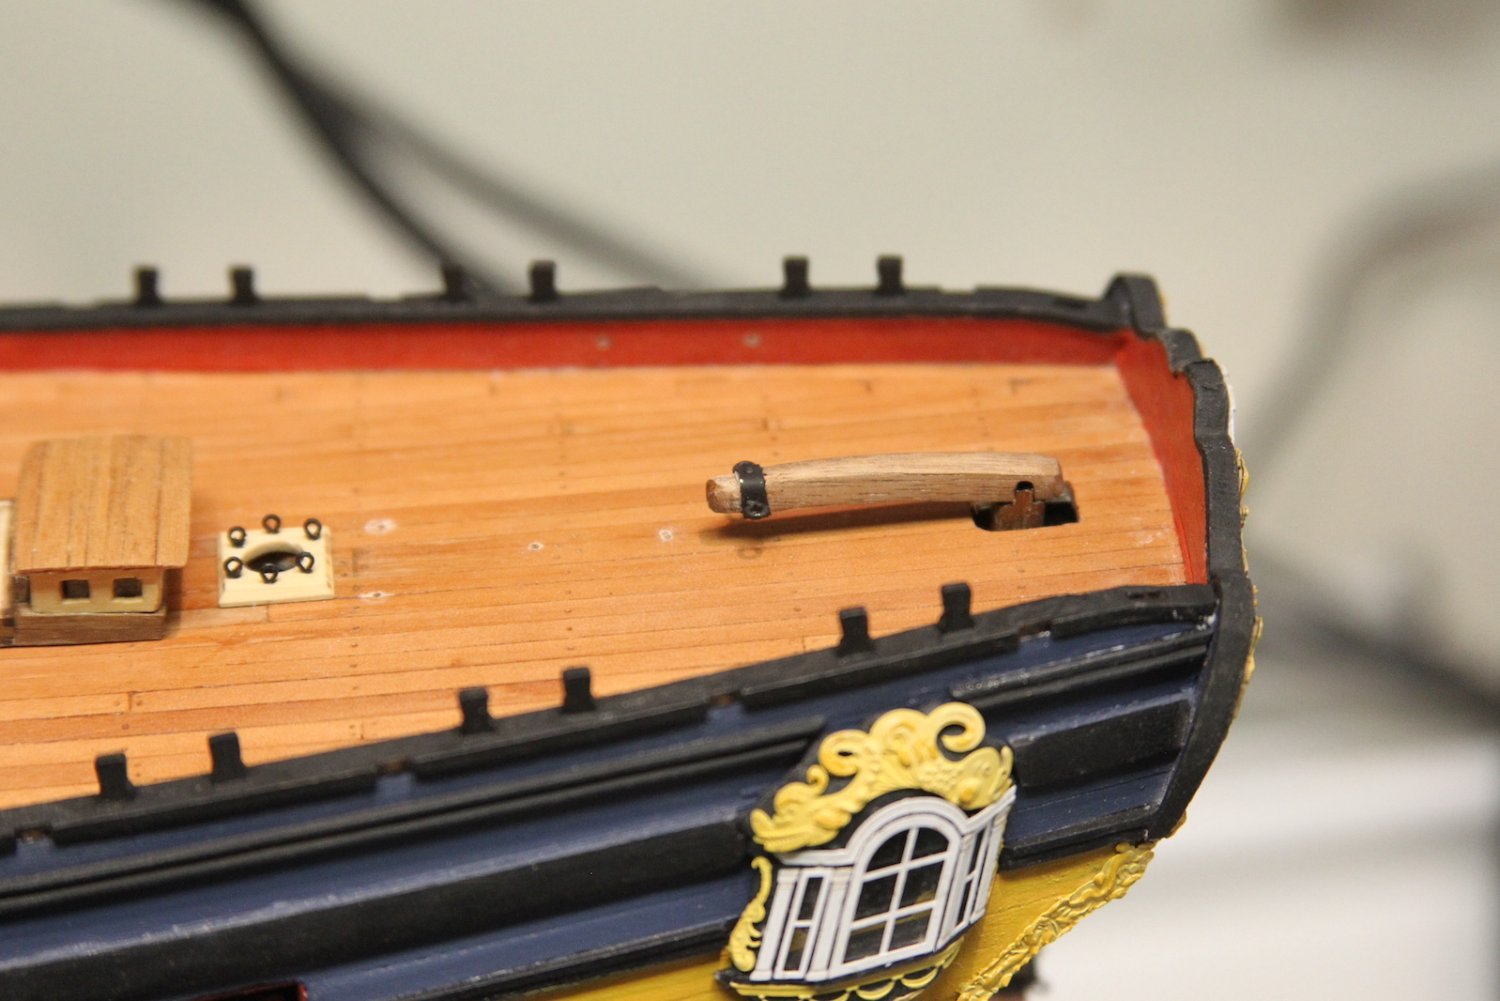
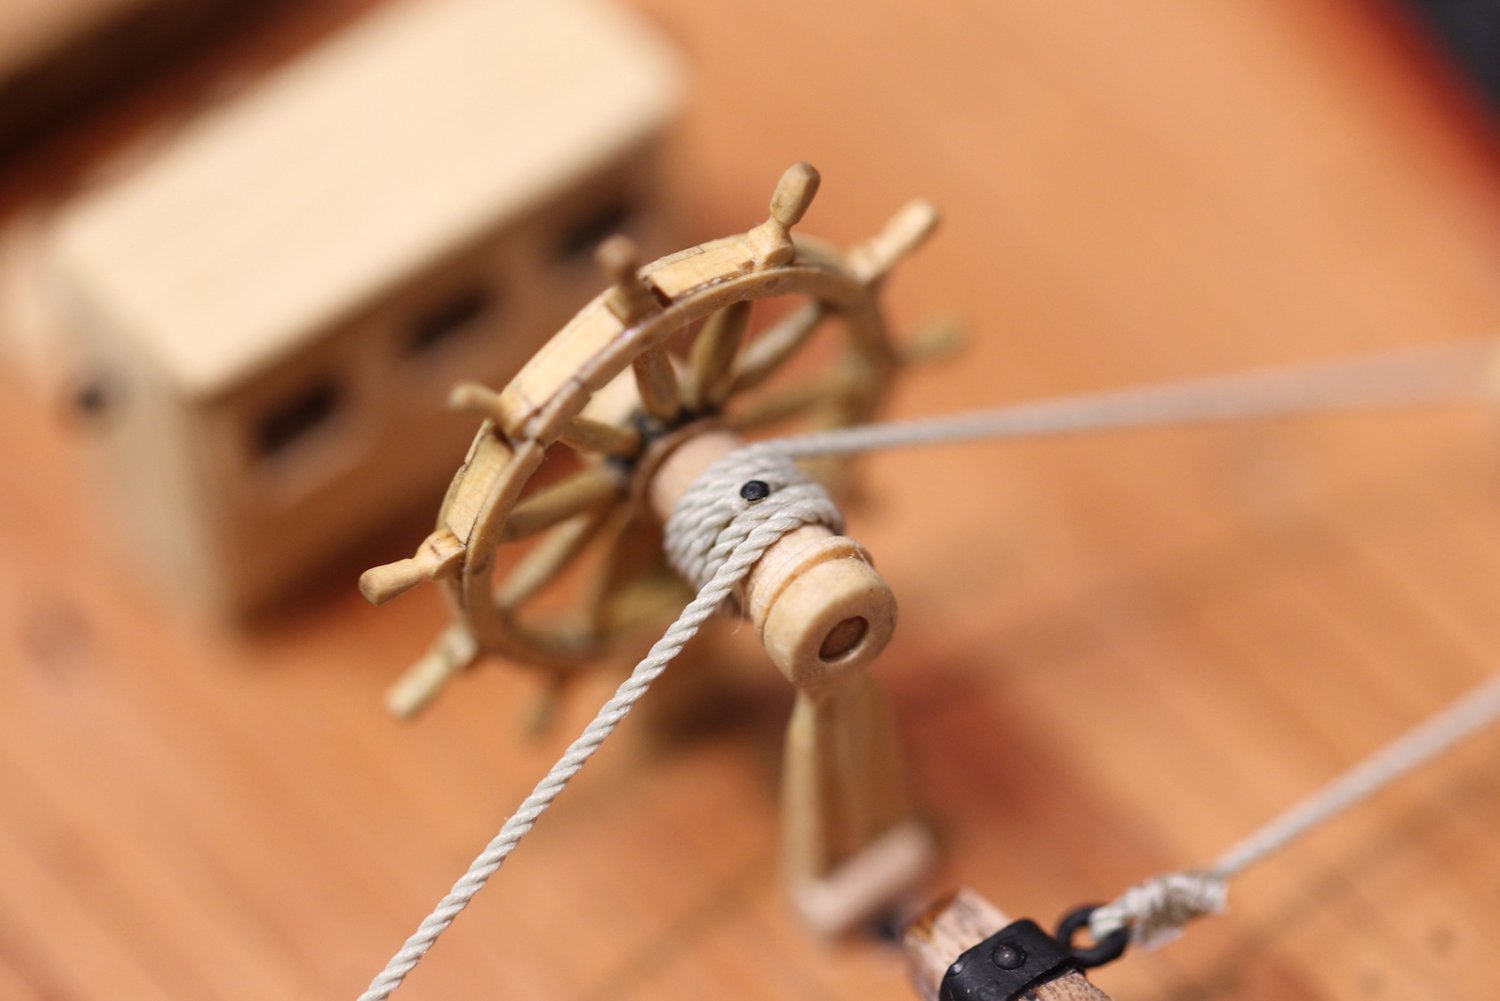
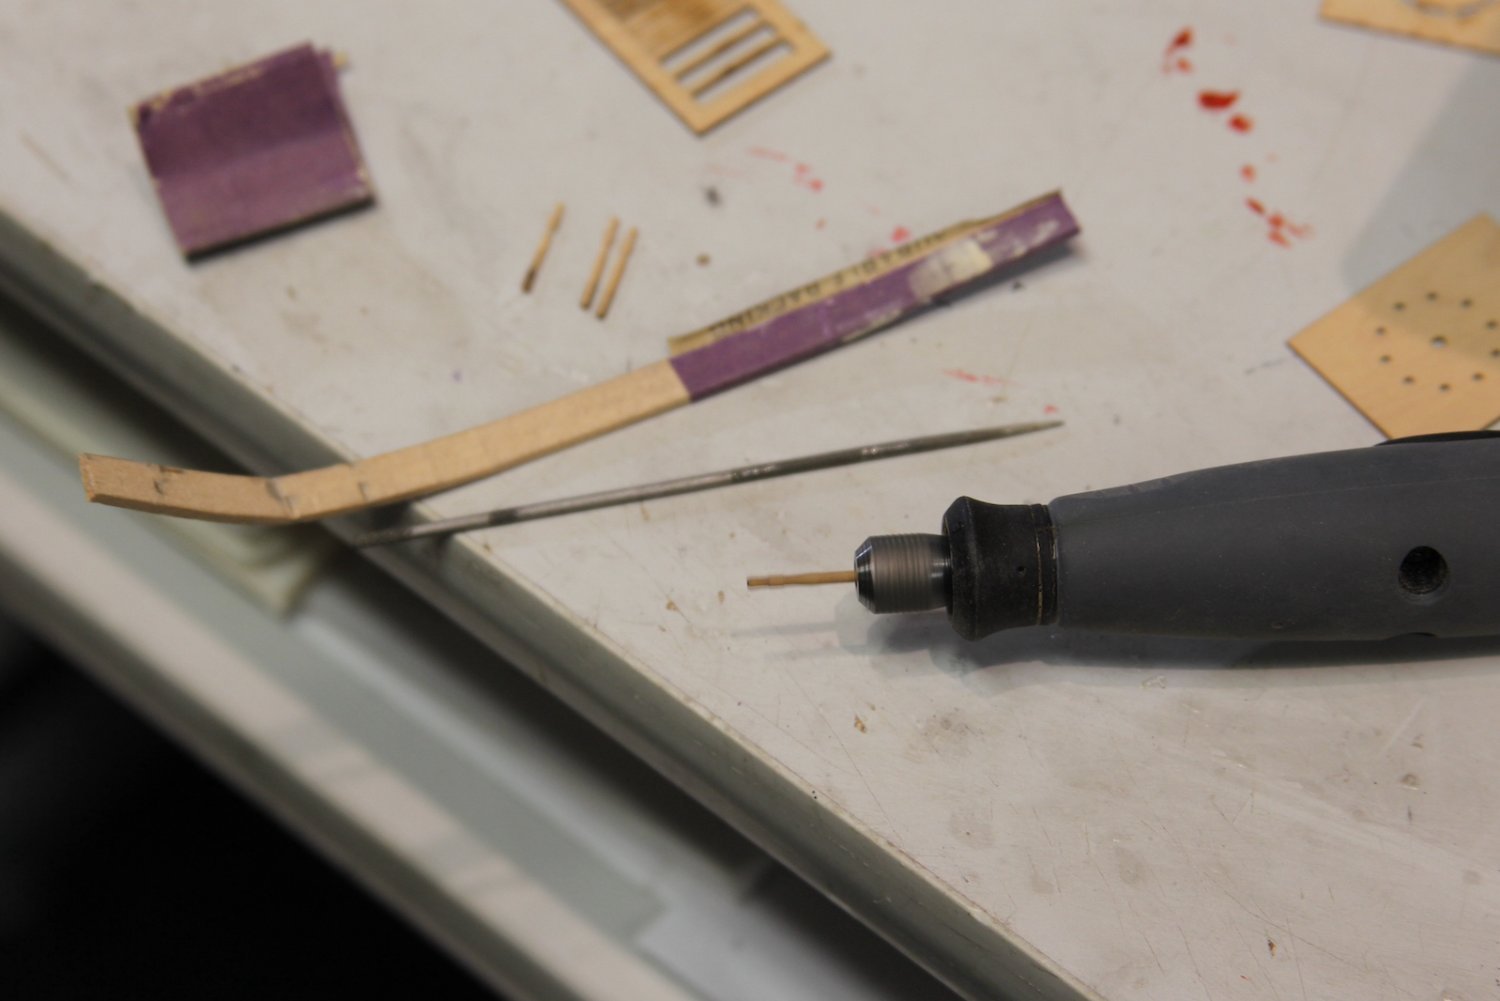
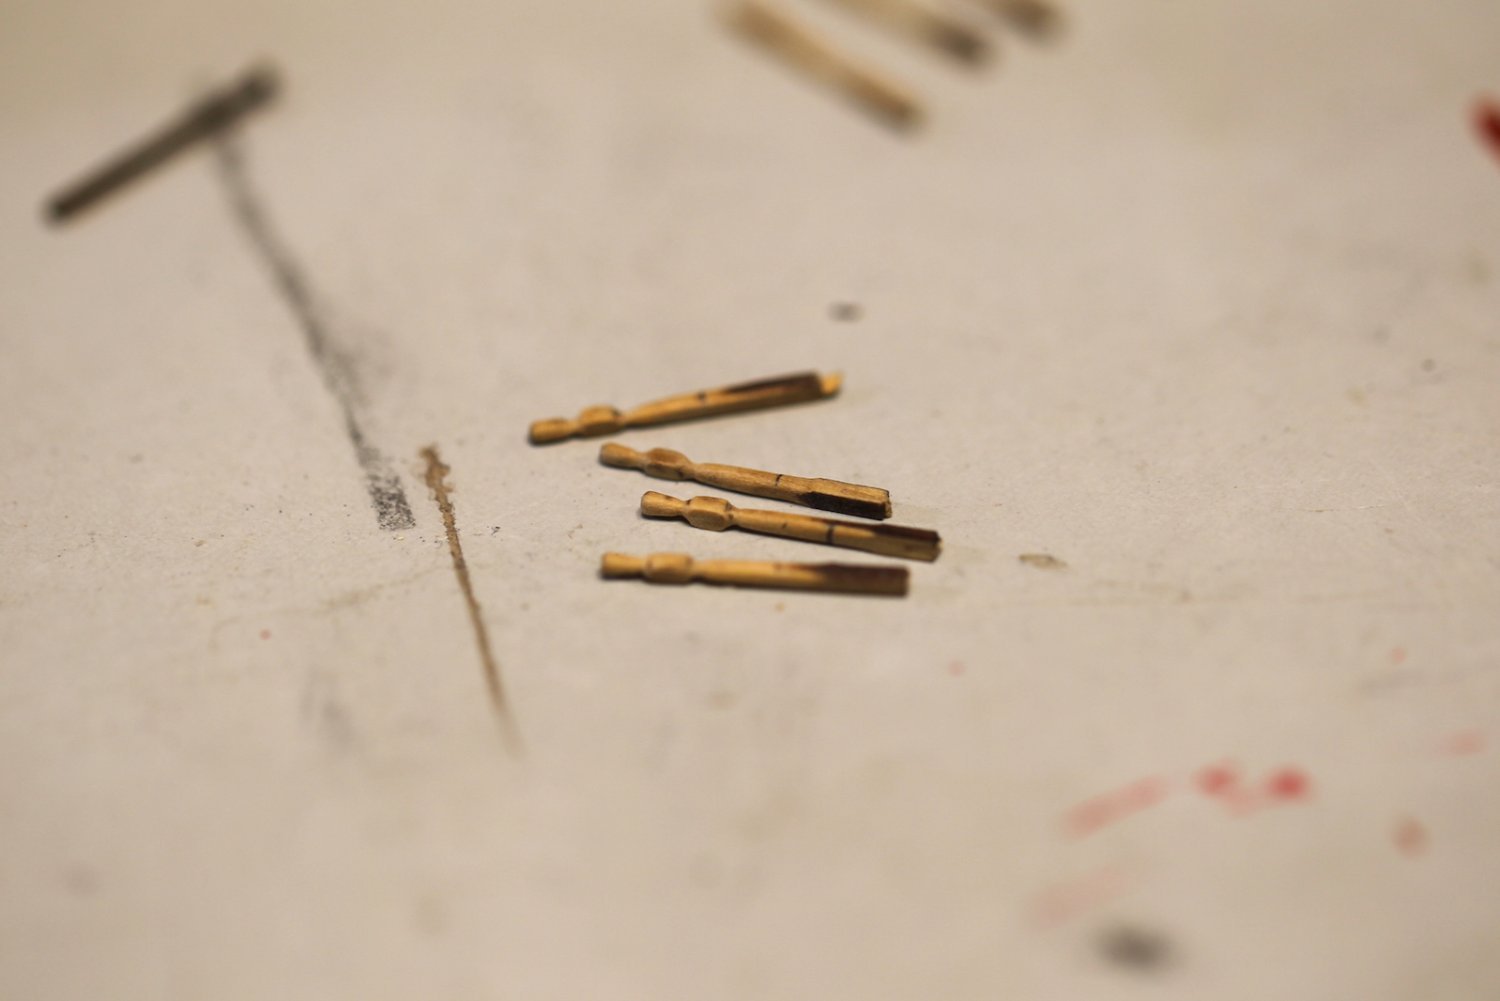
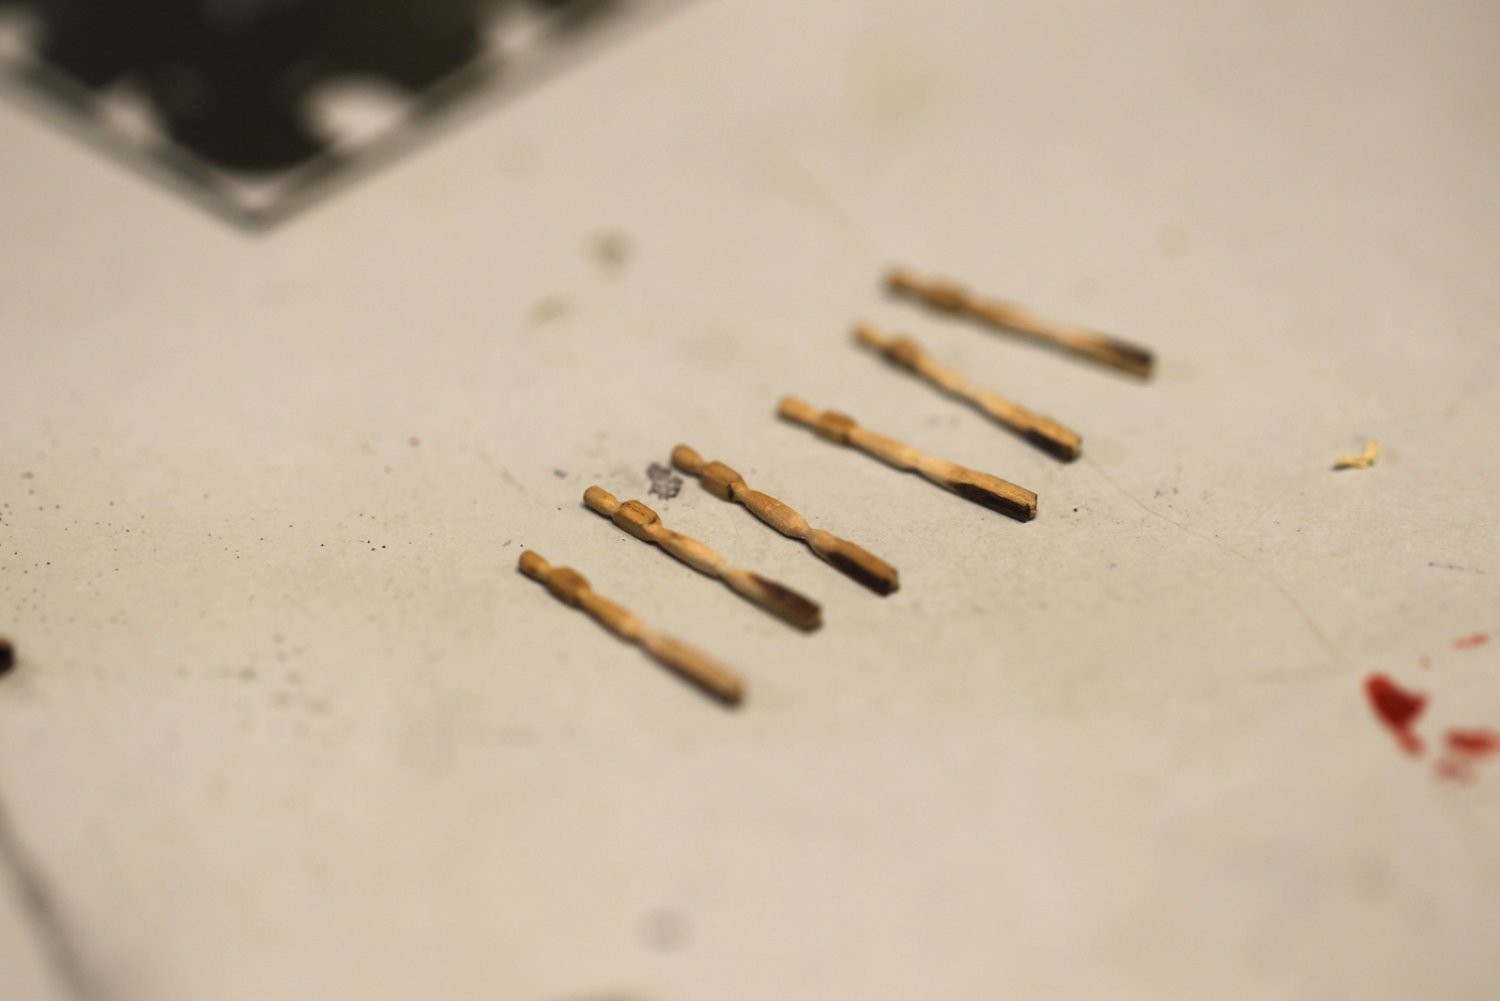
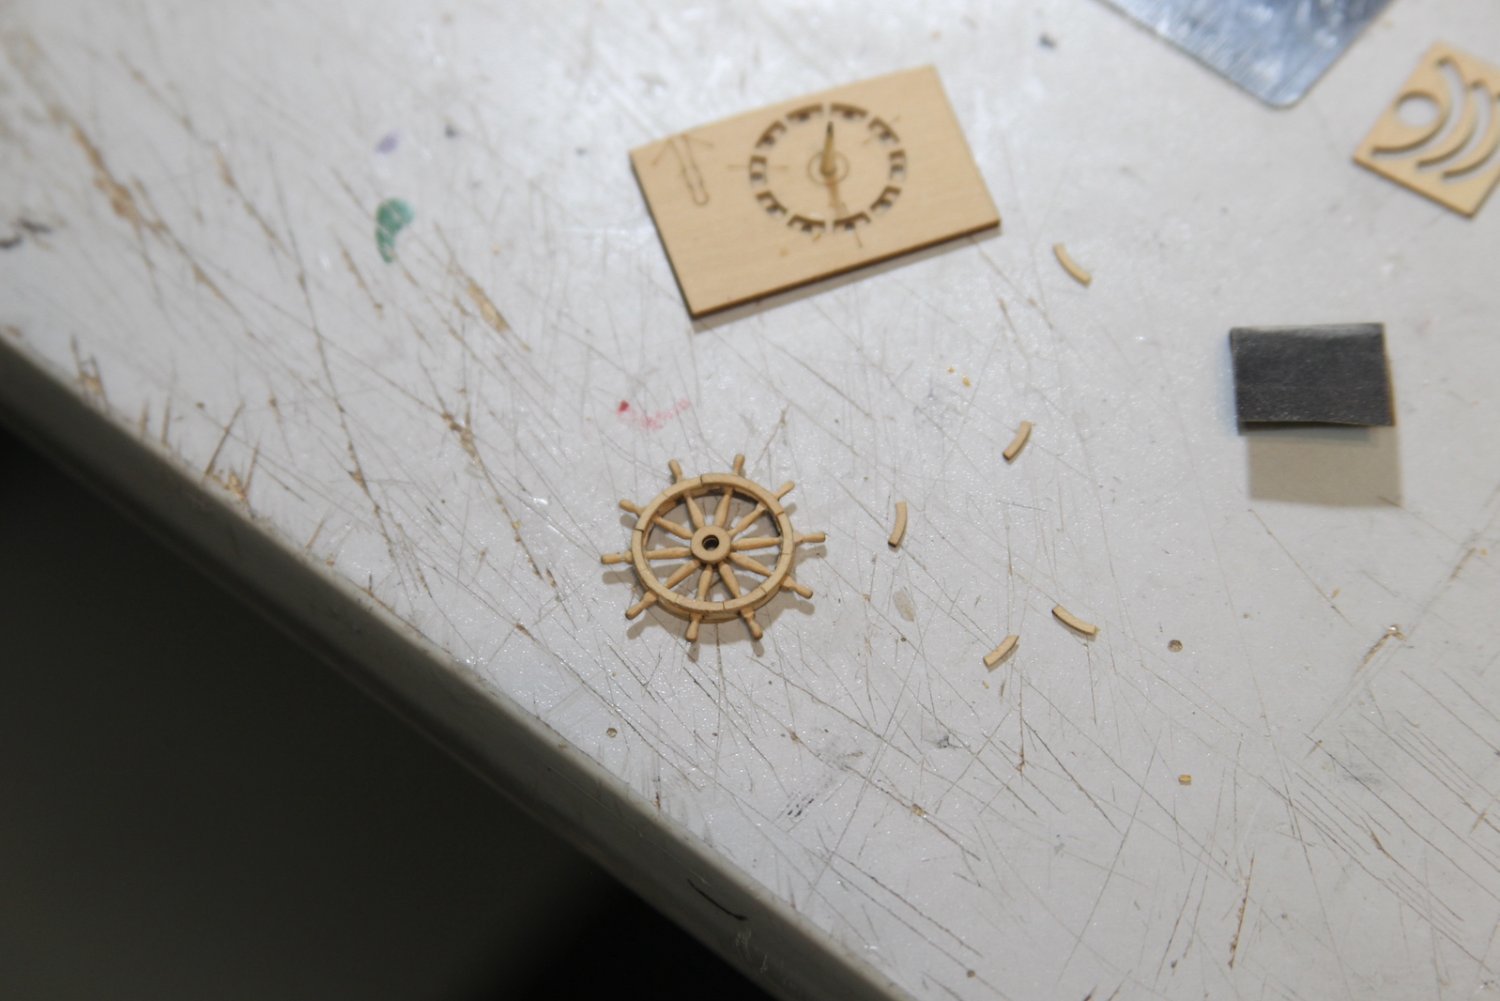
Continuing work on the wheel - the barrel is turned on the Proxxon lathe to form the base, a small ridge, and two ends that will fit into the wheel and the stanchions. The stanchions are carved boxwood - sanded and shaped, then given some texture down the center for a decorative flair. The funky looking "V" shaped piece in the picture below was the stanchion provided in the kit which does not conform to what I've seen in the Swan class documentation, however I used it to ensure proper scale. The assembled wheel is initially positioned on the deck to check size and fit.


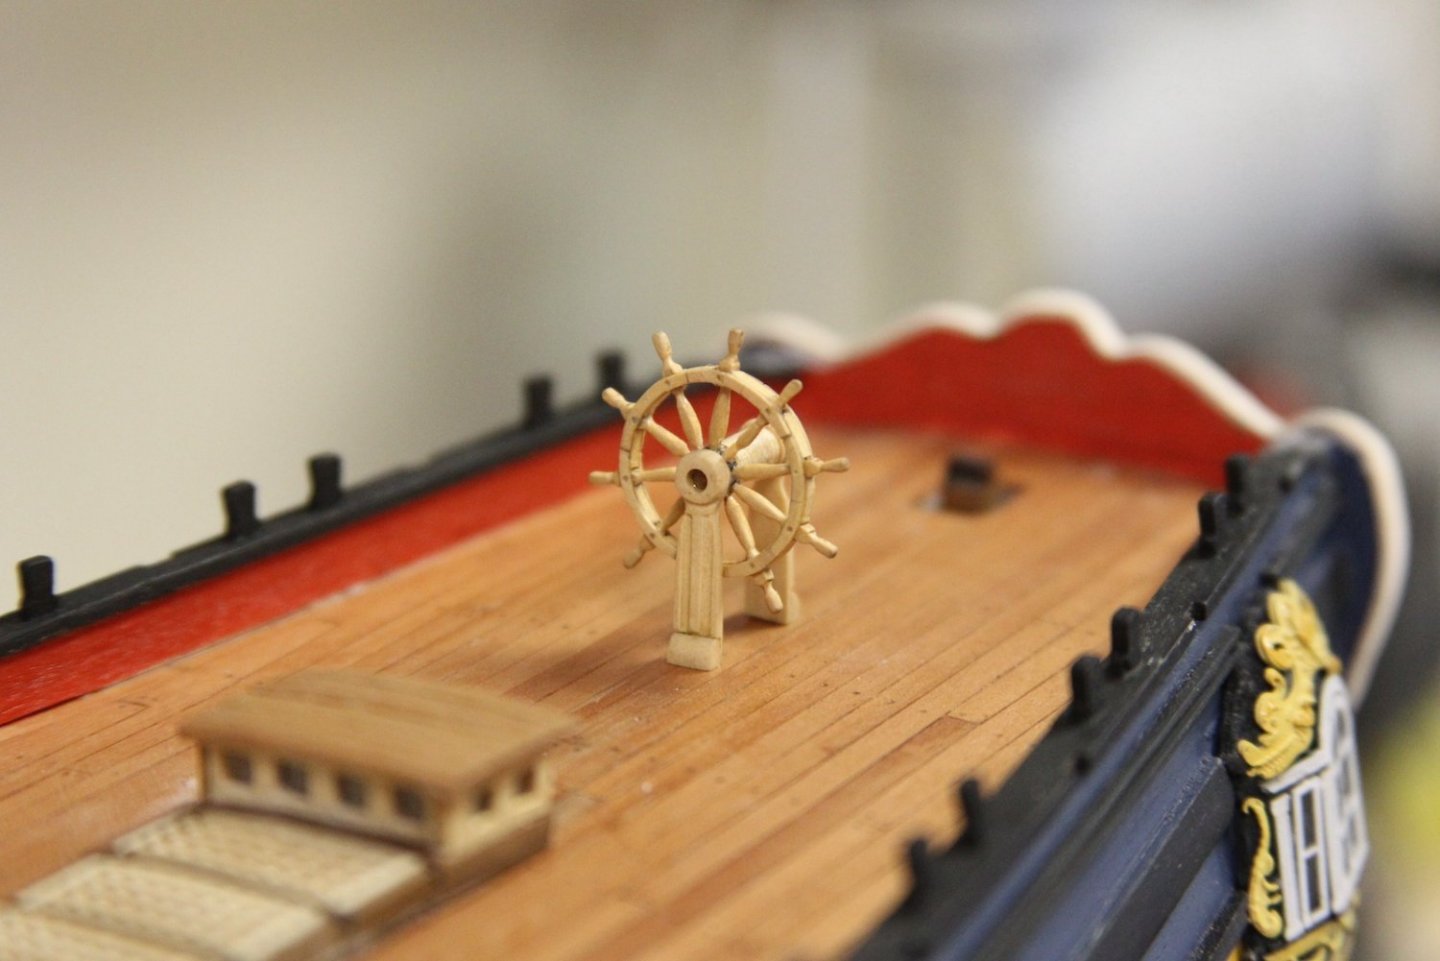

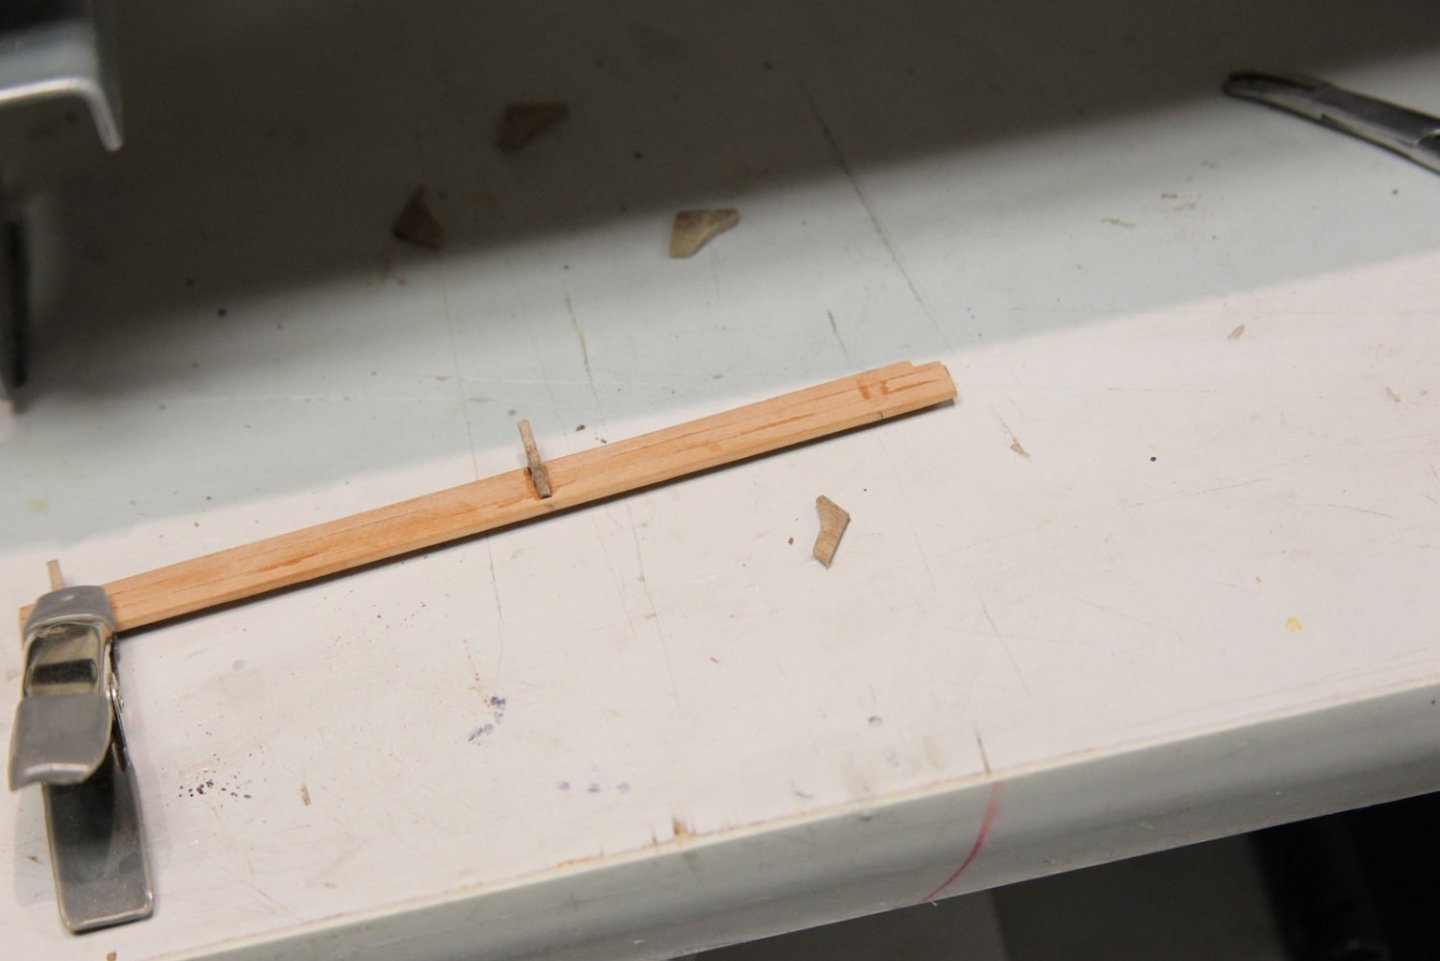
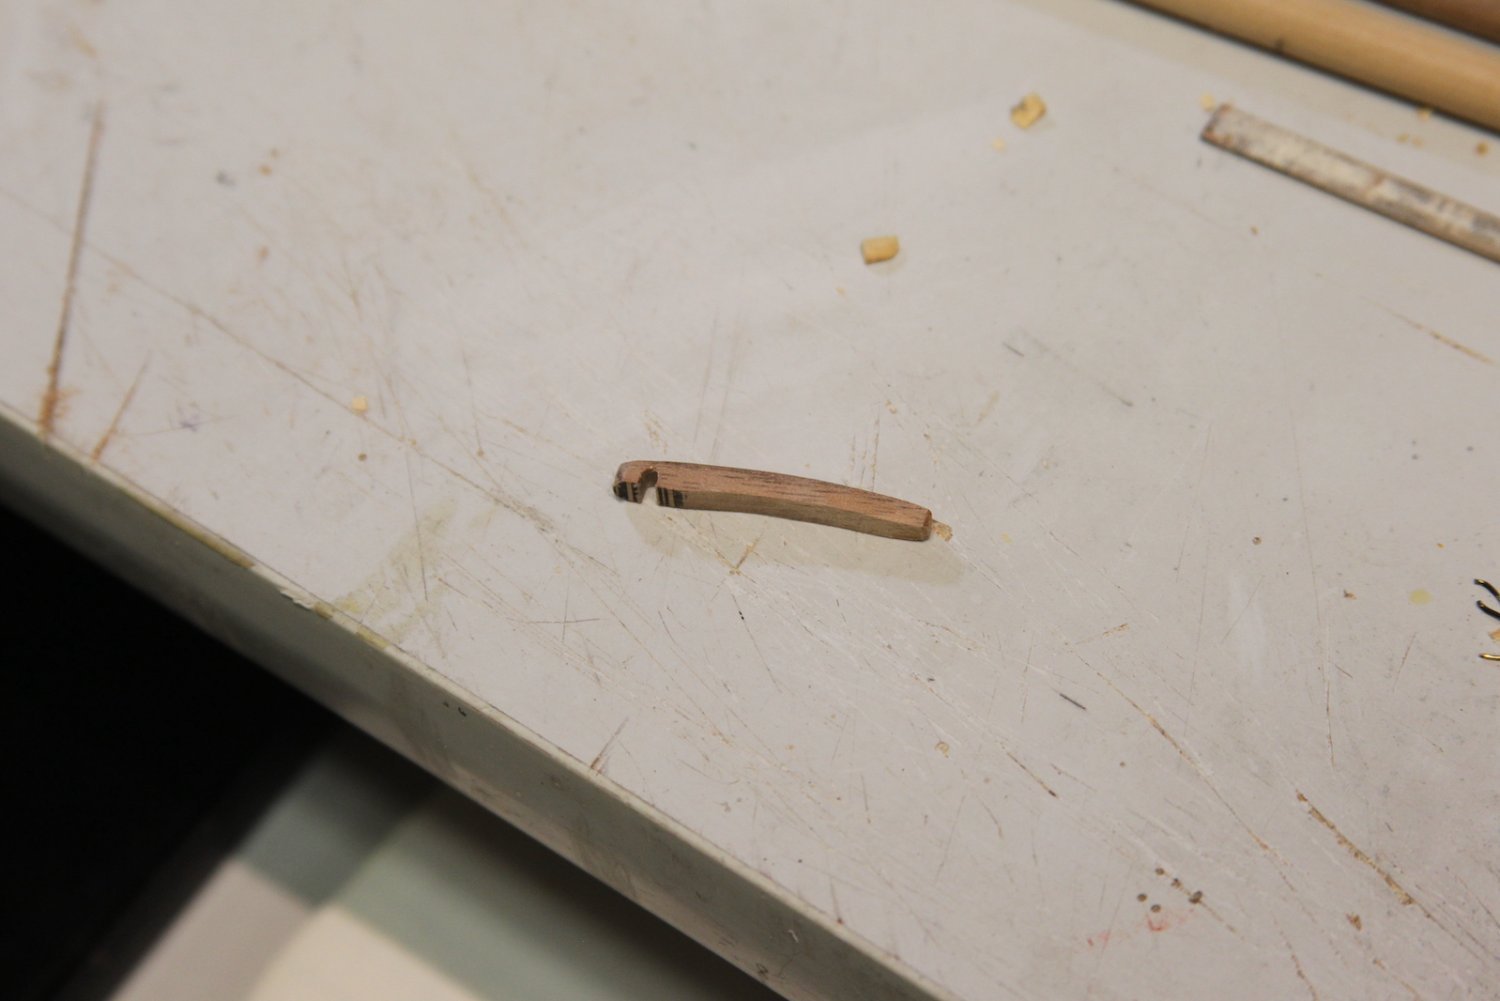
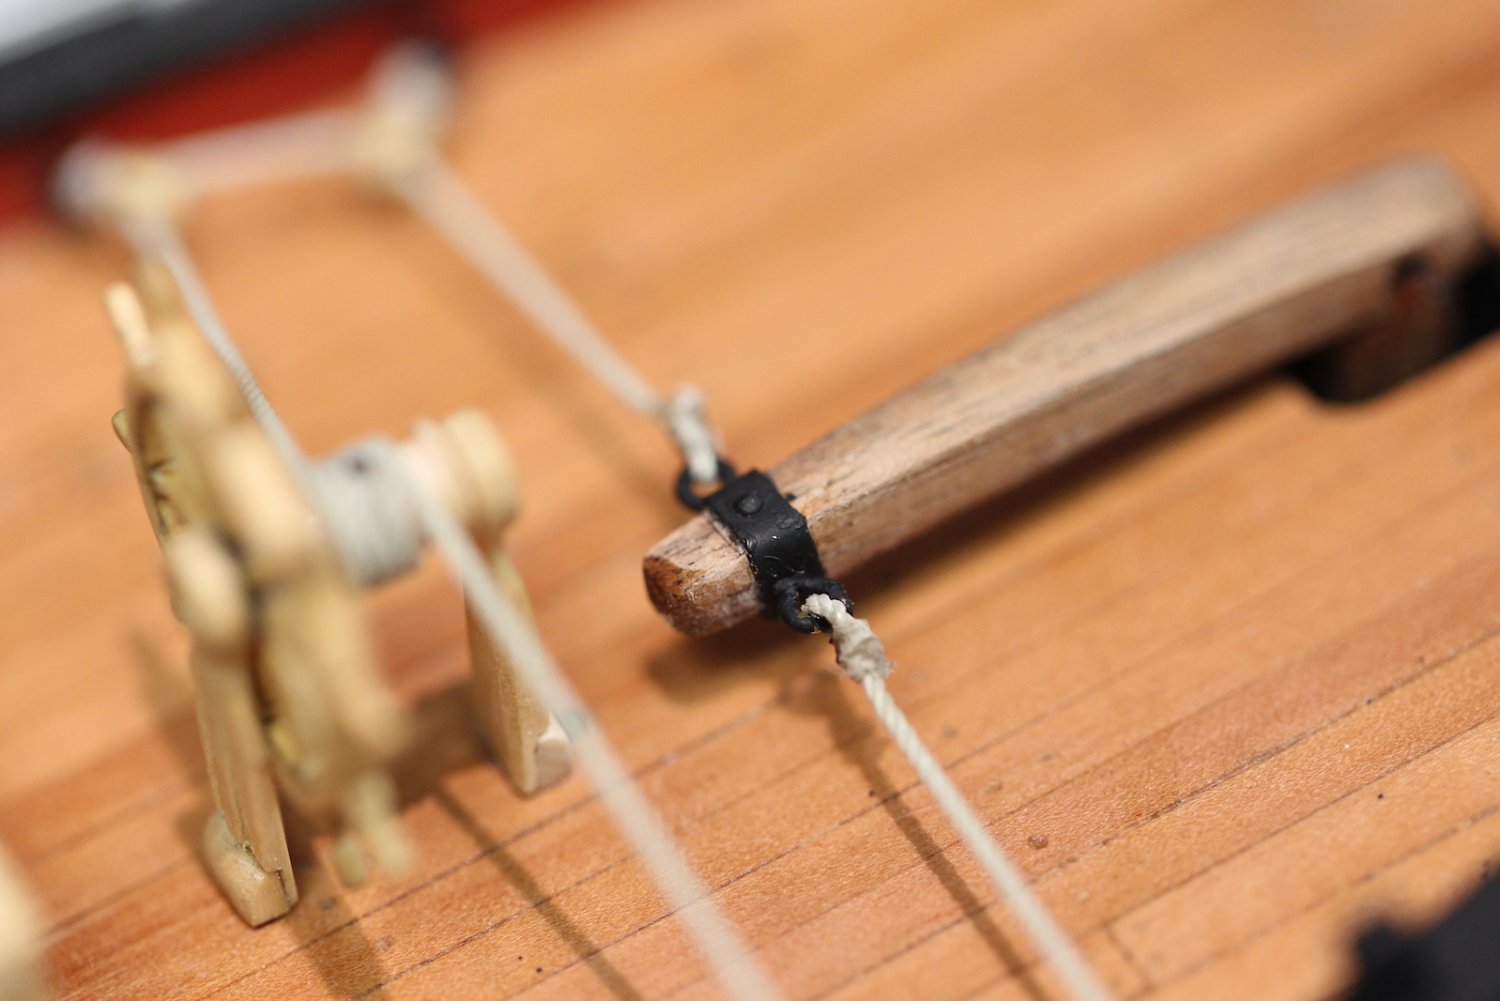
I ditched the kit tiller as I've ditched most of the plywood-esque pre-fab stuff because it's quite thin and delicate. My tiller is a pretty basic piece cut and shaped from 5mm x 5mm piece of walnut and notched at the base to fit the rudder and eyelets on each side of a metal band at the head. I shortened my tiller a bit to facilitate the space between the wheel and the binnacle (more on that later) and gave it a little curve for no specific reason other than aesthetics.


For the rigging I used .6 mm rope (since I imagined it needed to be pretty hefty stuff) attached to boxwood blocks from Dry-docks Models - they looked interesting so I wanted to give them a shot. Honestly - I'm not thrilled with them, but they served their purpose here. The rope is wrapped around the wheel barrel five times then through the corresponding set of blocks on the other bulwark. The wrap is attached to the barrel with a bolt stopper - another TINY (.020") bolt from micromark that I used on the rudder. Very difficult to get into place without getting glue all over the rope and discoloring it.

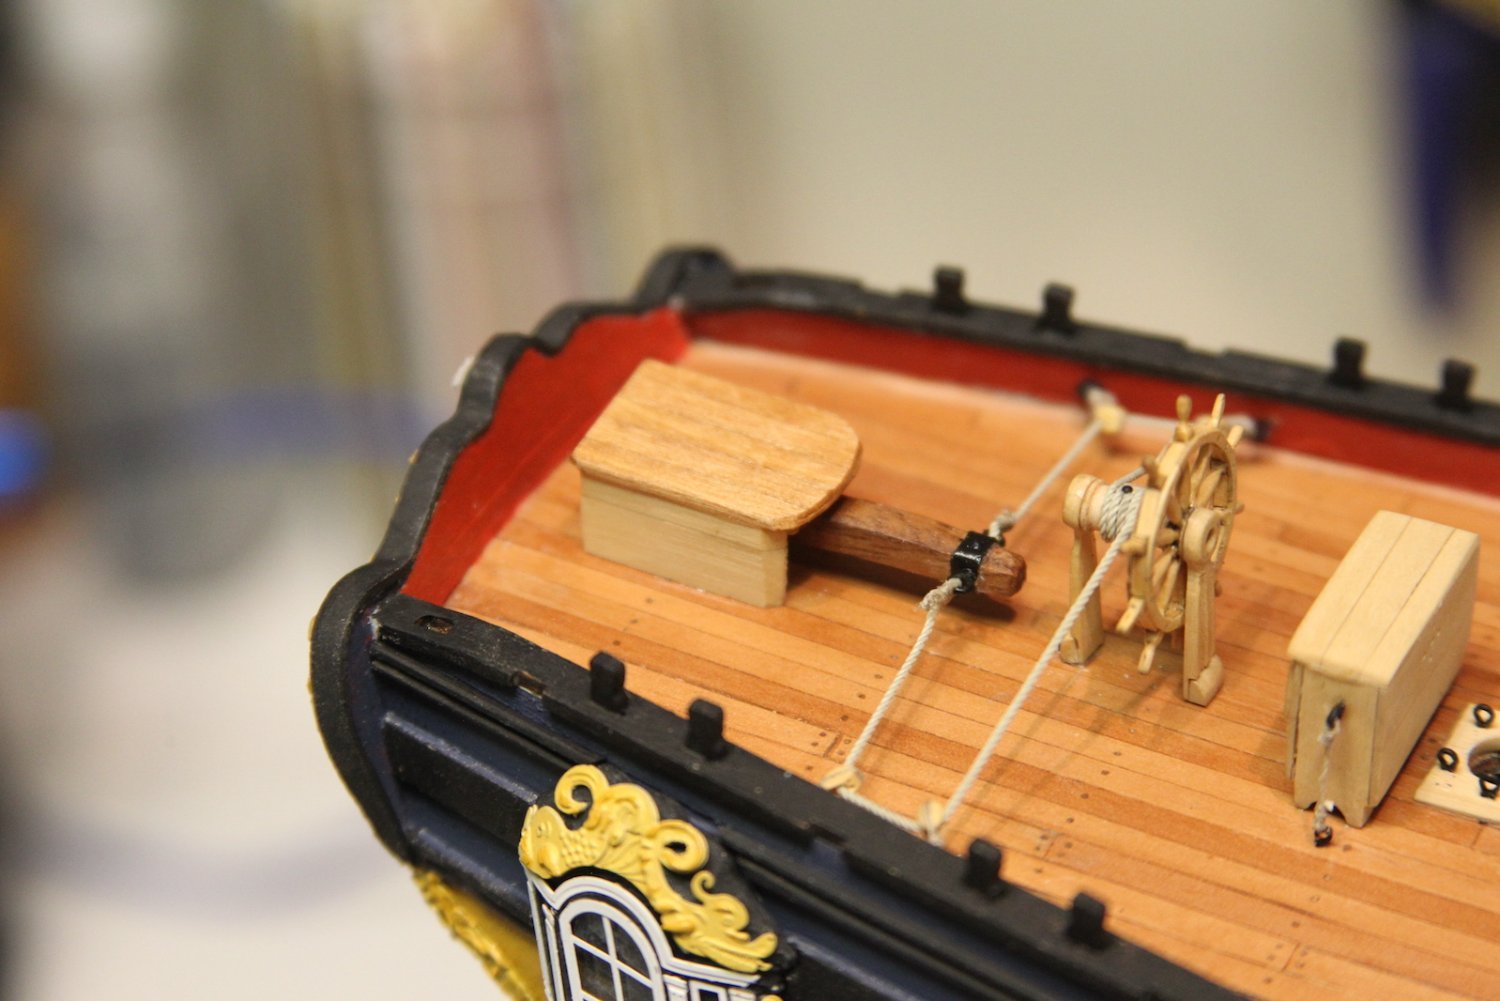
 The wheel is permanently fixed into position along with the binnacle that was finished earlier. One thing I wanted to ensure was that there would be sufficient space between the binnacle and the wheel for the helmsman to stand and maneuver. I've noticed that this little spacing detail is something that is often overlooked (or poorly accounted for) in many plans and builds.Finally, the rudder head housing it put together with boxwood and veneer strips to match the look/feel of the carriage house just on the other side of the mizzen. I shorted and reshaped the housing to account for my wheel / binnacle spacing as well as to ensure I had enough room between the rudder housing and the stern to put an ensign staff clamp.
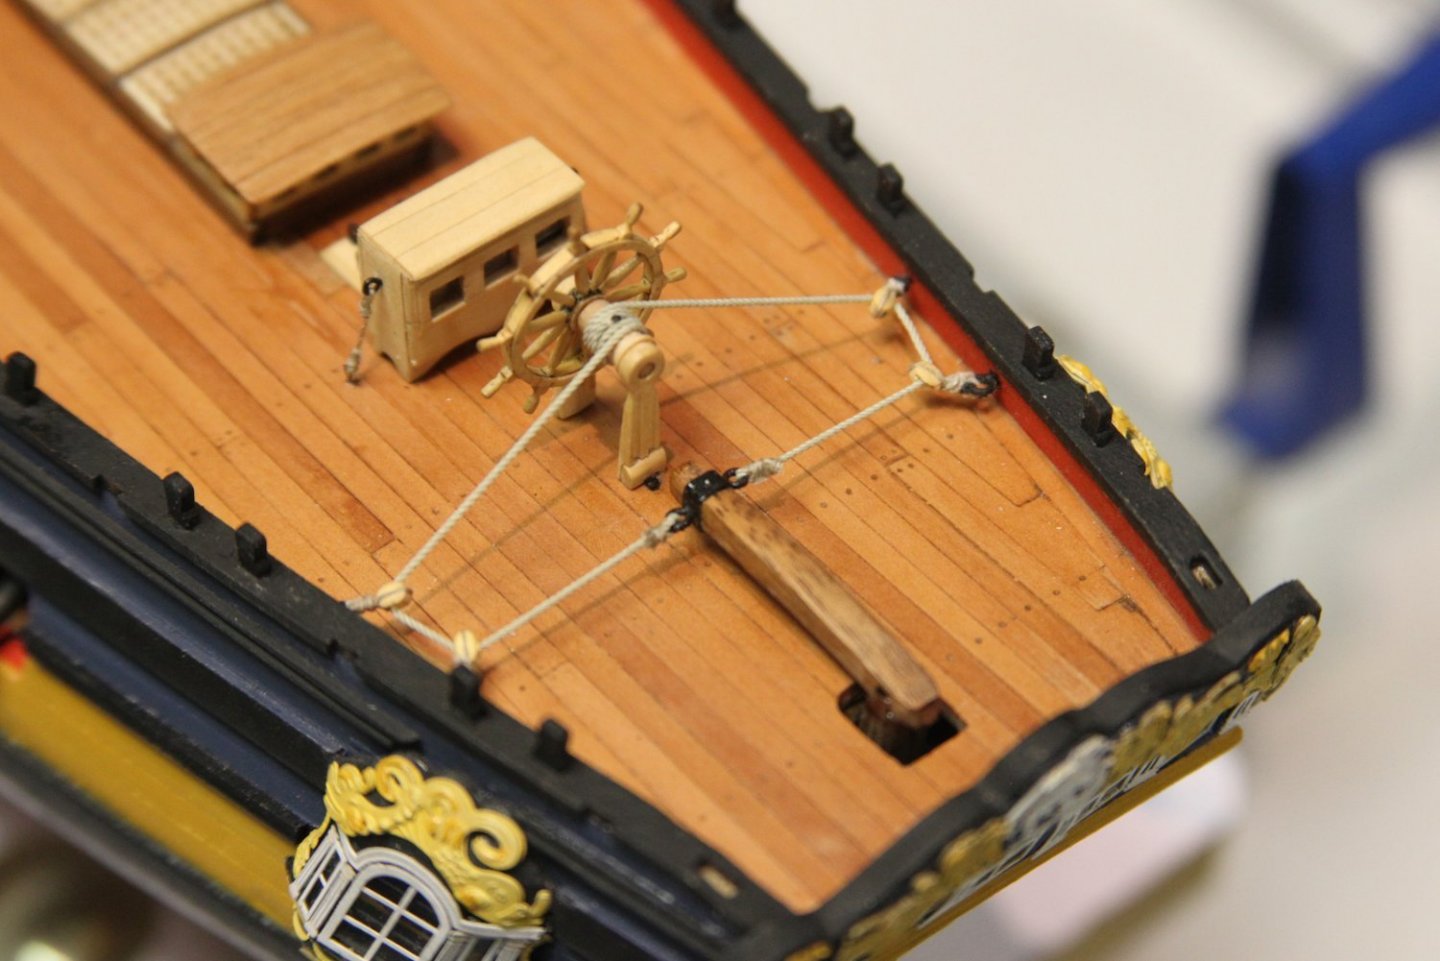
- BobG, WalrusGuy, KARAVOKIRIS and 8 others
-
11
-
-
43 minutes ago, glbarlow said:
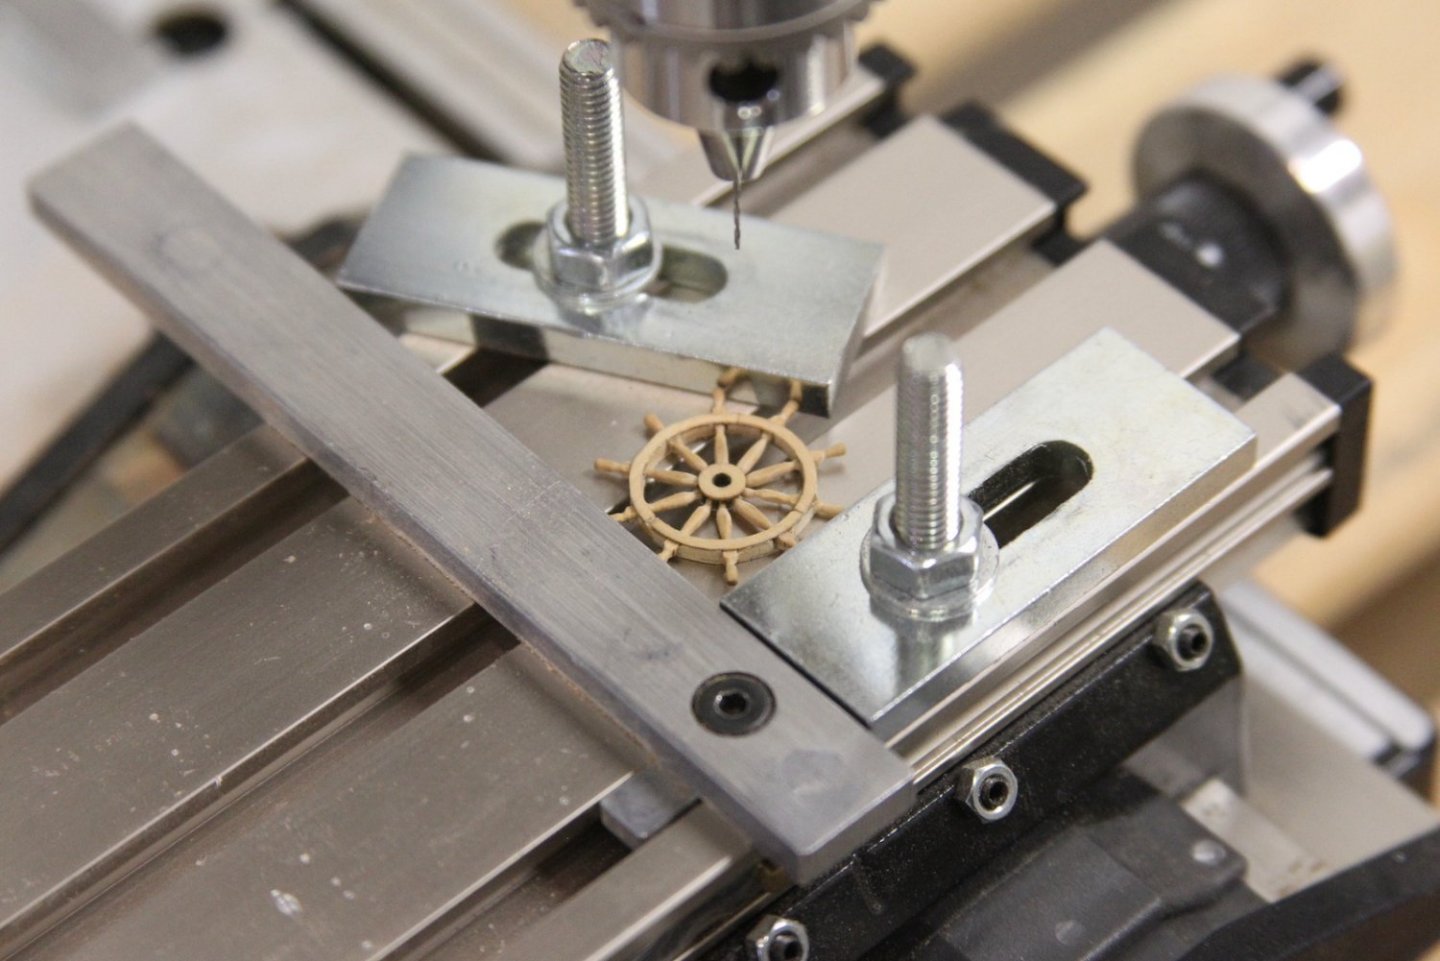
I like your hold down brackets for the mill. Where did you get those?
Thanks everyone for the comments. Glenn - They came as an addition option along with the "X-Y Table Attachment" when I ordered the drill press from Mico-Mark. They're pretty darn handy.
30 minutes ago, Dave_E said:why did you do so much deck work etc.
Hey Dave - I wish I had a better answer than this, but - I get bored. Hull planking is super challenging and tedious for me, and I much prefer doing deck work and fixtures. So I basically bounce back and forth between the two to keep me occupied. Especially since when I plank, I soak and shape the planks against the hull to let them dry (as opposed to using a bender or heat source). The deck work gives me something to do while I'm waiting for hull planks to dry.
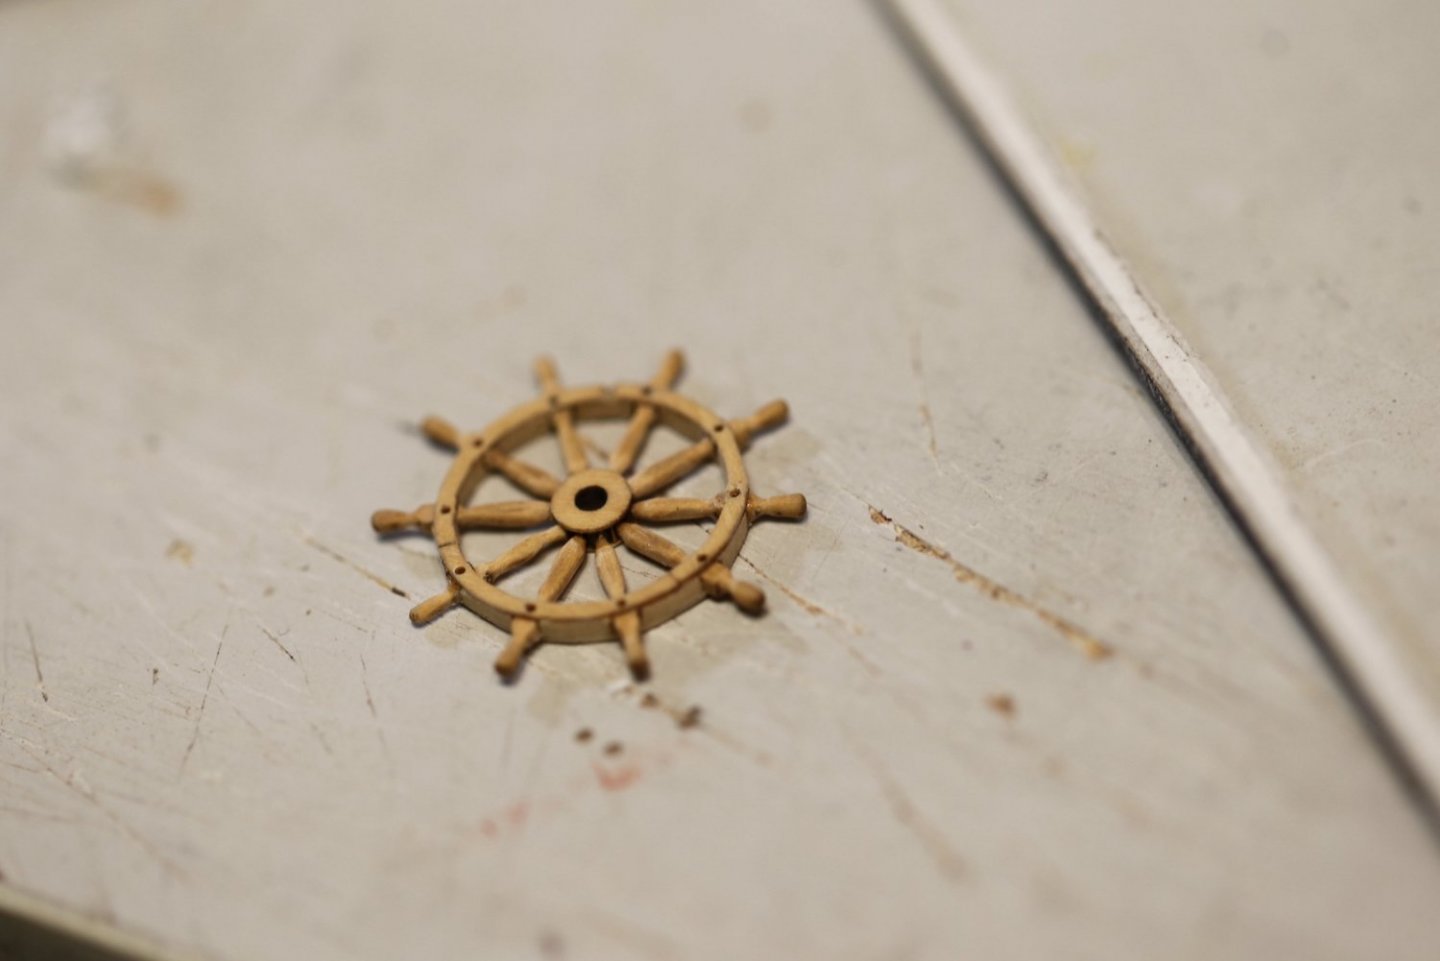
57 minutes ago, Landlubber Mike said:That wheel looks a lot nicer (and more in scale) than a lot of the pre-fab wooden wheels out there.
I agree Mike - Chuck does a great job and the boxwood lets you work with it a bit to shape it the way you want. He has two different scales - one that's pretty dead on for 1/64 and a slightly larger one that I haven't seen in person yet. The only challenge for me is getting the laser-cut char off without reshaping it too much in the process.
-
Thanks so much Pete - appreciate the encouragement.
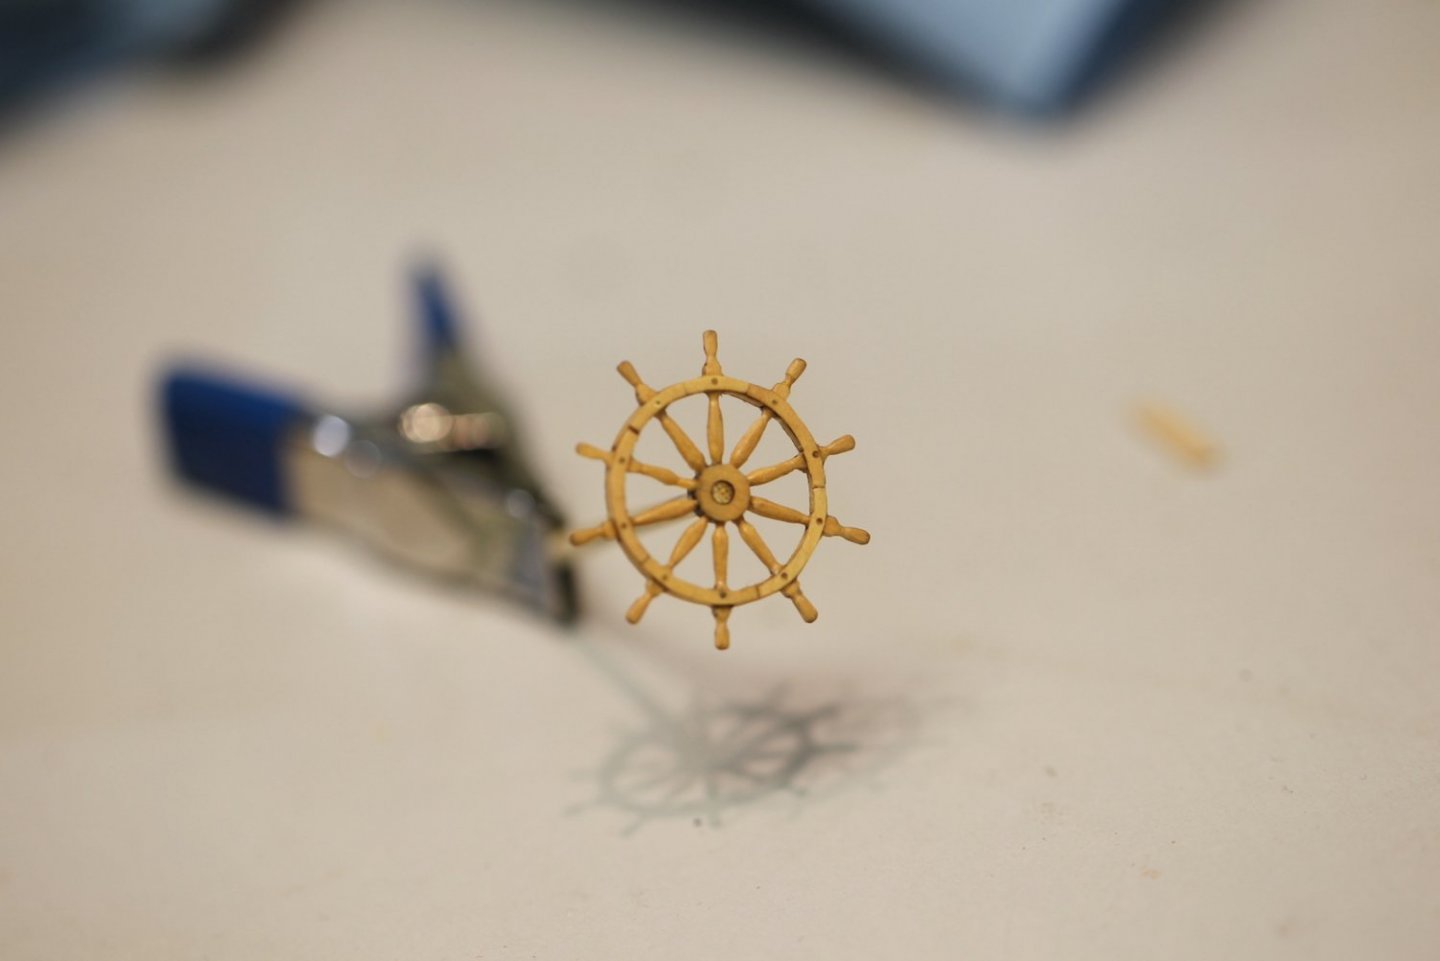
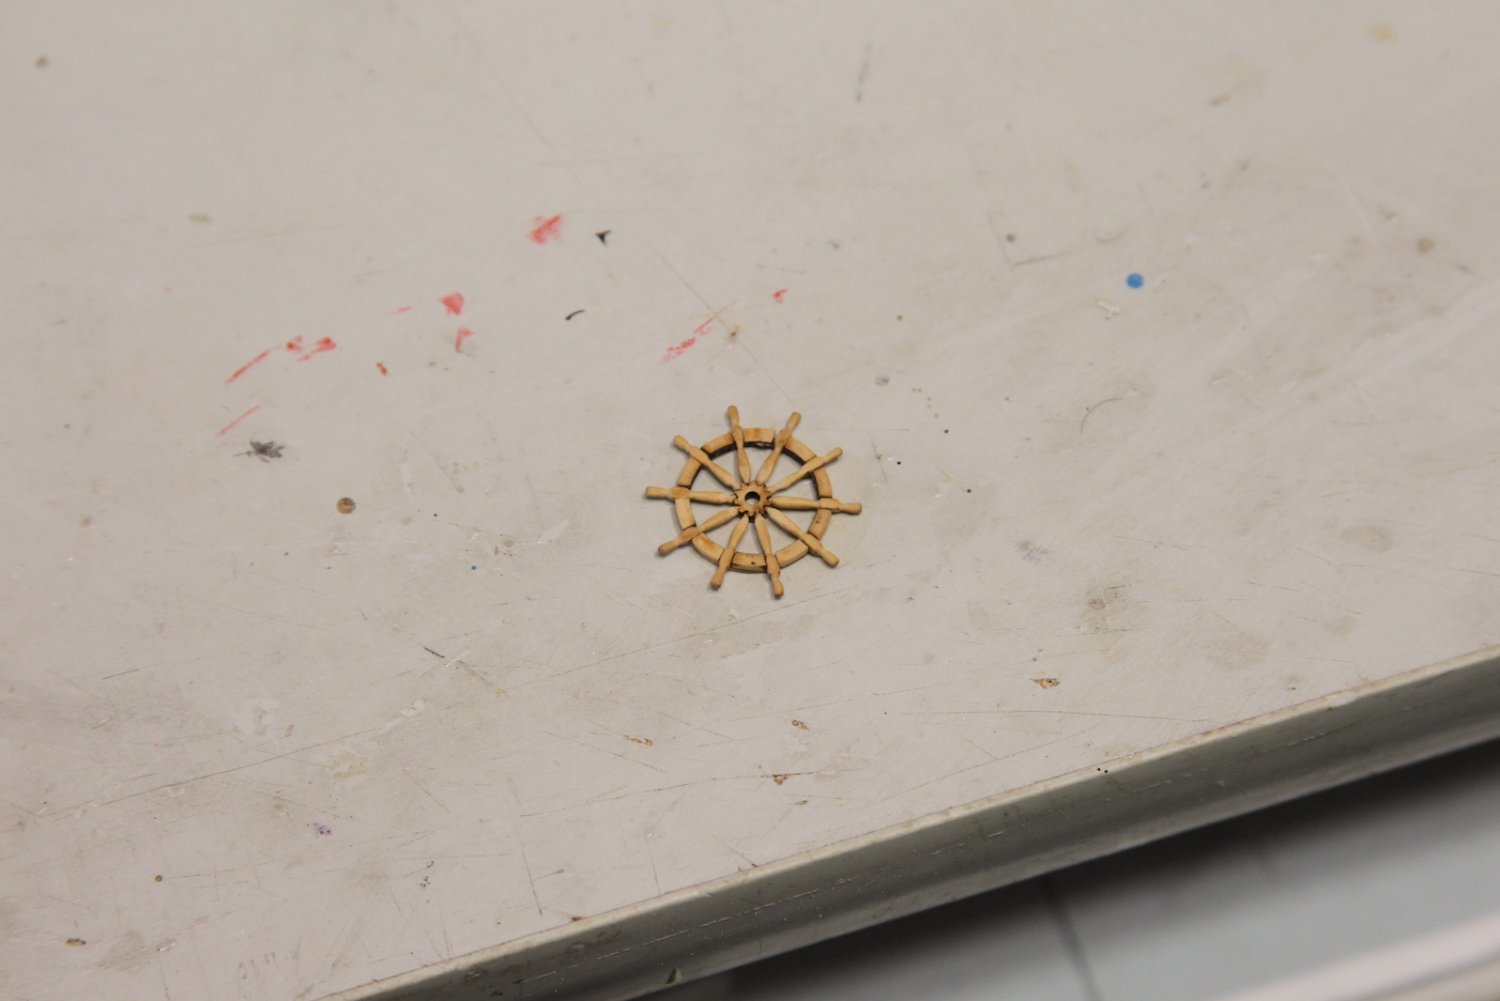
The ship's wheel is @Chuck's kit from Syren which I've worked with before on the Confederacy and is a real joy to put together.
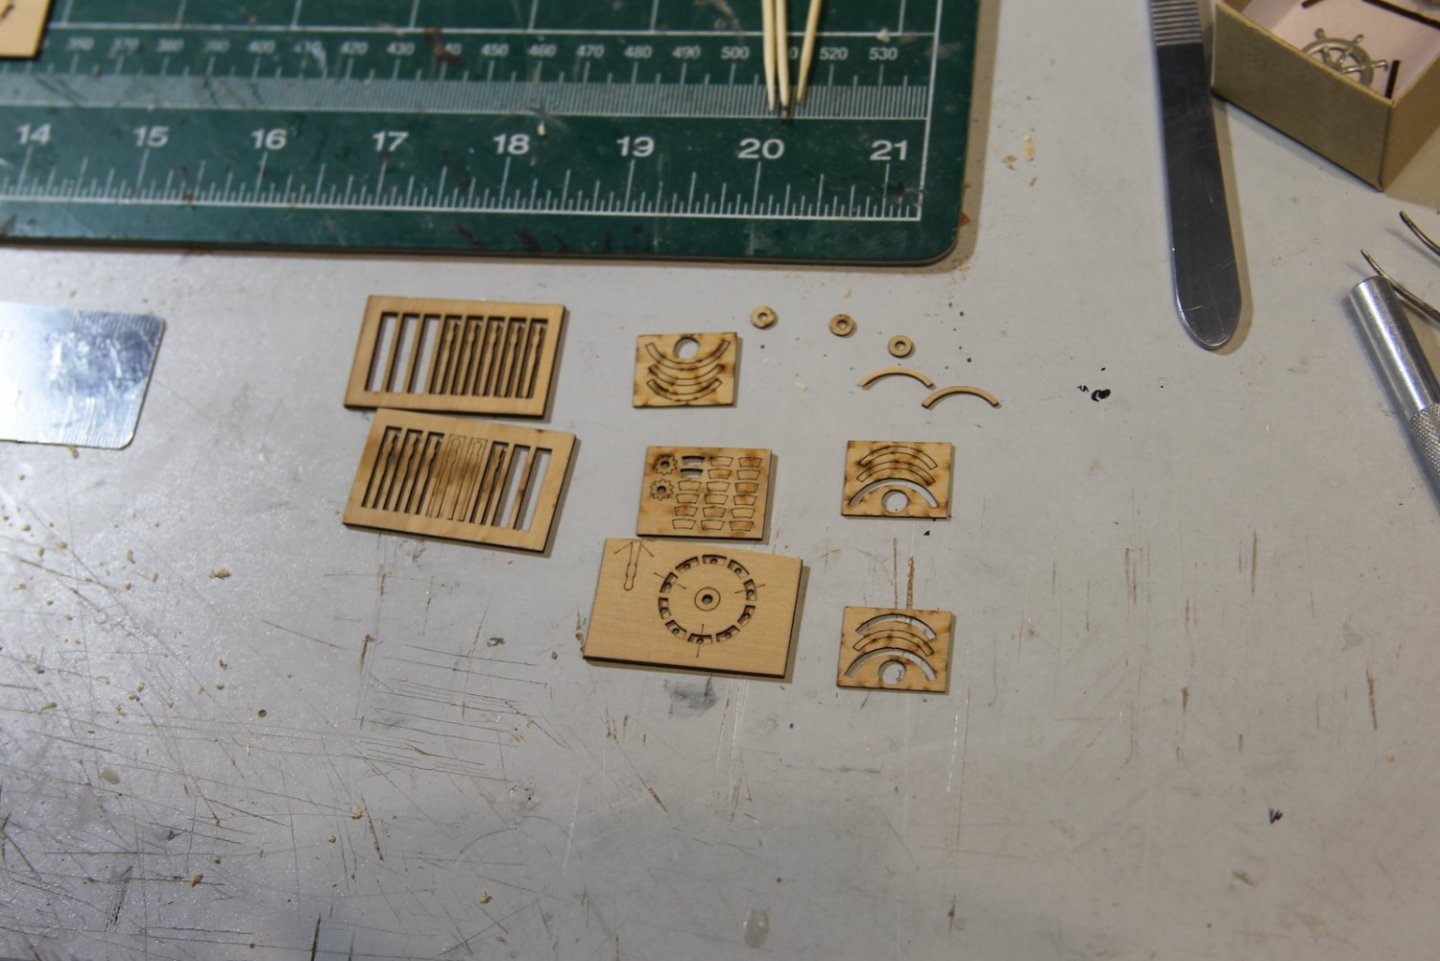


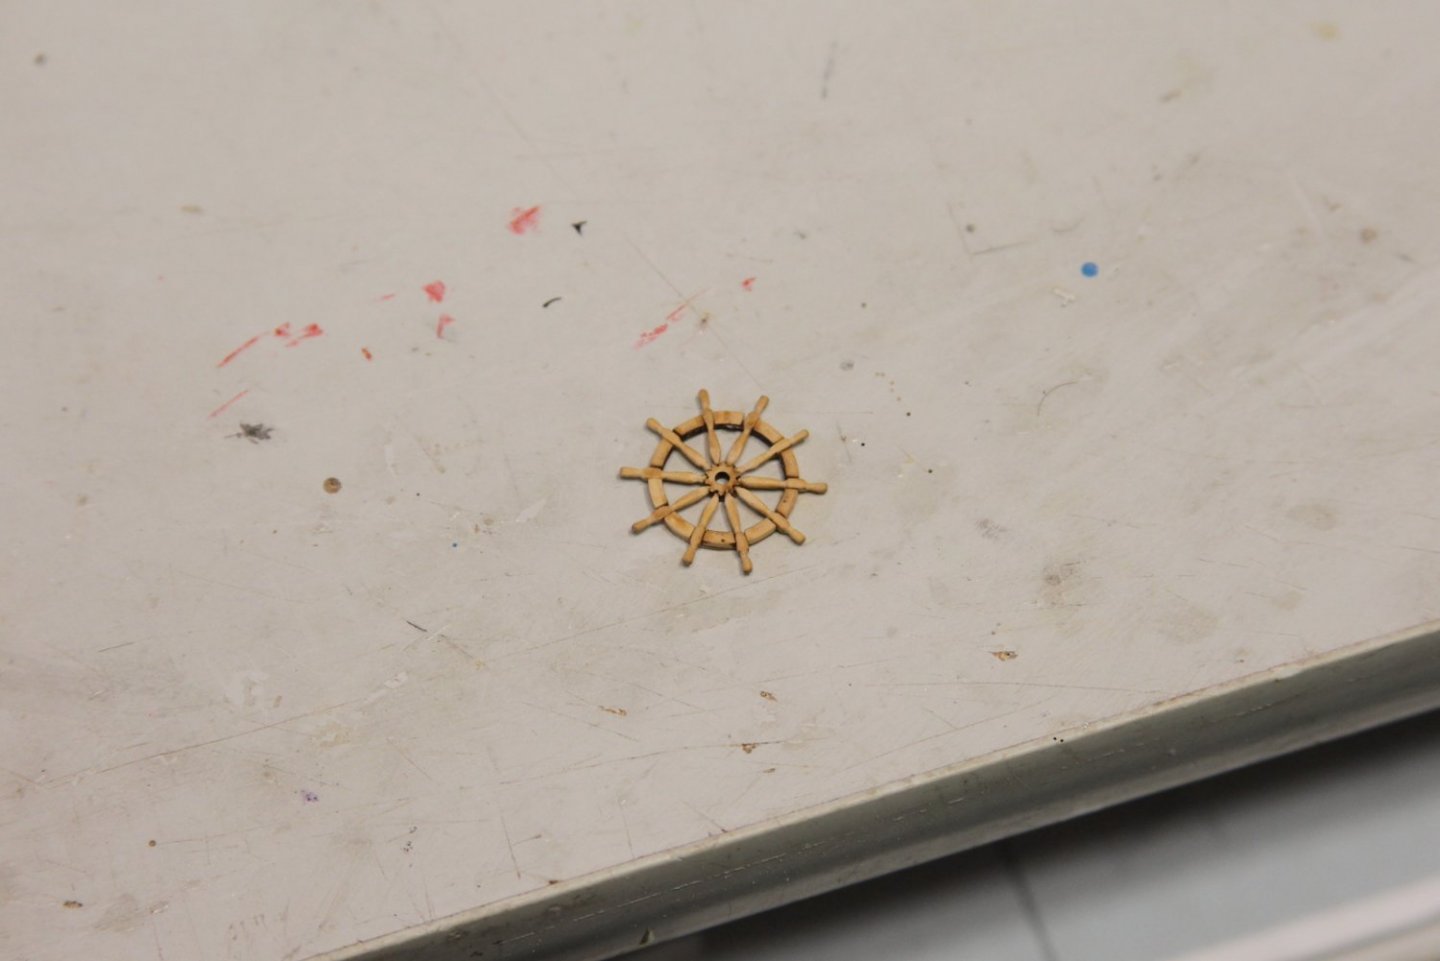
I tapered both ends of the spokes using a variety of needle files and sanding sticks and I cut off a toothpick to run through the center of the jig which held the hub and helped hold everything steady when I put it all together. The toothpick also helped quite a bit when sanding down the sides as thin as possible. I cut the outer circle pieces into several pieces to more mirror the look of the wheel from the FFM. Finally, I added some simulated treenails (as Chuck suggests in the directions) for an additional detailed look by using the drill/fill method with pva and sawdust.


-
Nicely done Mark - I'm with you on the macro photography. At this point I'm considering putting a little Vaseline on the lens like they did with the old 50's Lauren Bacall movies... 😆
- Edwardkenway, Keith Black, mtaylor and 4 others
-
2
-
 5
5
-
-
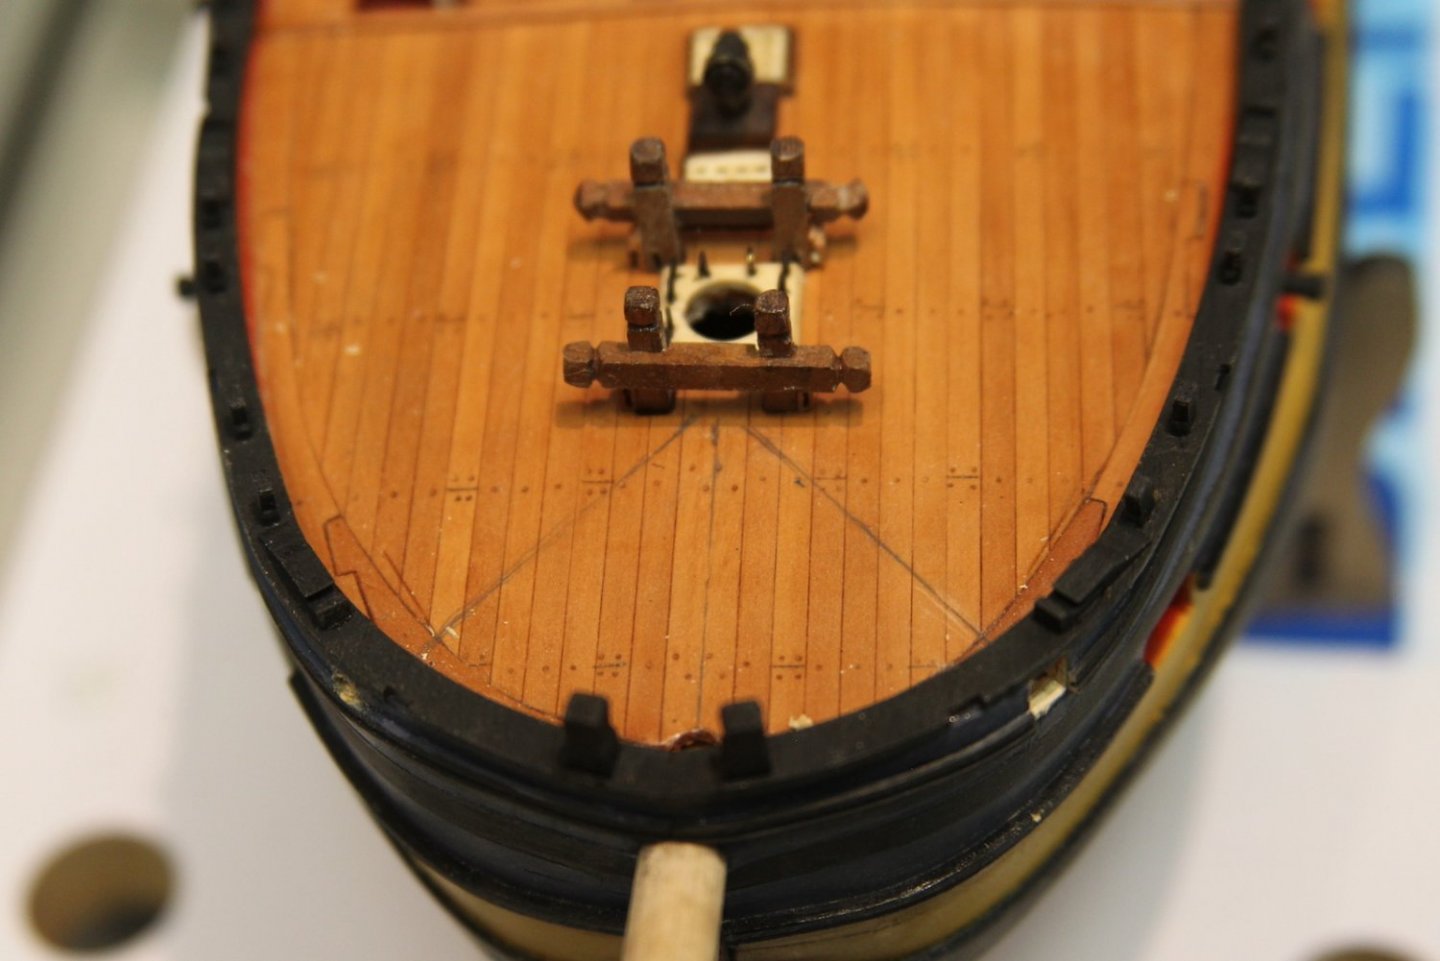
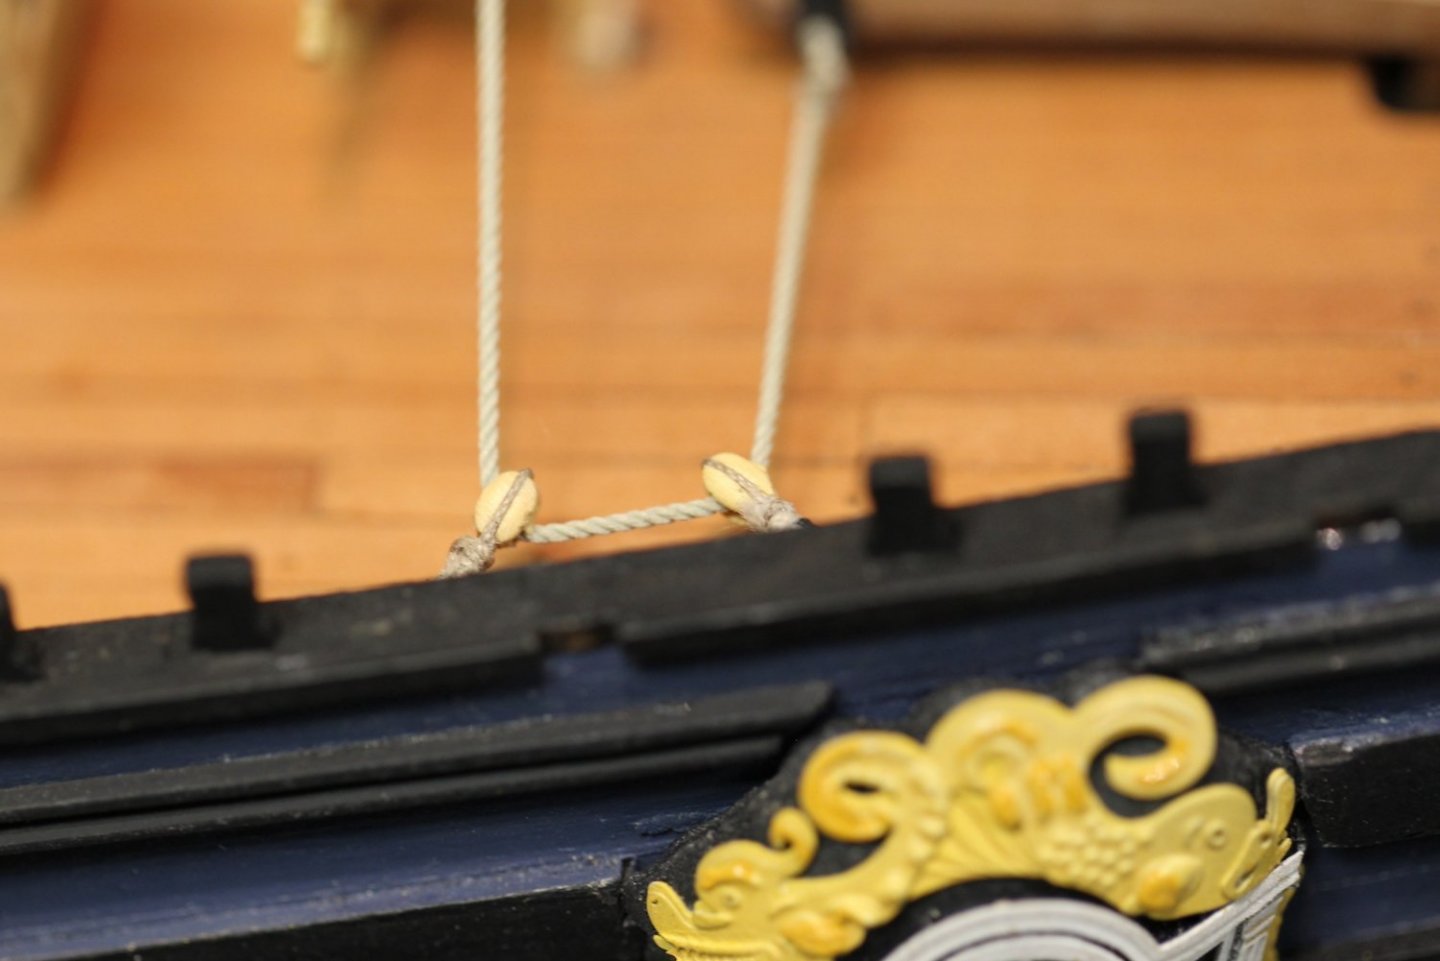
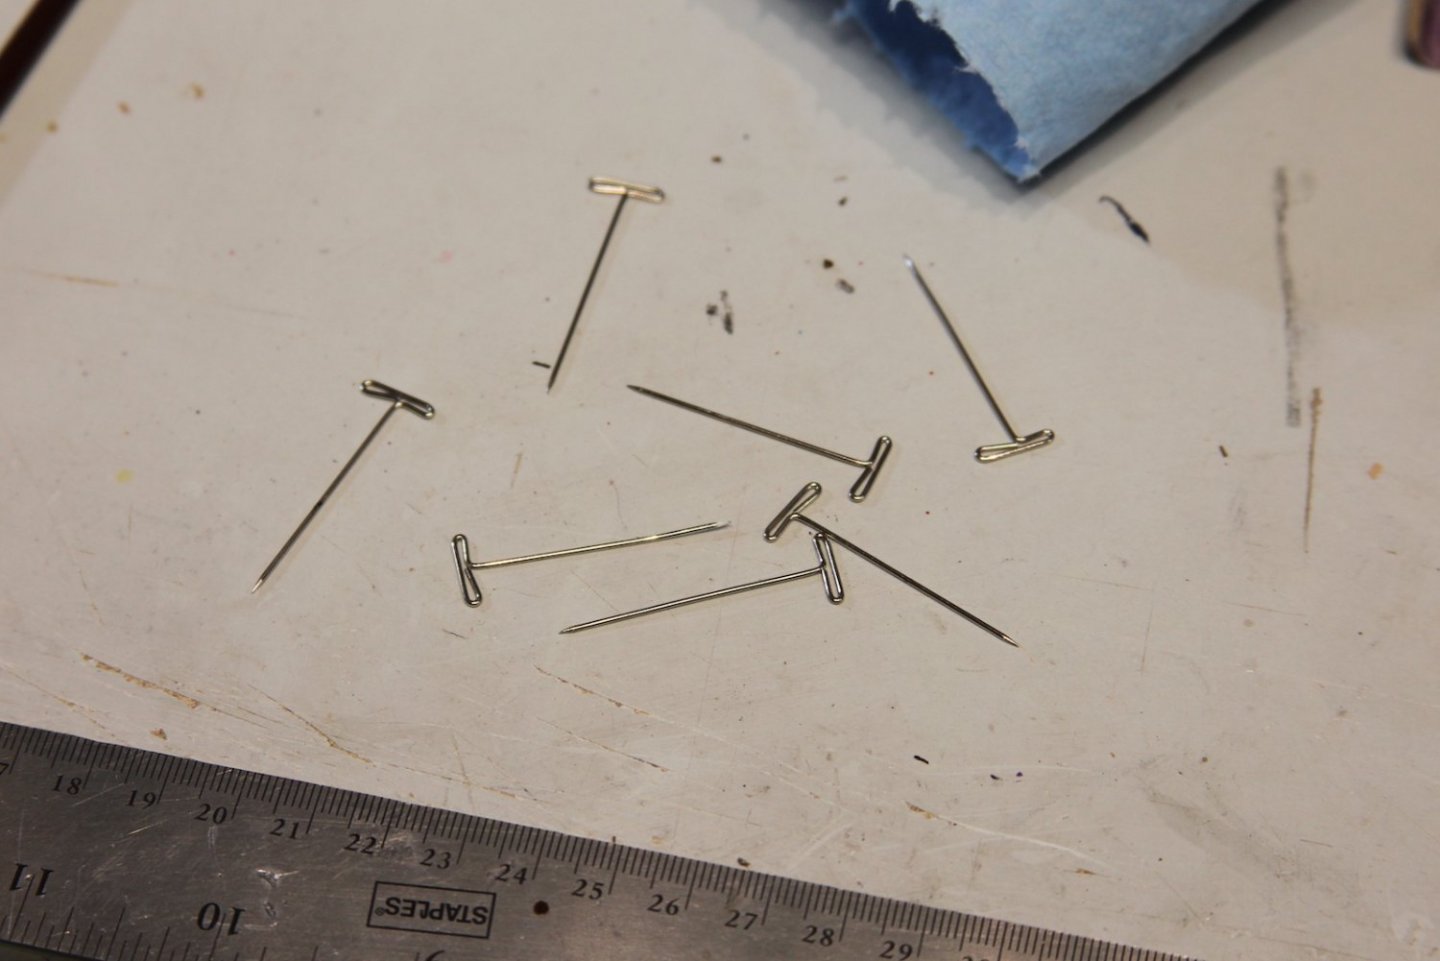
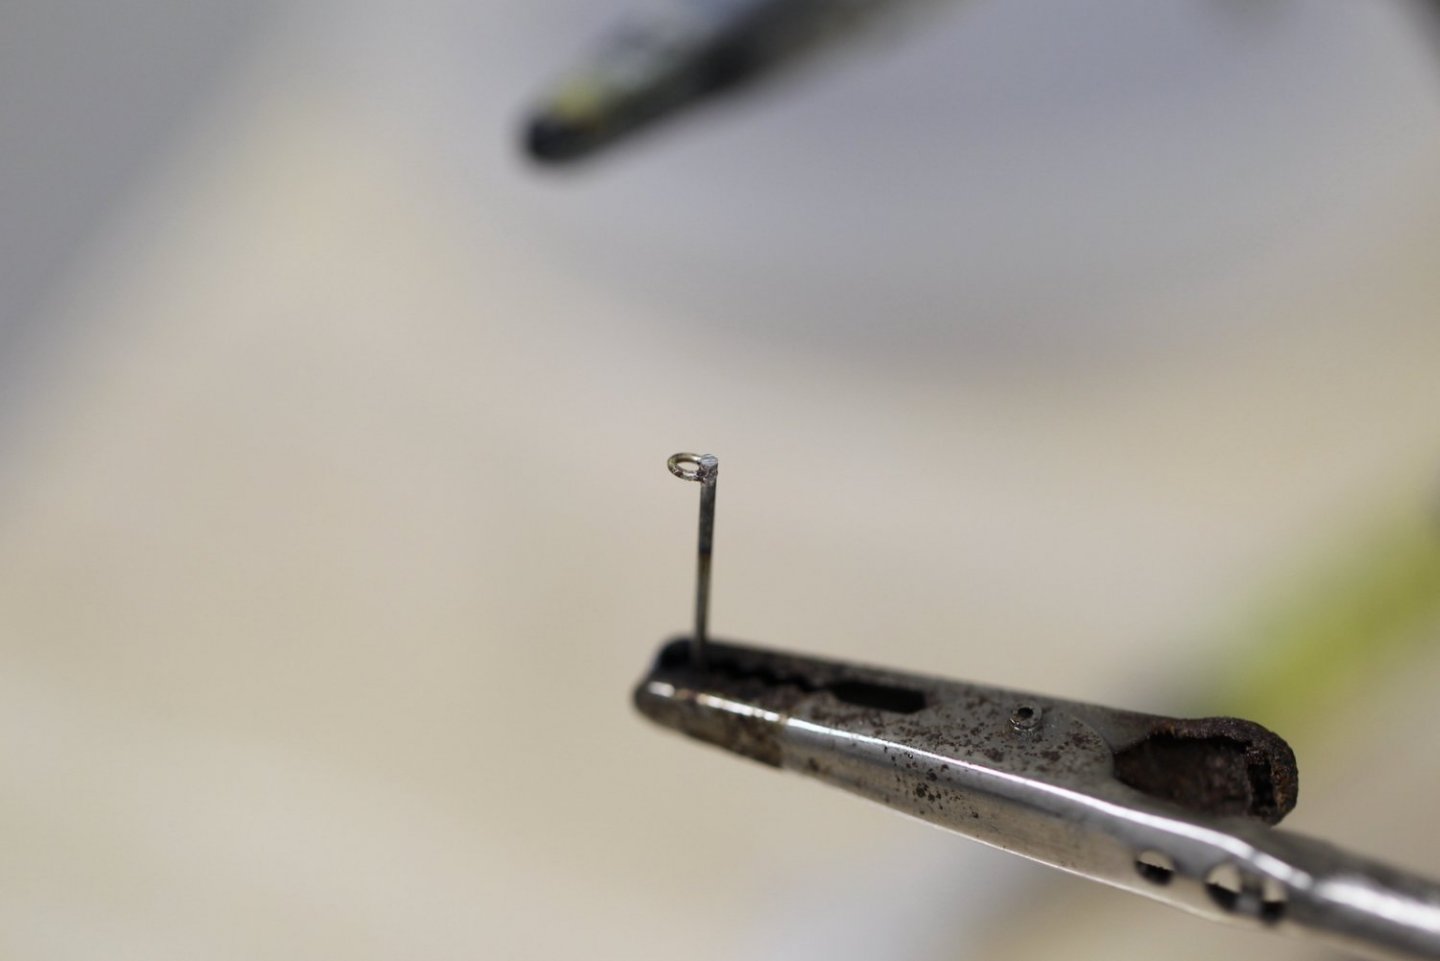
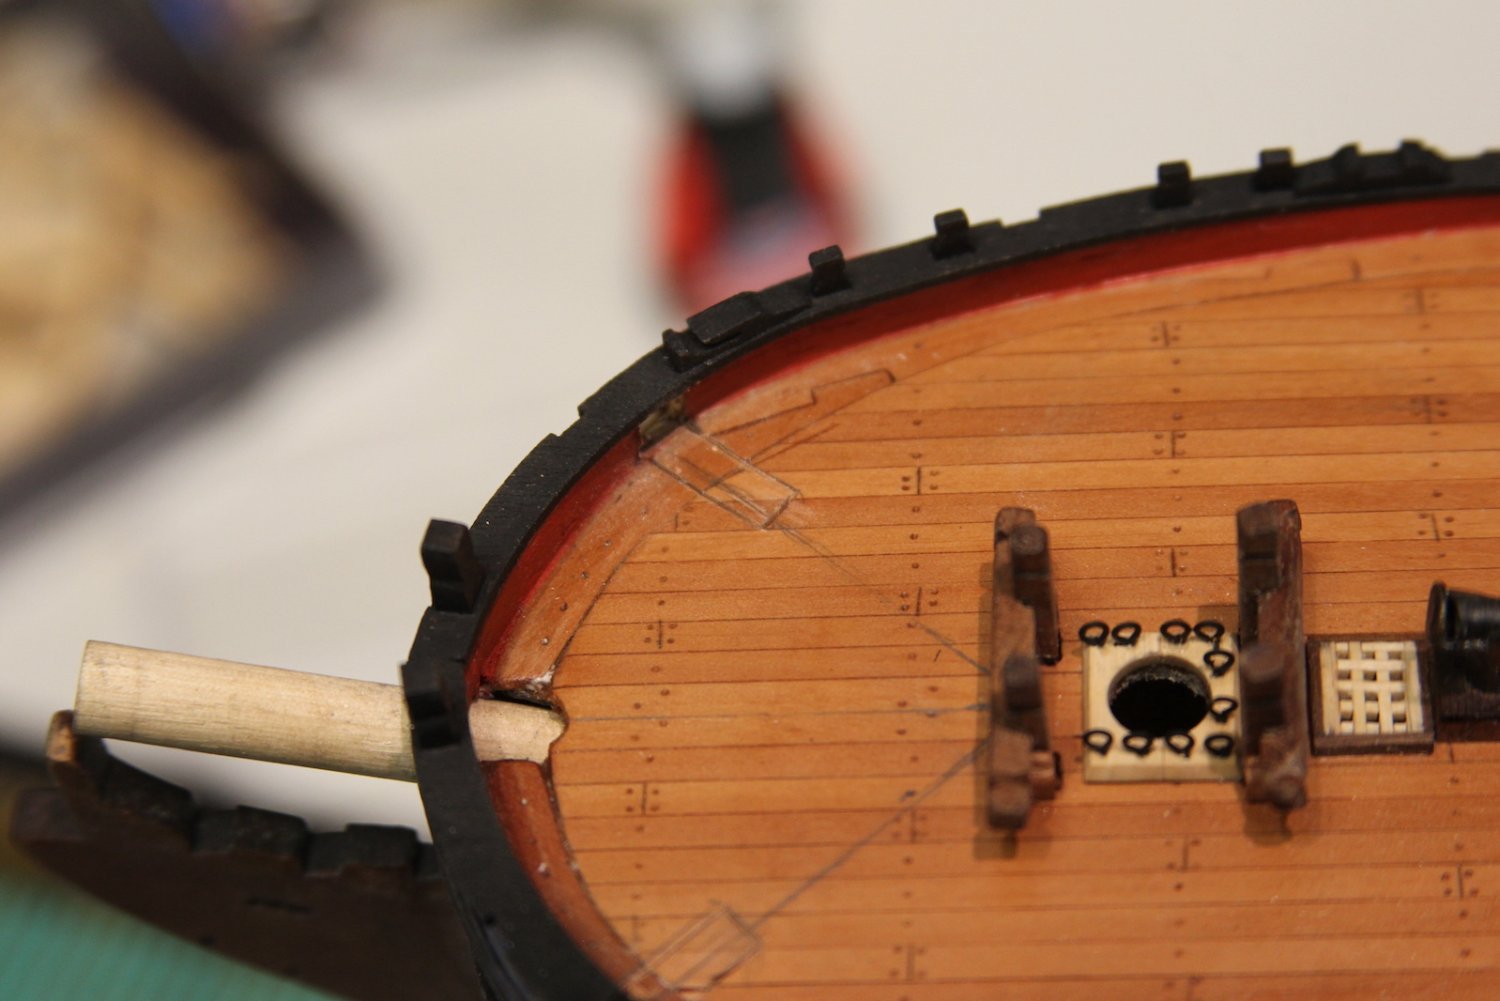
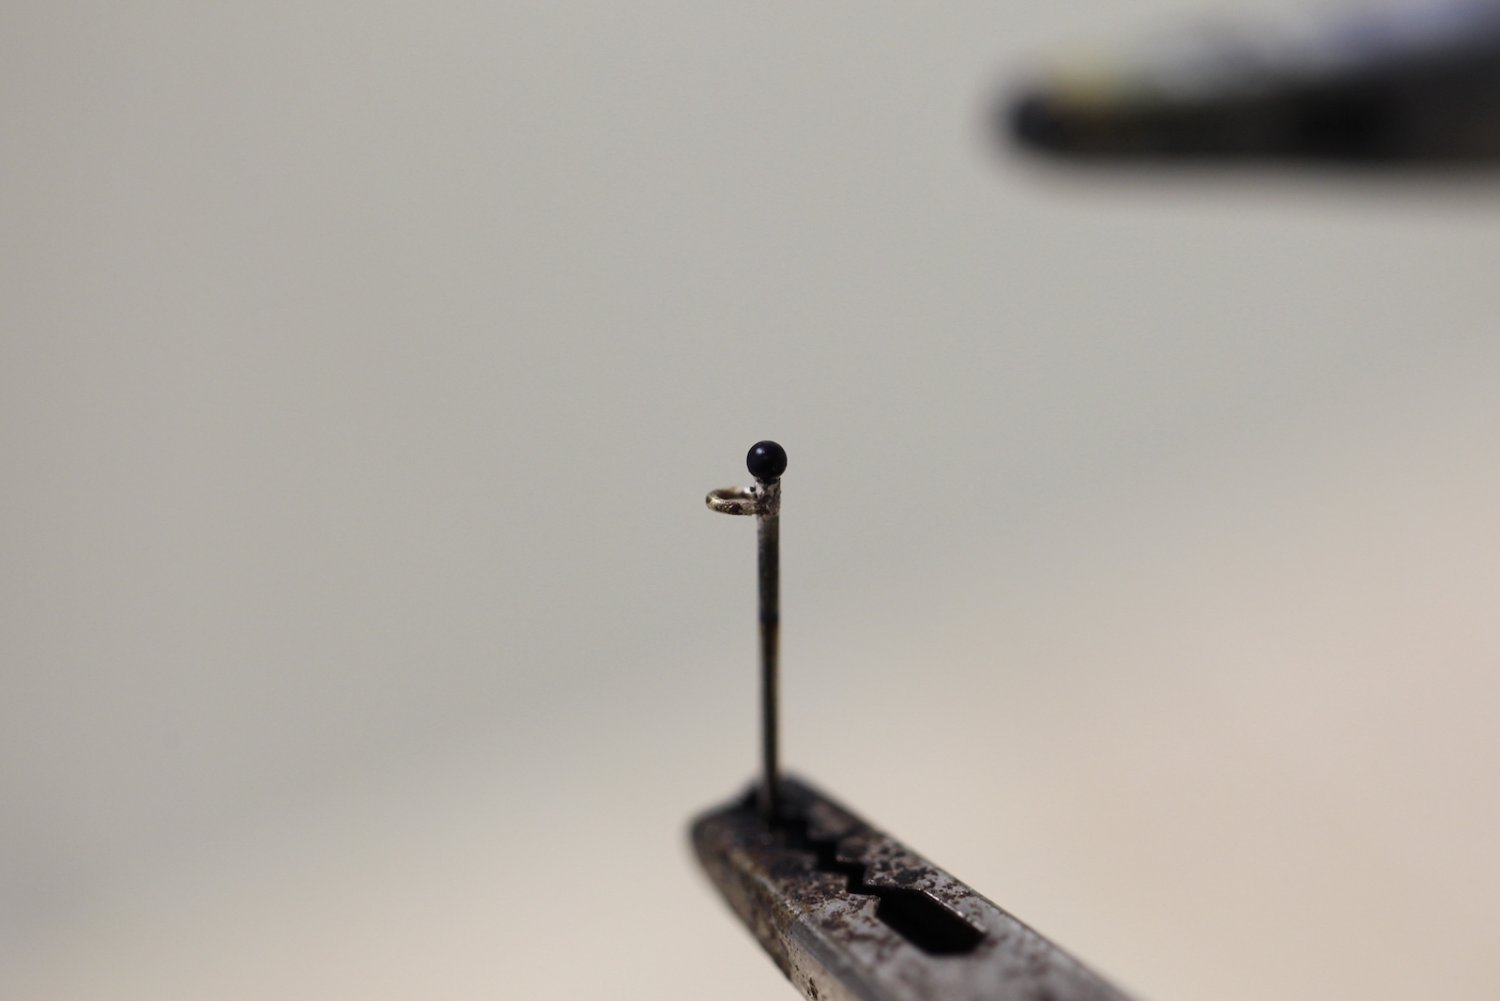
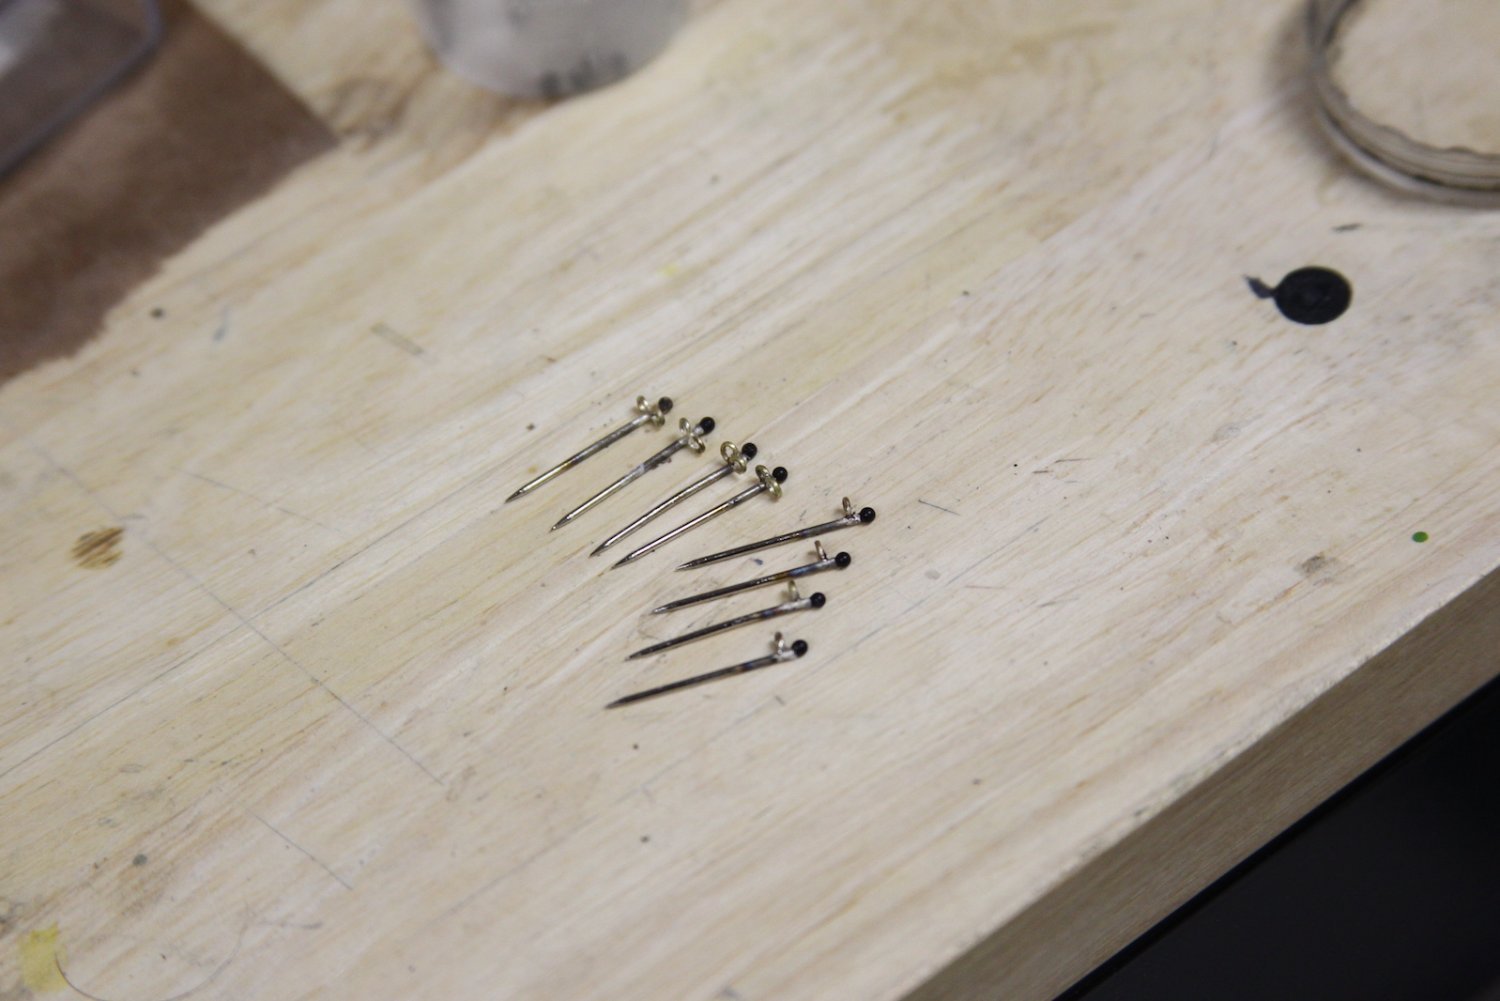
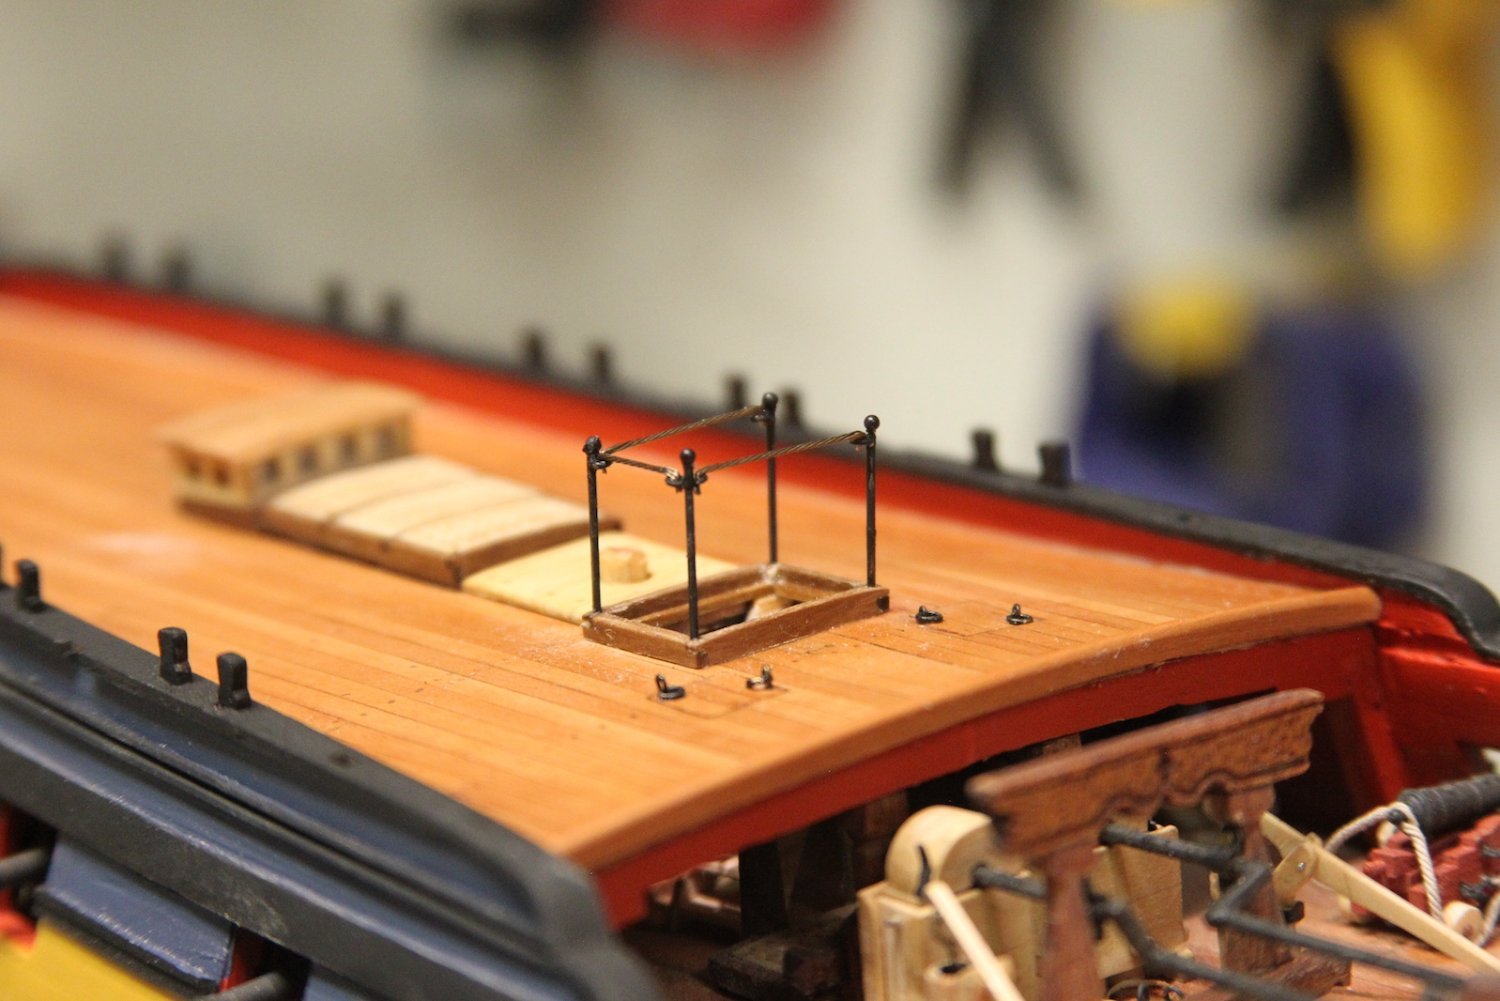
Short post on the stanchions and guard rails around the open hatches. The long eye bolts weren't going to cut it after seeing some of the cool things other folks have done on their builds. So I fabricated my stanchions out of these T-Pins that I snapped off. I wanted something with a pointy end that would facilitate mounting. I then soldered some rings to them.

After running around trying to find tiny little beads or something to serve as railing toppers (including raiding my teenage daughter's stash of beading supplies) - I onIy came up with about half of what I needed. So - I made the rest on my own by using half-dried clumps of acrylic paint, rolling them into tiny balls, and then letting them dry. Then painting over them with Model Master enamel paint. The toughest part was getting all the little balls perfectly round and the same size. Pretty hard to tell the difference if you ask me...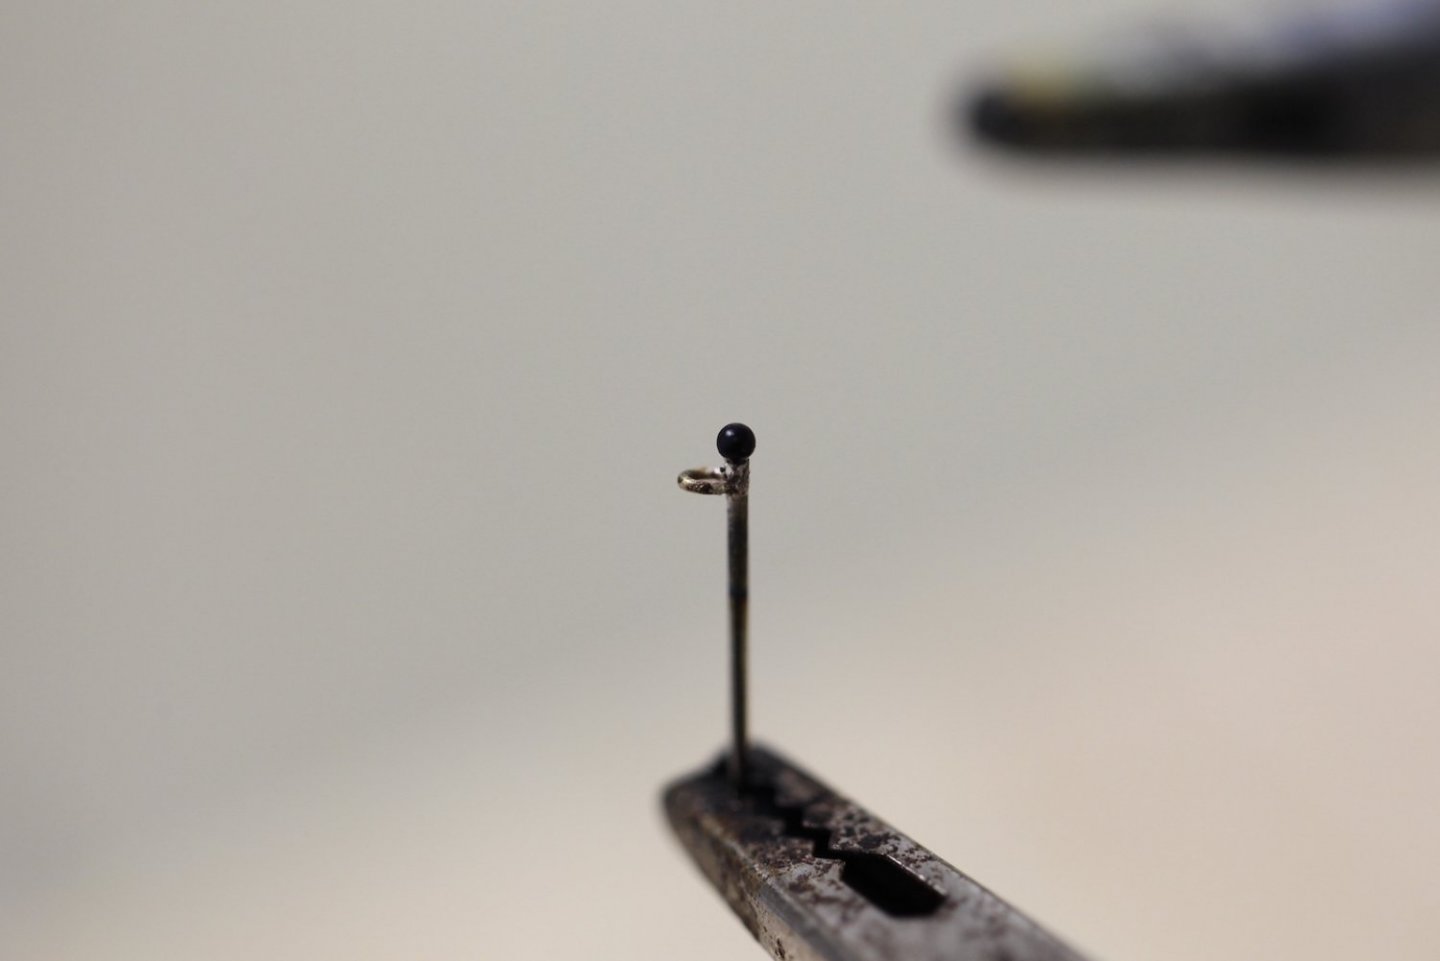

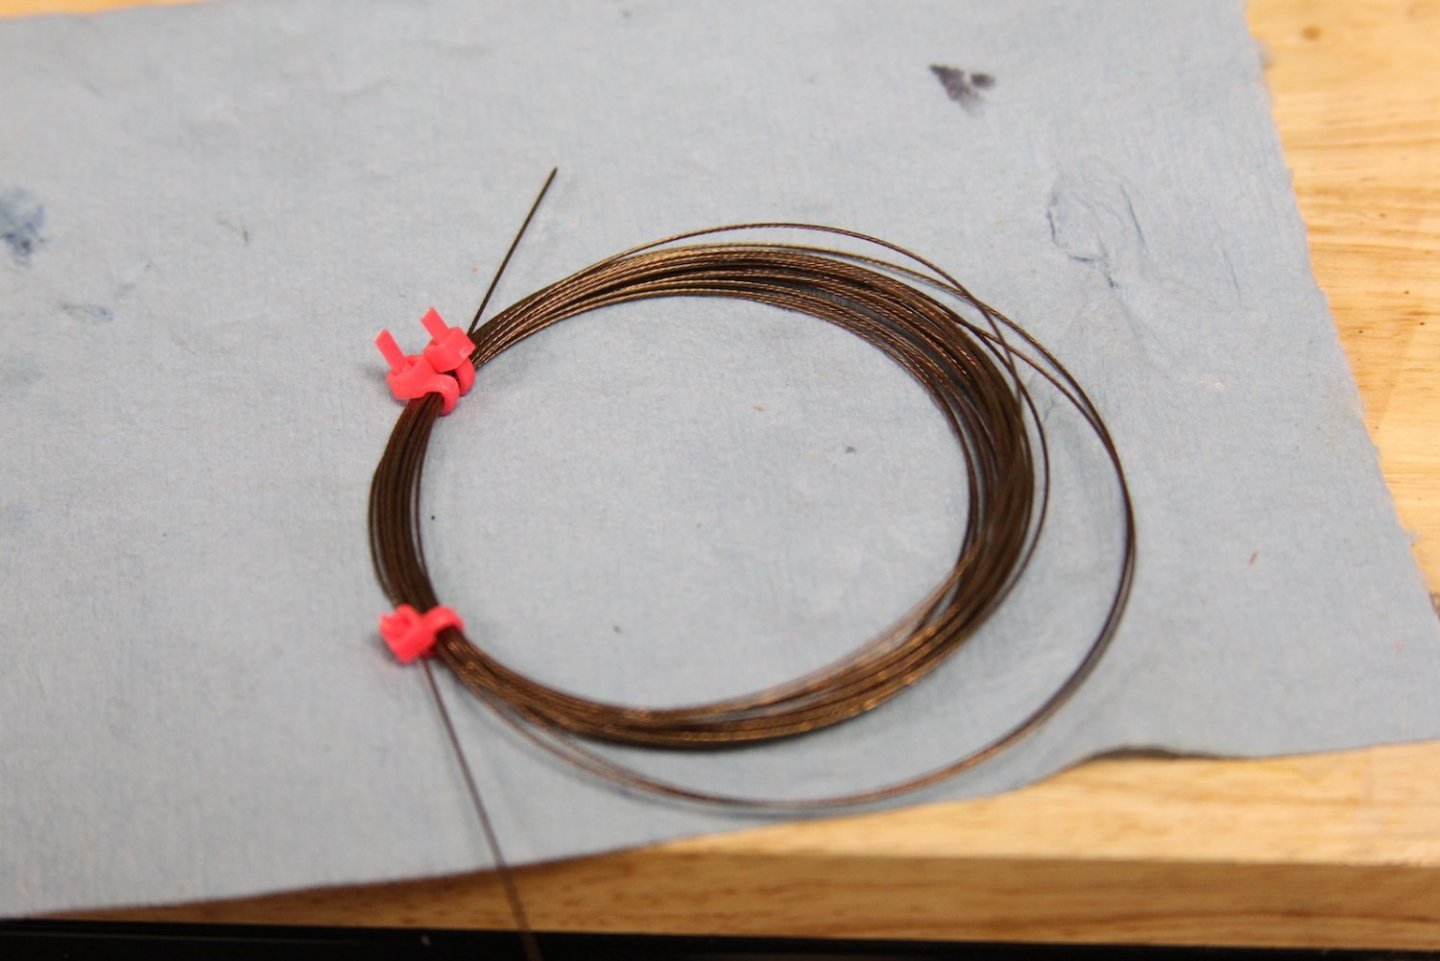
For the railings themselves, I've seen metal/wire used and I've seen rope. I decided to split the difference and use this pretty cool little cable wrapped wire I had lying around. Yup - I get this probably isn't accurate; but it definitely falls into category #2 of my aforementioned rating system: "probably not completely accurate but looks cool."

It's been said before - we all strive for a certain degree of accuracy, but sometimes it's also important to remember that these are our pieces of art, and that often calls for some deviation for our own benefit. Anyway - we all also seem to have our own "Mr. To-Scale Guy" with whom we test our sizes, etc. My guy comes from an old S-scale (also 1.64) Train set. He looks like that cuz he was pushing a lawnmower at one point.
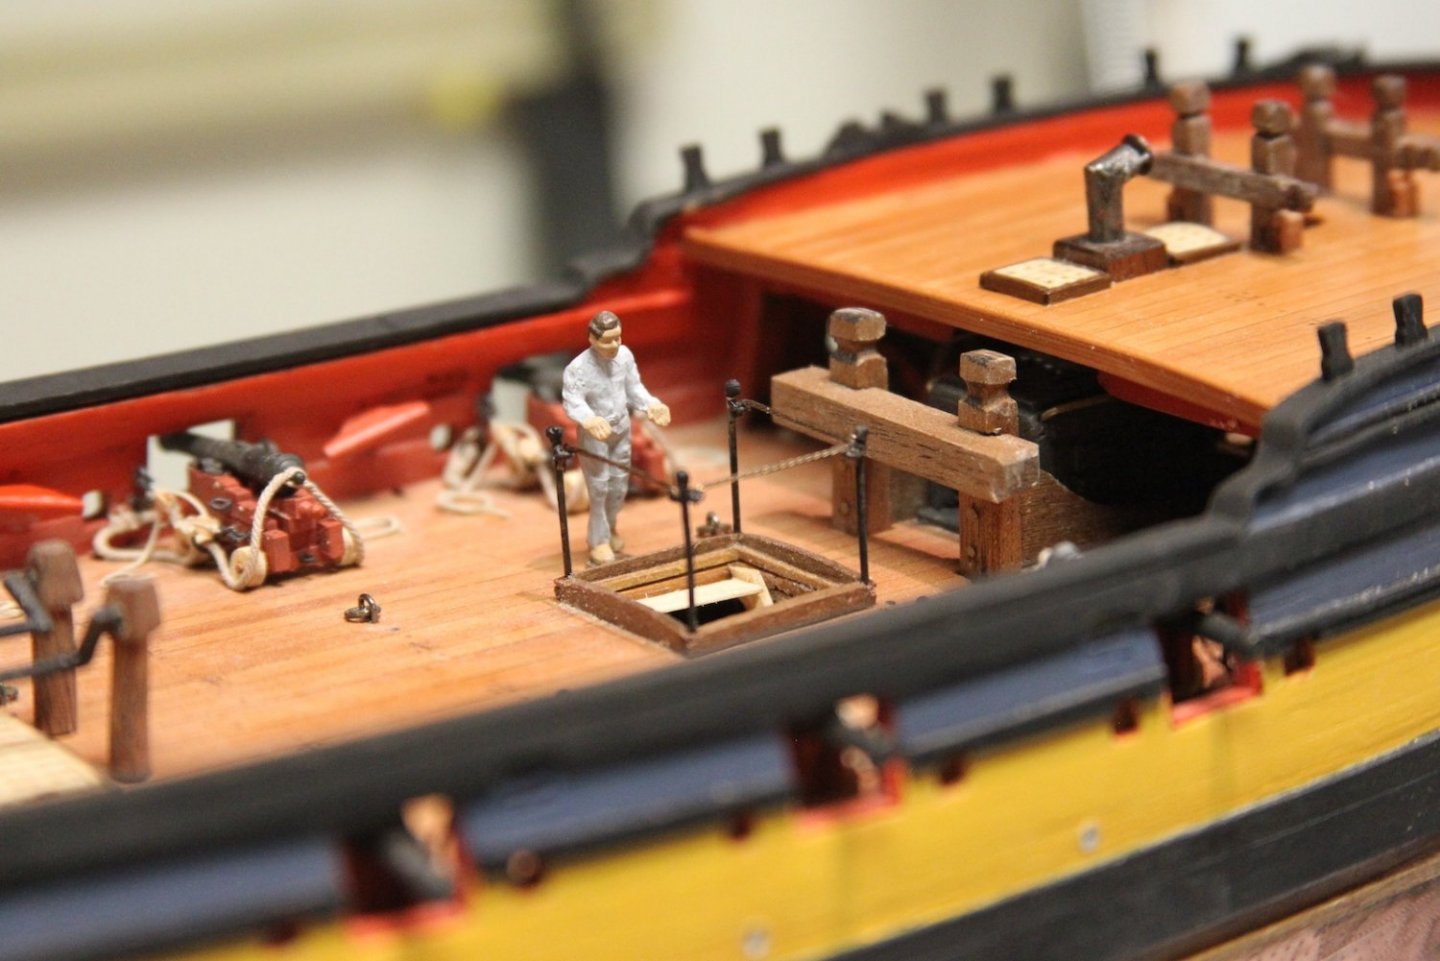
On another note - these macro shots remind me that I'm going to have a lot of dusting and cleaning up do do. Sheesh. Either that or I need to just start using a crappier lens. 😆
-
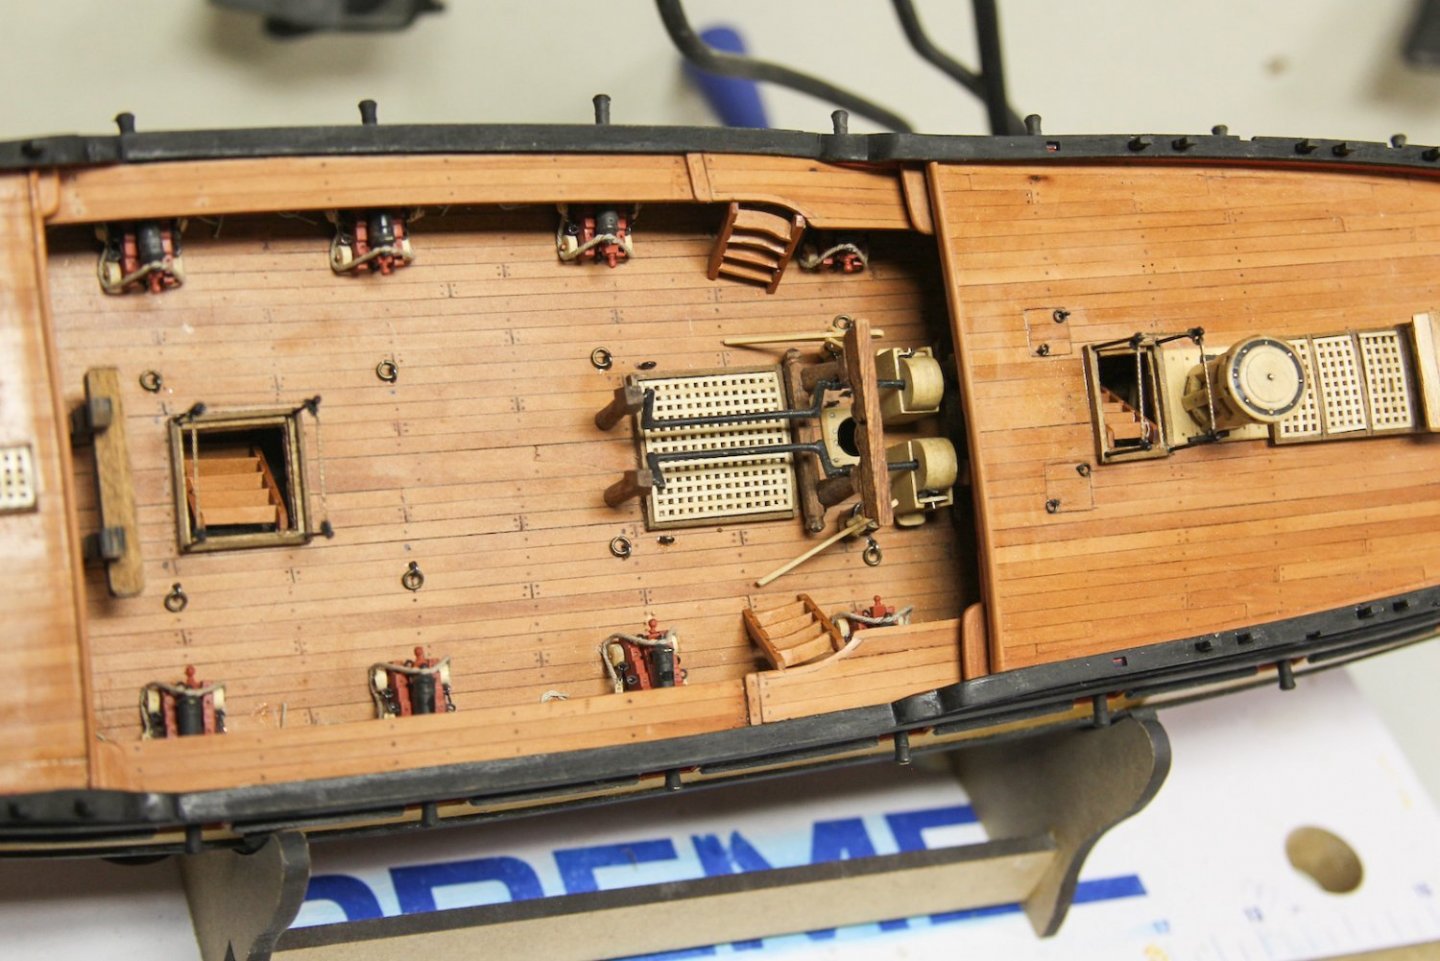
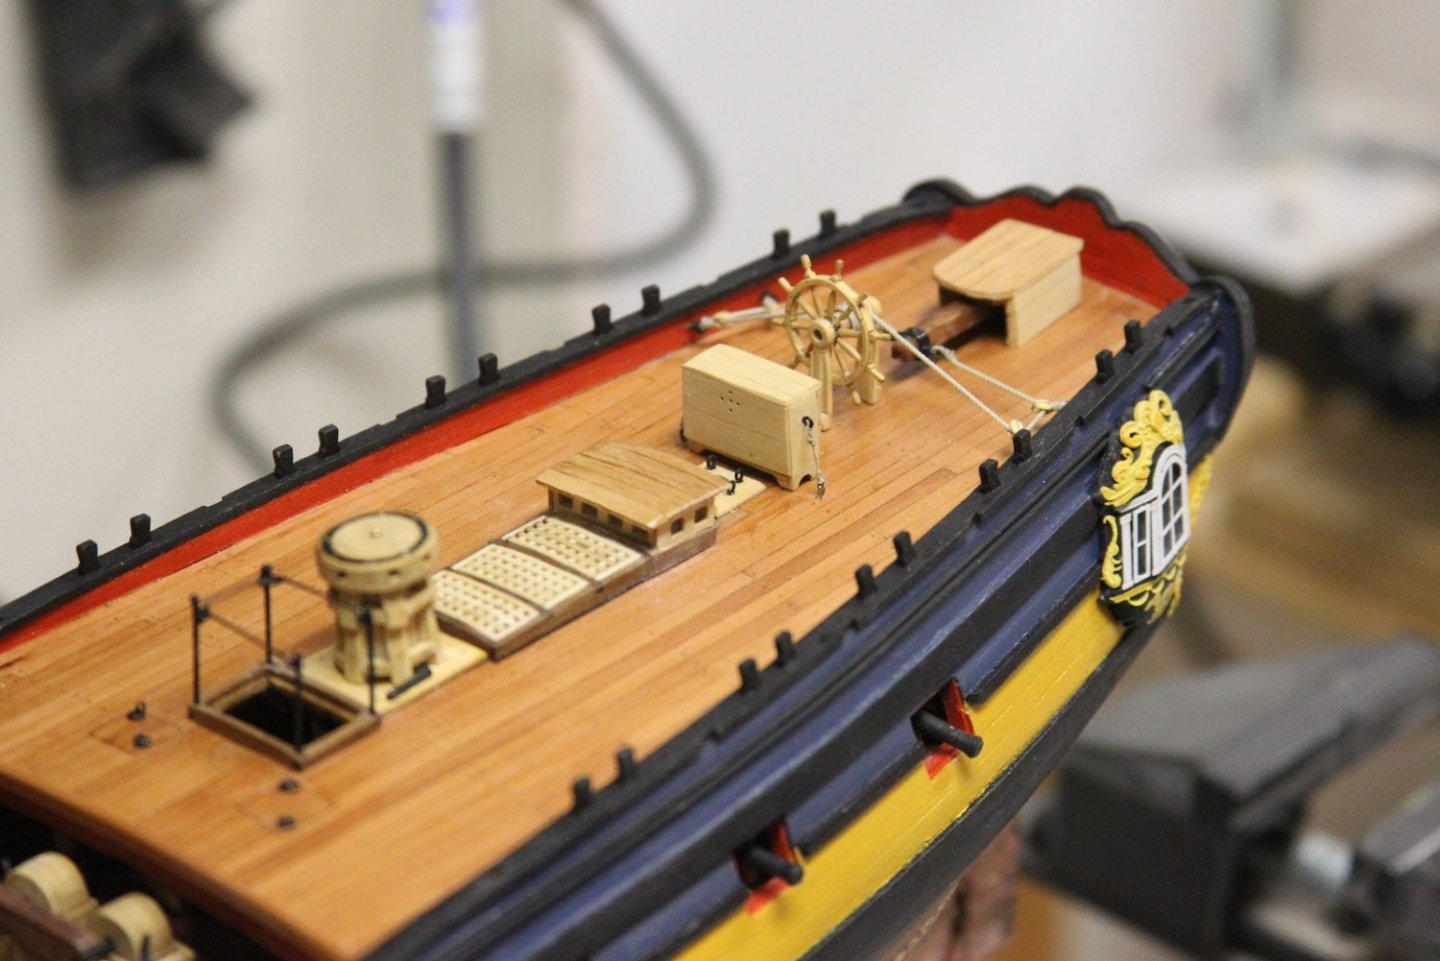
That's a beautiful contrast between the hatches, coamings, and the deck.
For what it's worth - although I also caught the difference between the grating of the aft hatch, I was actually looking for it based on following your earlier adjustments. Had I looked at these photos without that, I'm not sure I'd have really noticed it without it being pointed out.
- mtaylor and Blue Ensign
-
1
-
 1
1
-
-
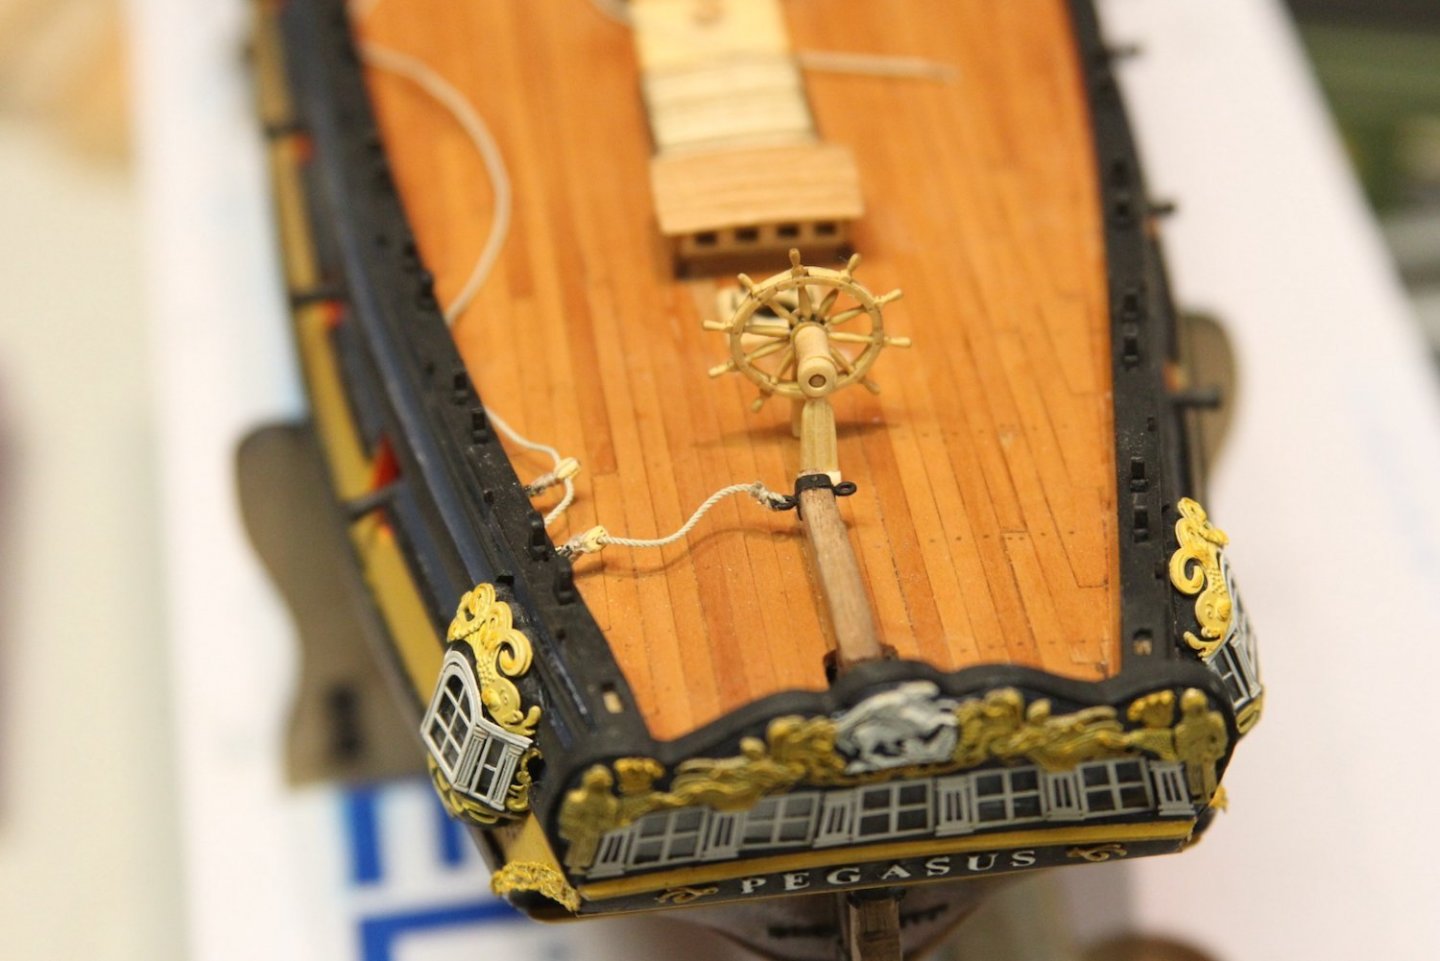
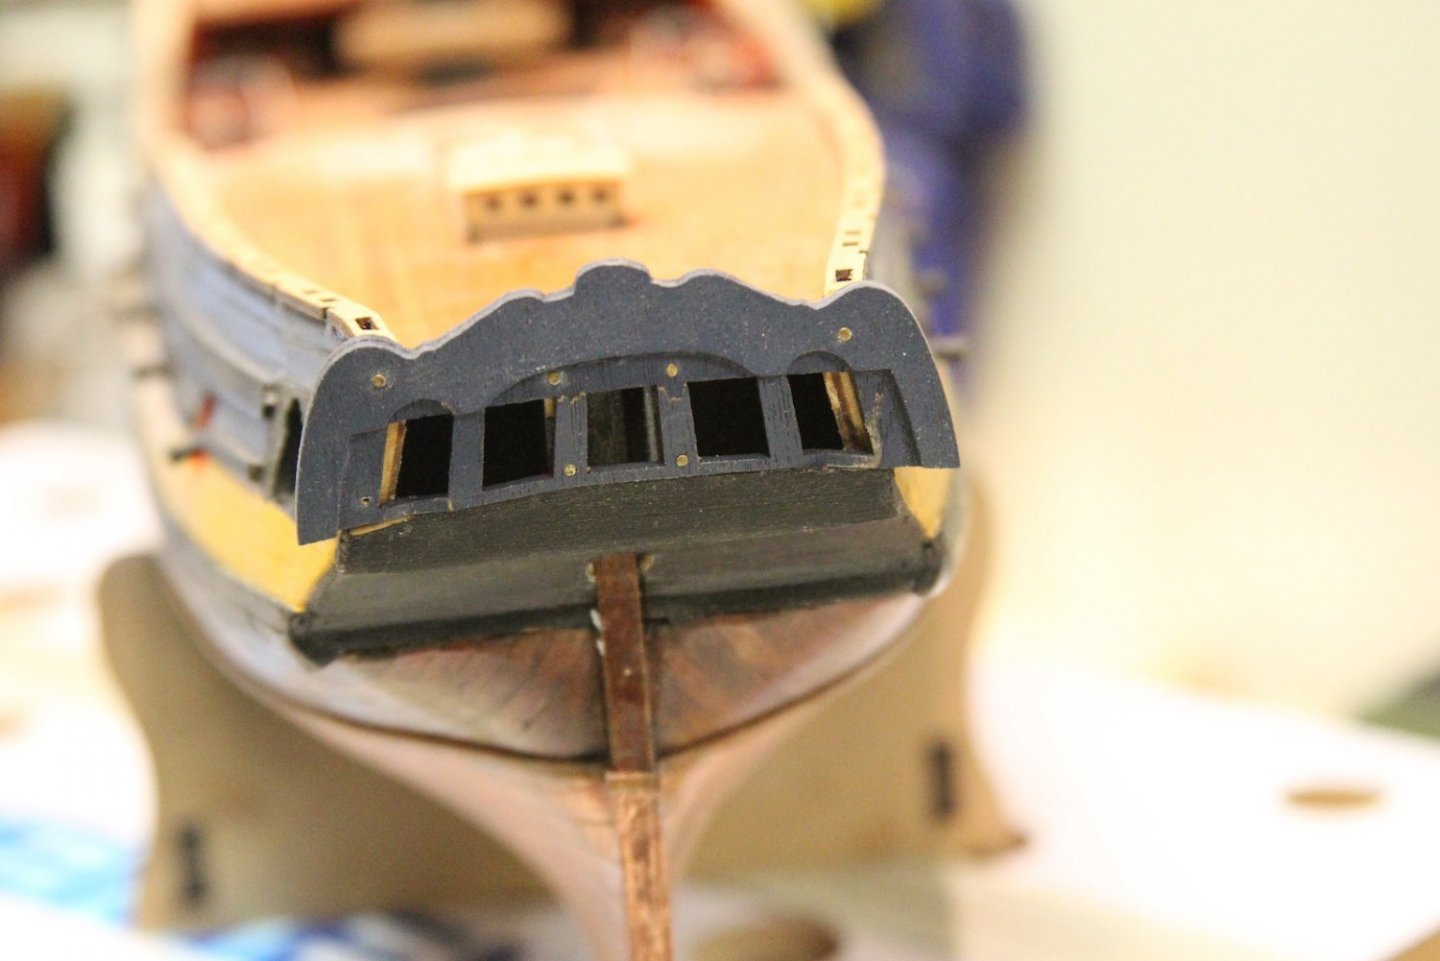
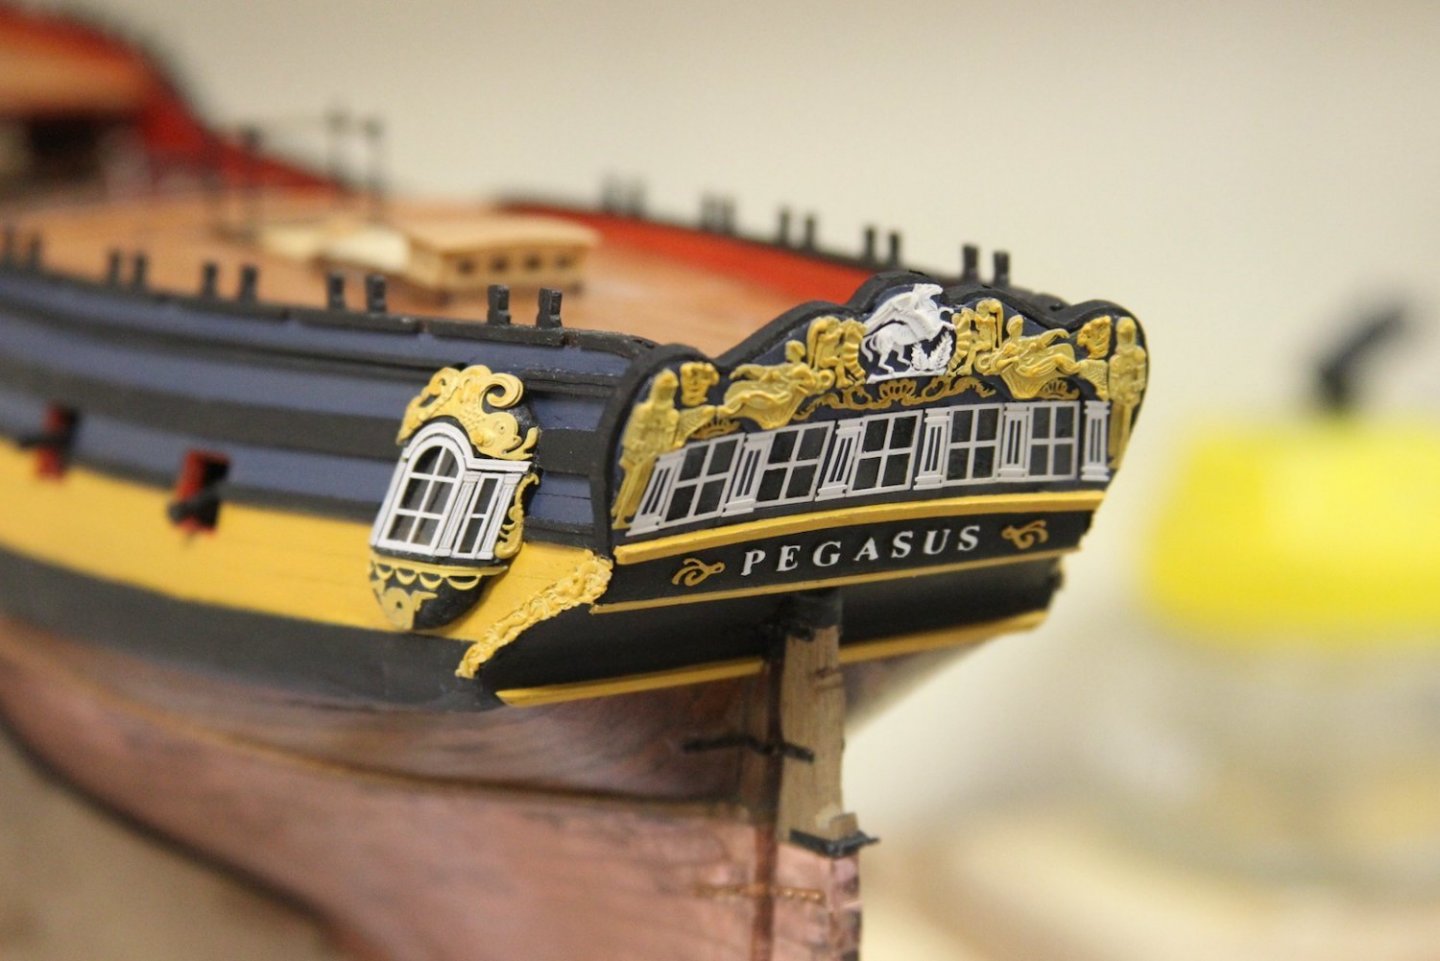
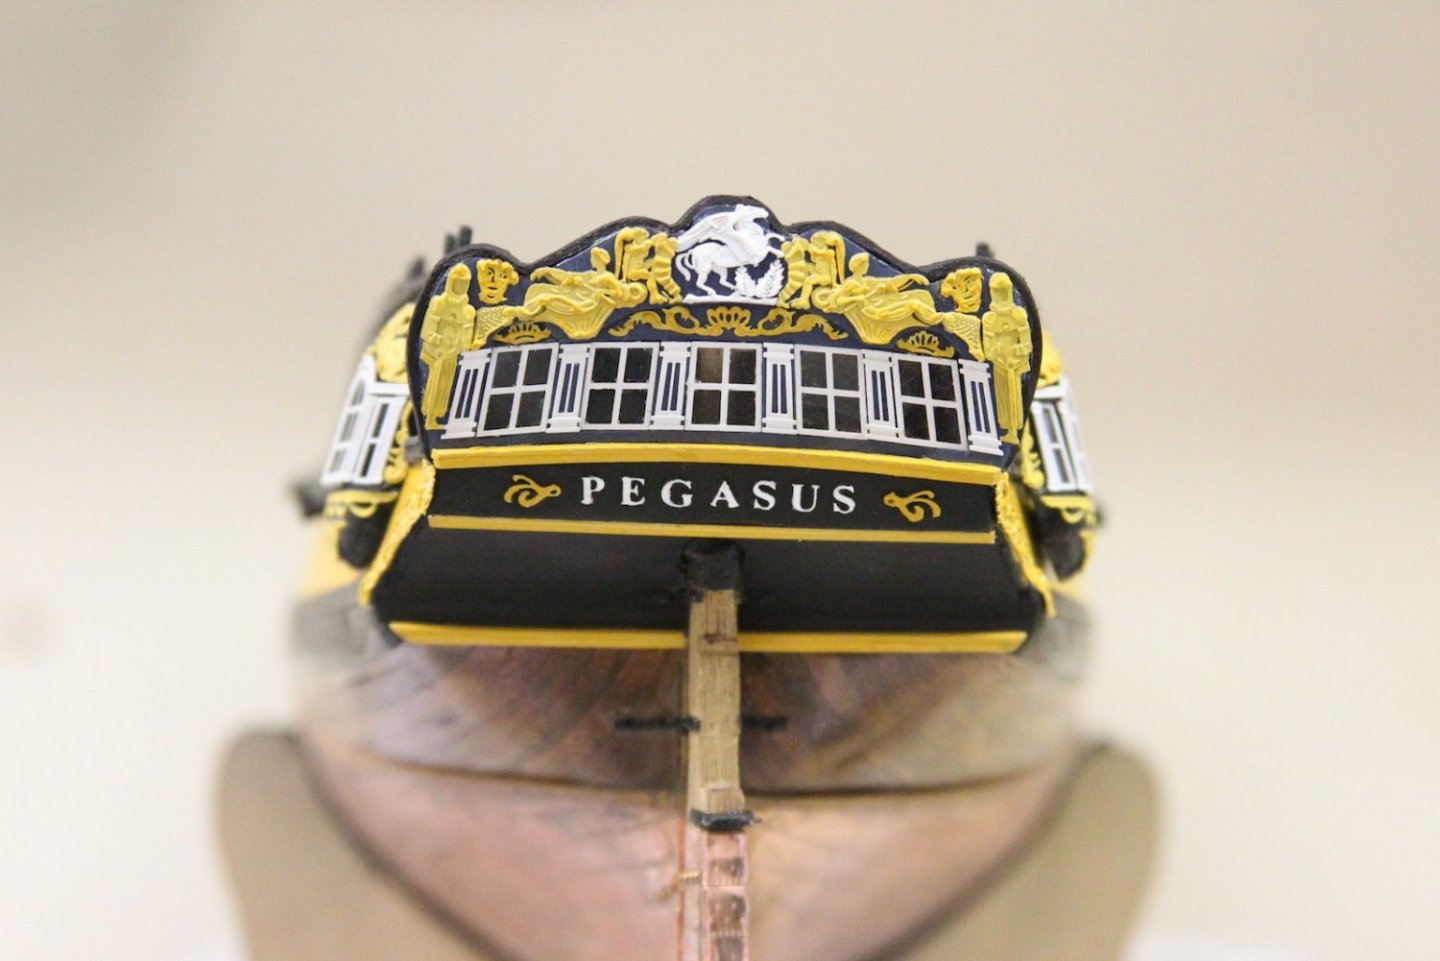
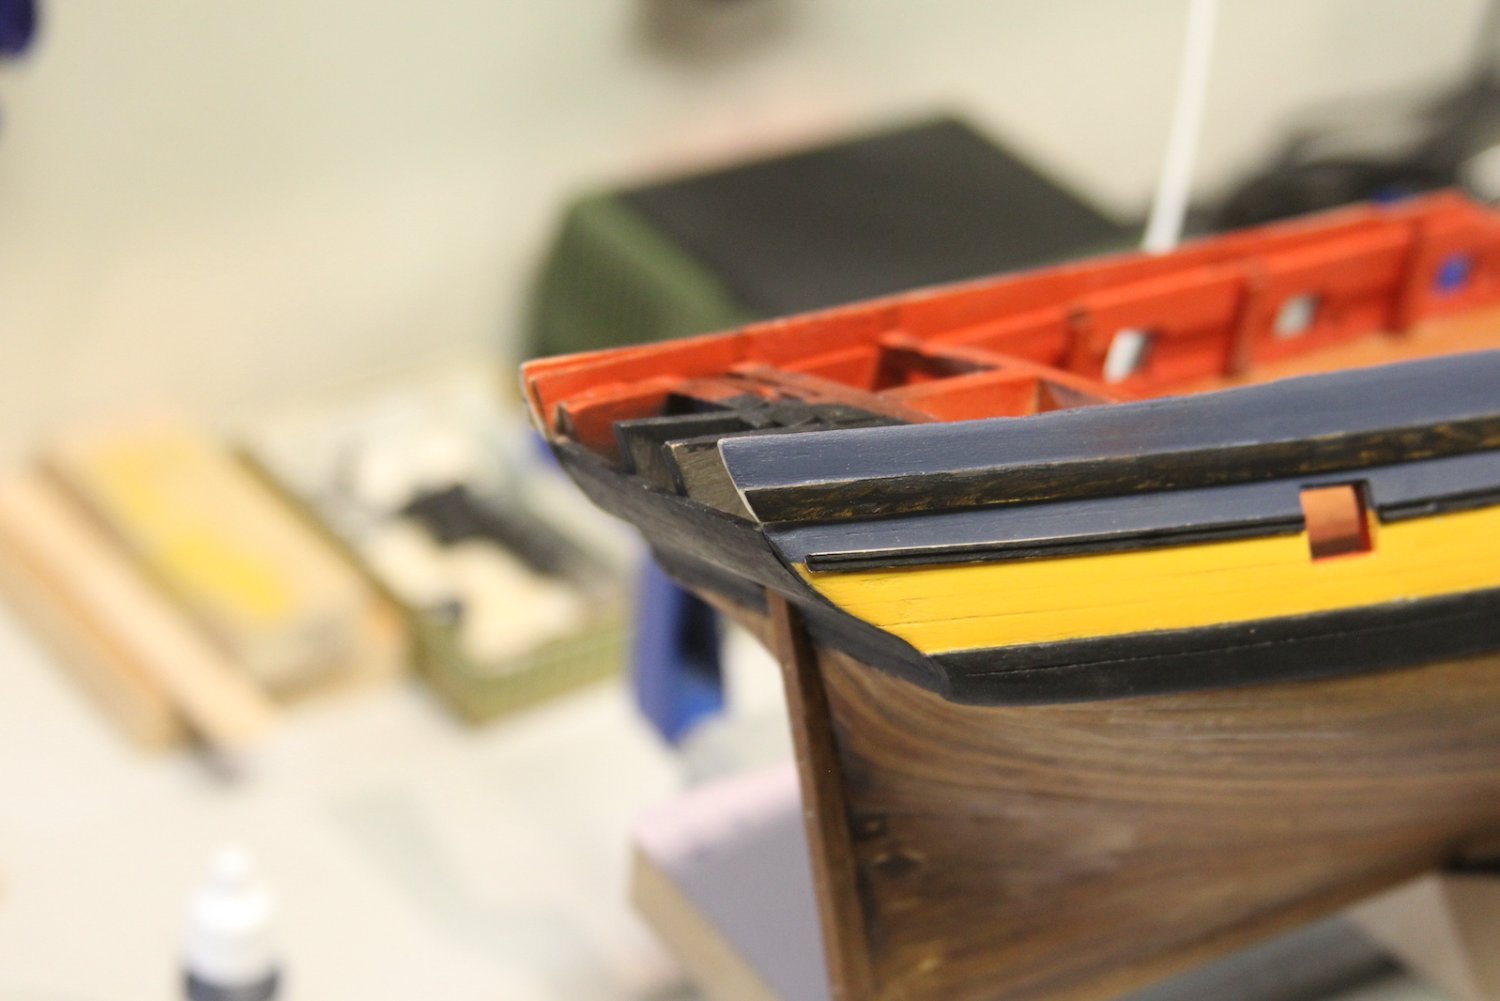
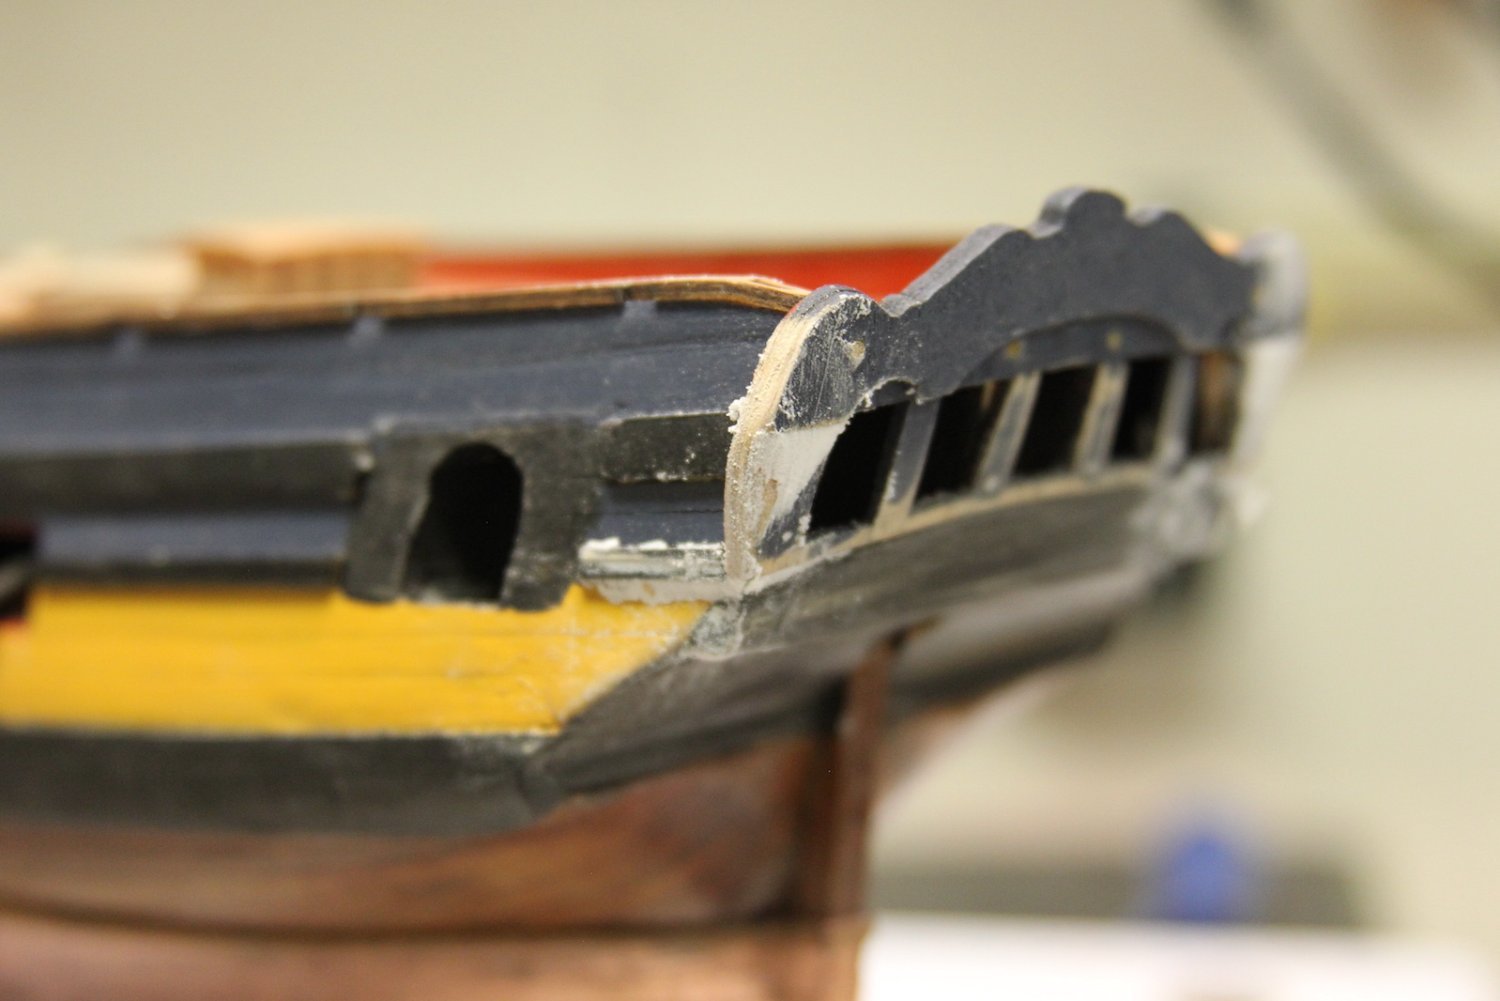
It's definitely worth mentioning that that last couple/few posts represent work that was done simultaneously mostly over the holiday break from work and the last week or so. It's not like I knocked all the stuff out one after another. I'd been thinking about how to handle the transom for quite some time - since like everyone else who's done this built I realized there's a pretty notable design flaw in that the sides of the transom just just out into nothingness with sharp edges. Very strange. The other noticeable different from the NMM plans was the way the stern curved whereas almost every reference (and build) showed it as being straight. So these two things needed to be sorted. First, I straightened up Peg's rear end.

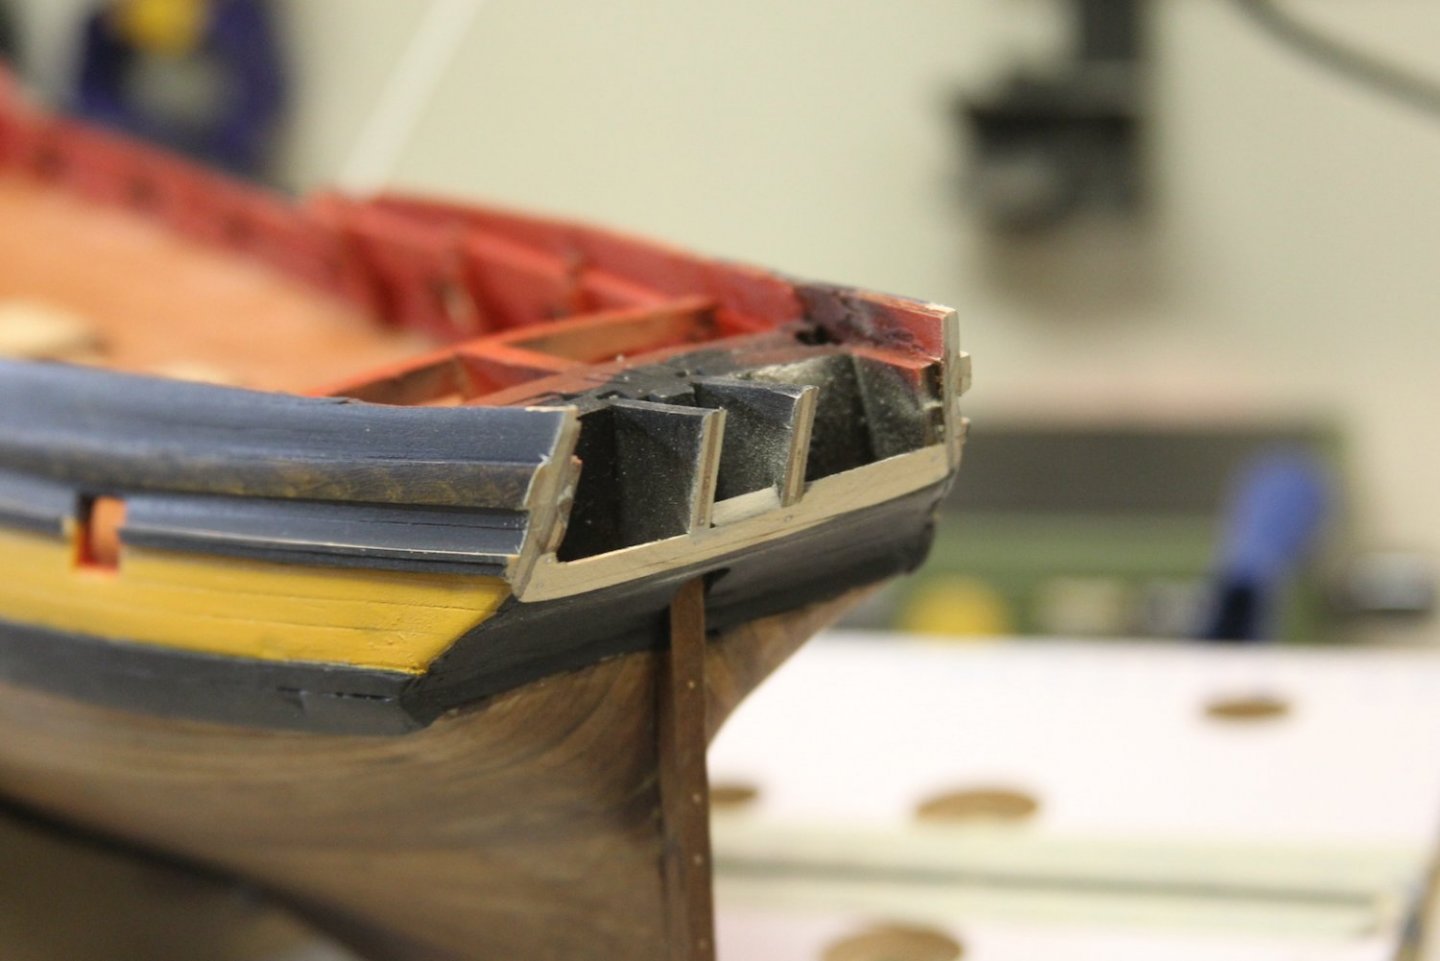
Next up, I addressed the weird jutting edges. I've seen a few different methods in builds - mostly adding a piece to fill in the gap. I decided my best bet would be to reshape the sides to more reflect the plans above. After sanding down and reshaping, I filled in the gaps and angles to smooth it all out. Then I added the moulding to separate the lower stern areas to get an idea of how this would all play out.
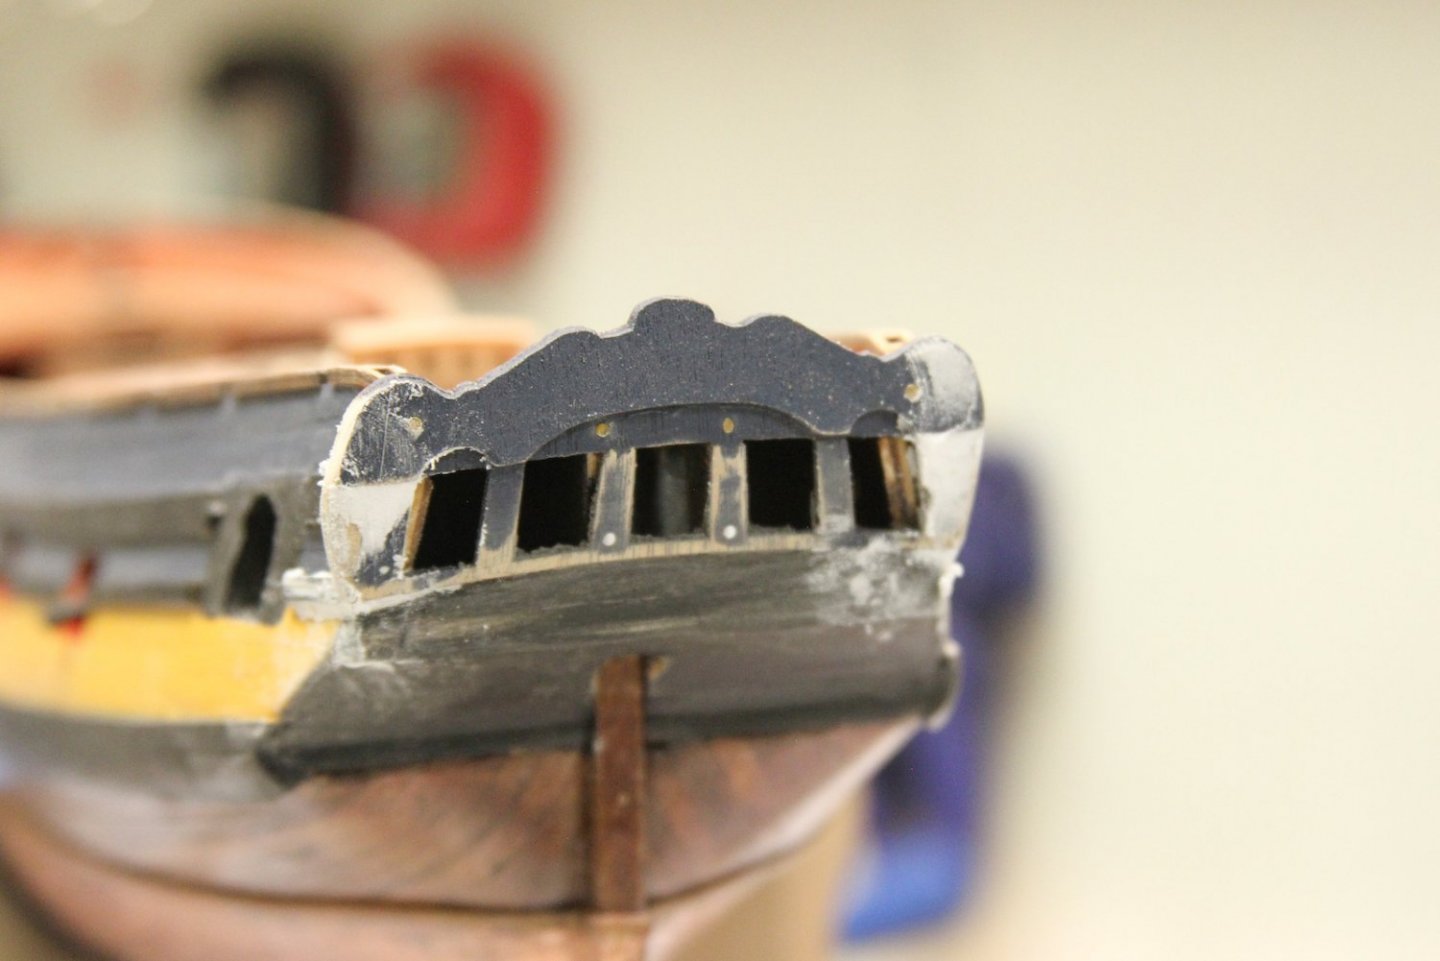

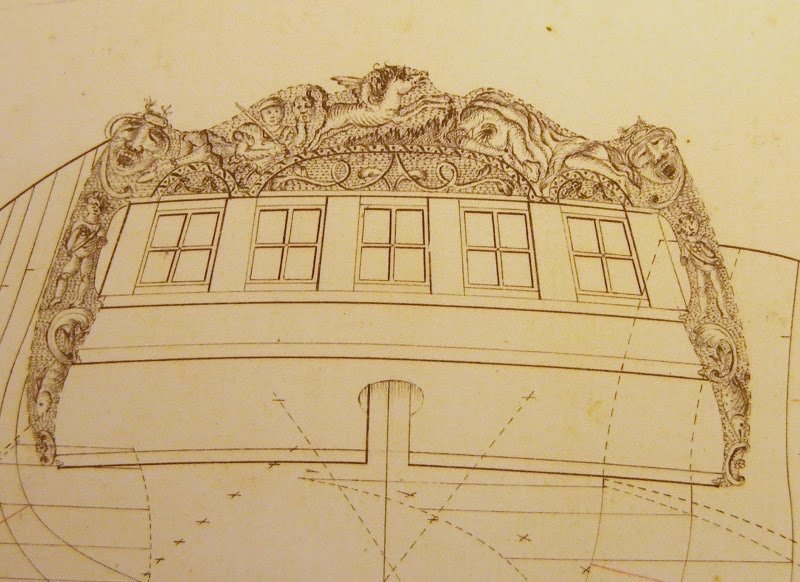
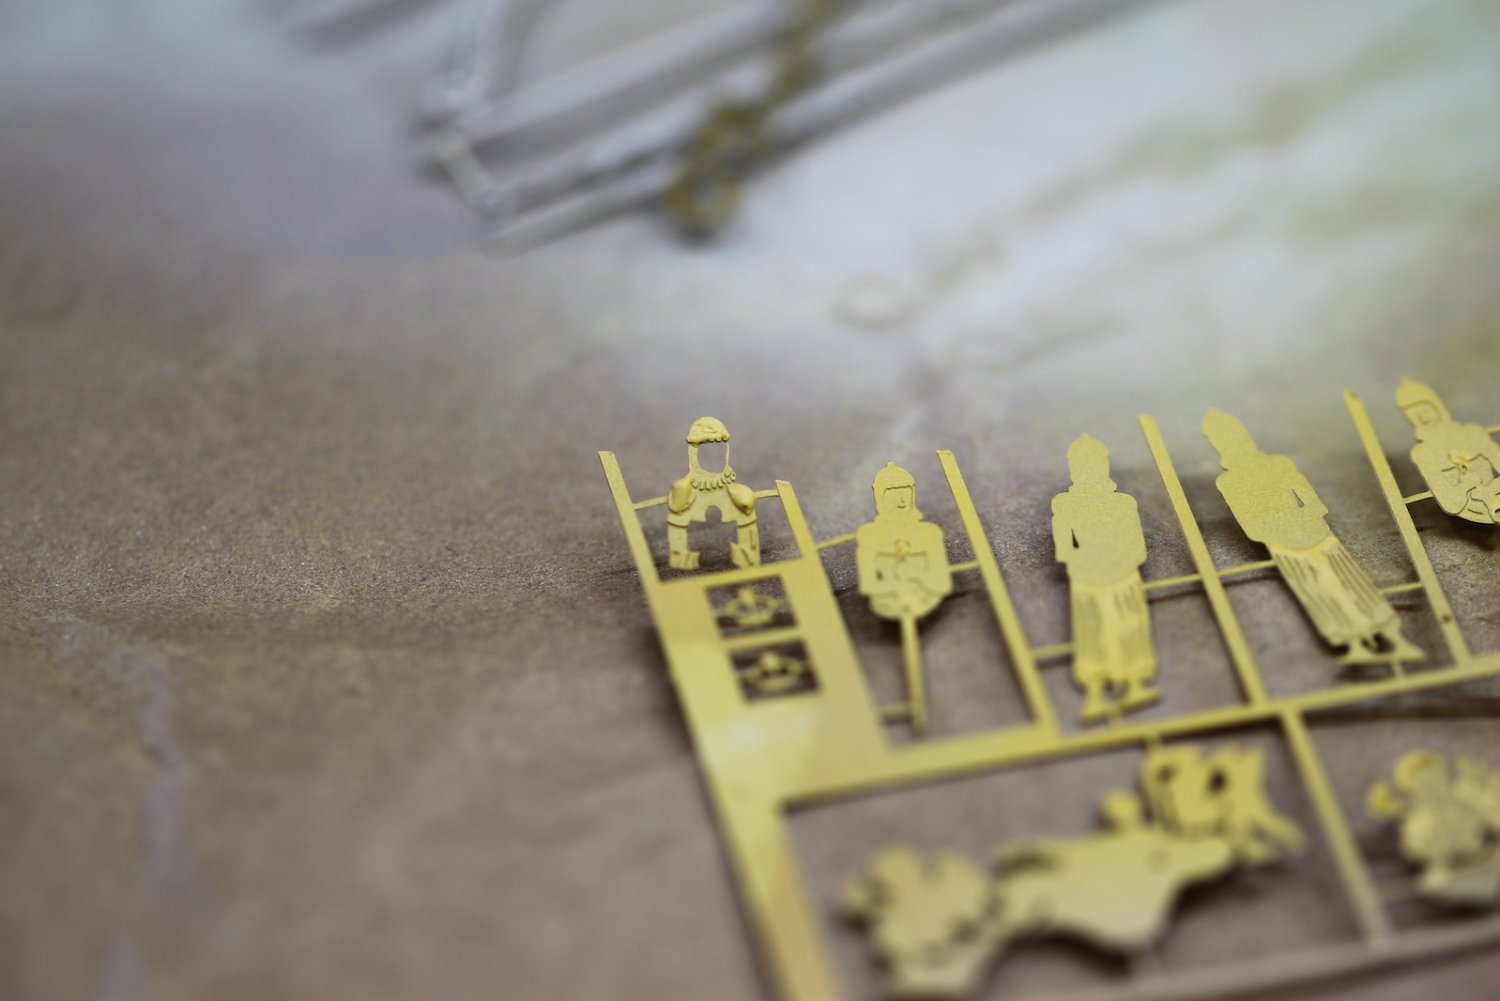
Though the reshaping of the transom looks much better, it does create a subsequent problem that needs to be addressed - the fitting of all the carvings and decorations. Obviously, the kit provided photo-etched decorations are made to specifically fit the kit shaped transom. So - how to fit the decorations into a smaller, differently shaped area?
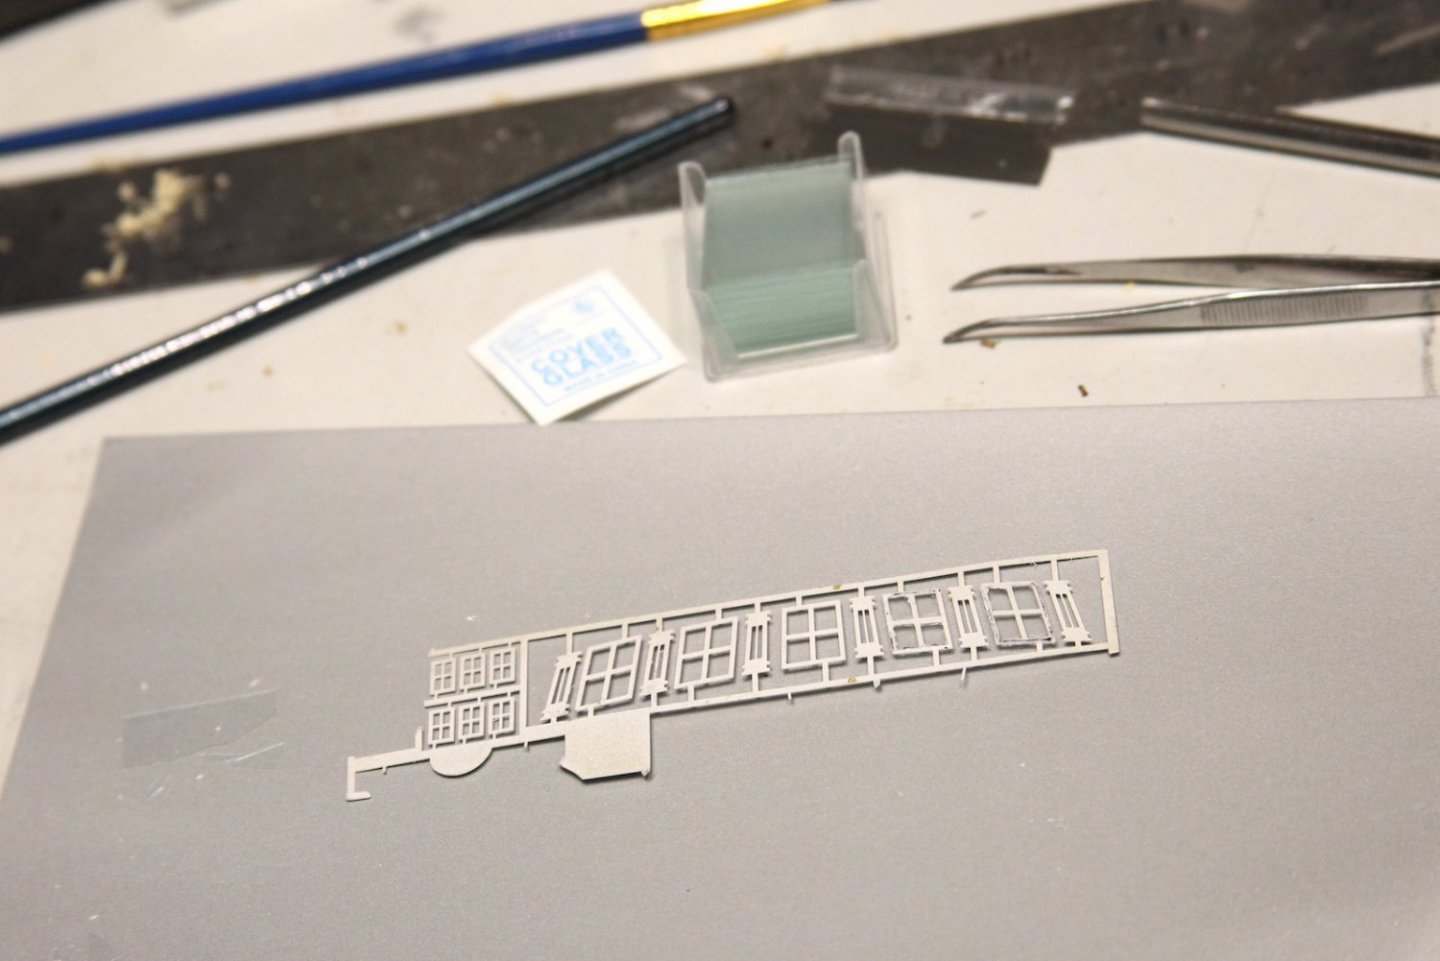
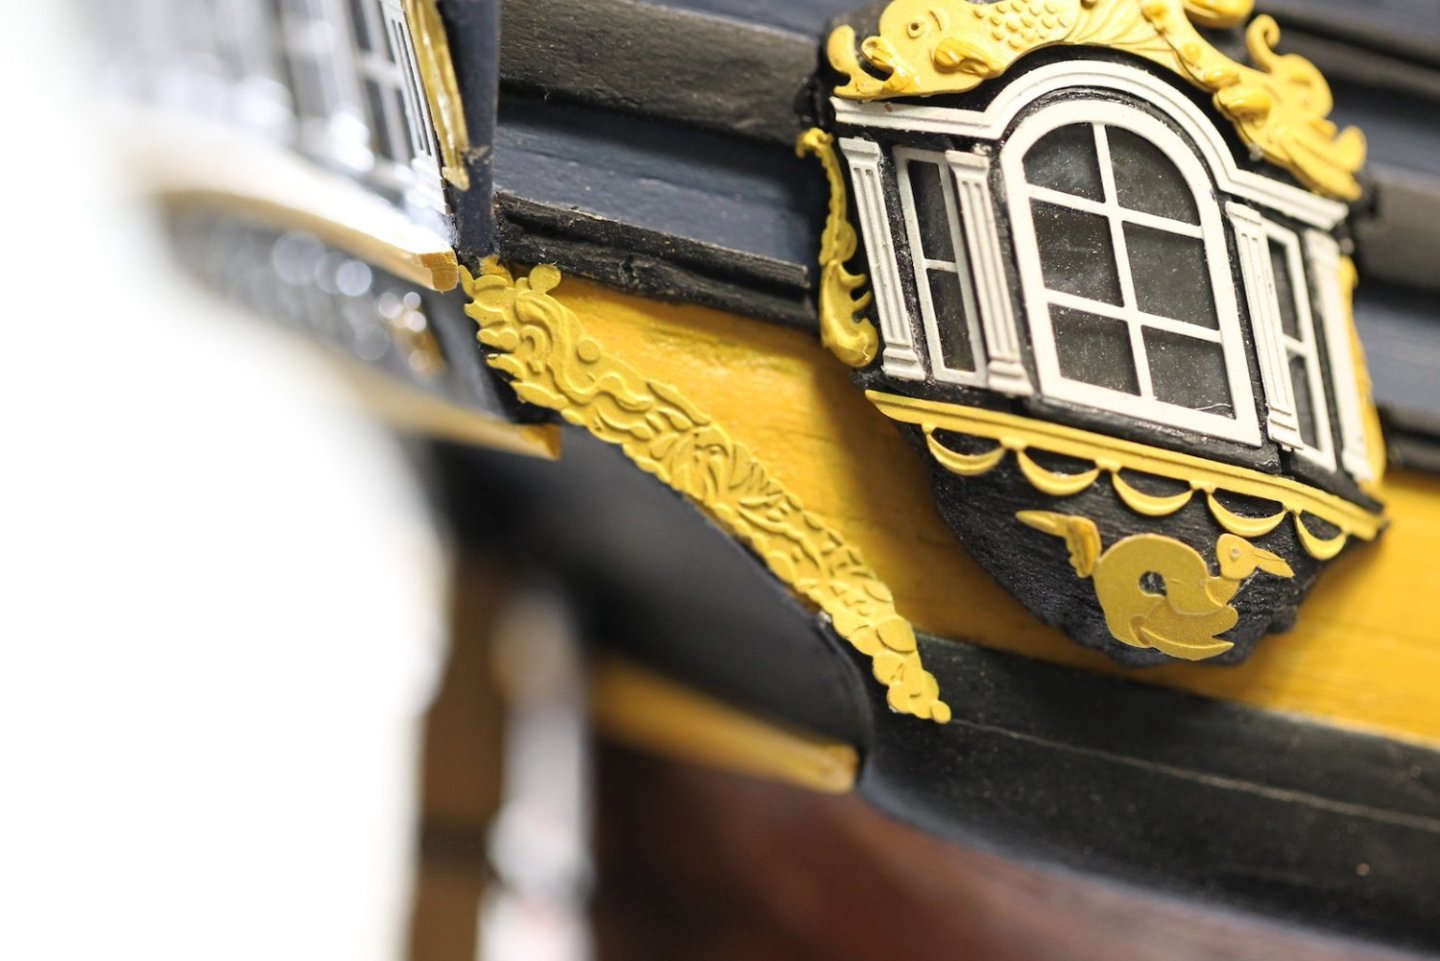
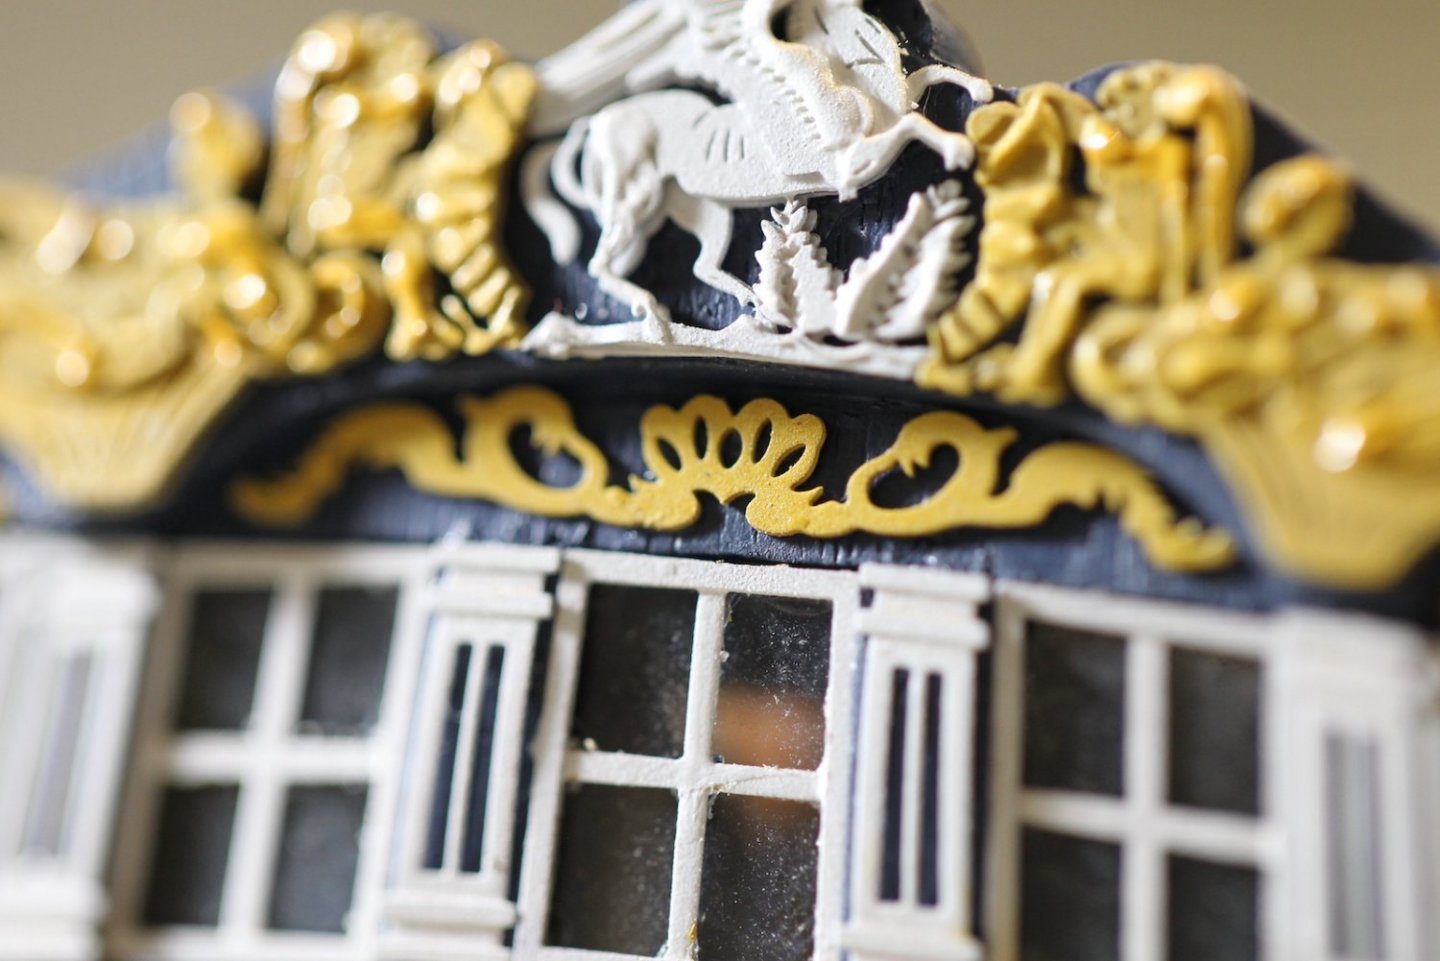
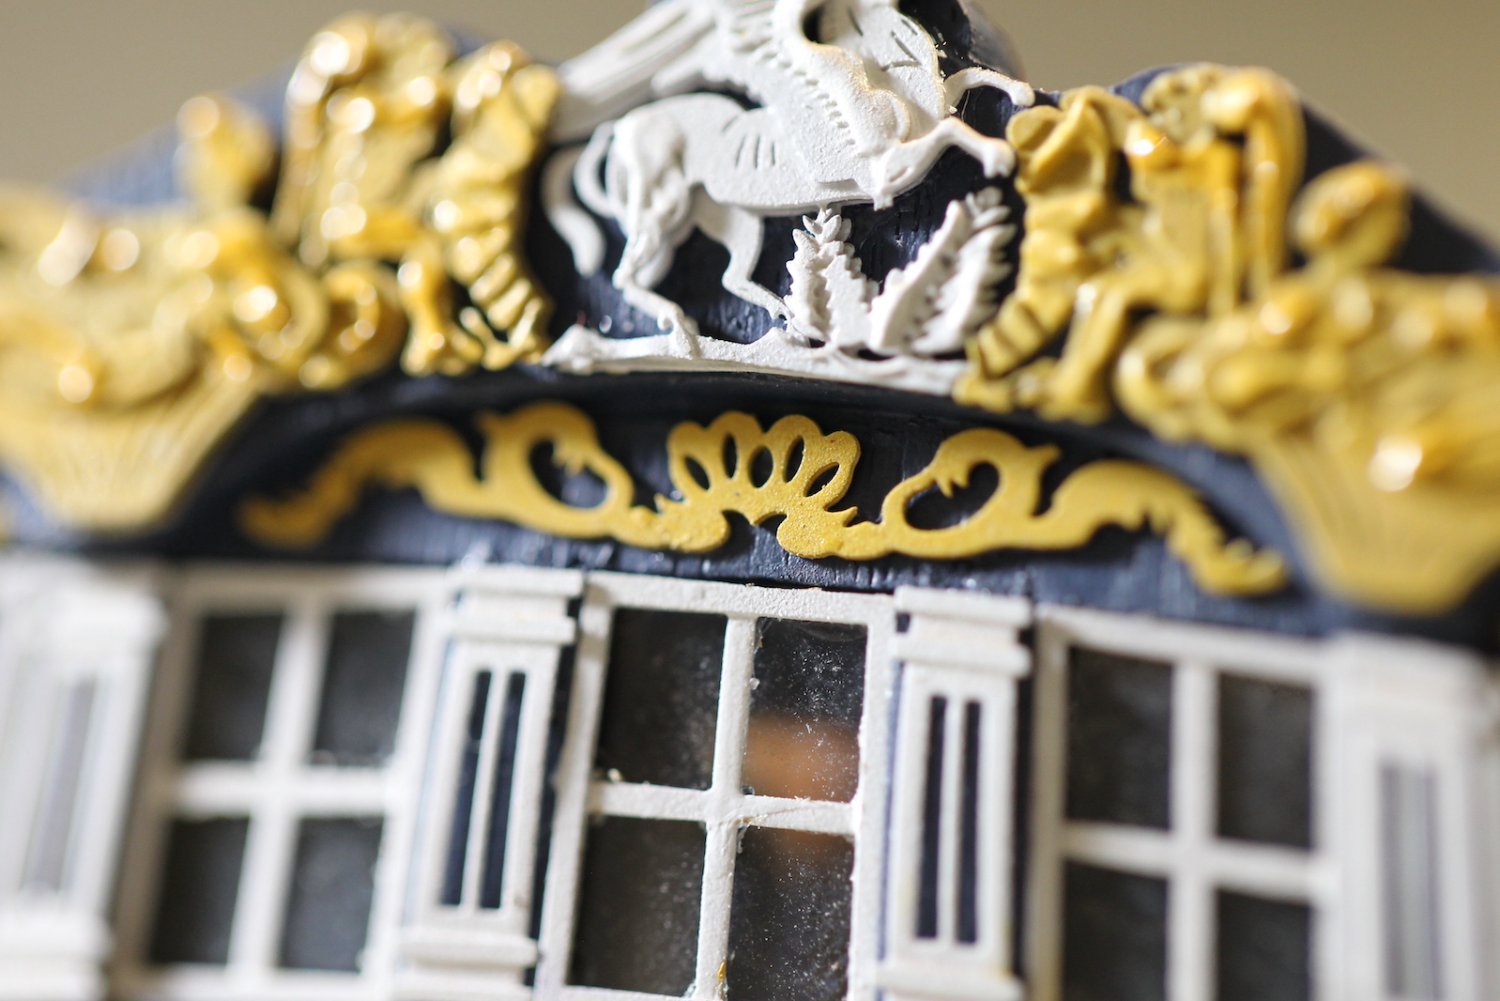
First, I painted them with a few different layers and shades of yellow and yellow ochre to try and create a more three dimensional look - the same technique as I used for the quarter galleries. Then, I installed the windows - because I know that the window locations are fixed and will serve as my benchmark for placing the rest of the decorations. Once again as with the quarter galleries, I am using the thin microscope cover glass as 'real window panes' in my windows.
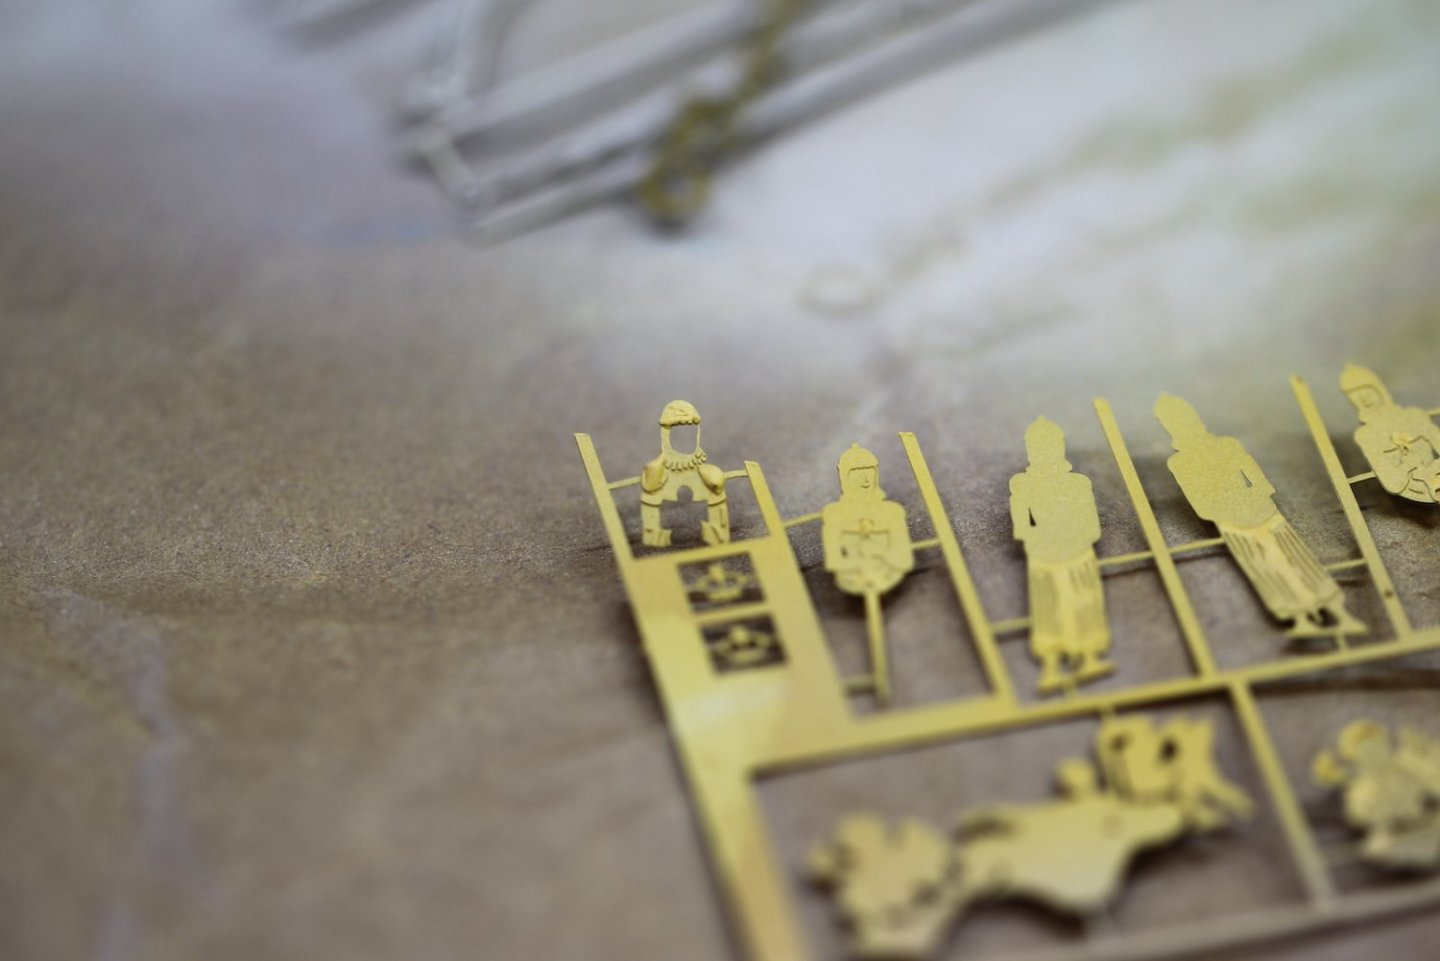
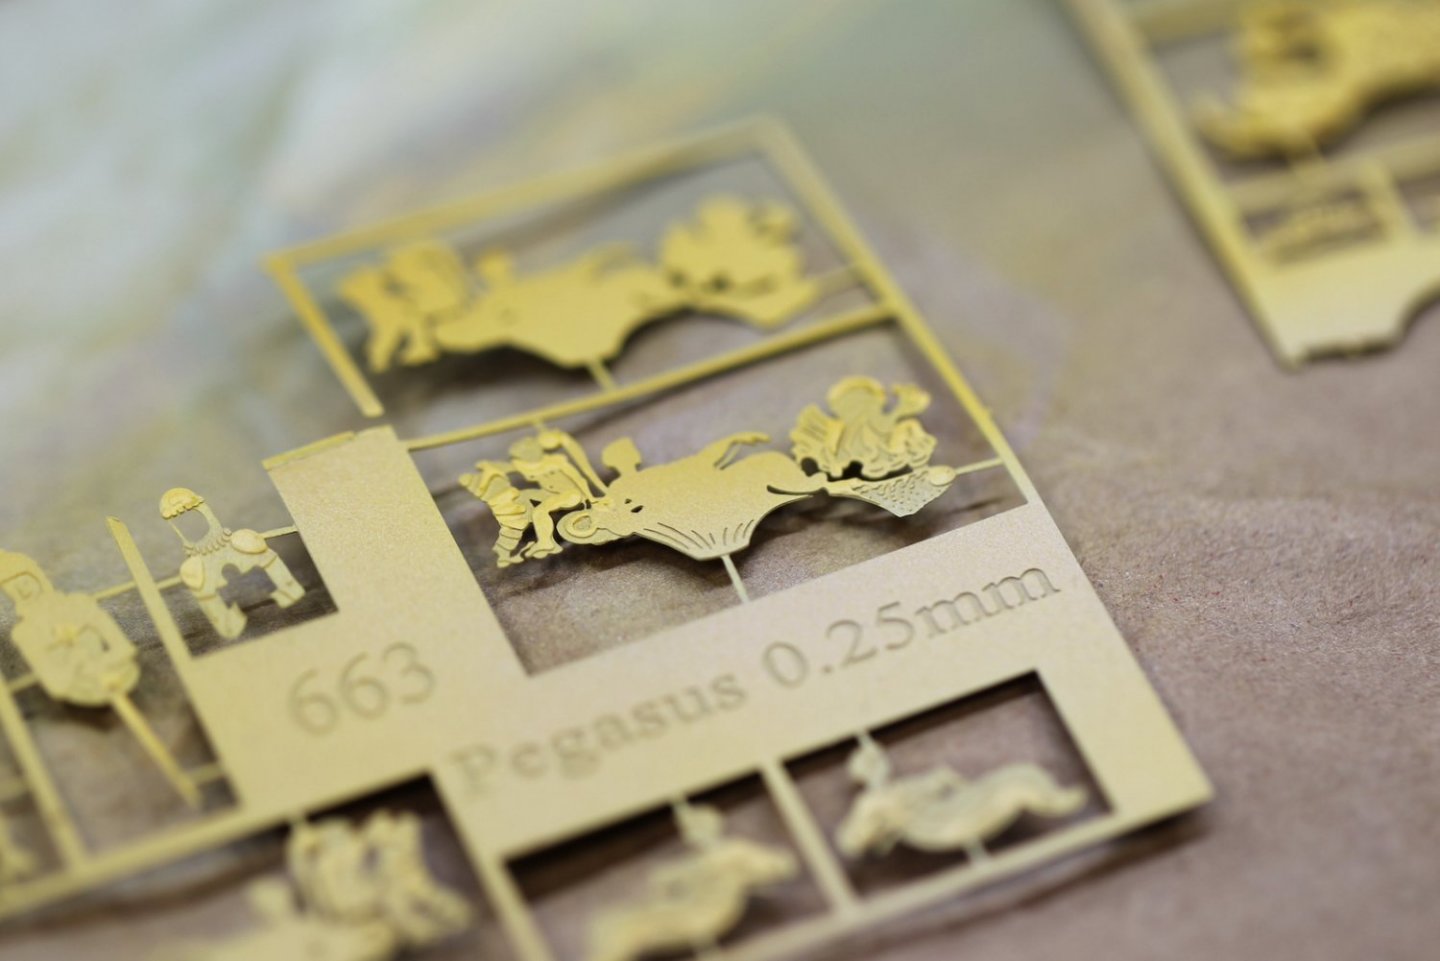
Although the decorations themselves come in layers to facilitate somewhat of a 3D 'carved' look, I used the same technique as with the quarter galleries to to add to that after they were mounted - adding some thicker acrylic paint to bring out the texture. But first I had to get them to fit, so I cut apart each decoration so that it is a separate piece which allowed me to place them individually. I started withe the Pegasus centerpiece, then added the two soldiers on the outsides (the poor soldiers had to be 'trimmed' to fit the different shaped transom) and then individually placed elements to fill in the gaps in between. I even pulled a couple decorations that were intended for other areas of the ship.

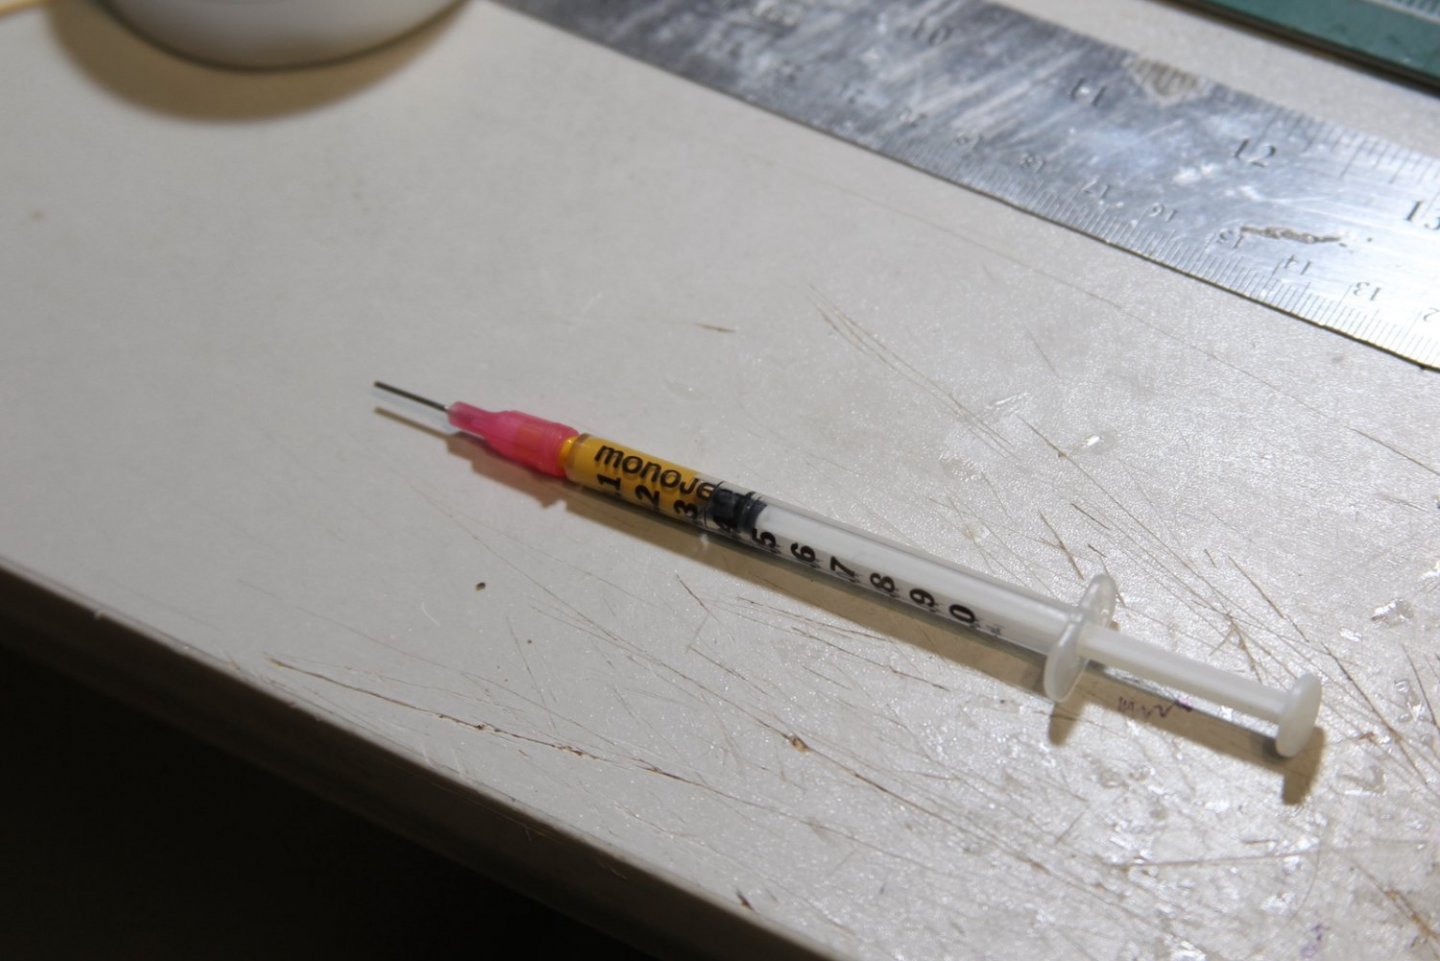
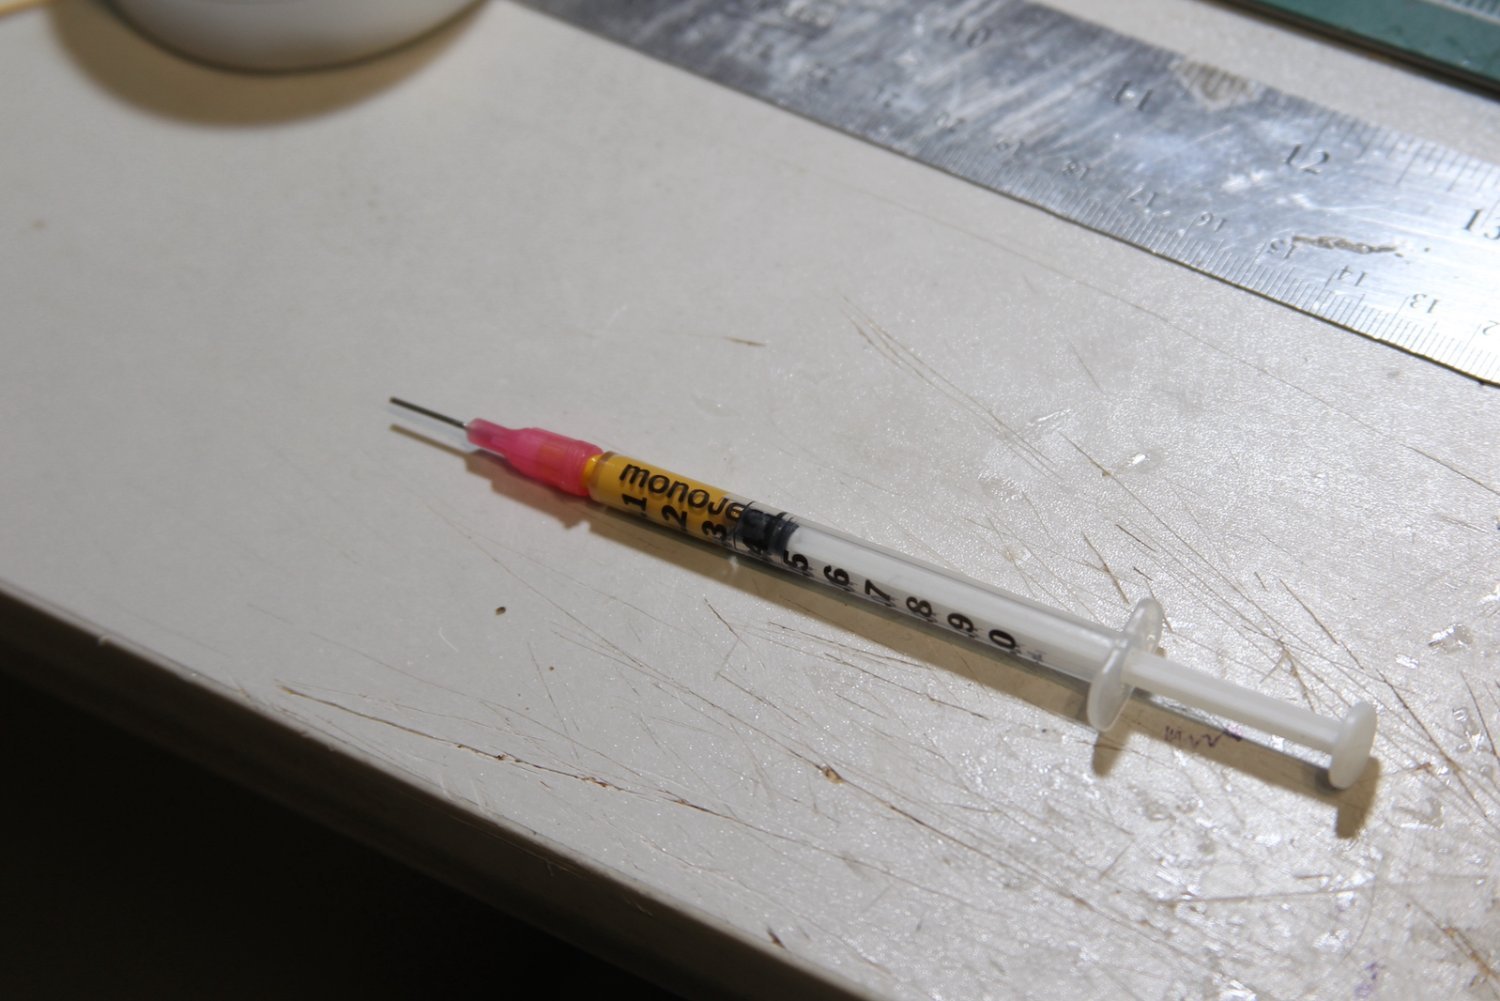
Then, to further enhance the 'carved' effect, I filled in a small syringe with relatively thick yellow ochre acrylic paint and attached the tiny nozzle used for silver soldering. I added the painted to raised areas of the carvings to raise them even further. This took a lot of time and patience and some scraping off of extra painted when my fat-fingers splooged out too much paint on occasion.

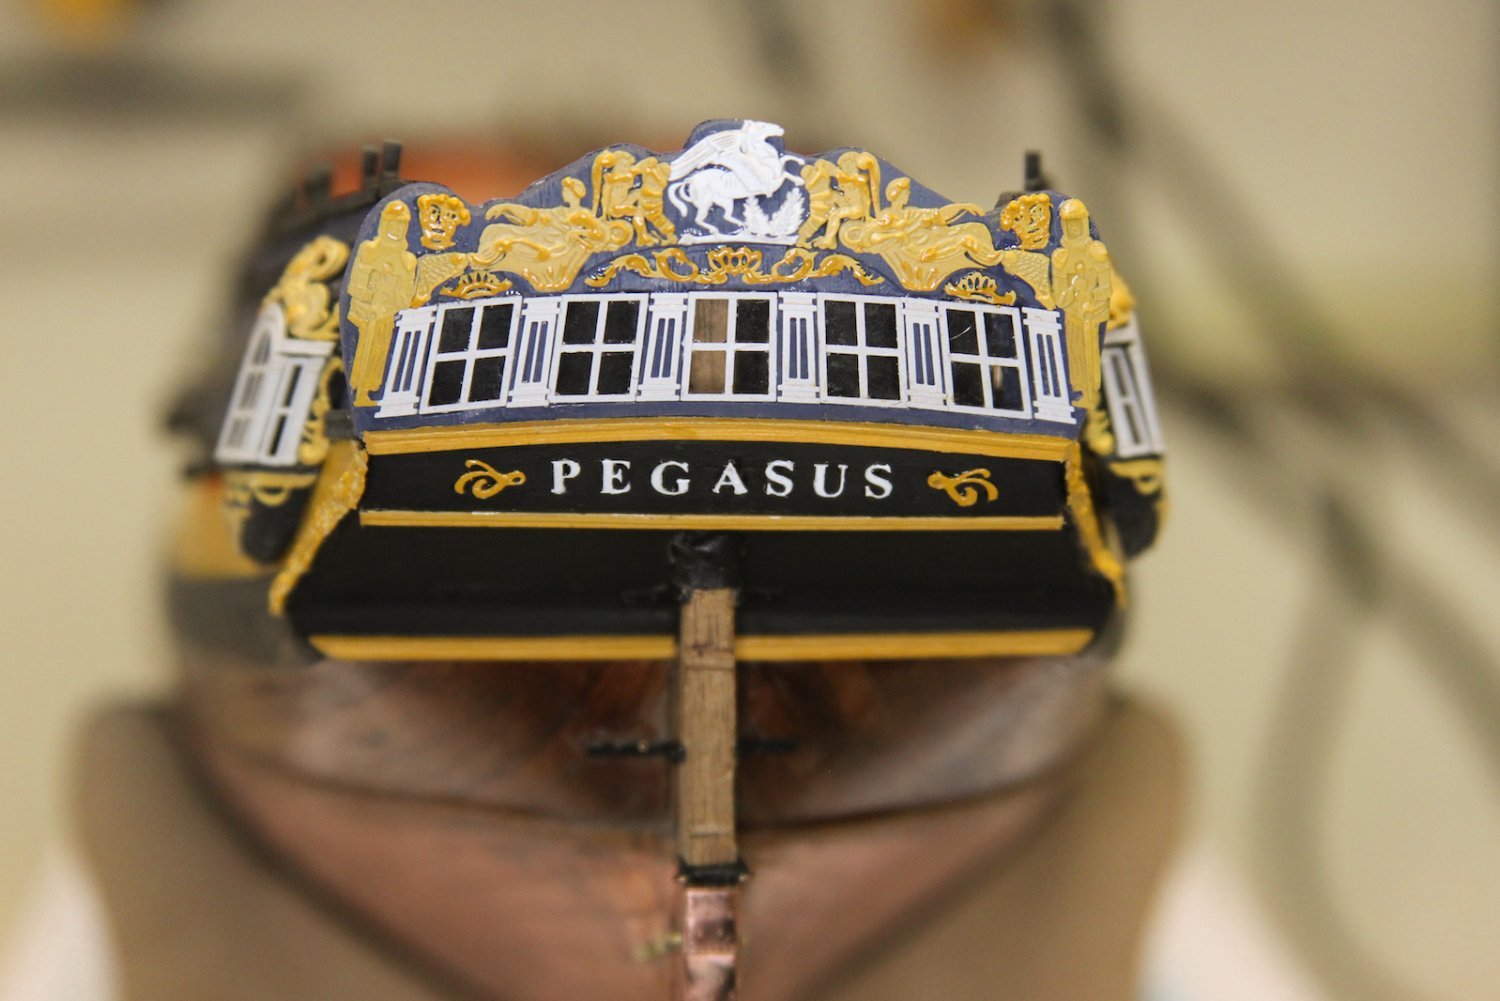
Finally, lining up the letters was an incredible pain in the a**. First, the laser cut letters are TINY, and very difficult to remove without damaging or bending them. Then - they were very challenging to paint, and finally- SUPER challenging to line up straight and with proper spacing. It took me almost as long to get the letters on the ship as it did to do the rest of the decorations. Unfortunately, I'm pretty terrible at painting letters or I'd have probably just abandoned the laser cut stuff and painted.
However, at the end of the day (though they're not perfect) I think they're pretty darn close. Of course the macro-lens shots show all the flaws, and I overall, I think it looks better to the naked eye than represented here with the super macro lens.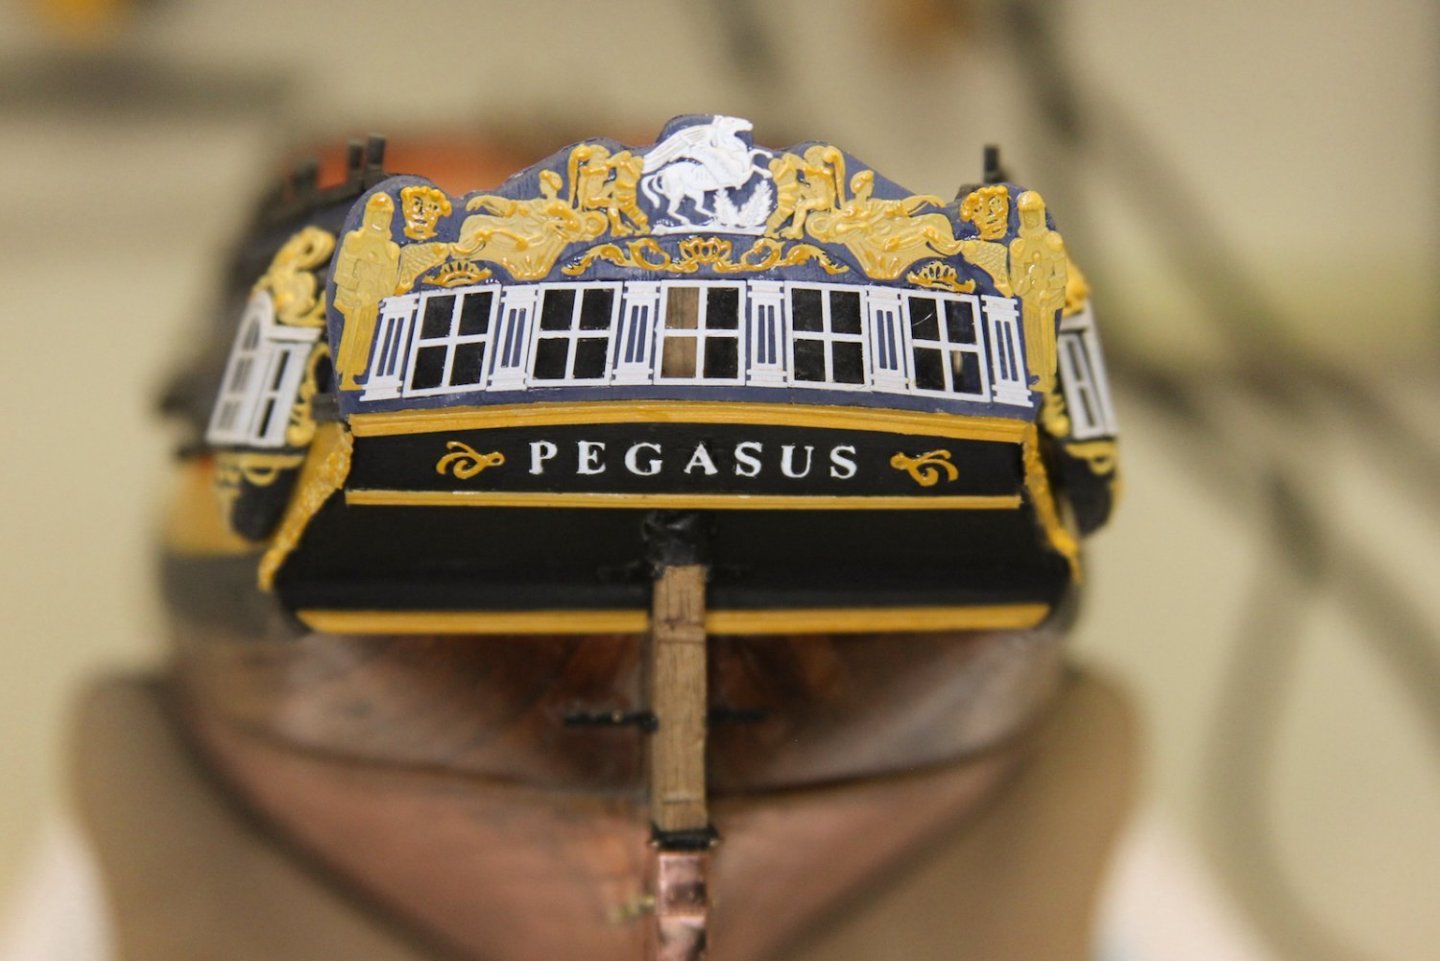
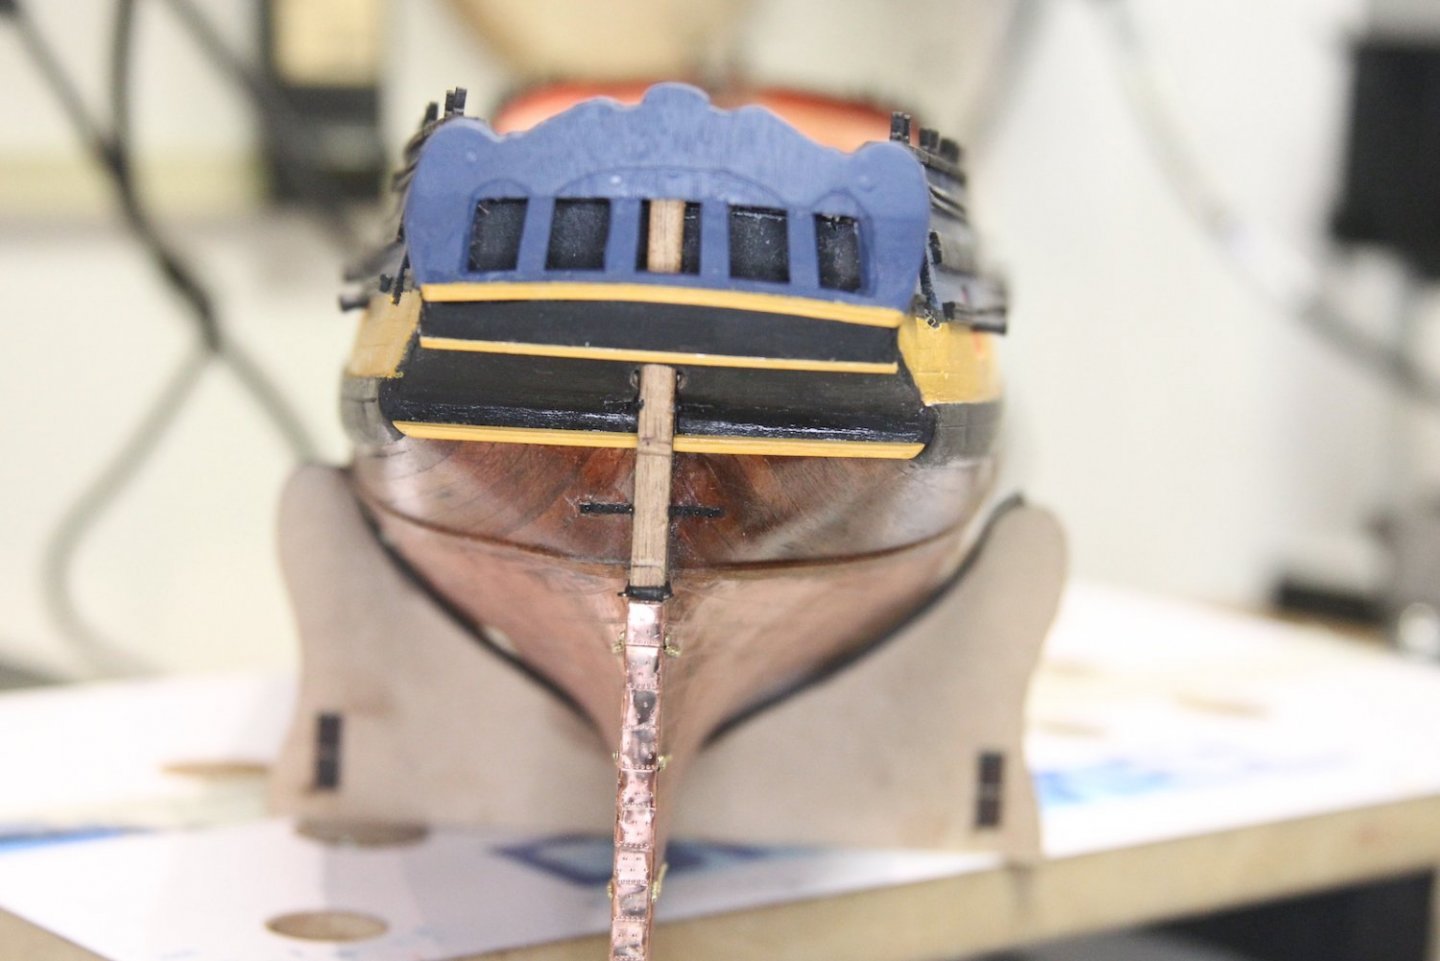
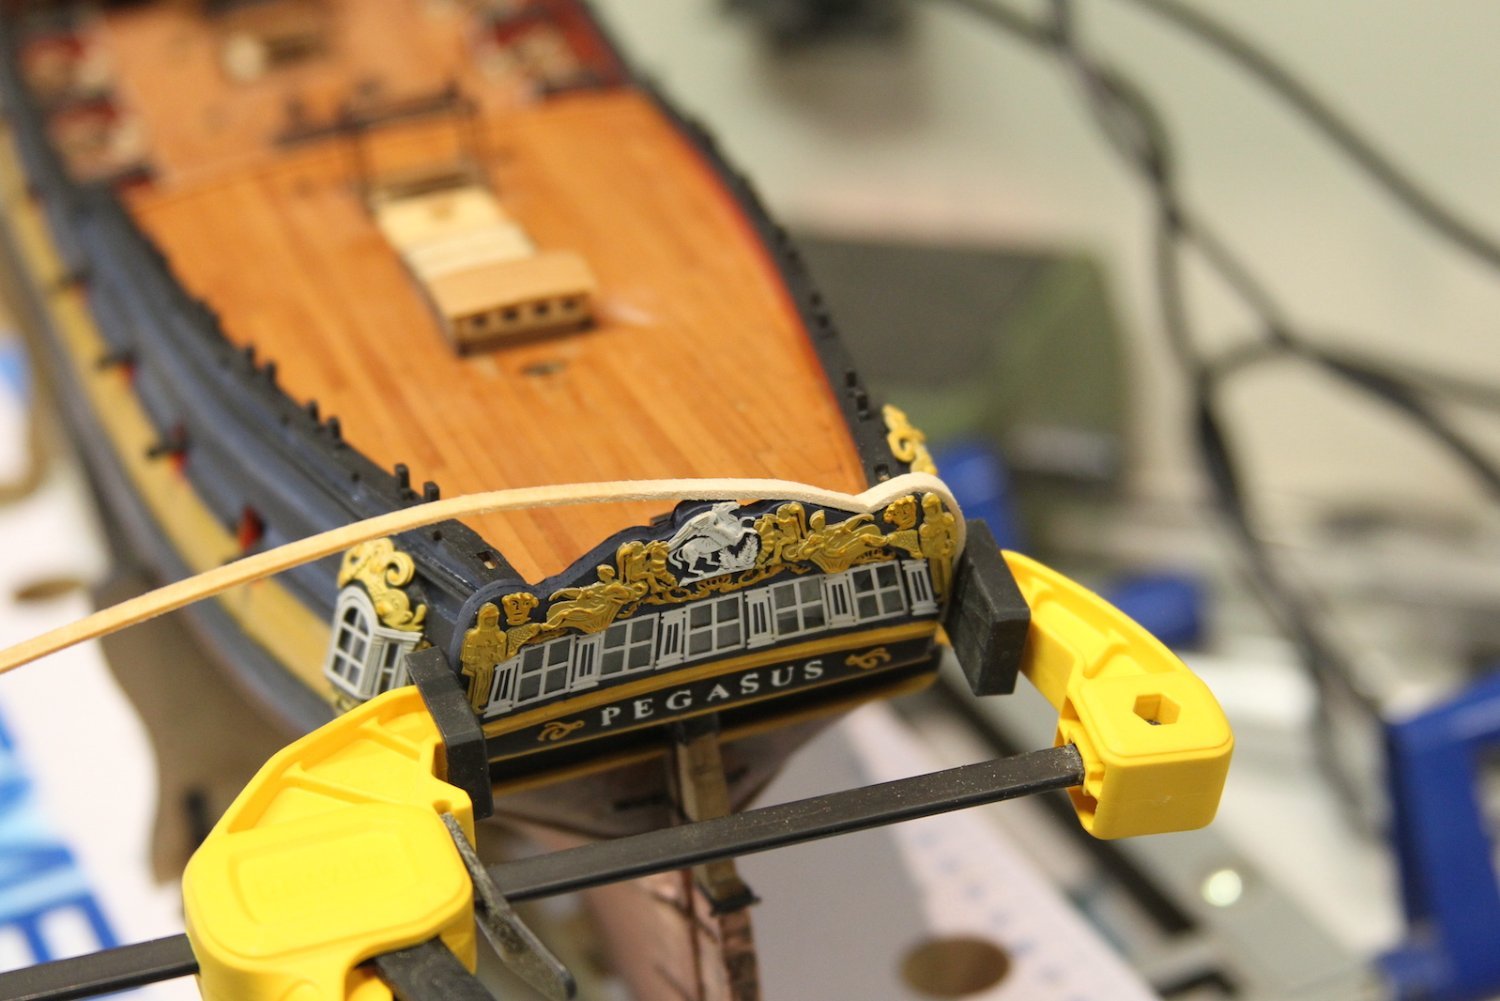
Next step was to create a cap rail along the transom so it would match the rest of the ship. I'd seen builds with and without this rail, and although I knew it'd be a bit of a challenge to get right I wanted to give it a shot. I started by thinning out a 5 x 2 mm strip of basswood and soaking it, then using a hair dryer to bend and mold it along the curves. I used the gel gorilla glue CA to glue it down as I went along.

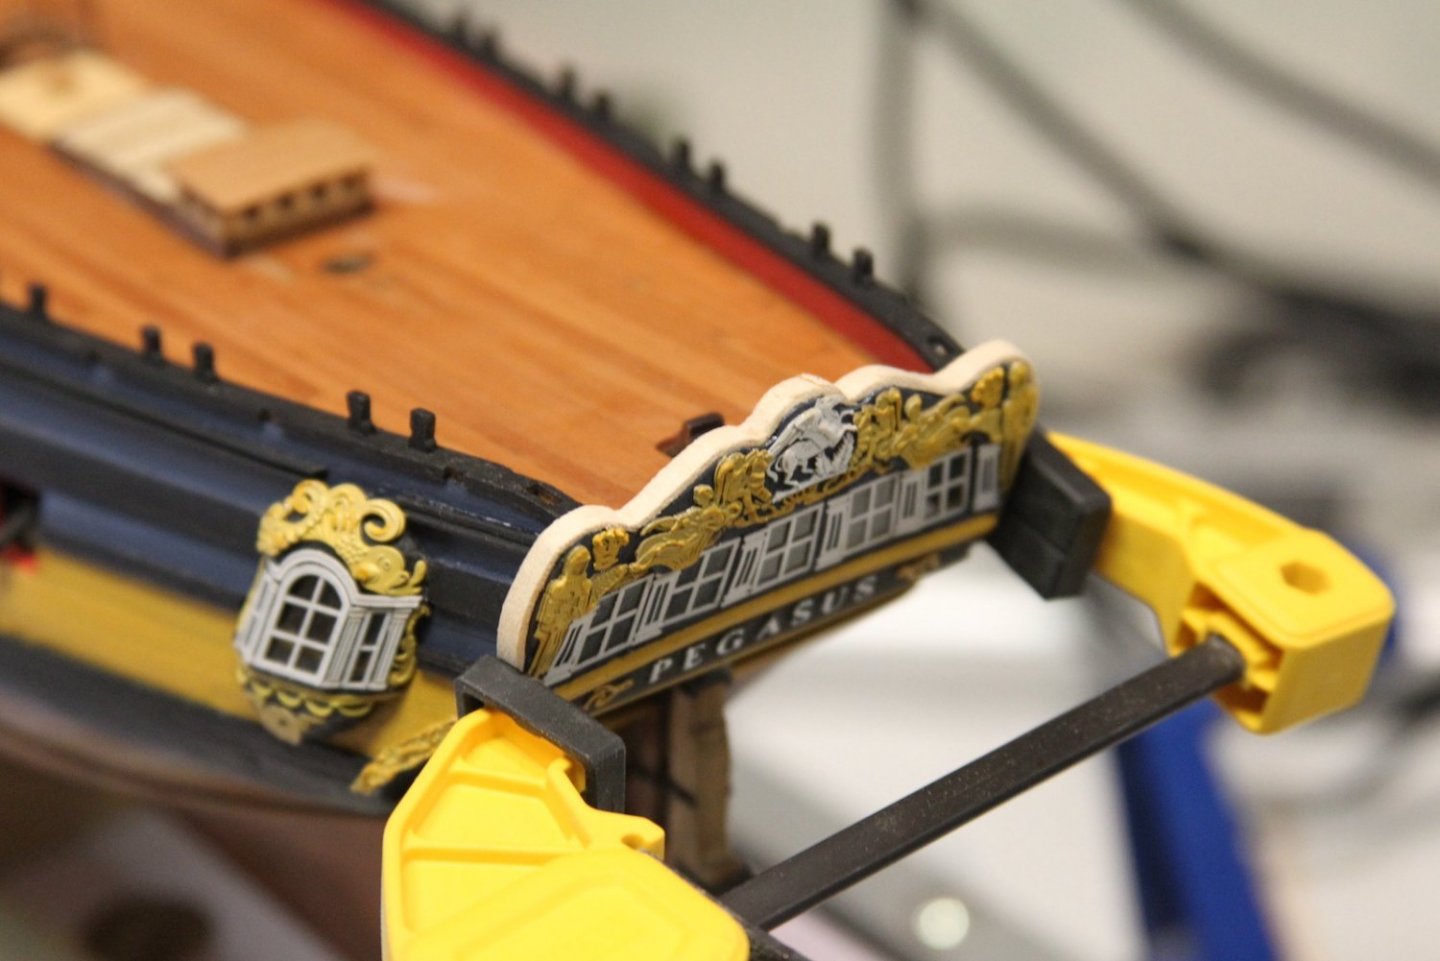
It was a pretty slow delicate process not to dry it too quickly and snap the wood, but it was worth it in the end. After some trimming of the edges toward the bottom where it meets the wales, a little bit of filler in some gaps, and sanding it was ready to paint. After it's all said and done, I am pretty pleased with the overall results.
- yvesvidal, ccoyle, BLACK VIKING and 12 others
-
15
-
7 hours ago, datadiscovery said:
What kind of wood are the decks planked with and how did you treat it?
Hey Pete - thanks for the nice comment and asking about the wood. I have to go back and make sure it's in there somewhere. But the decks are planked with Swiss Pear. Long story short - my project just prior to this one was finishing the USF Confederacy - a build started by a wonderful previous member @augie who passed away. Augie used Swiss Pear on the Confed, and I really just loved the way it looked, so I used the leftover for the Peg. I have treated it with a light layer of Tung oil - rub on with an applicator then immediately wiped clean from excess. I'm selective with Tung oil and WOP, but I like what the Tung does with the Swiss Pear as well as the Walnut that often comes with the kits.
Btw - I grew in Lebanon, Oregon - not too terribly far from your and @mtaylor's neck of the woods.
-
Nice looking work BE, especially the binding strakes. As always, I appreciate the ways in which you bring extra accuracy to kit projects. I don't ever see myself having either the necessary equipment or skillset to do a high level scratch project, so being able to 'up-sell' kits will likely be my preferred methodology. You give great kit enhancement tips.
- Blue Ensign and mtaylor
-
1
-
1
-
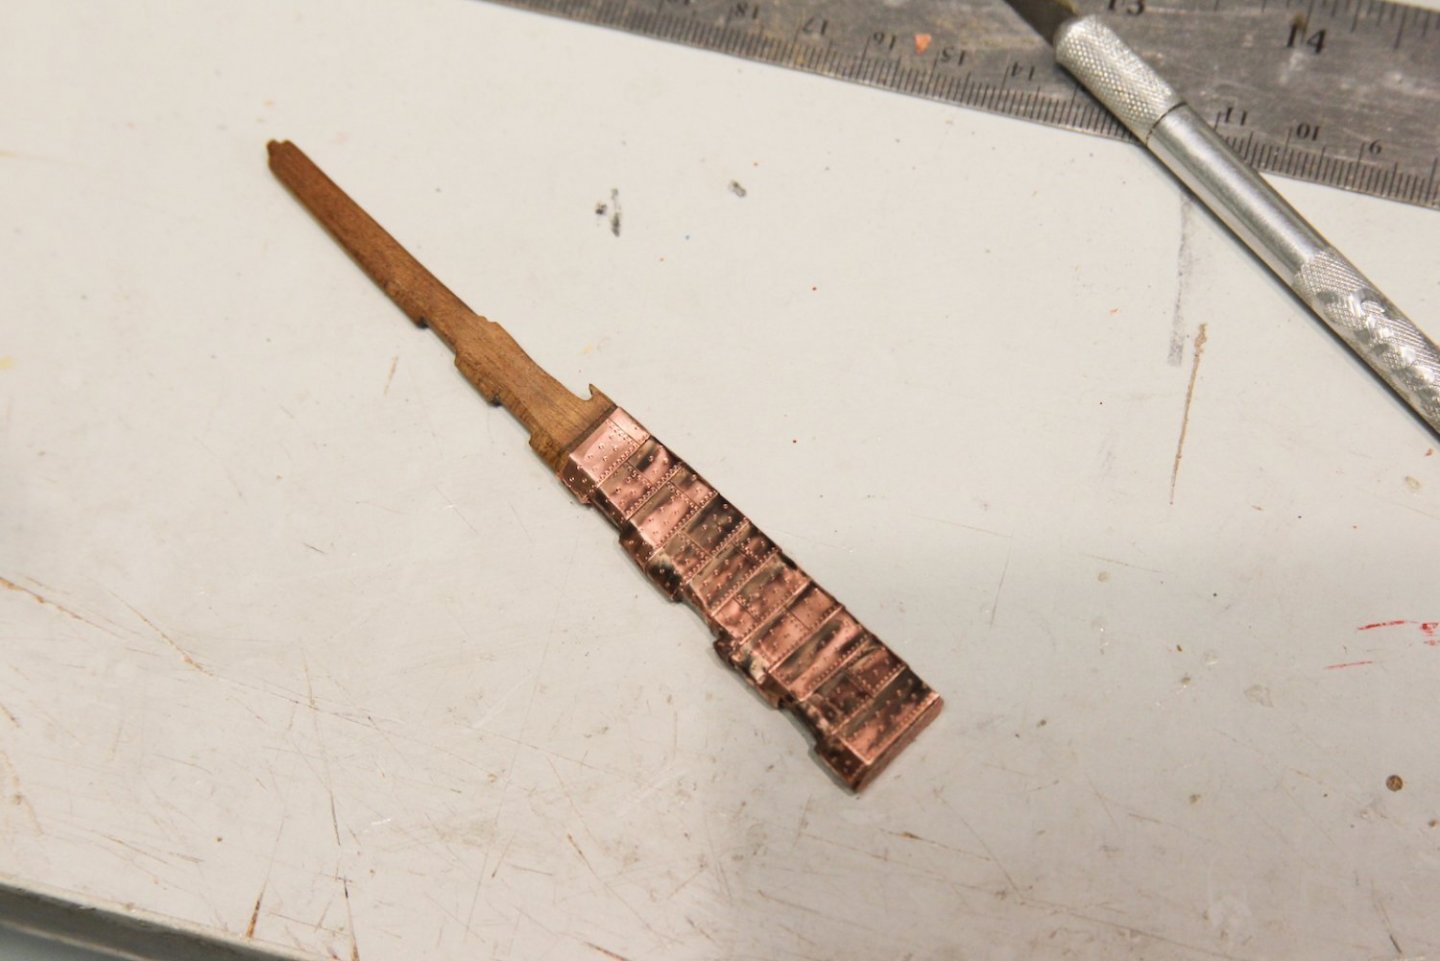
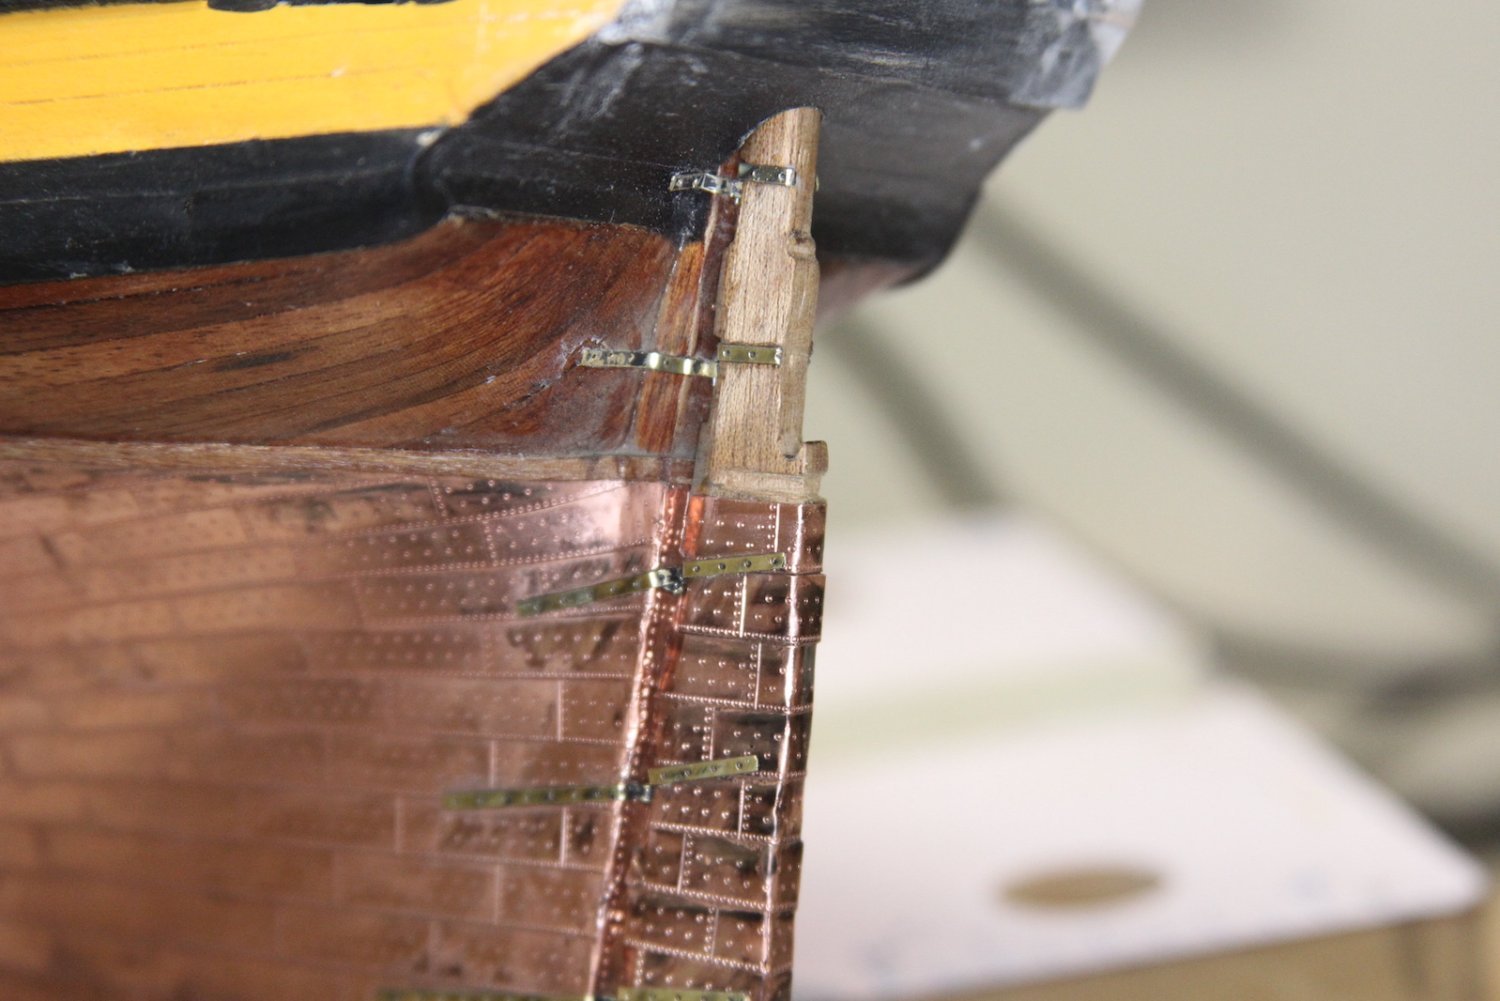
I also did some work on the rudder over the holidays. One of my faults as a builder is that I'm a bit erratic. I keep pretty good notes because of course skipping around means one has a tendency to miss things along the way. The rudder's up next so I can finish off the wheel, rudder housing and the rest of the deck fittings.
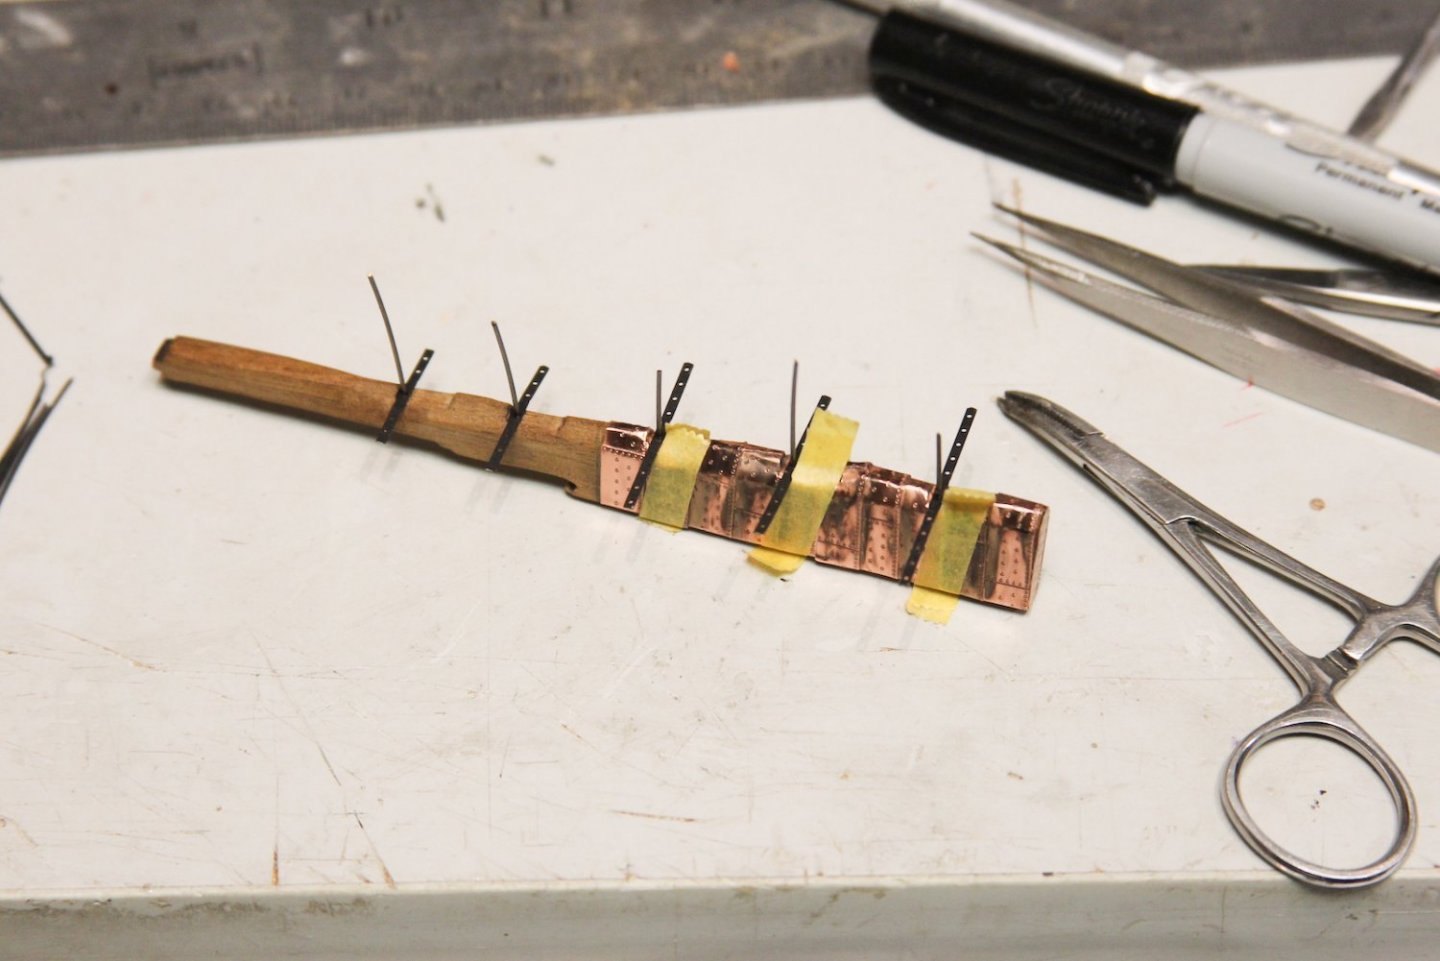
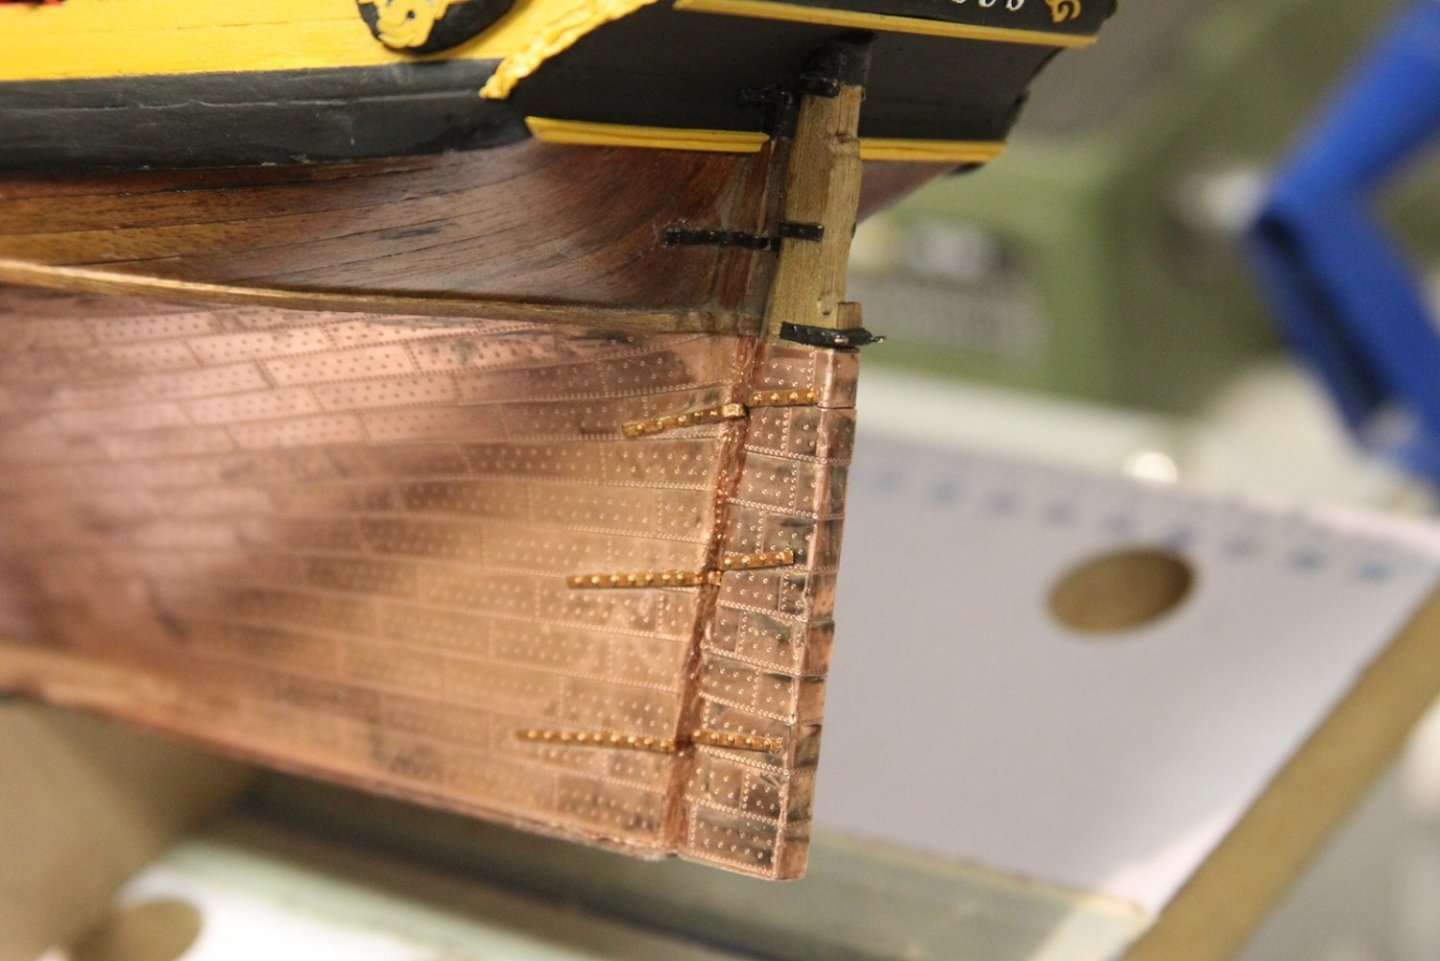
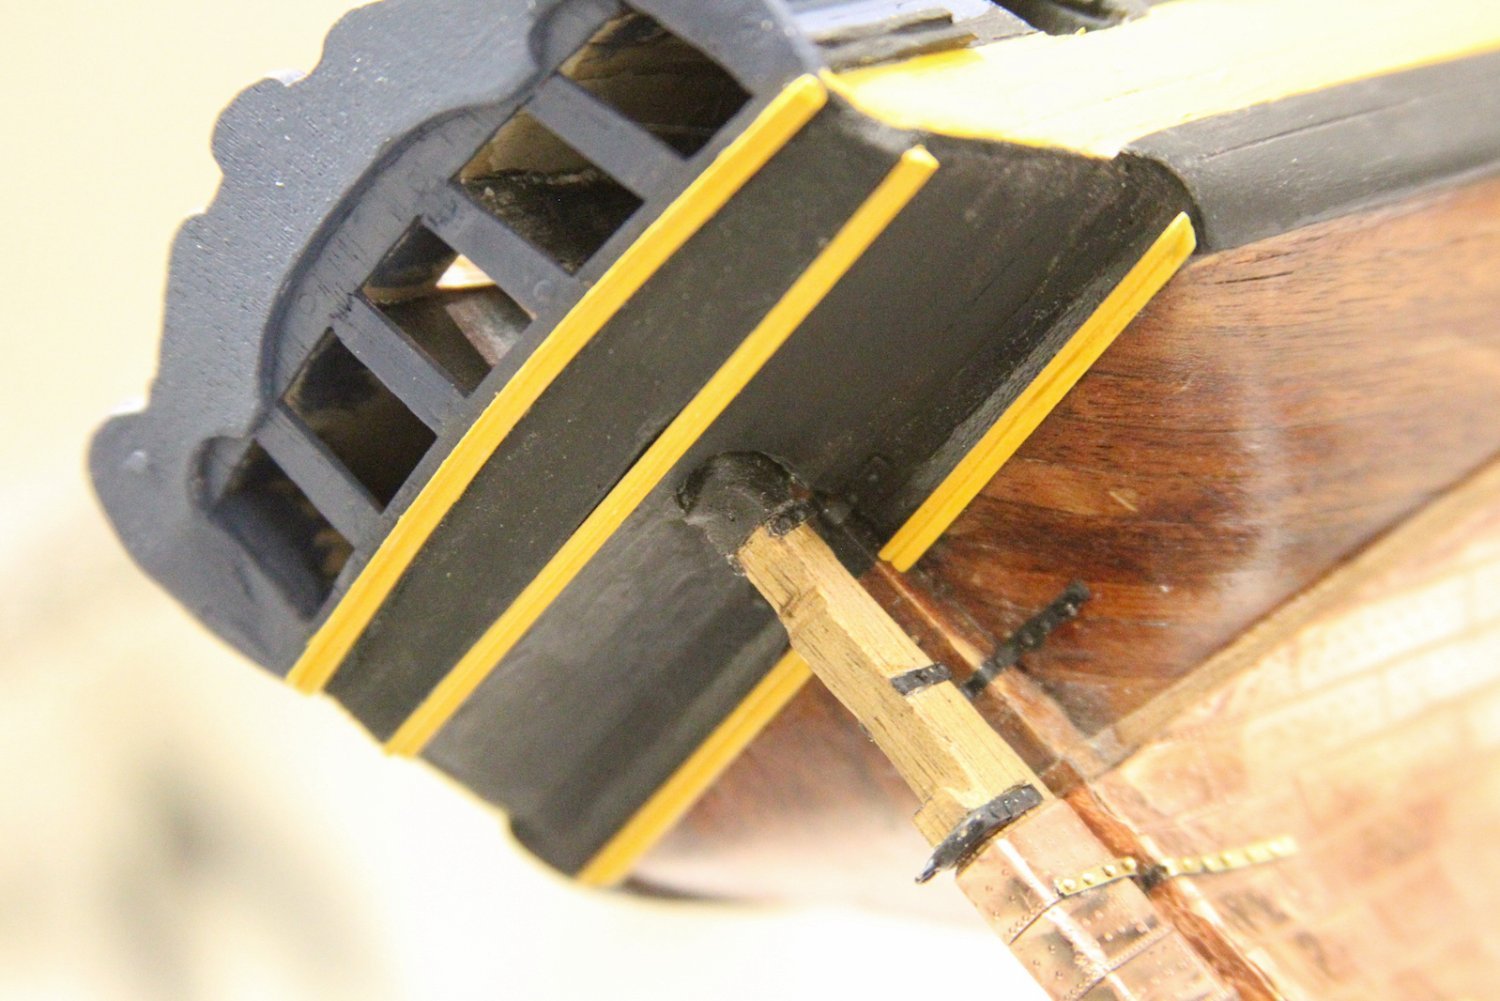
Anyway - on to the rudder. I tapered the insides and then plated the copper. It was a bit trickier than I anticipated, but I stuck with my desire to stagger the plates nonetheless. Then mounted the pintles with a center pin that would bend 90 degrees and serve as the mount to the gudgeons using tape to maintain an even offset and align the pintles and gudgeons along the rudder and hull.

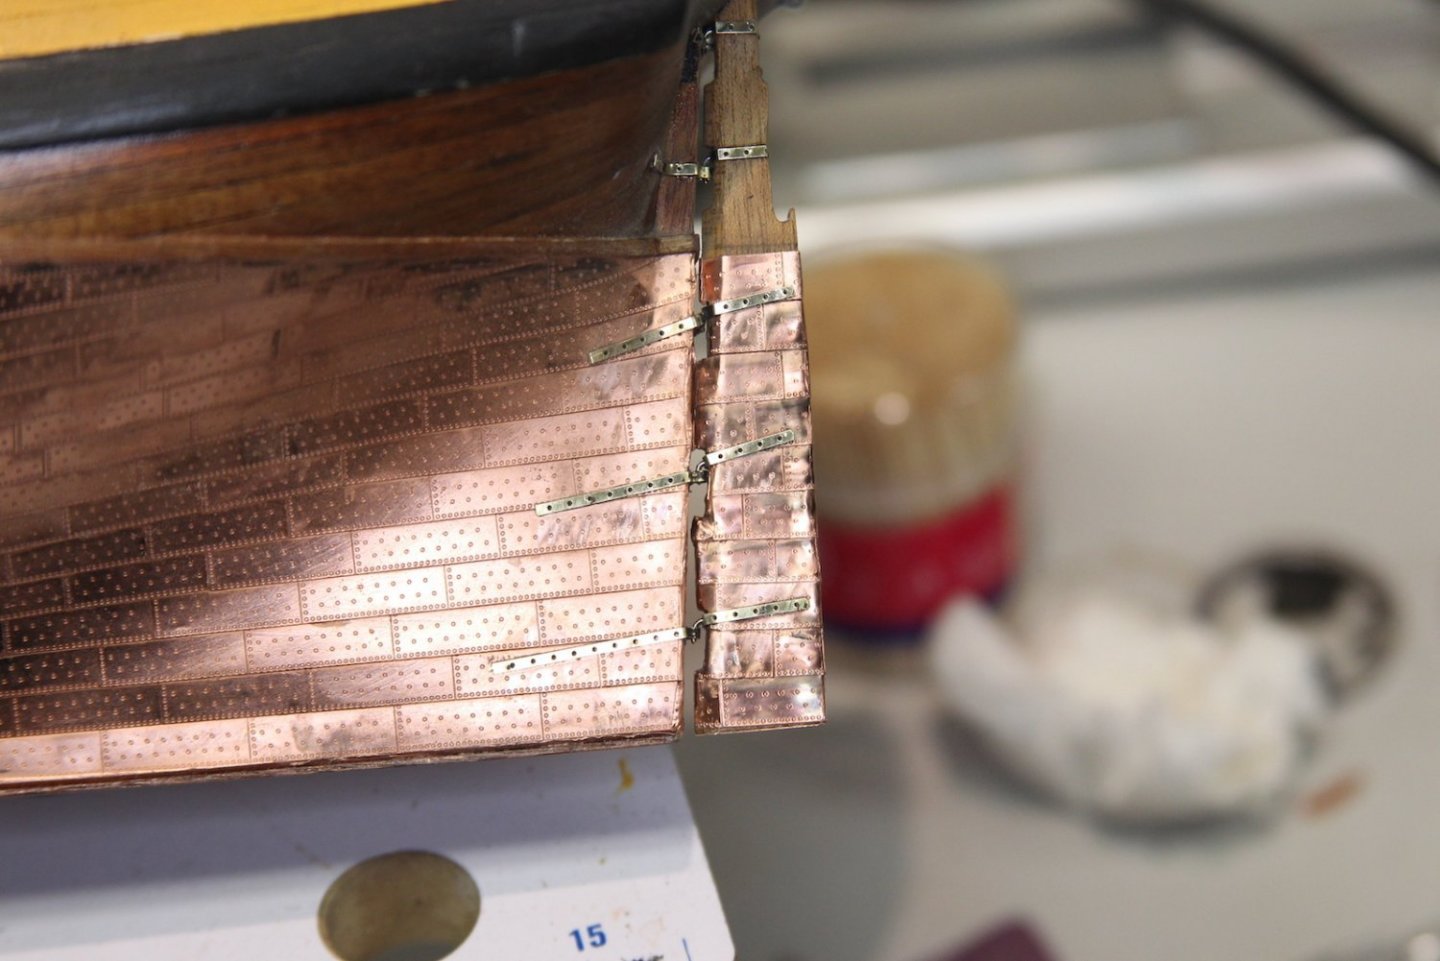
I created the spectacle plate out of a square piece of brass bent at a couple 90 degree angles then sanded thin to fit a complimentary slot cut out of the rudder. I then soldered a couple of brass rings to the corners. Everything is "bolted" with pins from Micro-mark - they're the .020 inch miniature nails. I like them for these applications because they have a round head that looks great for bolts.

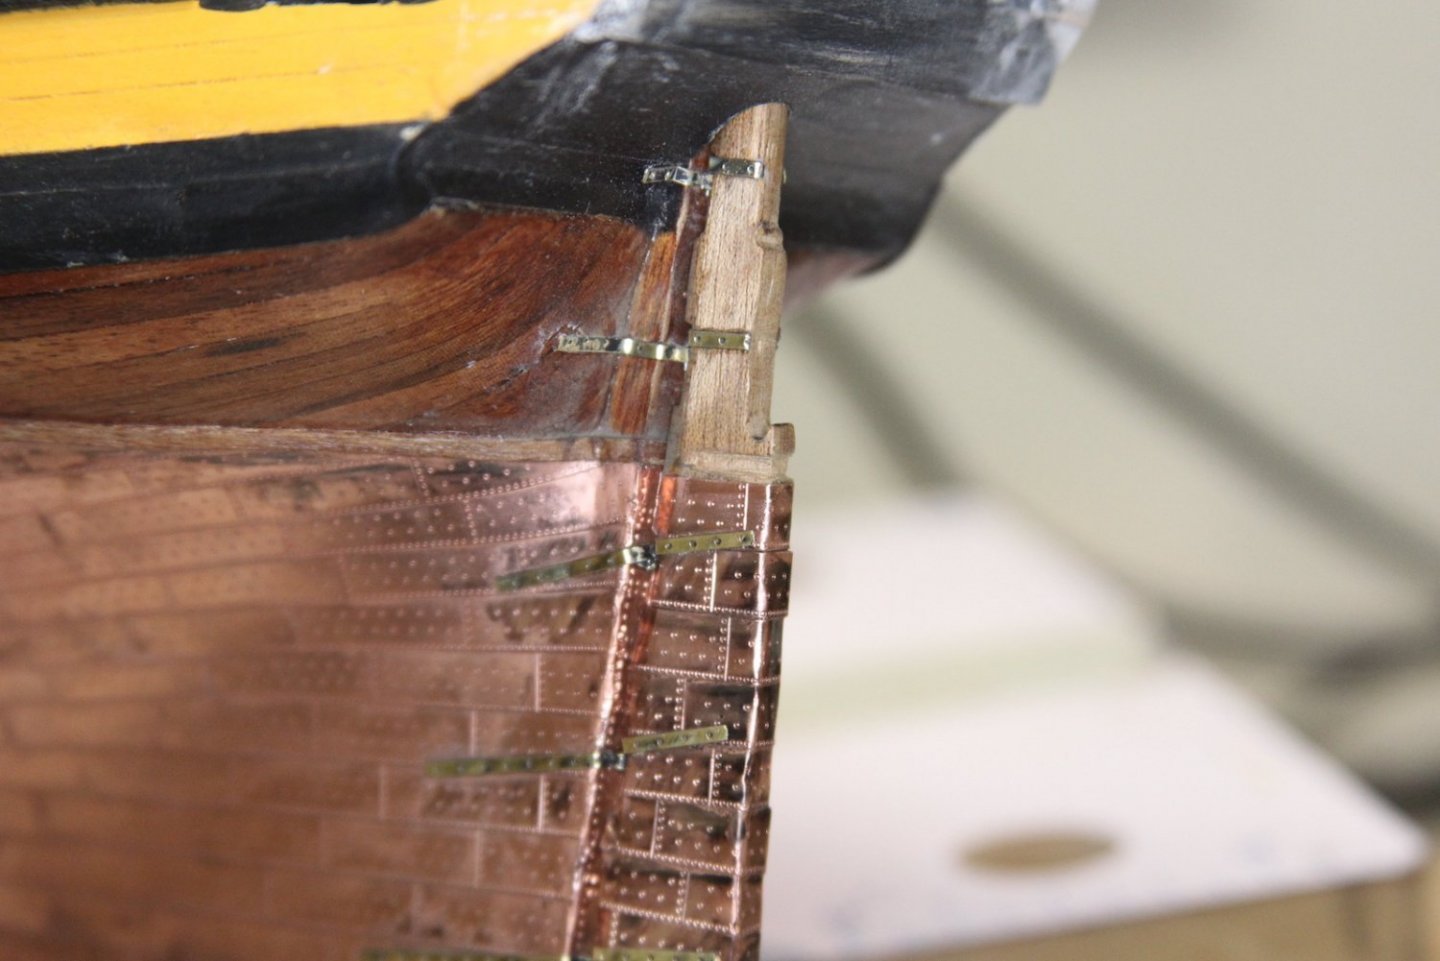
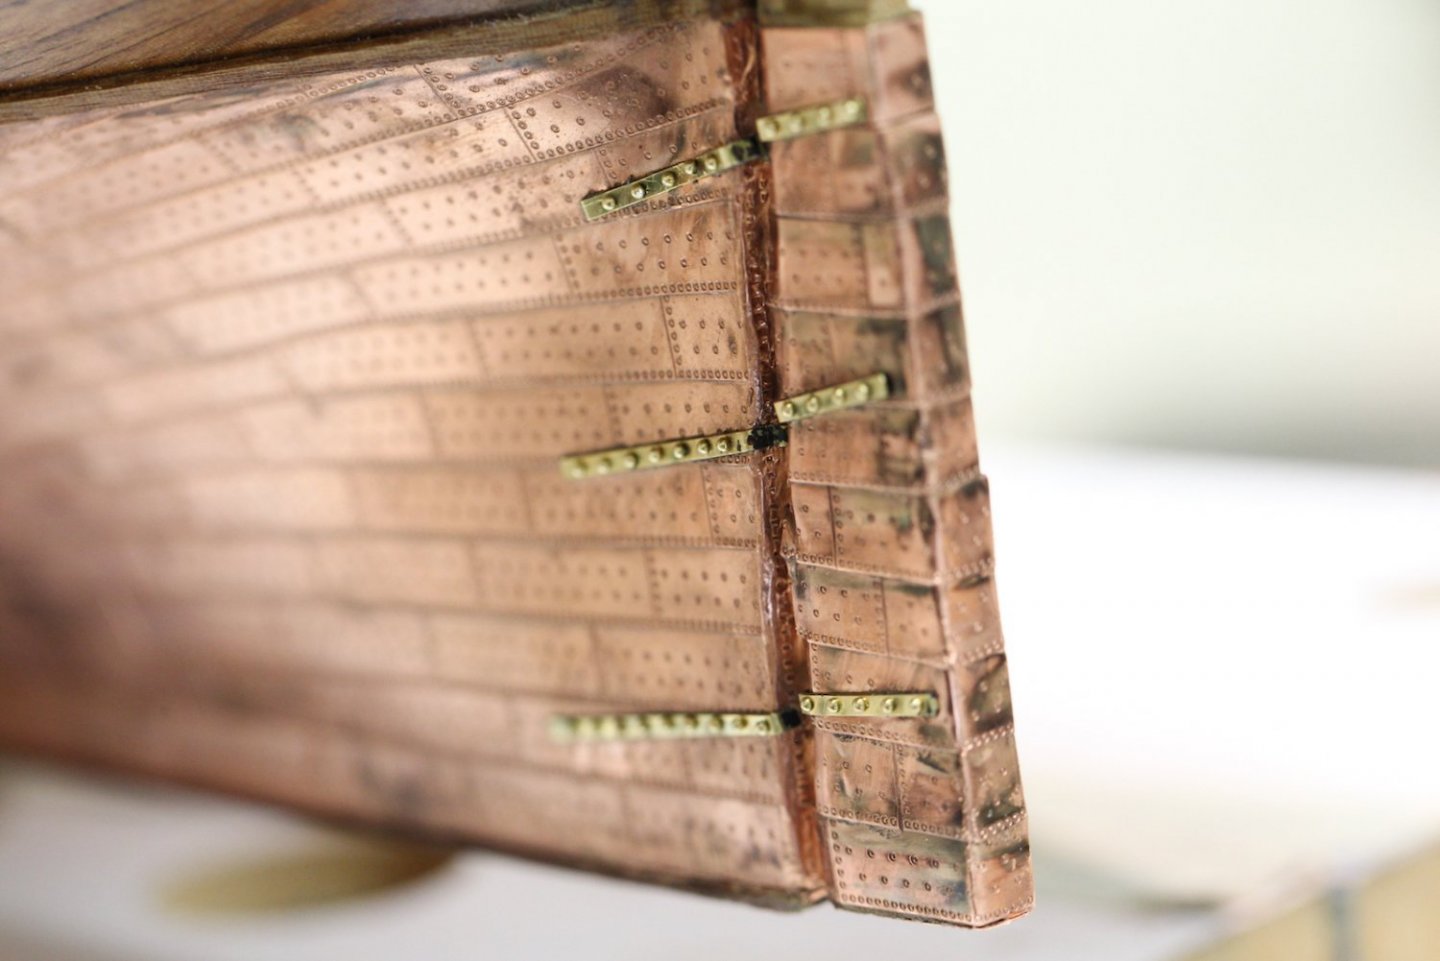
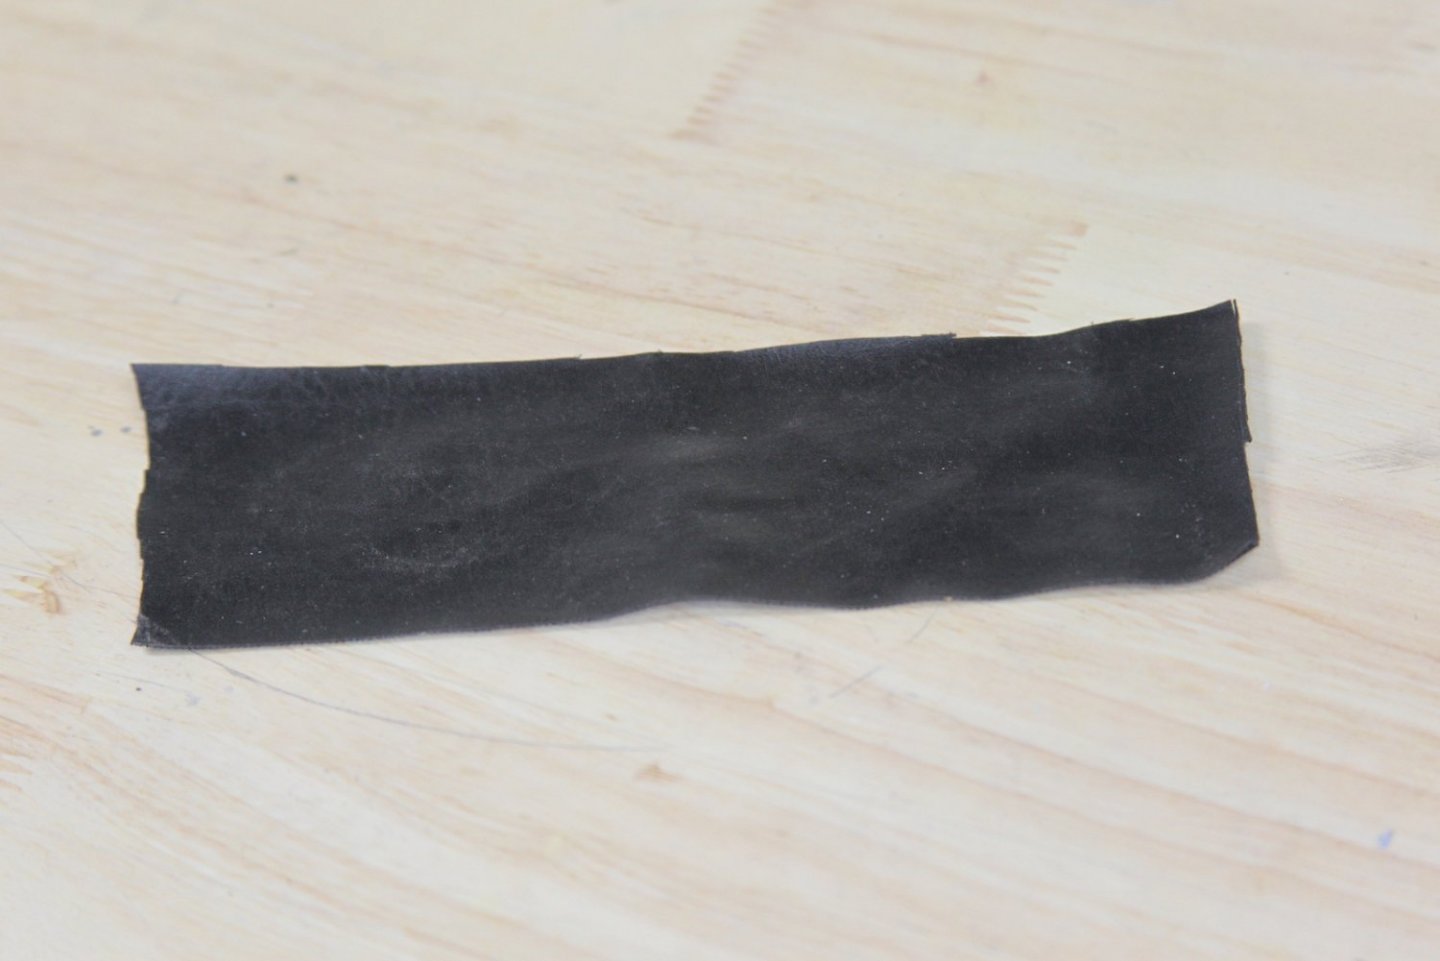
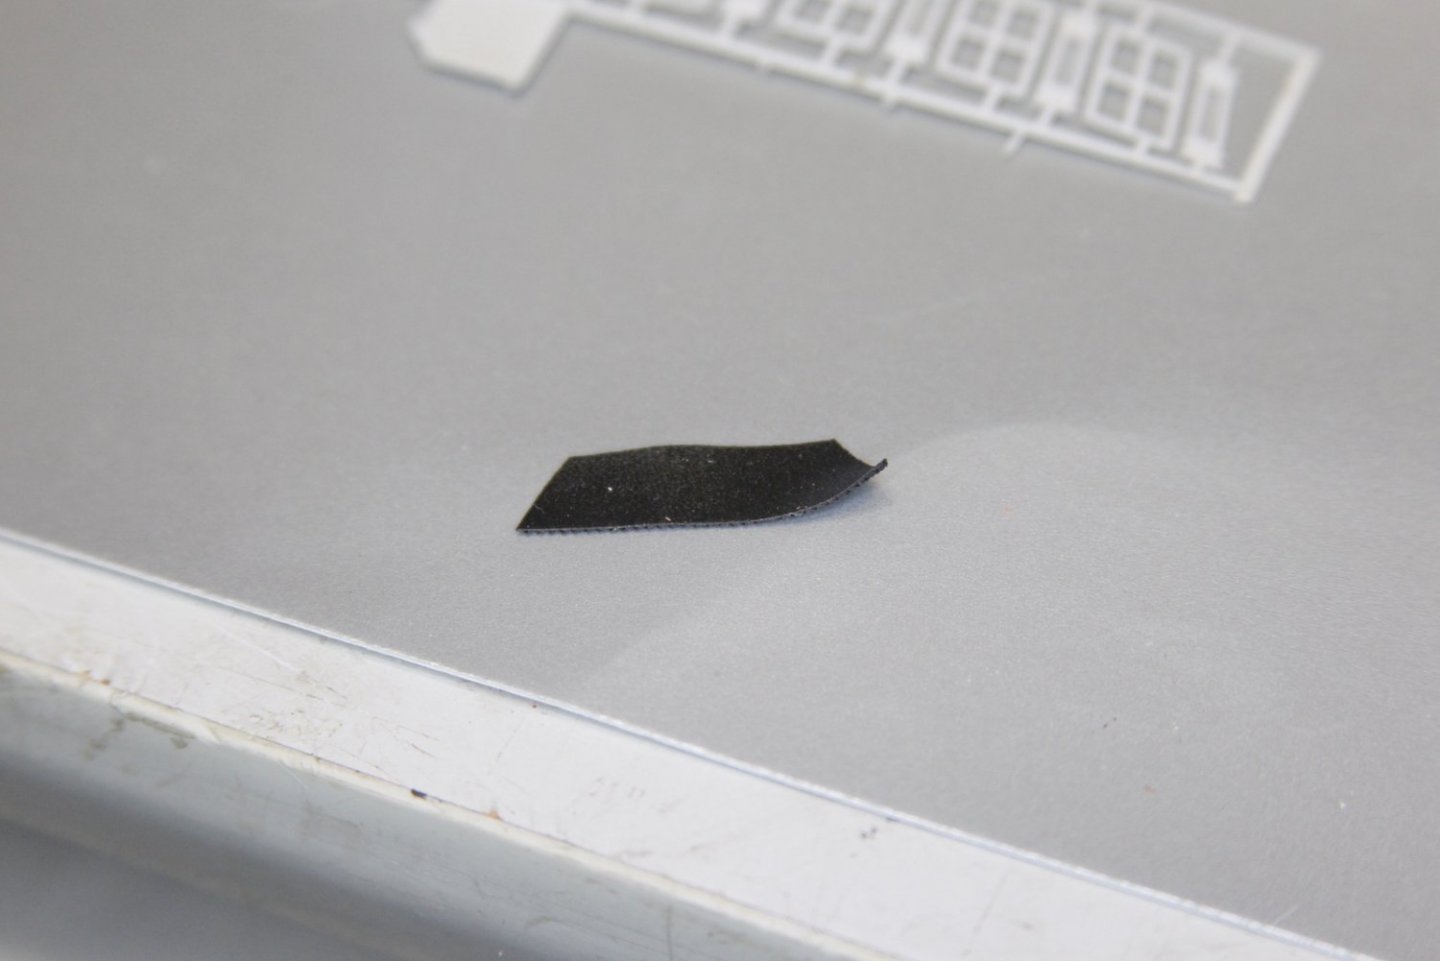
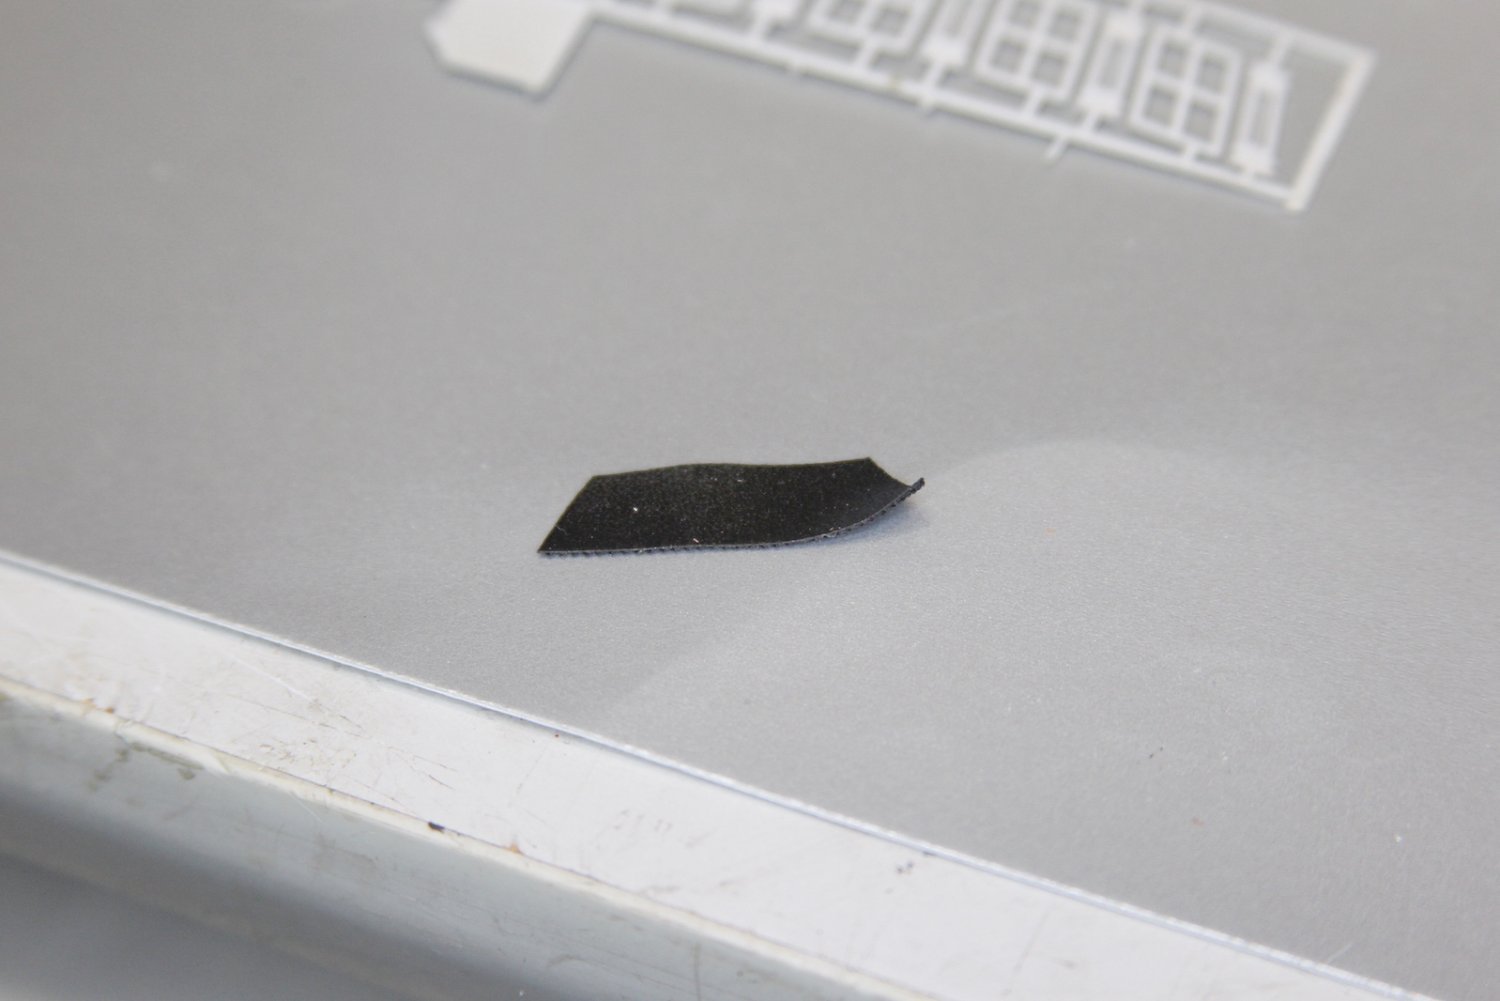
The rudder coat is made from an old piece of simulated 'leather' that I had left over from my Artesania Latina stagecoach kit. I think it looks pretty close to the tarred canvas that was used. I glued one side at a time then stuffed it up into the rudder hole. Finally, I painted the pintles and gudgeons copper from "Army Painter" copper paint. These paints are typically used for medieval action figures, etc - so do a great job of simulating metal. I appreciate that the hinge coating is just a slightly different color of copper as the plating.


HMS Pegasus 1776 by Moonbug - Amati Models - 1:64
in - Kit build logs for subjects built from 1751 - 1800
Posted · Edited by Moonbug
Thanks for the comment and encouragement Dave!
Thanks Grant, BE, & Andrew. I tried the drop of PVA initially and had a hard time getting it just the way I wanted. I have gotten it to work pretty well in the past - but this was just a bugger!
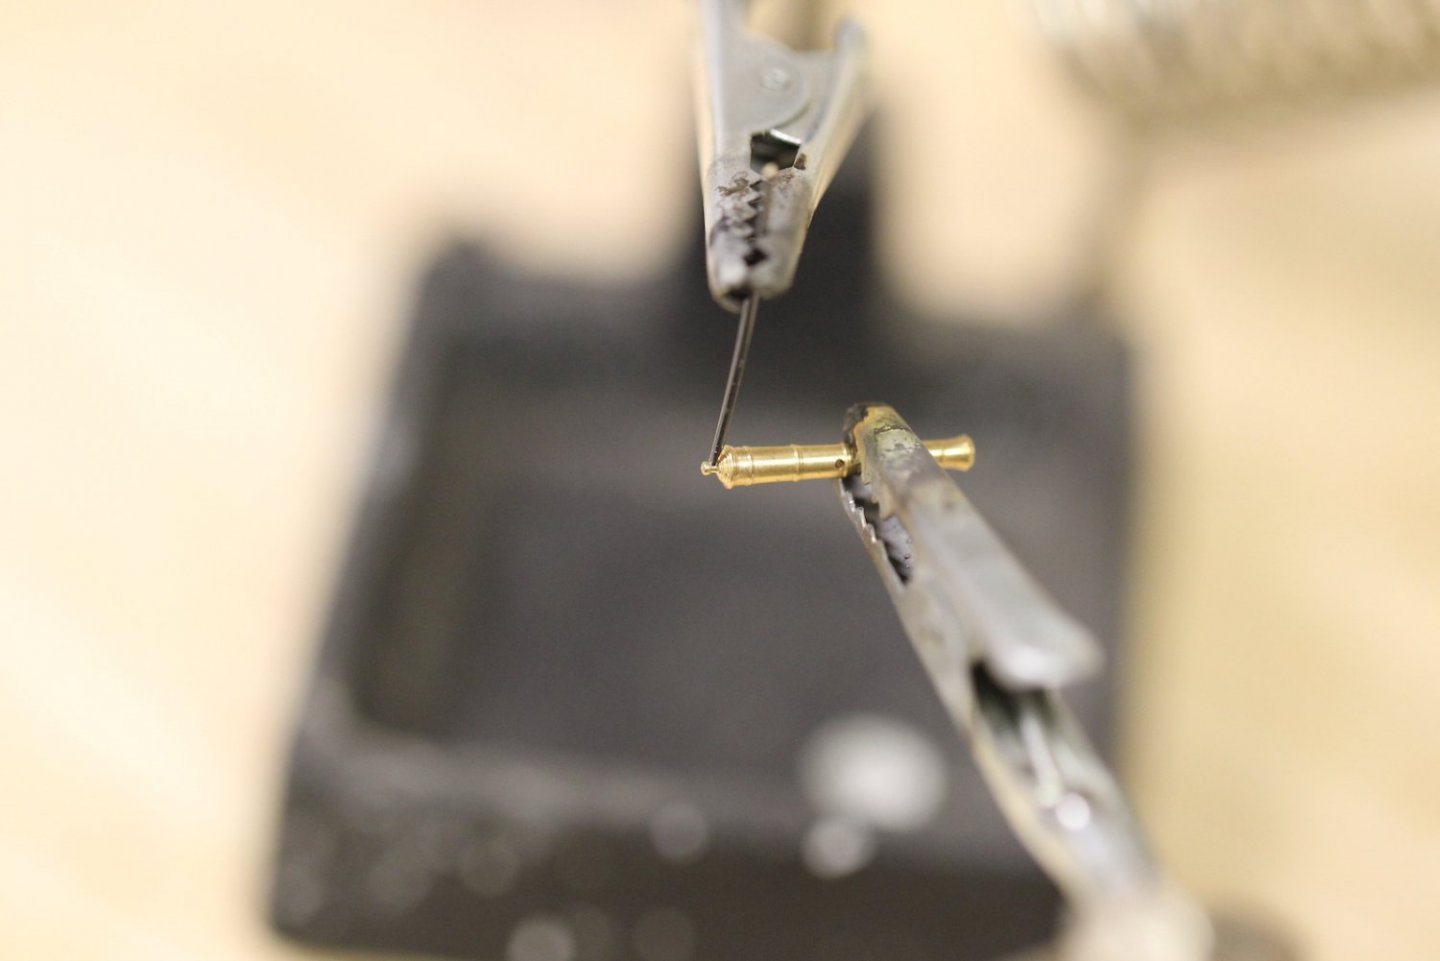
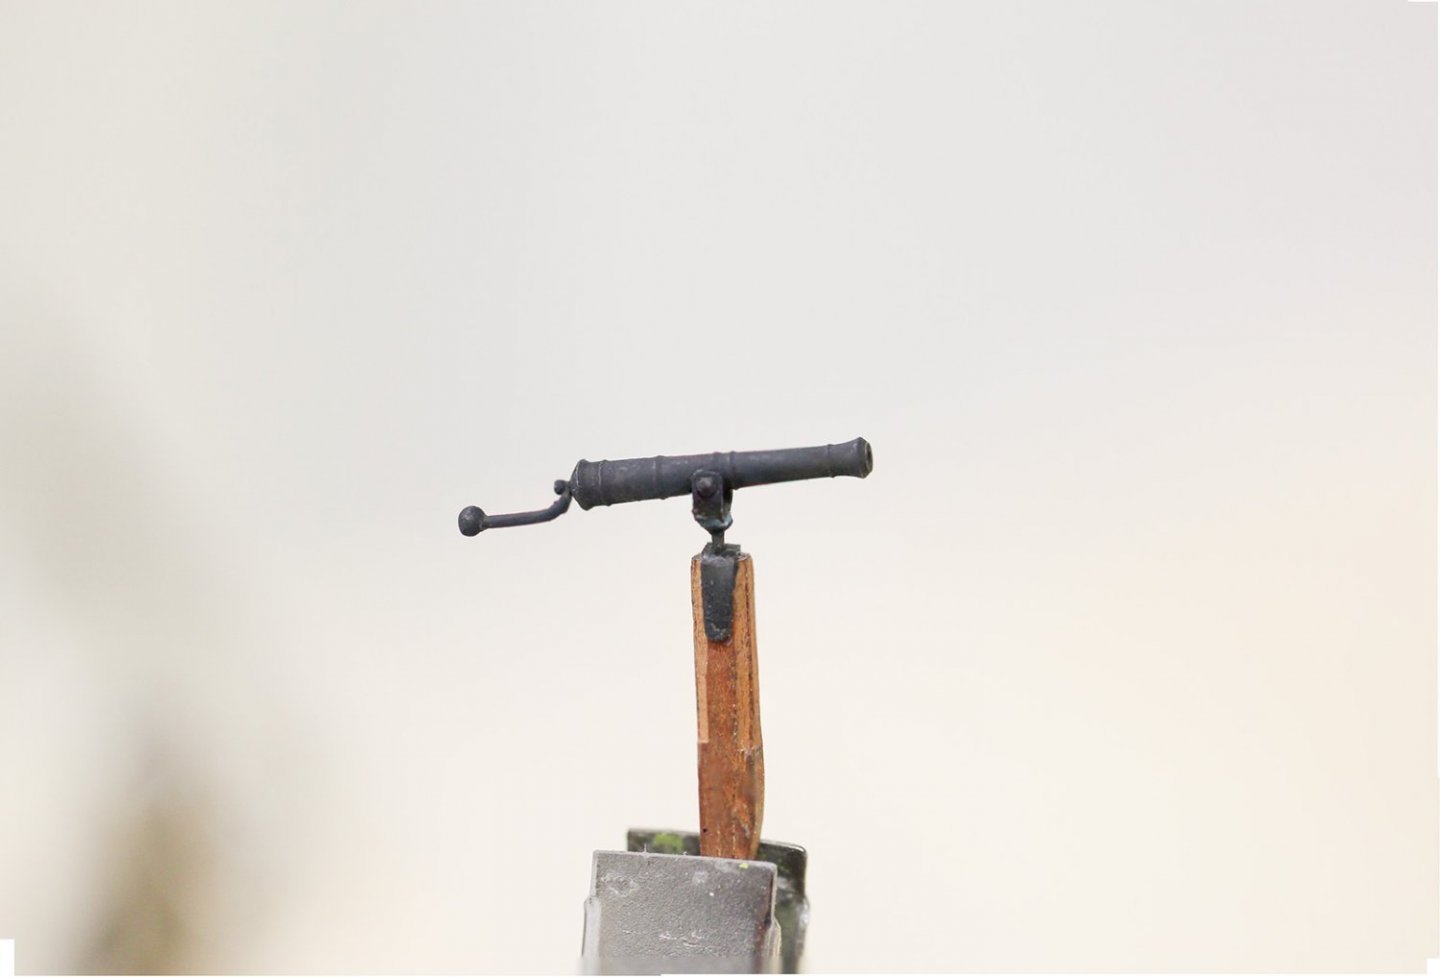
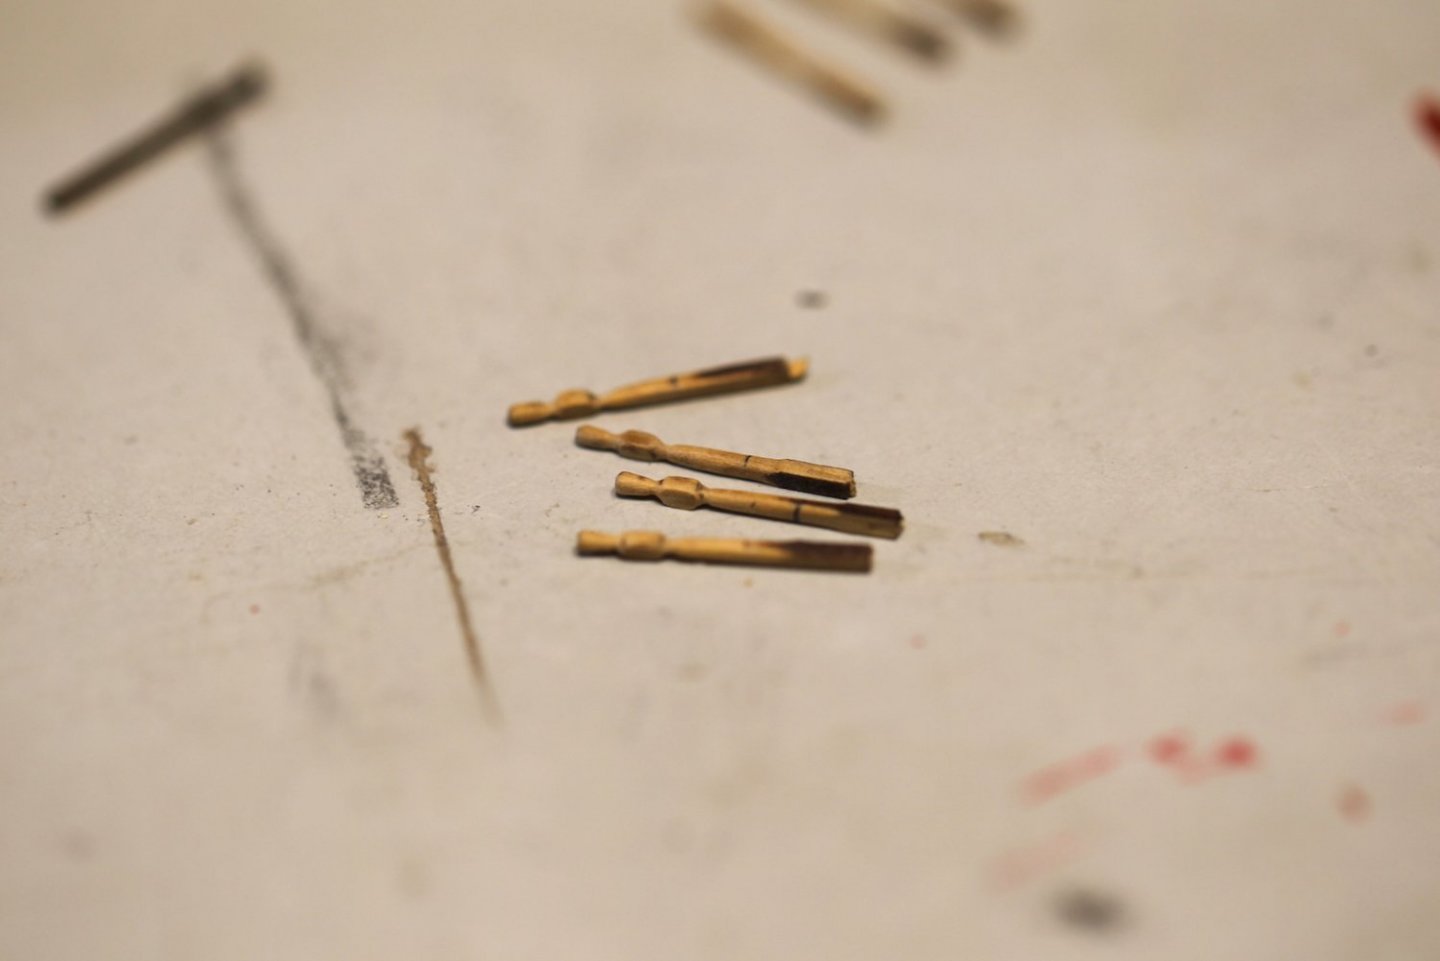
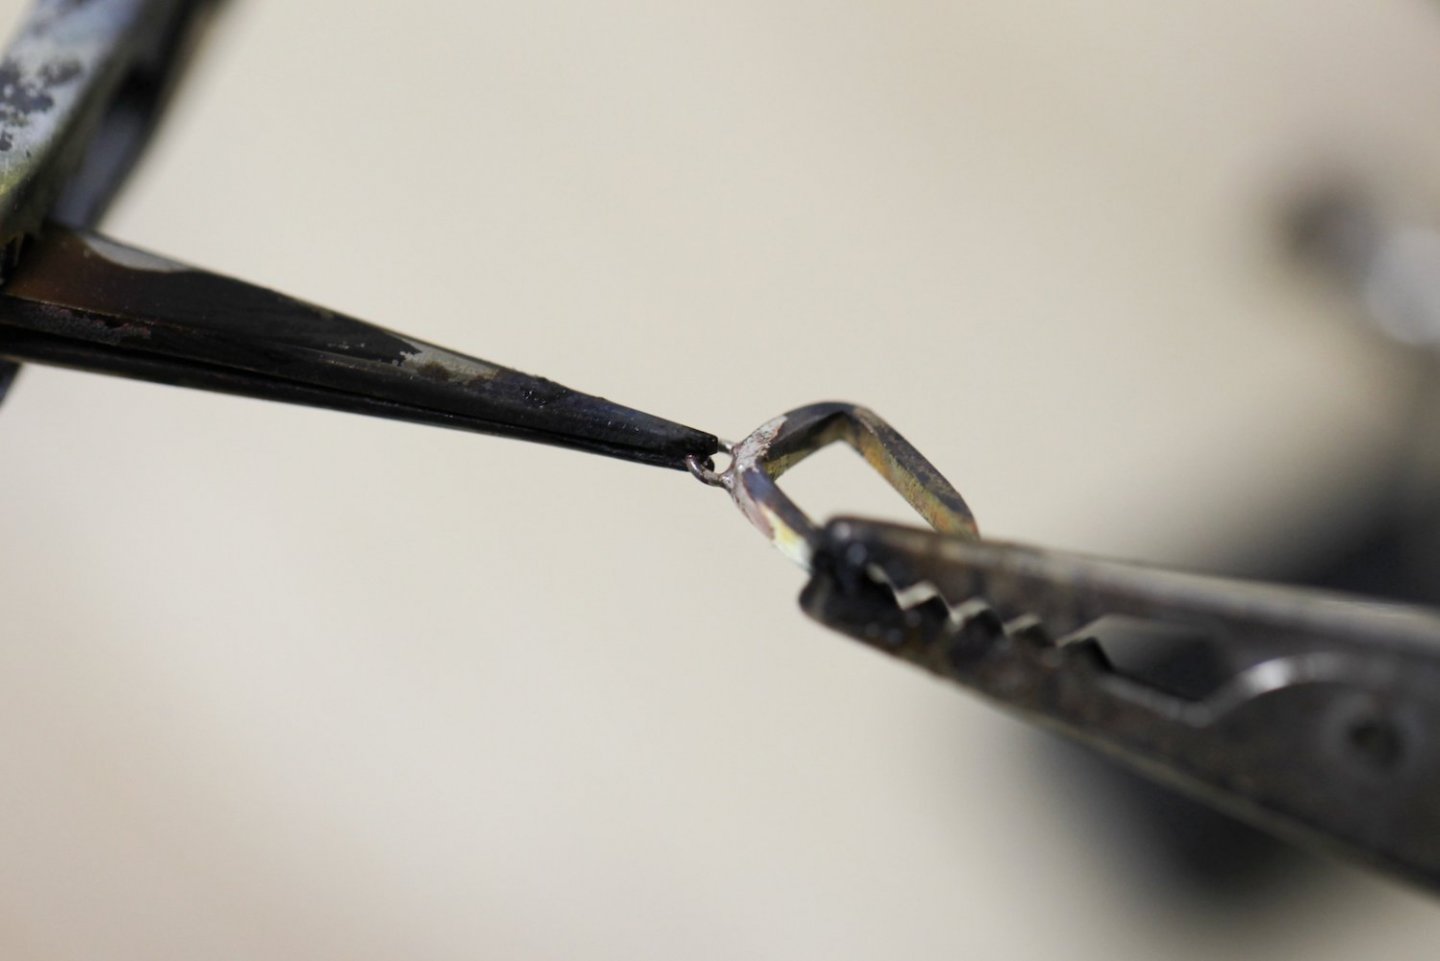
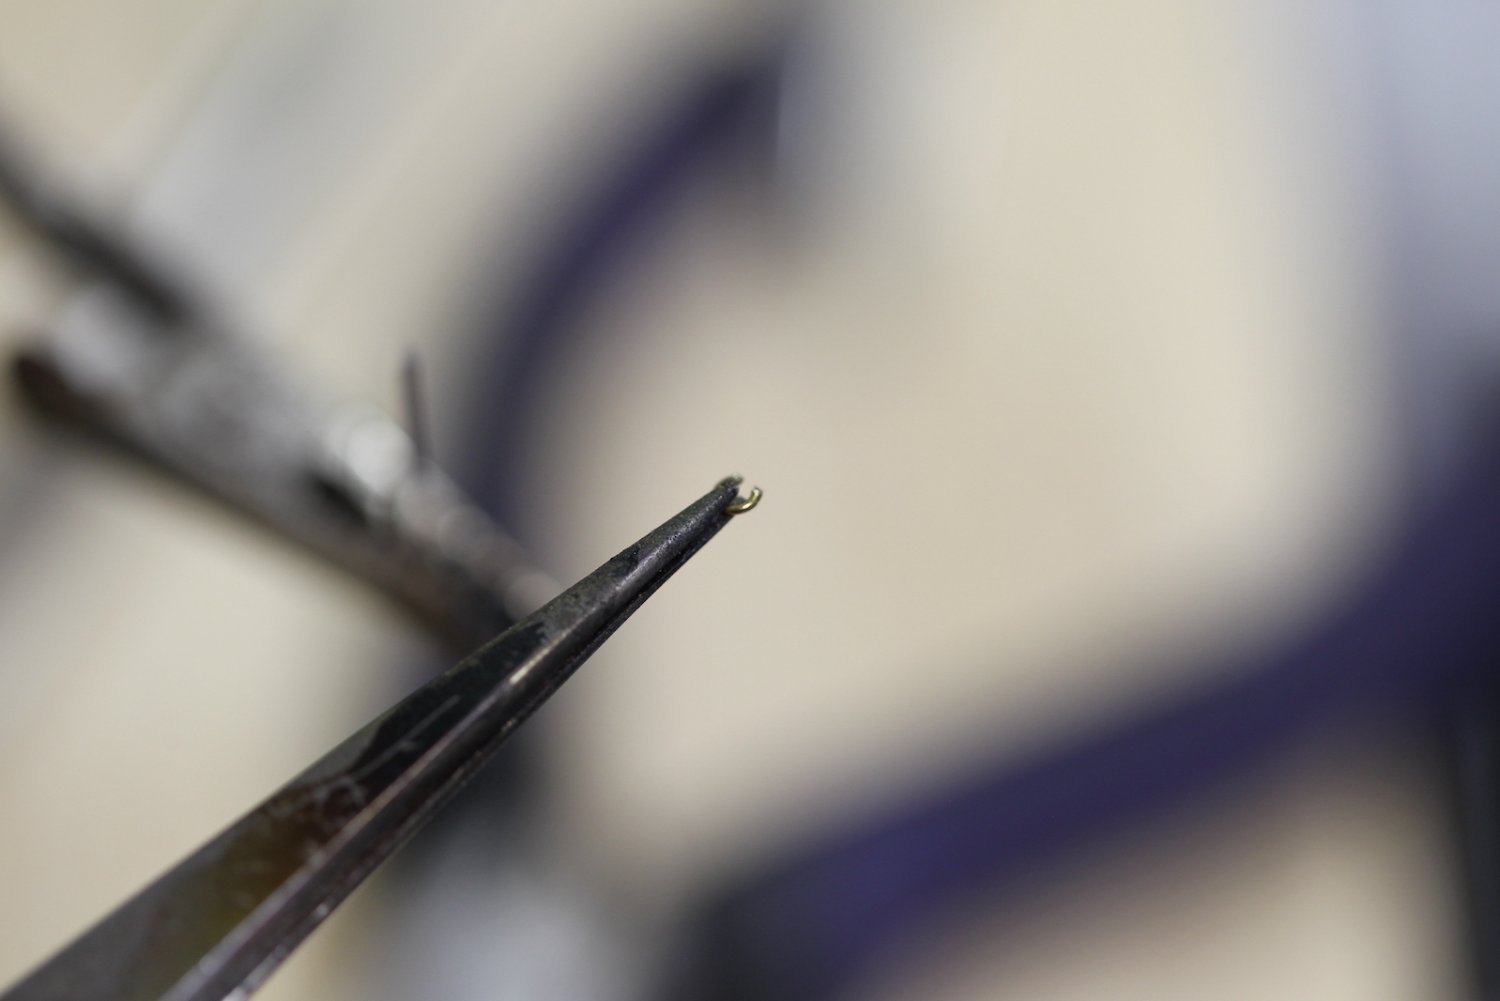
But then @Blue Ensign gave me a pretty great idea by mentioning the rudders - for my rudder brace bolts I used the ever handy .020" mico-mark tiny nails. So why not take another run at the guns using the longer version of those? Here is the result - I think I finally got close to what I wanted - as the handles themselves are more to scale with the guns.
It was a real trick soldering them however - as the melting point of the little brass nails was almost exactly that of my softest silver solder. So often the nail would melt a little along with the solder and had to be fiddled with. Then I shaped the handle after it was cooled. About 1/3 of the time, shaping the handle also meant snapping it off and starting over.