Landlubber Mike
-
Posts
4,543 -
Joined
-
Last visited
Content Type
Profiles
Forums
Gallery
Events
Everything posted by Landlubber Mike
-
 Look to buy the mill and accessories on eBay - I saved quite a bit of money doing so. The Sherline products are really well made that used items still hold up very well generally.
 -
I started reading it, and am about a third of the way through. It's a very interesting book, I'd highly recommend it. It goes into a lot of aspects of ship dioramas, including sail construction and shape, making realistic looking sea, etc. Not sure that I'll ever do a diorama, but it's given me some things to think about when it comes to building my models.
-
I've used their dyes and stains - very nice product. You can look through my logs for examples. Not sure that I've used their products on basswood, but have used it on a variety of woods.
-
I agree with BE - the Syren guns look much better. Amati does such a nice job with the kit, it's a shame that they use out of scale guns. I replaced my cannons with ones from RB models which are pretty close to the Syren ones in size and shape.
-
Really nice work Blighty. I just came back from Disneyworld, and they had a riverboat in the main park. Taking the ride and walking around made me appreciate these boats. Lots of really cool details to model!
- 296 replies
-
- 3
-

-
- chaperon
- model shipways
- (and 1 more)
-
Nice work Paul, and welcome to the Swan Class brotherhood The Pegasus is a really wonderful kit as I'm sure you're finding. BE's log is the gold standard that we all follow. For my gunport patterns, I soaked and pinned only twice. I found that it reverted a lot after the first soaking. The key is just to relax the fibers and make sure that everything lines up properly. Spy has some really good notes and suggestions on placement - particularly regarding the jigsaw connection. I forget if it's forward or behind where the kit diagrams show it. Don't worry too because you can sand back the ply, and since the hull is double planked, you can use filler, etc. It's a pain, but not too bad in the end (the patterns do make things easier than had the kit required you to actually frame the bulwarks, which is what I'm going through on my Morgan). Just take your time and you'll be fine.
-
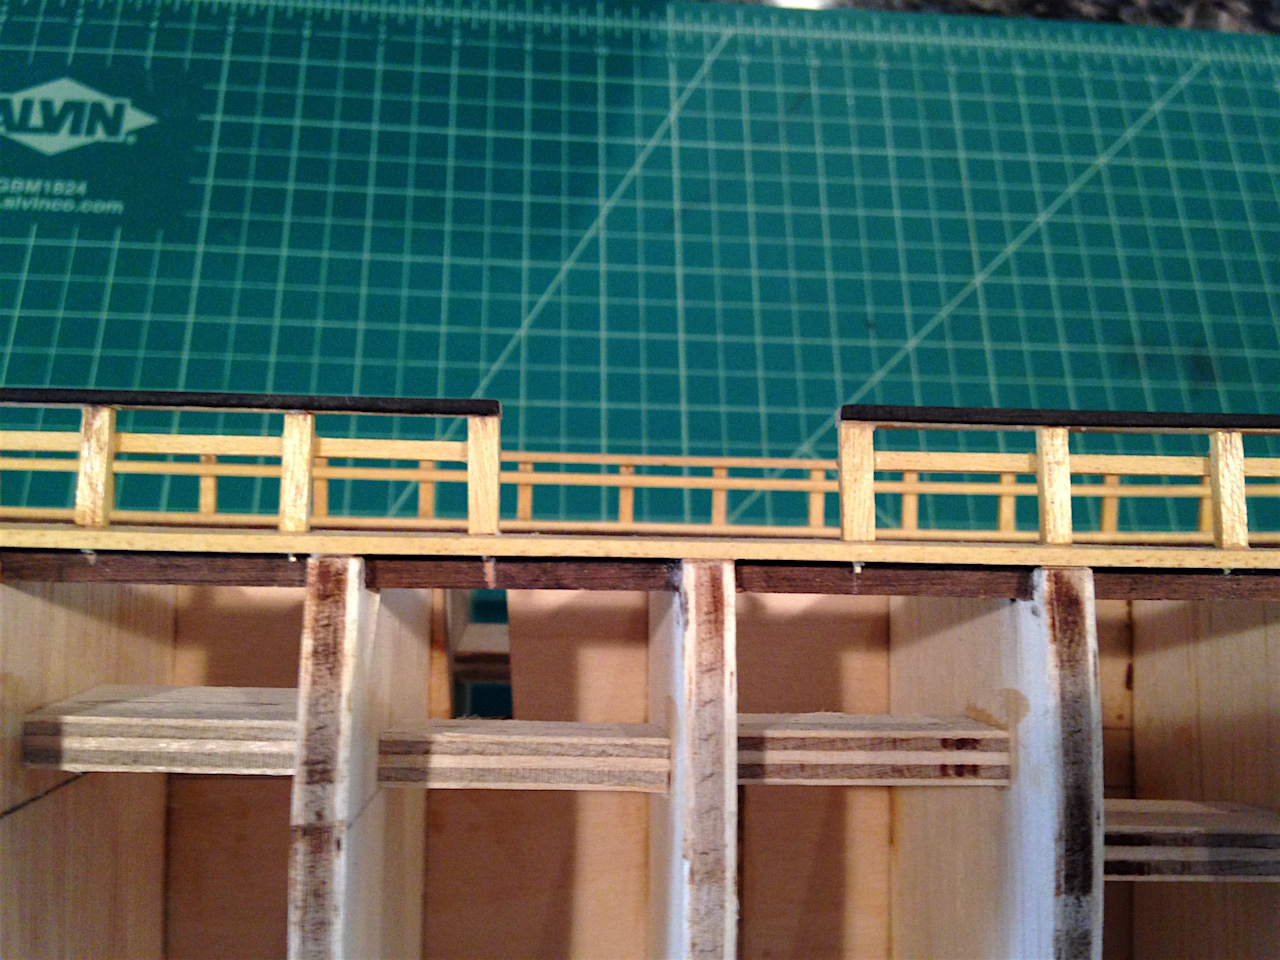
Martin, looks fantastic. Very nice job! It's funny, when we work at such scales and post pictures, the rails look pretty wide. You have to step back and remember that these rails are only 2mm in width or less, and that people won't be looking at these details with a magnifying glass six inches away Love the mounts by the way - she's looking very imposing now
- 467 replies
-
- 2
-
-
- fly
- victory models
- (and 1 more)
-
Hey Thistle, you're not alone as I abandoned my Unicorn for similar reasons. You can certainly make a nice model from the kit, but once you start down the path of trying for historical accuracy, the kit will frustrate you to no end. Seems easier to build her from scratch than deal with the hull and other issues. Have you decided on a next build yet?
-
Planking Clamp Use
Landlubber Mike replied to Worldway's topic in Modeling tools and Workshop Equipment
Personally, I don't use the Micromark screws to force the planks at all. I do a lot of soaking and pinning, and on my last build, spiling, to get the planks in a pre-formed positioned so that they don't have to be forced. I do think it's important to clamp the planks in position while they are glued to get a tight fit though, and this is where I think the Micromark screws as well as other screws, pins, etc., come in handy. -
Beautiful Joe. Something to add to the shopping list I had placed an order with Cornwall Model Boats a couple of years ago for some other stuff, and thought I would try out various wooden wheels from other manufacturers (the brass wheels are nice, but I'm not a fan of having to paint them). They all were too thick and out of scale. Chuck's looks like a great solution.
- 136 replies
-
- 1
-
-
- caldercraft
- Cruiser
- (and 2 more)
-
I agree ofencer - I think the Ancre monographs cover the real La Renommee. When I look at Chapman's Venus and some of the Swedish models of ships at that time, this model seems to be a Swedish one. If that's the case, it's pretty cool in that there aren't too many Swedish ship models out there.
-
Marc, thanks so much for looking in and the kind words. Even if the provenance of the kit is uncertain (my guess still is that it's a Swedish, and not a French, vessel and I'll probably build her as such), the subject is really beautiful and the Euromodel kit is absolutely fantastic from the detailed plans to the materials. The cast detail parts are very well done. Between being busy with work and working on items from my Morgan build, I haven't had a chance to spend much time on this kit. I'm still trying to come up with a plan on color scheme and the use of paints versus colored woods. In a way it would be nice to build a kit straight from the box since I'm already heavily kit bashing the Pegasus and Morgan. At the same time, I'm finding working with woods like ebony to not be so difficult, so perhaps a bit of kit bashing won't be that bad.
-
Looks really great Don. The Stefano is a really nice size - looks like a fantastic kit that will be a lot of fun to build.
-
Hey Pat, thanks for stopping by, happy to have you join us! Thanks Don. Have you done one before? I said I was going to put one together for my Pegasus and Morgan, and even had pre-sourced some nice flat MDF boards, but got lazy or wanted to work on the models and never got around to it. I would think they are pretty easy to put together too. Flattest place I can find in the house is my kitchen island of all things. Still, it's a pain to prop the model up with blocks and all that to get things square. Was a real pain this weekend in trying to see how the stern was shaping up, especially making sure that the corners where the main rail lines met were symmetrical.
-
Thanks so much for the kind words Martin. This has been an interesting new way for me to build a kit. The Badger and the Pegasus, as you know, use the European approach of adding gunport patterns. We all complain about them, but in the end, they do make things very easy once installed. I think the Model Shipway kits tend to use this bulwark framing approach, at least I saw that the Constitution seems to do so. One thing I think I might do for future builds is put together a framing jig which keeps the keel straight and perpendicular to the building surface, so that measurements are much easier to make. It's been a real pain to try and line up the hull square to measure heights and the like.
-
Ohayoo gozaimasu Fukui. Beautiful work.
-
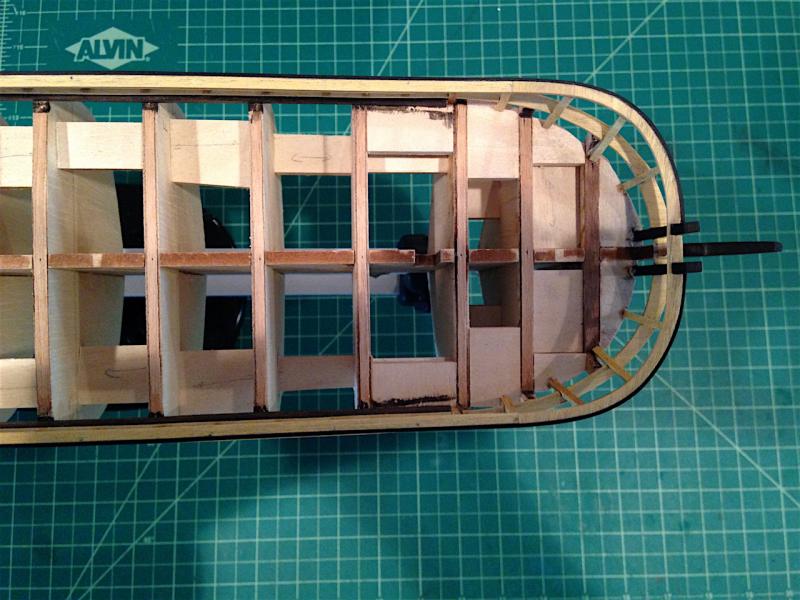
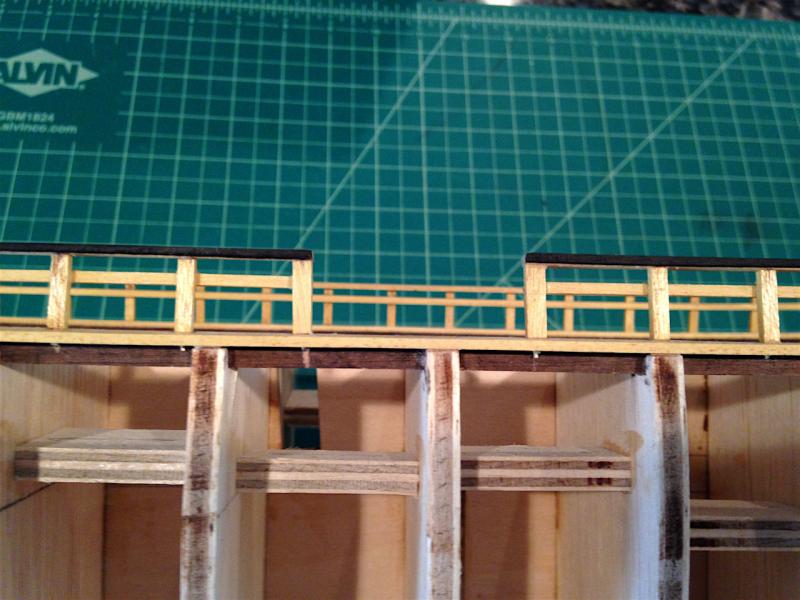
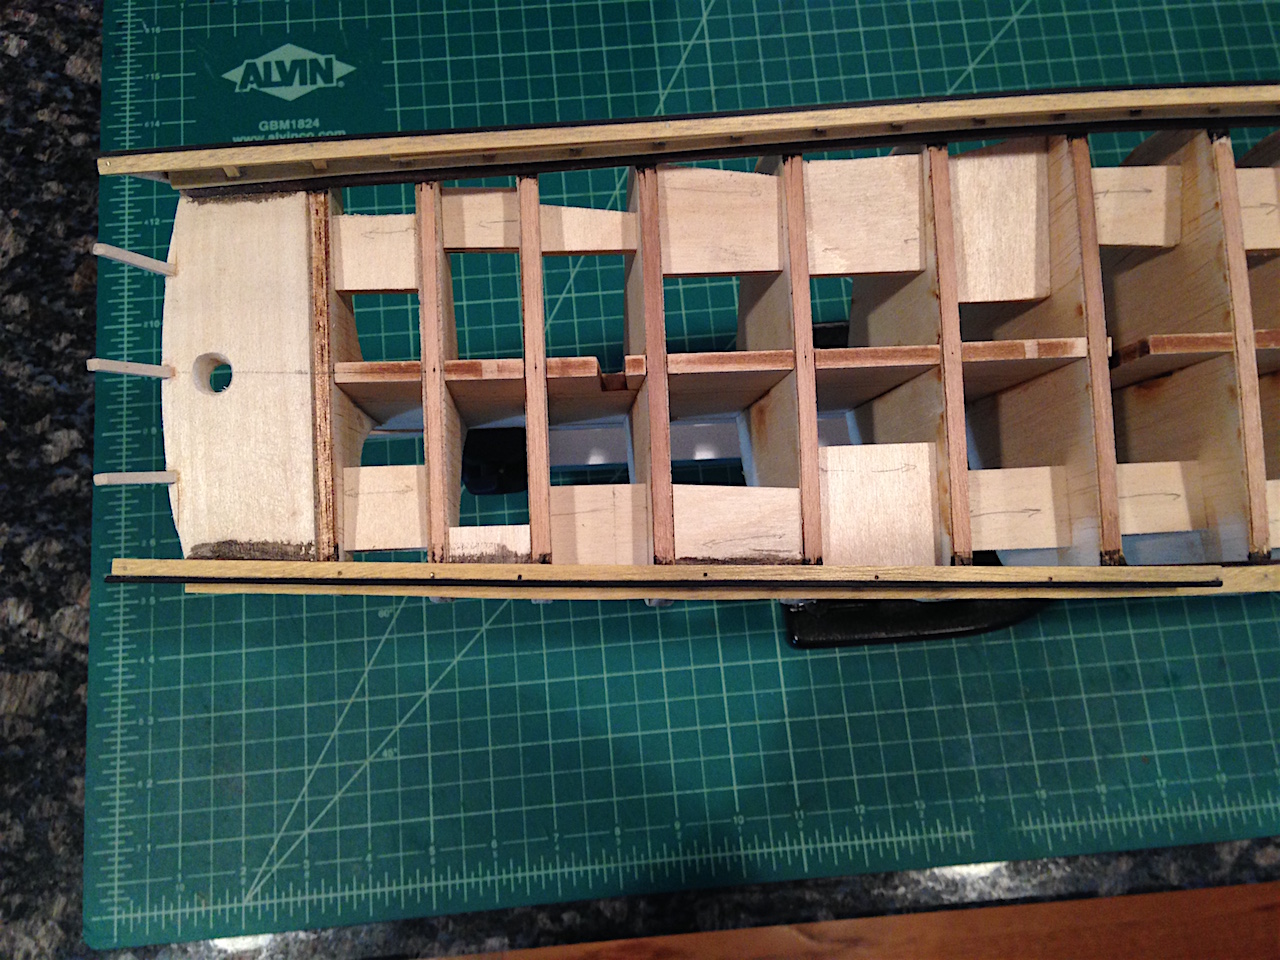
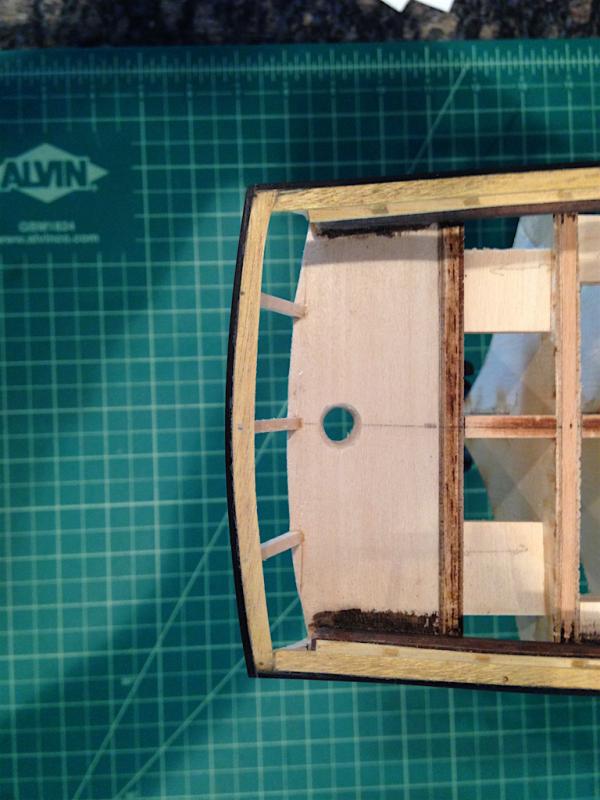
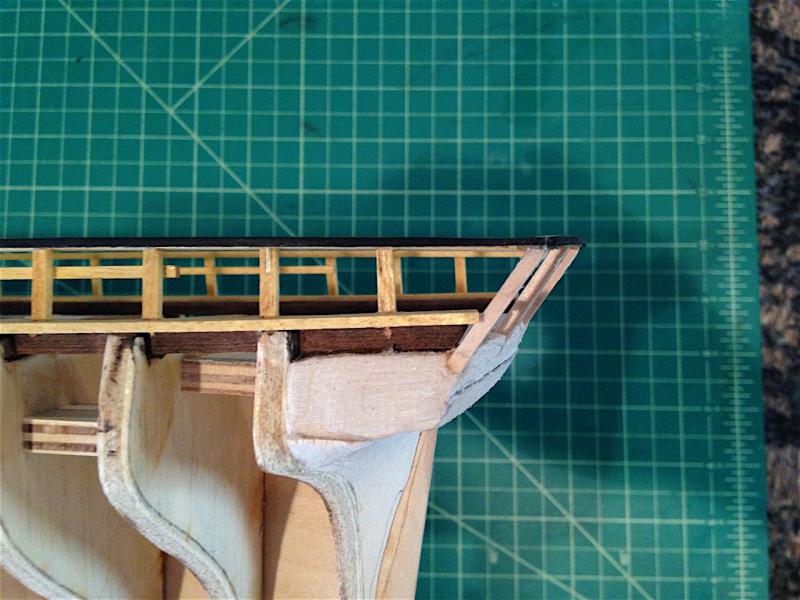
I completed the transom side of the main rail with respect to the yellowheart and ebony sections. It's a tricky piece to fit in that it there is not only a curve fore to aft, but also longitudinally (not sure if that's a word, but the main rail has a slow curve going up from the bulwarks to an apex at the midline of the stern and back down to the other side). This took a little planning, but what I did was to cut a wider piece of yellowheart and sand it to get the fore to aft curve. Then, I soaked it and put this plank forming jig I bought a while back from Micromark: http://www.micromark.com/plank-forming-jig,7164.html Once that was all done, it was a few hours of work to fit it against the main rail sections running along the sides of the ship. Lots of measurements to make sure that the curve at the transom worked and was uniform (thankfully, somehow the transom framing pieces were pretty spot on). Then it was on to gluing it to the hull - not easy with the various curves and lack of anchor points! Eventually after some pins and clamping, I glued it and let it sit overnight. Then this morning I laminated the ebony strip to it which wasn't too bad, and squared everything up. Some artifacts from the camera, but the lines are very smooth and continuous. A ton of time, planning and stress, but the main rail came together pretty nicely. Eventually I'll finish it by laminating holly to it to represent the white pinstripe that runs the hull, but I think next I'm going to start planking the bulwarks and preparing the deck area by adding support pieces for the various deck items. It's a relief to, for the most part, get the basic framing done so that now I can start adding things that will be seen on the model!

-
I ordered both sets of micro shapers too. Never knew those were out there, and saves me from trying to file out patterns on blades. Dave, did you make a decision on the quarter badges yet? Personally, I'd add them if you think they would be historically accurate (from Charlie's post, seems like they would be). Like the stern ornamentation, I think quarter badges add a neat little decorative touch and a lot of character to the model.
-
Those micro shapers look great Dave - easier than having to create my own shapers, thanks for the recommendation!
-
Planking Clamp Use
Landlubber Mike replied to Worldway's topic in Modeling tools and Workshop Equipment
I've used them and find them pretty helpful for planking in screwing them into bulkheads. They worked nicely on the Pegasus, where the bulkheads were in MDF. Like Andy said though, the cross piece is soft metal which bends, and the screws themselves can bend (I ruined a couple that got bent). The biggest annoyance is the knurled screw though - they are really brutal on your fingers if you are trying to screw them into something like MDF. -
Calculate your Admiral's daily/monthly hobby and guilty pleasures expenditures. If yours is like most admirals, including mine, model ship building is a mere pittance
-
These are long term projects, but of course, there is a pretty big upfront cost (particularly if you get into buying power tools, etc.). Annualizing the cost of the hobby, even with power tools, better wood, etc., you are still probably well south of $1000 a year (even better would be to compute the cost on a per hour basis). I'd second eBay as an excellent place to buy kits for a fraction of retail. Same for buying directly from people on this site (both of which I have done). You can also look into buying those packages where they send you a portion of the kit in installments over time. Just don't buy from the Chinese pirates!
-
Thanks very much for the suggestion Al. The kit has you build the whaleboats in a bread and butter fashion. That approach seems to work very nicely and easily, but I don't know if I can use that method and "paint with wood." Seems like I would have to do the framing approach like you are thinking about. I've barely started thinking about it, but have looked at logs with much interest where people are scratch building small boats around plugs or temporary bulkheads.
-
Thanks Doc! This framing thing is taking a while to get done right, but it looks like it might work out nicely after all. Holly seems much easier to bend, but I think I'm going to wait until I add the cheeks to the stem as the white strip extends from the main rail onto the cheeks. The nice thing about painting with wood in this way is that you avoid having to paint straight lines on things like the pinstripes. You can use your trusty table saw to essentially cut out the lines you need.
-
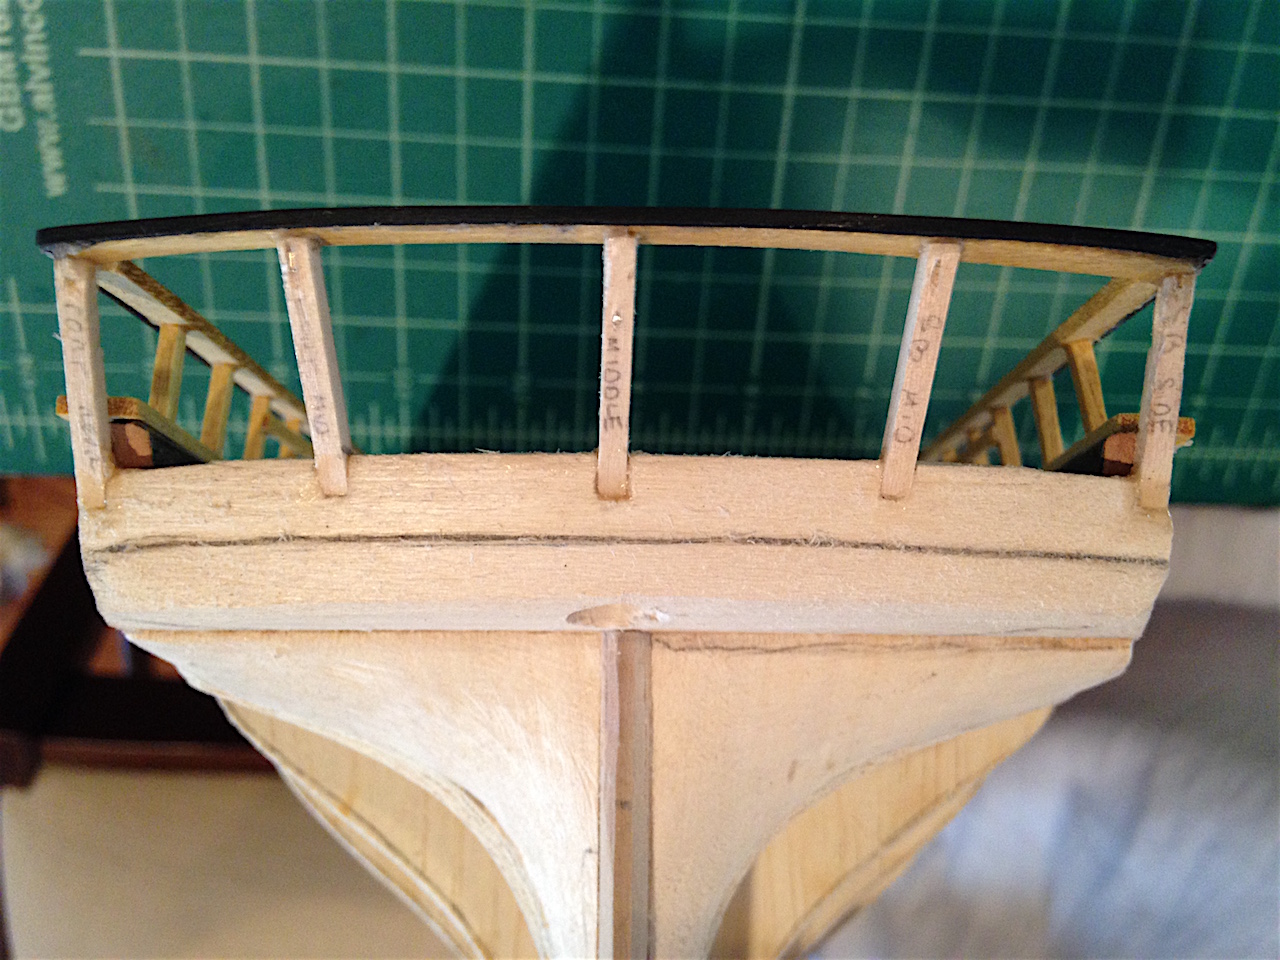
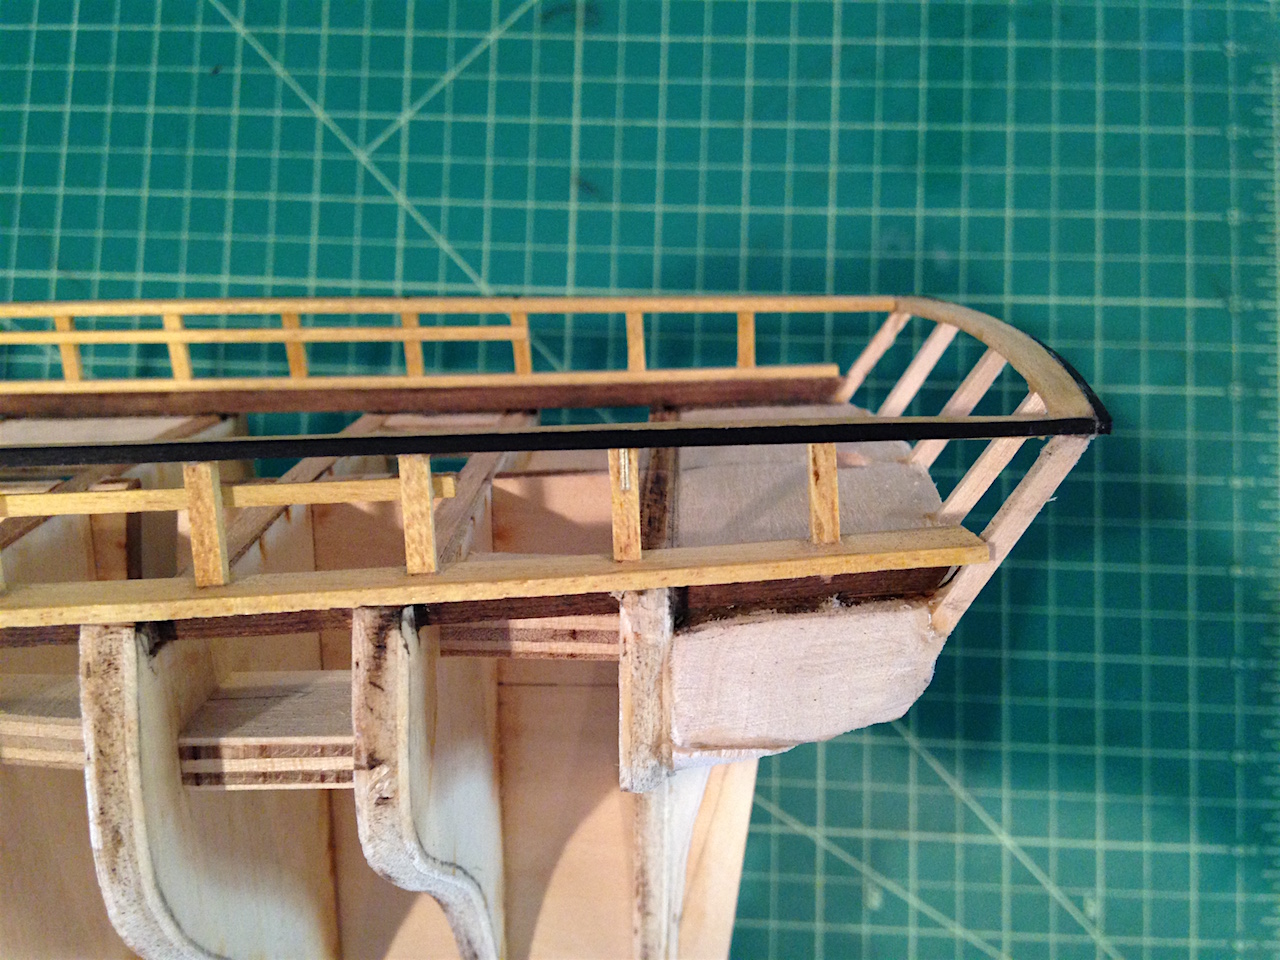
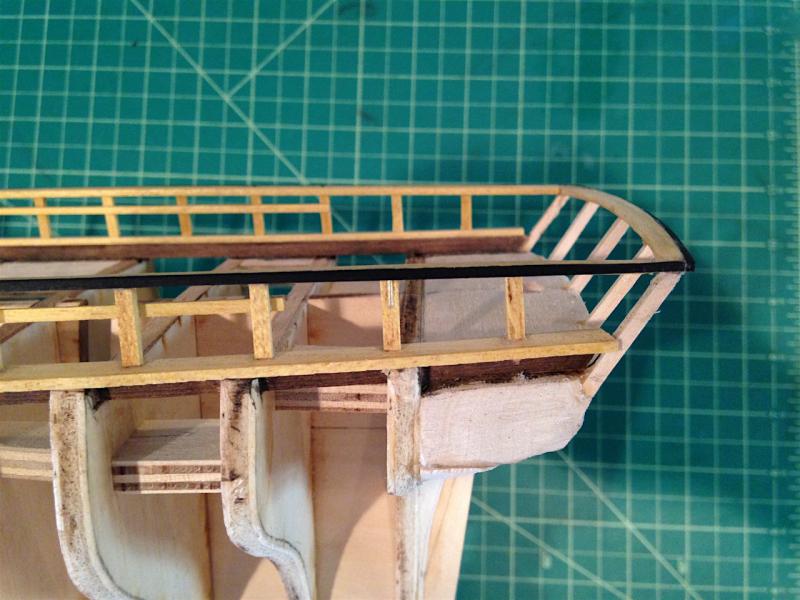
Elijah, thanks for looking in. Thankfully the Morgan has pretty distinct areas where there are color changes, so for the most part you don't need to change colors mid-strake or mid-piece. The trickiest part will be on the bowsprit I think, which changes from black to white so that will require two separate dowels attached together. One tricky area I'm working through at the moment is the main rail. The main rail is ochre inboard, black outboard, with a white stripe at the outer edge for one of the Morgan's pinstripes. So, what I am attempting to do is laminate three pieces of wood - yellowheart, ebony, and holly - to form the main rail. So far so good - I was worried about bending a thin strip of ebony around the yellowheart, but after a few failed attempts at bending ebony, I finally came upon a way to do it. The best success I had was to soak the piece, put it against a former with the curve I wanted, then use a hot iron plank bender that I got from Model Expo against piece to get the bend I wanted. After a few rounds of this, I was able to rubber band the piece along the former to help keep the bend. One thing to bear in mind is that the hot iron can burn the wood and even cause tiny divots, so it's best to use the iron against the opposite side of the visible piece of the wood - essentially, if the curve is concave, you use a former that is convex, and vice versa. Here are some pictures of the main rail after laminating a 1.5mm x 1.5mm ebony strip to the earlier installed yellowheart: