Landlubber Mike
-
Posts
4,544 -
Joined
-
Last visited
Content Type
Profiles
Forums
Gallery
Events
Everything posted by Landlubber Mike
-
 Gary, thanks so much for passing along your test results. It sounds like a very effective method - very promising. One thing I'm curious about with all these methods is what does the oxidation do to the copper. Does the oxidation form at the surface, and go no further (which is what I think happens with aluminum, though I'm no expert), or does it continue all the way through the copper if left unchecked (sorta like what happens when iron starts rusting). Especially in the latter case, it would be great if there was a way to stop the chemical process once you get to a point that you are satisfied with. Mobbsie! It's been a long time my friend and fellow Badger Brother. Hope all is well with you. I'm looking forward to your Pickle build!
 -
Looks great Jason - the bitts came out fantastic! I completely get where you're coming from on the rigging. Personally I think these models look a lot better fully rigged, but at the same time, the space they take up pretty much triples. I was surprised once I rigged my Badger how much more space it took - I can only imagine what things look like on a bigger model. Then of course there is the cost if you want to encase it, which goes up a lot if you need to account for a rigged model. Not sure that helps you, but I would certainly say that your Jason will looked fantastic rigged or not.
-
Beautiful Don! I was going to ask if you made your own rope too, as well as what machines you are using for creating the rope and the serving lines as I think your rigging looks very nice.
- 653 replies
-
- 4
-

-
- trabakul
- marisstella
- (and 1 more)
-
Beautiful work as always BE, very nice job! Thank you for sharing your build with us. I know I speak for many that we learn a ton from your modeling techniques and are always inspired by your work. I was going to ask what was next, but saw you already started the Longboat. I really need to log on here more often
- 156 replies
-
- 3
-
-
- pinnace
- model shipways
- (and 1 more)
-
That came out really well Martin, great job! I love the curves and colors which really go nicely with the rest of the model. I haven't had a chance to study the breast work and all the details that go into them, but are the sheaves actual working sheaves on the ship?
- 467 replies
-
- 1
-
-
- fly
- victory models
- (and 1 more)
-
Sure is GMO2. Do you mind sharing the results of your tests? I will certainly do the same when I get to them. Thanks again for sharing your thoughts and research on this very interesting topic!
-
Thanks very much guys, really appreciate all the thoughts. GMO, I agree on the need to be carefully using a chemical solution that would eat through the thin tape. That would be a disaster for sure! Jason, in addition to jewelry applications, I've seen stuff used for copper work in other applications like lamps, figurines, etc. Like GMO, I plan to test out various products and approaches to see what works. I have a feeling though that a paint approach might be the best to achieve that look.
-
Thanks very much guys, really appreciate the kind words. Bruce, that's really helpful to figure out that character. BE, I think you were referring to Alistair's Fly build where he used the, uh, personal fluids method? On the Amati copper plates, it seemed to turn the copper a darker brown look - a look I'm planning to use for my Pegasus, but I'll just have to make sure that I don't eat asparagus before collecting the sample For the Morgan though, I love the green copper look against the black hull. I haven't gotten very far in my research on how to emulate the green coppering in the models above. It seems like paints might be the only way to accomplish an even tone across the plates. What complicates things is that some copper materials (such as the tape supplied in MS kits) may have some sort of coating which limits the effect of some of the patina liquids. Will need to do some experimentation. What I can assure you all is that in no way will I use the approach that GMO2 mentioned of burying the hull in poop to achieve that look
-
Thanks Martin, you should give ebony a shot. It really is a beautiful wood. I can always send you some if you want to try it out. I think I'm using Gabon Ebony, which is jet black throughout, uniform, dense, no grain wood. Thanks Bruce. I bought some dry transfer letters and will try them out first, as I think there will be a slight difference in hue between wood and the paper. The letters are going to be tricky though to get lined up right, particularly since the name plate on the transom has a slight curve. I was also wondering what to do with that divider character - no dry transfer letters available for that one A third option would be to see if I could order custom decals. That would probably be the easiest/safest approach, though it's finding a vendor and hopefully not ending up with a high bill.
-
Sailor, I definitely agree with your recommendation. A whaler with a full load will have sat very low on the water due to weight is my guess - the natural waterline would be much higher than where it is on the ship currently, which is quite lighter these days without the need for hauling cargo.
-
Thanks guys for the kind words. Really appreciate it! Jim, so far ebony has been really nice to work with. It's not pear or boxwood, but it machines very nicely (it's a very hard, dense wood, so I don't use hand tools on it as much). If you look back on my log, you can see the kinds of bends I've managed to get on thinner pieces (if trying to bend thicker stock, I'd consider starting with a thicker piece than you need and sanding the curve in if wetting/heating doesn't work). In a lot of respects it's nicer than some of the walnut I've worked with, where if you happen to bend it in an area where there is a slight pit, the walnut will quickly snap on you. I do try to be careful of the dust, so I vacuum and wipe down the pieces after working then with a paper towel (because the wood is oily, wiping it easily gets rid of the dust). There's certainly a lot of negative commentary on ebony here. I think like most things though, if you know ahead of time the properties of what you're working with and plan accordingly, you can make it work. Personally, I enjoy the challenge and prefer the look of natural wood on my builds. Paints give a plastic look in my opinion, and while dyes and stains look really nice, I still think ebony outclasses them by far.
-
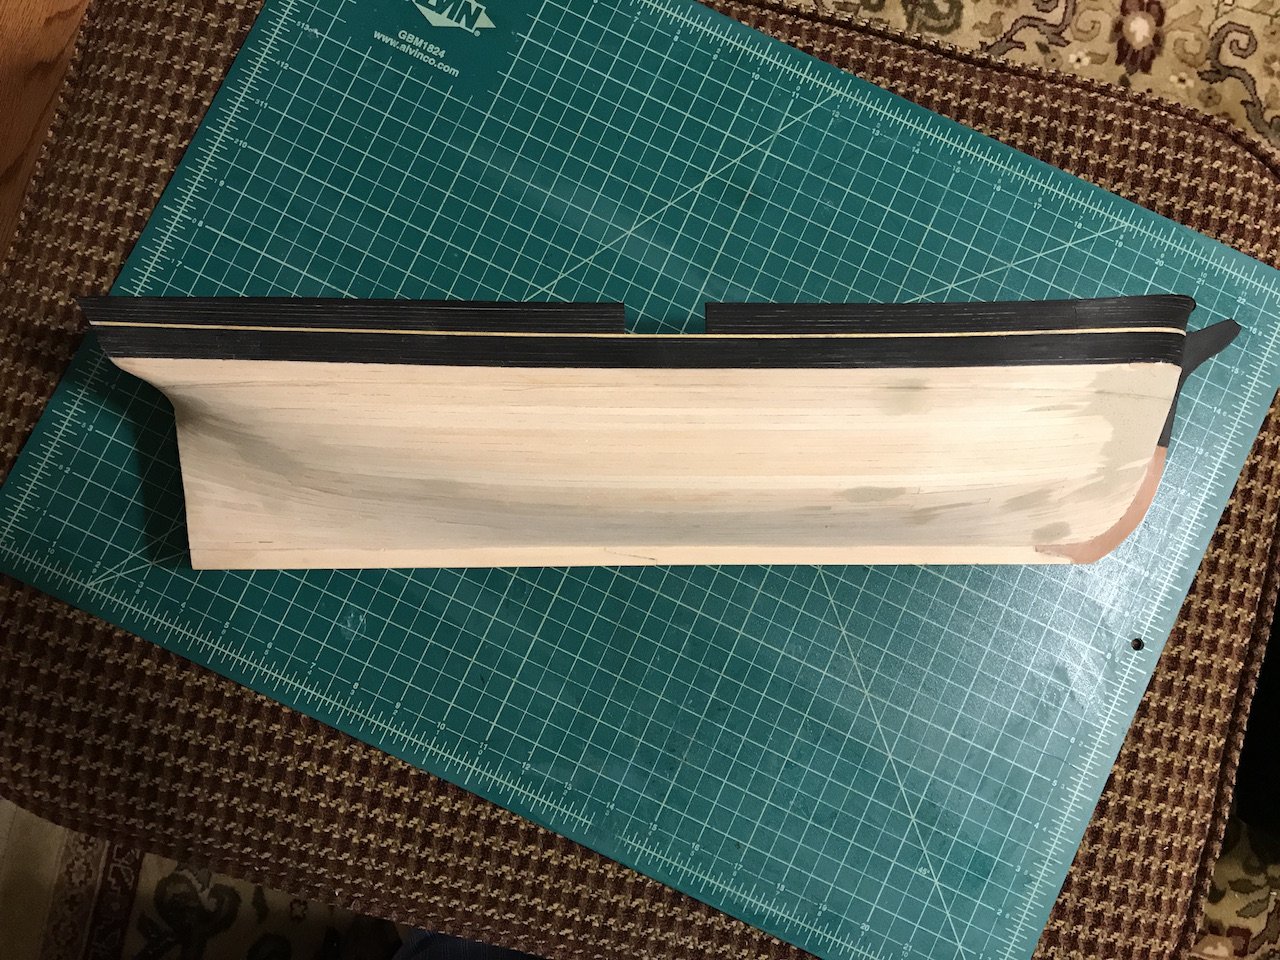
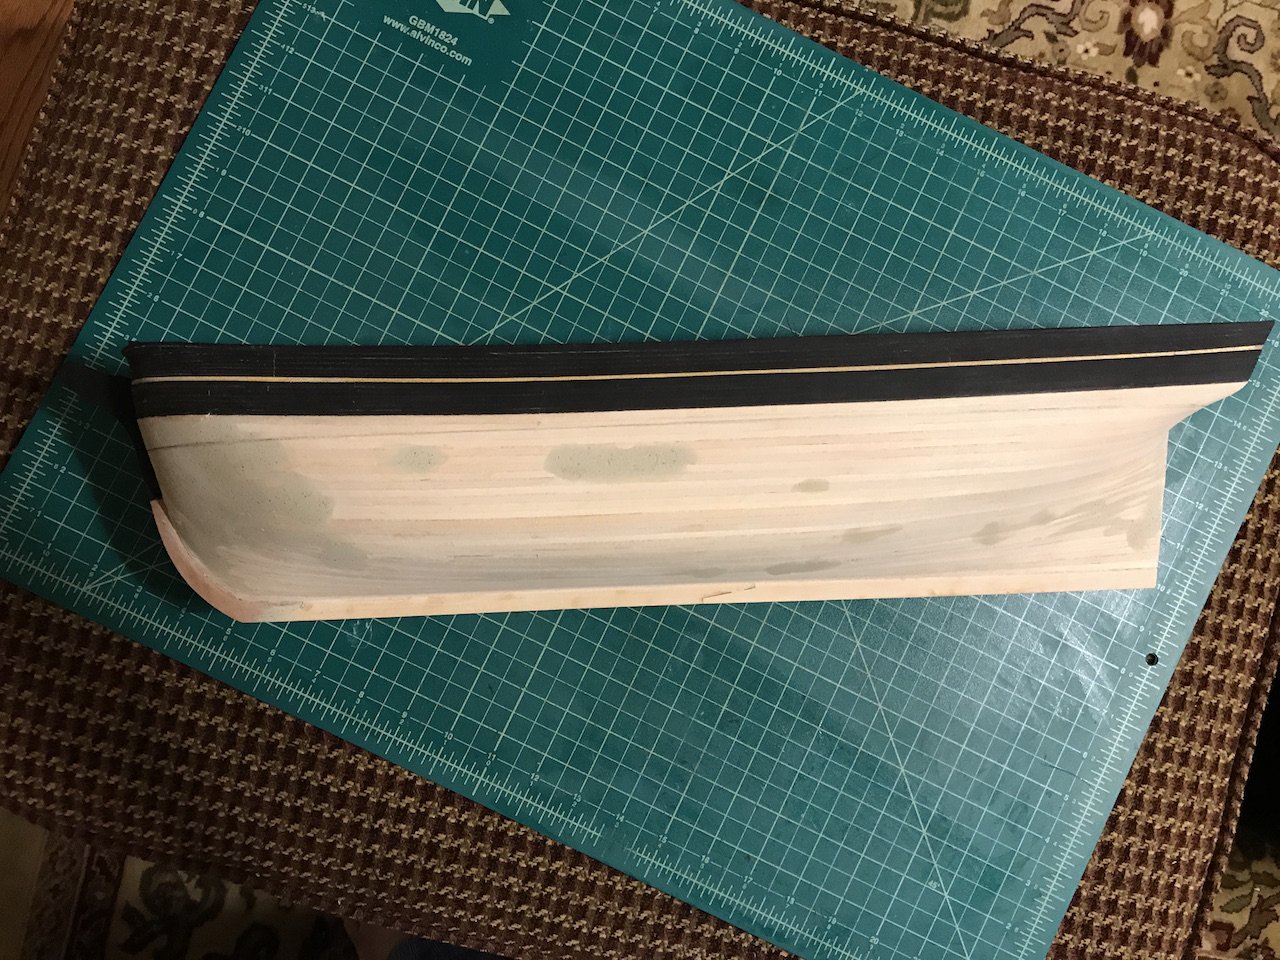
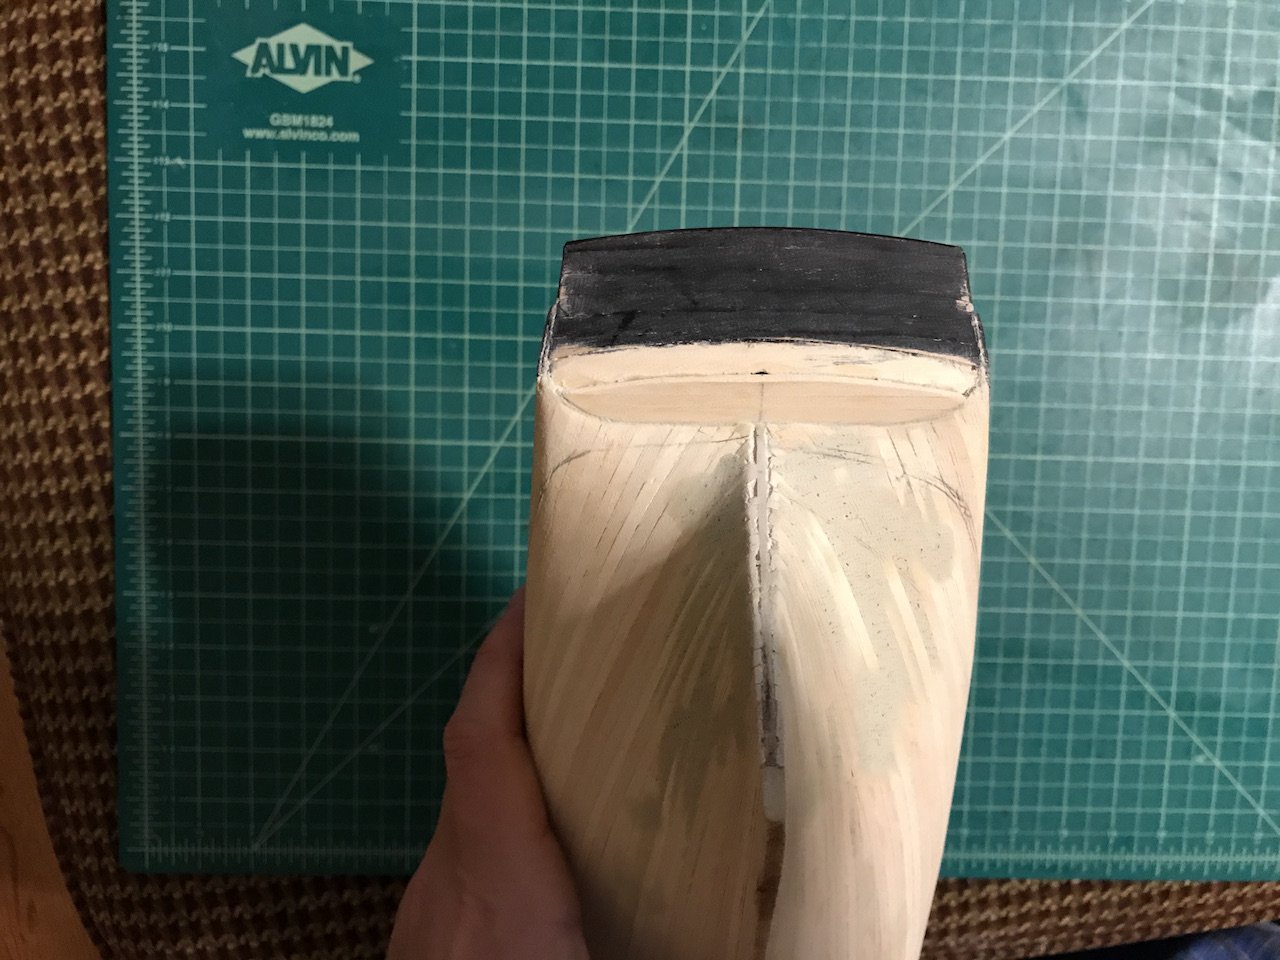
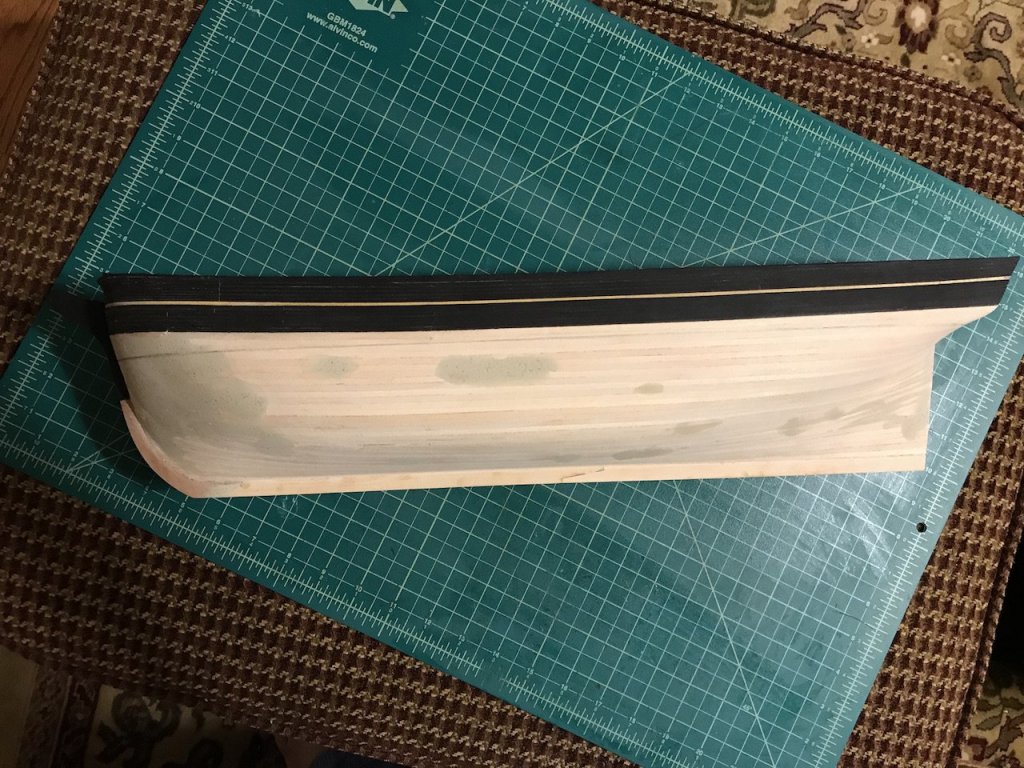
I've made some pretty good progress the last few weeks, and have finished the first planking. I didn't bother using planking bands, spiling, runs of planks, etc. since this area of the hull will be covered with copper plates and a few rows of ebony planks as a second planking. But, that resulted in a little clinking, and hence some filler at the stem and stern. The current ebony planking ends at the line of the wale, so I sanded the lime planking flush to it. For this ship, the wale is marked by a thicker row of planks, so all I need to do is just add the ebony planks on top of the first planking and I'll have the wale. For those planks, I'll certainly need to spile. In the stern picture below, I stained the top area of the transom black as the planking for the transom is curved, and I was worried about gaps potentially showing if I don't get the curves perfect. The counter is a little tricky because there are a lot of curves that end into it, including the name board which is the area between the counter and the black transom. I thought it was really important to get the shape right, so rather than go plank by plank, I glued a bunch of planks together, traced the counter pattern from the plans, and then cut and sanded the counter to shape using the tracing. That was much easier, and ensured an accurate and symmetrical counter. Once glued to the hull, I was able to use the counter to help sand the hull to get the proper curves into the counter. I think I'm going to go with the higher water line (thanks everyone for the recommendation), so mid-hull I probably only need three rows of second planking to get to the waterline. My plan is to go a little below the waterline, and then sand the planks under the waterline to feather into the first planking. I'm using 0.7mm ebony, so this shouldn't be too difficult. Thanks for looking in! Hope my friends in Florida, etc. are staying safe with the hurricane.


-
Really beautiful work Grant. Very nice job! It's funny, I was looking at Dumas' Cris-Craft boat kits earlier today and was thinking they might be fun to build - though I think I need to get a little more up the skill curve first. What did you think about the kit generally? Good components? Seems like you bashed it a bit.
- 339 replies
-
- 5
-
-
- dumas
- Chris-Craft
- (and 3 more)
-
Gorgeous work Martin, very nice!! I might need to borrow this for my Pegasus, really classy looking.
- 467 replies
-
- 1
-
-
- fly
- victory models
- (and 1 more)
-
Amazing work as usual Igor, beautiful! Your sails are incredible. Could you explain how you got the seams on the sails? I studied your pictures, but couldn't figure out how you used the black cloth to make the seams.
- 185 replies
-
- 2
-
-
- jolie brise
- pilot cutter
- (and 2 more)
-
Great work Tom. I have the same Winfield book and thought about doing a model on it. Your log is very inspirational!
-
I prefer the RB guns too. For what it's worth, I am replacing my Pegasus guns with the RB guns, not only for better scale but better looks.
-
Looks fantastic Peter! That's quite a lot of progress. I'll be following along with much interest!
- 366 replies
-
- 4
-
-
- bellerophon
- victory models
- (and 2 more)
-
Nice work! I use those same clamps. I prefer them over some of the others I've bought over the years.
-
I've been using ebony for my Morgan and have had no problems with gluing. I haven't found the dust to be problematic either - I just am very careful to wipe it down after working with it, which I probably should be doing with all woods. Ebony is gorgeous - the various ways of ebonizing pear and other woods don't really come close.
-
Great work BE. I loved the Proxxon mini-lathe. It made work on my Badger's masts and spars so much easier. I ended up selling it and upgrading to a Sherline (which I haven't used yet), but I'm sorta regretting it given how easy it was to work with the Proxxon (and I wonder if I'll ever use the Sherline to turn metal).
- 156 replies
-
- 3
-
-
- pinnace
- model shipways
- (and 1 more)
-
Looks really good! Impressive that this is your first build, very nicely done!
-
This is an amazing build Ken, incredible job you're doing. I echo what Pete said - even for those of us not working on this kit, we are all learning and getting inspiration from your log.