HOLIDAY DONATION DRIVE - SUPPORT MSW - DO YOUR PART TO KEEP THIS GREAT FORUM GOING! (Only 68 donations so far out of 49,000 members - Can we at least get 100? C'mon guys!)
×


Landlubber Mike
-
Posts
4,535 -
Joined
-
Last visited
Content Type
Profiles
Forums
Gallery
Events
Everything posted by Landlubber Mike
-
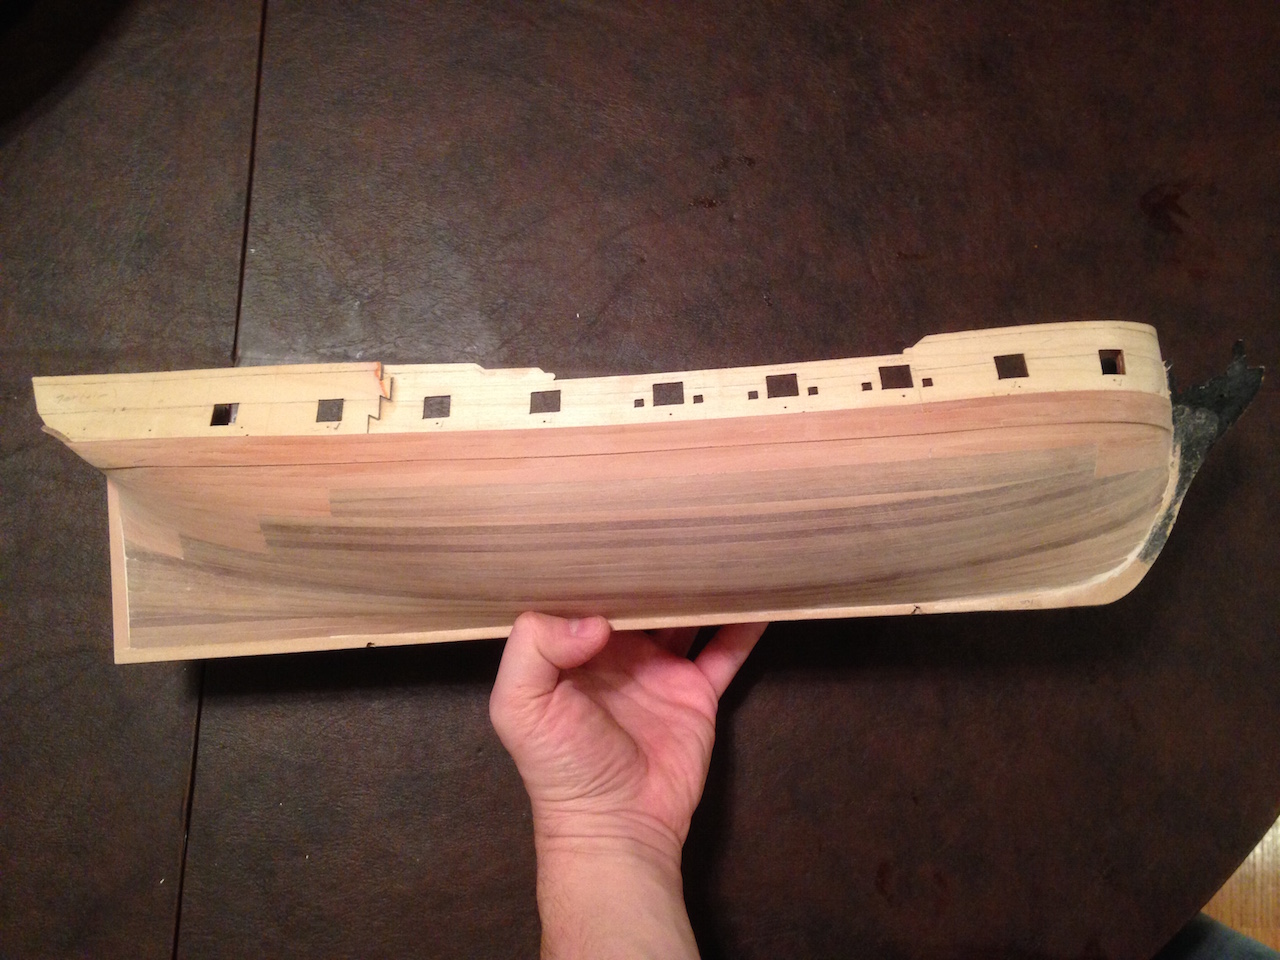
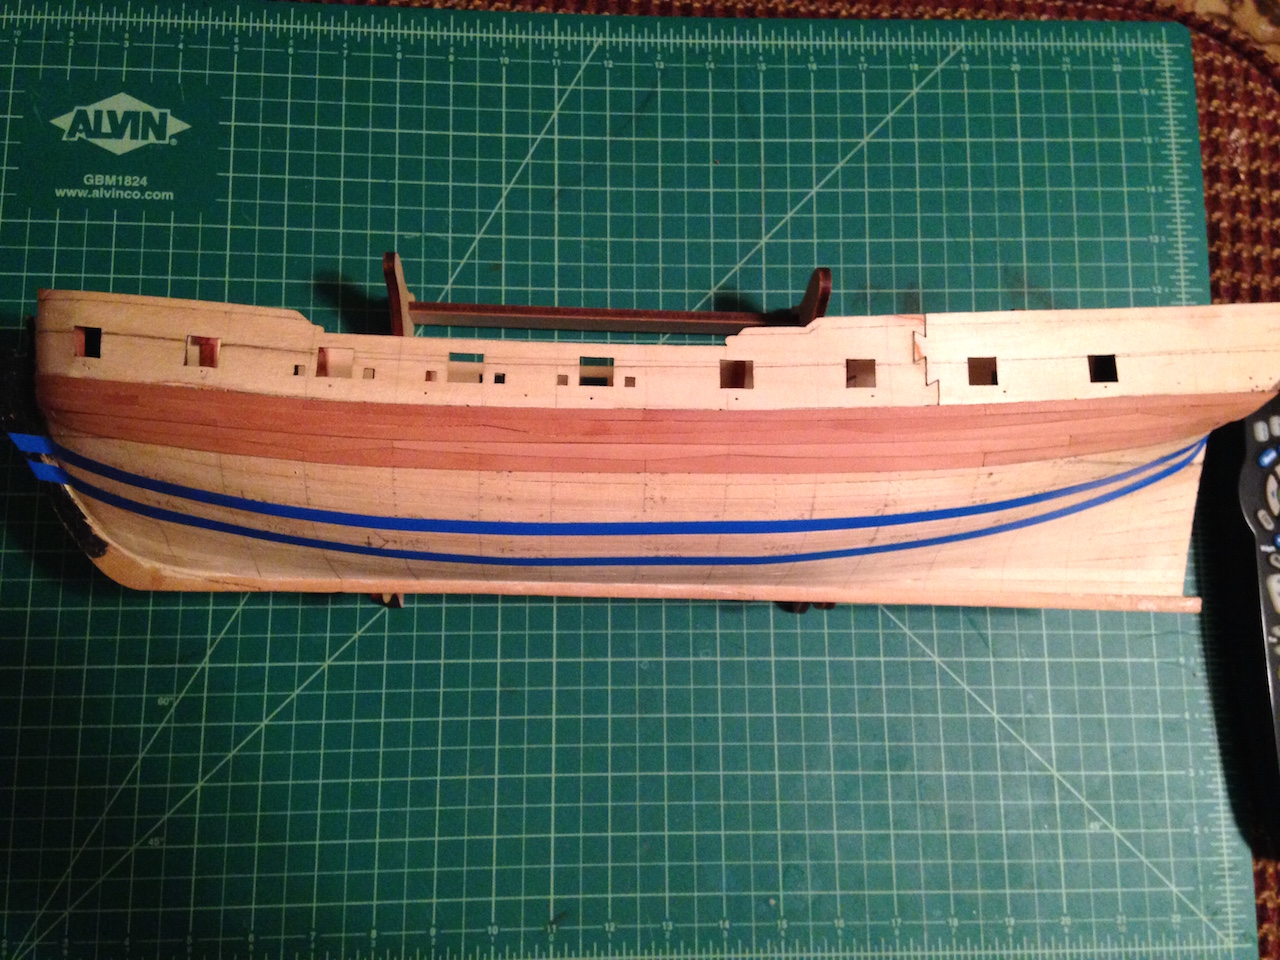
 Finally finished the second planking below the wales! I still need to clean up and define the edges of the wales at the stem and stern, but I'm pretty happy with how things came out. I got better with spiling as I went along, but the early planks finished nicely. Next step will be to stain the wales and the section of the hull to the copper line black. Above the wales I'll have pear stained a darker brown, pear stained blue for the friezes, and then a line of redheart planks at the top of the hull. So, I plan to stain this section black first, as I don't want to get black stain on the planks above the wales. Thanks for looking in!

-
Hi Thistle, thanks for bringing up the Corel Unicorn. Timely, as I'm close to the point of taking a break from my Pegasus to restart work on my Unicorn/Lyme build. I had a nice trip down memory lane going through my build log. Ian, John and others and myself have taken a close look at the kit relative to the Chapman plans, as well as the Lyme plans from the NMM - the Lyme was the sister ship of the Unicorn, and almost exactly the same except for the fact that the Unicorn has a beakhead bow. Overall, the general shape of the hull is fairly accurate, but I think if you go through the various logs, you'll find a laundry list of inconsistencies between the kit and the various plans that are out there: -- closed waist is wrong, layout of gratings, etc. also probably not correct -- at the bow, the stem is too low, the figurehead is too low, the forward bulkheads flare out at top (which doesn't seem correct) and the cheeks don't match up -- masts I think are slightly off -- wales should be thicker by a full plank width -- wrong lines for quarterdeck and upper deck, number of port holes doesn't match Chapman -- the stern area is really off, with no stern post, wrong angle of stern post area, stern tuck is incorrect, flag locker not correct, Lyme plans show the tiller above the quarterdeck A very good model of the Unicorn is this scratch 1:48 build - this model seems to be very accurate relative to the plans that are out there: http://shipmodeling.net/photopost/showgallery.php?cat=1318&page=1 I give Corel some slack as this kit is an older kit that I don't believe has been updated in recent history. It's reasonable for kit manufacturers to take shortcuts or not be completely precise. The folks at Corel were very nice too in sending me additional port holes free of charge after I sent them an email asking if I could buy extras. However, one thing that I think is unforgivable is the fact that the various plan sheets do not match up (at least mine don't)! . At the very least, the plans should match up. Anyway, I think the Unicorn kit will build into a very nice model, whether you kit bash it or build it straight from the box. It's unique in that I don't think I've seen any other beakhead kits out there, and the Unicorn and Lyme have been said to be the first "true frigate." I've kinda gone down the rabbit hole of trying to build an "accurate" model (whatever that means), but as you've seen on here, others have built very nice models without making many modifications.
- 66 replies
-
- 2
-

-
- resolution
- hunter
- (and 2 more)
-
Coming along very nicely. Thanks for sharing your build with us
-
Hi everyone, happy holidays and new year to all my friends out there Quick update on where I am with my Pegasus. I'm just about done with the section of the hull below the wales that will be above the copper line. I've decided to do that section in pear, and stain it black. Rather than waste a lot of pear that will ultimately be covered in copper plates, I'm using the kit walnut for the non-visible section. I've completed the pear planks for the stem, and am just about done with the pear planks at the stern. I have one more plank to add up to the stern counter, then a few more planks down stern post that will be above the waterline. I'm following the planking pattern in TFFM. It's amazed me at how precise the kit is relative to TFFM and the NMM plans. Also, the walnut planks used in the Amati kit are world's better than the planks used in my Caldercraft Badger kit, which was very splintery. Walnut might splinter more than a tighter grained wood like pear, but the Amati walnut is nice and tight. It's too bad that the variation in the color amongst all the walnut pieces (especially between the walnut ply pieces), as I would have just used the walnut rather than go with pear. I'm getting a little better at spiling, as the later planks are tighter against the planks above. The pictures above are with the planks pre-finished, but I think after some sanding and a couple of small areas that can use a drop of glue and some sanding dust, the planking should come out pretty well. Spiling certainly takes a lot of time, but I think the effect is really nice. I won't lie and say that it hasn't been nice to lay long planks of walnut down to cover up big sections of the hull at a time though


-
Gorgeous planking. What kind of wood are you using?
- 652 replies
-
- 1
-
-
- royal william
- euromodel
- (and 1 more)
-
I dabble in bonsai as another hobby, and this Japanese vendor came very highly recommended by folks on the bonsai boards that I frequent. Great quality tools, excellent customer service, and very fast delivery from Japan (on the order of less than a week). http://kaneshin.shop.multilingualcart.com/index_en_jpy_9.html While on their site, I noticed that they offer a full line of various types of tweezers. It's been hard for me to find good tweezers for modeling. I think I've bought and otherwise gone through about a dozen tweezers, and really only have one pair that seems to do it for me. So, I bought a few from that website figuring I would try them out. Wow, the quality, feel and fit are fantastic on their tweezers. Much better than what I was trying from vendors like Micromark. A good chunk of their tweezers may larger than what we need building model ships, but they have a few shorter ones that work very nicely. Anyway, just thought I'd pass their name along in case there are others that use tweezers a lot and have had a hard time finding good ones. I'm not affiliated with them in any way, just a very satisfied customer.
- 14 replies
-
- 12
-
-
Hi Ian, we haven't done one of these Corel strategy sessions in a long while, I miss them For the ship's wheel, I would consider putting it behind the mizzen, especially if you are going to add the tiller. I'm not sure that you could add the tiller and its rigging if it was in front of the mizzen. I like the idea of integrating the tiller cover into the flag lockers and getting rid of the skylights. I don't know where the binnacle would go, however. I can take a look at the AOTS Pandora book tonight and give you more specifics on the binnacle style and location. Interesting - take a look at this amazing model of the Pandora. The ship's wheel and binnacle are ahead of the mizzen. I don't recall whether the Pandora had an above-deck tiller, however. It was probably below deck given the location of the "Pandora's Box", a holding cell for the Bounty crew. http://www.shipmodell.com/index_files/0PANDORA3.html The Pegasus, however, had an above-deck tiller - here, the ship's wheel and binnacle are behind the mizzen. http://www.historicships.com/TALLSHIPS/Amati/Pegasus/PegasusV7.htm
-
IF YOU HAD A CHOICE
Landlubber Mike replied to Burroak's topic in Modeling tools and Workshop Equipment
Interesting seeing the responses here. I have a Dremel but rarely use it. On my current builds with lots of scratch building, I found myself using the scroll saw quite a bit in the beginning cutting out curved parts for the hull. Now I am using the table saw a lot to cut planks along with other things requiring a straight edge like the various deck items (frames for gratings, bitts, etc.). Above all else though, I think I have used the disc sander the most though. I could never get straight lines by hand, even using those sand-it type jigs. So, if building from a kit, I'd probably lean toward a disc sander. -
Really nice work Geoff. Very crisp on the details, looking fantastic!
-
Really great work Denis. Takes a long time to plank, but done well as you are doing, the results speak for themselves and make the time well worth it
-
Wow, absolutely gorgeous work Ian! Very very nice job, and a big thank you for the pictorial tutorial! Is that english boxwood from an old ruler? I'm wondering if i can get away with such detail using castello boxwood.
-
I used the kit tanganyika on my Caldercraft Badger, which I thought was ok, but switched to maple for my Pegasus. Maple is a really great wood to work with, but you do have some color waves in the grain. You can take a look at my Pegasus build (linked below) to see what it looks like. If you want a wood that is uniform in color, some people use holly, which I find a bit too white. Others use boxwood, which can be nice.
-
Great work Tom on what looks to be a complicated set of timbers. Very nice job!
- 1,350 replies
-
- 3
-
-
- constitution
- model shipways
- (and 1 more)
-
Thanks Ian. I have to confess that most of my work on the planking has been on my kitchen table and my living room ottoman My "workshop" is in the basement utility room, so no TV or adult beverages close by. I generally use my power tools down there, and then bring up whatever tools I need upstairs. With little kids running around and an Admiral to take orders from, I have to keep the main areas of the house neat. Don't worry, my workbench in the basement is a mess
-
Very cool build Ken, thanks for sharing all the steps with us. These card models look really intriguing
- 80 replies
-
- 5
-
-
- choctaw
- heinkel models
- (and 1 more)
-
Hey Ken, just came across your build log. Your planking is amazing - even more so that it is your first wooden build. Very nice job!
-
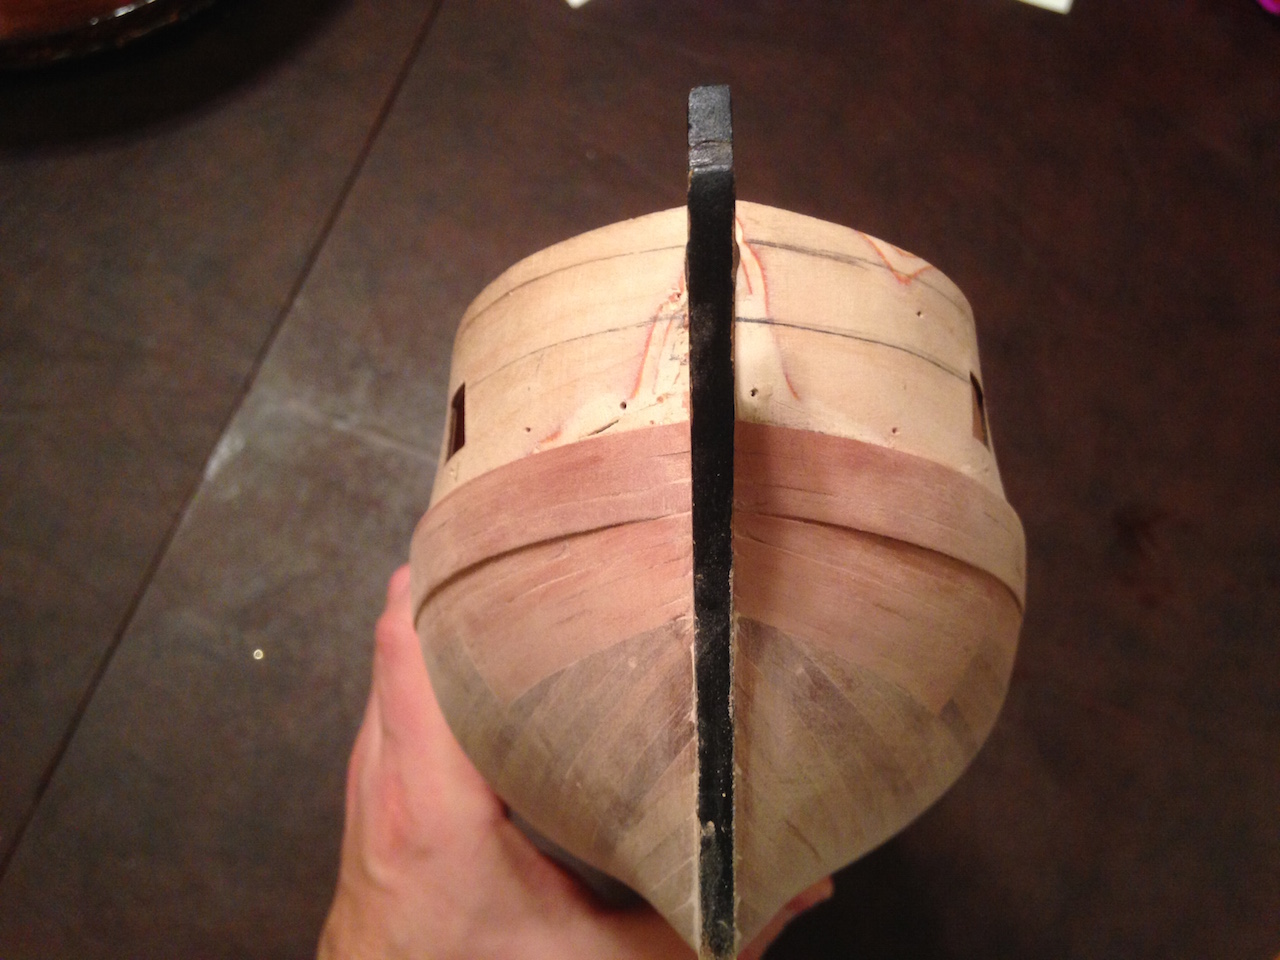
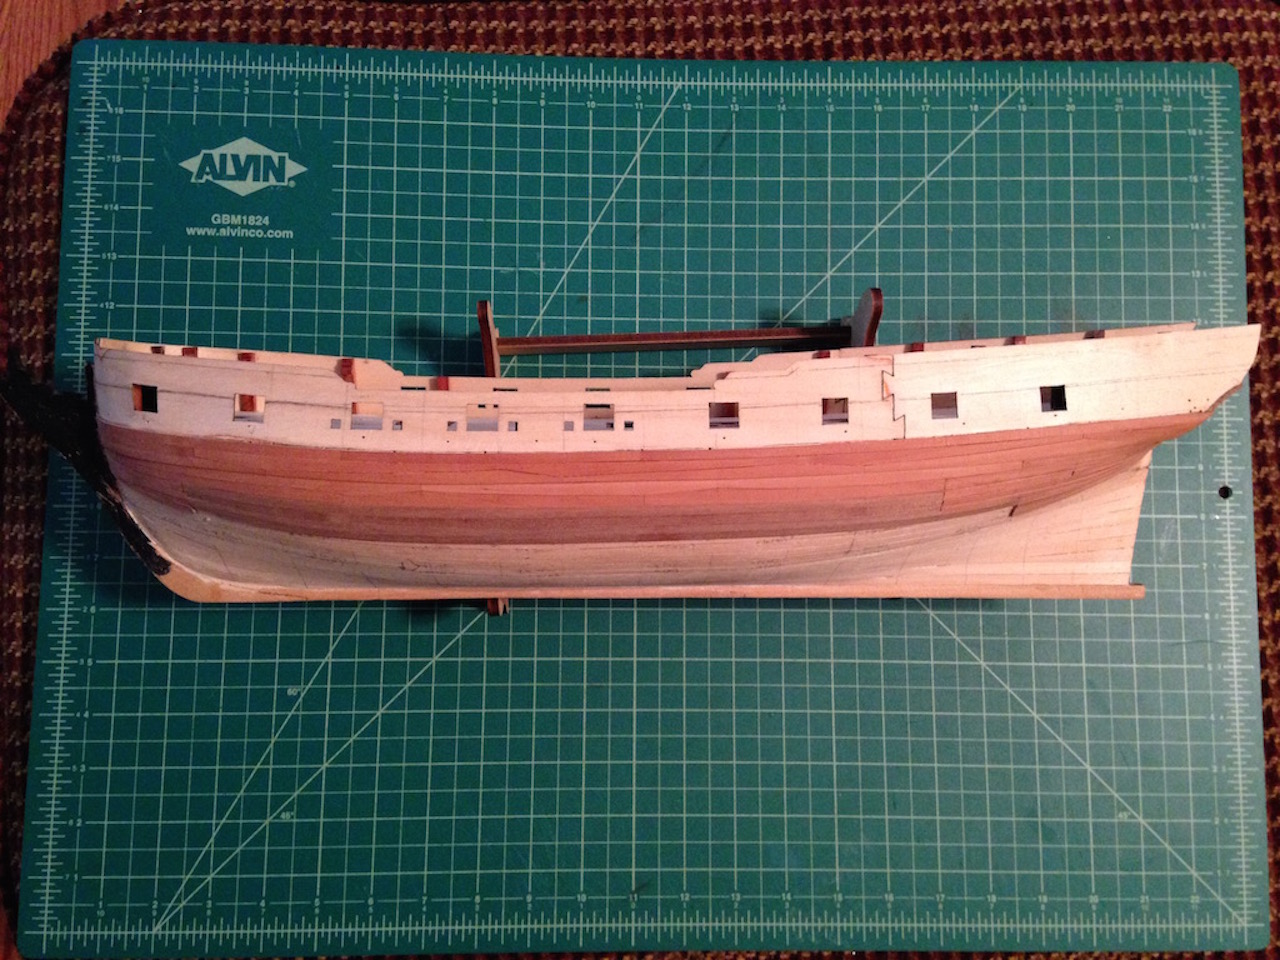
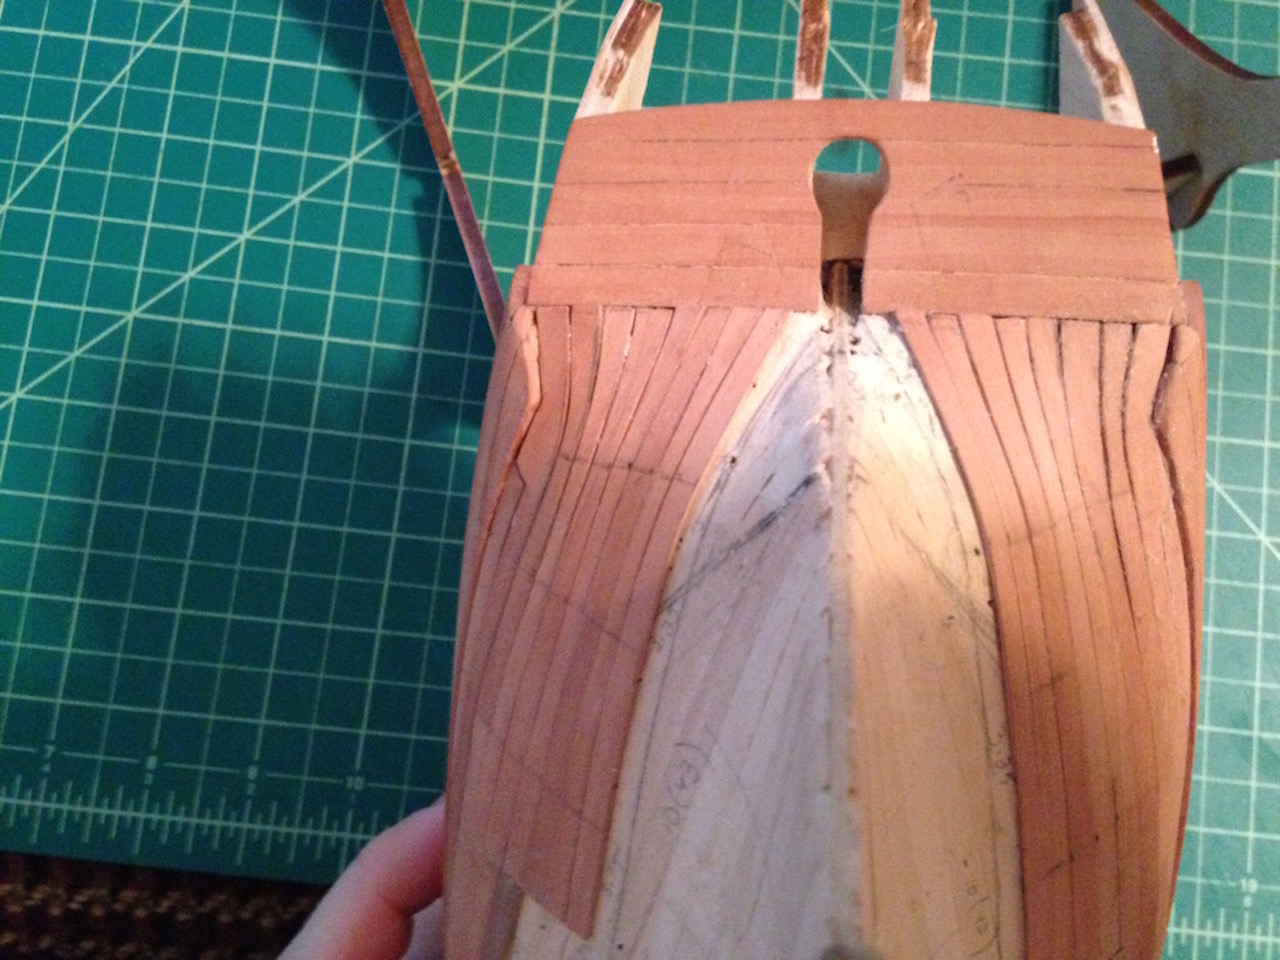
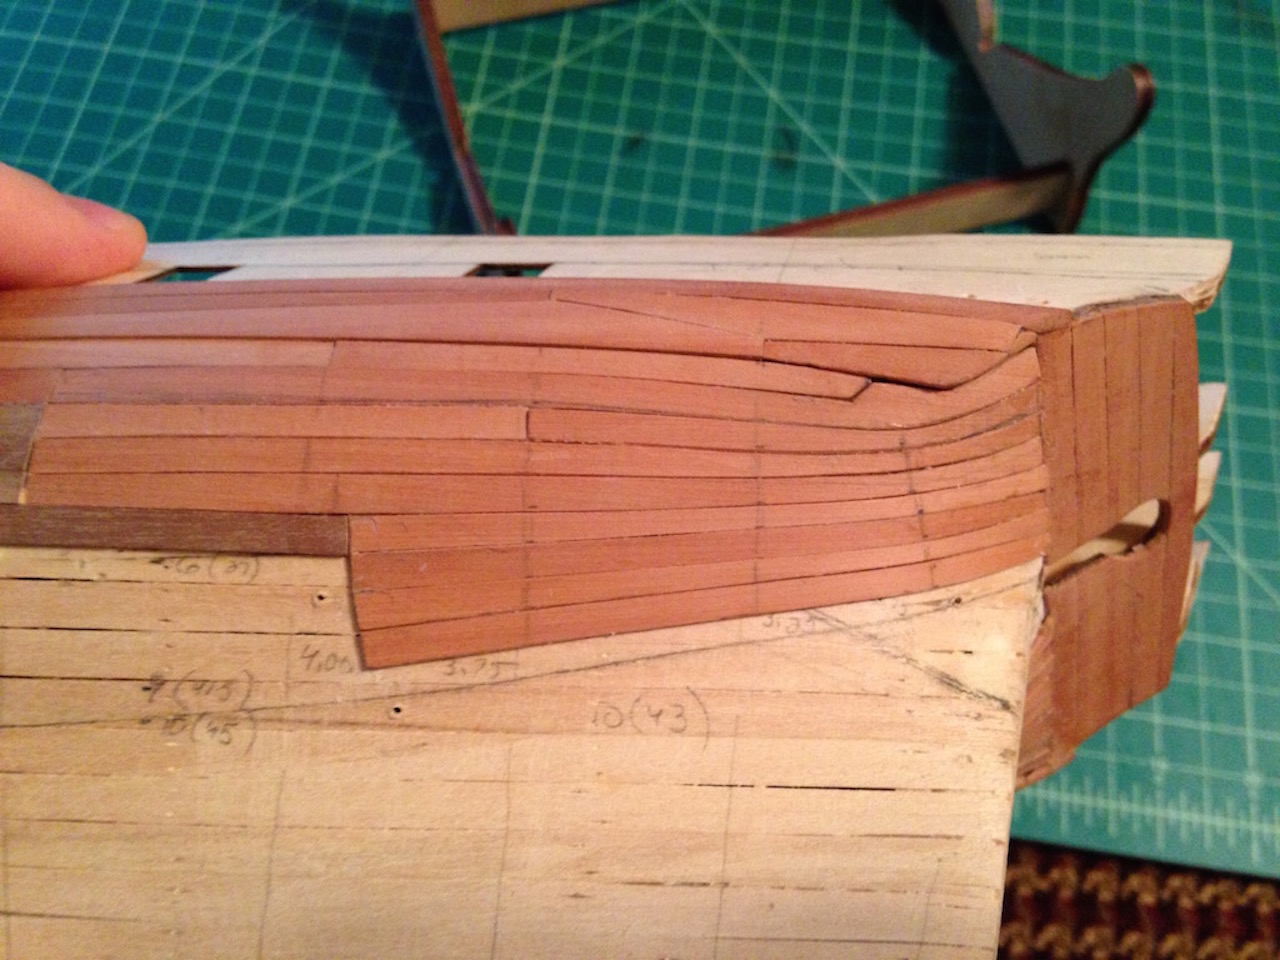
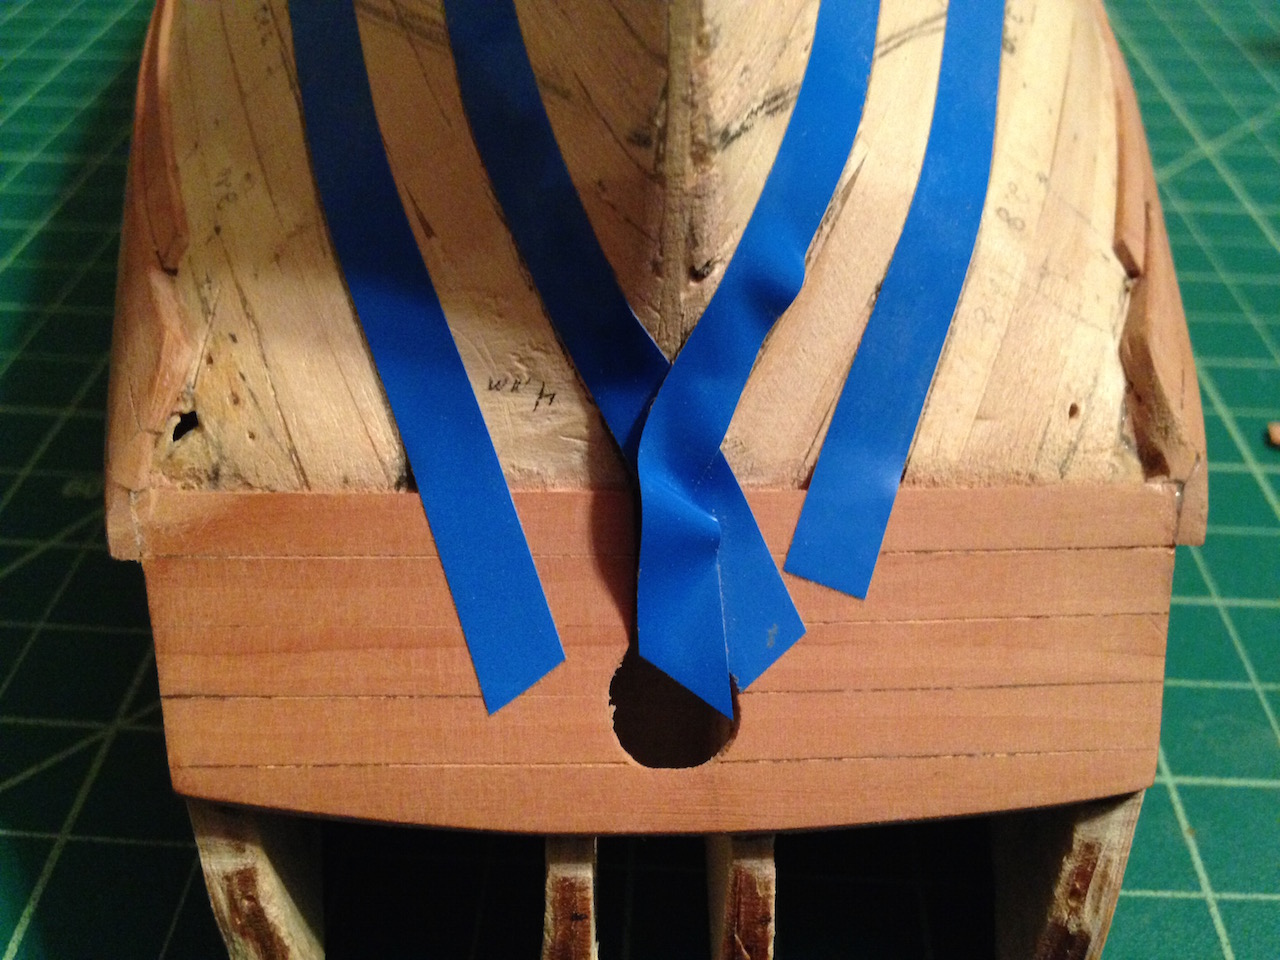
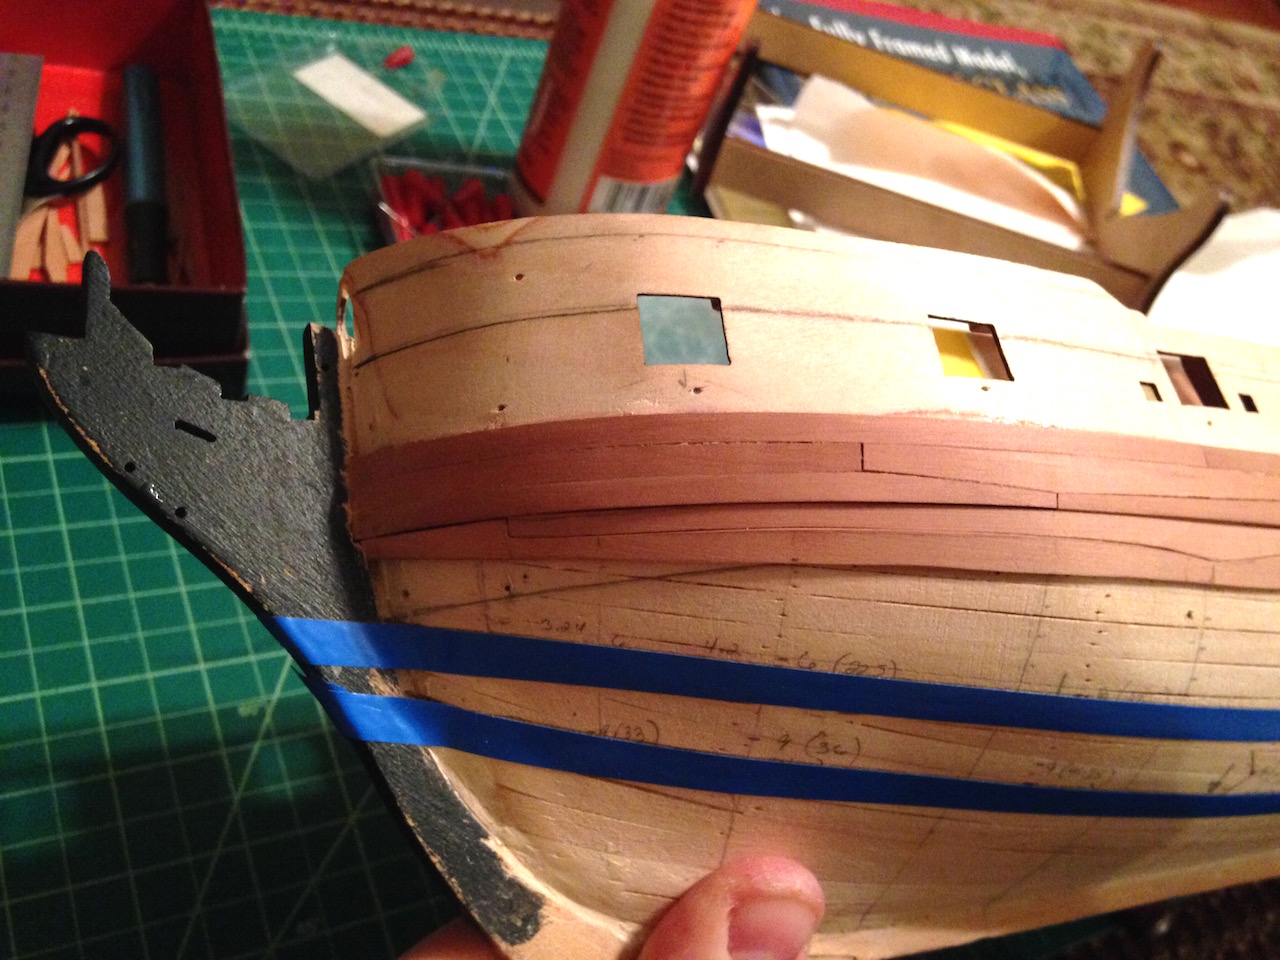
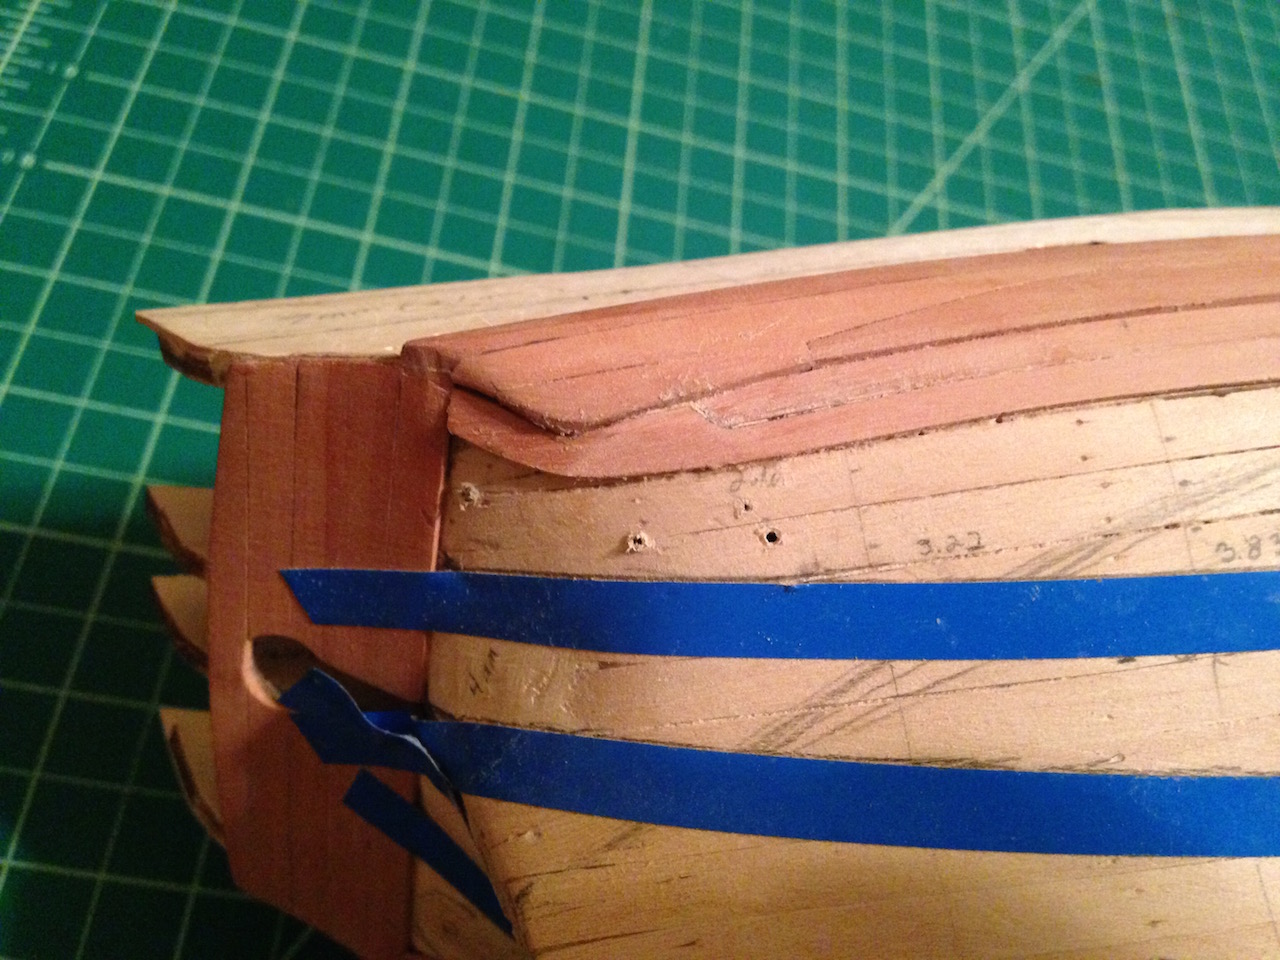
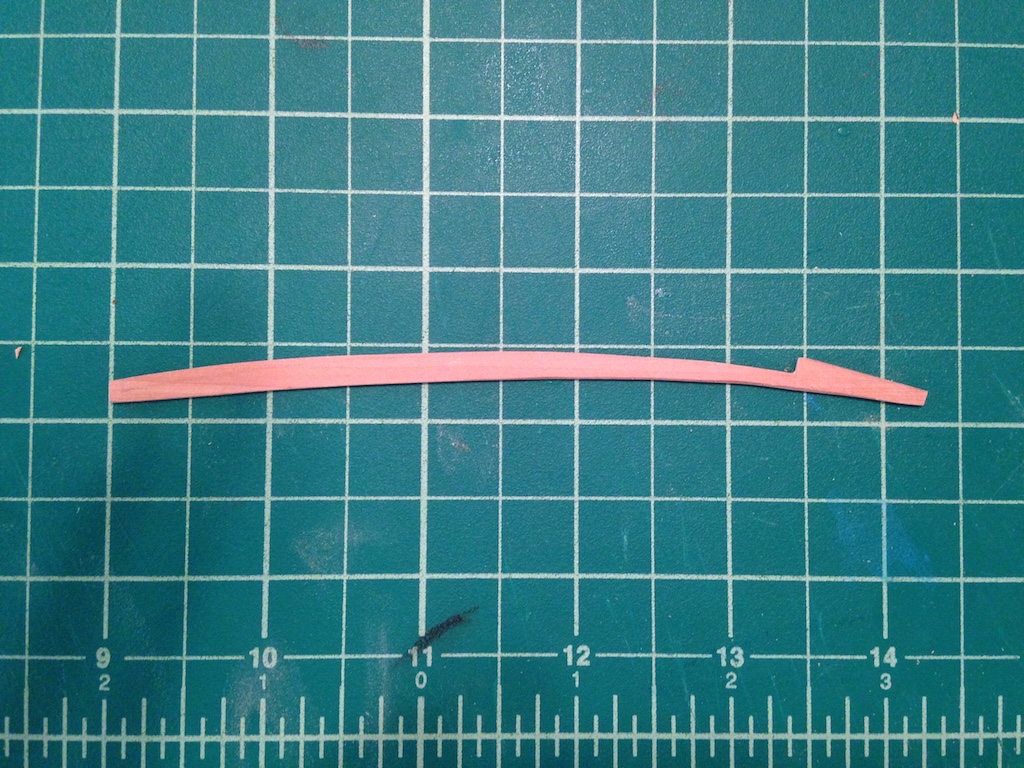
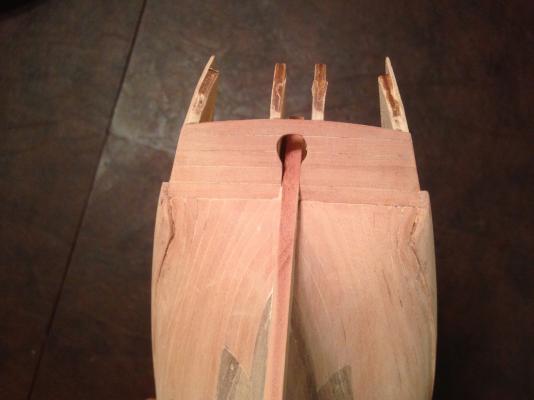
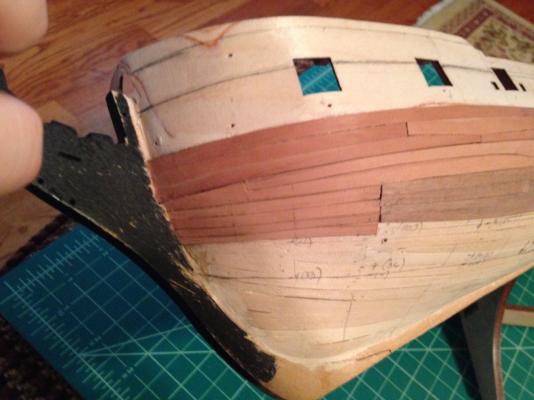
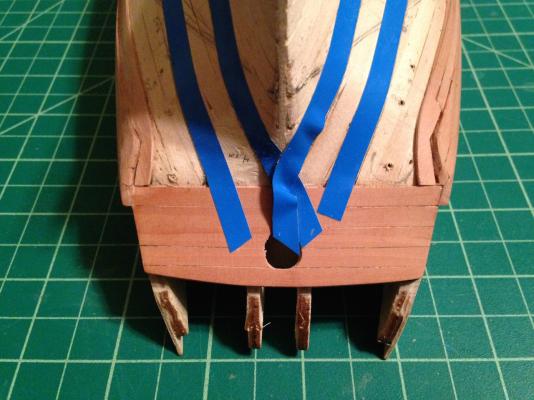
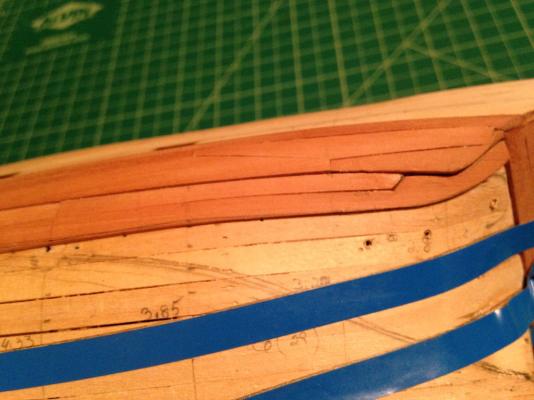
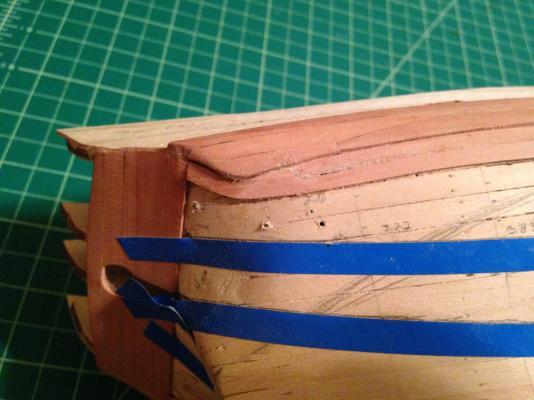
Thanks everyone for the suggestions on the aft end of the wales. The mistake was not extending the second row up higher. Not sure why I had taken that approach (maybe because there is a railing that runs across the bottom of the stern counter and into the wale?), but I ended up filling the gap with some custom fit pieces of pear, and sanded a nice curve into the aft end of the wale. I think it definitely looks better now. So this weekend, I've finished what are probably the most complicated planks on the hull - the planks in the second row leading to stem and leading to the stern. Here's a picture of the port side stem plank: Here are some pictures of the stern planks (some more sanding and finishing is needed, but it's late and I've been at it for a while tonight). Like the stem planks, this plank needed to take into account the drop plank above it. What made it more difficult is that the aft end of the plank also had to account for the hull curve up to the stern counter. Rather than use two separate planks, I decided to try and create one plank to fill that space like in the TFFM plans. Like the stem planks, I started with making a template from card, cut out the plank a bit oversize, then used an X-acto, chisel and sandpaper to slowly shape the final plank. After a few hours, I had my first plank. Like the stem side, I was surprised at how close that plank fit on the other side of the hull, so used that plank as a rough template come up with the second plank. Finally, here is a picture of the hull after the first two rows under the wale were installed: So with the first two rows done, the middle portion of the hull to the copper line is done. I have about four more rows of planks at the stem, along with another 10 or so rows at the stem. I'll probably just do partial planks on either side that will show above the copper line, and fill in the remaining hull with the kit walnut planks. Just doesn't make sense to me to spend hours and good quality pear wood planking the full hull when most of it will be covered with copper plating. Thanks for looking in!


-
Thanks for looking in Mobbsie. Hope all is well with you, my Badger Brother Too bad a lot of this planking will be covered with copper plates! It's been good practice for my Lyme build though, where I plan to leave the full hull in natural wood (no copper plates or white stuff).
-
Tricky plank Jason, looks very nice, great job!
-
Ian, great to see an update my friend. Your wheel is amazing. I was hoping to not use any paint on my current and future builds, but worried that I'd have to break that rule when it came to the ship's wheel. I bought a few from other manufacturers, and the wood ones seemed thick and out of scale, while the metal ones seem to scale, but have to be painted. Seeing your results, I might try turning a ship's wheel myself
-
Thanks for vote of support Mark I've made some good progress on the second row of top and butt planks. I've installed the first three planks of the row - no pictures yet, but I'll post some after I finish that last aft planks (which will take some time as I figure out how to address the wale issue at the stern counter). The plank at the stem on the second row is a real pain. The plank immediately above it is a drop plank, so the plank on the second row ends up filling that gap. Took me quite a bit of time to create the plank. I used card to approximate the shape, and then cut the planks slightly larger and spent a lot of time chiseling/sanding and test fitting. Thankfully the two sides were pretty comparable, so I had a good template for the port side after the starboard side was completed. Here's a picture of the starboard side plank - you can see how complicated the shape is. Glad I got them done - I now have to repeat on the stern side, but then won't have any more drop planks to deal with

-
Just wanted to wish all my friends in the US and around the world a Happy Thanksgiving (or equivalent holiday). Best wishes to you and your loved ones! I have a 19 pound turkey outside in the smoker cooking away, and wife and in-laws are working on the sides. Will open some wine and in a couple of hours, will be passed out on the couch in a turkey coma watching football.