


Landlubber Mike
-
Posts
4,416 -
Joined
-
Last visited
Content Type
Profiles
Forums
Gallery
Events
Posts posted by Landlubber Mike
-
-
Looking really great Dan!
I think Barracuda makes some replacement parts that specifically addresses some of the odder design choices. For example, if I remember correctly, they made some replacement flaps because the way Eduard designed theirs, a lot of the detail had to be sanded off. Same thing with the Eduard Spitfire - Barracuda makes a bunch of parts to avoid things like seams and other things.
-
-
Really great work Andy!! Excellent build and paint job - congrats!
-
-
1 hour ago, Gaetan Bordeleau said:
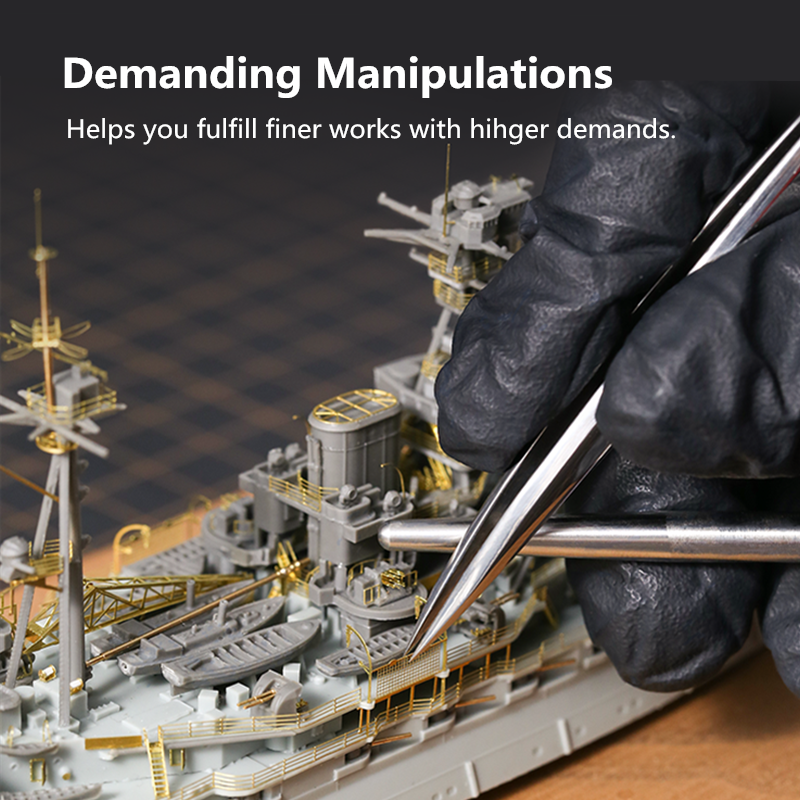
I would say that the main difference working small vs larger is the concentration level is very much more demanding, especially in carving to control your hands moves which are much more smaller.
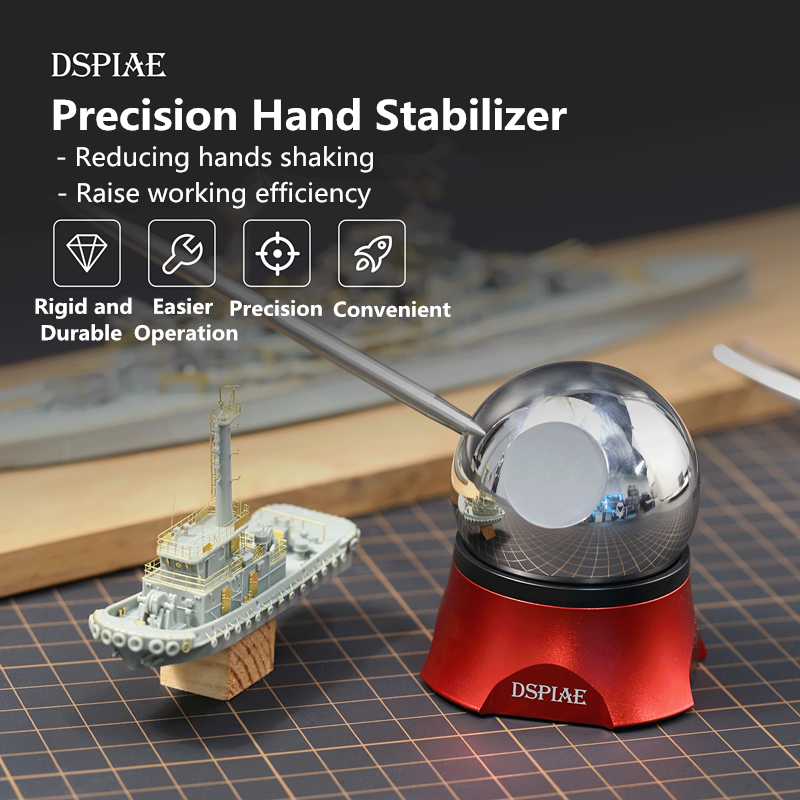
They have hand stabilizer tools out there that can help. I recently bought this one from Dspiae though haven't had a need to use it yet. Looks good to have, especially if I've had too much coffee before modeling!
- bruce d, knightyo, CaptnBirdseye and 2 others
-
 5
5
-
Holy squid Glen! That looks amazing!!! So creative and well done. Congratulations!
- Ian_Grant, Glen McGuire, Keith Black and 4 others
-
6
-
 1
1
-
@Gaetan Bordeleau, that model is amazing!
I have Phillip Reed's books and have always thought it would be fun to try and build a ship in such a small scale. It certainly would economize on materials and display space. It looks a bit daunting, but having worked on plastic models in 1/700 scale, I'm not as intimidated by working in wood in a small scale.
One thing to note is that he uses a lot of different materials in building his models - I believe he used a lot of plastic card. Before going into plastic models, I was sort of a wood purist when it came to wooden ship models, but these days I've come around to using plastic and other materials besides wood. And to the extent one does use wood, it's probably even more important to use wood with good modeling properties like boxwood. If I remember correctly, he was using planed shavings of wood for planking!
I'd really love to build the Sussex 1693 in a small scale - need to get my skills up a bunch of notches though!
- mtaylor, dvm27, hollowneck and 2 others
-
5
-
Gotta love painting three different colors on small parts 😁
- Egilman, Old Collingwood, Jack12477 and 3 others
-
6
-
-
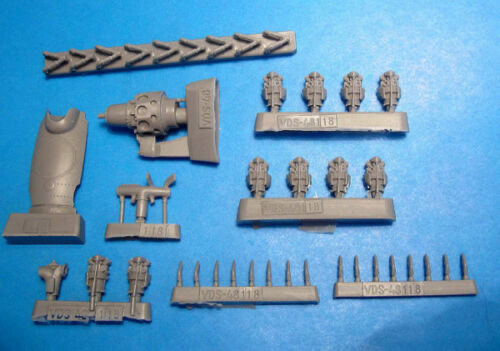
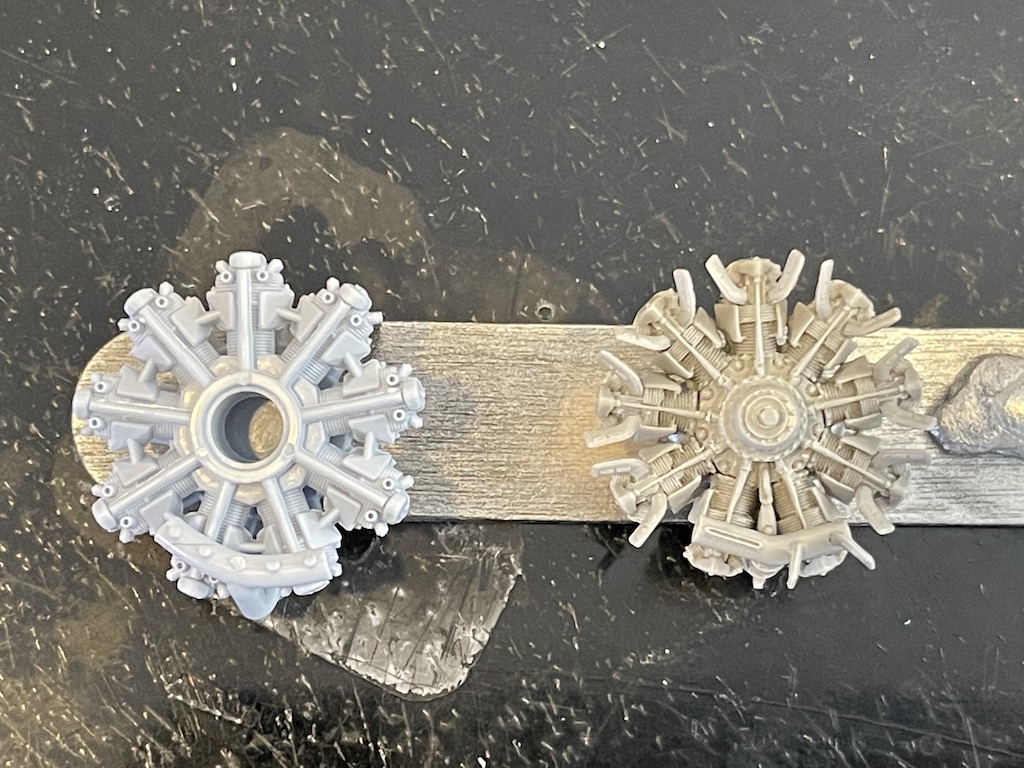
Taking a break from putting the finishing touches on the interior, I decided to spend some time on the engine. The kit engine is quite nice, but I picked up an engine that Vector makes specifically for this kit (VDS 48-118). Very detailed kit as you can see below.
Note: the Vector set includes a replacement bottom part for the engine housing. If you are building this kit with the Vector engine in the order in the instructions, you might miss this as the engine housing is built first on page 10, and the engine isn't built until page 15 of the instructions. This part is important as the Vector engine has a different shape to the underside than the kit part which is a little simplified. As part of the Vector set, you also have to trim off part of the pair of pipes that come down off the part containing the front pairs of legs.
My one pet peeve about this and other resin engines I've built (Aires, CMK) is that the propeller rod does not fit the kit propeller (way too narrow). Why can't they make the rod to fit the propeller?? Now I have to figure out how to make everything fit. 🤬
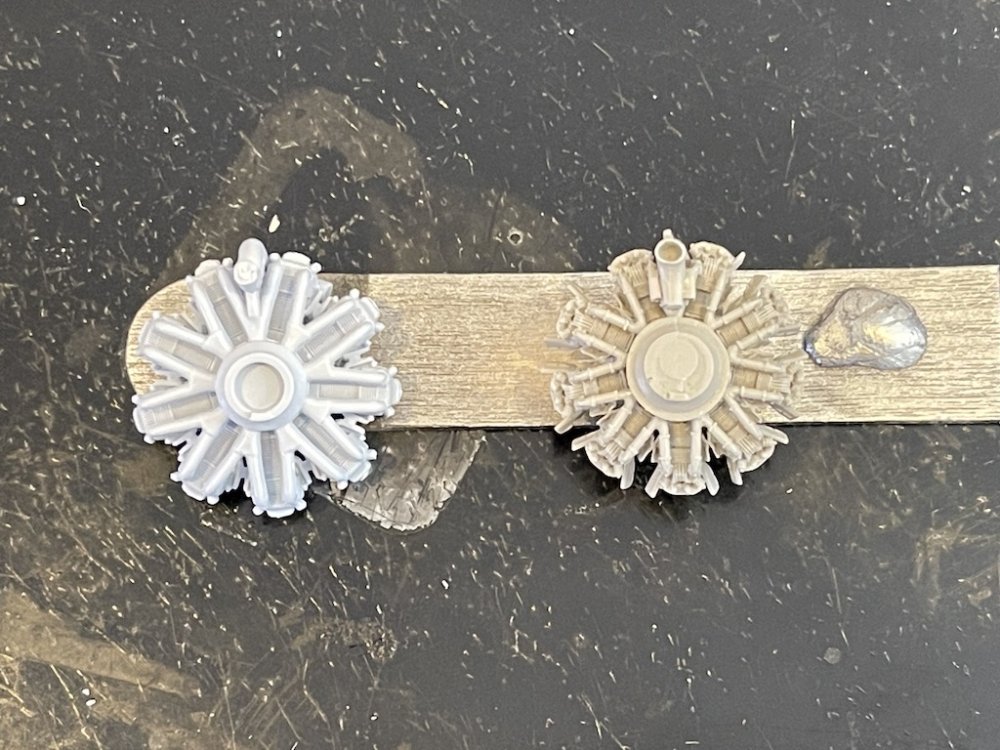
The engine took a few evenings to put together as I didn't want to rush gluing the cylinders in and having them out of line. In case you are deciding whether to buy the Vector set, as you can see in the picture below, the kit engine (left, dry fitted) is quite nice, but the Vector engine (right) really takes things up a couple of notches. I need to do a little filling and cleaning up, but otherwise, I'm really pleased with how the engine came out.

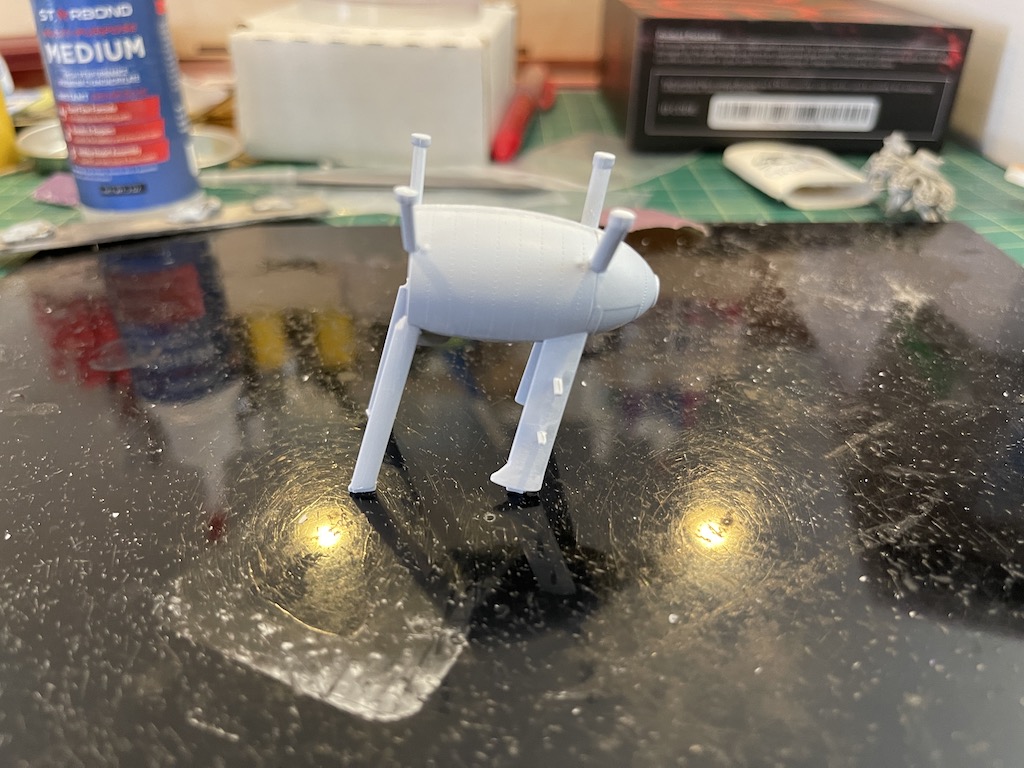
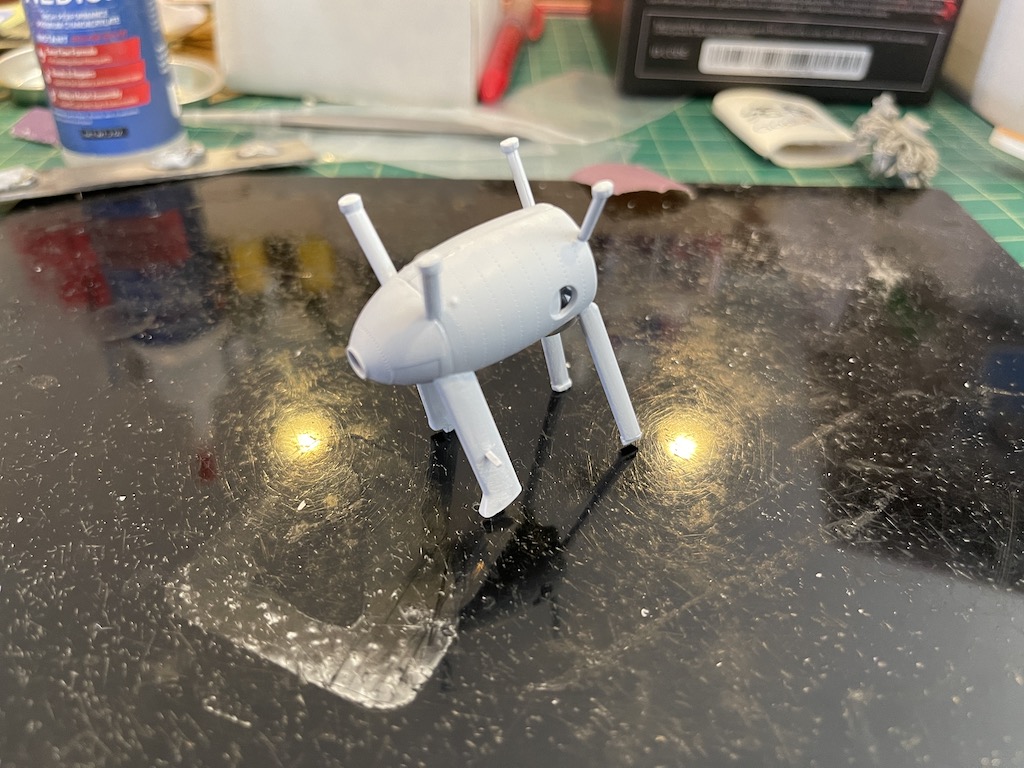
Here is the engine mount, where you can barely make out the Vector bottom piece in the second picture. I dry fitted the back pair of legs at the moment, as I want to button up the fuselage and test fit the engine mount before finalizing the mount. There's also an opening in the mount that you can see in the second picture. The kit provides two different parts that one can include on the side of the mount. I just need to pick one of them, since I'm building a different Walrus than the three included in the kit.


Interestingly (to me at least), the Walrus Pegasus engine/mount was pointed with an offset of 3 degrees to the left. The kit is designed this way, so kudos to Airfix.
Thanks for looking in!
-
The other issue I have with decals for things like stripes and belly bands is that there are times when you have to paint similar colors elsewhere on the model which don't have decals, so you are forced to try and match the paint job with the decal sections which isn't very easy and almost looks worse if you have two colors that are close but not identical.
Anyway, great job Andy!
-
Andy, your worms did a great job, wow! Stellar paint job! Glad to hear that Airfix sent out replacement parts -- good to know what companies will do that.
- Canute, realworkingsailor, Egilman and 5 others
-
8
-
Looks great Glen! I used the same crinkled foil technique for my water dioramas. One thing to note is that even though I added a sheet on top of the crinkled pieces, sometimes the more sharper folds ended up having trouble keeping paint and required extra attention and touchups down the stretch - problems which people try to avoid by adding the full sheet on top of the crinkled pieces. It was a real pain for me as I was building up the sea color-wise using different shades, so just trying to touch up with a brush was tricky.
So it might be worth trying to at least push down the sharper folds before you get too much further since you aren't taking that precautionary step. You could also brush on some gesso, where the thickness of that medium will cover the folds and smooth things out.
- mtaylor, FriedClams, Keith Black and 1 other
-
3
-
1
-
-
-
First question is do you want to turn metal? Big differences between metal and wood lathes. You can turn wood on a metal lathe but really not vice versa.
Second, depends on how much you want to spend. Lathe accessories with chucks, collets, centers, etc. really add up over time.
If you are looking for a nice little wood lathe for ship modeling, I think it's hard to beat the Proxxon DB250. Works great on things like turning masts. I had one before I decided to upgrade to a metal lathe for more functionality.
That's when I sold the Proxxon for a Sherline with extended bed and digital readout. Sherlines are built like tanks and will last forever. Also, if you ever see yourself possibly getting a mill, their lathe accessories can be used on their mill and vice versa. Sherline is a big price jump up from the Proxxon though.
-
-
-
Thanks guys! I have to say, a lot of fun I get in modeling is sharing with you guys. The camaraderie and learning through the sharing makes the hobby all that much more enjoyable.
- CDW, Edwardkenway, AJohnson and 3 others
-
6
-
Wow well done Glen!!! Kraken came out cracking! Good stuff!
- Keith Black, Glen McGuire, mtaylor and 3 others
-
5
-
1
-
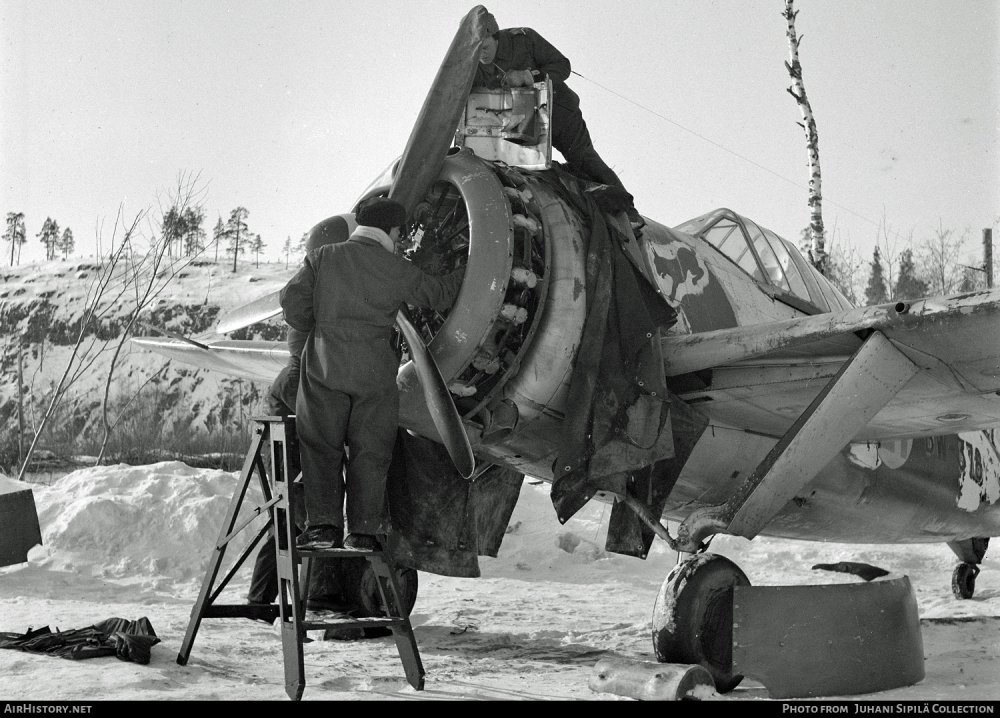
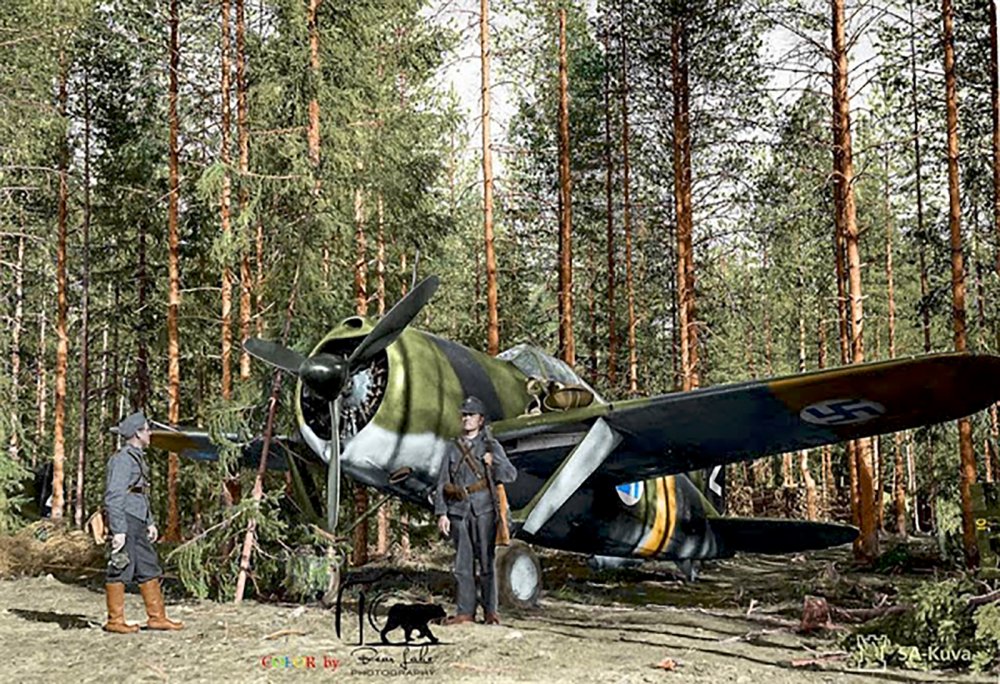
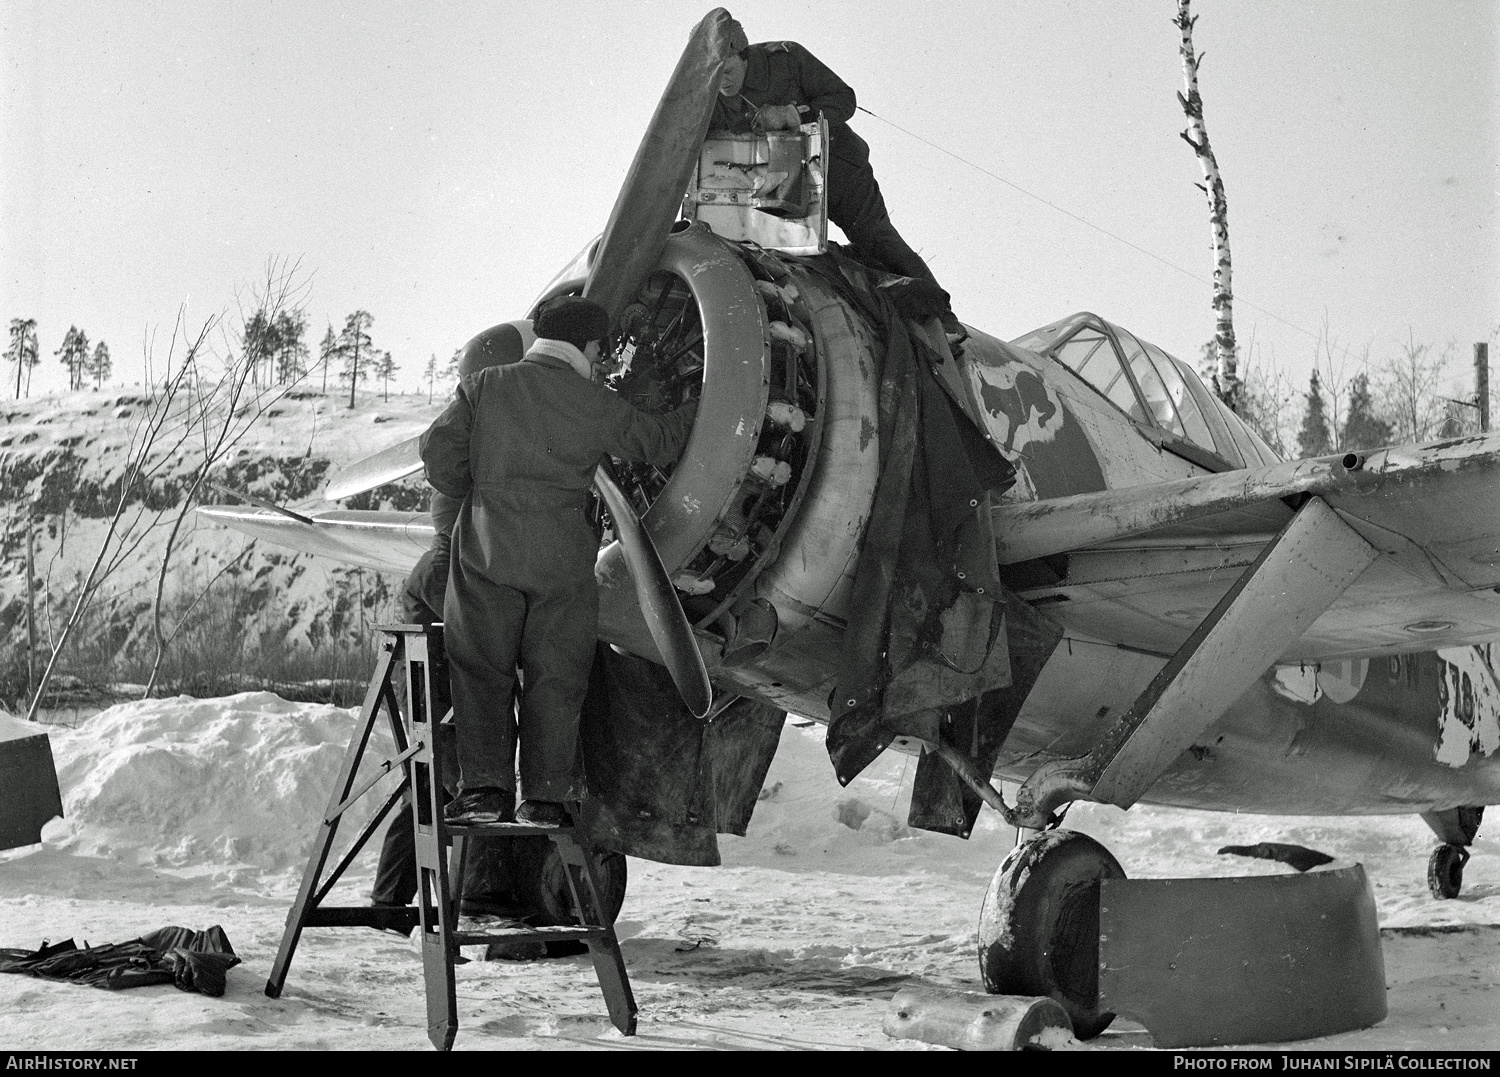
After some noodling, I think I'm going to try to recreate this picture in a model diorama:

Sorry for using this log to record my thoughts, but I think I've worked through some of the trickier parts, which are:
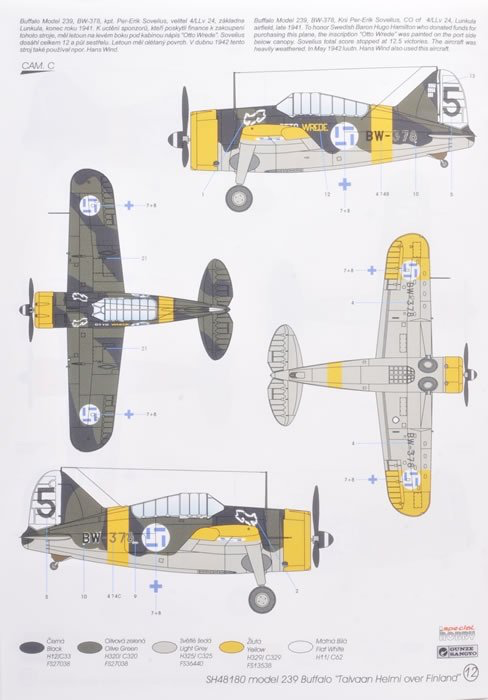
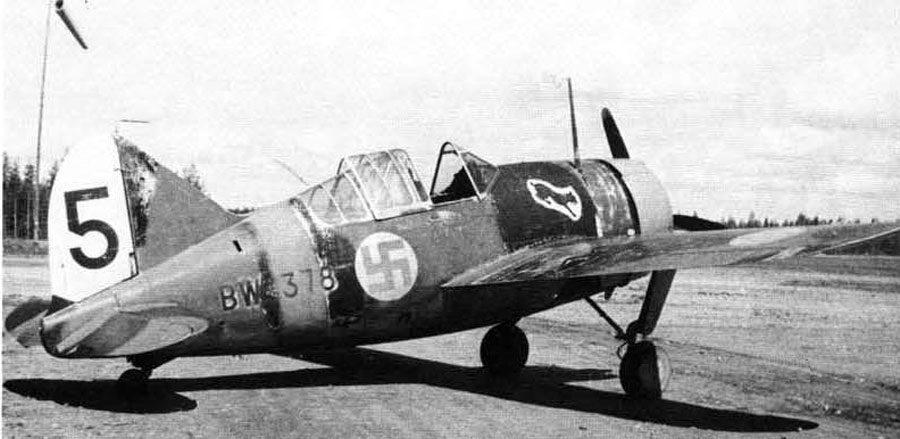
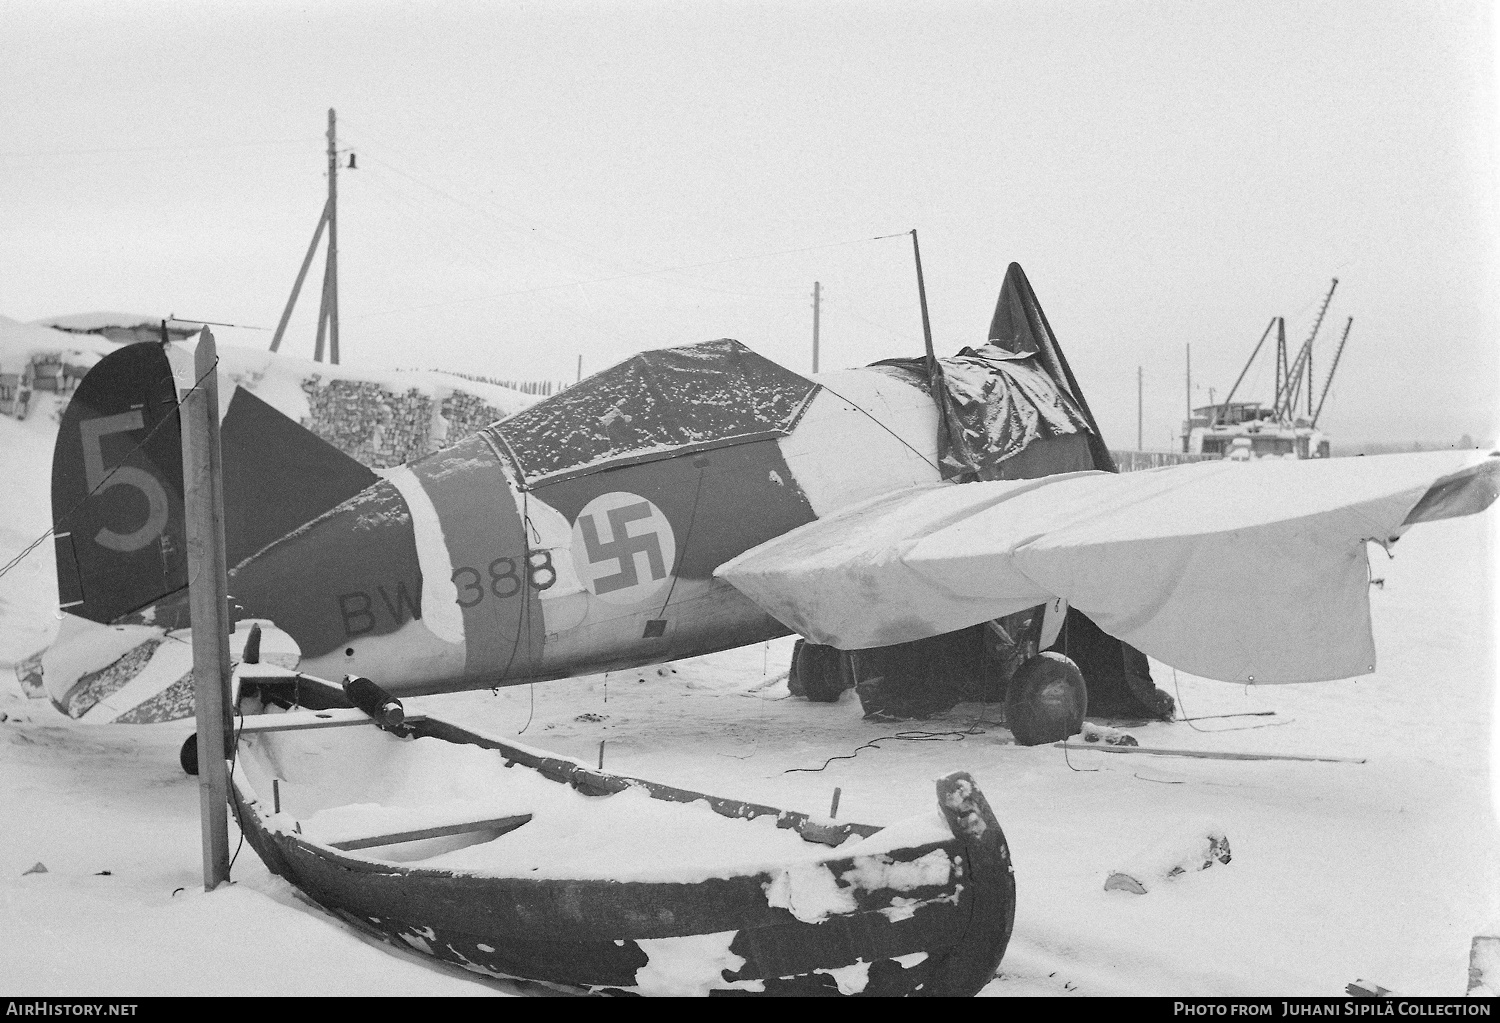
1. Representing the BW-378 - fortunately, the kit includes decals for BW-378 (Camo C). The picture above suggests that the plane was re-painted/painted over in a winter camo scheme that looks very similar to the kit's scheme in Camo A, so I'll use A as the model with C's markings. Super lucky here, as not having the numbers would have probably made me scrap this whole crazy idea. The one thing I'm not sure about is whether in adding white for winter camo, the tail would have been repainted from white to blue - my guess is not since it seems like typical practice was to apply white paint over existing paint - here the olive and black areas of the plane - rather than repaint sections like the tail. Too bad though, as I think the blue tail looks pretty sharp.
2. Engine - with the panels open, I'll need to have a more detailed engine than the kit engine. The B-239 used a 950HP Wright R-1820-G5 Cyclone. Looking around, there are a few mid-late R-1820 aftermarket engines out there. Fortunately I already have a Vector engine (32-005) that looks like it might fit the bill. I had bought it for the Dauntless kit I won in the Christmas raffle on LSM a few years ago, so I might try and use that one and see if it fits.
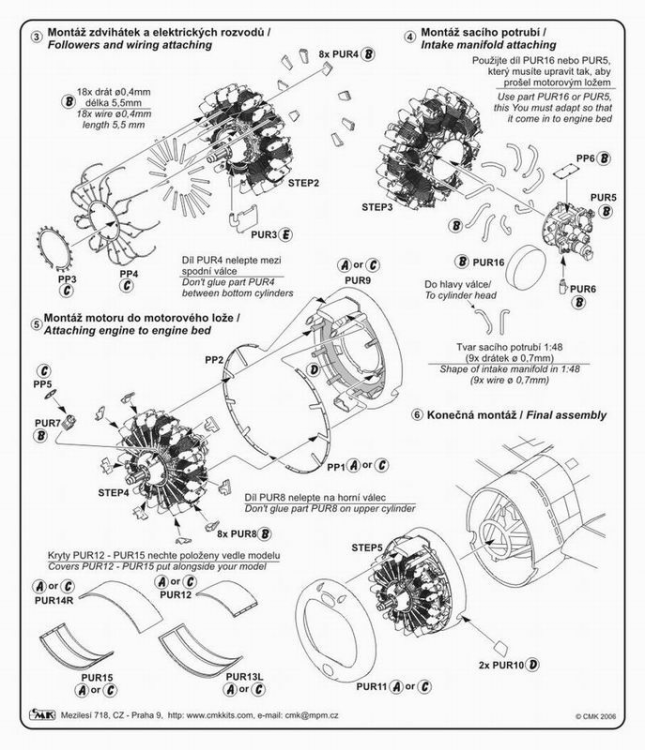
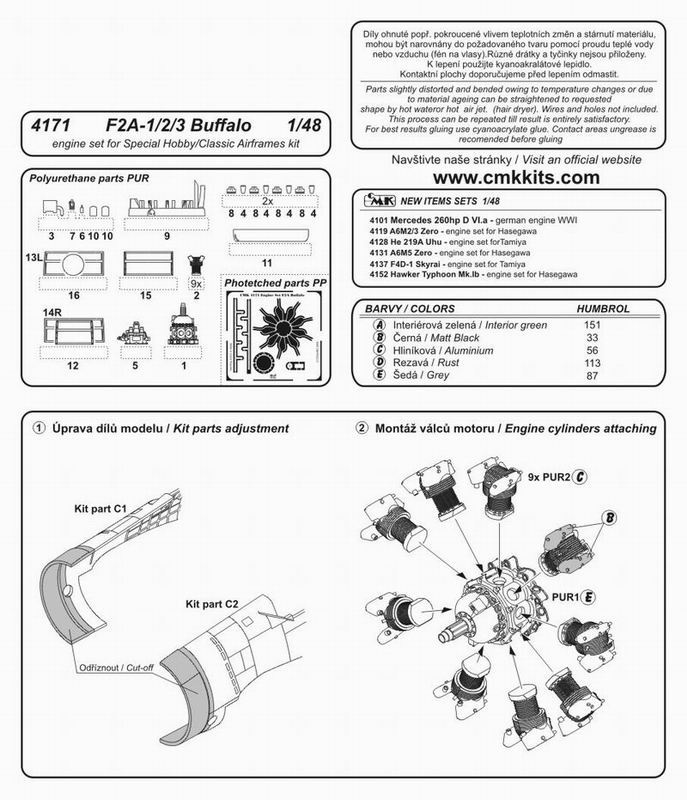
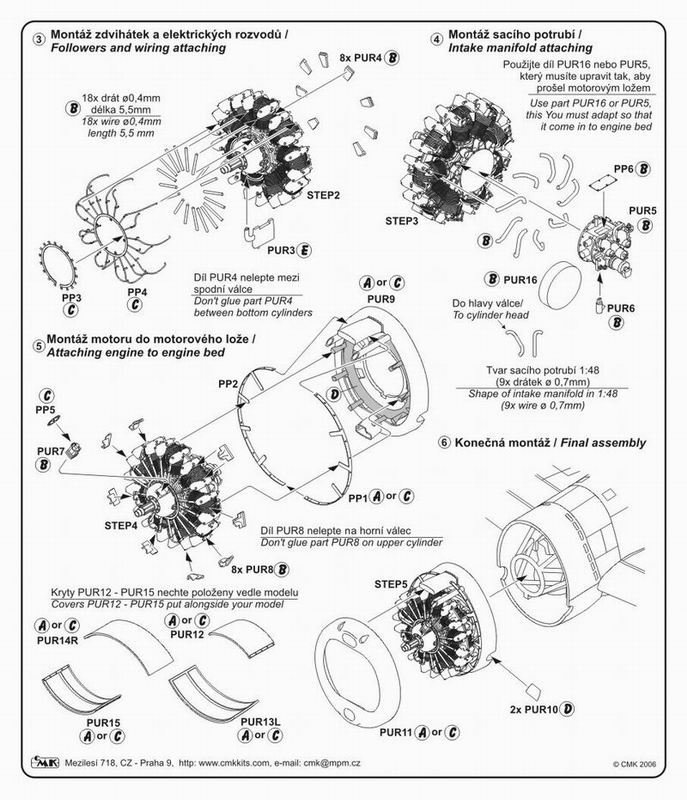
3. Cowl interior parts - on my 1/48 kit, I had opened similar panels using a CMK engine set which included the engine mounting pieces. For this 1/32 kit, it looks like things will be much simpler. I won't have to cut the access panels from the fuselage halves (as in step 1 on the 1/48 build) because the halves end in the right place since the 1/32 kit includes separate parts for the access panels. Plus, I believe that the 'curved-in' shape of the ends of the fuselage halves, together with the engine mounting pieces in the kit, get you PUR9 and PP1 and PP2 from the 1/48 kit (see instructions below). So, I think that all I will need to do is modify the kits access panels to show the one on the ground and the one held by the mechanic on top of the nose of the plane (which incudes the air vent, which should be fairly easy to replicate). Lucked out here (I hope) as replicating PUR9 wouldn't be easy.

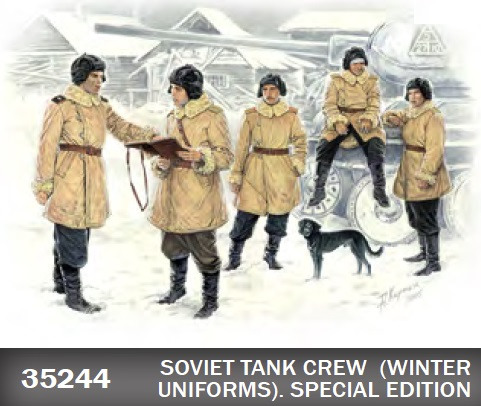
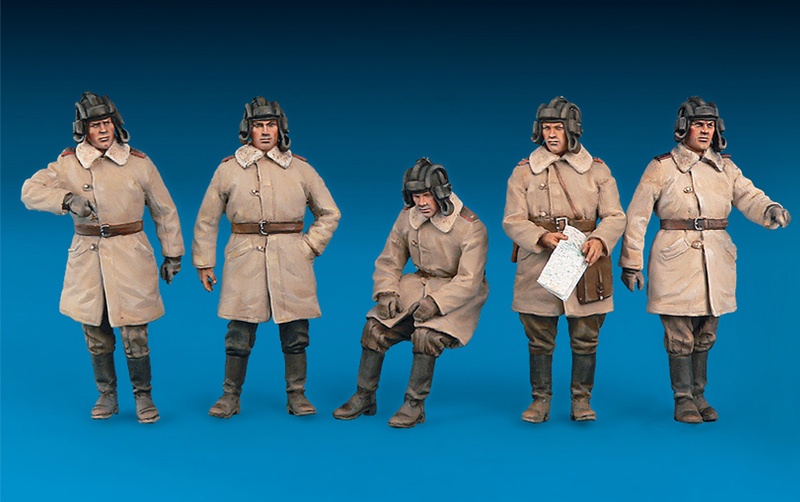
4. Figures. Ultimately, these might be the trickiest parts of the diorama. I'll probably find figures that most closely match the poses of the three in the picture, and Frankenstein them with other parts like "winter heads with hats", gloves, and boots, and probably add or modify details using Milliput or similar materials.
5. Other diorama items. The ladder and wheel chocks should be fairly easy to replicate. The tarps will be tricky - I might use something like Modelspan, which I think I would be able to wet, fold and drape. If anyone has any other suggestions, I'd love to hear them. There are a few products to replicate snow, so hopefully that won't be an issue. I'd really like to replicate that birch tree in the background if I can - it adds a nice touch to the scene!
All in all, I think this might be a lot easier to accomplish than I first feared. Thanks for bearing with me on my little build treatise!
-
-
Thanks Craig. Funny, before seeing your post I found this set from MiniArt that could work, or at least give me models from which I can create the mechanics/air crew in winter gear. I probably would do either the first or third picture, so wouldn't need a pilot figure. It's a bit hard to find figures in 1/32 in winter gear, but there are some in 1/35. I figure if 1/35 doesn't look right, I could use Milliput or something else to add winter clothes to figures to approximate what is in the pictures.
- Canute, mtaylor, Edwardkenway and 3 others
-
6
-
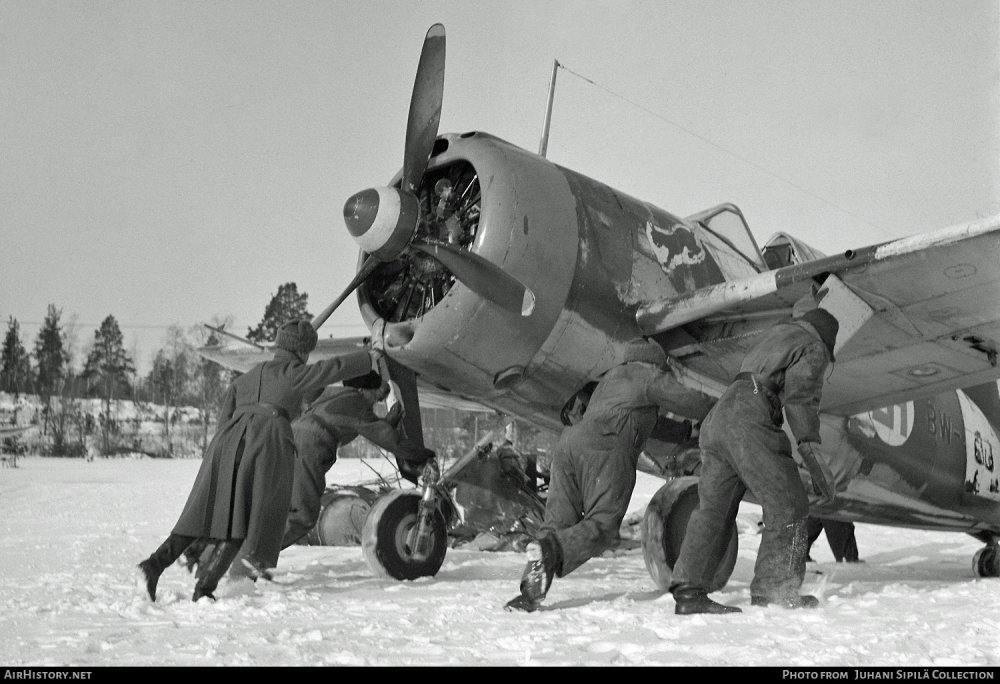
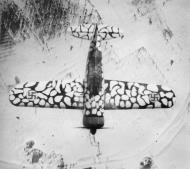
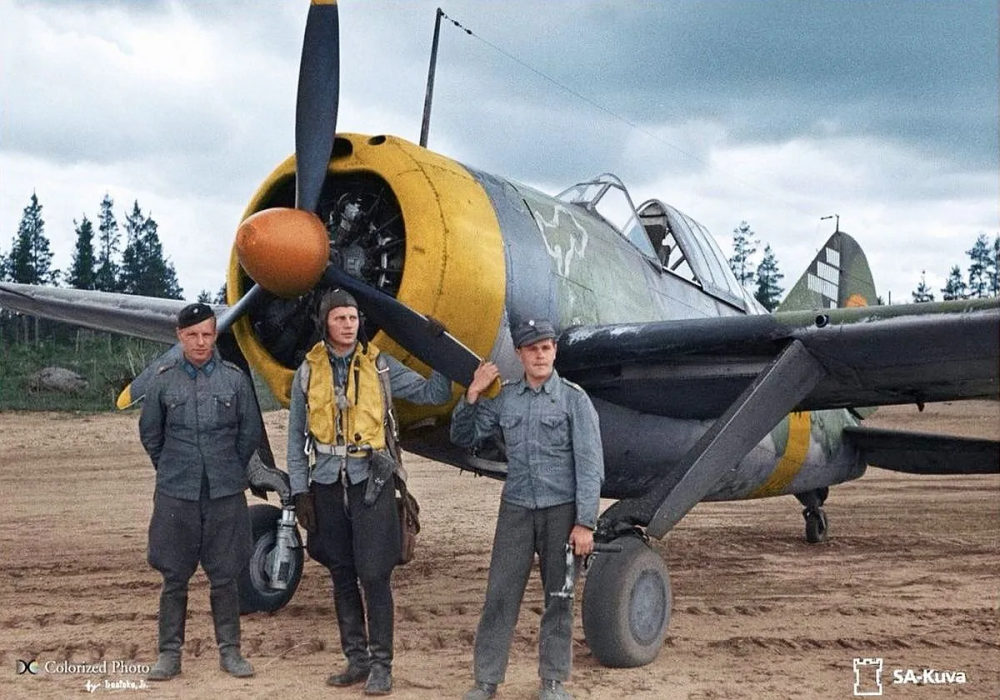
Some B-239 pics I found online. I wasn't planning on putting this model in a diorama, but I think it would be pretty cool to diorama the first or third pictures below. Unfortunately I'm not having luck with finding appropriate figures and numbering could be tricky.
BW-378:
Another of the BW-378:
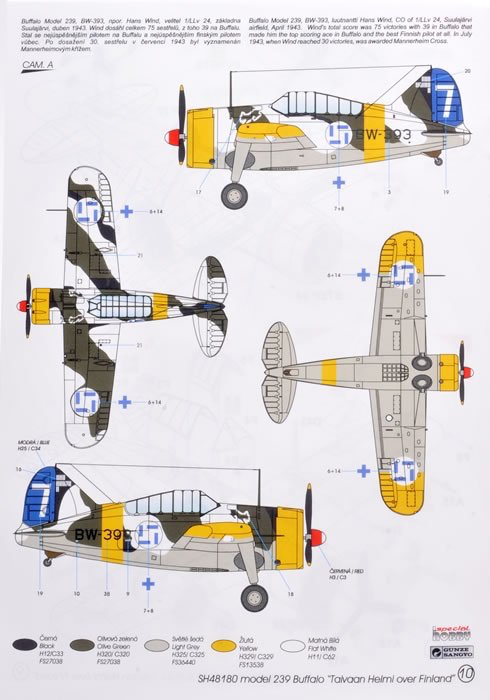
BW-383:

Interesting camo scheme:
The famous Lt. Hans Wind (302 combat sorties, 75 confirmed kills, ranked second on Finnish aces list):
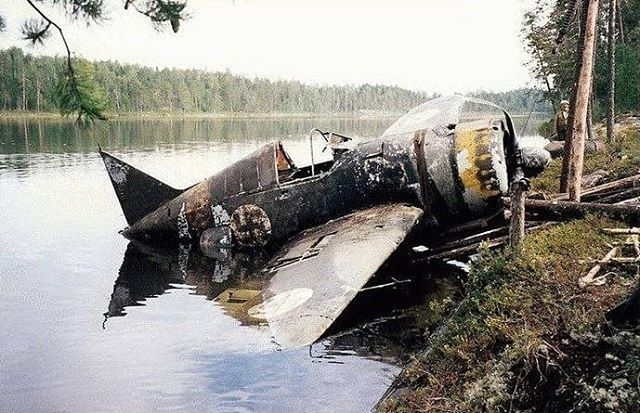
Of course, if the model ends up looking like a piece of crap, I could go for BW-372 which was pulled from a Russian lake in 1998:
https://www.warbirdforum.com/bw372.htm


Bristol Beaufighter TF.X by realworkingsailor - FINISHED - Airfix - 1/72
in Non-ship/categorised builds
Posted
Nice Andy! I'm a fan of CMK accessories, they do a nice job. I used a bunch on my Buffalo build.