


Landlubber Mike
-
Posts
4,416 -
Joined
-
Last visited
Content Type
Profiles
Forums
Gallery
Events
Posts posted by Landlubber Mike
-
-
49 minutes ago, realworkingsailor said:
It can also be a bit of a torment. On more than a couple of occasions I’ve had a great idea for a project based on a model kit, hopped on to Scalemates, checked out all the aftermarket stuff I would have needed for said project, only to find out I’m already too late for the party and all those aftermarket parts and decals are sold out, no longer in production, or otherwise completely unavailable. 🙄
That winter scheme looks intriguing. I wouldn’t be too worried about the white, I’m sure in real life those planes got so thoroughly grunged up you could easily pass on any paint flaws as pre-weathering!Andy
I know what you mean Andy. When that has happened, I set up saved searches on eBay for the aftermarket I'm looking for. I've really lucked out on some impossible to find items that end up turning up in my feed. More recently, I set up an account on Scalemates and put missing aftermarket on my wishlist, which showed me if other members on the site were offering it for sale. Managed to get a few aftermarket pieces that way - some of which had been discontinued for a decade or more. Nice feature of the site.
Good thing I'm not going to be buying any more kits so that should no longer be an issue...famous last words 🤥
-
Yes, those sites usually come up when I google the kit I'm interested in. Scalemates is another amazing resource - going to a particular kit (or aftermarket) page brings up build logs, reviews, instructions, related aftermarket, past and future iterations of the kit, sellers of the kit (or aftermarket), etc. Incredibly helpful site if you are building plastic models.
- mtaylor, Ryland Craze, AJohnson and 7 others
-
 10
10
-
18 minutes ago, CDW said:
Definitely signing up for this ride. Great start Mike. Kinda like the old Classic Airframe kits but more detailed.
Thanks Craig! Glad to have you along keeping me honest. I have a feeling that with a number of their kits, Special Hobby starts by taking old molds like from the Classic Airframes kits and then adds a bunch of resin and PE and new decals. I could very well be wrong about this though. The details on this and my last SH Buffalo in 1/48 are quite crisp and nicely done, which I'm not sure I'd expect from older molds, but maybe they clean them up or otherwise improve on older molds.
*EDIT* According to this site, the 1/48 kit was a limited release from SH originally back in 2005:
https://www.hyperscale.com/2017/reviews/kits/sh48180reviewbg_1.htm
What was interesting with this kit is that they give you a second set of fuselage halves, so you have to make sure you know which you need to use. My guess is that they didn't want to create a new sprue of the fuselage and interior parts for this particular version of the Buffalo, but instead created a smaller sprue for the 239 Buffalo and you end up using the interior parts from the original sprue. I was a bit confused at first, but at least now I have a good size paint mule to test paints and finishes on.
-
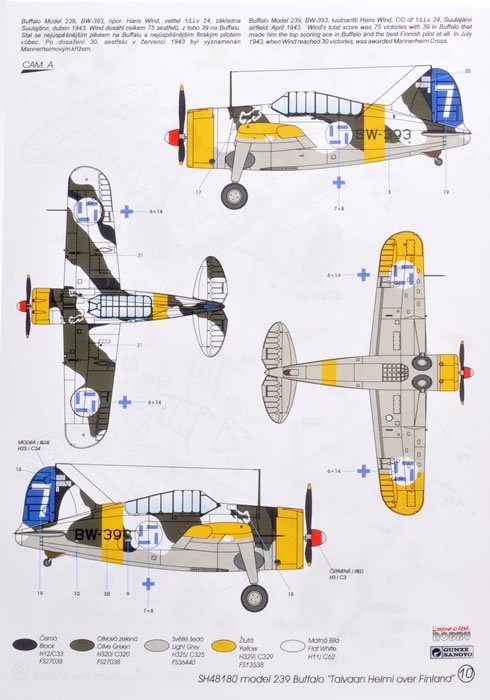
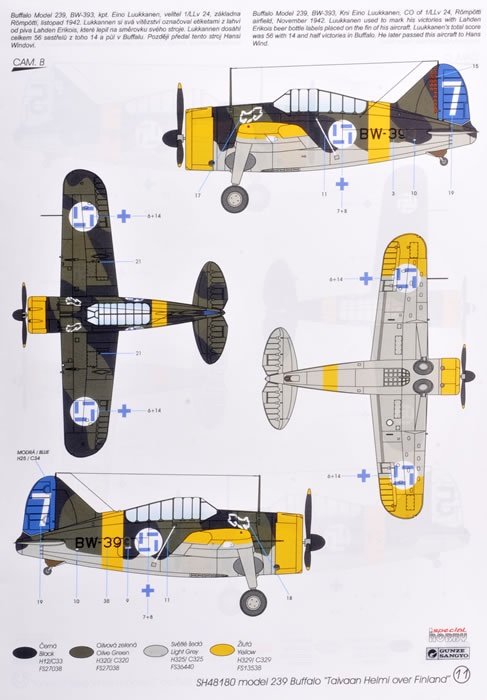
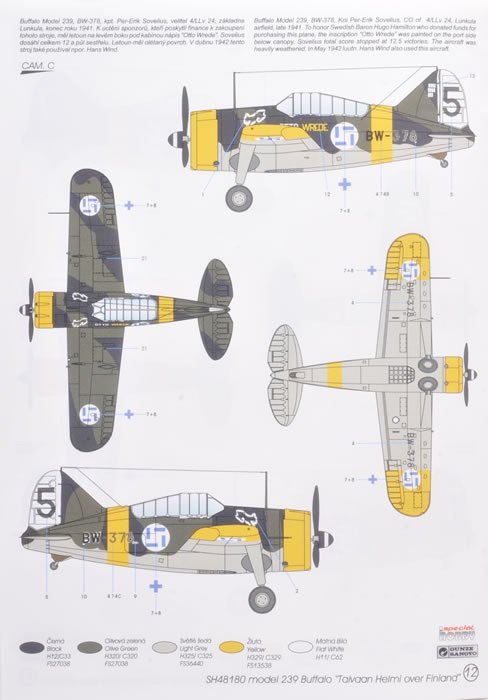
Thanks Andrew - I've always thought the Finnish scheme looked really cool. Generally they are black and dark olive on the topside, but one of the three camo schemes includes white in it for a winter scheme, and I might try that one. I've always liked winter schemes, though spraying that much white always scares me given how tough white can be to get the right coverage and opacity.
-
Nicely done Patrick, very cool trio. Lot of wheels to paint! What's next?
- Edwardkenway, Canute, Egilman and 4 others
-
7
-
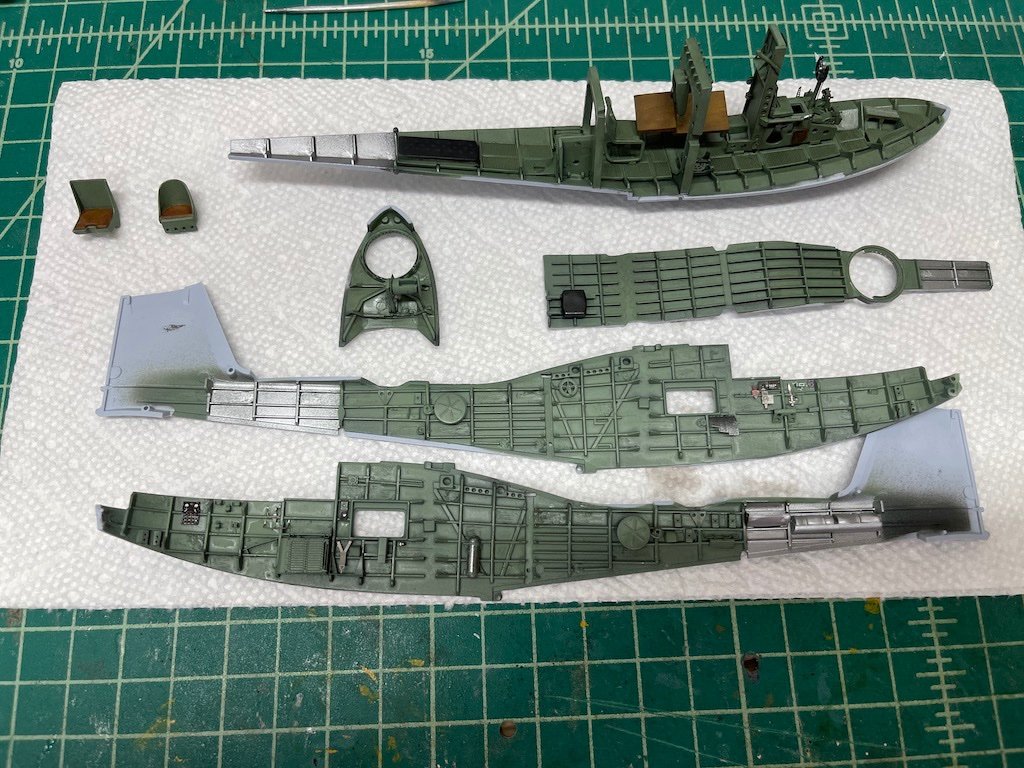
Here's where I am today. Managed to get painted the interior of the fuselage halves and remaining interior items to install.
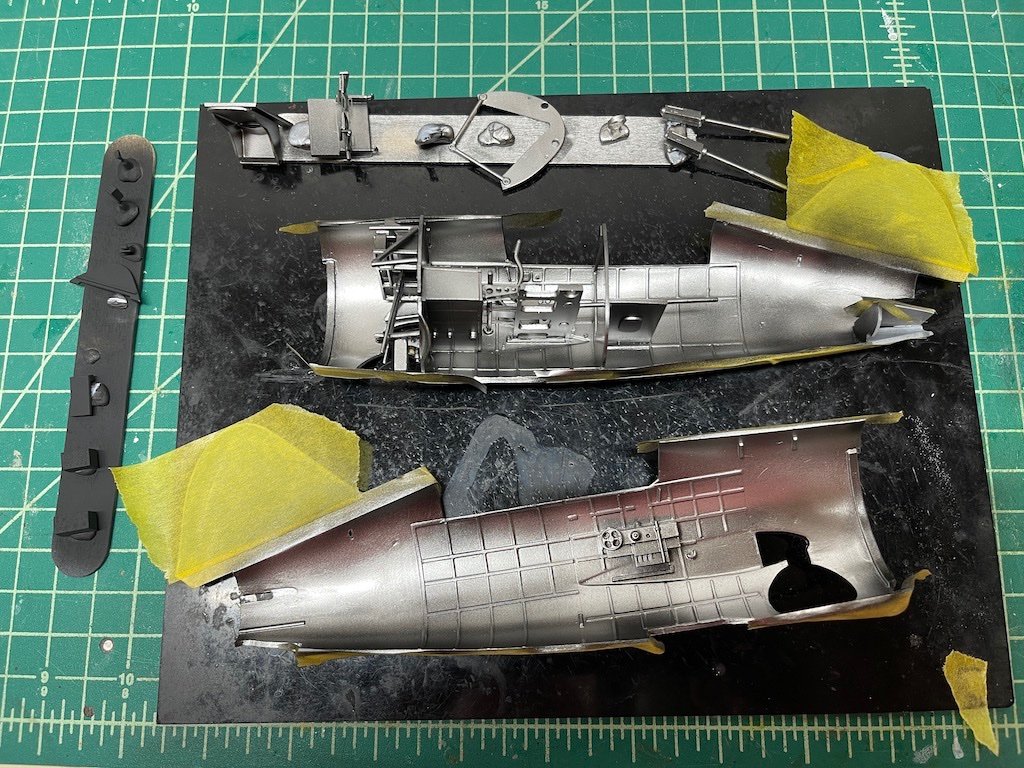
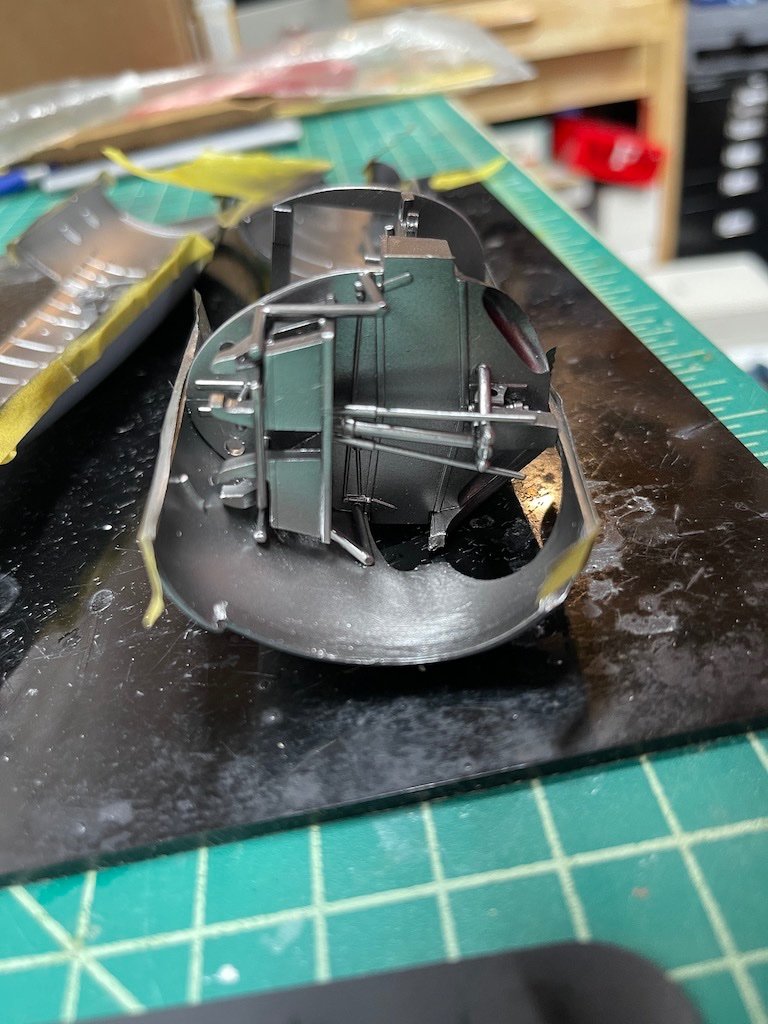
I'm pretty happy with how things are looking. I went ahead and used Vallejo's Metal Color Duraluminum. It sprays very well. After using mostly Mr. Color paints on my 1/48 Buffalo, it's been nice to go back to acrylics for ease of preparing the airbrush and cleaning. I'll still use Mr. Surfacer for the exterior primer and either Mr. Color or Tamiya for some of the harder to paint colors like the yellow on the cowl and wing tips, but I might go back to using acrylic elsewhere.
Thanks for looking in!
-
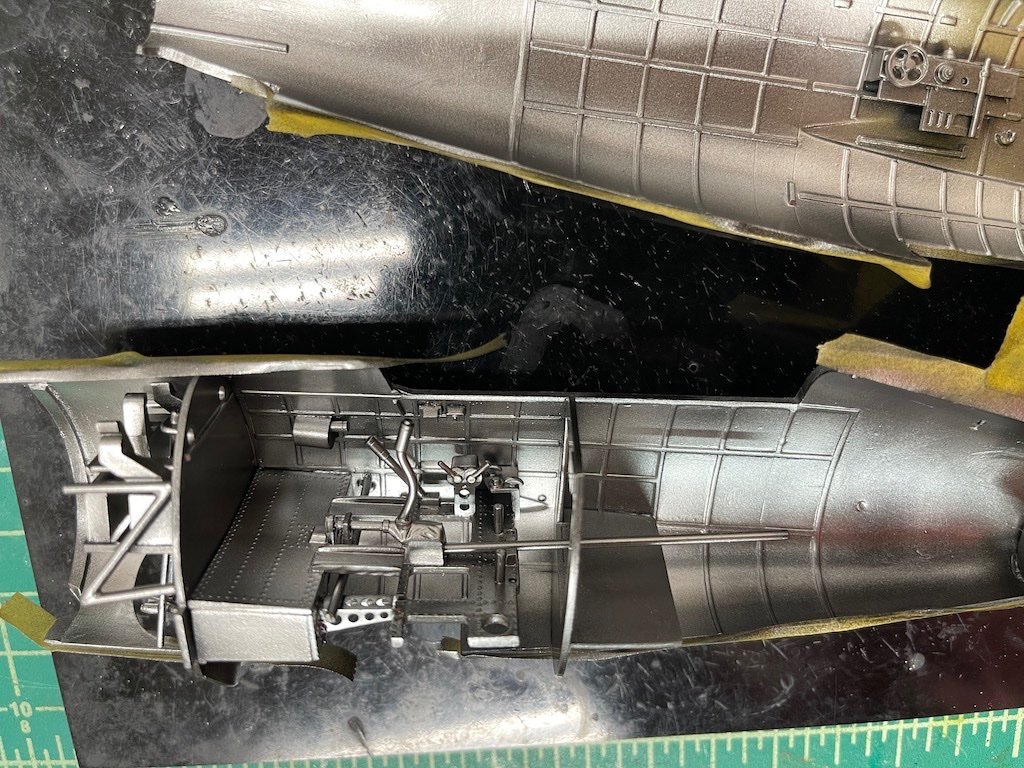
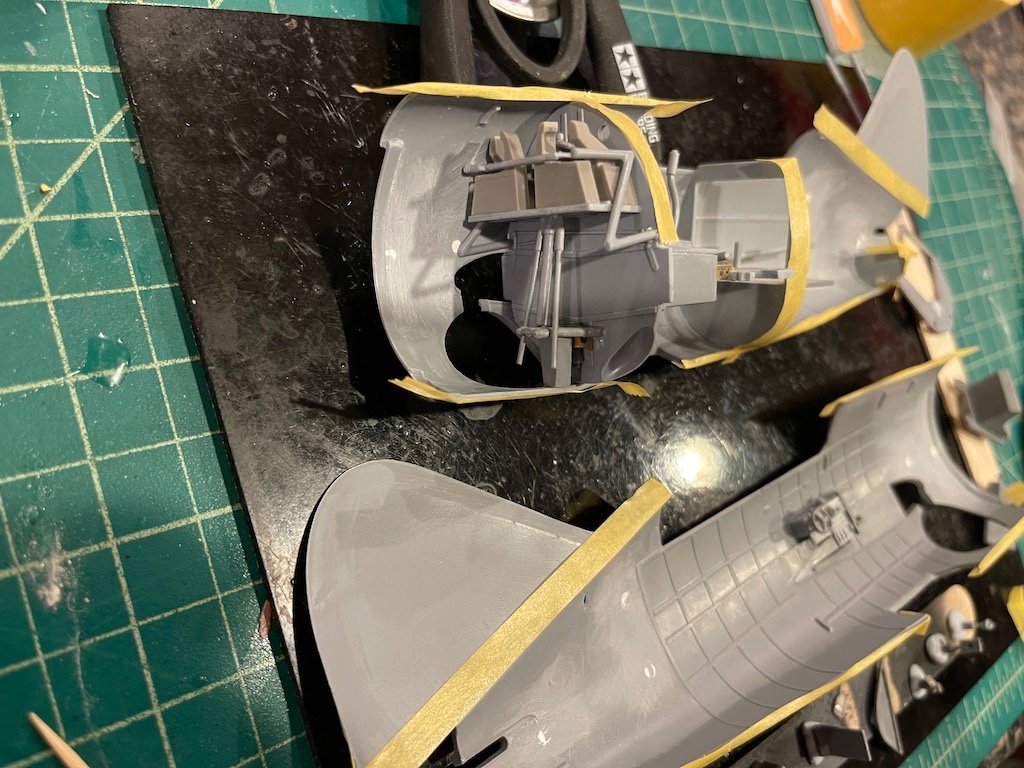
With the fit issues on getting the fuselage closed up, I thought it would be better to add as much of the interior as possible to one of the fuselage halves, rather than trying to install what are three or four separate assemblies into the fuselage halves and then trying to get it closed up. Taking this approach allows me to position the sub-assemblies on one half of the fuselage, and while the glue is drying, test the fit and get the final location by dry fitting the other fuselage half over it. Takes quite a bit of time, but I think it will be less painful in the long run.
Instructions are ok I suppose - generally there are no locating marks, pins, etc., so you have to sorta guess where the instruction arrows point you. Thankfully there are other builds out there on the web to doublecheck yourself.
- CDW, realworkingsailor, Egilman and 8 others
-
11
-
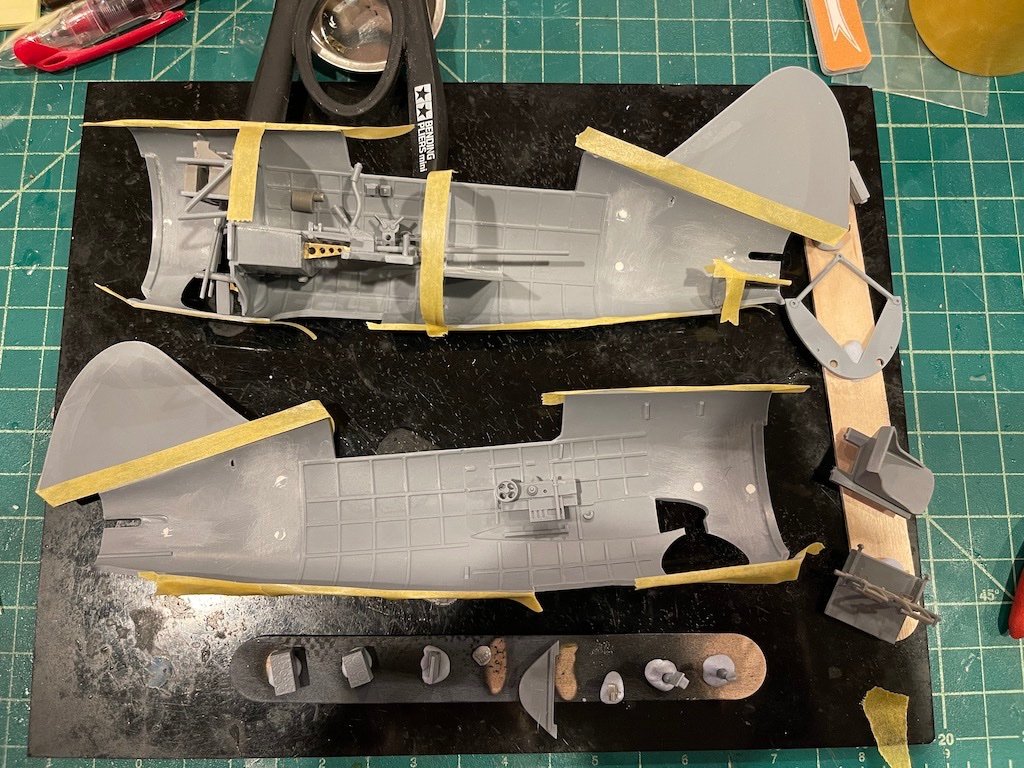
While waiting on parts to dry on my Walrus for otherwise just needing a break from it, I started the Buffalo 239 Finnish version from Special Hobby in 1/32. Since I just finished their 1/48 Buffalo kit, I figured I might as well tackle this one given I know what to look out for. Unlike the 1/48 kit I just finished, this one I will be building mostly out of the box with considerably less aftermarket.
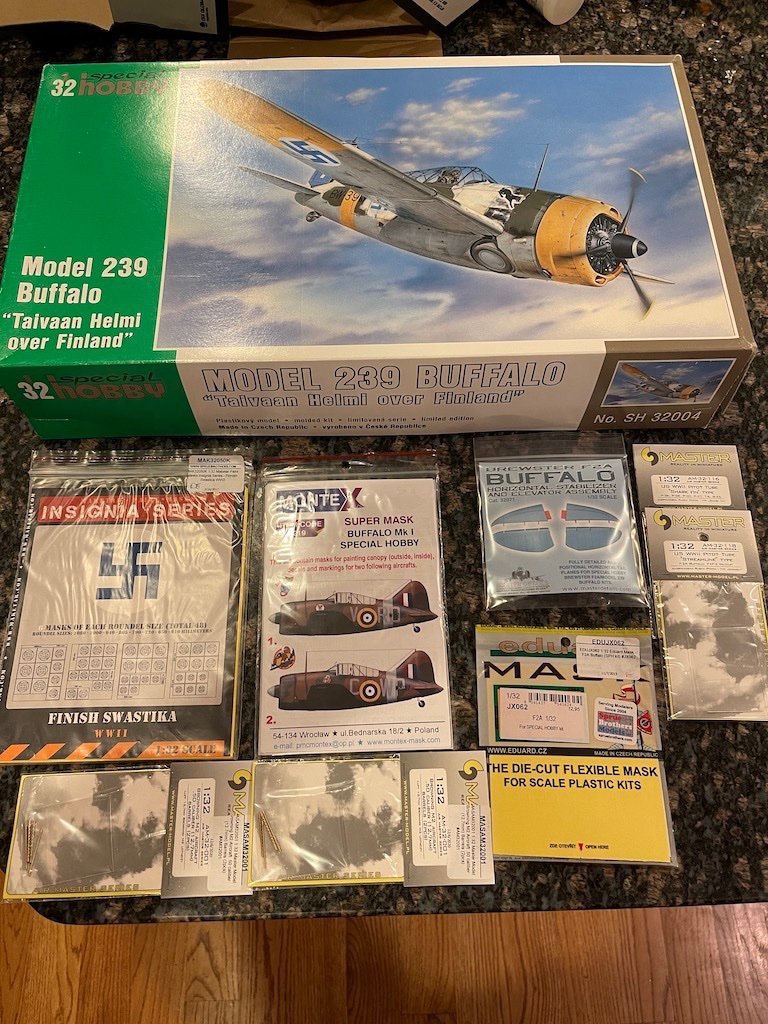
The kit is like the 1/48 kit (and probably most SH kits) in that in addition to the plastic, you get resin and PE details in the box. It's been interesting comparing this to the Airfix Walrus that I'm working on. The Airfix kit has great fit but a lot of flash and injector marks and other cleanup that you need to do. This Special Hobby kit needs much less cleanup, but the fit is not the greatest. I can tell already that I'll have a big gap closing up the fuselage forward of the cockpit 🤬 But, so far this has been an enjoyable build over the last week or so.
-
Making some progress on the Walrus. Managed to get the interior base coat paints down along with the color PE parts, and started a little bit of the weathering. Should be able to button it up in the next couple of days.
- Egilman, AJohnson, Haliburton and 16 others
-
19
-
Hi neighbor, welcome to the site. You'll find a great bunch of people here. Thank you for your service!
- Ryland Craze, Edwardkenway, mtaylor and 1 other
-
4
-
Great start Andy. Good move on the Yahu upgrade 👍 Looking forward to following along!
-
Thanks Patrick, really appreciate it!
- Edwardkenway, Egilman, Canute and 3 others
-
6
-
Thanks Kevin, took a while, but I finally got it over the finish line. Kept getting stuck and/or bored
")
- Canute, Edwardkenway, Javlin and 3 others
-
6
-
-
-
Insanely good work, wow! Could swear I was looking at the real thing. Great job!
- Edwardkenway, Canute, Keith Black and 7 others
-
9
-
 1
1
-
Thanks Dan! And glad to have you along for the ride as always Craig!
- mtaylor, popeye the sailor, Canute and 5 others
-
8
-
Great decision on how to do the suction cups - looks fantastic!
- Knocklouder, mtaylor, Glen McGuire and 2 others
-
4
-
1
-
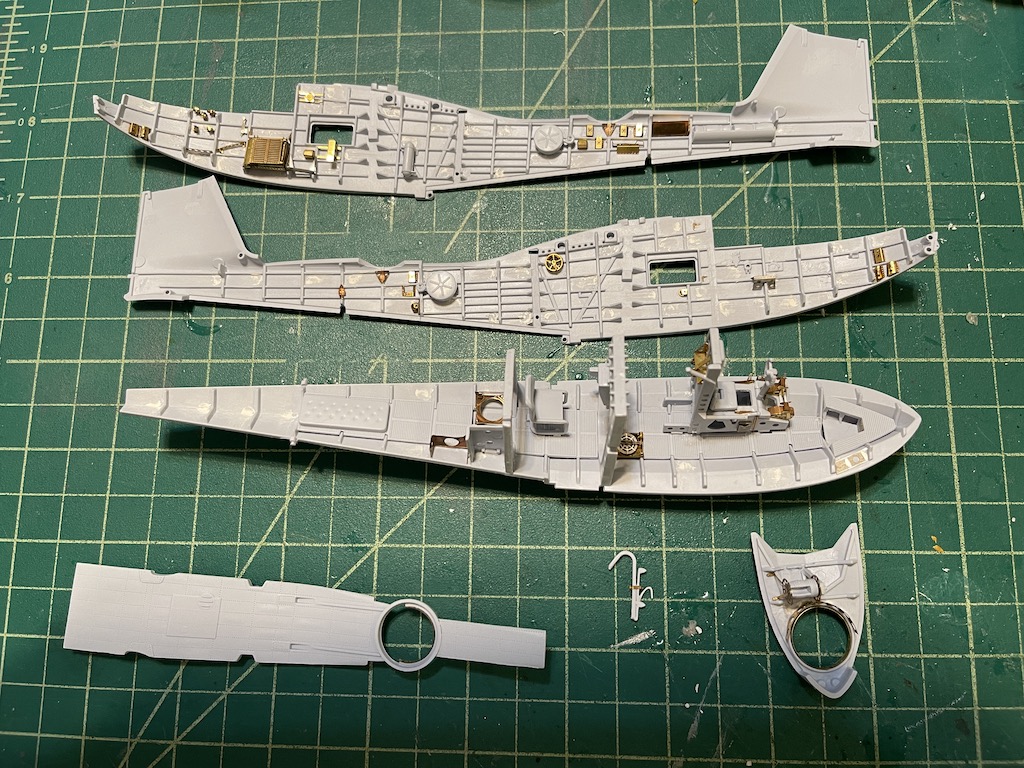
Finally got through assembling most of the interior. The Eduard interior PE set is pretty intense with a ton of pieces (close to 100 if not more if I remember correctly). Probably took a good 3-4 evenings of work to get in, and my guess is 95% won't be seen. But, good practice I suppose. I've gotten a little better with some of the types of PE that have vexed me in the past, including circles/rounds. Had a few to do here with the two gun cockpits, and improved my skills there. Here are the pieces with the Eduard interior, minus most of the pieces from the colored PE fret that will go on after I paint these interior pieces:

That little piece in the middle of the bottom row is actually the ship/boat's anchor - interesting!
After taping the various edges, I ended up priming these pieces and a few other interior pieces this evening. Then it's onto painting the interior green, adding the remaining Eduard pieces, and a bit of weathering.
Thanks for looking in!
-
Thank you Christian! I agree, would be a lot more complicated to accurately represent the damage if it extended below the water line. I could not find any pictures of the damage to the Asashio, only reports that the damage was light and that the ship continued operations until it reached Truk. So, I assumed that the damage was limited to above the waterline - artistic license I suppose
-
I'm in too! Great pic of your son!
Looks like a very detailed kit. My first Airfix kit was an old Citroen kit which was a bit underwhelming. I wasn't sure what to think of Airfix after that one, but my current Walrus kit from Airfix is really impressive. Looks like your Airfix kit is similarly very detailed and well done.
-
3 hours ago, SpyGlass said:
I see Fly now seems to have MDF frames - caution !!! Especially if you are doing mods - it doesnt have the strength of ply though not so prone to warp
The MDF used in these kits is very hard - much harder than plywood. At least that was my experience with my Pegasus kit.
-
20 hours ago, Danstream said:
Hi Mike, your model turned out a beauty. Very carefully assembled and painted with nice, smooth finish, clean transparents and with no unrealistic weathering. Very very nice to look at.
Congrats,
Dan
Hey Dan, thanks very much! Really appreciate the kind words. These particular versions of the 339-23 that went back to the US weren't used in combat from what I could tell, so I went easy on the weathering except to show a little dirt and dust. I was particularly excited with how the painted insignia and numbers came out - a little more work than using decals, but cleaner finish and no chance of silvering.
All in all, a really fun kit to put together, and a good learning experience with all the aftermarket.
- Egilman, Danstream, Old Collingwood and 6 others
-
9
-
5 hours ago, Hsae said:
Great work, Mike!
Hermann
Thanks Dan and Hermann, really appreciate it!
- Old Collingwood, Jack12477, mtaylor and 3 others
-
6

Brewster Buffalo 239 (Finnish) by Landlubber Mike - Special Hobby - 1/32
in Non-ship/categorised builds
Posted
Thanks guys! Glad to have you along.
Agree OC. Short squat little bulldog of a plane. Reminds me a lot of the Soviet Polikarpov I-16.