Landlubber Mike
-
Posts
4,547 -
Joined
-
Last visited
Content Type
Profiles
Forums
Gallery
Events
Everything posted by Landlubber Mike
-
 Reason I ask is that I have the MS Charles Morgan, and I'm getting close to the coppering stage of the build. For what it's worth, the copper plates that Amati includes in kits like the Pegasus seem really well done. They aren't cheap, but I think they would look nicer and be more accurate that cutting individual plates from that tape.
 -
Really nice job Mark. You're moving along quickly yet at your usual high modeling standard. Are you going to use the copper tape?
-
Looks well worth it! That would be quite a complicated tape job especially with the round surfaces. Really nice job. Can I ask what paint you're using for the Chromate Green? Is that the Vallejo bottle I saw in an earlier picture?
-
Bob, very nice work! I love the weathered look - looks amazing. Slim probably could use a little more food though.
-
B-25 Mitchell "Meet Miss Runyon" by Javlin-HK-1/32
Landlubber Mike replied to Javlin's topic in Non-ship/categorised builds
Coming along very nicely Kevin! -
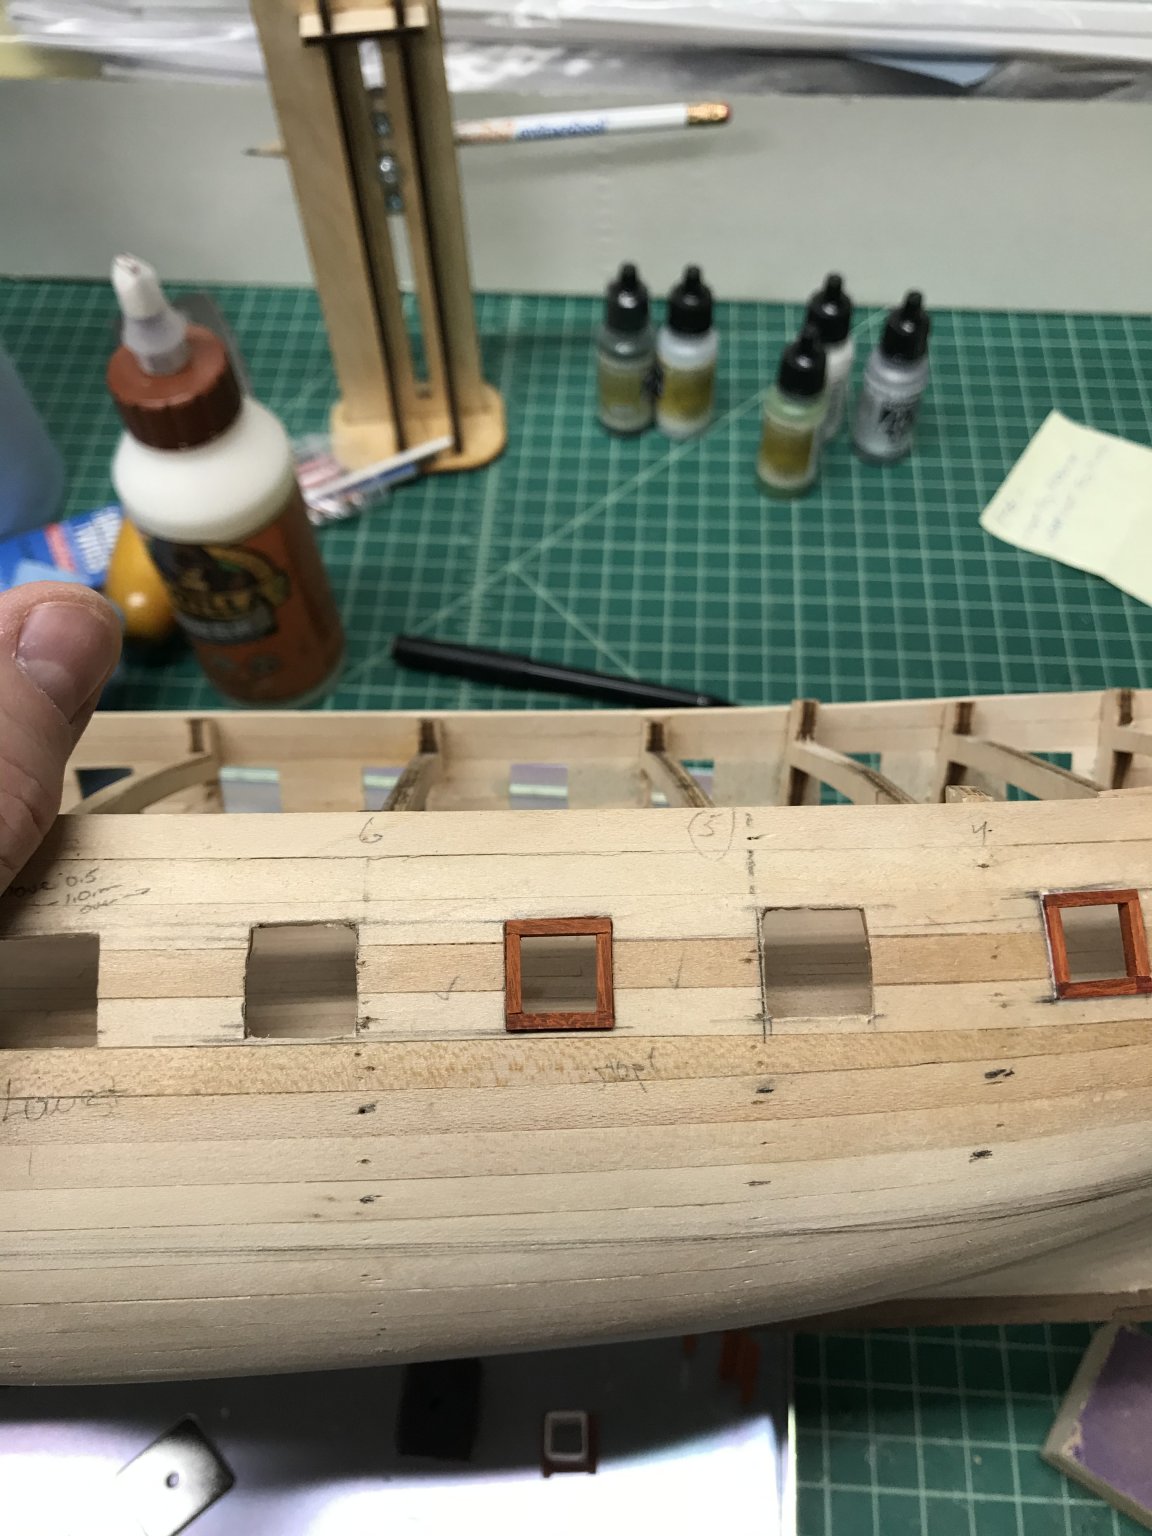
Hey Jason, thanks for looking in! I don’t know if they are completely square but they are probably pretty close. The bottoms and tops follow the line of the deck, but for the most part there was only a 0.5-1mm change in height from one corner to another. When i built the ports, I just went ahead and made them square. I figured I could sand the inside of the vertical parts of the ports if necessary. With that little of a rise though, I don’t think whether the sides are perfectly vertical or not will be very noticeable. i think some kits set the bulkheads apart in such a way that the ports are either equidistant between bulkheads or abut the bulkheads. No luck here where the bulkheads are spaced at varying distances. Just very glad to be past this stage. So many hours spent transferring plan measurements to the hull, double checking and triple checking, etc.
-
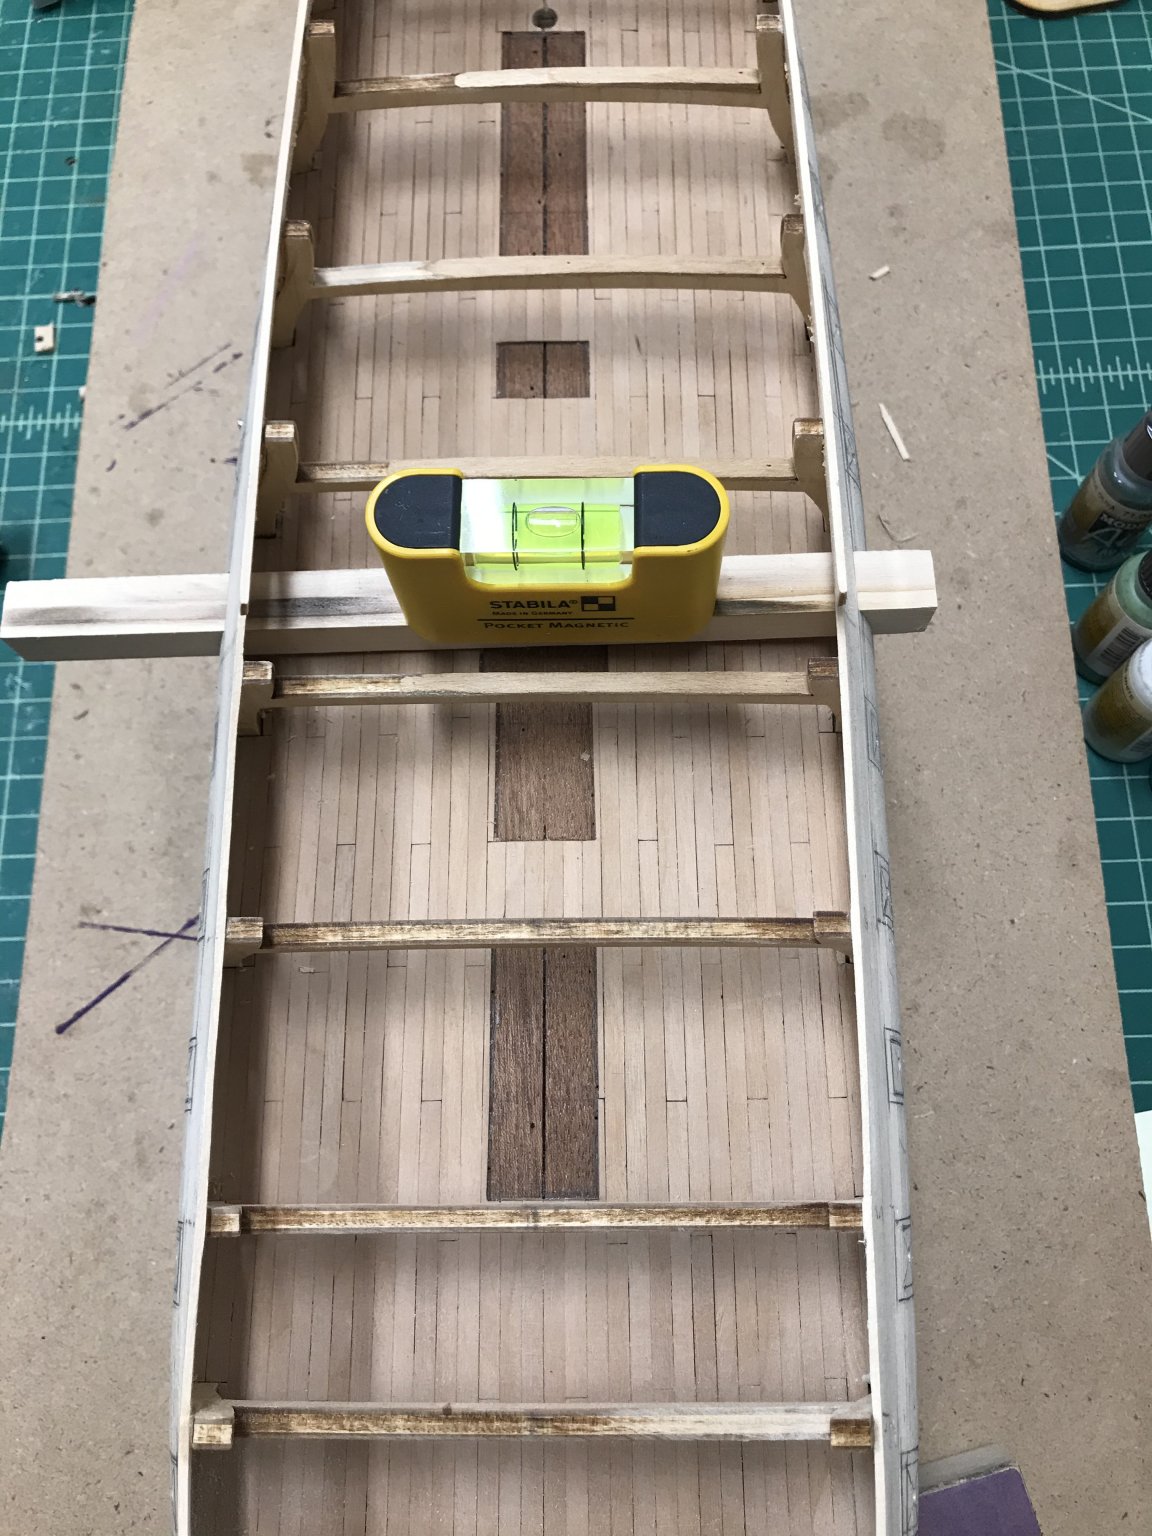
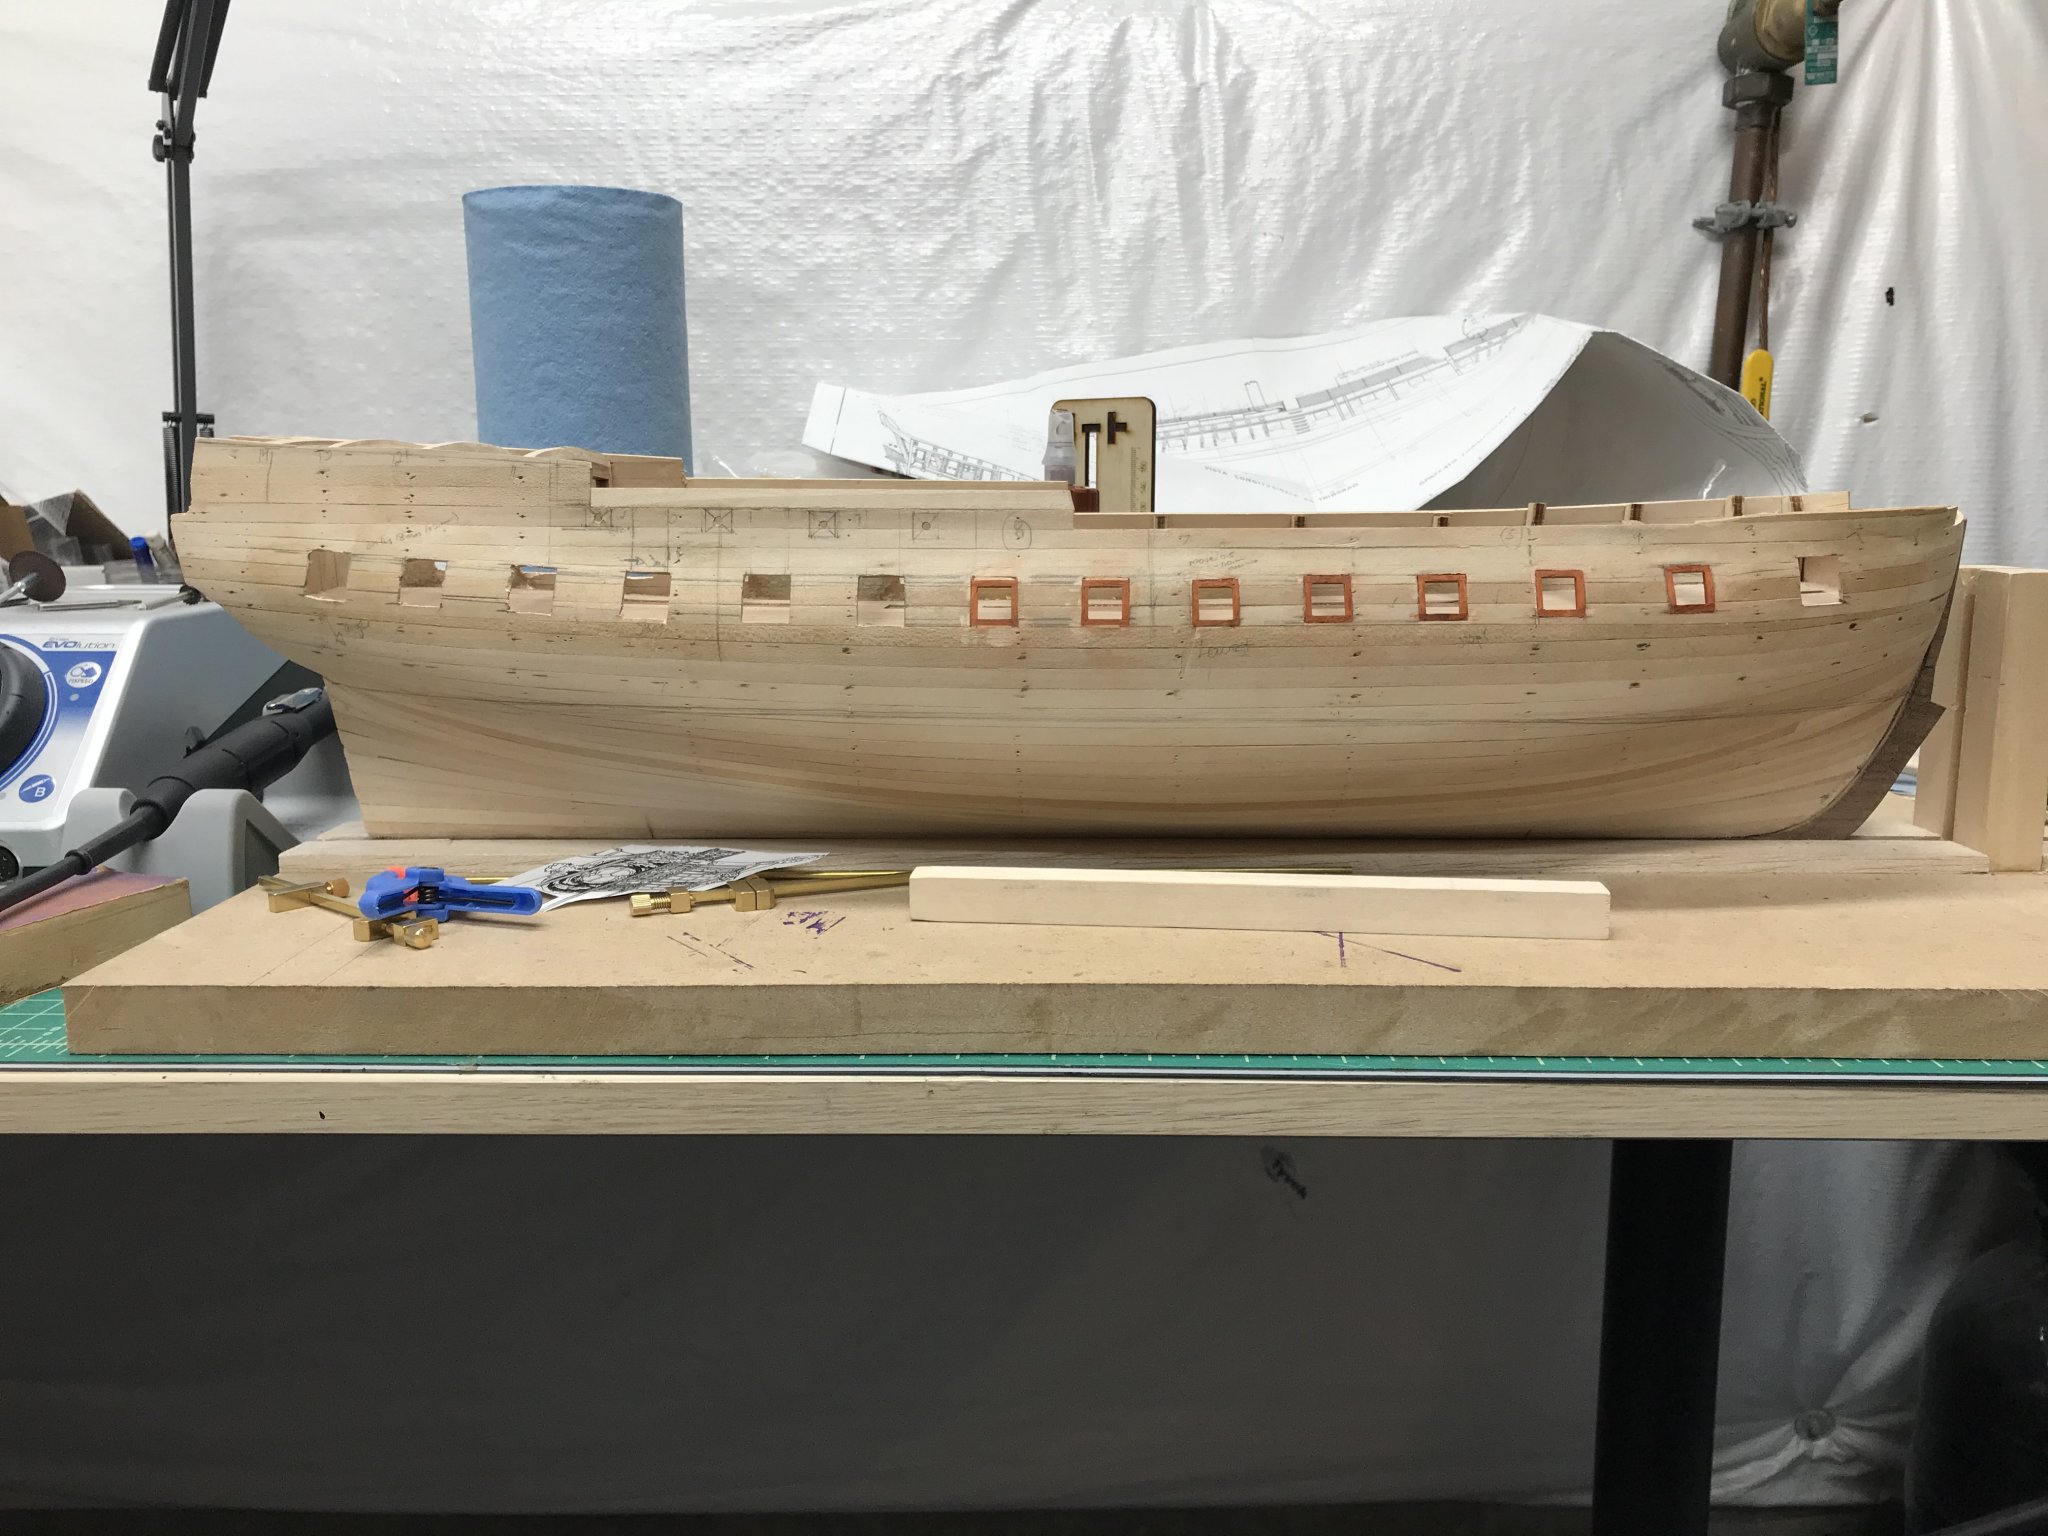
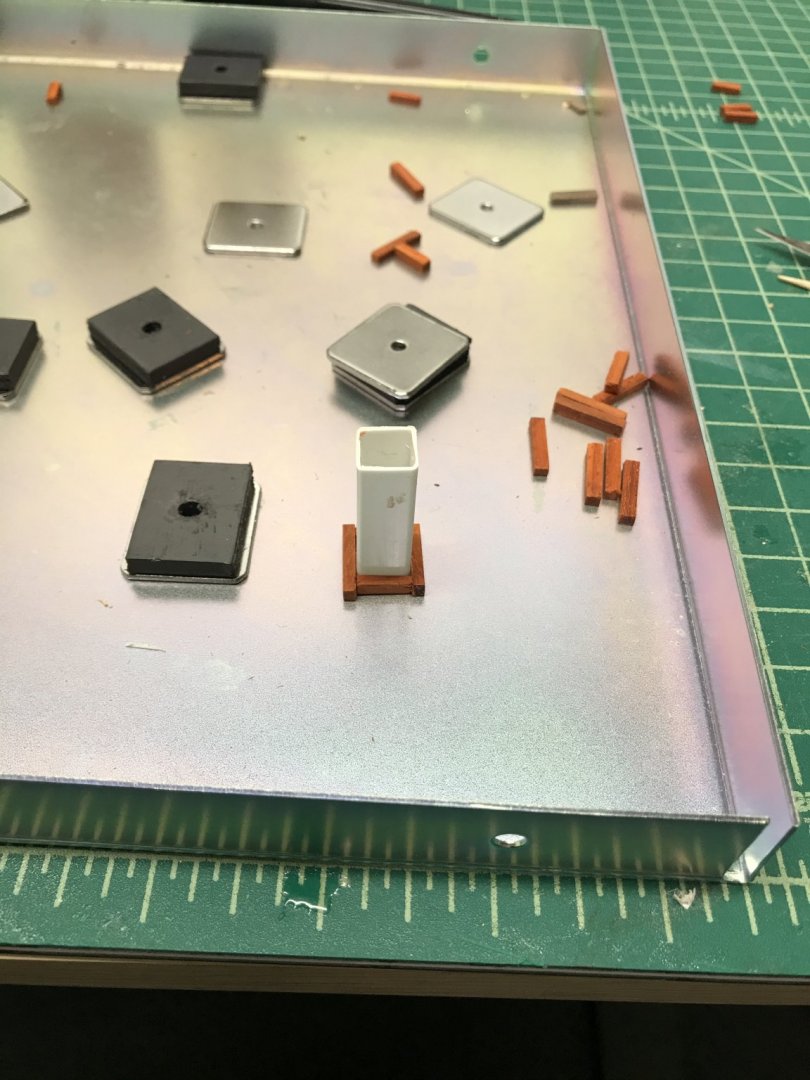
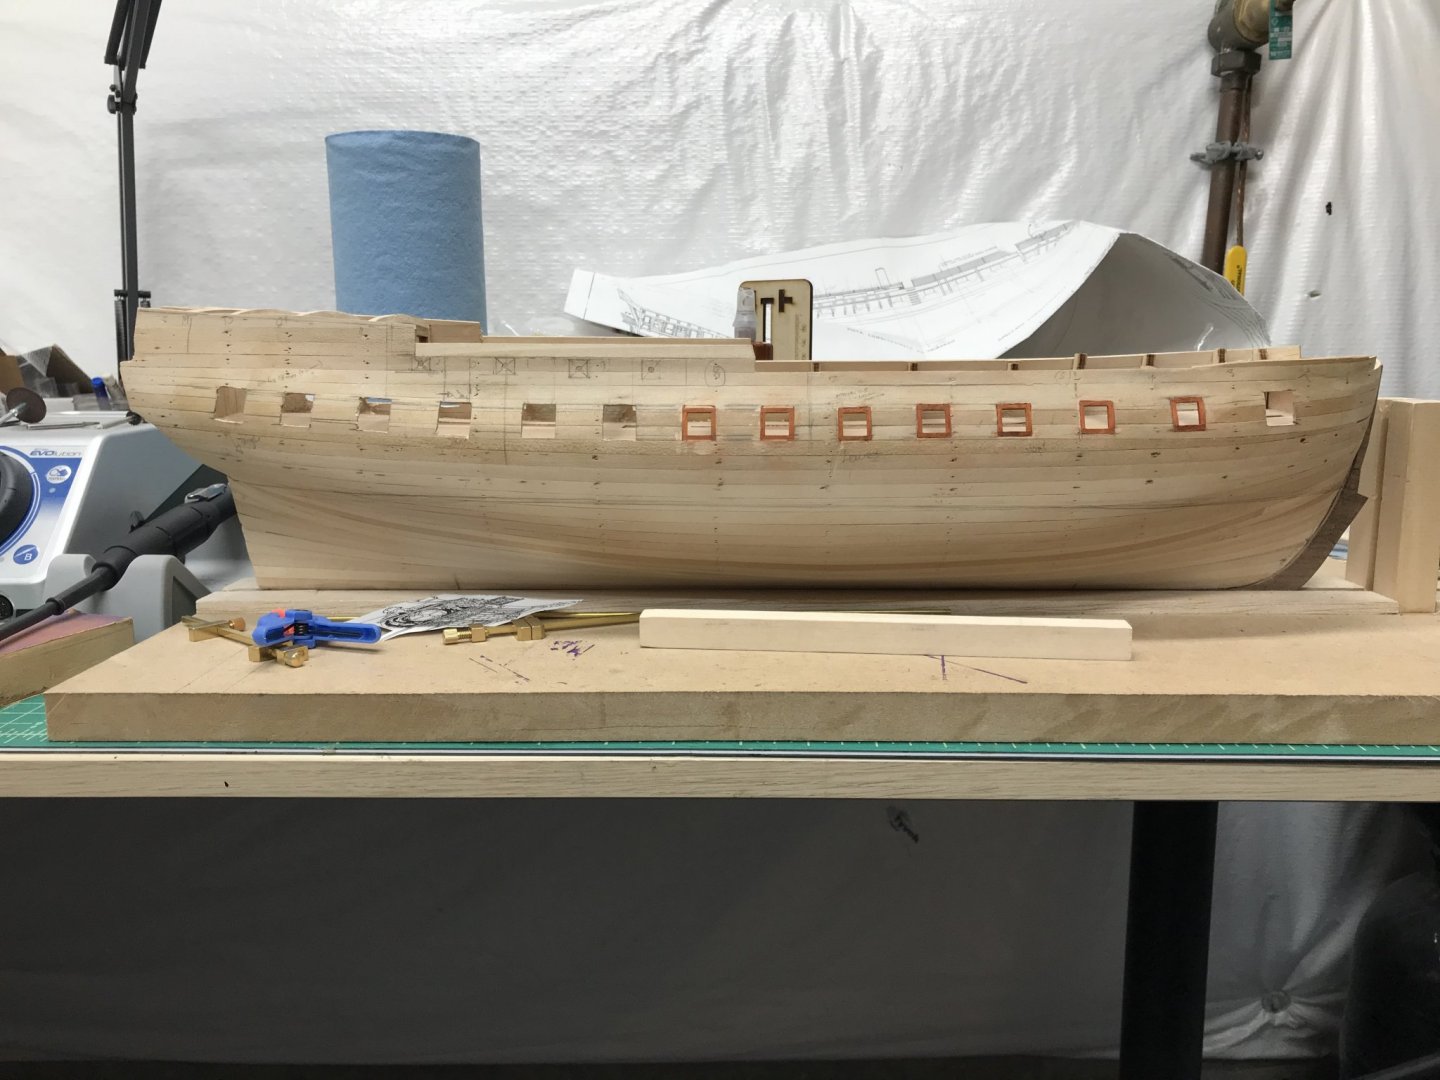
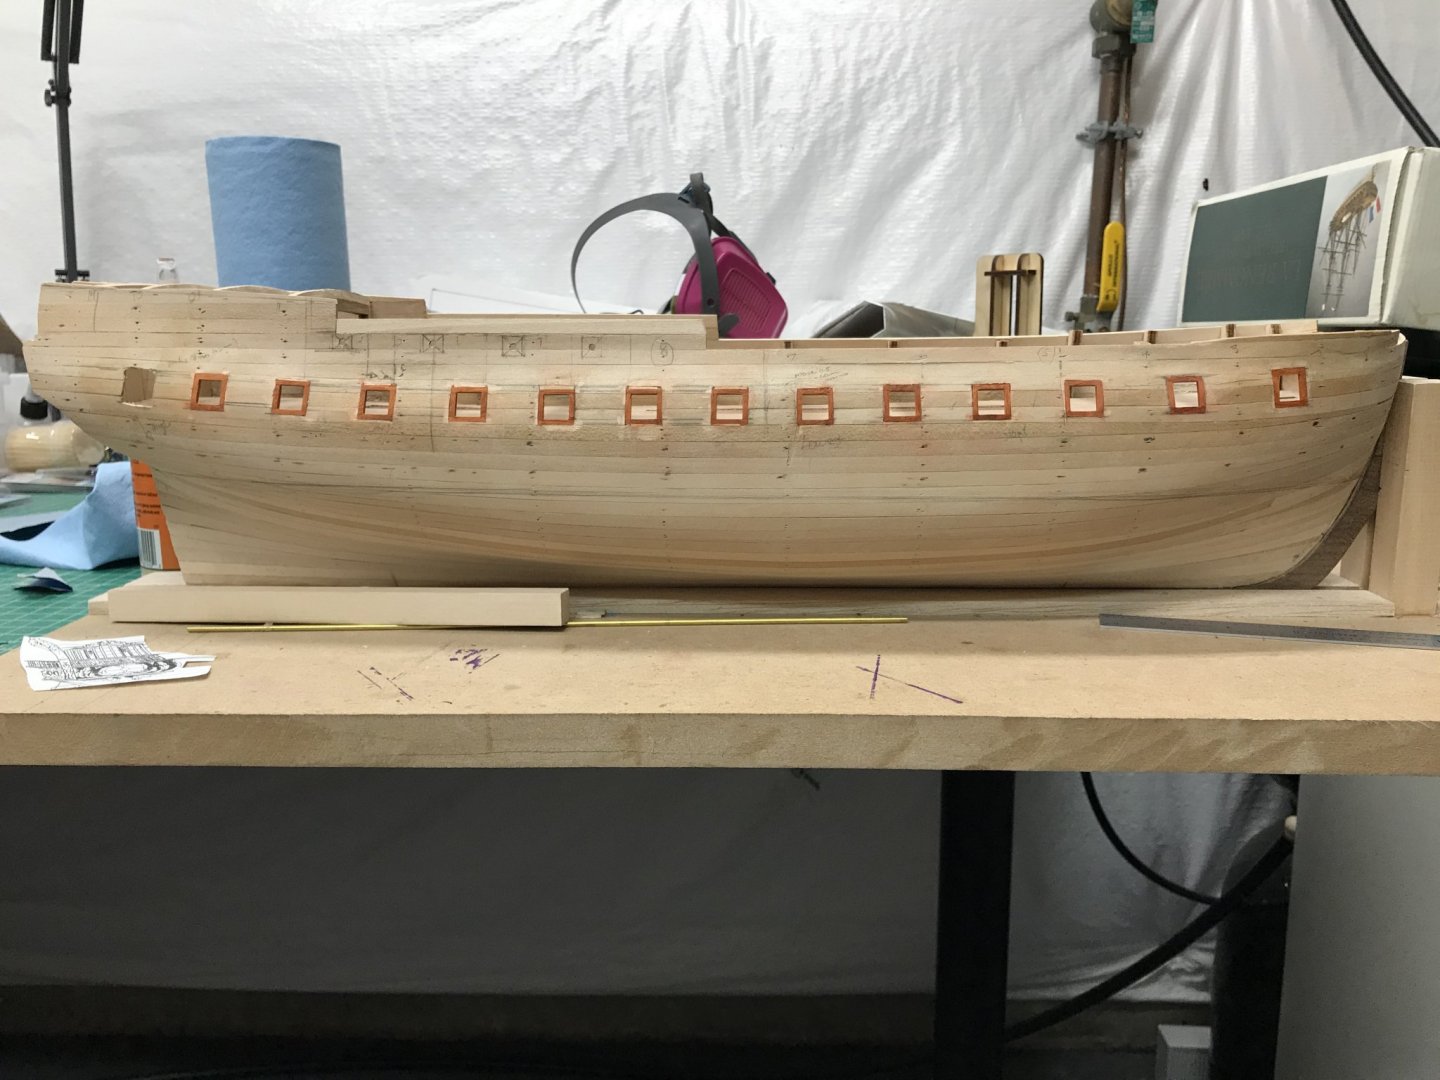
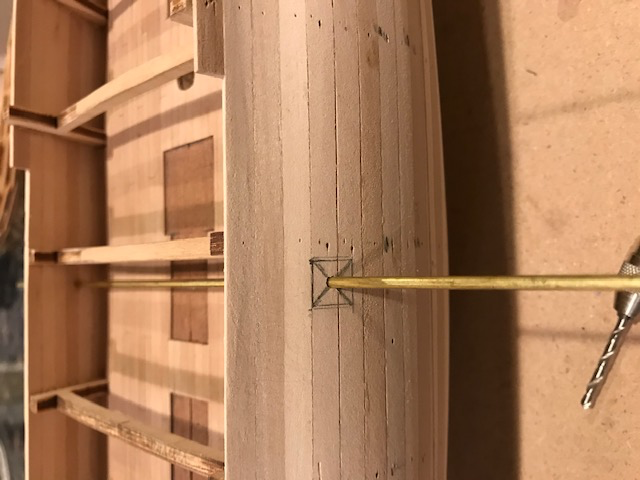
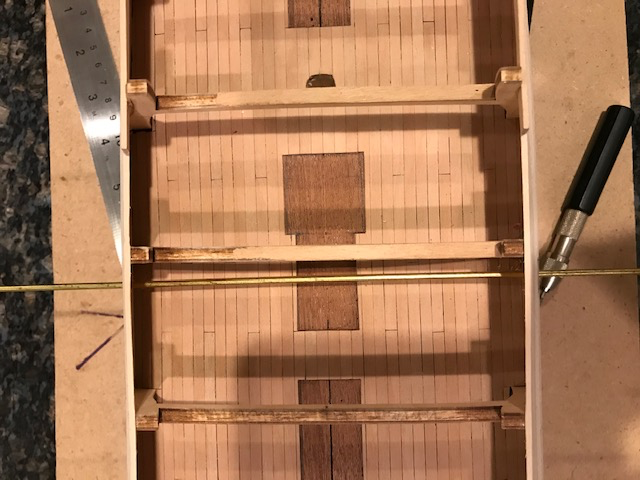
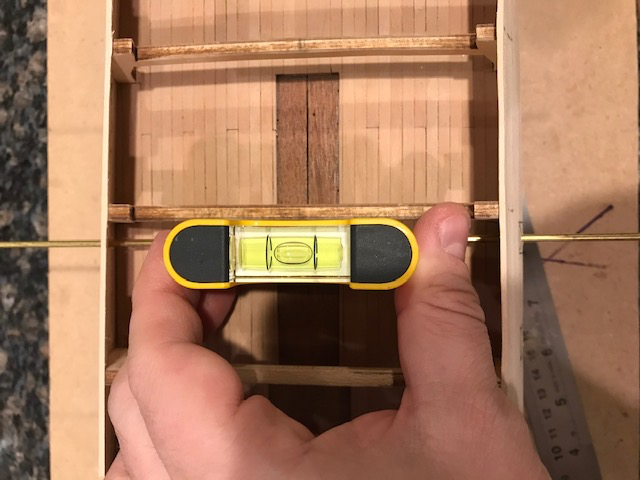
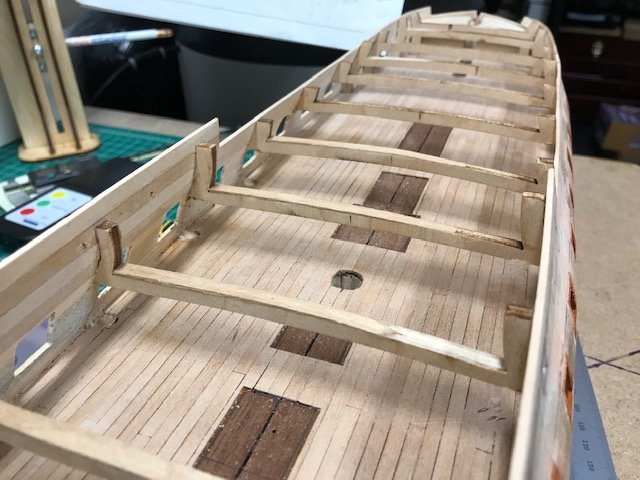
Hope everyone is enjoying 2020. With the holidays, work, and a diversion into plastic models, I haven't been devoting as much time recently to the LAR. I did manage to line out the gunports on the gun deck level. All I can say is this took forever! The gunport patterns on other European kits like Caldercraft and Amati are a godsend. Given that there are 14 gunports per side, I thought it was important that there be smooth line to the ports, that they be square, and that they be even with each other. Hopefully the pictures below show clearly my particular method. Essentially, I spent many hours marking out the 10mmx10mm gunports by transferring measurements from the plans, drilled a 2mm hole in the center, and ran a brass rod through to make sure that the gunports on either side were square to each other and level with one another. Then after cutting out the 10mmx10mm gunports, I ran a square 10mmx10mm through to make sure that everything was still lined up. Since I'm lining the ports, i went ahead with adding 2mmx2mm sills, opening the gunports to 14mmx14mm. This was fairly easy using a micromotor with a small cut off wheel. The cut off wheel made for quick, straight work. The sills ultimately will be about 1mm, so I have an extra 1mm to overlap them with the second outer hull planking. I'm using padouk that I picked up from Woodcraft. It's an interesting wood - nice color (though will dull to an orange-brown over time, interesting smell when worked, and machines fairly easily. It does have pits in it like mahogany, but these fill up pretty nicely when sanded. Hopefully when I apply a finish there will be no visible pits. You have to be careful with the dust as it can be an irritant, so I worked using a respirator and a shop vac going at all times. It also can stain very light wood, so you have to be a little careful with that as well. To get ready for the inner bulwark planking, I decided to remove most of the gunport-level bulkhead frames. That was not at all easy but took lots of micromotor work. I was a bit nervous doing so, but I had rubbed PVA all over the first planking which kept the planking very stable. Next up will either be the inner bulwark planking or the exterior planking. Given that the interior bulwark planking will largely be invisible, I might start with it, so that when I do the outer hull planking, clamping and pinning issues might be easier to deal with.


-
Hmm, I have the Borodino in my stash. After seeing your build, I'll either be inspired to do it, or dissuaded from starting it and will end up selling it
-
Nice work! And I love Tony's - good choice in spices
-
Hey Martin, happy new year to you! Nice job on the figurehead! Looks great 👍. I’m thinking of carving the Pegasus on my Swan class eventually - hopefully a lot easier than carving a person.
- 467 replies
-
- 1
-

-
- fly
- victory models
- (and 1 more)
-
Byrnes Model Machines
Landlubber Mike replied to Worldway's topic in Modeling tools and Workshop Equipment
I use the disc sander all the time. Probably my most used tool. Super easy and quick way to get straight edges. I was on the fence about the thickness sander but when you need it, it’s incredibly helpful. I’ve used it a lot more recently. -
Can't find your tools?
Landlubber Mike replied to reklein's topic in Modeling tools and Workshop Equipment
I keep losing my 6” rule. Bought three and just lost my flexible one again 👎 -
Advice on work station setup
Landlubber Mike replied to Paul Gardner's topic in Modeling tools and Workshop Equipment
Lighting, dust collection, and space for accumulation of tools, kits, etc. are important, especially if you’re going to be making your own parts. First I started on my kitchen table and ottoman. With all the tools, etc. I’ve gotten, I nowhave a more dedicated space with better lighting, dust collection, a work table, etc. One tip - if you’re going to buy power tools, make sure you know the feed/exit run space you will need. Some tools like the table saw and thickness sander can’t be put against a wall. -
Nice Kevin! Really came out well. I'm working on a couple of 1/72 biplanes myself, very hard at this scale so I appreciate the efforts!
-
Really nice work! Love the camo scheme, came out really well.
-
Very nice job! I love these Chris Crafts - saw a complete one at a show recently and they make beautiful models. The mahogany planking with a glossy finish with chrome accents is a really nice look.
-
Looking great! You've already passed me on my build. How are you finding the deck planking going? I am at about that stage on my build. Was thinking about putting a sub floor piece in to make the planking a little more even and possibly with better support. Either way, it looks like one needs to consider building in some underlying framing to support the hatches, etc.
-
B-25 Mitchell "Meet Miss Runyon" by Javlin-HK-1/32
Landlubber Mike replied to Javlin's topic in Non-ship/categorised builds
At 1/32, that's going to be a good sized model. Looking forward to following along! Mrs. Runyon is quite perky -
Looks great! The bulwarks are not easy when you have to individually set up all the stanchions.
-
Gift for 50th B Day
Landlubber Mike replied to ChrisLBren's topic in Modeling tools and Workshop Equipment
What did you end up getting? 🤔