

Siggi52
-
Posts
989 -
Joined
-
Last visited
Content Type
Profiles
Forums
Gallery
Events
Posts posted by Siggi52
-
-
Hello,
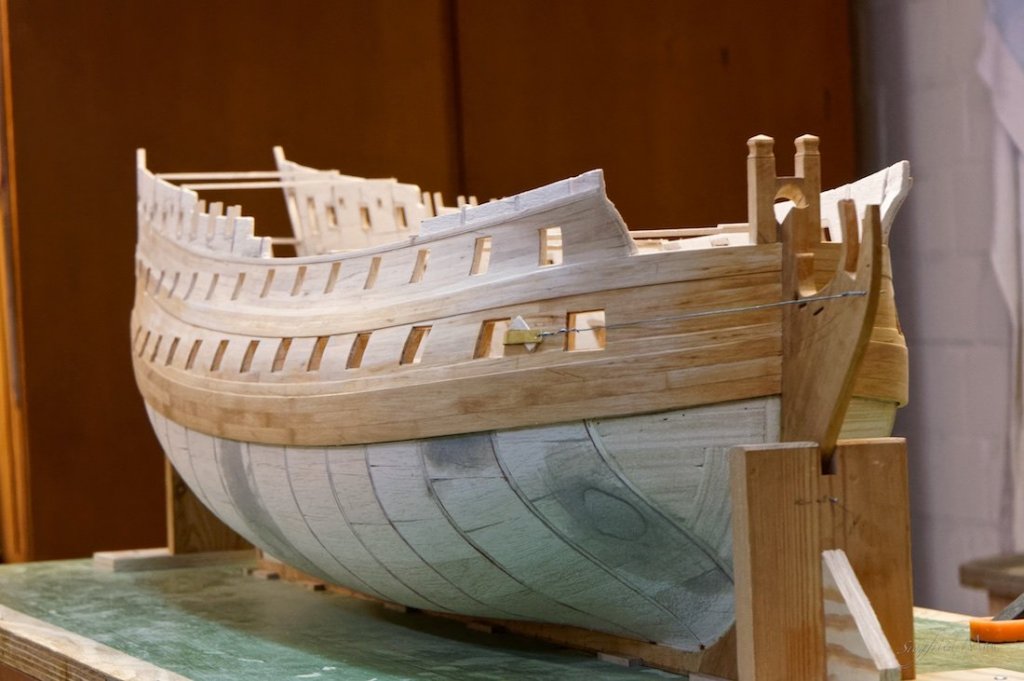
it is done, the hull is planked!
It went not all as I aspected, but I'm more or less satisfied with the result. Some putty and sanding will do the rest and paint will cover it later


And thank you all for your likes and comments.
-
Hello,
and many thanks for your comments and likes.
A short update, just to show you that I'm still working. Now are only 8 strakes left. But it's a boring task, here are no port holes
")

- scrubbyj427, Amalio, Mike Y and 20 others
-
 23
23
-
Thank you Mark, but I will show a ship, not the work to create it. I think it's ok.
- wyz, mtaylor and paulsutcliffe
-
3
-
Hello,
thank you Johann and all the others for there likes, but for me it's just one plank after the other

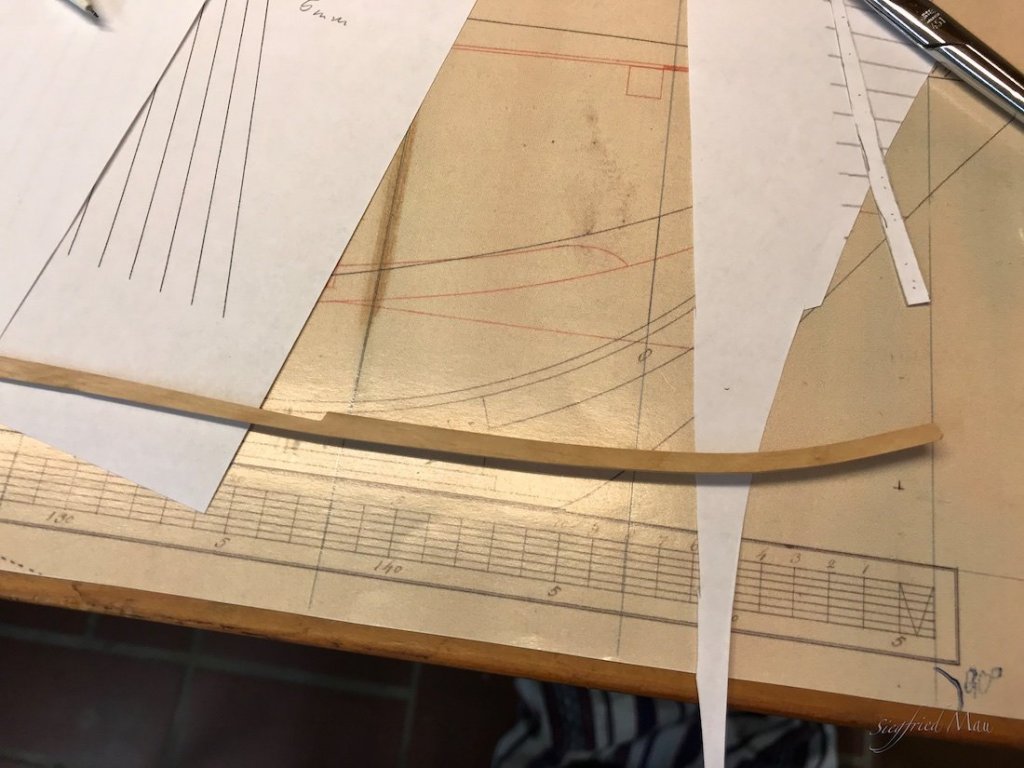
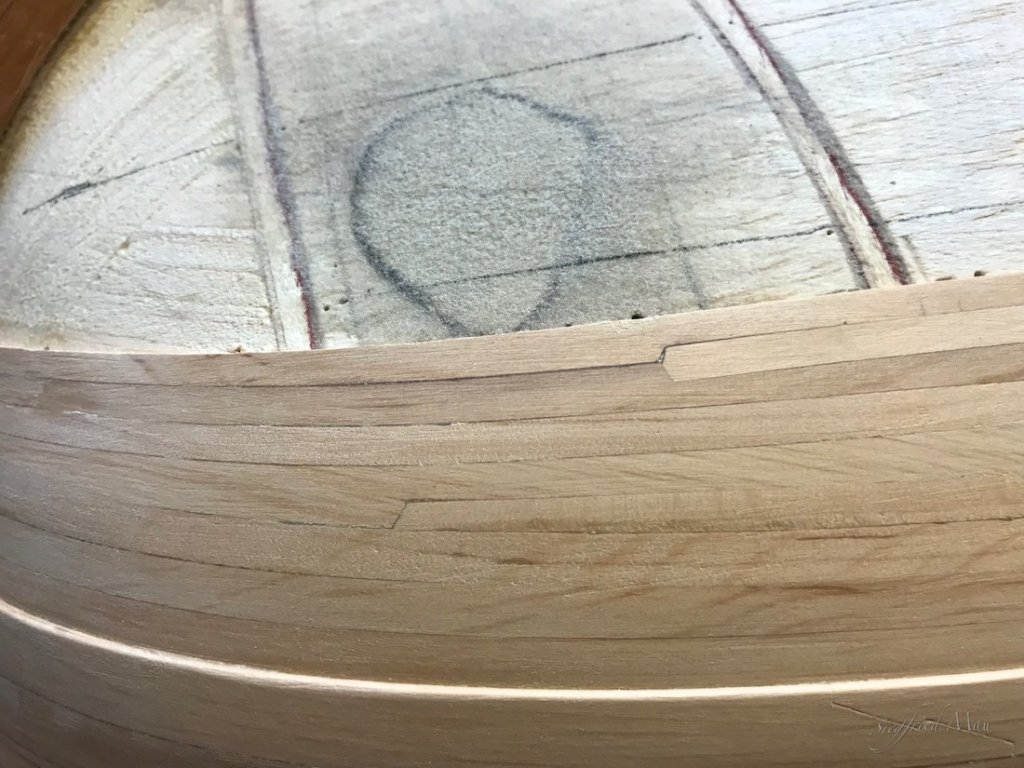
Here some pictures of the stealers I build already. I modified my bending jig for a more moderate curve and bend the planks upright. I think I will build also a third stealer, to get better around the bow with the planks.

And there they are. Not so perfect as Mark's joints, but later you would't see it, because of the THICK layer of white paint that covers them.
The advantage of building with balsa wood is that you could secure your planks with pins. So it's not all bad with it.


- gjdale, Mike Y, harvey1847 and 17 others
-
20
-
Thank you Paul and (and all others for your likes)
Druxey, I think I will build two drop strakes under the diminishing strakes near the bow. Goodwin (page 50) wrote that this was made in earlier times to prevent the planks from snying. Later in the 18th century that was't made anymore.
- OrLiN, paulsutcliffe, SimonV and 2 others
-
5
-
Hello,
today only a small update. I finished the garboard strakes and the diminishing strakes. At the pictures you could see that I started to divide the rest of the hull for planking. But first I have to look how many steelers I have to build. That means researching.
That was't easy, but at least the strakes gave up, and I won
")

-
-
Hi Tom,
thats a good tip. I'm immediately back in the cellar to do it. Thank you.
-
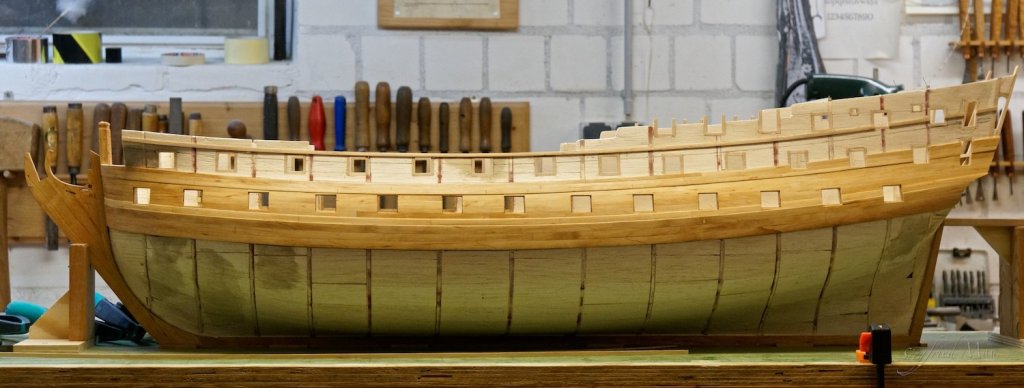
Hello, and many thanks for your comments and likes.
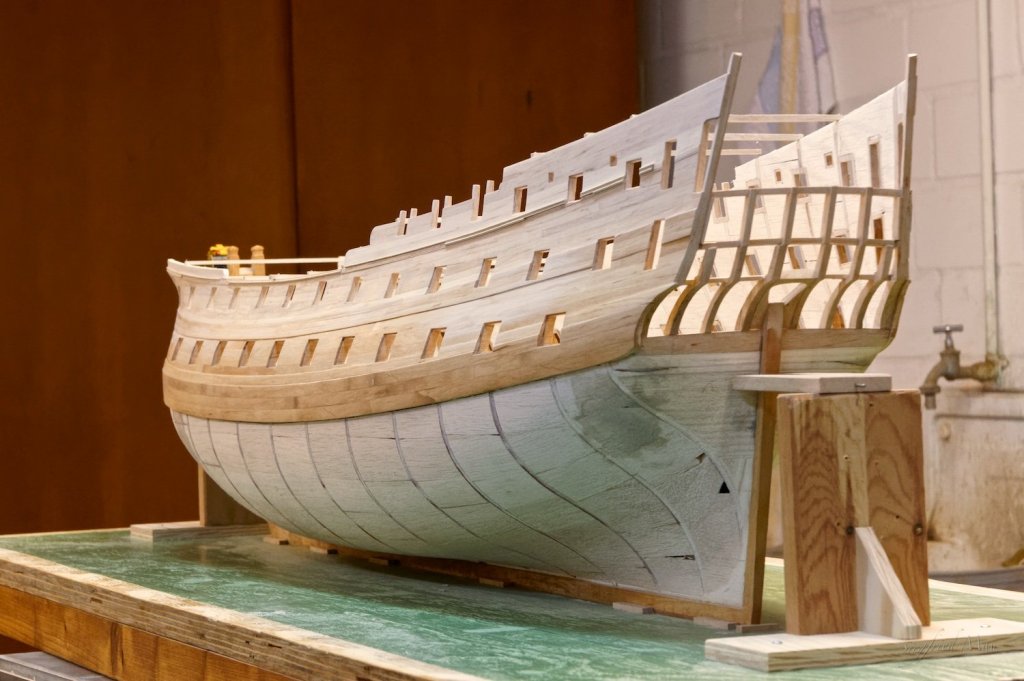
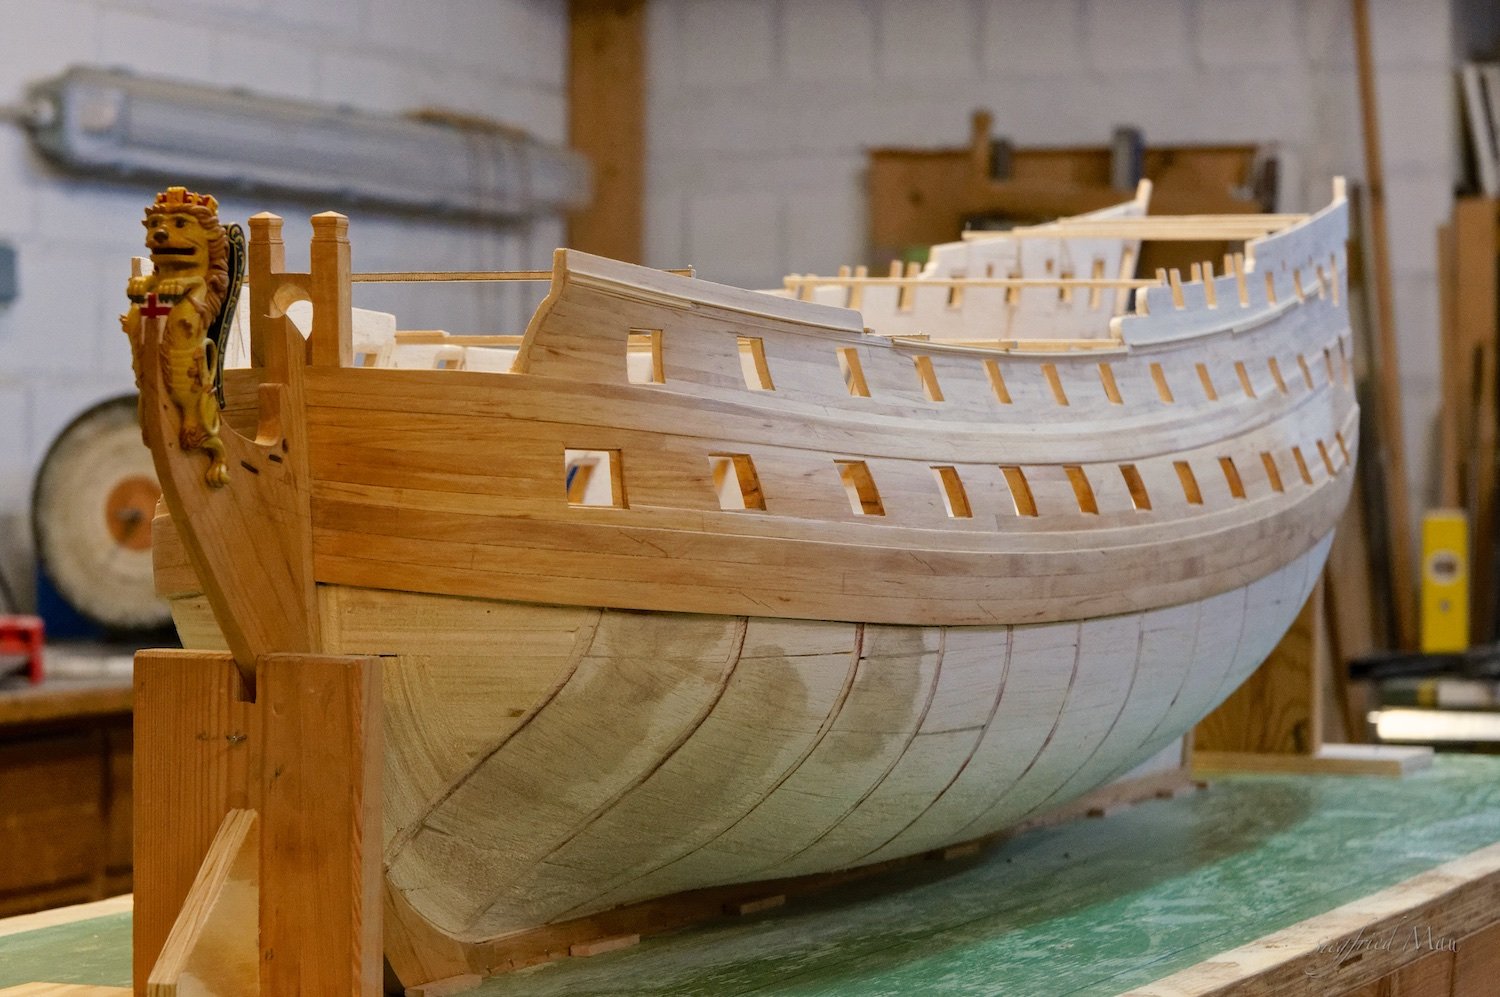
now the upper ship is planked. It was't always an easy job, but it's done. For that event, Leo was invited to take his seat.
The underwater ship would be easier, because there are no port holes,
 but may be other hardships.
.thumb.jpg.a0b1ee3cc4c4f754e927fdf8b617acf4.jpg)

- Dowmer, giampieroricci, Jack12477 and 23 others
-
26
-
Håkan, it's black alder
- paulsutcliffe and mtaylor
-
2
-
Hello and many thanks for your comments and likes,
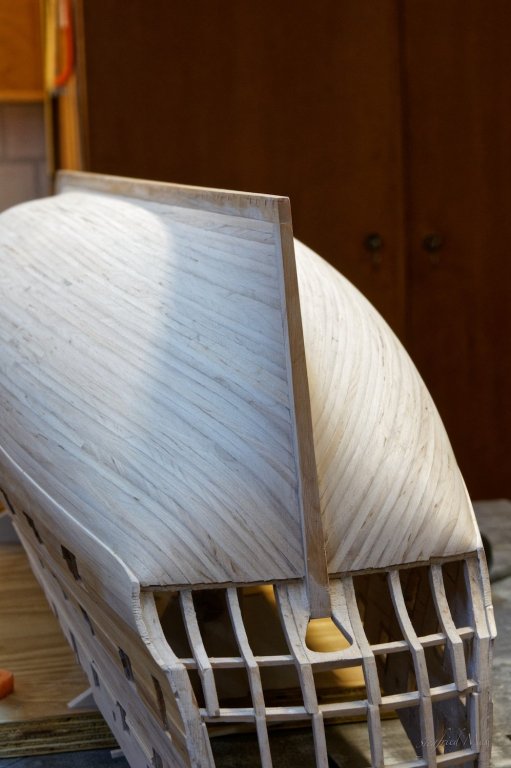
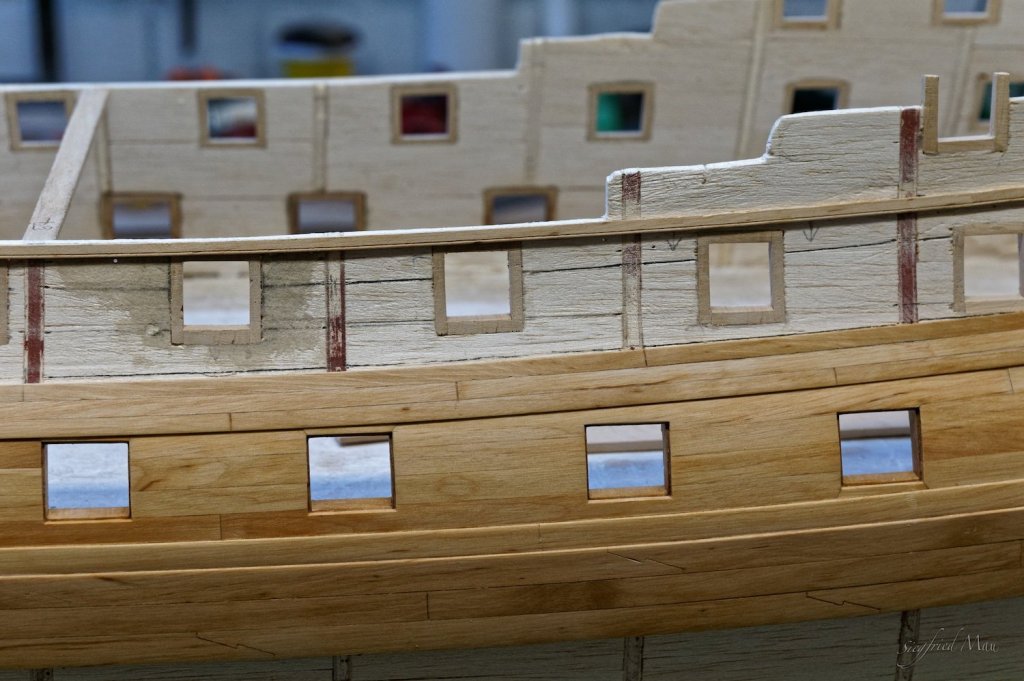
the rest of the week I was't very busy at the yard, but I finished the waist rail. The greatest problem here was the design that should work together with the channels, who must be integrated into the waist rail. At the first picture you could see the slots for them. For that I made the rail in two parts, leaving out the lower part for the for and main channels. Only for the mizzen channels I had to cut down the lower part. The upper part is also at the waist the drift rail, therefor here not installed.

- Landlubber Mike, popash42, Archi and 22 others
-
25
-
-
Good morning Mark,
these ties I have already, but not always installed. They are alway in the way if you would clamp down a plank.
One other problem is, that you could sometimes press a planks into the wood with your clamps. Also sanding is't easy, because the wood bents a little between the plywood and later you have there a bump. The wood would wait, until you are ready with your rulers, before coming out again
 Also scribing is a problem. But problems are there, to be solved

-
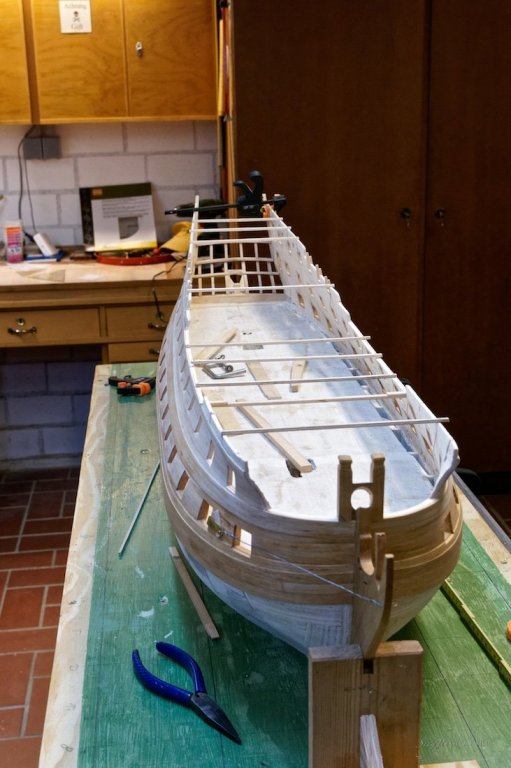
Hello,
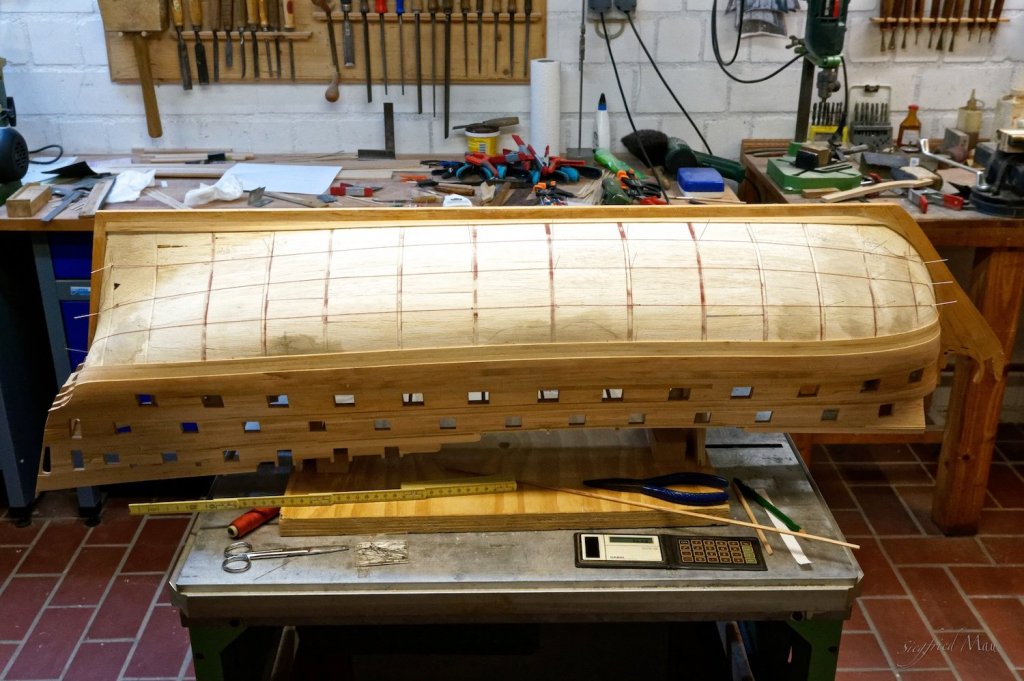
a smal update. Now I have planked the hull up to the waist rail.
What I have learned about this technic till now is, take better plywood and not balsa wood. For the under water ship it is may be ok, but now above the upper wales it's beginning to be too flexible because the walls here are too thin.
- Mirabell61, cog, Bluto 1790 and 24 others
-
27
-
Hello Michael,
thank you for your efforts.
I would prefer the method they used with the Bellona. But I think also, that there was at those times no hard and fast rule for the rails. The 1745 list of establishment was the start to build ships at all shipyards after the same dimensions. But the rails are not mentioned there. There dimensions are from the 1719 list of establishment, and there could have changed a lot since then.
-
Hello,
as I have always to say, but sometimes forget, thank you for your likes and comments. I really appreciate them.
Mark, I think also that this drawing is the best source for me. There changed so much in the later years, just to get the ships cheaper. That with the waterway I did't noticed till you mentioned it. But I did't know if it's right or wrong. May be that is also such a change. Then when it's work, it's ok.
The last days I was not really busy. I just build the under construction for the waist rail and started with planking the room from the channel wales to the top.
-
ok, Druxey, but that is in 1805. I think that 50 years before every variation was possible.
About the fight of the Yards and the Admiralty about the costs you could read a lot in Carr Laughton's book, Old Ship Figure-Heads and Sterns. Here a small extract from page 87.

-
Hello Druxey,
with that I do not agree. If they feared that there ships could be damaged, they would't build them so beautiful. No carvings and so on. Just as modern war ships. But they want beautiful ships, especially the shipyards. That was there pride I think.
Merchant ships have had there battles too, with pirates and warships of other nations. And all what did not bring the ship from one harbour to the next, was money that did't pay. That where merchants.
In the case that the rail is directly at the frames, they could have build easily a plank under the rail and you would see the frames too. I think so interesting are the frames in this section not. You see many models, where the rails are very flat. Almost even with the other surface. So there it could, be that they build that rail directly on the frames. As I see it now, it's all speculation, this or the other way. But why give they dimension for rails, who work only if the rails where build on the frames?
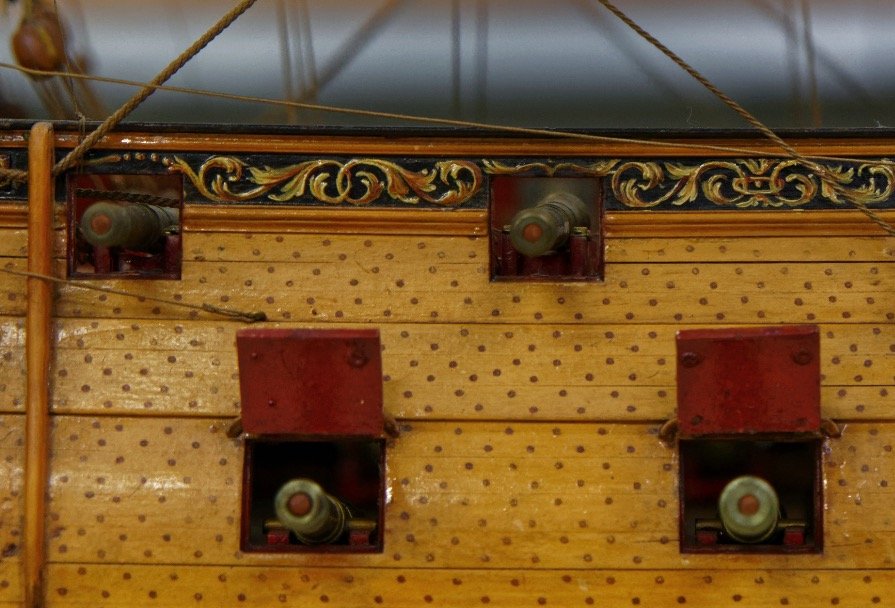
Here I found a picture in William Falconer's Dictionary of the Marine. That is what I think I will build. The waist rail sits on a thick plank and the sheer rail on the planking.
- harvey1847, mtaylor, Archi and 2 others
-
5
-
Hello and thank you Druxey and Jason.
Druxsey, you don't know why it is so as you wrote?
I looked in the meantime through my books and pictures, but could't find any thing that confirmed my favourite version, because of the thickness of the rails. If I set these thick rails ( according to the list of establishment) upon the planking, they are out of proportion to the ship. But then I remembered, what I have seen at the model of the Superb. There lie the moulded waist rail upon a thicker plank then the planks around. May be that this is the thick plank they asked in the list of establishment for. And also the plank on which the sheer rail sits, look thicker (but may be not)

Here pictures, Mark will know, from the Bellona. There the waist rail lie on a plank and the channels sits also on this plank. But the sheer rails lie directly on the frames! At the next picture we could see the waist rail on a normal plank, but the sheer rail on the frames. So I think anything is possible and nothing is hard and fast.
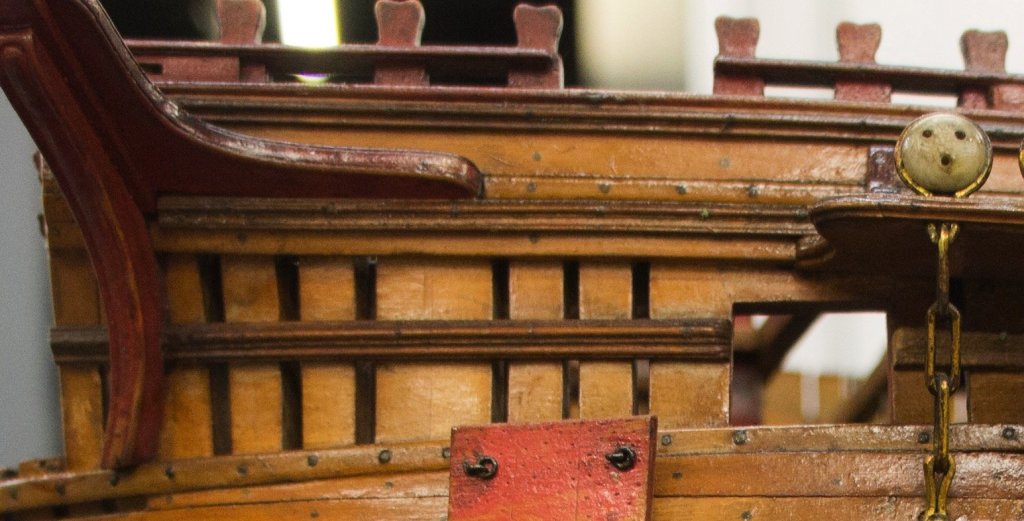
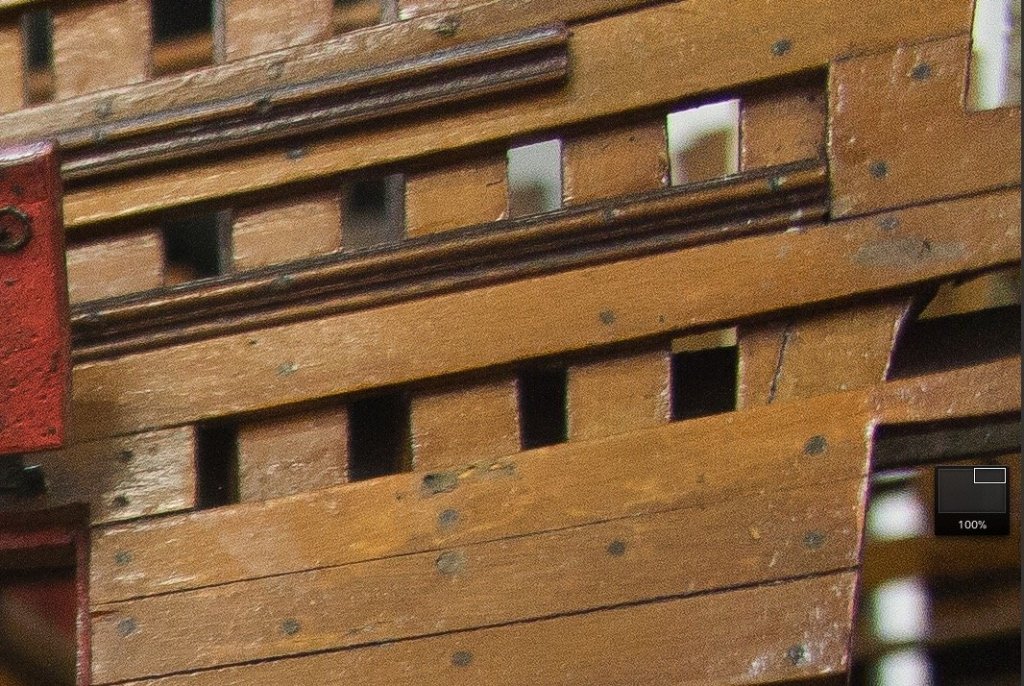
Here the coppered Bellona. The waist rail sits on a thicker plank but the sheer rail sits directly on the planking.

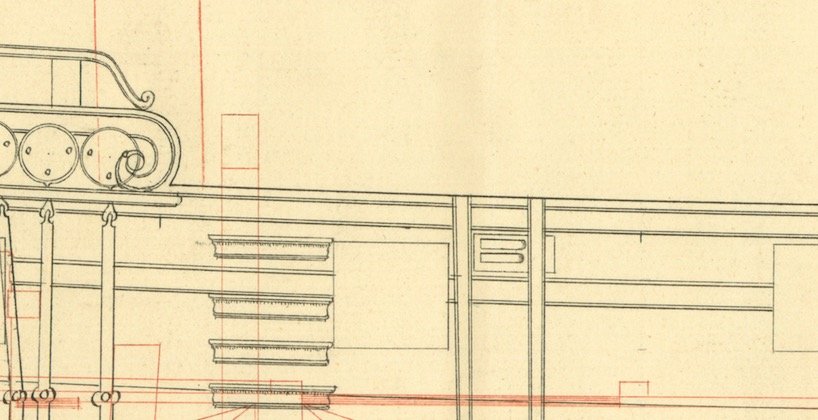
And here is a section from my plan. So, it looks if these rails shown in the plan, represent the thicker planks. The dimension are correct.
I have decided, to build the rails with ticker planks under them, as seen at the Superb. May be not so thick as set in the list of establishment. Somewhere in L.G.Carr Laughton's book about Old Ship Figure-Heads and Sterns, he quoted that the rails should also strengthen the upper works and that could't do the moulded rails.
If anybody has other solution, please tell me.
- albert, archjofo, harvey1847 and 4 others
-
7
-
Hello,
and many thanks for your likes and comments.
Mark, that are the remains from the ships of the 17 century. I think she is also at the stern a little higher than later ships.
Today I finished also the starboard side of the ship and now I will begin to plank the upper part of the ship. But there arose a question.
How did they build in the rails? I made a sketch of that what I mean.
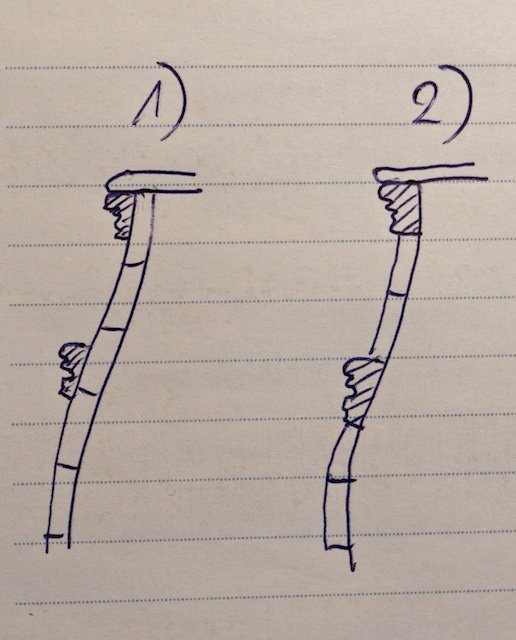
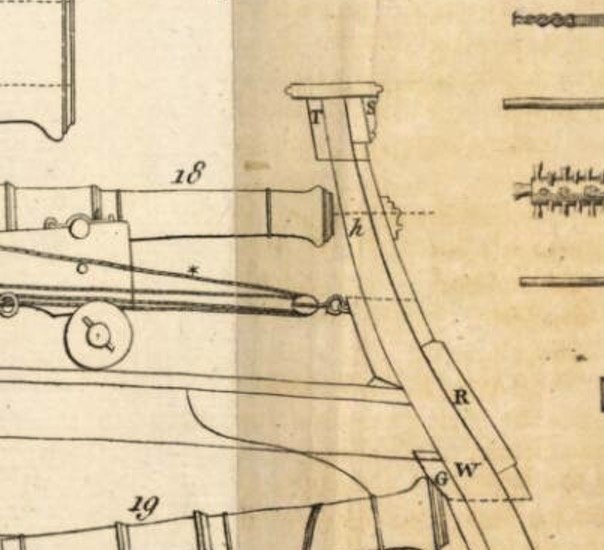
For the Dragon I used the version 2, but now I'm not really sure if that was right. At most models, where you could see it, they are set above the planking. That may be a short cut. But from the dimensions in the list of establishment they could also build it like in version 1. The sheer rail should be 8in broad and 3in thick, the waist rail 6,5in broad and 3,75in thick. The planking here is 2in thick, so they would stay 1 or 1,75in (0,5 or 0,9 mm) out of the planking.
If I set them above the planking they would stay 3 or 3,75in (1,6 or 2 mm) above the planking. And for that the rails are too low at the models.
Many thanks in advance
- Archi, mtaylor, paulsutcliffe and 7 others
-
10
-
That is really a great build, Keith
- paulsutcliffe and KeithAug
-
2
-
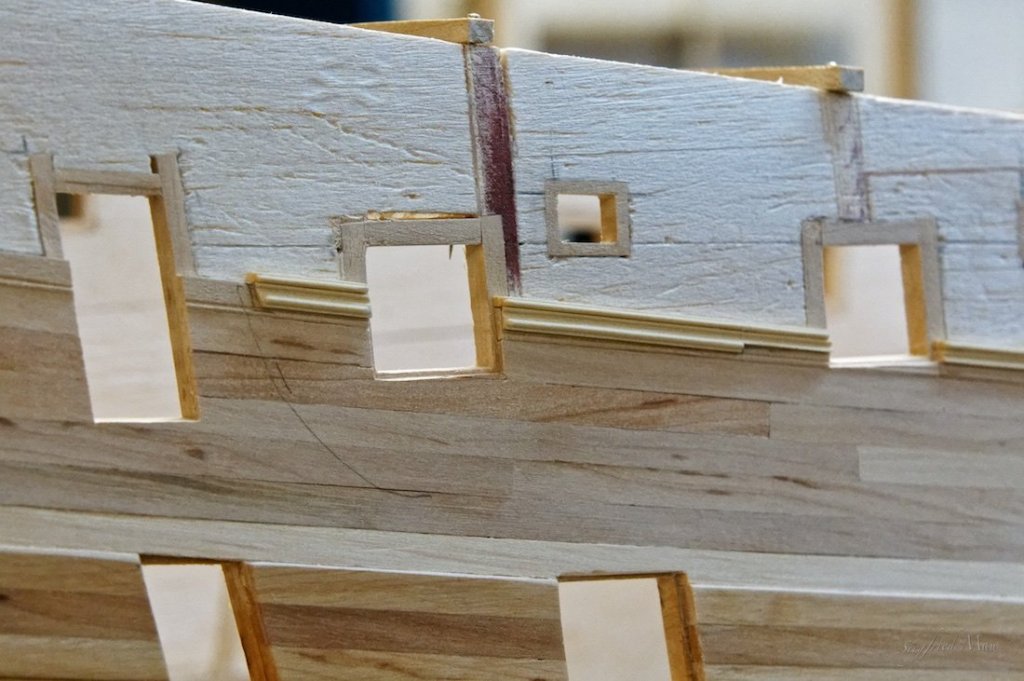
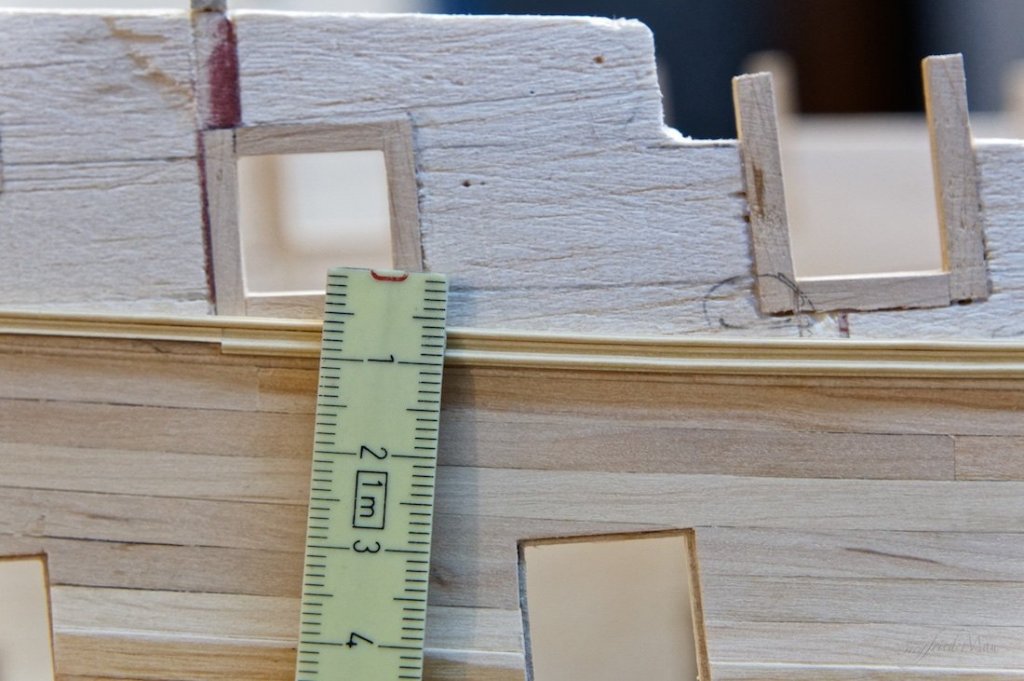
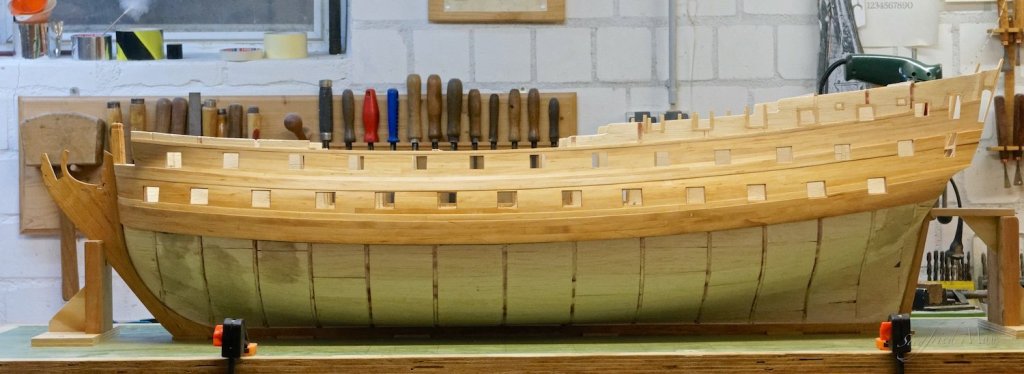
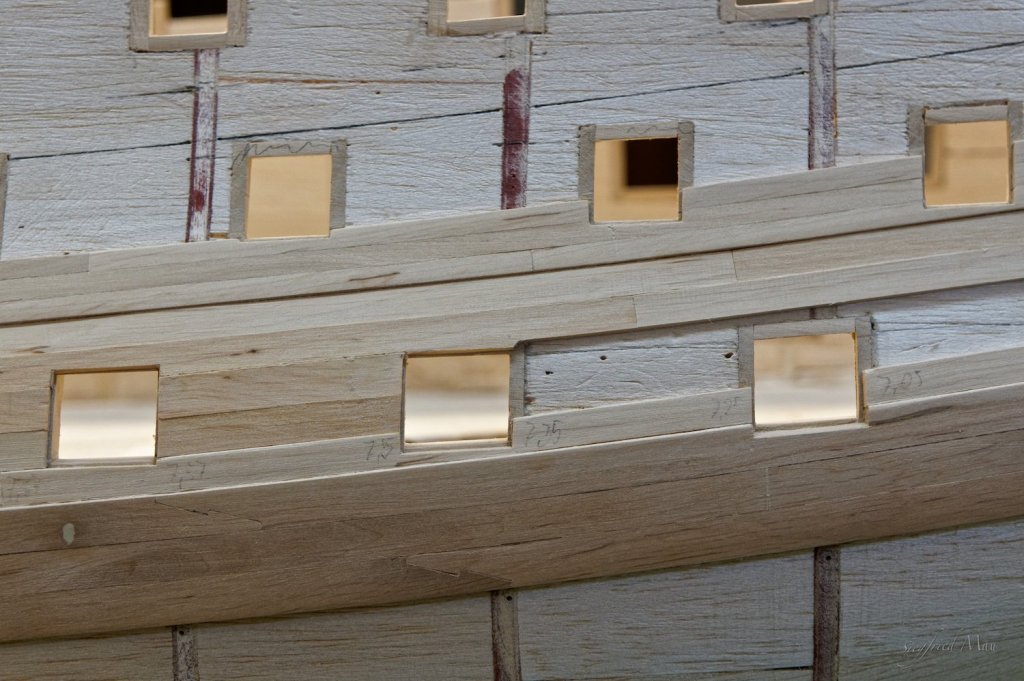
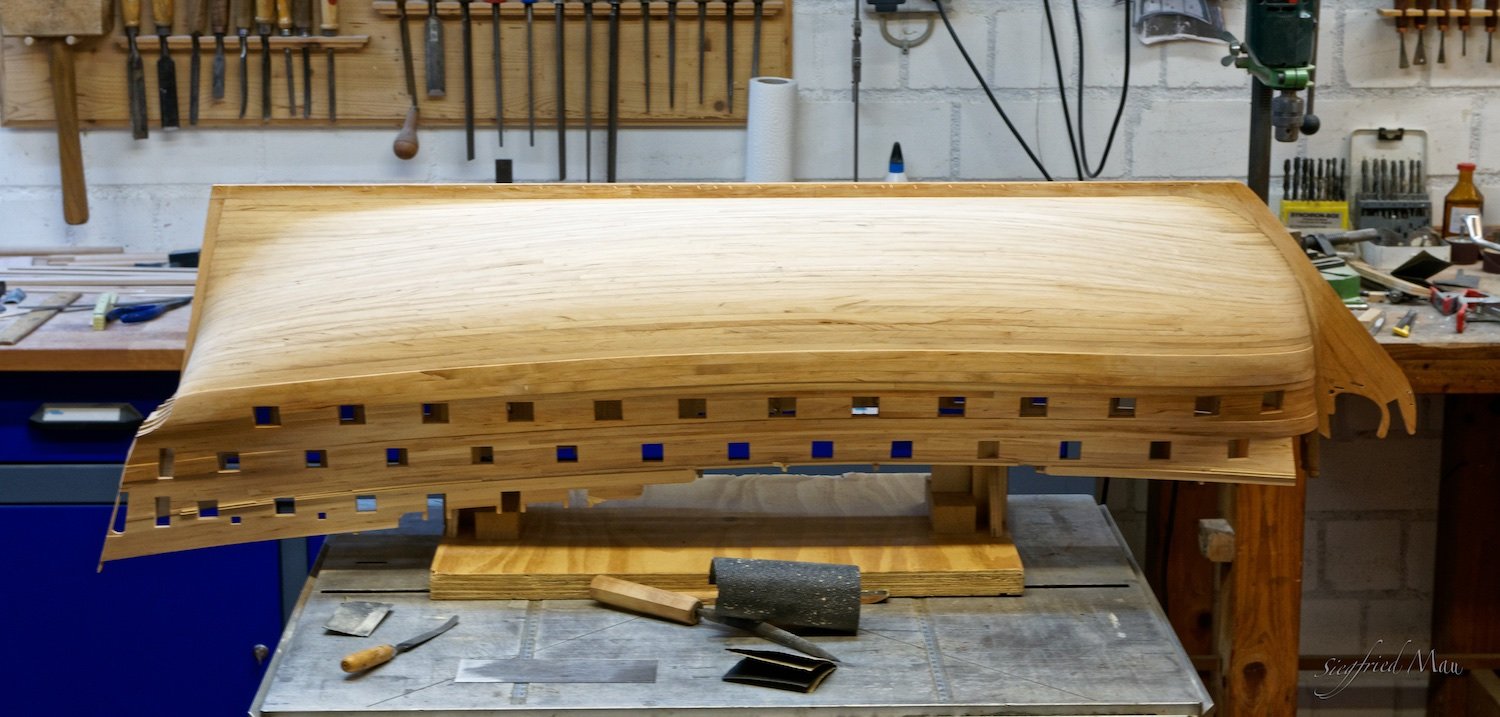
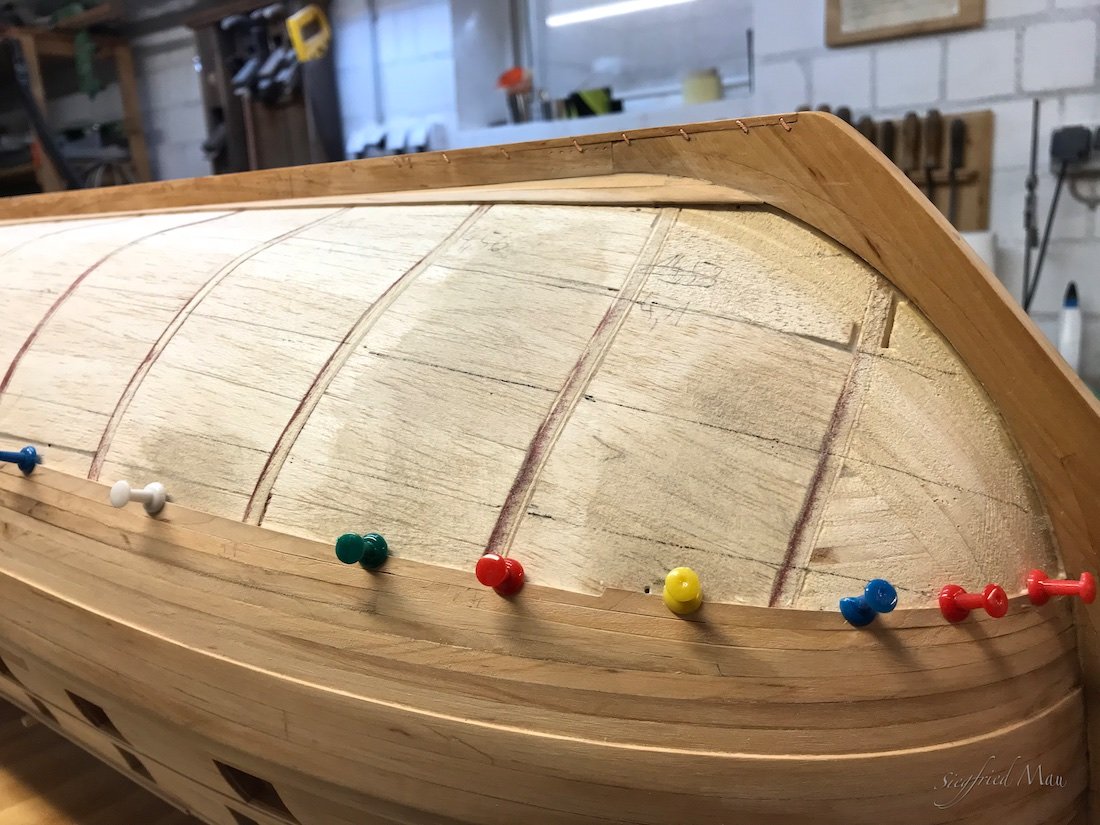
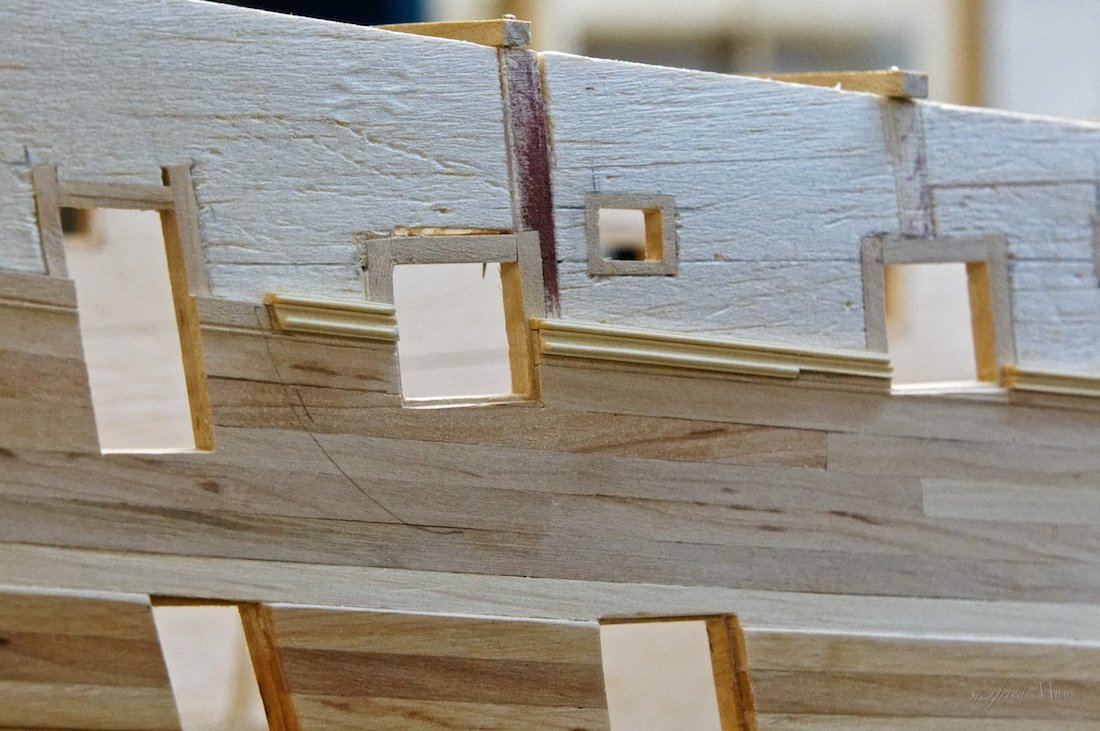
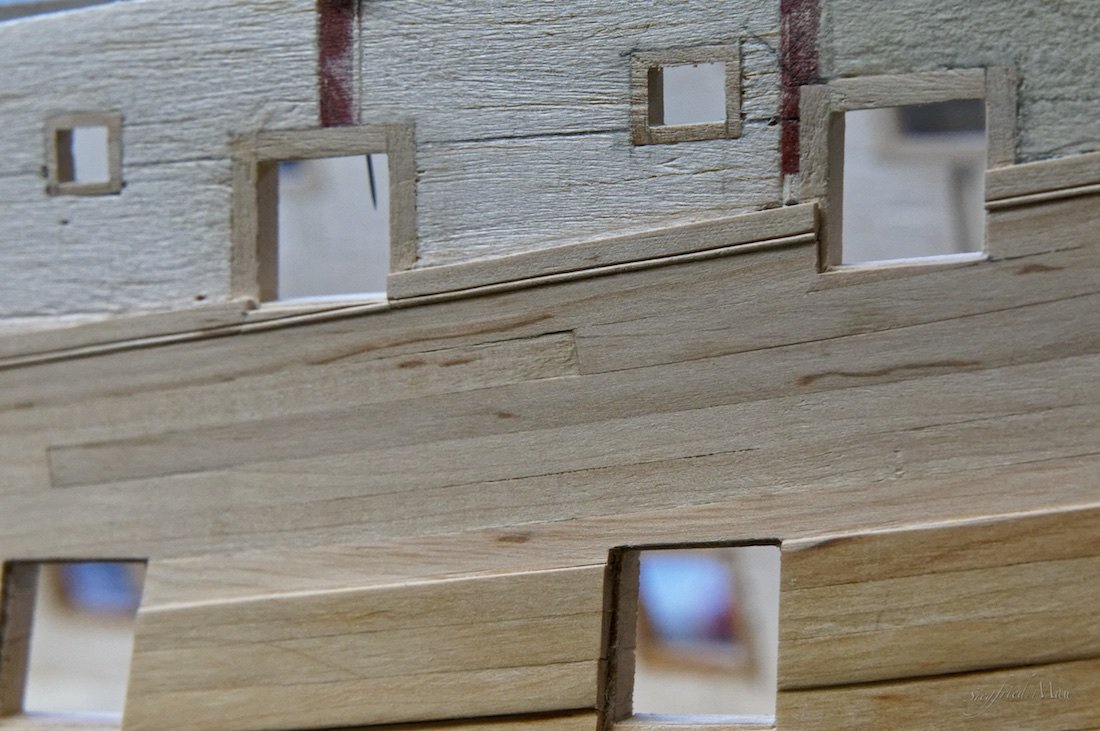
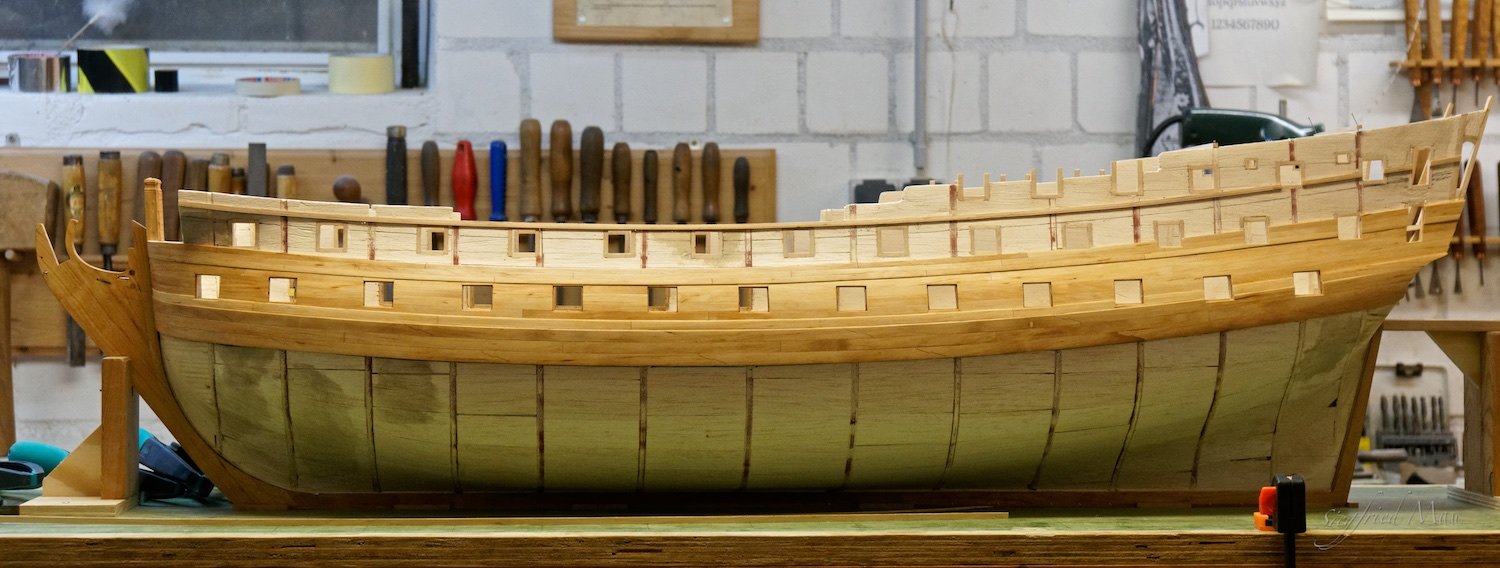
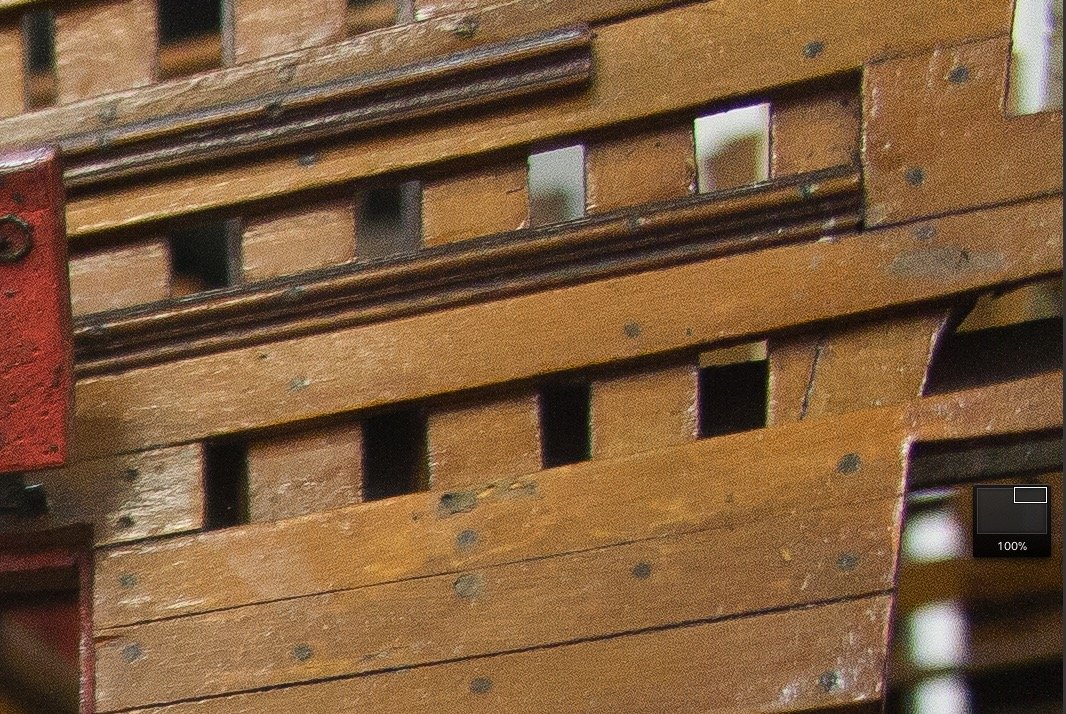
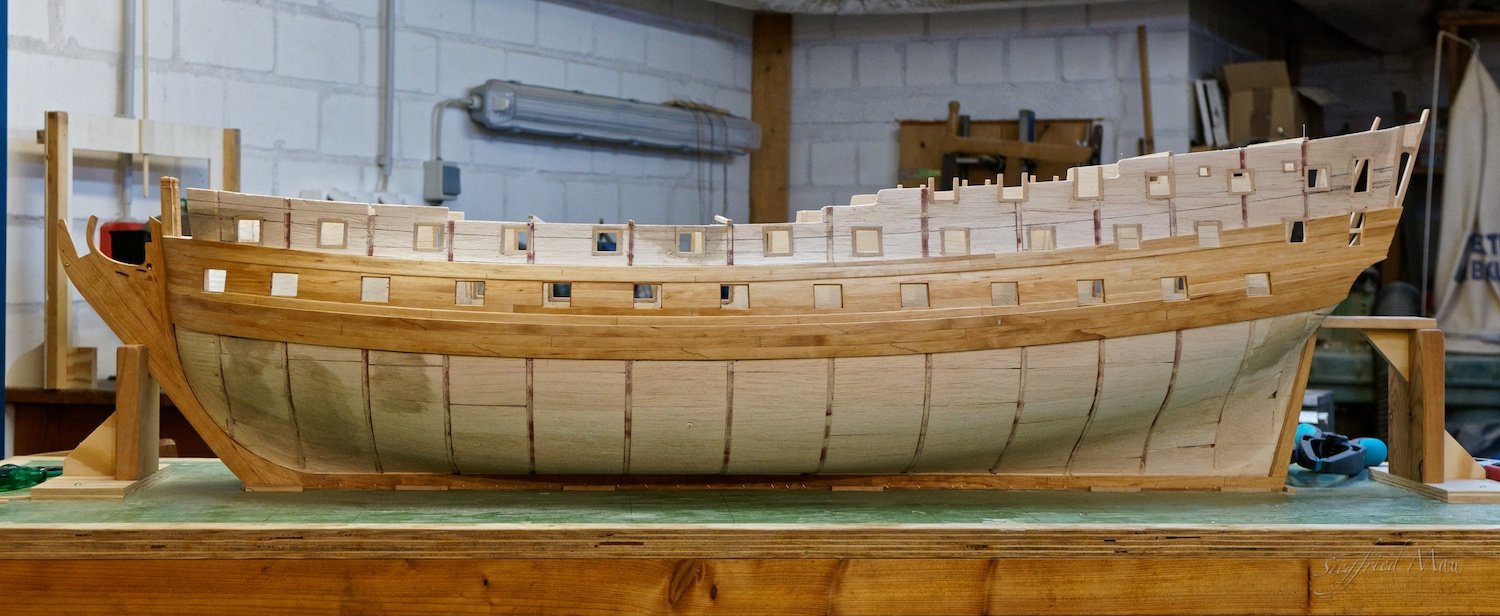
Hello,
today I finished the planking of the port side, between the wales. These gun ports slow your really down and I have a lot more of them above the upper wales

-
Hello Druxey,
don't worry, I see that not as a critic and for that I'm here in the forum. I have at the moment so much to oversee, there is a fault easy done.
It looks a bit step and I measured it immediately after reading your post, but it is ok so. You may see a shadow under the wale at the first bulwark to the right, that is the original measure point there. But the points at the stem post and the second bulwark are exact as at the plan. So the step would be more step from the first bulwark to the stem post, if I had't adjusted it.
That is may be a problem with these plans, there it looks even, but in reality is there than a kink. If you look at the last picture, seen from the side it is not so step. But the ship is really round at the bow.
So, thank you for asking
-
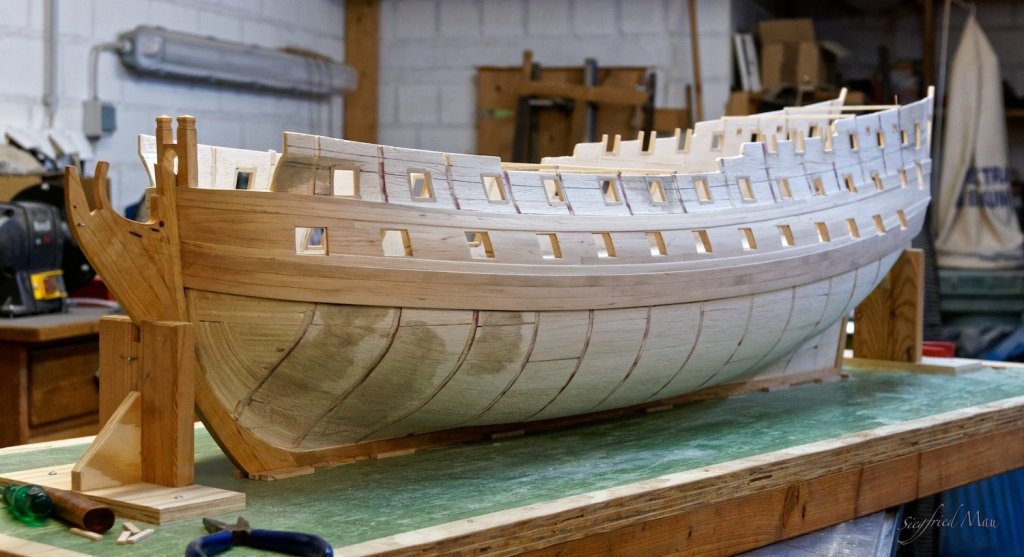
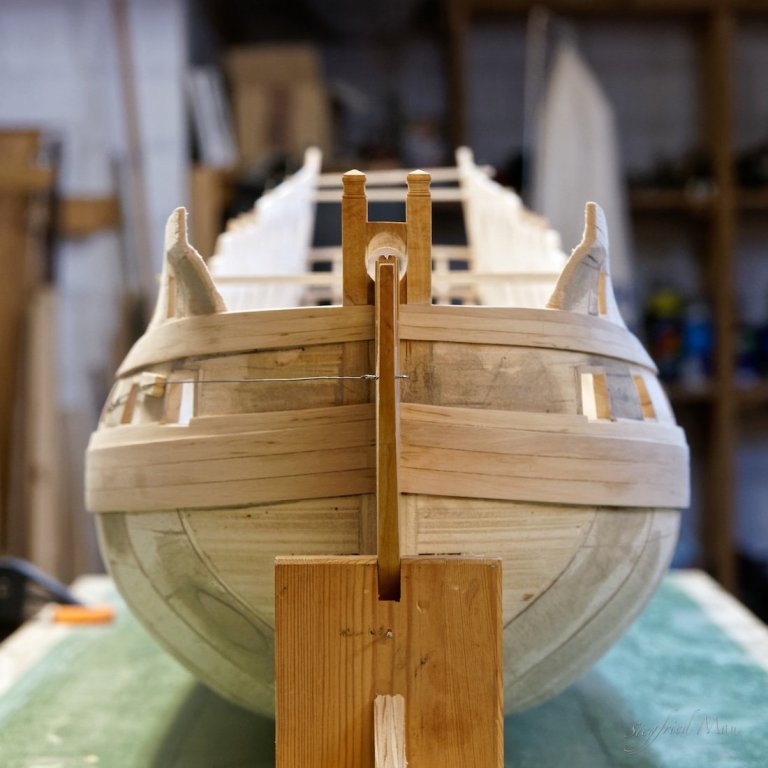
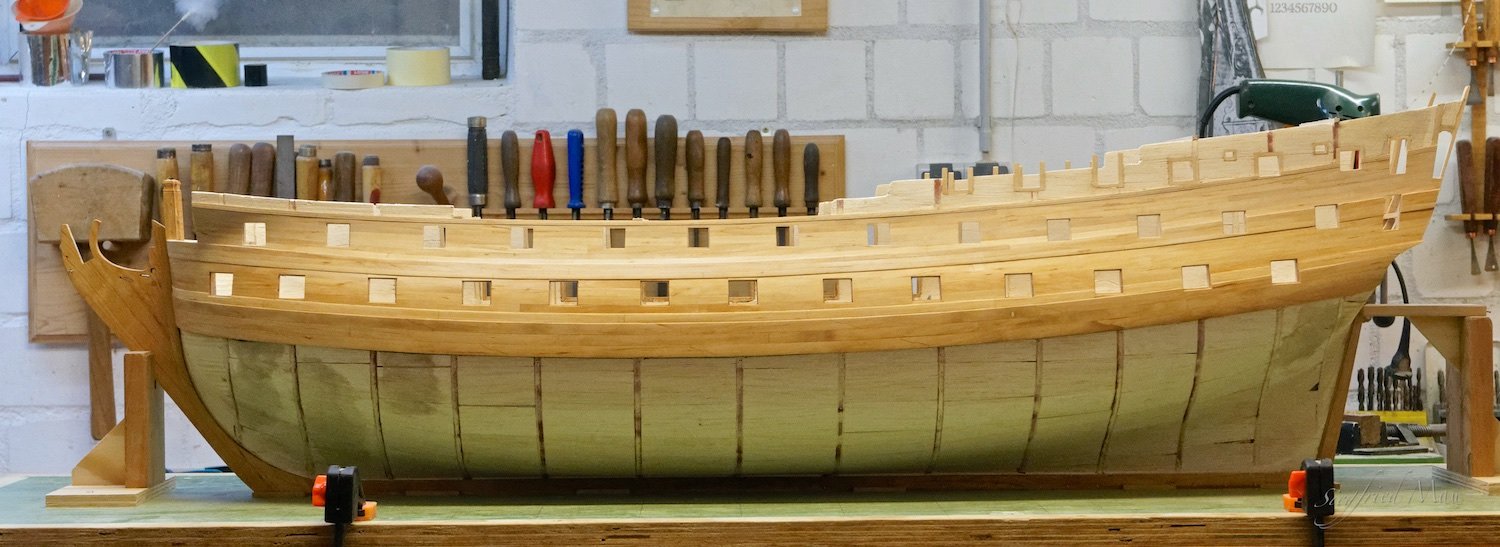
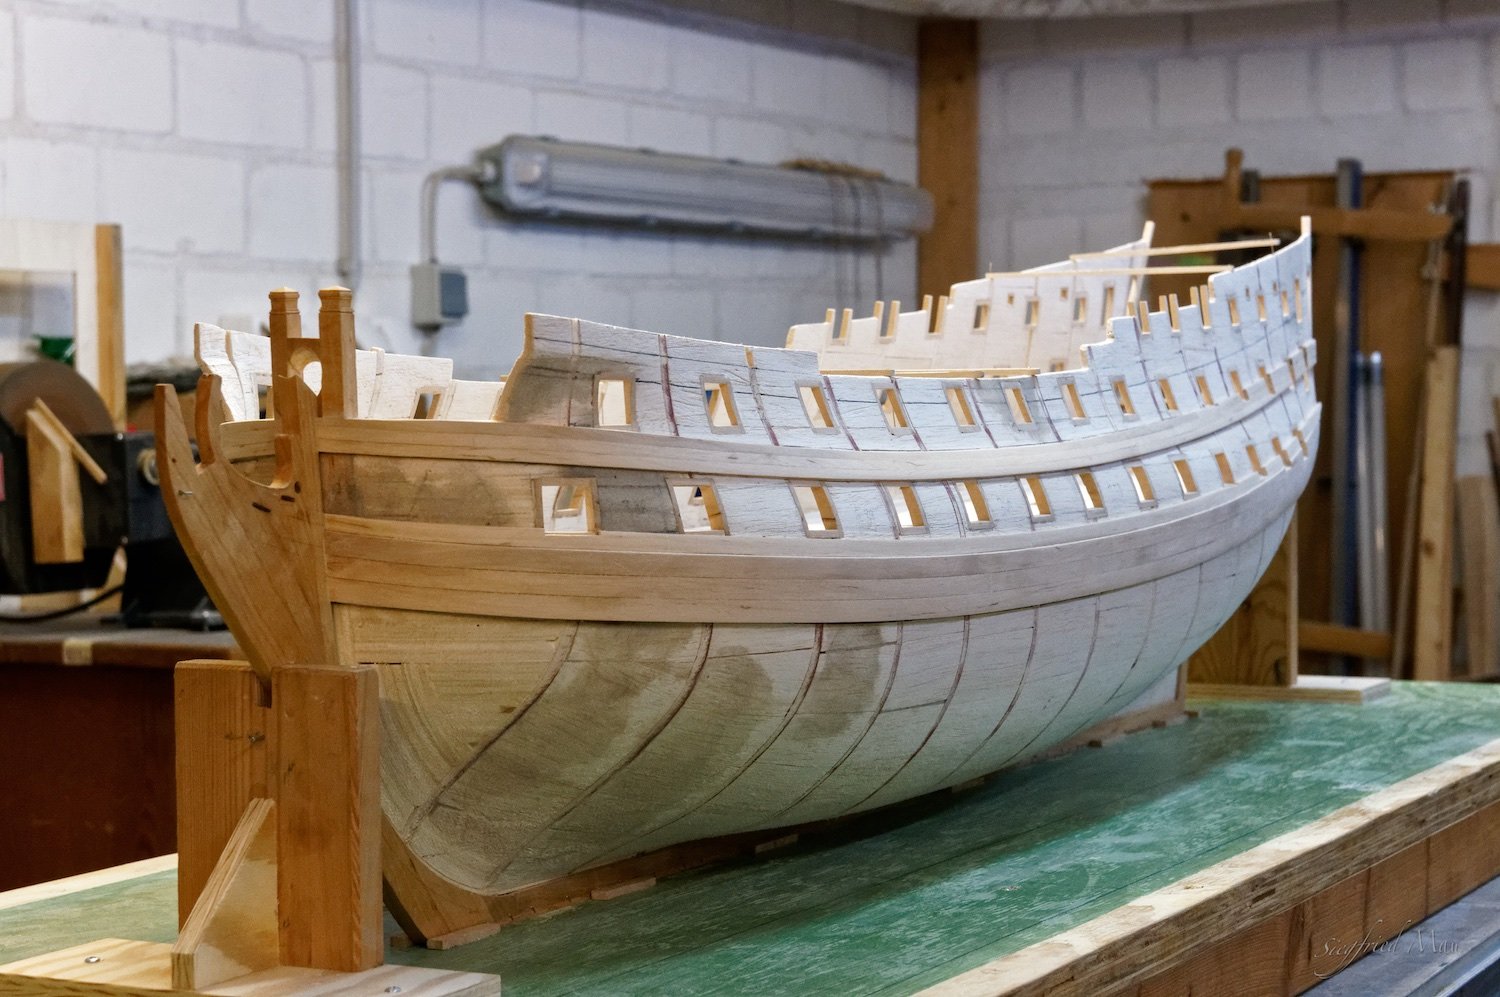
Hello,
first, many thanks for your likes and comments.
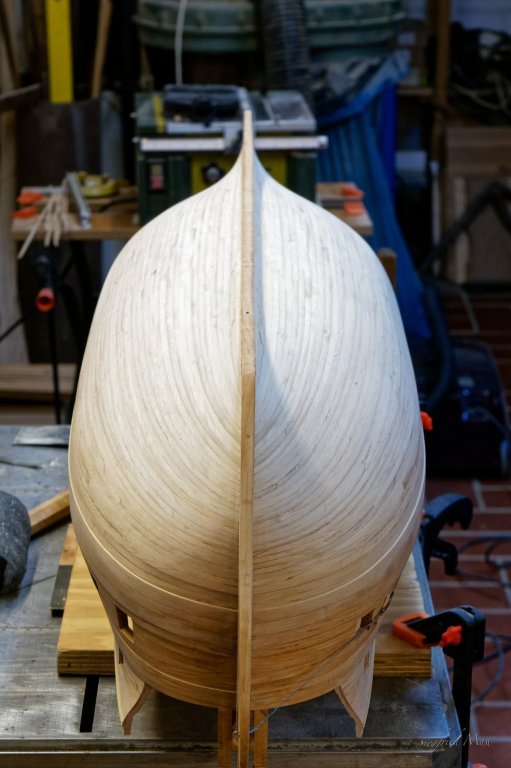
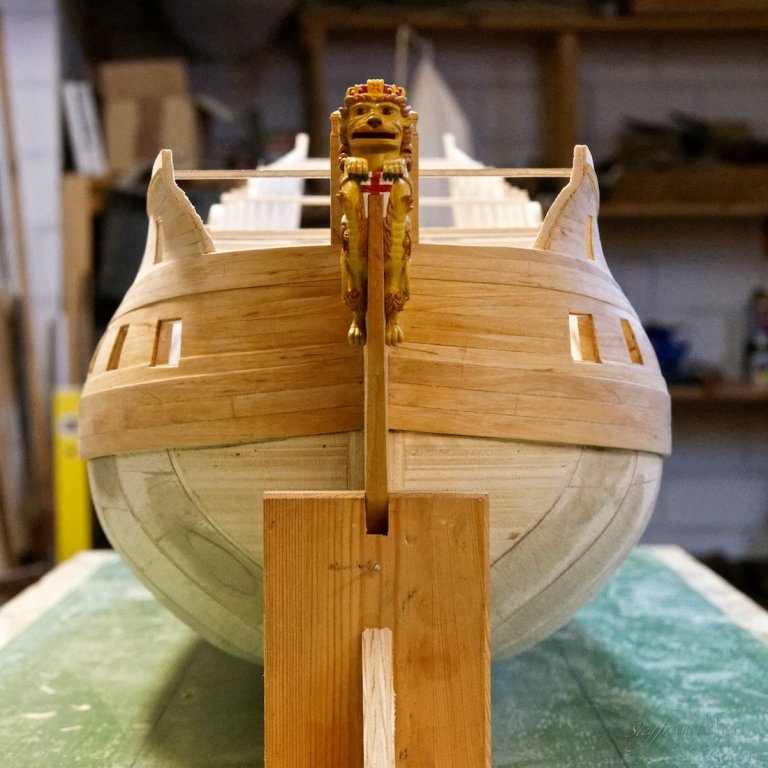
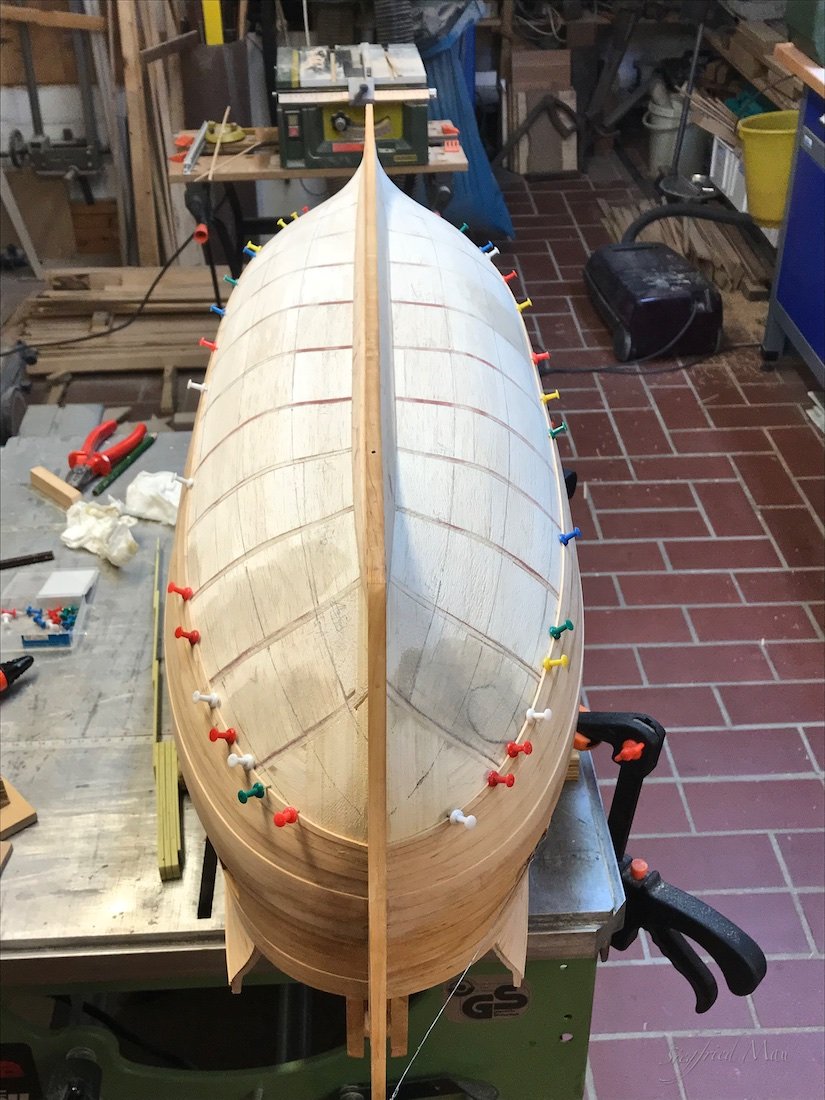
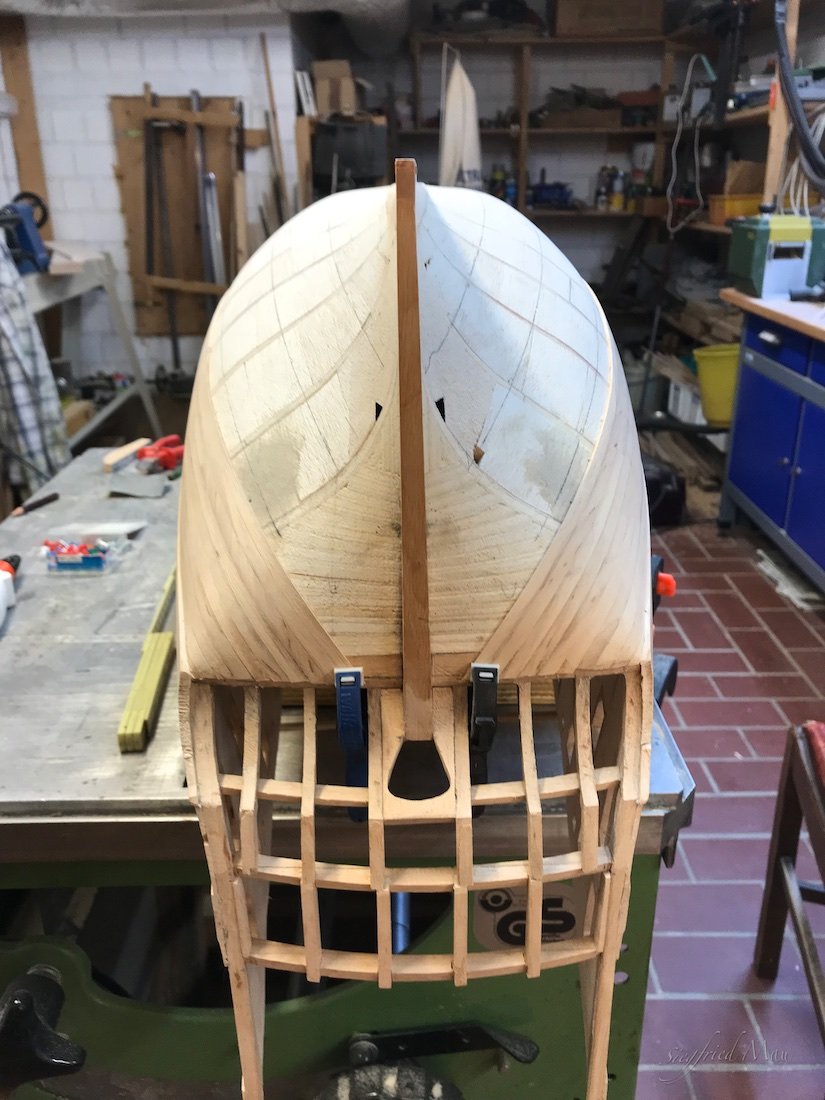
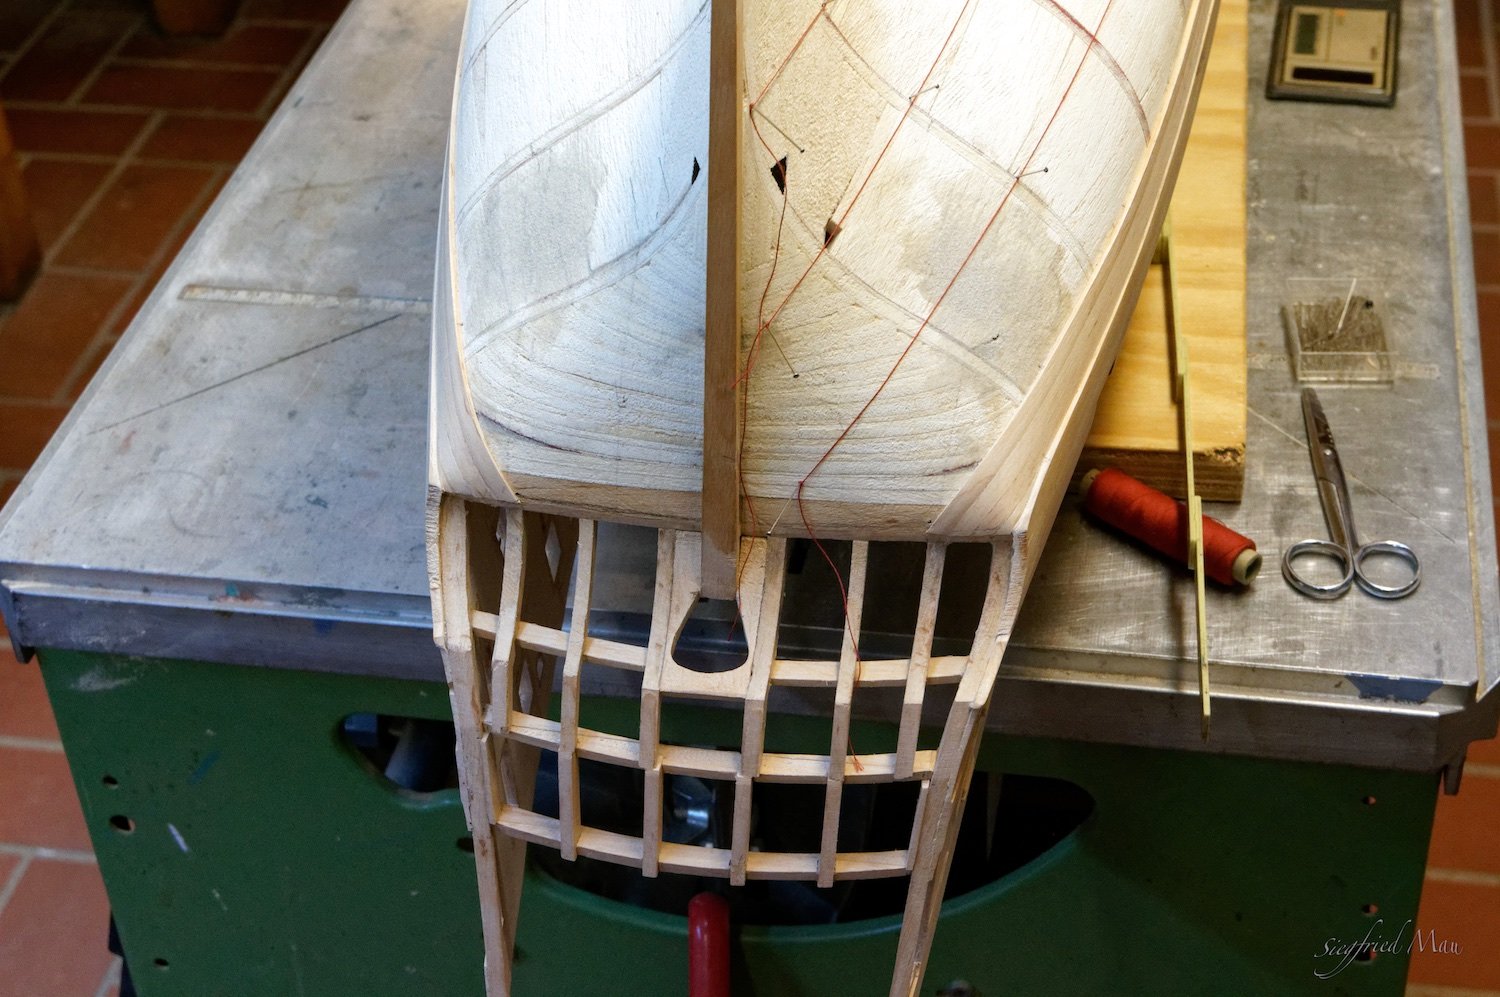
today I finished the so called black strakes. That was quite a task, but now it's done. I like the view of the fore ship, it looks like a bursted ball
The next thing is to plank the rest to the upper wales.


.jpg.db1ce1479af06cb388a2fd10453cb21d.jpg)


HMS Tiger 1747 by Siggi52 - 1:48 - 60 gun ship from NMM plans
in - Build logs for subjects built 1501 - 1750
Posted
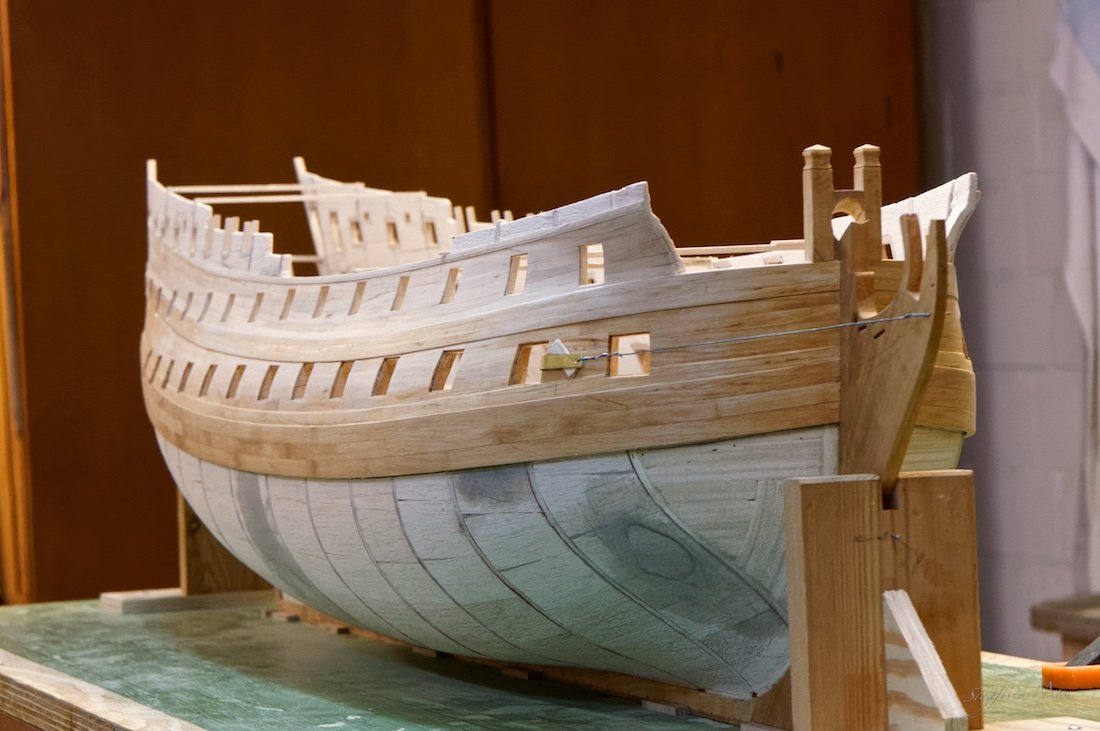
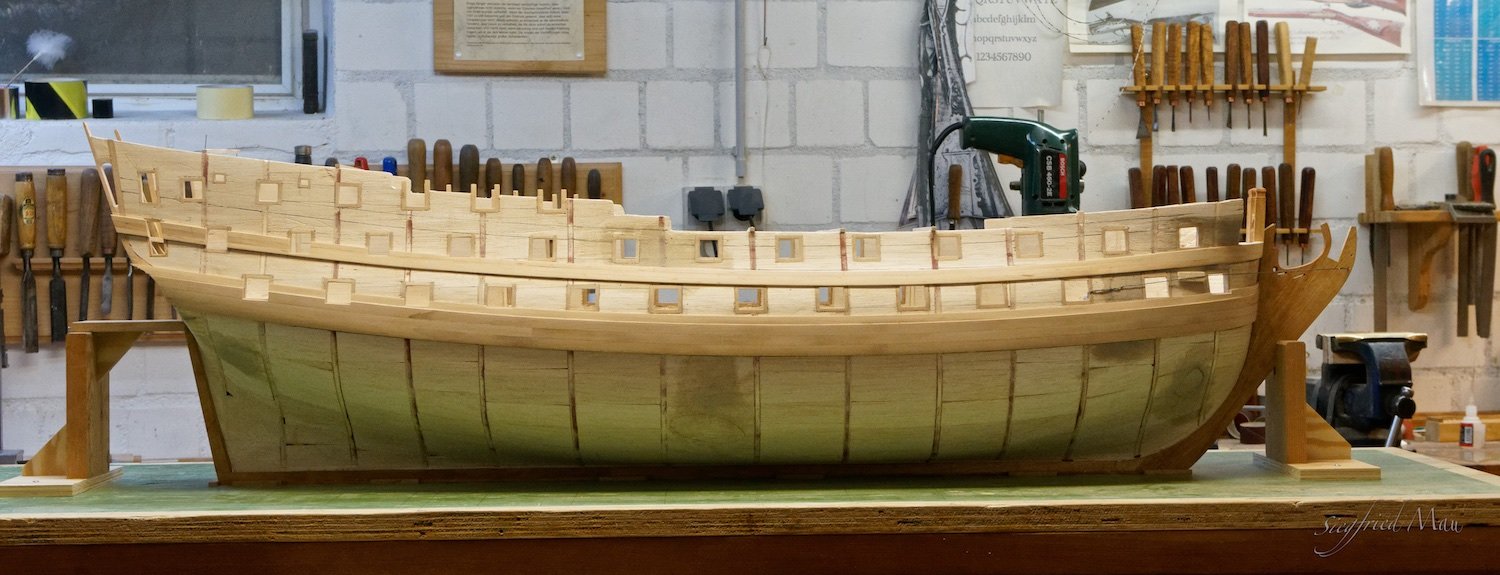
Hello again,
and thank you for your likes and comments.
Hubac, now and then you see it in this forum. Also my Dragon has these staples.
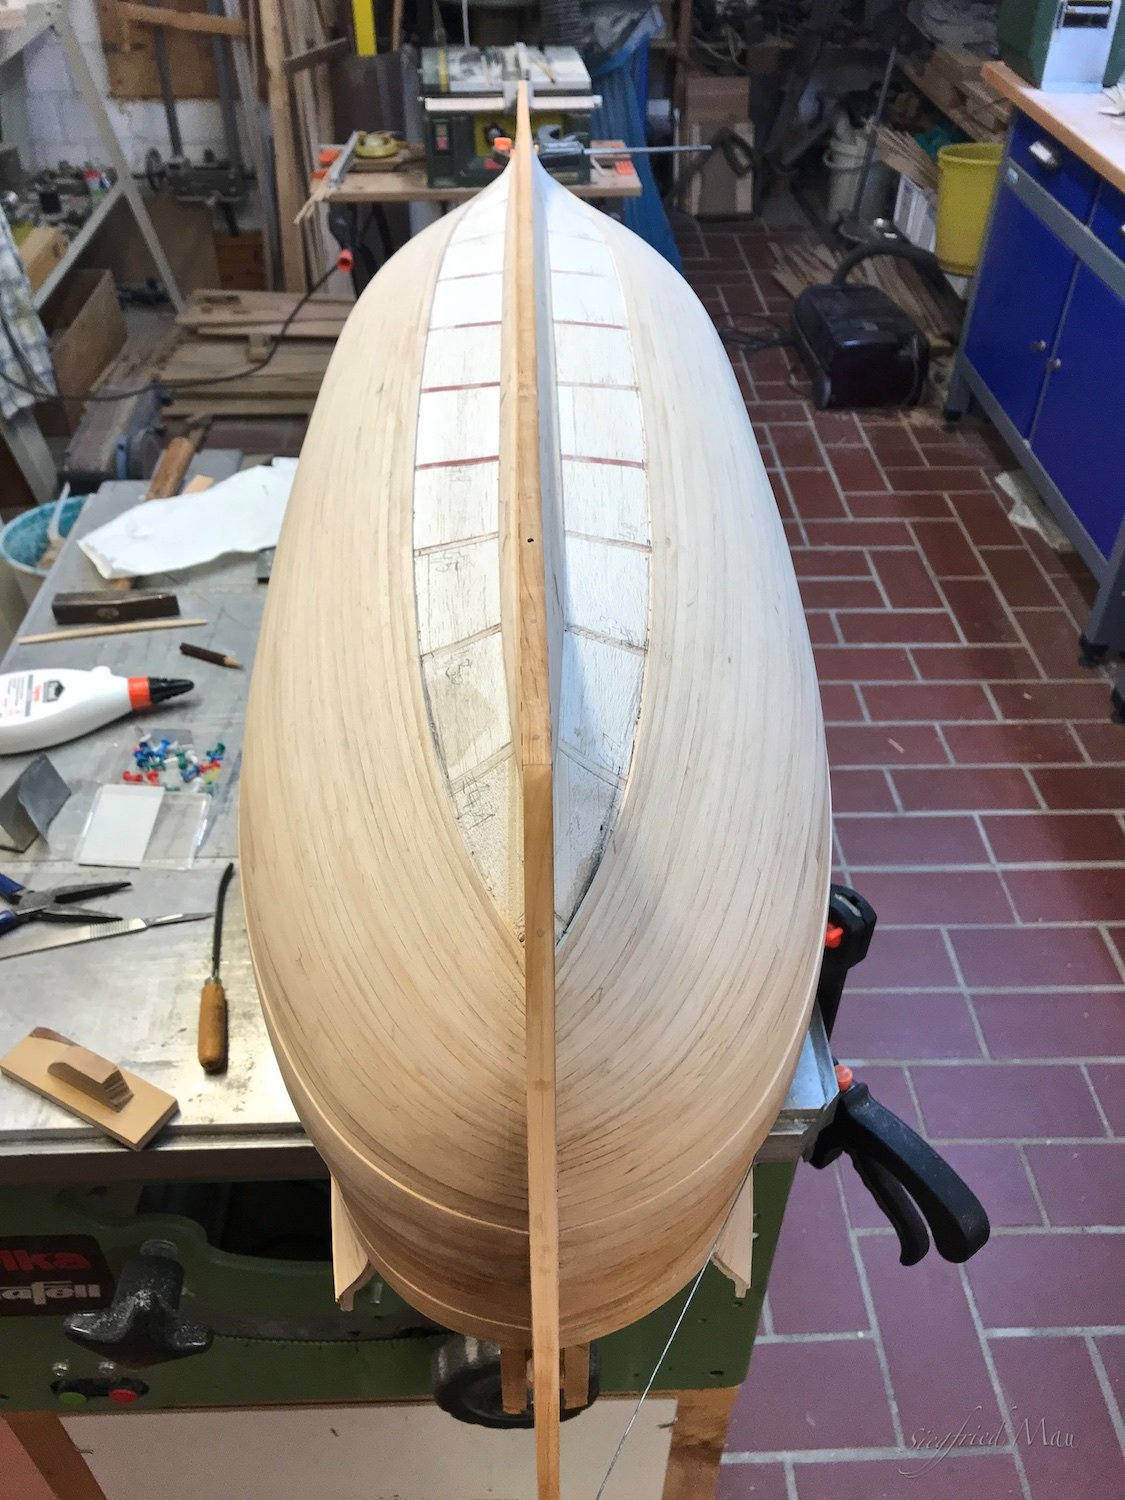
After sanding the whole forenoon, I think the lower hull is ready now. I should have started with the first drop plank at the 1. diminishing strake. But later you are always smarter
The next thing to do is, I think the ruder. Then I know how large the opening in the lower counter must really be.
But because here the spring came from one day to the other, I think my garden needs my attention first. The week before Easter we had two snowstorms with each 10 cm snow here. More north they had over 50 cm! One of my oaks lost a big branch then, and the experts will come Friday to cut it out. But also for me is enow left.