Louie da fly
-
Posts
7,990 -
Joined
-
Last visited
Content Type
Profiles
Forums
Gallery
Events
Everything posted by Louie da fly
-
 Well, I can't understand how the shrouds can have turned out to foul the hull. With pre-cut bulkheads it can't be that you've got the tumblehome wrong. But I'm glad you've found a good solution (in fact that's probably what I would have done in your place). Regarding the lower deadeyes, McElvogue's Book "Tudor Ship Mary Rose" (available as an e-book, by the way - see https://www.amazon.com/Tudor-Warship-Mary-Rose-Anatomy-ebook/dp/B014WSVJKK ) - shows them held by a metal strop, but I don't know whether he has archaeological evidence to back that up or whether it's speculation on his part. Note also that the Mary Rose deadeyes have LOTS of holes for the lanyards - it must have been a quite complex set of tackle. But as you're following the kit instructions, not kit-bashing, that's rather irrelevant. But your shrouds and deadeyes look very good. Steven
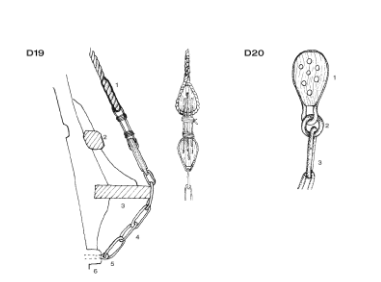
-
https://www.thevintagenews.com/2018/03/09/worlds-oldest-message-in-a-bottle/?fbclid=IwAR0gxDcPAe1qQtmQrS6_45CUfB78Myc1eU6Q8clppthFJyvXgj-ouwwIs0U&chrome=1&D2c=1&A1c=1
- 1 reply
-
- 9
-

-

-

-
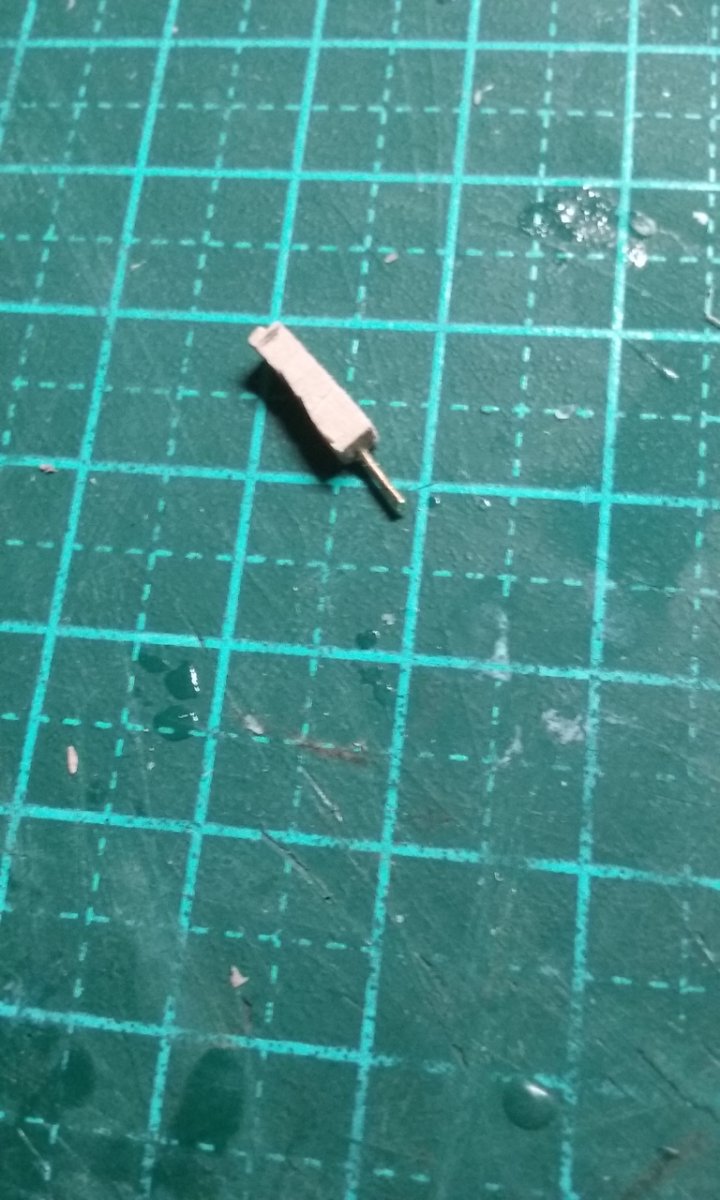
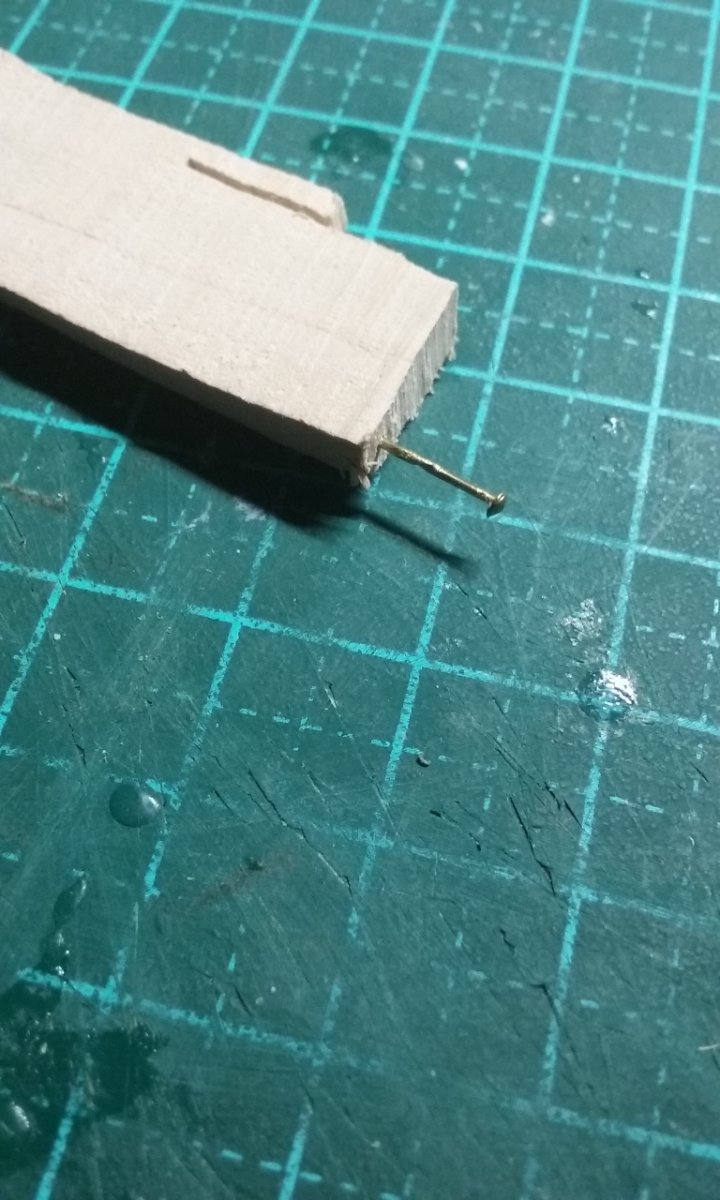
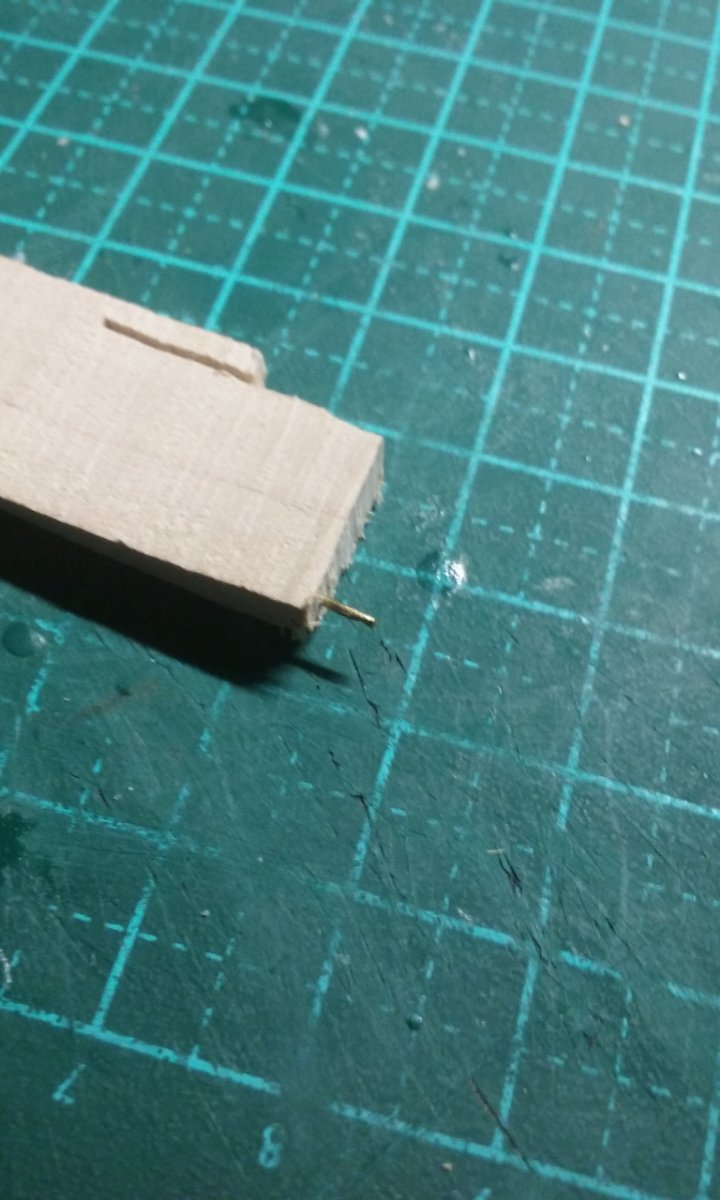
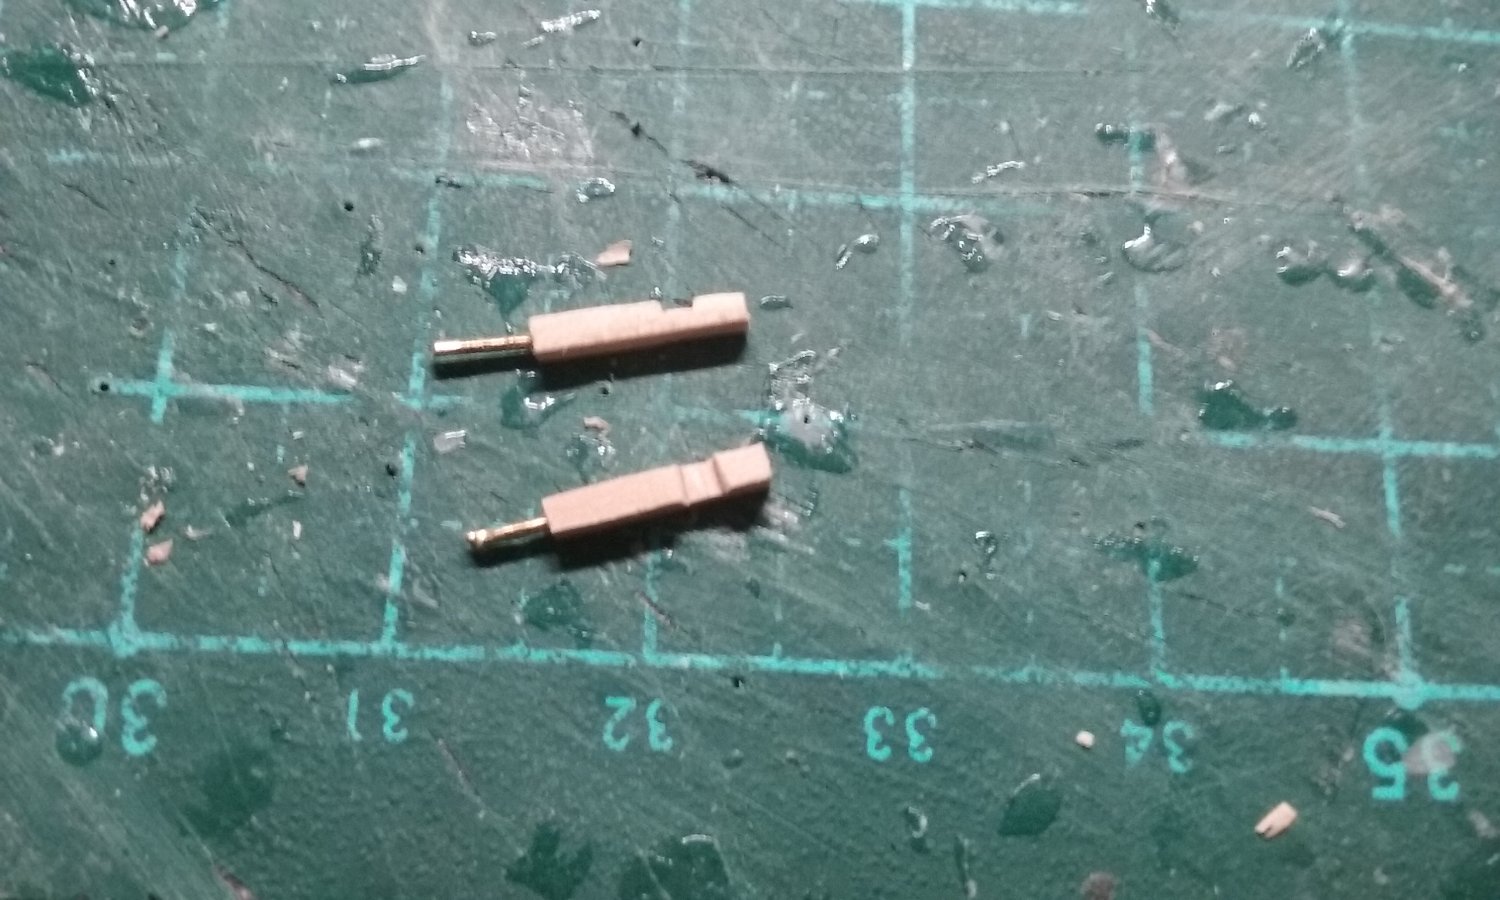
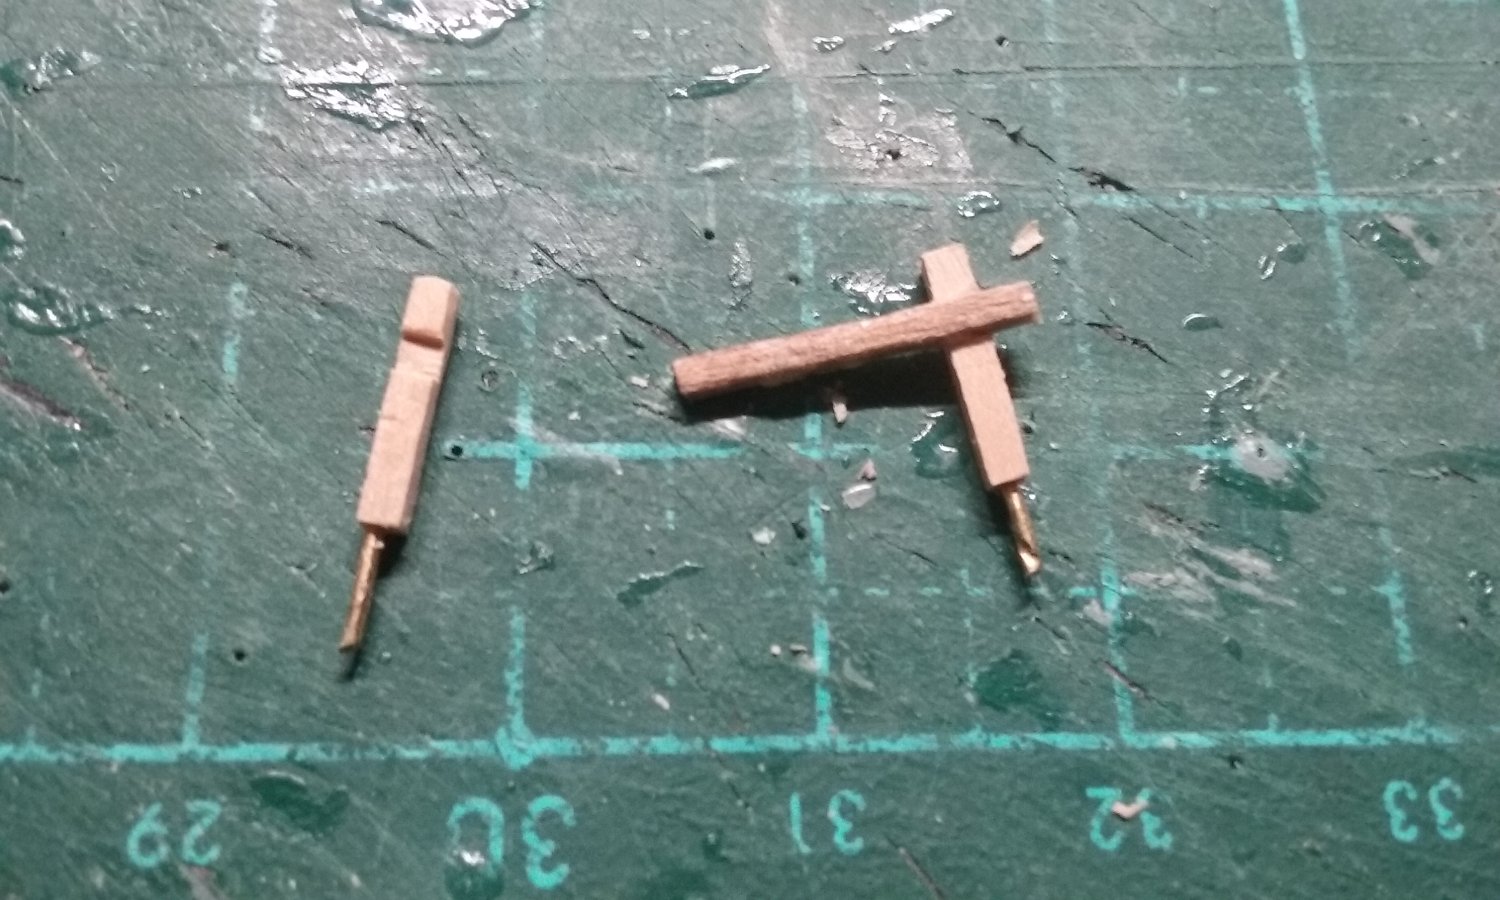
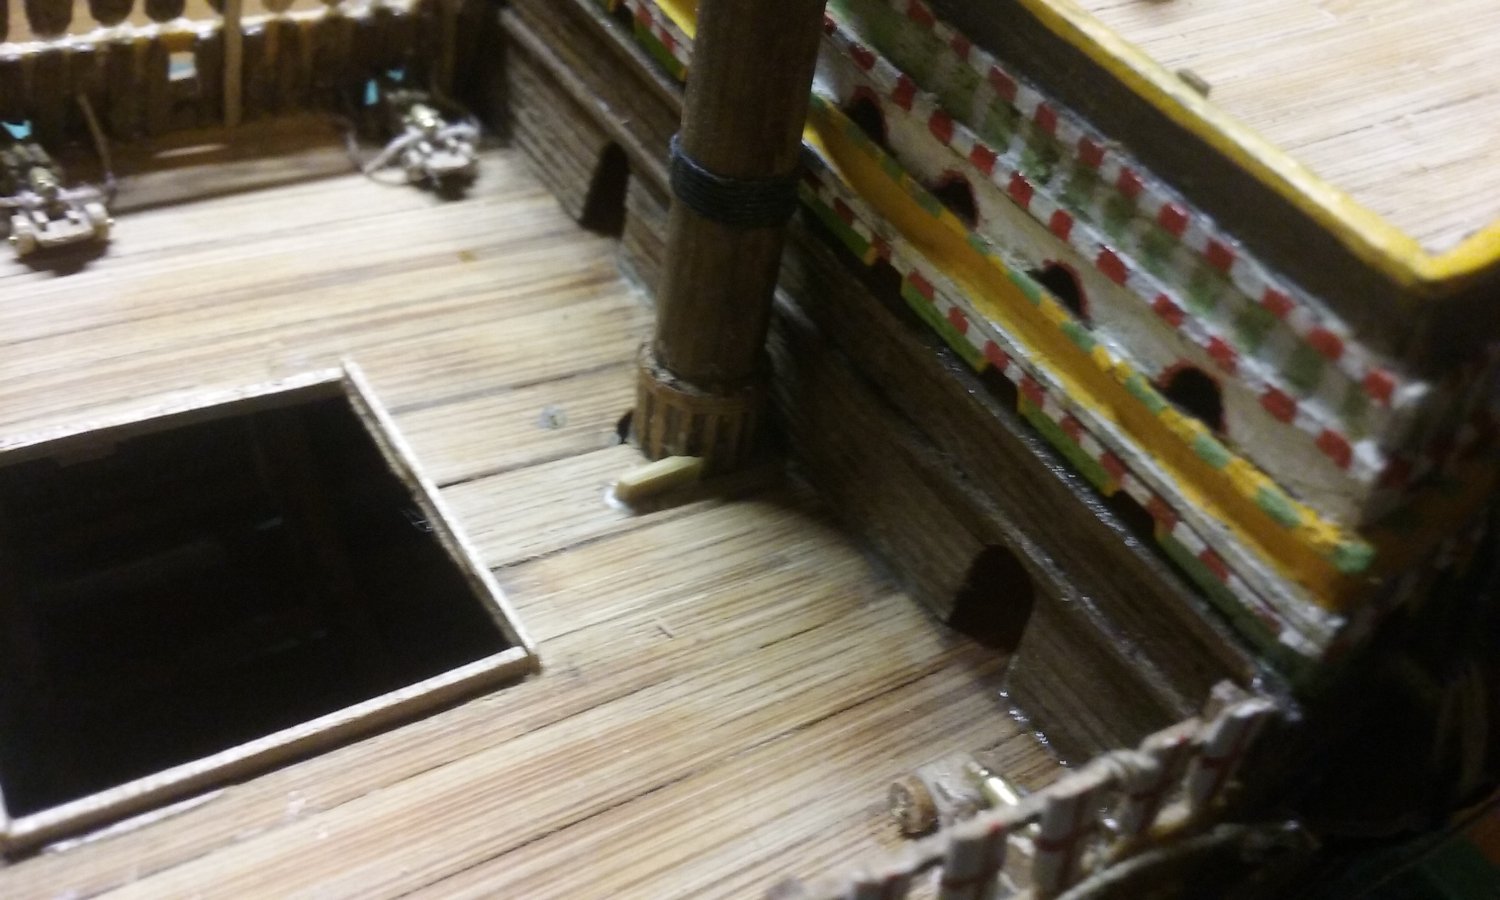
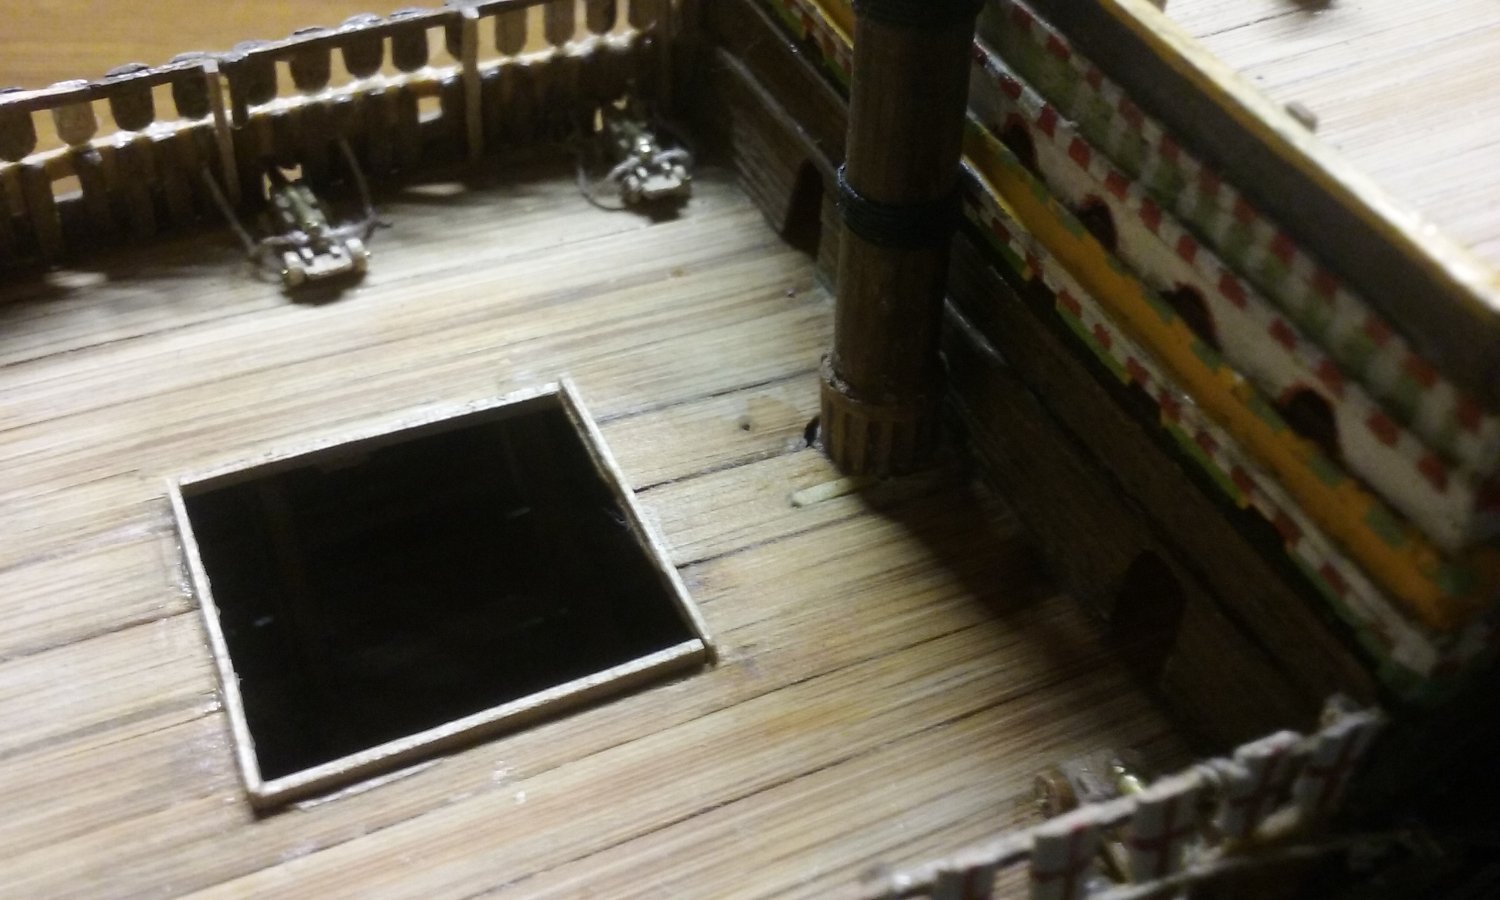
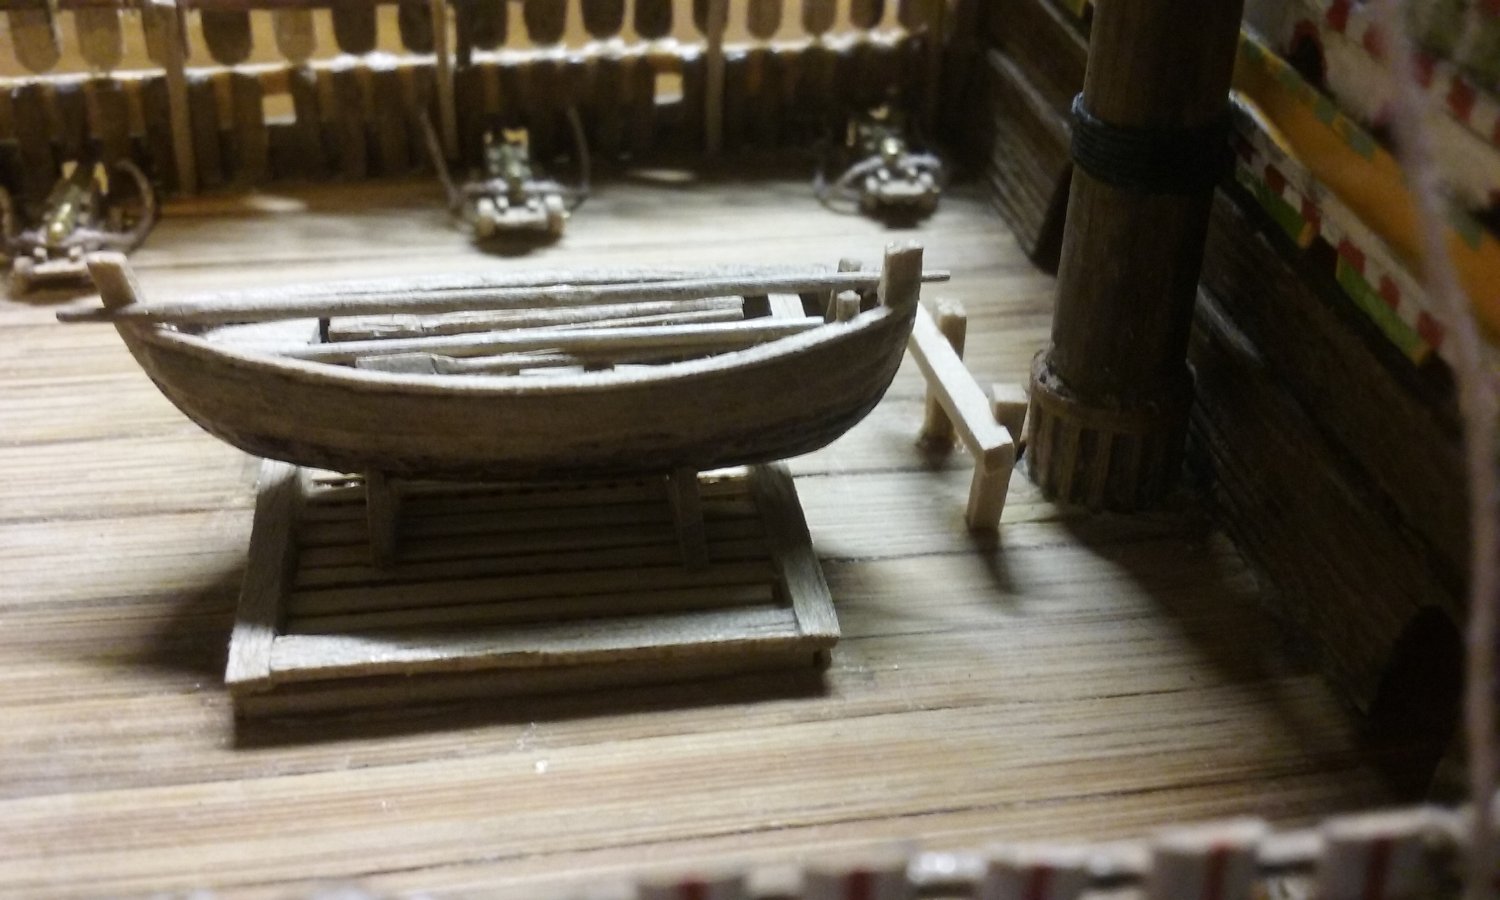
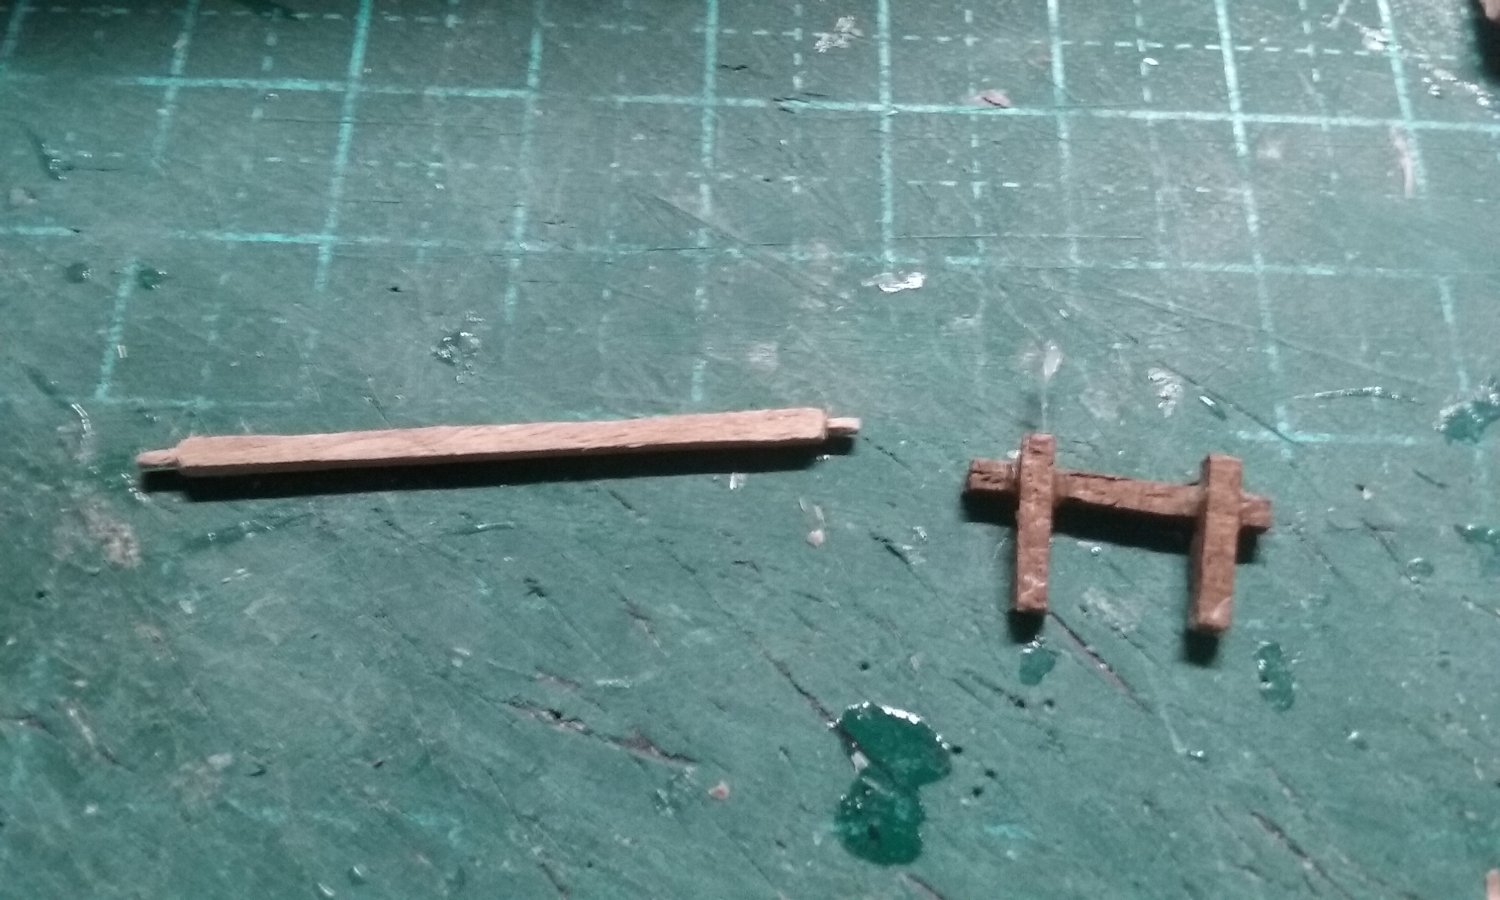
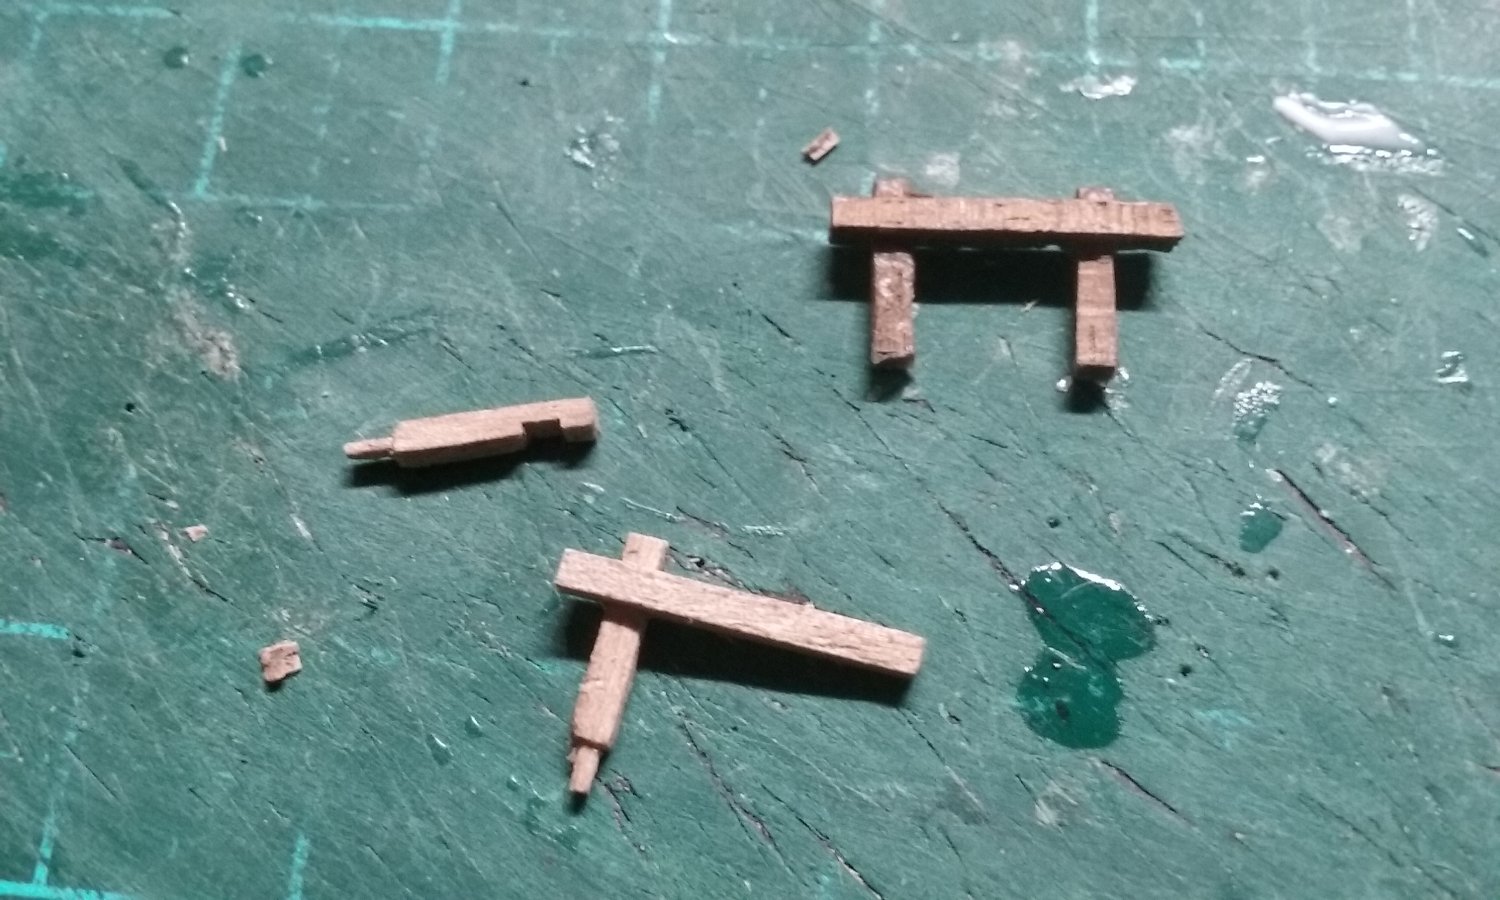
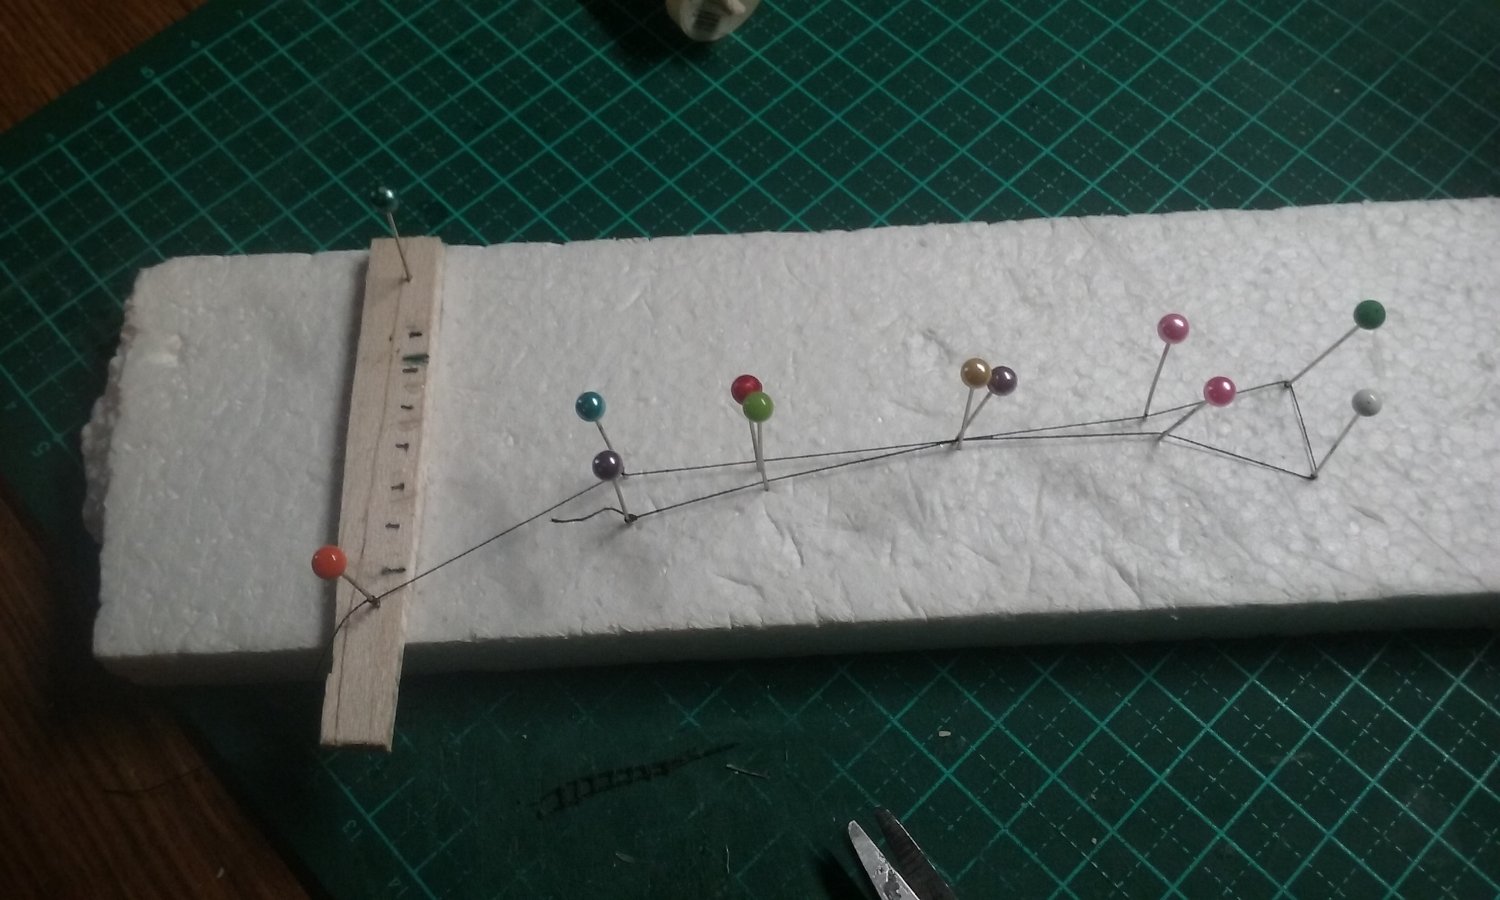
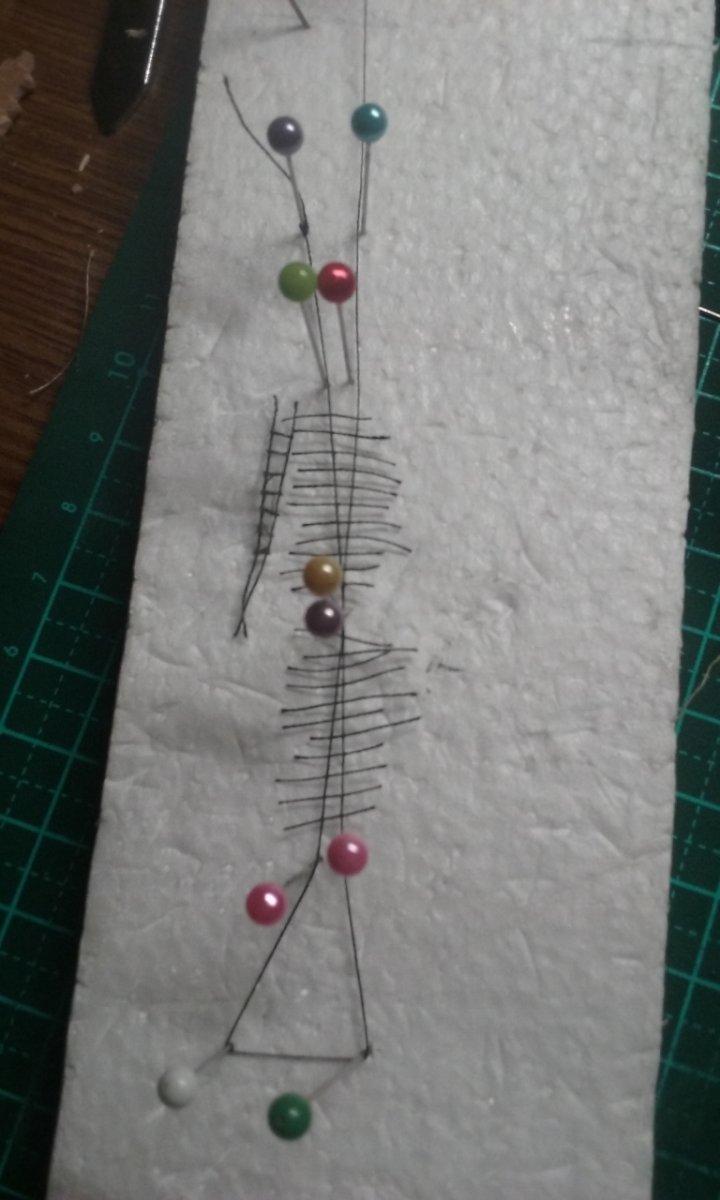
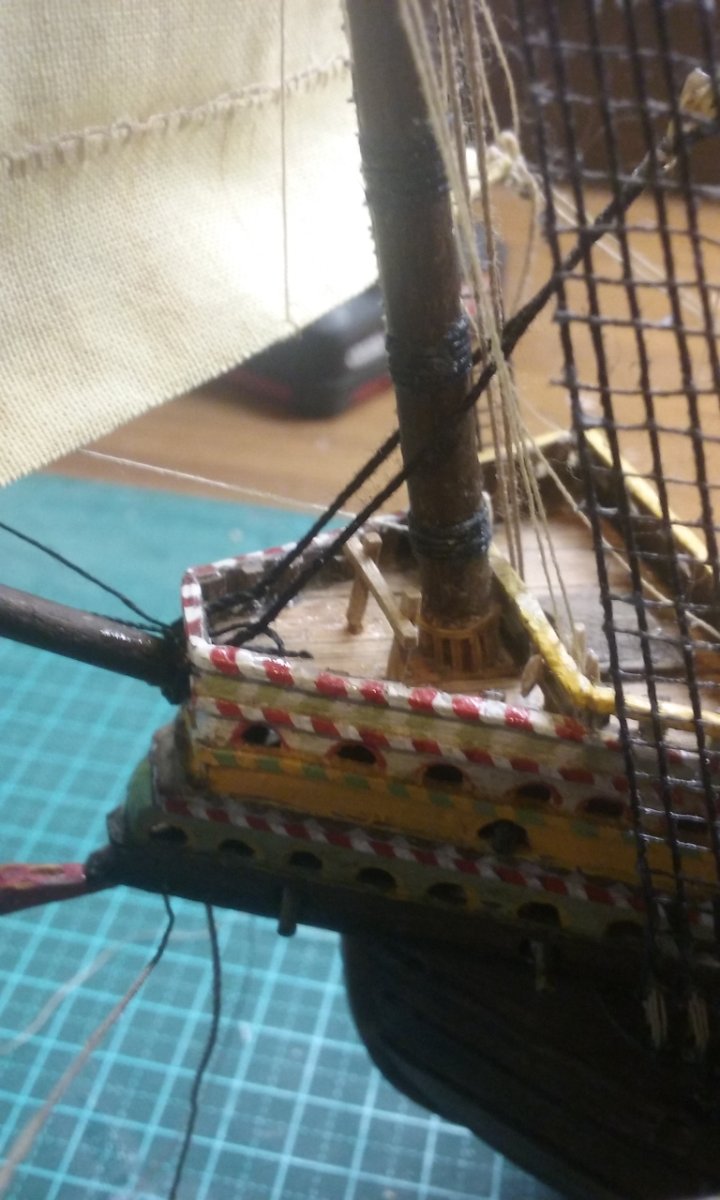
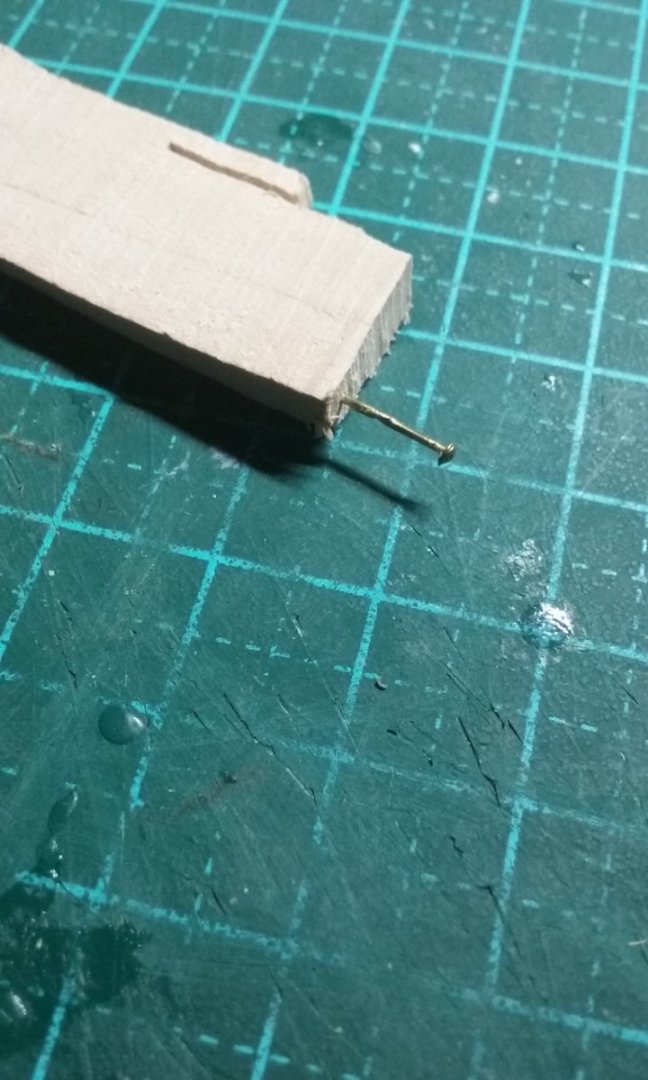
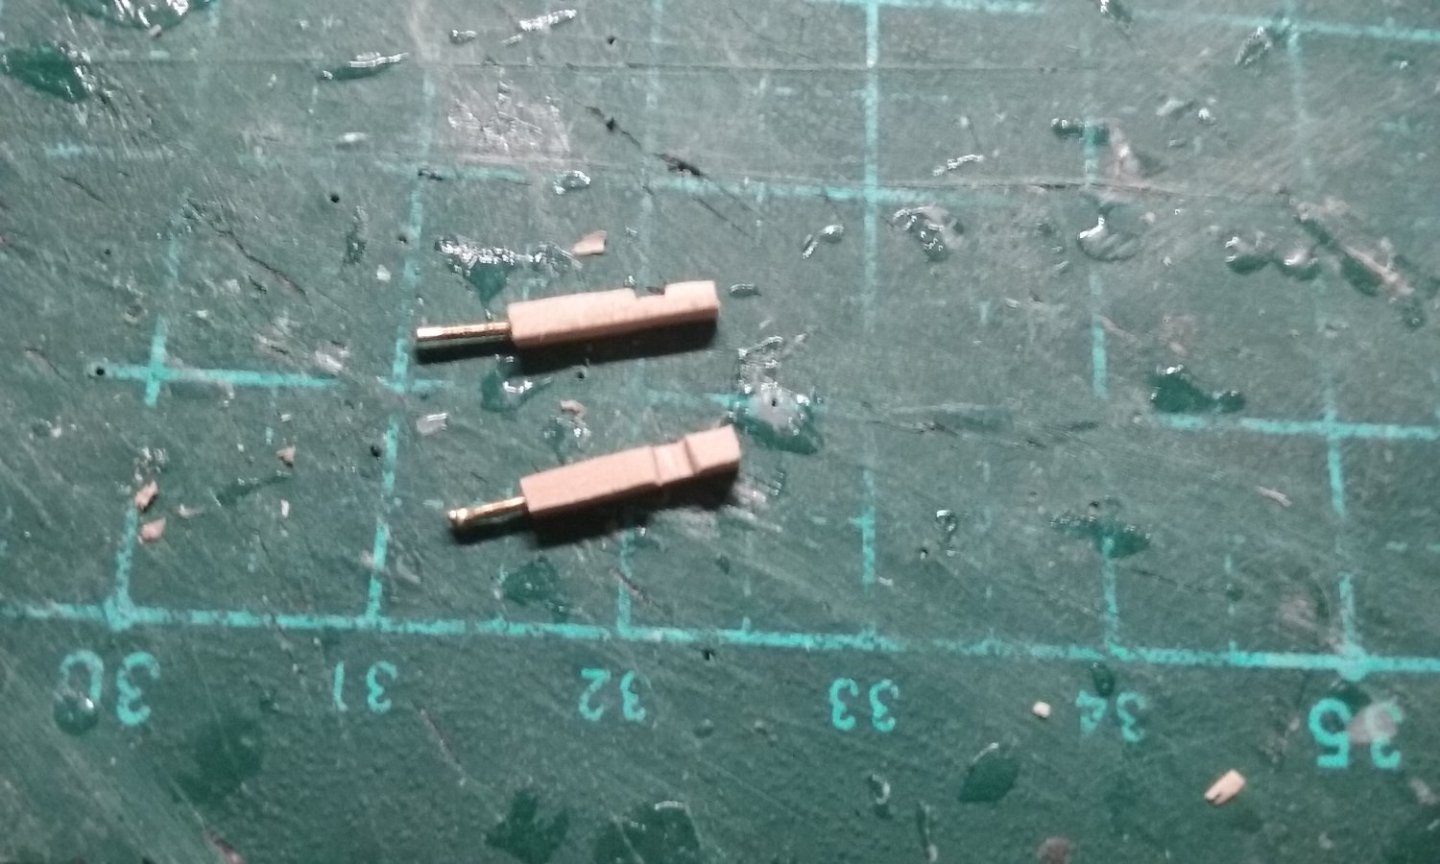
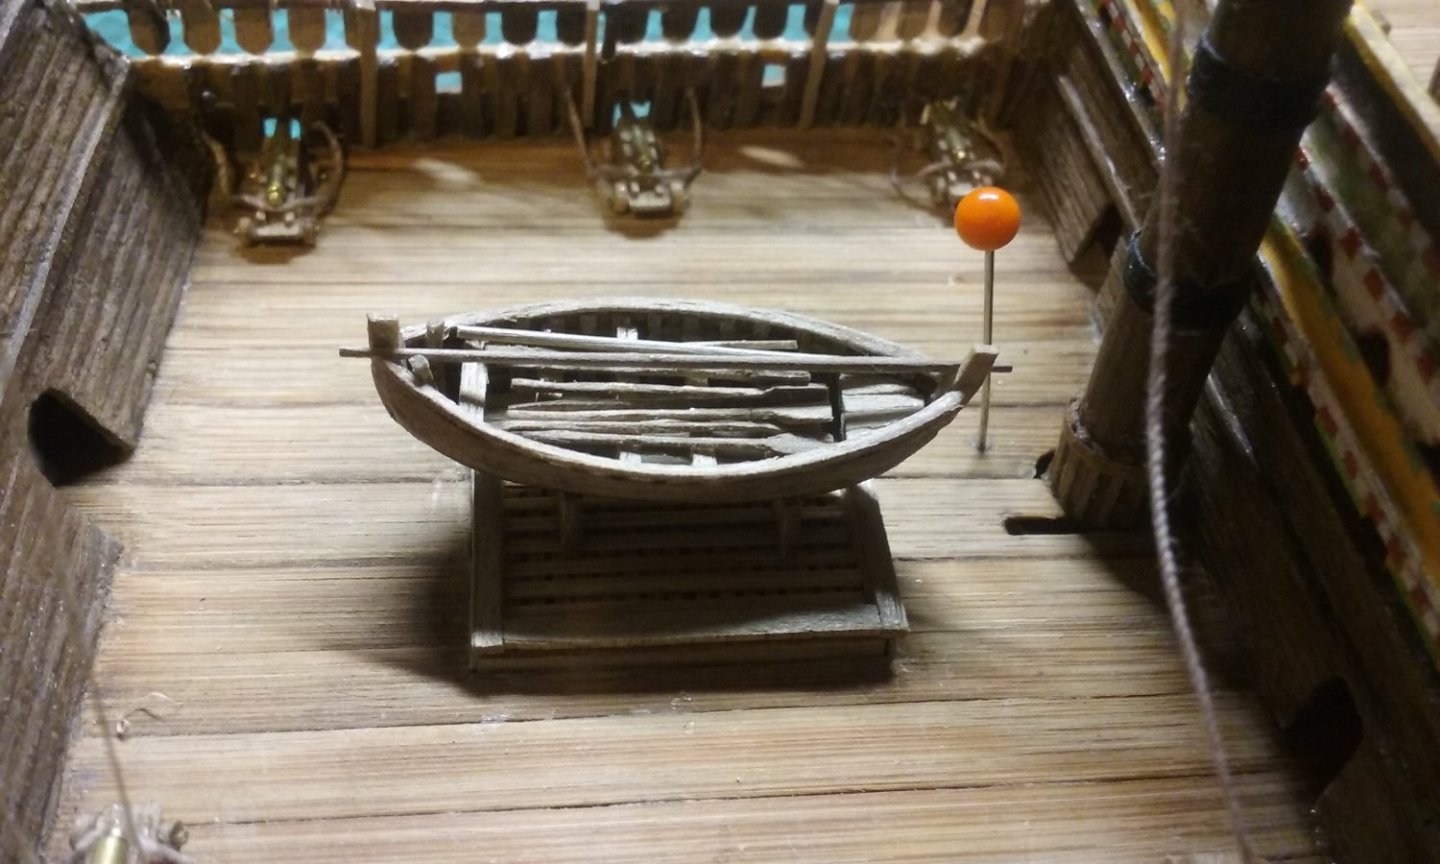
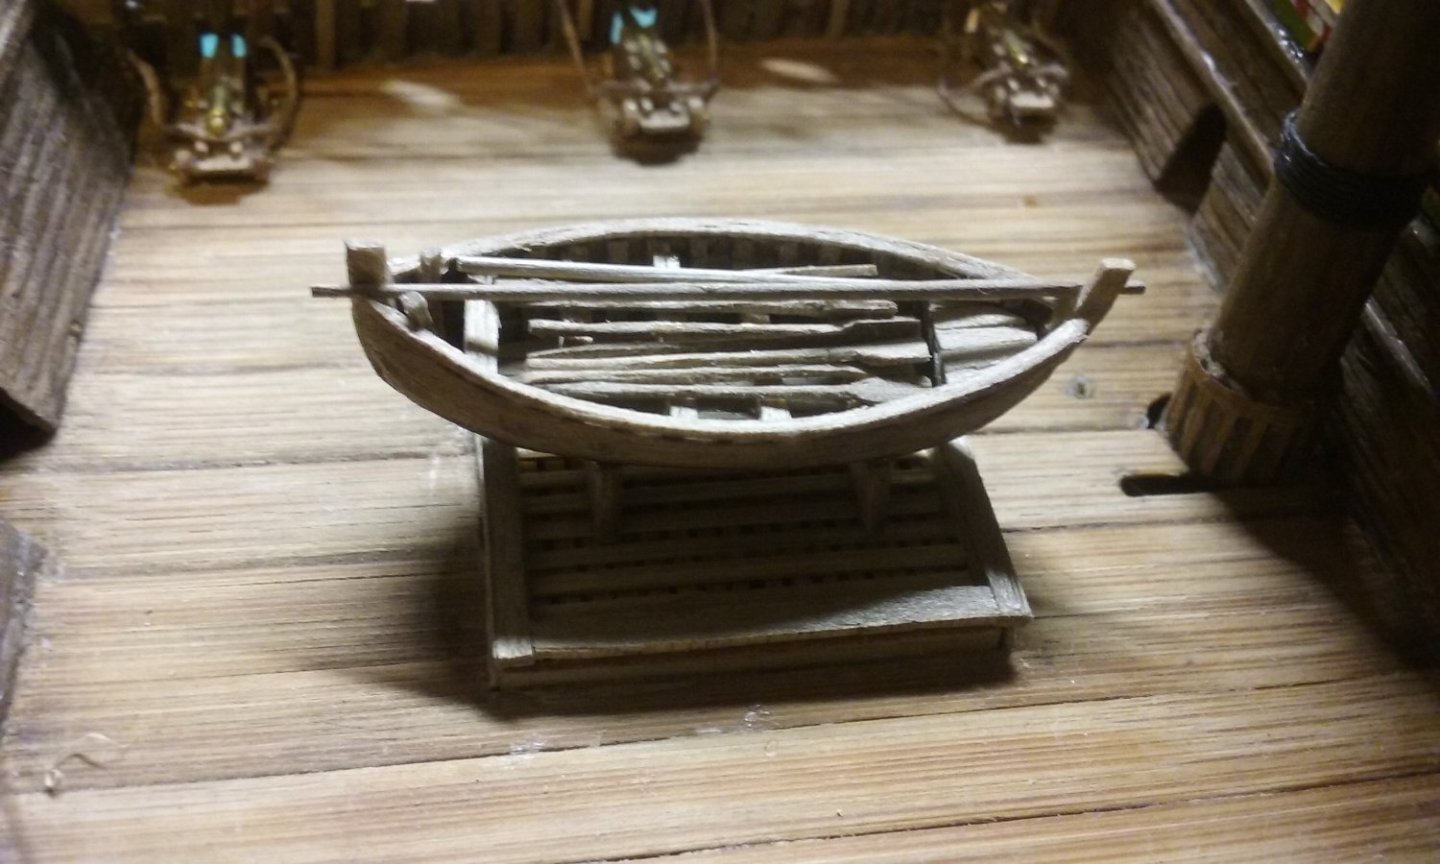
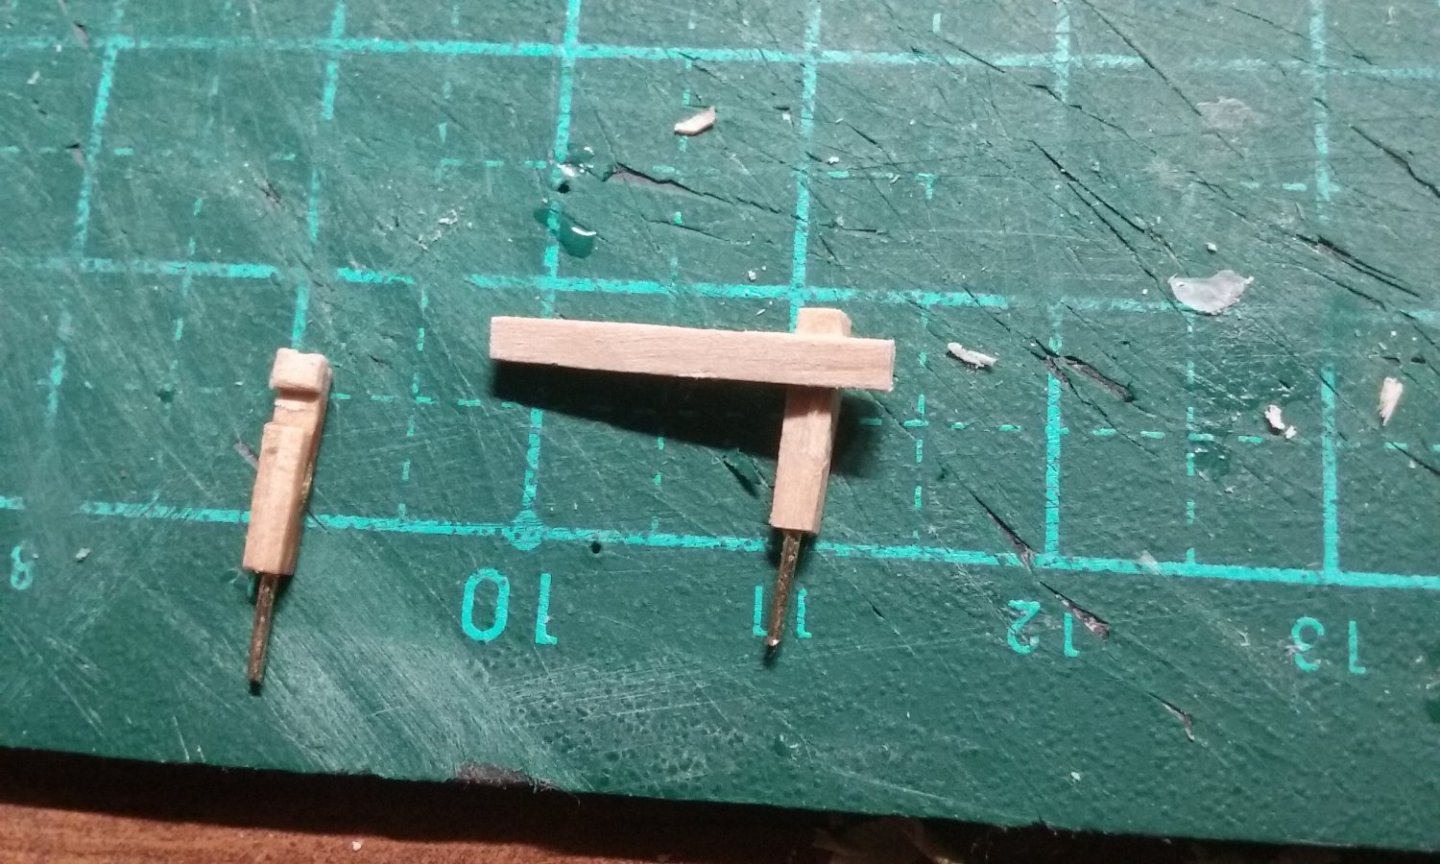
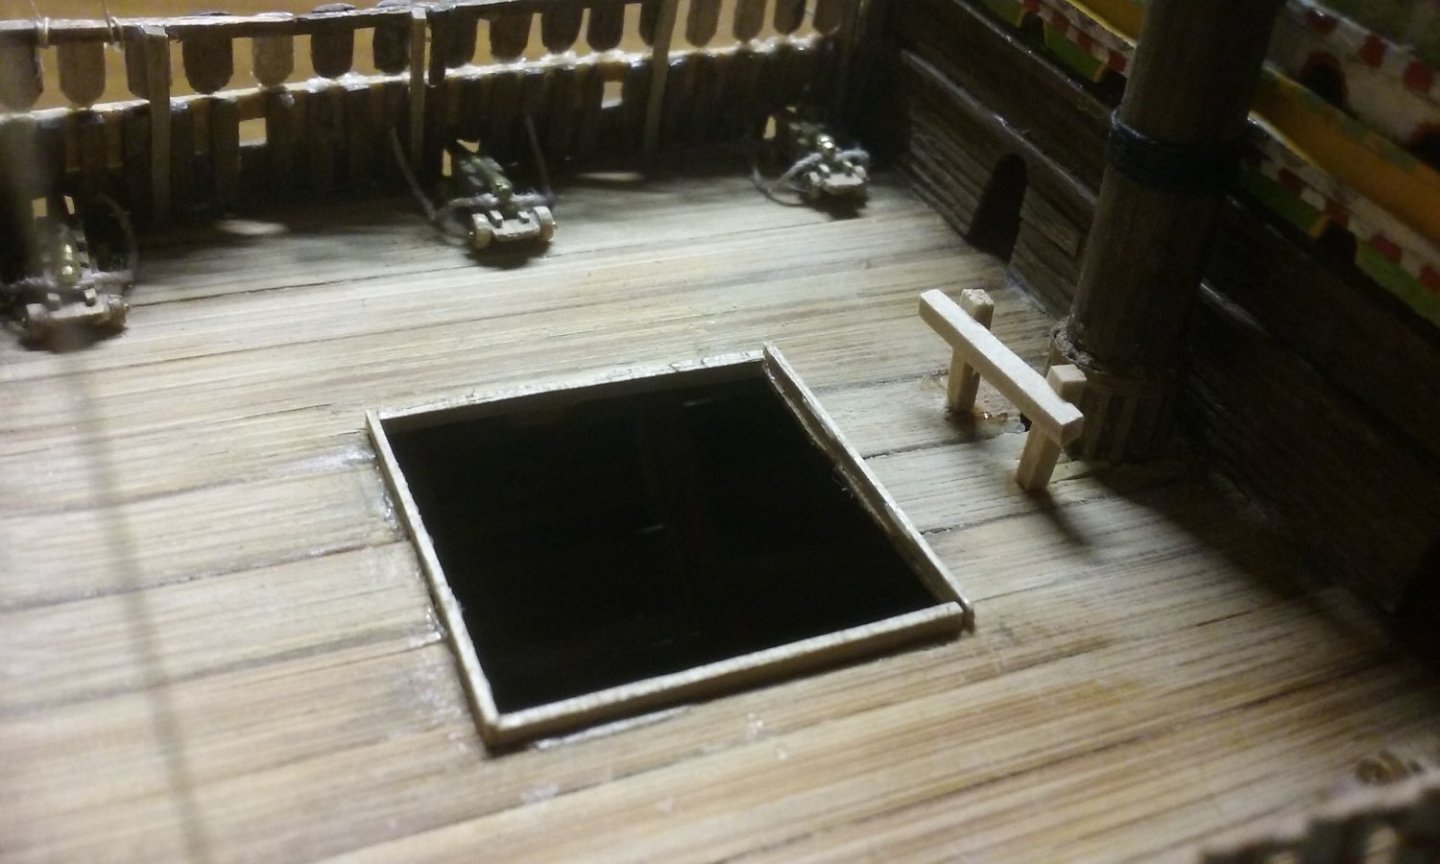
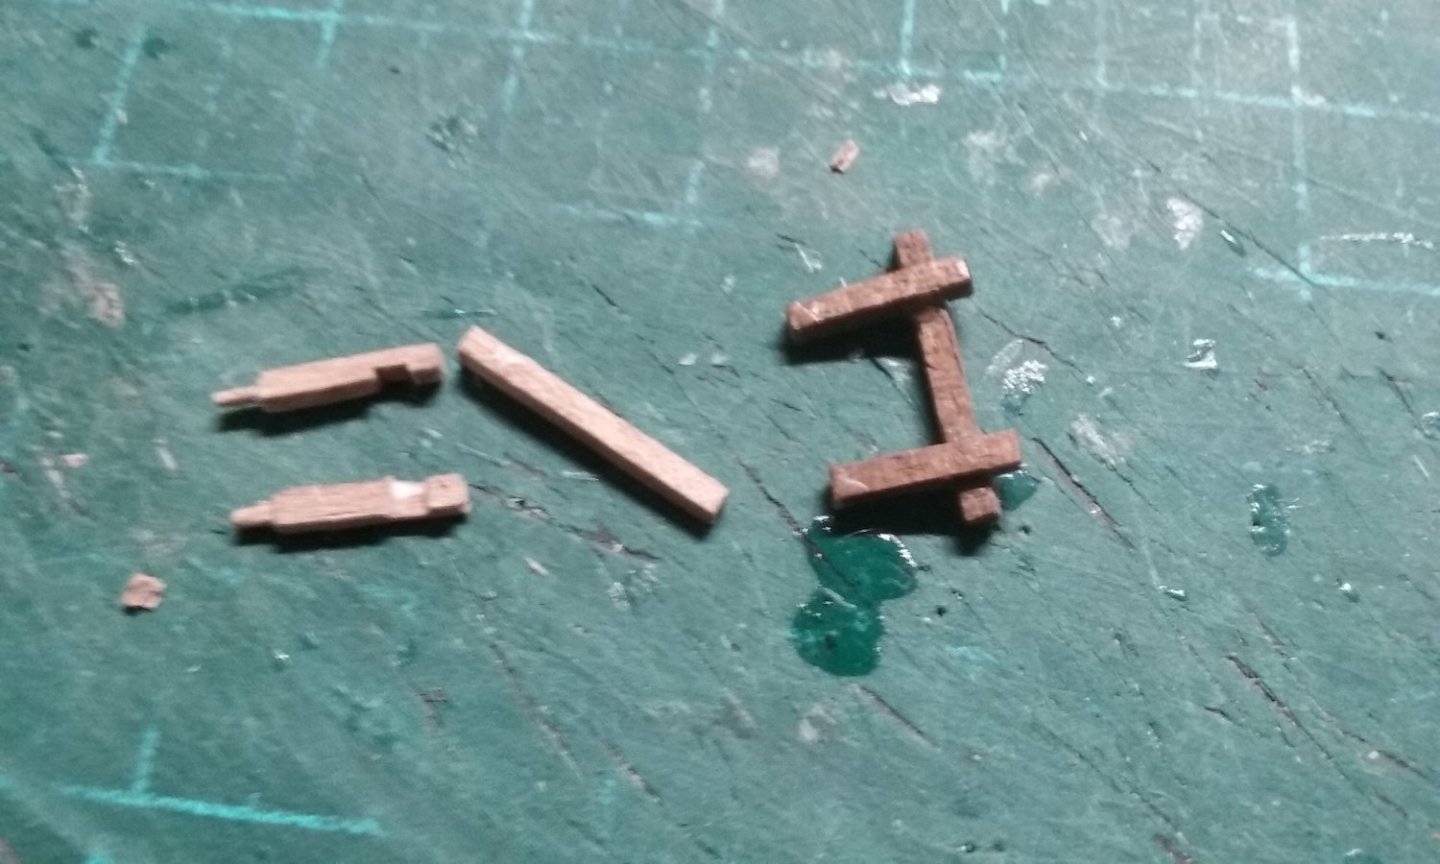
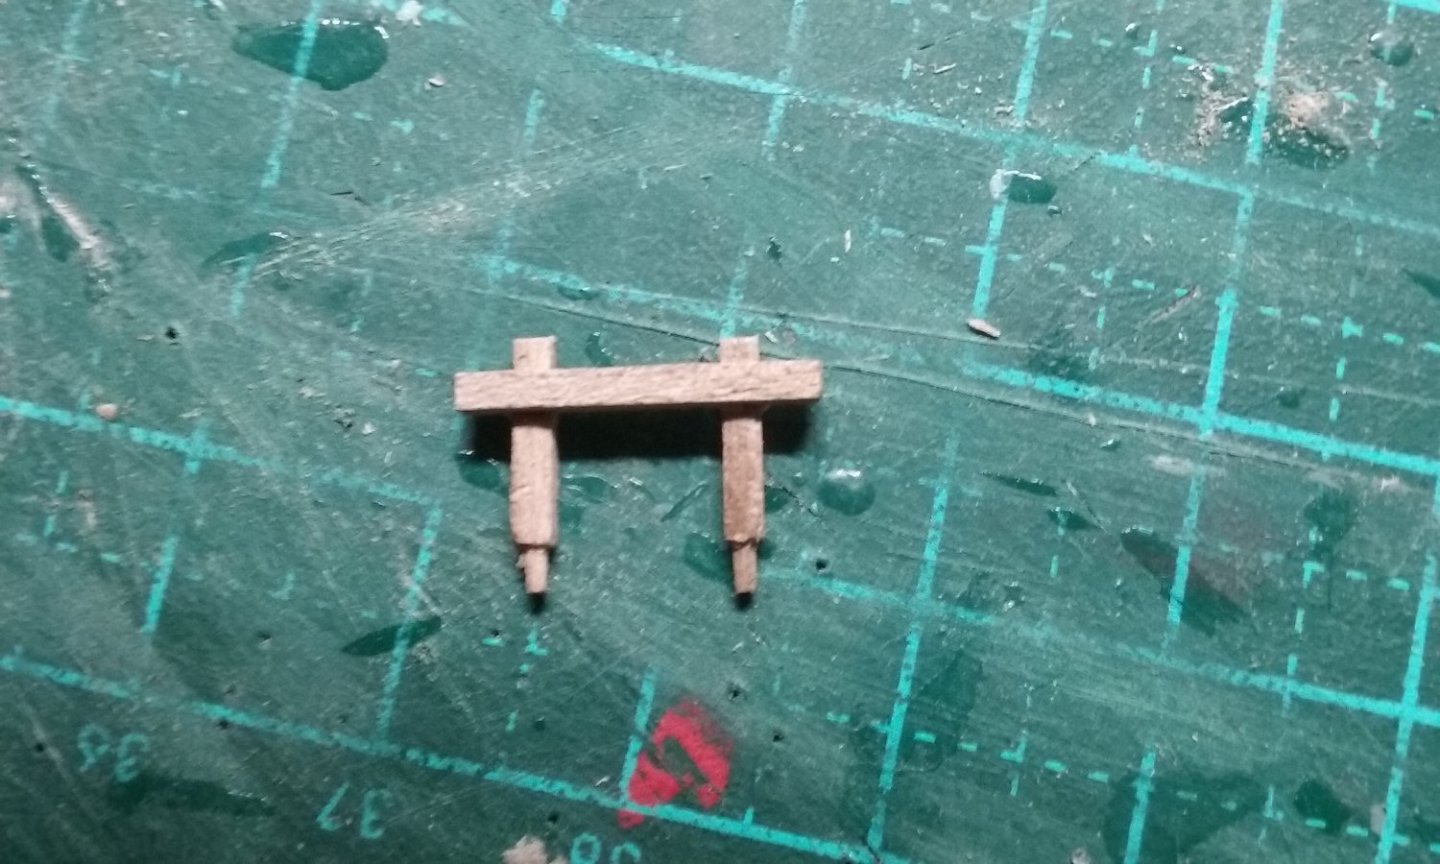
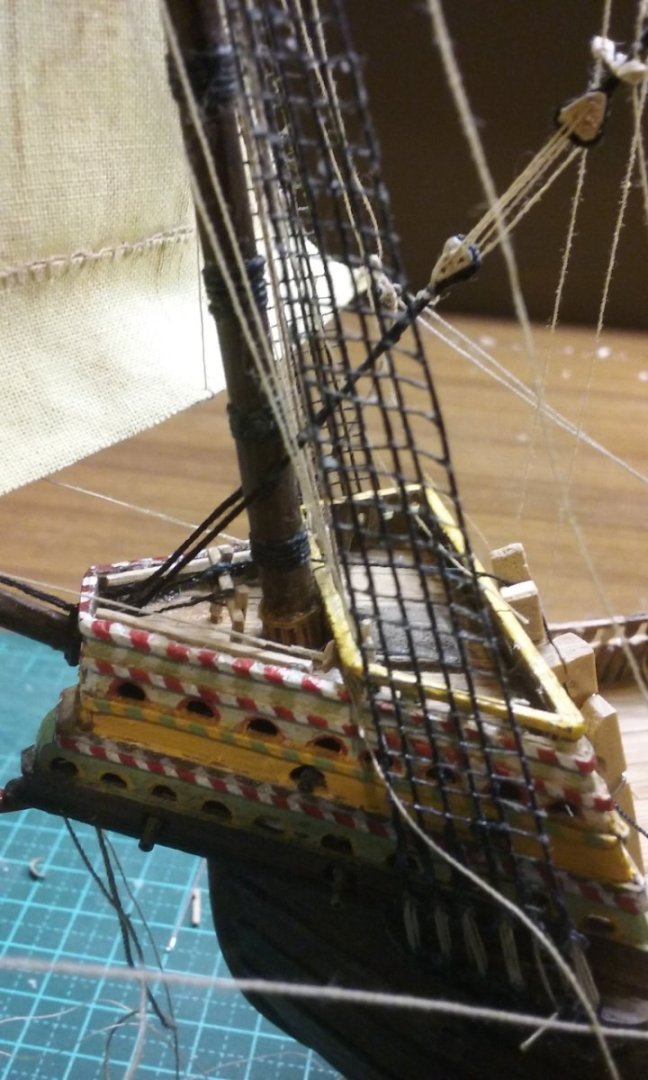
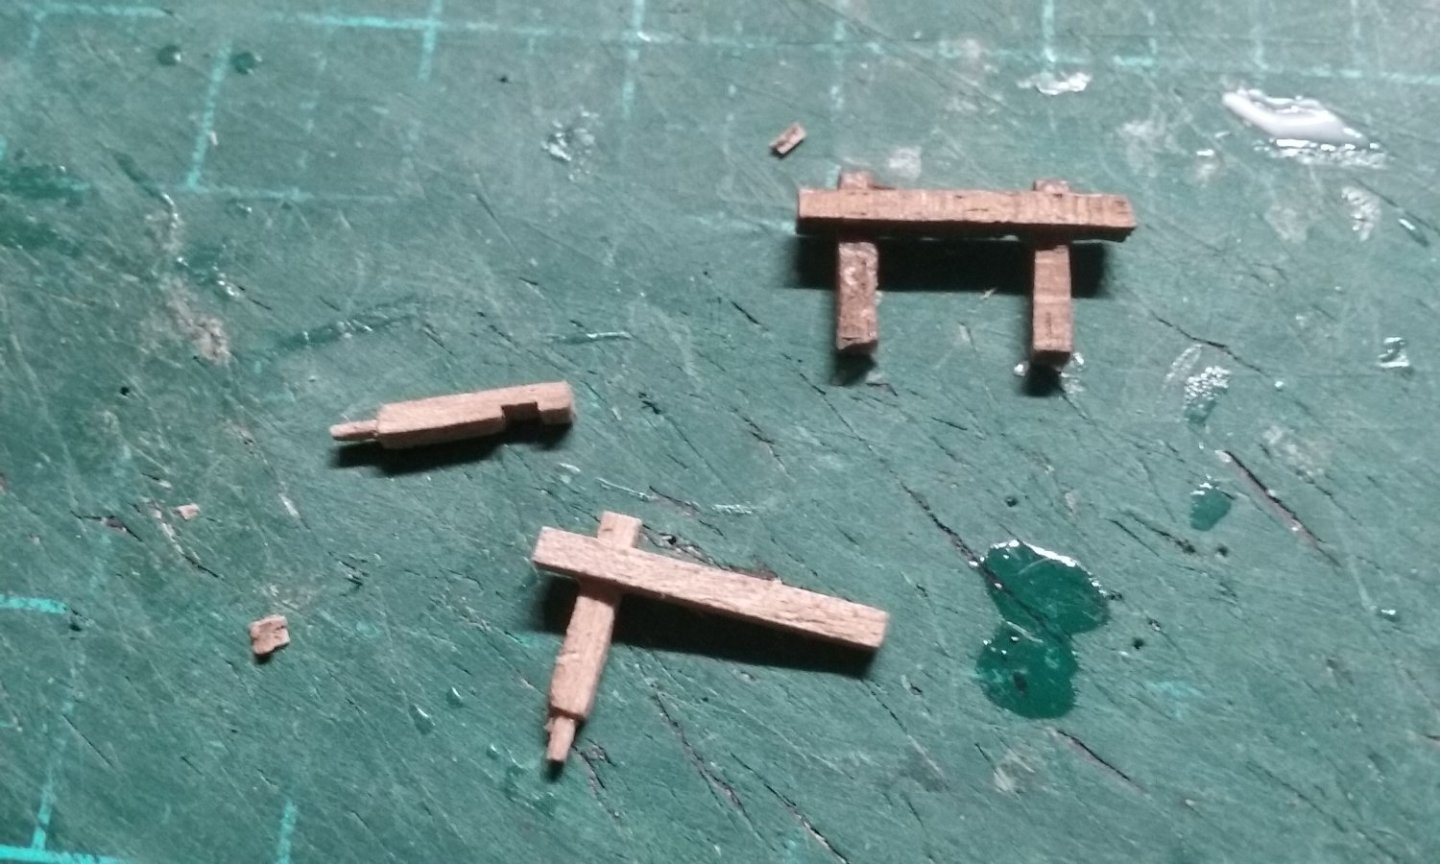
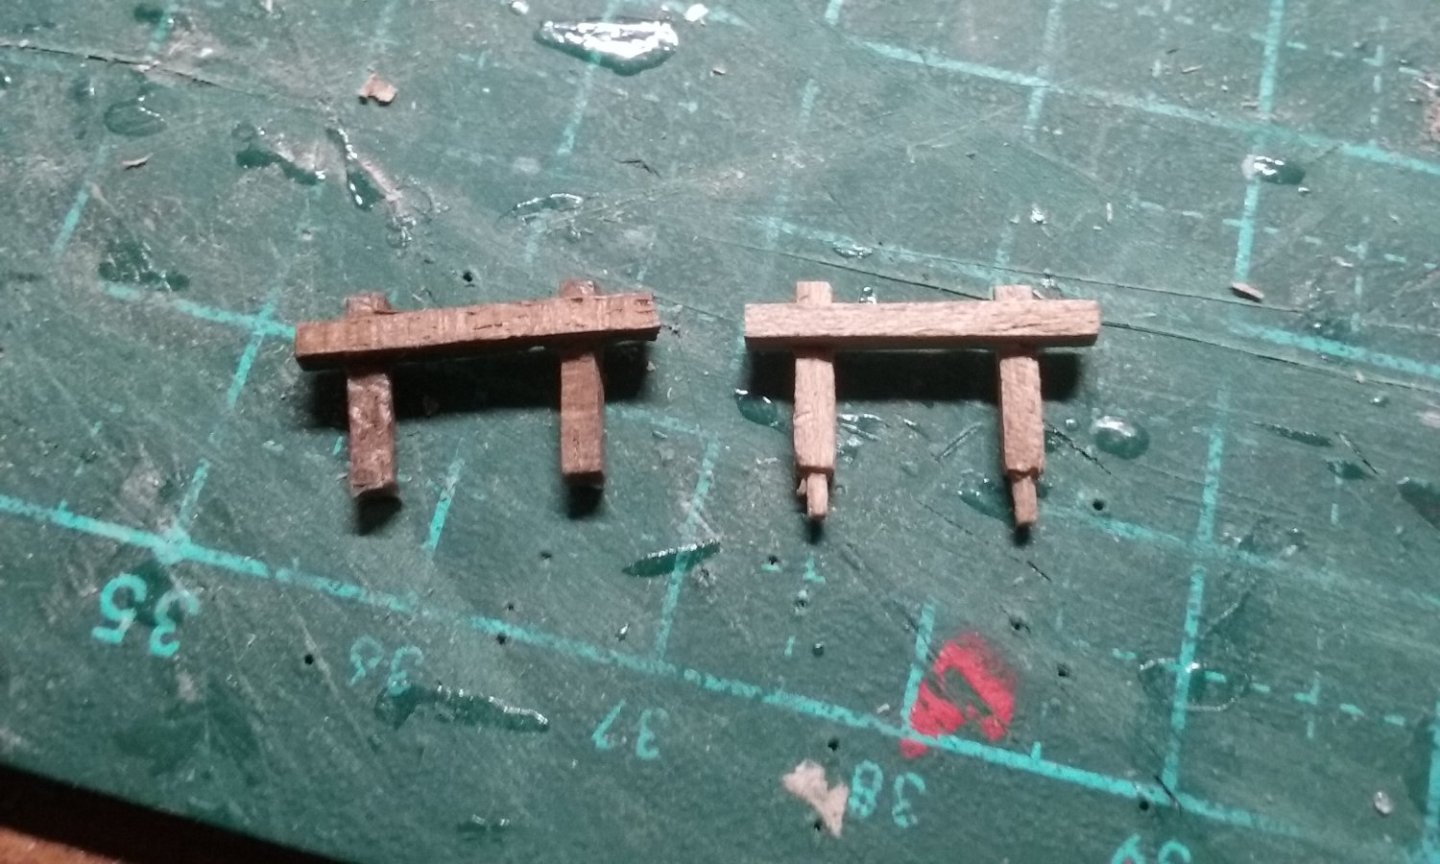
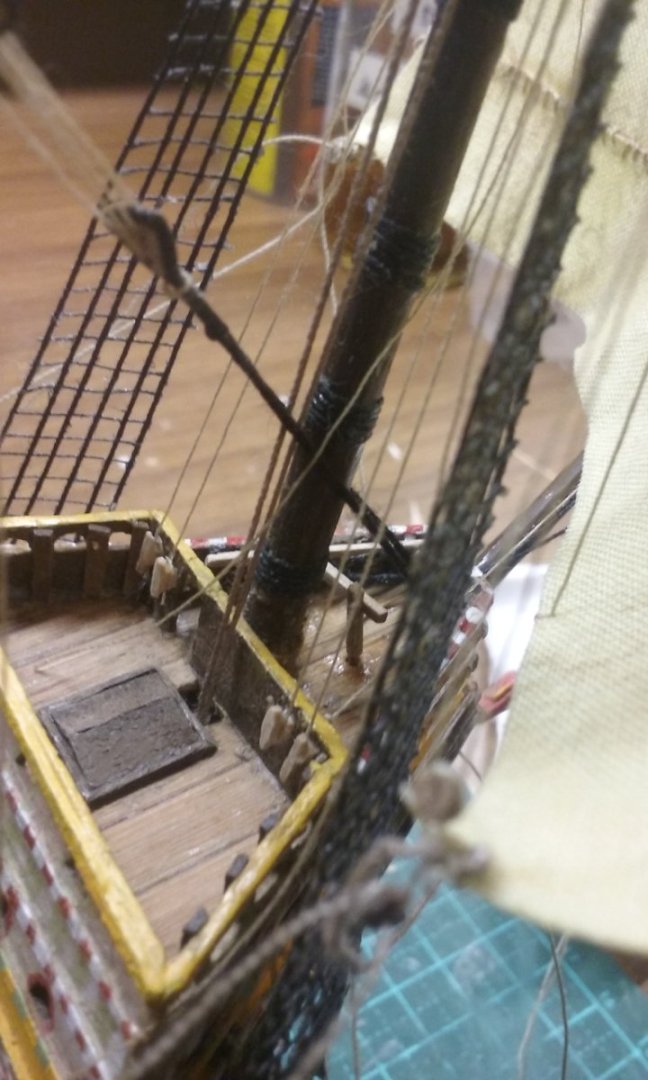
Unfortunately - no, they didn't. Not long after I glued the lines from the forestays on, the wooden "pins" snapped off, leaving me back where I was - or slightly worse off. Now I had to smooth down the protruding remnants of the pins before I could start again. This time I did what I should have done in the first place - I made new uprights with metal pins inserted in them, using brass sequin pins which have come in handy before. As there was a pretty sever splitting risk, I put the pins in first, then carved the uprights around them. I managed to salvage the crosspiece from the second broken set of bitts - the rest (and the original that I'd made back in the day) had to be discarded. I left it with the cross piece glued to only one upright, so I could adjust the width to line up with the holes in the deck. And I thought I might as well do the main bitts as well, before I put a whole bunch of ropes in for the mainmast. Unfortunately, I used the wrong tool - a cobbler's awl - to make the first hole in the deck, and SNAP! - the deck planking broke. So I then had to figure out how to repair the decking, while in the meantime working out how to make the balance of the holes for the pins without breaking anything else. Very difficult, particularly as I had very little wriggle room. I finally decided to use a sewing pin as a "drill". Very laborious - if you've ever had root canal treatment on your teeth you'll know what I mean - but it worked eventually. So here's the resulting hole (where the pencil mark is). After several failed attempts at gluing in a replacement piece for the deck (including taking off the hatch cover and longboat so I could slide a bit in underneath the deck to support the new piece - that didn't work either), I came up with a solution that ended up working - wedge in a piece that was much too thick (so it came up above the deck and then pare it down to deck level. And finally, the bitts are in place, for both fore and main masts. And the hatch cover back in place. Still working on repairs, rather than moving forward. But once I've glued the loose ropes back in place I'll be able to go ahead again (sigh) Steven


- 740 replies
-
- 12
-
-
-
- Tudor
- restoration
- (and 4 more)
-
Hello and thanks for allowing my membership
Louie da fly replied to Chestcutter's topic in New member Introductions
Welcome, Chestcutter! I live in Ballarat, just down the highway from you, and there are a couple of others in the general area. Yes, start a build log for your Vanguard. It's a great way to get help and advice, and we get to look at it as it takes shape. Have fun! Steven -
HMAS Perth had a Supermarine Seagull (very similar to a Walrus) which was known as the Pusser's Duck (I don't know if that name was used on other ships). It was damaged by bombs in Surabaya and so was unfortunately not available for spotting during the battles of the Java Sea and Sunda Strait. Regarding the colour scheme, perhaps the aircraft museum at Point Cook in Victoria might be able to help. The Walrus they have is yellow, but they might have information on other colour schemes. Steven
- 88 replies
-
- 3
-
-
- Australia II
- Finished
- (and 2 more)
-
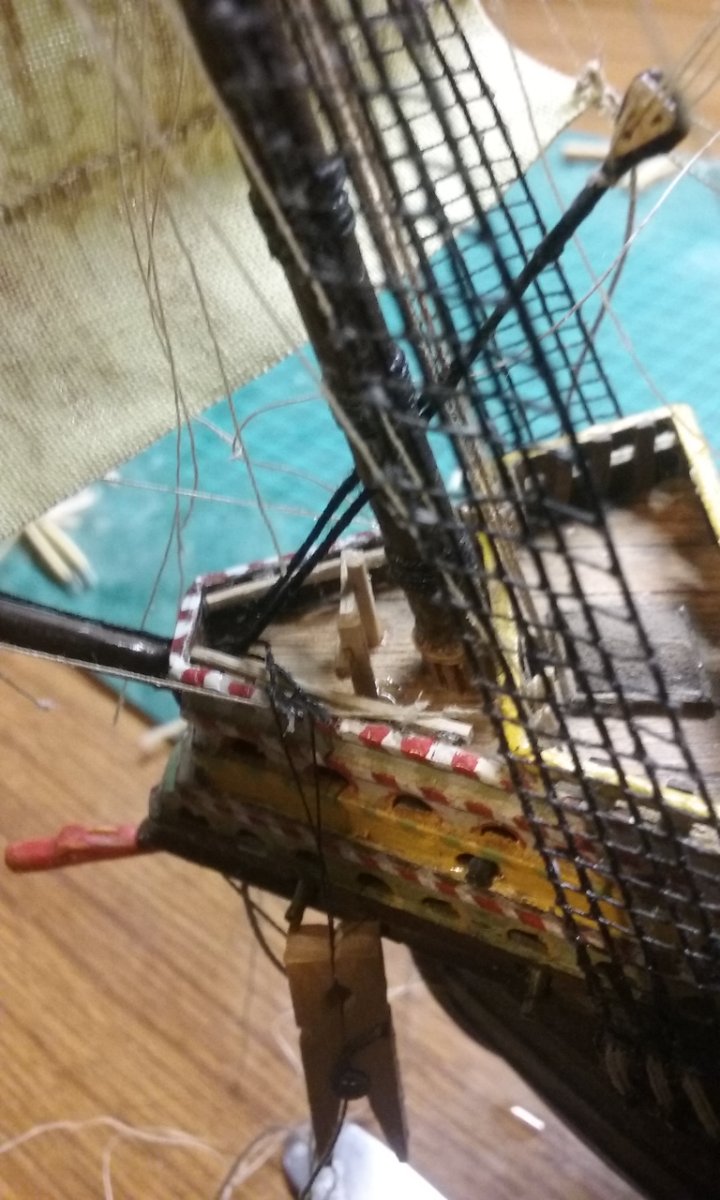
OK, so I've decided not to destroy the model - Not just yet, anyway (are you listening Harry?) Instead I've been working on various bit(t)s and pieces. Replacing the mainmast bitts with new ones that have built in "pins" so they won't be pulled off the deck like the foremast bitts were. And re-threading the lines from the forestays onto the new foremast bitts. One bonus - I managed to get them tighter so they were straighter. As I'd previously cut these ropes to length, I had to extend them (by gluing another bit of cotton onto them) to be able to pull them tight - you can see one of them leading aft past the edge of the forecastle, being tensioned by a couple of miniature clothes-pegs. Once the glue was dry, I cut them to length again. And I've added the fore-topgallant braces (I needed to make 8 tiny blocks - two for the pendants, 6 to run the downhauls through - one pair for each of the mainstay, main topmast stay and main topgallant stay) and down to deck level). And of course I'll have to repeat the whole exercise when I come to do the mainmast - (oh, joy.) I still need to finalise all the downhauls that were attached to the forebitts, which are still waving in the breeze at the moment. As I mentioned before, I'll be belaying most of these to the new side railings I've added, so the forces on the bitts are minimised. Heaven forbid that they pull off the deck again! Once that's all done I'll be able to move off the "repair" phase and back onto moving forward. Steven


- 740 replies
-
- 11
-
-
-
- Tudor
- restoration
- (and 4 more)
-
I'd second Gabek's vote for crochet thread. It comes in various thicknesses and dyes very nicely. The only problem I found with it is that unlike commercial thread for shipbuilding, there's no logical system for knowing exactly how thick the thread is. It's just a series of numbers - 10, 20, 30 etc, with (IIRC) the higher numbers being thinner. So you can't say "I'd like a thread half as thick as this one" - it just doesn't work that way. I'll be interested to know how the thread you already have performs. Just be aware that though synthetic thread lasts longer than natural, it is rather "bouncier" so it may not hang the same way. It can also be harder to get glue to adhere to. Steven
- 179 replies
-
- 5
-
-
- Second Build
- Pinta
- (and 2 more)
-
Some more videos I found very informative: https://www.youtube.com/watch?v=v6DZIvMZWzQ&t=584s https://www.youtube.com/watch?v=zlRbcTsm2rc https://www.youtube.com/watch?v=B3jU9Xz_GHE&t=237s Steven
-
Nice. Steven
-
This is the most amazing work. It's been quite a while since I looked at this log and the progress you've made is unbelievably good. Steven
-
Coming along nicely, mate. Make sure you sand down your second planking nice and smooth when it's complete. I was astounded at the difference sanding the planking made in my own model. Steven
- 179 replies
-
- 5
-
-
-
- Second Build
- Pinta
- (and 2 more)
-
Cargo ship ( possibly a cog) found in Estonia
Louie da fly replied to liteflight's topic in Nautical/Naval History
More news on the Tallin ship(s) https://news.err.ee/116222/medieval-ships-discovered-in-tallinn-are-rare-well-preserved-cogs -
Good to see her back under way again. Very nice work. Steven
-
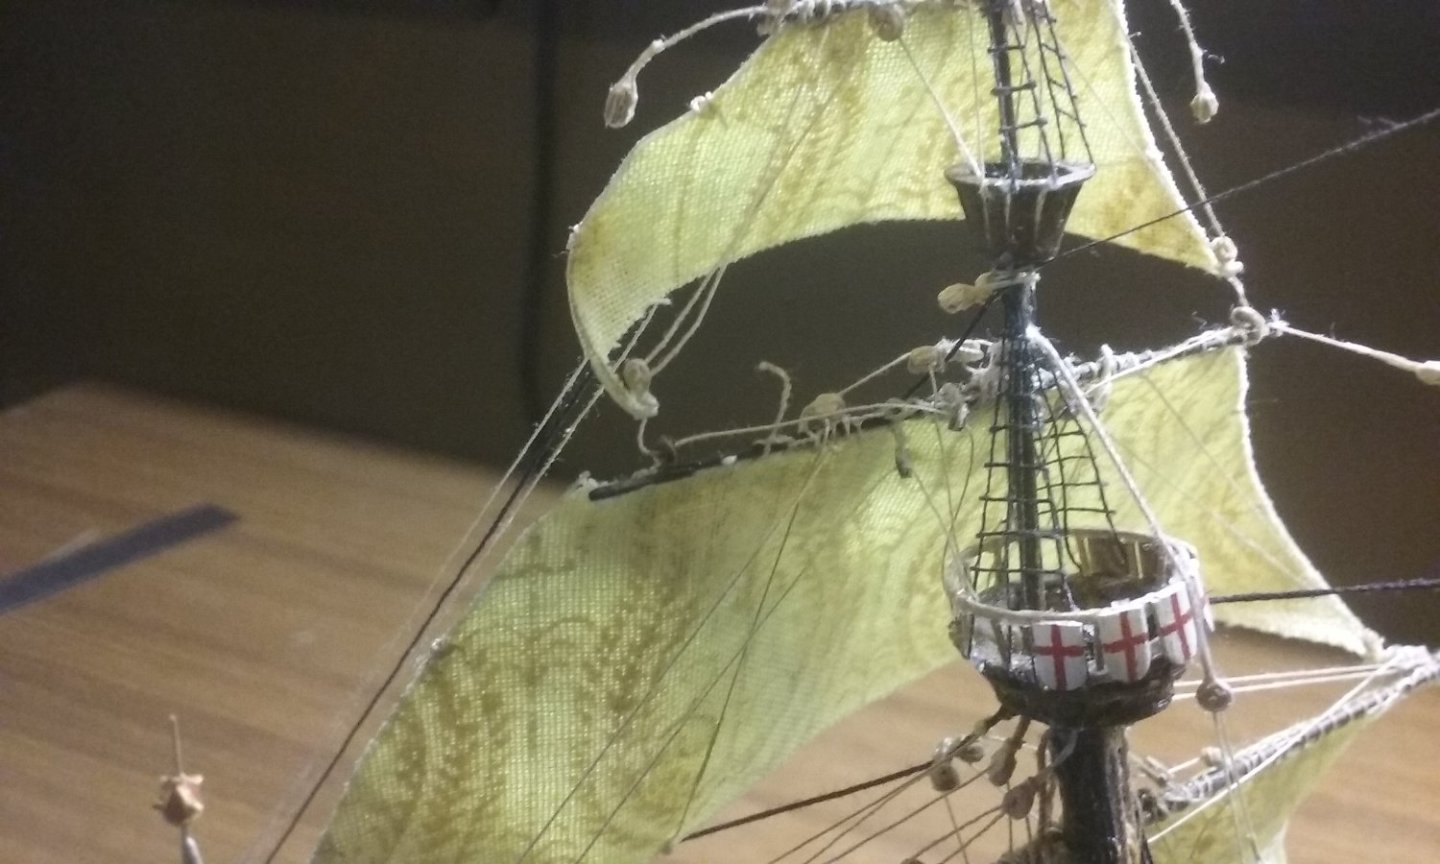
Thanks everybody for the likes and supportive comments (very welcome under the current circumstances, when I've been seriously considering throwing the rotten thing against the wall and taking up croquet instead ). Snug Harbor Johnny and Druxey, unfortunately the bitts coming away was a fault on the part of my "current" self - I already knew from previous models that butt-joints are a bad idea but I wanted to keep the original bitts that I'd made back in the day and didn't think about the forces they'd be subjected to. Or if I did, I thought "she'll be right". But unfortunately though we learn from our mistakes, sometimes the lessons don't stick straight away - we have to make the same mistakes again before those lessons really sink in. Roger, you have a point. However, the Great Harry is somewhat later, and while I'm mainly working off the reconstruction picture in Landström's book The Ship, more importantly, the original representation in the Anthony Roll shows ratlines in the topgallant shrouds. And the "feathery" ratlines were mainly the fault of my own carelessness in cutting off the ends cleanly. I still haven't quite finished the foremast rigging - there are a couple of things to do on the topgallant - braces and bowlines - and I'll have to belay again the ropes that were fixed to the old bitts. (BTW, I've decided that for the mainmast I won't be re-using the original bitts - I'll be making new ones with "pins" carved into the bottom of the uprights - once bitten, twice shy). Steven
- 740 replies
-
- 7
-
-

-
- Tudor
- restoration
- (and 4 more)
-
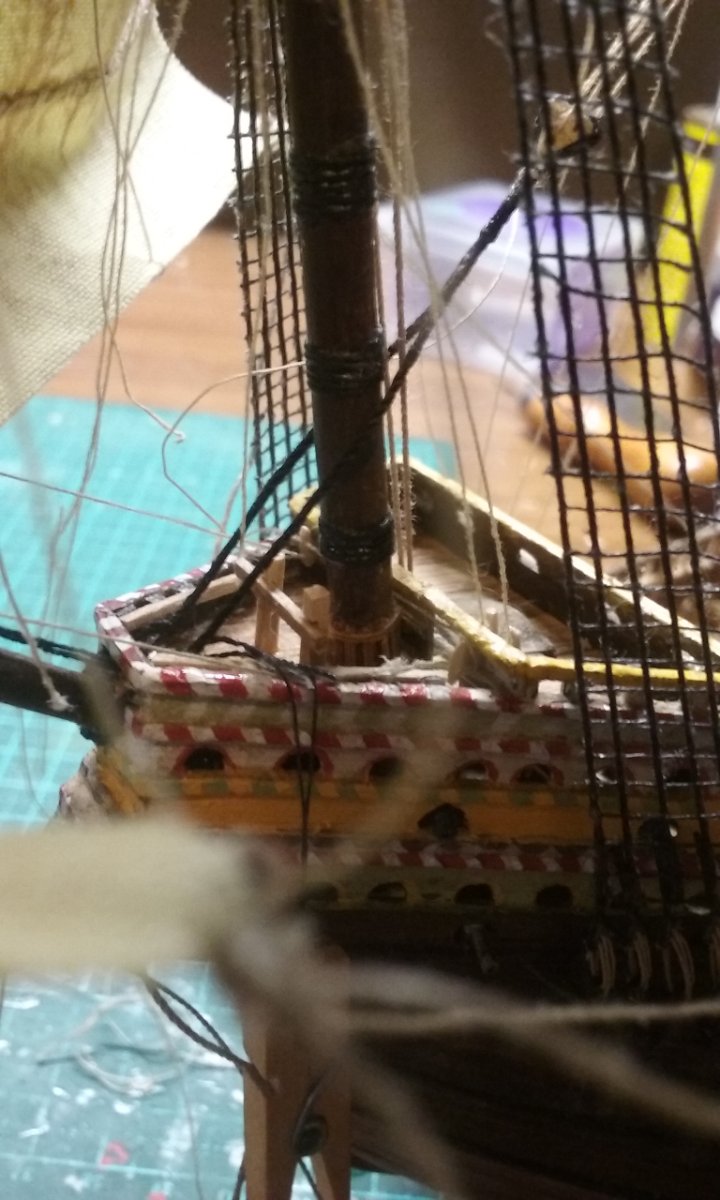
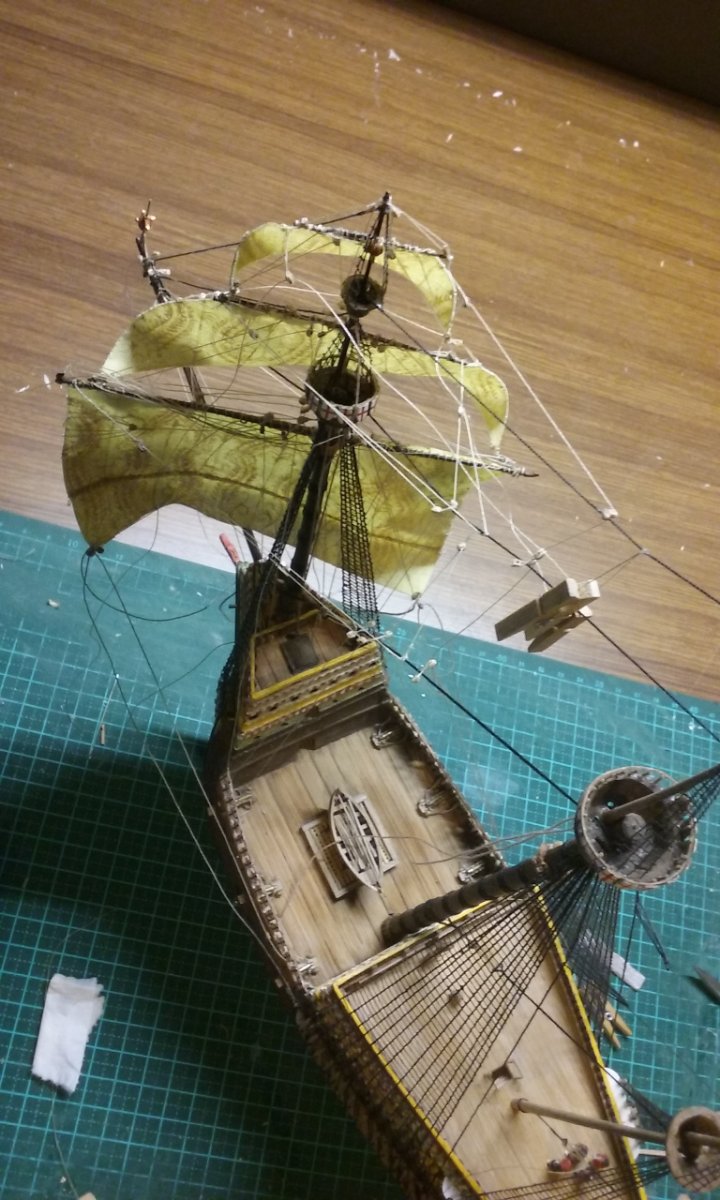
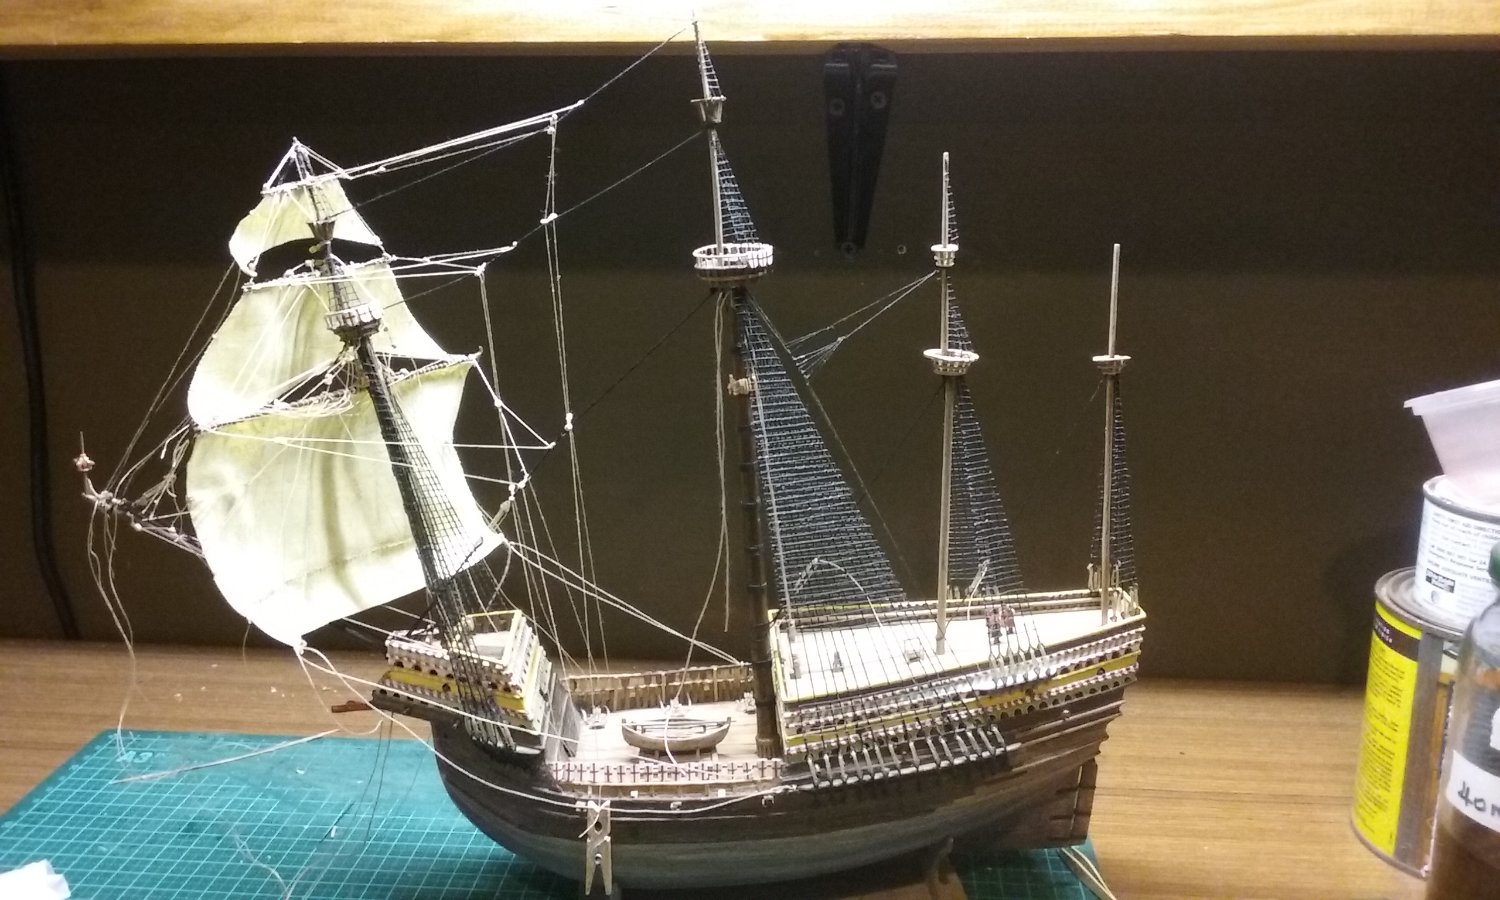
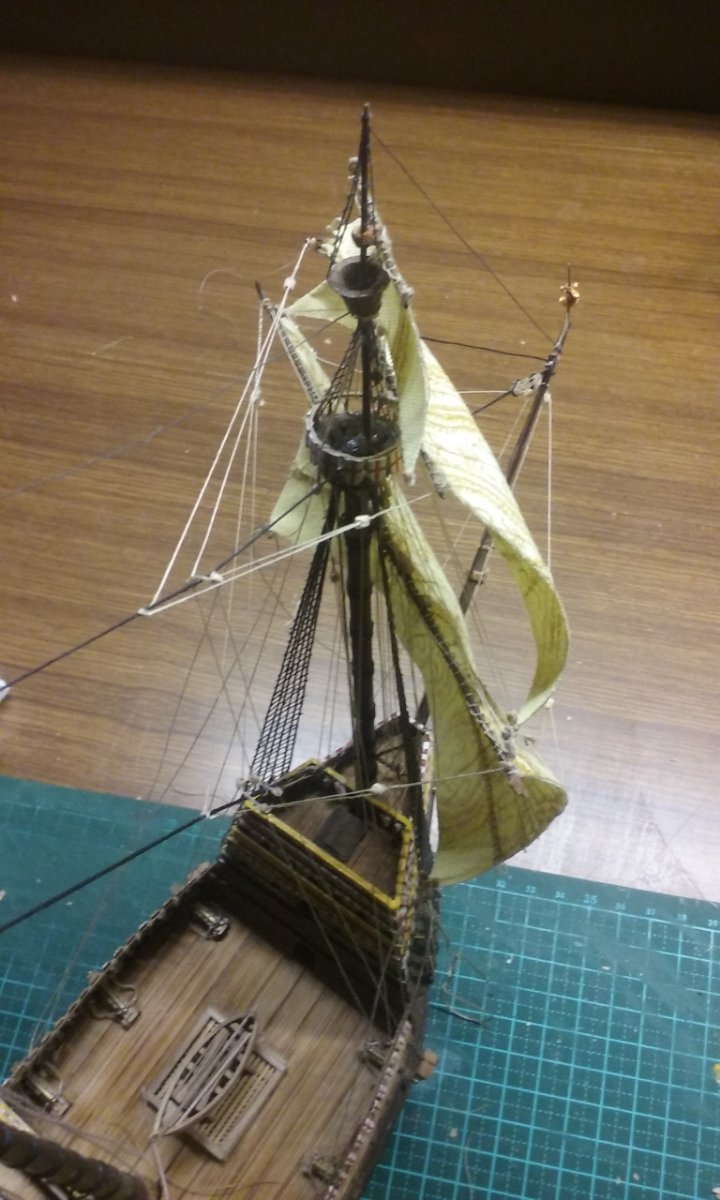
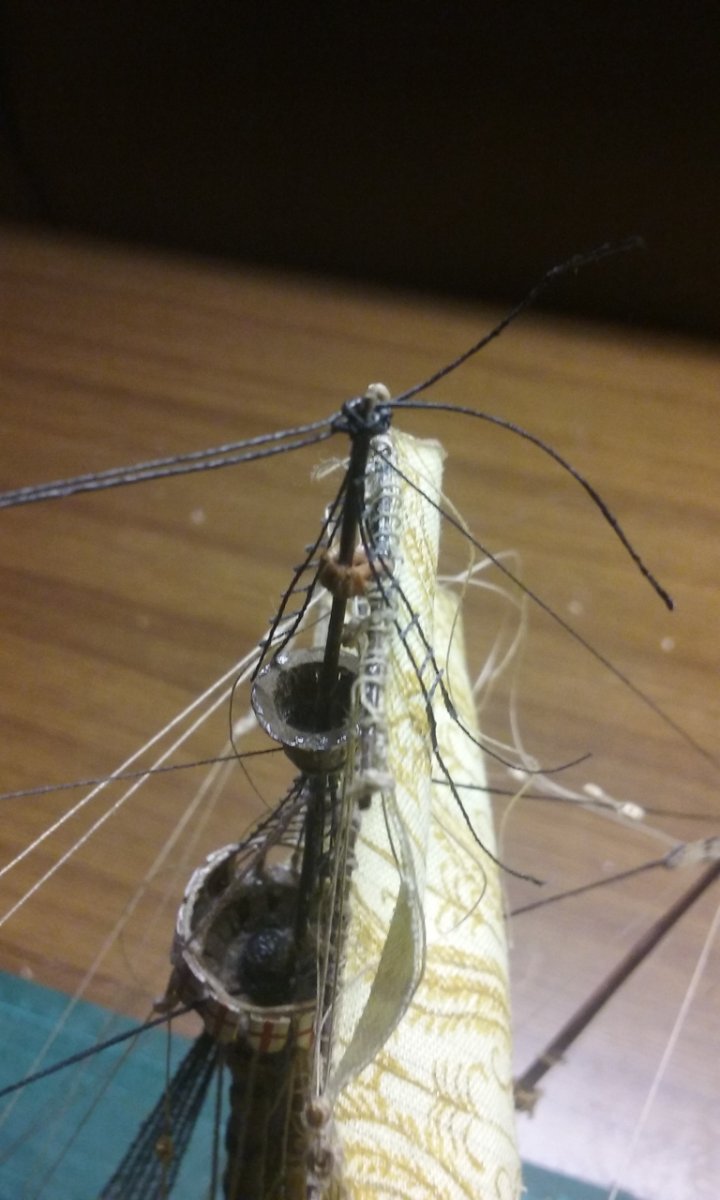
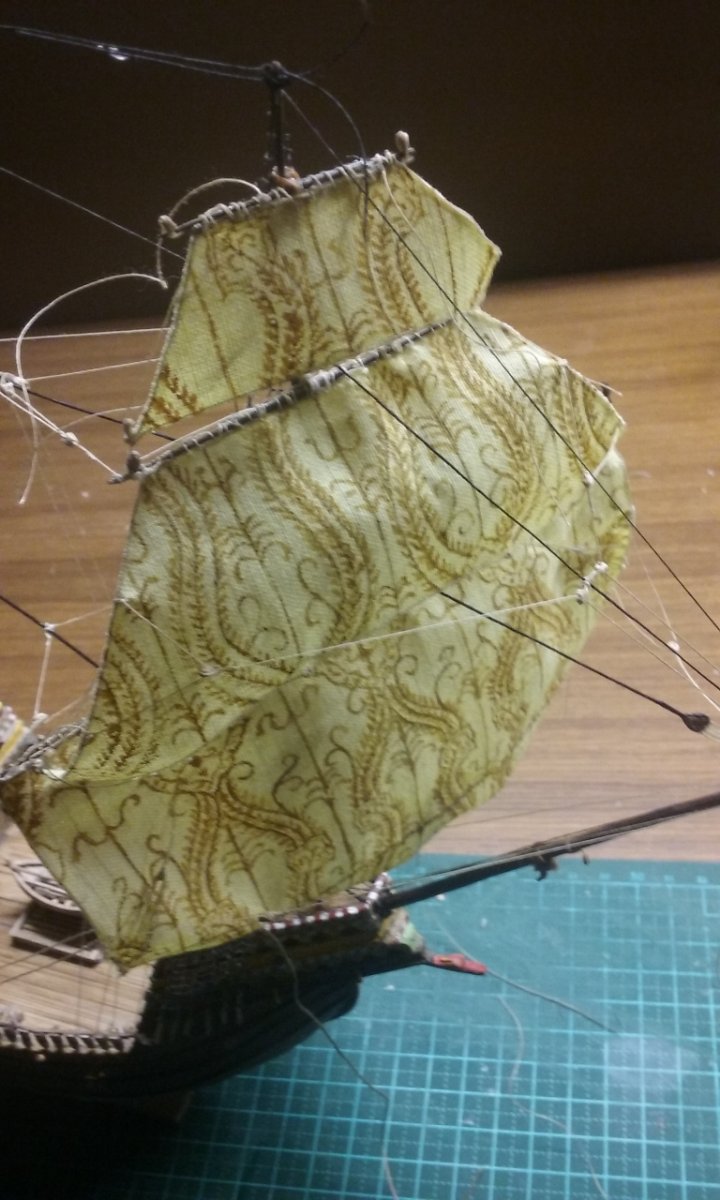
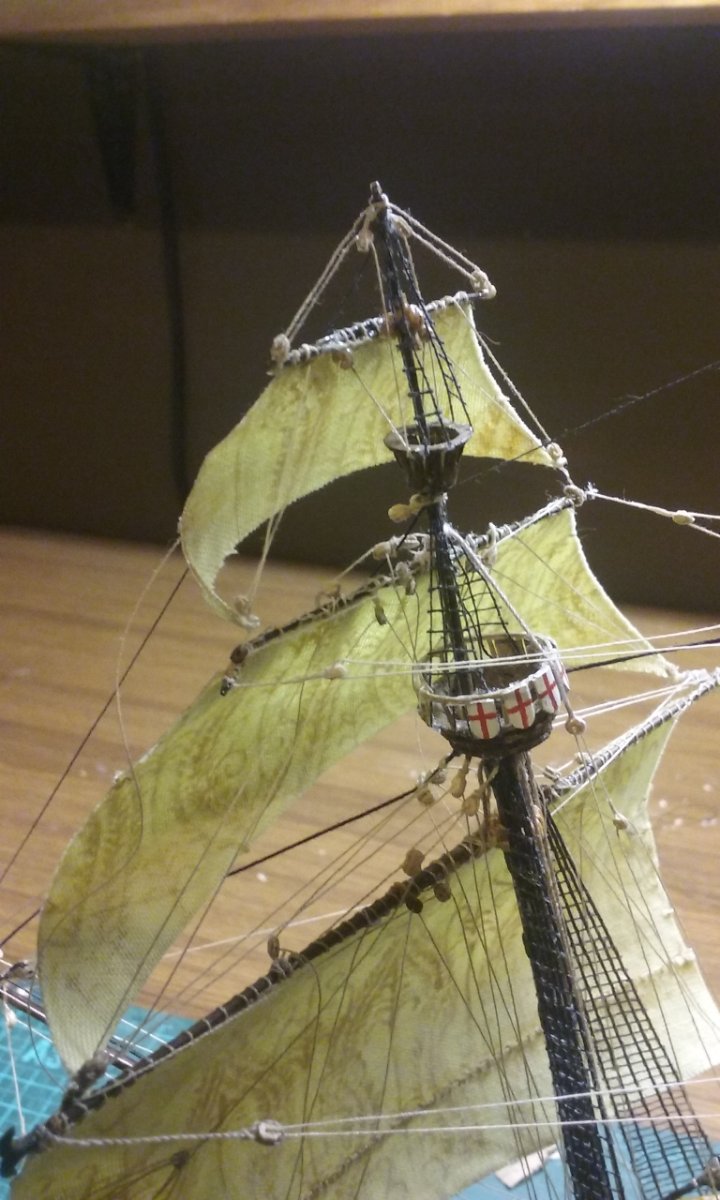
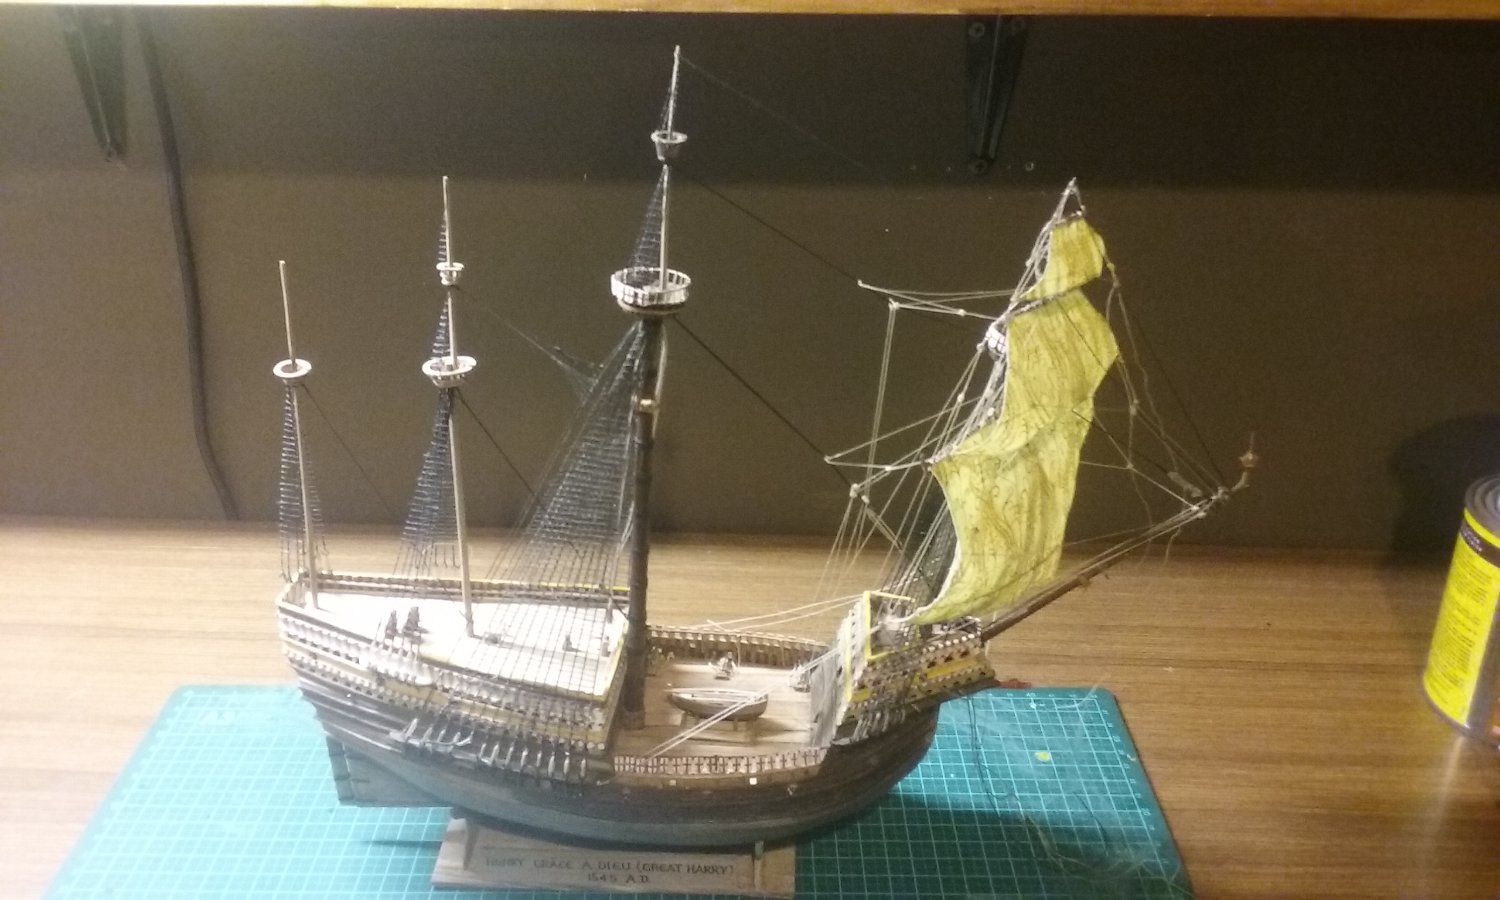
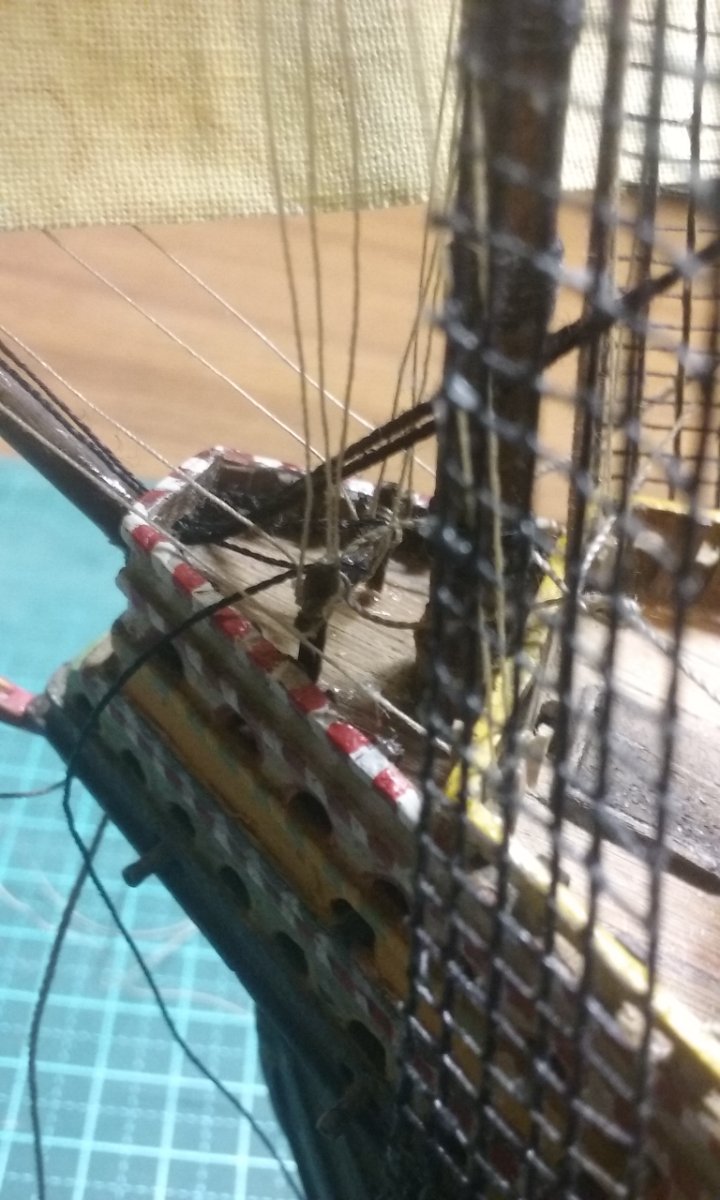
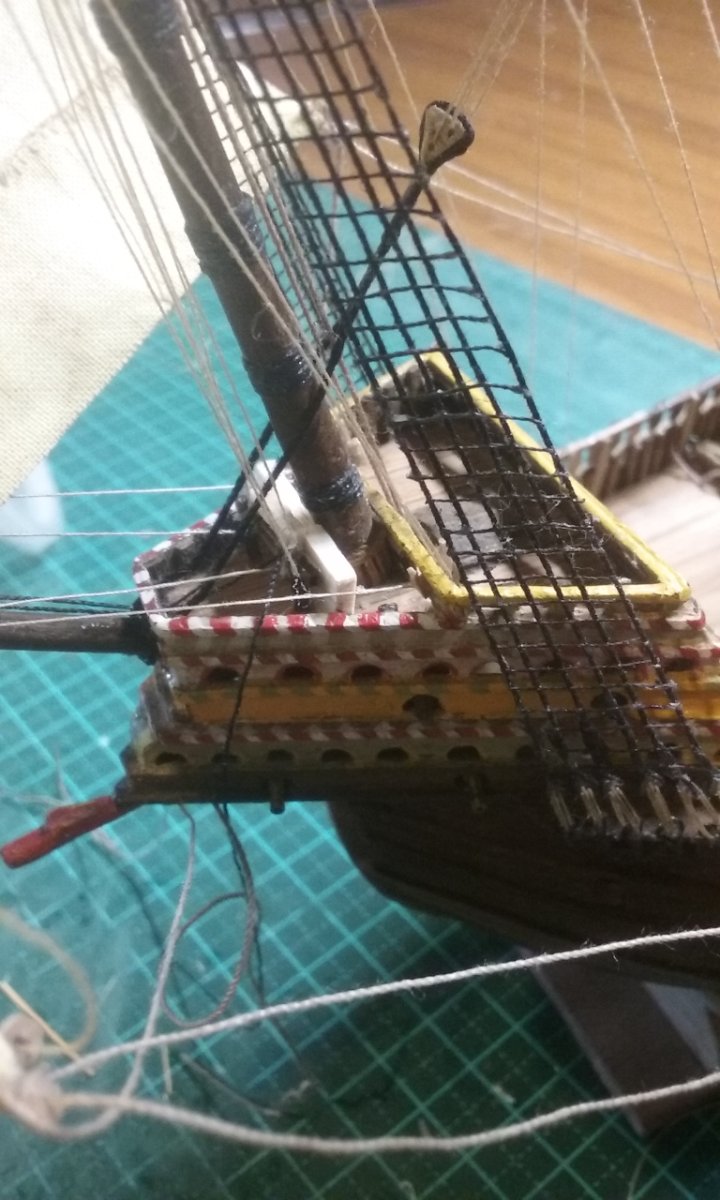
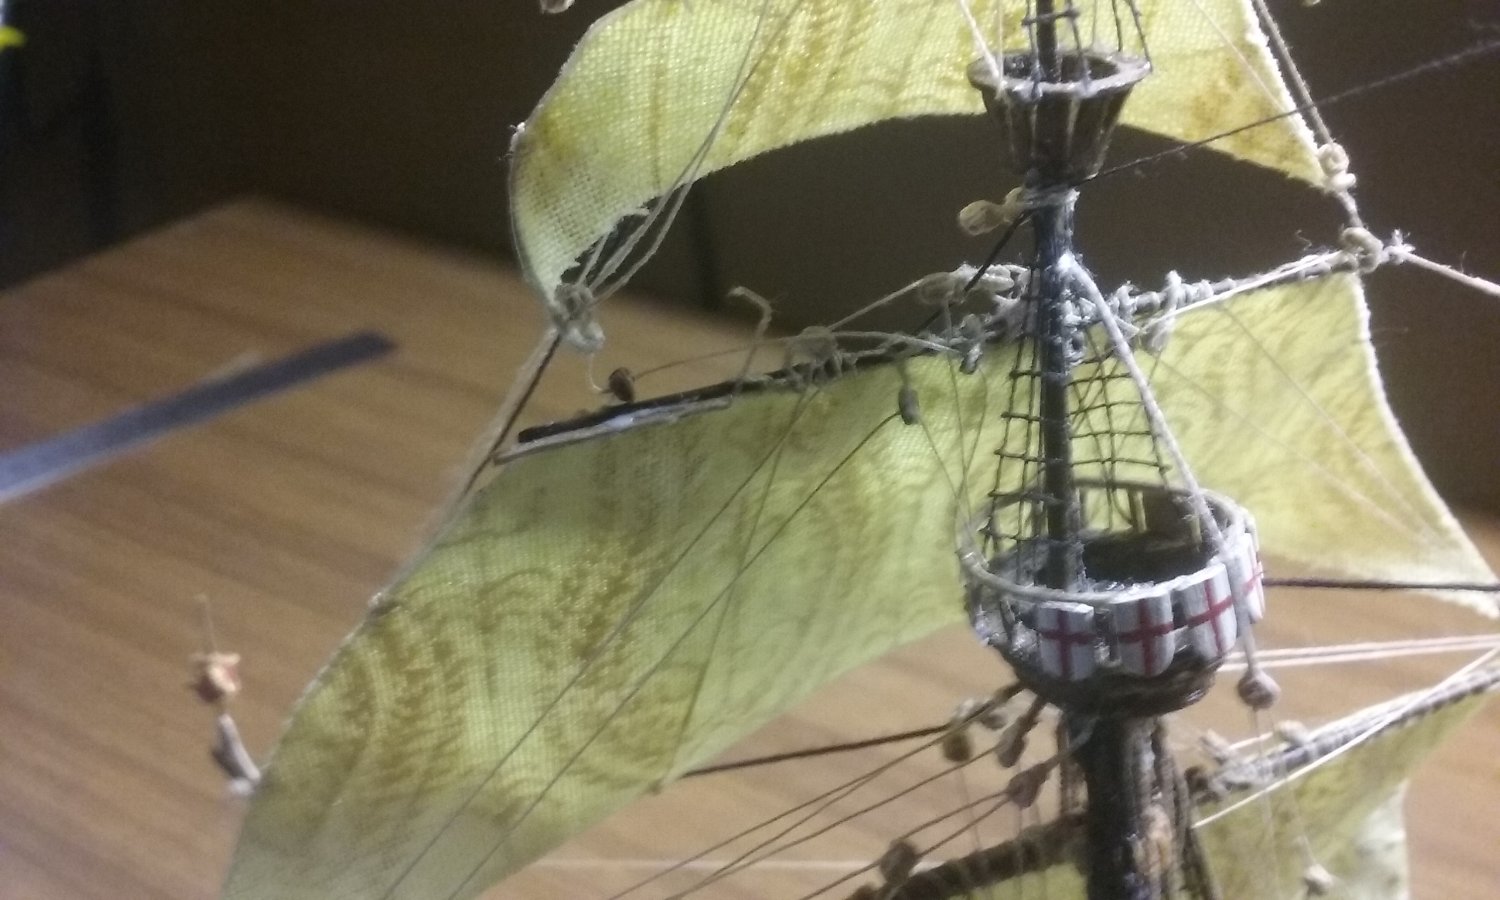
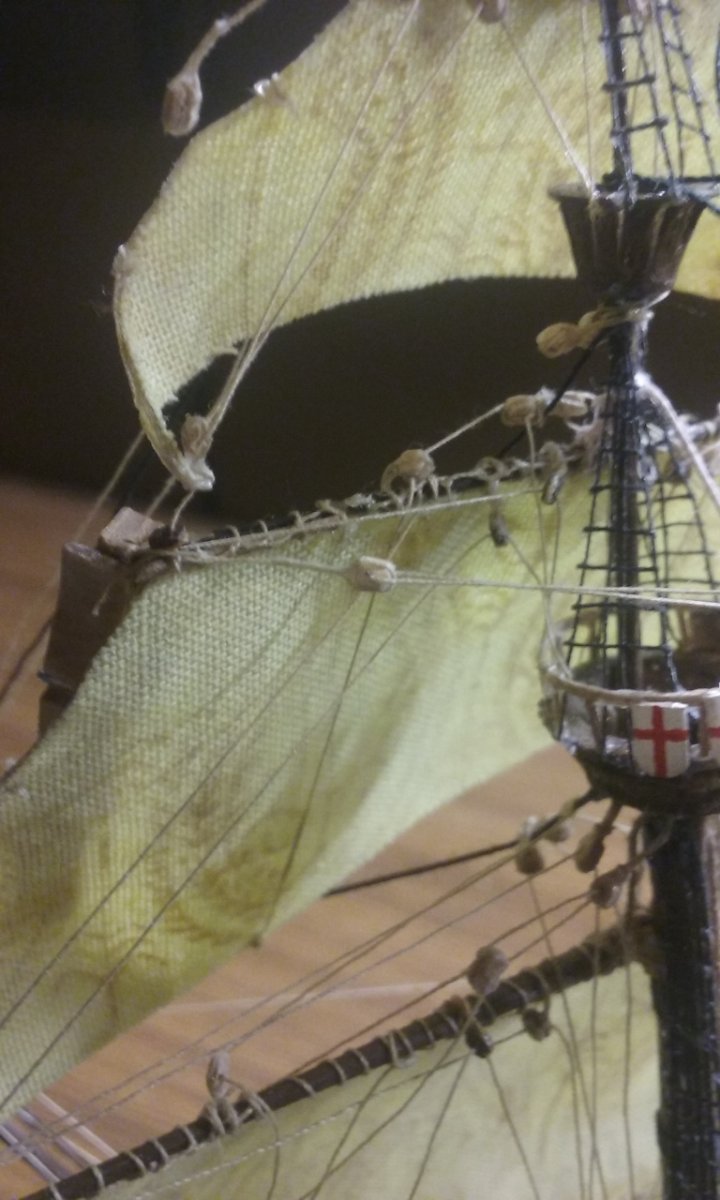
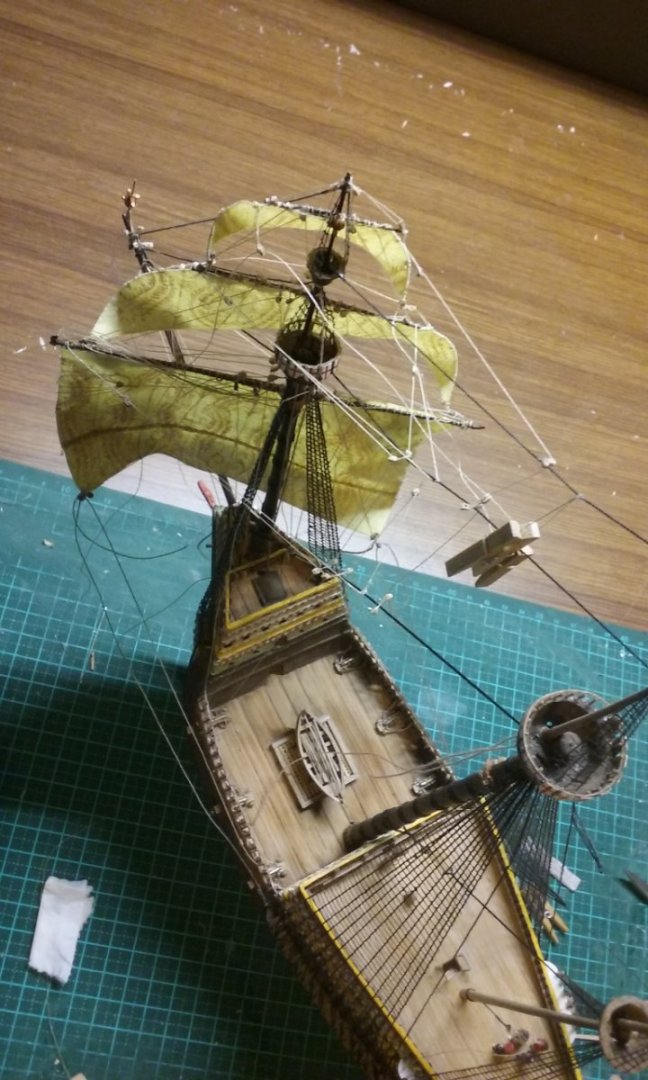
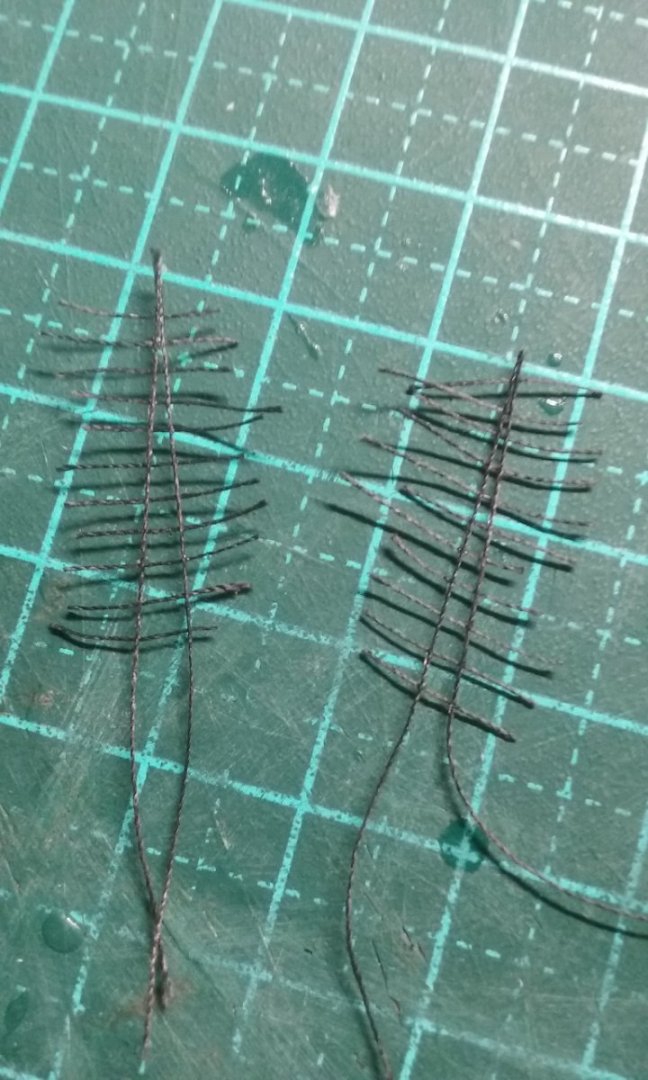
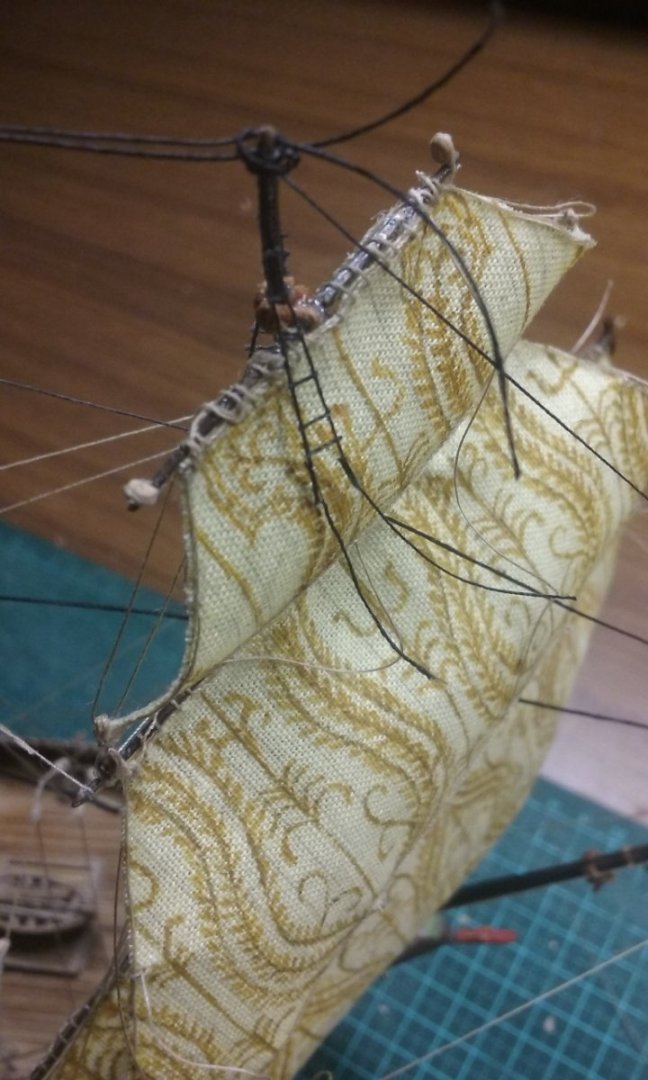
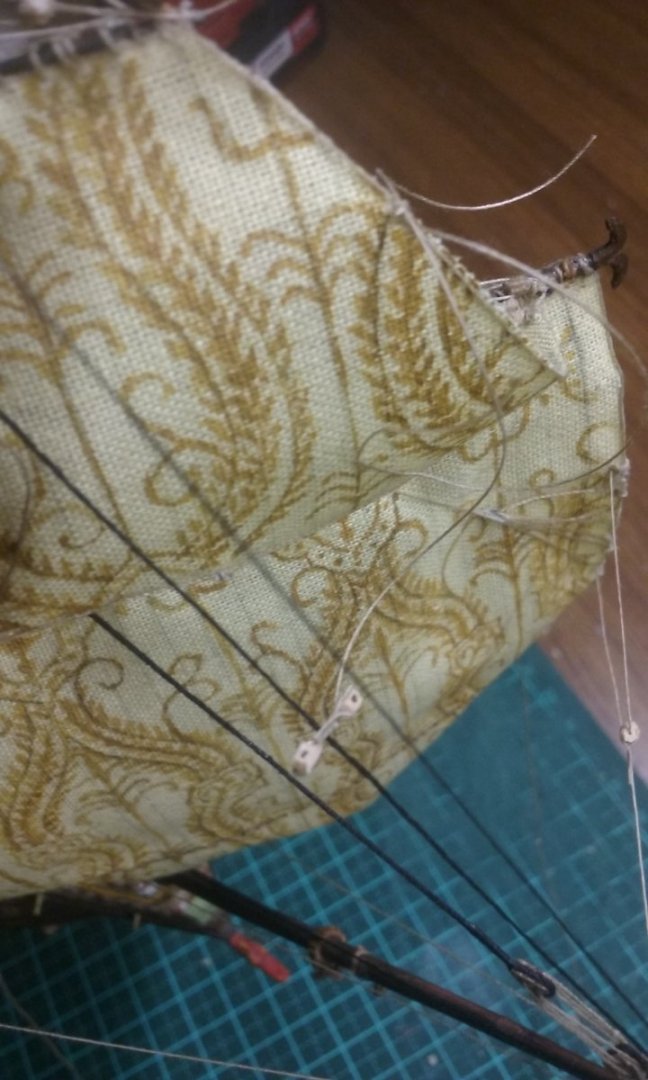
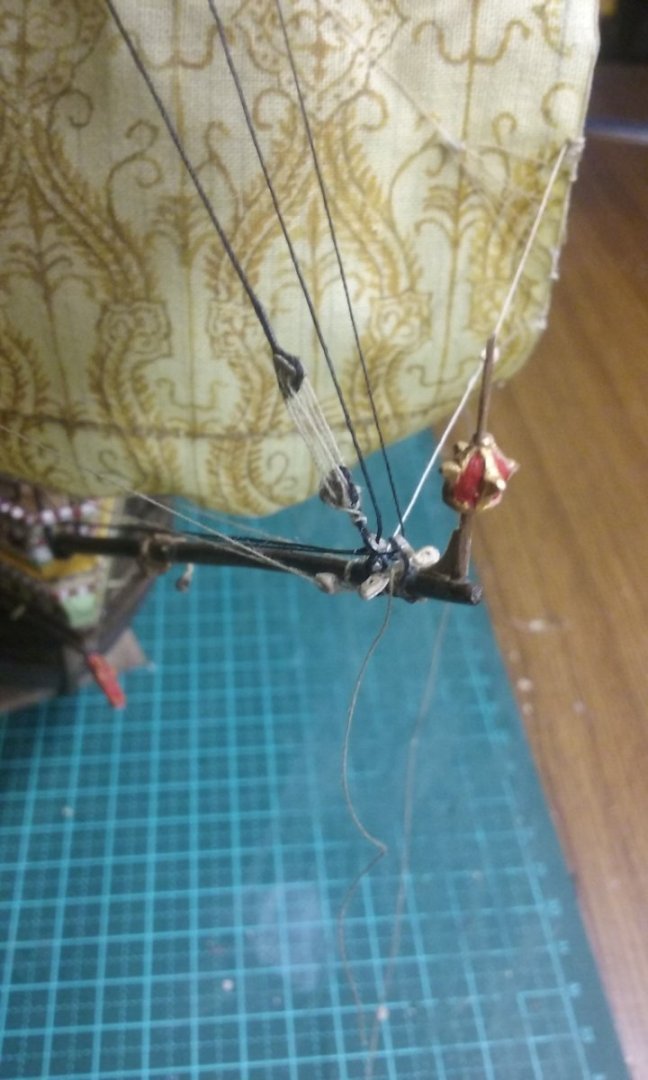
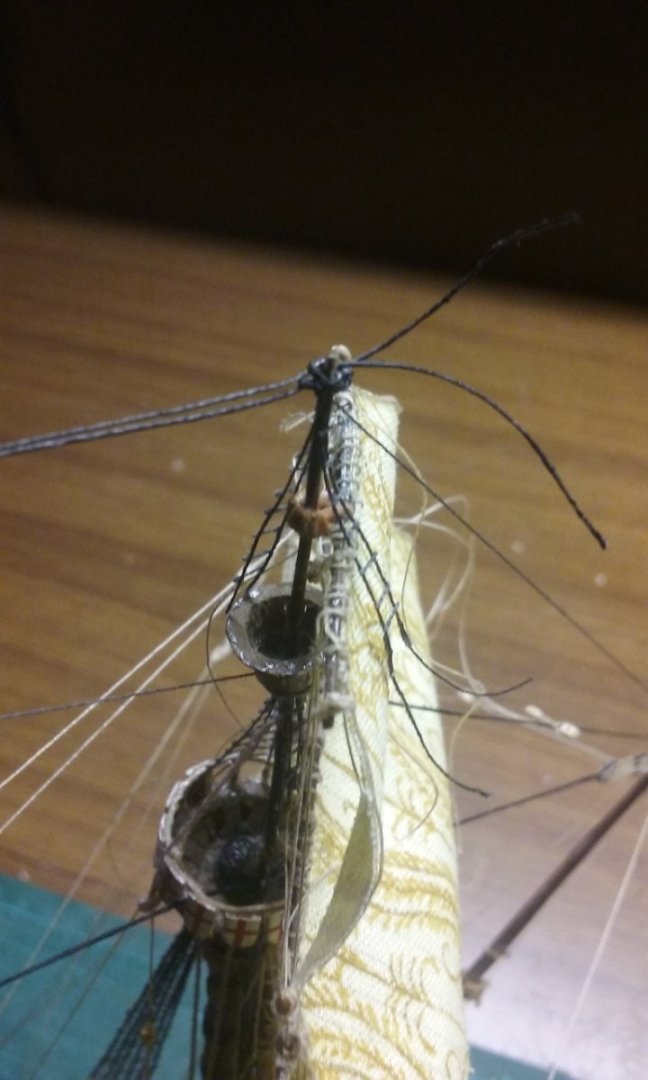
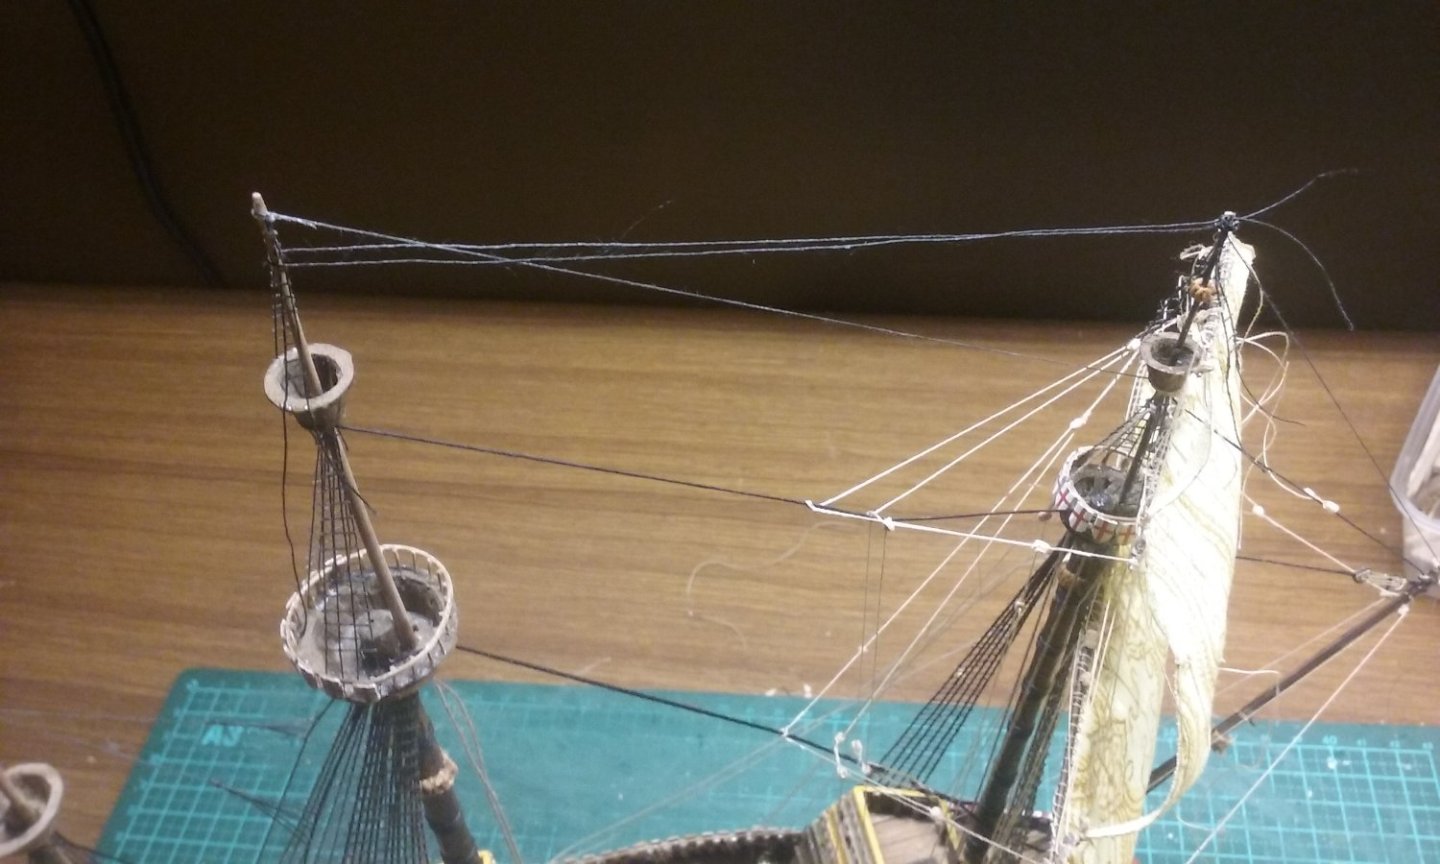
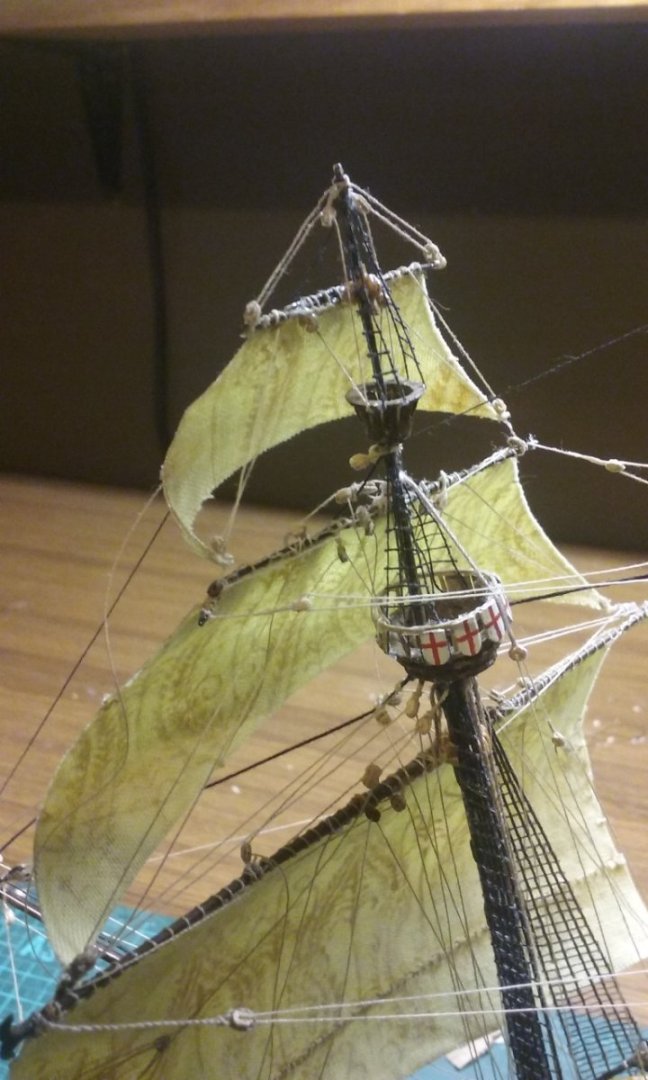
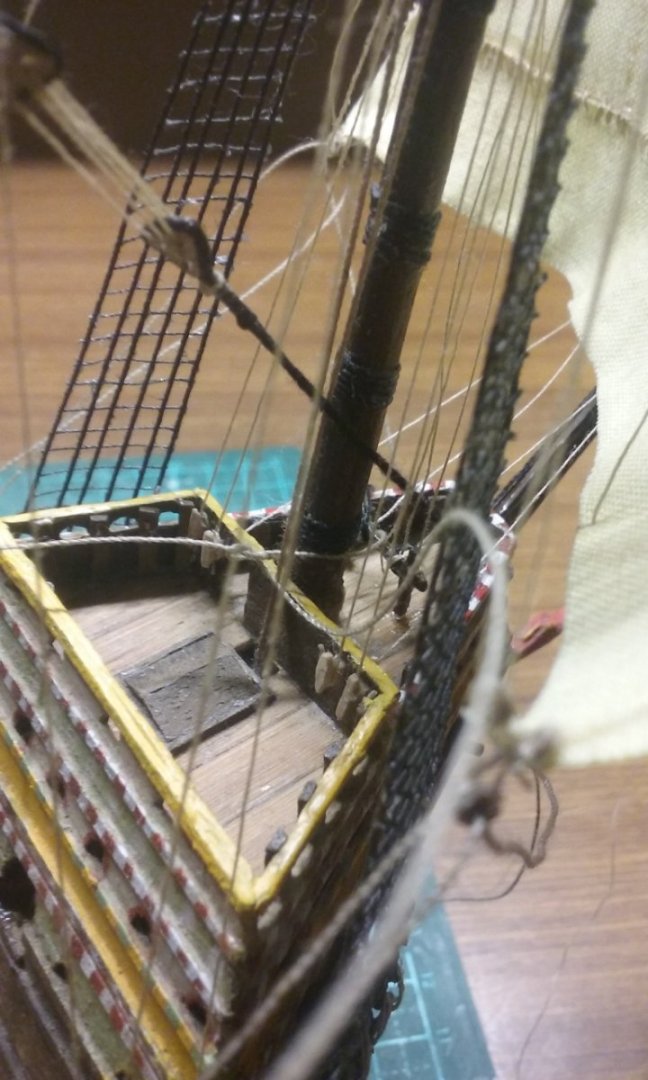
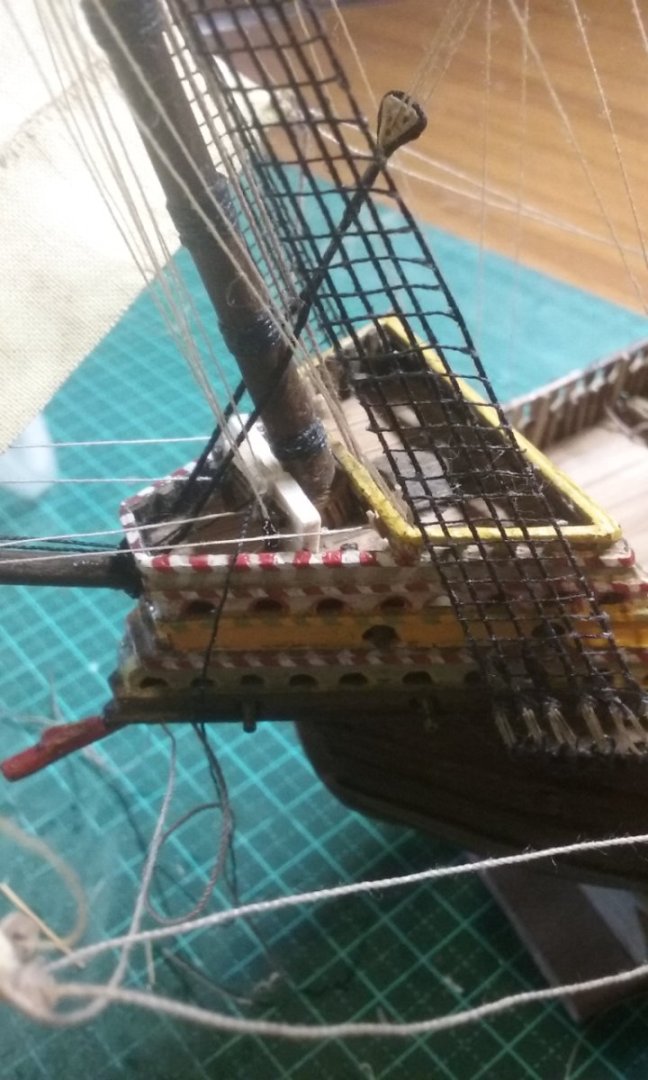
It's been a while since the last update. Mostly sails and rigging for the foremast - I thought I'd be on the mainmast by now, but it's been going very slowly. Quite a lot of fiddly work, but not much dramatic to see where I've been. I had to replace the fore-topgallant shrouds - they were looking particularly tacky, the ratlines had gone "feathery" at the ends. Fore topsail braces Adding the new topgallant shrouds. I'd discovered the main topgallant had bent both forwards and sideways, so I had to remove the stay (which had gone loose), bend the topgallant mast straight with my trusty soldering iron and put in a temporary rope holding the fore and main topgallants taut so a new stay could be added. Adding blocks to the fore topsail stay for the forecourse bowlines to run through And the corresponding blocks on the bowsprit. Combined fore topsail sheets/forecourse lifts Fore topgallant stay added while temporary rope makes sure it will be taut. Forecourse bowlines in place Topgallant lifts, clewlines and sundry blocks. I've also glued the parrel truck to the mast, with a (non-historic) small wedge to hold it in place. Overall view And then - disaster! The topsail yard broke - possibly at an earlier mend. So after a lot of soul-searching I decided to cut away the robands and fish the yard (shouldn't be all that obvious when it's fixed. Fish being cut to shape: Yard glued back together And fish glued in place Robands replaced, along with the blocks for the sheet and brace. And then another disaster - the bitts which were just end-glued to the deck, lifted off under the force of all the lines that were belayed to it. I tried gluing it back on with a sort of spacer (made of balsa) to hold it in place: No good at all. Just messed up the foredeck and the bitts came loose again immediately. I decided I had no option but to remove all the ropes that were belayed to the bitts and make a new set, this time with "pins" carved into the ends, to fit into holes in the deck. All very well, but there was no way I could get a drill into that confined space. I ended up drilling them by hand with the pointy end of a fine file, and an awl. VERY fiddly and time consuming. Unfortunately I did't take photos of the new bitts and the holes in the deck, but here they are glued in place. I'm just hoping they'll stay this time. But this time I've added a new couple of side-rails that will take quite a few of the ropes that were belayed to the previous bitts. That should reduce the force on the join with the deck. Unfortunately there's a bit of shine from the (CA) glue, which I can't do much about. Steven


- 740 replies
-
- 13
-
-
-
- Tudor
- restoration
- (and 4 more)
-
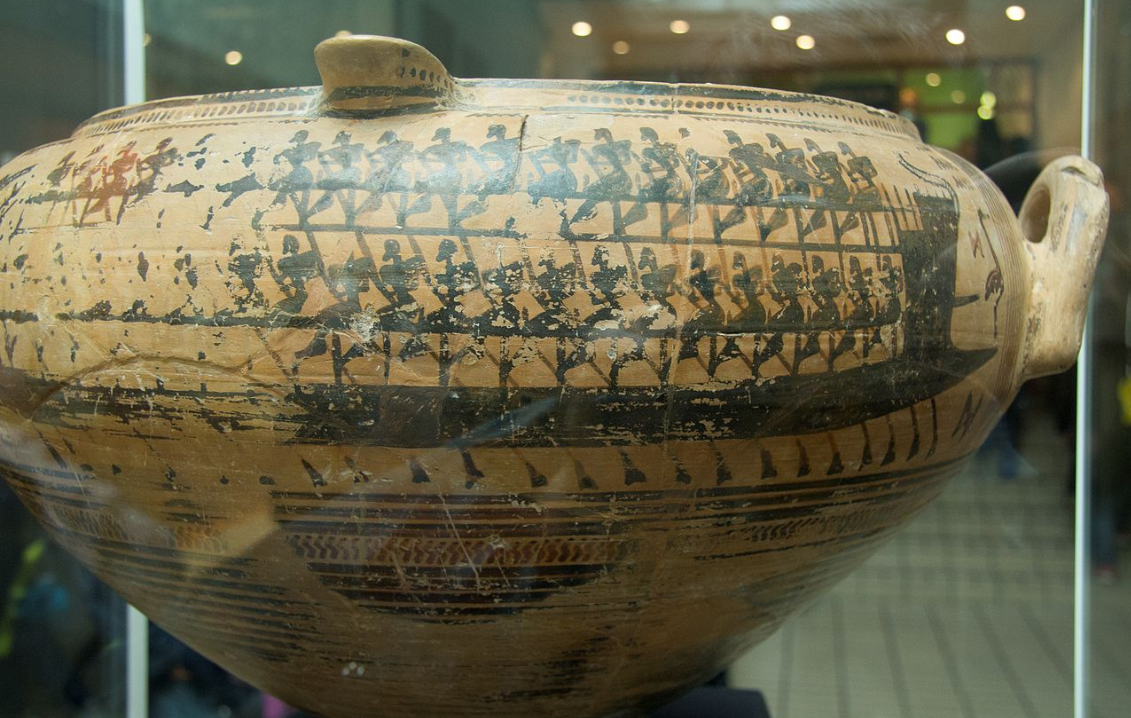
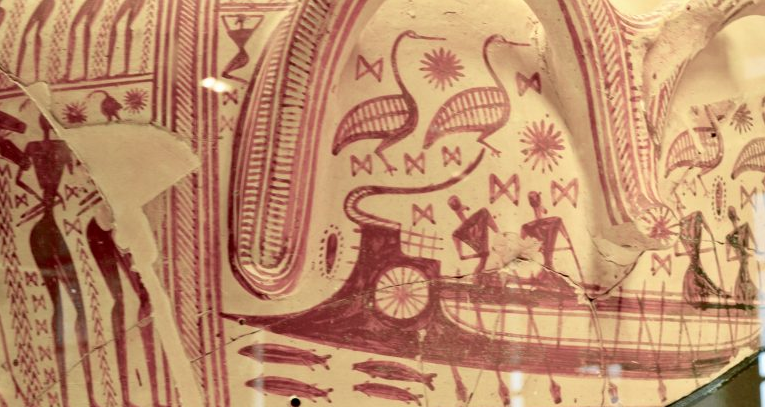
Interesting idea about paddling, but contemporary representations on pottery show this type of ship was rowed, not paddled. Thebes vase (krater) - 735-720 BC. Dipylon vase (approx 750 BC) Steven
-
It's been a while since I've looked at this log. You're really powering ahead! Steven
- 63 replies
-
- 3
-
-
-
- Finished
- Khufus Solar Boat
- (and 1 more)
-
I have made them out of brass (posts #969 and #1000, but I find wood is much easier to work with. Steven
-
I made mine out of wood and they worked quite well. See posts #322 and #325 at I carved them out of pear wood, and used garden tie-wire for the rings. Steven
-
Beautiful work, Patrick. I'm just struggling through this step with my own model - so many ropes! Steven
- 756 replies
-
- 3
-
-
- galleon
- golden hind
- (and 2 more)
-
HMCSS Victoria 1855 by BANYAN - 1:72
Louie da fly replied to BANYAN's topic in - Build logs for subjects built 1851 - 1900
I've been following this discussion with interest but without feeling sufficiently qualified to make any suggestions. I'm glad you've come up with a solution you're happy with, and that doesn't require pulling everything apart and starting again. Steven- 1,013 replies
-
- 4
-
-
- gun dispatch vessel
- victoria
- (and 2 more)
-
Mediaeval Shipwreck found in England
Louie da fly replied to Louie da fly's topic in Nautical/Naval History
Yes, but don't hold your breath. It usually takes years before the archaeological report is completed . . . Steven