


YankeeD
-
Posts
151 -
Joined
-
Last visited
Content Type
Profiles
Forums
Gallery
Events
Posts posted by YankeeD
-
-
-
YankeeD, tartane,
Perhaps you could verify your links before posting! Niether one of them works
It surely works only I put the phrase between brackets, if you just click it it is most surely the computer adds the last bracket automatically. Computers are not that smart that they realize they should leave out the last bracket as it does not belong to the link. And correct I could have solved that by adding a space...

-
A very nice frame build indeed!! Interesting way to fix the frames also.
Will follow this with interest.
Rgds and god speed!!
ps (The correct website in above post is http://www.constantwillems.nl/chebec.html)
-
I am looking forward to the finished product
Well, as I have no deadline, it will probably still be years to see her completion.... and I am even not sure what level that will be???

I work as I feel up to it. Sometimes I bend over different projects and nothing happens for weeks or months.
Rgds Hans.
- mtaylor, WackoWolf, FrankWouts and 2 others
-
 5
5
-
Ouch... November last year!! That's a long time since I posted.... Time moves fast if you are having fun, no?
Well Not much has happened, save another year passed. I finshed the work on the transom (thanks for the word Popeye!) and on the windows therein.
I had to do some restorations here and there, as during the passing of time the wood shrunk and some gaps appeared.
Its probably the winter season here which can be very dry (<20% humidity).


All in all I am quite happy but the BIG question is........ which next step????
Inside hull planking?
Fix and finish the transom? I do not want to finish and fix the transom as I rather like it when it still can be removed, but somewhere in time I will have to...
Maybe the first Wale?? after which I could do the lower outside hull planking up to the first gunports...
All choices to be made....


-
-
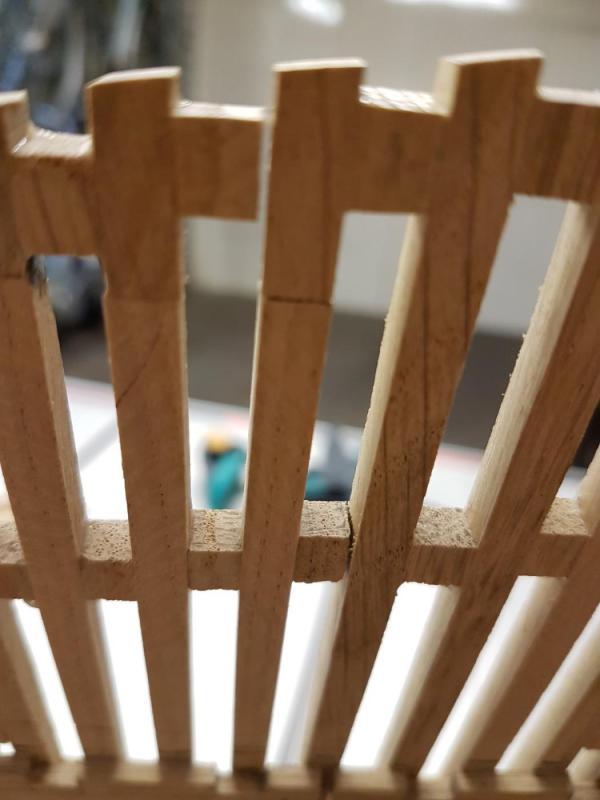
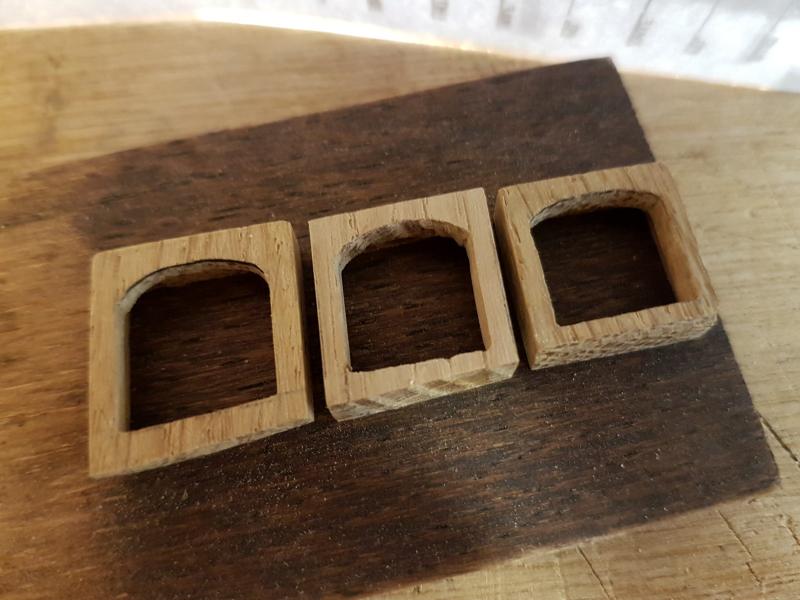
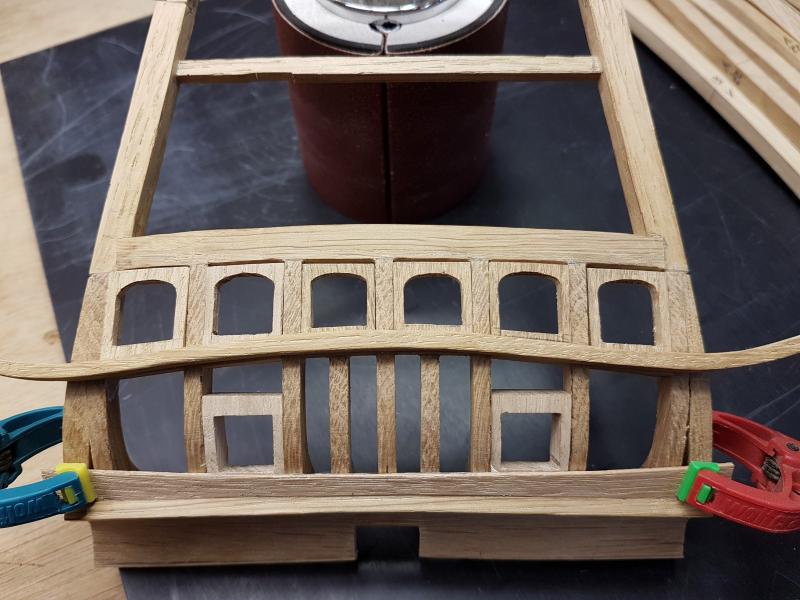
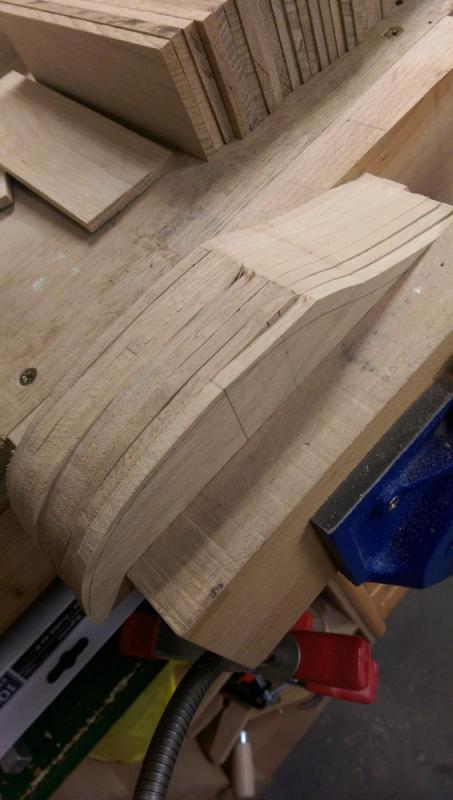
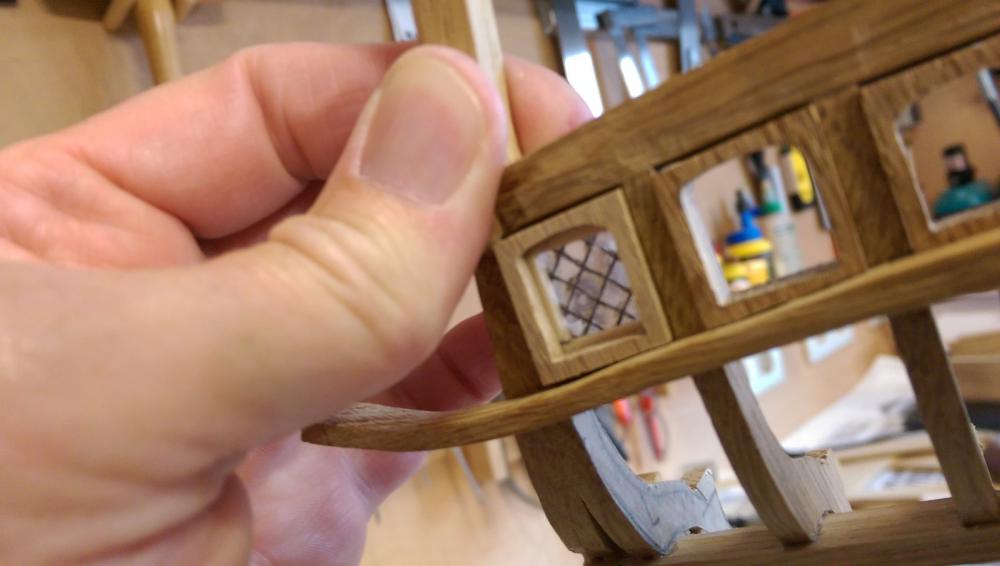
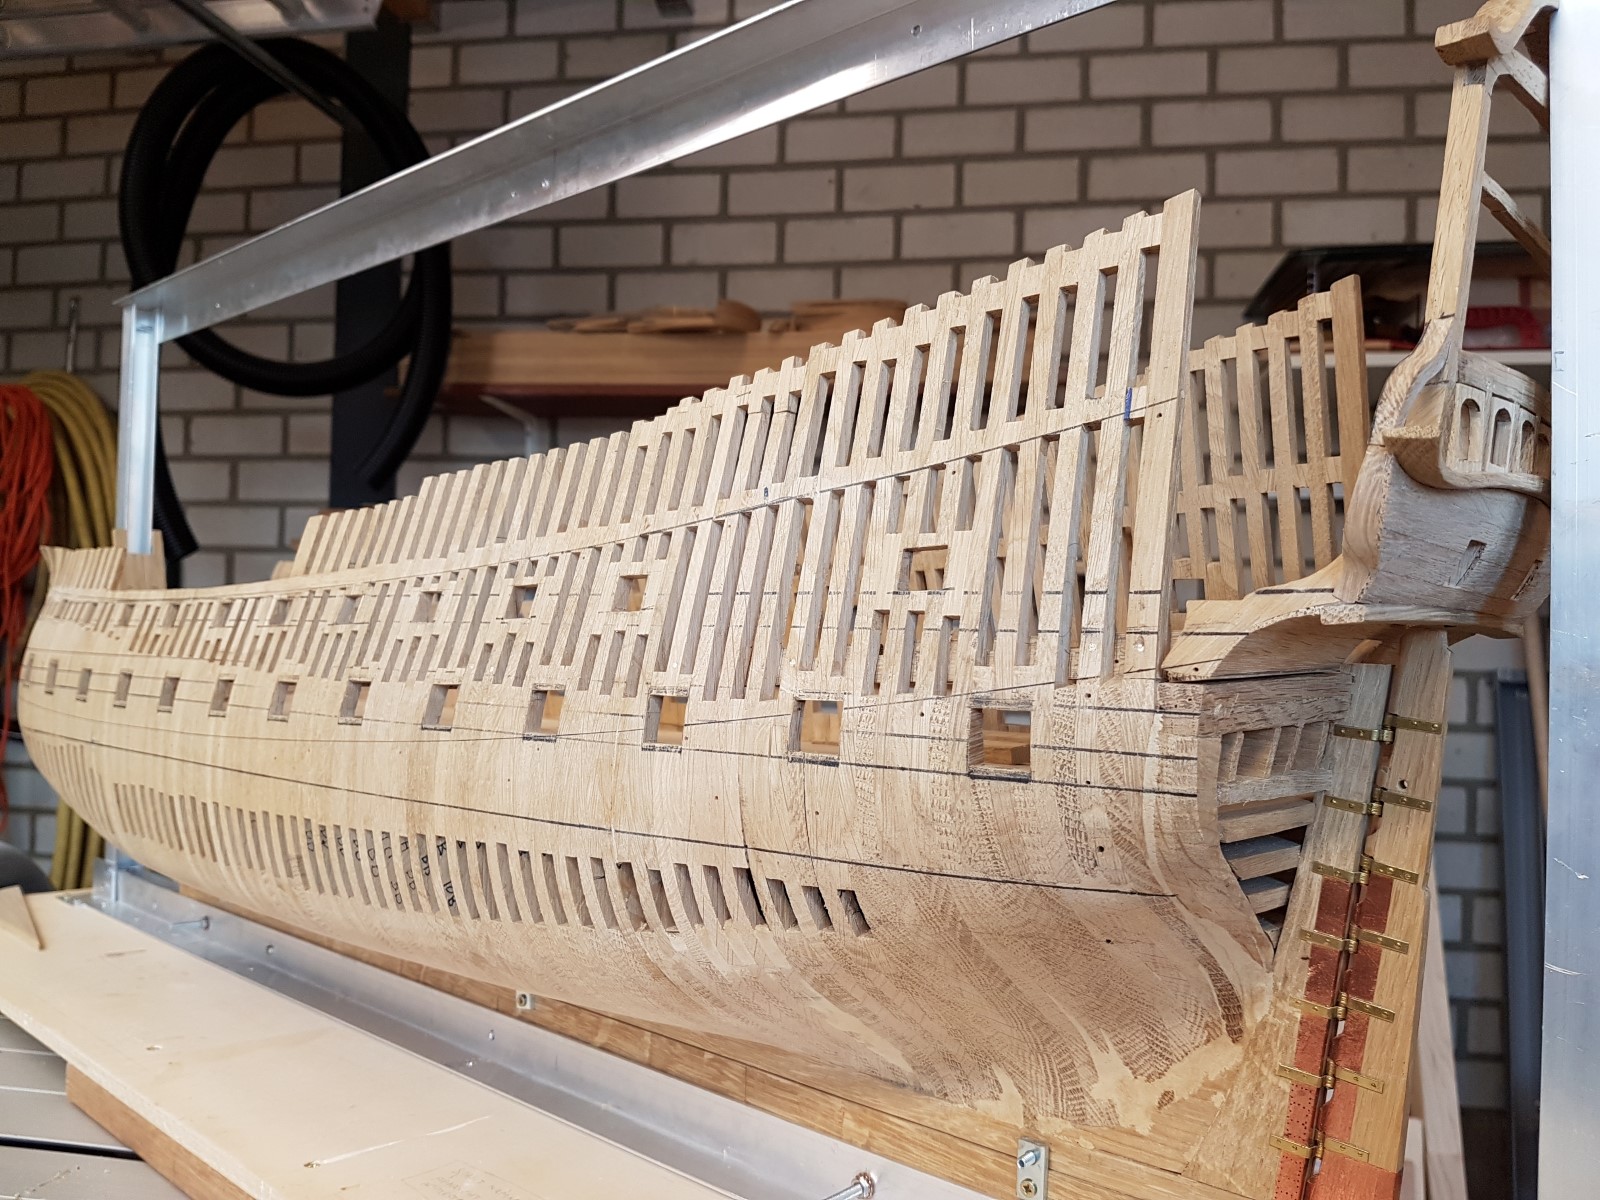
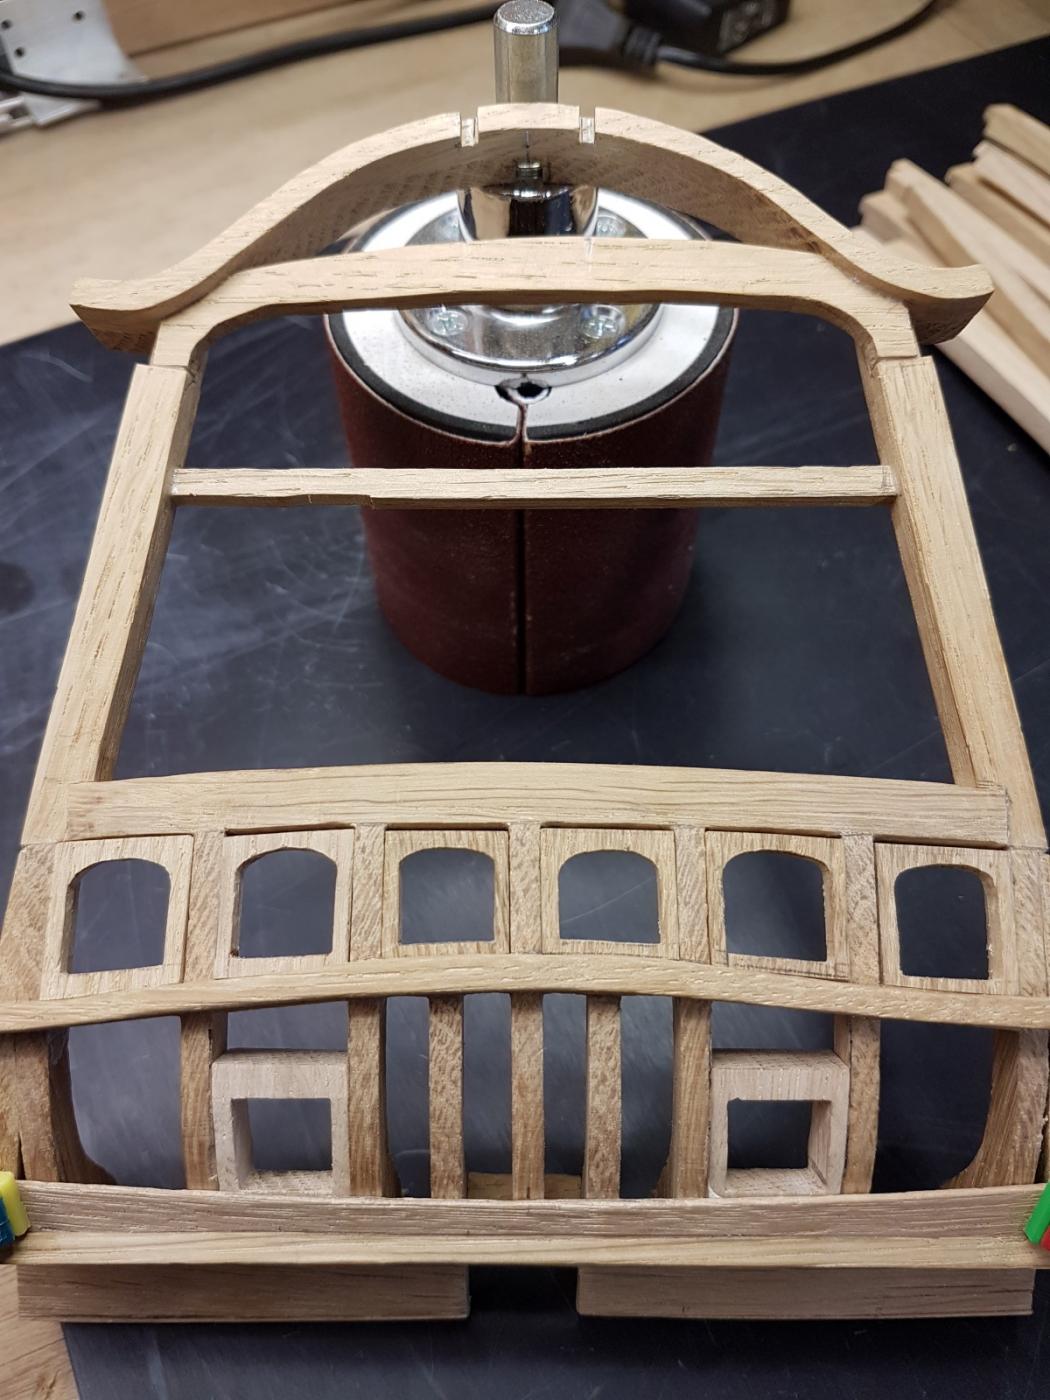
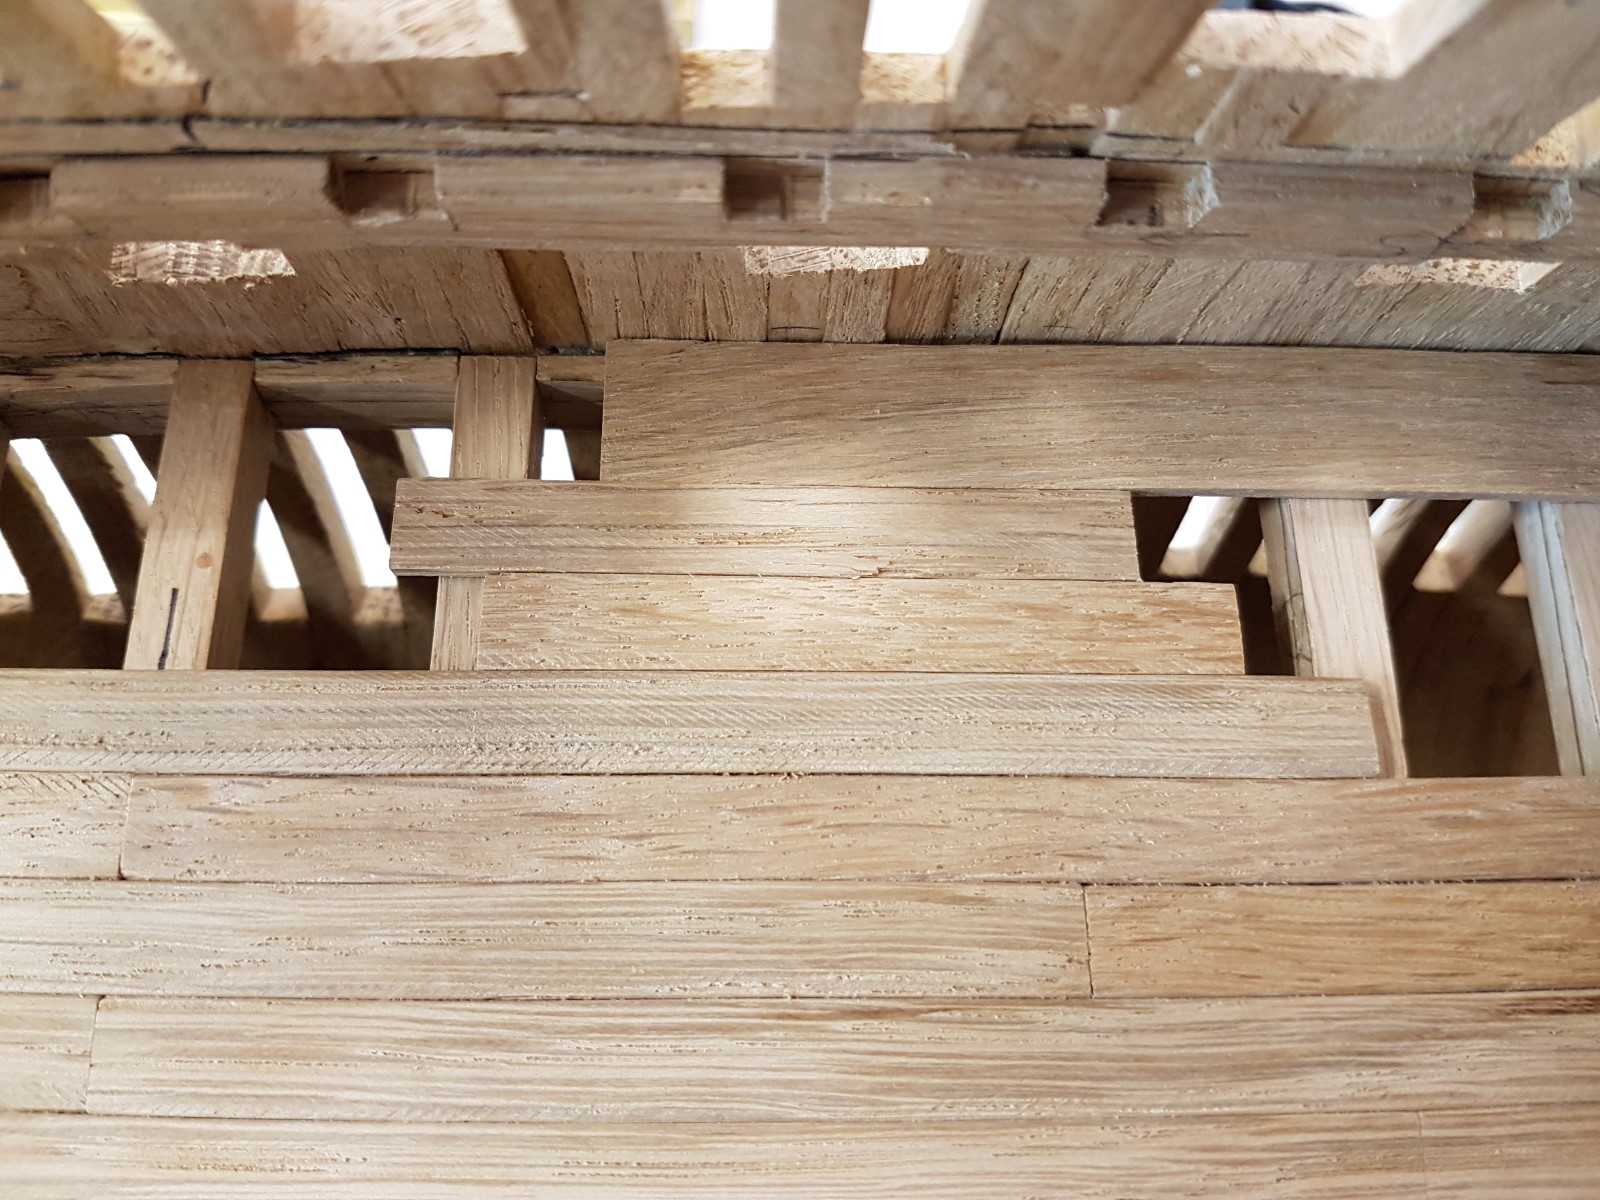
Well it has been some time since I called in. Work stopped for several weeks as I had another project to do and we took some holidays. As I had had enough of planking I started some work on the stern.
I was not satisfied with some frames of the sternwindows so I started making some new ones. Nice to see how the older wood has already stained by itself.
In my other dutch build log we have had some discussion over the two ports just below the twisted cornice. They are definitively no gunports but it is for me also not clear what they serve for.
Some say they even dont belong there on the 7P but Blom's drawings are very clear in this.
Opinions are welcome.

Rgds Hans.
- mtaylor, FrankWouts, davec and 18 others
-
21
-
Very nice!!
I am hopping in to follow the building!!
Good luck, Hans.
- Piet, FriedClams and mtaylor
-
3
-
the deck looks sweet! oak has such nice grain.......are you going to stain it? very nicely done!

Thanks!!! Yes, I am going to stain it later on. I intend to make it blackish. A little like the method and colour Mr. Hollom uses on his HZ model here on the forum only a little more blacker.
I already did some test pieces but am not quite sure.


- WackoWolf, aviaamator, Dan Vadas and 17 others
-
20
-
Dear Allan, I lived in Eindhoven for a number of years yes and worked for Philips untill I started an own company with a friend.
Now I live in a small town nearby called Nuenen.
Thanks for your comments. Hans.
-
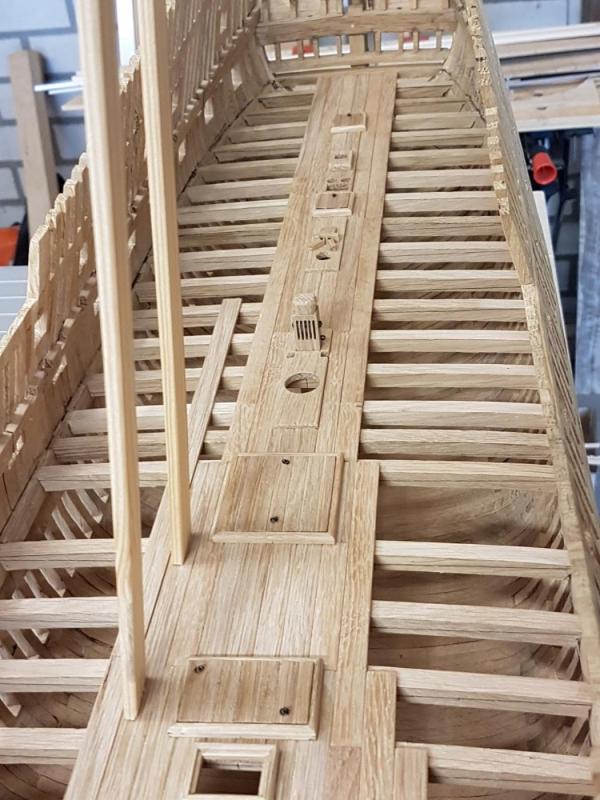
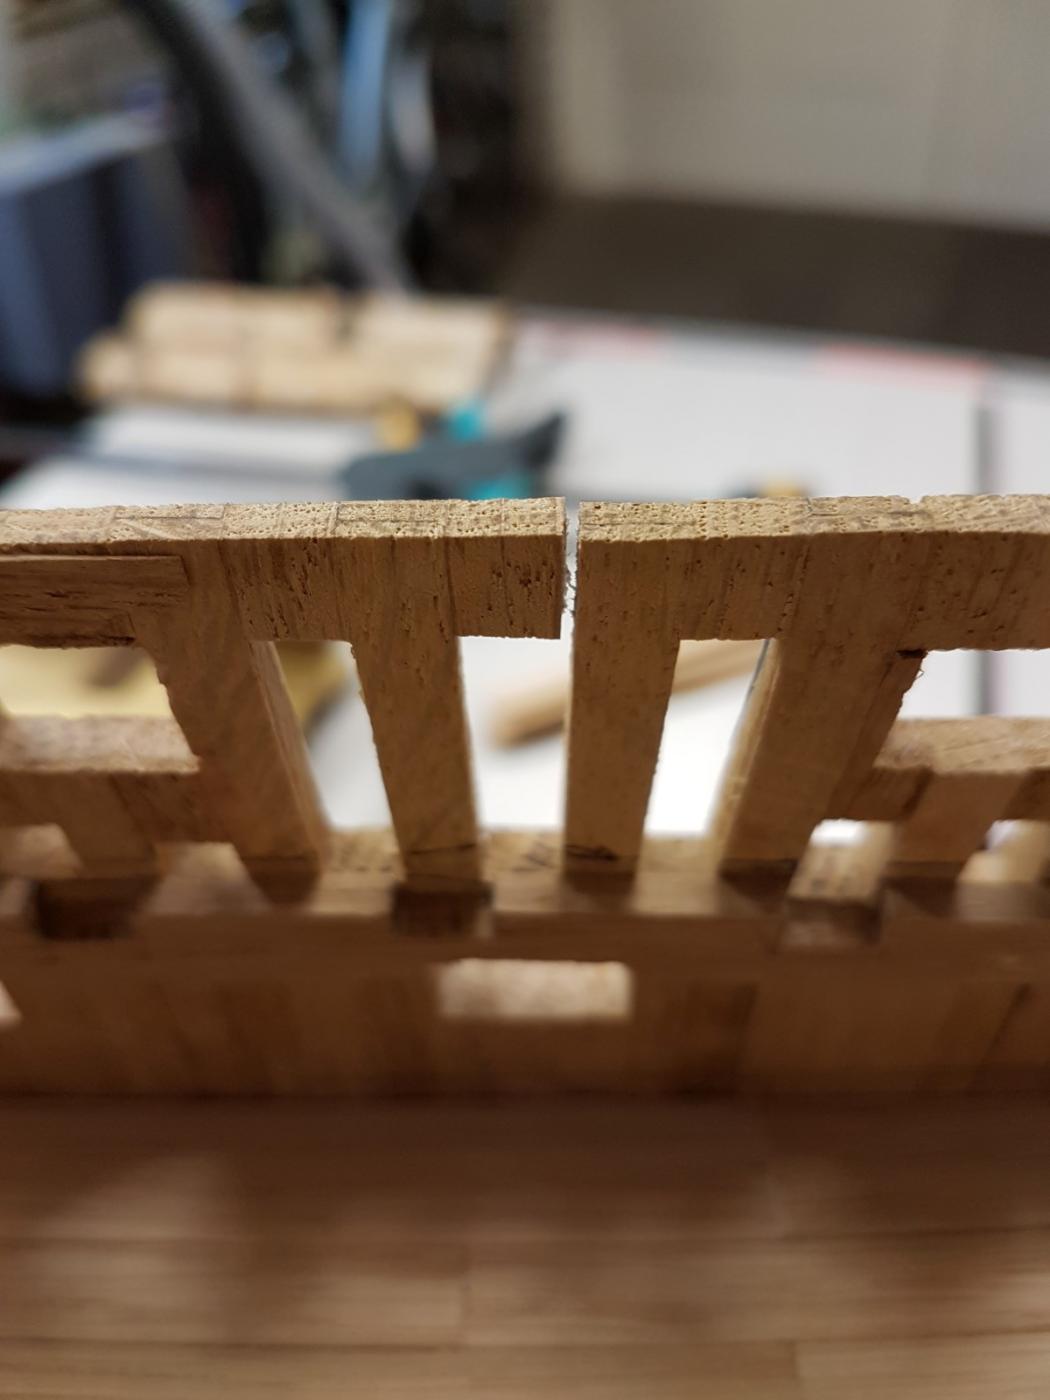
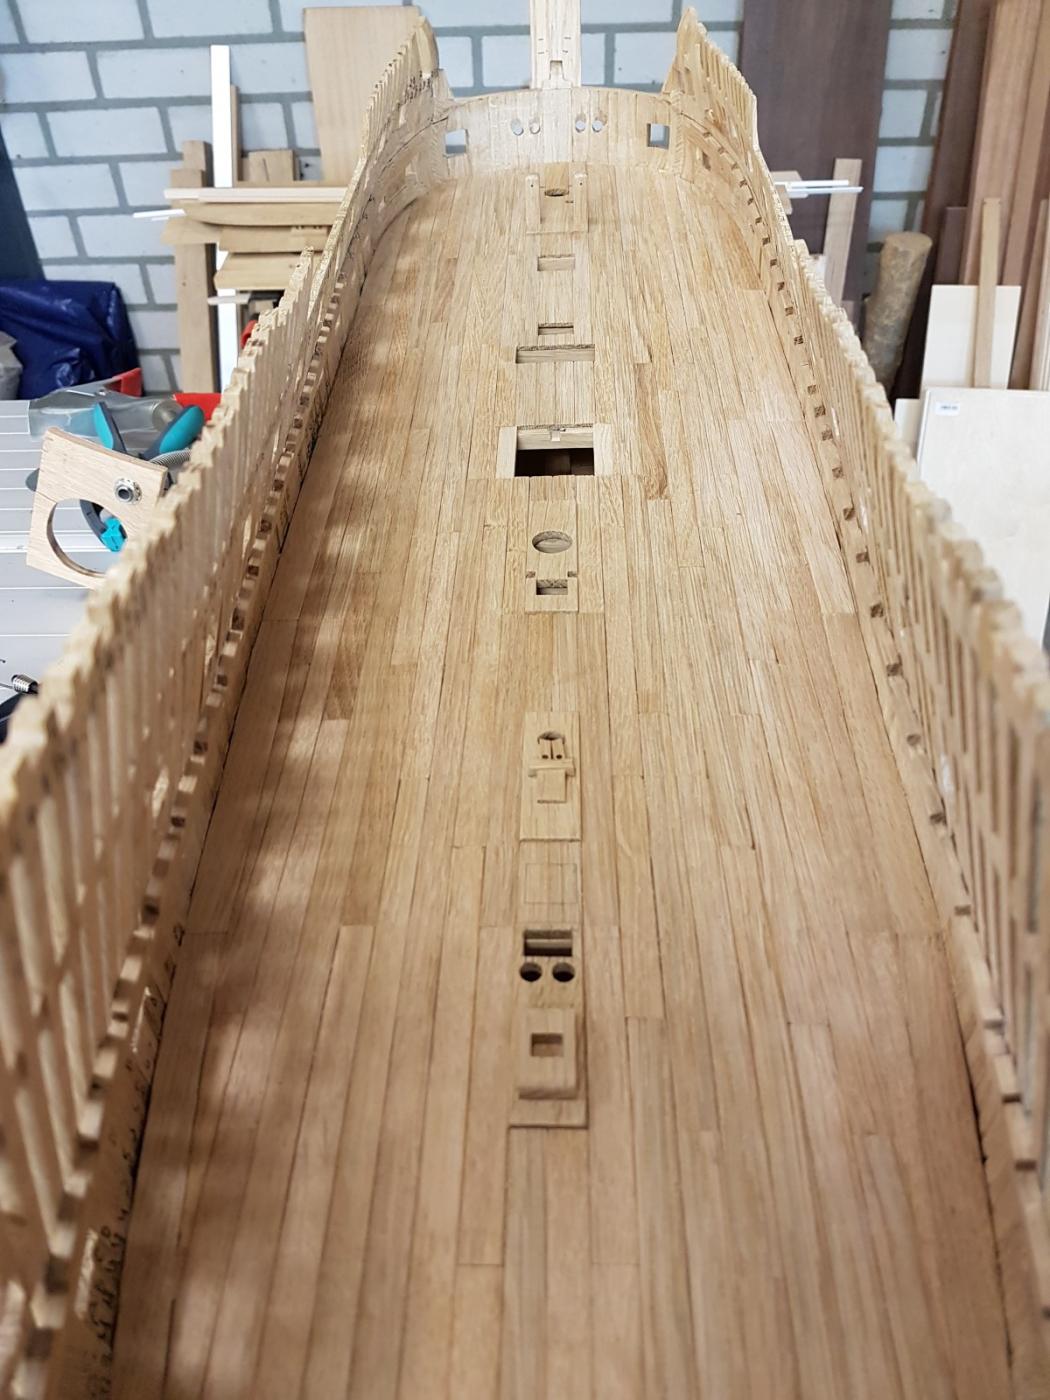
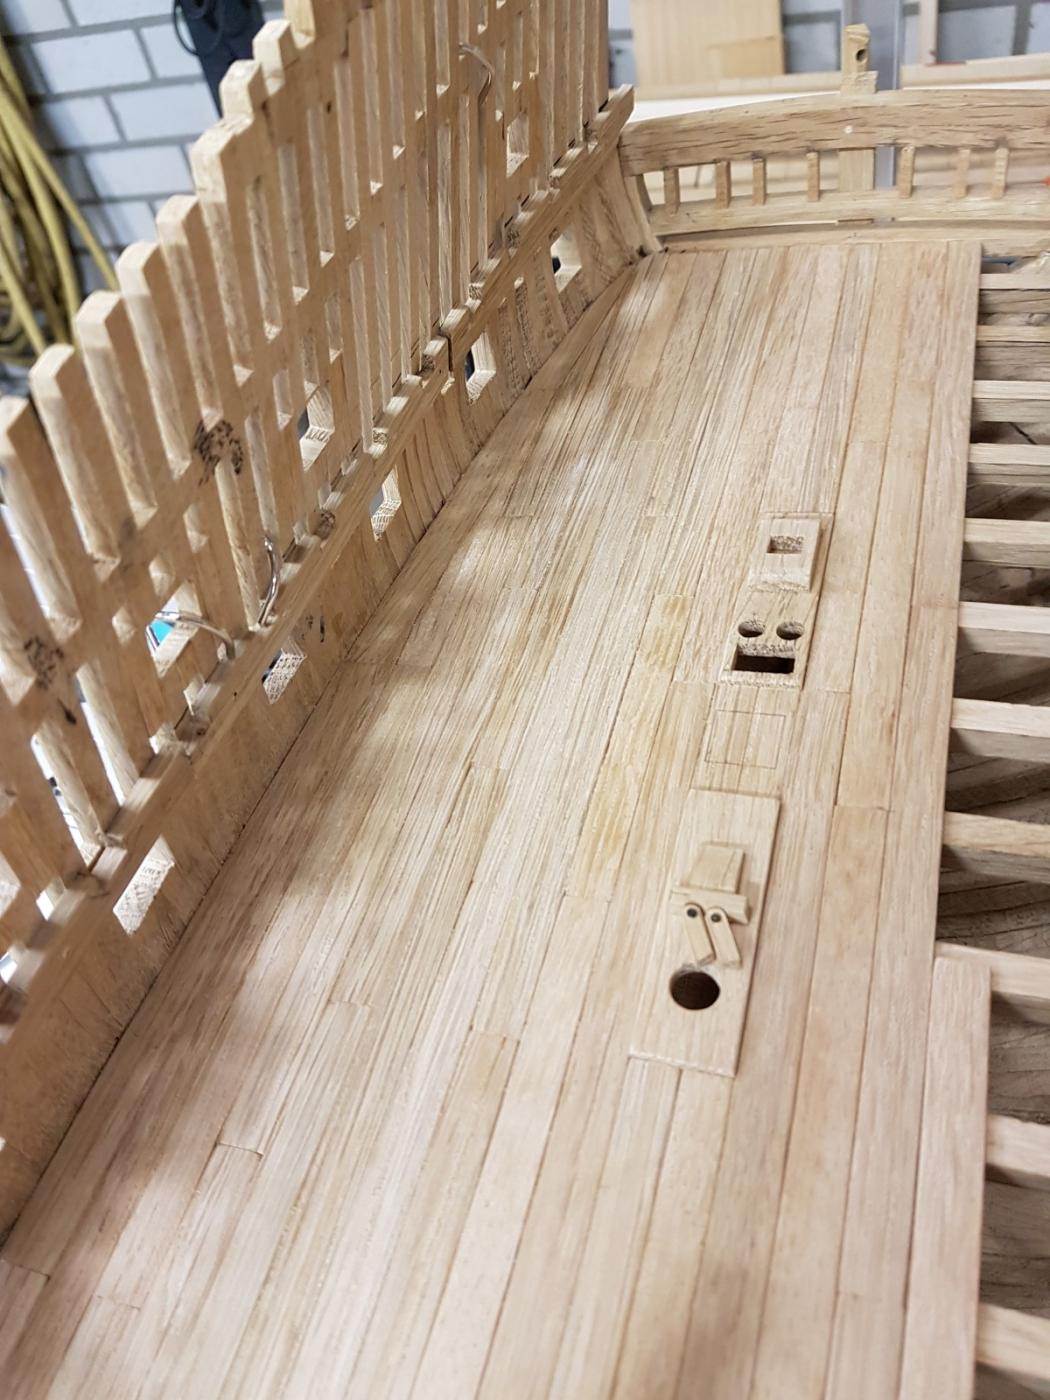
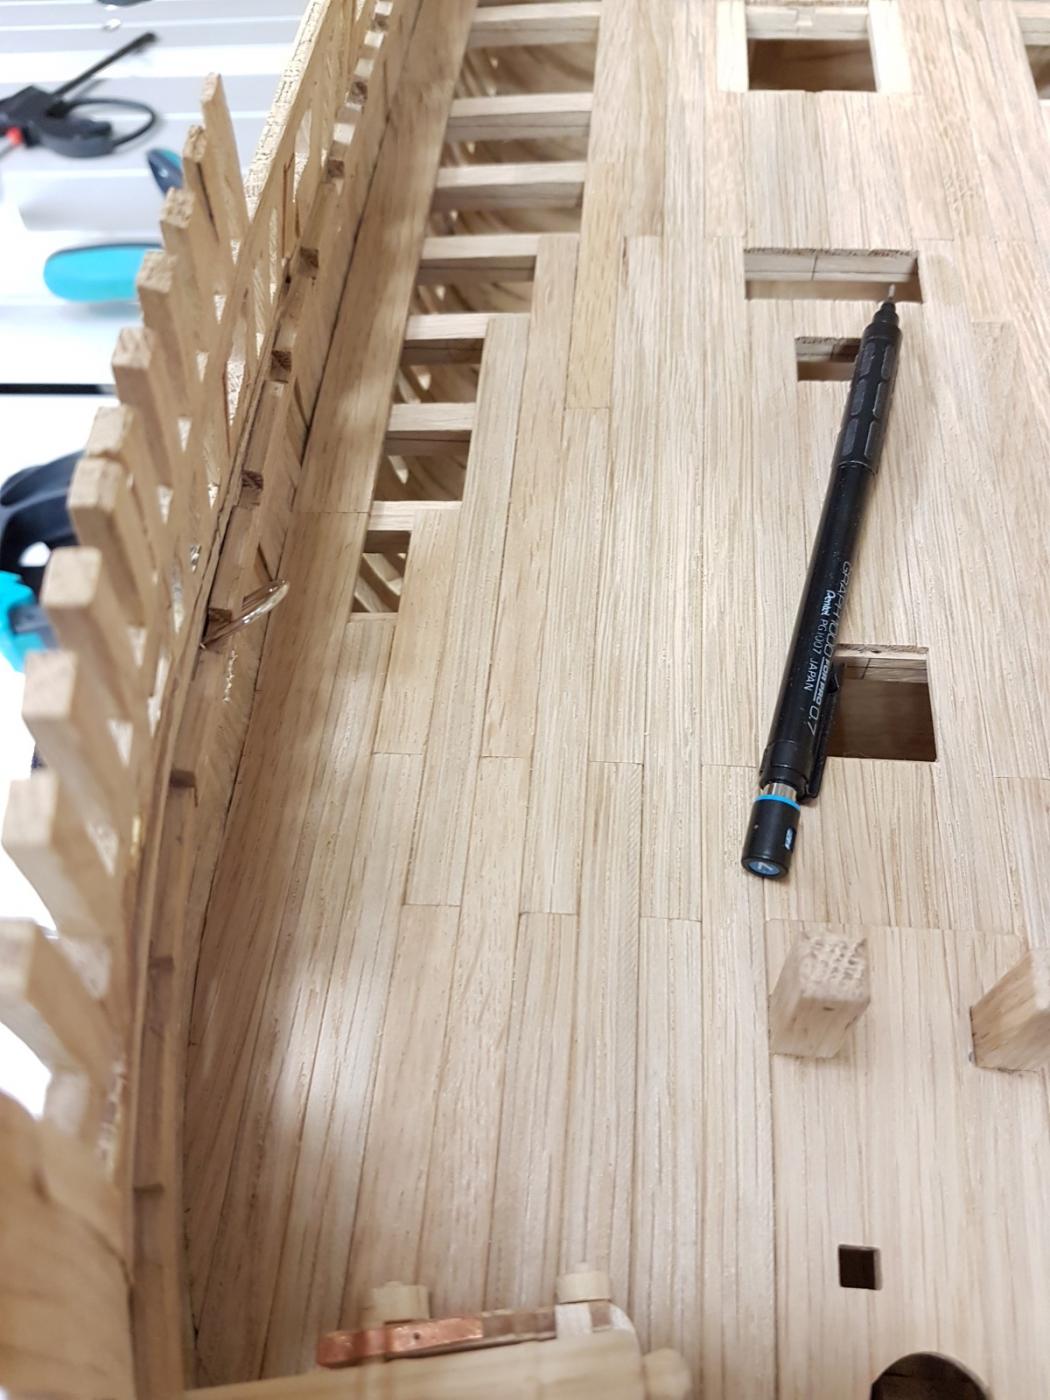
Just a short intermediate update, the orlop has been closed.
The next phase will be the insude hull planking. it fits 3 streaks from topside orlop to main deck.
1 is already in place the maindeck wagers (deck clamps??).
Now it will be 1 streak of about 14mm from orlop to underside of gunports and then another from that to the maindeck wagers.


rgds Hans.
-
Well after a perfect holiday, nicely tanned and rested. As for the pic on the 7P (MMDD) thanks but I can see some differences with the plans I use and I do not intend (but who knows what can happen) to build a full model. I wonder who/what build that is?? Is there a build log?
Now a short update from the past 2 days.
I had some choices to be made on the planking widths.

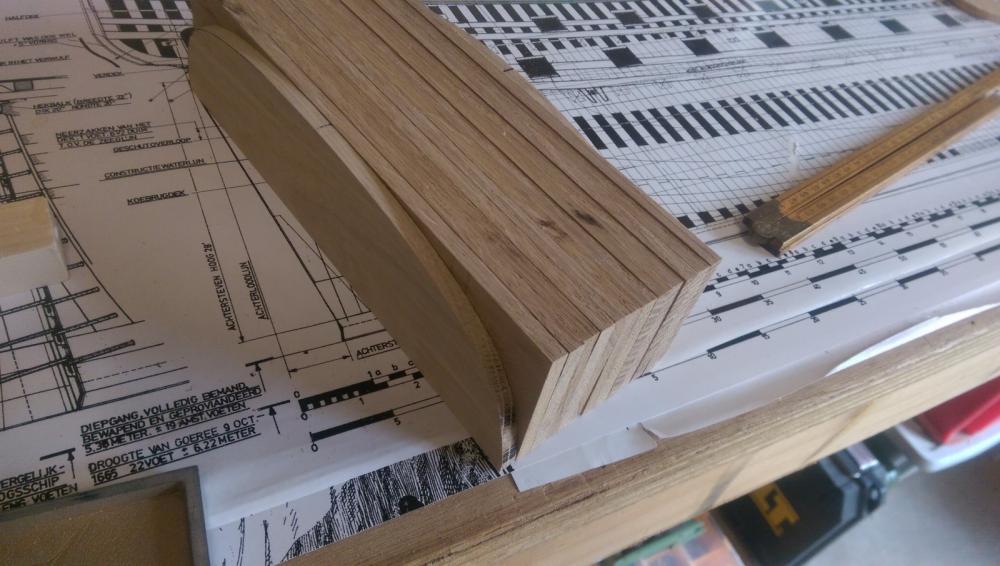
I said I setteld for 14mm waterstreaks. (12 should be according to plans and scale but that would not fit the other planks well.
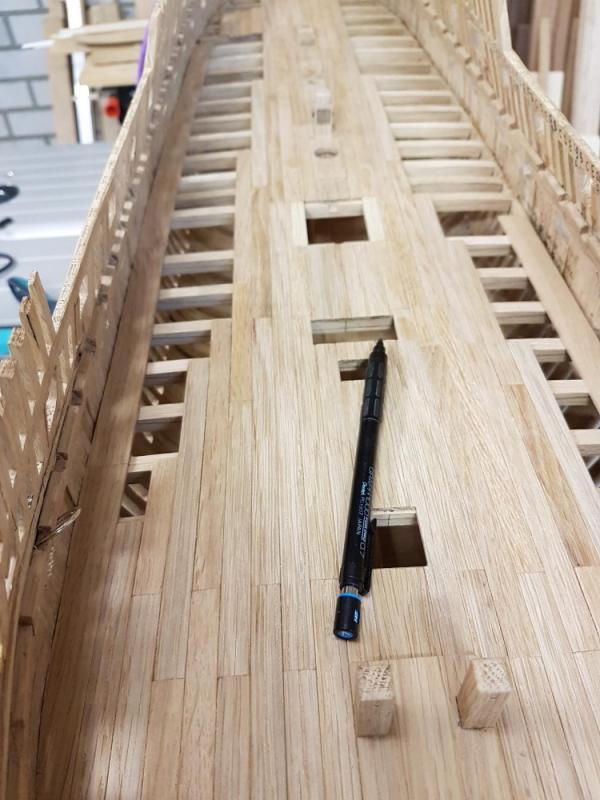
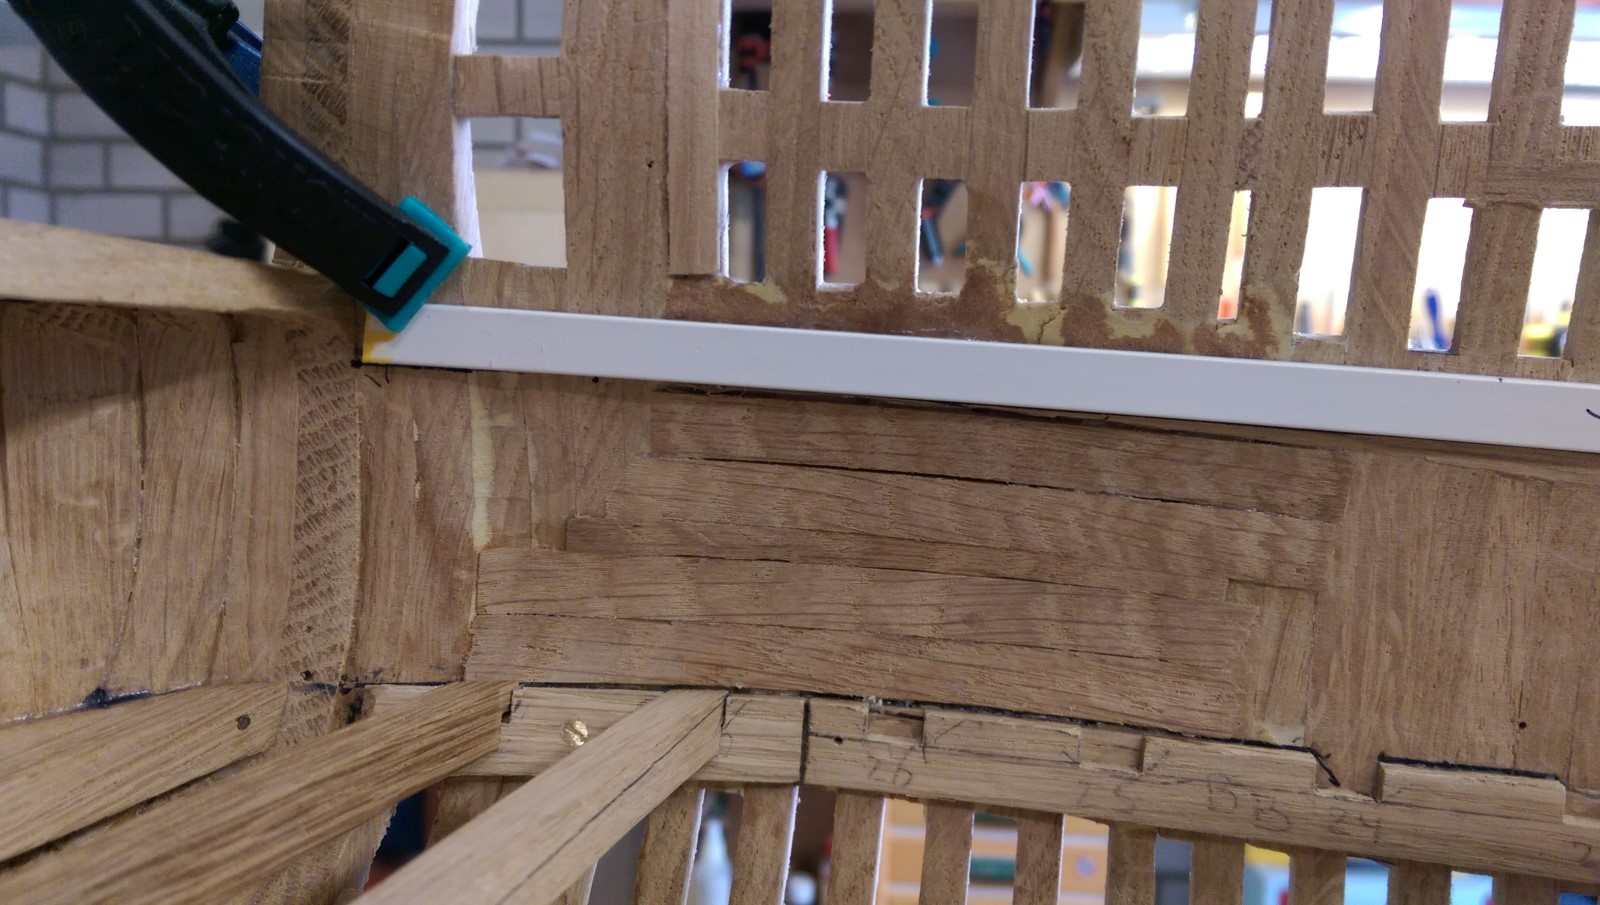
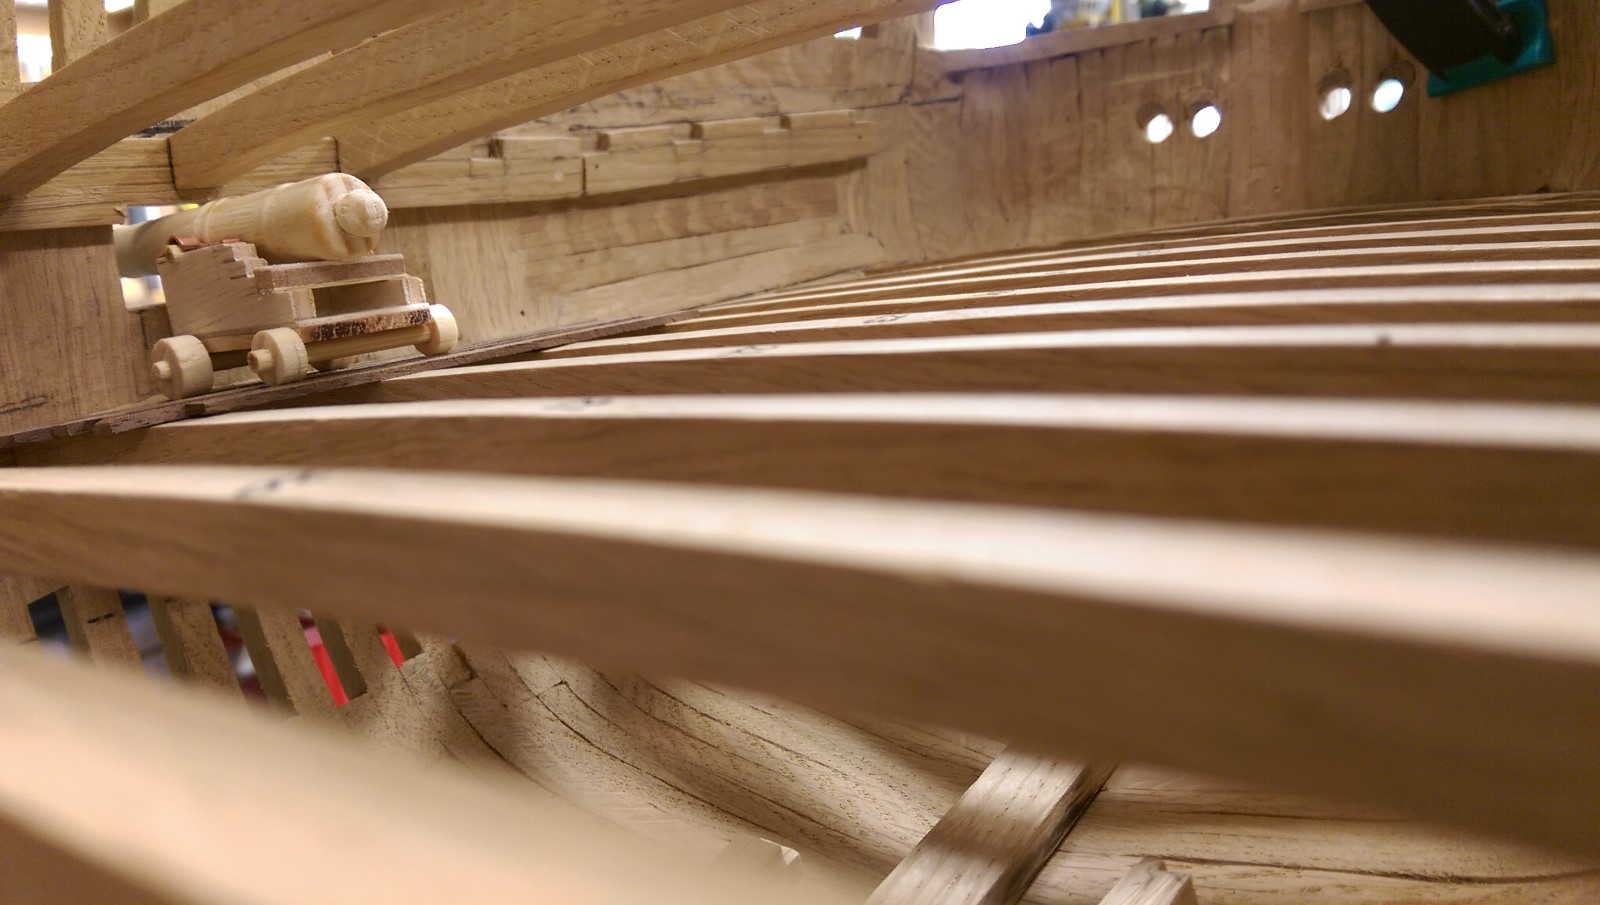
Here the raw waterstreaks

And here the closed half of the orlop deck.


Now for the coming weeks closing the other half and then....??? the inside hull planking up to the main deck I think.
I am still doubting when to start the outside hull planking. I guess after I finish the inside hull planks up to the main deck.
Rgds Hans
- mmdd, flying_dutchman2, druxey and 20 others
-
23
-
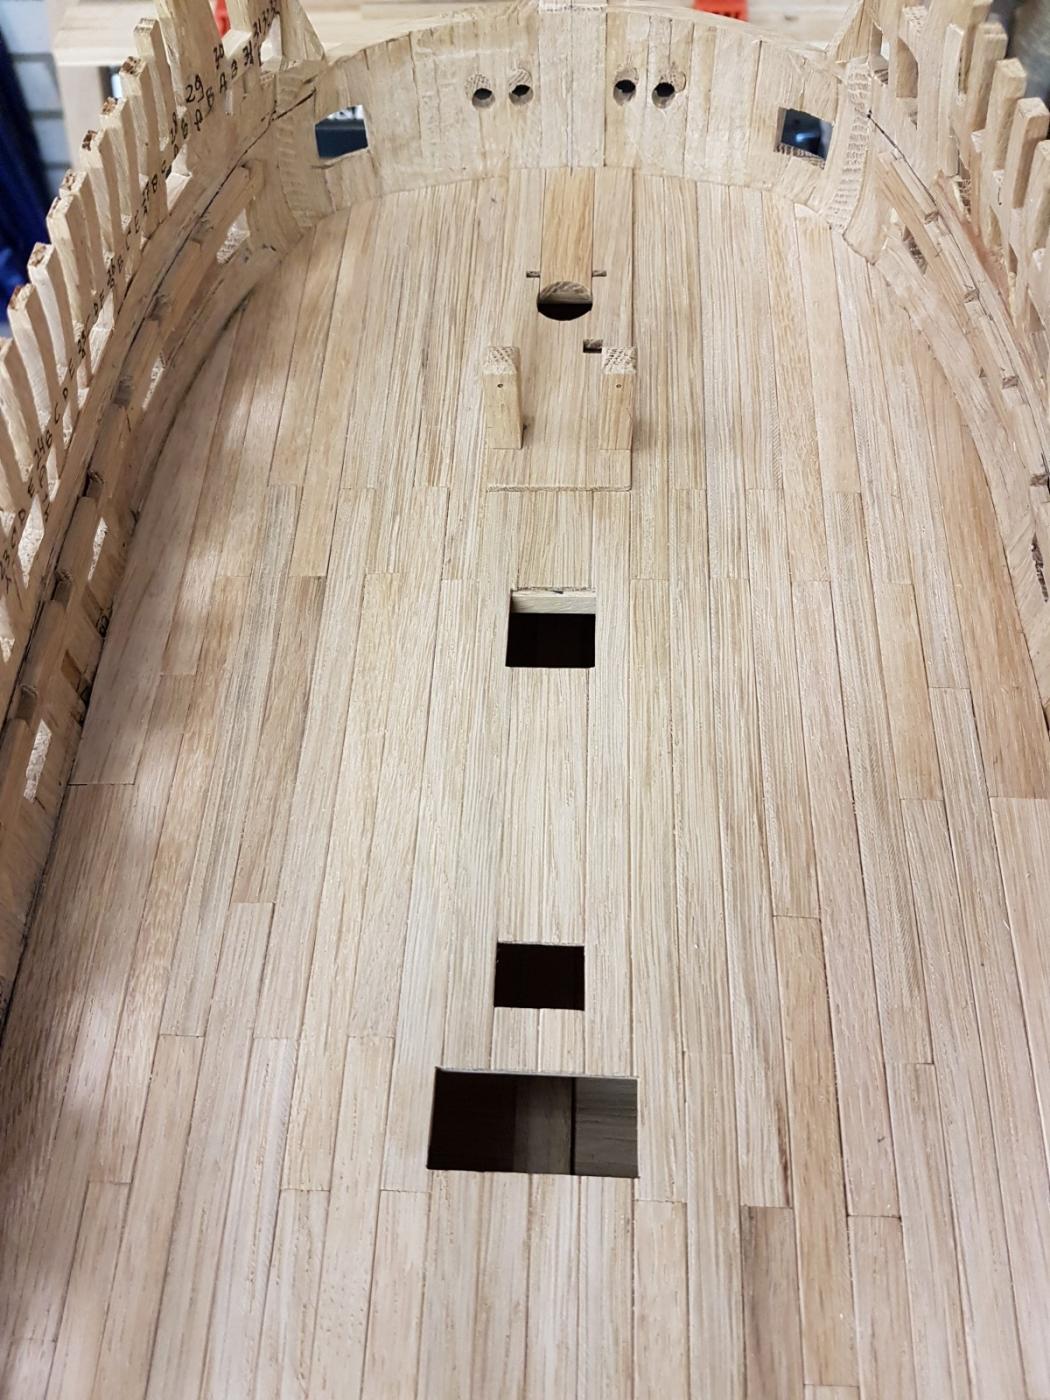
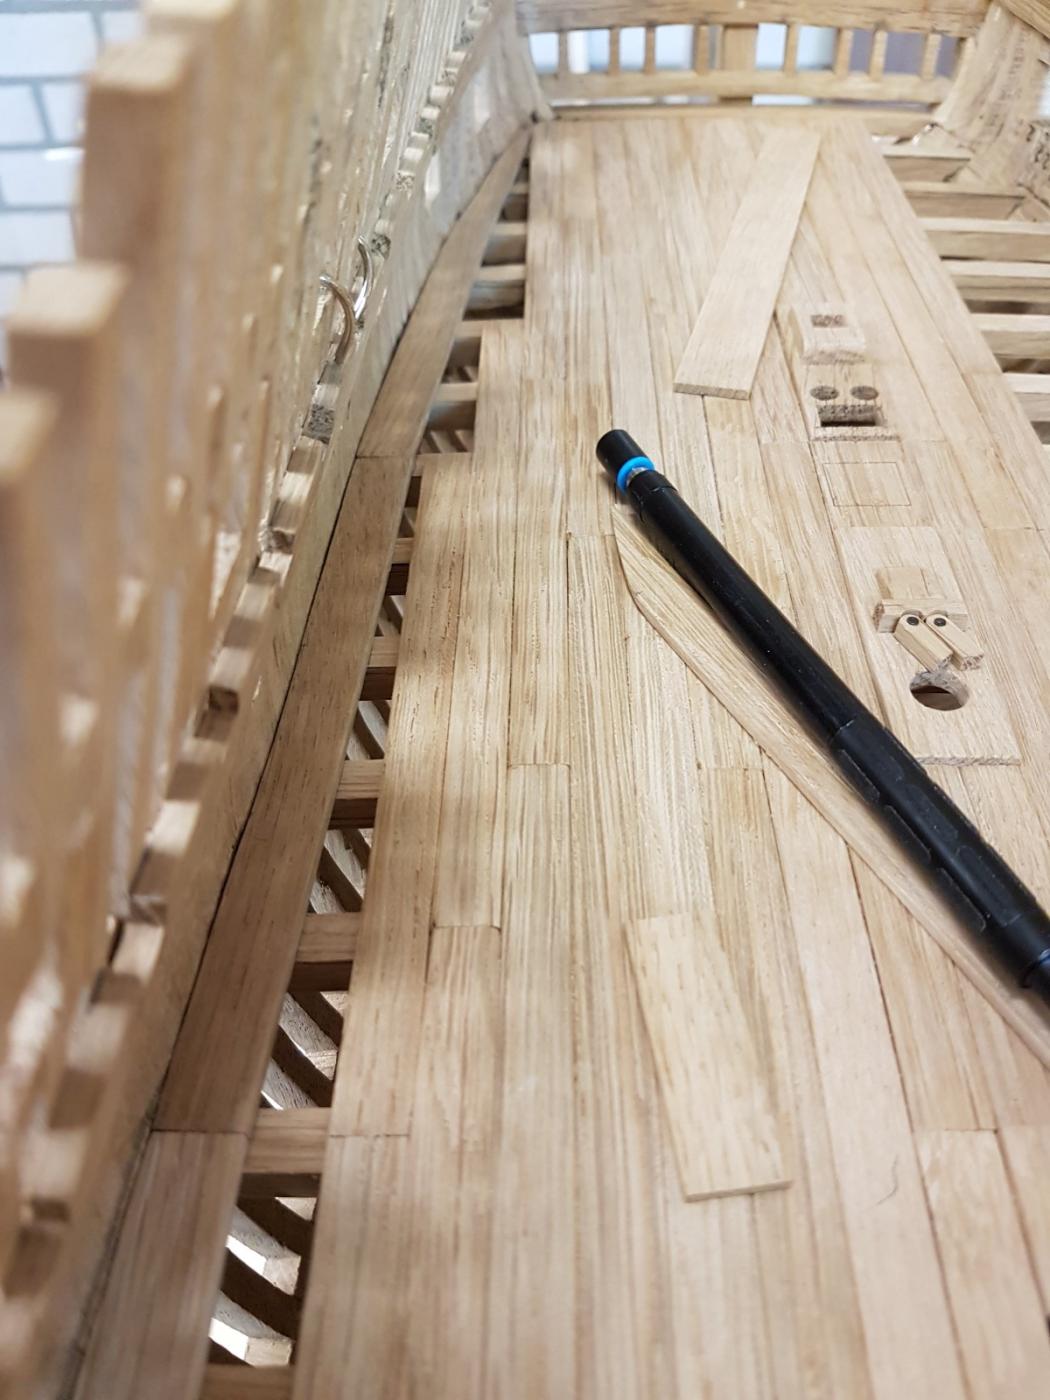
Well just before we are of on hols (we are going after the main season, nice and quiet:)) a last update.
As said the deckplanking and more details of the deck added.


This is were we stand today.
Here I have chosen for the waterway of the orlop for 14mm broad oak. Its a little too much (it should have been 12 according to the scale. The first parts has been fitted now I will finish this waterway first in whole to the rear and then work the rest of the 10mm dekplancking to the waterway.

See you all in a couple of weeks


- hexnut, flying_dutchman2, EJ_L and 26 others
-
29
-
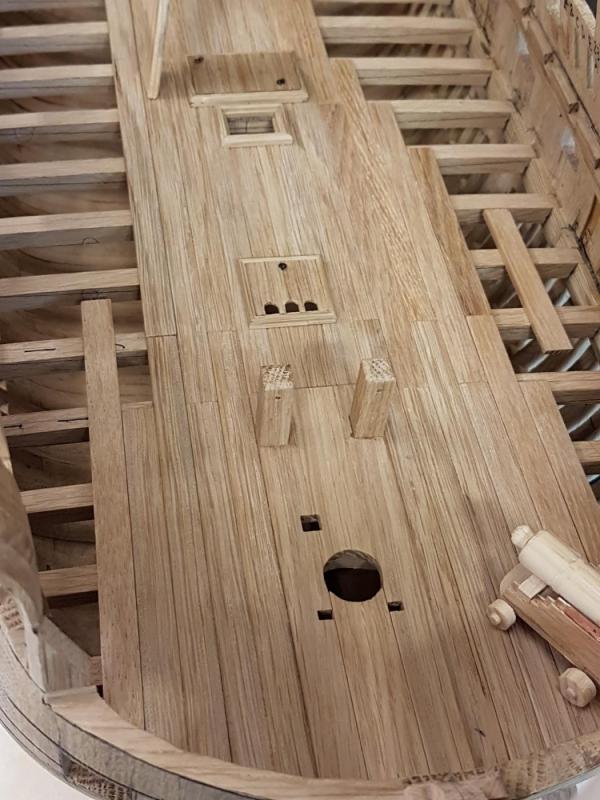
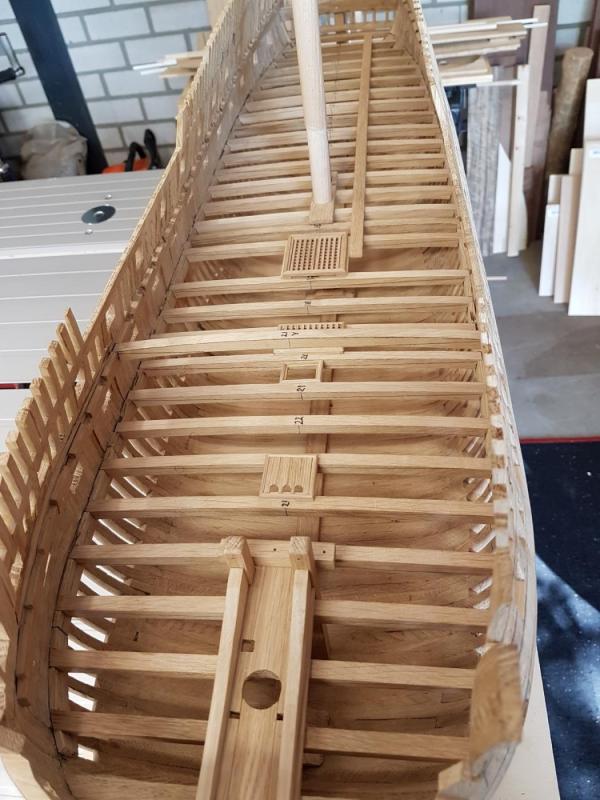
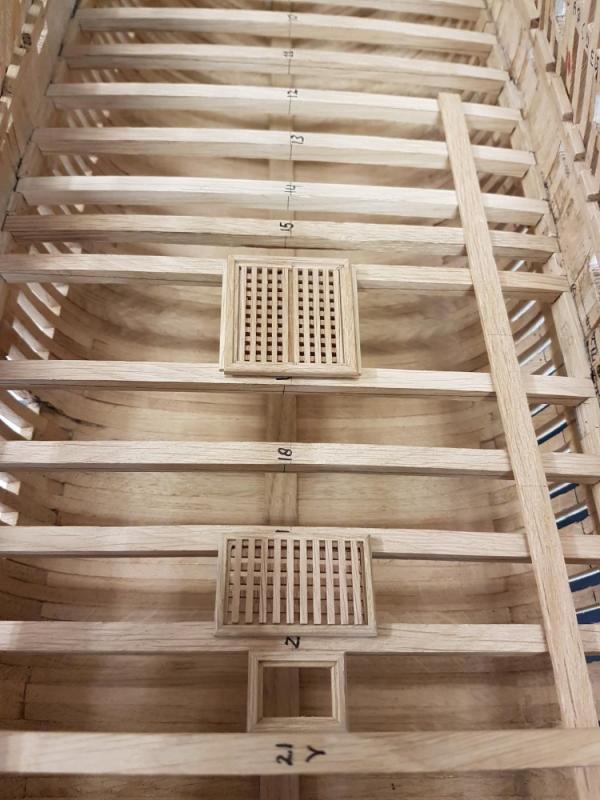
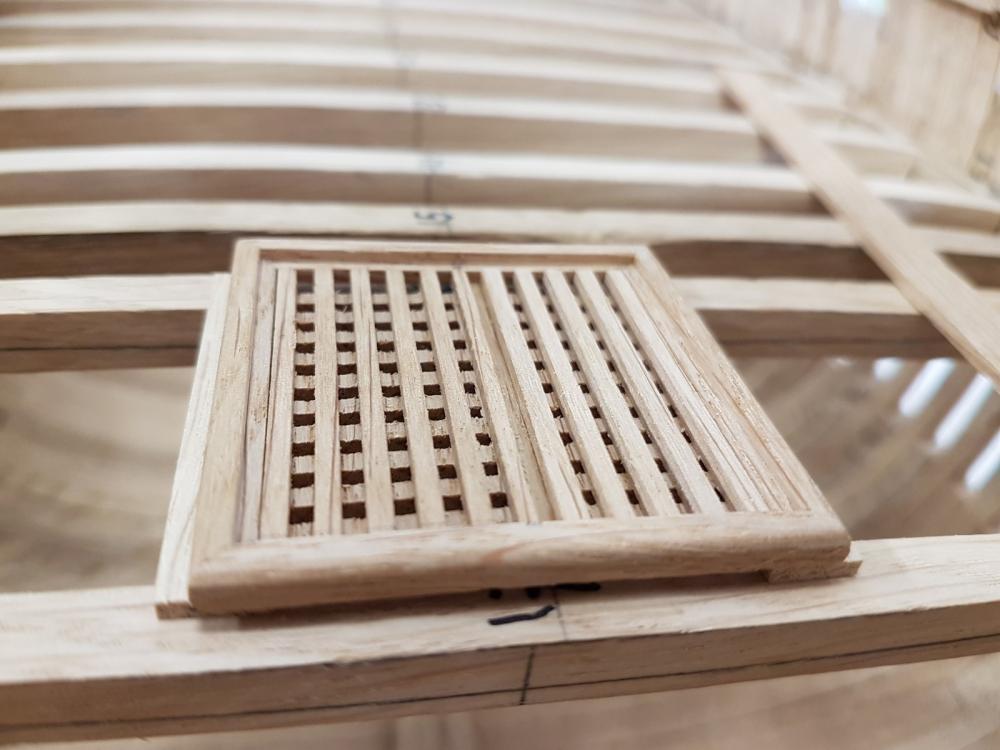
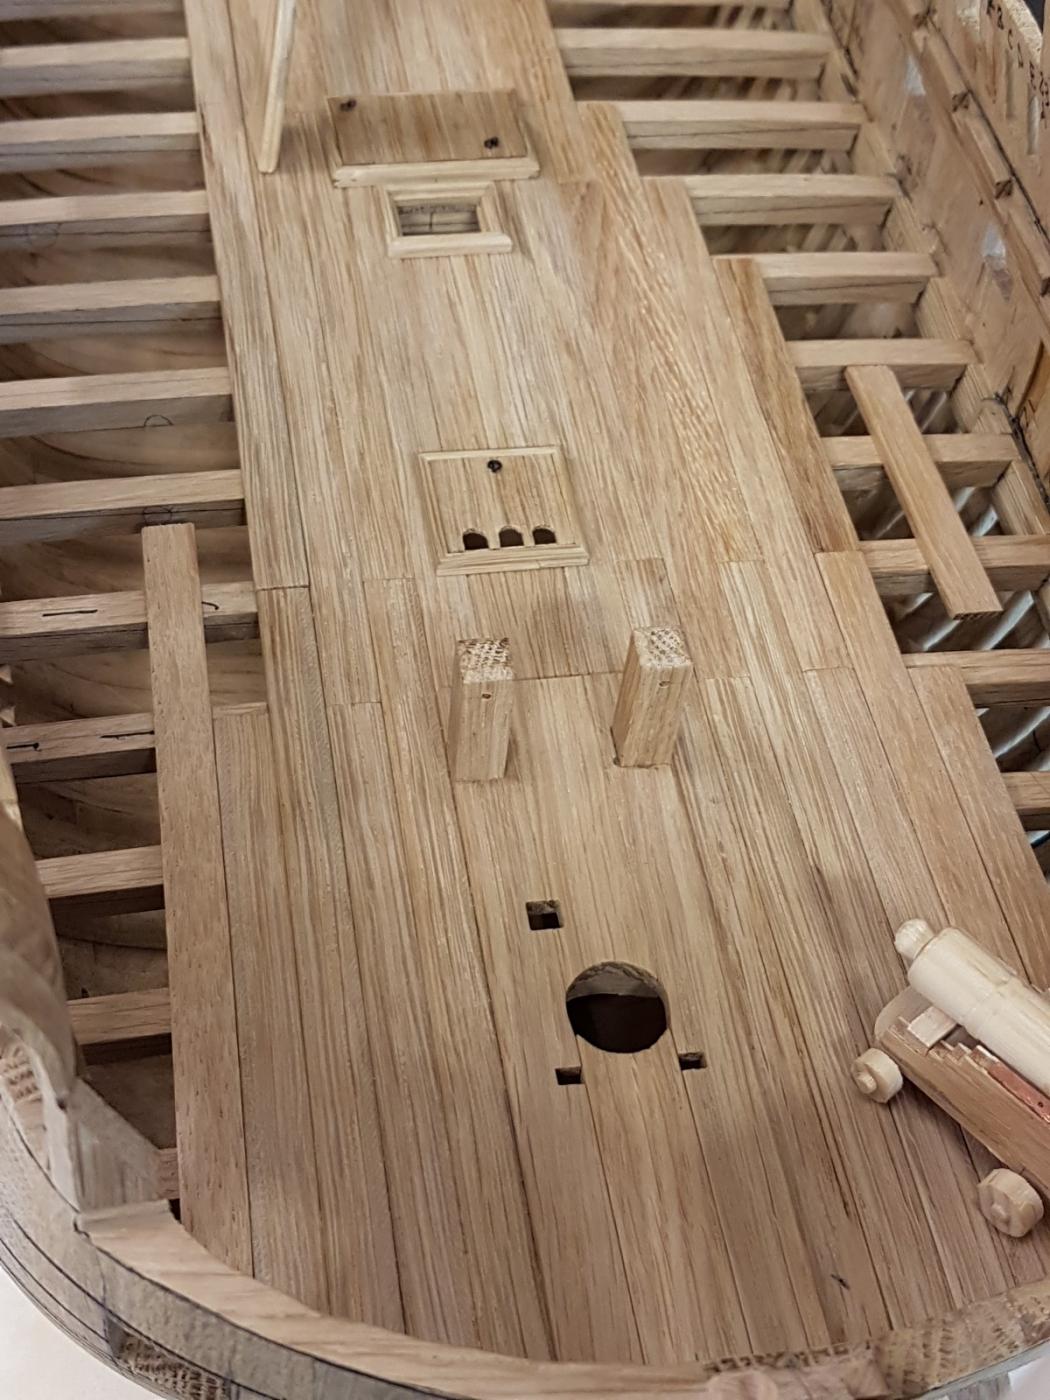
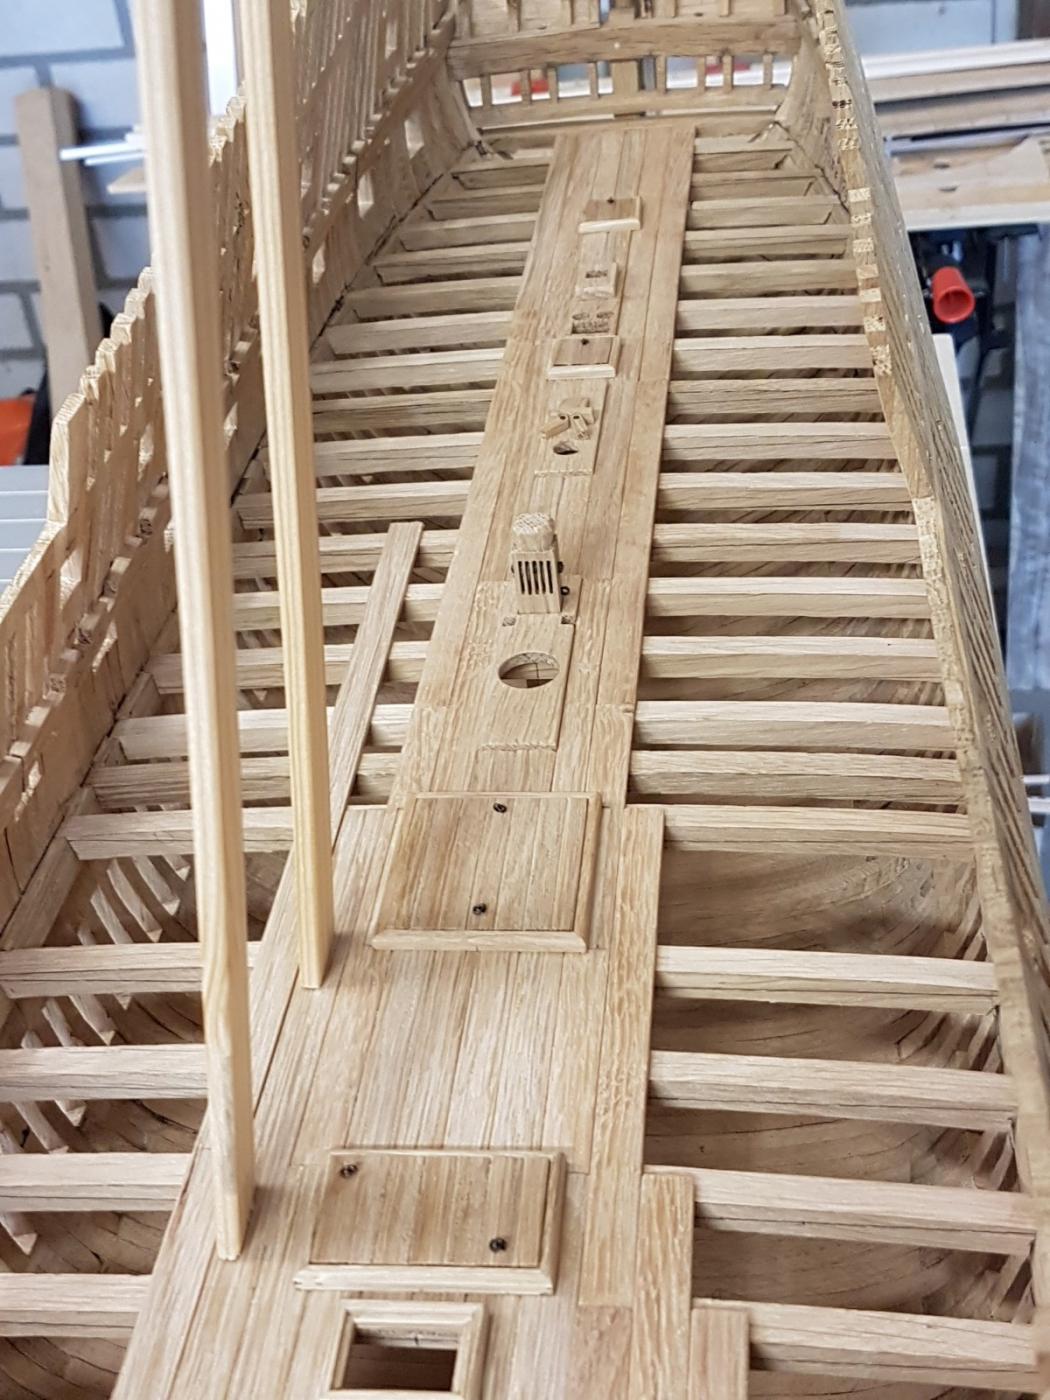
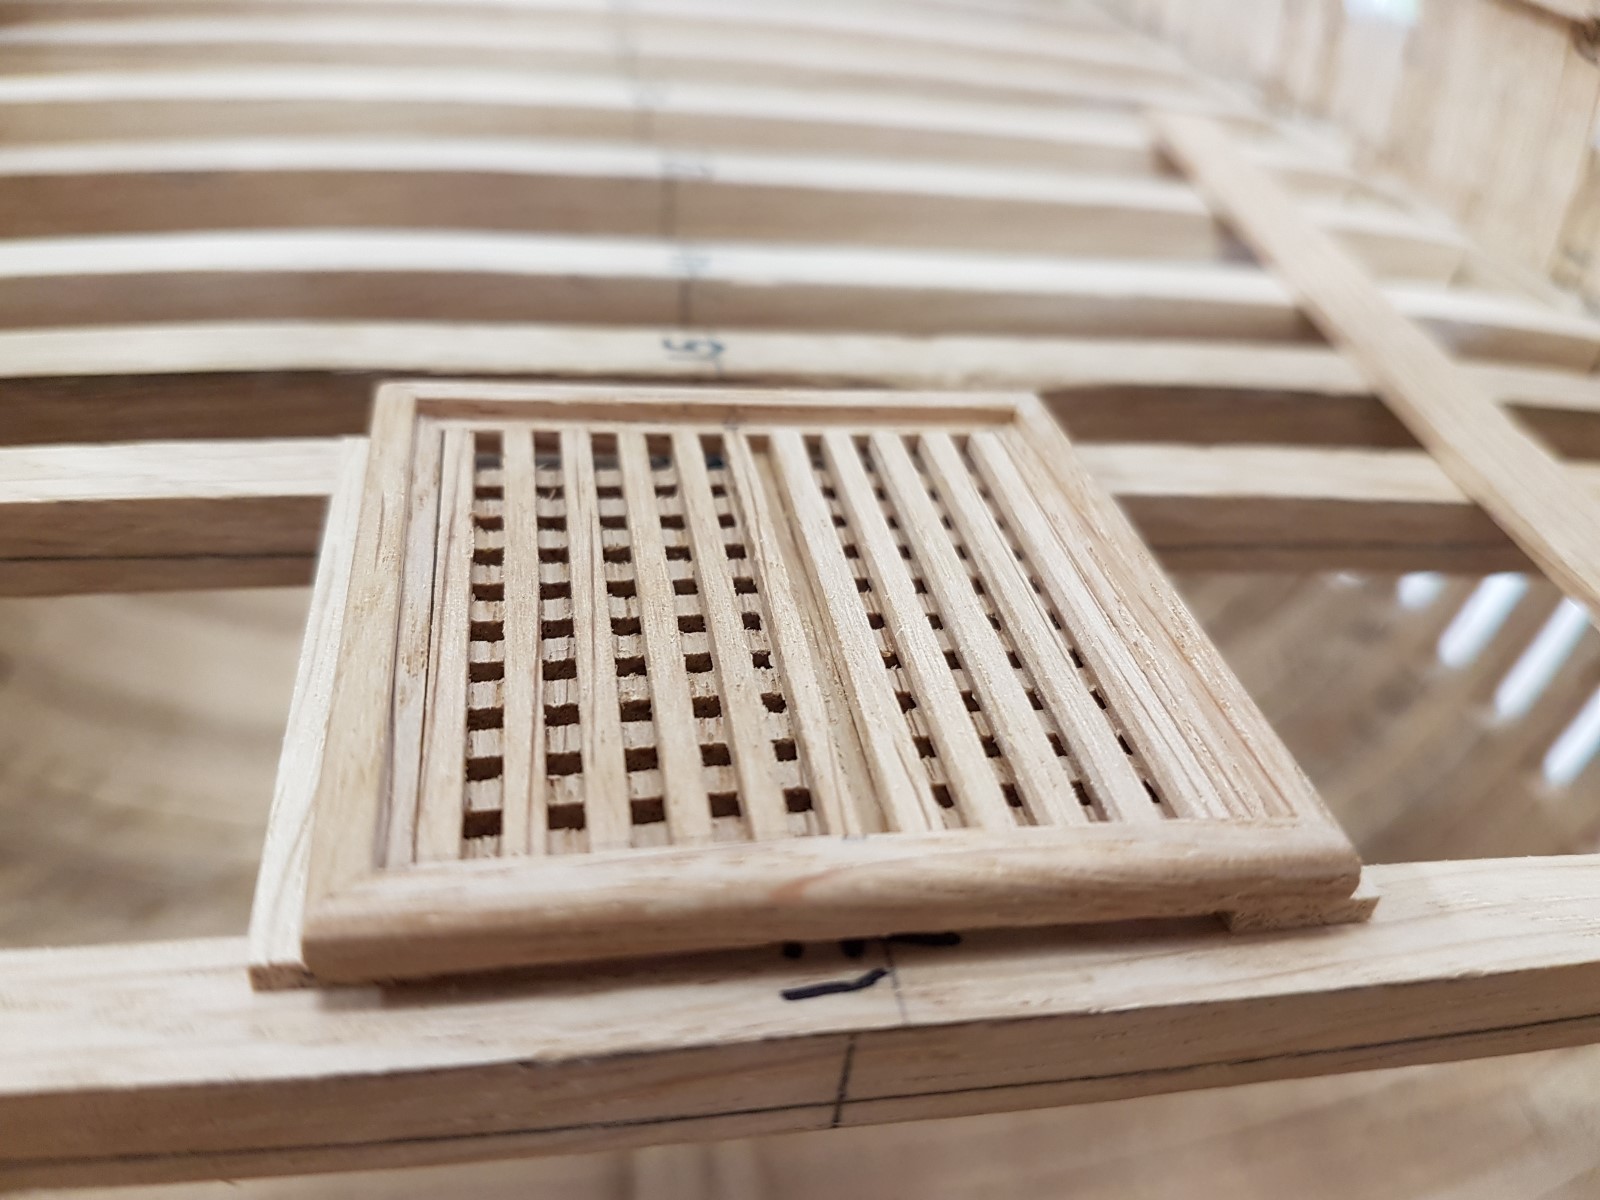
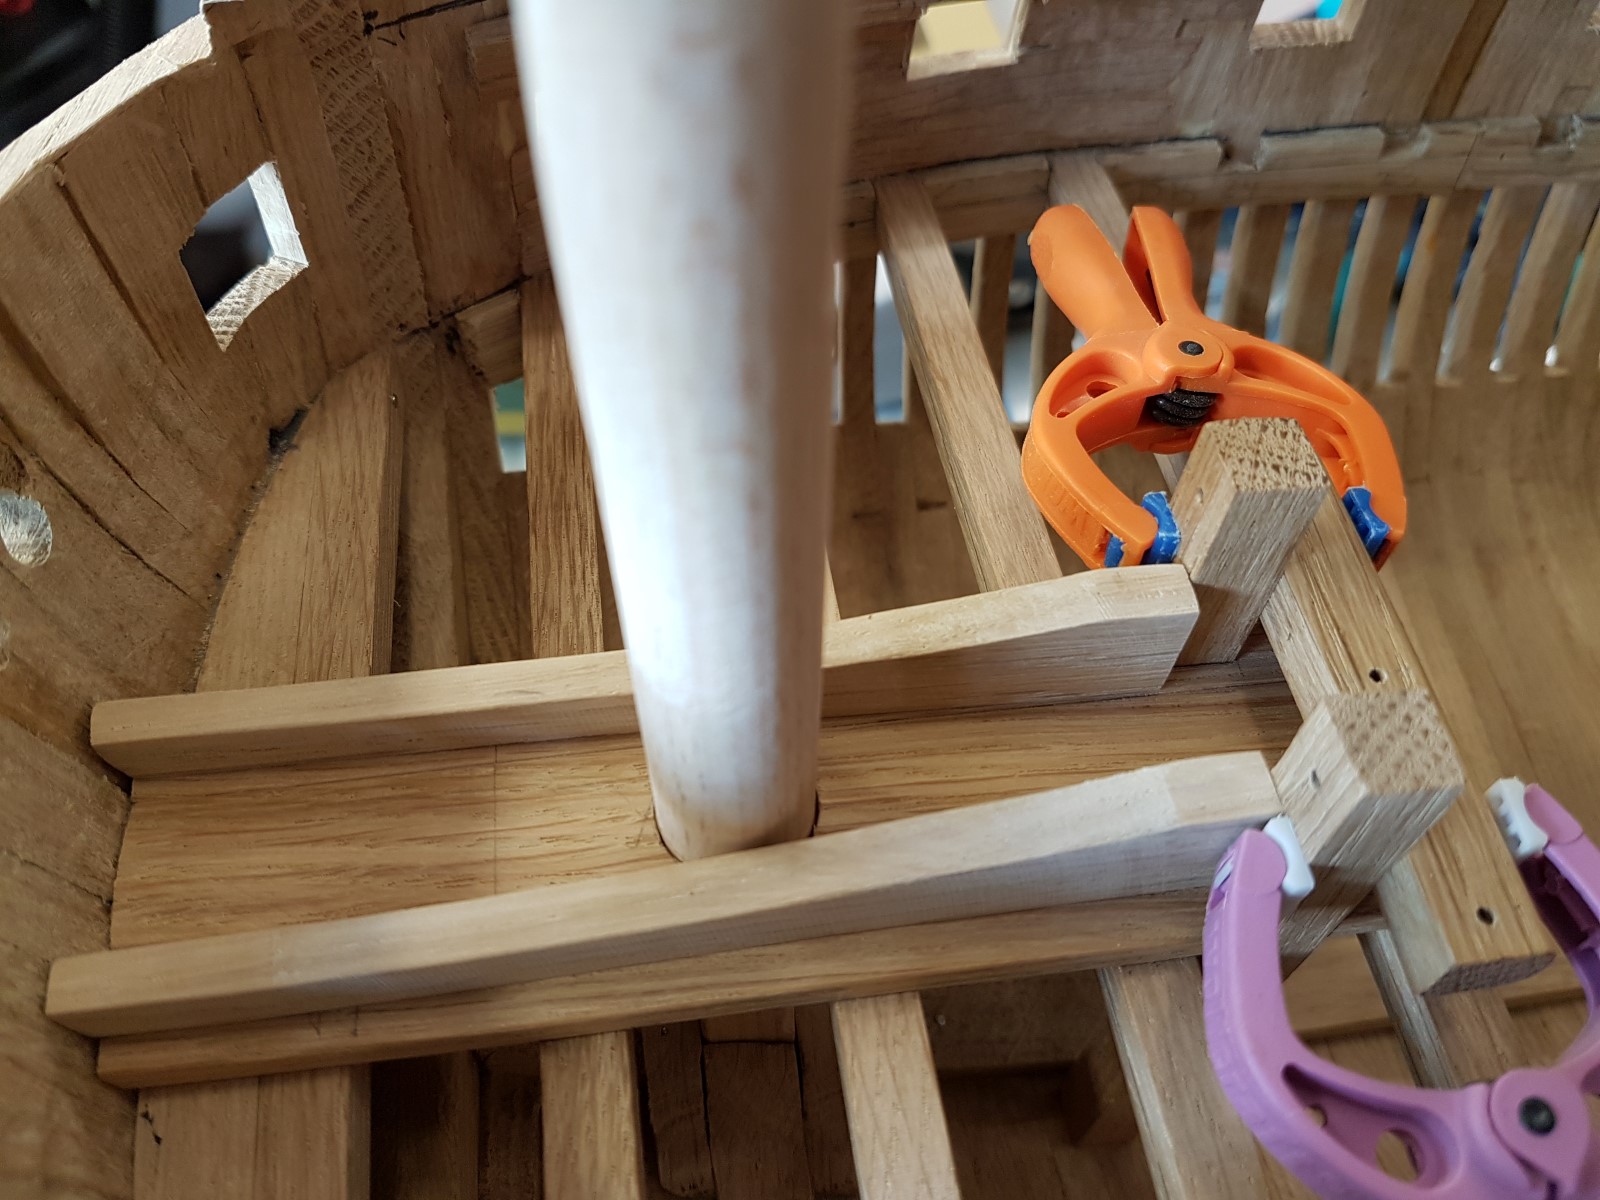
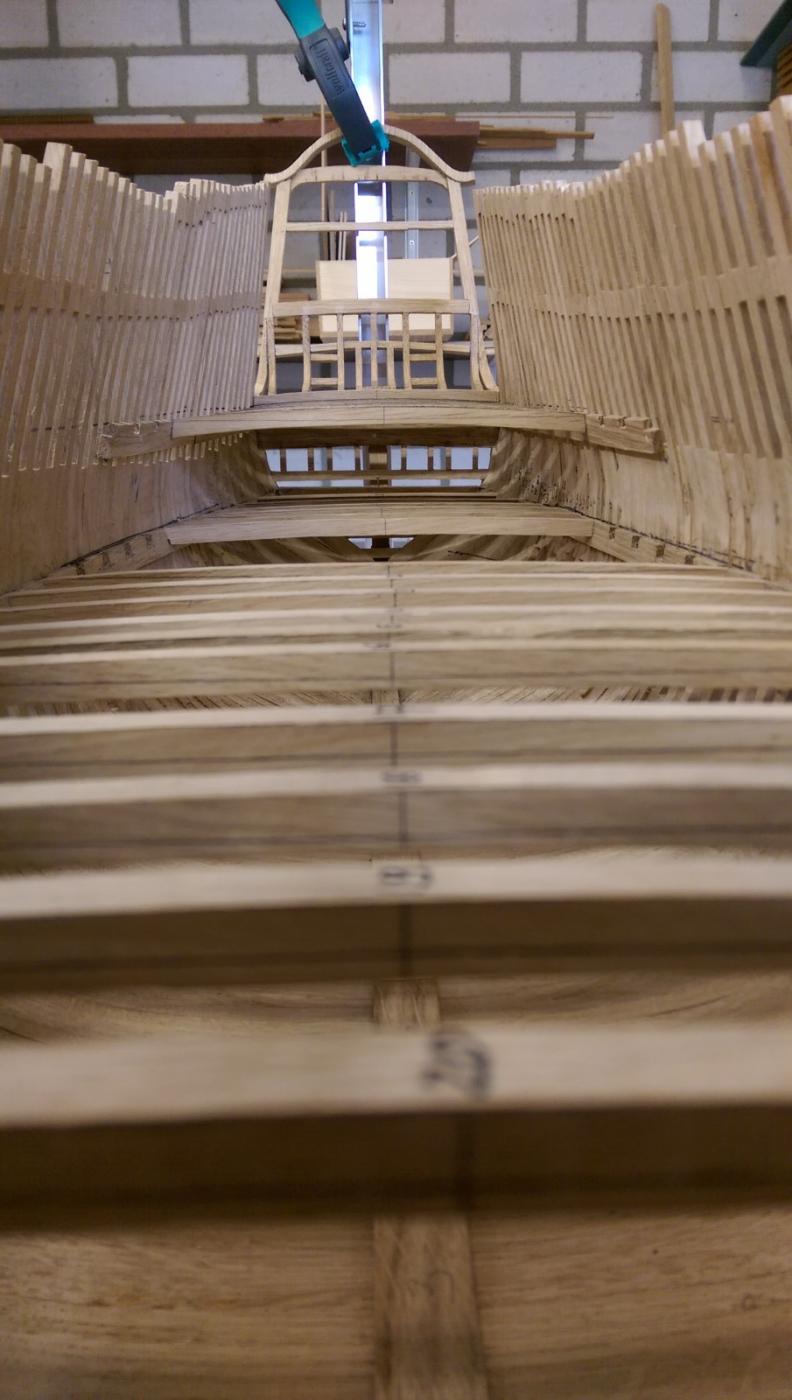
Well time for another update. I continued the work on the parts on the orlop deck. Some deckbeams have been fitted permanently and I will continue to do this as I finish hatches and gratings etc..
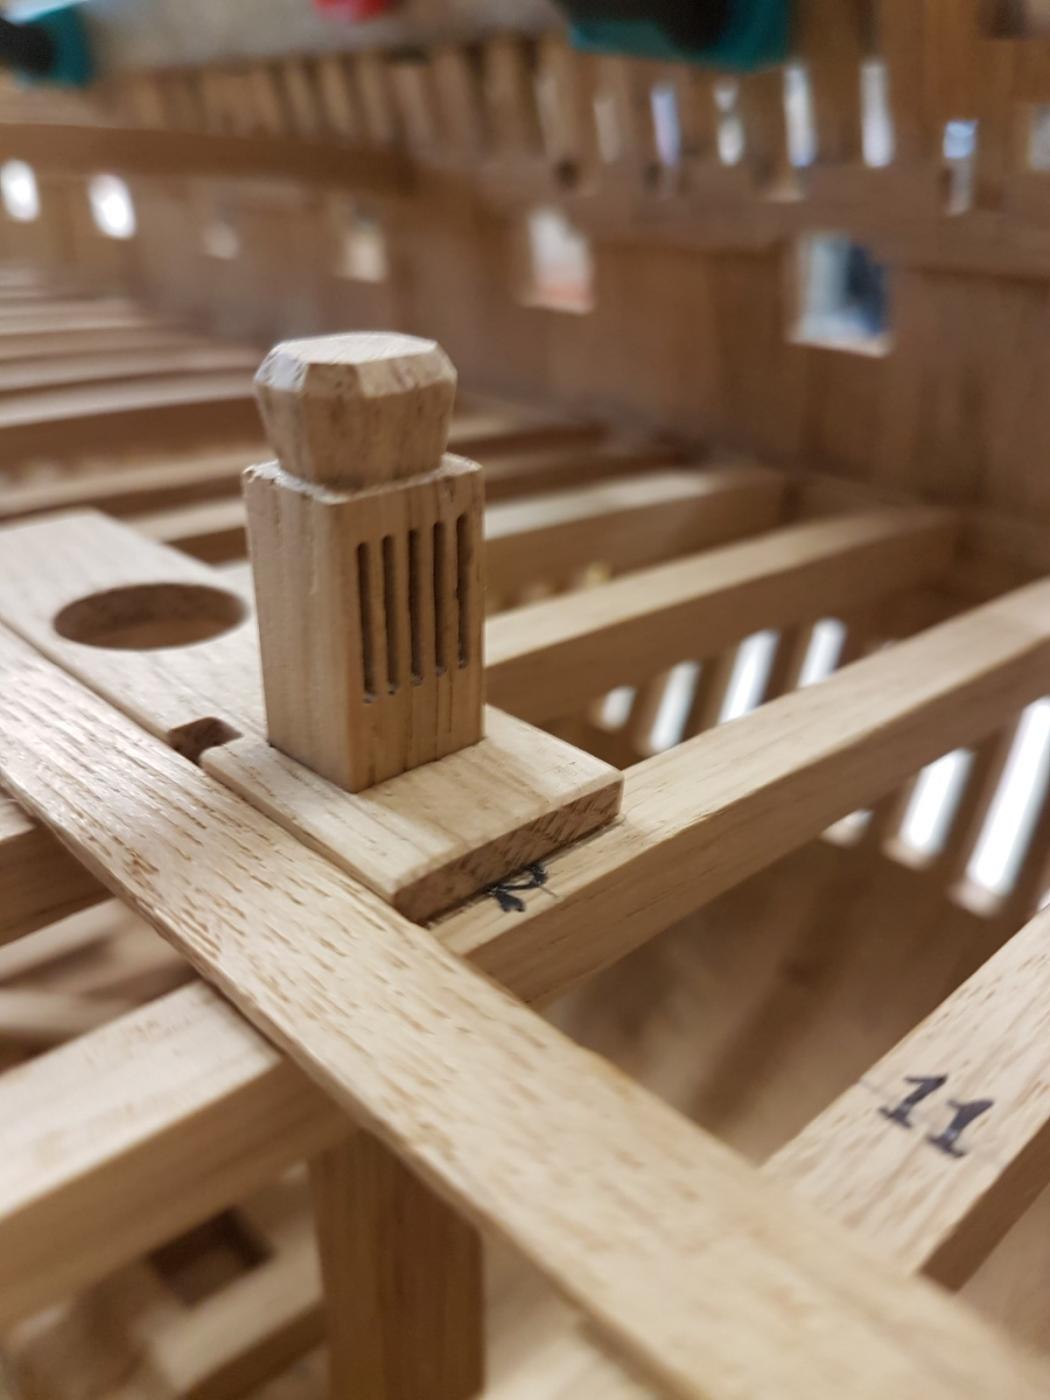
The positions of the 2 front masts have been fixed now and the "vissingen" have been glued in place.
From there on I will continue building all the parts on that deck and also start the deckplanking, using 2mm thick oak 9-10mm width.
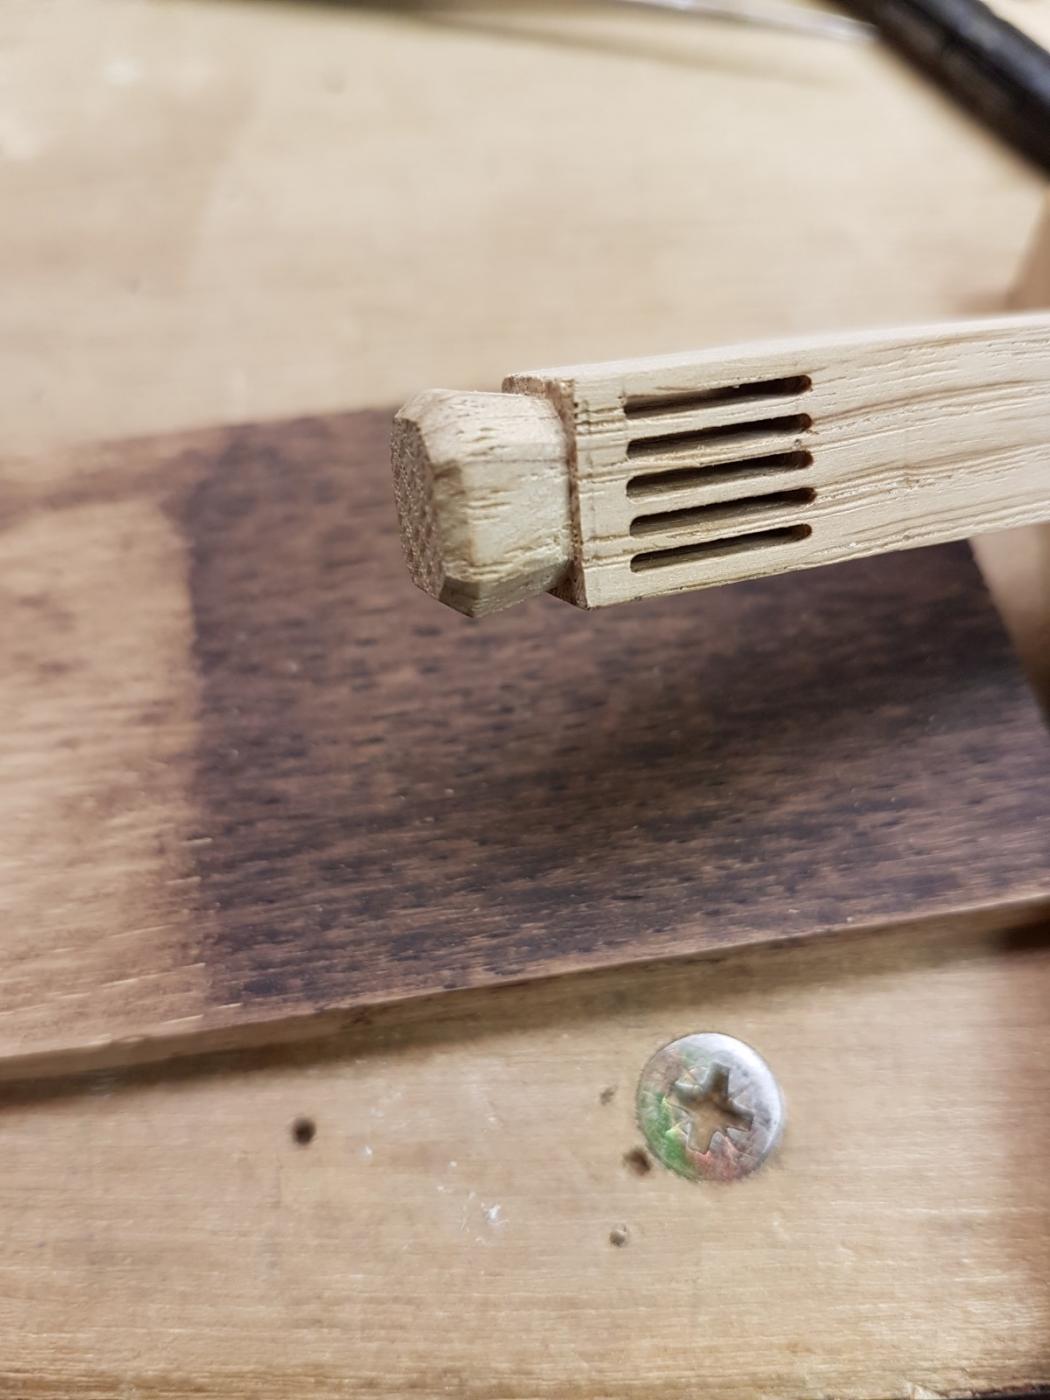
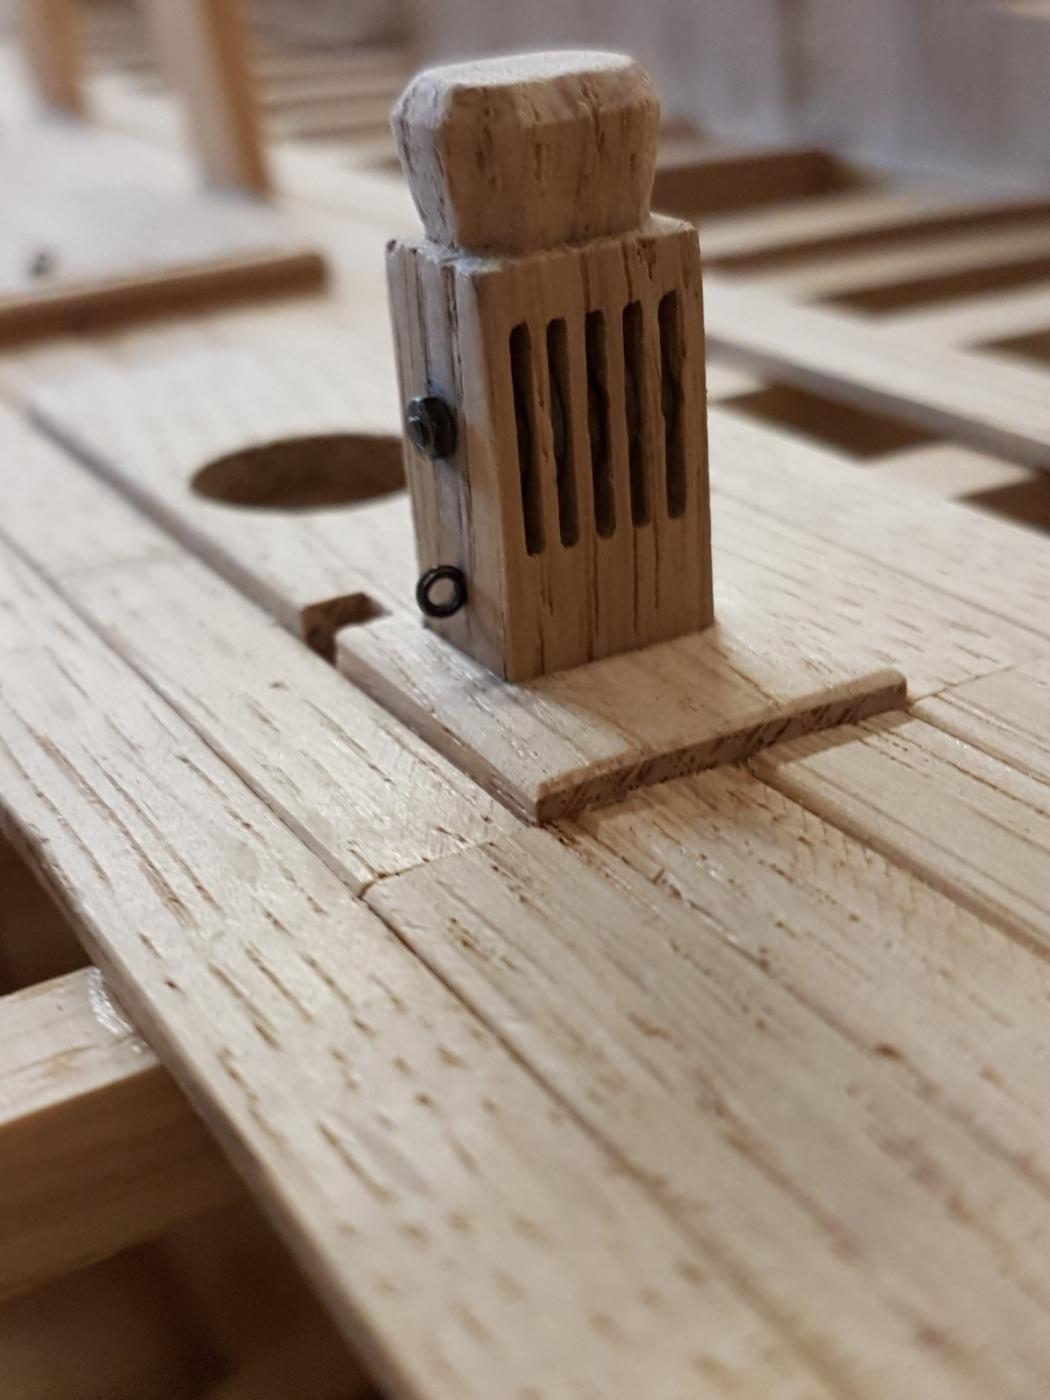
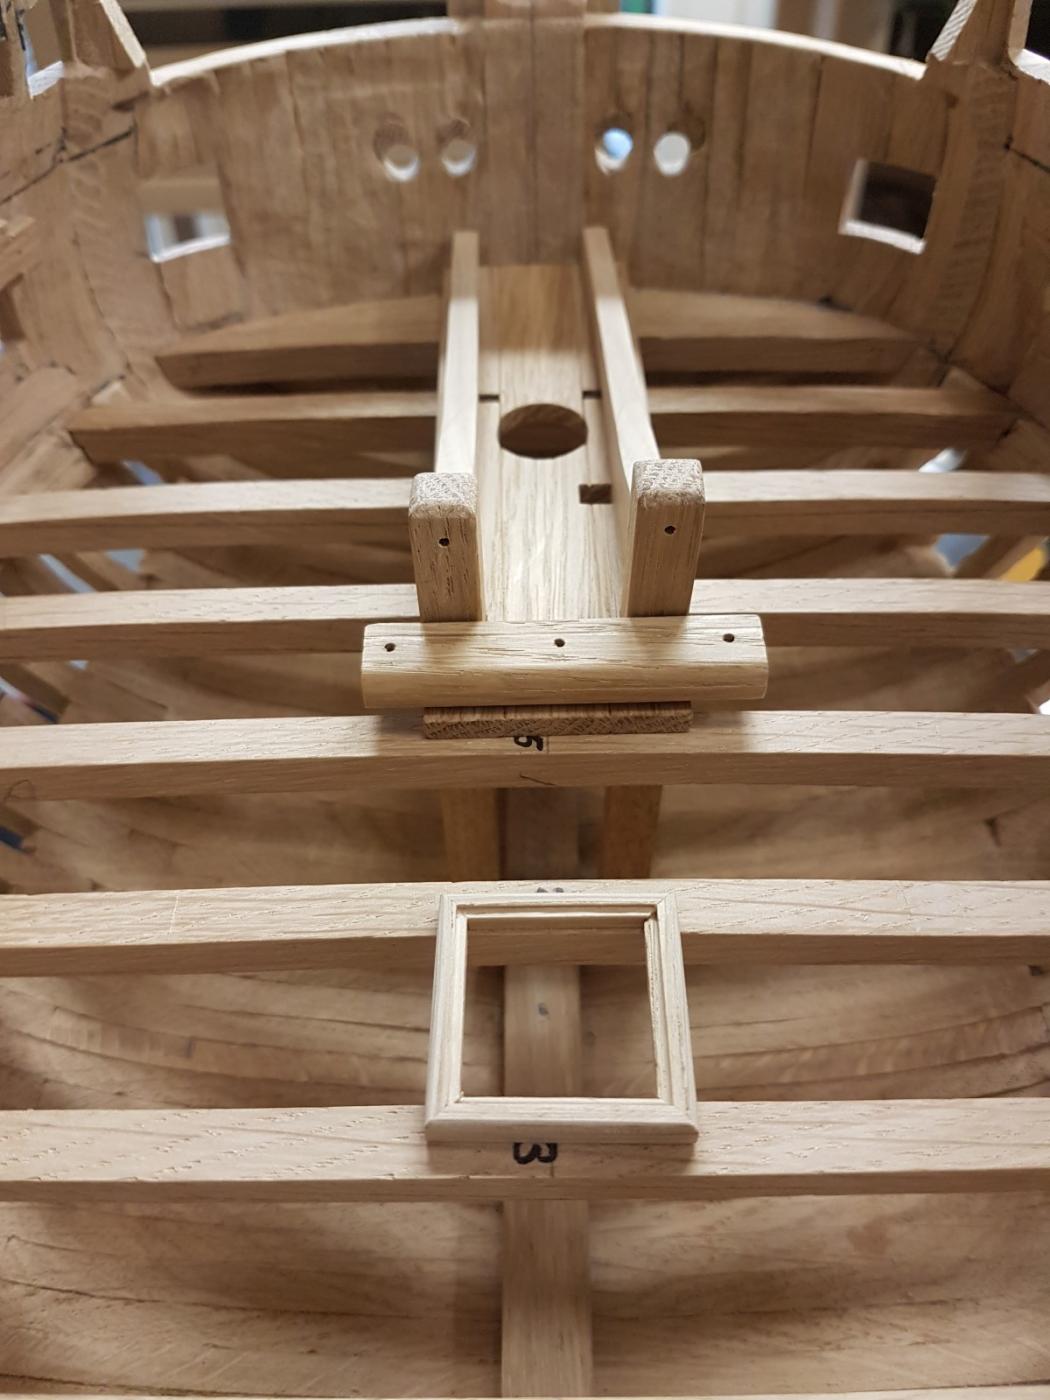
very satisfied with the main knight!

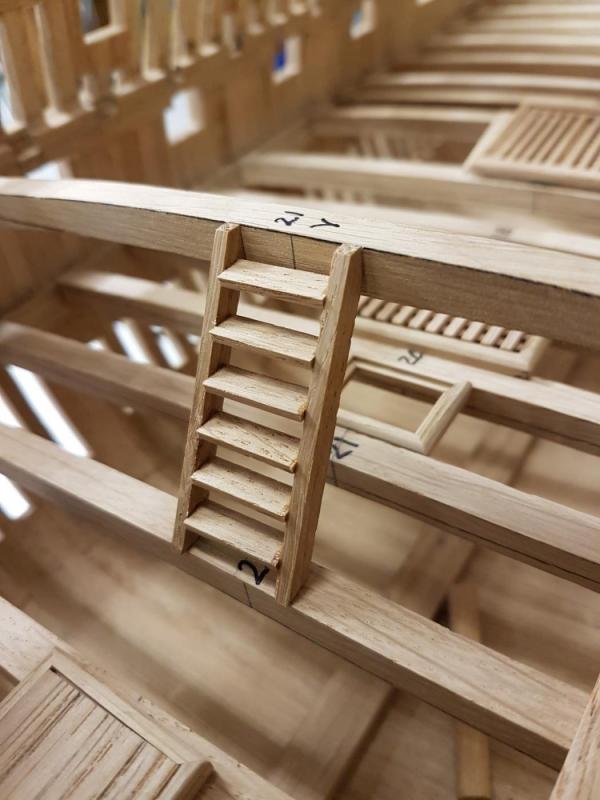
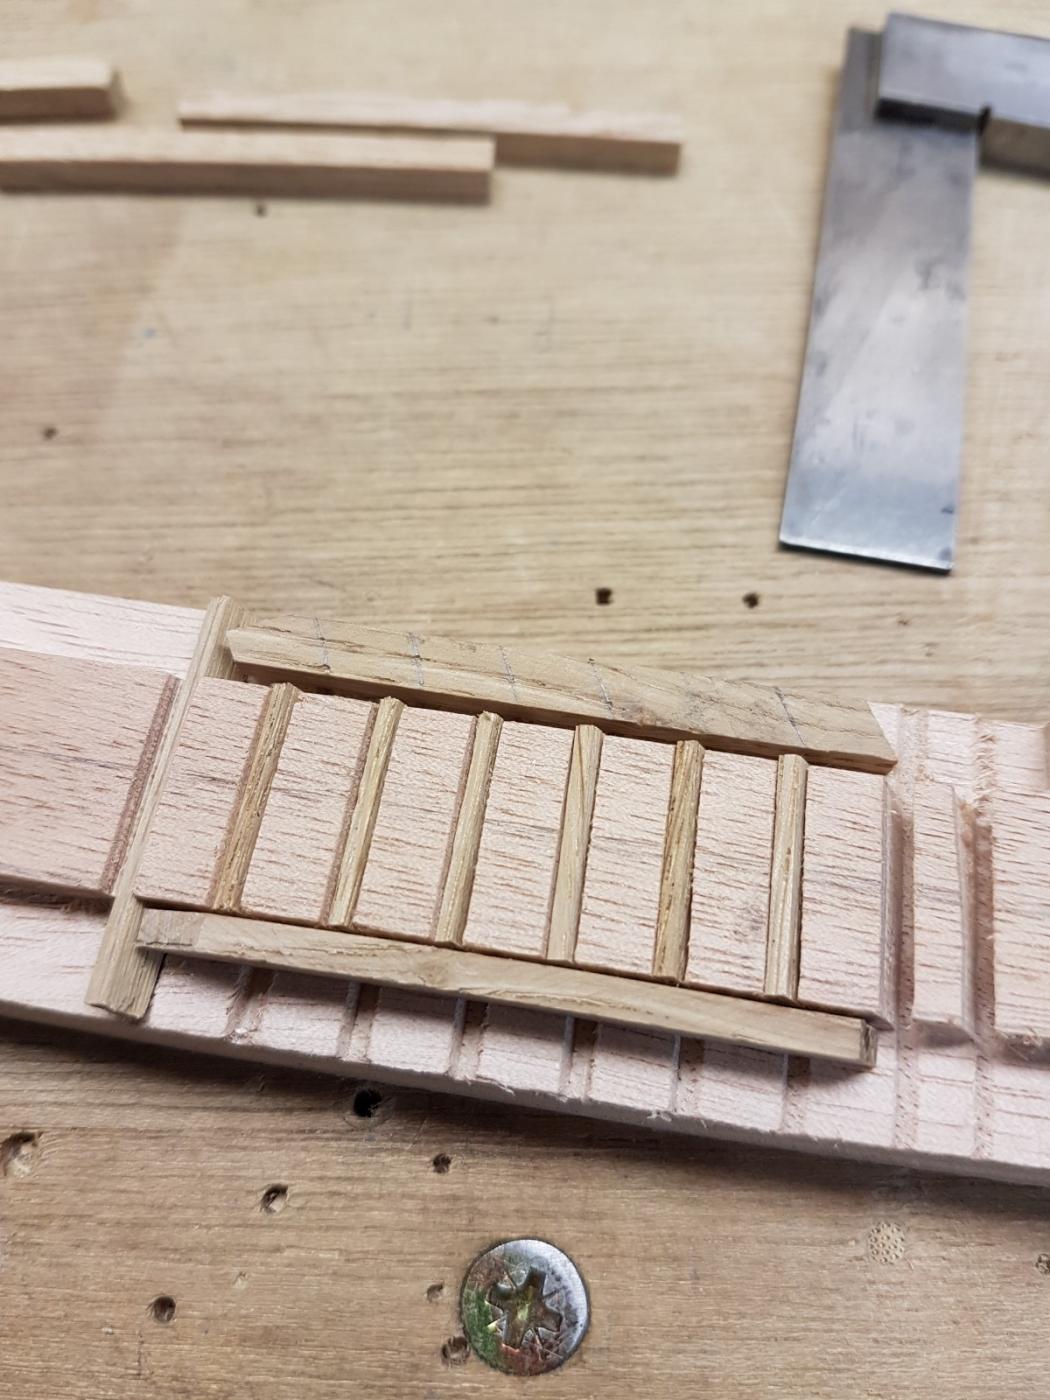
I was not satisfied with the first try of a stair. The steps protruded at the front.
And the sidebeams were too thick. I adapted the mould and thickness and now I think they look good.


- WackoWolf, G.L., Mirabell61 and 23 others
-
26
-
I thought it was time for another update. I intend to keep this log updated by several weeks up to once a month. My dutch log will be updated more frequently though, about daily as I make progress.
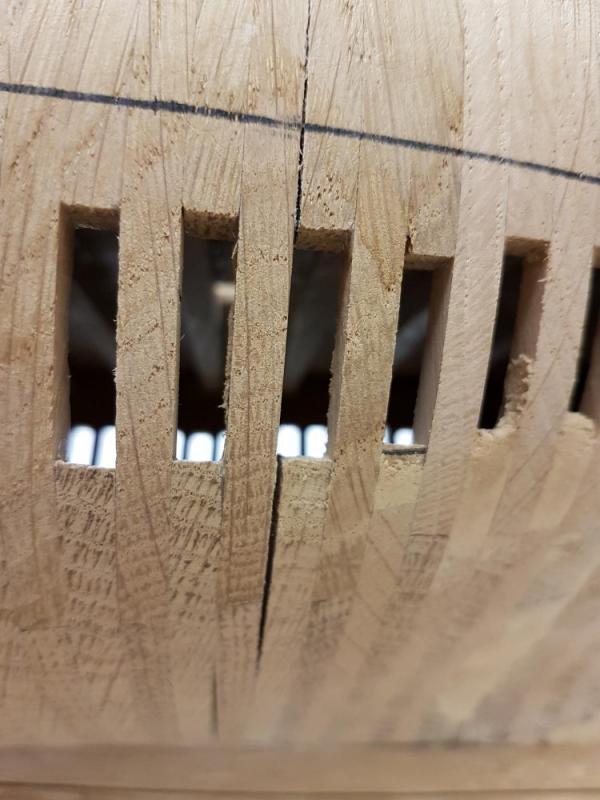
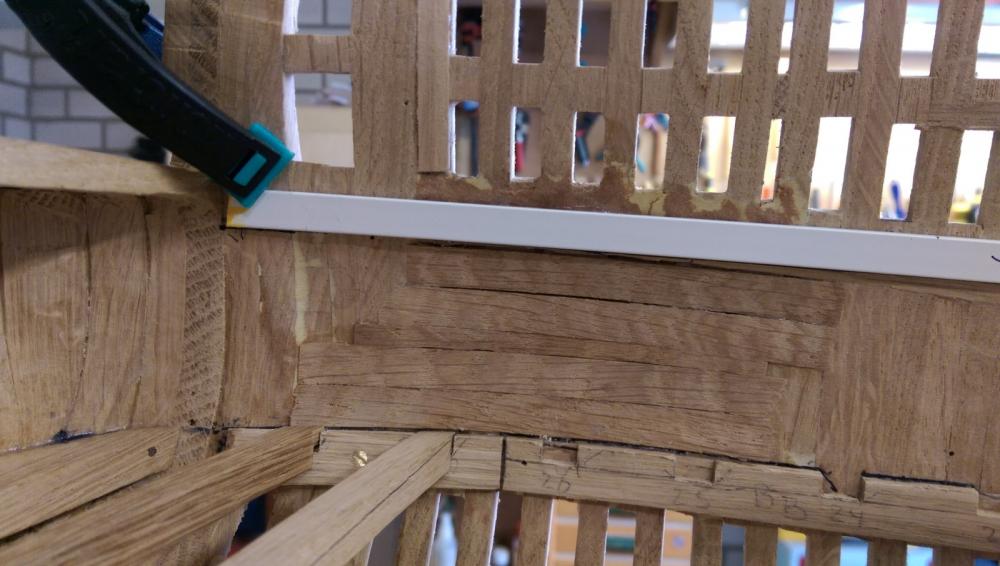
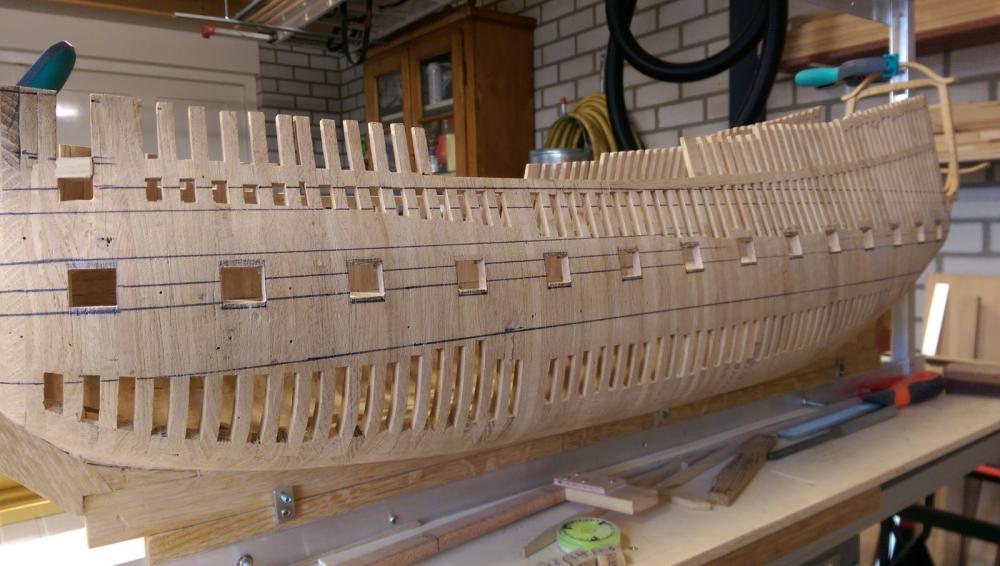
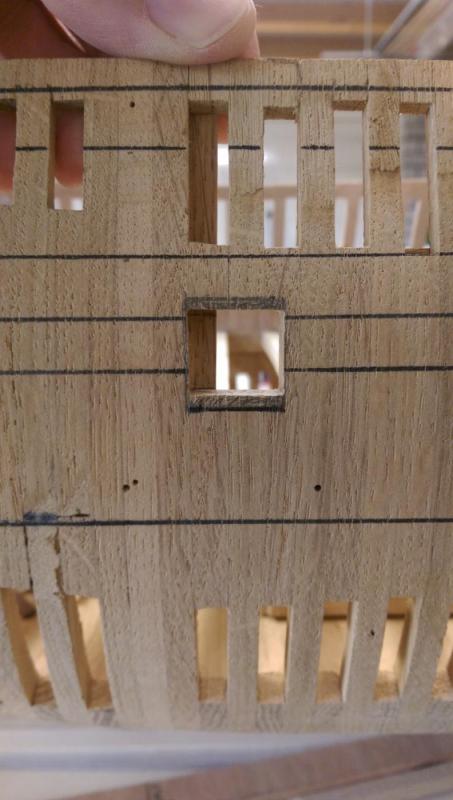
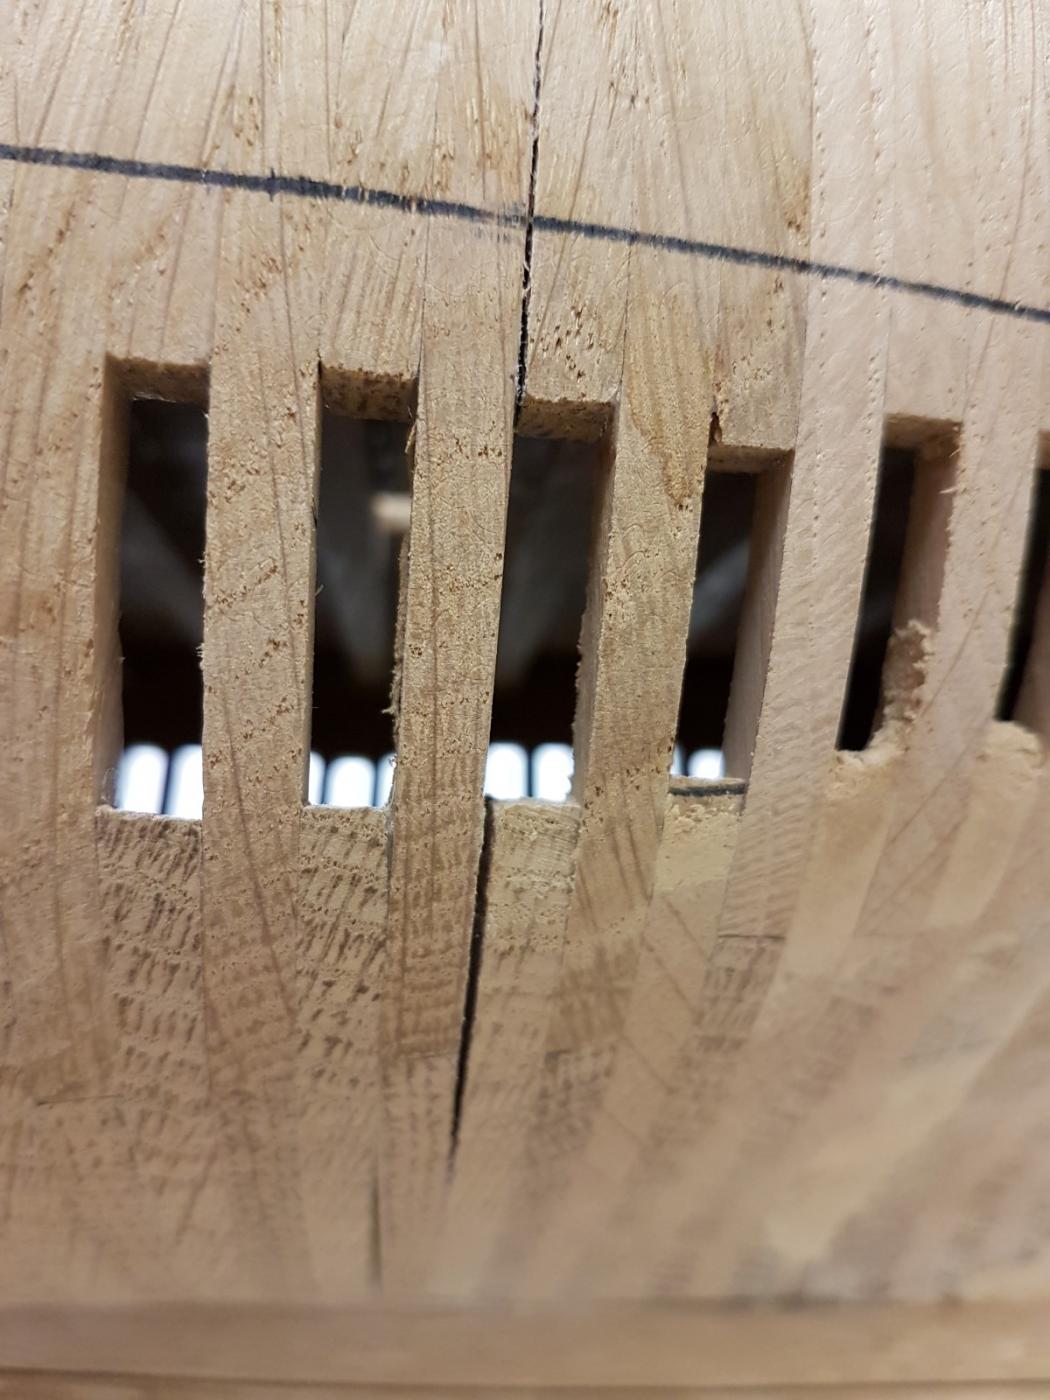
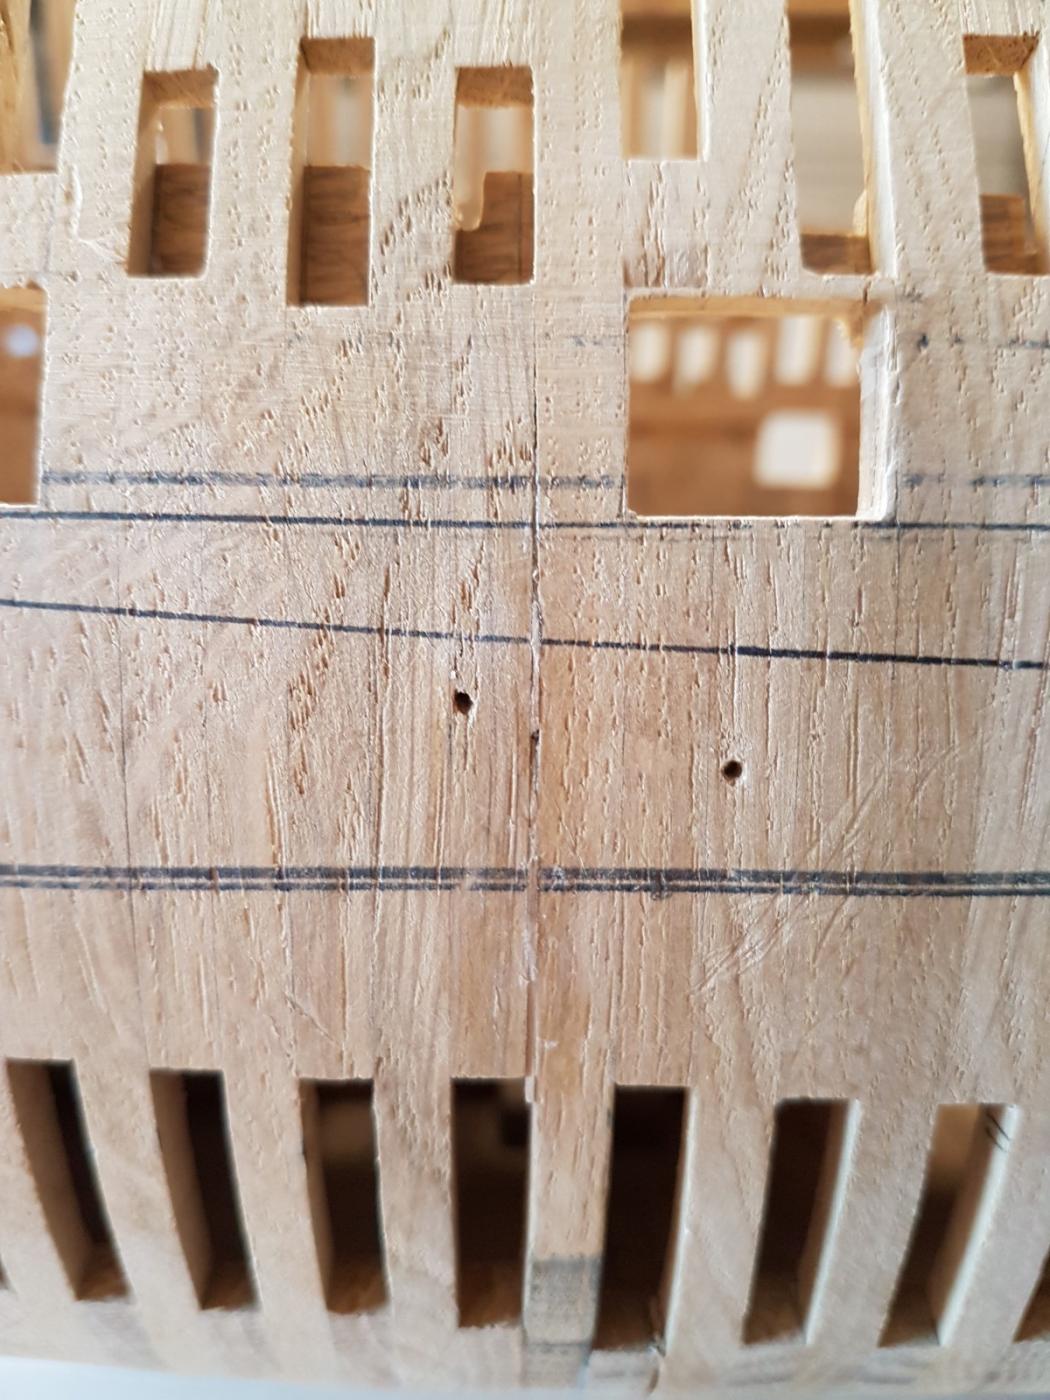
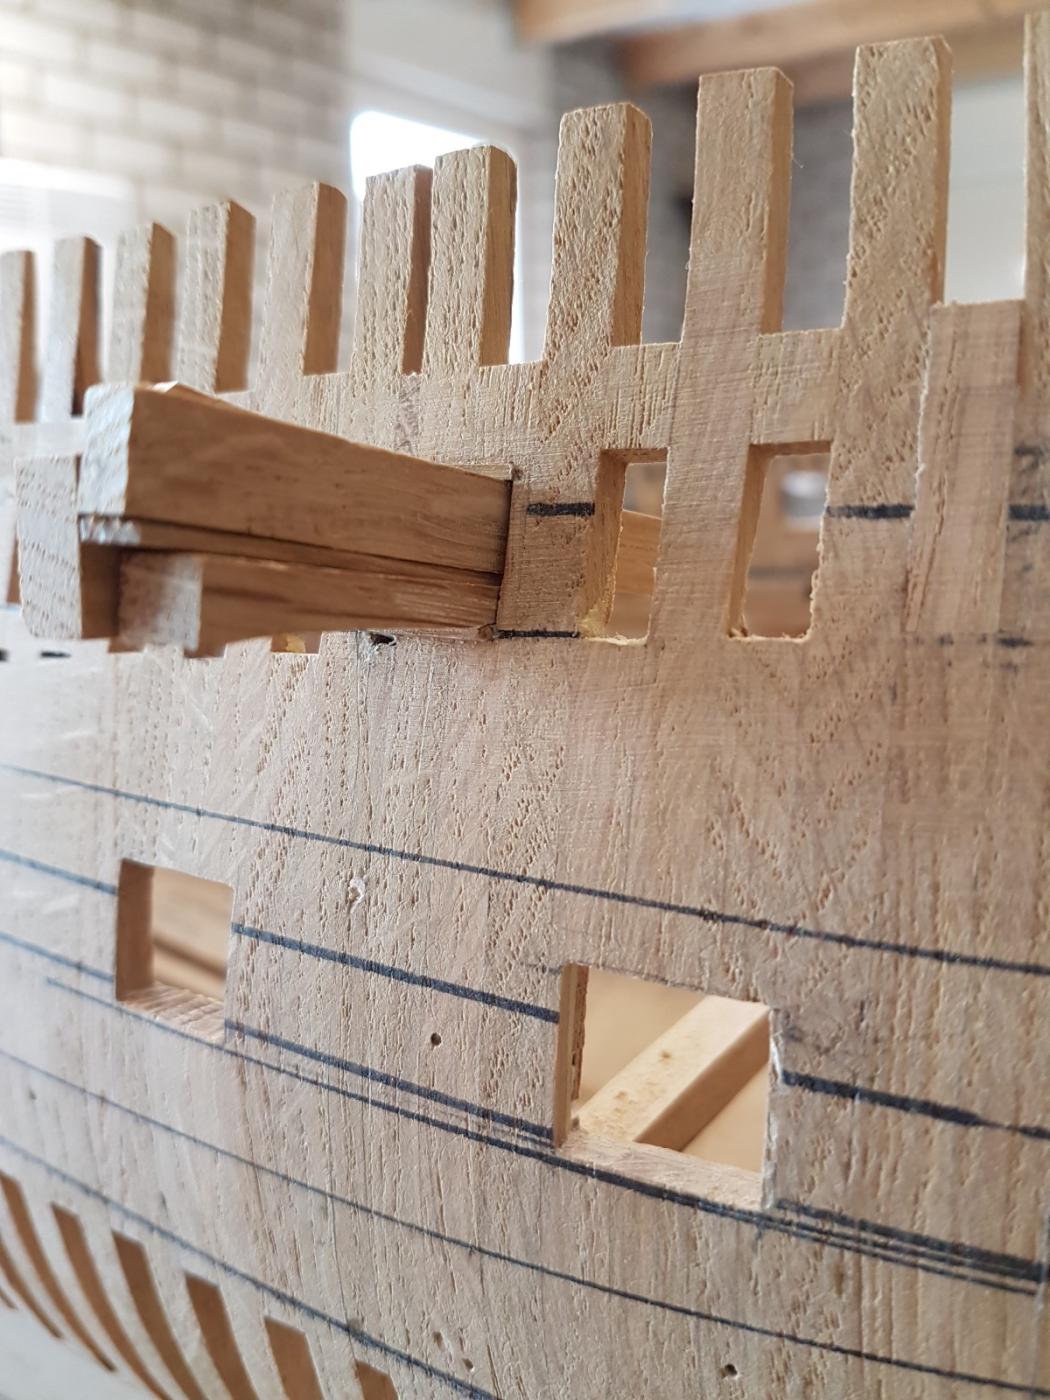
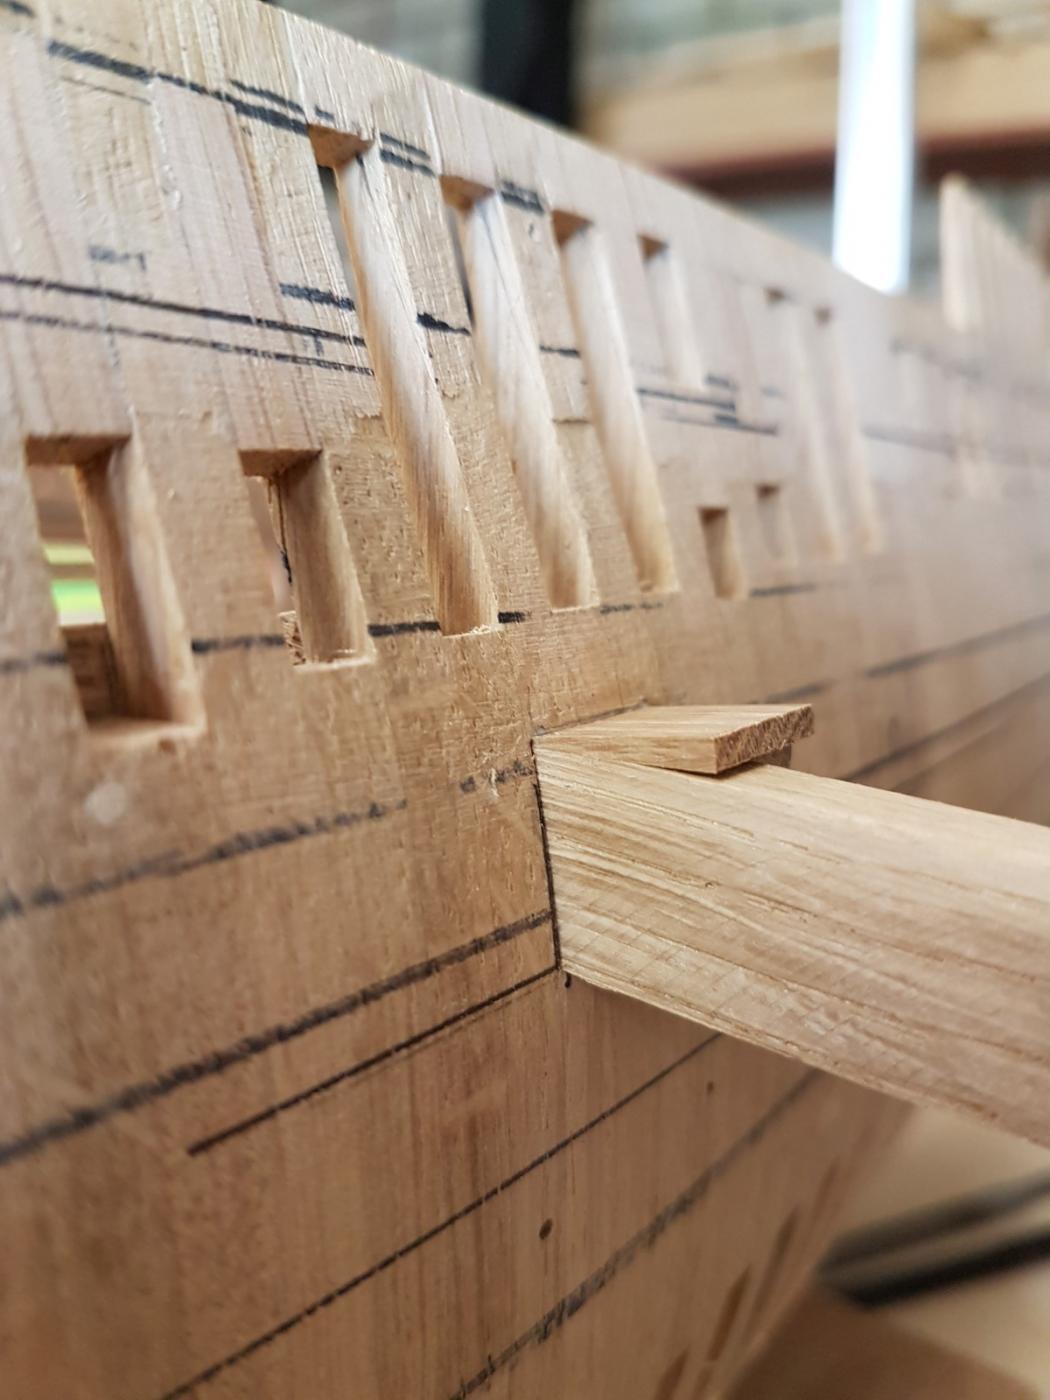
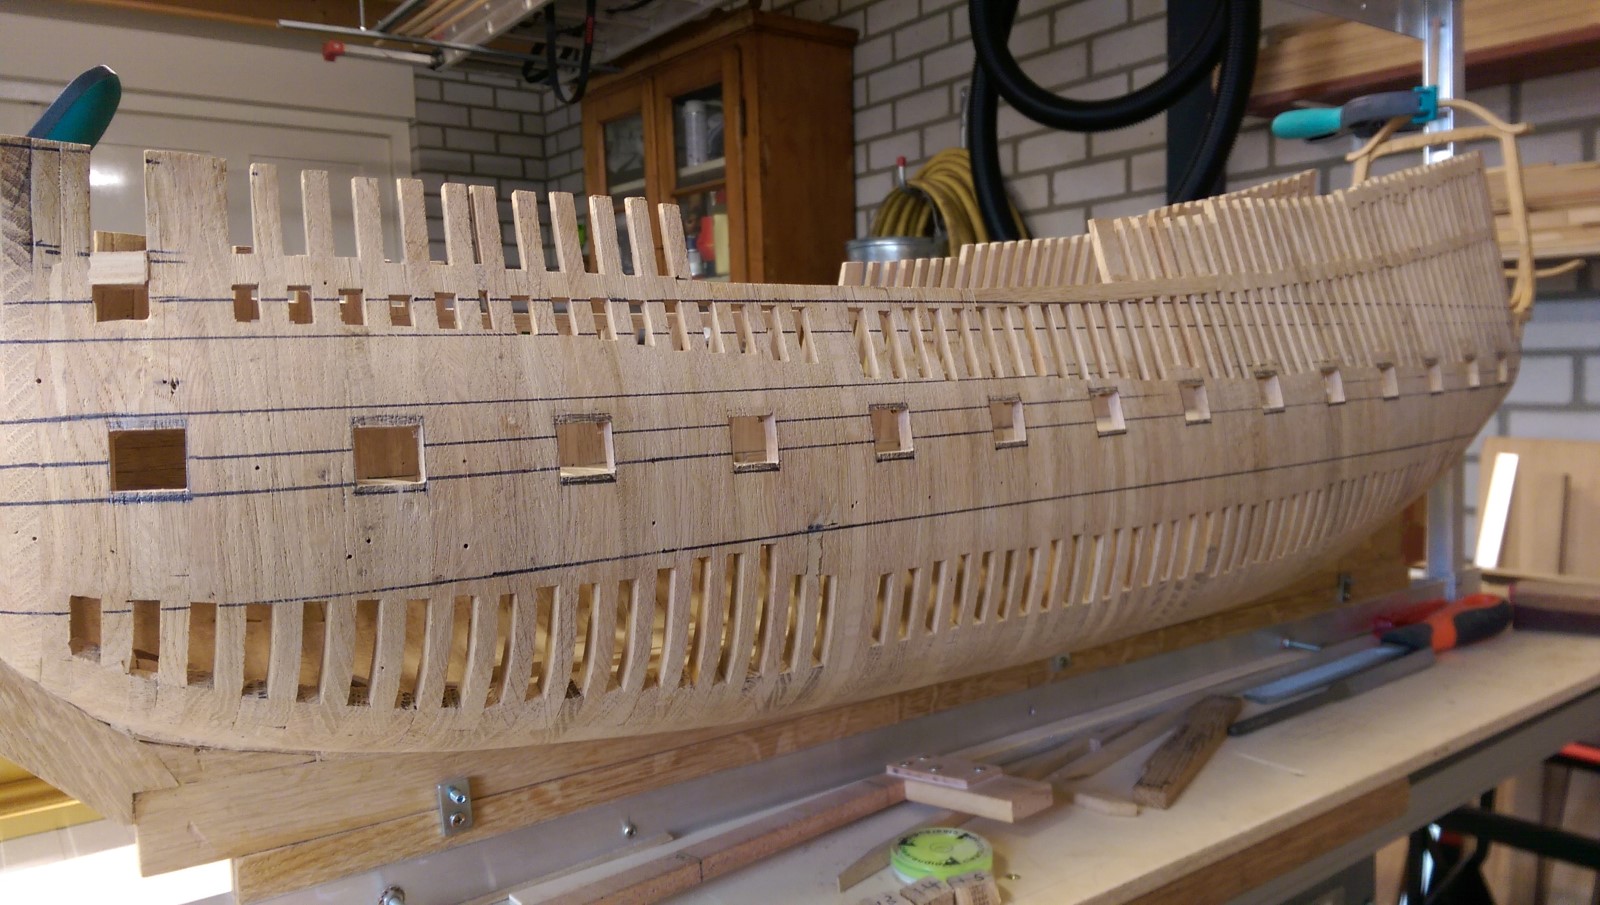
So, for the past weeks I have finished all the gunports of the lower deck and the upper deck. There were quite soem ports that needed rework after the intial cut out or where I sanded to hard in my enthousiasm
 .
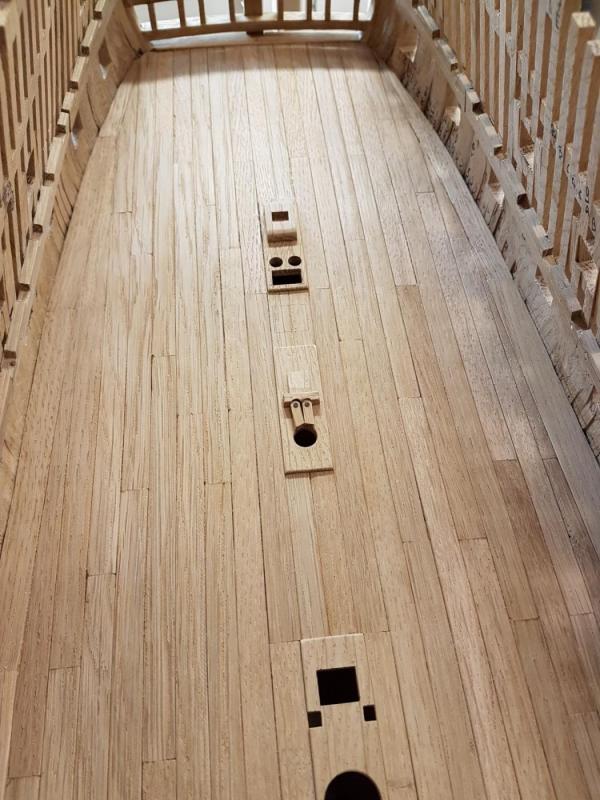
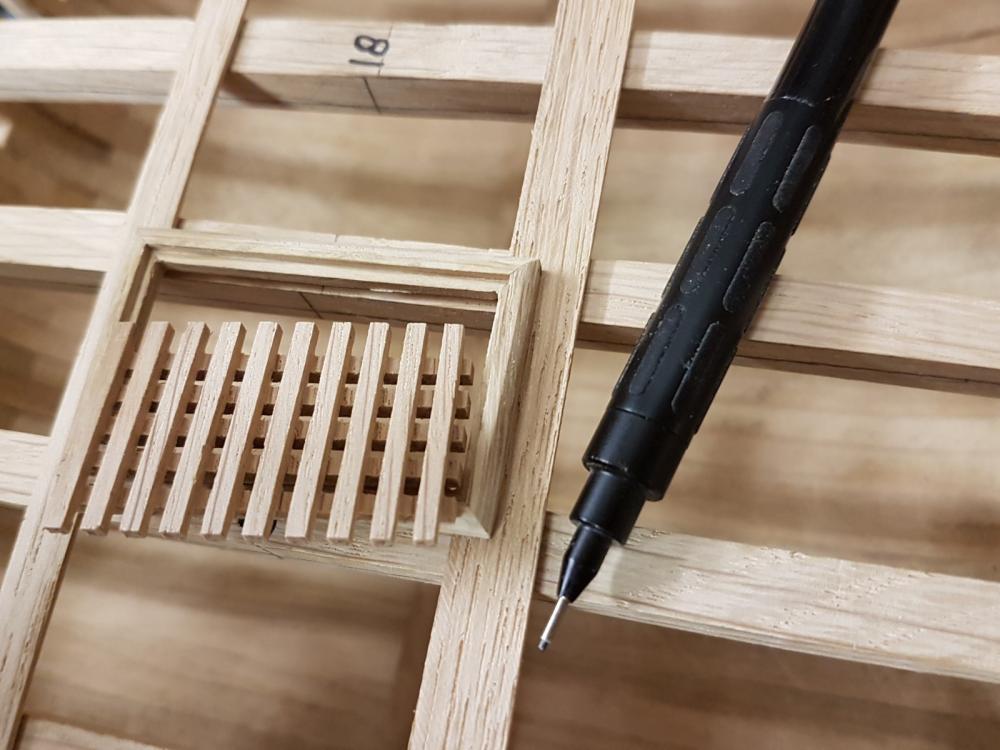
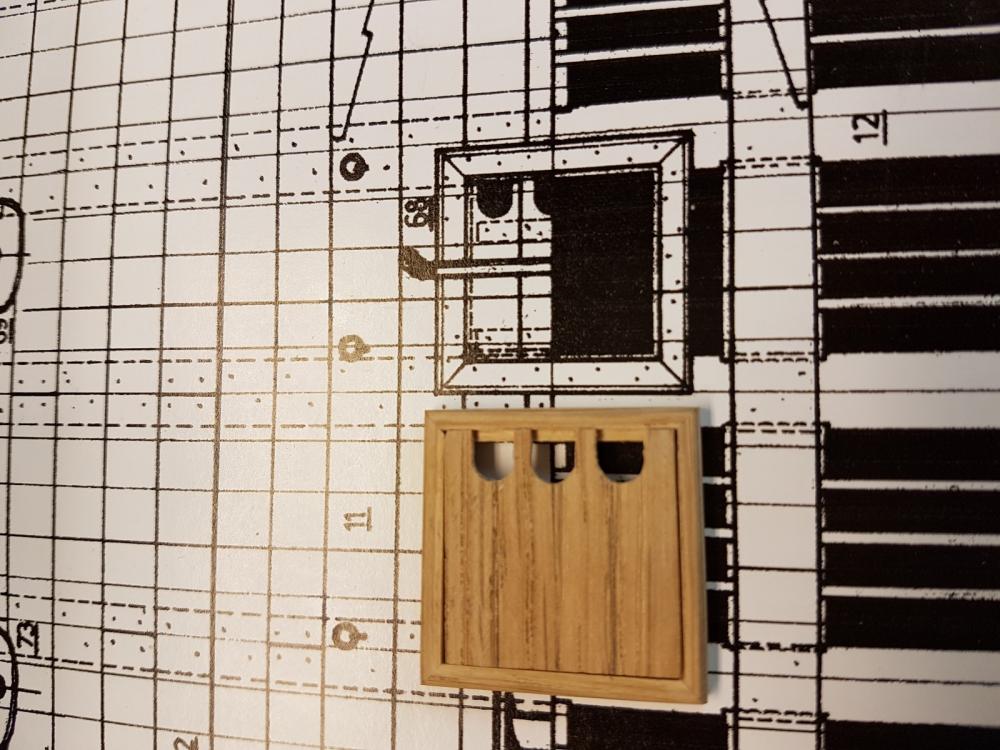
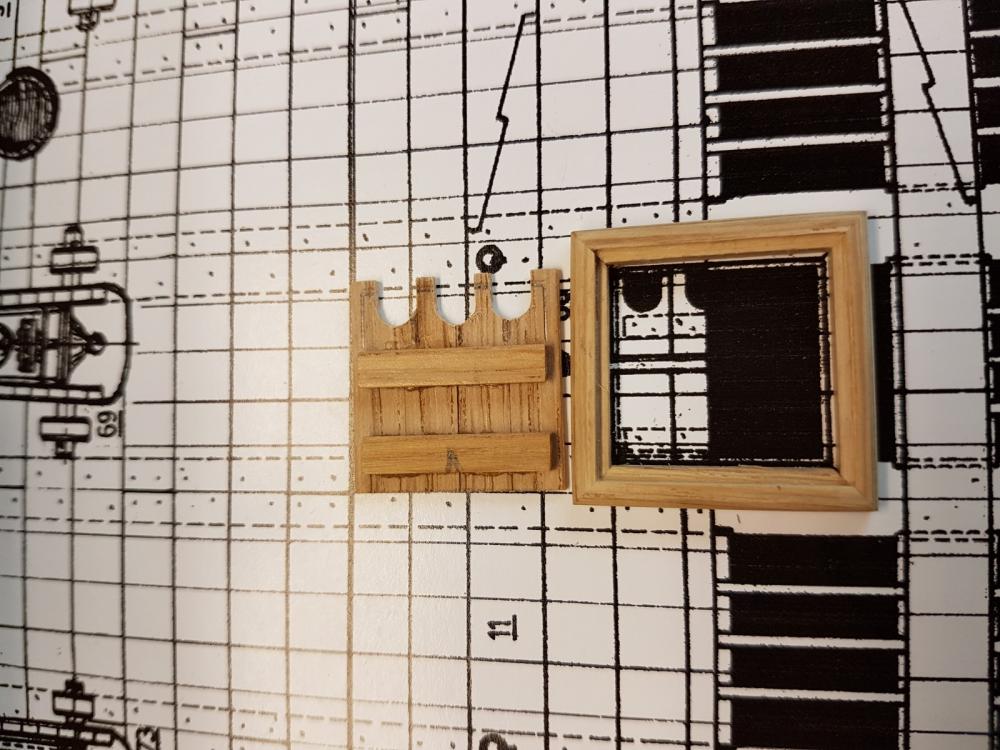
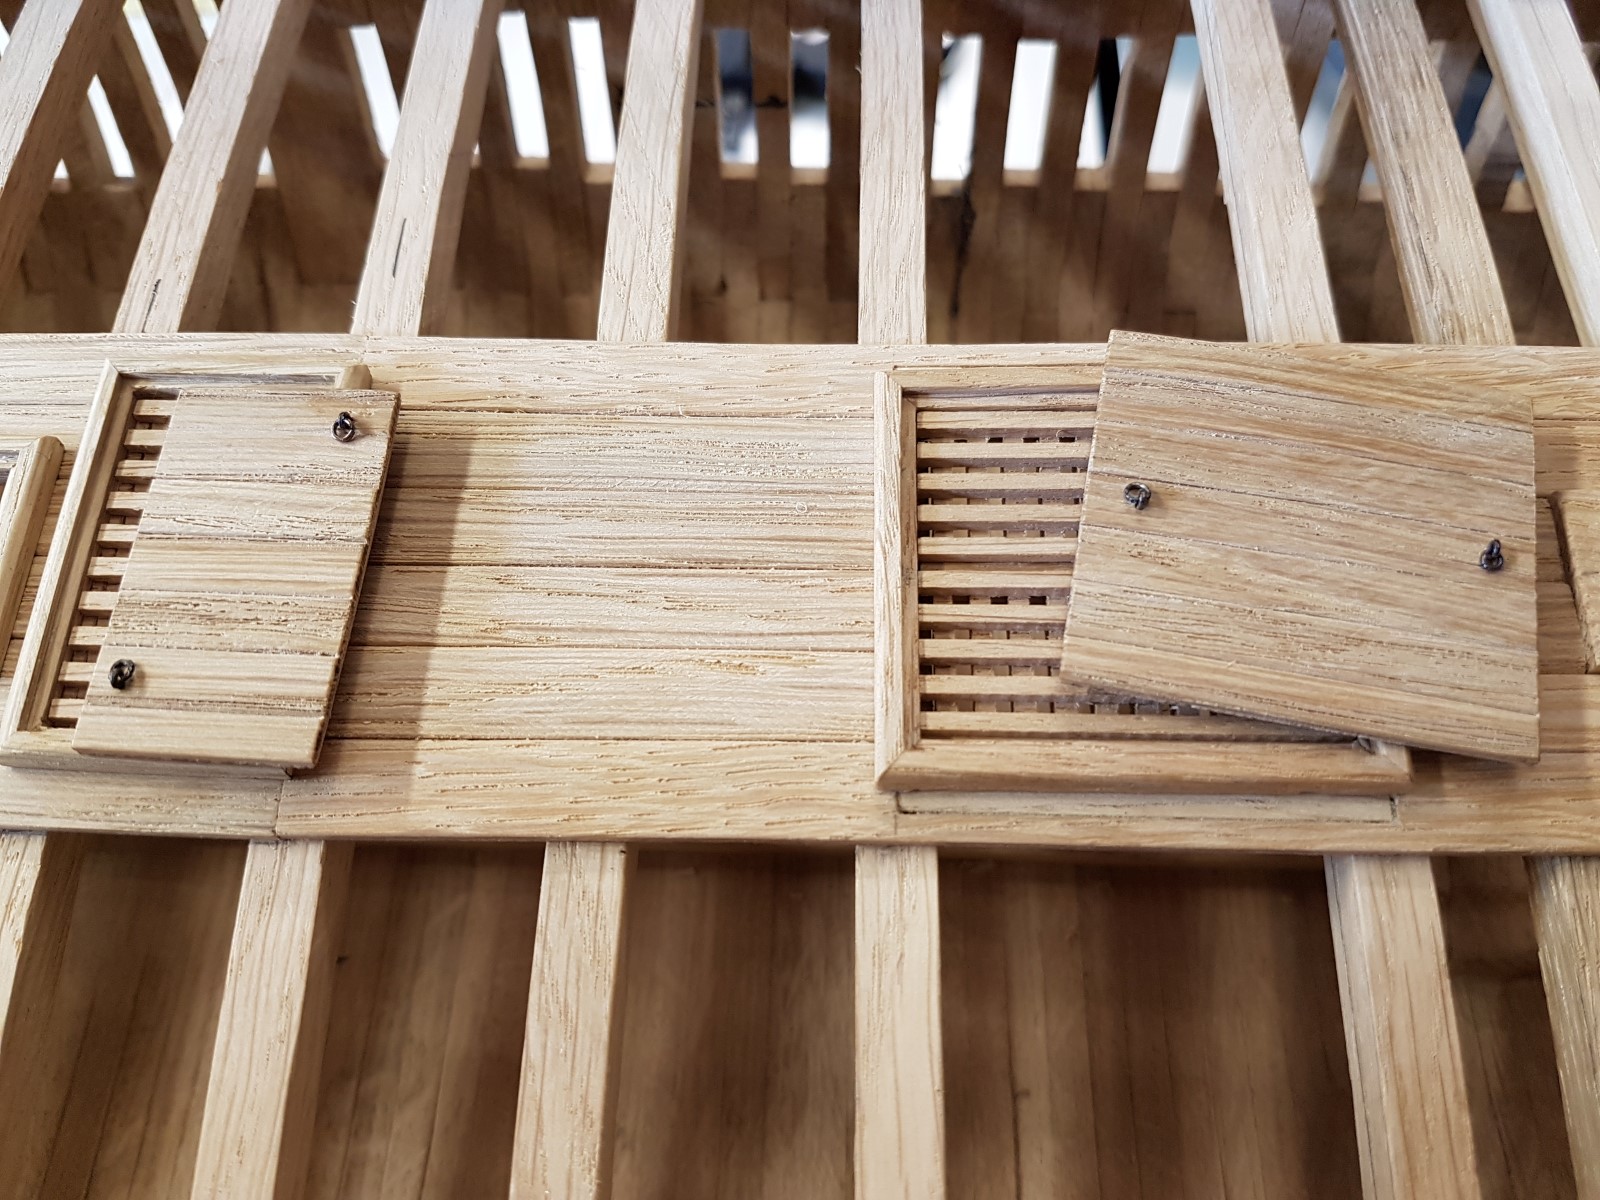
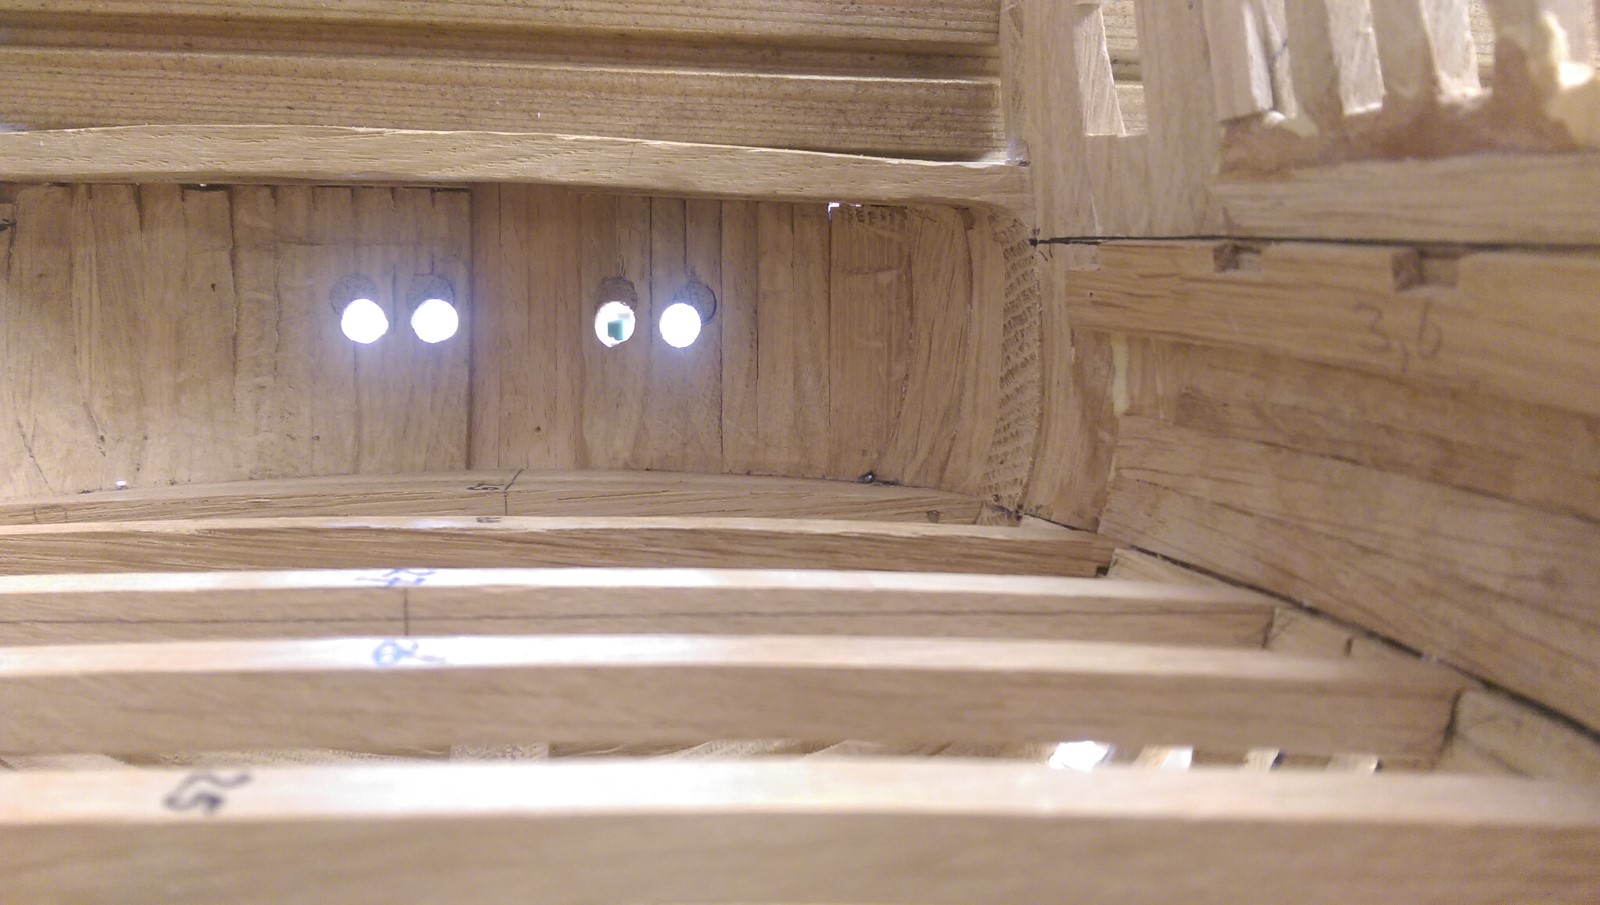
.A simple tool for checking that ports were level at both sides. After this tedious work I wanted a change of work so I started on the anchor 'betting'.


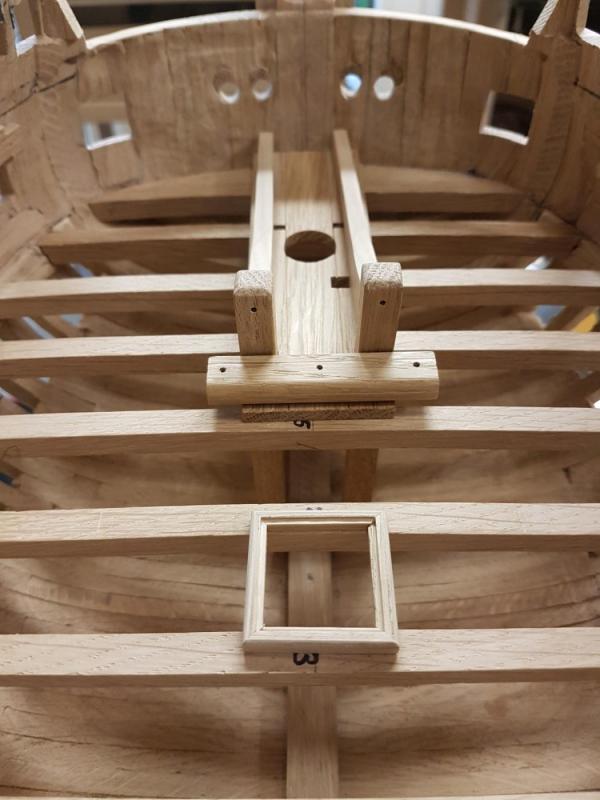
I do have a problem with the lid and the holes for the anchor cables. The drawings clearly show 3 holes whereas I think only 2 cables went down in the hul??? I leave it for now it will be sorted in due time.
I will now started work on the remaining parts of the lower deck, like gratings and down stairs. After that the deck planking I think and after that the insie hull planking up to the upper deck.
Will be continued.
Rgds Hans
- mtaylor, tomsun, bob from barton and 21 others
-
24
-
-
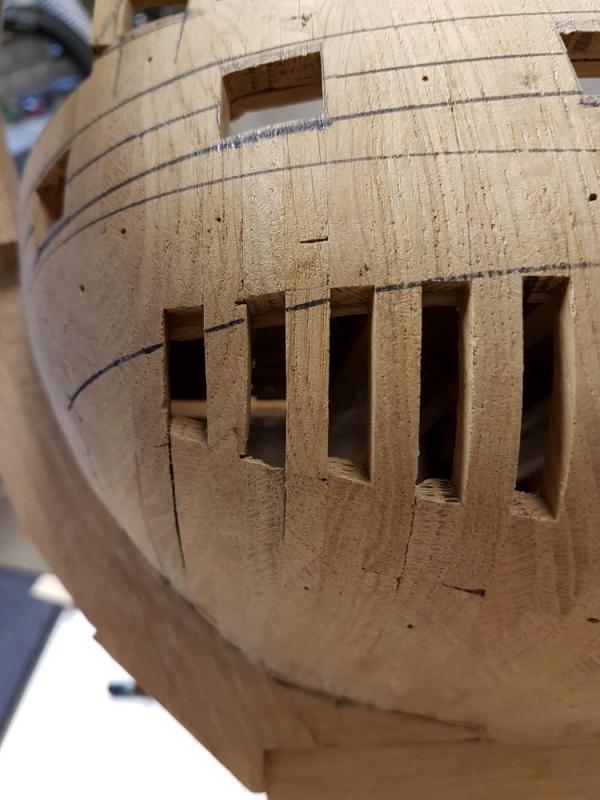
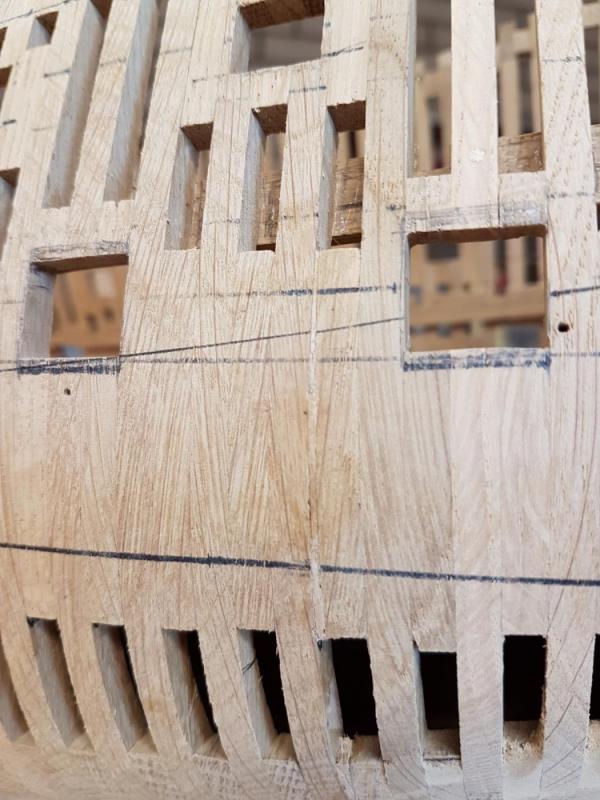
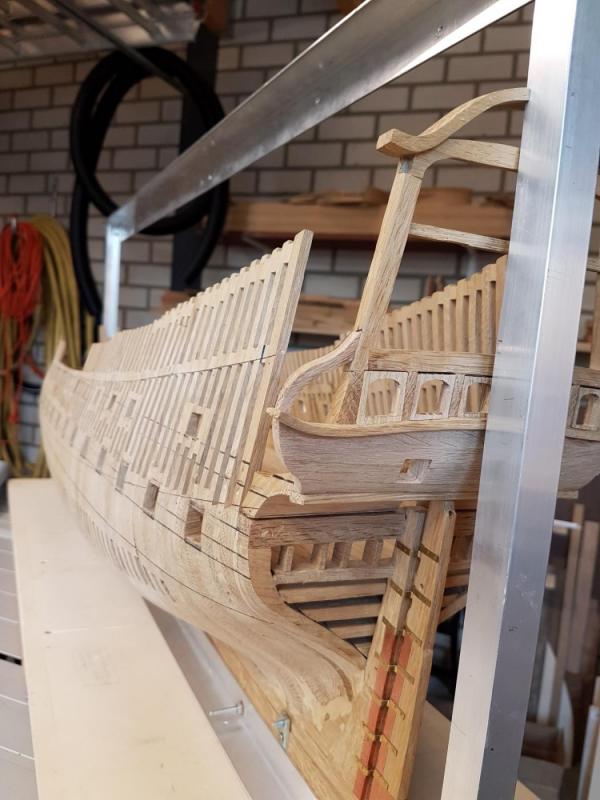
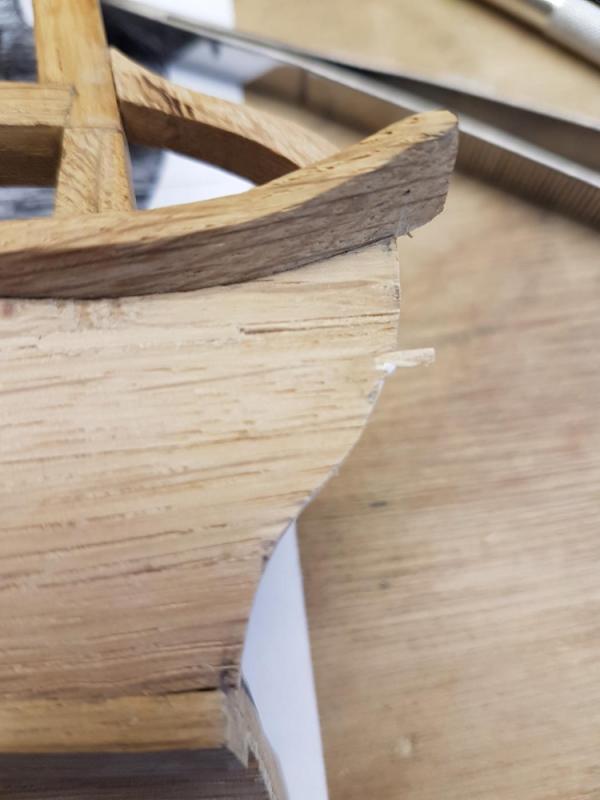
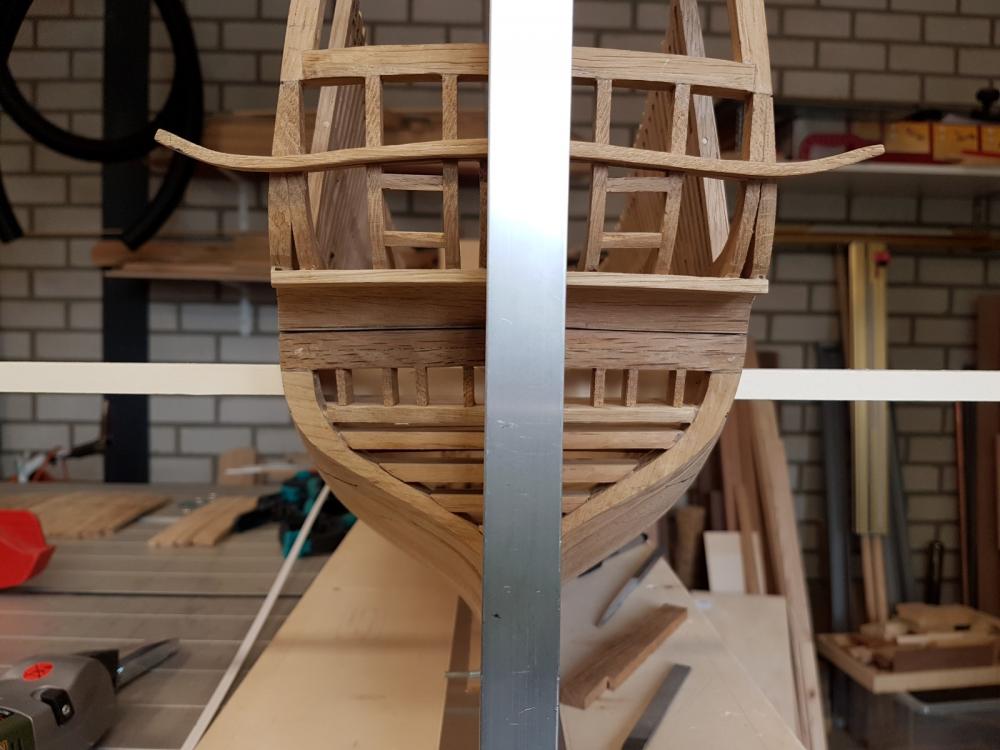
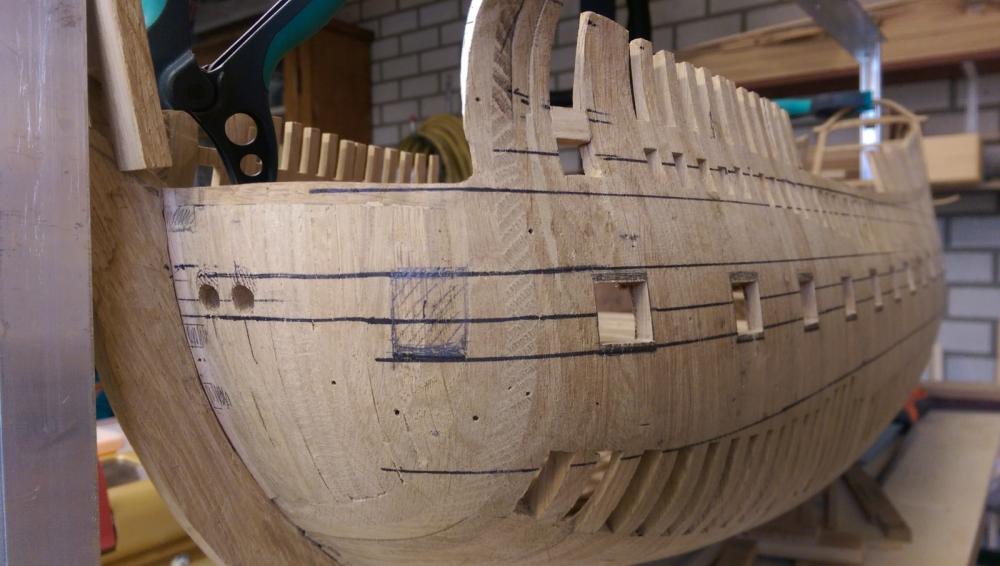
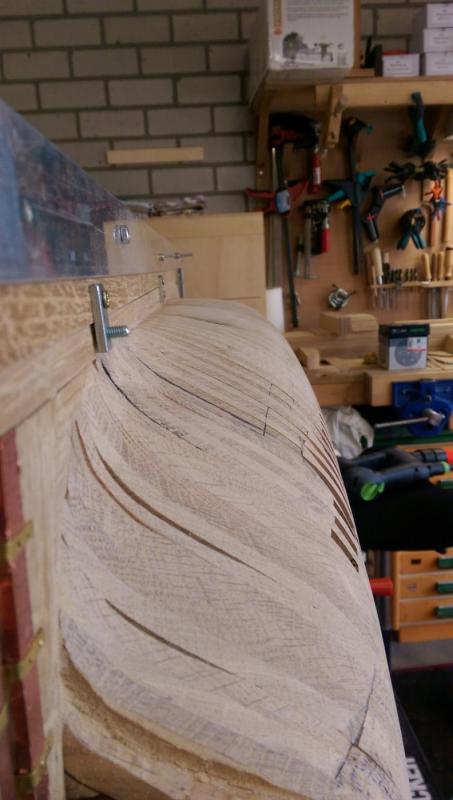
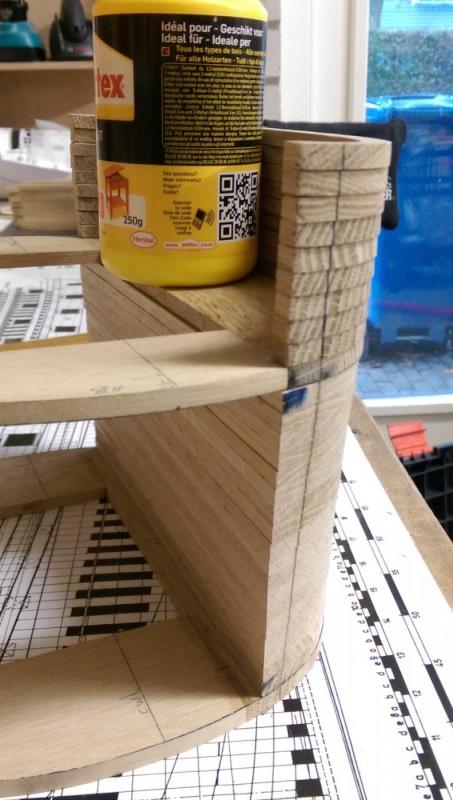
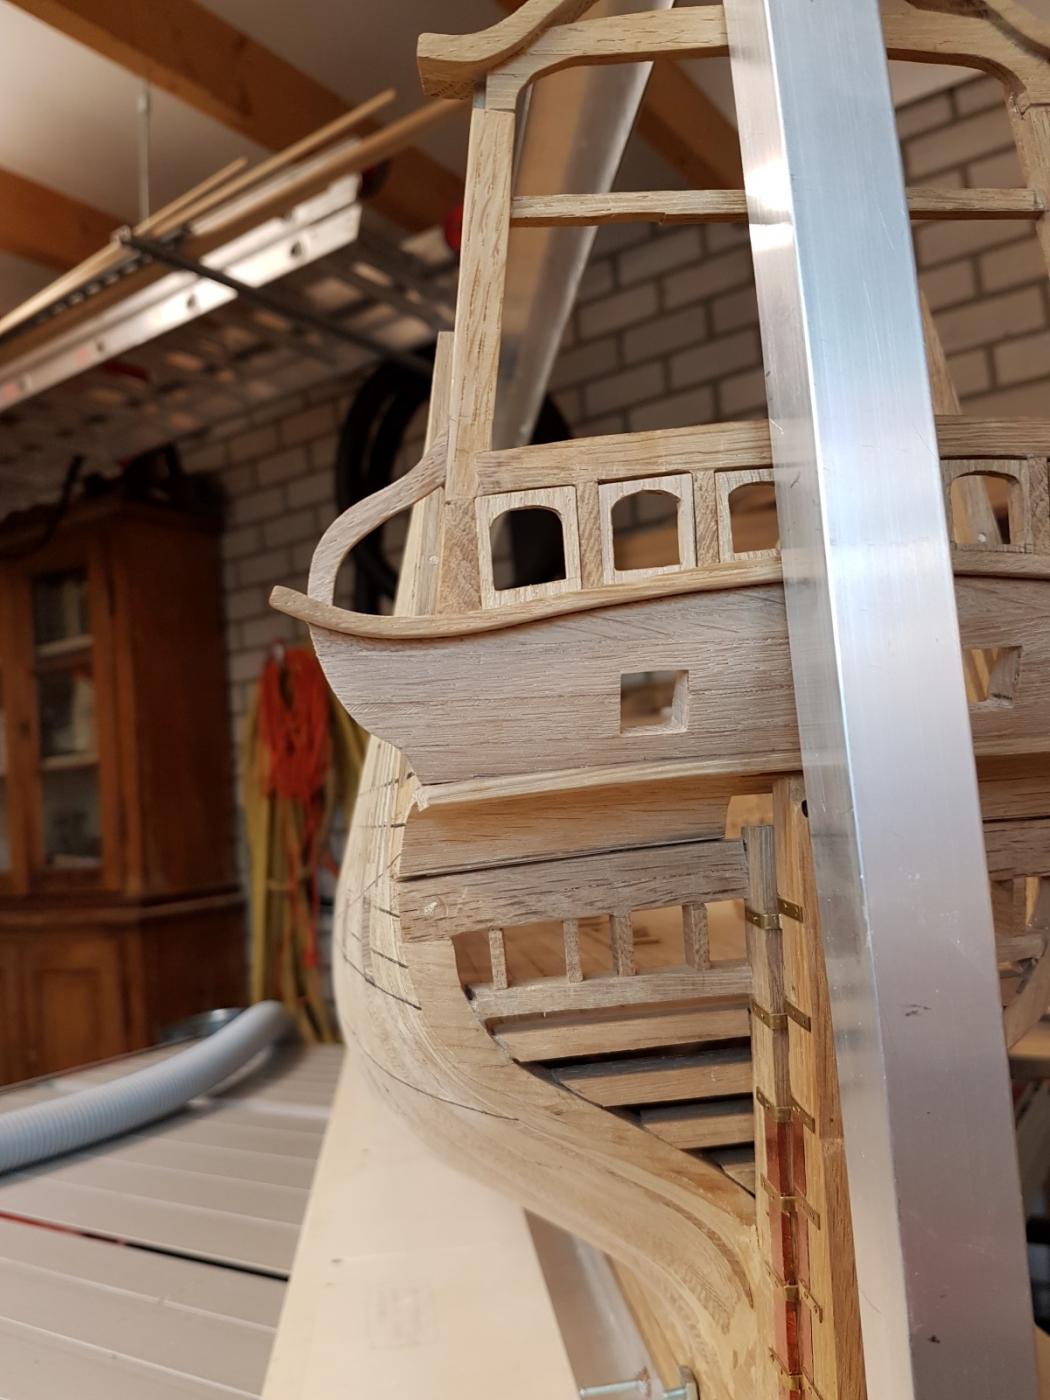
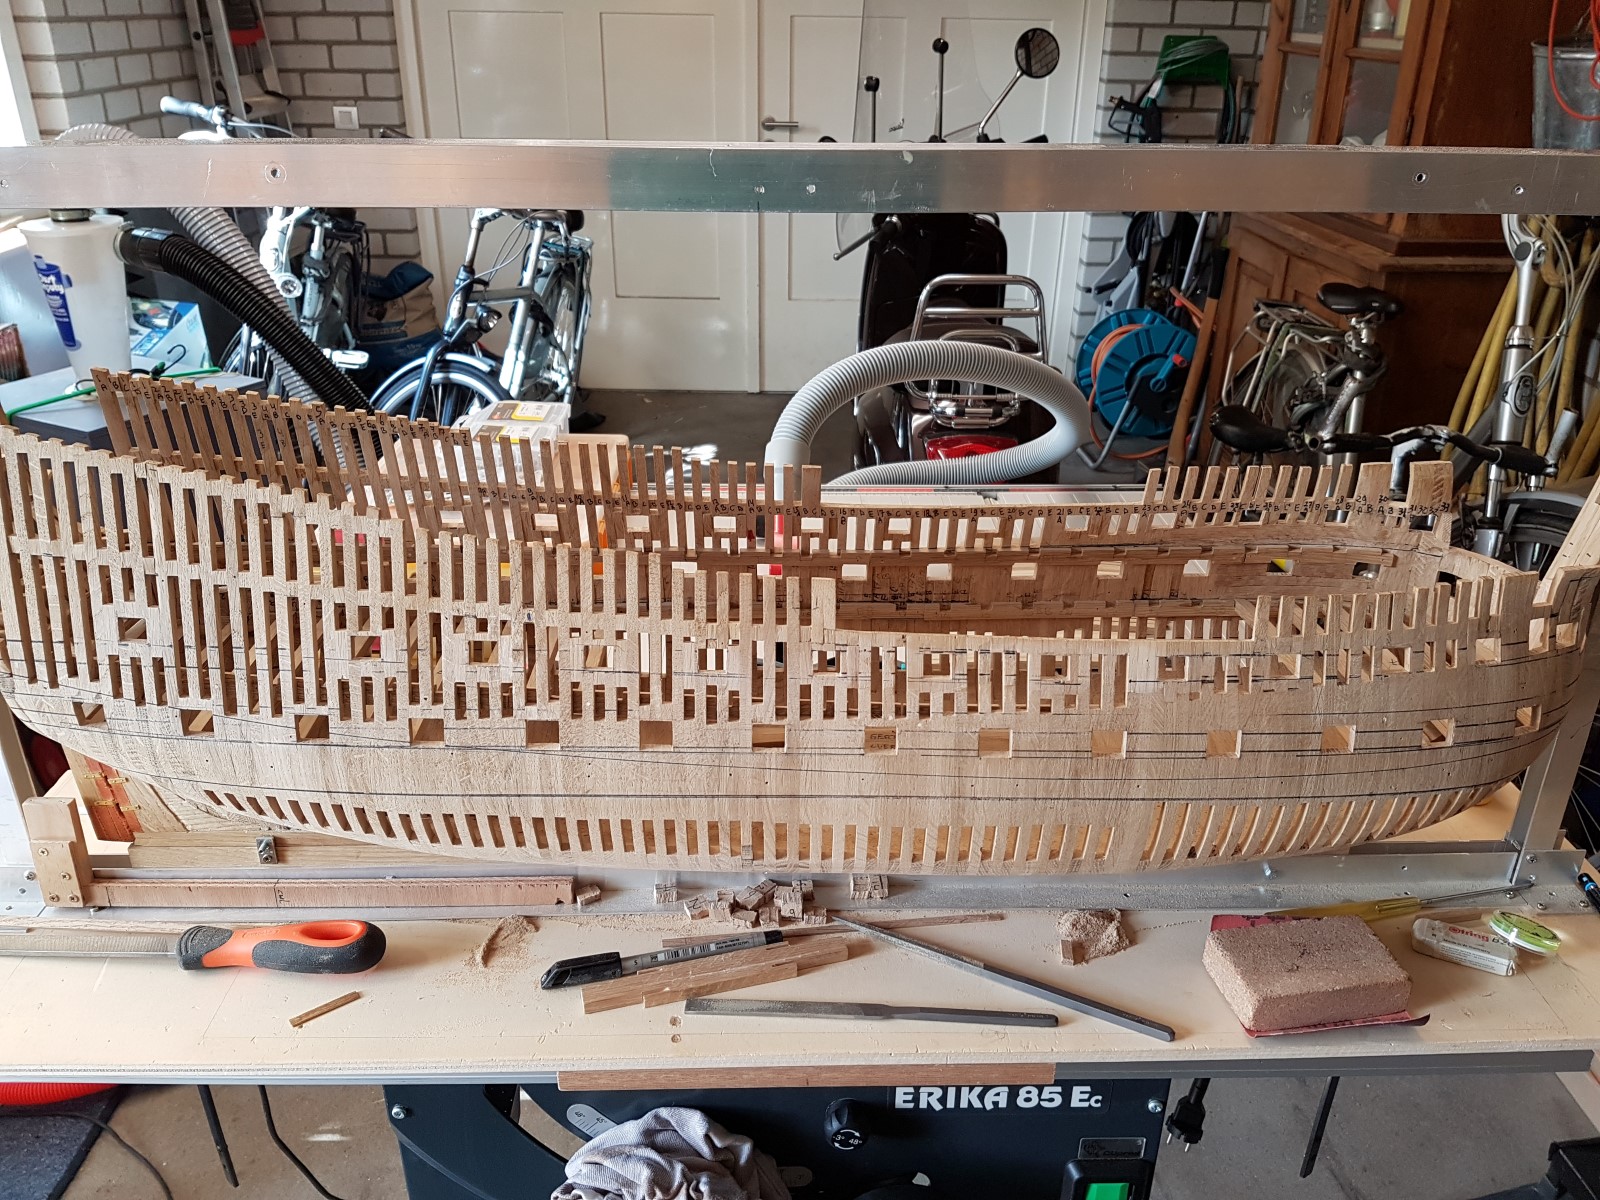
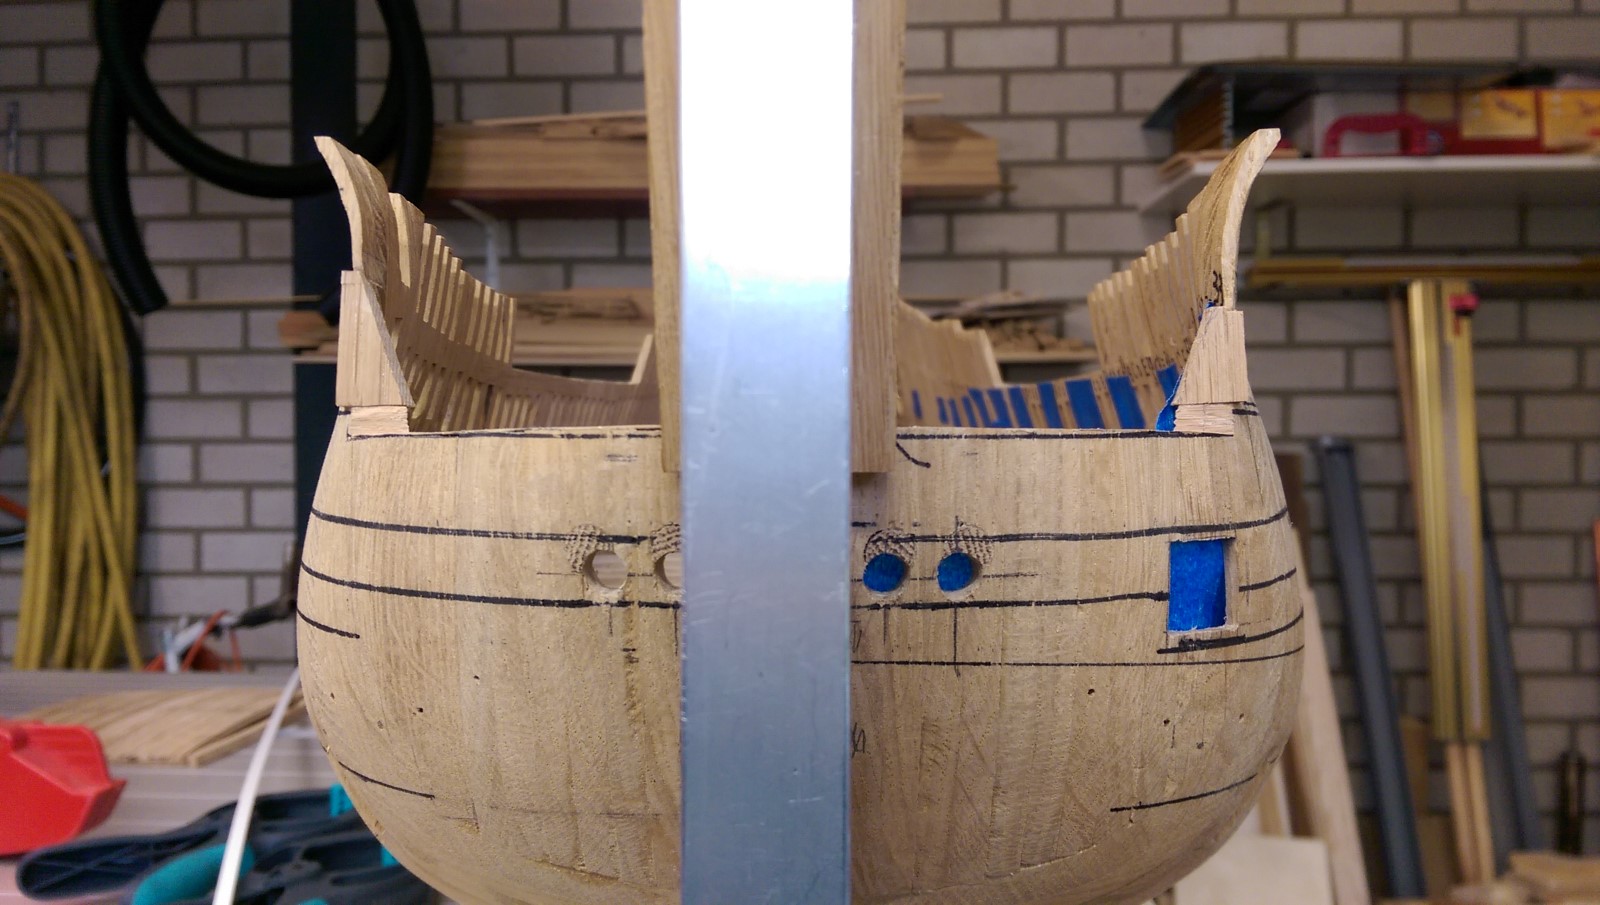
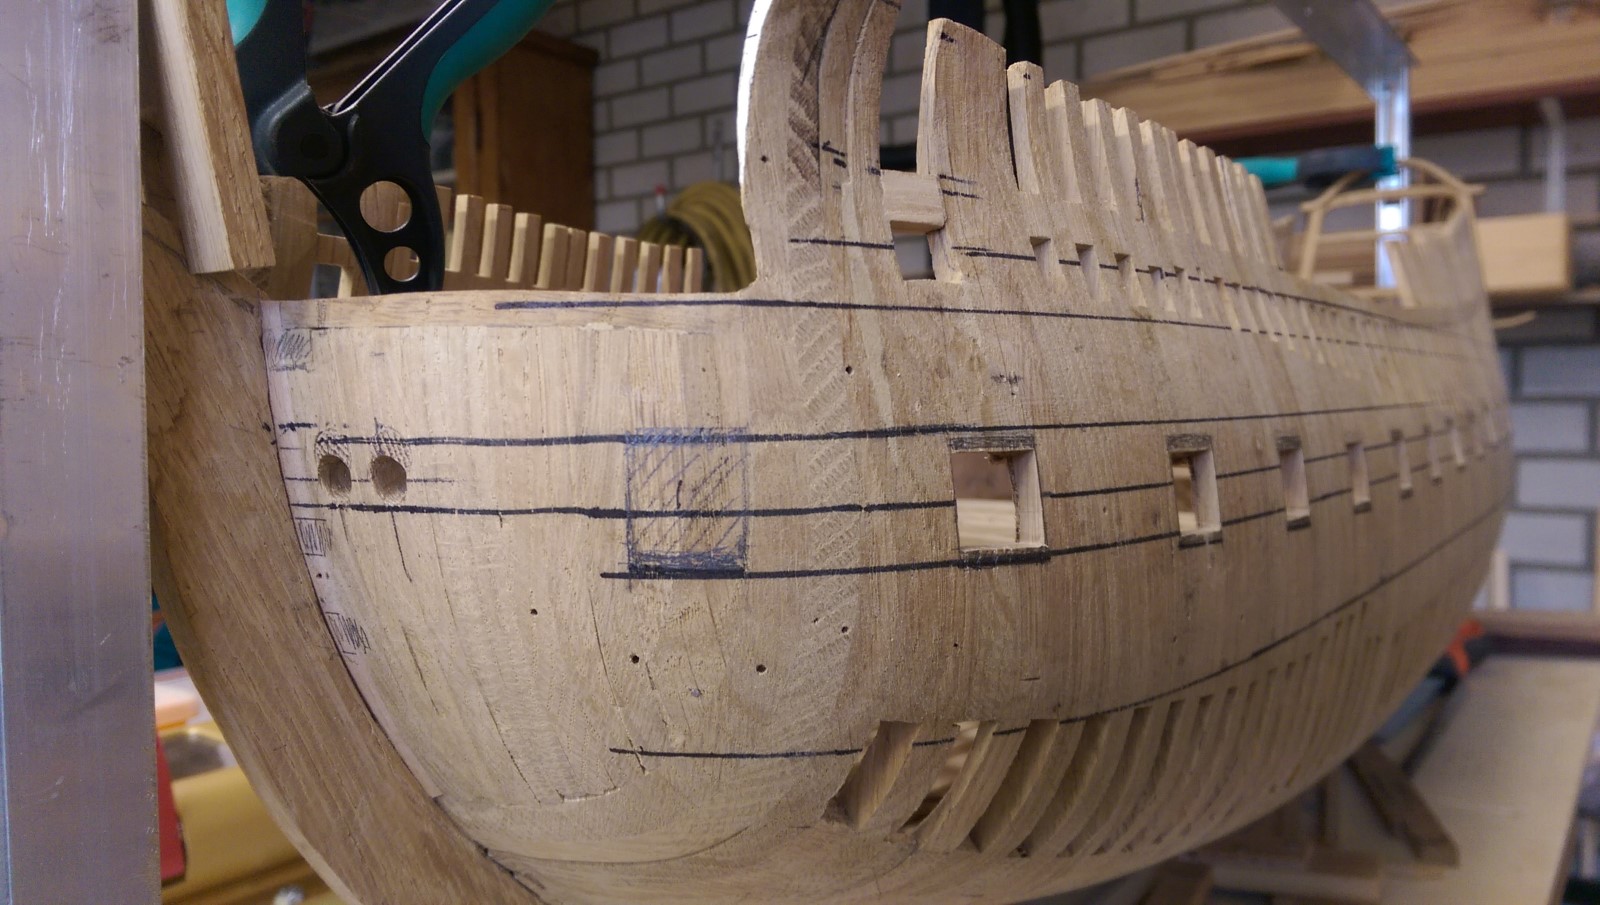
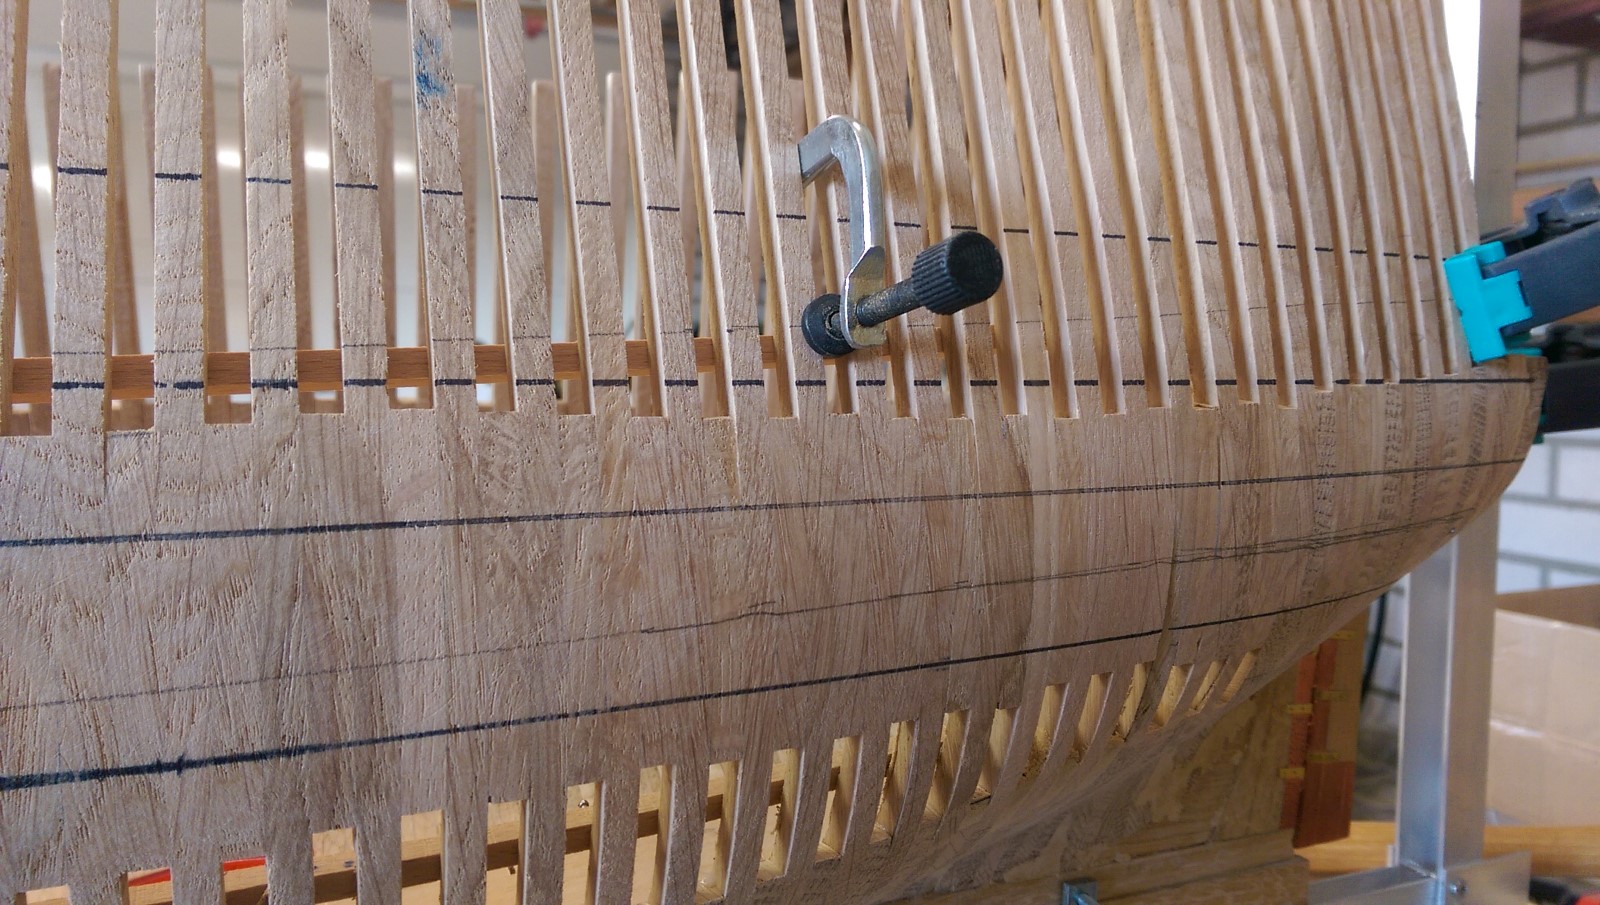
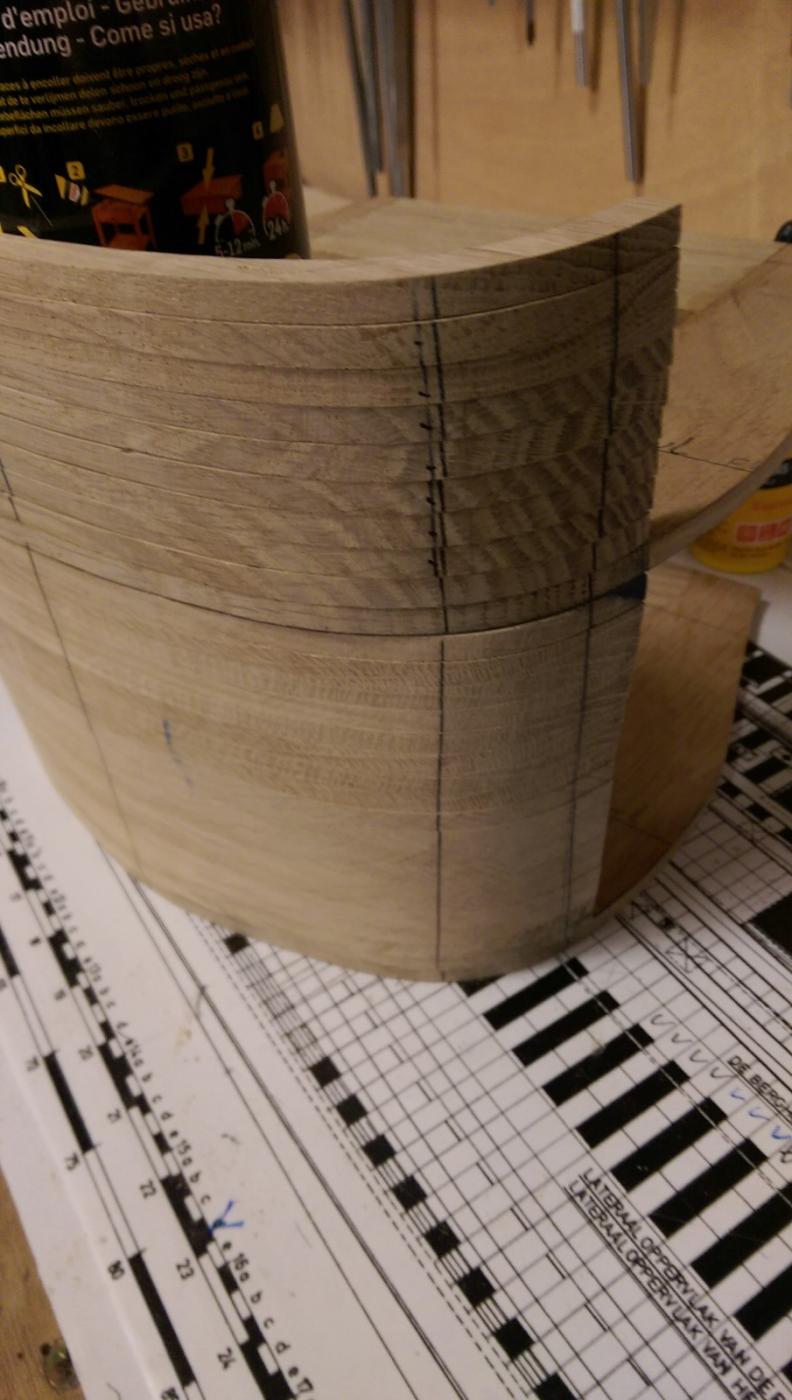
Just a short update. I finished the correcting of the bow as its height was not correct.
The bow was build using a different method than what I used after I came to the 'grootspant'.
Also the holes for the anchor ropes had to be moved.

I finished one side all the gunports for the orlop and main deck.

Its hard to find the right english terms I now use the translation of Ab Hovings book but it does not contain all the words, eg like luizenplecht??
H.
- Archi, flying_dutchman2, firdajan and 19 others
-
22
-
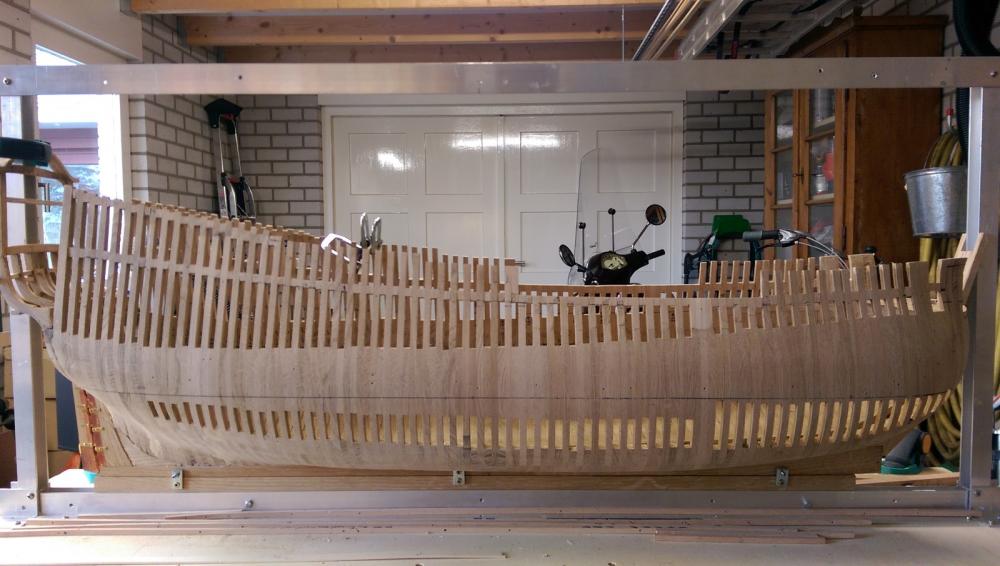
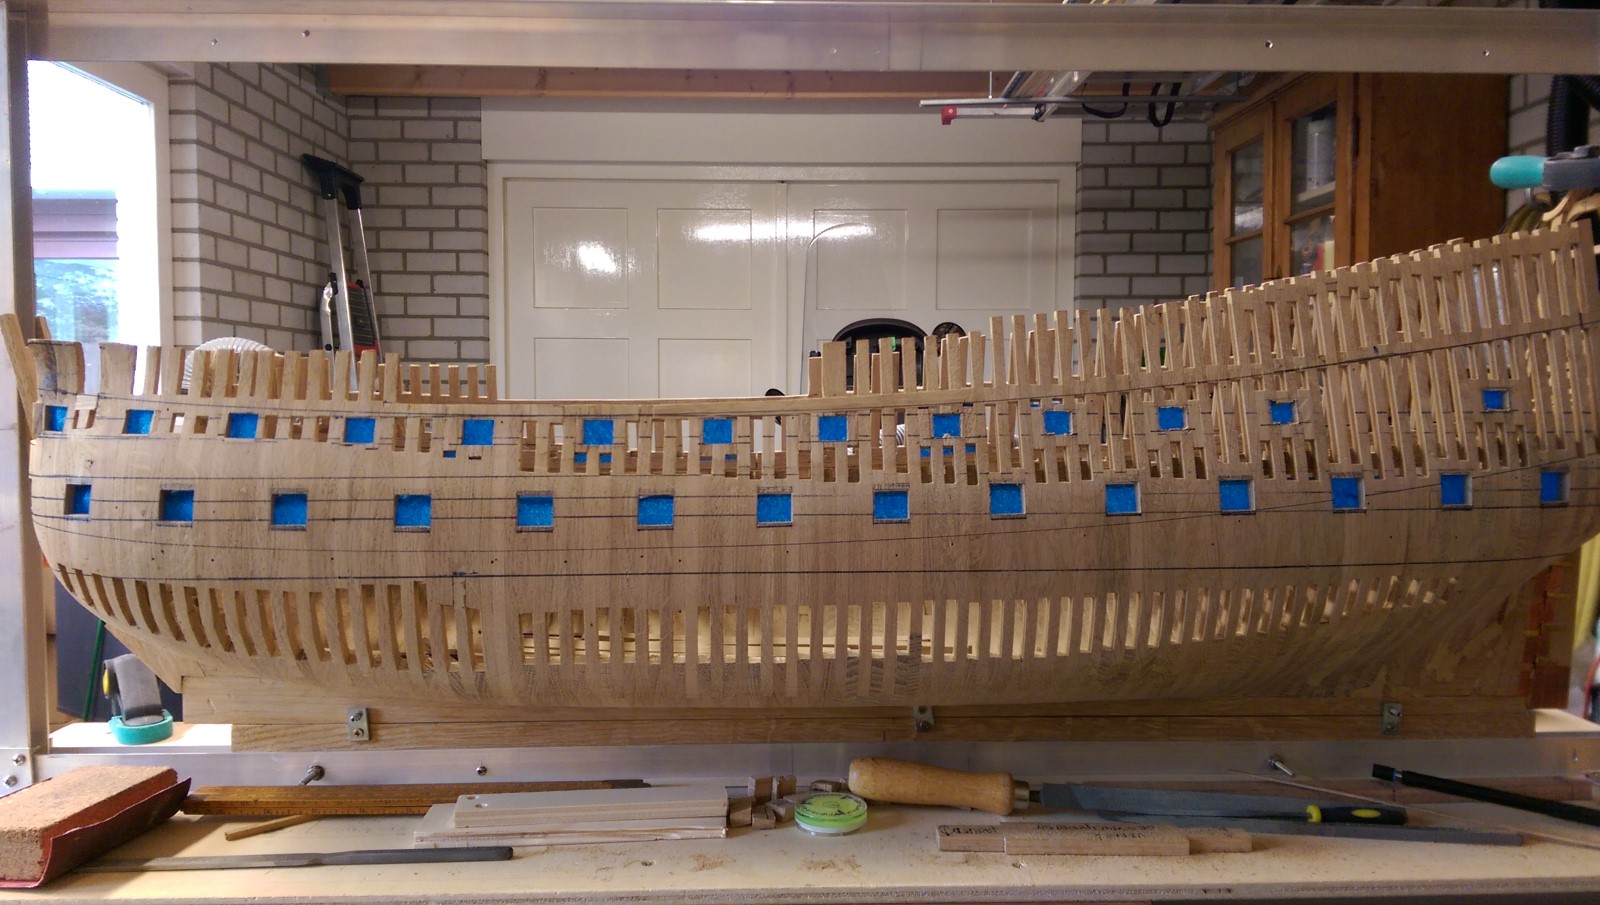
Thanks Jan! Indeed nearly a meter from bow to stern (Not included the beakhead).
I will be planking the hull both sides as my mood and thinking stands now.
Rgds Hans.
- Piet, WackoWolf, FrankWouts and 4 others
-
7
-
Hello Hans,
I liked your introduction to yourself and to this build.
You had a nice start and all is well under way. The scale 1:50 will give quite a large ship, in my mind I can see a sideboard with a model in wall-filling formate. wish you much fun with this wonderful scratch build..... will the model be under full rigged sail ?
Nils
Hi Nils, thank you. The answer to your question is in the opening post
 :
:"The whole build might not be completed, I might stop at admiralty level. I am not so much into knitting and roping but who knows…."
Regards Hans.
- mtaylor, Mirabell61, Piet and 3 others
-
6
-
After the deckclamps I build the 2 main decks


And here is the status per today:
I am working on the gunports now.

- Duanelaker, mwb, Tadeusz43 and 36 others
-
39
-
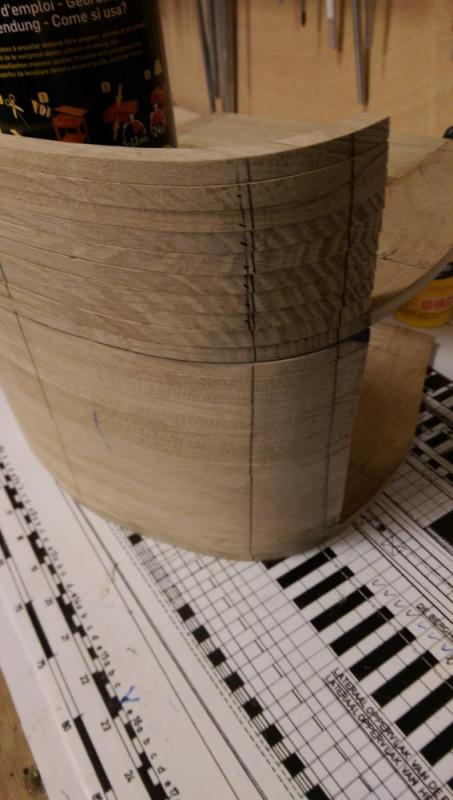
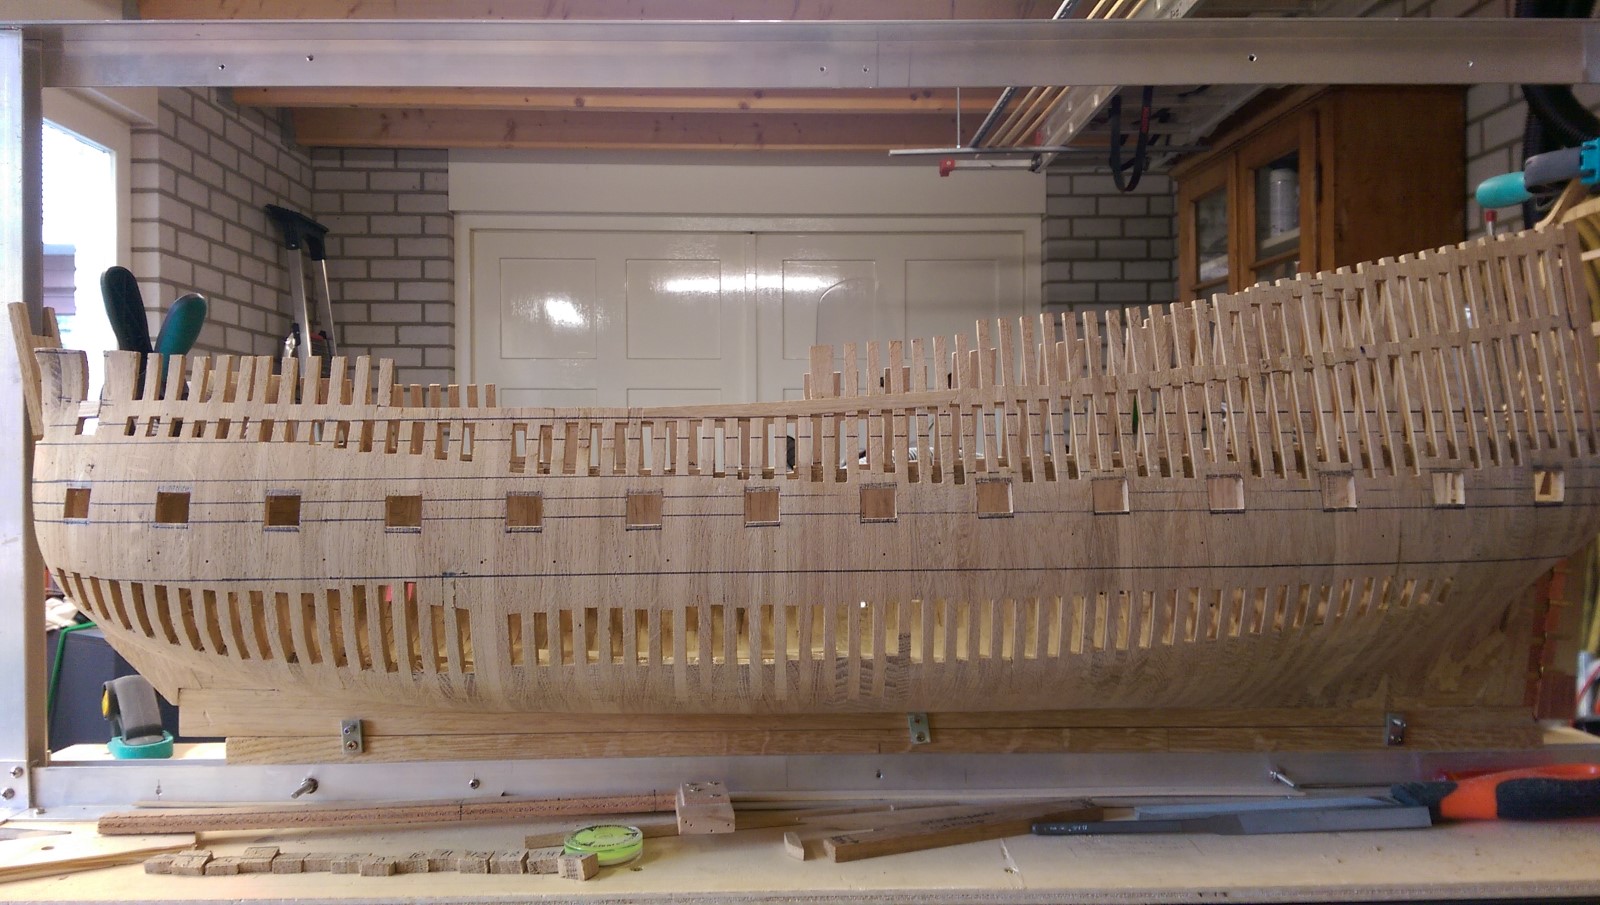
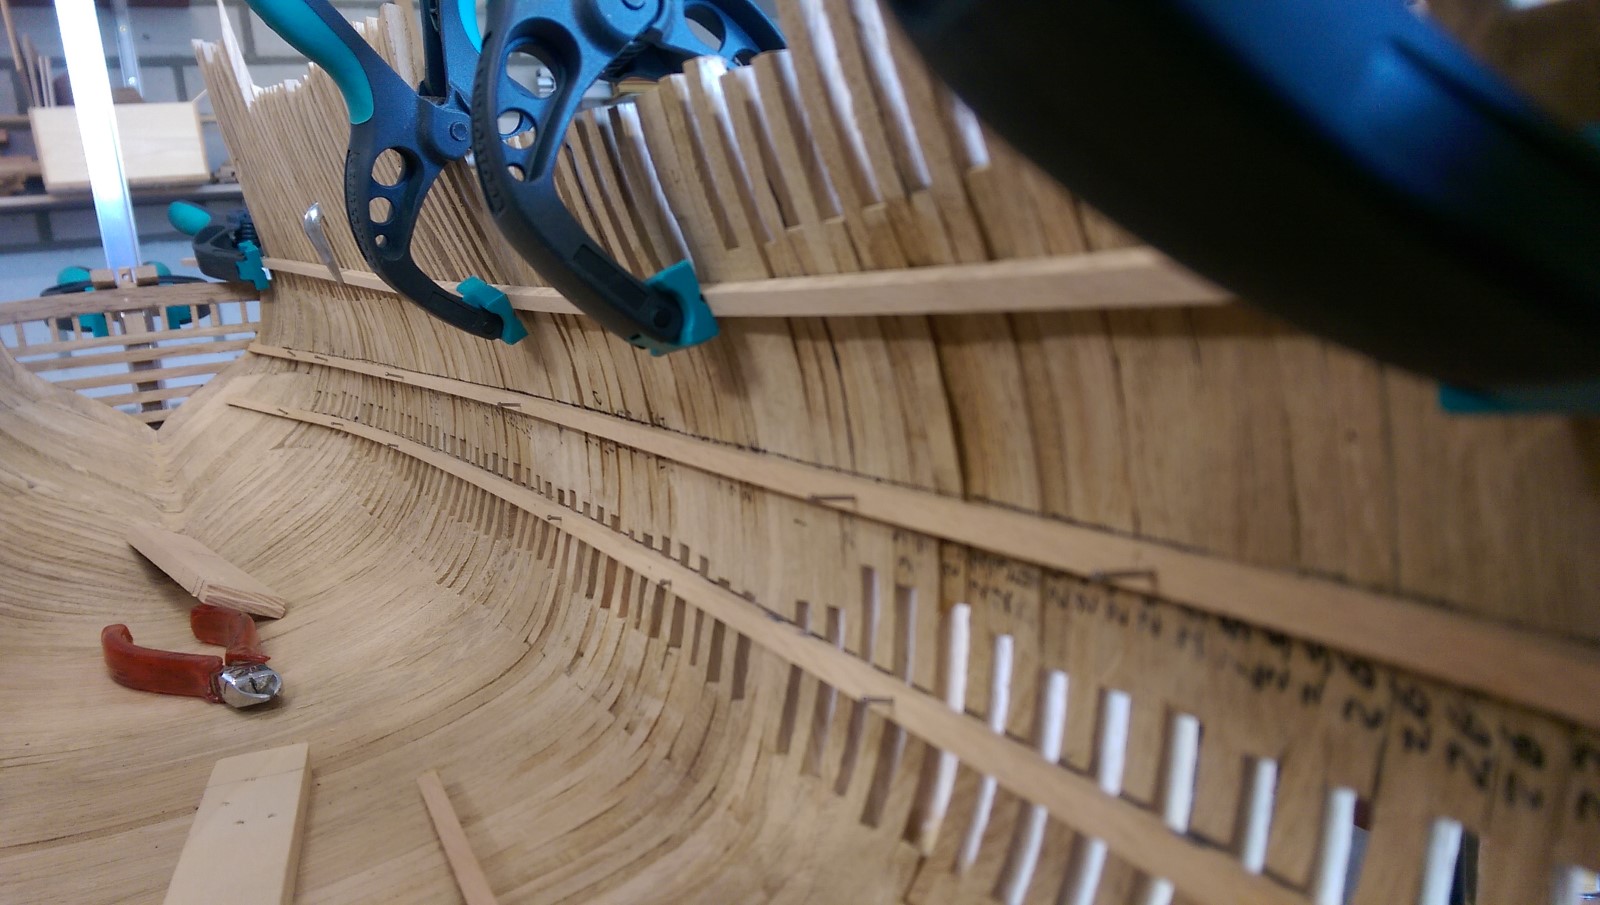
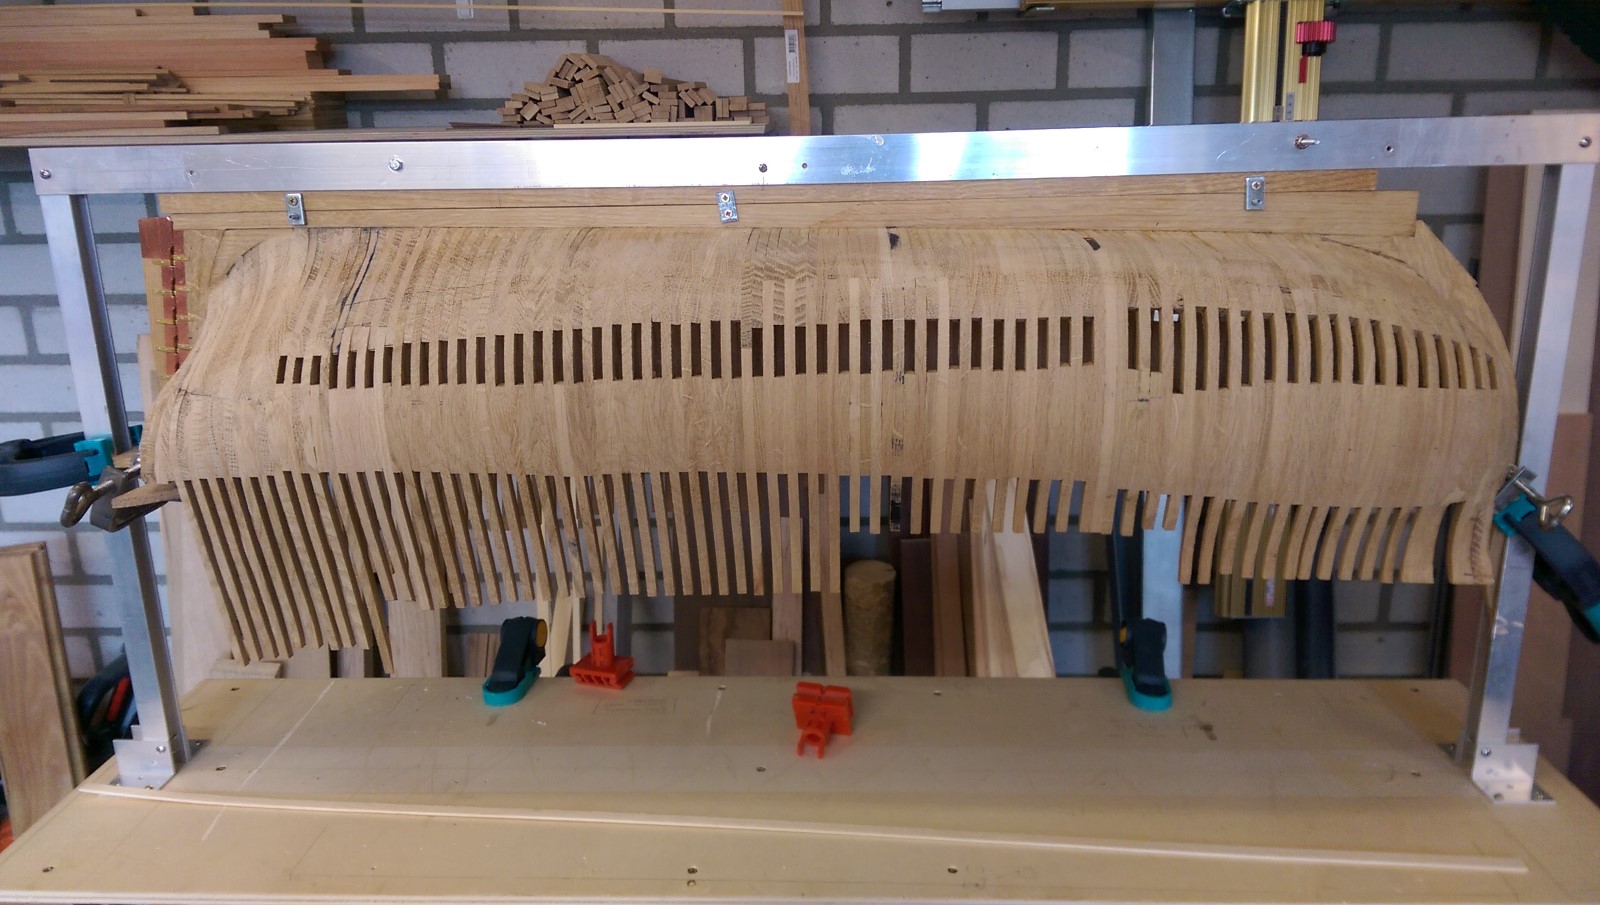
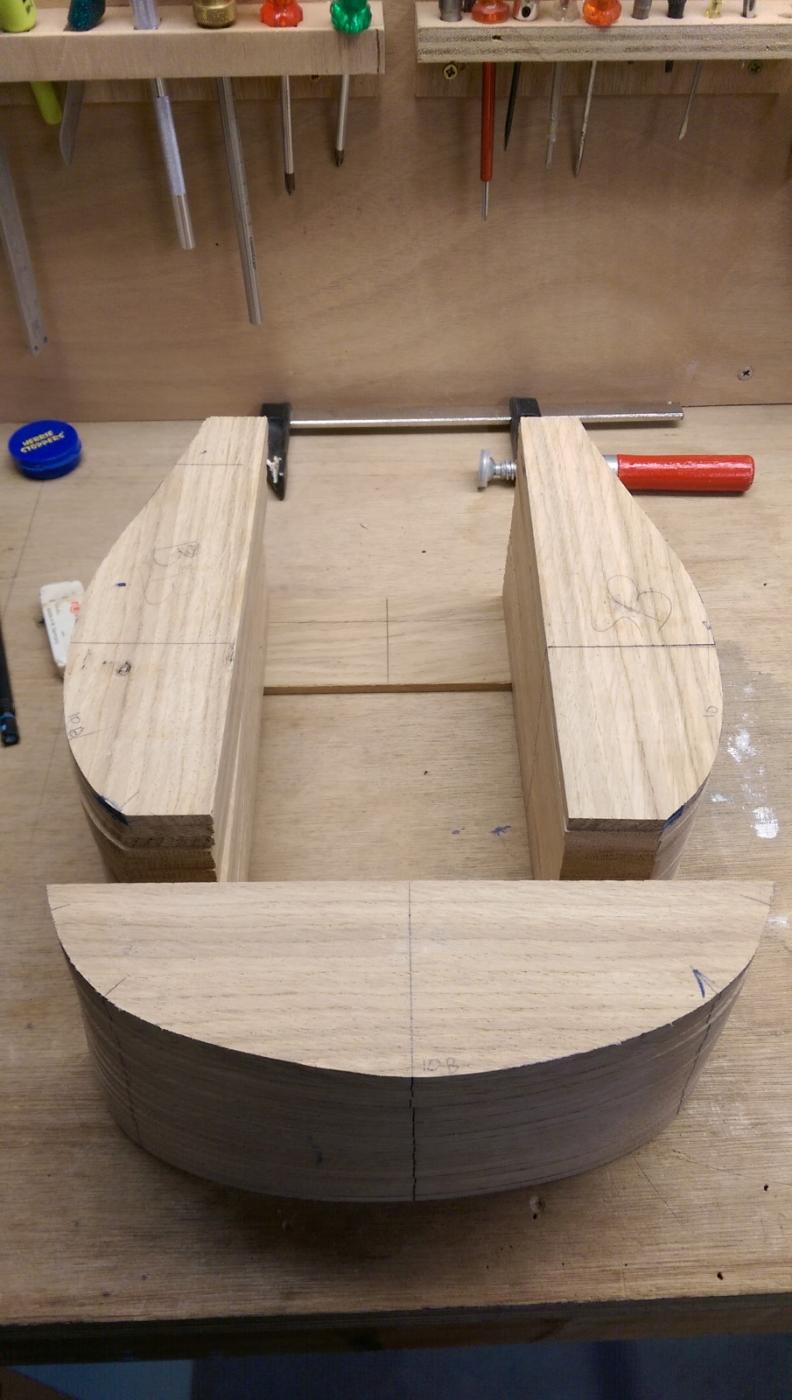
I decided that after closing the hull it was time to get the shape roughly in order.
It took a lot of sanding and on some points I needed to correct the lining by adding wood or replacing parts.
As I changed methods of framing the bow part was slightly of scale (it ran a little too wide) but enough sanding was possible.

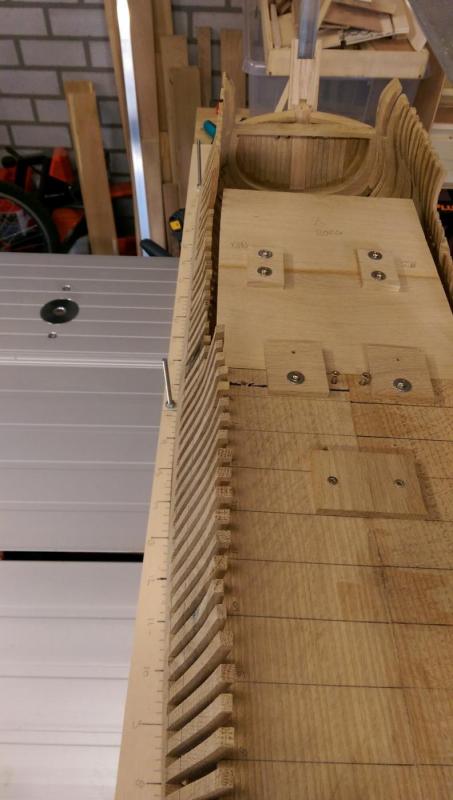

Next steps deck clamps

- firdajan, Omega1234, aviaamator and 26 others
-
29
-
As I said in my "new members introduction post" some time ago, I hesitated to start a second build log here, since I have an extensive build log on a Dutch forum.
As this Dutch forum is basically/mainly an RC flying forum and over the last half-year/year the historical ship build sub-forum has gotten quieter by the day and most of the ship building persons that are still active there, are also active here on MSW.
So now I have decided to also start a build log here on MSW. It might not be an day-to-day active log as on the Dutch forum but I will see how it evolves.
The reason is mostly because this forum is much more active and has a much broader reach.
In this first post I will give a very short survey from start to the status of today.
Why I build something
As of January 2014 I have become ‘pensionado’ by lucky circumstances! So a lot of hours spare time. Since my younger years I have always had a hobby whereby my hands played an important part.
Plastic motor models, aircraft models where my favourites back then. I switched to electronics (my profession as an engineer) and built my own loudspeakers (woodworkingJ) and HIFI equipment for many years.
Now why a ship and particularly why this ship?
My family line has a long history (back to the 1700’s) of what we call “binnenschippers”, persons that hauled merchandise/goods by ship from the North sea ports land inwards. My grandfather was the last in line who trade down the Rhine as far as Koblenz.
So I started reading books and visiting forums. Now as a child I visited the “Batavia Warf” quite often with my parents and later on with my own kids I have witnessed the start (and death) of the 7-Provinciën.
Also a mysterious ship where little was known so it leaves a lot to the builder to decide and come up with. A choice was easily made.
My goals!
First of all: I have fun and love building and working with the wood!!
It’s not my intention at all to build the best looking or the most historical correct ship! Just the fun of building it is my main and first goal.
Being busy and figuring out how I can get something done. Getting acquainted with new skills I need and to perform certain tasks. That’s what I like about it. It’s my first build both in wood and as a ship, so I will get to learn and master many things.
I have chosen to follow the drawings made by Otte Blom. Not because they are the best but because they appealed to me the most.
The whole build might not be completed, I might stop at admiralty level. I am not so much into knitting and roping but who knows….
I started the build around summer 2014. Sometimes I stop for a while, working on other projects.
It’s mainly build from European oak, (apart from parts that were in those days also in pine (grenen) or other materials were used).
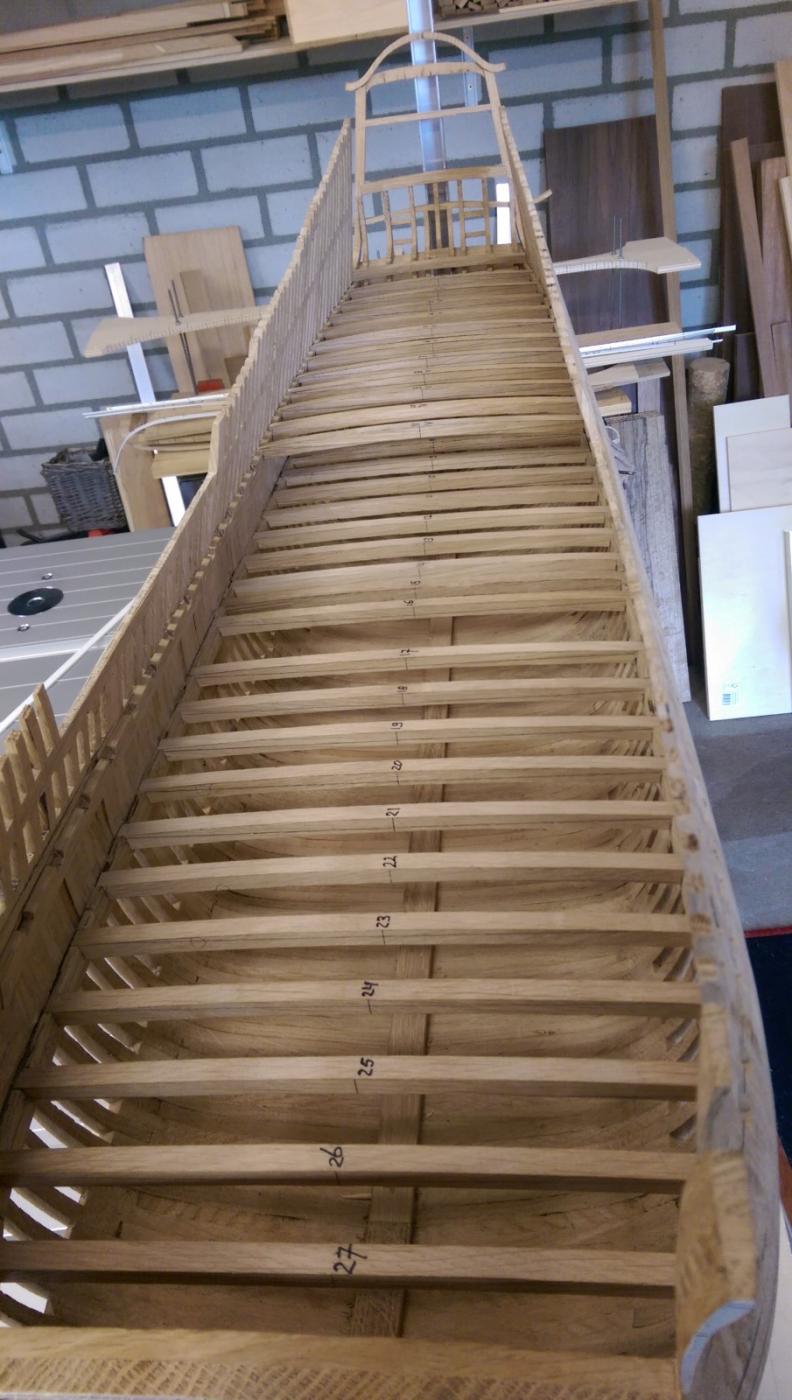
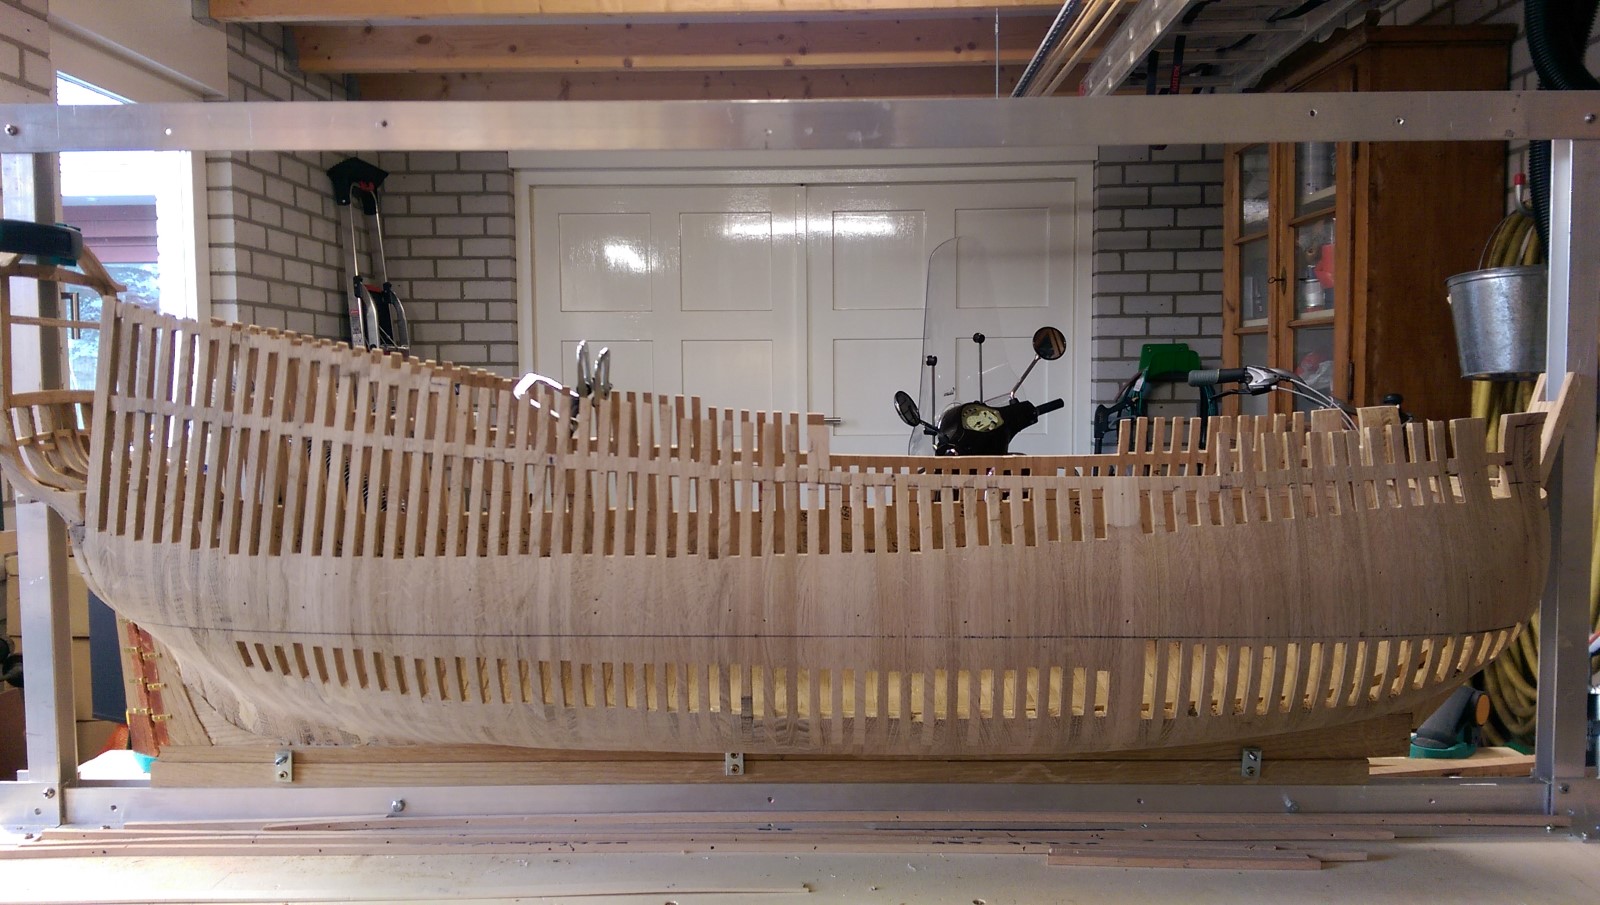
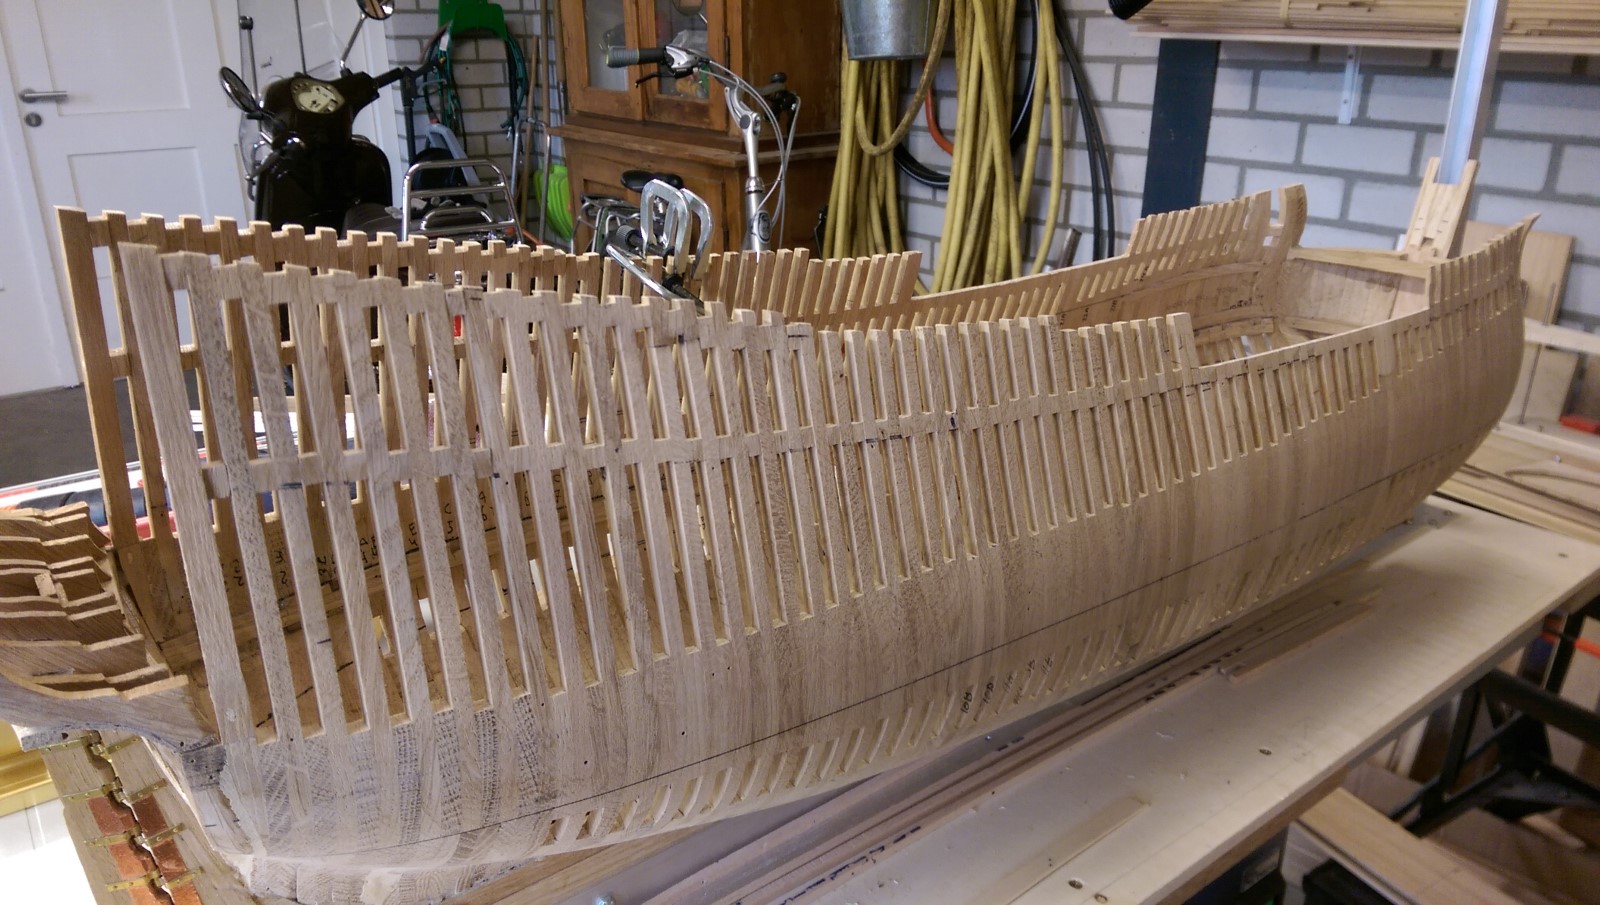
How far I am:
The pictures speak for itself I would say. I tried to take some representing pics from the start up to now.
Have fun building….. Hans.
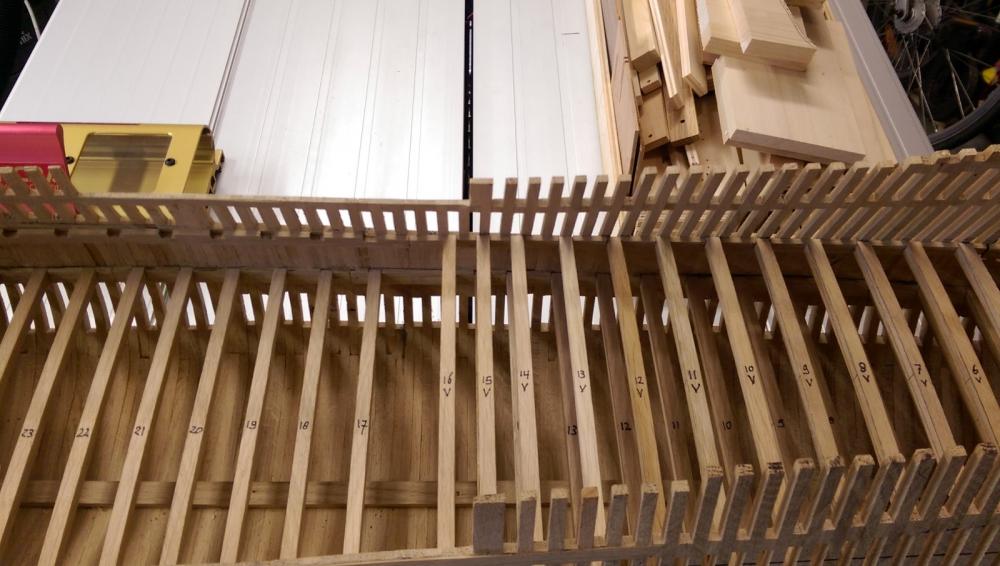
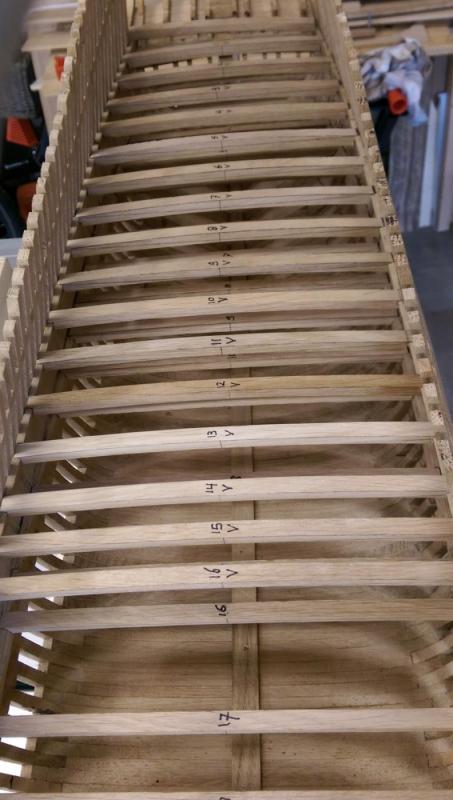
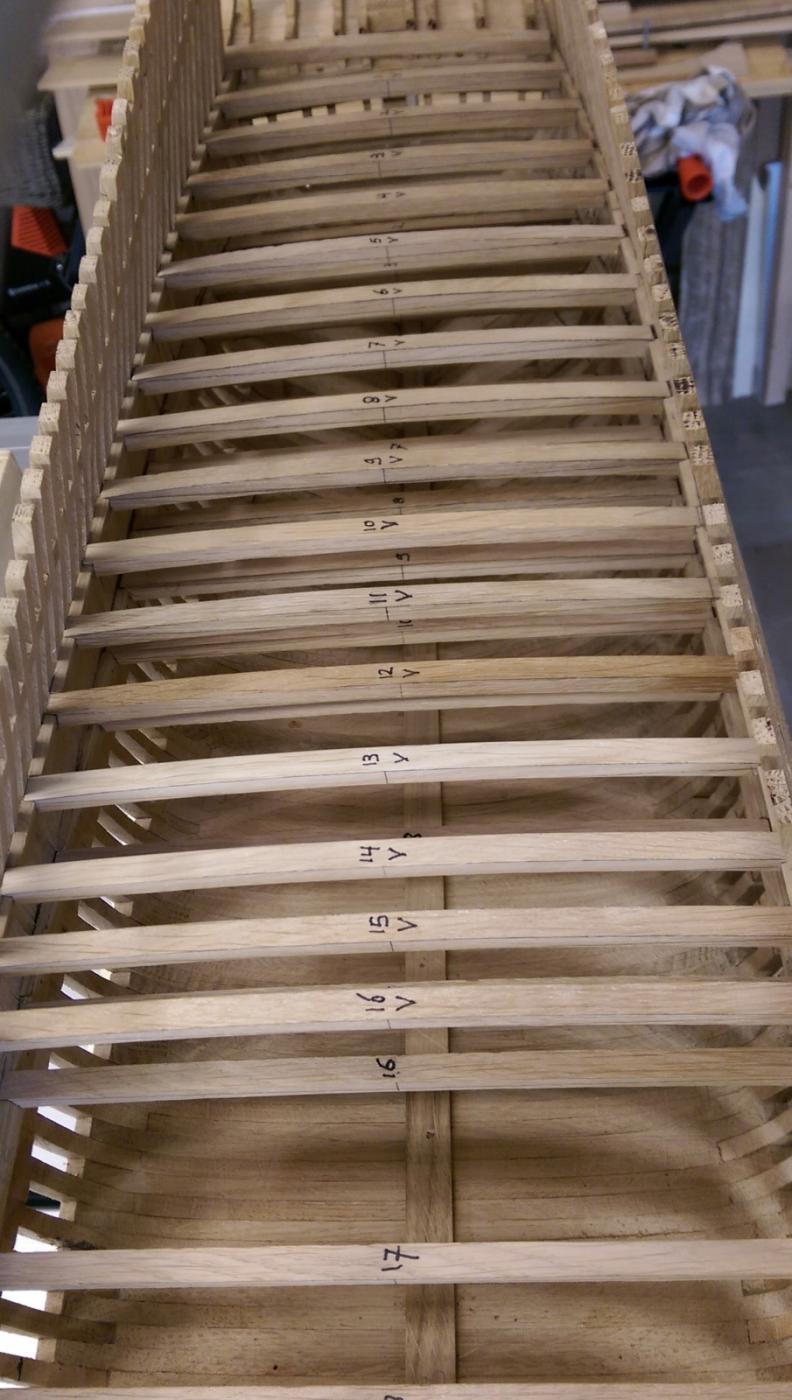
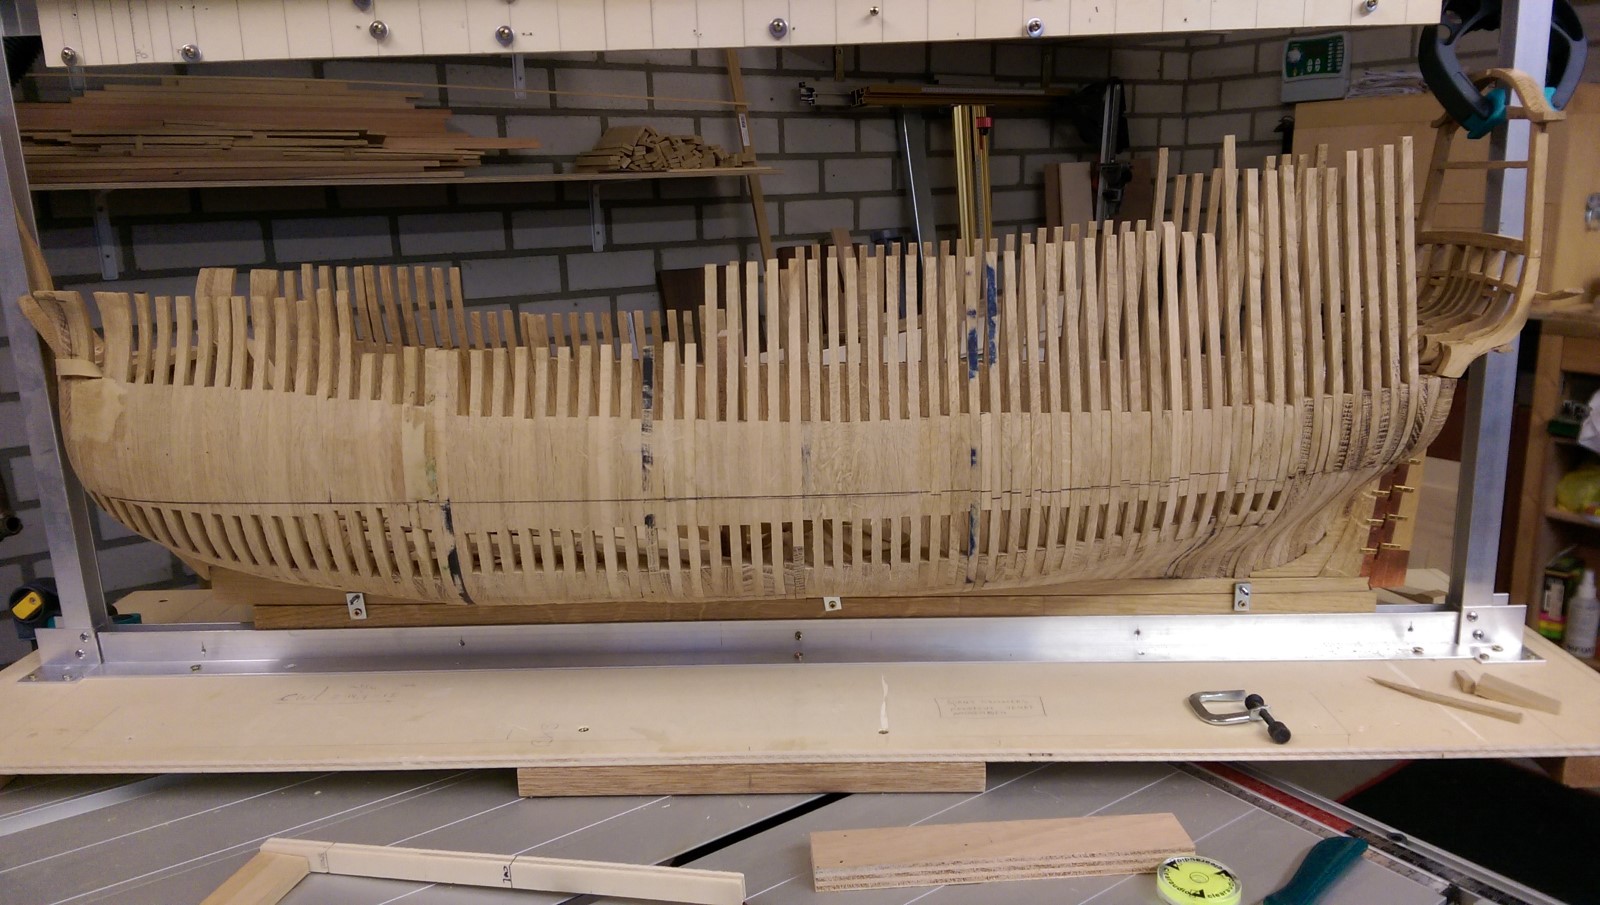
This is from around November 2014. (I lost earlier pictures:( )
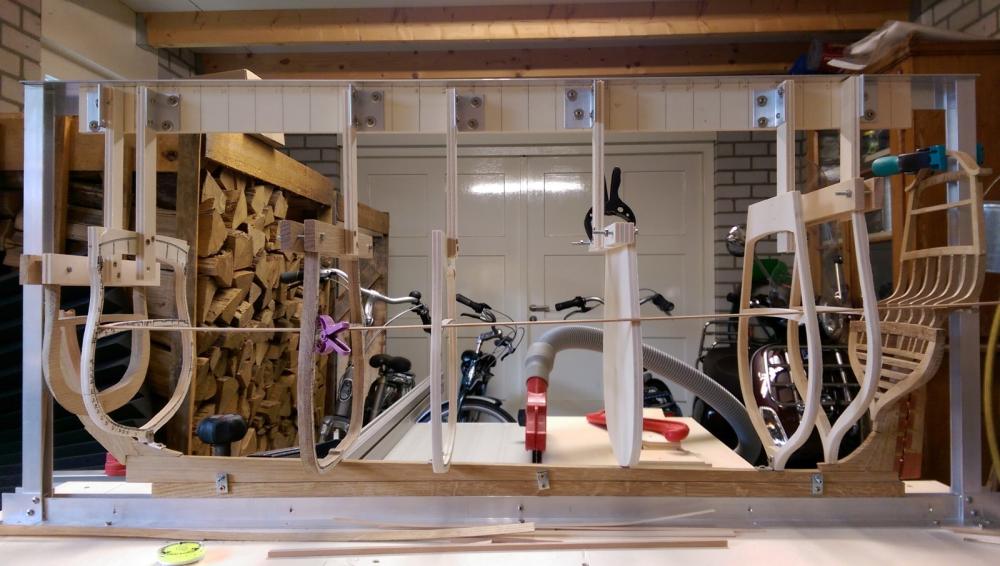
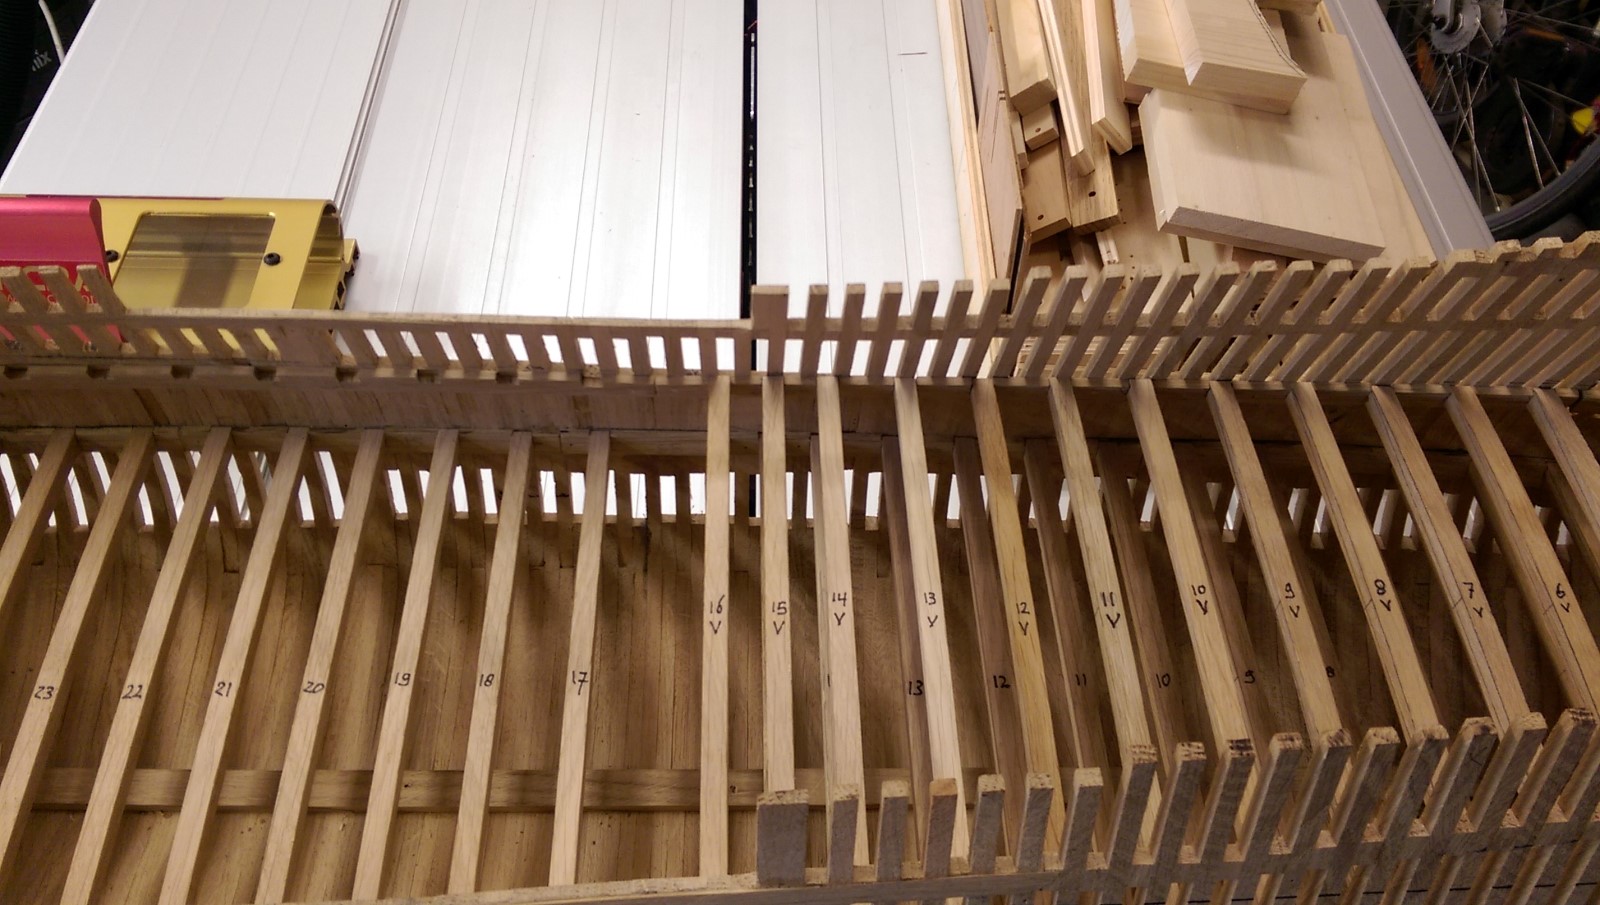
My first method of framing. I changed methods in a later stage.

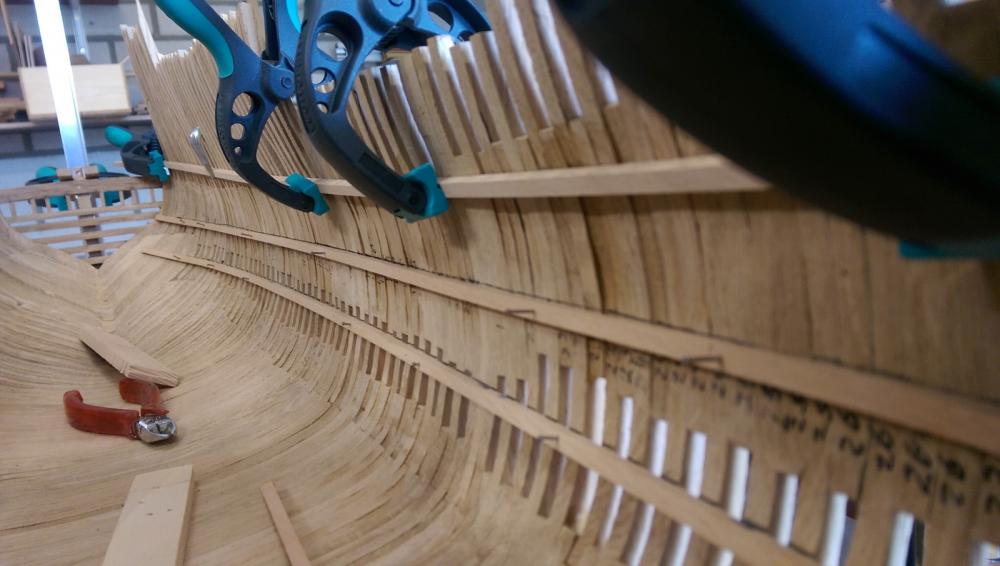
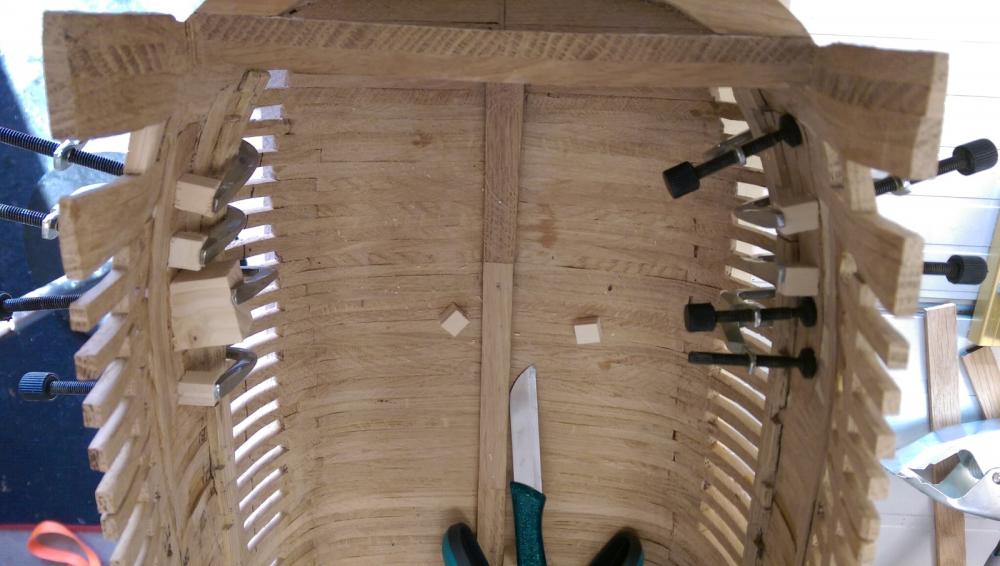
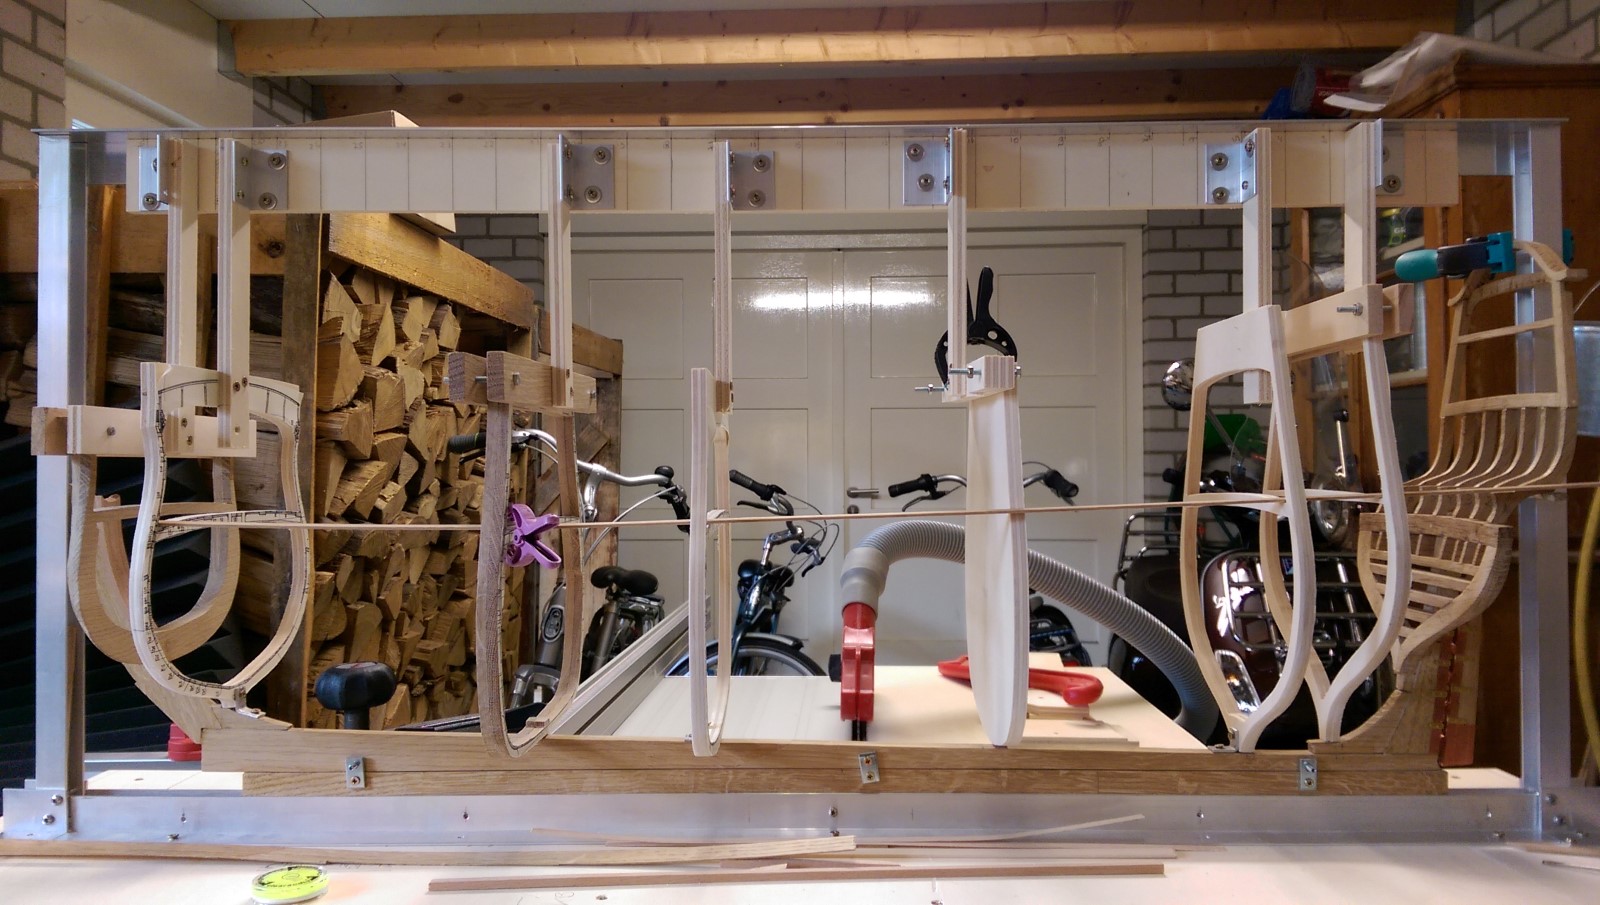
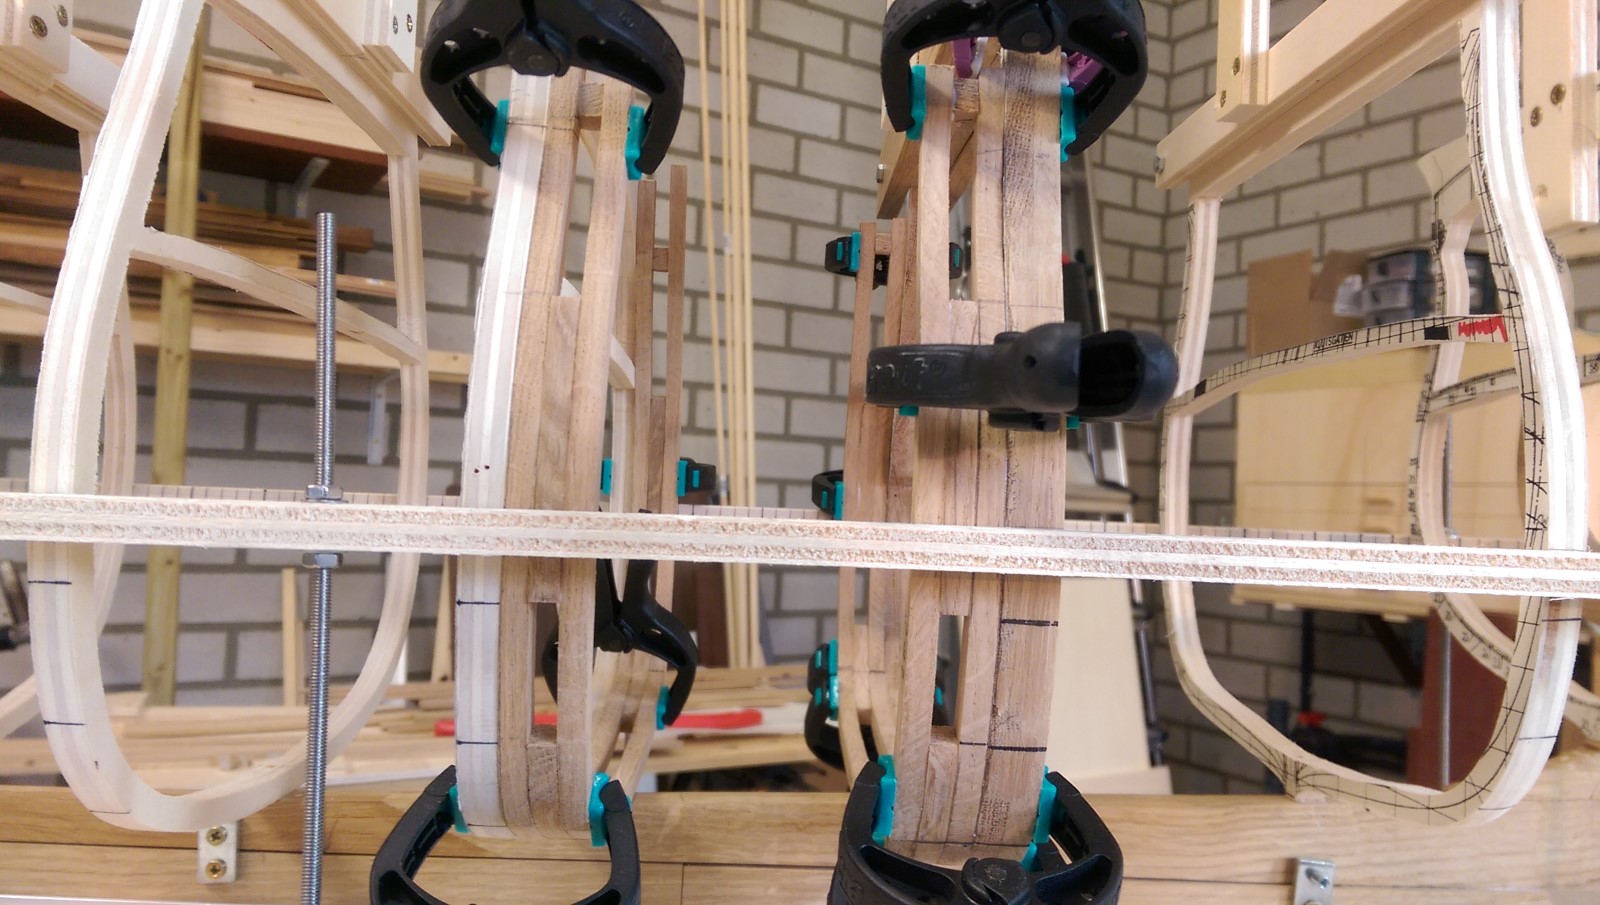
I started working them in lots. A much better way to keep the correct lining of the hull.
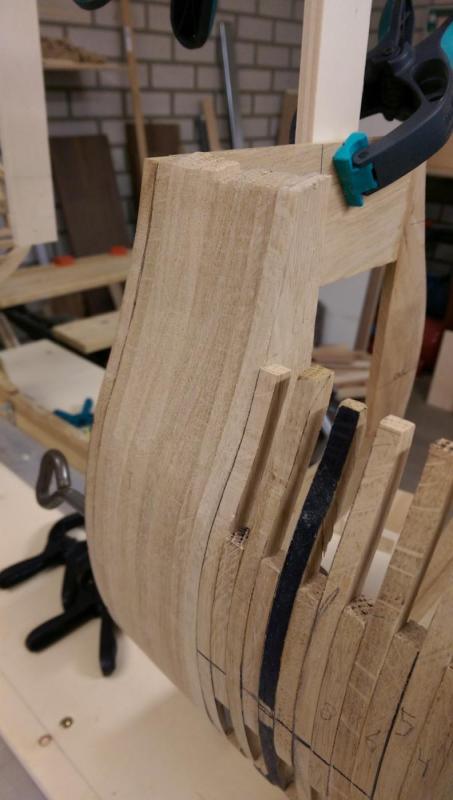

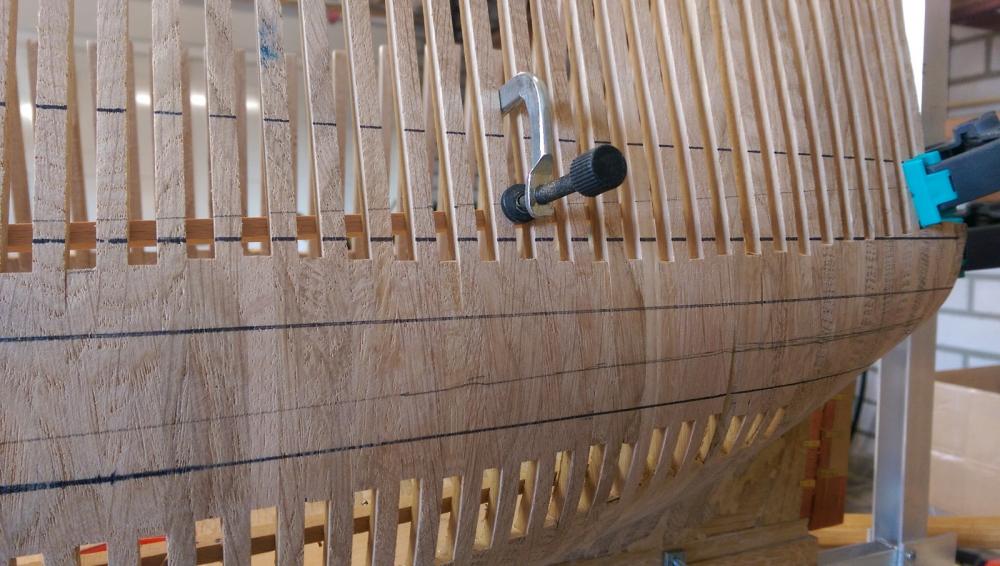
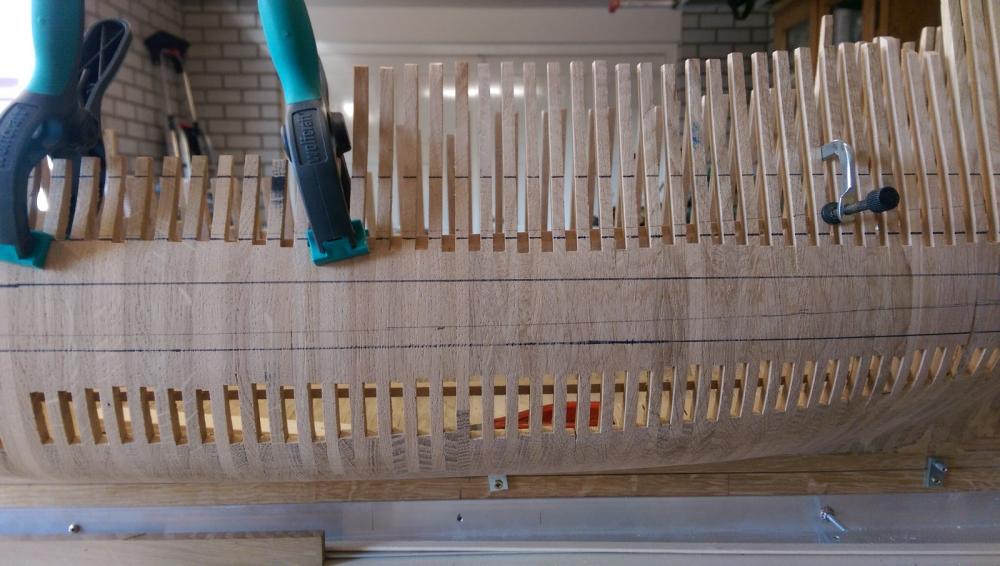
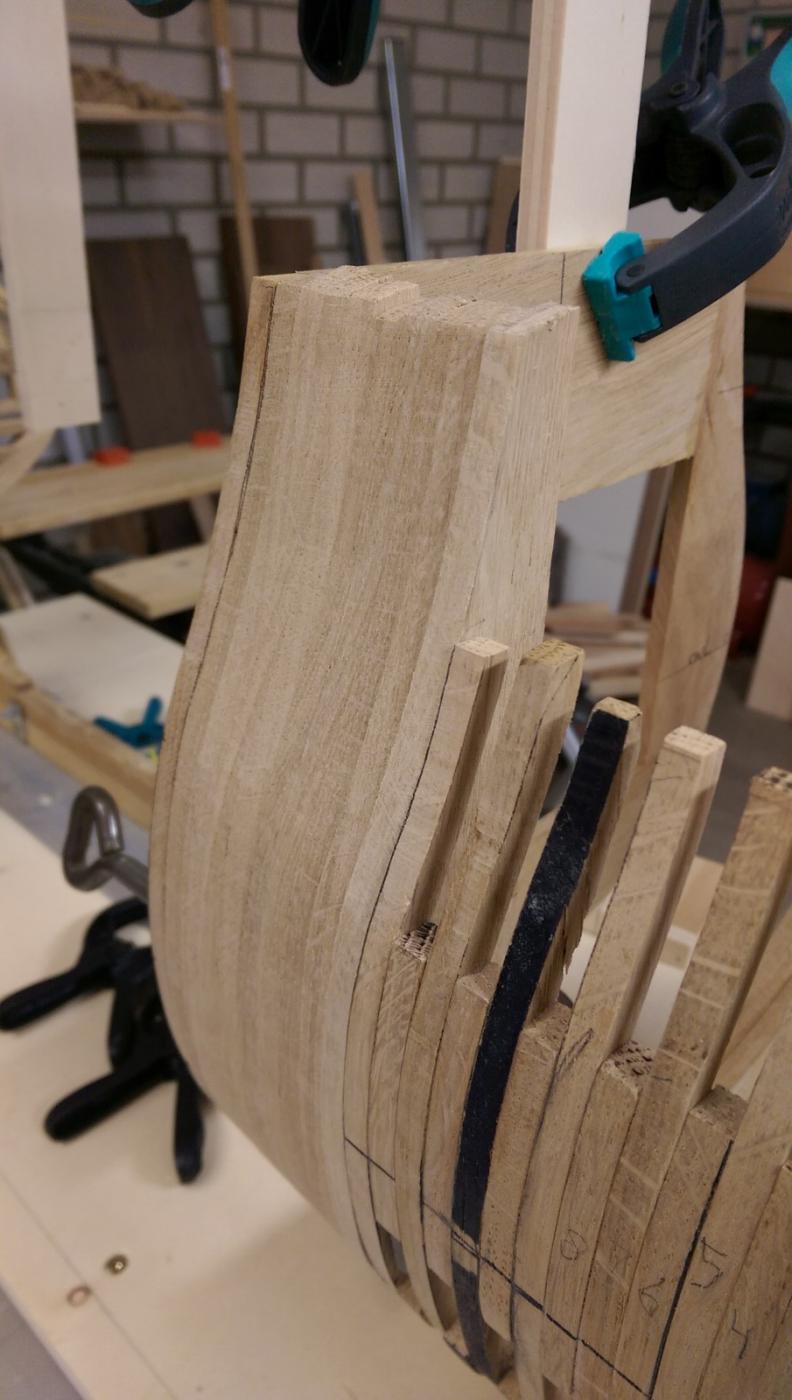
I finalised the hull around January 2016.

The reason for taking that long is that when I got tired of the treadmill of framing I stopped for weeks or worked on other parts, like the windows below.
-
-
Missed your birthday, sorry Piet.
Als nog van Harte!!!!
ps the goodies arrived and I am perfectly happy.
BTW very nice build!!
Rgds Hans.
- CaptainSteve, mtaylor, Piet and 1 other
-
4


 .
.


74-gun ship by Gaetan Bordeleau - 1:24
in - Build logs for subjects built 1751 - 1800
Posted
Well I am in for this! Cant wait to see you start....
Good luck and have fun!!
Hans.