


YankeeD
-
Posts
146 -
Joined
-
Last visited
Content Type
Profiles
Forums
Gallery
Events
Posts posted by YankeeD
-
-
haha, I am in the electronics business.... But no 1mm solid core copper. The main there is either stranded wire or solid core but then 1mm2 or up.
So As said I do have the 0.4 and 0.5 but 1mm seems hard to find. And some times you find 1mm brass but as said above that tends to be quite stiff.
Well we keep looking.
Thanks for all teh help/answers. Hans
-
1 hour ago, G.L. said:
Very nice maintop.
Is that oil paint for artist painters that you use to make your color?
Yes indeed. And I dilute it with pure white spirit. Learned in another thread here and on some other forum.
- popeye the sailor, mtaylor, EJ_L and 3 others
-
 6
6
-
July, and the weather keeps good here, too good to be really busy. But some progress was made. I proceeded with the main mast, cap and top and also the formast. I enjoyed making the top (mars). I needed some workabouts to get the nice round sphere.
.thumb.jpg.ba94bc0ae4cc0226407739e1678ca4bb.jpg)
Fine tuning the size and shape.
.thumb.jpg.7ad662f69a28fb2d3fddde87fd4e82b0.jpg)
.thumb.jpg.e0ae427b098aa088e852499ad7bb17a5.jpg)
.thumb.jpg.54a0bbf43117e21719cf80d6b16a0da6.jpg)
here the hings holding the outer ring are still too bulky, I sanded them into a smaller outline by hand.
.thumb.jpg.313ddfc0dcbbcaaf18c920adb4e61130.jpg)
As you can se here. and the outer is glued and hold fast for drying by some tie wraps.
.thumb.jpg.815308fcdb62317e7750363daf2c844c.jpg)
Coated and dry fit on the mast
.thumb.jpg.67968a2bff0d0c8406e83ee7650cf43a.jpg)
The status as per today. Now the top for the foremast.
.thumb.jpg.50a68316710897419e0a7bfdc3028fc2.jpg)
Also some experimenting with oil colour for the hull and decks. The smaller parts like masts gratings ornaments will be in 'beits' the colour as per previous picture.
.thumb.jpg.2f753d8081c062a50fa370337315a828.jpg)
- Duanelaker, KORTES, GrandpaPhil and 16 others
-
18
-
 1
1
-
Kees, very nice!! Question: the copper wire is that 1mm? where do you purchase that in NL?
I do find 0,5 but I also need 1mm and can't find it. (Maybe not looking hard enough....)
rgds Hans
- kees de mol, mtaylor, cog and 3 others
-
6
-
some beautifull building here... hats off
- kees de mol, Piet, popeye the sailor and 1 other
-
4
-
Thanks for the explanations. I will follow your build and further lessons about the historical building of our Dutch vessels with interest.
Rgds Hans 👍
- druxey, FriedClams, mtaylor and 1 other
-
4
-
Another month passed by so time for another update. Not much has happened as we were out to the sun for a couple of weeks.
As said I continued with the masts, below the 3 masts are the final masts outlined and all..
This was quite some ado to get them in the right angels in both directions... langscheeps and dwarsscheep... (Longship and sideships???)
.thumb.jpg.a87e756cf9e06173f92e9e83bbb28947.jpg)
.thumb.jpg.e147484c099f7ae64188216c4a0611d0.jpg)
Next step the ezelshoofd and hommer, the pictures speak for itself but there was some mindbraking involved to get what I liked.
.thumb.jpg.6554f9b8906d8fd8cf66152305d4edae.jpg)
.thumb.jpg.32923558fff32aa406a8757a32473b2d.jpg)
As the mast were too long form mu turning device I had to invent a workabout...
.thumb.jpg.6fa0b67eb2de1500b769bccf5e571a4b.jpg)
.thumb.jpg.859a1243e12d23d19f62cfab8947d890.jpg)
.thumb.jpg.7868fbc390d4a09fbd489dfdb0759563.jpg)
.thumb.jpg.3ee82685b7b5b8464ea5356a69cf8e7e.jpg)
.thumb.jpg.14fca8d71ca258f6a11e623e1f6a2a06.jpg)
.thumb.jpg.f2d50f548b903f12c17afacaffd47a73.jpg)
.thumb.jpg.c494a71a3db05f5c7521a841d384d57e.jpg)
-
More than a month ago so maybe time to give an update. Steadily working through the gunport hatches, a tedious and boring job.
.thumb.jpg.12cae8be453a34808e2cc3fac3ab3712.jpg)
Fitting all in place..
.thumb.jpg.55eba5d287885b9ea89ec3c91ee2d060.jpg)
Working the hatches into place and adding the gunwale parts.
.thumb.jpg.d6d09437692826fa483cbfdde3bcc4bb.jpg)
4
.thumb.jpg.8f5539a6fe6e80051f2f2ad14b32076e.jpg)
But I am happy with the looks. Not too tight and perfect. I like it that way, as I am sure ships in those days weren't neither.
.thumb.jpg.4fd4fdf635567555ec9078b185141fe9.jpg)
Then the insides grounding.
.thumb.jpg.7e096cd938fc3f9a5f115bccf79dd956.jpg)
And I still like how it came about.. The next steps will be finishing the maingun deck so I added some loose parts that I build earlier for the looks. I guess any builder wants to see how it will look and cant wait to see the whole....??
.thumb.jpg.63f9e59d02335d428da2757ba391de6b.jpg)
Also I will be doing the final masts at least first parts, as I have been using too short counterfits. Below the right lenght cuttings ready for working on them. This I will do first as I will be happy to turn from the monotonous work of the gunports.
(Please ignore the deformation of the mobile lens.. it gives some strange angles here and there)
.thumb.jpg.37c61fb193406c548fa728eec8b7e3b7.jpg)
-
In the meantime we have advanced. I build a new clamping/workboard. As there is no longer need to hang the ship upside down and I want free space to work all around the ship.
.thumb.jpg.1040fa07afbd045b882daa61a891a391.jpg)
The next steps are working gradually upwards now. I have to finish everything around the main gundeck before I can close the next deck.
.thumb.jpg.2808a326a1a65ce2d483a66357aa55c9.jpg)
A test with a 3D printed model of the emblem
.thumb.jpg.b711f4ccef5c50f9f764a88e52d541cc.jpg)
Filling the gap to be able to add the planking
.thumb.jpg.43c25ae41a0d14bd4ef898f7ce4b9040.jpg)
Then the gunport rabbits and hatches
.thumb.jpg.c11ae37fdb72339e94be013b9b5eb5d6.jpg)
Rabbit sanded to follow the hull.
.thumb.jpg.c7a6ef268ad8382b1e7cf4f3fbc57aa5.jpg)
.thumb.jpg.f2360b1cc723aa34c84d79873151149b.jpg)
.thumb.jpg.f71dd094d6c9b9238a0a6a12c5d09101.jpg)
And so far for the port side, now on to starboard side.
.thumb.jpg.39ded5a46081ec1511c66250f94afbc5.jpg)
.thumb.jpg.68b6ec7852c7624a34328f931c5aa2fe.jpg)
-
-
On 3/3/2015 at 4:14 PM, amateur said:
Have you seen the model by Peter (Mr Hollom).
That's becomming a real stunner: (can't impute a link here ...., search for Hohenzollern)
Jan
It seems the build of Mr. Hollom has been deleted??
-
I finished the rudder. I am really satisfied with it. I will not fasten i yet. Only in a later stage, just to prevent damages.

- tadheus, Valeriy V, marktiedens and 14 others
-
17
-
Hi all, (do not want to be gender specific....;))
I have returned to the hobby again after a full recovery of my hand. Thanks for all the good whishes.
Just waiting to get the right hand done, but that will be spring somewhere. not just yet...
I have started redoing the rudder as said. I am using mainly the method used by Drazen (Thanks for that!) I think the photo's are mostly self explanatory. Its a slow learning curve but I like it very much although progress is slow.
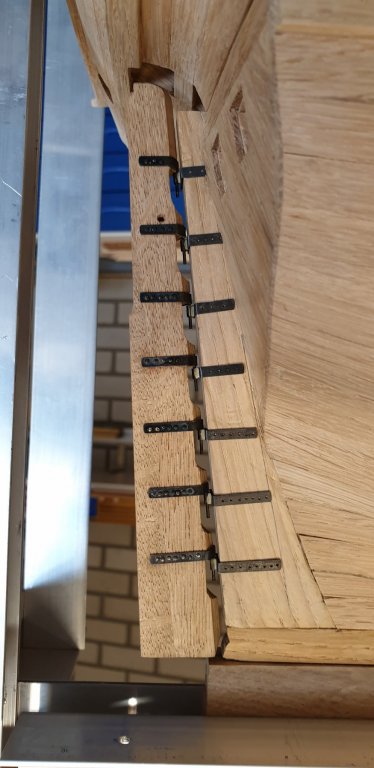
I made the rudded out of seperate parts of wood, taking care of the grain direction as to prevent as much as possible deformation. And I decided to do the hinges also from scratch. Previously I used Amati hinges.
.thumb.jpg.8e2d1a3ce5e1d3af1ab1abb43a357792.jpg)
.thumb.jpg.414af3f19d06194cba38e01696dbf098.jpg)
.thumb.jpg.7950b7247d594c66382accac5614ee6e.jpg)
.thumb.jpg.bd14f4a6d1f020a505ee7020a8f8ffe4.jpg)
In the background the Amati hinges from the previous rudder.
.thumb.jpg.048dc4a1a9a3f55445625a35bbdc6394.jpg)
I had a big problem blackening the parts. I left them much too long in the solution and 2 were totally 'eaten' away. I did 4 pieces again.
.thumb.jpg.c1e95c6b42927abef9098fb5beac60c2.jpg)
I on purpose made the bolting a little out of line. I like the looking of this.
.thumb.jpg.c841cc8236825e8b79b8f66899b821af.jpg)
.thumb.jpg.88b5984f67420fcb3dc3592212451ec4.jpg)
And now up to the counter part. I hope to finish today.
.thumb.jpg.402d95c18c88fb1f78ddd06f6b1245b8.jpg)
-
Thanks for all your good whishes!!!
- FrankWouts, EJ_L, Piet and 3 others
-
6
-
-
Just a short update. Its been very quiet and I haven't done much.
I have had surgery on my hand and that takes more time as expected. I also neglected to take it easy and that put me back again a couple of weeks.
Also the motivation is low. The weather is cold and bad and I need to go outside to the shed.So I guess it will be untill next year before I will continue. Don't worry I'll be back :)!
Hans
-
Well its been more then a month, time for an update. I finished both sides with the gunport inserts/rabbits It took me the majority of the past months.
Still also some small corrections but I am happy withe results.
In between sides I stopped for some diversion to work on the gunport lids and hinges, just as a test. But I am not satisfied. I have to find an easier method to make them in qty.
For now the work will stop a couple of weeks for holiday. The next step I decided to do the rudder anew. I made that in an too early stage and I want to improve it and more realistic. I just became more and more unhappy with it.
.thumb.jpg.8d16671ca51bc2746ca21f8dff6b4ab0.jpg)
.thumb.jpg.751d5c38ccab368822c9537a833ed242.jpg)
.thumb.jpg.fff9a3fa803891247a1f481d1b7d011c.jpg)
.thumb.jpg.e3f96948e1ffd24eb410b11168f32239.jpg)
.thumb.jpg.46d41bbc6e92c1be034bbb6248262b3b.jpg)
.thumb.jpg.3ebd729c340e314bcc898be38882f46e.jpg)
- druxey, Duanelaker, FrankWouts and 19 others
-
22
-
On 2/24/2018 at 8:52 PM, paulsutcliffe said:
Any chance of you getting these scaled up to 1/48
Regards Paul
I second that
")
- Canute, mtaylor, paulsutcliffe and 1 other
-
4
-
I am joining in, great techniques to be learned here!! Very nice work indeed.
Grtz hans.
- Piet, mtaylor, kees de mol and 1 other
-
4
-
Well i am finshed with plancking up to the third whale on both sides now. Both sides had the same flaw with wrongly placed gunports which have been corrected now.
.thumb.jpg.180a57715efcb042ac8b3f5cde0606be.jpg)
Below picture does not show the correction yet but the camera (GSM) also has some distortion and the angel differs from the picture below of the starboard side, so it is not as bad as it seems. In the mean time this side has been corrected as well.
.thumb.jpg.ac61d5ab44eddaef0651a1fc85724bb1.jpg)
.thumb.jpg.56a908730bef2e2822c9d6b6704c0e2d.jpg)
Now I started working on the gunports and the rabbets. To make the gunports I made a sanding tool, 2 sides sandpaper only. It works great although slow but accurate. It makes it easy for me to make sure the ports are perpendicular (thanks google).
.thumb.jpg.e248b38601eca5553dd2d2b9be7095ab.jpg)
.thumb.jpg.bea8f16abb953a2f7cd556fcab9c2017.jpg)
All the rabbets are oversized in lenght, so I will make them fit and than protrude them and sand them to follow the hull. Then I will have them fall back about 1.5mm and sand the inside equal to the inside planks. I will not fasten them until I am ready to move up and start on the upper deck.
But before starting the upper deck I have to decide how far I will go. Do I install canons or not, only a wooden model or closed gunports???? havn't made my mind up about that yet.
.thumb.jpg.da1088fe6d15a112e35c2545e72e1868.jpg)
Secondly I still have to come up with a good working method to make the gunport hatches. including the dilution to fall into the rabbet.
.thumb.jpg.d9a94962210f6859908f303e1bd380fb.jpg)
So all in all a lot to do still.
Hans.
-
Well about time for another uupdate although not very much has happened. The weather has been very good for weeks in a row now so little progress.
But Starboard side I finished up to the 3rd whale. I had to do some correction on 2 gunports. Which is the second time but it was still not ok, I simply dont understand why as I checked tripple times before.
here the wrong situation: With the 5th port already a part of an insert for the correction.
.thumb.jpg.3a19132118482fb6bbe81c6751bcf7be.jpg)
Nest steps are the portside planking and the 3rd whale.
Rgds Hans.
.thumb.jpg.ea9b297585d3c6ecdeddeedf6739fdab.jpg)
-
I had to do some rework on the Forecastle deck which I already knew but now was the time to do it.
The running and lines of the frames were not good. After sanding I had so few thickness left I had to thicken the frames.
According to the drawings by Blom the top of the railing of the forecastle deck railing should be a straight line but I will kee a slight curve.
.thumb.jpg.69bb29089812a3ab2a689faf724cf786.jpg)
.thumb.jpg.688d49e981de4f1818bab46849156d3c.jpg)
Here below the portside has been done, the starboard side still needs to be done, which in the meantime has been done as well
.thumb.jpg.764a68e5a2760414a120db2c6824c429.jpg)
.thumb.jpg.3998283f7f6477e4ba792fb5d5d2f86b.jpg)
The next step will be the planking up to what we call 'het rahout' .
And here I have a question. Both Blom and Monfeld mention in general terms about the scarfs/joints of the planks. But this is mainly below the wales.
I cannot find anything about the planking joints above the second wale.
Looking to Winter's photos you also cannot determine, although it looks like straight joints and this might be the more logical as the many interruptions by the gunports.
I think I will use straight/flat joints as it makes life easier.. Any comments/thoughts are welcome.....
.thumb.jpg.a9bc7cd011ee7daf8a62204e51584136.jpg)
.thumb.jpg.ef83a6e6312cb03ec2834346f15c8dbb.jpg)
.thumb.jpg.549548ce0e3f5ca90dad7f2b1400c12b.jpg)
-
On 3-5-2018 at 9:01 AM, greenstone said:
English, and there is an instruction in German (for Europe)
Well may I correct you here. there are more people in Europe that read and speak English than German.
So I guess that might be true for moddelers as well. So for european kits I would certainly include English as well.
But they are very very nice kits!!
- thibaultron, Canute, paulsutcliffe and 3 others
-
6
-
Well another month passed and some holidays in between and a bad eye infection thatkept me from working on the ship. But we still had some progress.
I found a discrepancy on the gunports. Both side the same. So I decided to first correct that and then to fix the stern and the missing frames to the stern.
After that I intend to start the hull planking upwards.
.thumb.jpg.31acb4fda2b1e5ba79ef5b9d18417639.jpg)
I know the white line of the (Rahout??) is not correct but its on purpose to get the correct lining for the frames. Once the frames are ok I will return to the correct line.
.thumb.jpg.e54b91c1f1ec14194d80989ebc8c8674.jpg)
.thumb.jpg.3c4ddea0d68770f785ddc91c201dcf86.jpg)
Have a nice weekend all.
.jpg.799987e451278b9bae1f313ba899c8a6.jpg)
.jpg.3e541892fbf6fa429852156a36c6efcc.jpg)
.jpg.912cb8825b66eb09f48ae579277aef2e.jpg)
.jpg.ed08fbe92144030144bac2933aa76691.jpg)
.jpg.ef63693493bdb88e17bb5bceae321575.jpg)
.jpg.d1da85e867241216e0815605902aff72.jpg)
.jpg.9b7b896089b5ba527f52e28a9d411fec.jpg)
.jpg.c395298f16e8267b2faf1d2a112baa35.jpg)
.jpg.3bb2ee84ca75ebc28808fbb6f9d5a898.jpg)
.jpg.40ec95091f2c4a567aab5d1f7a45be38.jpg)
.jpg.1b2e670242244e1760af3de4311c5c5b.jpg)
.jpg.180db52f1a4031601f7224a3c4c8db0f.jpg)
.jpg.5cd60606f213d2b0f2ecef12e6a642f8.jpg)
.jpg.5a39cacce70340a572705331e6eed88b.jpg)
.jpg.8396b796767682203023e08de5c8e1c1.jpg)
.jpg.20da53fd52cdd4968c6b8c9314d1d7ca.jpg)
.jpg.ae56198f7d7a62b456fa566ad3afff79.jpg)
.jpg.75d958e1d44a422d329233dbb70dae3c.jpg)
.jpg.d953e92fad08b74ffe34844e5f4bf830.jpg)
.jpg.7f233aff3eac99c28fbad1cb1d517cf1.jpg)

.jpg.0e75f6757544794770bd2402cbcb0021.jpg)
.jpg.db71927a64bb710bb2d5c5d41a0df1f3.jpg)
.jpg.a25cd5b81cc4f420cc815e273298d923.jpg)
.jpg.5ca3e7e81feb3a8c0e12c000c8843993.jpg)
.jpg.b1bc5aa7497983b49c4c0984382d47d2.jpg)
.jpg.f914f296dbc7124298a912f9c92ce9a1.jpg)
.jpg.6af7e38b55e376a08a1cfafff9d2dc77.jpg)
.jpg.72029dfdfff4541e9b1dfbe8909bd7b0.jpg)
.jpg.1e844f29a0863367905d44fc1a4efeb9.jpg)
.jpg.4a12c4e9a62835fda5f37669be20c849.jpg)
.jpg.3f35155f62c7ed1030500335e7fdfd81.jpg)
.jpg.659fdddb84f23d489e66b71c585971f6.jpg)
.jpg.224feb22e953dd9100ef396ca446e3b1.jpg)
.jpg.ae89112b59770d22ad7bd10e4ed843e1.jpg)
.jpg.1bd4611d01209e0004b70adf52ec7aae.jpg)
.jpg.b3c9dcab3db4a6b26d7a75a1768b2dbb.jpg)
.jpg.2846d5e82b9106aae5364a4d125eb4e6.jpg)
.jpg.86fc30a095db25c3c49eaa1da9ba66e9.jpg)


.jpg.2645e84e77890e08690cb46315589fee.jpg)
.jpg.8b0350f8c9d440a30fd6381e9ea4b299.jpg)
.jpg.0a9ddc9c62defa6886e0969c44bd3854.jpg)
.jpg.bdb1ba930d06578366e3ca7cc6a7b2fd.jpg)
.jpg.fe3e5e8db3e6147c9c03695f7a37678e.jpg)
.jpg.09548506f85e5d17d224c55984338b5d.jpg)
.jpg.945b4204a9b0a8b96615ac3a661bc2f8.jpg)
.jpg.15951e1a13f41191e75f255554384cdf.jpg)
.jpg.24d9cbe0f009170dd9b780c47bd90459.jpg)
.jpg.5e2fed97de7825023f3d9bb9b4979090.jpg)
.jpg.b432fbef181636199d27f04cd9ff16f1.jpg)
.jpg.c98cec2af727c9e9b0baf96914add95f.jpg)
.jpg.b6568b4f02f502e1a8808fa8eb555a70.jpg)
.jpg.96dc0cadf7325ade5dcef188be6ea25c.jpg)
.jpg.77b53c76839243ee3f960c73d84b844b.jpg)
.jpg.9ff8e0263ab2a26cb9ea8b4a0bf84ea0.jpg)
.jpg.ffb0331f21b67db68ced9b16d68cb376.jpg)
.jpg.907ce2defad9dad47f412b687d3eeb05.jpg)
.jpg.1ee6cd27d161e51d6ff6ed59c0dbd2fe.jpg)
.jpg.9928be980c243fd8e57e58d49faab5cd.jpg)
.jpg.4e841c573b5349a20799d226d3d36261.jpg)
.jpg.877944399bdc8b97b2f893ea3c0bde78.jpg)
.jpg.b621ad3db6c321bf1c3d157d7b653b45.jpg)
.jpg.ce74fc4b0c91d877150a356d76914e49.jpg)
.jpg.3f120985ed3ab2ee32c164f7e47b215e.jpg)
.jpg.68d37bf9ca95a413e238e6647ad3235d.jpg)
.jpg.21142144a15dea3ab25c229a5e768dc3.jpg)
.jpg.8c3ebb398369159a7cff5cd01b5a5ff9.jpg)
.jpg.35c452cd7c92942b67f213a830743281.jpg)
.jpg.793e83e7e081a0f5996b408bbf0e5763.jpg)
.jpg.78464f8009b4f45990cc0b9c6351821b.jpg)
.jpg.8c5a84f69c987be4945ce6e897821130.jpg)
.jpg.3ad32ebfb12d8e09e7a599c84745315a.jpg)
.jpg.1d78d1da0390c840fcf15a9bbee74970.jpg)
.jpg.af6e258e871f7ac4b1c96483e1ce3bde.jpg)
.jpg.2a00e47c419b06ada20e5b0da7422bcb.jpg)
Wilhelmina VII KW140 by kees de mol - Herringlugger 1914 - Scale 1/25
in - Build logs for subjects built 1901 - Present Day
Posted
Thanks Jan! Seems available after all. Will make an order and see.