


KeithAug
-
Posts
3,867 -
Joined
-
Last visited
Content Type
Profiles
Forums
Gallery
Events
Posts posted by KeithAug
-
-
On 4/17/2023 at 8:22 PM, mbp521 said:
, I would, but I'm too honest.
Yep - morals are a problem in most of the world!
- Canute, bdgiantman2, Keith Black and 2 others
-
 3
3
-
 1
1
-
 1
1
-
39 minutes ago, Bob Cleek said:
The late Gerald Wingrove, MBE, undertook as his magnum opus an exact sectional model of the Falls of Clyde in brass (I believe.)
Bob, Yes, I was following Gerald’s build until he sadly died. His jigs were fantastic. I just prefer working in wood.
- druxey, Keith Black, mtaylor and 1 other
-
4
-
2 hours ago, Rick310 said:
PS. I’m dedicating my model to my 5 year old granddaughter!!!
That is an excellent plan.
My granddaughter will be 4 in September and knows Germania is hers. I will suggest to the parents that I need a new sponsor for this one.😬
- FriedClams, Keith Black, davyboy and 3 others
-
2
-
4
-
10 minutes ago, Bob Cleek said:
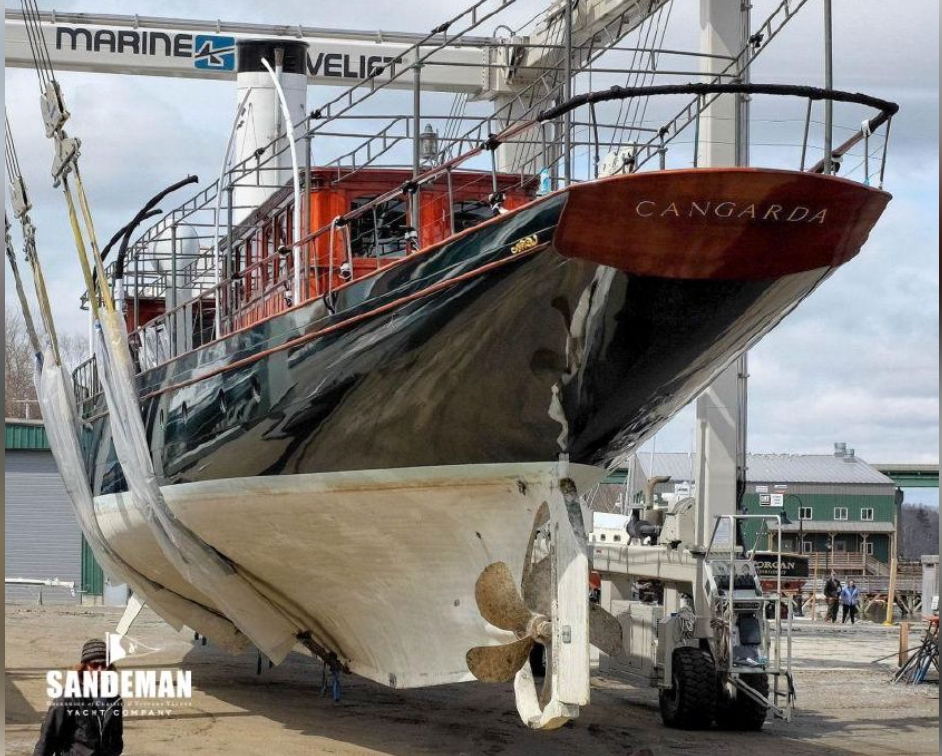
In your Germania build I remember your decision not to paint the Germania's hull. What are your thoughts regarding the Cangarda's hull?
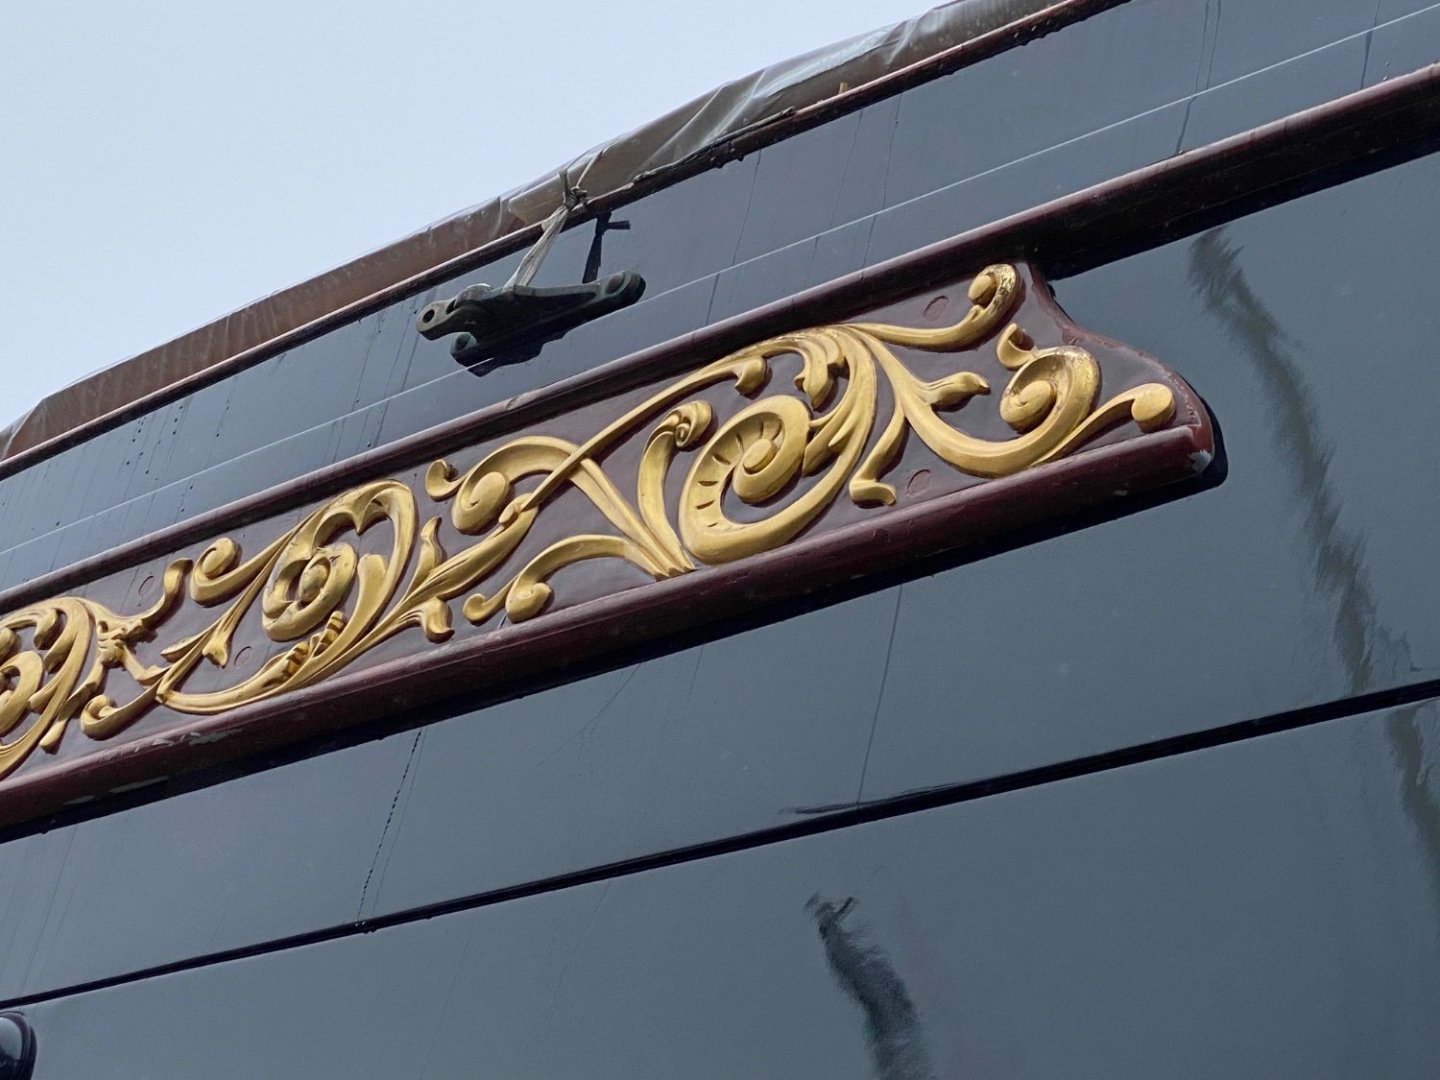
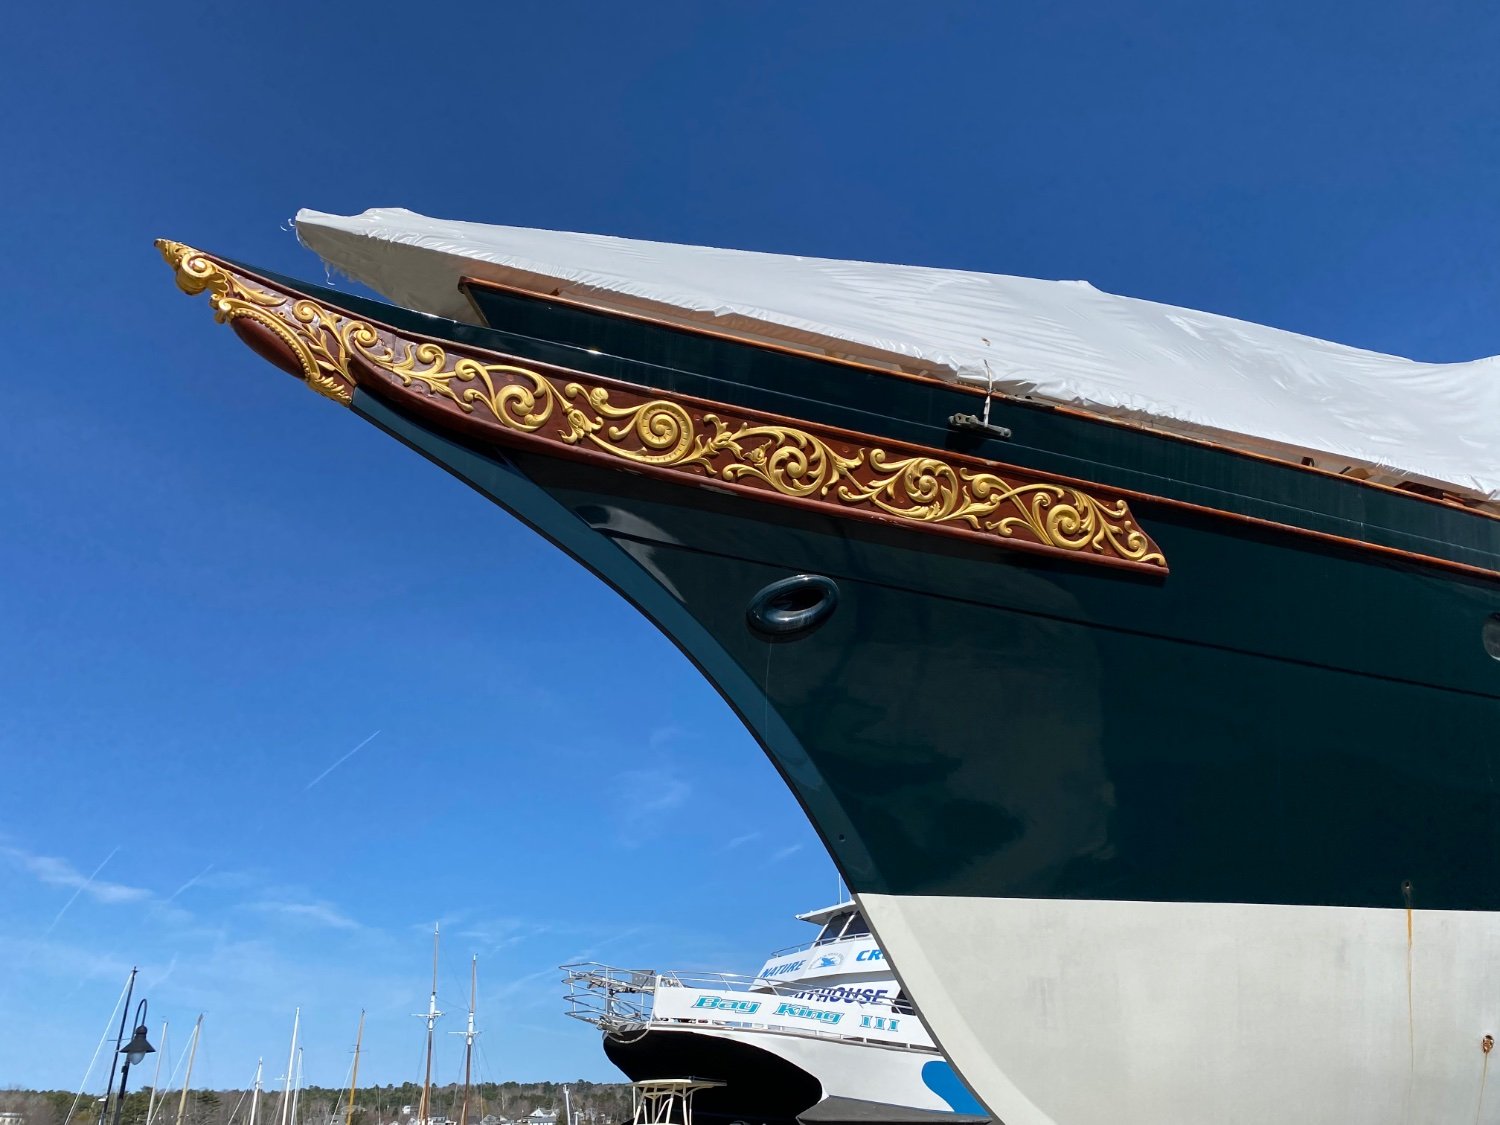
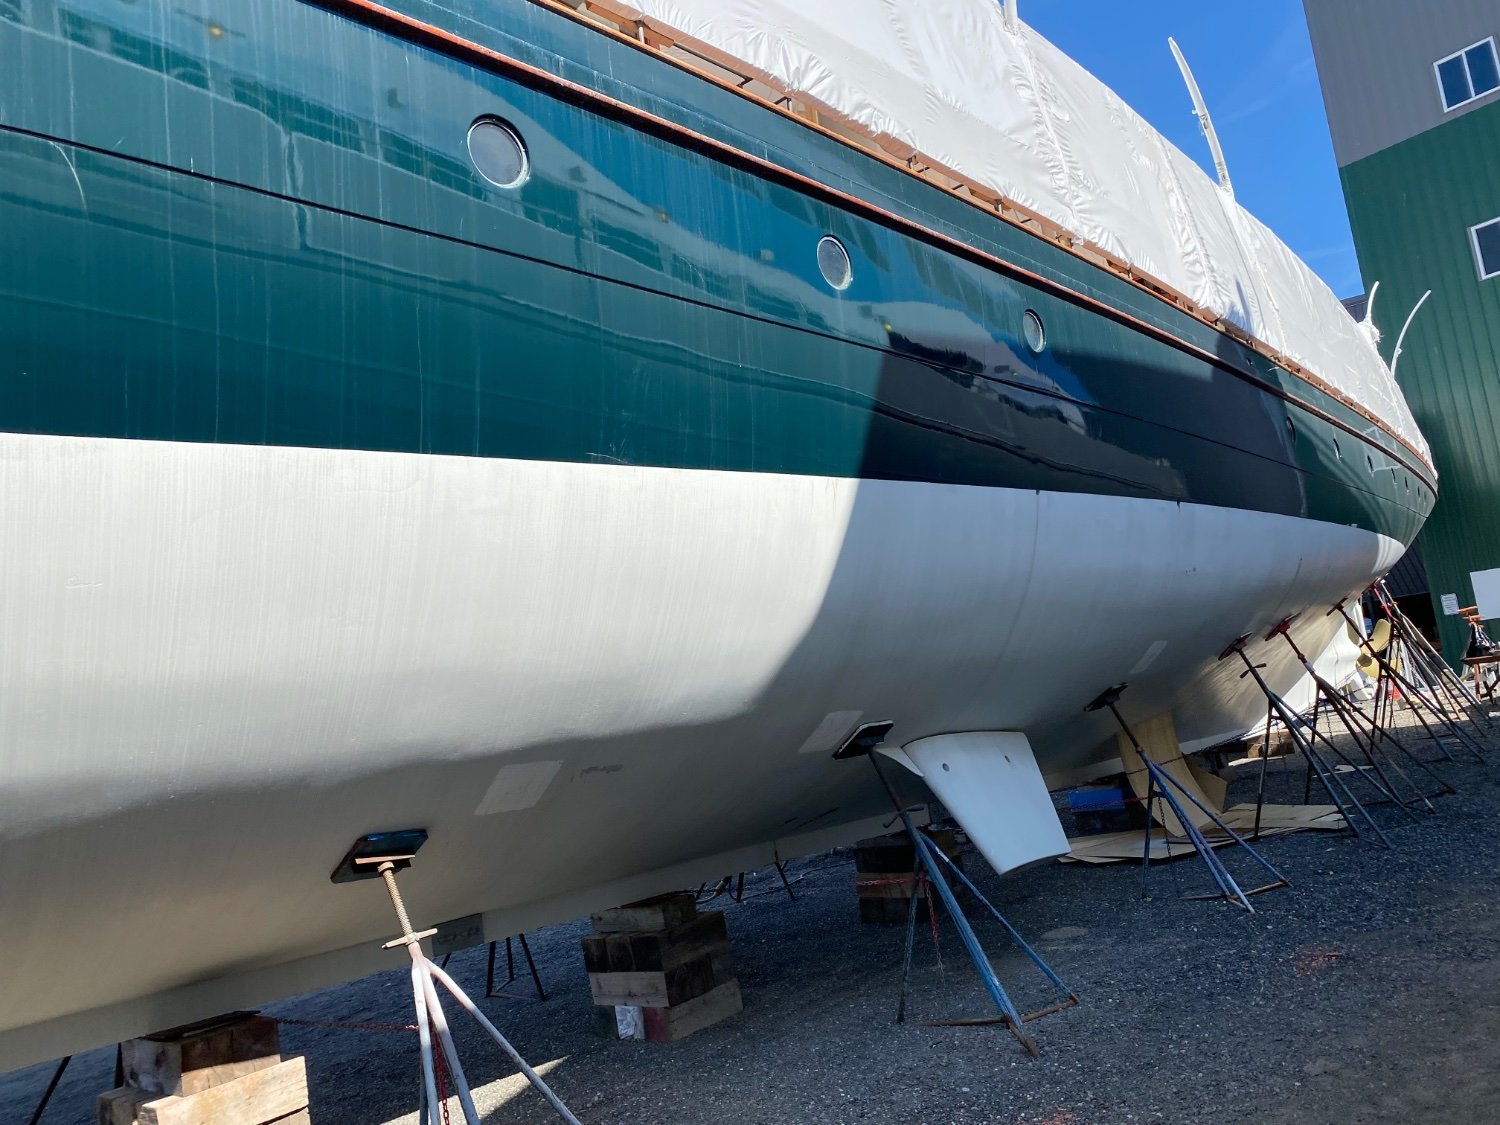
Bob, I’m modelling her as she is now with her all welded “smooth” hull. As originally built she was constructed from riveted plates as can be seen in some of her early photos. My first thoughts on painting are. Plank her hull in mahogany and overpaint above the waterline in green to match her current finish. Below the waterline leave the hull as polished mahogany. But who knows what I will be thinking in a years time☹️.
-
1 hour ago, Bob Cleek said:
Then, later, here she is flying the British "Blue Duster" in Canadian waters. https://en.wikipedia.org/wiki/Blue_Ensign
Bob, hmmm! I suppose she may have a Royal Naval Officer or reservist on board or be a member of a Royal Yacht Club, who knows?
Or it may just be that the red duster is a bit lowbrow!
-
2 hours ago, Rick310 said:
I was able to get aboard Cangarda today and took approximately 100 pictures.
Many thanks Rick.
Are they on memory stick? If you agree I will send you my home address by PM. If you let me know the costs I will gladly reimburse them. Best regards.
- Keith Black and mtaylor
-
2
-
28 minutes ago, FlyingFish said:
mallard green.
Andy - Thanks for the reference. Good job dad didn't have a Triumph Stag - he wouldn't have got very far.
- FriedClams, mbp521, FlyingFish and 2 others
-
1
-
4
-
48 minutes ago, shipmodel said:
it would make more sense to paint it on just before launching. Yes?
Dan she was launched in 2008/9 and I can't find any signs of a hailing port since then - although I don't have a lot of pictorial evidence.
- mtaylor, FriedClams, Keith Black and 1 other
-
4
-
-
59 minutes ago, Wintergreen said:
Roger that!
Is that like "Roger the Cabin Boy" from Captain Pugwash?
- Colin B, mtaylor and Keith Black
-
3
-
2 hours ago, goatfarmer11 said:
Oh boy, I'll be following along for this one Keith. Its going to be a beautiful model.
Denis - over the coming weeks I am going to be generating a lot of intermediate frames which may be of some interest to you.
- Keith Black, mbp521, goatfarmer11 and 2 others
-
5
-
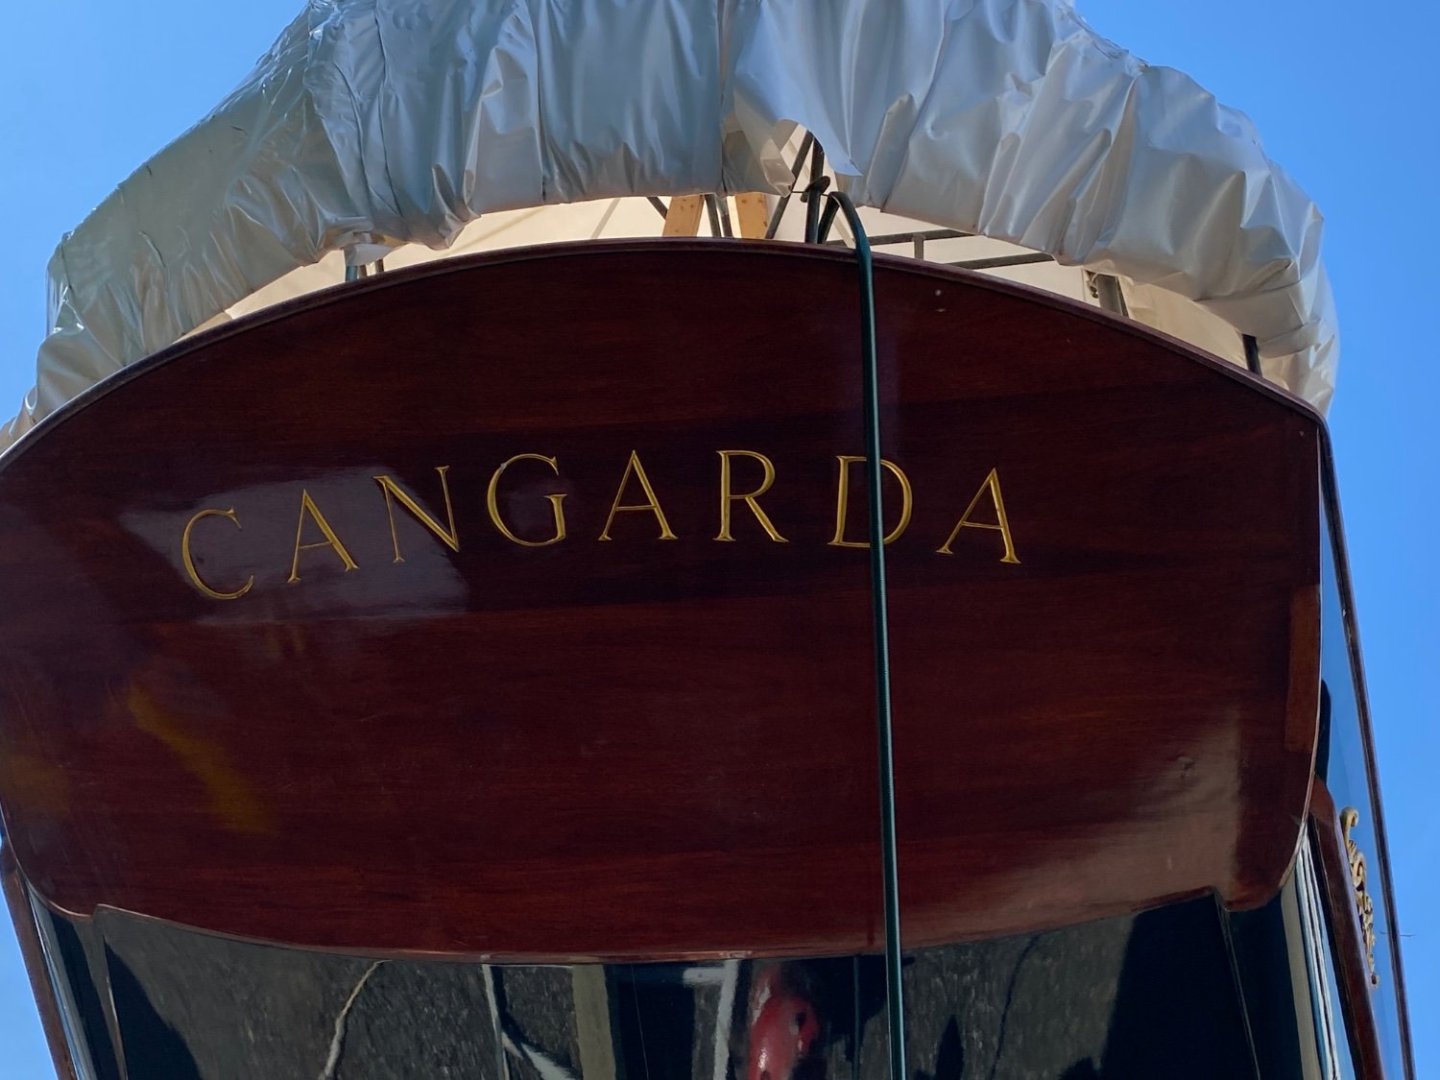
1 hour ago, Bob Cleek said:
. It could be that she was pending transfer of ownership and the new owners intended to register her with a new hailing port.
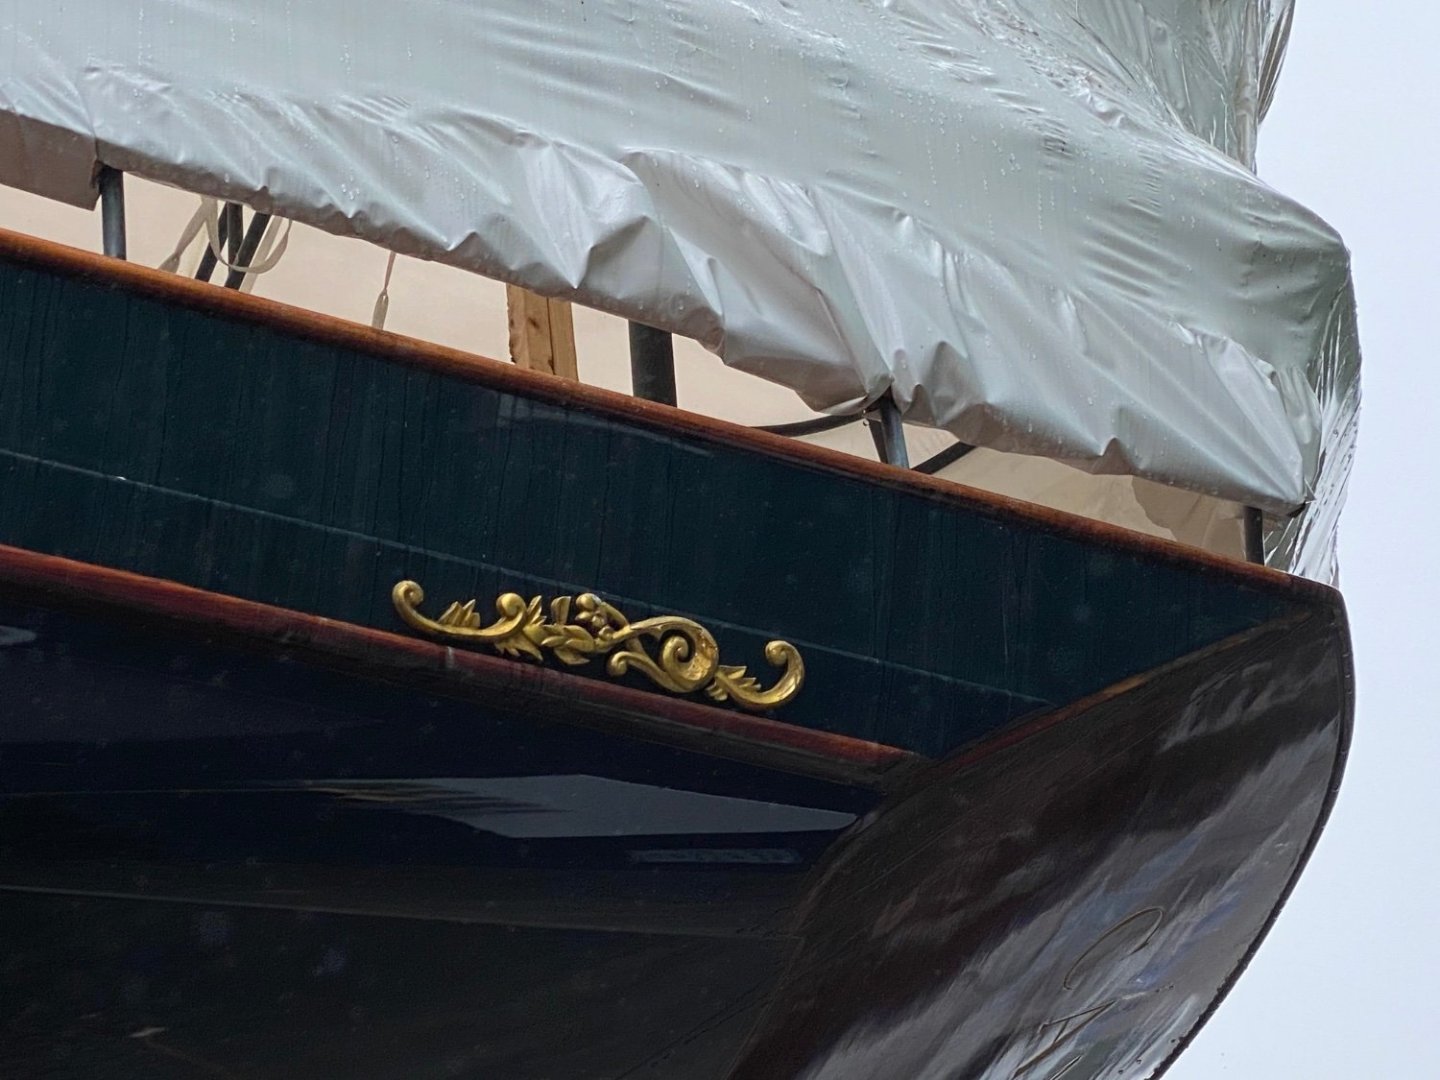
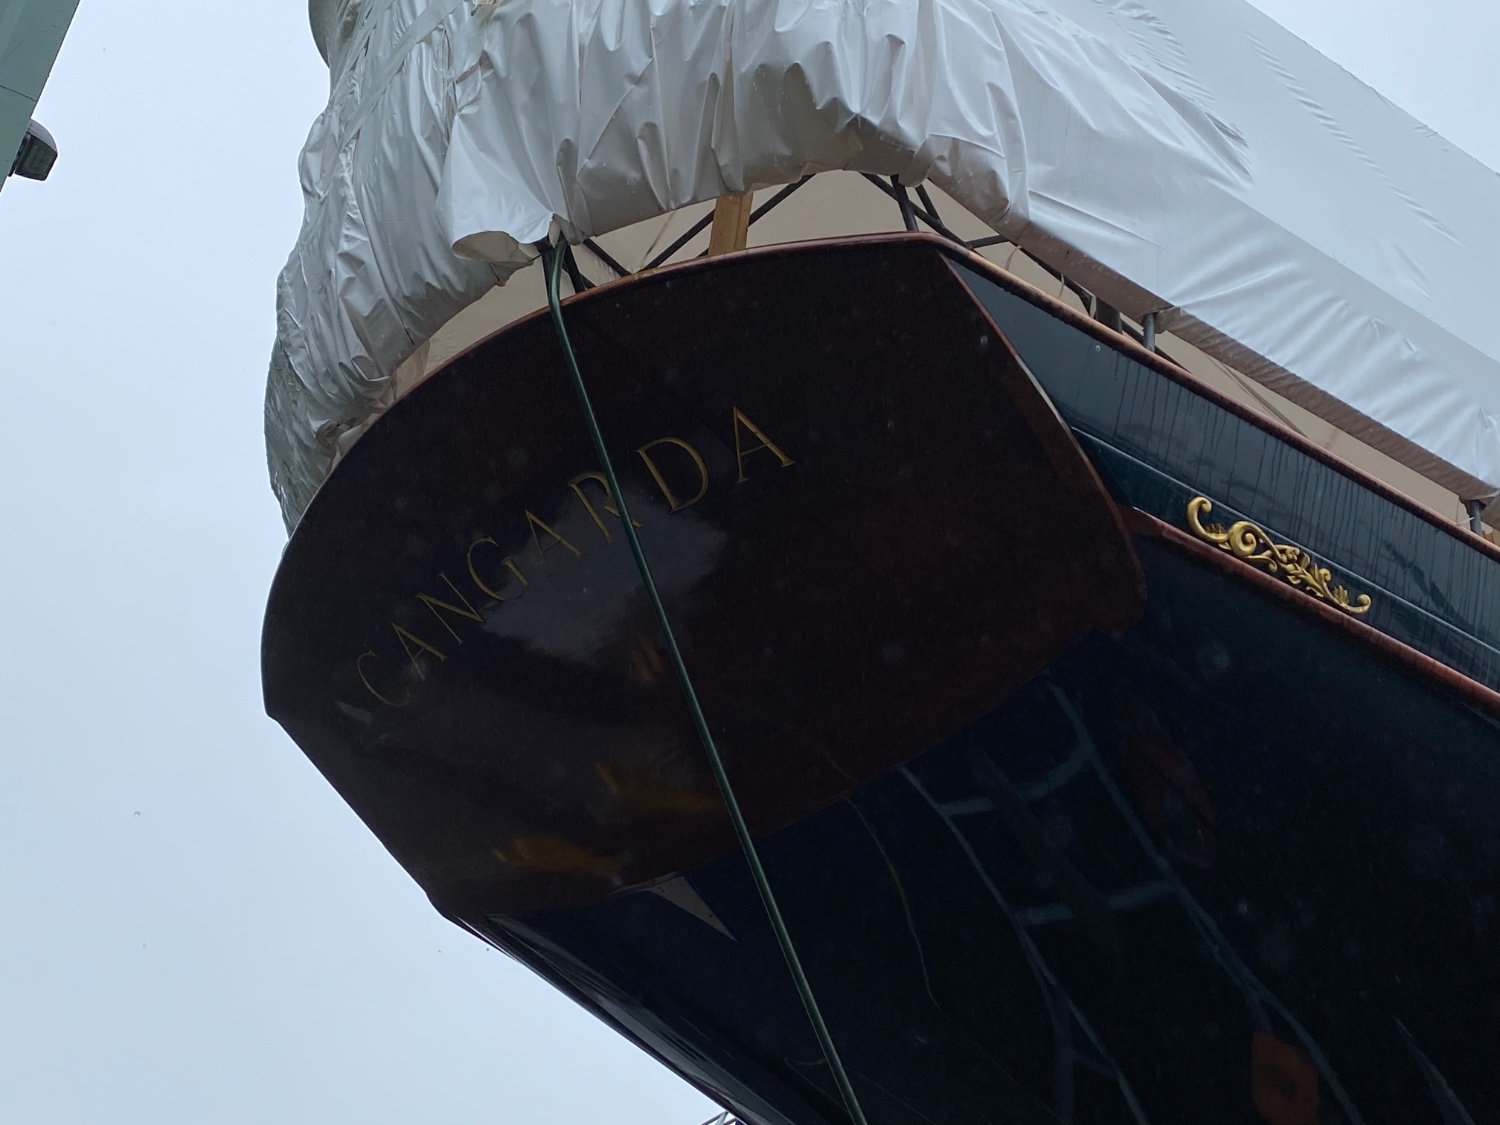
Bob - I thought that but then had a look at the photos I had of her since launch. Only one or two show the stern with any clarity but I can't see a hailing port on any of them.

The second image is August 2021.
- FlyingFish, Keith Black, mbp521 and 9 others
-
12
-
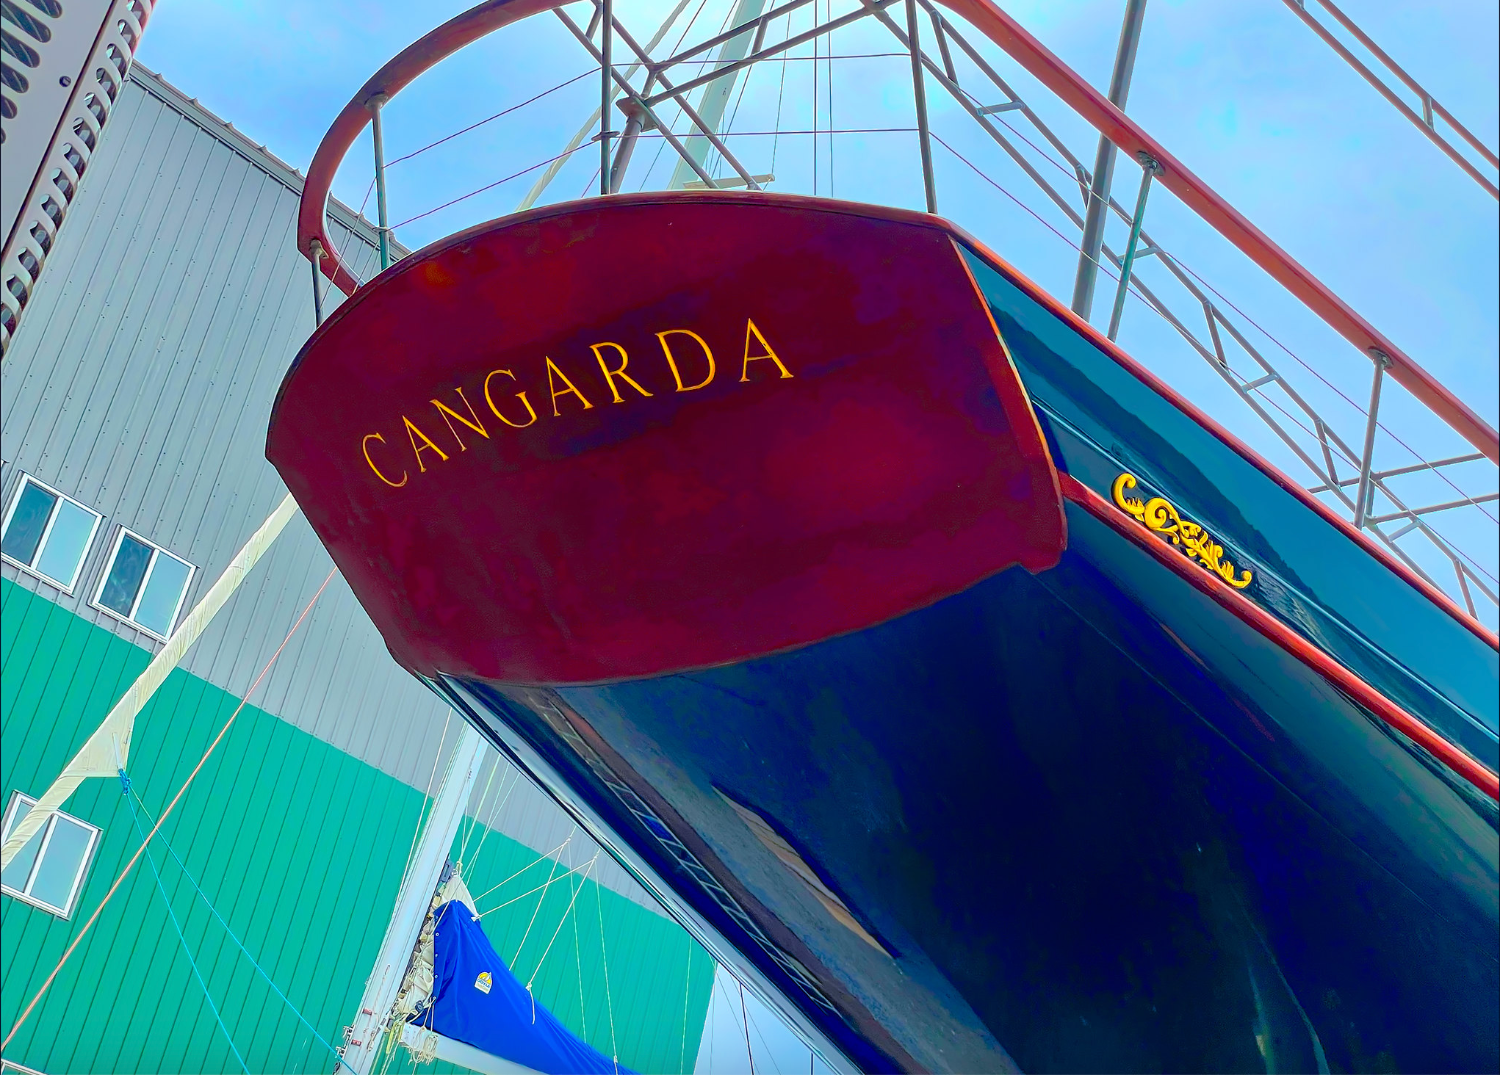
2 hours ago, Bob Cleek said:
BTW, does anyone know why she doesn't have a hailing port on her transom?
Bob, I don’t know but like you would be interested to find out.
This is what I believe the rules are:The name and the hailing port must be displayed externally on the vessel, either on both sides of the hull or on the transom. The hailing port must include the place and a state, territory, or possession of the United States.
- mtaylor, Ras Ambrioso, Keith Black and 2 others
-
5
-
2 hours ago, FriedClams said:
It's going to be quite large isn't it - a little over 5' (1.6m) - am I figuring that right?
That’s what the admiral said ………………….. rather disapprovingly as I was pasting the plans together on the dining table earlier today. She relented when I showed her the photographs of how pretty Cangarda is.
5’9” overall length.- FriedClams, Valeriy V, michael mott and 4 others
-
2
-
 5
5
-
Great forensic dissection of you photographs Keith.
- Glen McGuire, mbp521, FriedClams and 4 others
-
6
-
 1
1
-
-
15 hours ago, mtaylor said:
I really think that you ought to consider starting a log on the Cangard even if it's just a research topic
Mark - thank you - I have started build log
- mtaylor, Keith Black and FriedClams
-
3
-
On 4/18/2023 at 1:56 AM, von_bednar said:
The frame is a single 3d printed piece
Wish I knew how to do 3D printing - all the software issues and failed printing attempt I read of sort of puts me off. I admire those who have mastered the the technique as you seem to have.
- Keith Black, mtaylor, thibaultron and 1 other
-
4
-
20 hours ago, Roger Pellett said:
If our free trade negotiators have failed to exempt legitimate exchange of intellectual materials between out countries then that is a shame.
Roger - i wasn't aware of this and as you say it would seem to be easily circumvented by ebooks. Maybe the law makers have been reading too much Fahrenheit 451.
- mtaylor, Roger Pellett and Keith Black
-
3
-
14 hours ago, mtaylor said:
enjoy real life and save the model for rainy days.
Just for clarity I am certain Mark is referring to the MODEL BOAT.
- Keith Black and mtaylor
-
2
-
On 4/13/2023 at 12:17 AM, Mark Pearse said:
This photo is a good one, a displacement hull trying to exceed her hull speed.
In my sailing days we used to call it "surfing". Very exciting in a short keel light displacement boat.
-
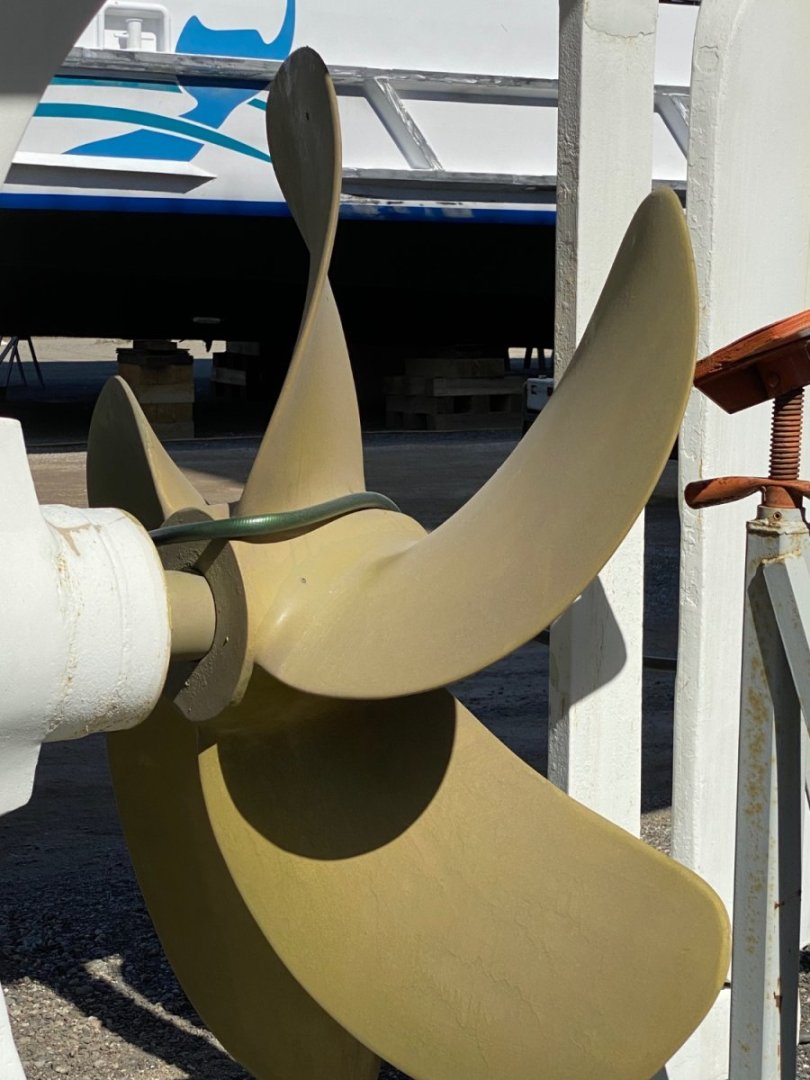
On 3/28/2023 at 6:19 PM, Valeriy V said:
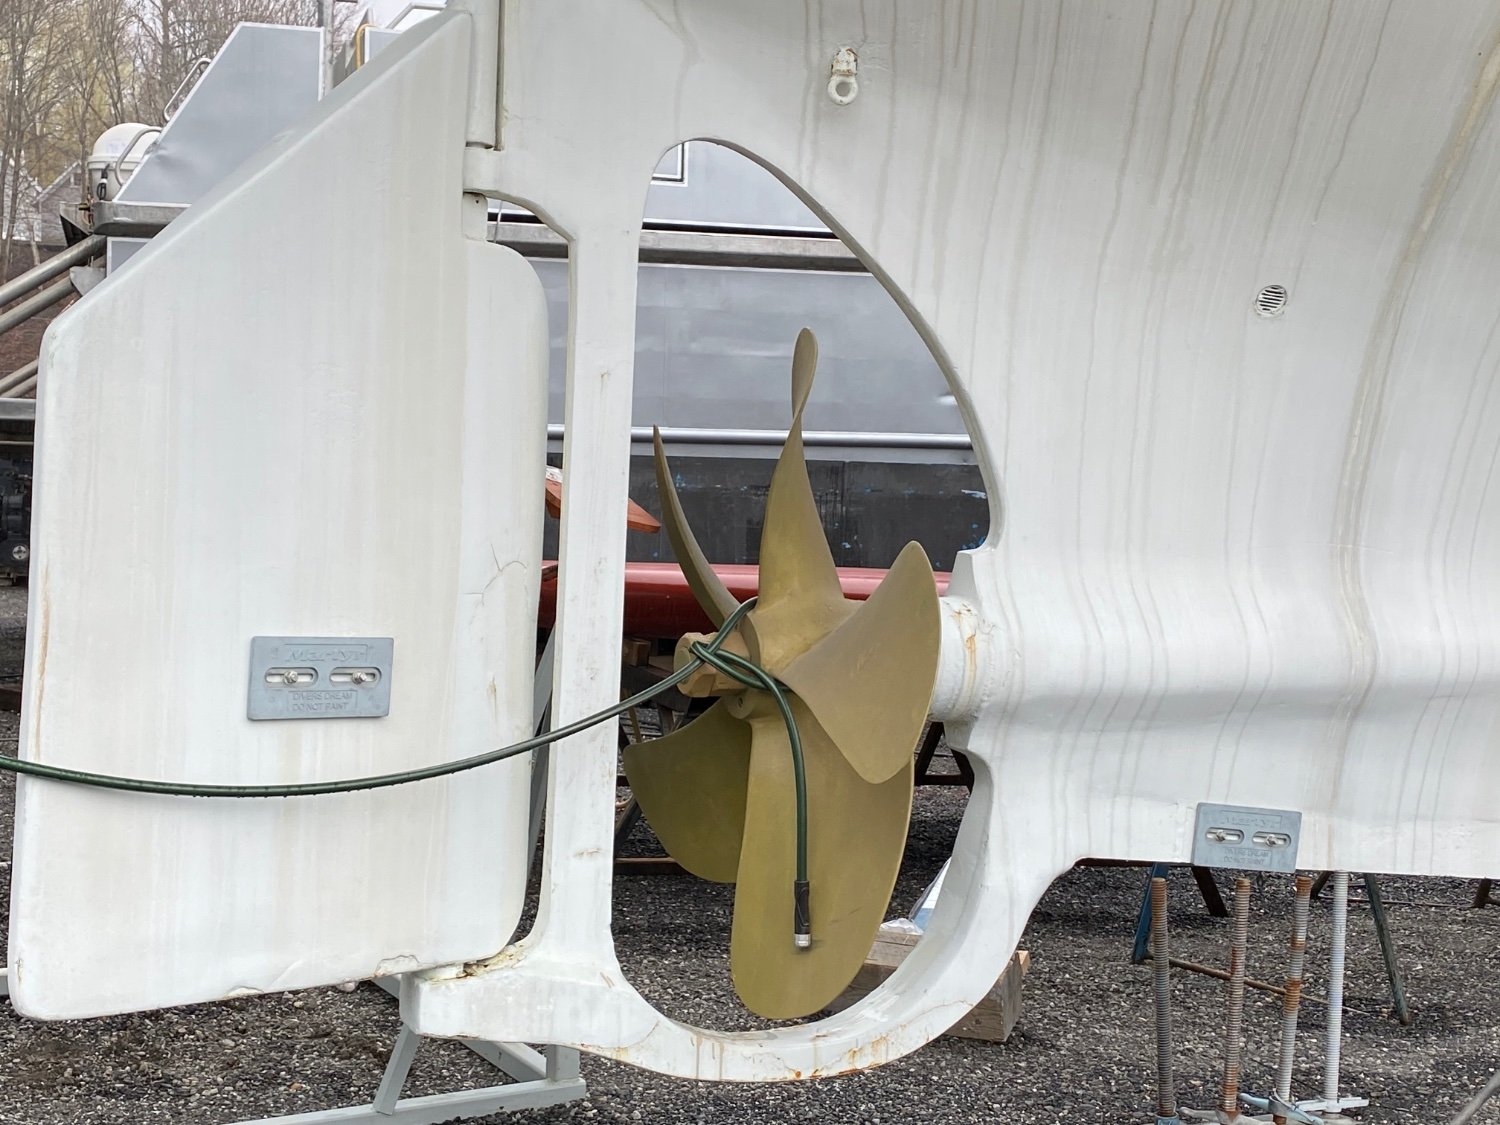
I am making the propeller group of the destroyer.
Very nice, How did you make the propellors and "A" frames? Are the blades brazed on to the hubs and how did you achieve the twist? Ditto the bearing bosses on the "A" frames. Hope you are keeping safe.
- shipman, Keith Black, Canute and 2 others
-
5
-
- NRG Member
-

- Location Belfast, Maine
Keith,
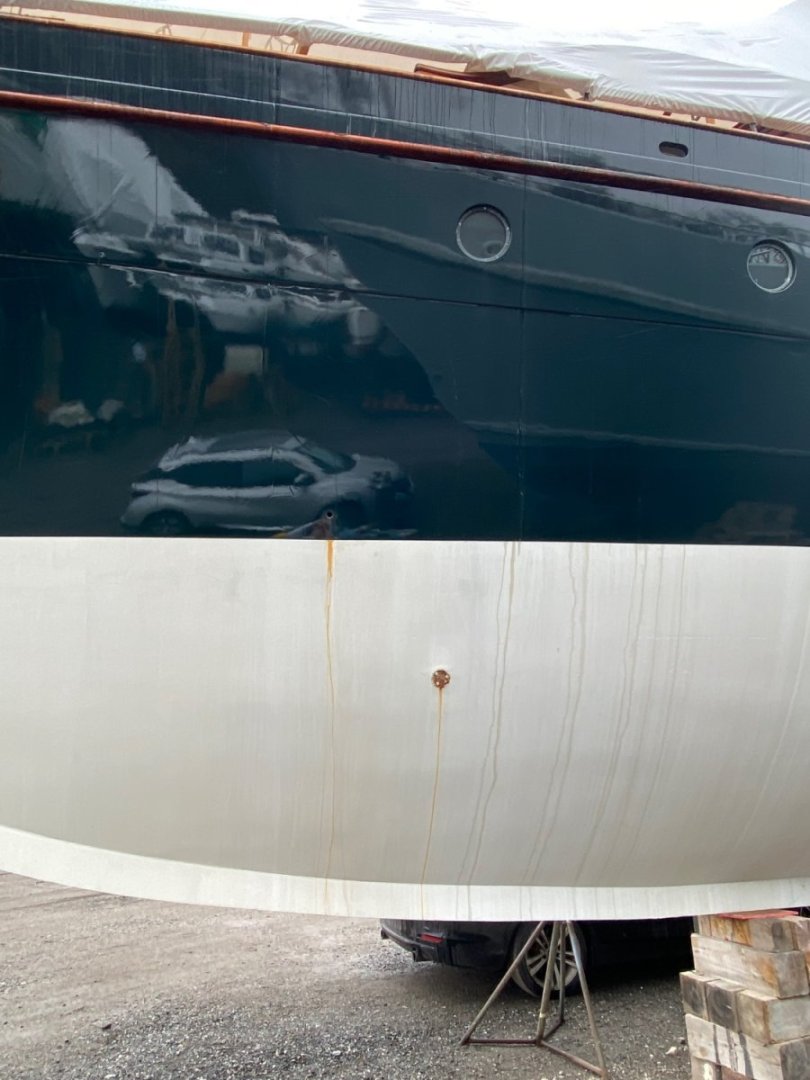
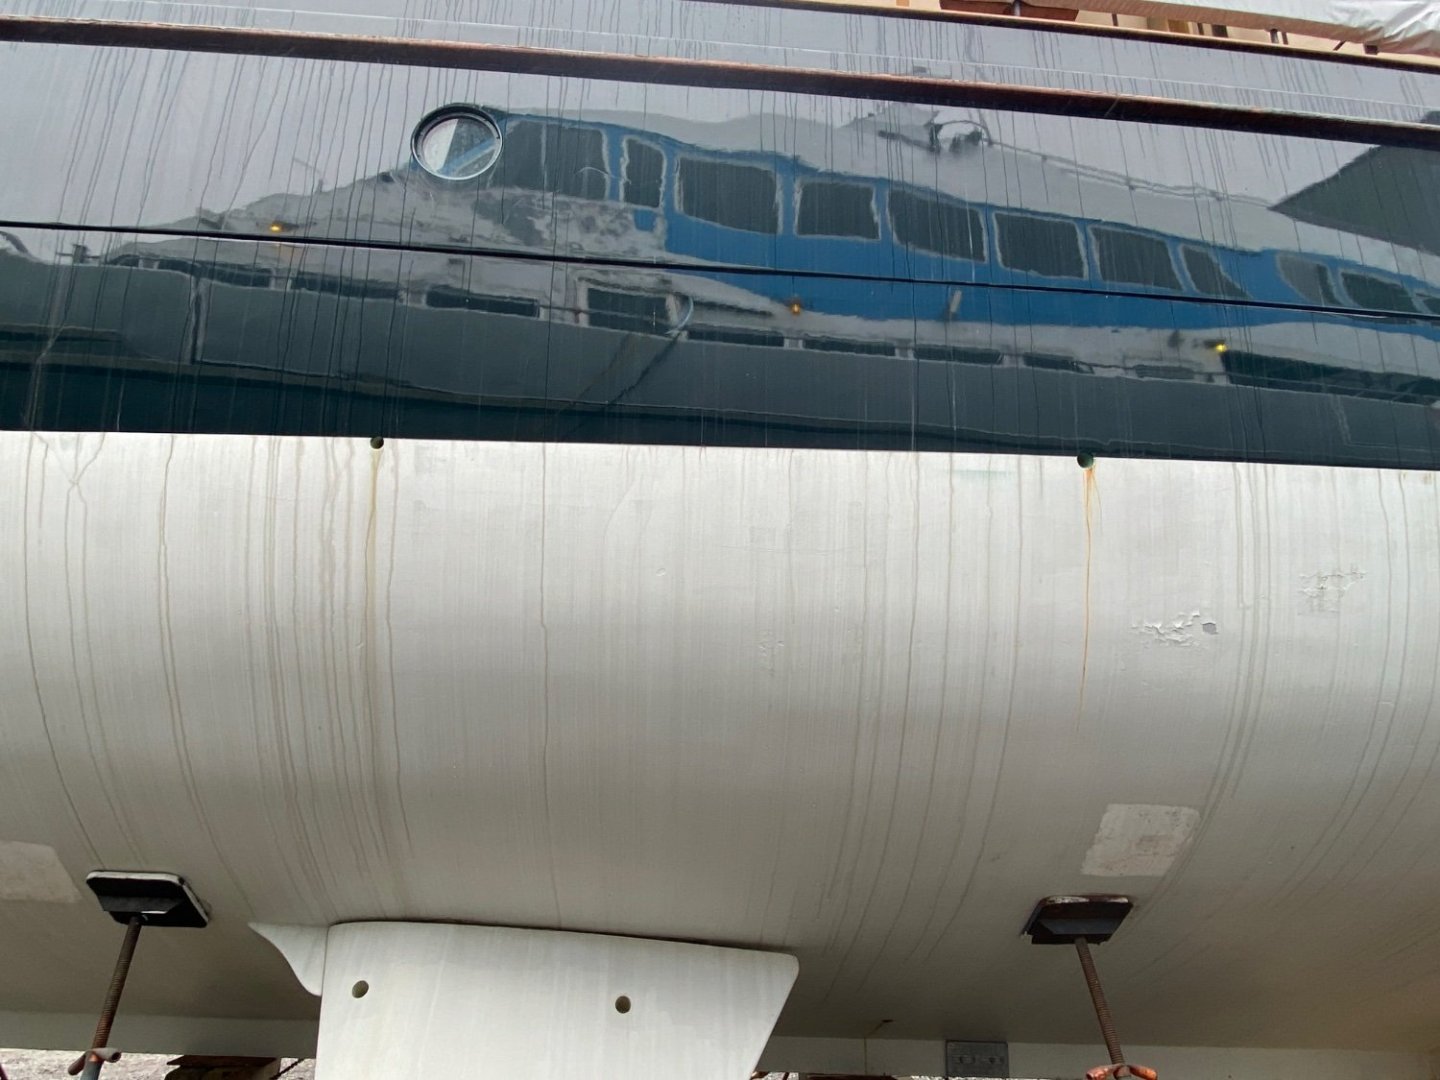
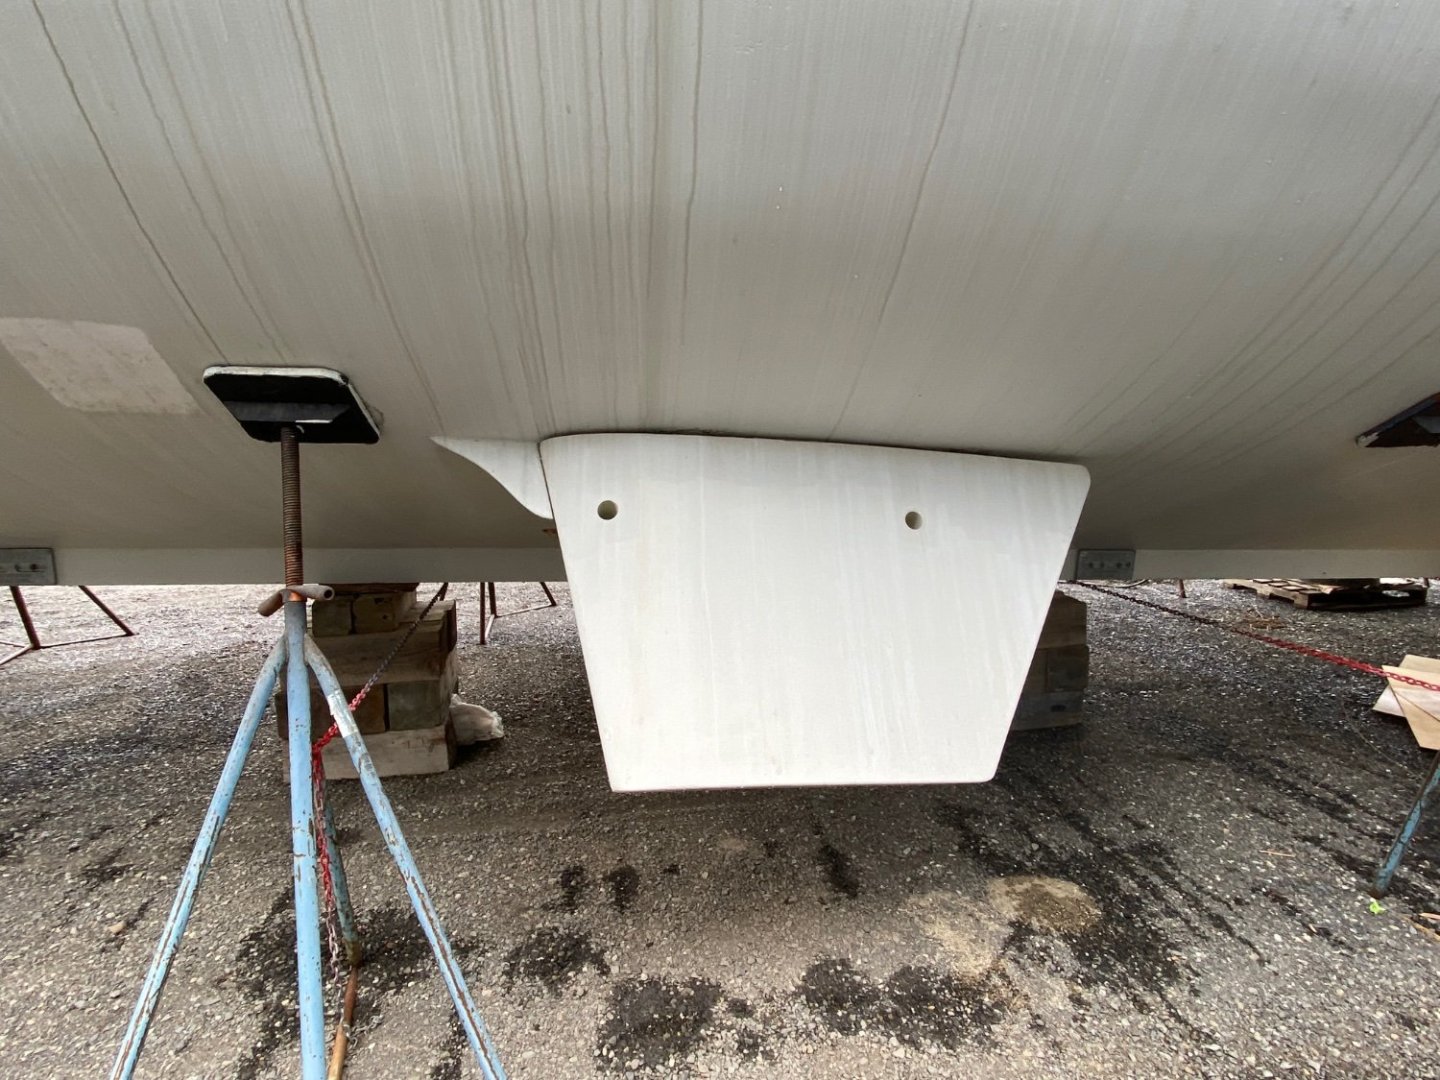
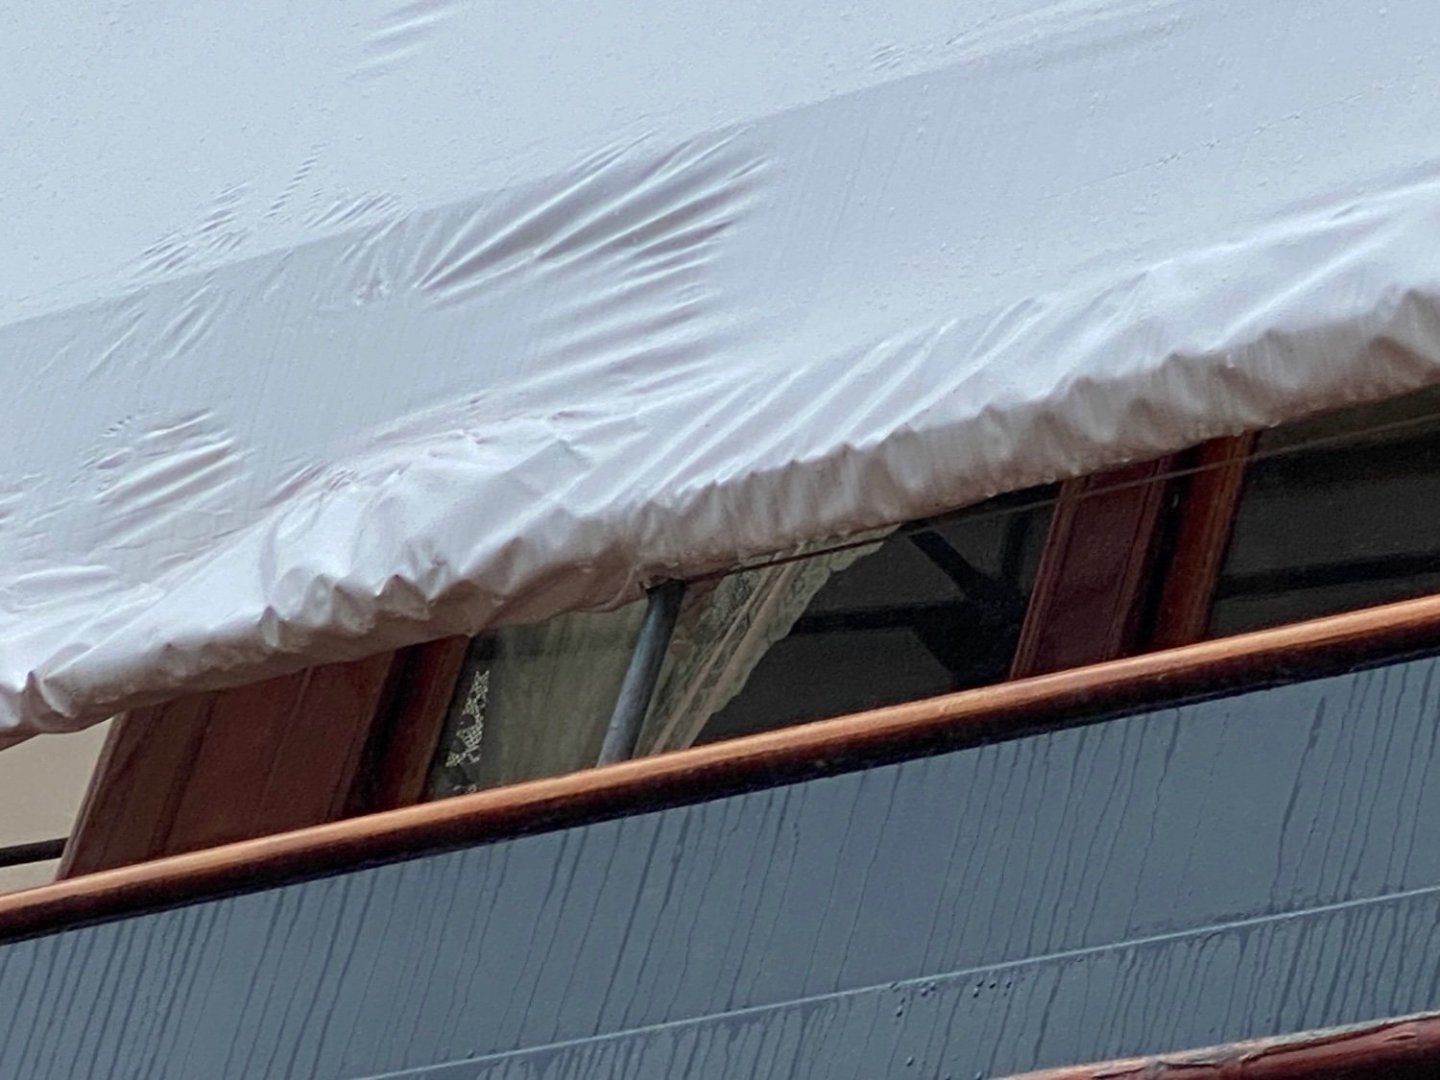
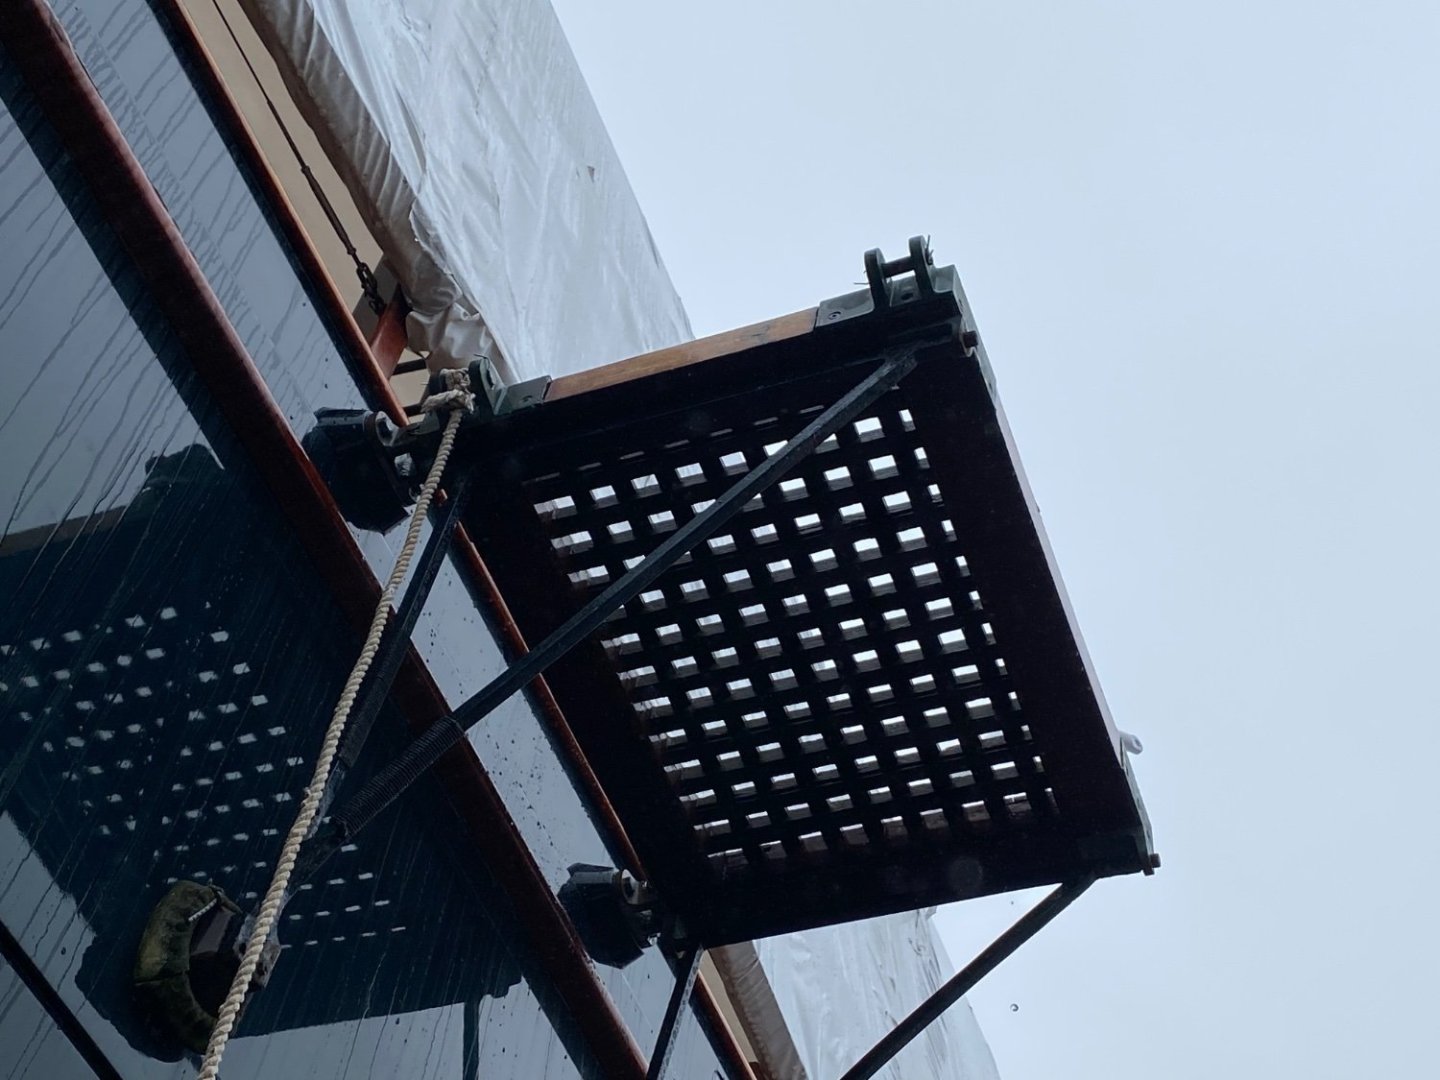
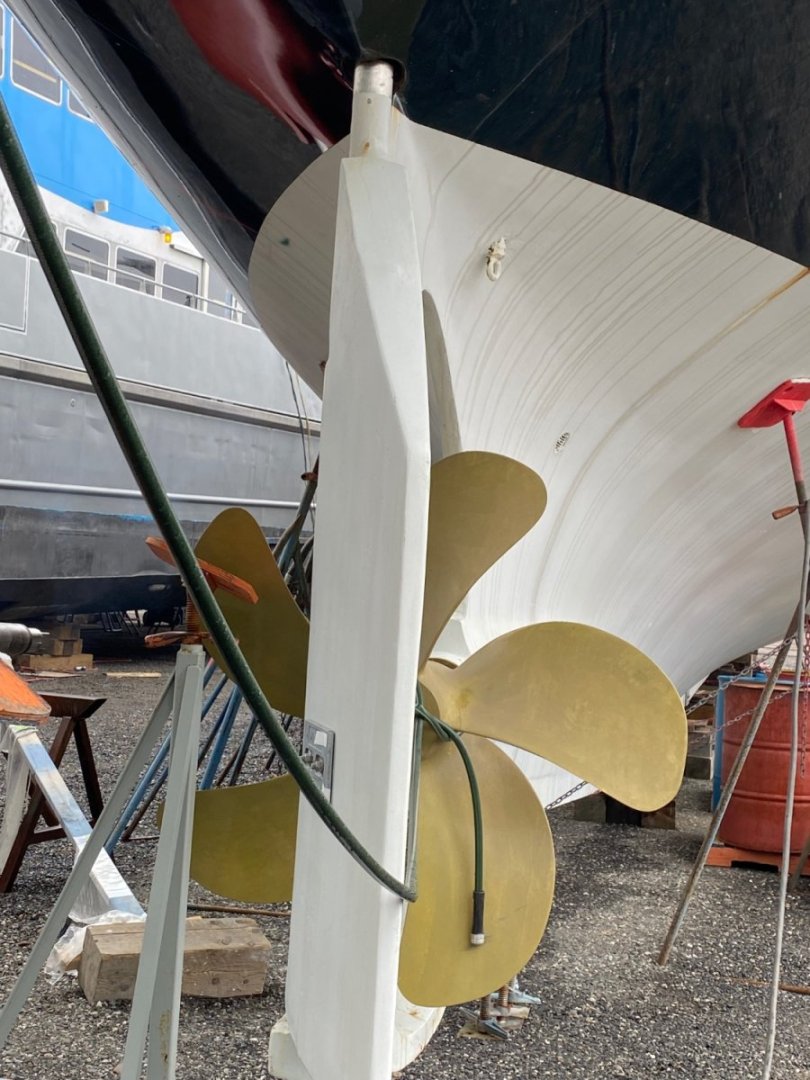
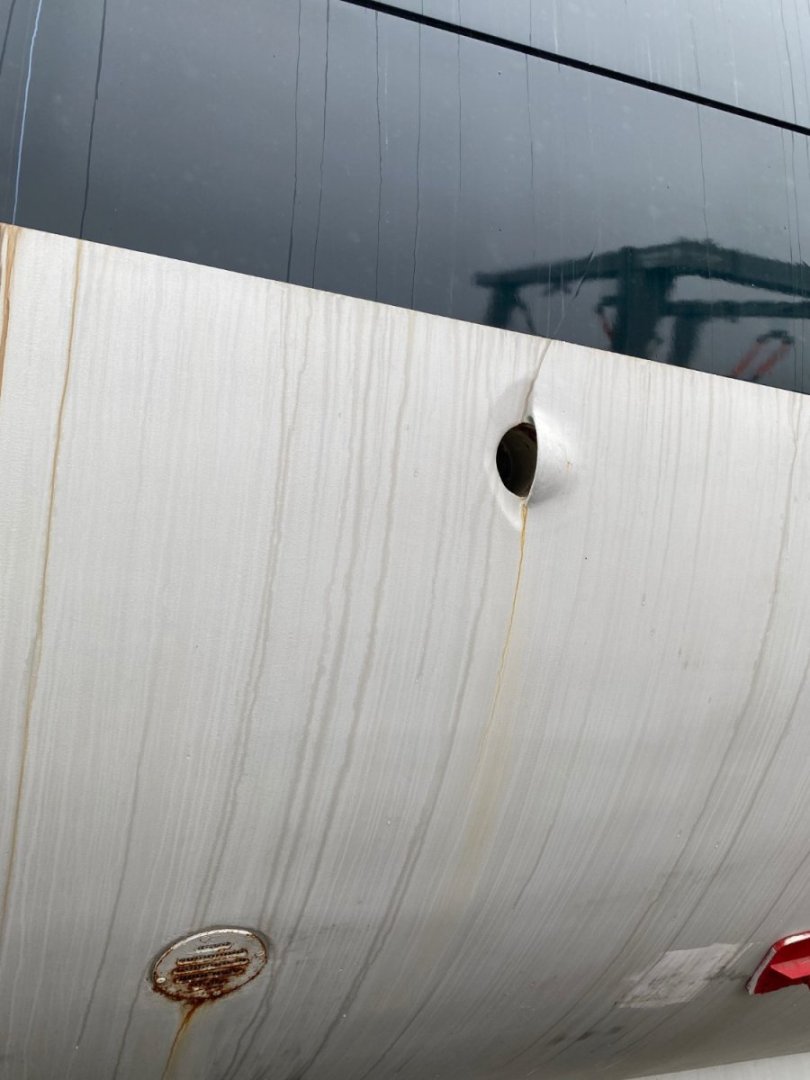
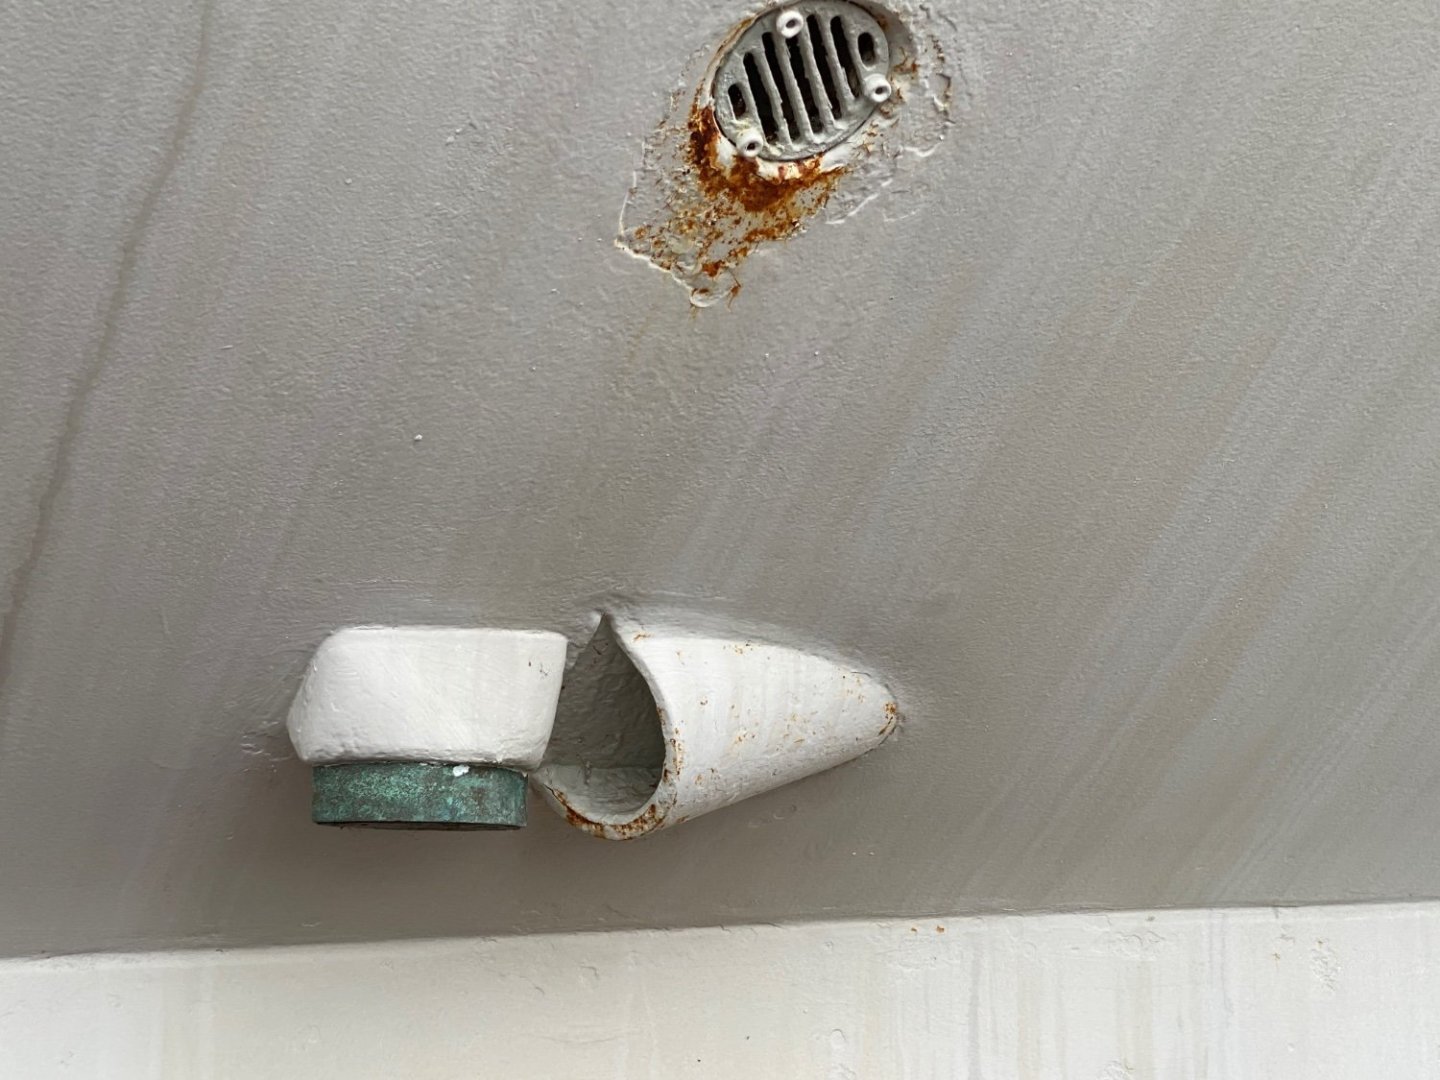
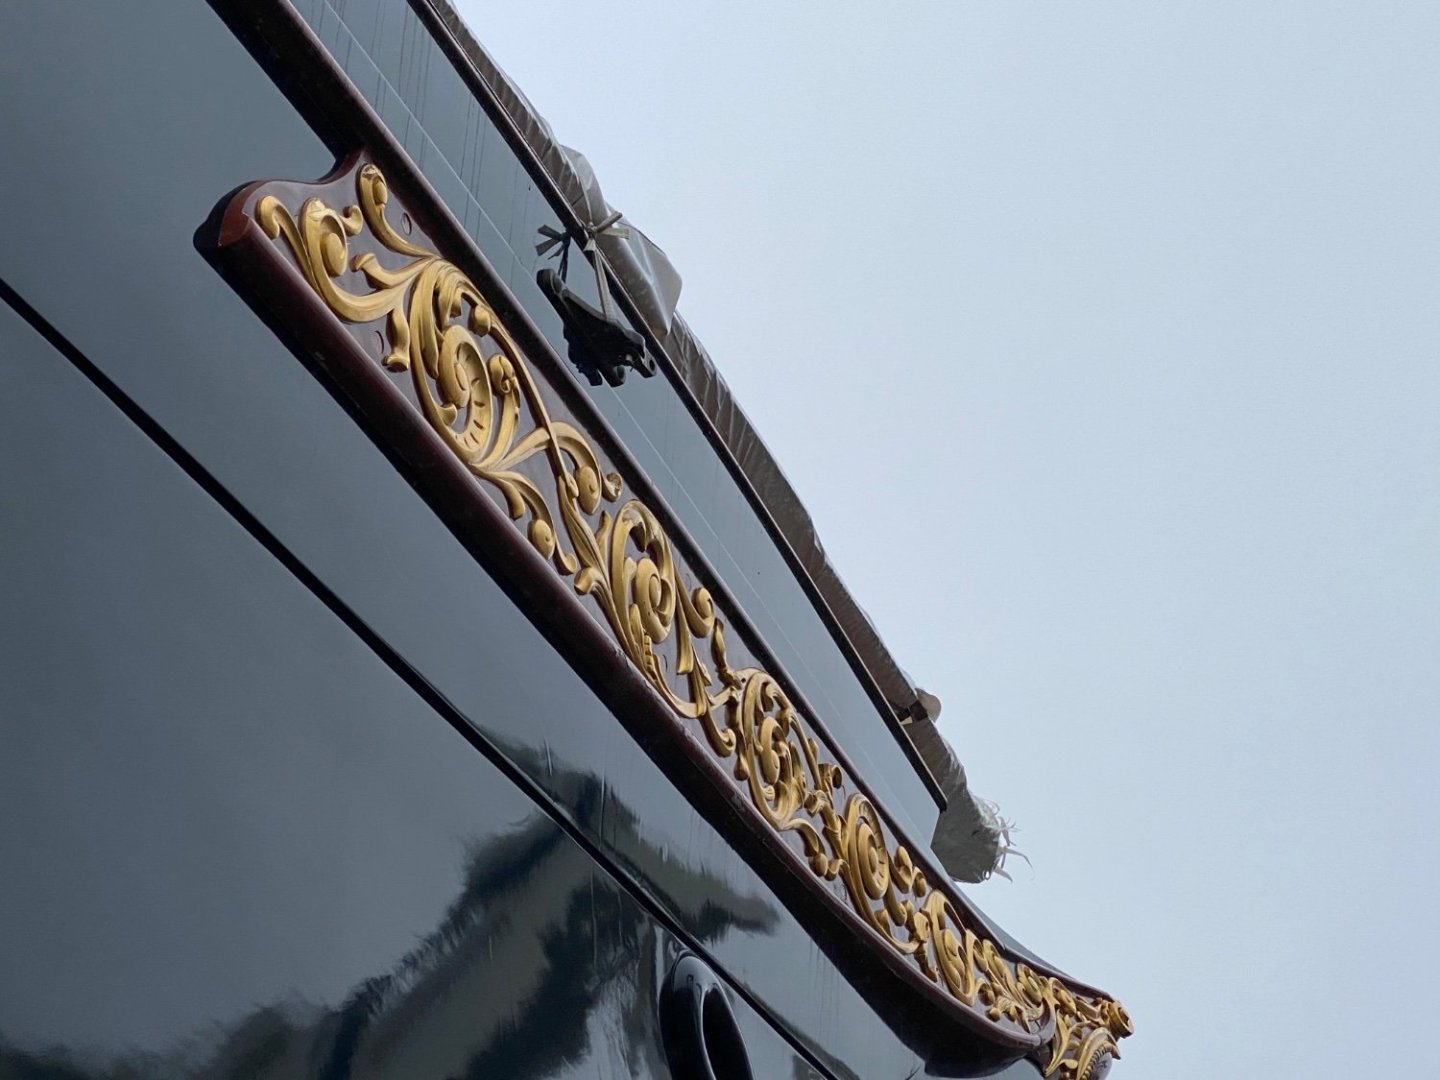
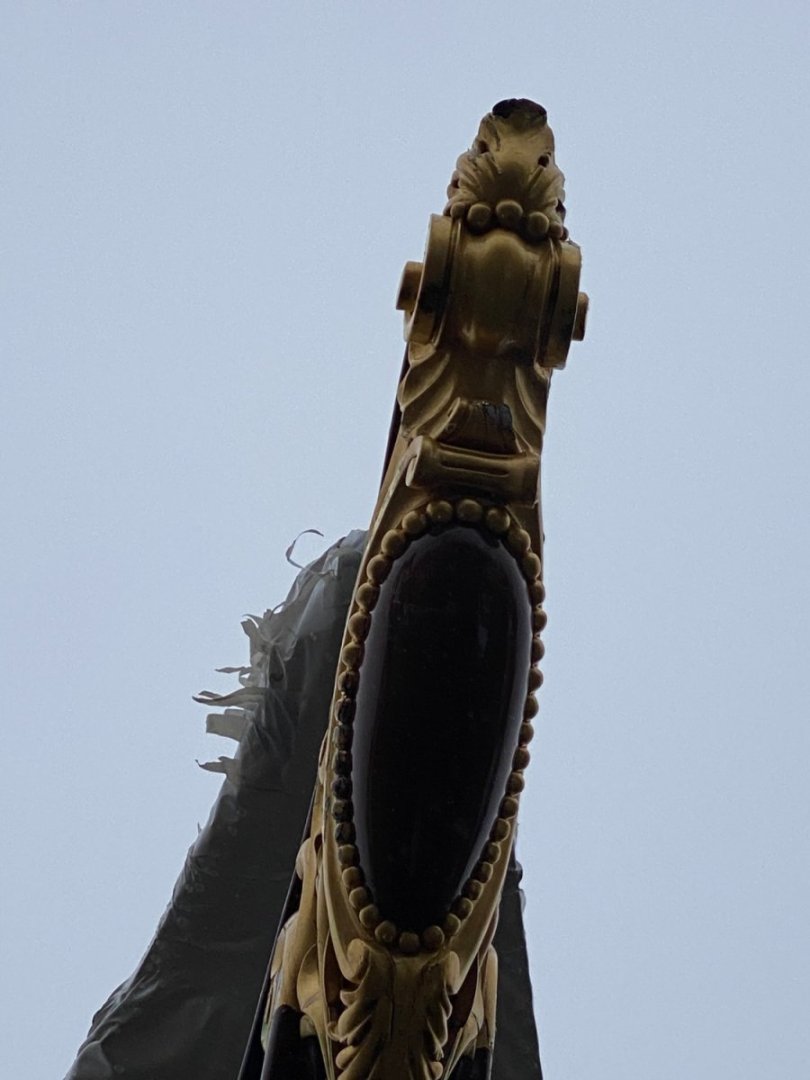
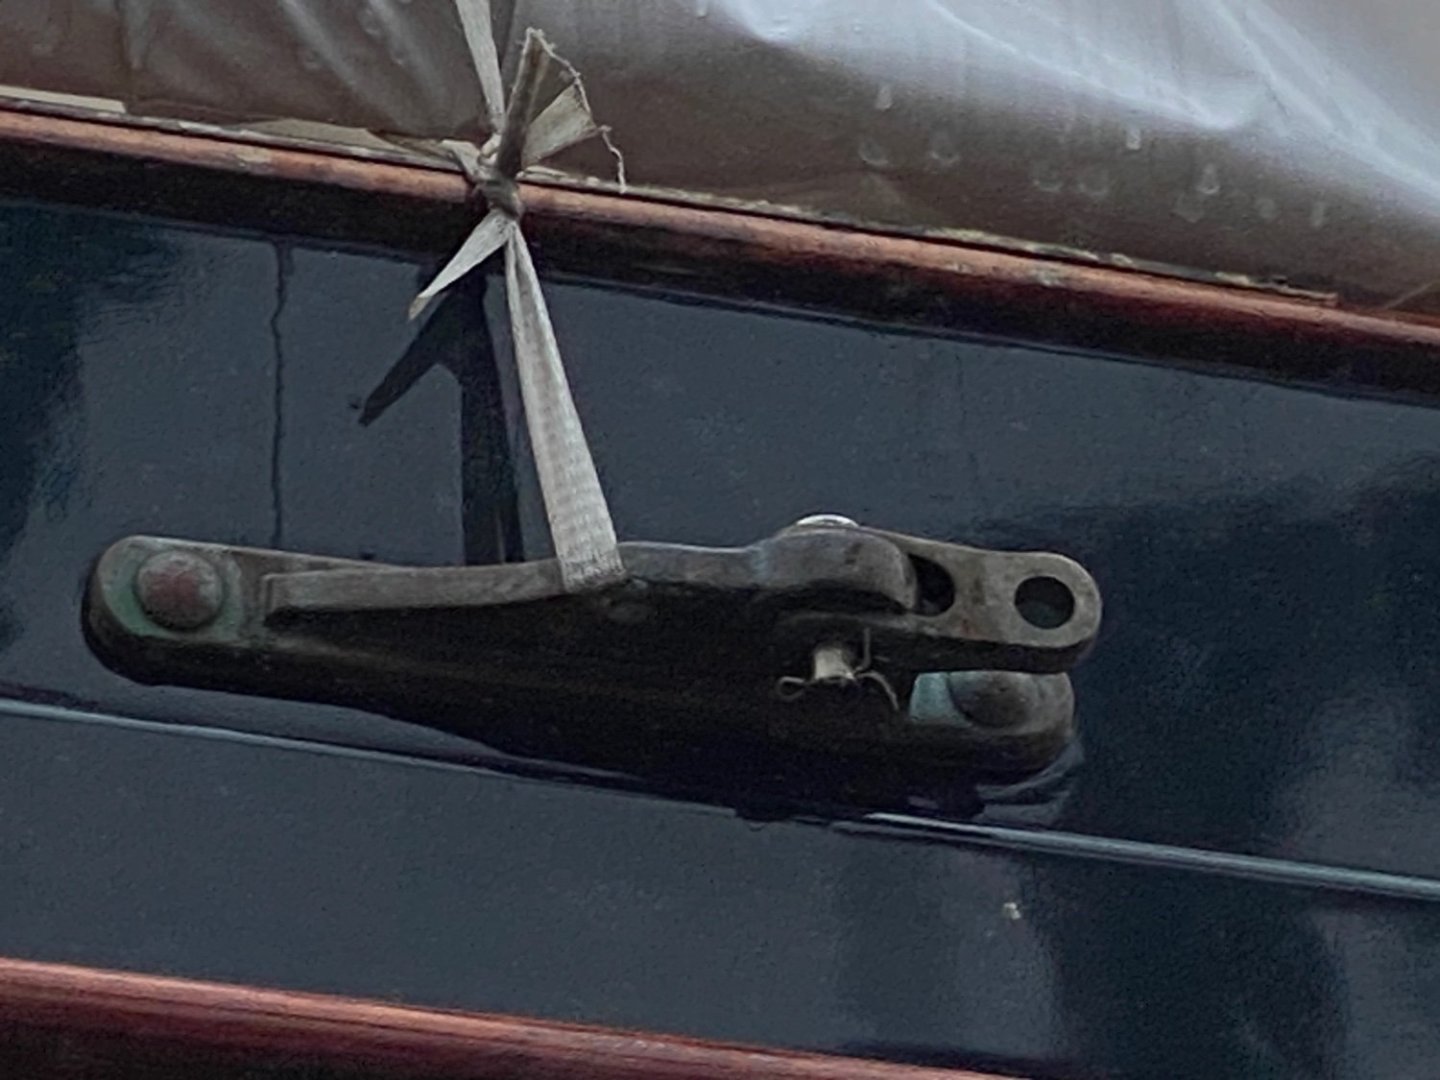
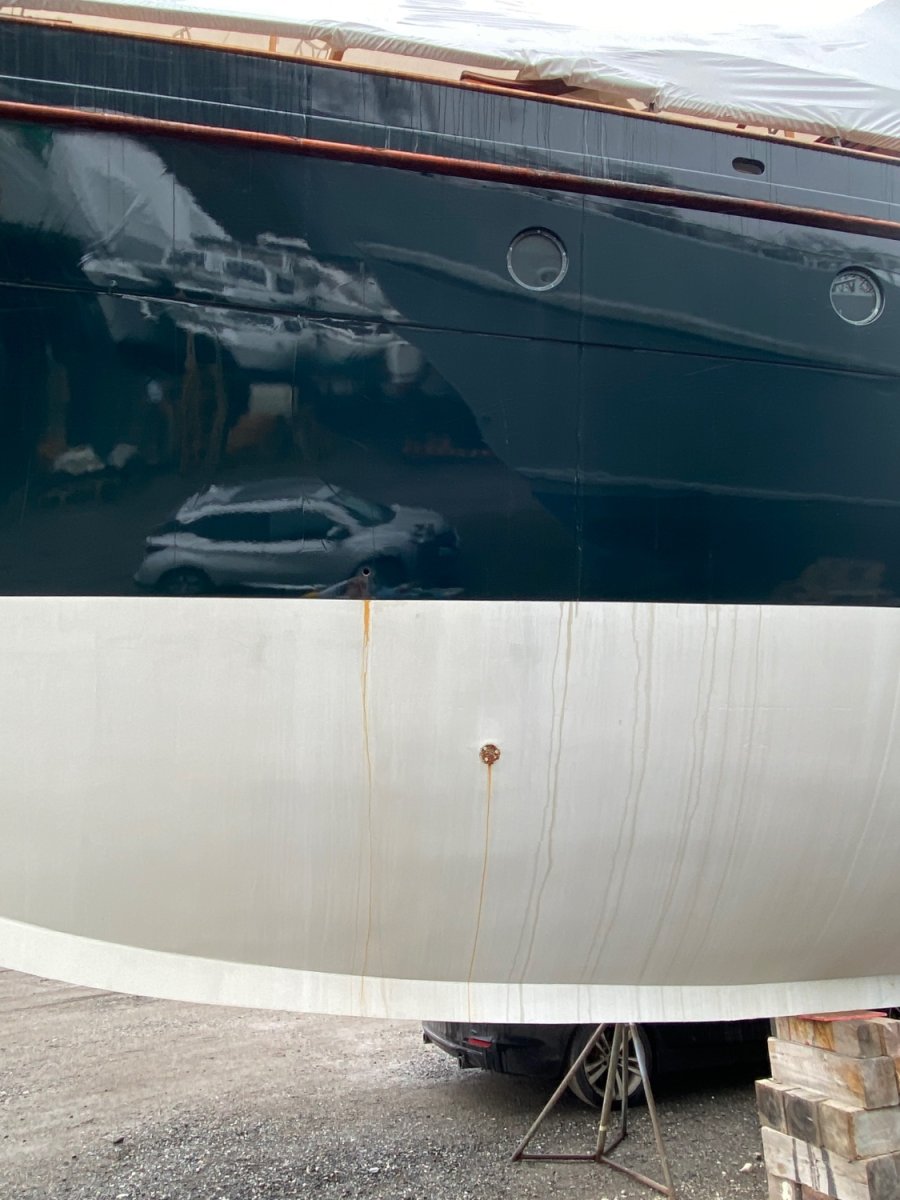
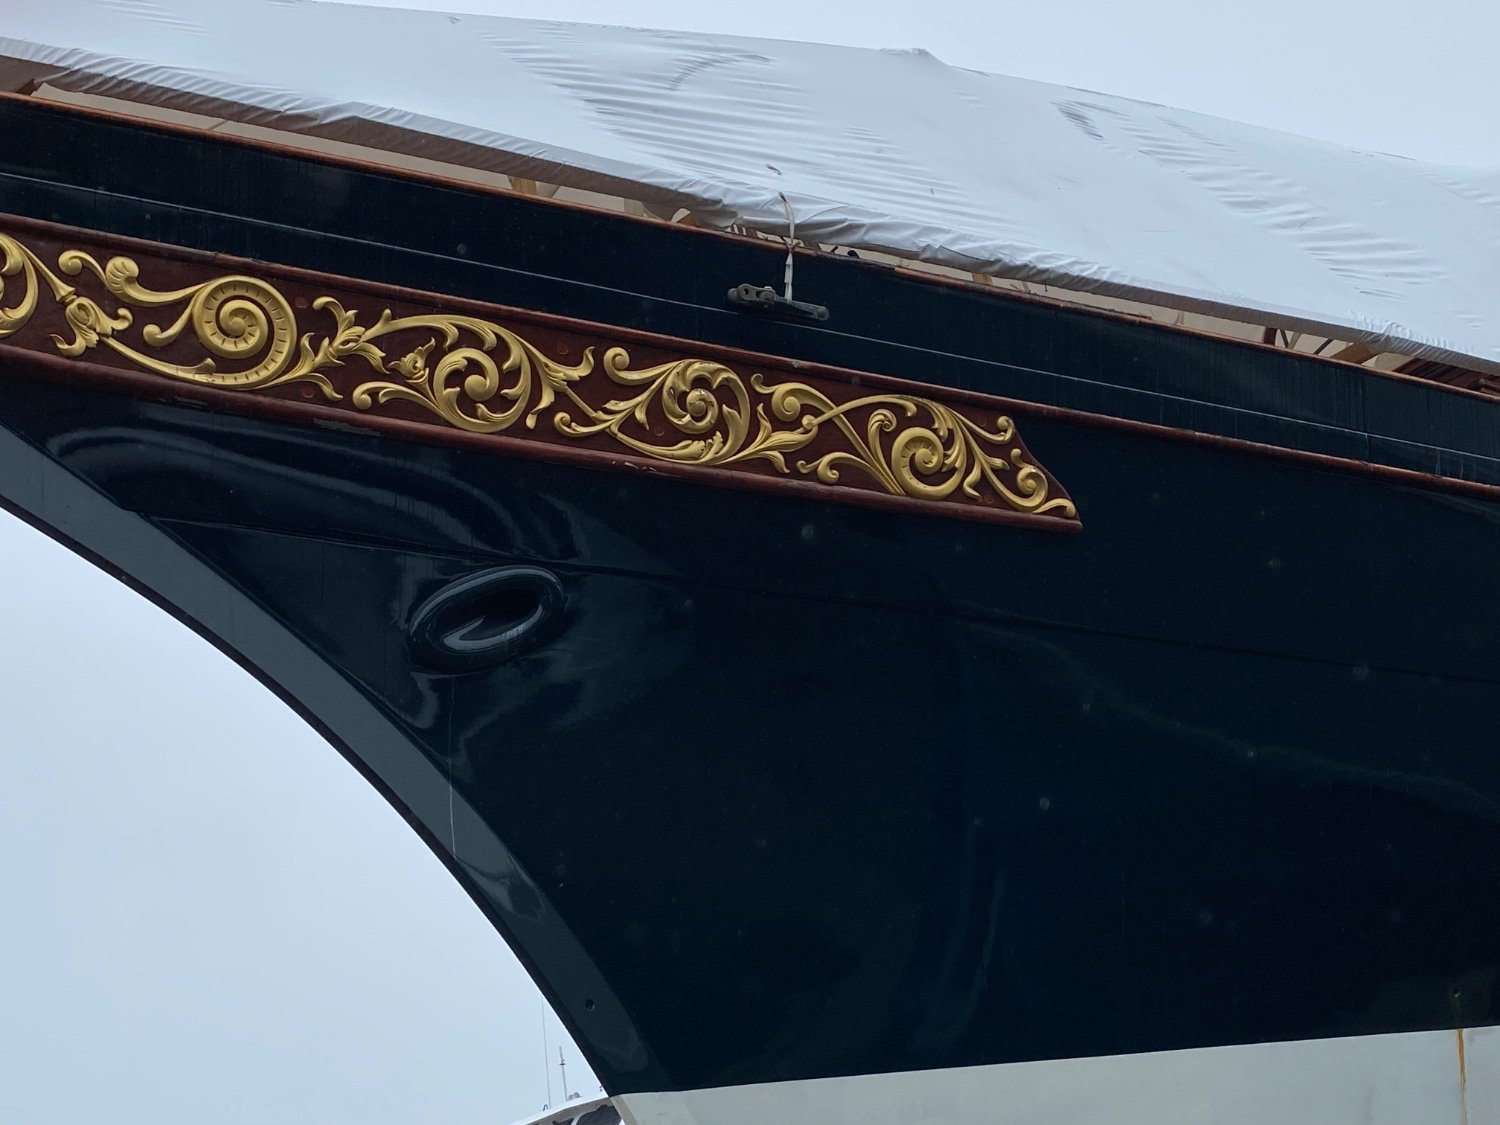
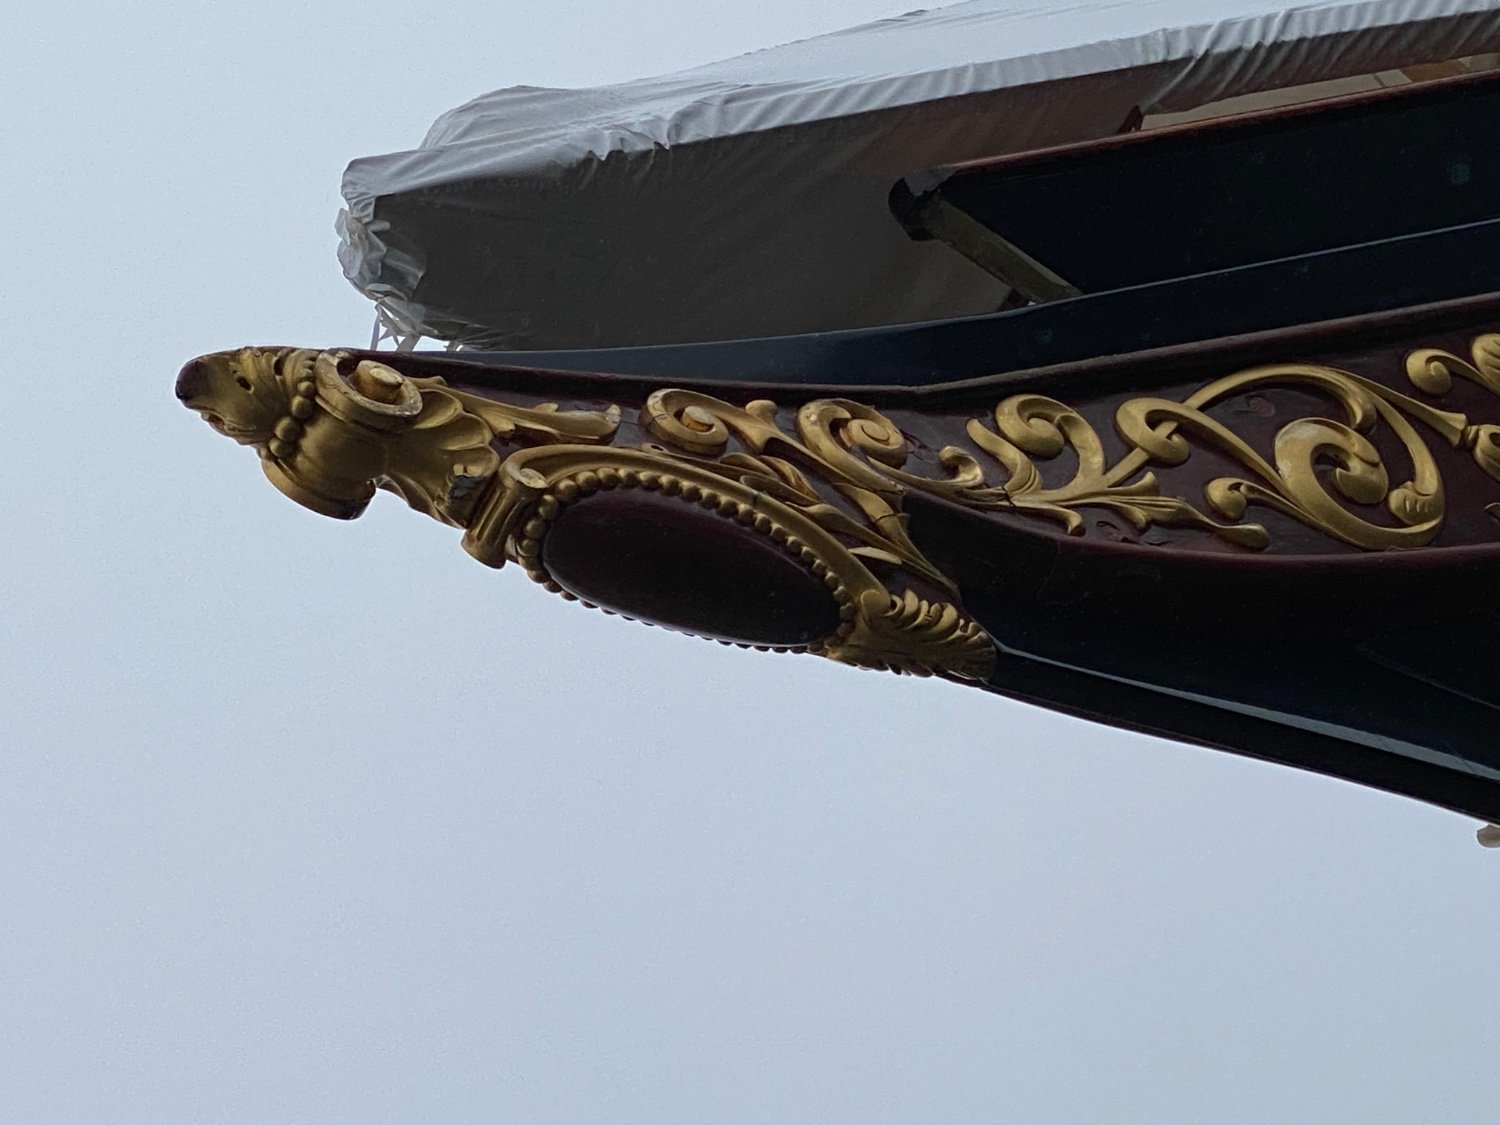
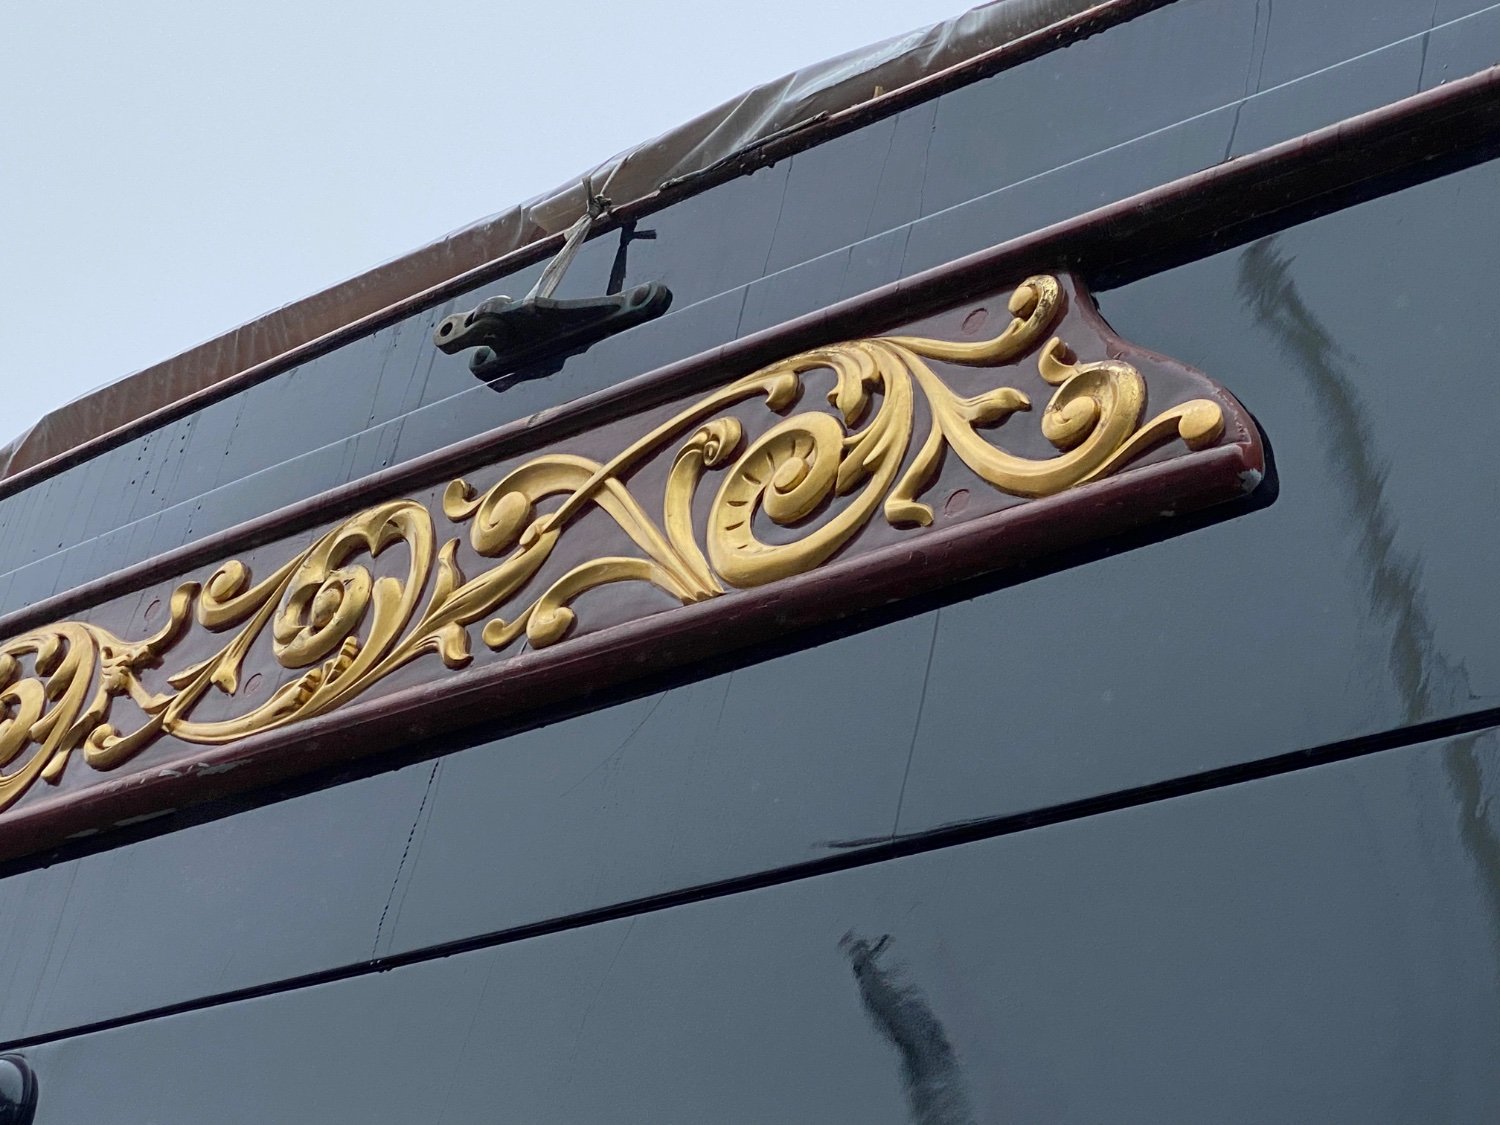
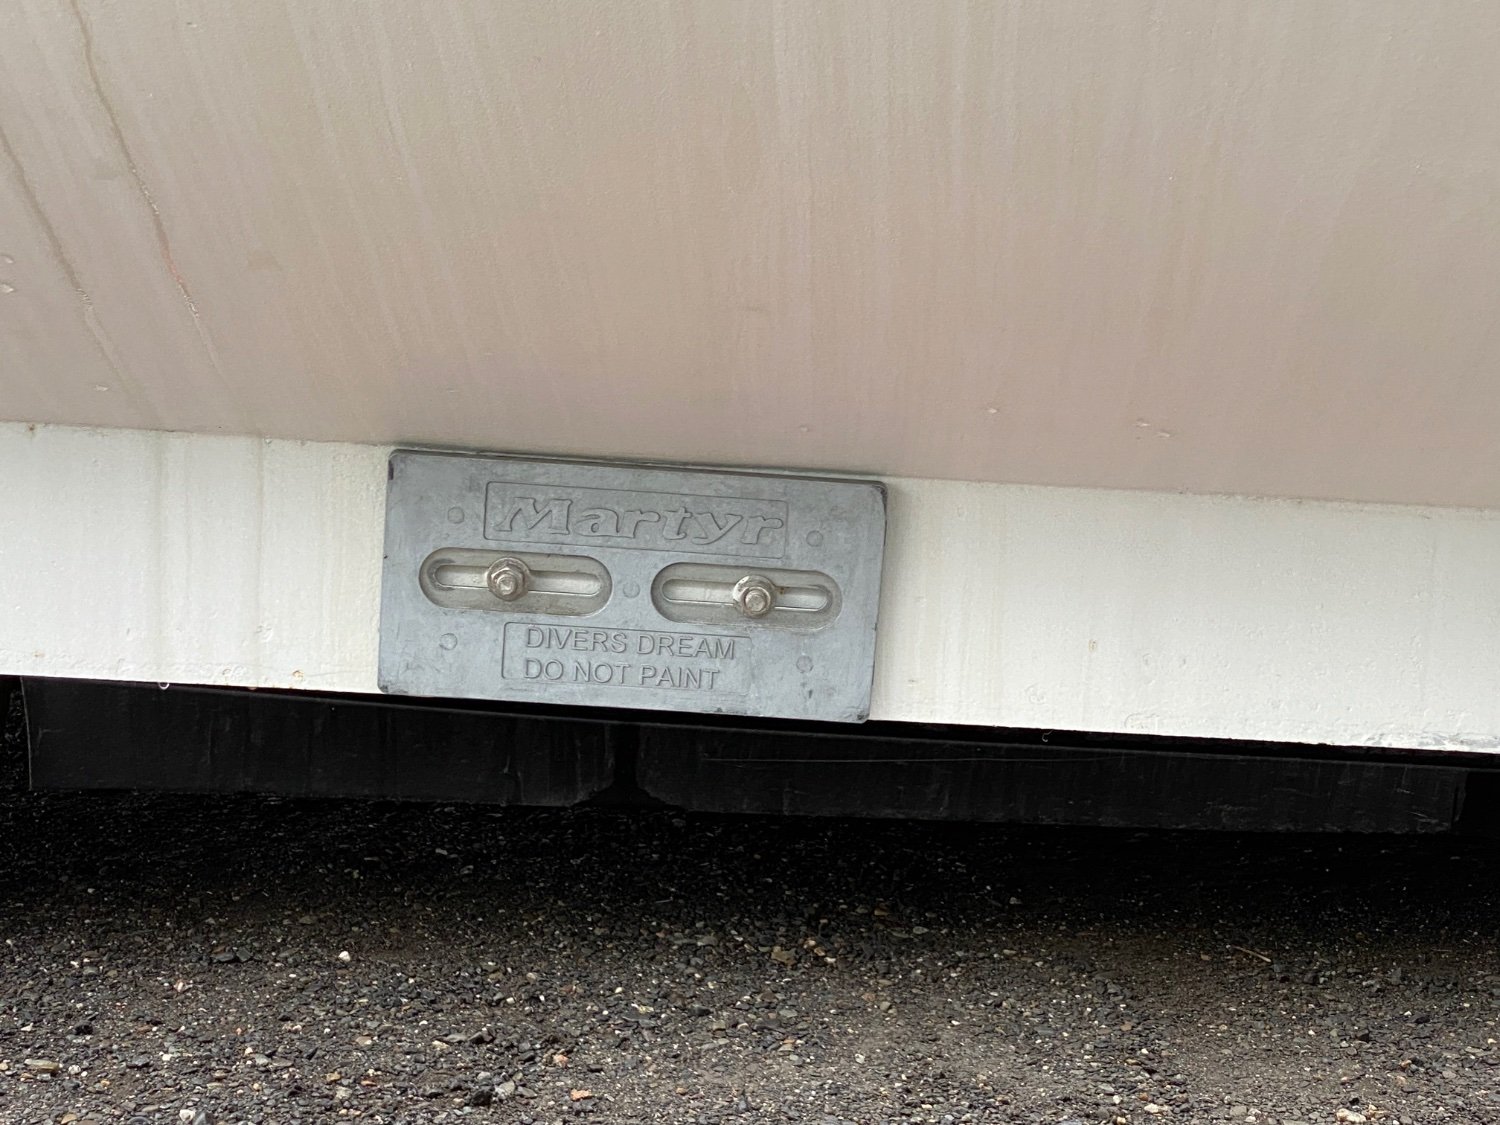
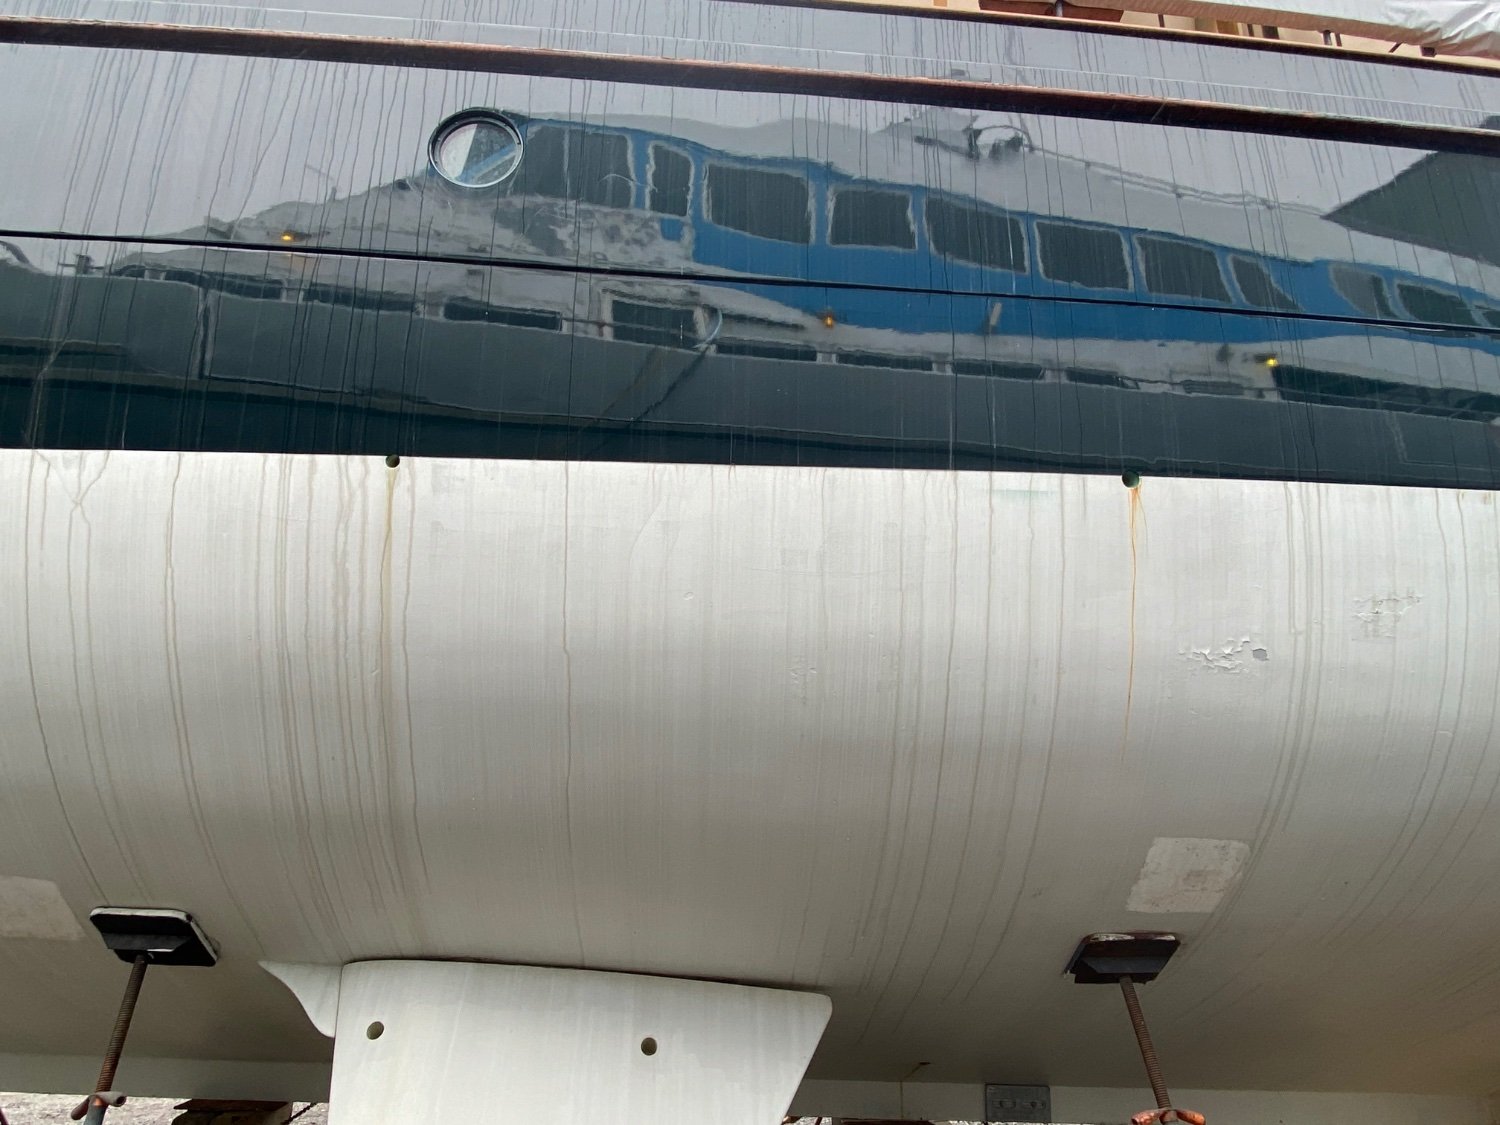
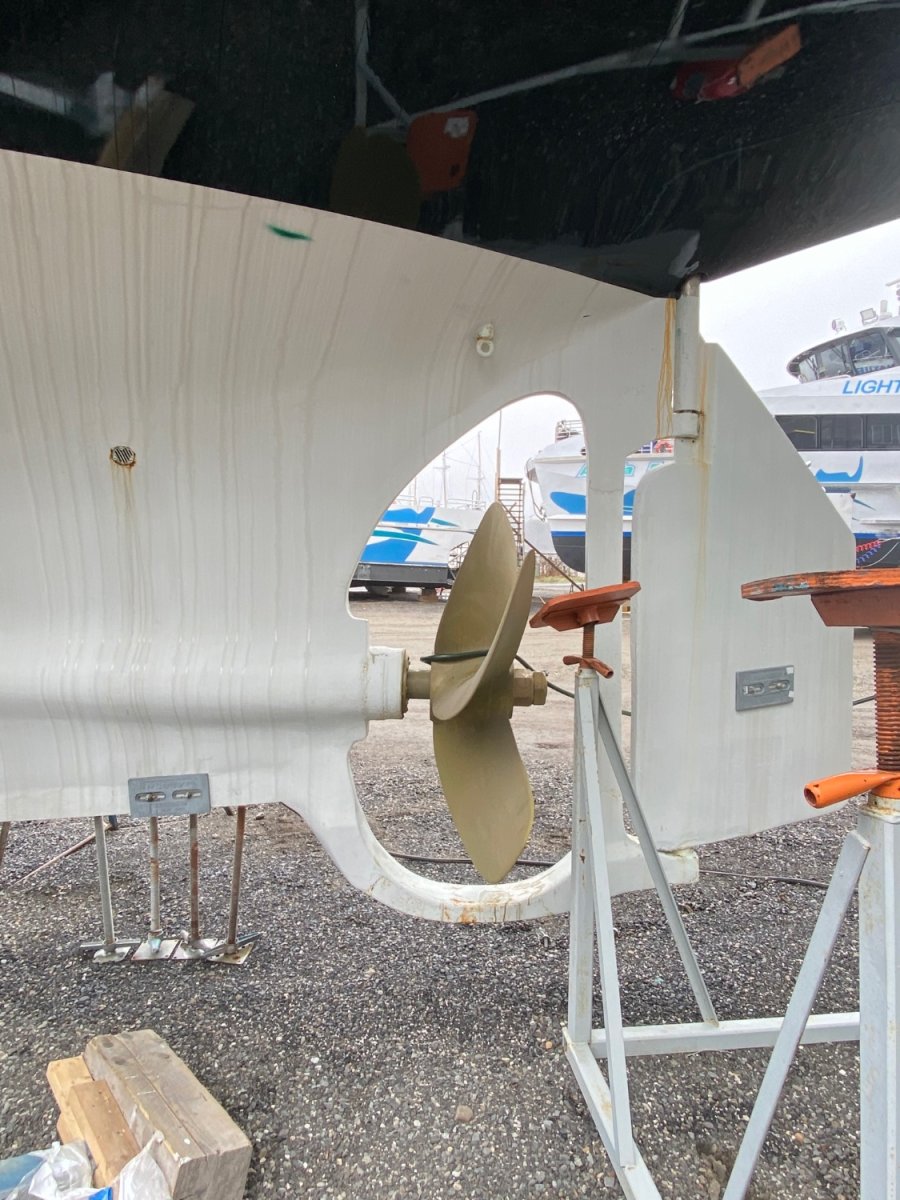
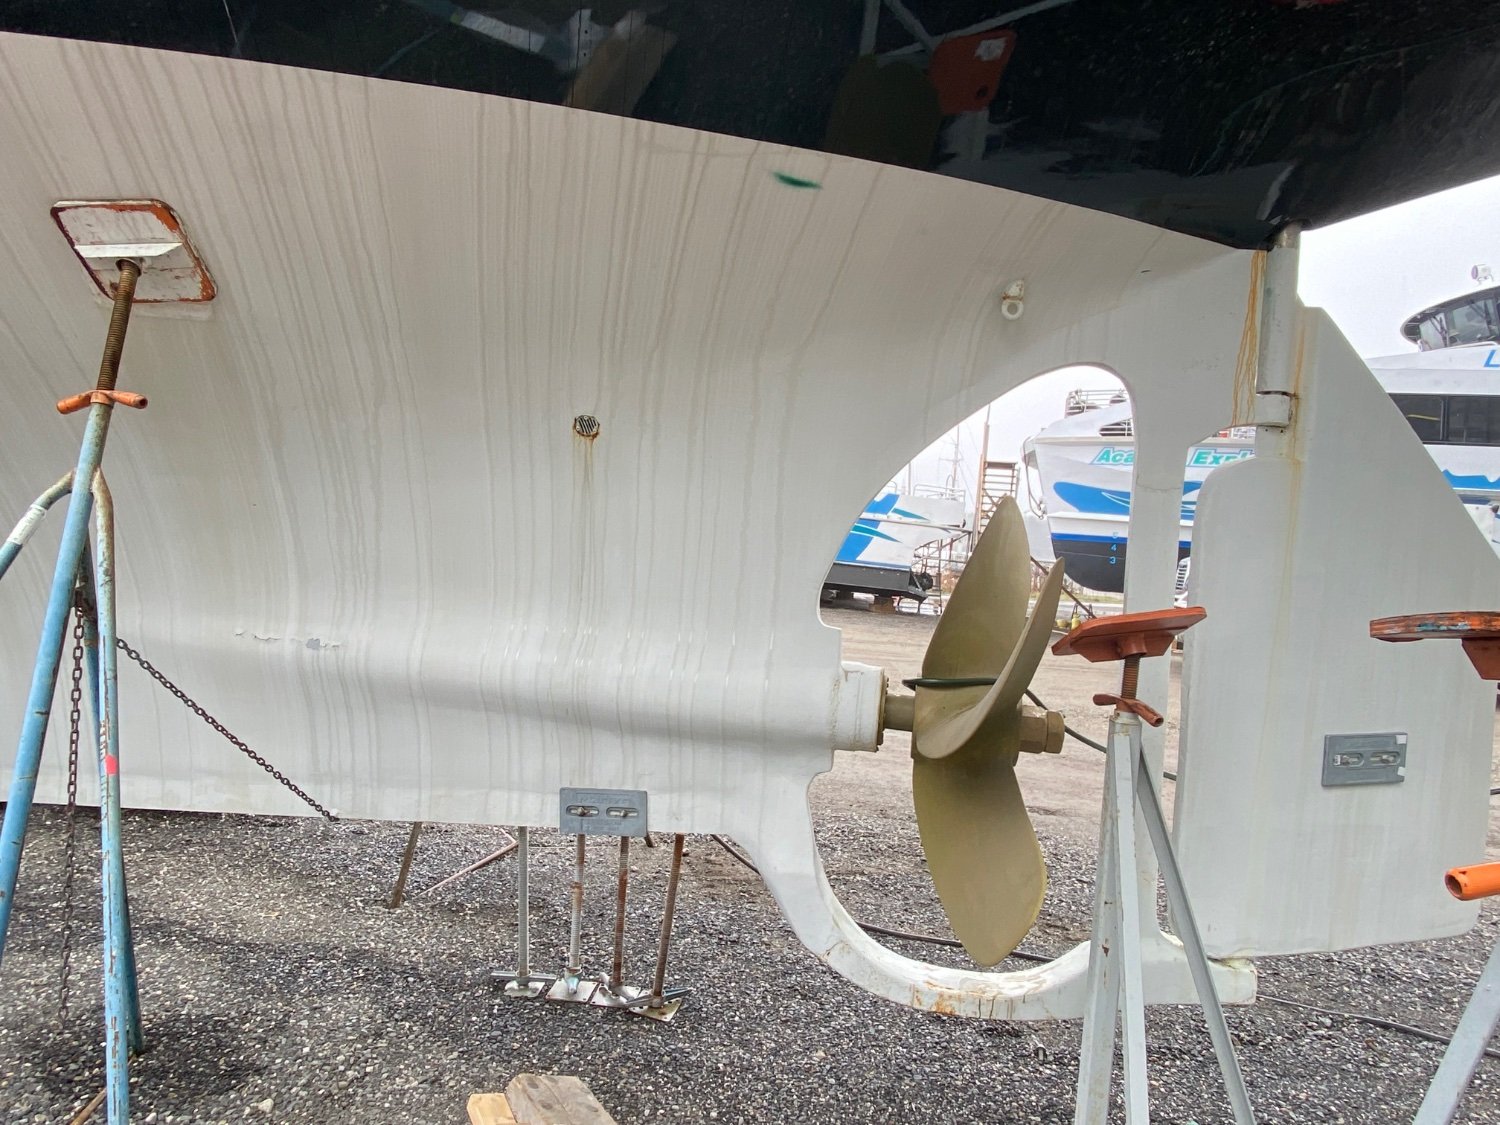
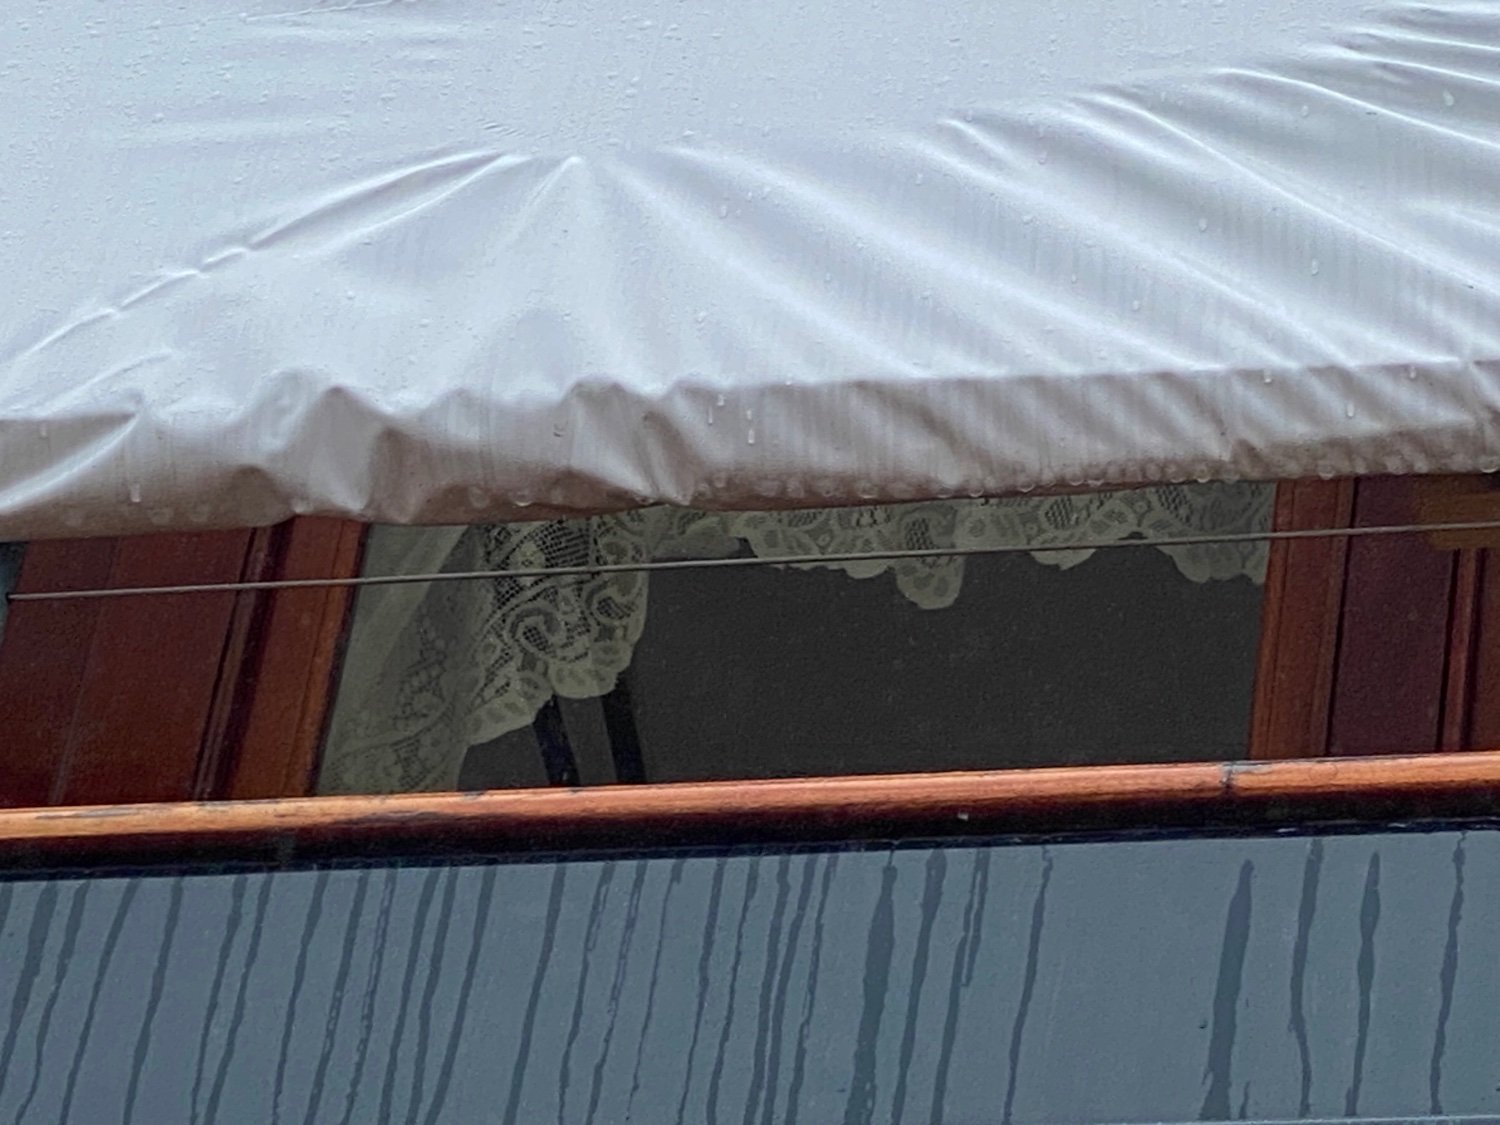
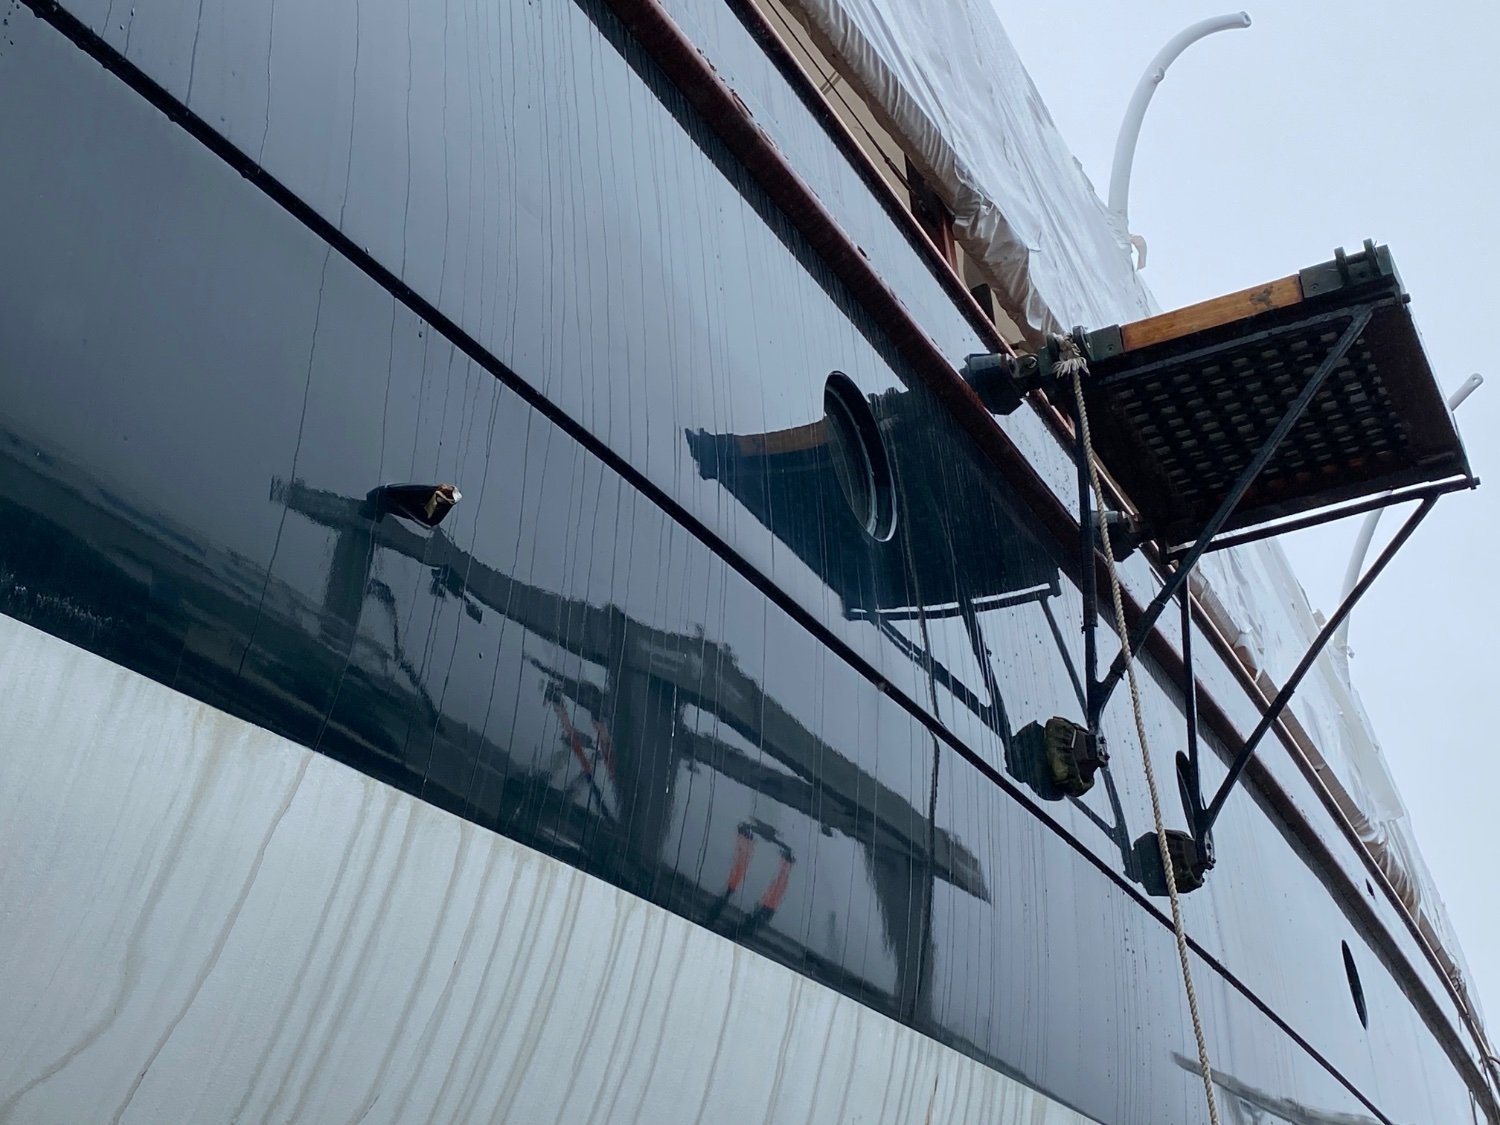
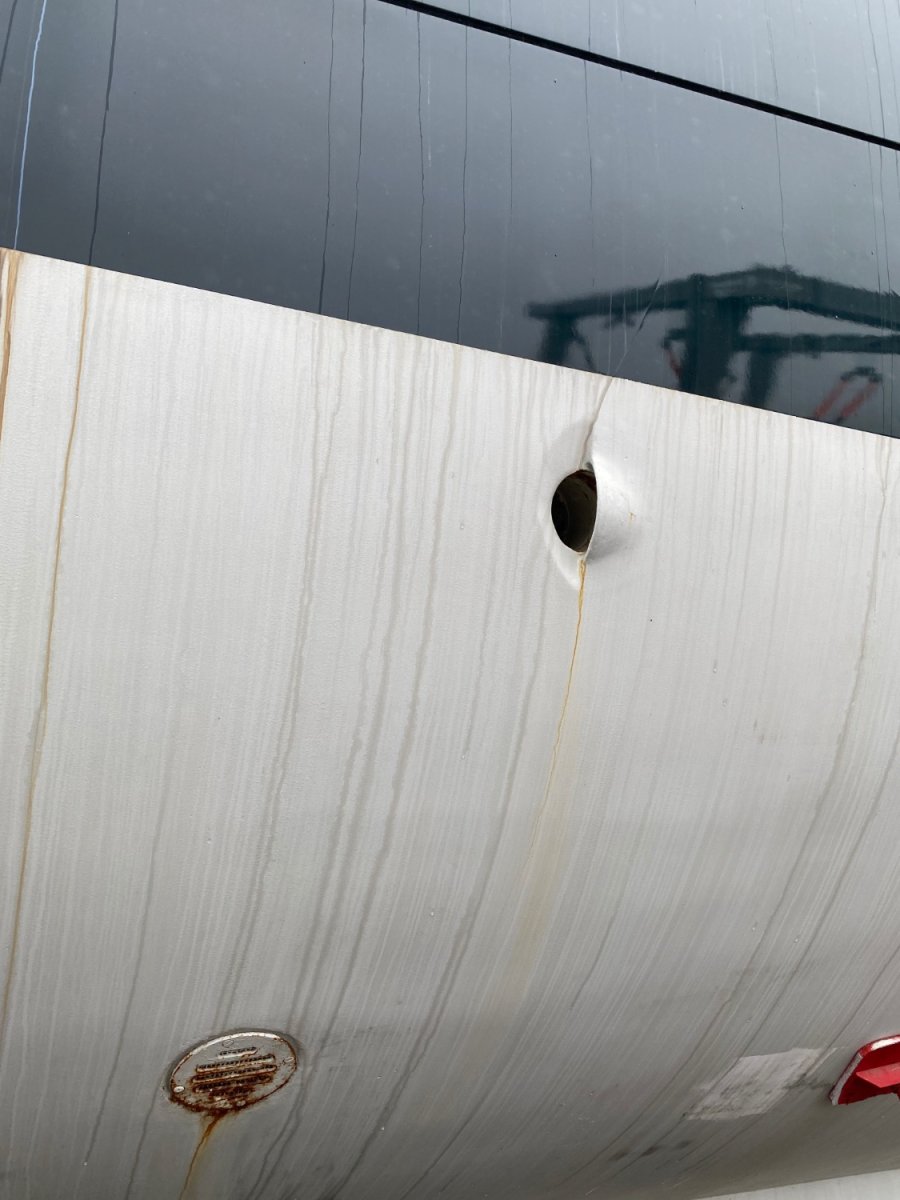
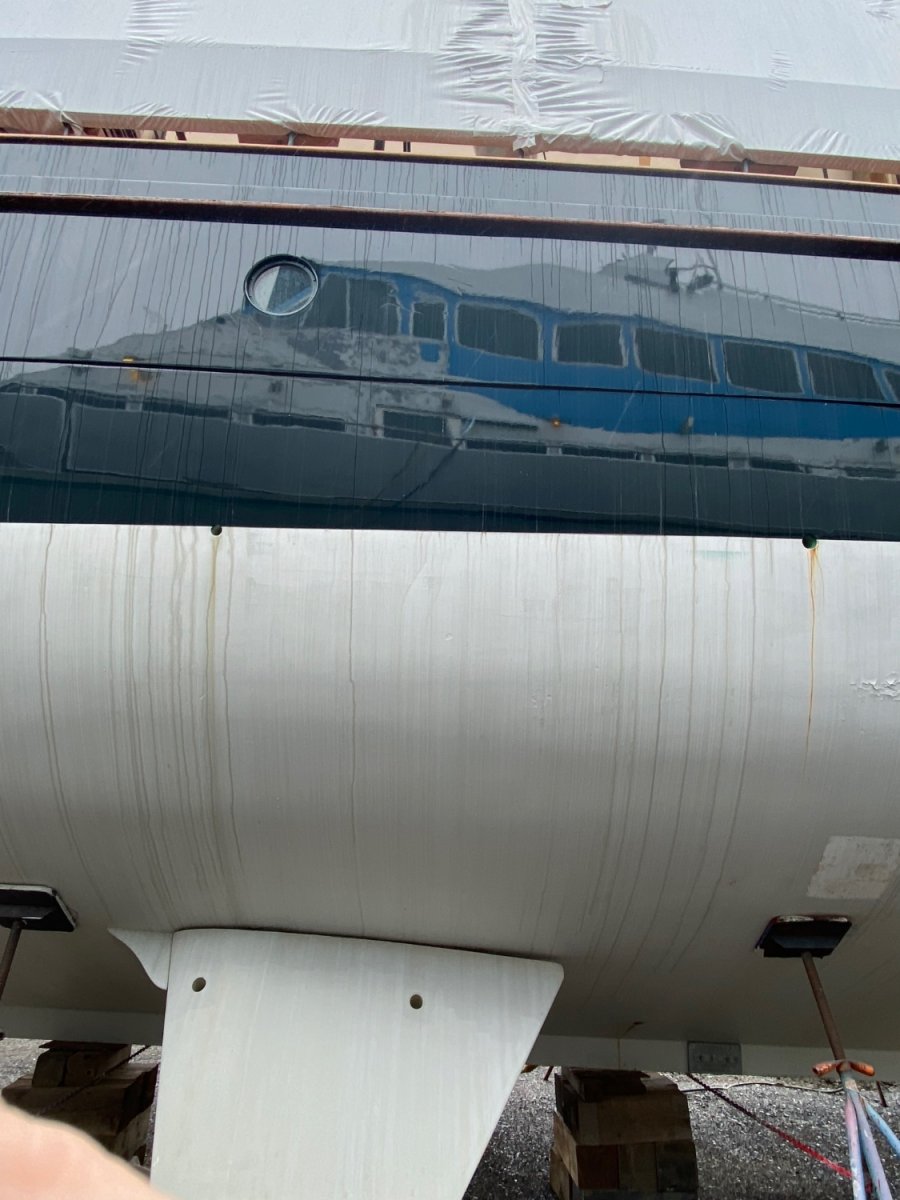
I got some more photos of Cangarda today. Slight rain and overcast.
I put in a request to get aboard to take more photos, hope to hear back sometime today or tomorrow.
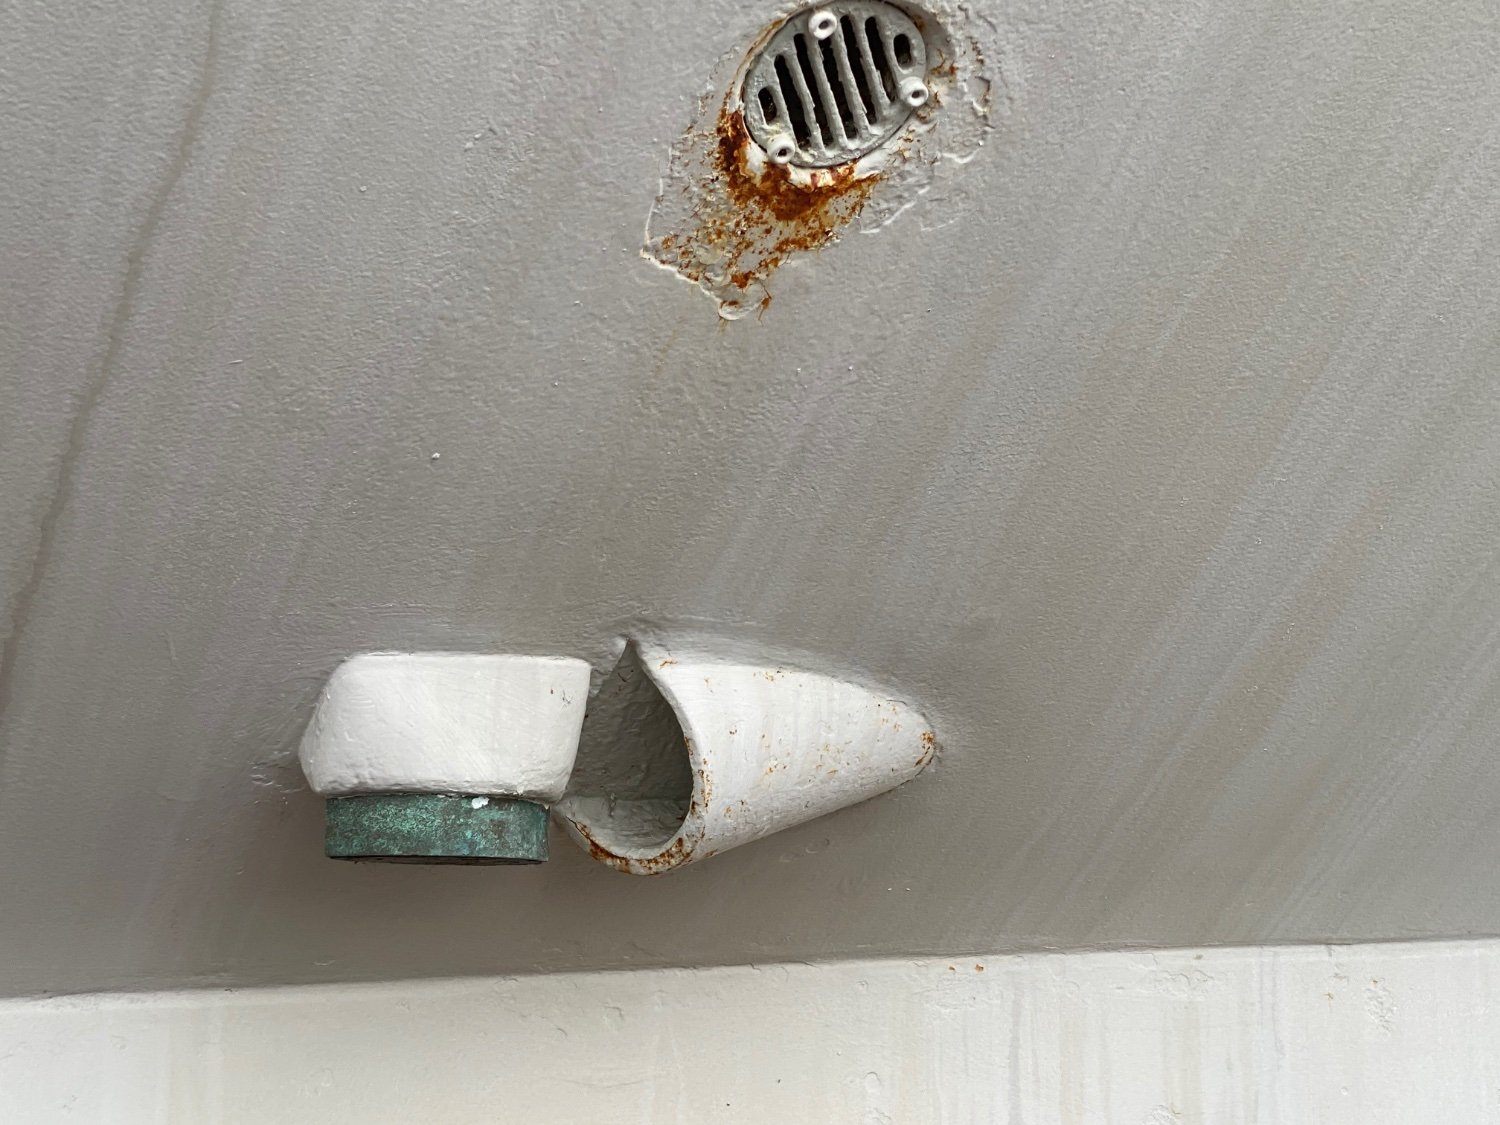
Note that the discharge pipes are not symmetrical port to starboard.


- FlyingFish, GrandpaPhil, mbp521 and 16 others
-
19
-
- NRG Member
-
- Location Belfast, Maine
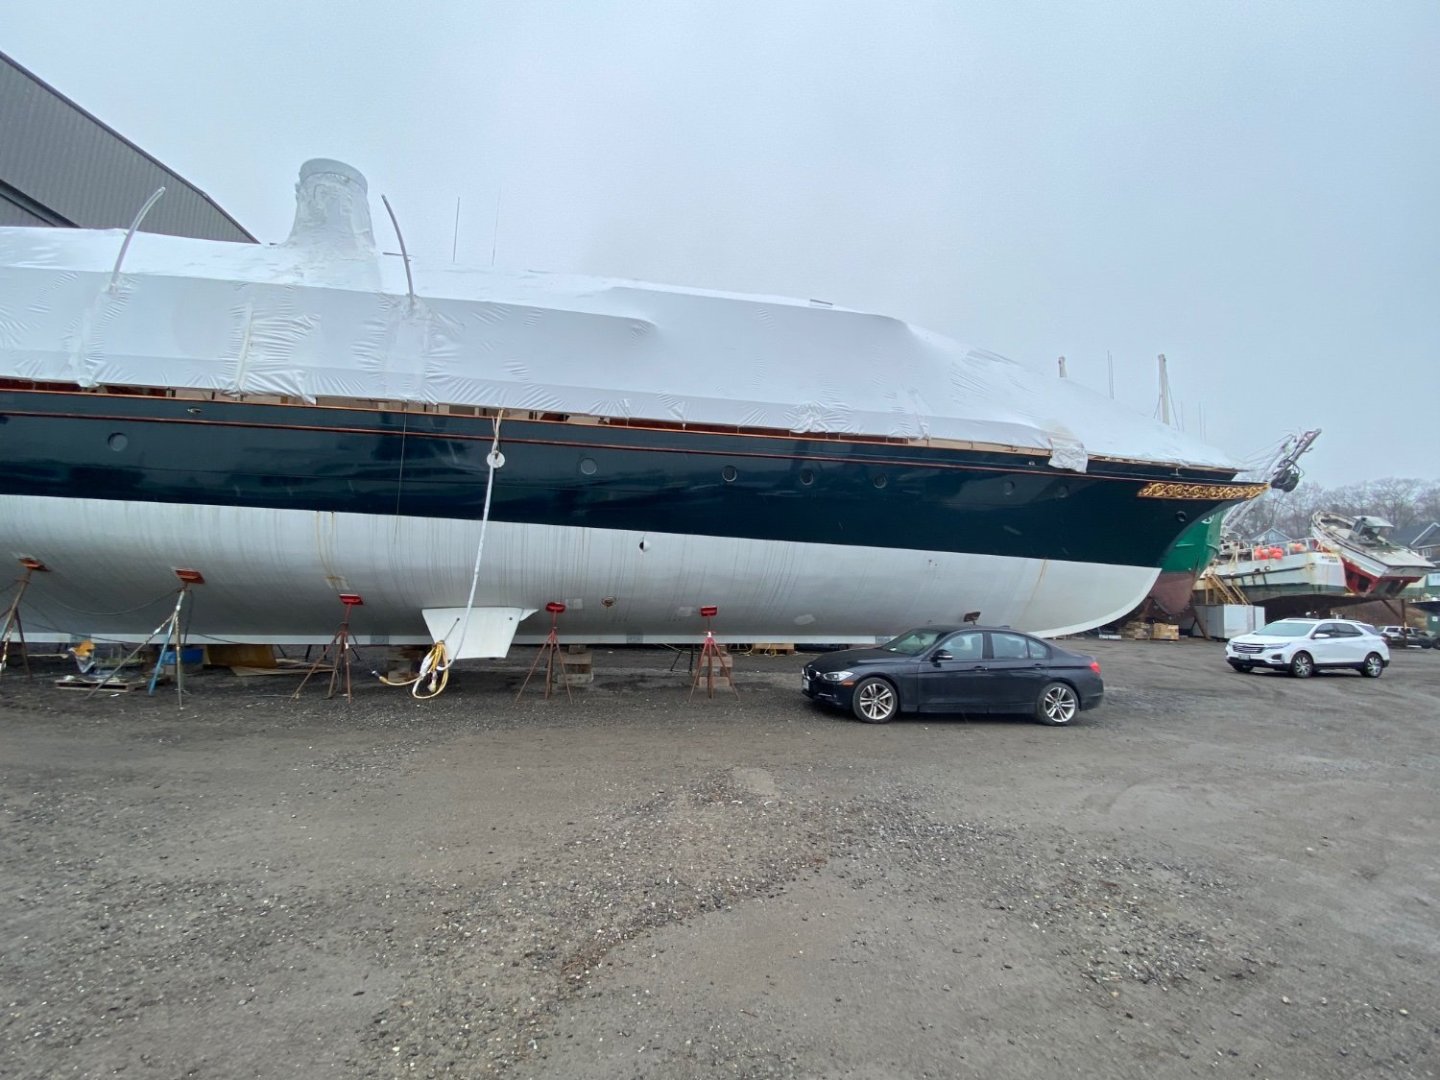
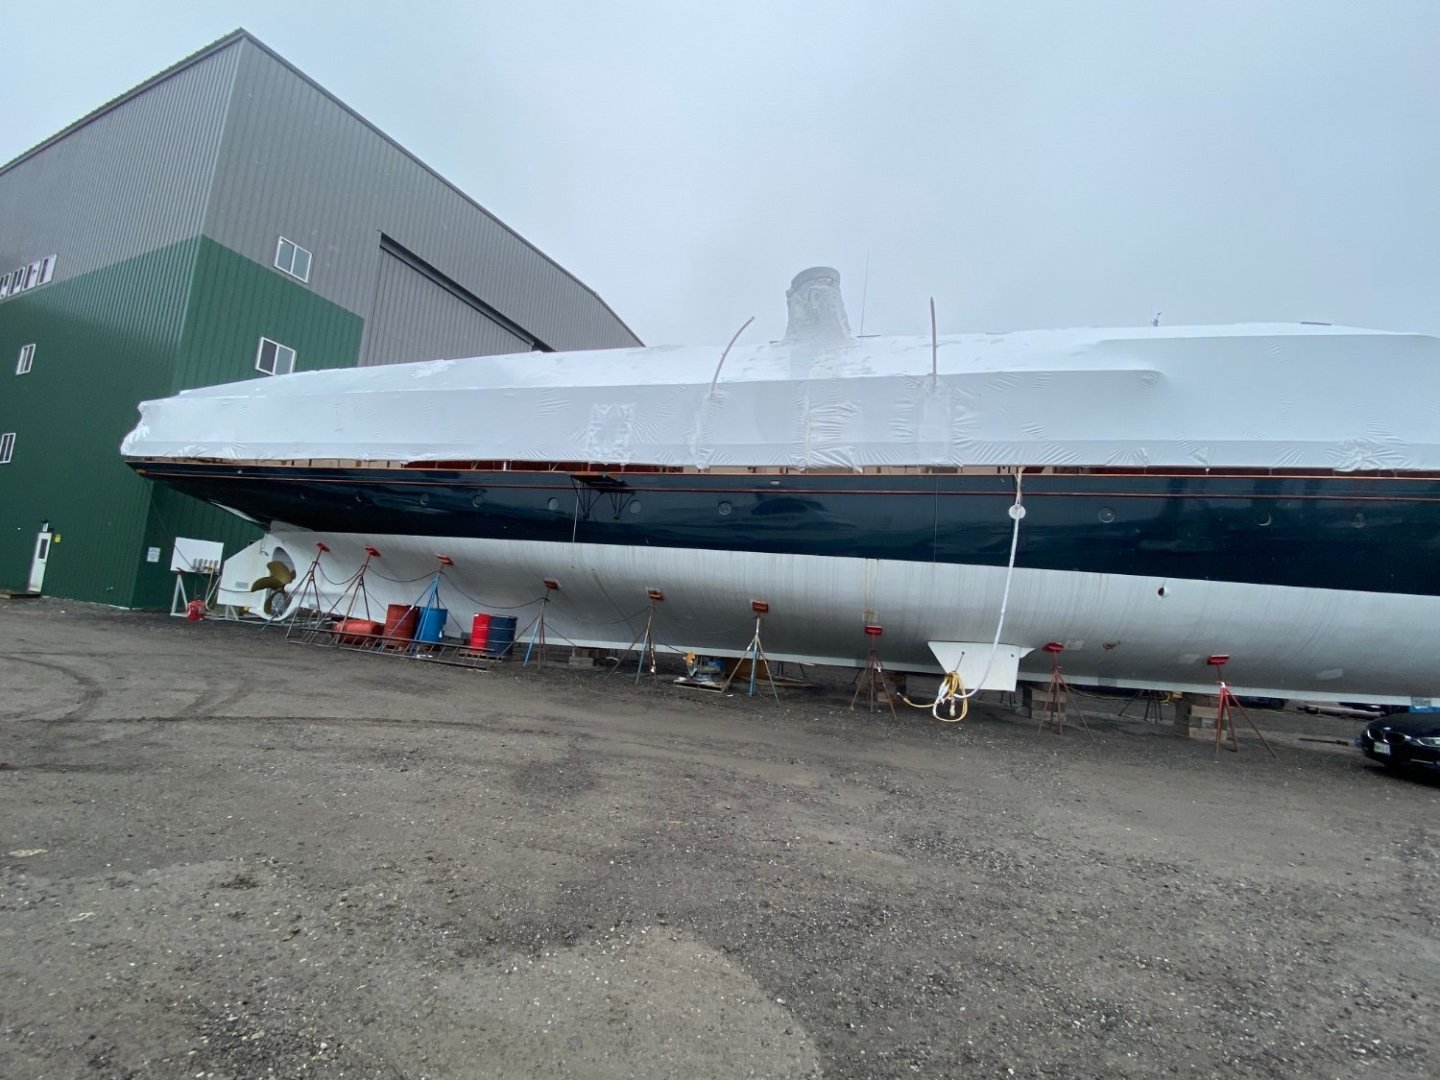
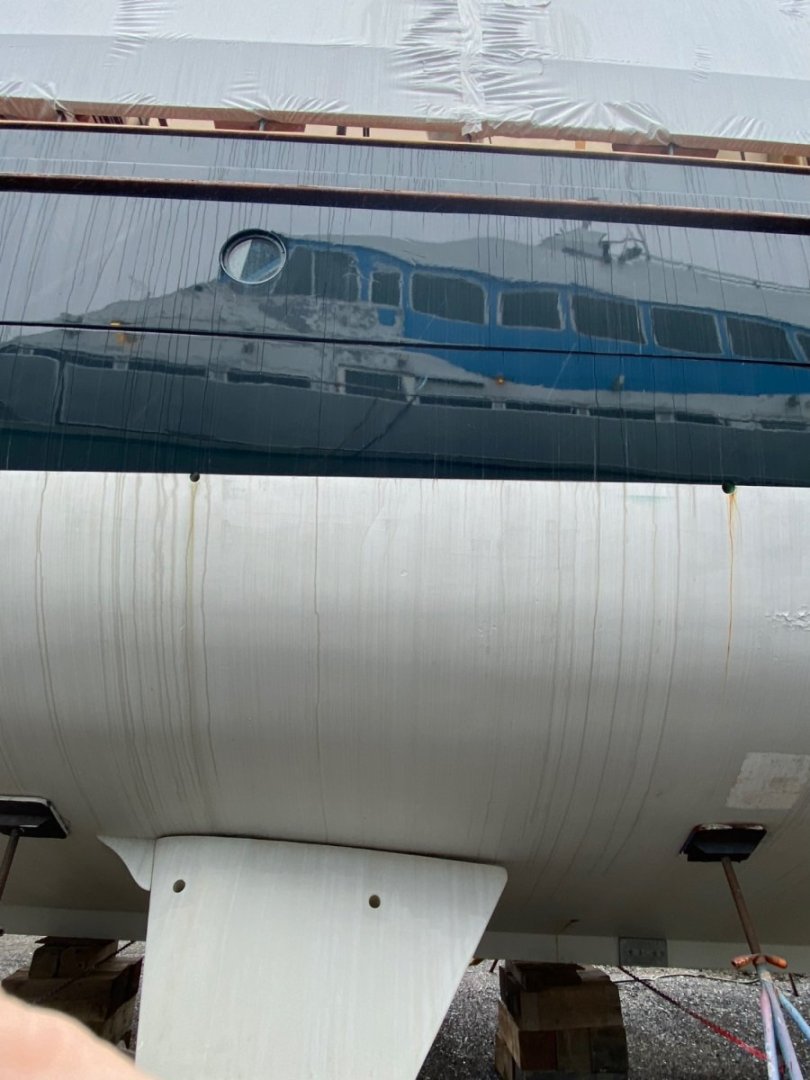
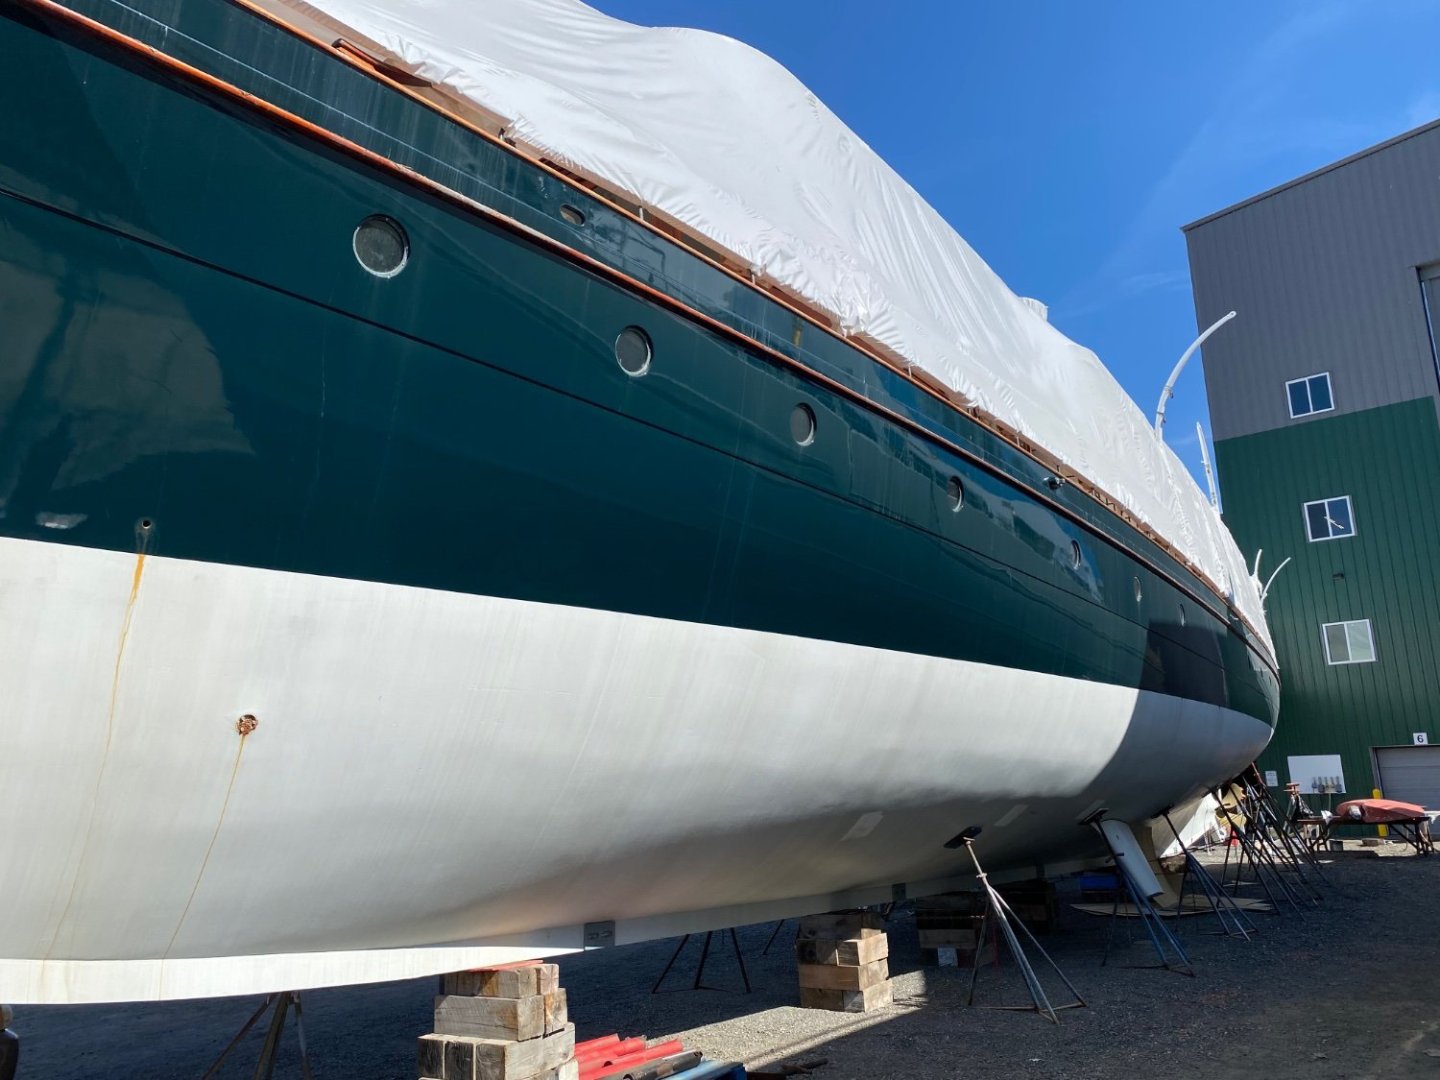
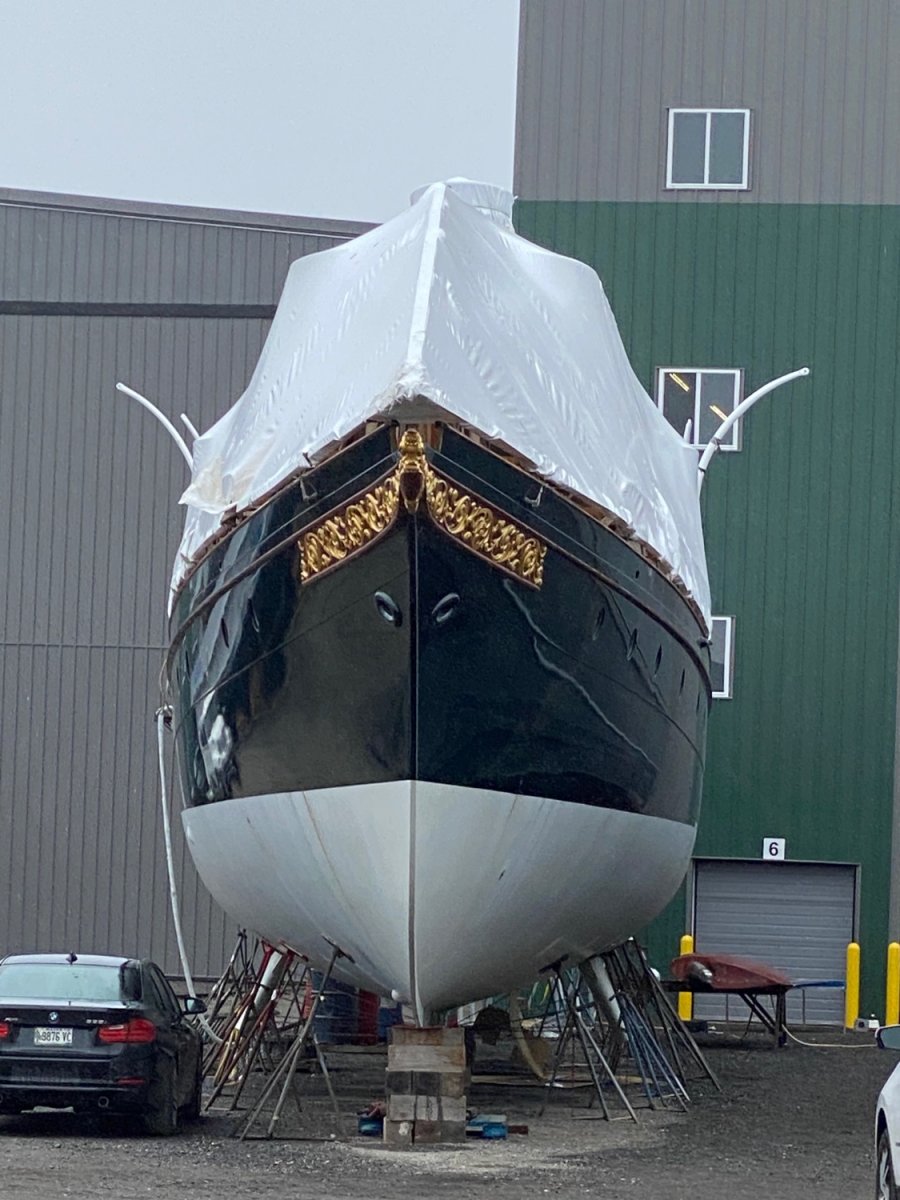
Keith, they just pulled a Cangarda out of the shed. It is still covered up. When they get some stairs and open her up, I’ll try to get some pictures inside.
Rick
Edited Friday at 11:13 PM by Rick310


Delete email- Retired guy, Tony Hunt, yvesvidal and 8 others
-
11


Cangarda 1901 by KeithAug - Scale 1:24 - Steam Yacht
in - Build logs for subjects built 1901 - Present Day
Posted
So I had better make a start but firstly a big thank you to all of you who have engaged with this project thus far. I will try to be as enthusiastic as you all seem to be.
I have been collecting photographs and looking for plans of Cangarda on the net for about 8 months. It is fairly normal to find web photographs of restored classic yachts. Typically they are photographed in anchorages and photographs are also taken when they are sold or chartered. Unfortunately these photos are generally less than ideal for the typical modeller. For a start, much of the charter photography focuses on broad external overviews complemented by extensive detailed shots of the internal accommodation. The camera rarely points down at all those interesting deck fittings or up to the heavens where all that fascinating rigging resides. Shots taken at anchorage (or in transit) are also generally less than ideal. They tend to be taken from too far away to get the detail and of course deck detail is generally obscured by the viewing angle. Sometimes as in Cangarda's case photographs of the restoration are available and these can be a useful resource.
So far as plans are concerned, in Cangarda's case I was somewhat fortunate. A paper to The Classic Yacht Symposium 2006 covering the early restoration of Cangarda contained 4 useful plans as follows:-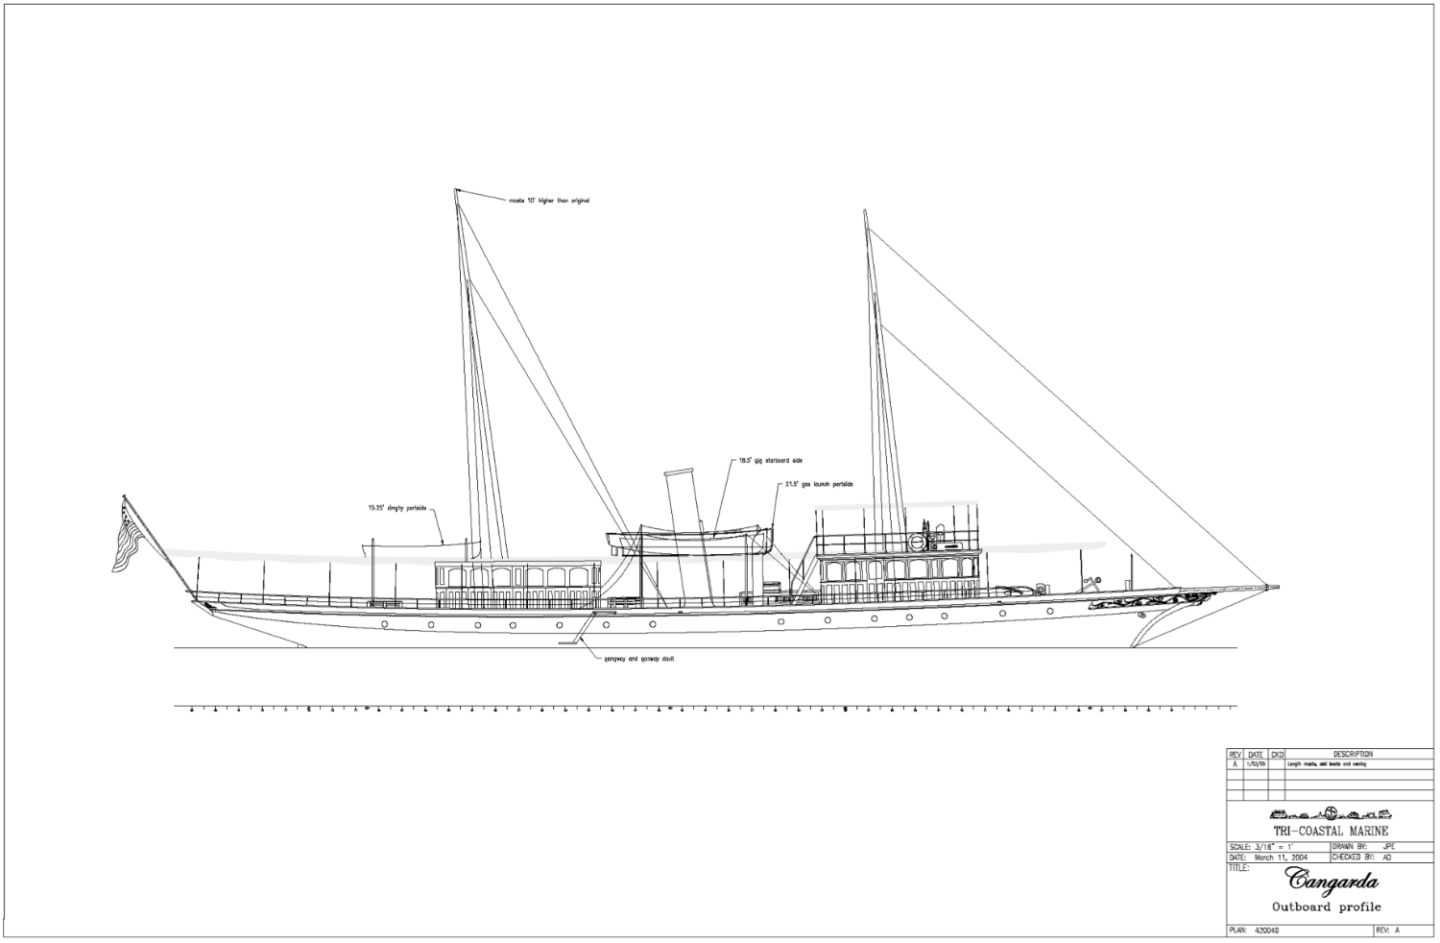
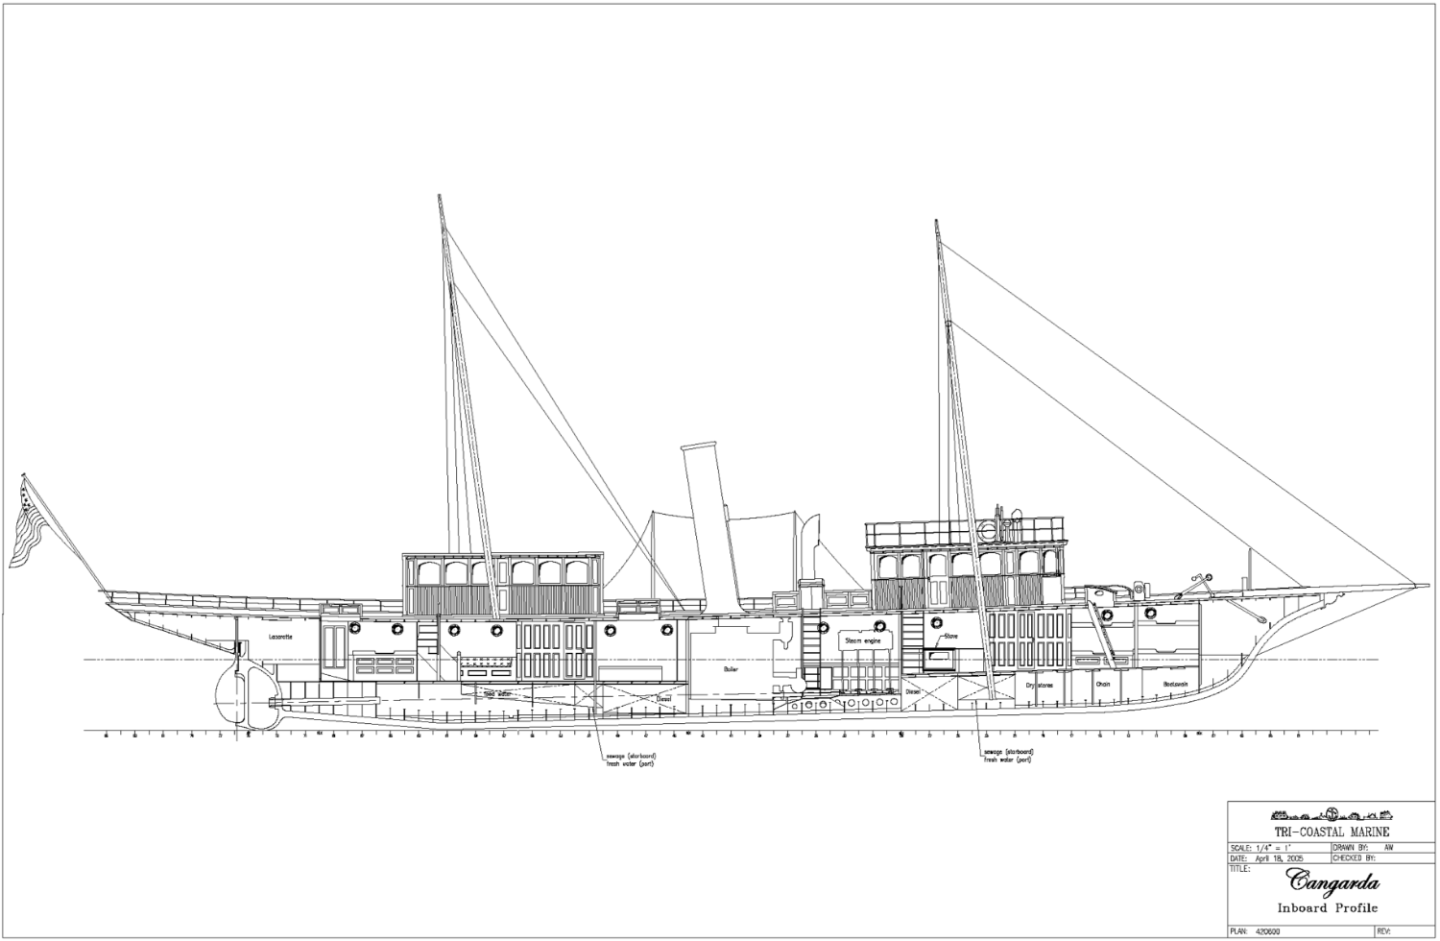
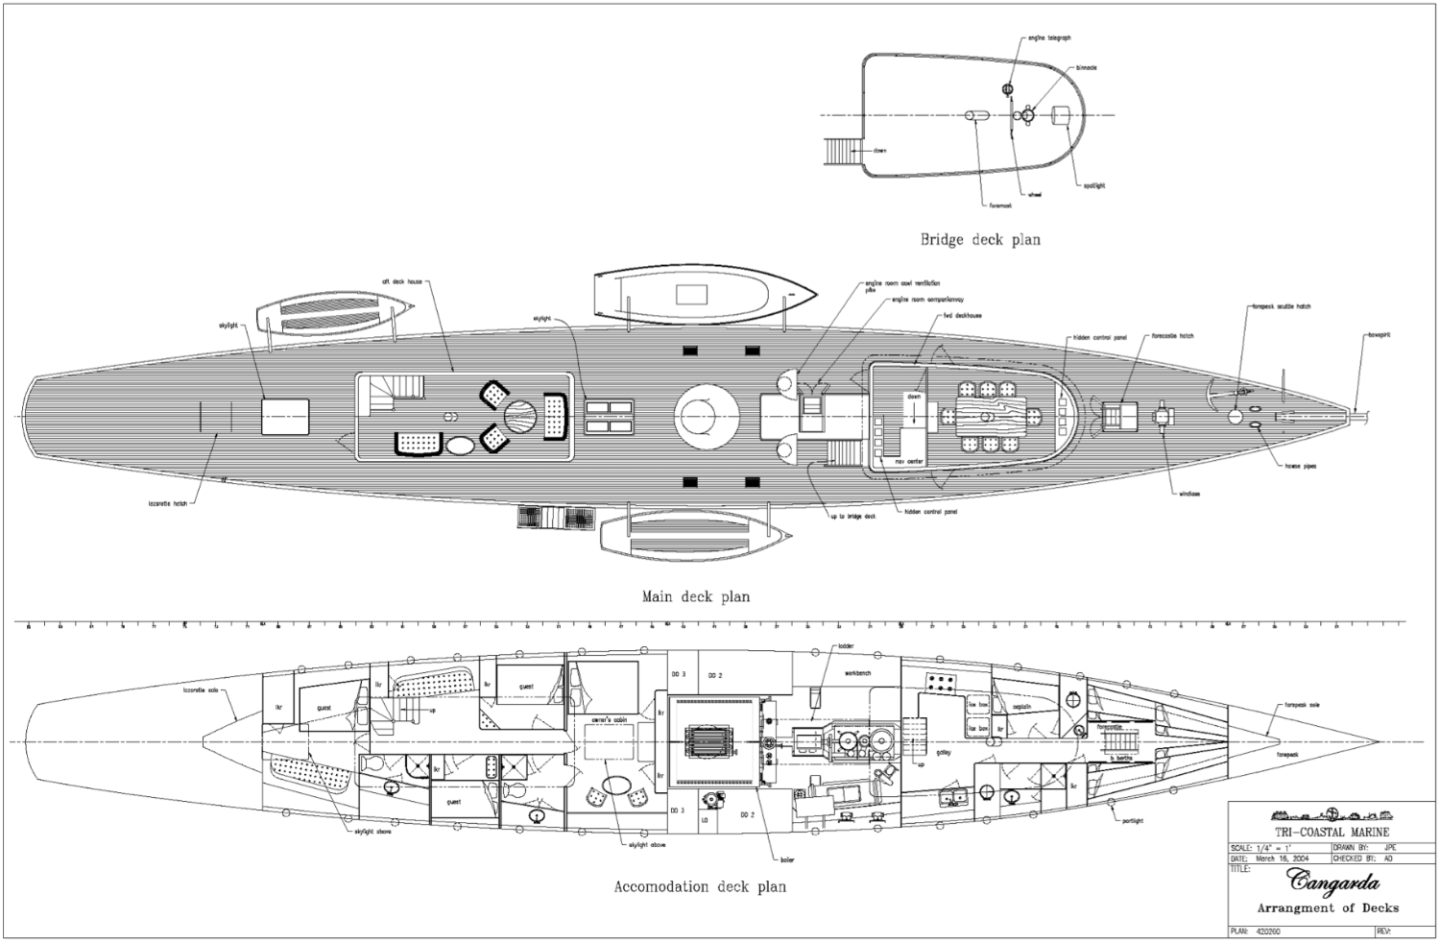
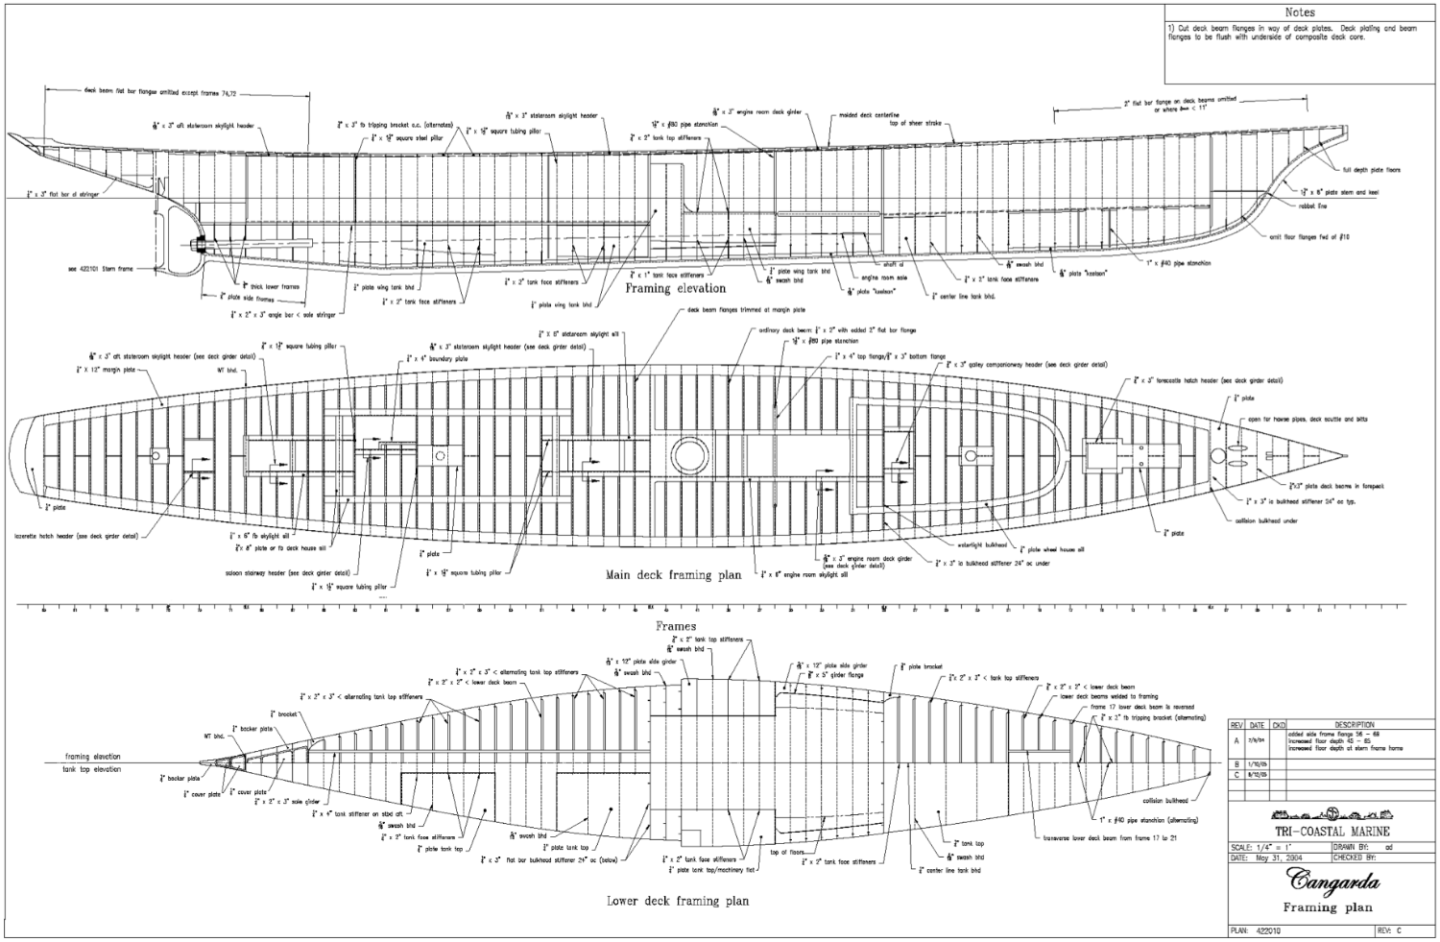
These plans while containing a lot of detail were contained within a PDF document and I struggled to find a way of extracting them while keeping the detail. The images posted above are screen shots and of course when these are blown up they pixelate and produce saw tooth line edges which aren't very useful.
Notably the plan information did not contain hull lines and at this stage this was the most significant obstacle to attempting a successful model build. What did give me some optimism was that I had found a lot of on line photographs of the hull fabrication. With these I had started to get a bit optimistic that I could use the available plans (above) with the general frame shapes to make a reasonable representation of the hull form.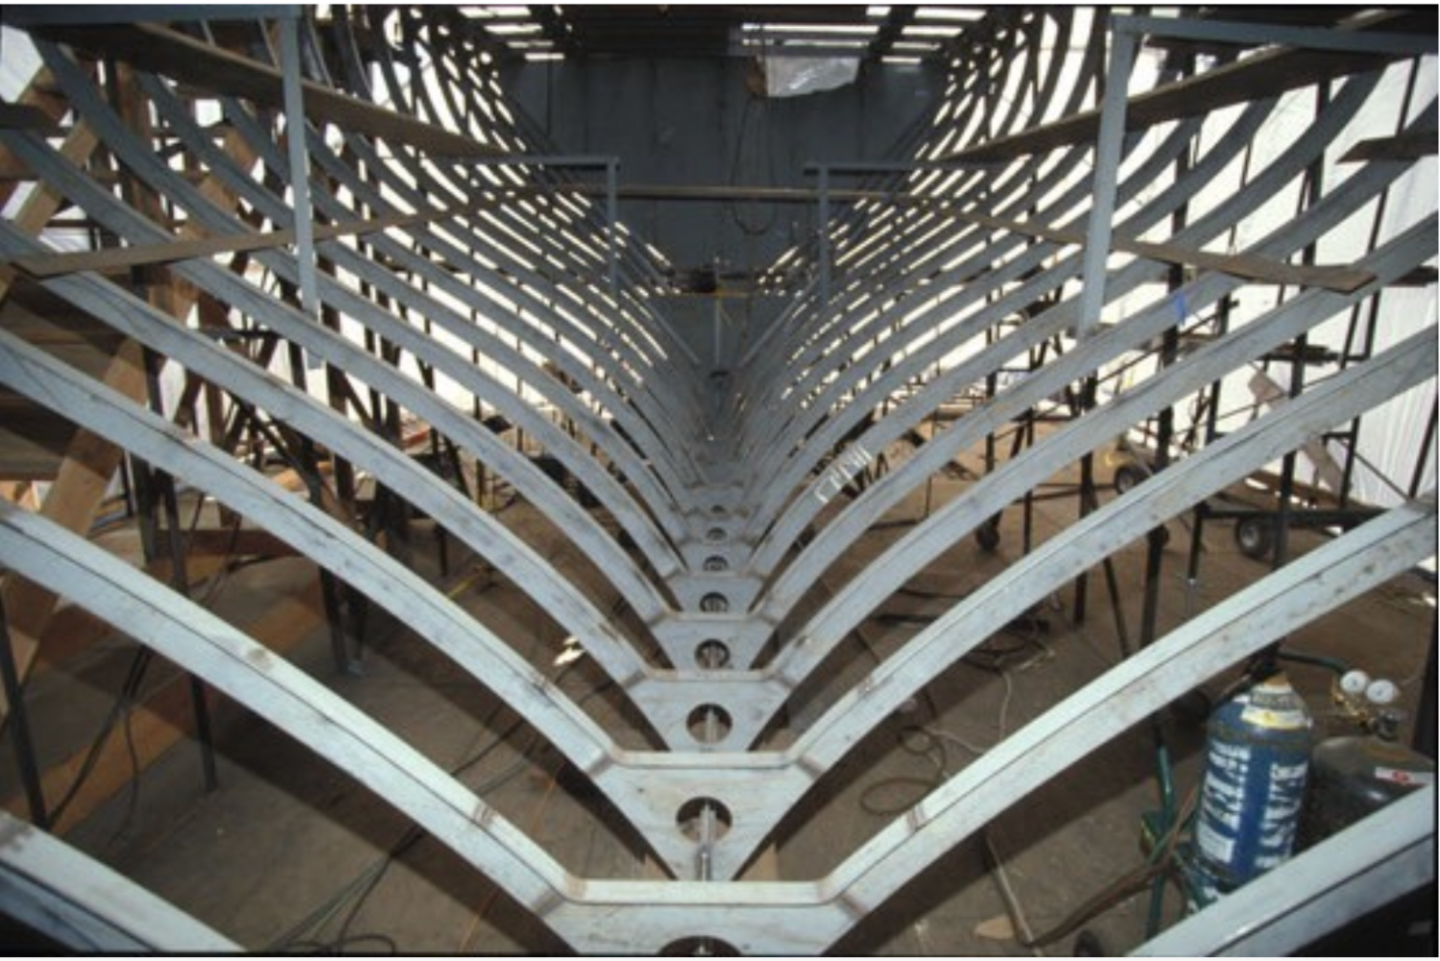
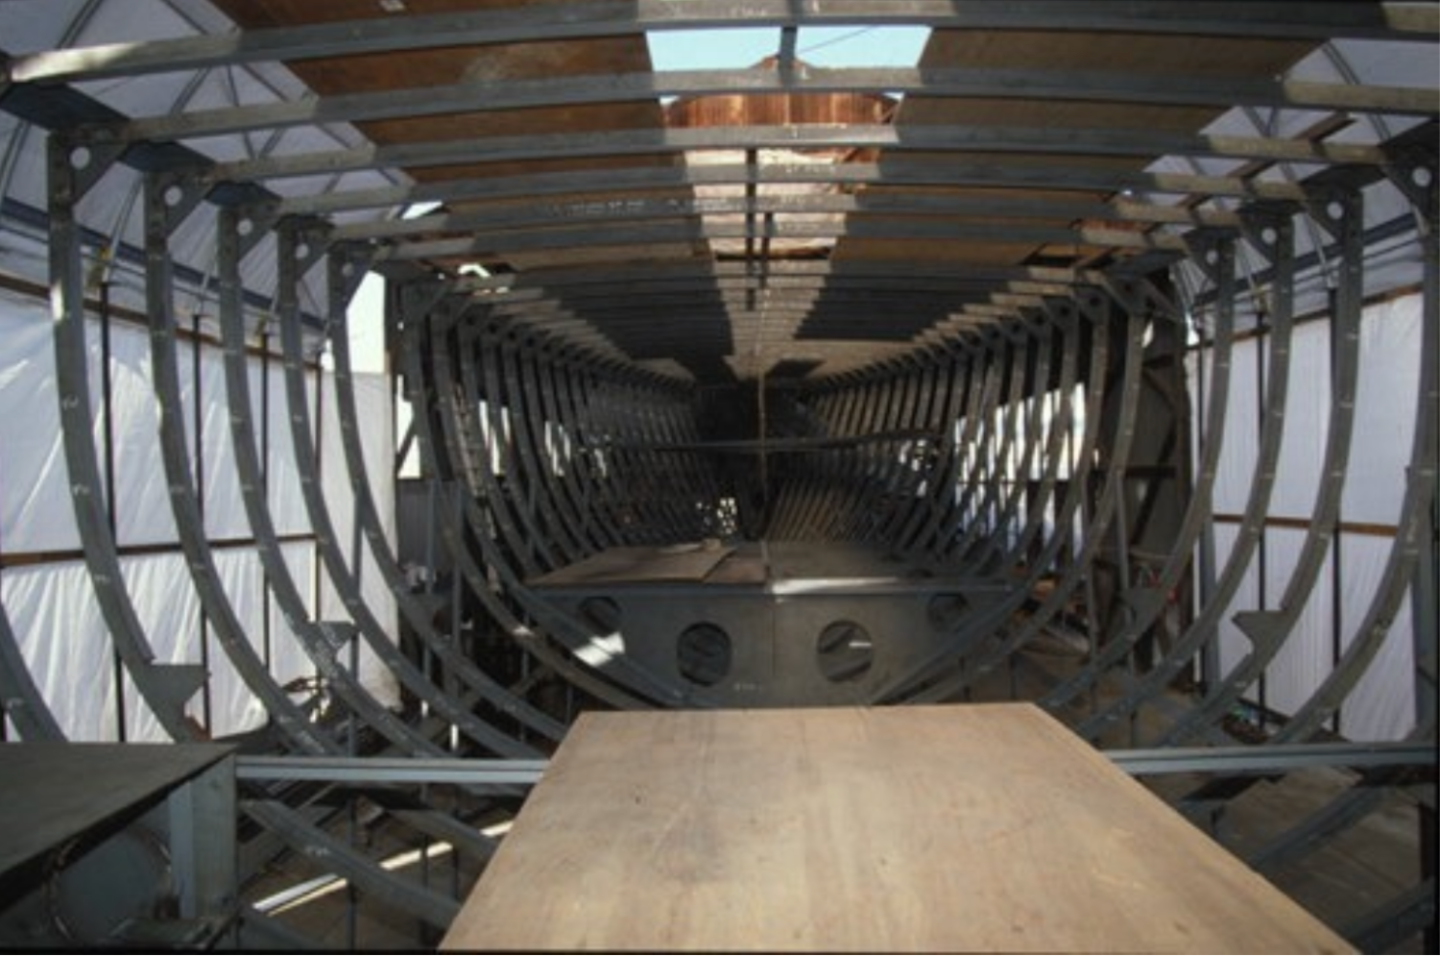
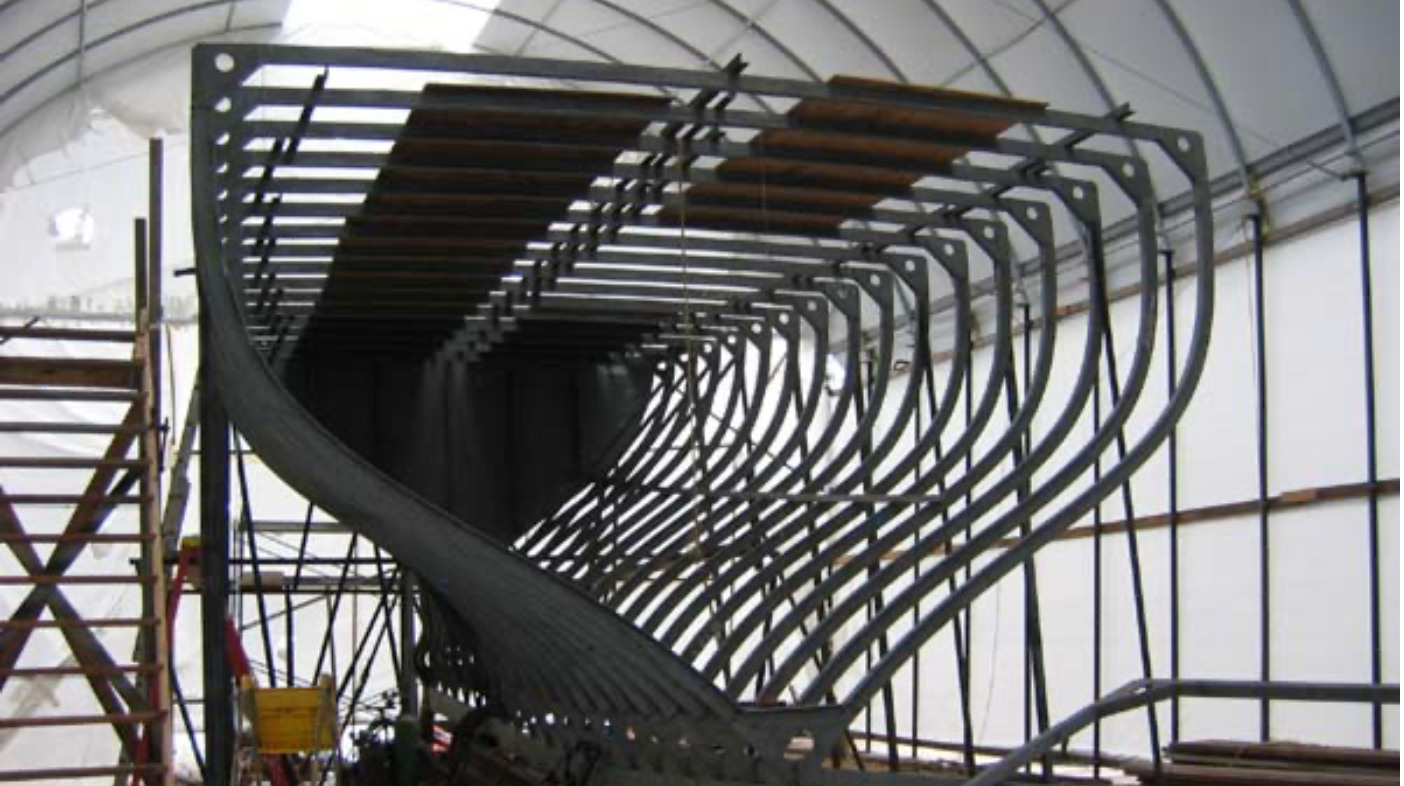
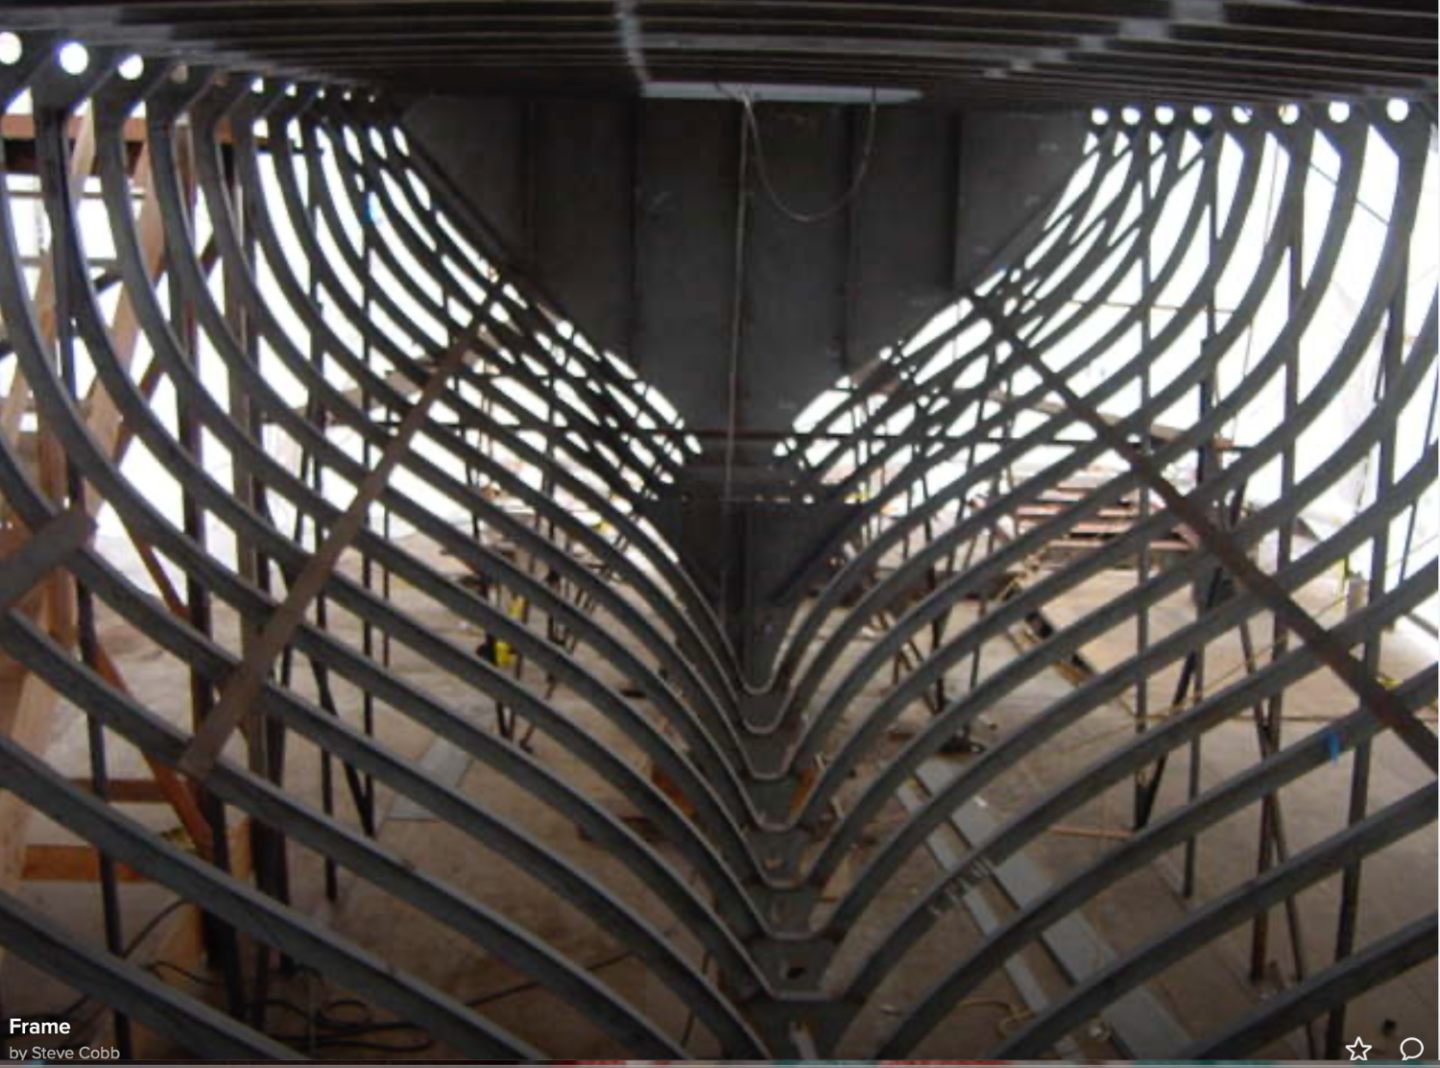
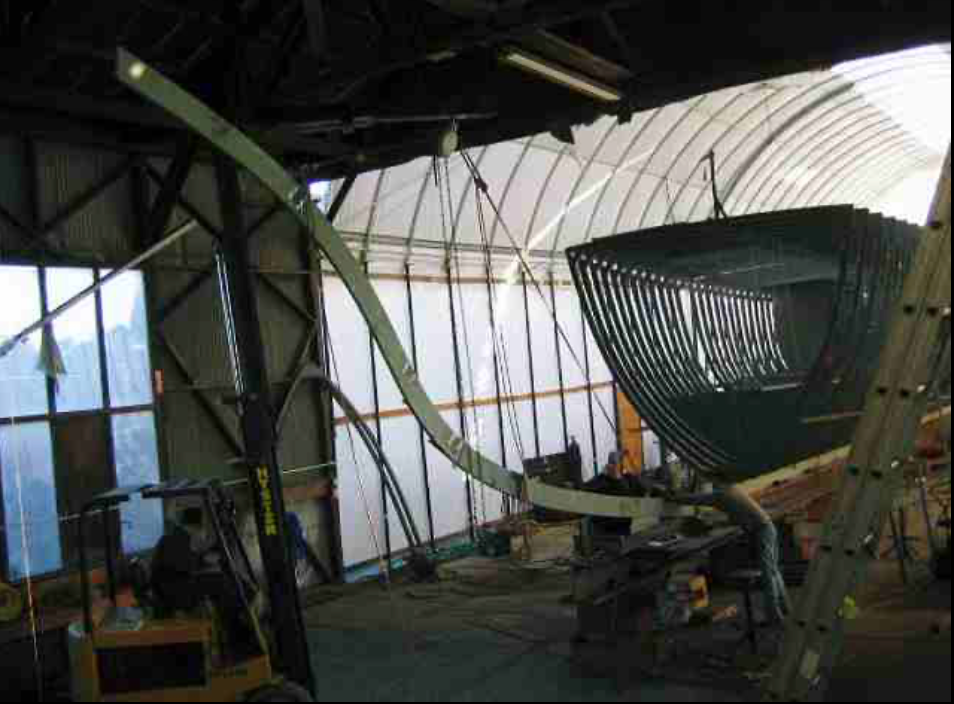
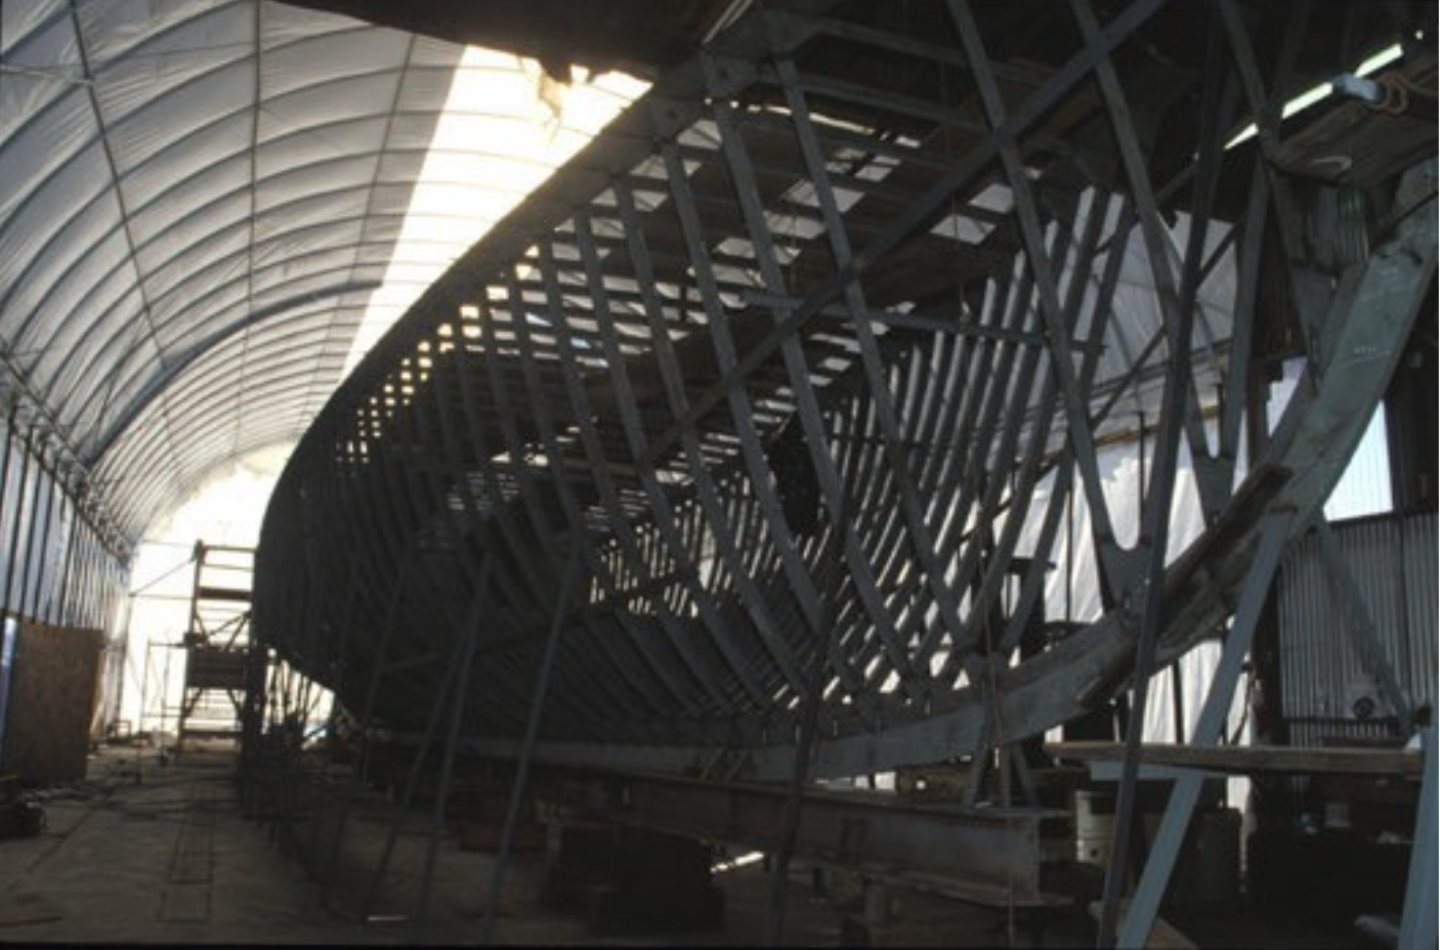
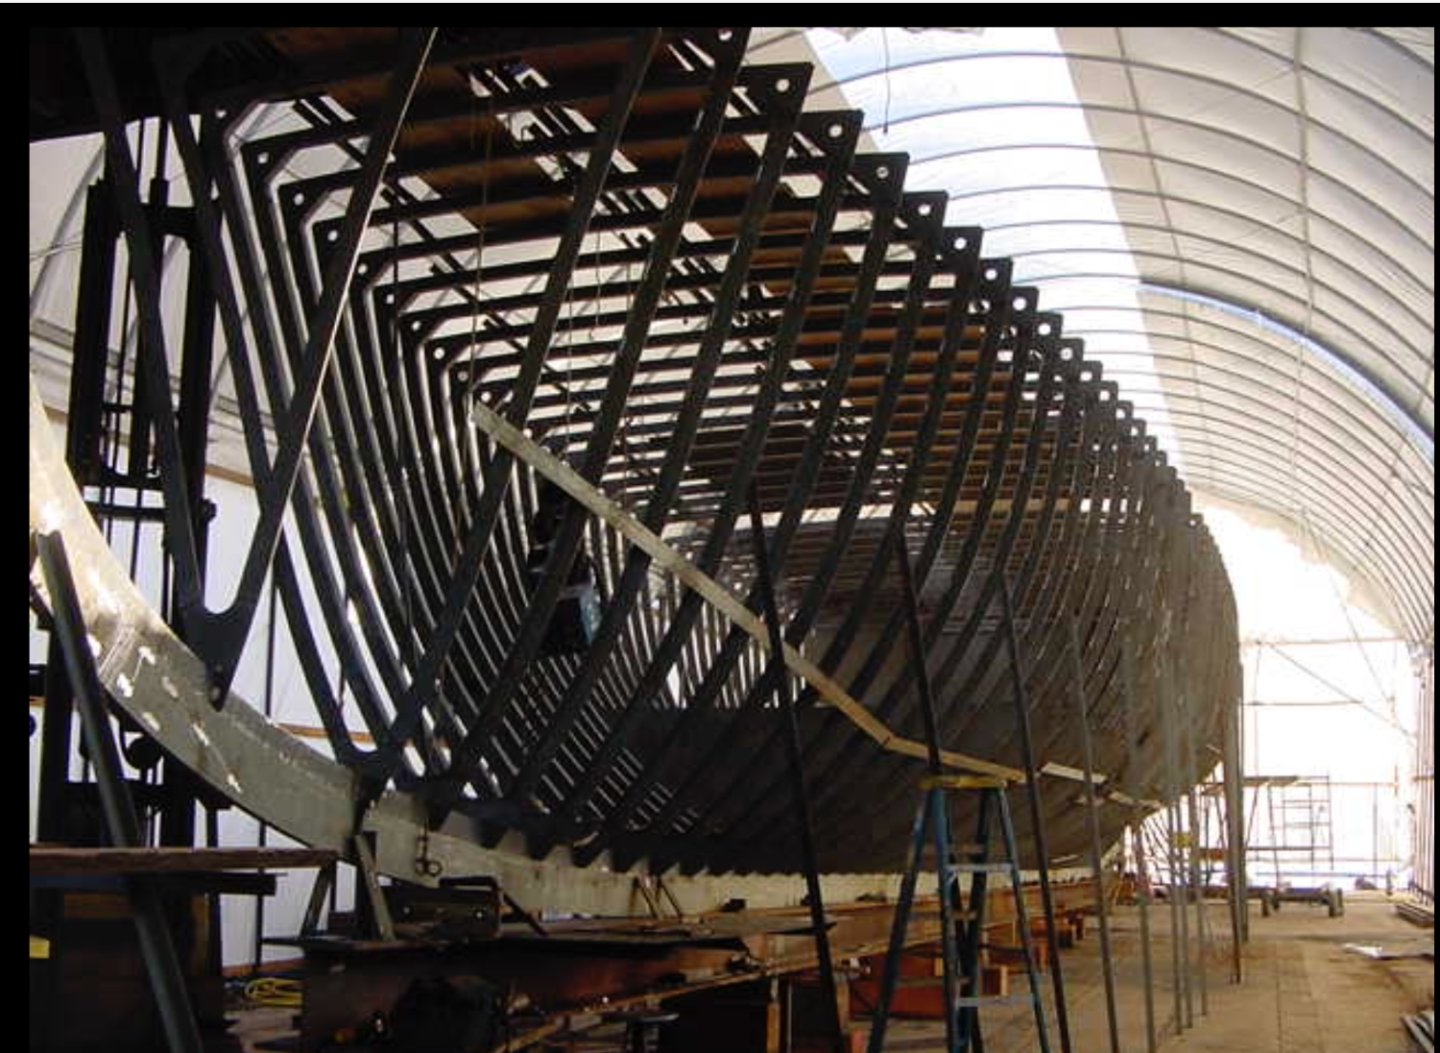
Interpreting the frames from the camera angle distorted images to generate the frame sections wasn't going to be easy but hey i was willing to give it a go.
I am always a bit reluctant to put upon people and this was probably the reason that I only recently contacted Jeff Rutherford whose boatyard undertook the restoration of Cangarda. I couldn't have been more delighted with his response. Jeff confirmed that