


Chuck
-
Posts
9,099 -
Joined
-
Last visited
Content Type
Profiles
Forums
Gallery
Events
Posts posted by Chuck
-
-
Great start my friend. I will be following along. Hopefully you wont catch up anytime soon. Also...keep in mind that if you need any parts that I make available for the project in pearwood, I can laser cut them for you. I have the wood for that. Its just special order and will take a few days to cut after you request it. Parts like the windlass and such. Going with a metric size for things like the bu;kheads is no big deal at all. It wont matter as long as you adjust the width of the slots.
-
-
Thank You Druxey....I will have to remember that. I just finished making that "ear" and will mount it tomorrow.
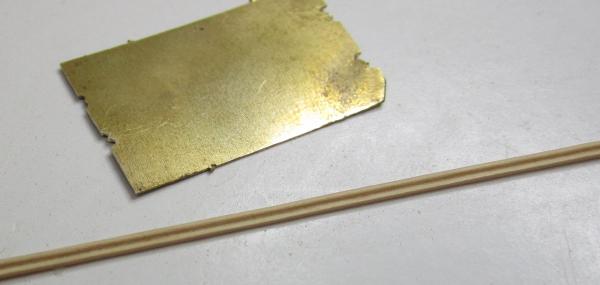
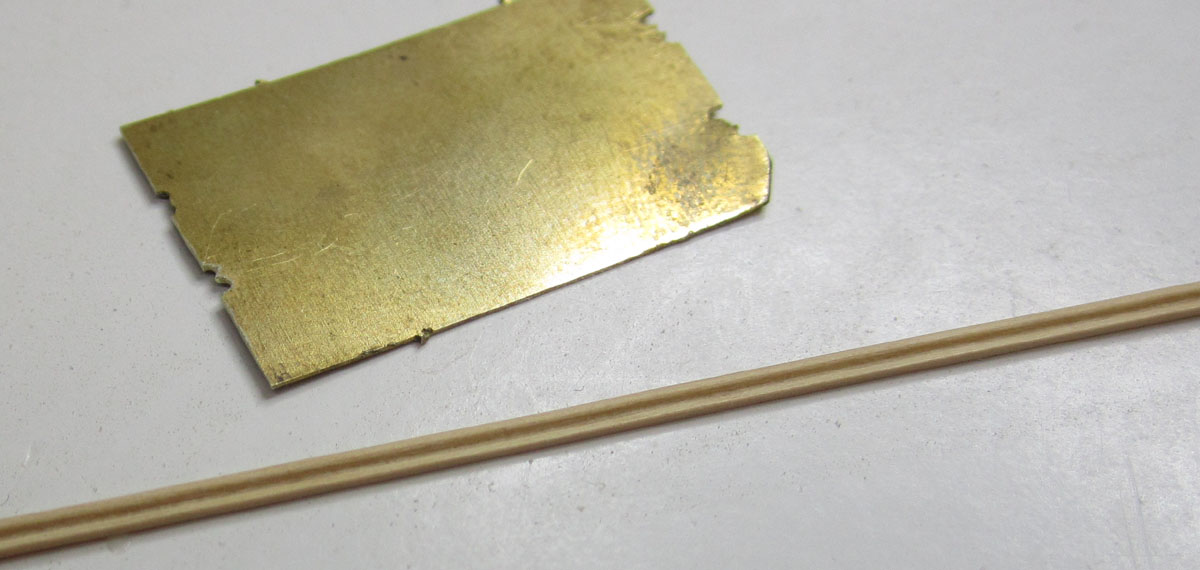
As far as the scraper goes. I use whatever I find handy. They dont have to last long. In this case I used some thin brass and to cut the profile I did it by hand. I used a combination of needle files and broaches. and even a razor saw. I just go slow and if I screw up, I throw it away and make another. Once I am happy with a scraper I will scrape all of the molding I need for the project. Just in case I lose it.
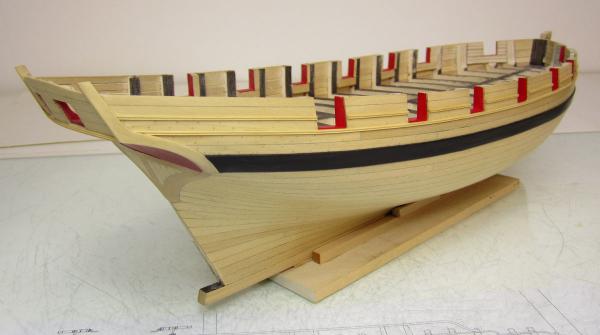
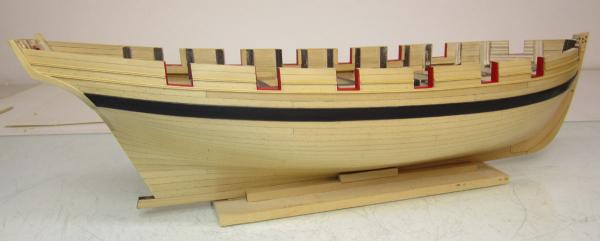
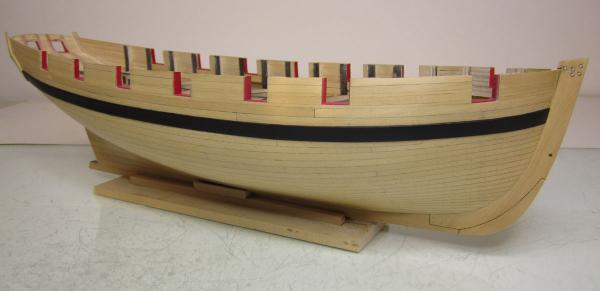
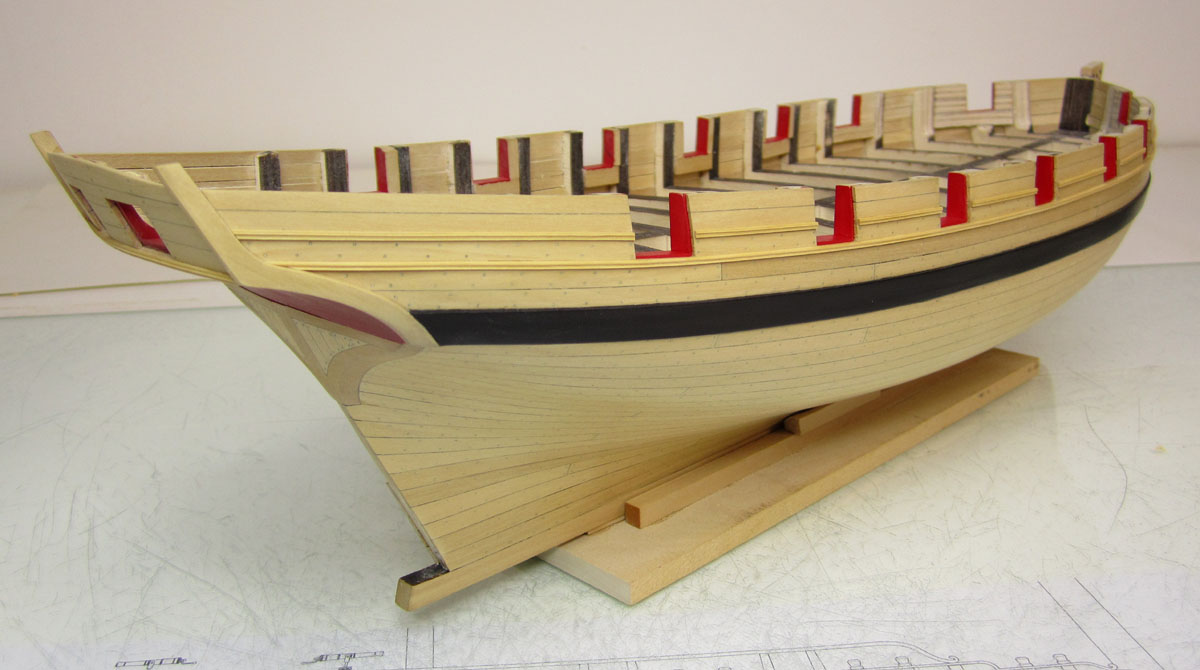
The bottom molding has a slightly different profile than the one above it. I just wanted to mix it up a bit because using the same profile everywhere gets boring. I also see different molding used on contemporary models rather than just repeating the same one.
Chuck
-
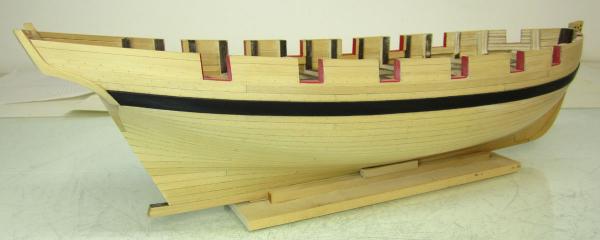
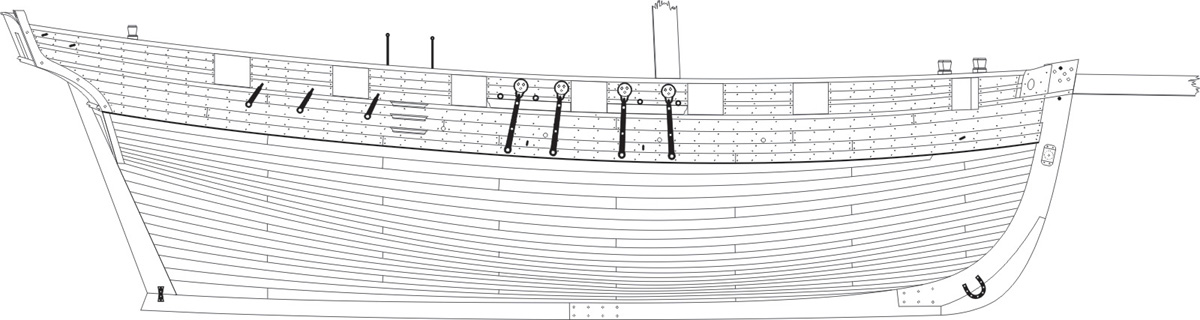
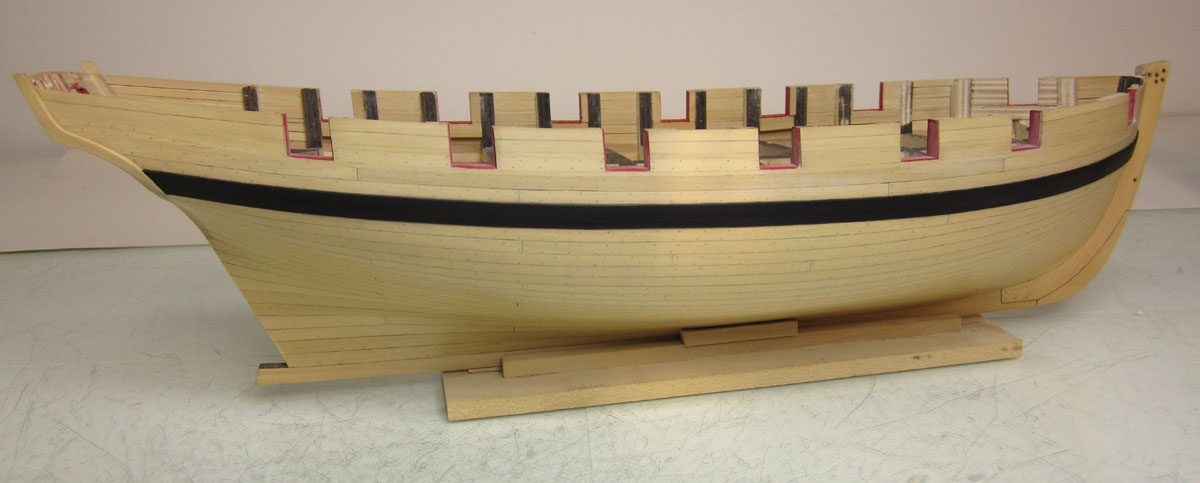
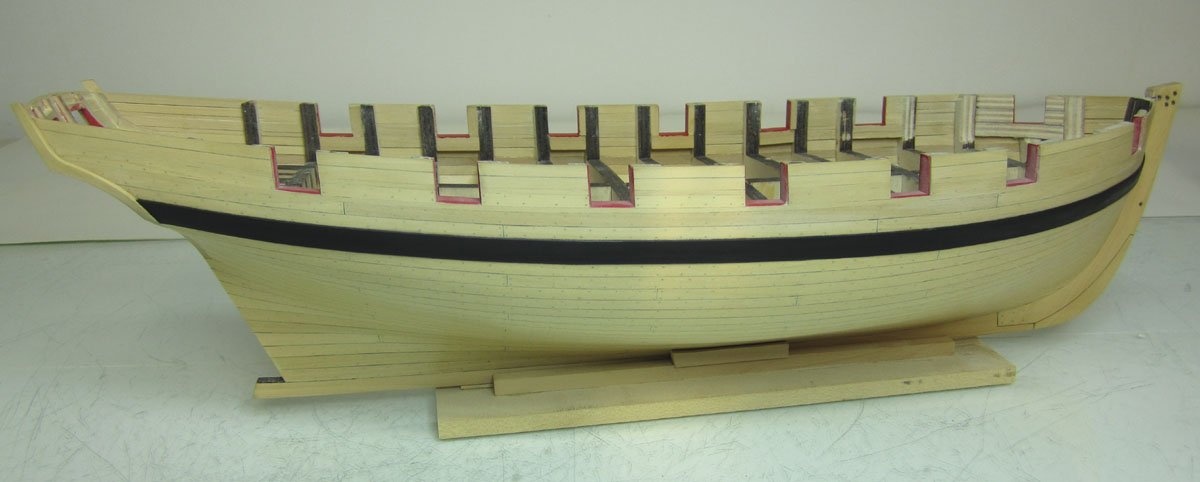
Funny you should mention those. I didnt want to start treenailing the other side today. I wanted to wait until after Tuesday which is when I will get a chance to finish that planking. So I added some of the fancy molding. Those thin 1/16" wide strips were the first layer of what would become the fancy molding. It was important to add them below the ports in a special order before the other planking above the wales could be done. This would ensure a proper run of the planks and what would become the second layer of fancy molding.
I actually added that today. They were made as you usually see them, with a scraper. I was very careful to make sure they were very thin. One thing I notice is that folks tend to place molding on their models that is too thick. The molding on the Cheerful is 1/16" wide but less than 1/32" thick. I started with strips that were 1/32" thick and after scraping, I thinned them down even more. It makes for a more delicate look. In hindsight, I could have gone even thinner.
At the bow, the lower molding will carry over onto the stem. But it wont be as I show it in the fourth photo. It should be thicker in the corner between the two so the transition is smooth. But I have only lightly tacked it in this area to show you how it may actually look. I will try and finish that up tomorrow and I will take more pictures. My transition onto the stem with the molding was only a test to check the run of the molding and see how it looks. I will do it for real maybe tomorrow.
Take a look at the contemporary model (last photo) and you will see a standard at the bow (not a molding strip) that will look similar to how I will eventually do it. That is the kind of transition onto the stem I am looking for.

- Landlubber Mike, KevinR, Krelis and 25 others
-
 28
28
-
Just checked...reference lines are OK...its just a little short. I adjusted. So just add a wee bit to the top of each filler. Sorry about that.
- qwerty2008 and Stuntflyer
-
2
-
It looks good Maury....I would build up the filler tops to the same height. My guess is that the reference lines are wrong. Probably a mistake on my part. I will check out the plans and make an adjustment.......I will report back.
-
-
-
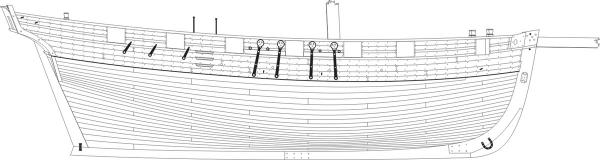
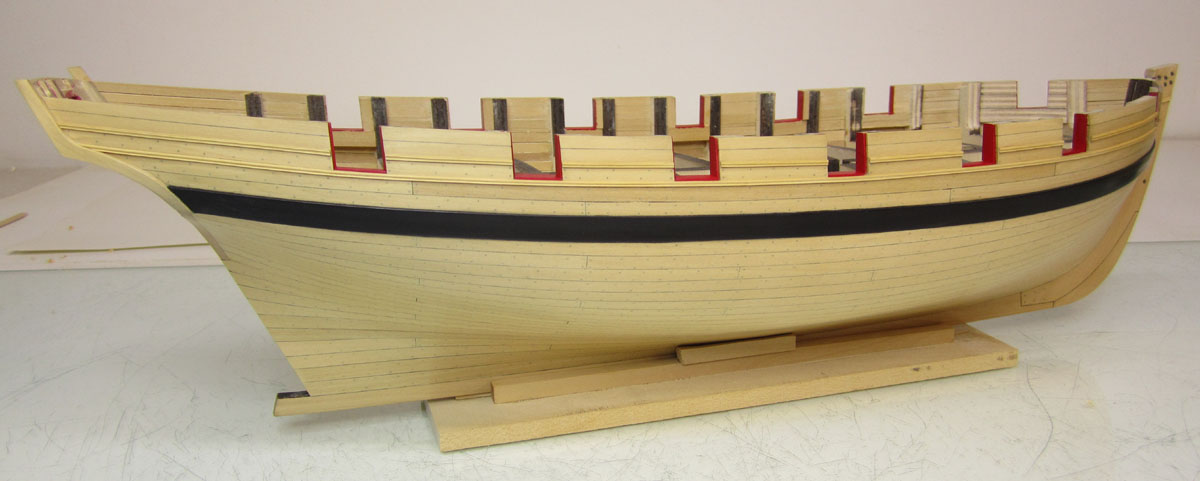
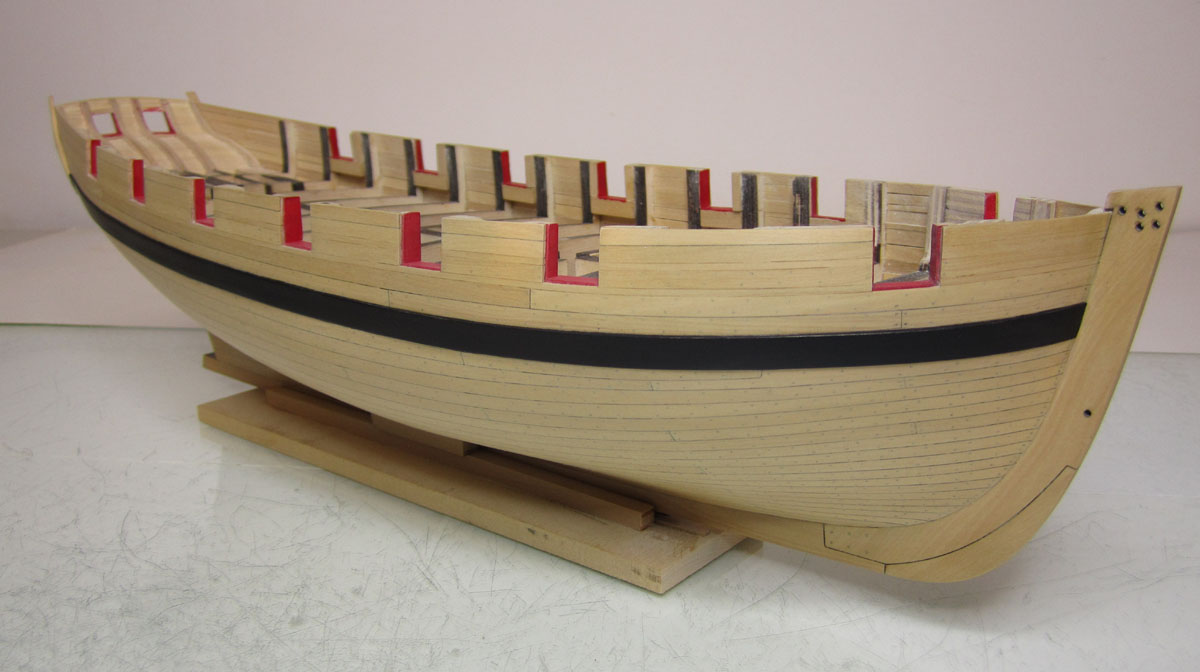
I was asked to take a photo from the bow "right-side-up", so folks can see the run of the planks there. I hope this will do the trick. Let me know if there is any other questions.
Chuck

- fatih79, reilly, kees de mol and 21 others
-
24
-
-
-
Thank you very much.
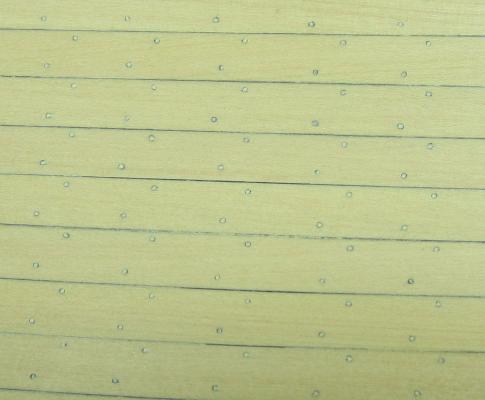
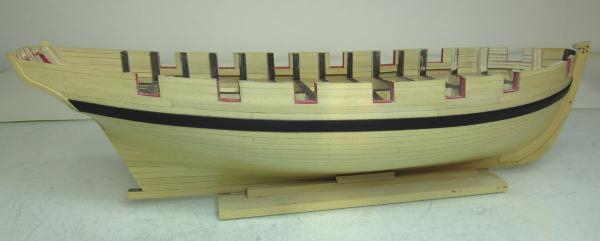
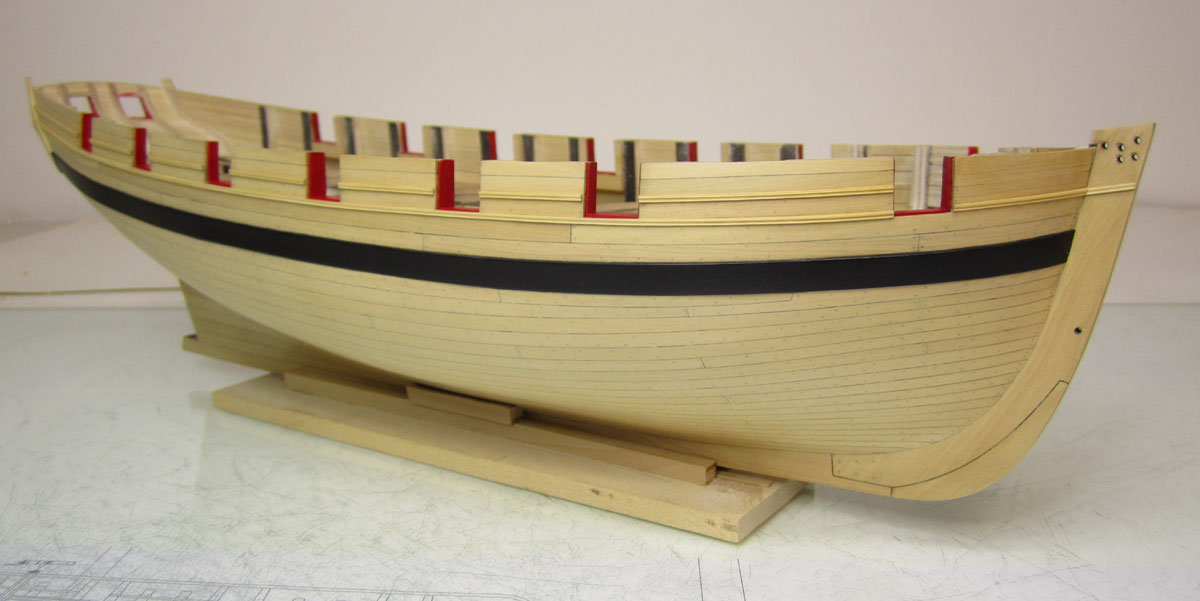
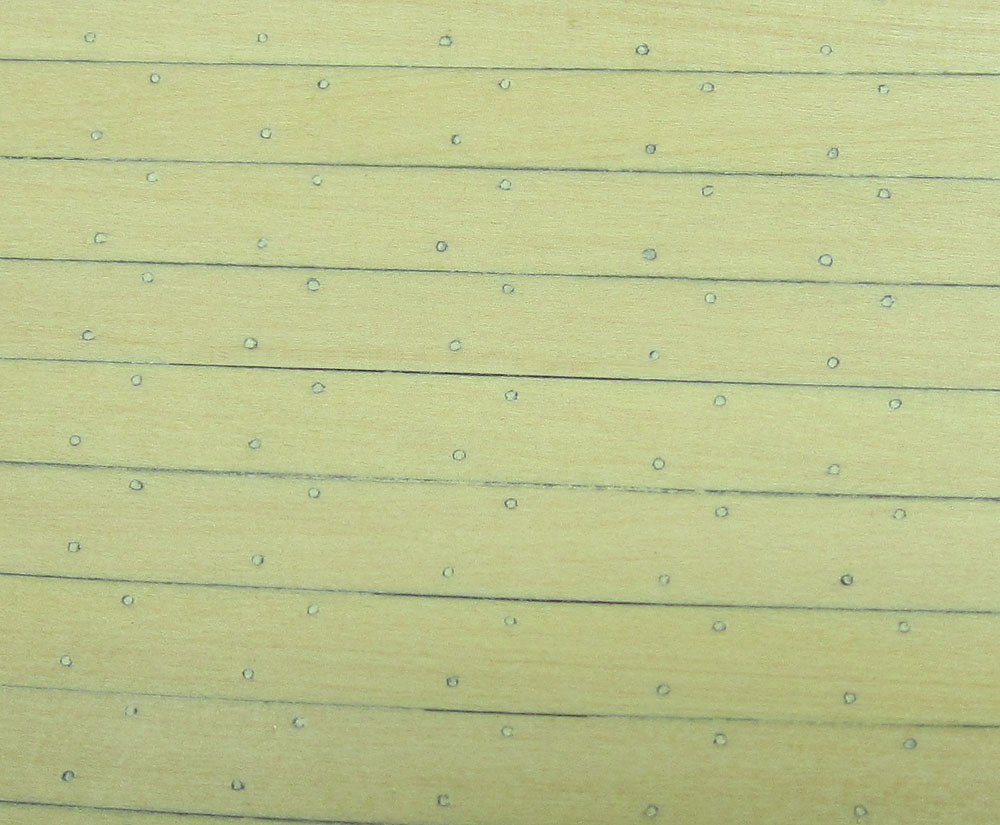
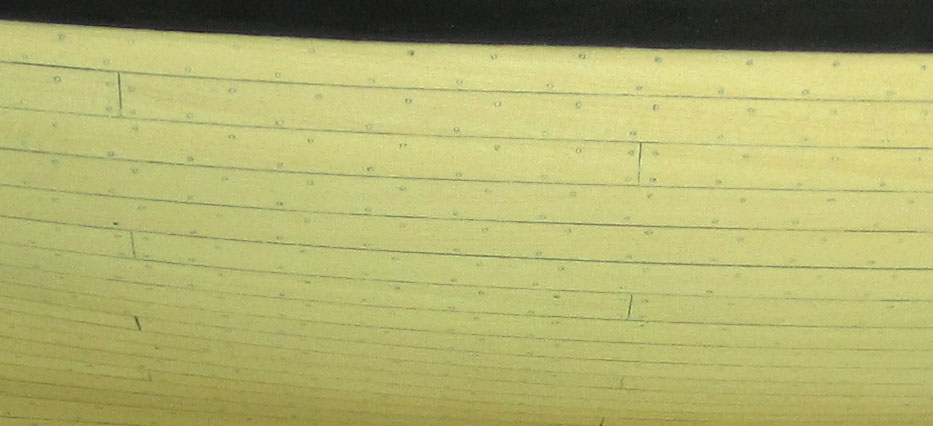
I finally finished treenailing this side. I am glad that is over. I tried my best to take pictures of the treenails really close. I had to mess with the settings of the camera to get the best shot. But at least you can see the shape and detail. They are not perfect by any stretch of the imagination. But it does the trick. Remember these are #78 holes.
Interesting though...the last two photos are identical shots except I changed the settings. On my camera I changed from Fluorescent to outdoor....on a setting and look at the color difference. Freaky. I could swear that both are representative as well. Its funny the tricks your eyes play on you. Only after seeing them side by side does it get so clearly different. I couldnt even tell you which is better. After looking at both for so long it all just blends together and gets confusing. I think I like the third one down the best and wont change the settings again until my kids steel the camera and screw up how I set it up. Then I have to start all over again.

I hope this helps.
Chuck

- GLakie, fatih79, Elmer Cornish and 22 others
-
25
-
-

Nautical Research Guild Spring Issue is completed.
Become a member and get it delivered to your front door every 3 months.

Here are some highlights including the table of contents.
Modeling a Third-Century A.D. Roman Merchantman by Charles Cozewith
Introducing a Novice to the History of the Ship: Six Books Revisited That Guided My Study by Phillip Roach
EZ Line for Rigging Small-Scale Models by Mark N. Lardas
The First Western Warship in the Hawaiian Islands Navy of Kamehameha the Great: Yet Another Fair American! by Clayton A. Feldman
Liverpool-Class Lifeboat, A RNLI 1945 lifeboat at 1:18 scale: A Call for Updating the Dockyard-Style of Modeling by Hubert Mallet
Jon Michel: A Gentleman’s Tugboat by John De Broske
An English Bomb Vessel, circa 1690 by Gary Krempien
COLUMNS SHOP NOTES Using a Lathe to Make Ship’s Masts and Yards by Andy Blokmanis
MODELERS’ REVIEWS Combrig’s 1/700 Scale Battleship HMS Victoria, 1890 by Mark Myers
Click here to read one of the articles....
-
-
Nope....You guys have to cut some stuff!!! LOL
 Its just the plywood stuff which is basically to save some time. No kits, at that point I might as well cut everything, that would take the fun and spirit out of the project. Its a very easy scratch project to build. I am sure you guys will fun making those few pieces. But if you guys really want other parts, I would be happy to custom laser cut them for you, but they wont be part of my stock items at all.
Chuck
-
Thanks John
I will try to take a close up image of the treenails so folks can see them....but I am sure they will be pretty ugly that close up.
-
Excellent work ...its looking great
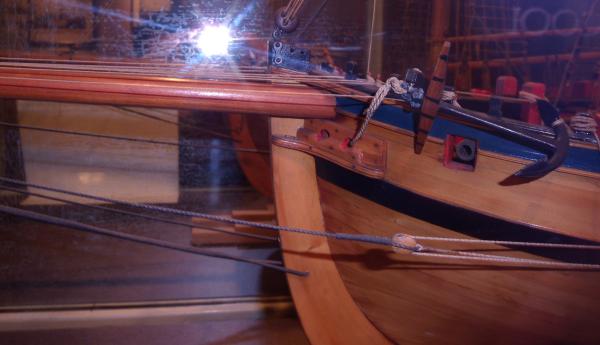
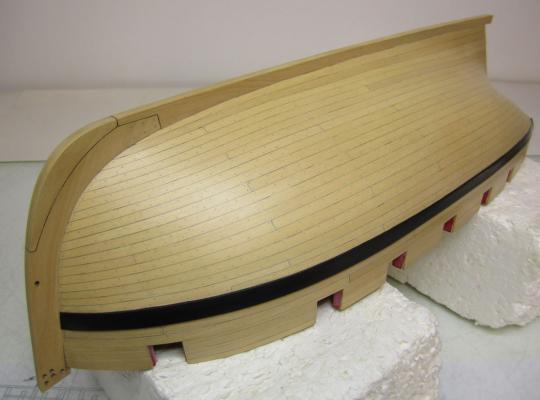
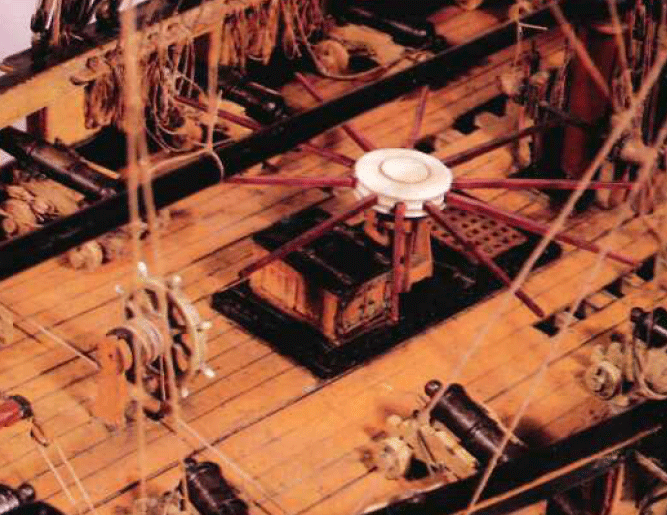
With regard to the cannon balls, that detail was taken from two contemporary models (english) of the same time period. They were both cruiser class brigs. On one of them, the shot racks were wrapped completely around all four sides of the coaming. I thought that was a bit too much so I used the example where they were just on the sides. Its hard to see in the photo but this is the version where they are shown on all four sides.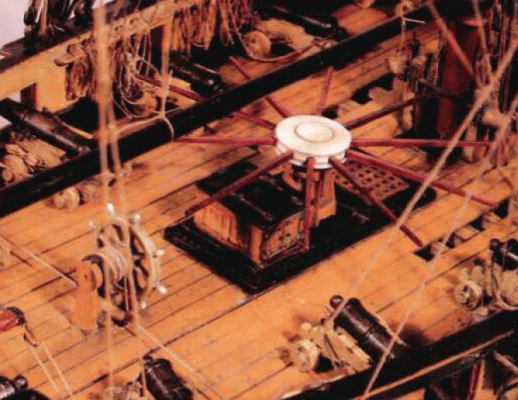
- Gahm, CaptainSteve, JesseLee and 2 others
-
5
-
-
-
A # 78 hole is really small, but what I did was after drilling the holes for a small area about 2" x 4".
- sand the area smooth
- use a sharp awl and GENTLY insert into each. Dont push it too hard or you will distort the hole shape.
- Take a very , very , very sharp #2 pencil. Insert point into each hole and twist lightly. You must keep a sharp point and sharpen the pencil every ten or so holes. Use one of those cheap kids pencil sharpeners.
- Then fill each hole with Elmer's wood filler. Scrape off excess with a piece of wood.
- Sand it smooth to get a nice surface.
- Then aply some wipe-on-poly.
-
Spent the day treenailing...woo-hoo!!! Managed to get half of the starboard side done. I am using a #78 drill bit for the size. They are subtle which I like. In fact here is a close up as it may be hard to see in the full profile image. But it ads the nice texture I like without looking to measle like. Clicking on the two bottom pictures might give you just a hint of treenails although it may also be my photography skills.
Chuck

-
Maybe in the next few weeks Crown will be open for business. Look for an announcement but you can follow this topic for updates.
http://modelshipworld.com/index.php/topic/9119-introducing-crown-timberyard/
Jason is actually shipping me a wood package for my Cheerful project which will be made available to support the site for a donation. I will be sure to post some pictures for everyone to see when it arrives. I am sure the quality of the wood will be superb.
Chuck
-
I will be offering the bulkheads pretty soon. But thats it. It will never be a complete kit . Only a few items to help the scratch builder.
- GLakie, jonny.amy, qwerty2008 and 3 others
-
6


HM Cutter Cheerful 1806 by Chuck - FINISHED - 1:48 scale - kit prototype
in - Kit build logs for subjects built from 1801 - 1850
Posted
Here is a look at that "ear" piece. Actually I am not entirely sure it can be called an "ear" as it is only an extension of the molding. But this is indeed what I came up with. Taking a piece 1/16' thick I formed the piece. Its shape was found playing around with a card template. Then I transferred it to the wood. Finally the same scraper I used on the molding was used on this piece. Then a small length of molding was butt against it and continued aft. This is as far as I am going until after I plank and treenail the other side. I did however adjust some of the molding after seeing the pictures I posted yesterday. Some of it had some minor dips and waviness. I feel better now.
Then I will add the stern post and move to the inboard details by planking the bulwarks etc.
Chuck