


Chuck
-
Posts
9,455 -
Joined
-
Last visited
Content Type
Profiles
Forums
Gallery
Events
Posts posted by Chuck
-
-
-
-
-
Really fine work Eric....well done!!!

- Canute, Stuntflyer, mtaylor and 1 other
-
 4
4
-
-
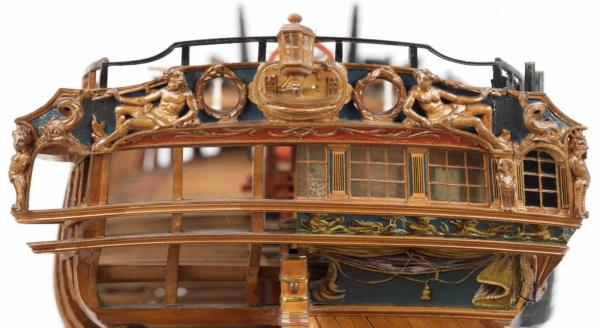
Look at the center carving on the contemporary model of Winchelsea...might give you some indication. The center carving on this model I think is a little heavy. I will be giving it more depth but maybe 5/64" at most at 1:64 scale and if possibly 1/16" thick if you can do it.
- Canute and avsjerome2003
-
2
-
-
-
Nicely Done!!

- GLakie, Seventynet, Canute and 2 others
-
5
-
I am not sure actually...but its doubtful.
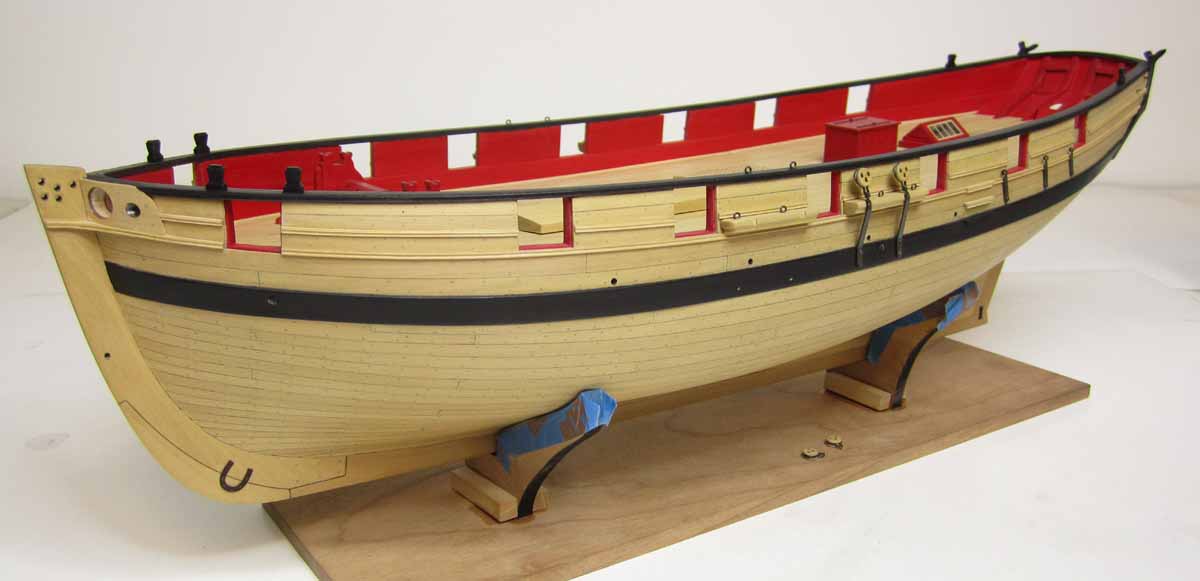
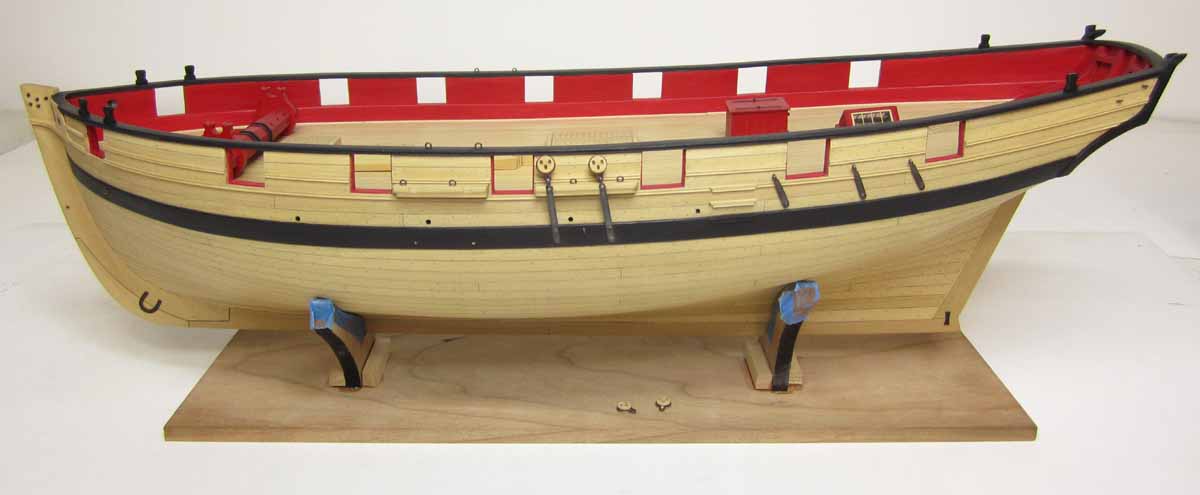
Today I reached a milestone...not much of an update however...I have completed all of the outboard details. The rudder will added a little later as I wanted to finish the inboard details at the stern including the seats first. BUT...then I noticed that the aft-most deadeye is a bit too high. So I will have to redo that chainplate before moving on...maybe tomorrow...Oh well!!! I spoke too soon. But at least I can start the inboard details as well. The fixed block for the inhaul at the bow was also completed.
Chuck

-
-
The port sill and lintel usually follow the run of the deck. Therefore they are usually not square square. While the uprights are perfectly vertical.
- Azzoun, Doreltomin, Canute and 3 others
-
6
-
-
Thank You very much
. Just a small update as I got tired of making rope today. I started in the chainplates and deadeyes. They are made pretty much like the others I showed, only longer. The deadeyes are stroped with 22 gauge black wire. I have six more to go and probably will get that done after Thanksgiving. I wish all of you a happy and tummy stuffing turkey day.Chuck


-
-
Yes I buy them online here.....
http://www.hobbylinc.com/cgi-bin/s8.cgi?str_s=k%26s+bar
Yes you can use the wider sheets and strips to make scrapers. They dont last forever but get the job done for me.
Chuck
-
-
-
-
-
Write a proposal and send it to me as described here.....
http://www.thenrg.org/nrg-ship-model-research-grant.php
Chuck
-
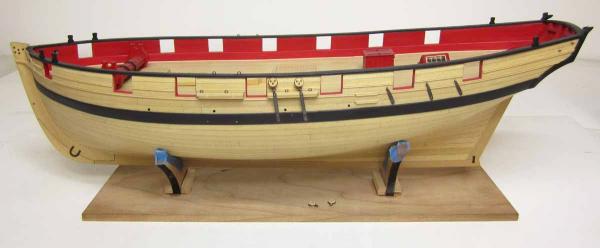
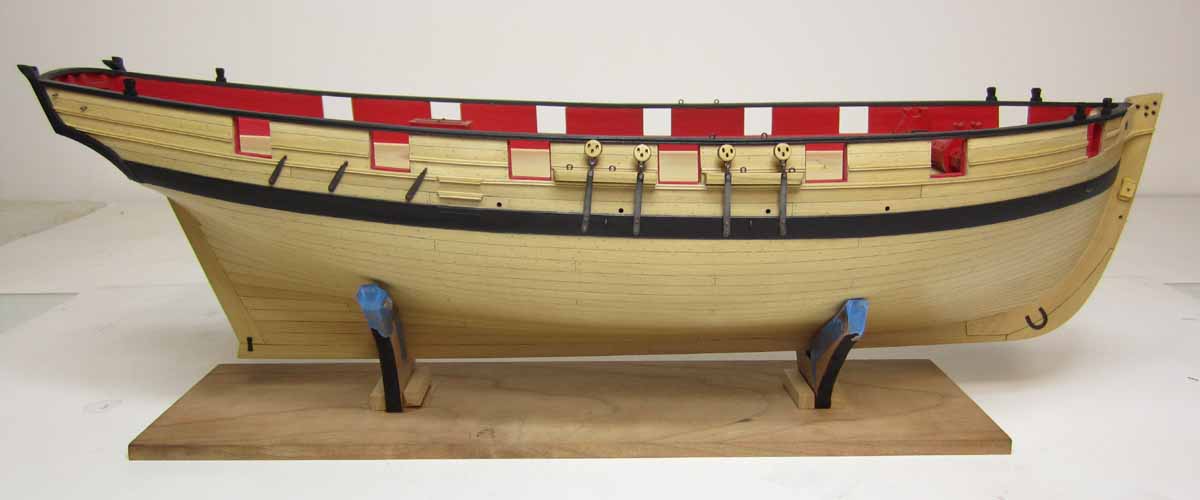
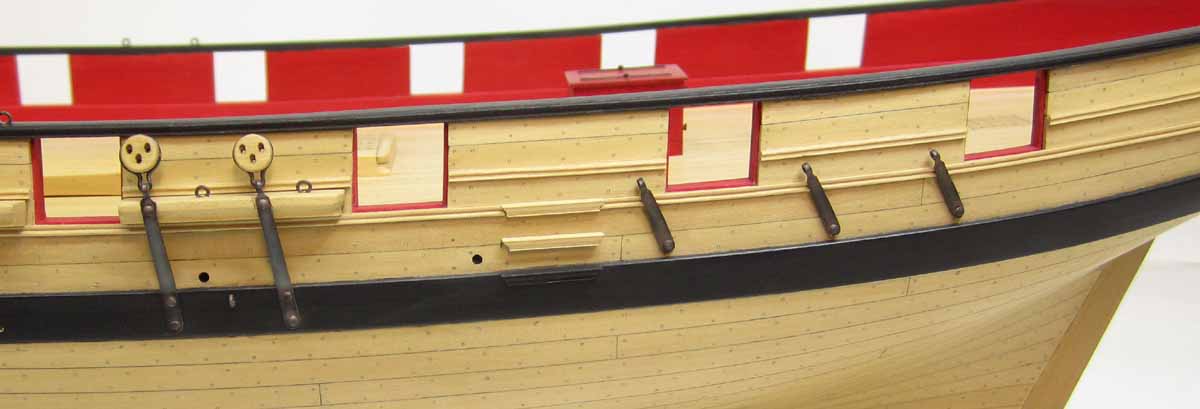
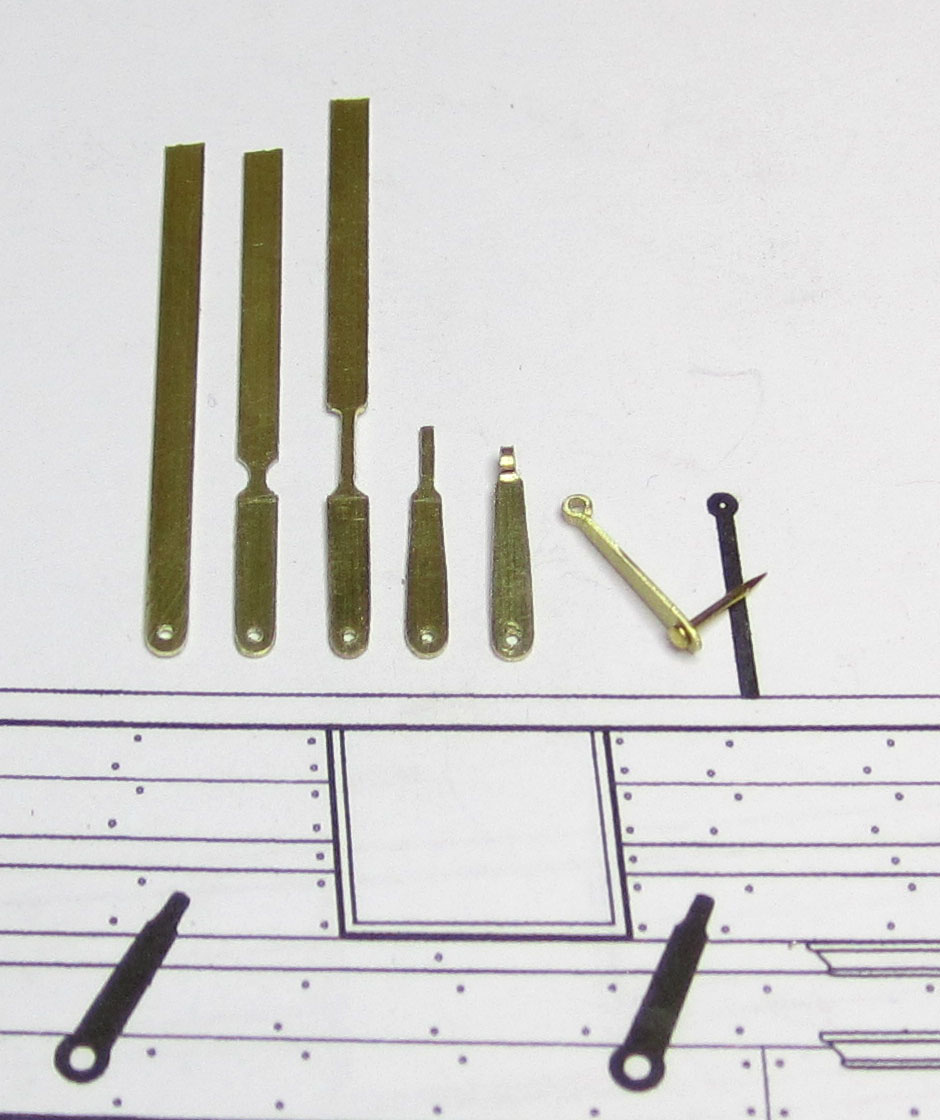
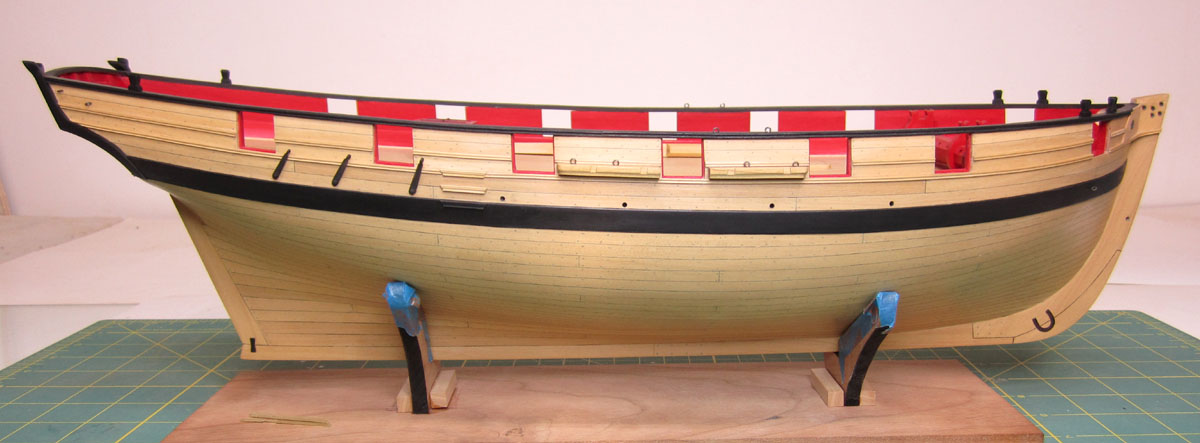
The channels are in and I added the eyebolts to the exterior of the hull. I also drilled the scuppers which was pretty straight forward. Then I started to fabricate the plates for the backstays. These were made using 1/64" x 3/32" brass strips. The K&S strips are soft and can be filed easily to shape. You can see the progression of steps used to make them. There will be three chainplates on each side of the hull.
I started by drilling the hole at the bottom and rounding it off.
Then I used a round file to notch the strips on both sides as shown in step two. This will be the top of the chain plate where it gets thinner.
In step three I used a flat file to extend that thinner portion on top so I could bend it into a loop like making an eyebolt.
Step four is where I cut off the top excess strip and tapered the bottom portion so it got slightly narrower as it worked its way to the top.
The last two examples show the chainplate completed with the thin portion of the brass on top bent into a loop. This will get a hooked tackle when it comes time to rig the back stays. I used small little brass pins....you know the ones...they come in every kit and I have a whole bunch of them.
Next its on to the deadeyes and chainplates for the channels. Its really the same procedure to make those except we will add a stroped deadeye to the top of each.
The outboard details are almost all complete. Once the deadeyes are completed there is only the rudder and fixed block on the stem. Then we finish up inboard!!!!


- egkb, SawdustDave, tkay11 and 40 others
-
43
-
It looks very good. That is a very simple way and a clean way to do it.
Chuck
- Jack12477, Canute, Dimitris71 and 1 other
-
4
-


Cross section plans
in Cross Section Build Logs for HMS TRITON
Posted
Indeed there are many sheets. About 40 give or take. Enlarging the plans isnt an issue if they are for your own personal use only. But because they are PDF you may be able to do it at home if you have that capability.
Chuck