gjdale
-
Posts
4,891 -
Joined
-
Last visited
Content Type
Profiles
Forums
Gallery
Events
Everything posted by gjdale
-
 Love it!
 -
Great link thanks Hamilton!
-
Hey Chuck, Fantastic video tutorial! Thanks so much for posting these. I don't know if you've considered it, but if you re-made these videos with a "proper" view over your shoulder, I'm sure they would sell like hot cakes through your Syren shop. Your commentary is great and really explains both what and why you're doing each step in a way that is very easy to follow. You're a natural teacher! You could do a whole series of these videos that folks could choose from as their needs arise. Reading about it is one thing - seeing it done adds a whole new level of understanding.
- 1,051 replies
-
- 1
-

-
- cheerful
- Syren Ship Model Company
- (and 1 more)
-
Yep, lovely work there Augie. You really do keep raising the bar.
- 2,191 replies
-
- 2
-
-
- confederacy
- Model Shipways
- (and 1 more)
-
Lovely work John. She just keeps getting better.
-
Good for you John! The hardest part is making the decision to re-do. After that it's easy. I know you'll be very pleased you made this decision once the re-do is complete.
- 2,250 replies
-
- 3
-
-
- model shipways
- Charles W Morgan
- (and 1 more)
-
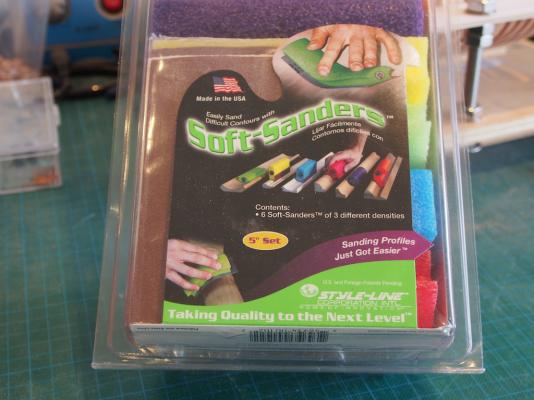
Thanks Mobbsie, Augie, Jack and David. David - I ordered those sanding blocks on line. Can't remember where/who from, but that's why I posted the pic of the packaging. The one thing I do recall is that they were not at all expensive.
- 456 replies
-
- 2
-
-
- finished
- bomb ketch
- (and 2 more)
-
Simply ingenious Ian! Fantastic tutorial too. Thanks for posting so much detail about how you approached this task - it's both informative and instructive.
-
She sure is looking majestic Bob.
-
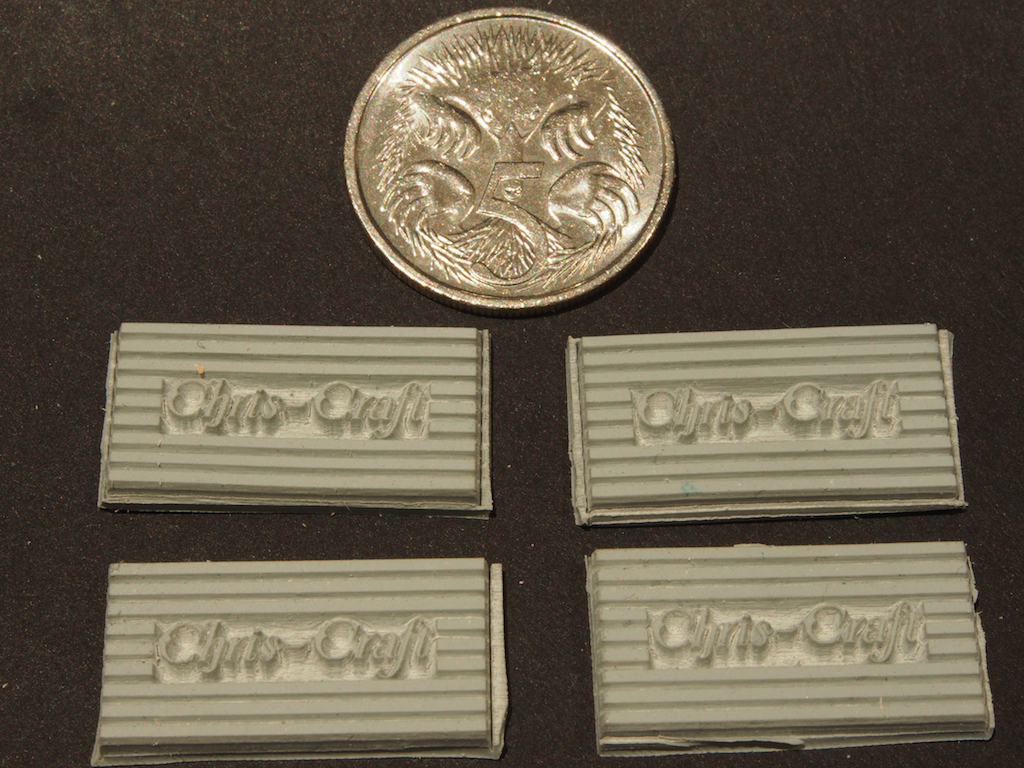
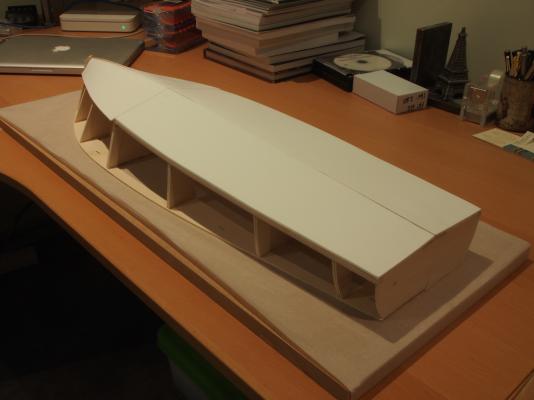
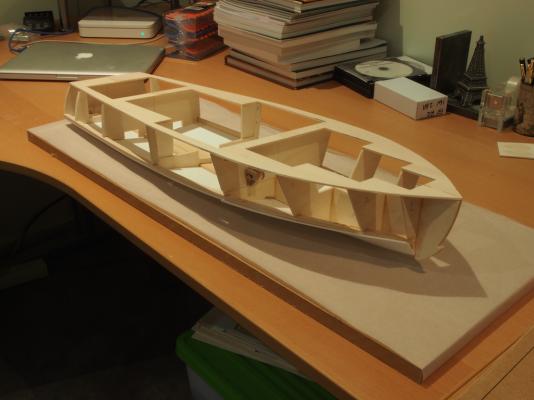
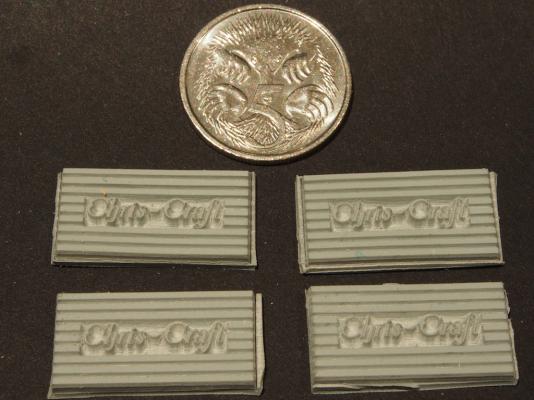
Once the glue had dried, the bottom planking was faired back level with the chine strip and the transom. The next step is to release the hull from the build board by removing the previously applied staples in the sheer plank. It looks kinda boat-like now! The Sheer plank now needs to be faired to the frames before applying the side planking. Just debating whether to install some running gear and cabling before installing the side planks. My order from MACK products arrived during the week, and I’m very pleased with the looks of the various goodies (which will be revealed in due course). In the meantime, picking up on an idea from the RC Groups forum, I contacted a rubber stamp making company here in Australia and had them make up some Chris-Craft logo rubber pads for the step pads. The company were excellent to deal with and produced proofs from a photo I sent them. Once I gave them the go ahead, the finished product was waiting for me when I got home from work the next day. Can’t beat that for service! The stamps are only available in grey rubber, but I think they should paint up okay with black paint. I’m very pleased with the way they have come out. They look better than the photo suggests – I couldn’t get the camera to focus on the pads instead of the five-cent piece!

- 339 replies
-
- 15
-
-
- dumas
- Chris-Craft
- (and 3 more)
-
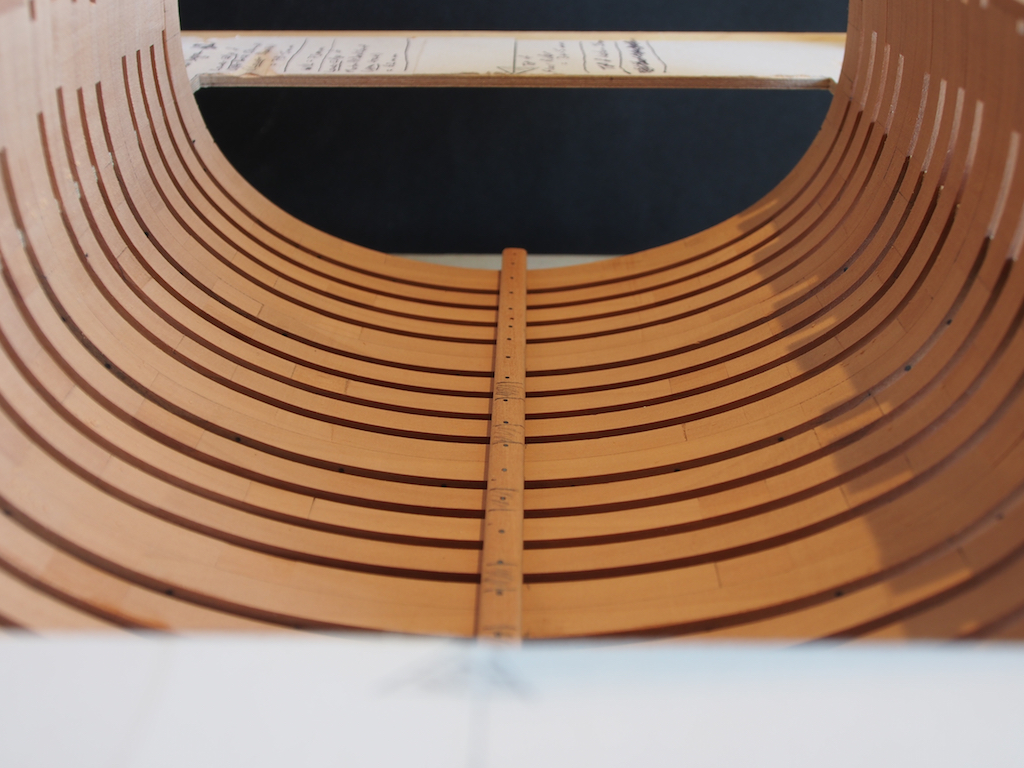
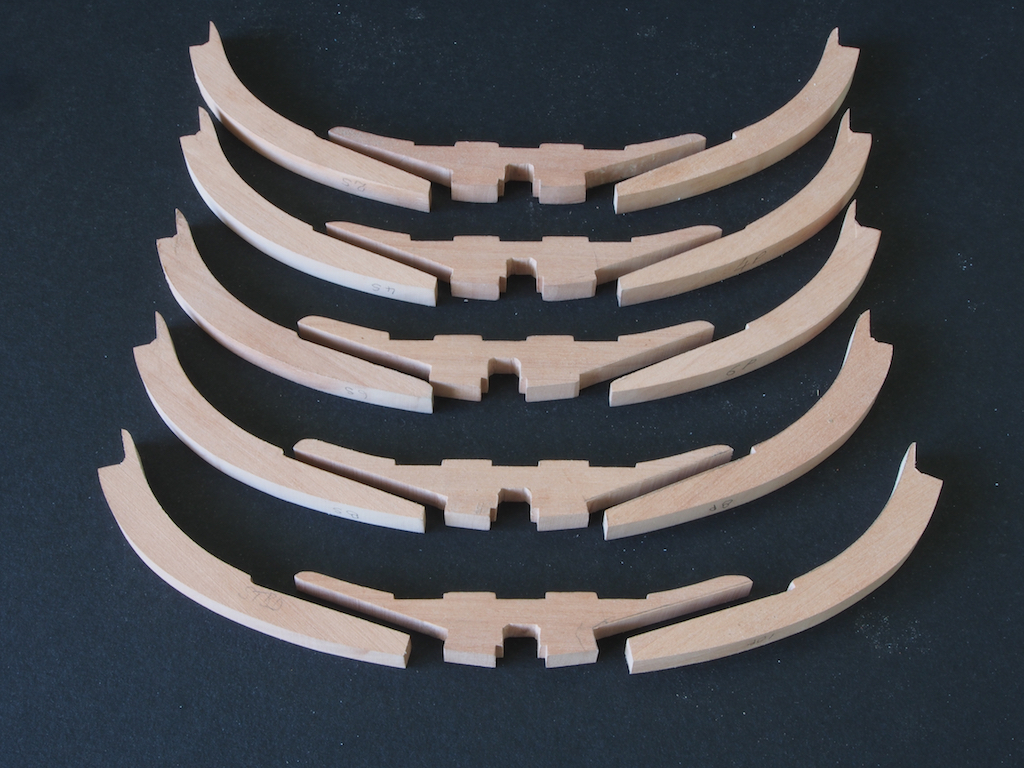
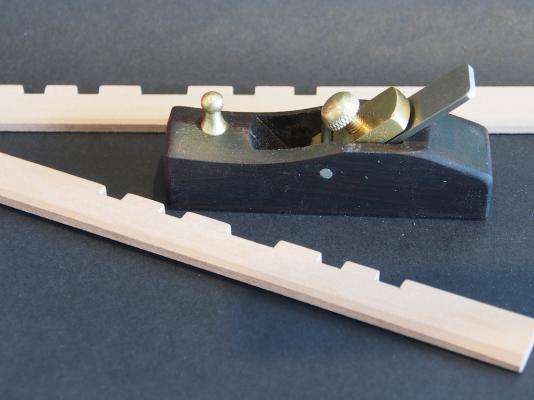
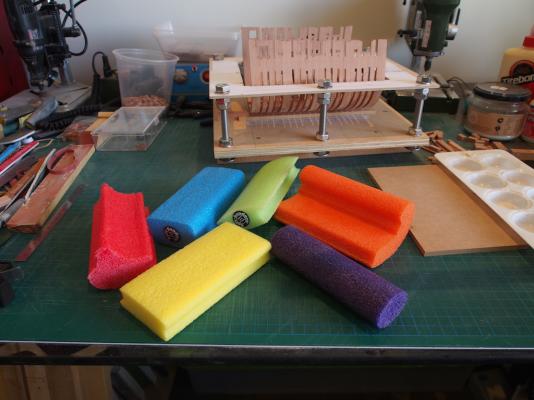
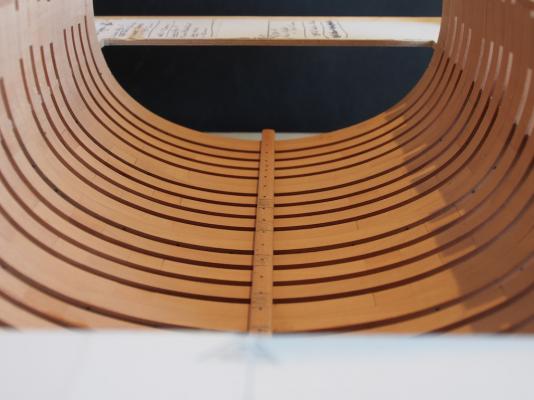
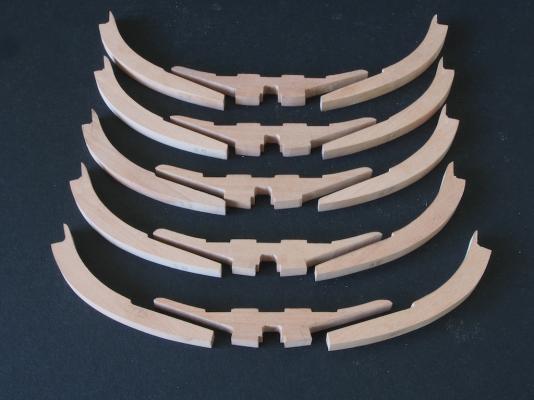
Mortar Pit Deck Clamps The next task was the construction of the Mortar Pit Deck Clamps (upper strake). This is a relatively straight forward job and the Sherline mill made short work of cutting out the required notches. A bevel was required on the lower inboard edge, where this clamp butts up against the lower strake, which is a thinner dimension timber. This was marked out using a compass, and then a miniature plane was used to cut the bevel. I picked this tool up at a woodwork show a year or two ago, and it is just wonderful to use. The outboard faces of the clamps also needed to be shaped to allow for the curve of the frames. For this I used one of my foam sanding blocks (the red one on the left of the picture). These come in a pack of six different shapes and use a self adhesive sandpaper (samples included in the pack). I picked up the tip on these from somebody’s log here at MSW a long time ago, but I can’t actually remember whose log it was. Anyway, they are terrific - I used these for fairing the inside of the frames as well. Keelson The Keelson was also fairly straight forward. It was simply planed and sanded to impart the necessary bevels, and then drilled for copper bolts at each frame. Locator holes for the pillars to be installed at a later stage were also drilled before fitting. After glueing in place, the copper bolts were added, being glued in place with epoxy, and then blackened. I hope I don’t have to remove it now! It was then marked out for the locations of the Floor Riders. Floor and Futtock Riders The Floor and Futtock Riders were a real bear to make. At first, I thought I would be clever and cut all the Floor Riders together. Good in theory, but they all need to be finessed for their particular position to account for the inevitable small errors in previous steps. Similarly, the Futtock Riders were cut from the template and of course did not fit the curvature of my frames - accumulation of errors again. Net result was that I had to remake all components, ensuring that each individual piece was carefully adjusted to fit in its designated location. It took me the entire weekend to remake these parts, but they are now ready for fitting.
- 456 replies
-
- 23
-
-
- finished
- bomb ketch
- (and 2 more)
-
Nice work Sjors, she's looking great. By the way, I just noticed your Avatar. You have seen the film Midnight Cowboy haven't you? Are you trying to tell us you've had a job change?
- 1,616 replies
-
- 3
-
-
- caldercraft
- agamemnon
- (and 1 more)
-
Outstanding Danny, as we've become accustomed to with this build. Congratulations on reaching another significant milestone too!
-
Just outstanding in every way Gaetan! Interesting to read your observations on tools etc too.
-
Great work Jack. The practice has obviously paid off in spades! I know what you mean about the feeling of finally getting it right.
- 60 replies
-
- 1
-
-
- granado
- bomb ketch
- (and 1 more)
-
Great work John. Replacing the blocks was certainly a good call.
- 2,250 replies
-
- 2
-
-
- model shipways
- Charles W Morgan
- (and 1 more)
-
Blackening brass problem
gjdale replied to Maury S's topic in Metal Work, Soldering and Metal Fittings
Maury, Sorry, I posted on your build log before I saw this thread. I started using the Birchwood Casey brass black on Danny's advice after a lot of unsuccessful attempts with Blacken-it. I haven't had a problem since, including soldered pieces. -
Echo by Maury S - FINISHED - Cross-Section
gjdale replied to Maury S's topic in - Build logs for subjects built 1751 - 1800
Maury, I've had success blackening soldered pieces using Birchwood Casy Brass Black. I normally use the silver bearing solder paste, which I believe is what you have used here? -
Okay, okay, I'm coming........... The dog ate my homework and now I have to re-do it.
- 255 replies
-
- 4
-
-
- granado
- bomb ketch
- (and 2 more)
-
While I use an office chair "inside" (ie in the allegedly "clean" work area), in the garage where I have all of the "dirty" machines, I opted for a hairdresser's saddle stool. As the name implies the seat is very like a saddle, and the rollers are actually from in-line skates. It works very well in moving from tool to tool (those where it's safe to operate sitting down). I use it for scroll saw work, disc sanding, mill work, and some lathe work. I have bad hips and get a sore back after standing for only short periods, so the saddle stool is great. The next mod will be a new hip - coming soon........
-
Great work Mobbsie! It may have been a pain in the a#%£¥ re-doing them a couple of times, but the end result really looks worth it. I'm glad that talking it through on Skype has helped. And of course, the issues you found are a terrific guide for the rest of us still playing catch-up. I'll be starting on Keelson and floor/futtock riders today, so we'll see if I can avoid some of those pitfalls!
- 255 replies
-
- 2
-
-
- granado
- bomb ketch
- (and 2 more)
-
Nicely done with the ebony Jack, though it does sound like a lot of extra work. It will certainly give your model a unique aspect. I certainly agree that starting with some of the interior frames is a smarter way to do it - save the two end frames until you've had plenty of practice. That said, your chock joints look pretty good from this distance!
-
Congratulations Jesse on completing an excellent build. She looks fantastic and you should be very proud. So what's next?
- 607 replies
-
- 3
-
-
- scottish maid
- artesania latina
- (and 1 more)
-
Thanks everyone for the kind words and "likes". Rusty - thanks for the tip re sanding. Mobbsie - thanks for keeping a weather eye on things mate, but I'm pretty sure that's an optical illusion. There are so many curves in play, that it's almost impossible to tell where straight lines start and finish. I did check it all with a straight edge though and am satisfied that all is in order. Glad to hear your floor riders came out successfully - I look forward to the amended version.
- 456 replies
-
- 1
-
-
- finished
- bomb ketch
- (and 2 more)
-
Tips and Tricks for Airbrushing
gjdale replied to JPett's topic in Painting, finishing and weathering products and techniques
Great idea for the thread JP. I'm still a relative novice with the airbrush, so look forward to picking up lots of tips and tricks here.