gjdale
-
Posts
4,894 -
Joined
-
Last visited
Content Type
Profiles
Forums
Gallery
Events
Everything posted by gjdale
-
 They look pretty good from this distance Bob!
 -
Thanks David, Mobbsie, Dave, Canute, Rusty and Jeff, and all the "likes". As everyone seems to agree that things look good to proceed, I've glued the first frame in place. This will be a fairly slow process as I will be installing some filler/spacer blocks as I go and waiting for each frame to set properly before moving on to the next. I'll post more pics when we get there. Jeff - it's nice to have you looking in on all of us. Your drawings are a joy to work with.
- 456 replies
-
- 1
-

-
- finished
- bomb ketch
- (and 2 more)
-
Great job Mike - bravo!
-
Great work Augie. She's looking more beautiful every day!
- 2,191 replies
-
- 2
-
-
- confederacy
- Model Shipways
- (and 1 more)
-
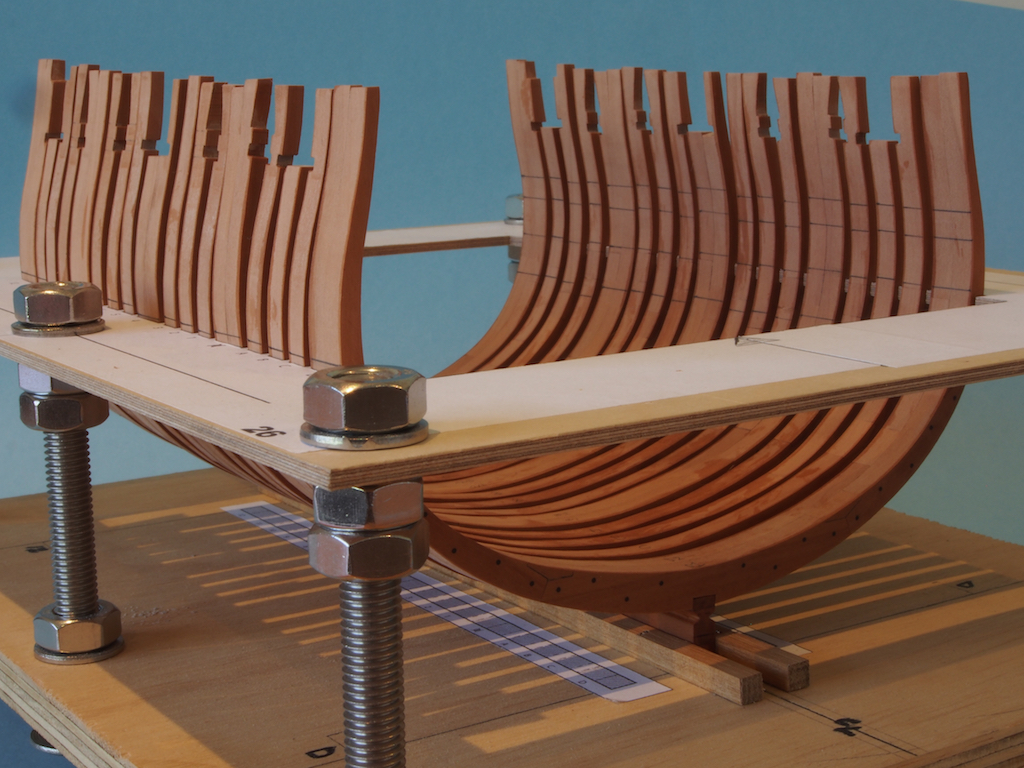
Thanks Augie, Jack, Mobbsie, David (Scratch) and Mike, and all of the "likes". Well, the frames are finally complete. Here they are prior to having the WOP finish applied: All of the gunport and sweep port sills have been pre-cut, again thanks to Mobbsie for showing me the method for this: And here are all the frames test-fit in the jig: All appears to be in order. I marked all the reference lines from the frame drawings on the individual frames, and they seem to be fairly well aligned and in roughly the right place, so I think I'm good to glue up. If anyone spots any glaring errors, please let me know before I break out the glue!!!

- 456 replies
-
- 25
-
-
- finished
- bomb ketch
- (and 2 more)
-
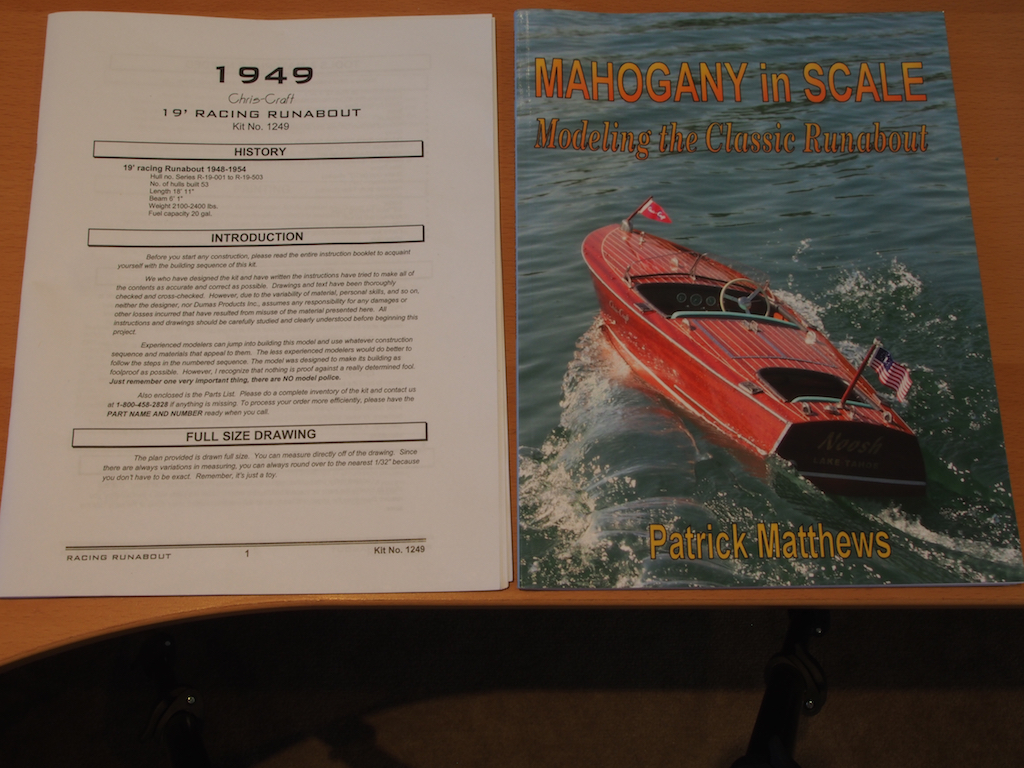
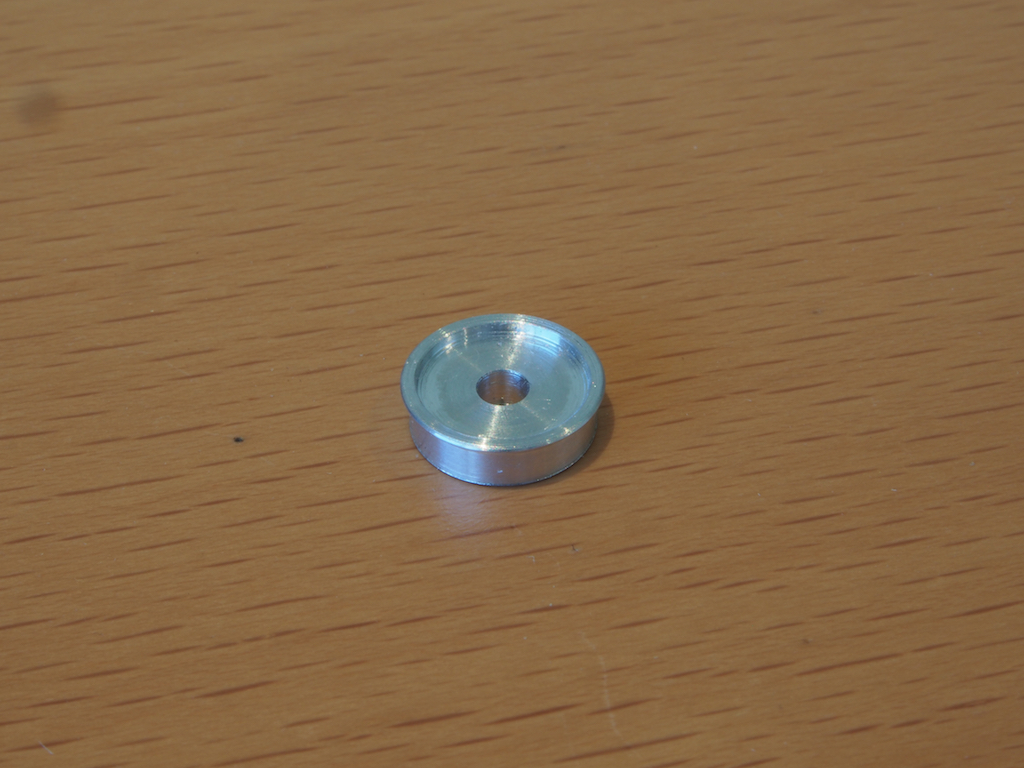
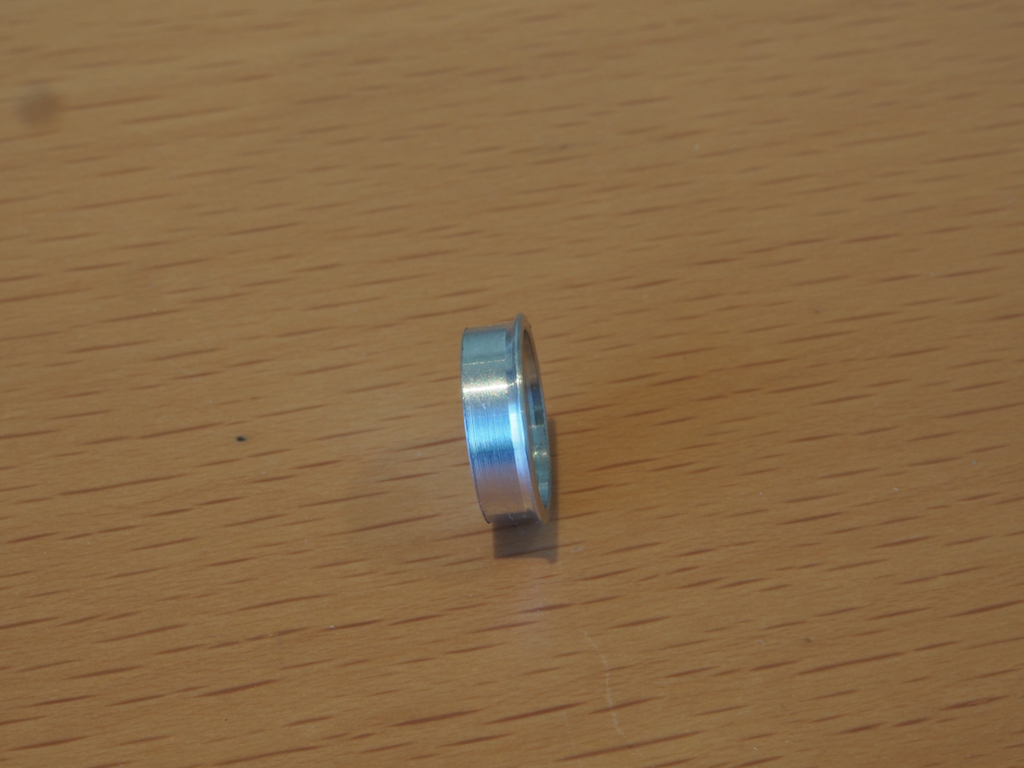
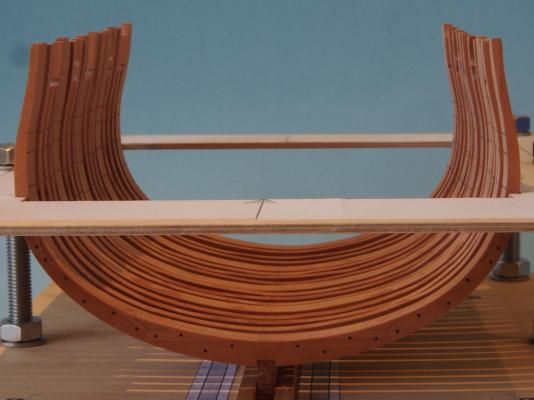
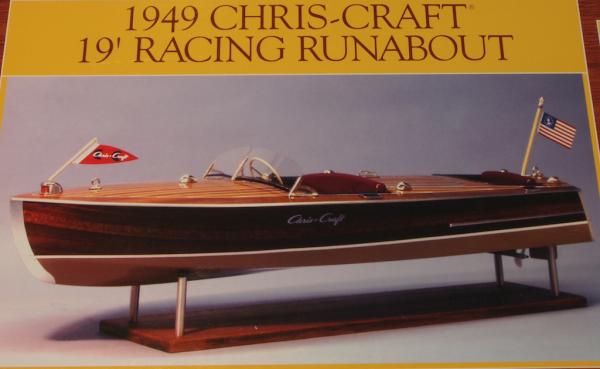
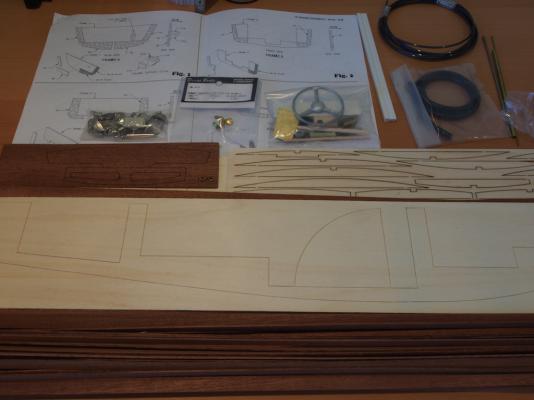
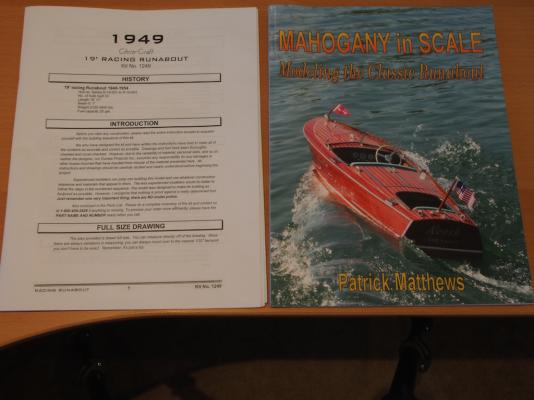
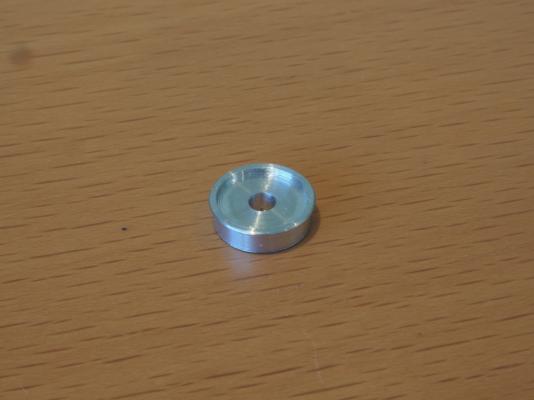
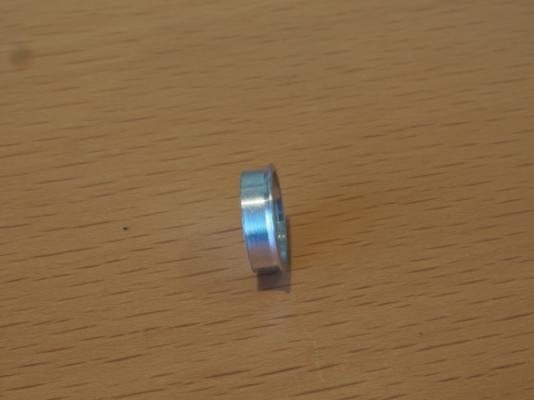
Introduction I bought this kit about two years ago, having been enamoured by the excellent build log of Rusty on MSW 1. Sadly, that build log disappeared with the “great crash”, although Rusty did re-instate the photo sequence from his build. This kit represents a couple of “firsts” for me. First up, I’ve opted to go with making this a working radio controlled model – something I’ve never done before, but the Admiral thought it might be a bit of fun and so in a way this is “her” boat. We have a pond/lake nearby and some grand kids that might also enjoy taking her for a spin (if they can wrest the controls from the Admiral, that is!) Secondly, the building of this boat calls for the use of fibreglass – something else I have never done before. What's in the box? The kit contents are interesting and appear to be generally high quality. There is a mixture of die cut and laser cut parts, Mahogany strip wood, cast metal fittings (with what appears to be nickel plating), a type of plastic board (which forms the hull below the waterline), some aluminium strip (for the trim), and some styrene strips (that form the “caulking” for the deck planks). The kit also contains all of the running gear required to make the boat operational, minus the motor, battery and RC units. These I bought separately at the time that I bought the kit. The propeller supplied is a two-bladed plastic one, so straight up I opted to purchase a replacement three-bladed brass one (you can just see this in the centre of the photo below). A set of decals, a full size plan sheet, a collection of building diagrams and what appears to be a fairly comprehensive instruction manual complete the contents. I had also come across a book titled “Mahogany in Scale” by Patrick Matthews, which is meant as a generic guide for modelling this style of boat, but uses this exact kit as the example throughout. Having read it from cover to cover (twice), it will be a great reference throughout the build. Construction - First Steps I also found a number of build logs of this kit on an RC forum (including one by Pat Matthews) and have already come across some interesting ideas for modification. A common complaint among other builders has been the use of a decal strip for the instrument panel. I have already decided that I will replace this by making my own instrument gauges. So oddly enough, having cut out a build board to commence the project, I decided to start the build by doing a “proof of concept” for the instrument gauges. It took a little trial and error with the lathe, but here is a sample of what they might look like. I forgot to add a scale reference, but this is one of two smaller gauges that will be about 12mm external diameter. I have bored out an inner section to a 10mm diameter, into which a gauge face will be glued, and I have cut a shoulder and bezel to allow it to be mounted through the dash board. The one larger gauge will have a 16mm external diameter with 13mm inner section. I have found a few pictures of appropriate gauge faces on the web, and will probably draw my own in CAD based on these. Of course, my mate Mobbsie is now trying to convince me to add LED lighting to these……………..
- 339 replies
-
- 19
-
-
- dumas
- Chris-Craft
- (and 3 more)
-
Likewise Jesse, hope you're feeling better soon and able to move on with this - the finish line looms ever closer!
- 607 replies
-
- 3
-
-
- scottish maid
- artesania latina
- (and 1 more)
-
I'm stickin' with WOW!!! and OMG!!! Just beautiful Ed. I too am intrigued by this sculpting epoxy......
- 3,618 replies
-
- 2
-
-
- young america
- clipper
- (and 1 more)
-
Hi Bill, Welcome to MSW and thanks for your comments on my Victory build. This forum is a great resource for finding help and advice and will quickly become the most used tool in your tool box. The best way to get that advice is start your own build log when you're ready - you'll find many others will then follow along and you can ask questions as you go. You can post specific questions within your own (or others) logs, but if you want more general advice, posting a separate thread is likely to get more replies. If you haven't already done so, do a search for Victory builds as you will find many here of high standards to help you out. I particularly recommend reading through the log by Gil Middleton - it is probably the "Gold Standard" for kit builds of this ship, although it is the Caldercraft version rather than the Mamoli one. If you really want to see an impressive build, check out the scratch built Victory by EdT. To answer your question on paint colours, the main ones you'll need are yellow ochre and black. I did most of my painting long before I found MSW and my choices today would probably be different. However, I used Humbrol No.7 for the Yellow Ochre on mine, although there are many other brands available. You might like to have a look at the "Admiralty" paints on the Model Expo website. I've heard some good things about these paints. Finally, I recommend you make an introductory post in the "New to the Forum" section, to introduce yourself properly. You'll find a very warm welcome from around the globe, and if you mention your Victory build, I'm sure you'll get plenty of responses from the many other Victory builders here.
-
Very neat Bob. Stay on that bicycle and keep pedalling my friend!
-
Boyd, It really is easy. I knew absolutey nothing about bandsaws but was able to understand and apply this easily. I made myself a set of written step by step instructions from the video so that I could work through them without constantly replaying the video. After watching the video (several times) I found that I actually understood what I was doing when I went to apply it in practice. I was put onto this video by the guys on the woodwork forum who all raved about how good it was.
-
If you want to learn how to set up your bandsaw properly, take a look at this you tube clip of Alex Snodgrass: I watched this, took notes, then went and applied it to my bandsaw (I'm a complete bandsaw neophyte too), and it worked a treat. Very simple and easy to follow. As for ripping planks - I would think you would need a re-saw blade for this. From what I've read, this is what the serious woodworkers use for cutting veneers on the bandsaw. That said, I agree with other advice that a table saw is a better choice for this task.
-
Great work on the frieze Toni - and a neat solution to your dilemma.
-
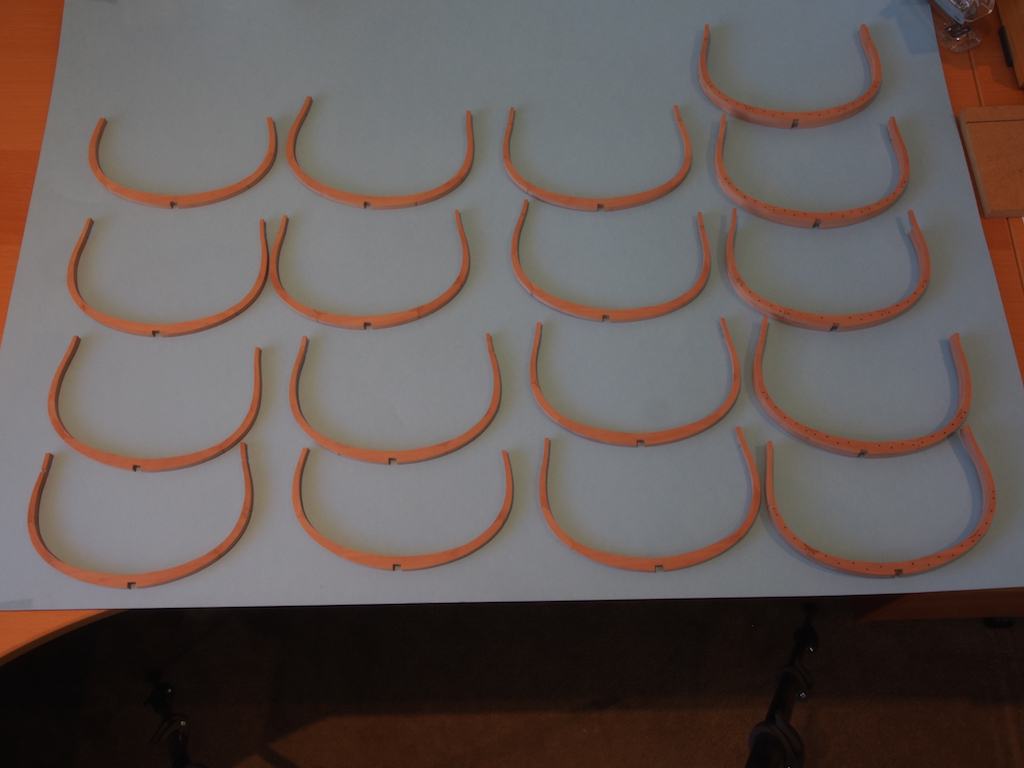
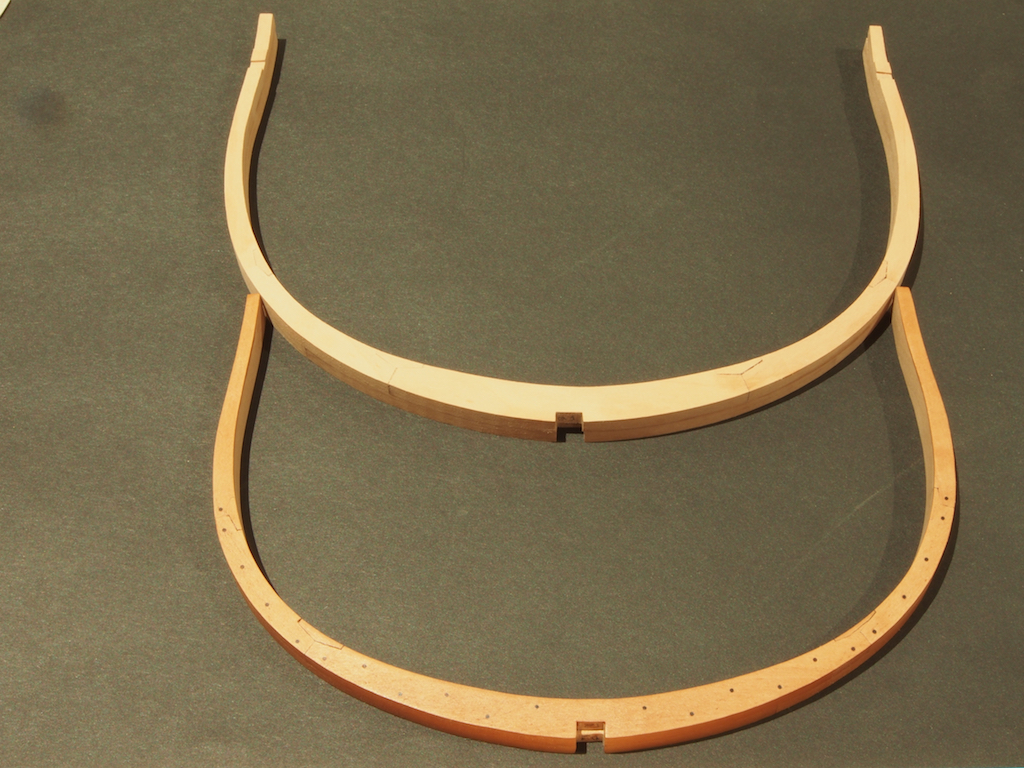
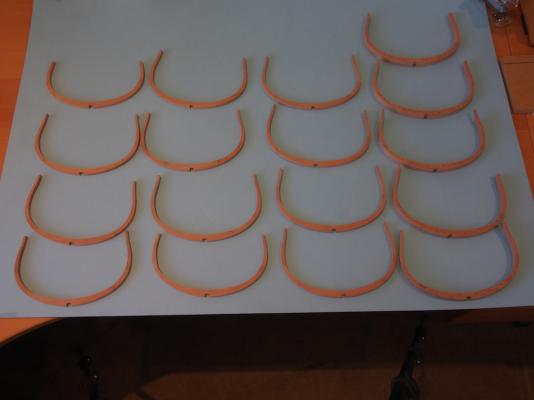
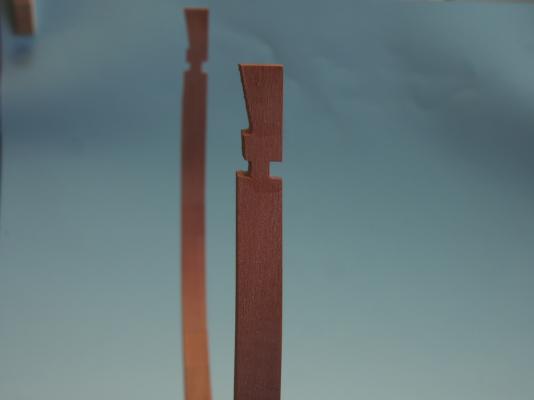
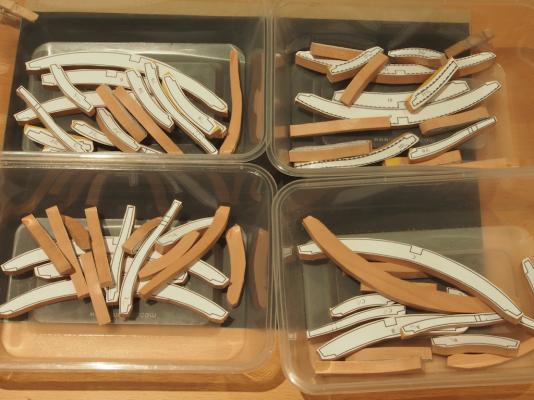
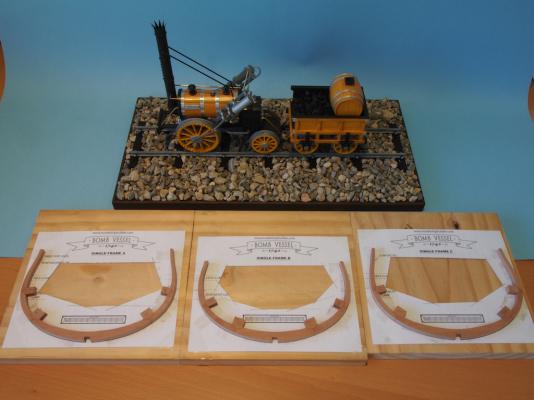
I thought it was about time I posted an update, just to show "proof of life" in the shipyard............ I thought it timely to do some testing of finishes to make sure I was happy with the result, as I will need to finish the fore and aft faces of the frames before permanently installing them. I plan on using Minwax Wipe-On Poly (WOP), in a satin finish, following the lead of some more experienced scratch builders here. I was very satisfied with the result (and ease of use). For the Australians on the forum, I did find Minwax in Bunnings here but they carry only a very limited range of products. I visited the new Masters home improvement centre recently and was delighted to see that they carry an extensive range of Minwax products. Anyway, here's a shot of the test frame with two coats of WOP. An untreated test frame is in the top of the picture. Unfortunately, the photograph doesn't really do it justice, but to the naked eye, it is a very pleasing colour. i have also rough cut all of the remaining single frames. I managed to cut all of these - 12 frames (60 component pieces) from a single 24" x 3" billet of Swiss Pear. That provided me with lots of tricky scroll saw practice but I managed it without any boo-boos along the way. In fact, I think it took me longer to lay out the pattern pieces to make them fit on the board, than it did to cut them out! Here they all are: And I have managed to custom fit the chocks to the first three of these frames. Having finally settled on a reliable method for making these, they are really not difficult and don't take much time at all. Again, I have to pay tribute to my mate Mobbsie for putting me onto a great method for making the scarph joints - this is half the battle for getting a good mating joint with the chocks. Oh, you may notice something in the background of this shot that might help to explain the apparent lack of progress lately!

- 456 replies
-
- 18
-
-
- finished
- bomb ketch
- (and 2 more)
-
Sounds like you have a plan for the way ahead with the 2mm blocks Sjors. I look forward to seeing the results.
- 1,616 replies
-
- 2
-
-
- caldercraft
- agamemnon
- (and 1 more)
-
Great start Jack. Your keel looks excellent.
-
Can i live without a BYRNES TABLE SAW
gjdale replied to shihawk's topic in Modeling tools and Workshop Equipment
If the price is comparable, go with the Byrnes. You won't regret it! If the price is not comparable, go with the Byrnes. You won't regret it! -
Great progress Mobbsie. I'm glad the double sided tape worked out for you, and also that you found a finish that you like. I need to extract the digit and get a move on now to catch up!
- 255 replies
-
- 1
-
-
- granado
- bomb ketch
- (and 2 more)
-
I can only repeat what others have said Bob. The figurehead is fantastic and yet another example of how this site brings people together from all around the world in a very special way. Congratulations to Janos for both his skill and his generosity.
- 1,477 replies
-
- 4
-
-
- essex
- model shipways
- (and 1 more)
-
Nice to see you back in the shipyard Sherry. Your canons look terrific.
-
Need advice with Byrnes saw
gjdale replied to bigcreekdad's topic in Modeling tools and Workshop Equipment
Hi Bigcreekdad, The problem you are experiencing is blade binding and is a common issue - you're not doing anything wrong per se. The issue is caused mainly because these thin slitting blades are a uniform thickness - that is, the teeth are the same width as the body of the blade, which means that the teeth don't give you any extra clearance from the blade once they've cut the wood. (Hope that makes sense). There are essentially two solutions available. The first is to add an additional fence that extends from the front of the table to around the centre of the blade (or just short), as in Mark Taylor's description above. This gives the cut strip some extra space after passing through the blade. This is what I did and it works pretty well most of the time. I still had some trouble ripping 1/4" stock. The second solution is to add some "back taper" to your fence. To do this, lock the front of the fence in position, and then push the rear of the fence away from the blade slightly before tightening and locking in place. This will take a little trial and error to get the amount of back taper just right, and may need a little adjustment to get the desired milled width. Once again, this is giving the cut strip that little extra space. I know that this is the method that Jeff Hayes of HobbyMill uses (used) for all of his production runs. The other thing to watch for, and has already been mentioned, is the run of the grain. Sometimes just flipping the stock over and cutting from the other end helps. Hope this helps. PS One extra thought. If none of the above work for you, try going back to the 4" carbide tipped blade. It is more wasteful in that it cuts with a wider kerf, but because of the wider teeth in relation to the blade body, you shouldn't experience the binding problem. -
Mark, At least with "senior's moments" re-dos look like a new experience every time! :P
-
Lovely work Mark, and very instructive too.
-
Looking fabulous Ben.