gjdale
-
Posts
4,894 -
Joined
-
Last visited
Content Type
Profiles
Forums
Gallery
Events
Everything posted by gjdale
-
 Nice progress Carl. As for painting, you have to be happy with the final choice, but for what it's worth I'd go with the white.
 -
Hey Jack, Delighted to see you up and running. Good news that your health has improved enough to make a start. I'm not too far ahead of you now, and as I've made all the mistakes so far, you should be good to go! (Okay, not ALL the mistakes...........Mobbsie made a few too! )
- 60 replies
-
- 3
-

-
- granado
- bomb ketch
- (and 1 more)
-
Nice work on the yards Marc - they certainly do take a lot of work! I love your hi-tec storage assembly too.
- 525 replies
-
- 1
-
-
- cutty sark
- mantua
- (and 2 more)
-
Those panels are a very clever design and they look great Augie, as does the rest of the build.
- 2,191 replies
-
- 1
-
-
- confederacy
- Model Shipways
- (and 1 more)
-
Always a pleasure to start my morning with one of your updates Bob - such clean and crisp work never fails to bring a smile to my face. Glad to know that you snuck in some modelling time among house guests May 2015 bring you health and happiness, and lots of modelling satisfaction.
-
Great looking deck Nigel. I like your approach to "scaling down" effects. I too like to use LoS. Ever since reading EdT's description of being able to use it "in situ" without affecting the surrounding timber, I've used it with copper in lieu of brass whenever I can. Just did the "bolts" in the frames of my cross section the same way and it works a treat. I find that it's also very easy to use - another bonus!
-
Looking great Carl. Bad luck with the oops, but as you say, we need to put a little of our own DNA into every model we build.
-
Nice looking guns Sjors. Can't wait to see them rigged!
-
Lovely work on the treenailing Nigel. Sane is highly over rated!
-
Looking good Mark. Gotta agree about the Swiss Pear. I'm using it for the frames in my cross-section build and its a real joy to work with.
-
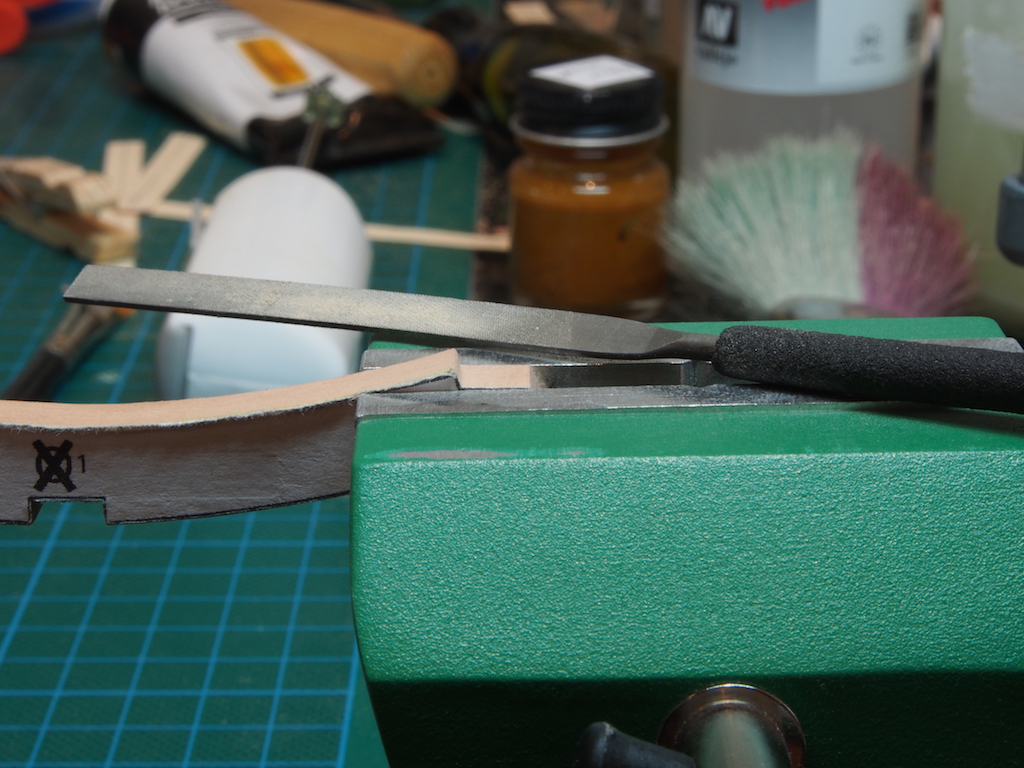
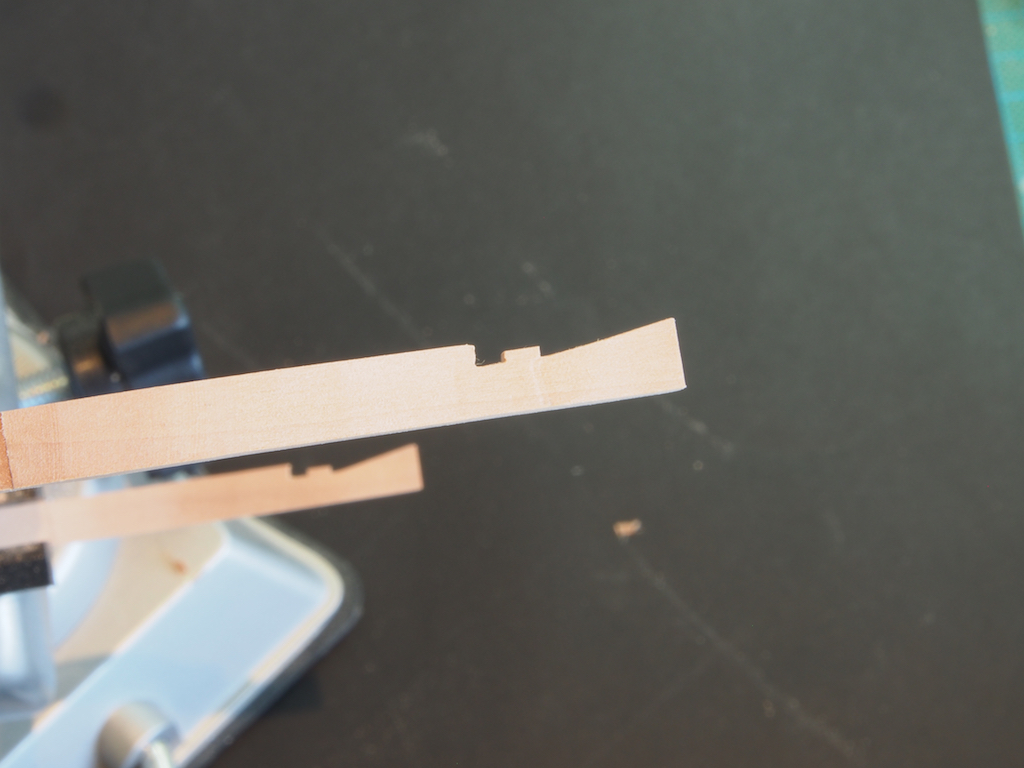
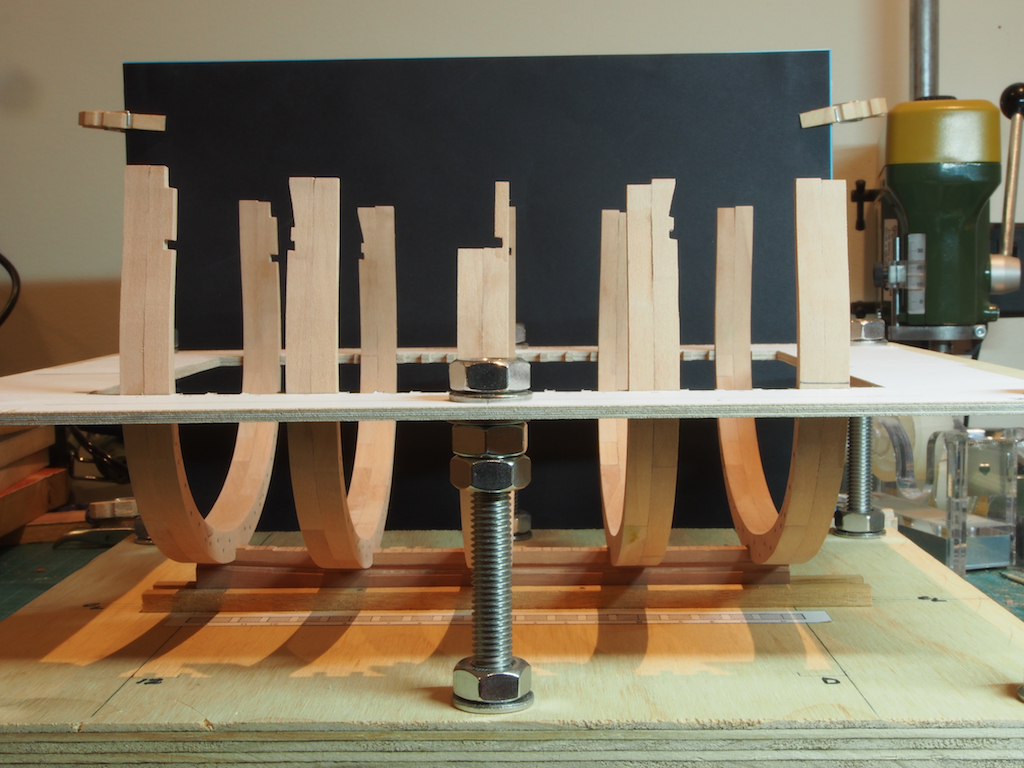
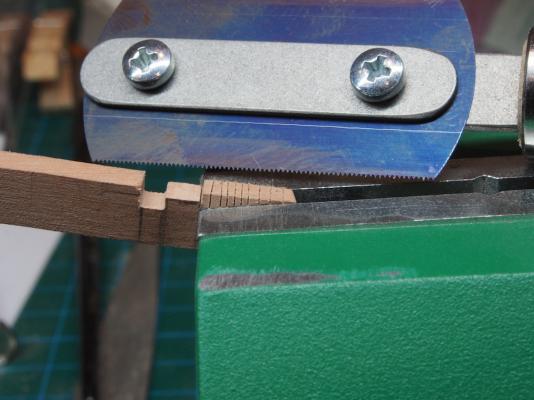
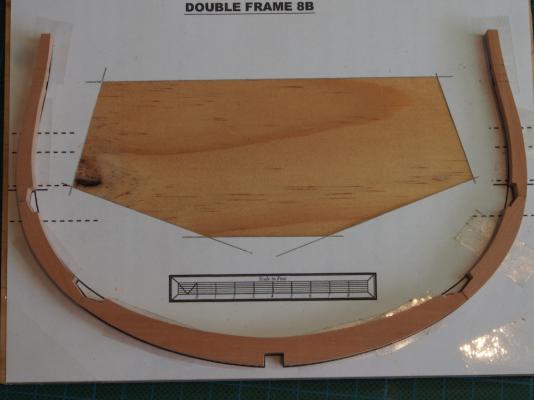
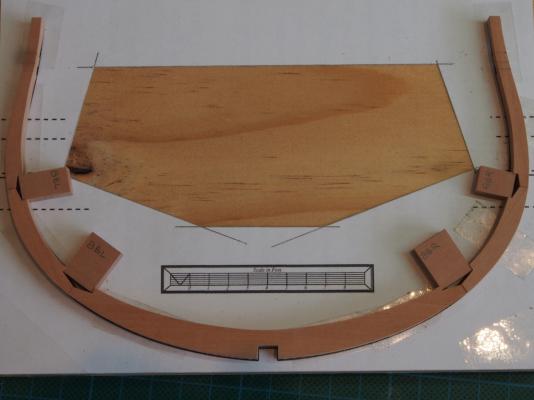
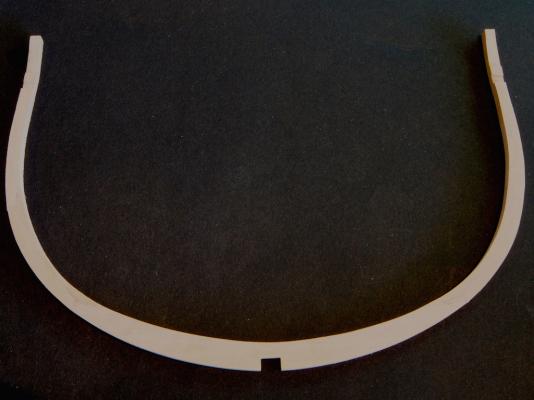
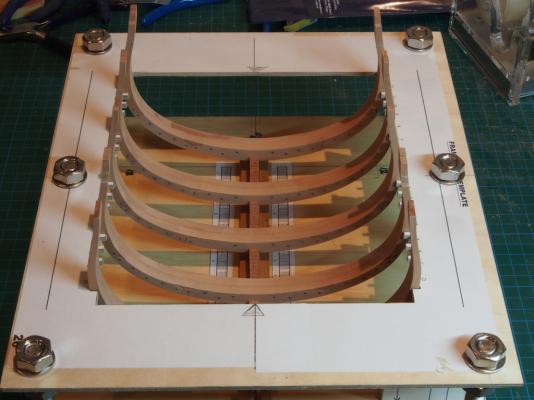
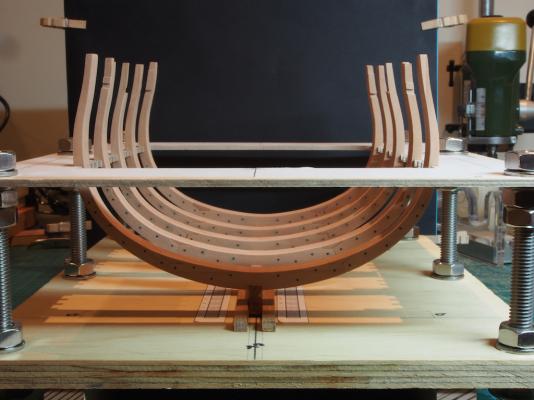
Thanks very much Bob, Mark, Sjors, Dave, Jeff and Aldo, and also to all of the "likes". It's been a while since my last post, but only because I was doing more testing, thinking, testing, thinking............ Completing the Double Frames Okay, so I decided that I wasn’t entirely happy with my scarph joints, and also that I was over-thinking the Chocks. Time to revisit methodologies (again). I decided to try Mobbsie’s method of creating the scarph joints, by using a file and the top edge of a vice as a reference plane/stop. Only problem was, I first had to go out and buy a new vice with a flat top surface on the jaws. The method is really simple. Having cut roughly to shape on the scroll saw, simply line up the template pattern line with the top of the vice jaws and and file until you feel metal instead of wood. Some of the frames require cutouts for gunports/sweeps etc, and these are cut into the frames prior to assembly. To achieve this, I used a neat razor saw to make some initial cuts before removing the waste with a chisel, and then finishing using the file/vice method. Time to re-think the Chocks, again…….. Here’s the latest method, and this really seems to work well. First up, getting a good, neat butt join between adjacent futtocks is essential, along with scarph joints that meet evenly at the butt join. This is achieved using the file/vice method and test fitting, filing, test fitting until satisfied. Once happy with the butt/scarph joints, I used double sided tape to hold the lower central futtock in place over the pattern, placed more double sided tape over the locations for the remaining futtocks, and then placed some glue on the mating face of the next futtock before placing it in position hard up against the first futtock, where it is held in place by the double sided tape until the glue dries. This process is repeated with the remaining futtocks until the frame (minus chocks) is complete. The chocks were then made by cutting a piece of stock to roughly the width of the chock space and then finessing with the Disc Sander until a neat fit in to the chock opening was achieved. Note the “handles” on the inboard side of the chocks. The chock ends were then shaped on the Disc Sander until a neat fit was obtained, at which point the chocks were glued in place. Because of the neat fit, and the frames being held in place on the tape, no clamps were required. This had been problematic previously as clamps tended to throw everything out of alignment as they were tightened. Once the glue had dried, the frames were removed from the templates, the chock “handles” trimmed close on the scroll saw, and then finished off on the spindle sander. Here’s what a completed frame looks like, with almost invisible joints…. Once the method was worked out, completing the remaining double frames went very smoothly. All five double frame pairs have now been completed. Here are a few progress shots: That's it for now. Off to Sydney to visit family for a couple of days and then it's on with the single frames, which should be relatively easy (famous last words)......


- 456 replies
-
- 29
-
-
- finished
- bomb ketch
- (and 2 more)
-
Hi Aldo, Wonderful to see you back in the shipyard again! I do hope this signals a resumption of play and that we'll be seeing a lot more of you once again. Your progress looks great so far. Great idea to have Chuck laser cut some tricky parts for you.
-
Hi Carl, I've been tempted by this little kit on numerous occasions, so it's good to see one being built. I'll follow along with interest.
-
Hi Kevin, I know that some people like to glue/pin their masts in position, but I have never found it necessary. The Standing Rigging will hold it securely in place, and if ever the ship were to be damaged, it is then an easy matter to remove/replace the mast (which would not be the case were it to be glued/pinned).
- 1,319 replies
-
- 9
-
-
- caldercraft
- Victory
- (and 1 more)
-
ROYAL CAROLINE 1749 by Doris - 1:40 - CARD
gjdale replied to DORIS's topic in - Build logs for subjects built 1501 - 1750
Congratulations on your new job Doris. I hope you still manage to find enough time to progress your exquisite models.- 883 replies
-
- 5
-
-
- royal caroline
- ship of the line
- (and 1 more)
-
Great work Frank. Your models are always that little bit different with your weathering techniques.
-
Lovel work, as always, Augie. The stove looks fantastic - hope you managed to finish it in time to cook the crew their Christmas dinner!
- 2,191 replies
-
- 2
-
-
- confederacy
- Model Shipways
- (and 1 more)
-
I think that all looks much better Sean. Merry Christmas.
-
Wow Sjors, what a great looking rear end! Fabulous work mate, Aggy is looking quite splendiferous. Merry Christmas to you both.
- 1,616 replies
-
- 1
-
-
- caldercraft
- agamemnon
- (and 1 more)
-
Hi Sean, I've just gone and dug out my AOTS book on Victory and it tells me (pg 18) that the gun tackle blocks were all 11" (both side and train tackle). At 1:90 scale that works out at 3mm almost exactly, so your blocks are actually correct. They just "look" too big. At the end of the day, it's your call and you are the one who has to be happy with the results. By the way, the same reference tells us that the breaching rope is 9 1/2 inches (that will be circumference). I'll let you do the math to work out if yours are the correct size (though they look about right to me). Hope this is helpful. Cheers,
-
Sean, as you asked for "brutal honesty", I would say the guns look pretty good, but I still think that all of the tackle looks over size for the scale. I think I used 2mm blocks for the side tackle. I know that Syren does some in this size. It might not sound like much difference, but a 3mm block is 50% larger than a 2mm block. Sorry, but you did ask.........
-
Gorgeous looking grating Nigel - that is particularly well done. Very impressive!
-
I'd have to say that I'm not a fan of that style of rope coil Sean, except for "Admiral's Rounds" - it's just not consistent with a "working" display.