gjdale
-
Posts
4,894 -
Joined
-
Last visited
Content Type
Profiles
Forums
Gallery
Events
Everything posted by gjdale
-
 She's looking quite splendiferous John. I'm sure she'll be happy to await your return - don't rush to complete stuff before your trip.
- 2,250 replies
-
- 2
-

-
- model shipways
- Charles W Morgan
- (and 1 more)
-
That's a great approach Boyd, and one that will bring you a lot more satisfaction with the end result. Keep up the great work.
-
Thanks for that extra info and explanation Mobbsie. She is really is a fascinating subject to model.
- 456 replies
-
- 1
-
-
- finished
- bomb ketch
- (and 2 more)
-
Popeyes - it depends only on how the scale is expressed. Cars and planes normally use a straight ratio type scale such as 1:48, 1:72, 1:8 or whatever, meaning that one unit of length in the model represents that number of units of length at full size. So at 1:48, one inch equals 48 inches, or one mm equals 48mm. That is, the scale is independent of the unit of measurement. Where it gets confusing with ships is that in addition to this ratio expression, there is also the use of the "inches per foot" scale. In this form, the scale is expressed in terms of the number of inches on the scale model that equate to one foot at full size. So for example a scale of 1/4" means that 1/4" on the model is equal to one foot at full size. If you do the math, a scale of 1/4" is identical to a scale of 1:48. Is your head spinning yet? It gets even more confusing when the "inches per foot" scale is used, bit the inch designator (") is left off, or when the ratio form is used, but expressed in fractional form. For example, talking about a 3/16 scale (meaning 3/16" to the foot), which is actually a scale of 1:64 in ratio form. Or alternatively, talking about a scale of 1/24 (meaning a ratio of 1:24), which is actually a scale of 1/2" in "inches per foot" form. Now is your head spinning? Sorry for hijacking your log Mobbsie - I'll get my coat and leave now...........
- 62 replies
-
- 6
-
-
- harwich bawley
- fishing boat
- (and 2 more)
-
Thanks for all the kind comments and "likes" folks. Mark - I've just had a look at my AOTS for Granado, and that does appear to be the case - 24 shells for each of the fwd and aft mortars.
- 456 replies
-
- 3
-
-
- finished
- bomb ketch
- (and 2 more)
-
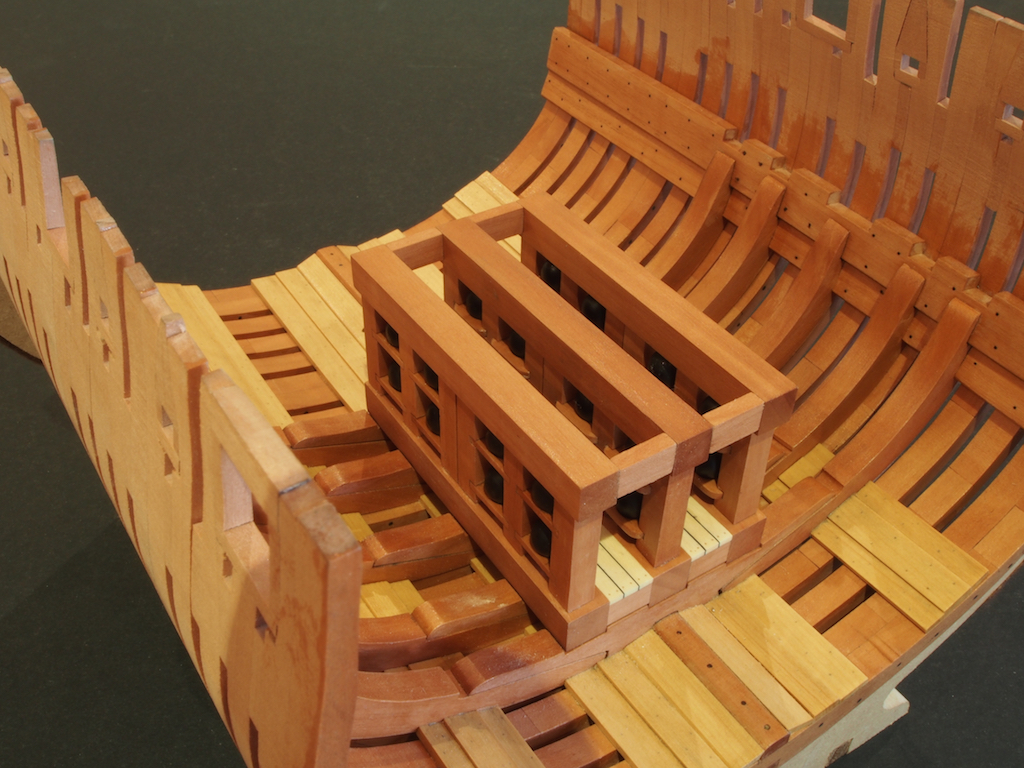
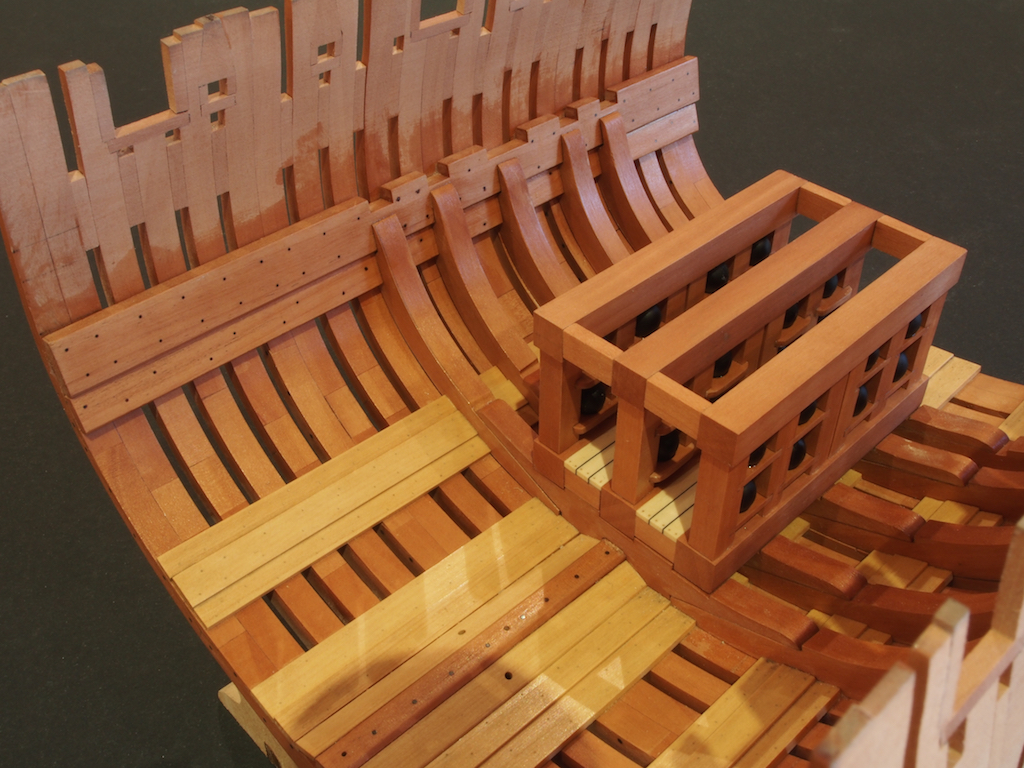
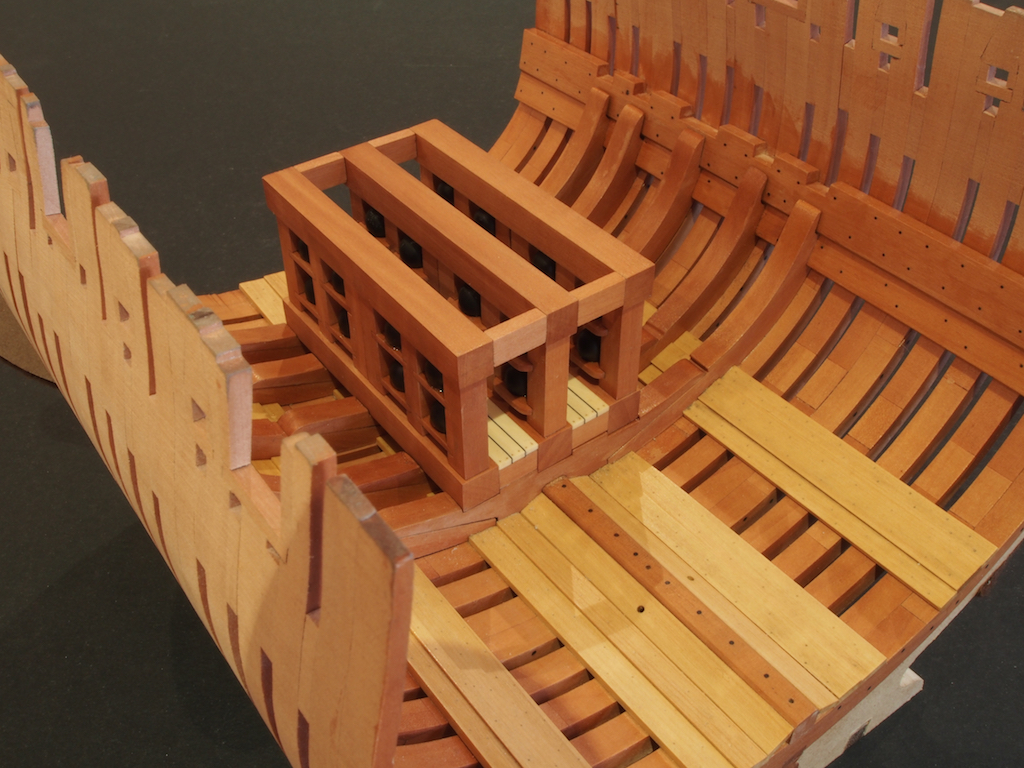
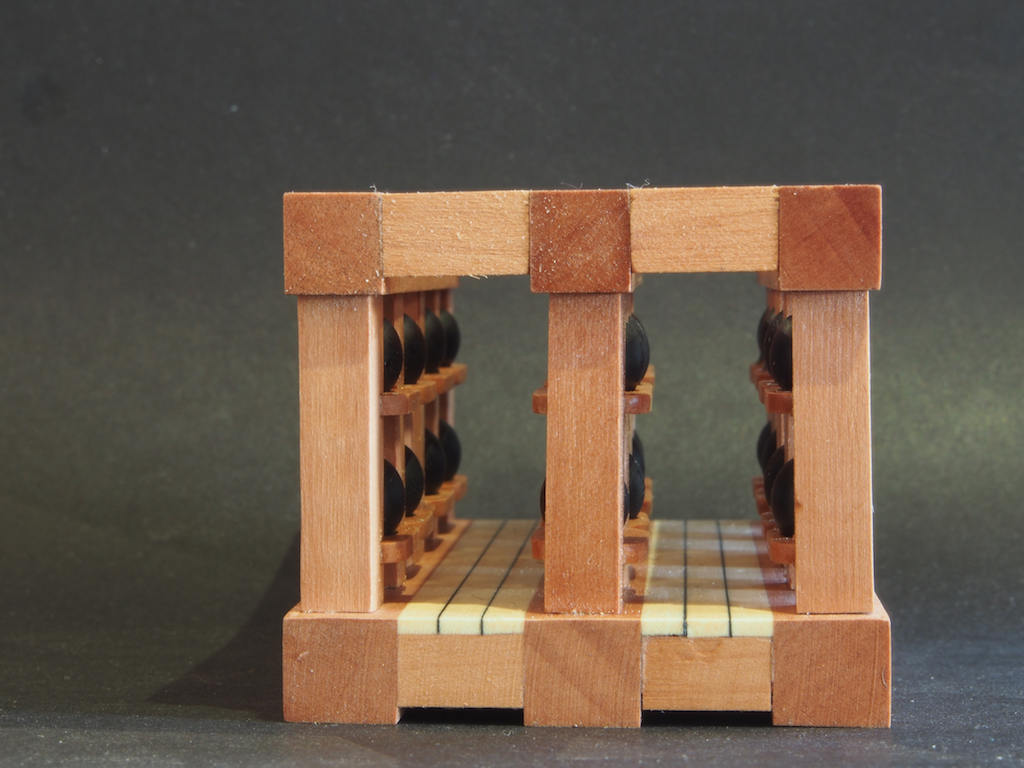
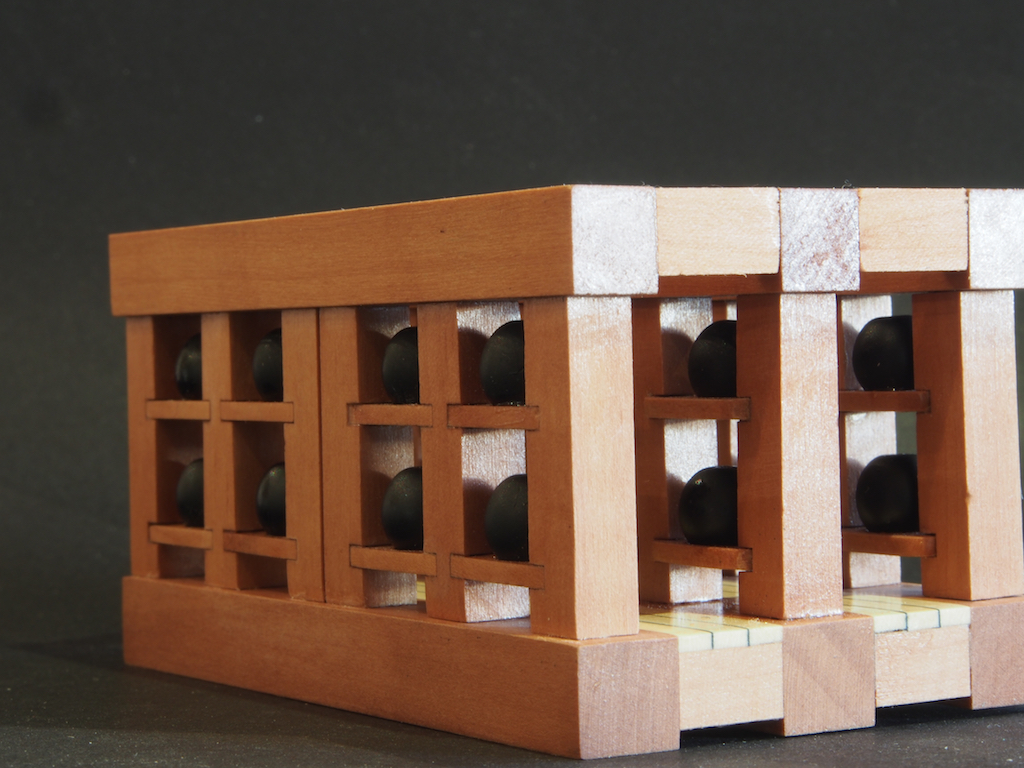
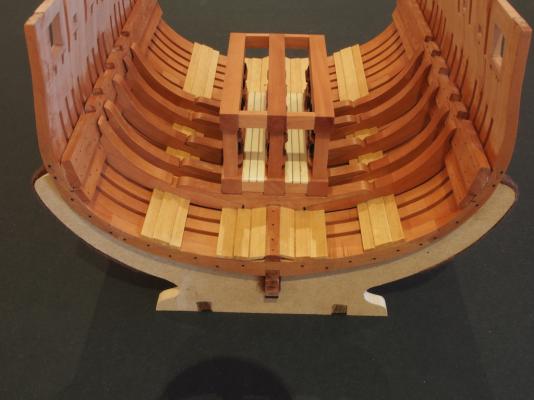
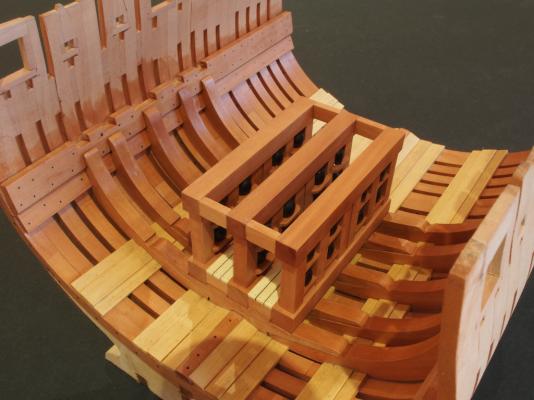
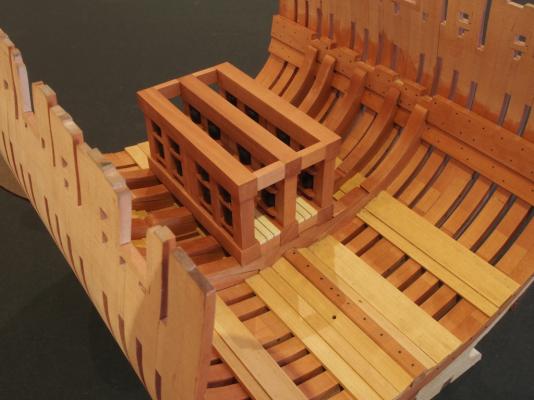
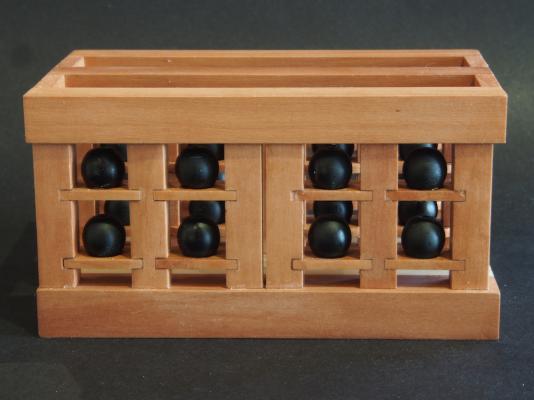
(Continued from last post) The completed Shell Room was then placed on the model, but has not been permanently fixed as yet - just in case it needs to come out again during construction of the next phase of building.


- 456 replies
-
- 21
-
-
- finished
- bomb ketch
- (and 2 more)
-
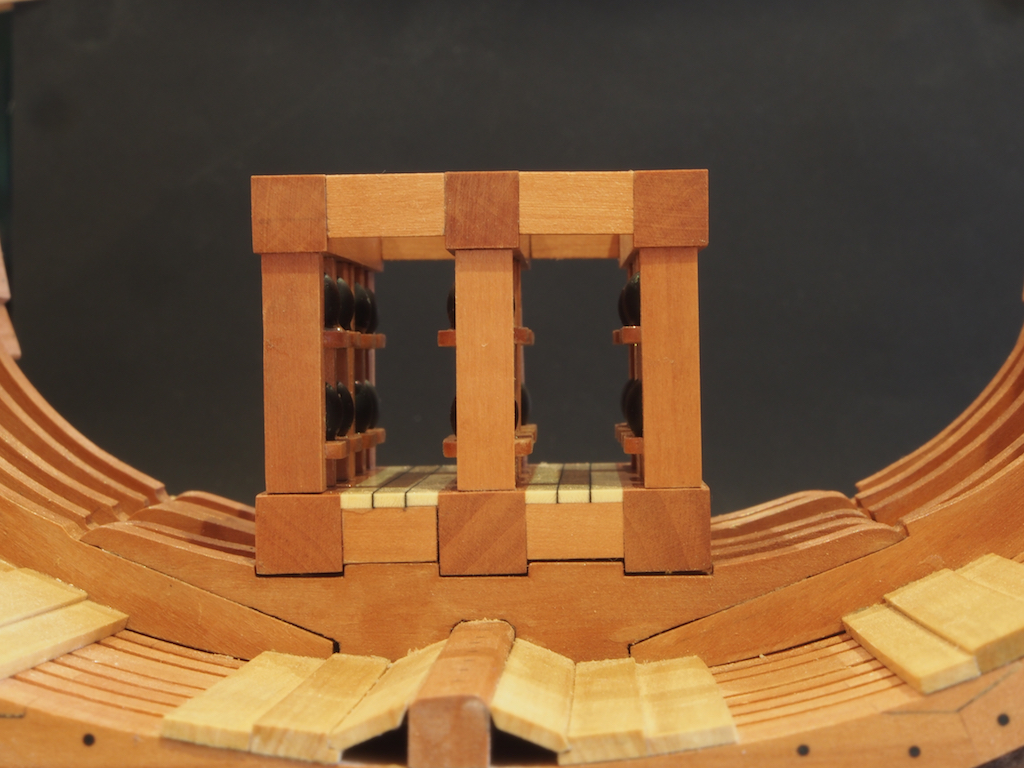
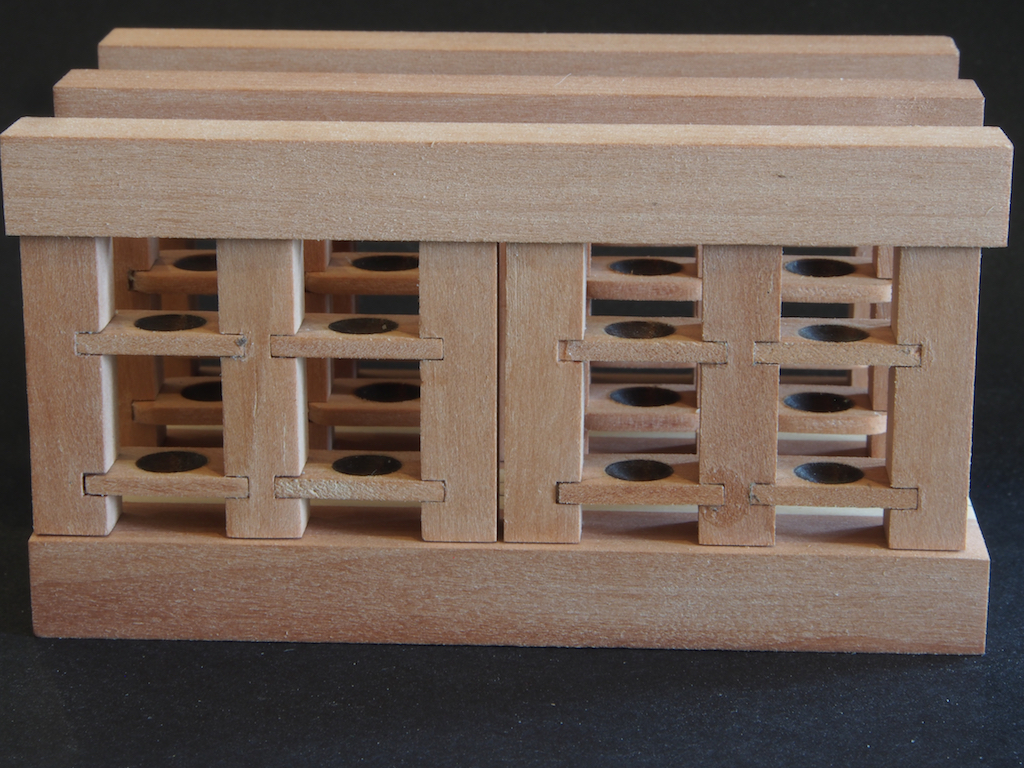
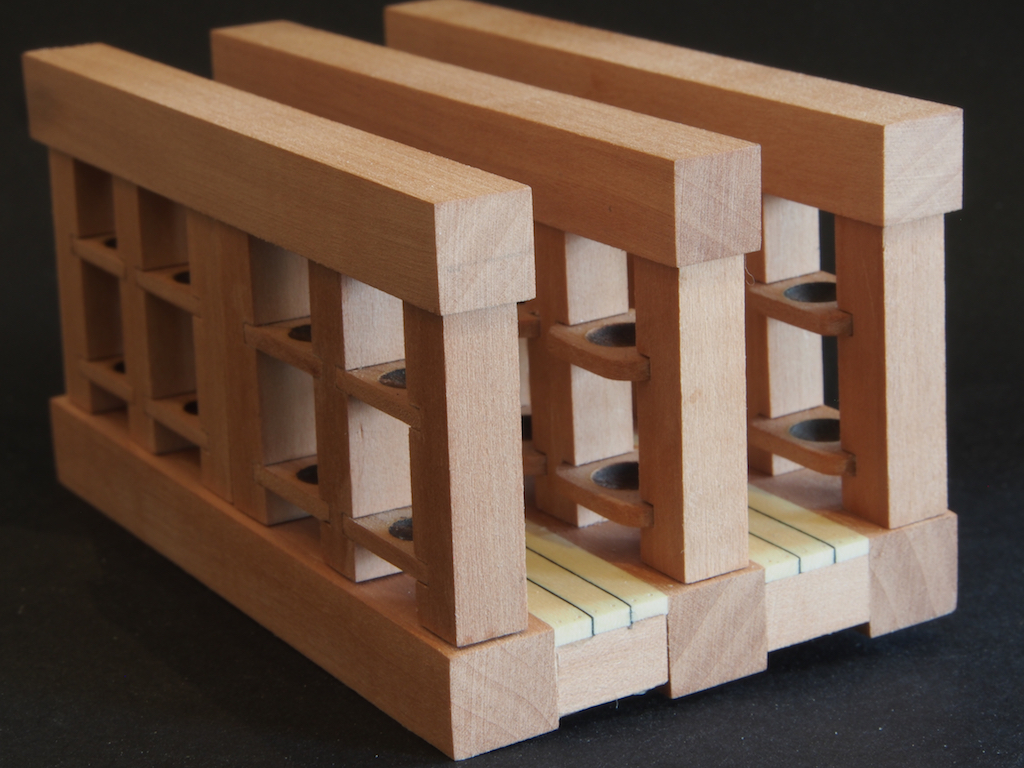
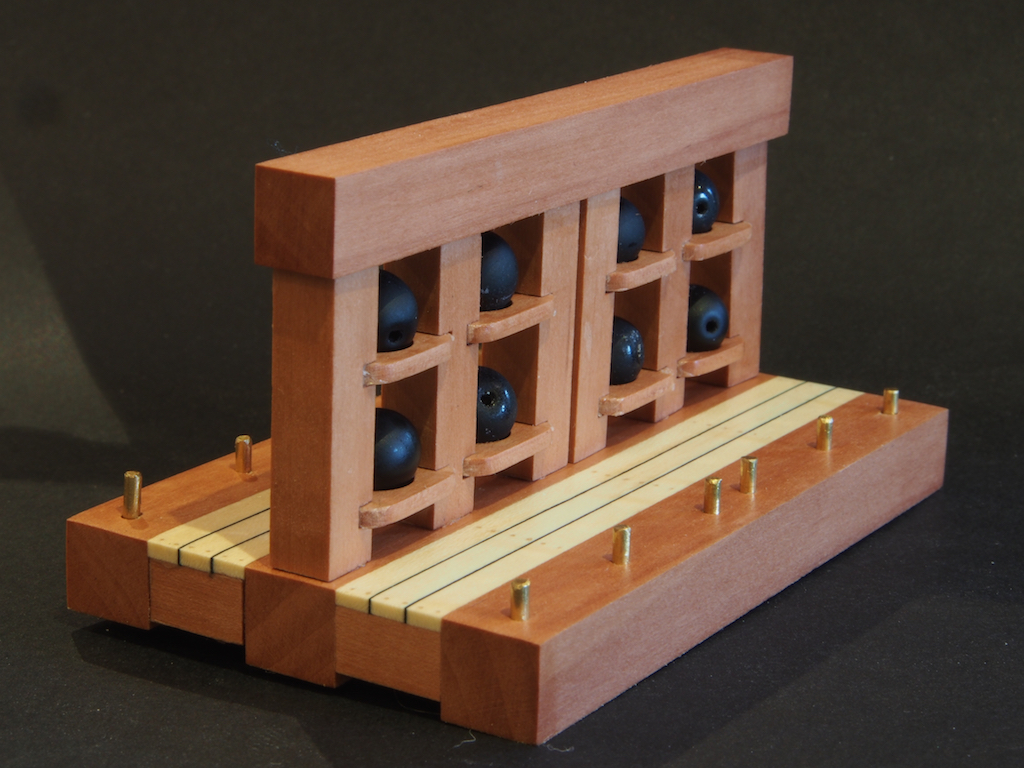
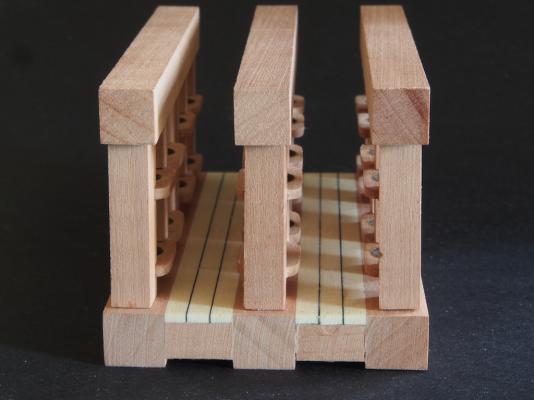
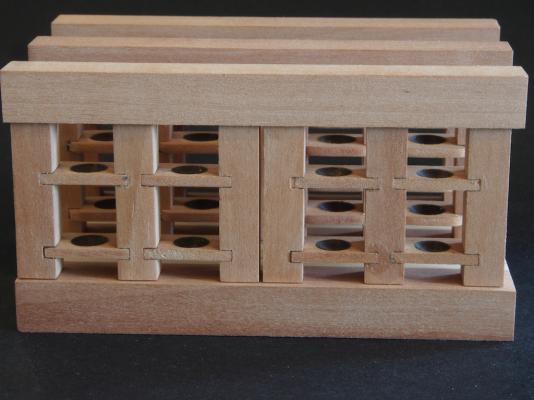
Thanks again for all the good wishes folks. After a week or so of complete rest following the operation, I was permitted to return to the shipyard in a very limited capacity, which has been enough to enable me to complete the assembly of the Shell Room. Before commencing assembly, I thought ahead one more step and realised that the upper support beams will be let into the deck beams above them. To ensure a proper fit, I cut a 5/16" slot in a piece of scrap using a 5/16" end cutter in the Sherline Mill. I then passed each of the three upper support beams through the Byrnes Thickness sander a couple of times so that they made an easy slide fit in the test notch. This should mean that the Deck Beams will be easy to fit, allowing a little room for glue. Here are a few shots of the third (and final) set of components dry-fitted as a final check for accuracy: In order to provide easy access for both application of Wipe-On Poly and installation of the Bombs, final assembly was done in stages. The first stage was installation of the centre-line racks. In the next photo, you can see the centreline racks installed, with WOP applied and Bombs temporarily installed. You can also see the brass pins used to aid alignment during installation. After that the Bombs were epoxied in place in all racks, the port and starboard racks were installed and finally the header cross beams were added. Here are a few shots of the finished product: In the next post I'll add some of the completed Shell Room in place on the model.


- 456 replies
-
- 21
-
-
- finished
- bomb ketch
- (and 2 more)
-
That's just lovely Mark. Any chance of some more close ups of the duplicator in action?
-
ancre LE BONHOMME RICHARD by Jeronimo - FINISHED
gjdale replied to Jeronimo's topic in - Build logs for subjects built 1751 - 1800
Just beautiful Karl!- 662 replies
-
- 1
-
-
- bonhomme richard
- frigate
- (and 1 more)
-
Jack, Nice to see an update from you and your frames are looking great. At least by being a little behind, you have avoided the trap that both Mobbsie and I fell into with the gunport/sweep cutouts! Don't worry about pace - it's not a race but a mutually supportive build. The routine is that Mobbsie races ahead and finds all the traps, I come along and re-learn the same lessons, and then you get the benefit of both our mistakes! My recovery is going well, thank you. I hope to be able to finish assembling the shell room this weekend, though I'm still not allowed near power tools - have to wait until I'm off the pharamceuticals for that!
- 60 replies
-
- 6
-
-
- granado
- bomb ketch
- (and 1 more)
-
So, Vulture has now been cat-scanned? If Ziggy were a Labrador Retriever, it would also have been lab-tested! Glad to hear no significant damage all round Danny. Pets are wonderful companions but they do try our patience at times.
-
Difference between a deadeye and a clump block
gjdale replied to Captain Al's topic in Masting, rigging and sails
Al, If you google the term clump block, you'll find both definitions and pictures. jbshan has it pretty much right in his answer above. A block is a very different beast to a deadeye. If the instructions are calling for a three holed clump block, then I'd suggest using an ordinary triple block (ie a regular block with three sheave holes side-by- side, not in the triangular pattern of a deadeye). Triple blocks are fairly readily available, including through Chuck's Syren site, or can be scratch made quite easily. -
Great work on the margin planks Mobbsie. The colour of your deck planking is a great choice too!
- 62 replies
-
- 1
-
-
- harwich bawley
- fishing boat
- (and 2 more)
-
Now that's REALLY nice work Bob. I love your rope coils too - they are very realistic in appearance.
- 1,477 replies
-
- 1
-
-
- essex
- model shipways
- (and 1 more)
-
Very nice Boyd - I really like your interpretation in this build. As for time / speed of build, just remember that it's not a race and there are no deadlines to meet. 3 years would be a very fast build in my books (says he who took 19 years for this ship).
-
Great work Ian. I am constantly amazed and impressed by your engineering ingenuity, and your ability to work out the "how to" as well as the "what". Your log is always an education that I thoroughly enjoy. Thanks for sharing so much of your thinking and processes.
-
Great start Mobbsie - a lick of paint makes thecworld of difference.
- 62 replies
-
- 1
-
-
- harwich bawley
- fishing boat
- (and 2 more)
-
Fascinating project Wefalck - I'll be interested to follow your progress on this.
-
Hi Charlene, Another warm welcome from "downunda"! Looks like you've made a great start already. As far as you saying that Jerry is not always right goes, as a husband I can assure you that these days I find myself more often certain than I am right! I hope you enjoy your build and the camaraderie of this great community called MSW.
-
Excellent work Ken. Your meticulous attention to detail, and your experimentation, are both paying off in spades.