gjdale
-
Posts
4,894 -
Joined
-
Last visited
Content Type
Profiles
Forums
Gallery
Events
Everything posted by gjdale
-
 Congratulations Jesse on completing an excellent build. She looks fantastic and you should be very proud. So what's next?
- 607 replies
-
- 3
-

-
- scottish maid
- artesania latina
- (and 1 more)
-
Thanks everyone for the kind words and "likes". Rusty - thanks for the tip re sanding. Mobbsie - thanks for keeping a weather eye on things mate, but I'm pretty sure that's an optical illusion. There are so many curves in play, that it's almost impossible to tell where straight lines start and finish. I did check it all with a straight edge though and am satisfied that all is in order. Glad to hear your floor riders came out successfully - I look forward to the amended version.
- 456 replies
-
- 1
-
-
- finished
- bomb ketch
- (and 2 more)
-
Tips and Tricks for Airbrushing
gjdale replied to JPett's topic in Painting, finishing and weathering products and techniques
Great idea for the thread JP. I'm still a relative novice with the airbrush, so look forward to picking up lots of tips and tricks here. -
Nice to see you putting that serving machine to work so well John. Your rigging is looking great.
- 2,250 replies
-
- 2
-
-
- model shipways
- Charles W Morgan
- (and 1 more)
-
This continues to be a fascinating build Carl. Can't offer any advice, but it all looks good to me.
-
Nicely done, Bob. It may be a pain, but the results look to be worth it.
- 1,477 replies
-
- 1
-
-
- essex
- model shipways
- (and 1 more)
-
Your deck looks great Sjors - as others have said, "natural" differences in timbers make it more realistic.
- 1,616 replies
-
- 2
-
-
- caldercraft
- agamemnon
- (and 1 more)
-
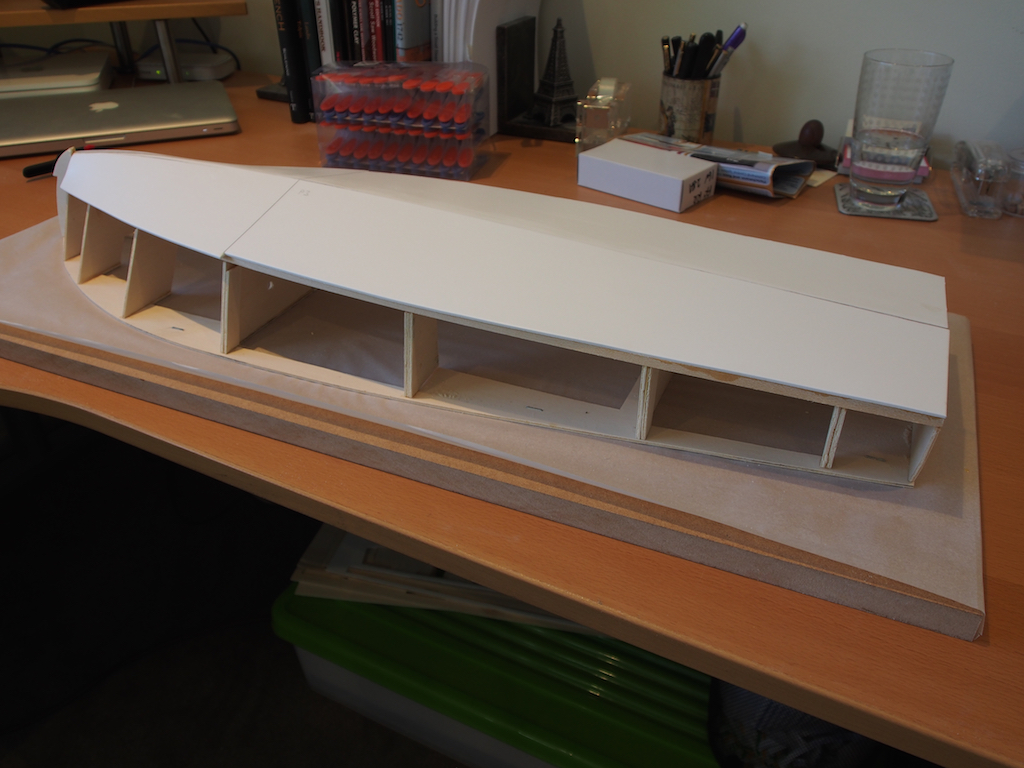
Construction: Planking Didn’t have much time for this build this weekend as the other build (Bomb Vessel Cross Section) took up most of the available time, but did manage to fit the bottom planks. Planking begins with the bottom planking. This is achieved with two large “plastic” sheets. The material is an expanded core PVC called “Sintra”. On the bottom of the hull, there will be no over planking as this gets painted. On the rest of the boat, the Sintra forms an “underplanking”, over which the Mahogany planks are laid. Use of the Sintra simplifies and speeds up the build, and makes the whole vessel lighter (a consideration for later on with the RC version of the build). I have heard of a number of people having water ingress issues due to the Sintra and the fact that the bottom is also not fibreglassed like the remainder of the boat. I will either seal the hull with a waterproof car body filler, or fiberglass the bottom as well as the rest of the boat – I haven’t yet decided on this aspect.

- 339 replies
-
- 17
-
-
- dumas
- Chris-Craft
- (and 3 more)
-
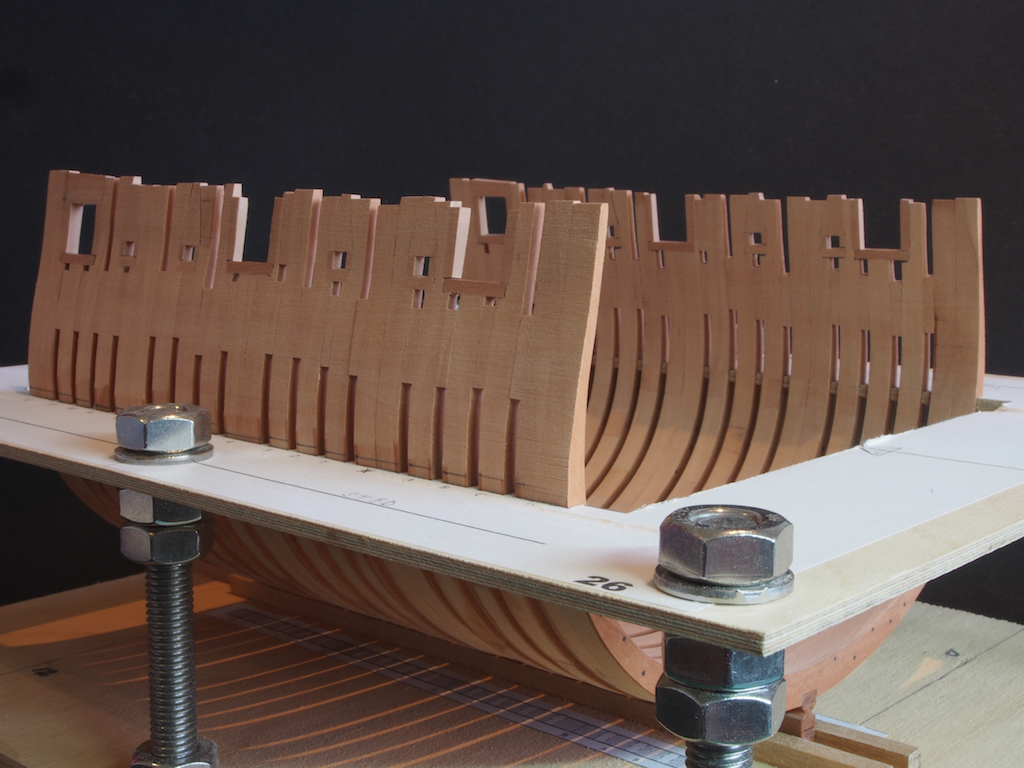
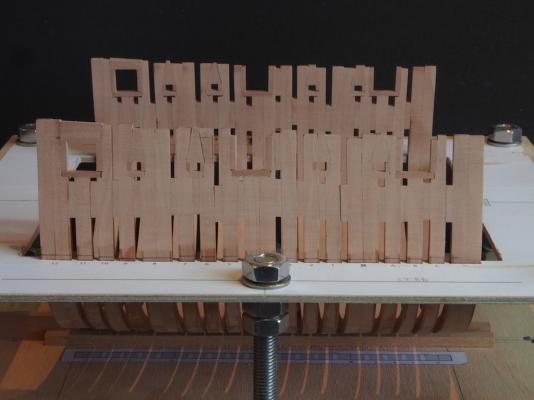
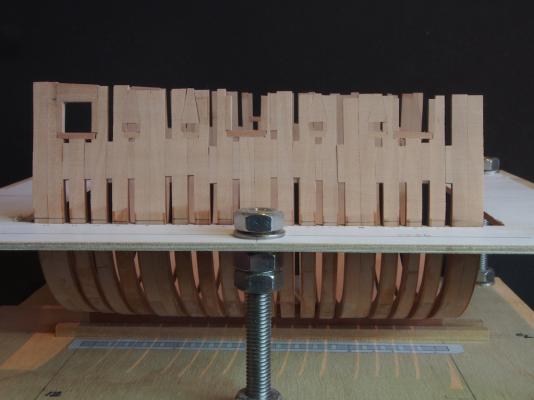
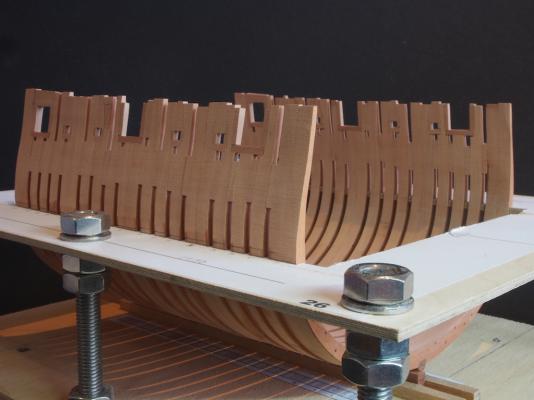
Repairs Complete! Fillets were fitted to all of the gunport and sweep ports previously opened up and cleaned up. To make the task a little easier, a standard size of fillet was used, and the opening adjusted accordingly. To ensure that the ports remained centred in the openings, two simple sizing jigs were made (one each for gun ports and sweep ports). These were simply a block of stock sized to the internal dimensions of the ports. The triangular shaped filling lintels above the sweep ports look tricky, but were surprisingly easy to make. I simply placed a piece of sticky label paper behind the opening and traced around the outside of the opening onto the paper. This was transferred to a piece of 3/16” Pear stock, ensuring the grain was running vertically, rough cut and then sanded to the left and right side lines on the Byrnes disc sander. The length was left slightly long and then gradually reduced on the sander until a snug fit was obtained. Once all filling lintels had been installed and given overnight for the glue to fully cure, it was time to start sanding……..and sanding……..and sanding………and yet more sanding. The outside of the hull was faired above the waterline using 80 grit sandpaper. As this whole section above the waterline will be completely planked, I decided not to go any finer with the sandpaper (at least for now) as this will give a good “tooth” for the subsequent glue. I also found that some of the spacers were starting to come loose, so didn’t want to push my luck with these, at least not until there is something more substantial holding the frames together! The inside above the waterline was sanded in similar fashion, while below the waterline was further sanded with 120, and then 180 grit. There will be sections below the waterline that will remain unplanked, so I wanted to get that down to a smoother surface. I’m still contemplating whether to go further with the finish sanding here. I have deliberately not cut the height down to final size at this stage. Any way, here’s a few photos of progress to date:

- 456 replies
-
- 18
-
-
- finished
- bomb ketch
- (and 2 more)
-
I think the only thing that got "bored" was the hole for the bowsprit, Augie! Great forward planning, masterfully executed.
- 2,191 replies
-
- 2
-
-
- confederacy
- Model Shipways
- (and 1 more)
-
Great work Bob, and a great tutorial too!
-
Okay, it's official, I've exhausted my supply of superlatives. Can someone lend me a few please?
- 1,215 replies
-
- 1
-
-
- sloop
- kingfisher
- (and 1 more)
-
Echo by Maury S - FINISHED - Cross-Section
gjdale replied to Maury S's topic in - Build logs for subjects built 1751 - 1800
Lovely work Maury. -
Jay, A slightly simpler way of making the hook parts might be to use large sewing needles with the eye cut in half. I like the idea of using TWO hooks though - I can see that this would make it a lot easier to get the line behind the bottom of the pin. Might save a lot of colourful language I imagine!
-
Jack, Sorry if I confused you, but I was referring to using the same method of filing with the vice as you've used for the scarph joints. Hope that clarifies what I meant. Just sent you a PM re gunports as well.
-
Thanks Ben, That's a great solution and it seems really obvious once I read it! Wish I'd thought of that before. Isn't hindsight a wonderful thing! Now that you mention it, I do recall reading of this in your log - pity I didn't remember it at the time.
- 456 replies
-
- 2
-
-
- finished
- bomb ketch
- (and 2 more)
-
Thanks David, and welcome aboard. Doing the RC and the running gear will be a first for me, so I'm hoping I can rely on a few more knowledgable folks here to guide me along the way. So far, everything has seemed relatively easy and has gone pretty much according to plan (famous last words). I must say, that the instructions are very good so far, and are enhanced further by cross referencing with Pat Mathews' book. And I'm definitely having fun!
- 339 replies
-
- 3
-
-
- dumas
- Chris-Craft
- (and 3 more)
-
Congratulations on reaching such a significant milestone Ben. You must be feeling very pleased - your work is excellent! Double rum rations all round
-
Joe, Have you considered replacing the kit blocks with some from Chuck's Syren company? They would really make a big difference and complement your excellent build beautifully. Just a thought..............
- 302 replies
-
- 1
-
-
- granado
- caldercraft
- (and 1 more)
-
Thanks David, The answer is to not pre-cut the port openings, but to do these only after all the frame are assembled into the building jig. I've suggested to Jack P that he try this approach. We'll see how he goes.
- 456 replies
-
- 3
-
-
- finished
- bomb ketch
- (and 2 more)
-
Great to,see you back with an update Ian. What a shame that your lovely stove is now hidden from view. At least you have the pictures, and we have all seen them.
-
Augie - welcome aboard my friend. Great to see that you found your way over here. Grab a drink form Mark at the bar and pull up a chair. Bob (Hexnut) - thanks for the tip re plastic polishes. That particular product doesn't ship to Austalia, but I'm sure I'll be able to find something similar in an auto parts shop here. Brian (GuntherMT) - I may have been mistaken over some of the materials used. According to the instructions, the frames are allegedly Mahogany Plywood. I don't think so, but could be birch or basswood (?) - they are very light. Also the Chines and Butterfly keel are listed as being Poplar - maybe, but again they are very light (which is why I may have incorrectly assumed them to be balsa). Comparing these materials to that which IS listed as balsa in the manual, there is a difference, but not much. The exterior planking is definitely Mahogany though
- 339 replies
-
- 2
-
-
- dumas
- Chris-Craft
- (and 3 more)