


Baker
-
Posts
4,134 -
Joined
-
Last visited
Content Type
Profiles
Forums
Gallery
Events
Posts posted by Baker
-
-
Beautiful work, and great painting.
-
-
Thanks GL
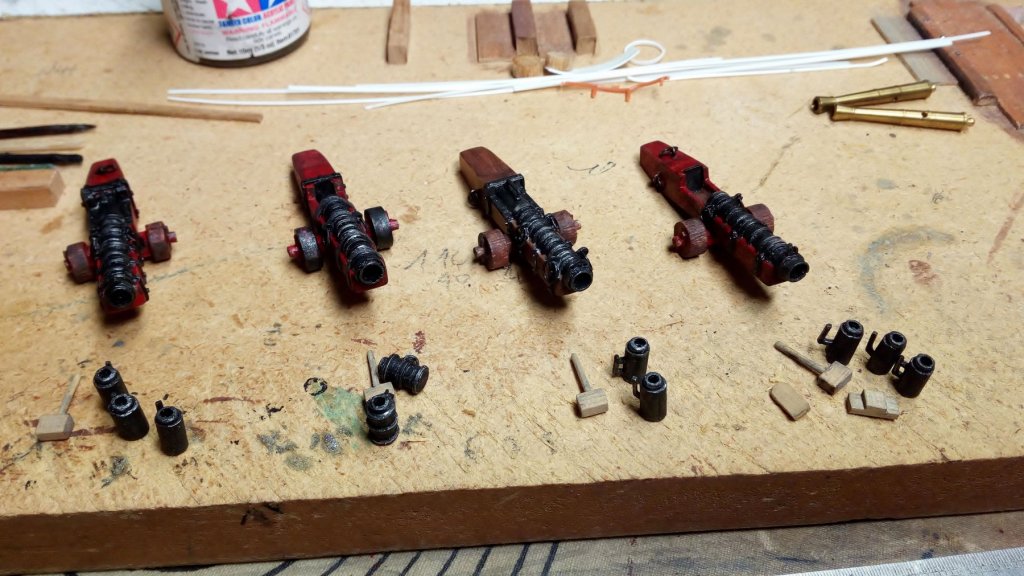
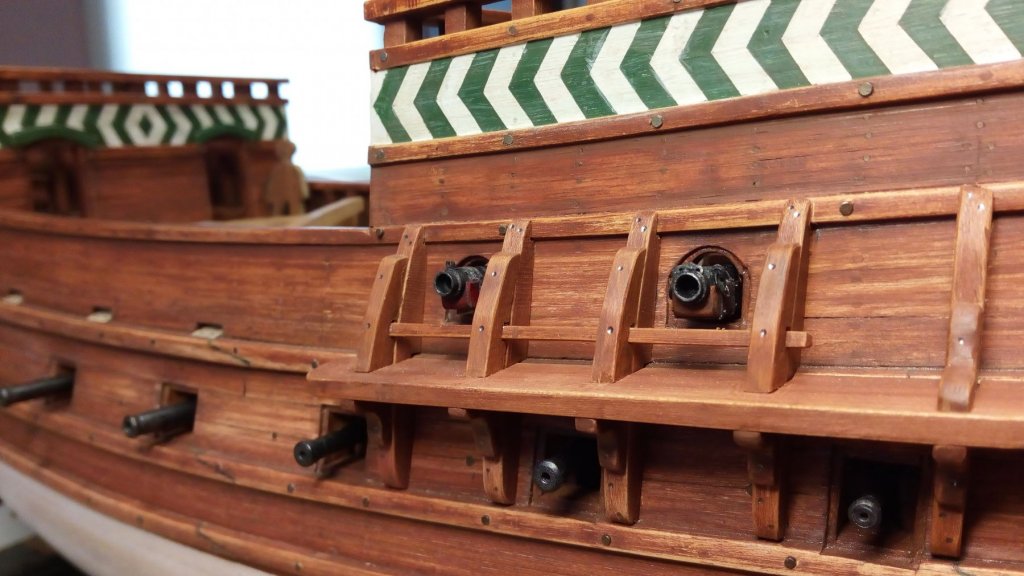
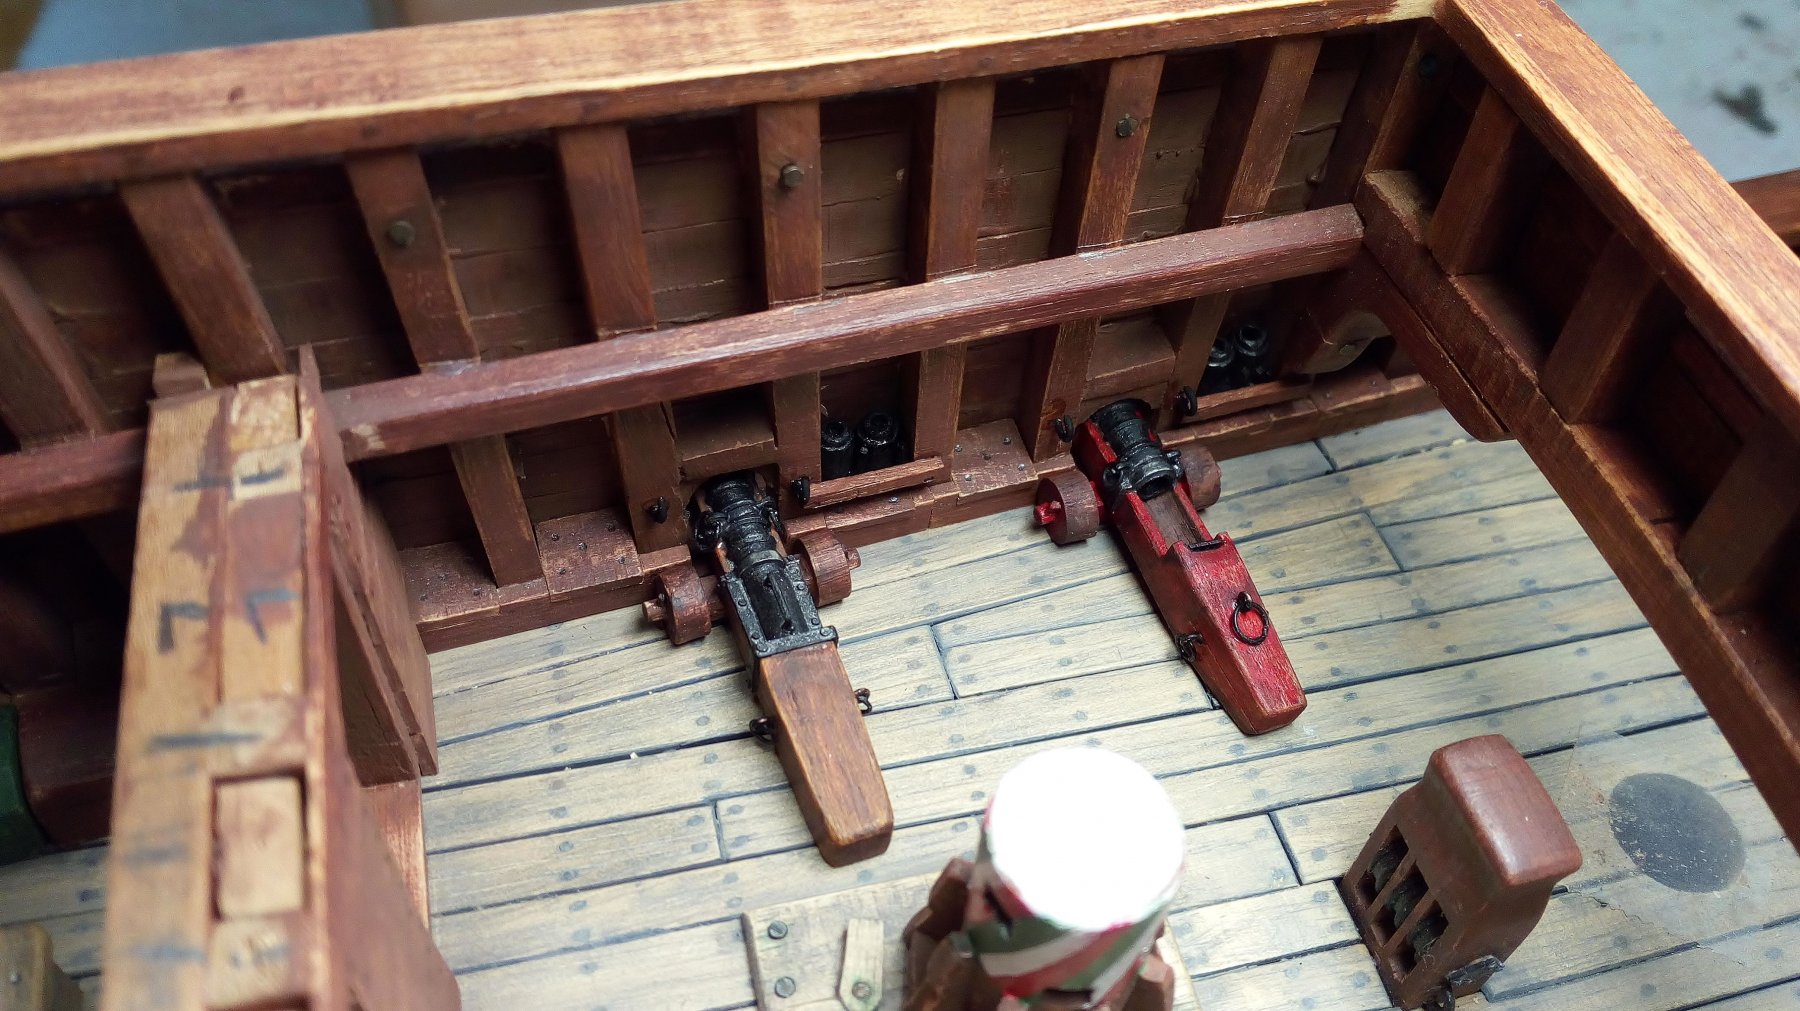
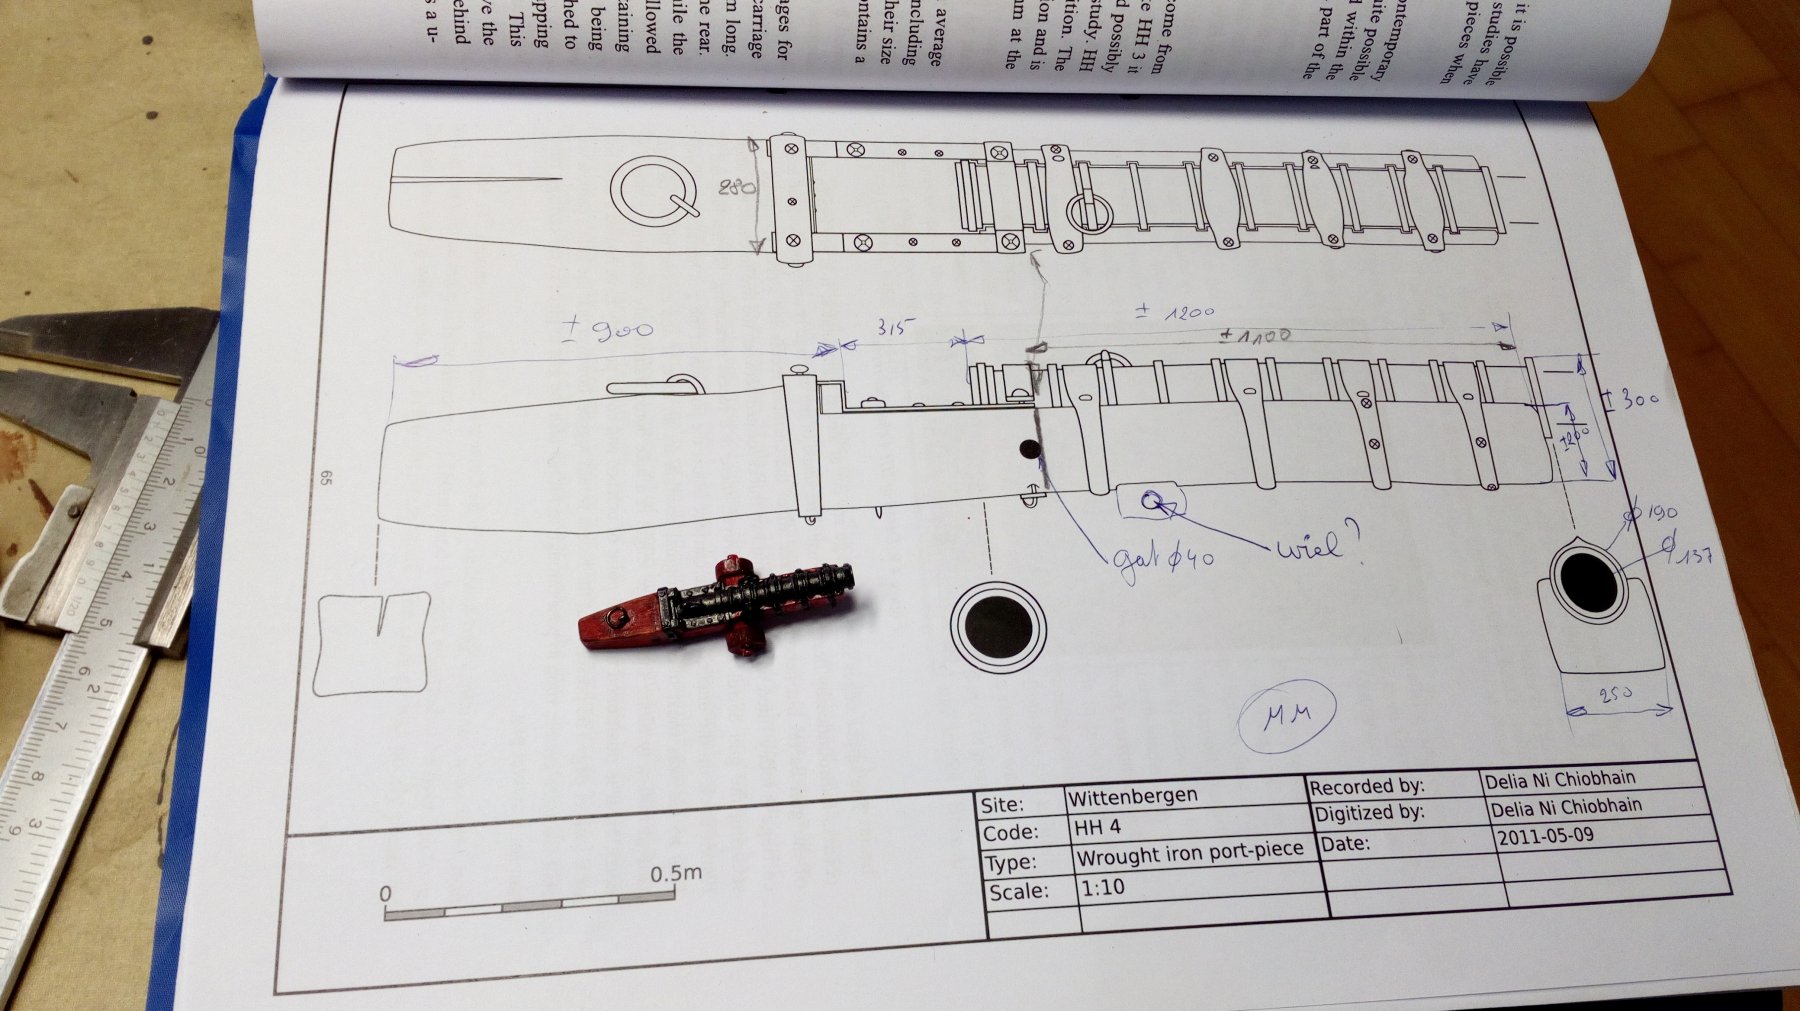
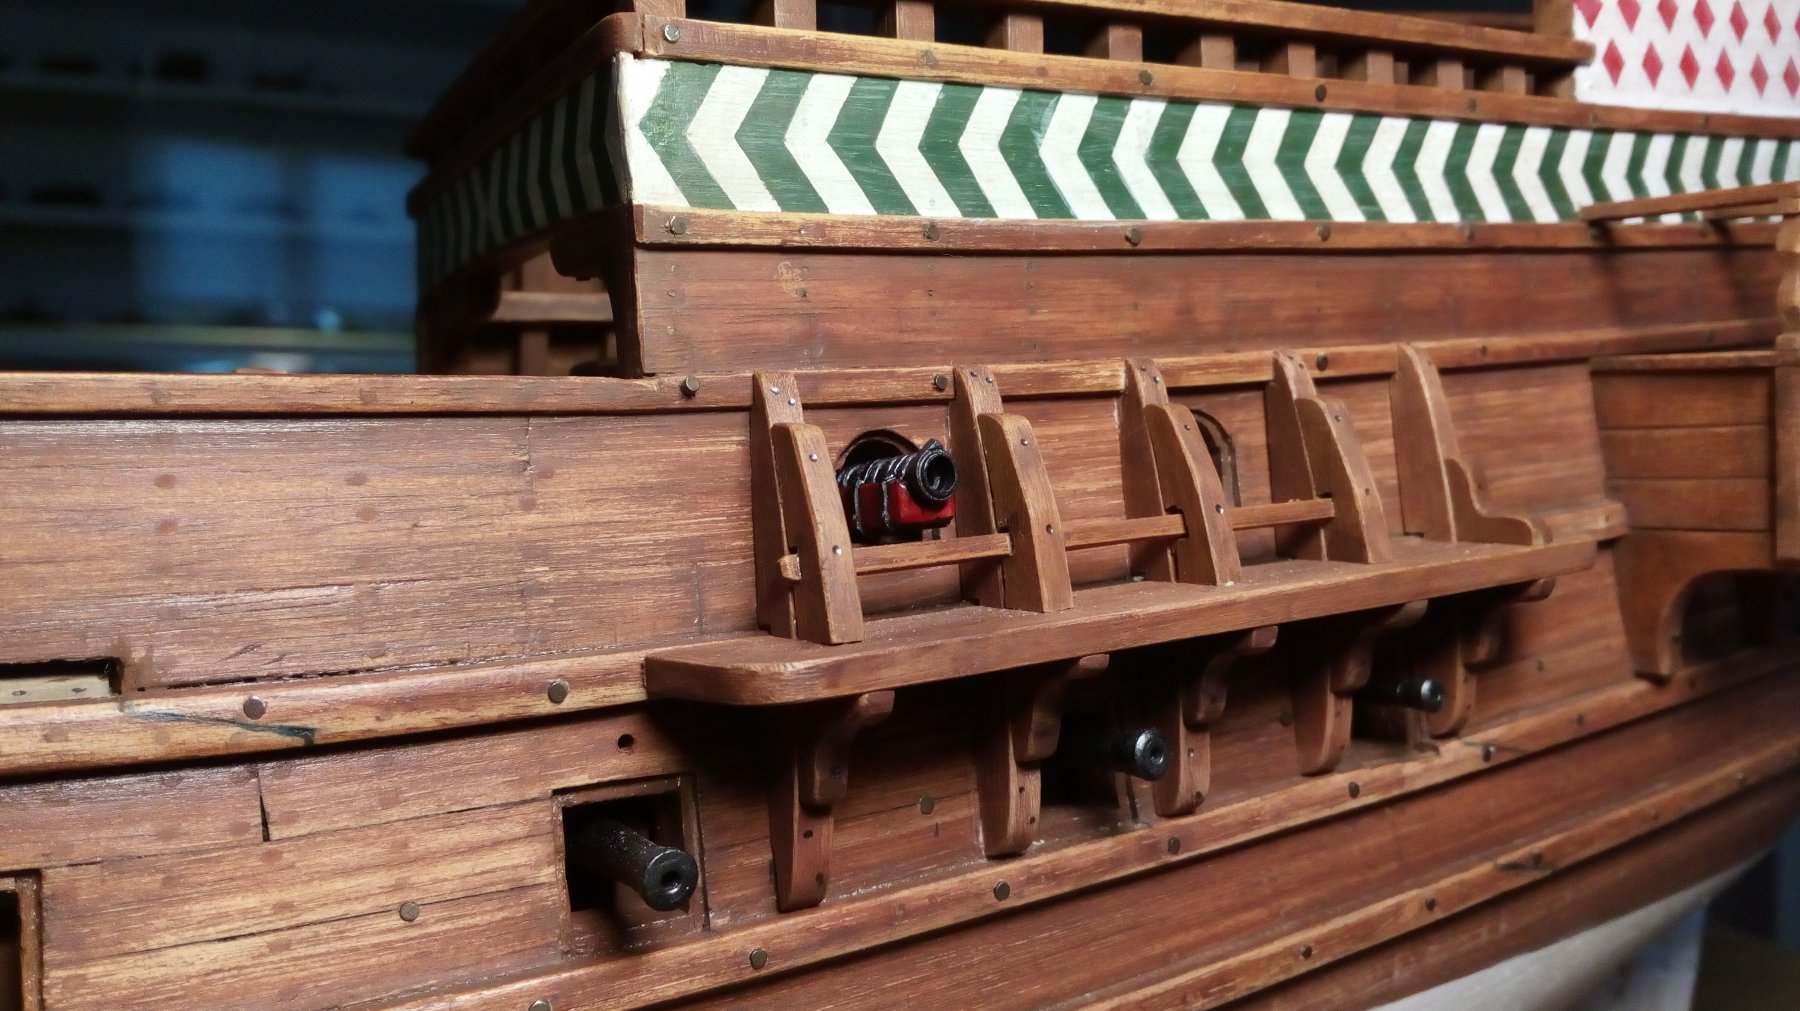
Mostly the cannons on armed merchantman (and probably also on some warships) came from different sources. They used what was available.
That is why most cannonbarrels below deck are different.
And these 4 are certainly different. At the time, the barrels were forged one by one and then placed on large costum made heavy beams.Let us say that 3 pieces were already painted when they came on board. The 4th was not painted, and the budget was too low to buy extra paint
")
Errors (not vissible on the picture)
2 Nails (bolts) come through the wood on the inside
 and it is now impossible to remove them.
-
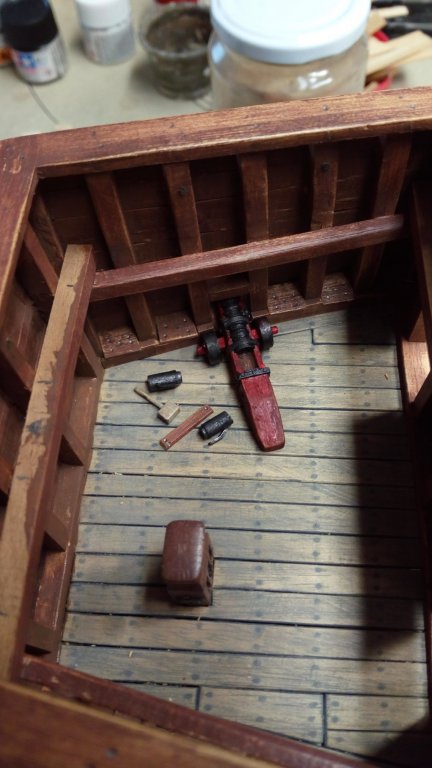
The 4 cannons are ready. Together with a part of the necessary extra parts and tools.
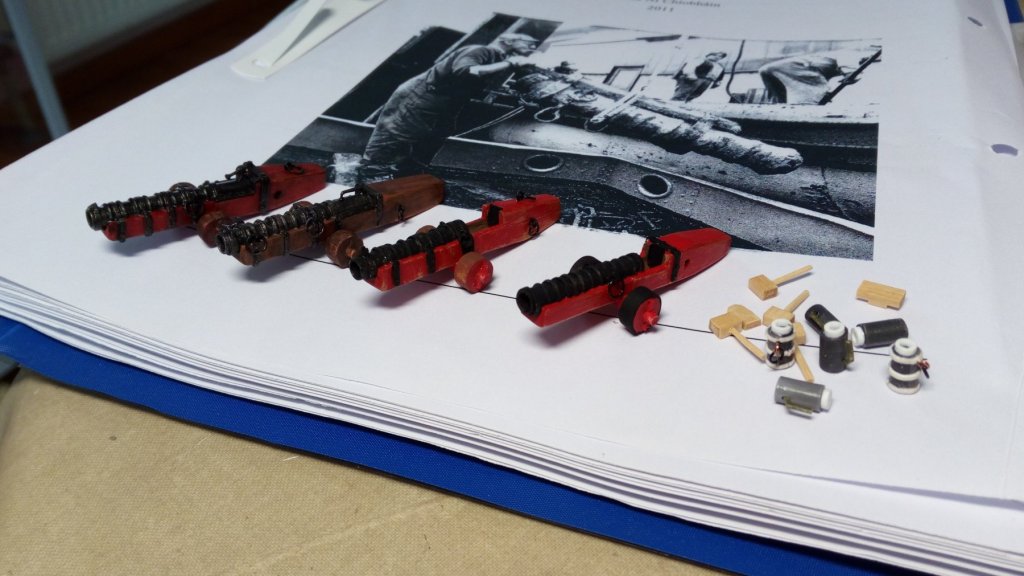
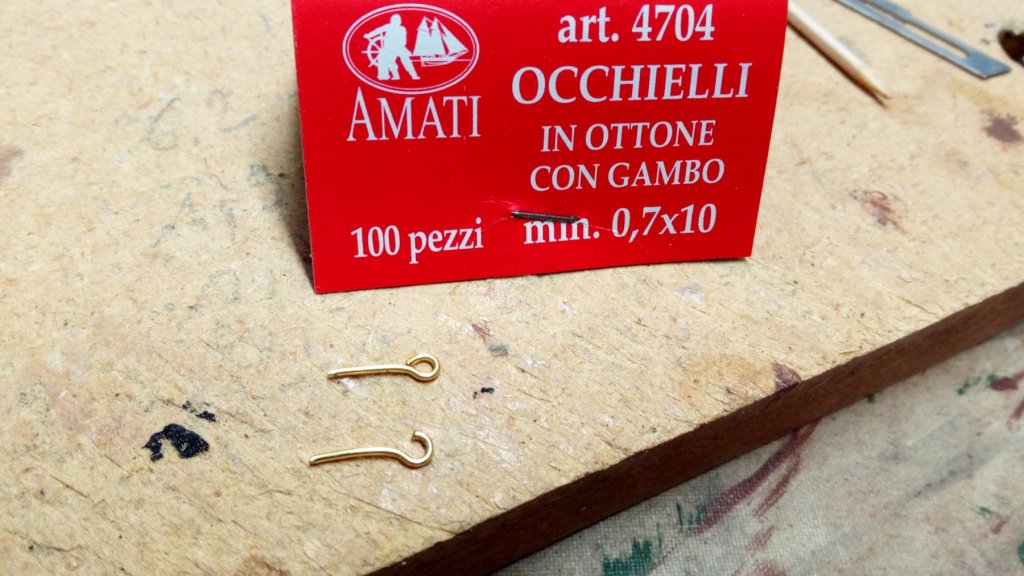
Make hooks.
Drilling holes
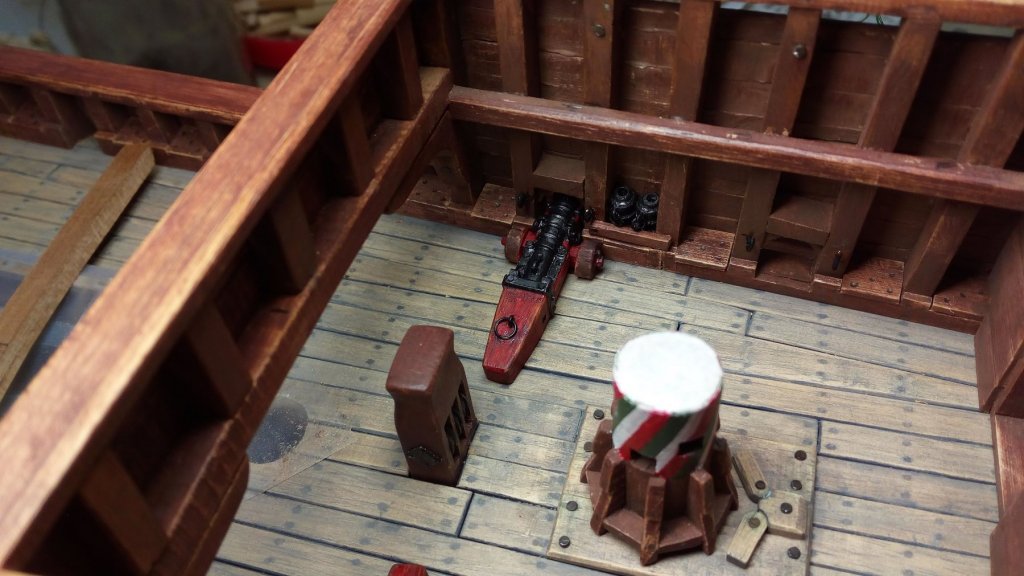
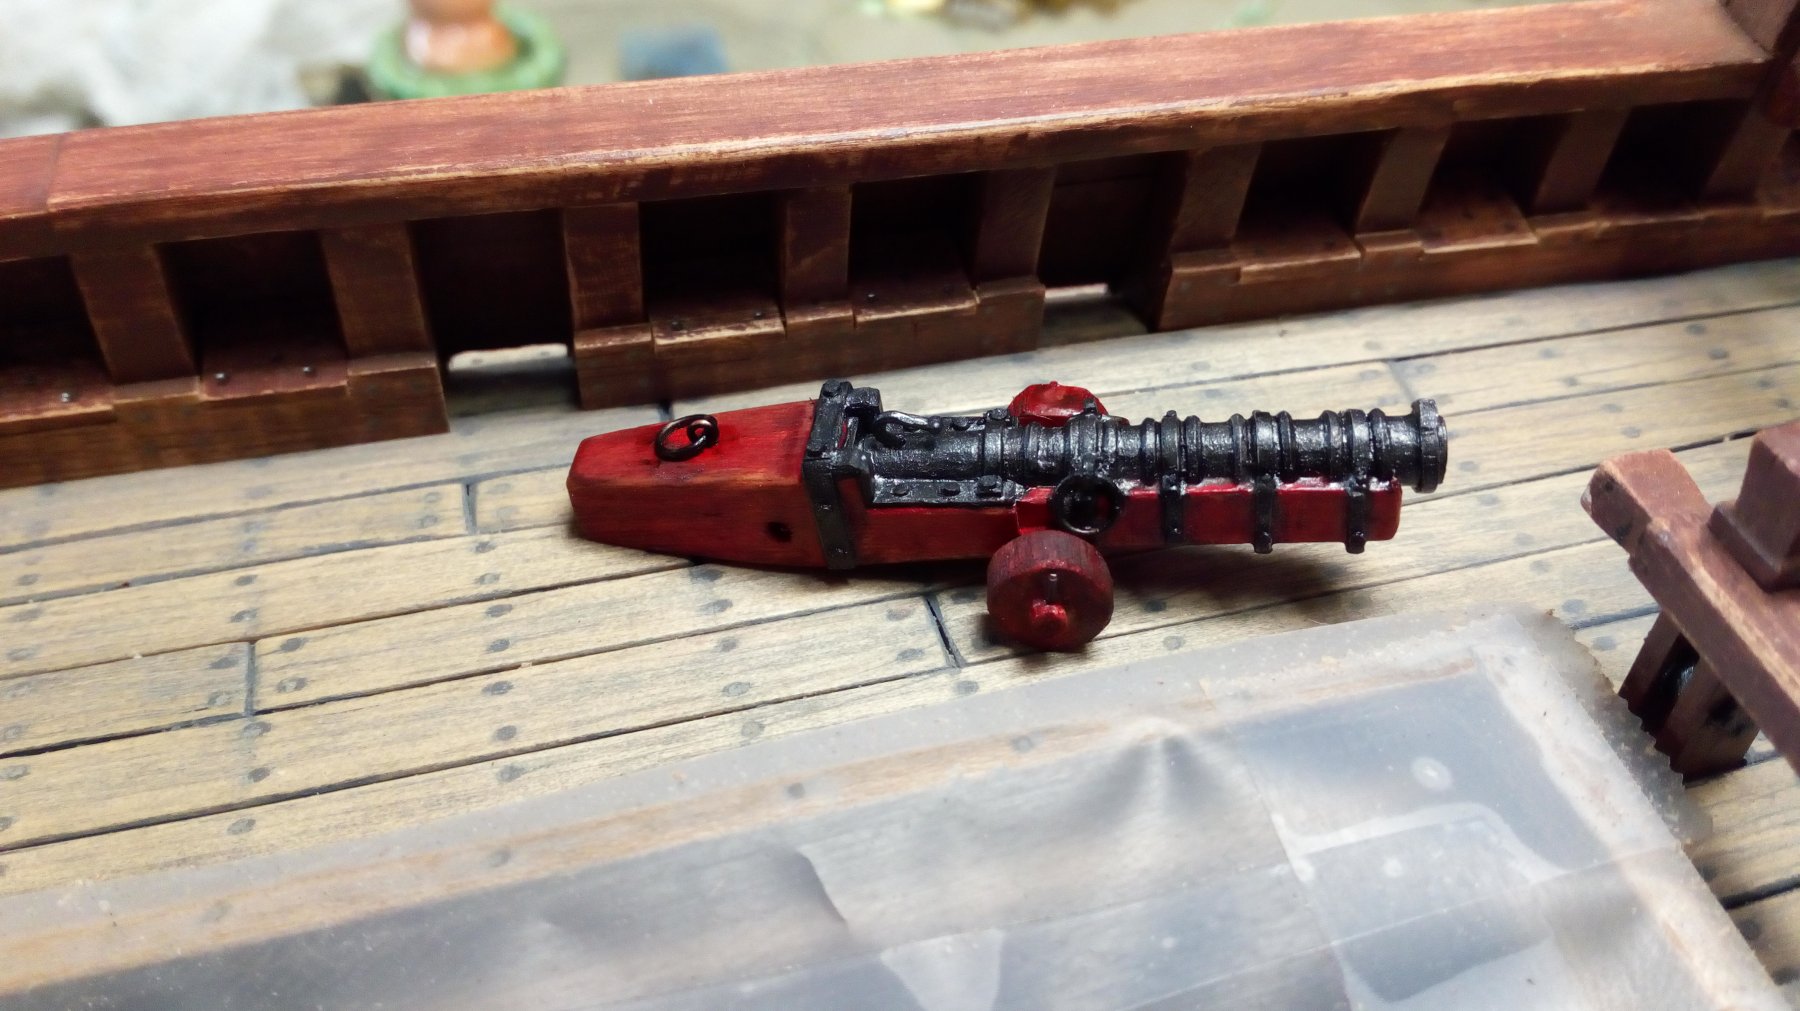
The installation of the parts has started.(the cannons are not yet glued to the deck)
Here and there I made some errors on the inside of the hull, the intention is to hide these errors with various items.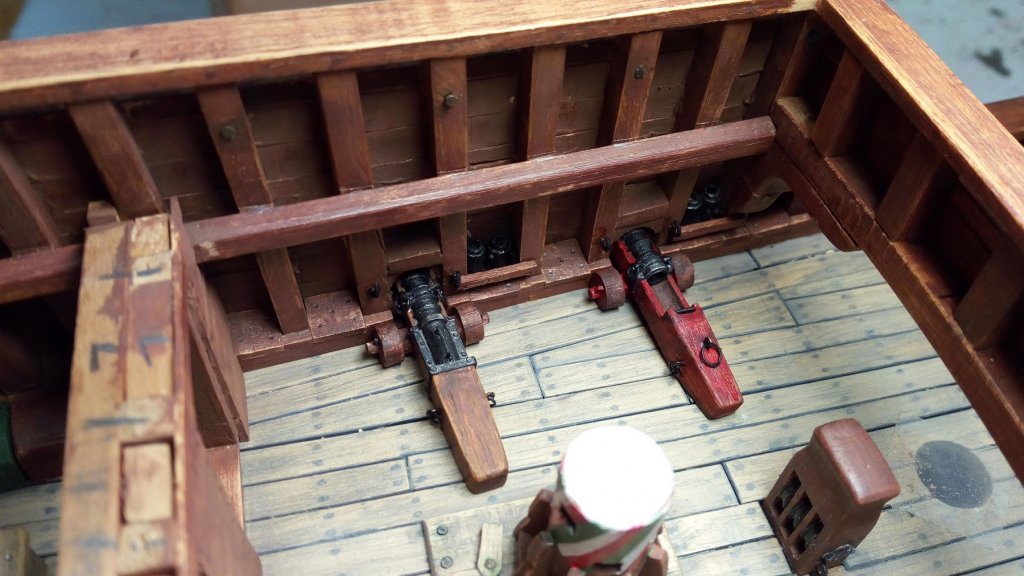
These cannons look really medieval and inappropriate on a ship from this time. But historically they are correct.
One cannon is placed in the front castle. I still have two small cannons to make.
Thanks for following.
-
Thanks Carl
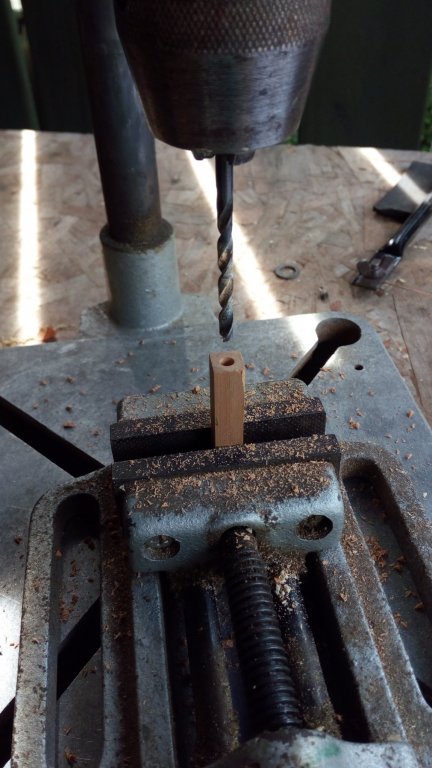
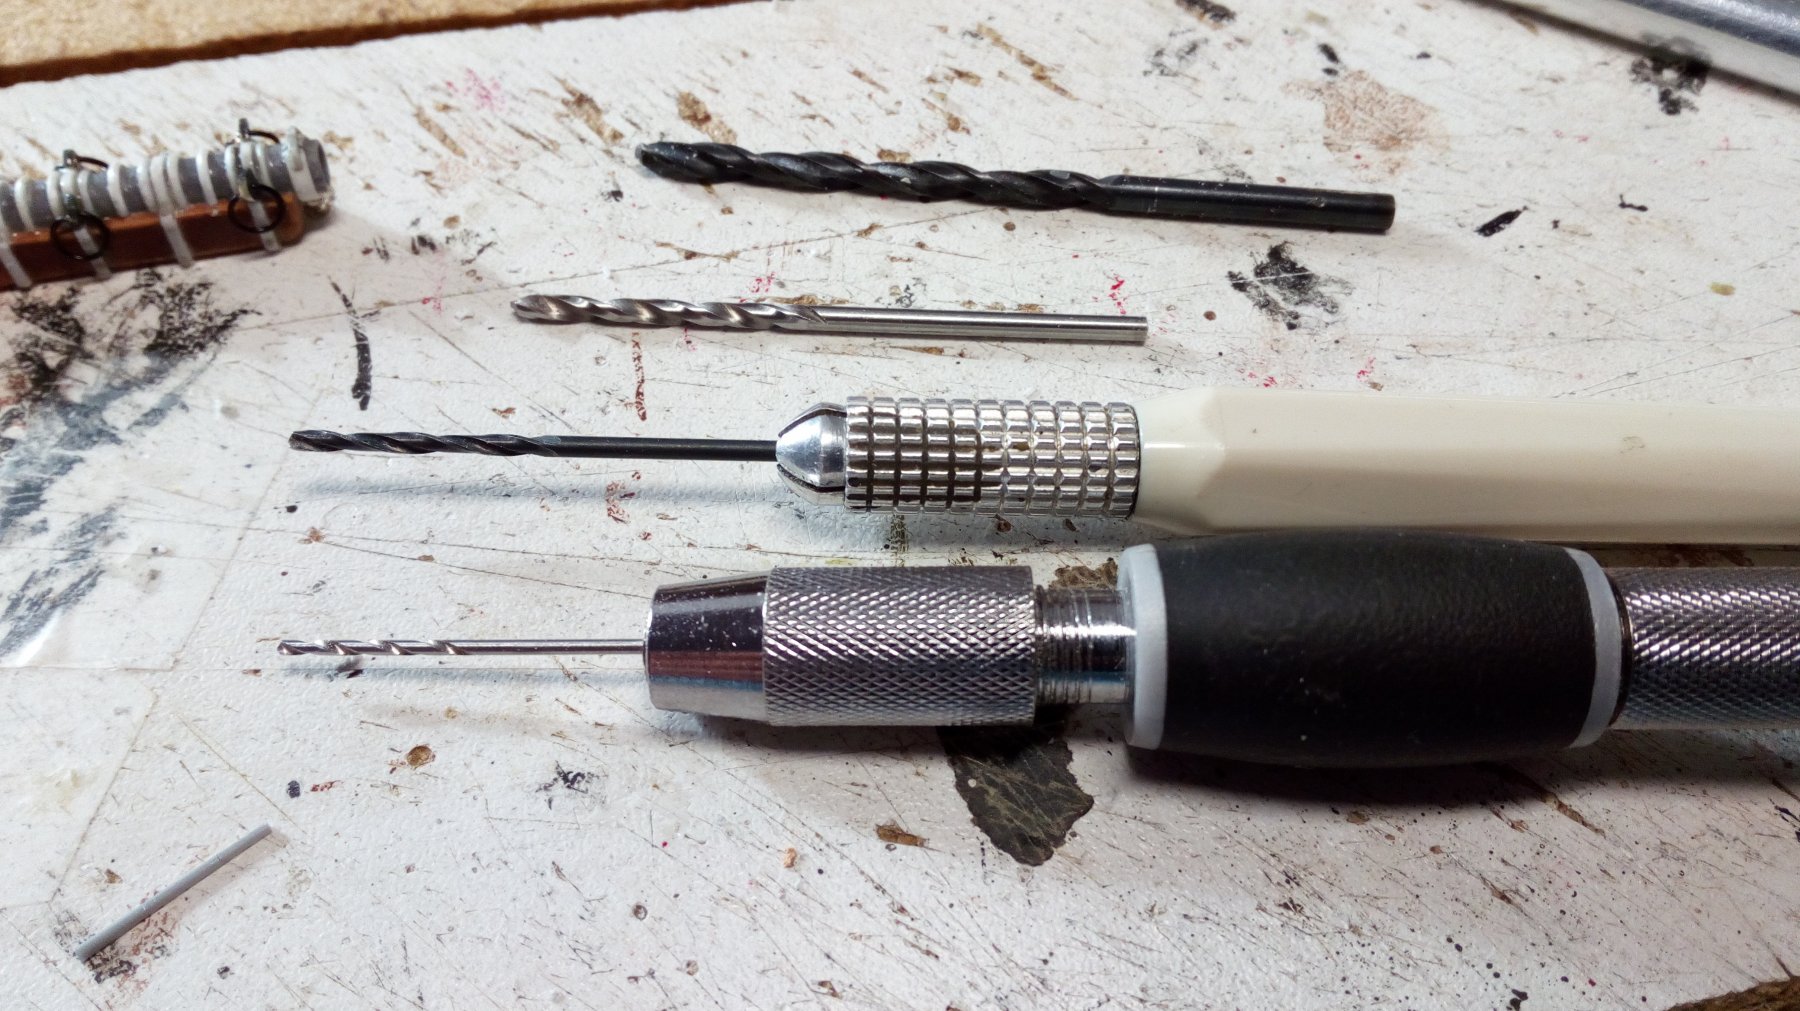
The sprues have been drilled approximately 3.5 mm deep. Caution is required during drilling.
The bore is 3 mm and the outside diameter of the barrel is only 4 mm.
I used 4 drills. 1 mm, 1.5 mm, 2 mm, and 3 mm. all drilled by hand.
This is how I make plastic strips. A "photo cutter" is ideal for doing this. I have the desired thicknesses and widths always in stock this way.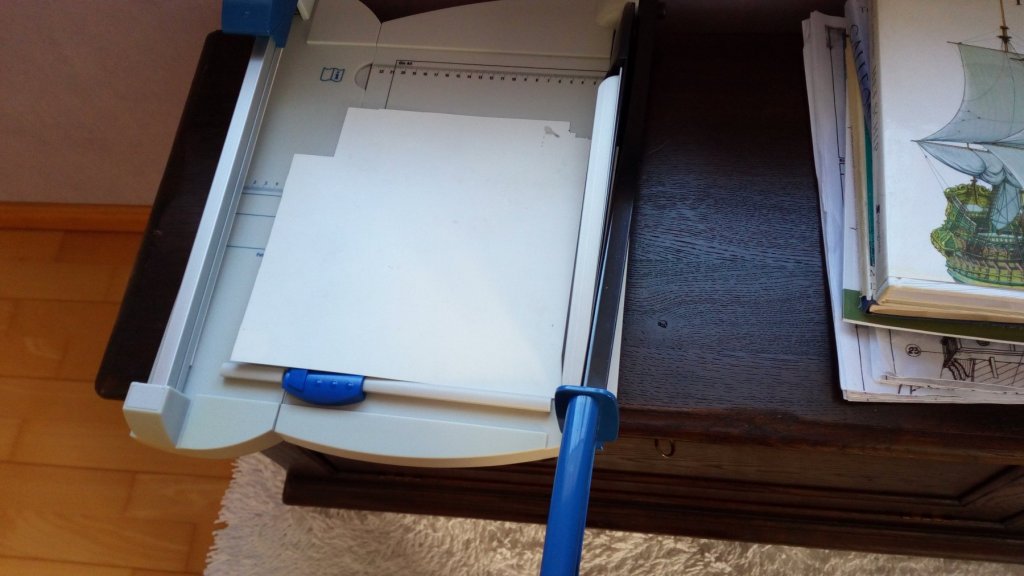

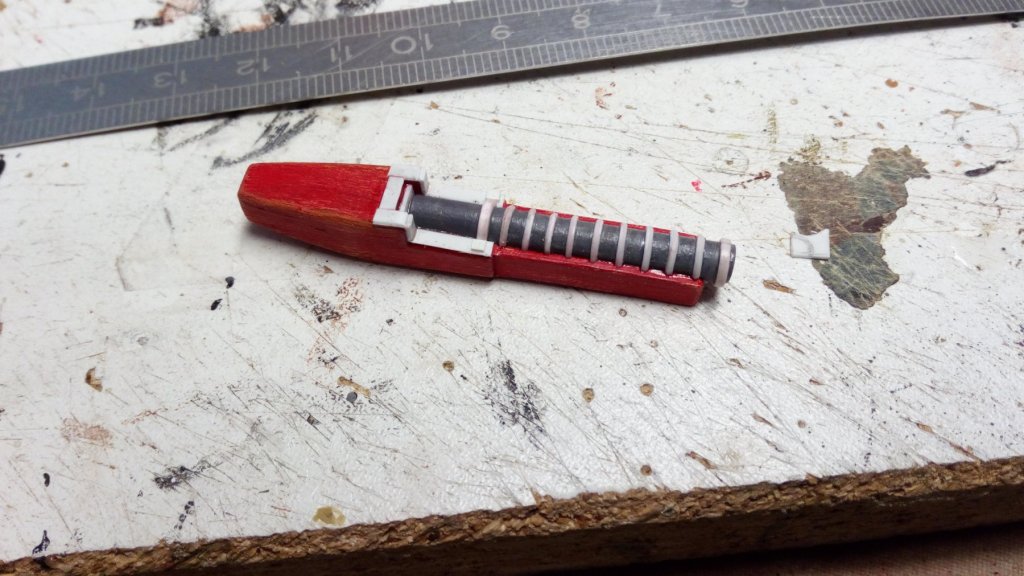
Bore unpainted
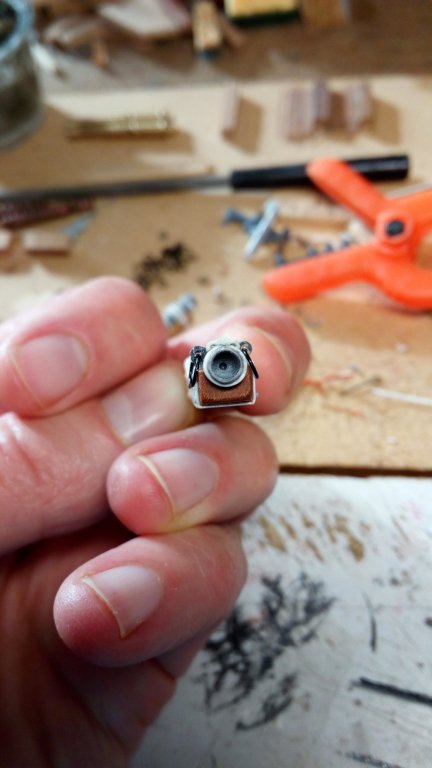
Painted.Interior in matte black. The "top of the barrel" is then accented with pencil (also possible with matt silver)

-
A nice paint job and nice wheatering
Congrats- Hubac's Historian, EJ_L and mtaylor
-
 3
3
-
-
-
Thank you everyone for following and the nice comments.
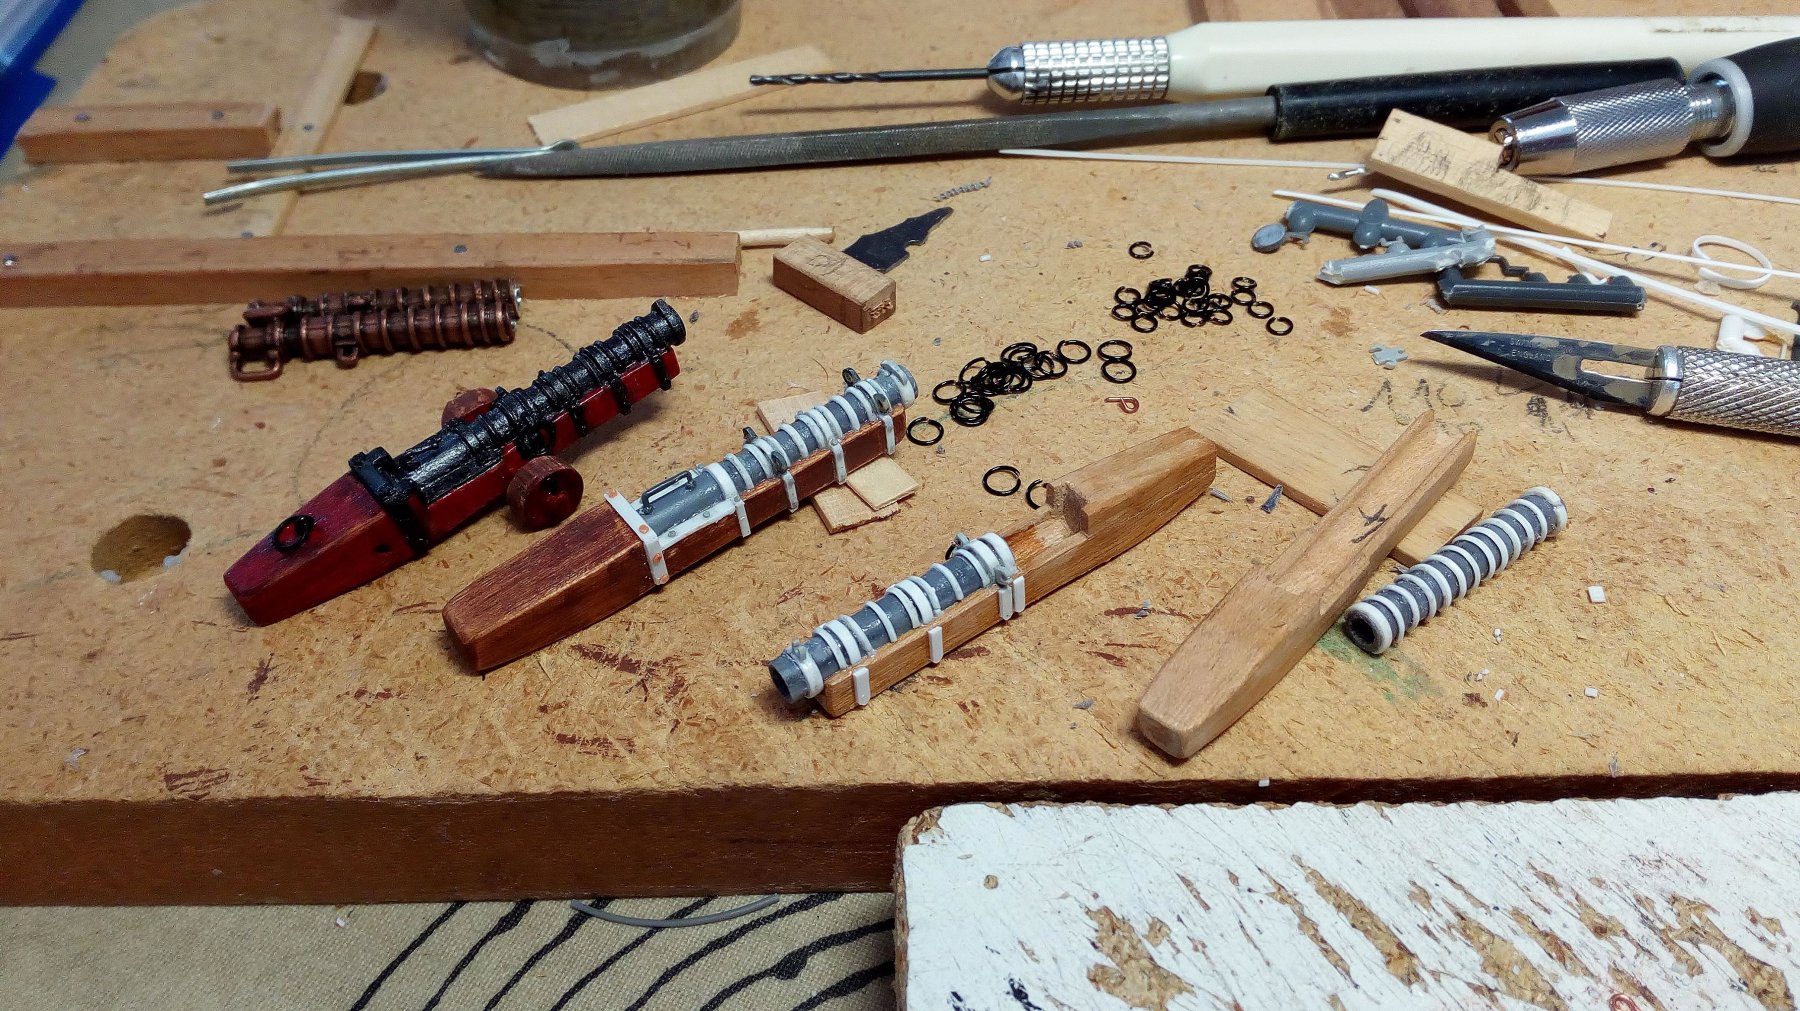
The construction of the guns continues slowly. I build each cannon as a separate model, something like my military model building on a 1/72 scale.
progress of the cannons, and i made metal rings of different diameters. Top left in the photo are a few (low quality) purchased cannon barrels that I wanted to use first.
to be continued. -
-
Great work, this is going to be a beautiful model.
-
-
Thanks Lawrence,
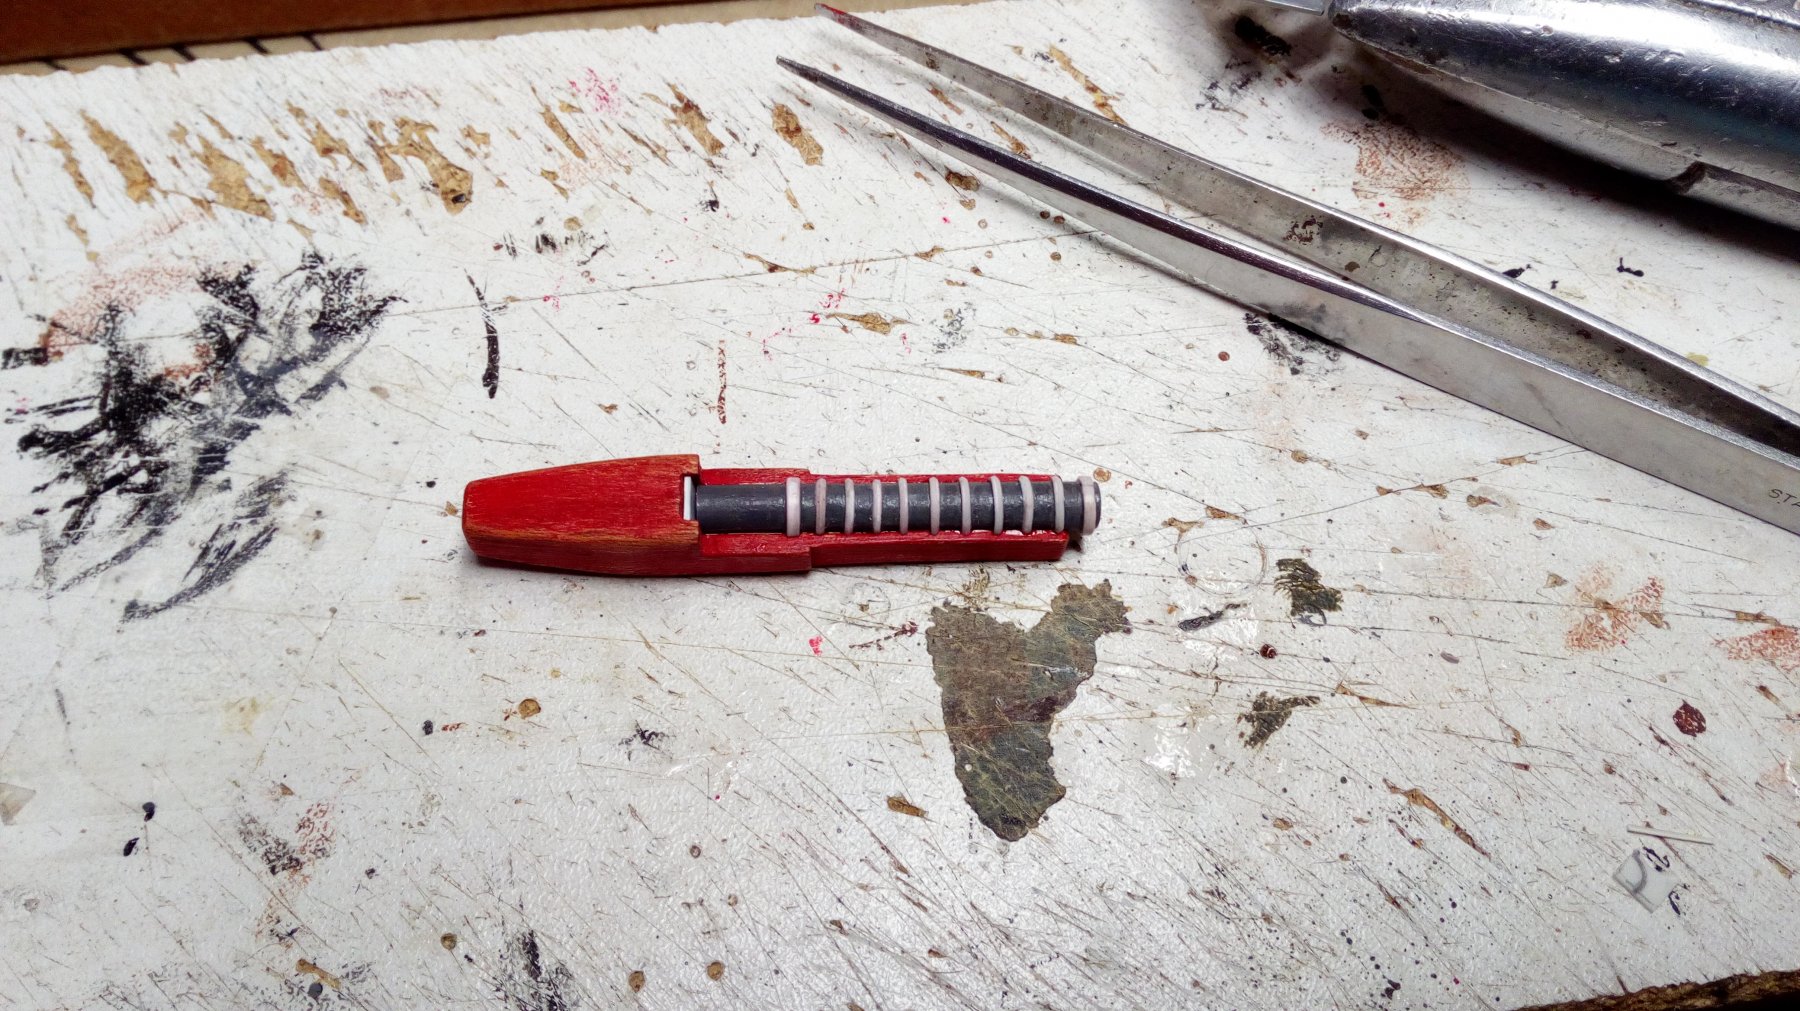
Started making 4 "wrouth iron" cannons. This type of cannon was still in use during this period.
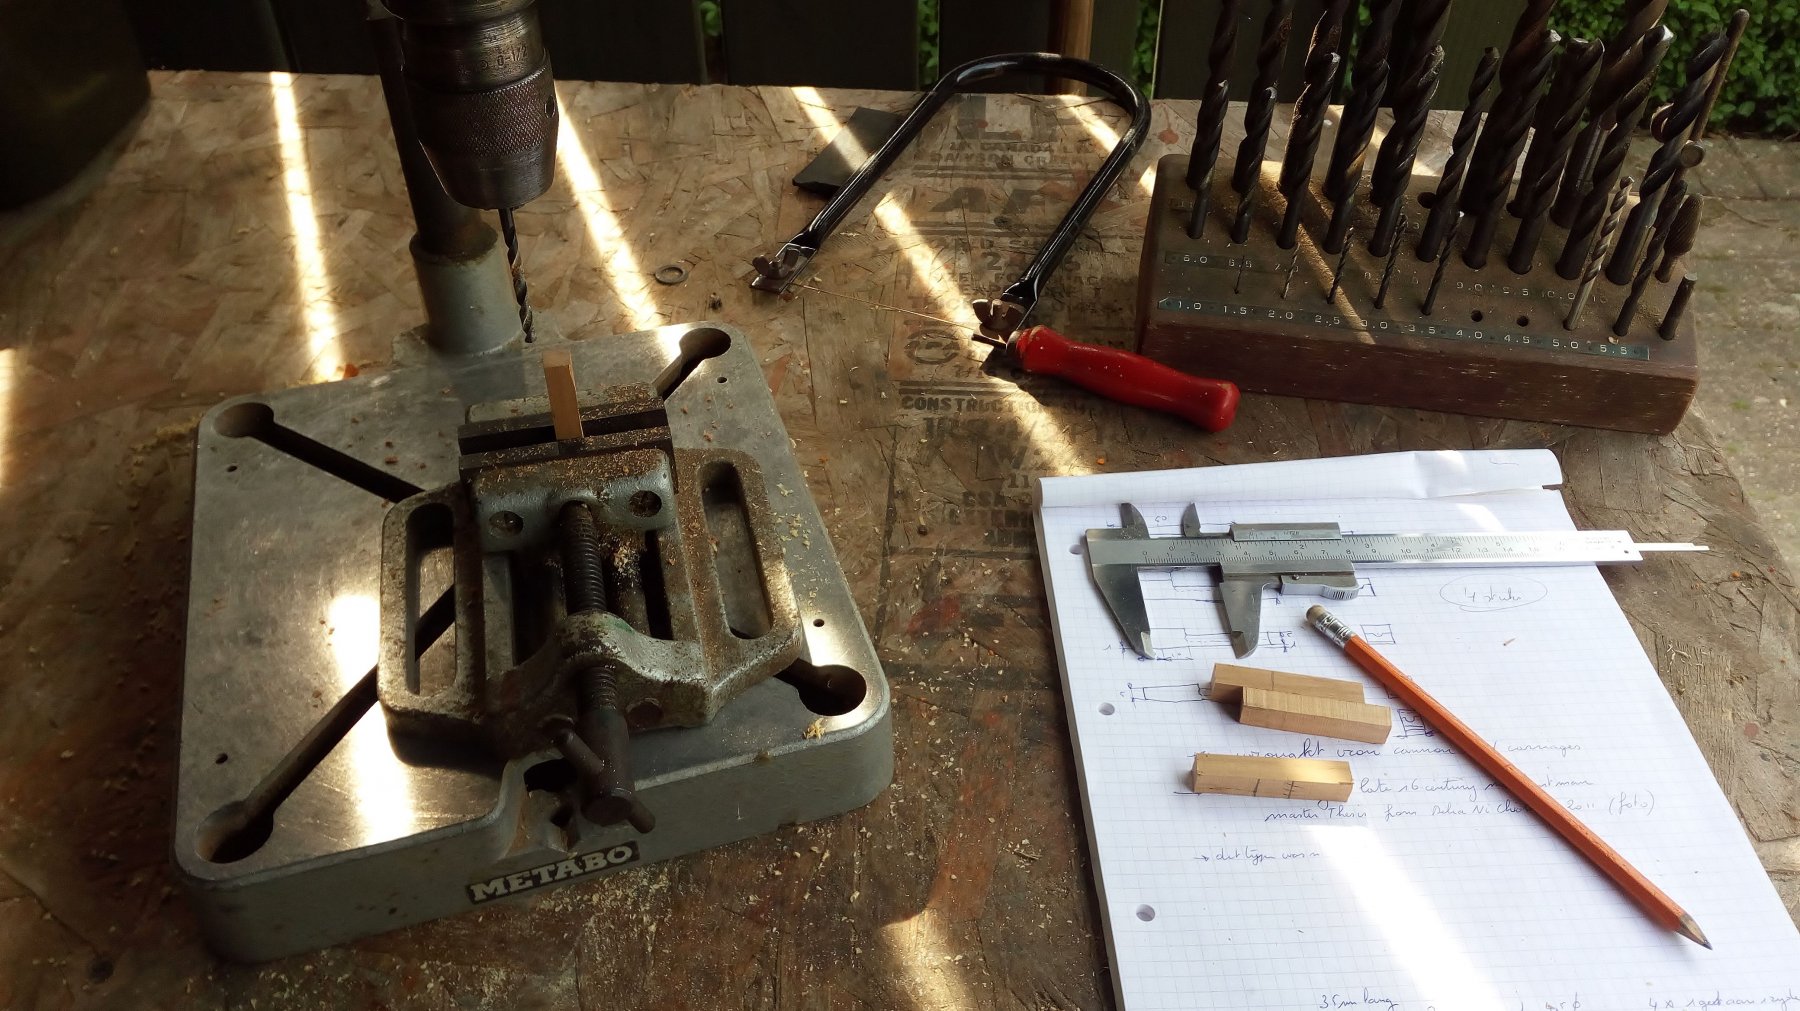
The base: 4 blocks of cherry wood. A hole is drilled and a piece is cut out.

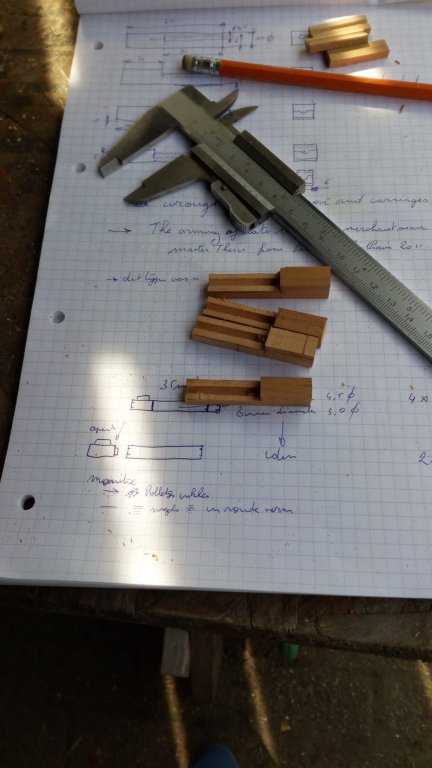
The block is cut to shape and sanded.

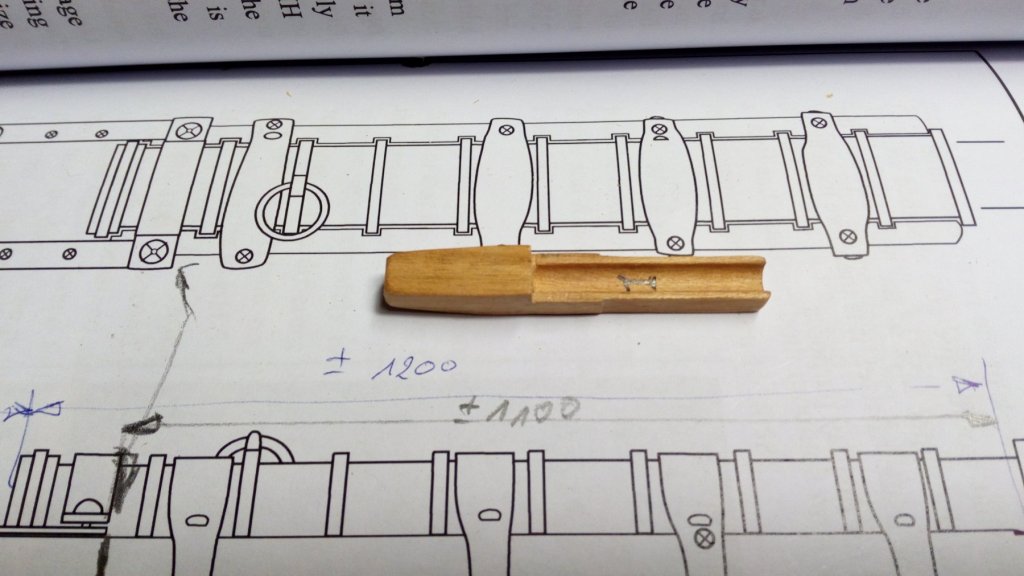
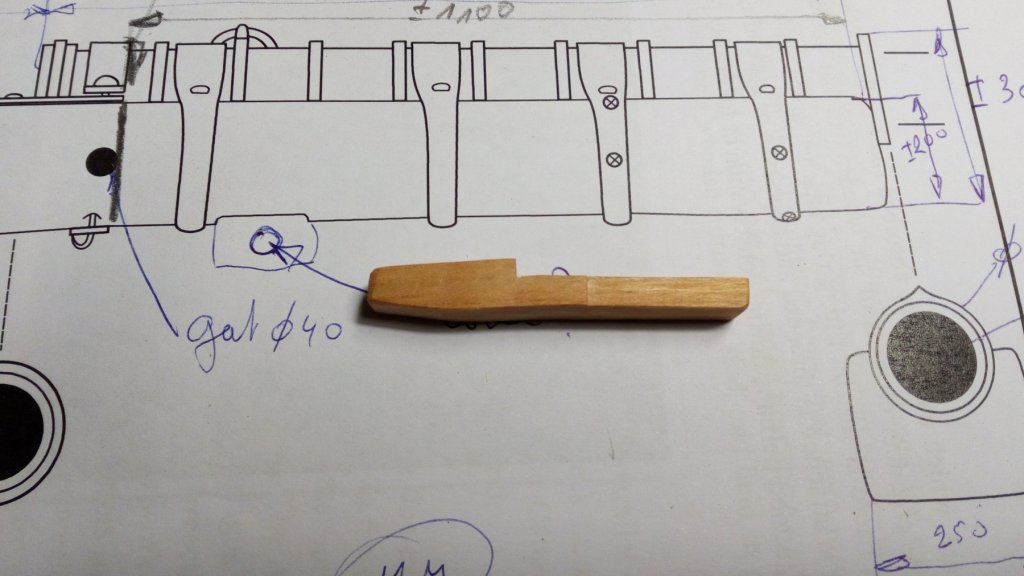
The cannon barrel. the first piece is a test, Made from a piece of plastic sprue and various pieces of plastic strip. Bolts are made from stretched sprue.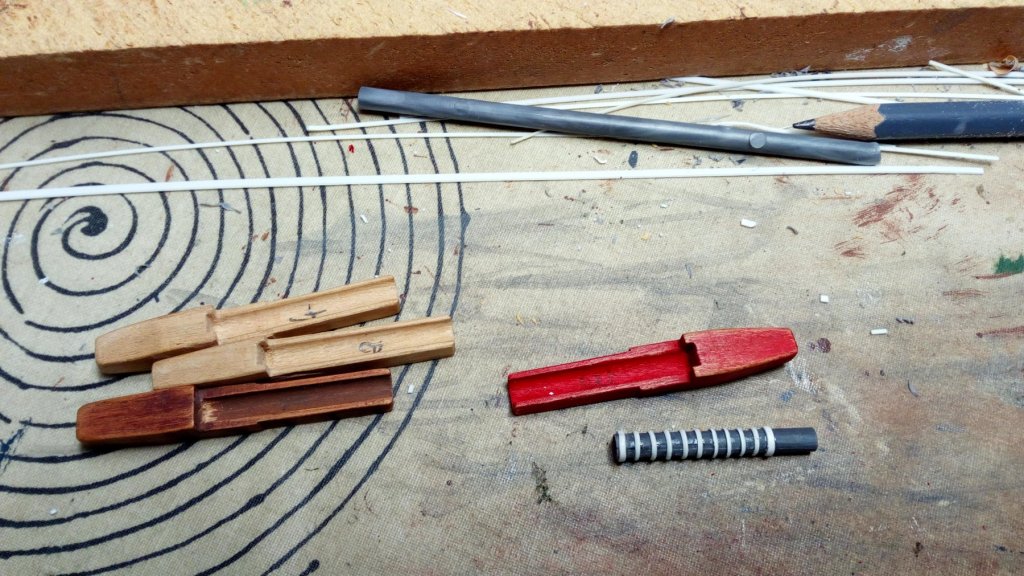

No stress
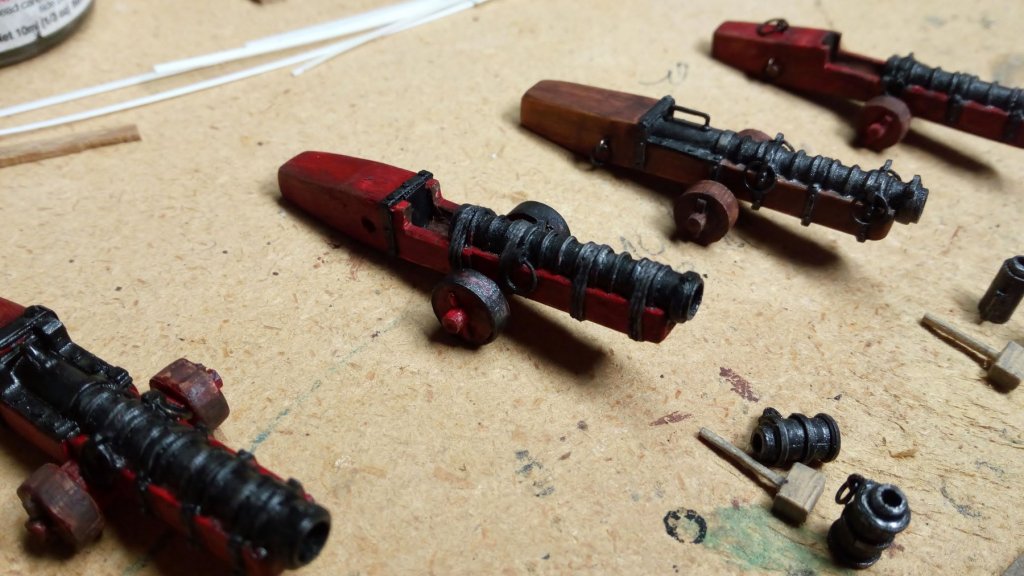
Ready to paint.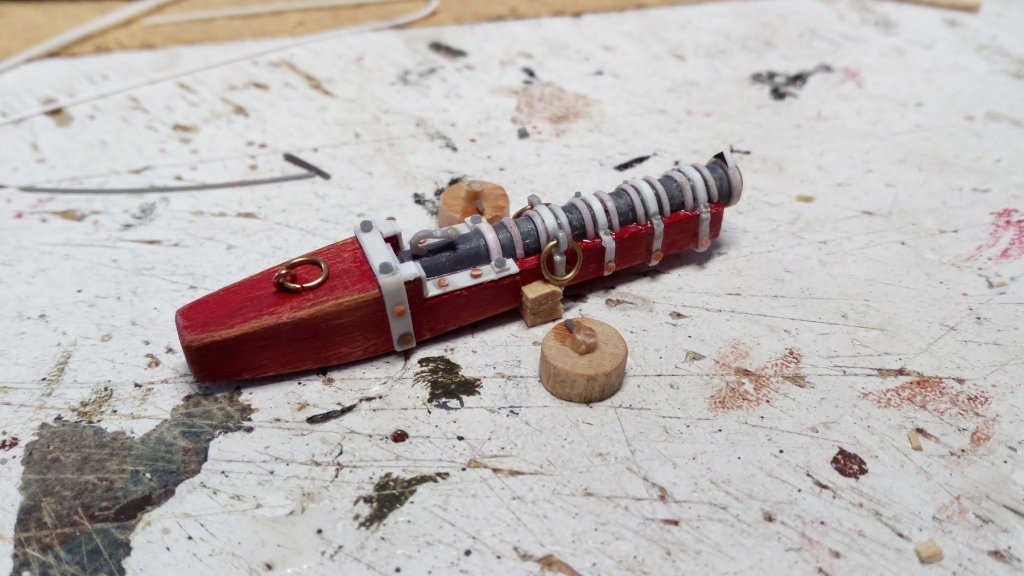
Painted and weathered and ready.


1 done 3 more to go. Thanks for following- Barbossa, G.L., GrandpaPhil and 14 others
-
17
-
-
I agree with Keith.
- Keith Black, mtaylor and macmac
-
3
-
Battle tactics from the time of the galleons
- mtaylor, Canute and CaptainSteve
-
3
-
Nicely painted, great work!!
-
Great work Steven. This is going to be a beautiful windlass.
- mtaylor, EJ_L and Louie da fly
-
3
-
Mooi gedaan.
Nicely done.
-
-

Greetings, patrick
-
The wreck is said to have been well preserved. And is approximately 25 meters long and 7 meters wide
Some pictures of the cargo. Text is in Dutch.
https://www.rtvnoord.nl/nieuws/206844/Spectaculaire-ontdekking-bij-berging-containers-MSC-Zoe
-
Thanks Michael,
The maps are really easy to do.
1 Download the images and save to a folder
2 Select what you want to print
3 Choose format
4 print
I use the printer at work (don't tell my boss)

Go pro single frame ?? No no, a cheap Huawei smart phone

-
Hello,
After the historical info about Verrebroek. And what can be found in "my backyard" when you start digging
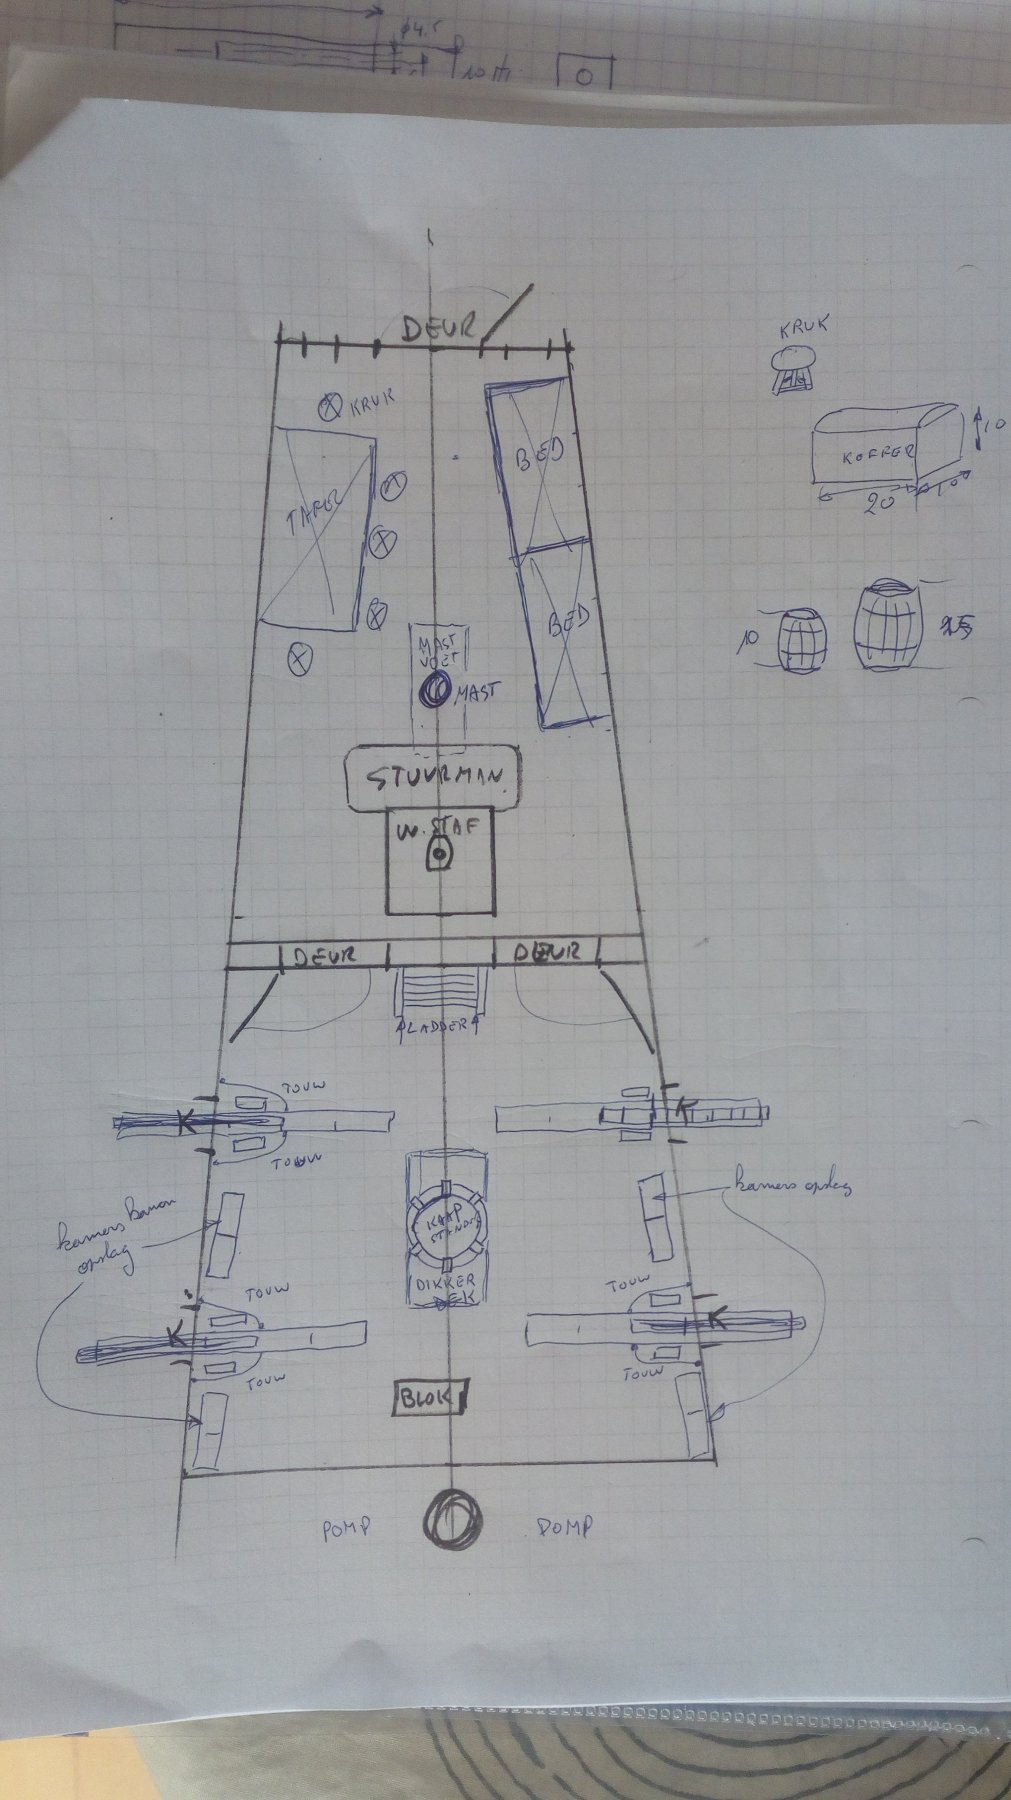
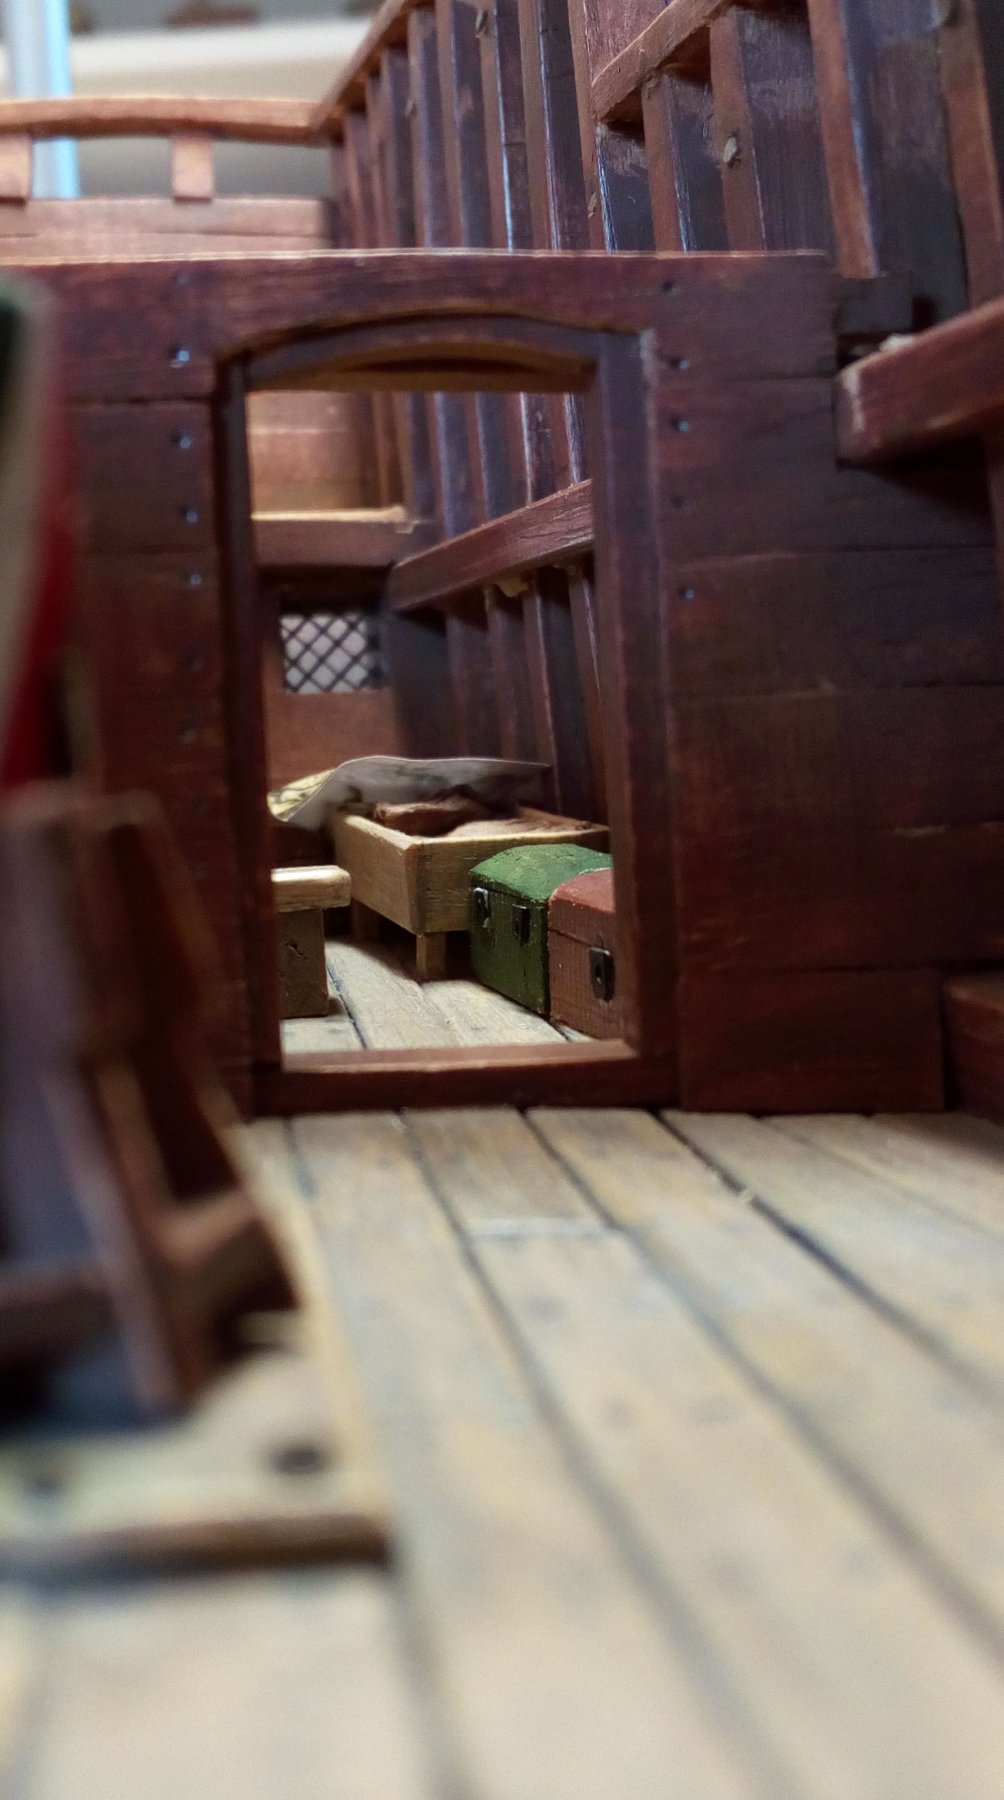
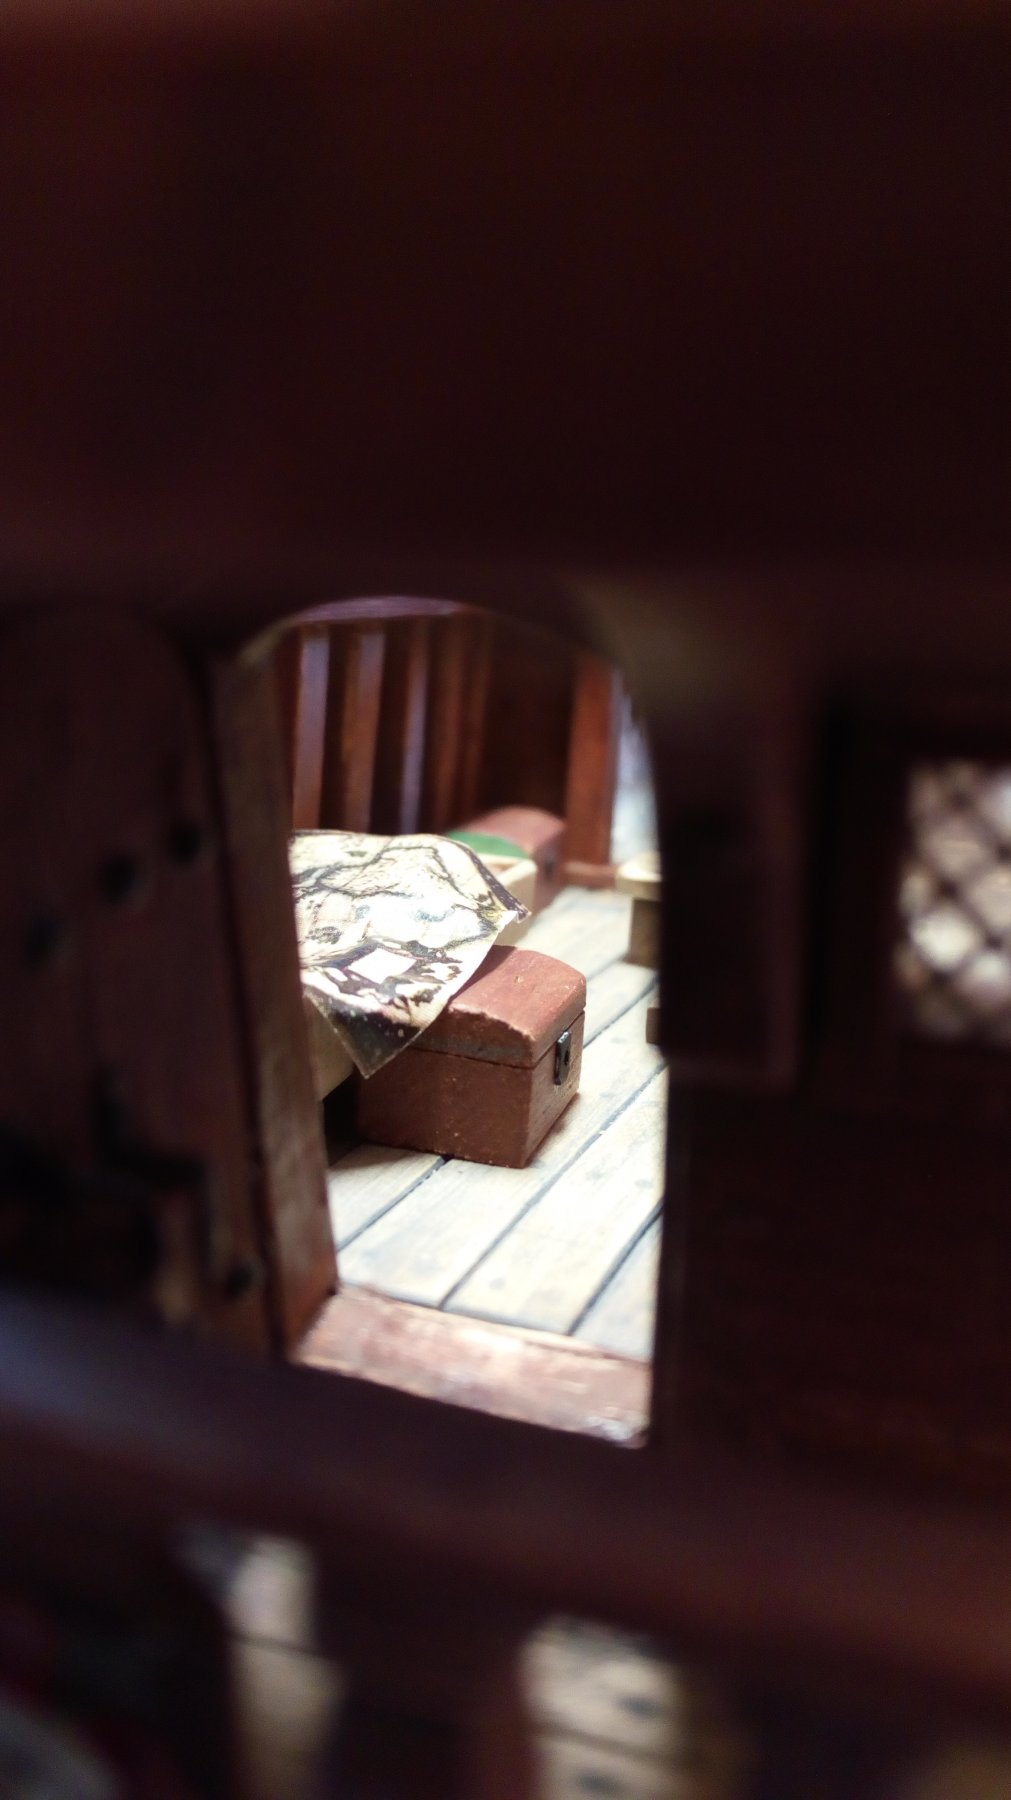
A small update about the model.
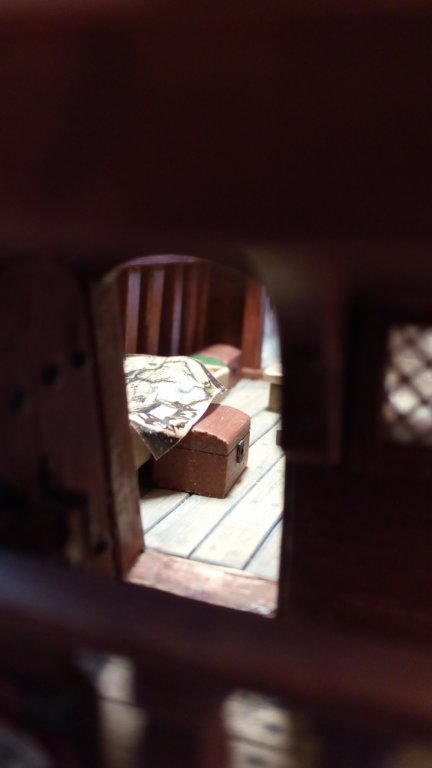
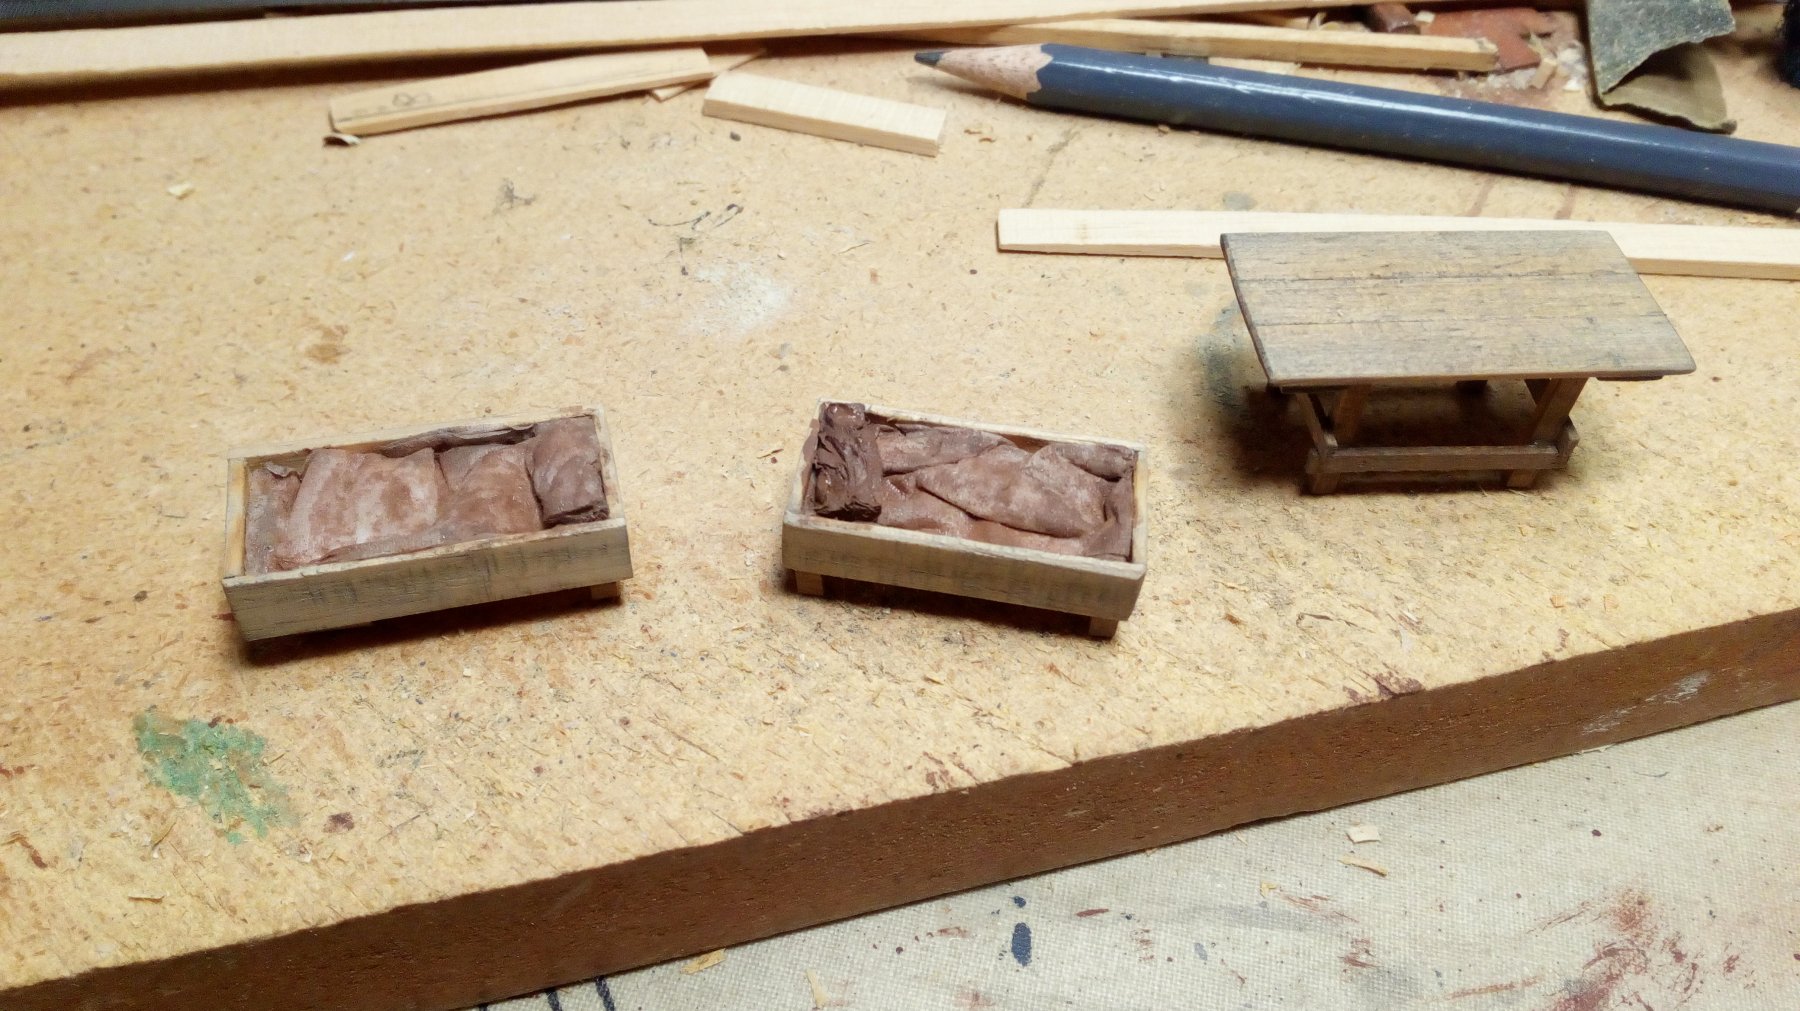
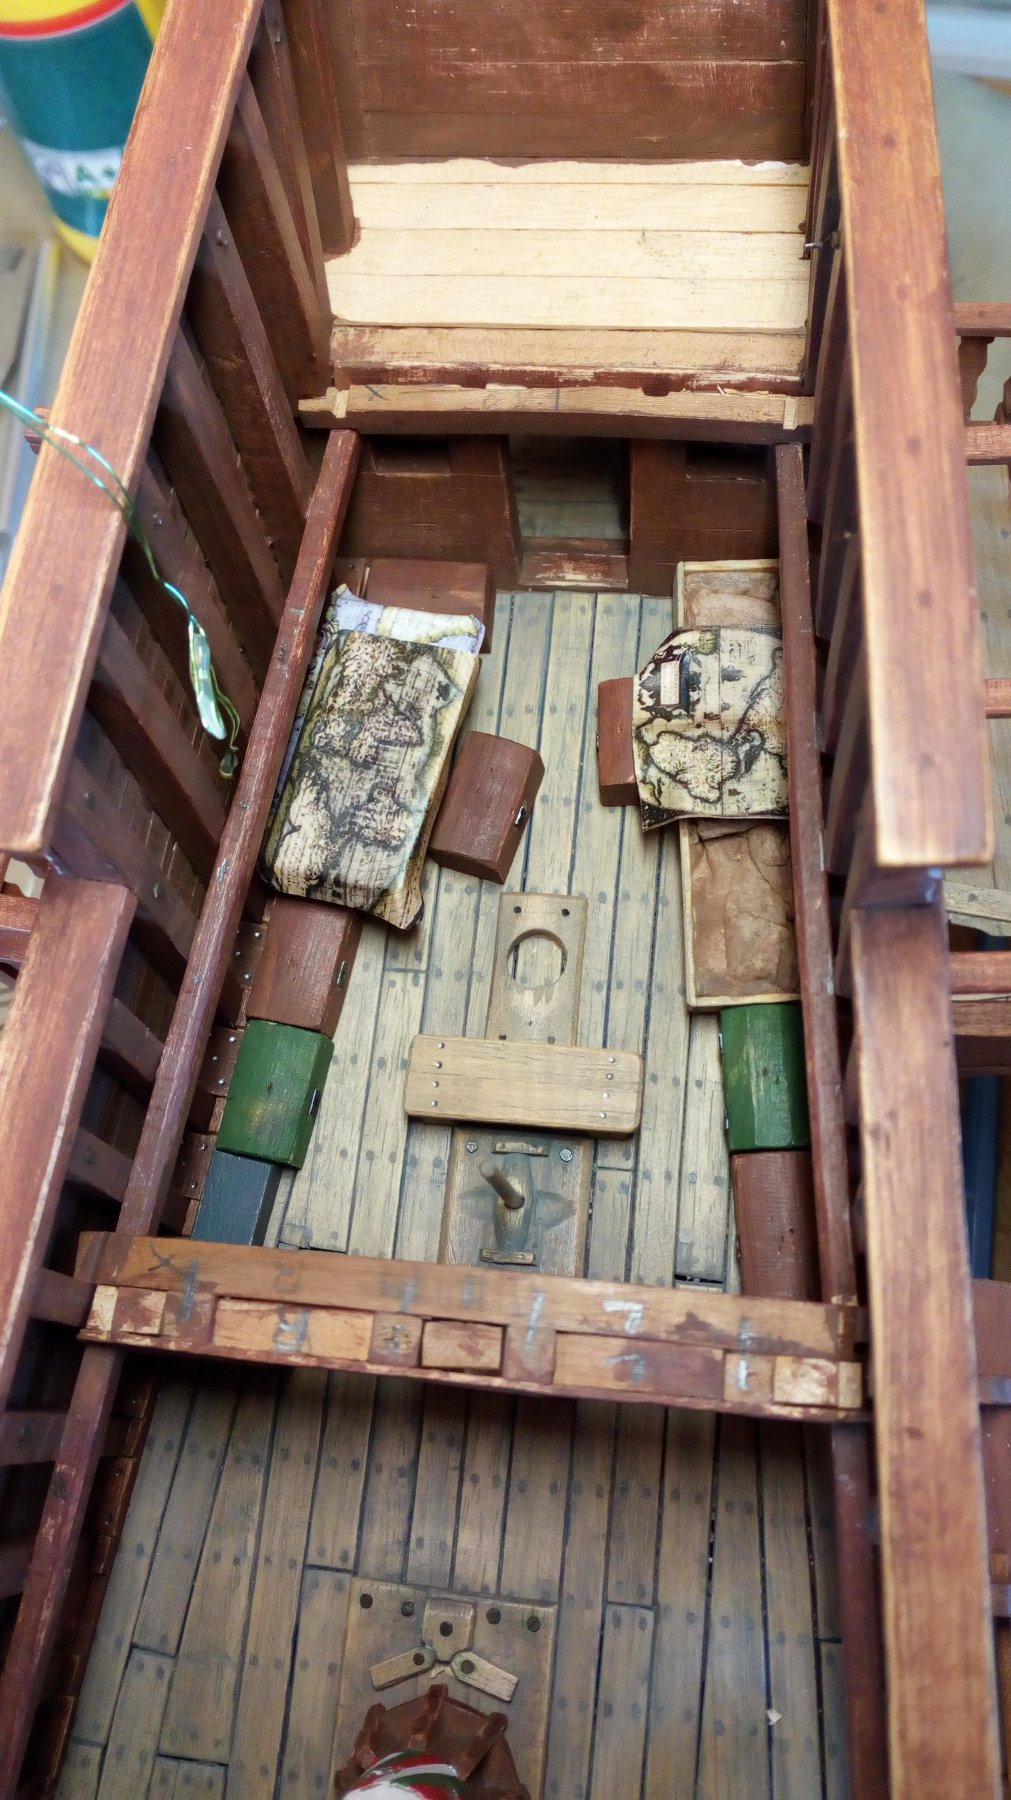
Because the doors of the main cabin are open. Some furniture and other items must be provided.
Drawing a small sketch in advance is always handy.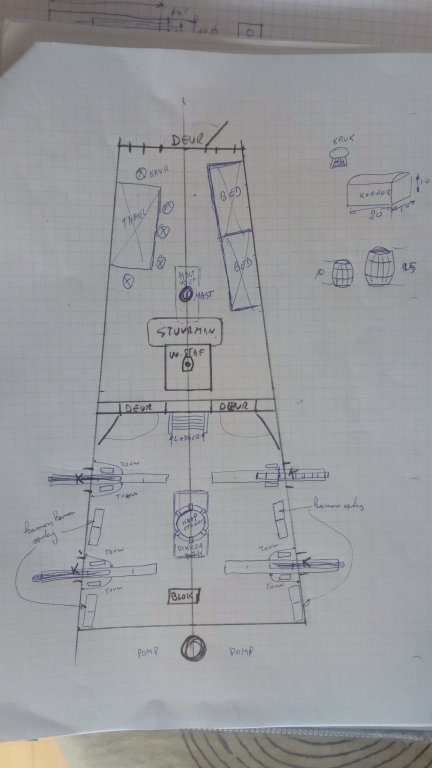
A table and a few beds. Made from scrap wood and paper tissue.

Suitcases of the people who are allowed to "live" and work in this cabin. And some old maps downloaded with google and printed.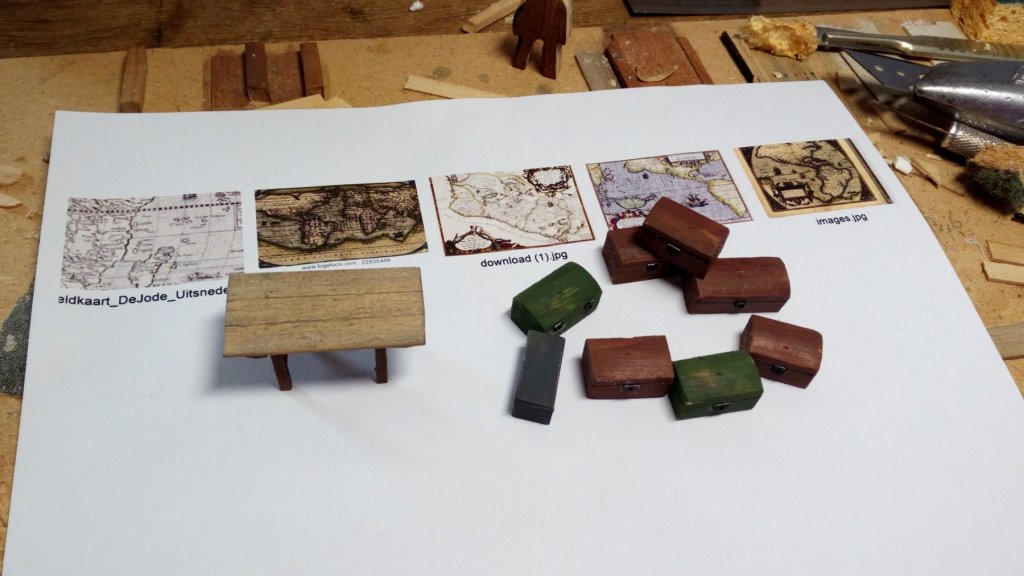


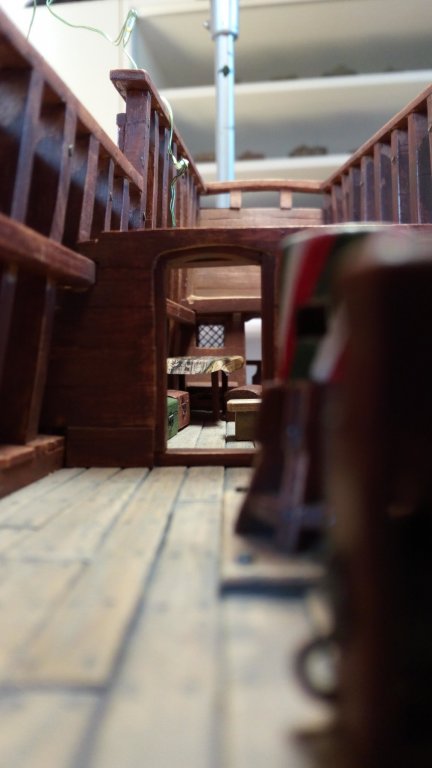
If the visibility in the cabin remains good with the ledlights , additional items will be provided.
Thanks for following


Golden Hind (ex-Pelican) by Baker - FINISHED - scale 1/45 - Galleon late 16th century
in - Build logs for subjects built 1501 - 1750
Posted
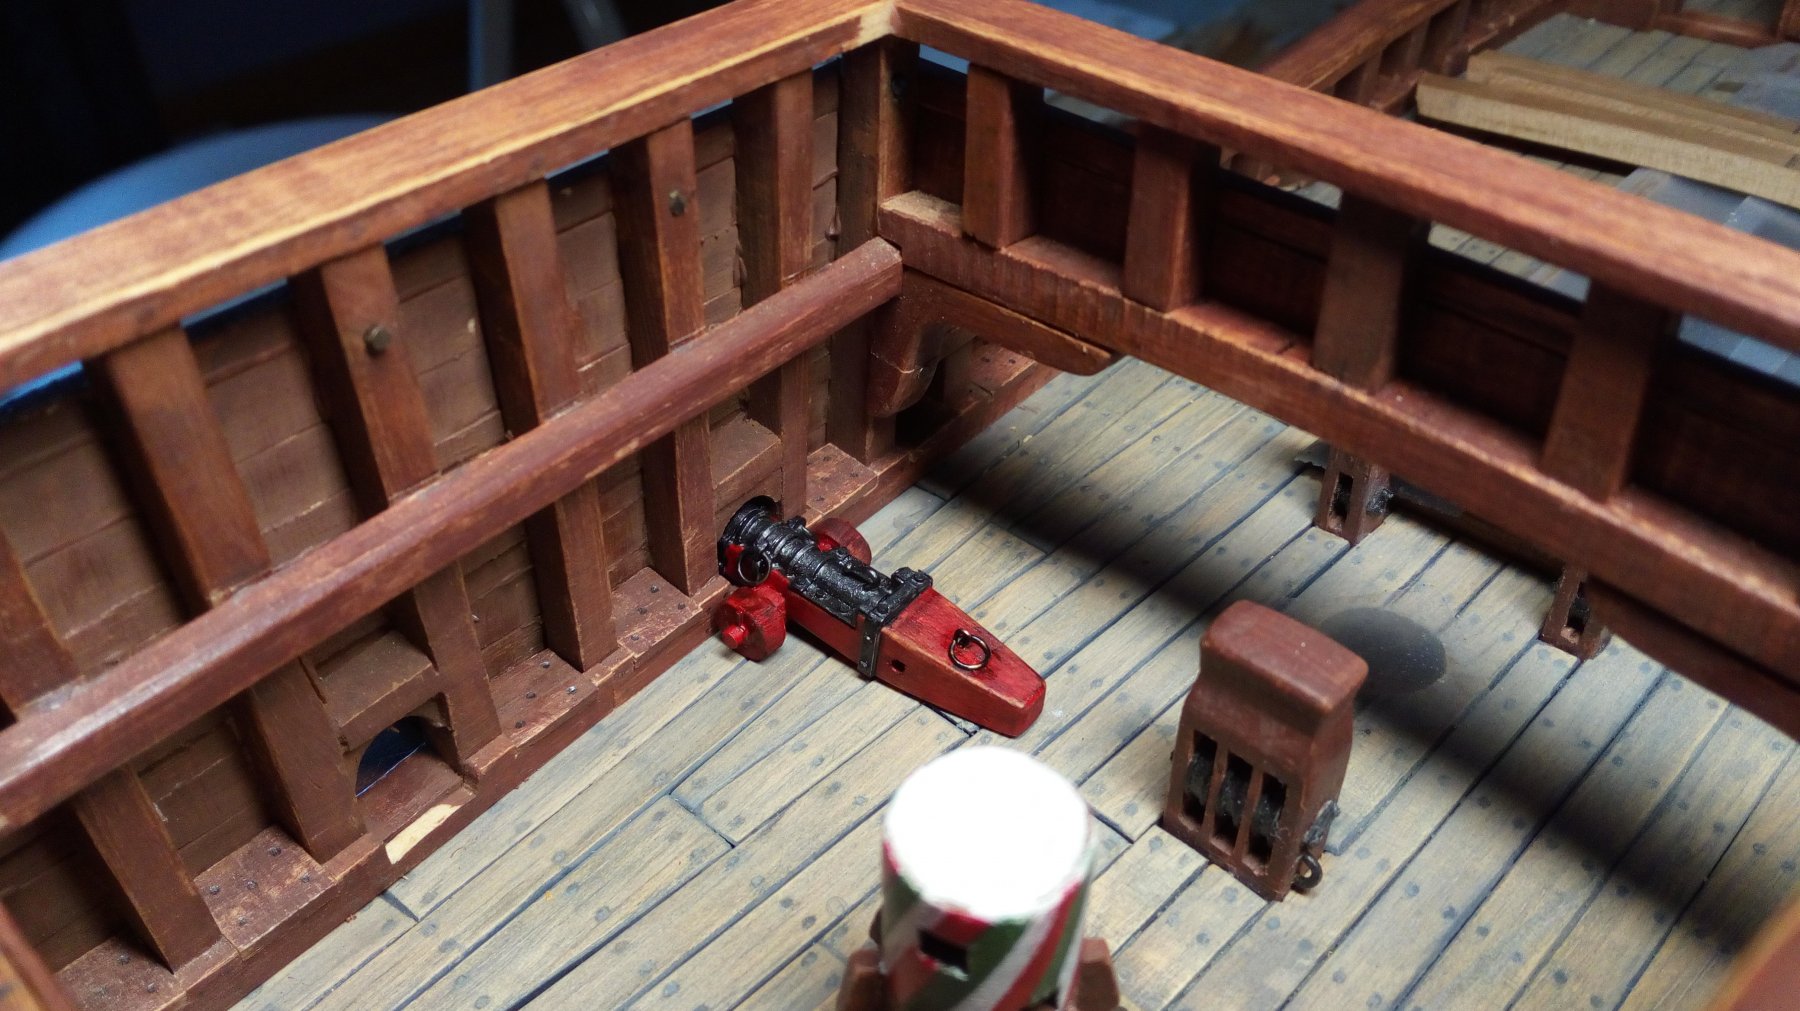
Small update
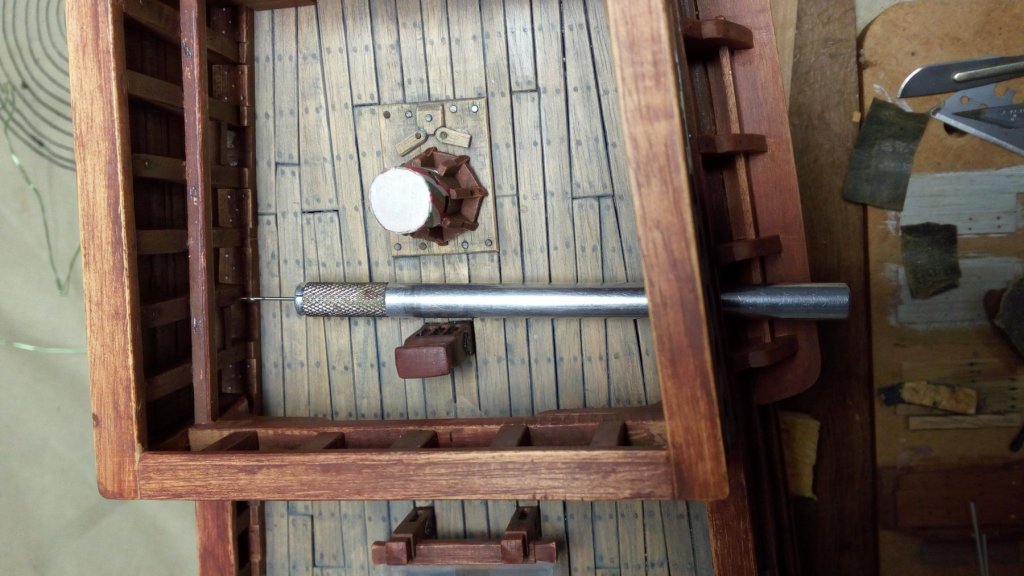
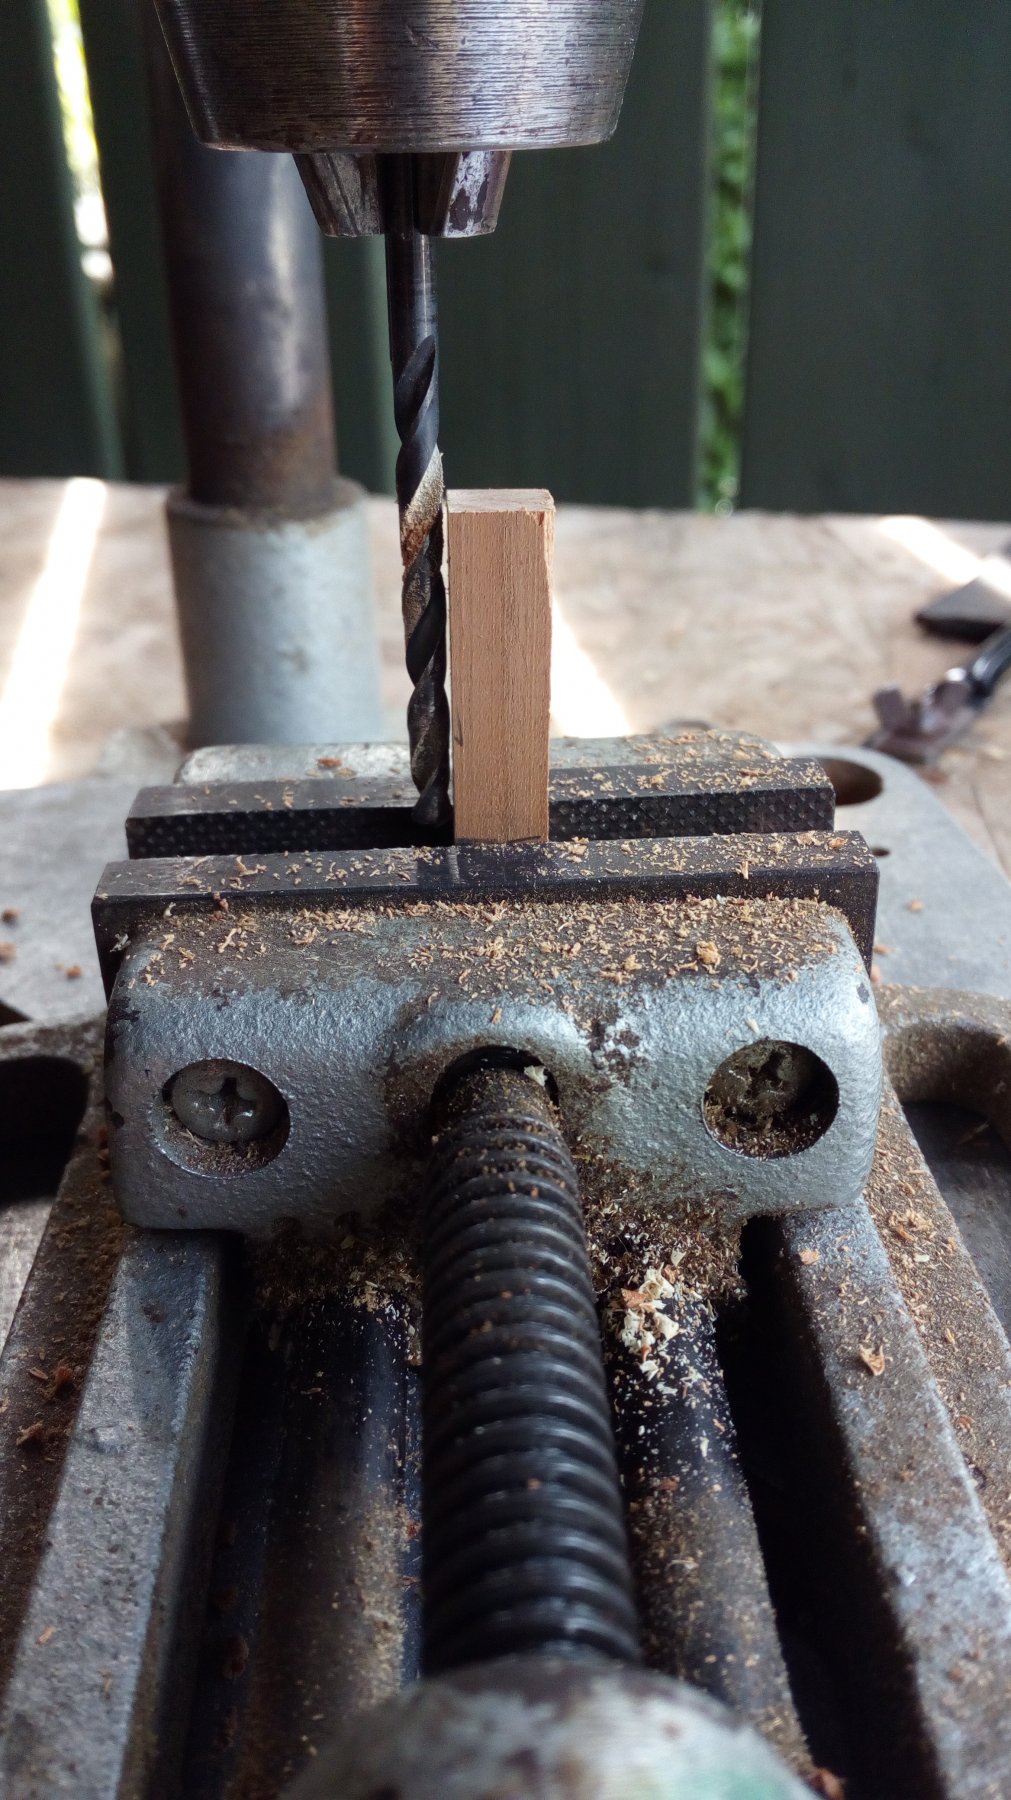
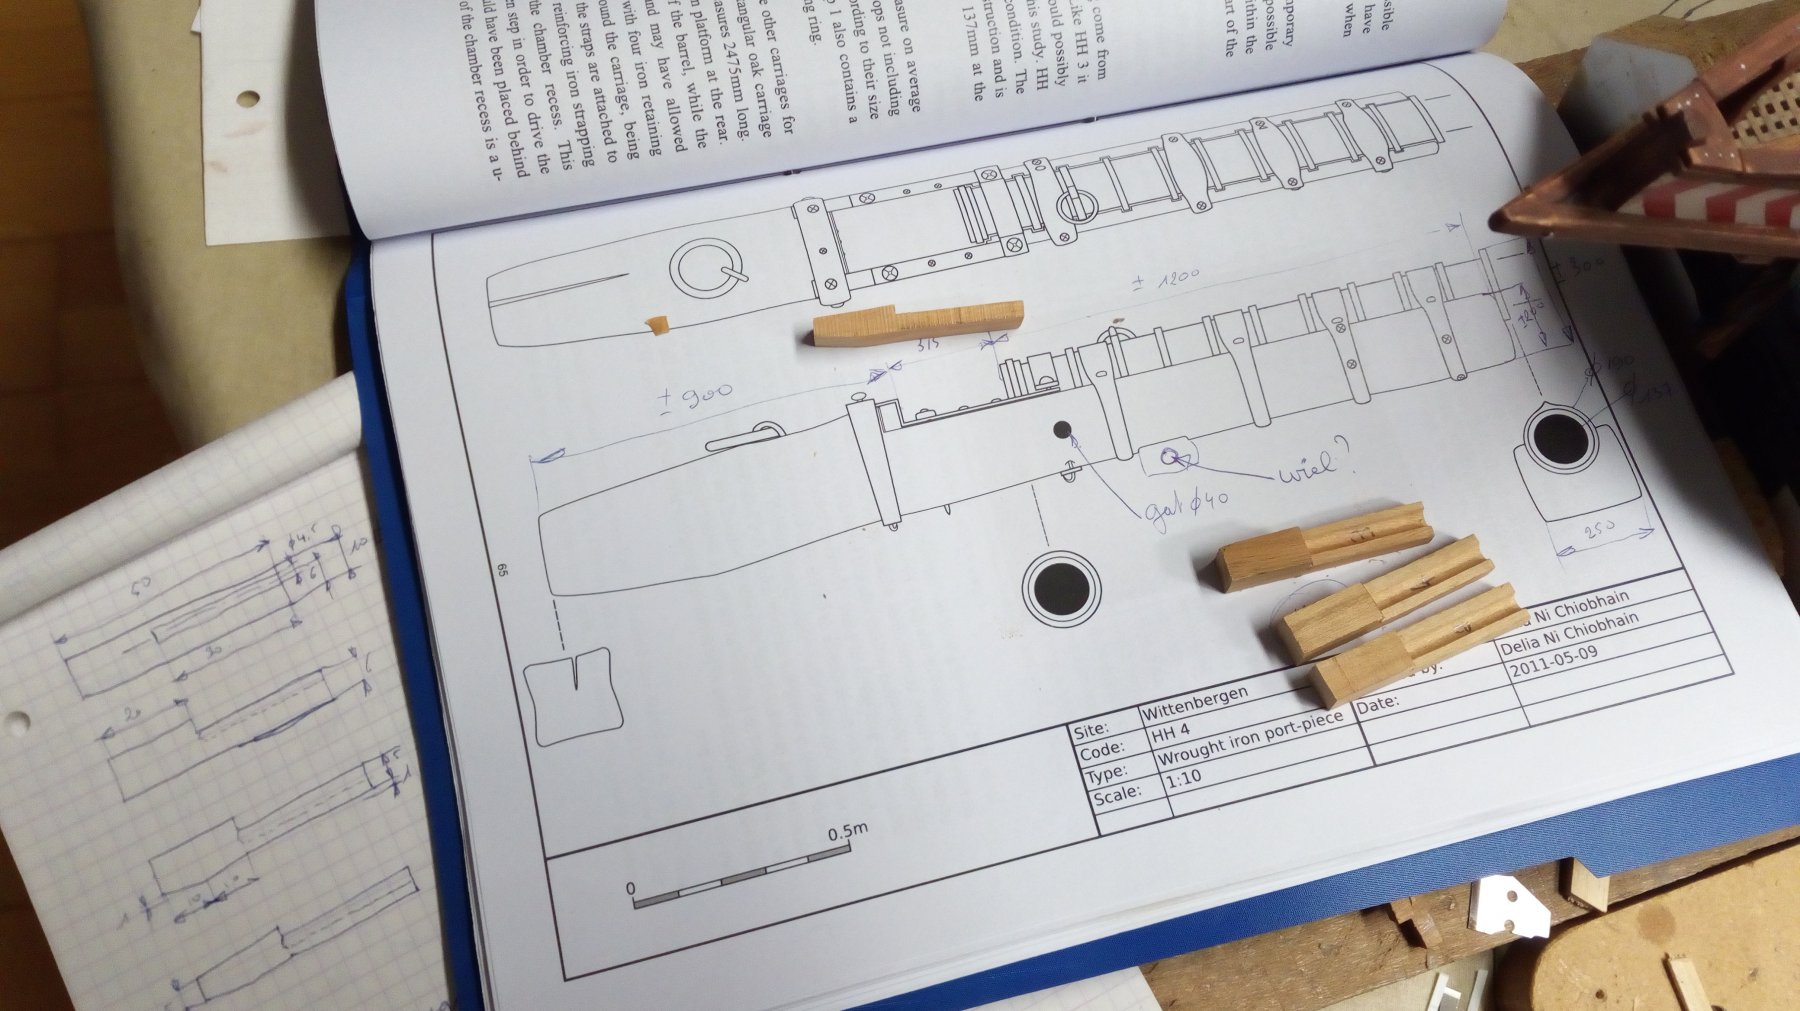
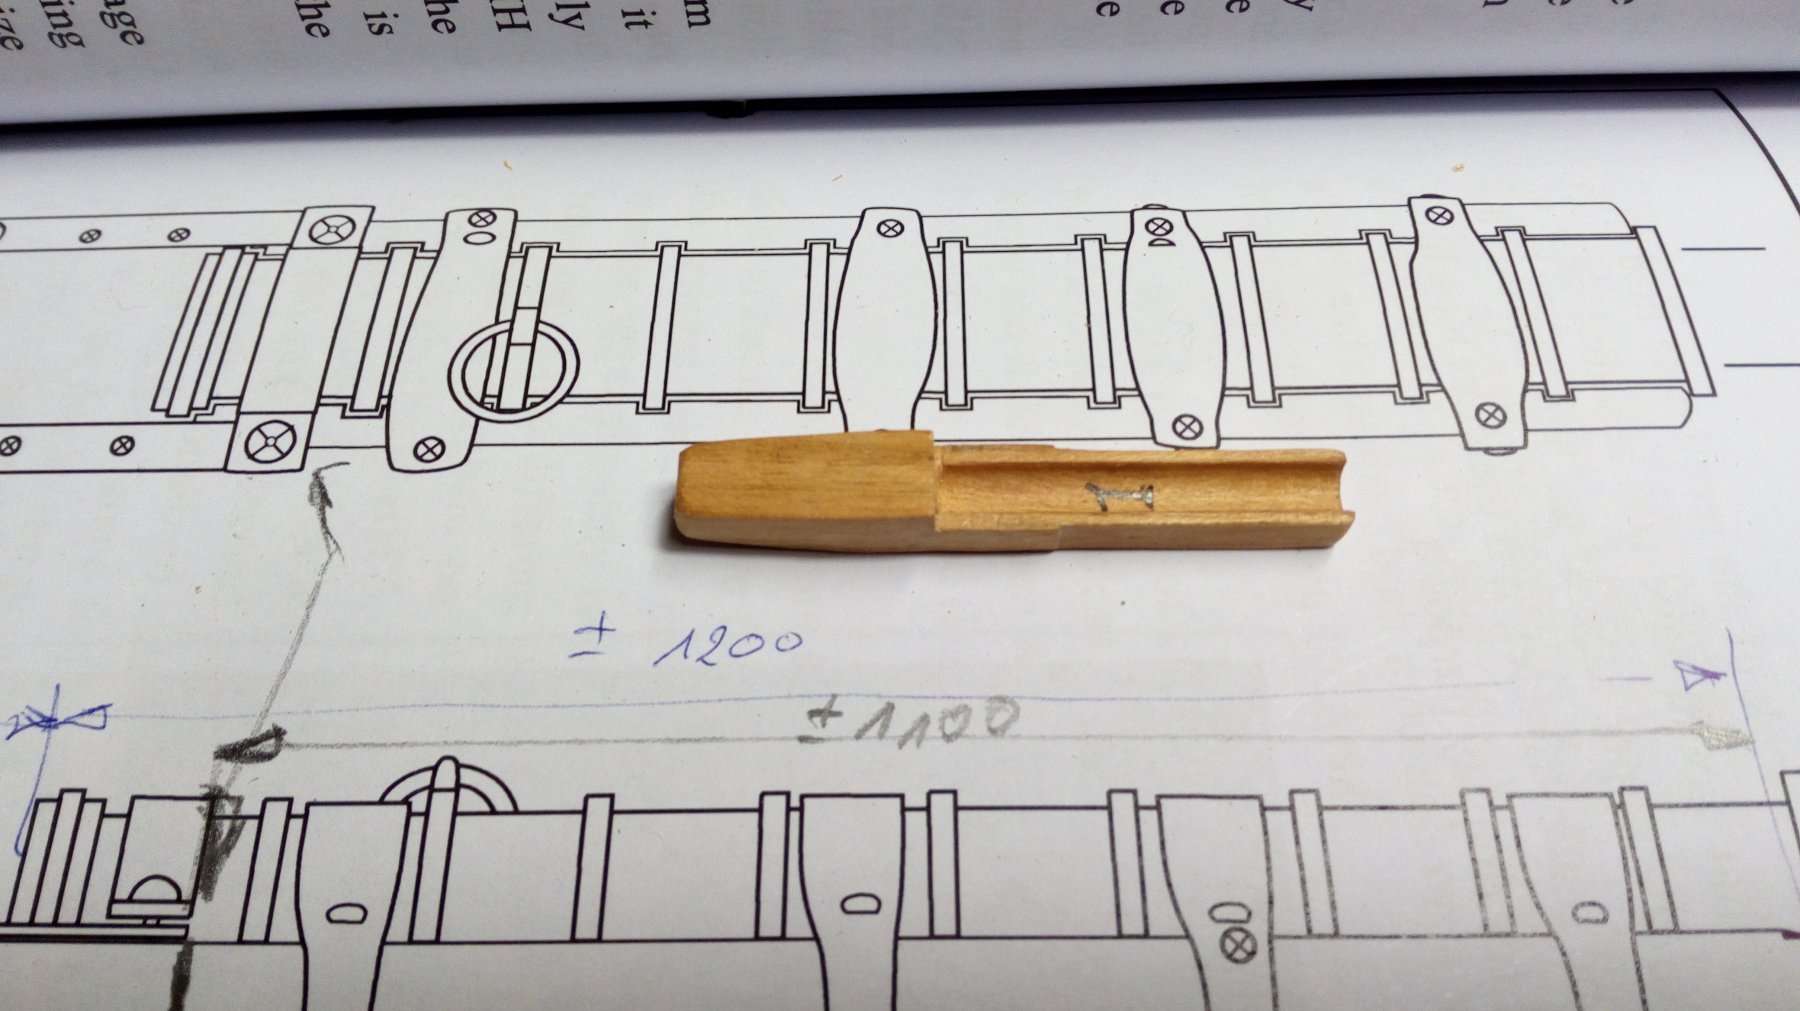
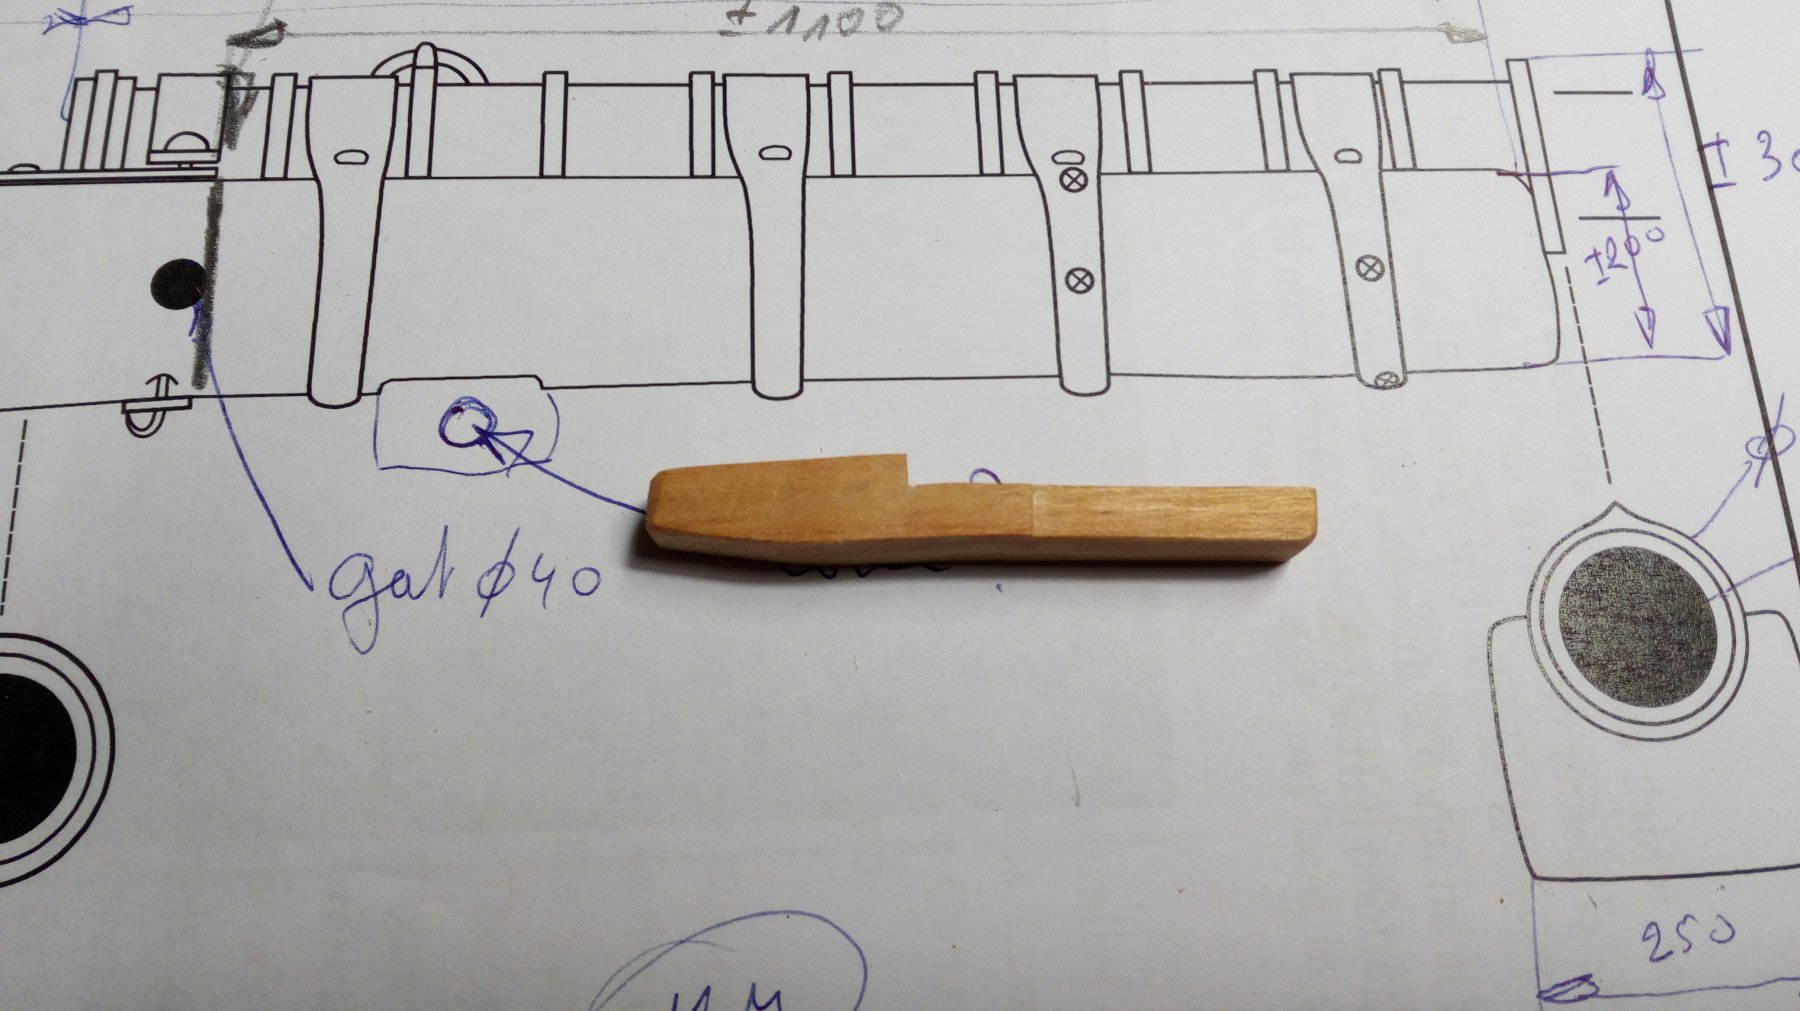
Found a solution to camouflage a few errors and a suitable place to stow the bars of the capstan.
made 3 bars and 3 dummies
glued them together
and in place
finished and 1 error invisible and 1 error almost invisible
Thanks for following