


gsdpic
-
Posts
543 -
Joined
-
Last visited
Content Type
Profiles
Forums
Gallery
Events
Posts posted by gsdpic
-
-
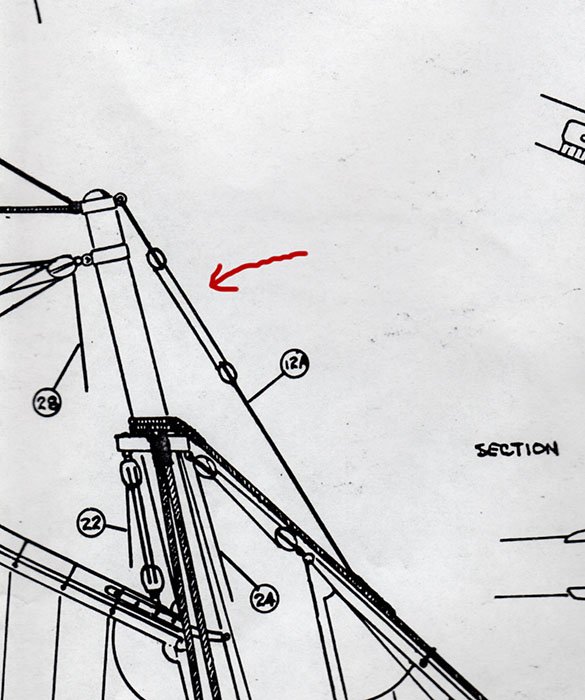
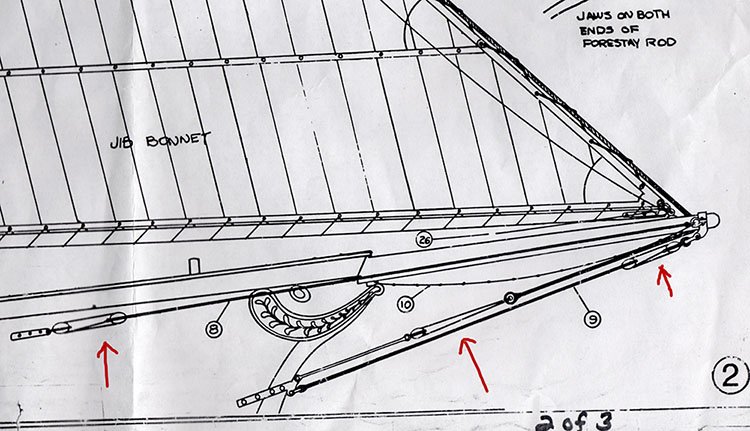
I am working on Bluejacket's America 1/48th scale. I am getting close to rigging and have started studying the rigging plans, such as they are. I am not a sailor by any stretch of the imagination, and am a bit unsure of a couple things I see. Most of the running rigging I can figure out...I can see how pulling a line here moves that thing up there. But there are a couple places where there are a couple blocks that appear to just be there to tension standing rigging and it is not at all clear how/where the line terminates. For example, see the two pictures below. One is the top of the fore mast the other is obviously the bowsprit. In these cases you can see the line through the blocks (or bullseye in one case) but the line just appears to be a loop, it does not terminate anywhere. At least in a couple cases it is obvious the line starts off tied to the first block, but then where does the other end go? Maybe it is tied off to the other block, or to the line the block is attached to (similar to the lanyards for the shrouds)? Looking at the build logs for the Mamoli America kit, it looks like they have those lines by the bowsprit go back through a hole in the bulwark to a cleat on deck, but that looks rather clumsy.
Any help or suggestions would be greatly appreciated. I am not really concerned about hyper realism, mostly just curious about this.
Thanks for taking the time to read and reply.
-
More Fiddly Bits
I've continued to make progress, adding more fiddly bits....cleats, etc...to the various booms/gaffs/masts. In some cases I was able to use the supplied Britannia metal pieces. Some metal parts I fabricated from copper wire, copper tape, and some copper sheet that I had, then chemically blackened. For the cleats and other wood parts I used scrap cherry wood. I have not put any finish on any of this stuff and have not decided between leaving the wood bits natural or painting them white like the parts they are attached to. At this point I am nearly done. I still need to do the jaws for the two gaffs and the crosstree for the main mast, but I think that is about it.
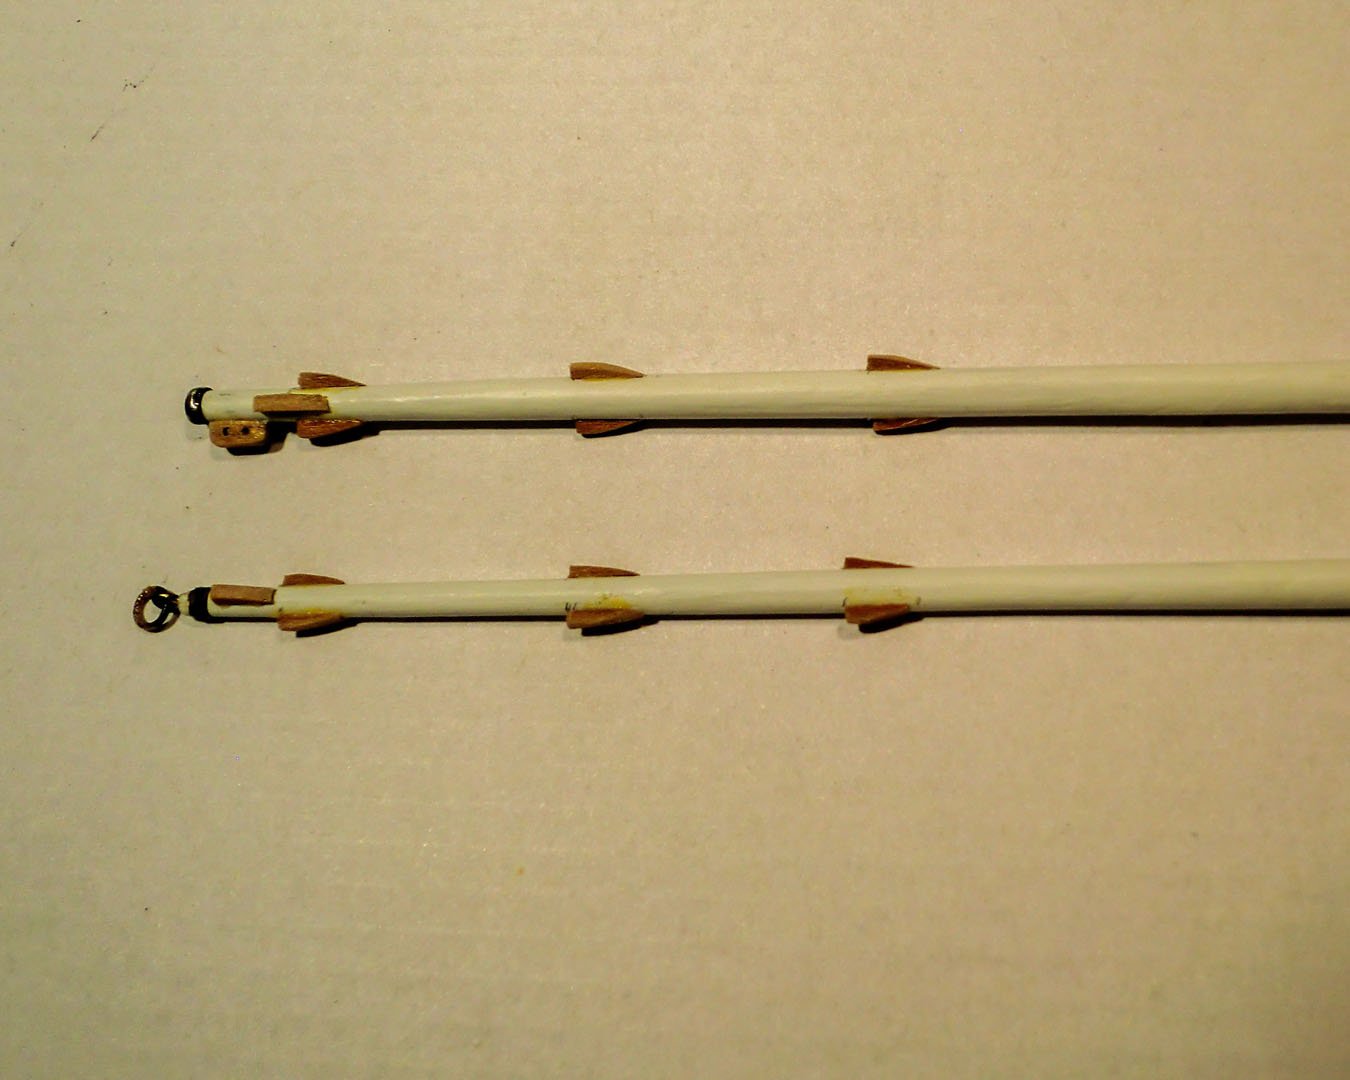
Aft end of the jib boom...sorry about the blurriness. These bits were fabricated from copper as noted. There were britannia metal parts supplied but my jib boom was a bit too thick for them.
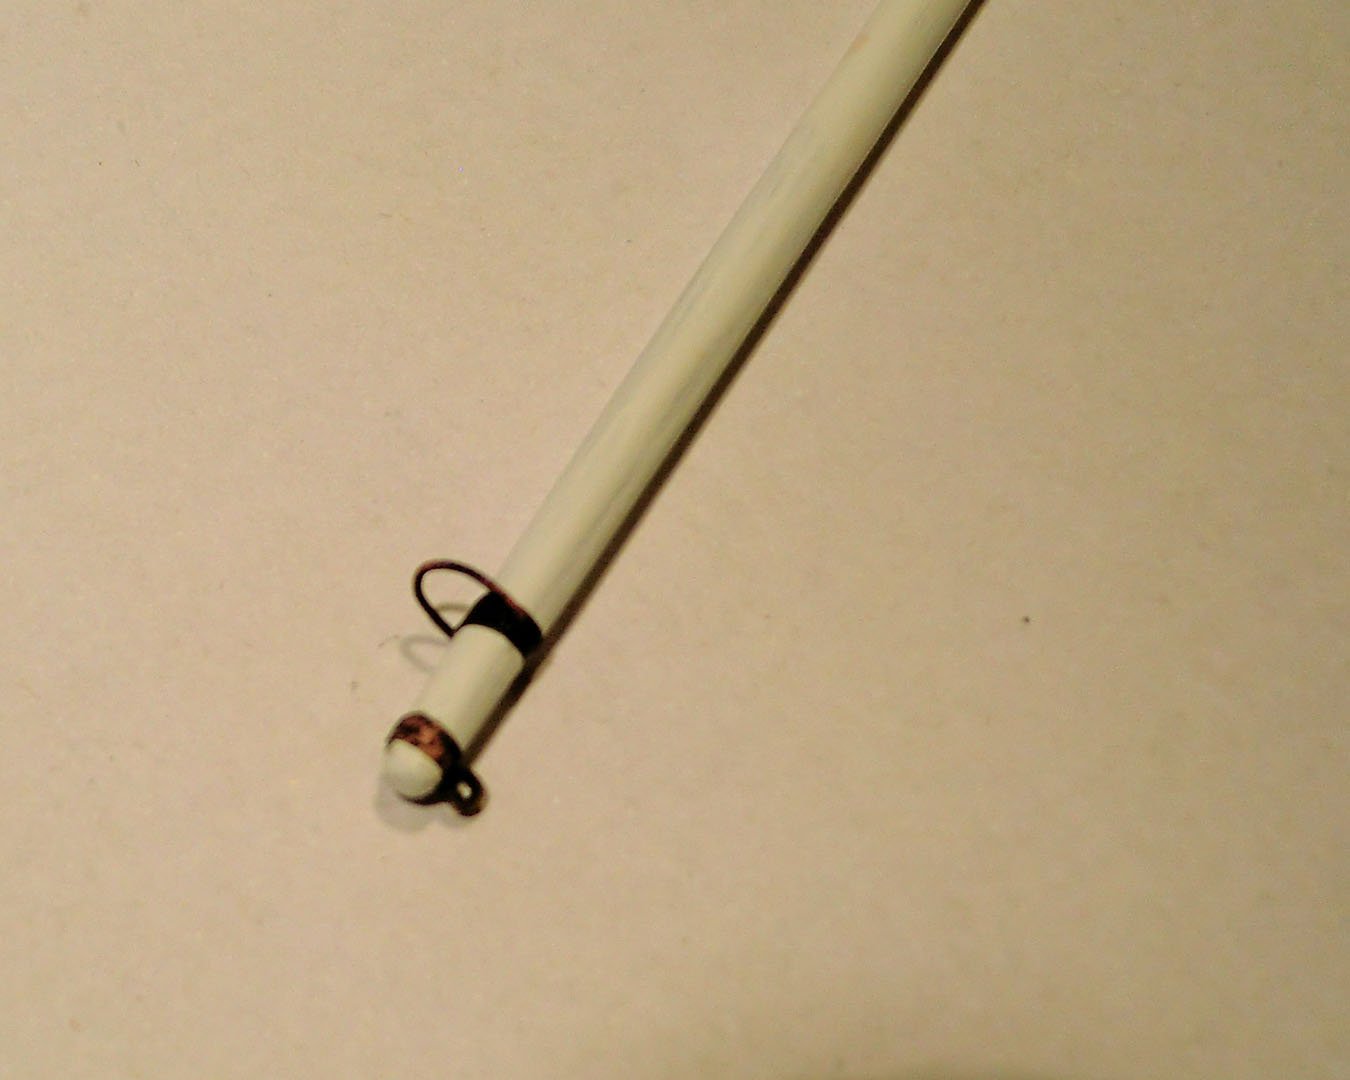
End of the bowsprit....gooseneck for the jib boom and the end piece, mostly from supplied brittania metal parts. It is not really shown, but there is a sheave embedded in the end of the bowsprit. That nail head you can see is the axle for the sheave.

The two gaffs.
Finally, the aft end of the main boom, with a bunch of blocks and cleats.

-
Been quite a while since you updated this log. Are you still working on the America?
-
Progress Update
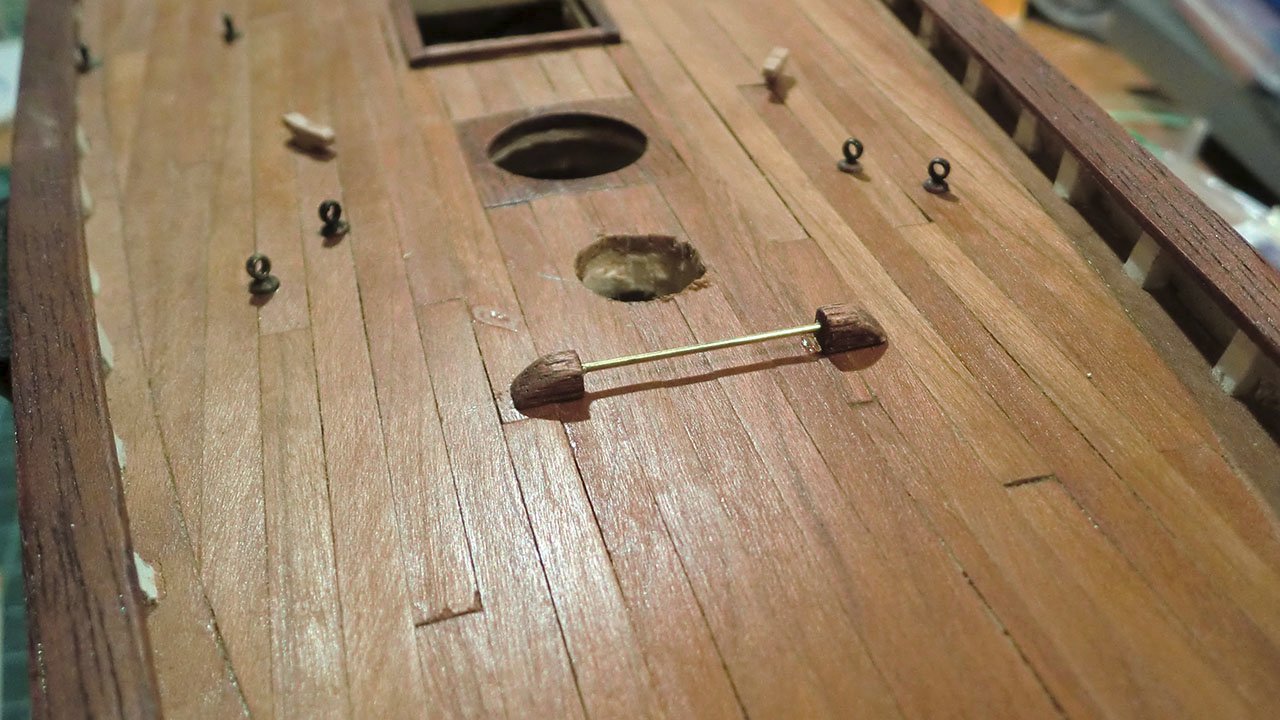
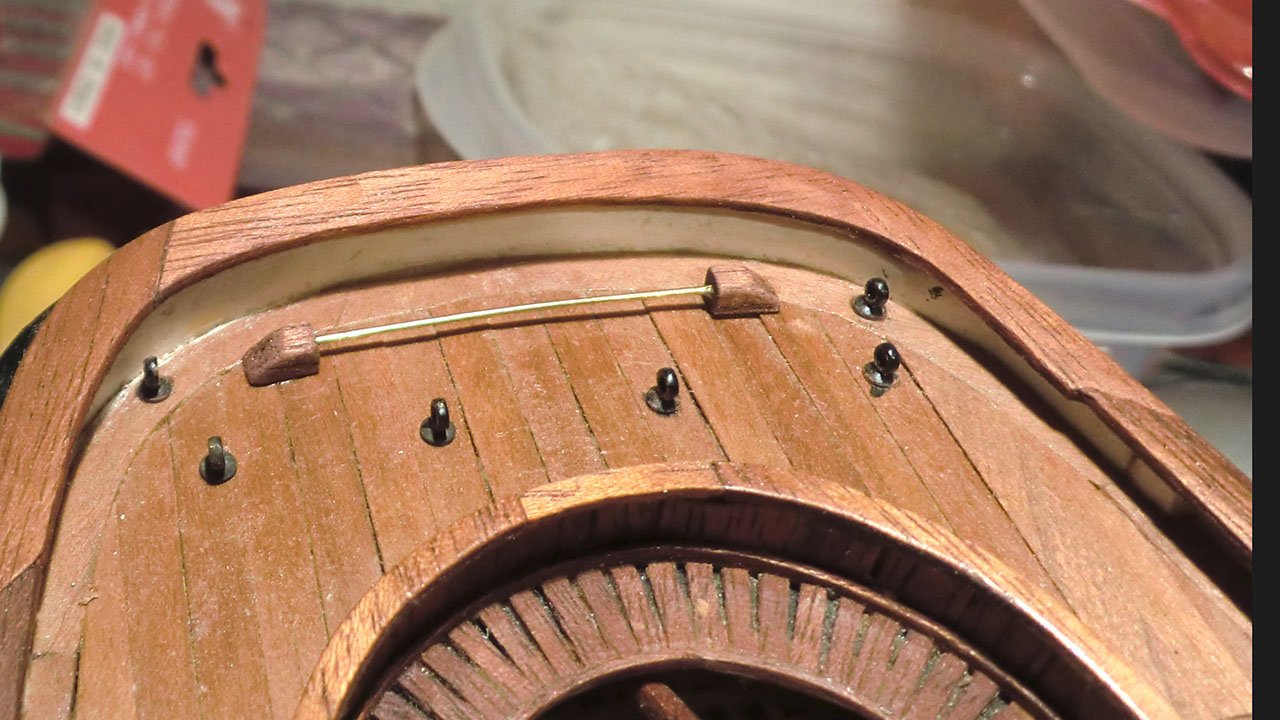
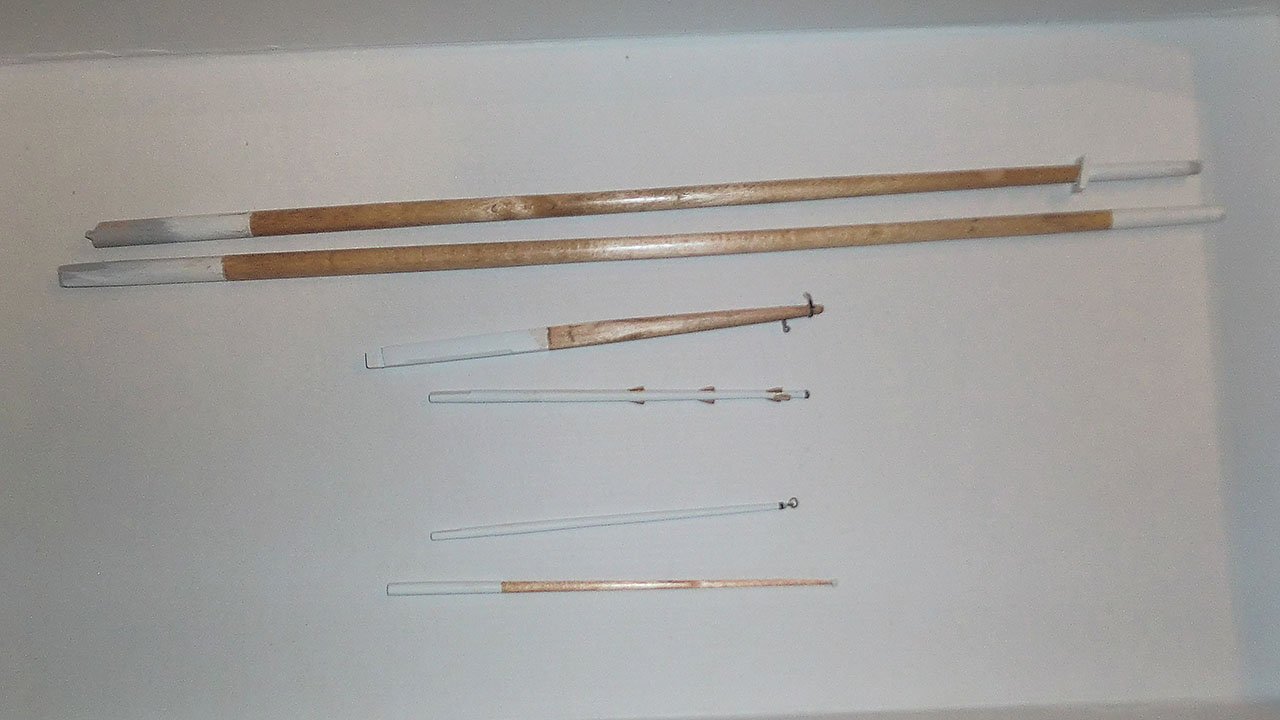
When I left off, I was working on trying to include a couple small boats on deck. I have not completely abandoned that effort, but I have put it aside for now. The following three pictures show what I have worked on.....
The first two are the two horses/travelers on the deck. With that I am mostly done with the deck fittings. I have not placed the galley stack yet, though am not sure if I will include it. I also have not done the anchors and anchor chains and anchor davit. I left out the "pump wells" as well...they were just little round pieces of Britannia metal that I did not think added anything.
The other picture shows the masts, bowsprit, booms, and gaffs. I have painted and stained them and have just started working on adding some of the details like cleats and sheaves, though I have not completed any of them. The main gaff is closest, lacking only jaws.
- Duanelaker, FriedClams, GuntherMT and 1 other
-
 4
4
-
On the Road Again
So, after a very, very long break I have actually started working on the America again over the last week or two. One thing that caused me to hesitate was the need to make a few decisions.
1. Rigging line: The Bluejacket kit supplies line, of course, and it looks pretty decent. The main negative is that the running rigging line is pure white. I really feel like it needs to be stained or dyed. I was unsure about doing that, or just ordering some replacement line from Syren. I have decided to use the line provided. I purchased some brown dye though I have not tried it out yet. The Bluejacket website describes the line that they sell as cotton and indicates that the white stains easily, so I assume the same stuff is used in their kits and the dye will work fine.
2. Blocks and Deadeyes: The Bluejacket kit supplies Britannia metal blocks and deadeyes. My initial reaction was to dislike them, though I can see some advantage, mostly in perhaps being a bit more detailed than one could accomplish with wood. As with the rigging, I debated replacing them with wood blocks from Syren, but have decided to go forward with the ones supplied in the kit. I will chemically blacken them, even though the plan sheet indicates using white for the blocks. I just think that would be too painful.
3. Sails: The Bluejacket kit does not provide material for sails. But I have decided that I will at least attempt sails. Just today, some sail material ordered from Bluejacket arrived, though I might also try making a sail from paper following some of the information elsewhere on MSW to see how that compares. If neither looks good I'll leave them off, but I hope to be able to include them. At least it only has 4 sails.
Feel free to provide any feedback on my decisions. In a little while I'll complete another post summarizing where I am and what I have done during the last few days.
-
-
Wonderful build. Actually, wonderful pair of builds. The two fishing boats together really make a statement. Thank you for taking the time to document your work and inspire us all. Wishing you and yours a better 2021 as well!
- BobG, Blue Ensign, bruce d and 3 others
-
6
-
I'd like to follow along as well, once you get started. I've seen a few other build logs of Marisstella kits and it seems the builders are always impressed by the kits, and what I see in the logs looks really good as well, to the point I am considering one of their kits myself. Also good to hear that your customer service experience was good as well.
-
Amazing work, both the model and the comprehensive build log explaining the techniques used. Thanks for taking the time to share your wonderful model and the knowledge and techniques used to create it.
- mtaylor, FriedClams, druxey and 1 other
-
4
-
Interesting, the hull construction looks pretty much exactly like my Bluejacket America (which is sort of languishing in the shop). I did not realize they had other kits that followed the same scheme. I'll follow along to see how you progress. Have fun with the build.
-
9 hours ago, Jonathan11 said:
Loved the video! Where can I get one of those invisible robots??

That would take all the fun out of it! I don't know how he did parts of the video, especially the rigging. Maybe he really did have an invisible robot. Though watching the tying of the ratlines at 1/4 speed is a pretty good way to learn how to tie a clove hitch. Like @BenD said, the video could be useful learning tool.
- Rik Thistle, mtaylor and J11
-
3
-
Anyone out there follow Tom's Modelling in Motion on youtube? For the first time he has done a wooden ship build...Amati's Lady Nelson. Most of the prior build videos are airplanes. The videos are incredible. It must drastically increase the effort to build the model and do the stop motion video at the same time. Definitely worth the 9 minutes to check it out.
I have no association with him...just follow him on youtube. Hope this has not already been posted elsewhere here....I did a search and did not find it.
- Ryland Craze, Gregory, itsmes and 7 others
-
10
-
2 hours ago, BobG said:
I have always loved the yacht America. This is a very impressive build of an advanced model and your craftsmanship is outstanding. Congratulations, Gary, I hope to see you complete this beautiful model.
Bob, thanks for the interest in my project, the kind words, and the encouragement. A few times in the past I've checked your Pen Duick log and have been very impressed. MSW is sort of a double (or even triple) edged sword. I've learned a ton reading stuff here, but also have been humbled by the skill and knowledge and dedication of others, like yourself. And I have spent far more time reading the website than working on my own project in the last year.
I have made little bits of progress here and there, and I really do hope to spend more time on it and finish things up. I do have one small excuse....7 months ago (almost to the day) I stole the chair from the shipyard for my "temporary" work-from-home office set up, which I have used every week day since. So dragging a chair around from one room to the other has become one other small hurdle to resuming work on it.
-
Beautiful model, well done! And thanks for putting all the work into explaining what you have done, particularly with the sails. One of these days I really need to get back to mine, and these posts provide some inspiration.
-
On 9/21/2020 at 12:08 AM, Richard in Missouri said:
Thanks, I read the review and comments. I'll be watching to see how the frames line up before planking. I was under the impression that the bow blocks ended up having planking over them. I thought they were there to provide more material to support the sharper curve of the wood. Reading the review and comments, it sounds more like it is an instead of planking the bow forward of the first frame. I didn't see any seem on your model suggesting that was the case. I like the tank and crates you added in your model.
I think I left the bow block a bit large, then butted the planks up against it, then sanded things smooth. And then some bondo and layers of primer and no visible seams anywhere.
-
Regarding the non-level waterline....I recall reading about that somewhere else, though I apologize I have no idea where. As I recall it is just an aesthetic choice to counteract an optical illusion. With some hull shapes, a perfectly level waterline can actually appear as if it droops down at the bow and stern, so they raise the ends of the waterline up just a bit to make it look level to the eye.
Very nice build so far, looking forward to seeing more progress.
-
Looks like you are off to a great start. Your attention to detail will serve you well. I'll follow along....I built this kit 4 or 5 years ago, though it was before I discovered MSW so there is no build log of my efforts. I did post a picture in Eric "cathead"'s review of this kit. If you have not seen the review it is probably worth a quick look:
-
Amazing detail as always, and as Wefalck says, that last picture with your hand reminds all of the scale of this model. Those close up pictures of the chain plates look like they could be from a full sized boat. You must be getting close to done? I've thought that before and you keep adding more incredible details. I am anxious to see the weathering on the hull....it always makes me smile a bit to see the weathered topsides and the almost pristine hull.
- mtaylor, druxey, Keith Black and 1 other
-
4
-
Well done on both the boat and the bird carving.
-
I've enjoyed intermittently following this fantastic build. Really impressed by the level of thought and research you put into the project. You were not just building a model, but really trying to understand how it all worked and how the original builders approached construction. Well done.
- leclaire, Canute, FriedClams and 3 others
-
6
-
Very nice. I agree with Jim T on both the inwales and the point at the bow.
-
Nice little boat, Andrew. I am in the midst of building CLC's Annapolis Wherry model which uses a similar construction technique, though is a bit simpler than the dory. I did not create a build log for it. I enjoyed your remark about being 23 hours into the 10 hour project....with the wherry, you shape a couple of oars/sculls from two layers of the plywood glued together. The instructions claimed that while it looks like a lot of work, they can be sanded down to shape in about 20 minutes. I think it took me a couple hours to do each one.
I too am trying to just use paint I have on hand to avoid going out any more than needed. Unfortunately the finish on one side of the wherry will not be quite as nice because I ran out of primer, and the 5 year old rattle can of paint I am using on the hull takes a couple days to dry. But I think I am close to having it done.
-
Excellent video, technique, and results on the life boats Kevin, thanks for taking the time to share. When I last worked on my America, I got a bit sidetracked trying to do a couple small boats to place on her deck. I was using a similar technique with a mold and holes drilled to hold the frames, though I had not thought to cut slots into the mold as you did. I probably started 4 or 5 of the little buggers before I completed one that I liked, then I decided it was too large. I am now working on another project but hope to get back to that one soon.
-
Hi....Good start. I built this model about 5 years ago, before I discovered MSW so no build log. I do recall that the fit of the planks was somewhat rough...i.e. they were all a bit larger than needed. But I don't recall the difference being as great as what you show. I suspect that you are correct thinking that the stem piece is farther back than intended. But it also looks like maybe that plank is not as far back as it should be...notice the gap near the top of the plank, between the plank and the transom. I think I would move the plank back a little to close that gap and carefully trim some off the front of the plank. It might be helpful to trim some of the front of the bottom piece as well so that you don't have that little point sticking out, allowing the bottom front corner of the plank to sit against the stem.
America by gsdpic - FINISHED - BlueJacket Shipcrafters - 1/48 scale
in - Kit build logs for subjects built from 1851 - 1900
Posted
Ready for Sails and Rigging
Well, the model is, I am not sure I am.
Thanks for looking in and for the likes.
I've pretty much completed all the other details, though as noted below I have found a few things I may need to tweak. And of course, taking close up pictures always reveals flaws in the finish that I may try to fix, not to mention dust that has collected on the model. Anyway, here are some pictures of where it stands now. As I considered this another milestone I got out the "real" camera and took more care in taking the pictures.
Next I need to attach blocks to the masts, booms, gaffs, and eyebolts on the deck, then I will experiment with sail making. While I'd really like to attach the masts at this point I think it will be much easier to attach the sails to the masts off of the boat.
Overall view....
With masts and booms. They are just balanced in place here, not attached. And yes I have enough wiggle room to make the masts parallel when I glue them in place.
Bow and anchor details. After I did this, I realized there were two shackles that were supposed to be attached to the top of the anchor and then the anchor rope was to go to the shackles. Oops. Also, the kit did not include anything specifically for the anchor rope/chain. I felt that even the thickest supplied line seemed too wimpy for the anchors. I dug out the rigging line for my unfinished Niagara and braided together three lines to make one much thicker anchor rope. You can also see the name plate. At first I tried one of those inkjet printer decals but when I placed the yellowish gold decal on the black background, it just completely disappeared. I ended up printing the name with a black background on a piece of paper and attaching that for the name plate. You can also see the custom carved trail board in place of the Britannia metal one supplied by the kit.
I also attached the remaining deck furniture.
And here is the shot of the eagle on the stern. It is not very visible due to the angle of the transom. The Britannia metal piece was also pretty thick, more so than I would like, but I used it anyway.
Here are the main and fore gaff (top and bottom). I completed the jaws and clapper since last time I posted a picture of them, though I fear that my clappers will not angle enough to allow the gaffs to point upward as much as they should, so some rework may be needed. The jaws were just carved and shaped from scrap cherry wood and I inserted some short lengths of blackened copper wire to represent the bolts holding the jaws to the gaffs.
And here's a better picture than I posted before of the ends of the jib boom and main boom.
Finally some details of the masts. First, the lower part of the mast with the mast hoops and the ring of belaying pins, and on the main mast (top) the gooseneck for holding the main boom. Below that is the detail shot of the mast tops. While taking the shot I realized I did not put the bolsters on the main mast (i.e. the rounded piece at the top of the trestle tree, I assume to reduce wear and tear on the shrouds).