


gsdpic
-
Posts
541 -
Joined
-
Last visited
Content Type
Profiles
Forums
Gallery
Events
Posts posted by gsdpic
-
-
I am also catching up on this build. All of the detail and weathering is great as everyone else has said, but that tiny water valve is just jaw-dropping.
- druxey, FriedClams, Keith Black and 1 other
-
 4
4
-
38 minutes ago, Gregory said:
Likewise, the Bluejacket America is POF...
At least the larger one is. I've lost momentum working on mine, though see my build log (in the signature) for a look at it.
- mtaylor and thibaultron
-
2
-
By "barrel back" I assume you mean this one. I think this was the second wooden model I completed, quite a few years ago, long before MSW. It is just a static model and not used for RC. It is also 40+ inches long. I remember debating between this one and the Typhoon but ended up with this one.
Ok, sorry for the minor hijack....I'll follow along with interest.
-
More Deck Details
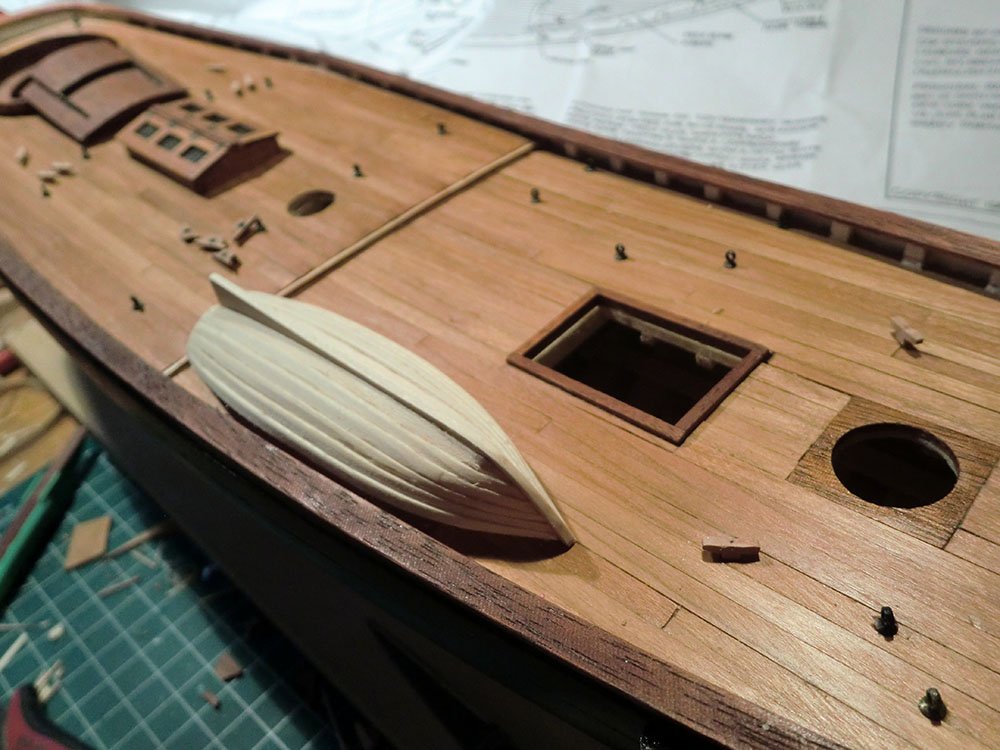
I created some brackets for the removable davits for the anchors and the boats. I've installed the two for the anchors. The brackets are just little shaped pieces of mahogany with a short piece of blackened brass tube inserted in a hole in the middle of the bracket, then glued to the edge of the cap rail.
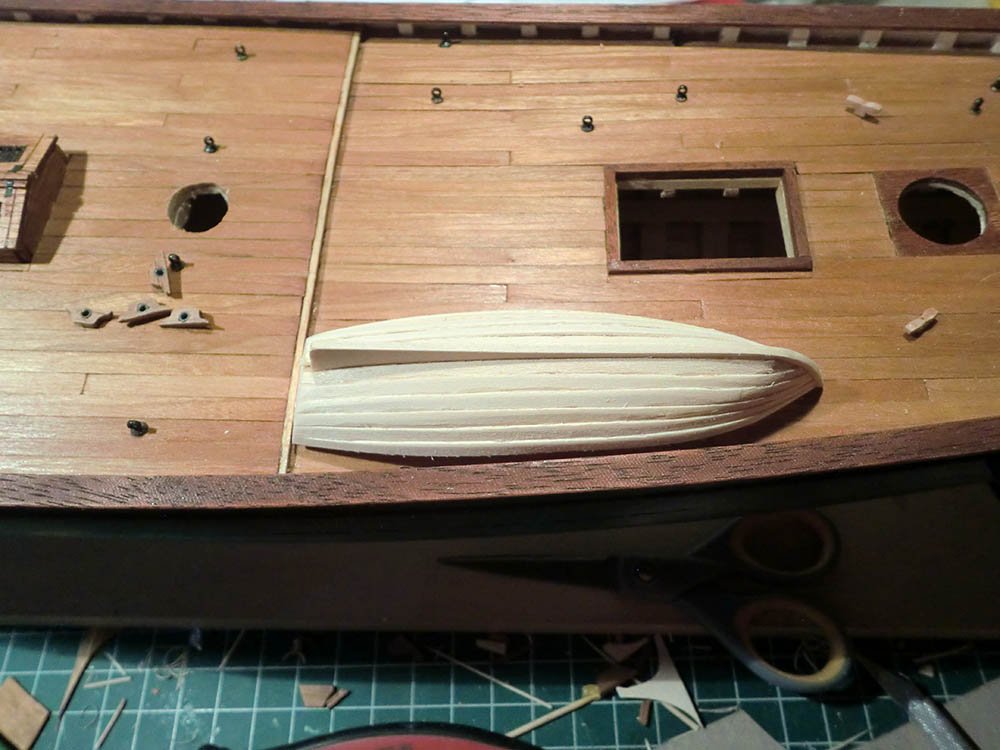
I have also been working on and off on building a couple of boats. The plans indicate that America had two, either hung from davits, or lashed to the deck, or removed for races. The kit does not have any provision for creating the boats but I thought it might be a nice added detail. I have created, or at least started on, probably a half dozen of these little guys. Each one is a little better than the prior one but still flawed. I've been trying to create a small lapstrake boat of no particular design, about the right size. My latest attempt is shown below in the position where it would be lashed to the deck. I feel it is still a bit too large (and it is a bit bigger than what is shown on the plans) and this one has a bit of a skewed stem. If I were to finish it, I would likely paint it white.
Any thoughts, comments, suggestions? I am tempted to just give up on this detail and leave them off, leaving America in "race configuration" with no boats. Or maybe I'll try again, make it a bit smaller and narrower and make sure the stem is not allowed to flex while building the boat.
- FriedClams, GrandpaPhil, coxswain and 4 others
-
7
-
Dave....I know I have seen references out here to Vanda-Lay in the past. If you punch "Vanda-Lay" into the search box at the top you will get three pages of threads that refer to them. Many of them refer to other products but at least a few mention the drill press. You might start by looking at those threads if you have not already done so.
-
A Little Progress
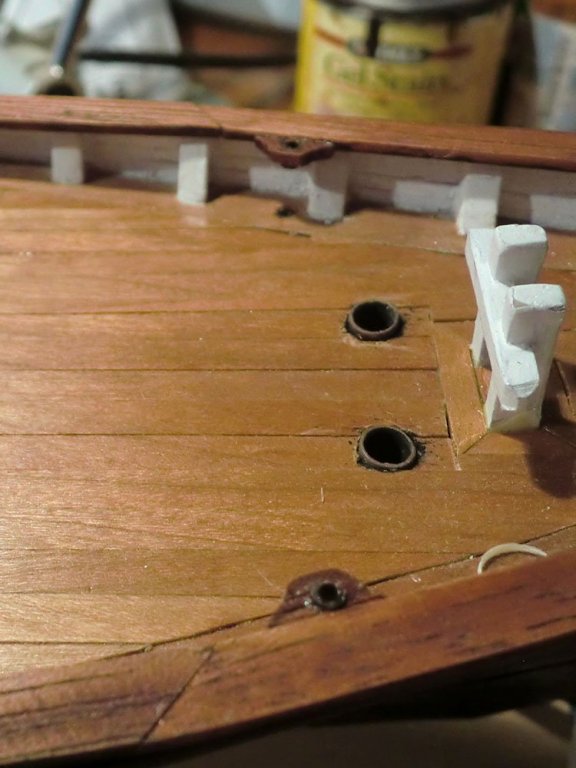
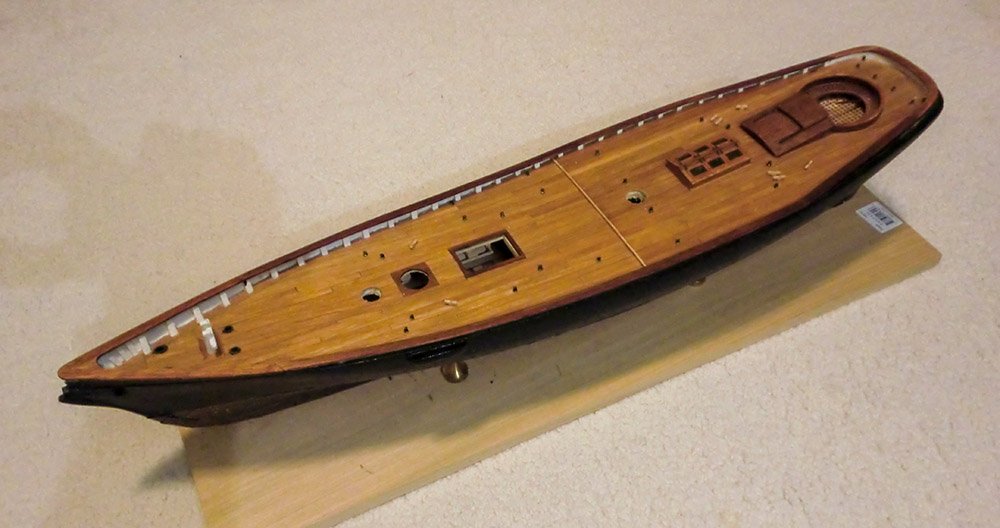
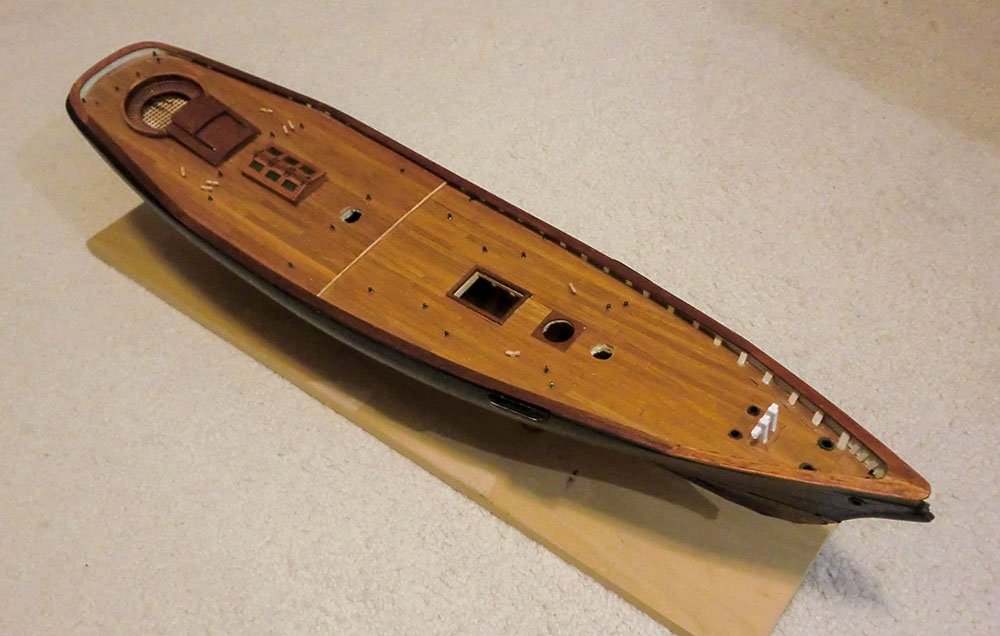
Apologies for the glacial pace of this build of late. Every once in a while I find some time to work on the America. Of late, I have been working on finishing out the deck fittings. I used the pad eyes from the kit and placed them on the deck as shown in the plans. I tried to blacken them, but they turned more of a strange pinkish brown so I then painted them as well. I also scratch made some cleats instead of using the metal ones supplied in the kit, and scattered those around the deck. And I did the hawse pipe openings for the anchor chain. Finally, the biggest change to the appearance is that I completed the cap rails. I used quarter inch wide strip wood for most of the cap rails, with some other pieces cut from 2 inch wide stock on the stem and stern. All the wood was mahogany, though it was quite different in color and grain. I used some stain to try to even it out a bit, with some success though it is far from a perfect match.
I have just a few other little bits of deck detail to do, then on to masts and rigging. I have the masts and gaffs and booms all shaped though none of that is stained or painted. I guess I will use the metal blocks from the kit and also use the rigging line from the kit though I will attempt to dye the white rigging line more of a brown/tan color.
Here are a couple pictures of the current state.
-
Congratulations on a beautiful build! I don't think there is anyone who does not like this old mahogany boats.
-
4 hours ago, SandyBay said:
I’ve just read your log from beginning to end and I’m just blown away by the sheer amount of work involved to get your model to where it is now. Did you (or your admiral) ever work out how those cherry strips mysteriously ended up in your online shopping basket.
Thanks, that is still a mystery. I kind of lost steam on this project, as the beginning of the year is busiest for me at work. I expect to have some free time coming up so hoping to get back into it soon.
-
Are you sure about the location of the upper planks? From the second and third picture above it appears to me that they are higher on the starboard side, especially toward the stern. There appears to be less of the frames and edge of transom showing above the top plank on the starboard side.
Great progress, and well done to notice the possible issue and take a step back to figure out a plan. We've all been there and those of us who rush ahead anyway (like me sometimes) regret it in the end.
-
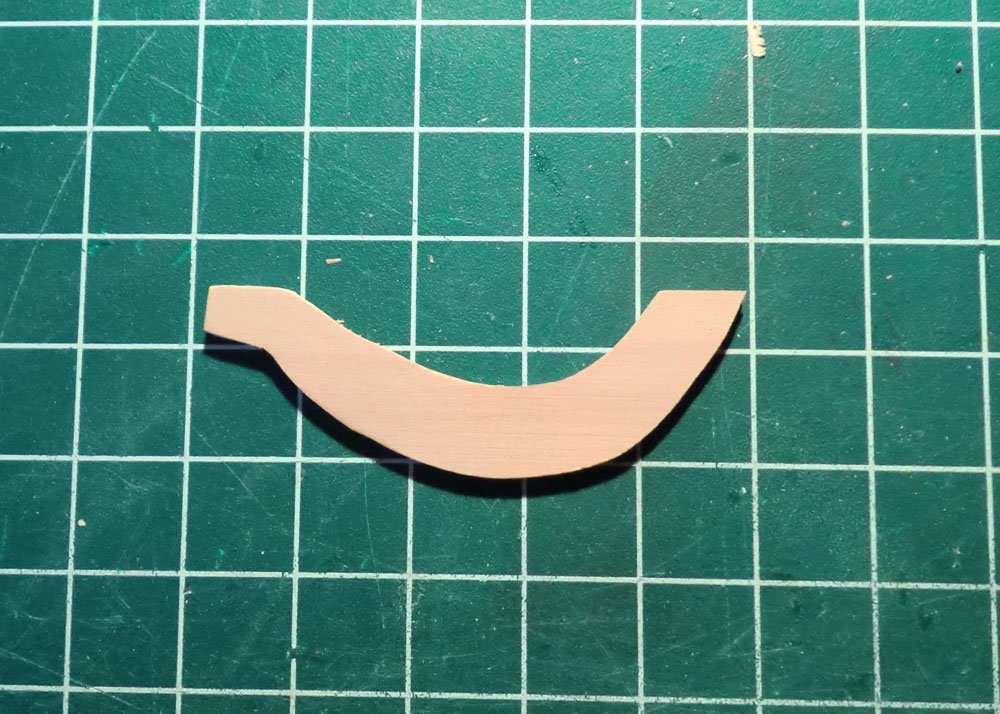
One more try with the trailboards
I could not resist. I made another pair of trailboards, my last I swear. I made them a little thinner, with the outer edge thinner, and made them less of a semi-circle and a little more of a Nike "swoosh" shape, for lack of a better term. They look better in real life...this is definitely a case of the close up photography not being my friend.

-
Back to the Trailboards
Progress has been very slow of late. I took a little hiatus for another project, and otherwise have been quite busy. Some time in the last week or 10 days was the 2 year anniversary of starting on this project.
I resumed working on the trail boards. Not sure why but I have some obsession about not using the cast parts even though they look decent and even though the painting of the cast eagle worked out well. So I went through a couple more iterations of doing some carving and painting. I think I have some now that I'll use, though who knows I might look at them next week and decide I can do better.
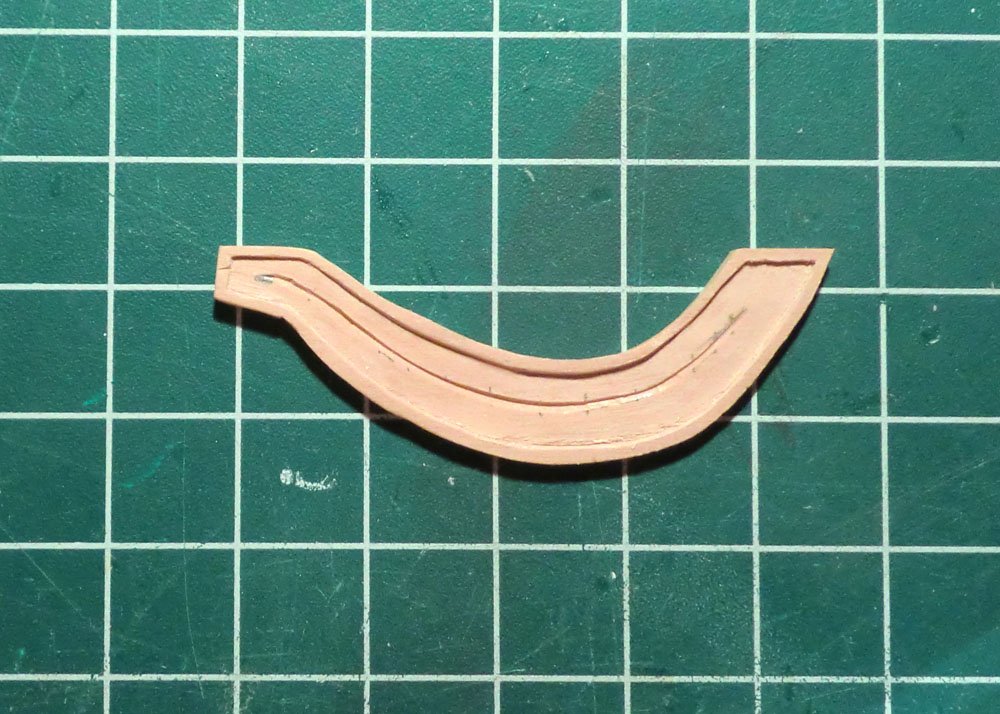
1. Here is the blank that I started with (Pear wood). I used a paper pattern that I fit over the model rather than the exact shape of the cast parts. I think my hawse pipe was a little farther aft than intended so my trail board is a little longer.
2. I started with a cut around the inside edge, to form a lip around the trailboard.
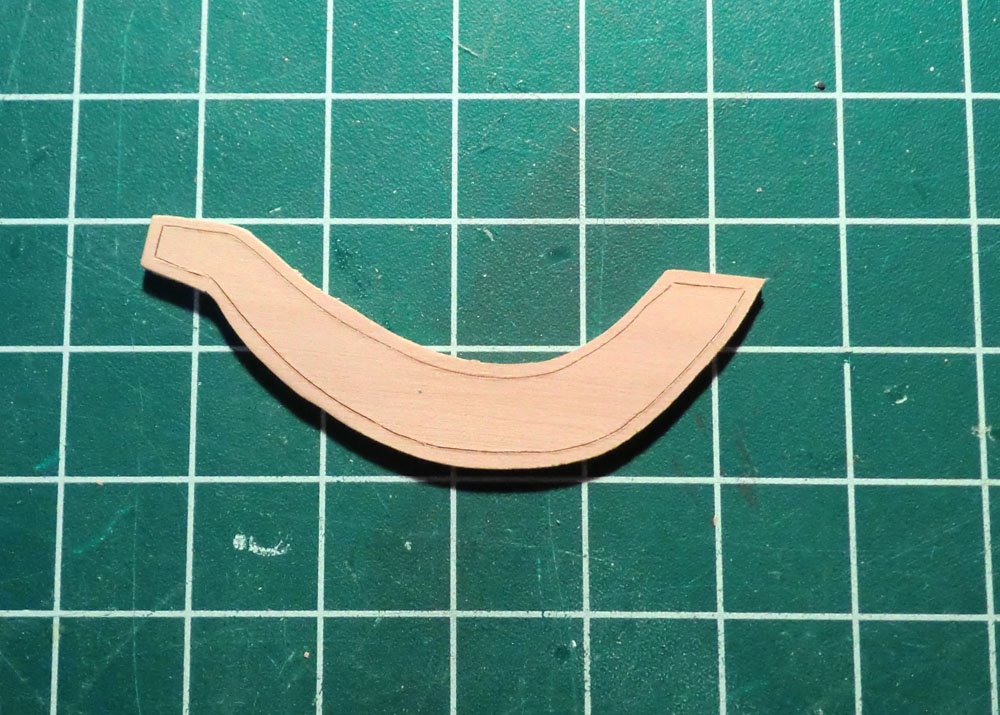
3. I then used various chisels to remove some wood from the inner section to form the lip, and sanded that down. I then used a v-shaped gouge to create a main "stem".
4. And then I used a small rounded gouge to create "leaves" along the stem. And then repeated the process for the other side.
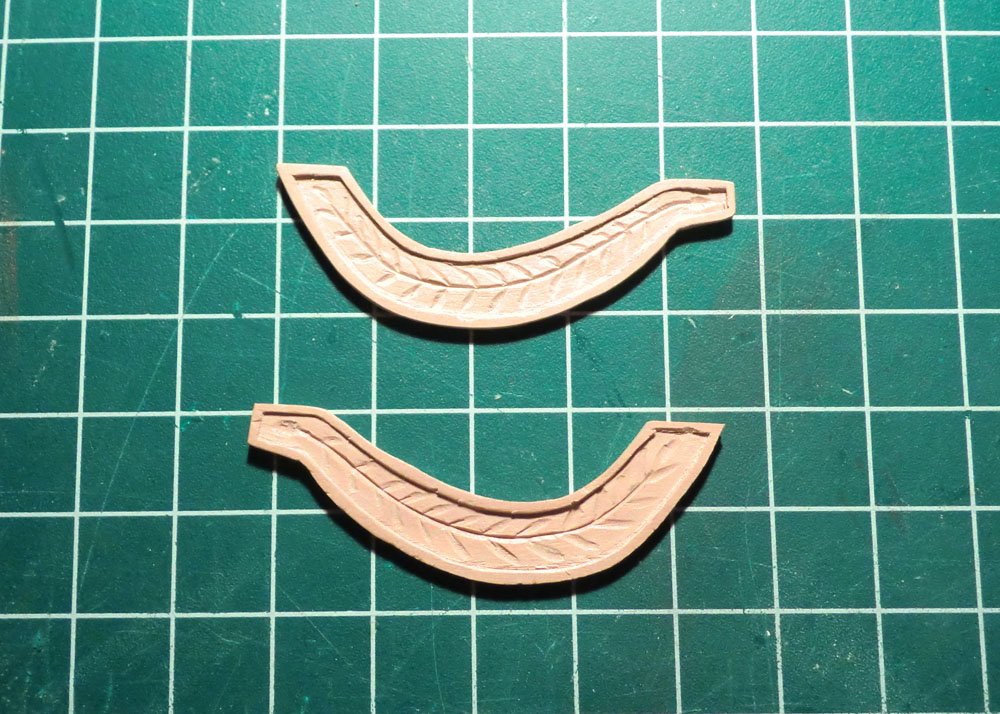
5. Here is an alternate design I did earlier, with some more simple scroll work instead of the stem/leaves. You can see one of those broke during production.
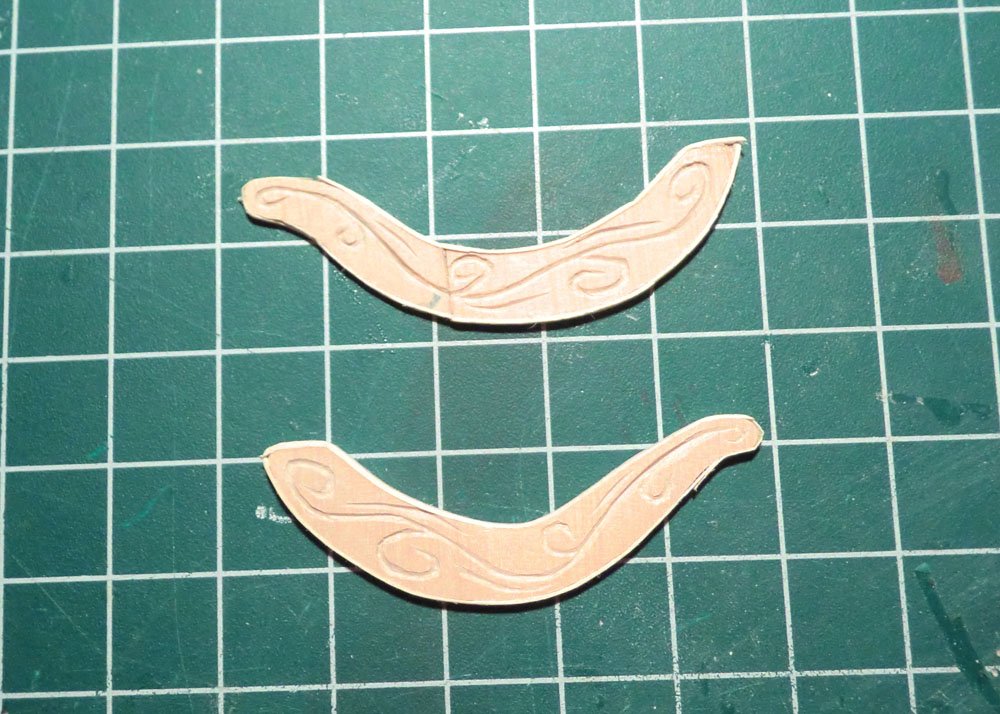
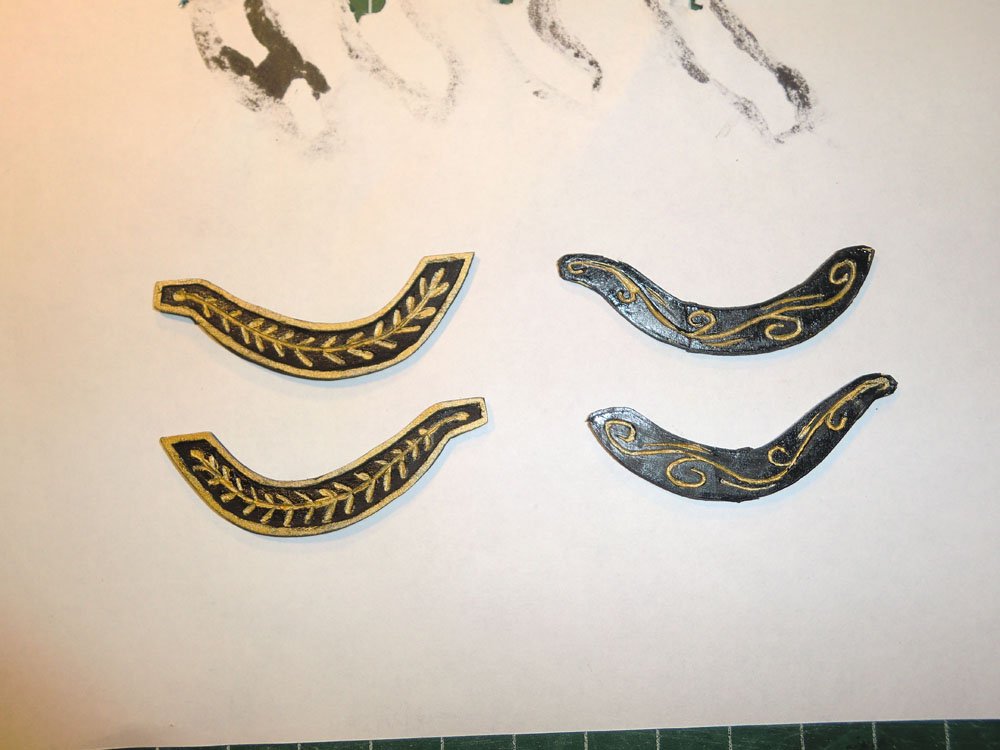
6. And here they are painted black and gold. I'll likely use the ones on the left. Seems no one is sure of the actual original design but they seem to be a little closer to most (but not all) of the contemporary paintings. I do wish that the lip around the outer edge was a bit thinner, and for these I was carving the design into the wood, where my previous attempt carved away the background so that the design stood out instead of being indented into the wood. Doing the latter is more difficult especially if trying to leave a lip around the outer edge. You can see on the "alternate" design, I attempted to glue a very thin strip of wood around the outside to form the lip but that presented its own problems. Sounds like I am convincing myself to try again. I did pretty much all of this carving by hand, though I also experimented some using a rotary tool.
- CiscoH, BobG, FriedClams and 3 others
-
6
-
Thanks for the thorough explanation of how you did the cap rail....progress on my America has stalled until just recently, but the cap rail is one of the things I will be doing in the near future and this post helps.
-
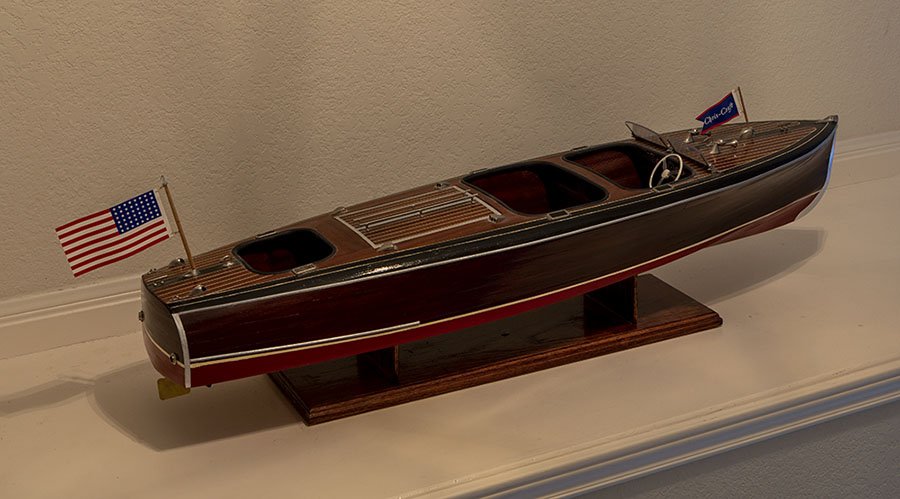
Good start. I'll follow along as well. One of the first wooden kits I built was one of the Dumas Chris Craft speed boats.
-
It is a pleasure to see all the thought and research and experimentation you are putting into this fascinating build. Seems like not too much more to do now...anxious to see the final pictures.
-
Welcome to MSW from Central Texas. Very nice railroad model/diorama. As for the ship building, remember it is not a competition. We are here to enjoy and share the hobby, learn a few things, develop our skills, pass the time, and in some cases use swear words.
") It's all good....
It's all good....
- Keith Black, BETAQDAVE and mtaylor
-
3
-
-
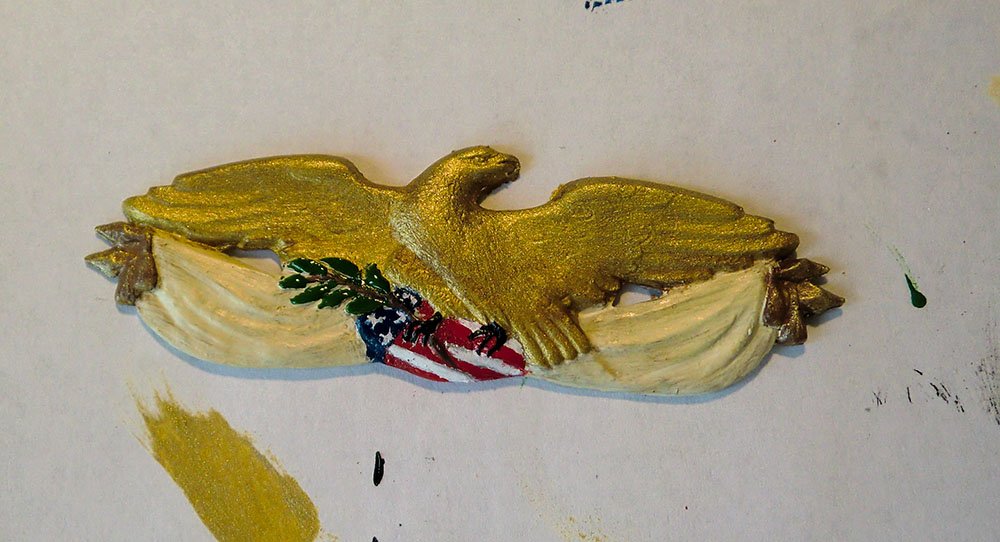
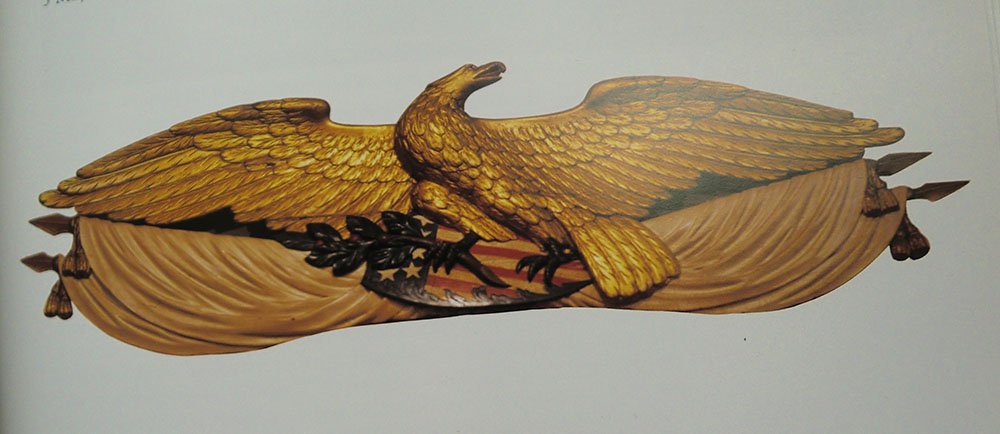
The Eagle has Landed....or been painted
I am still out here, working a bit on the America now and then. Doing a lot of little steps like shaping the gaffs and booms and putting on cleats, etc. and also some stuff on the deck and hull, like putting on eyebolts and cleats. I've also been doing some experiments regarding mast hoops and ships boats. But none of that stuff is too interesting to show or in the case of the experiments, not successful enough
But I also worked on painting the eagle that is on the transom. The Bluejacket kit provides the eagle in cast brittania. It actually looked fairly good and fairly accurate, so I have been working on painting it. I cleaned and primed the metal, then painted it mostly with Tamiya acrylics, though for some colors I used some testor's enamel. Basically, I used whatever I had laying around from other projects. After it dries for a day or two I'll probably shoot it with some of the clear spray acrylic I used elsewhere to even out the finish. Below is a picture of my painted eagle, and also a picture of the real eagle, taken from the book "The Low Black Schooner".
- Duanelaker, GuntherMT, ESF and 3 others
-
6
-
There is one brief build log here for that kit, if you have not seen it. It might help you decide if it is something of interest to you.
- thibaultron and mtaylor
-
2
-
Kevin....the case makes a great finishing touch.. And thanks for the extra effort of making the videos. I found them useful to see how you did various tasks. I need to use this as inspiration to finish my America, which has languished a bit during the last few busy months.
-
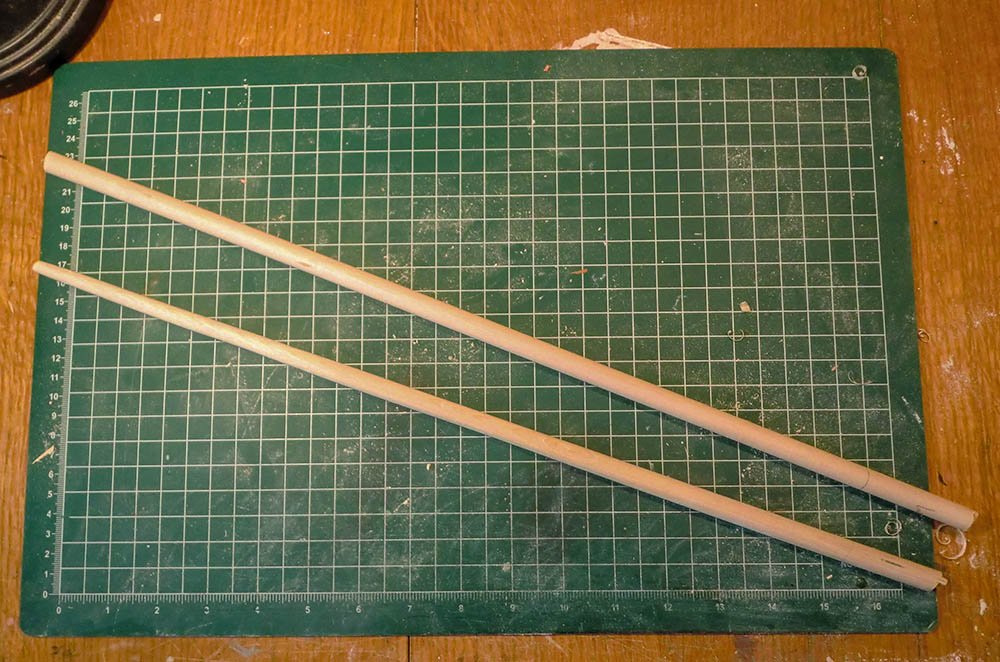
I'm still out here, very, very slowly making progress. I've been shaping the masts, gaffs, and booms. Oddly, the kit did not include a dowel for the jib boom, so I picked one up at the local hobby shop. I also sent an email to bluejacket suggesting they correct that.
Below shows the current state of things....the two masts, the top section of the main mast, the fore and main gaffs, and the main boom. I am still working on shaping and sanding the main boom. On the two gaffs, I probably have some more work to do on the end of the gaff that is closest to the mast but I am waiting to do that when I make the jaws. The only remaining one is the jib boom mentioned above. I also need to add a variety of cleats and such to these, then they will be painted white for the most part, though sections of the masts are left natural, which I will likely stain to darken them just a bit. I see now in the picture the main mast appears to not be completely straight...maybe it is just an illusion.

-
I saw the picture of this beauty that you posted on the "snapshot" thread. Really elegant looking little boat. I watched the assembly video on their website, looks like an interesting build. I definitely like the way you finished out the interior with stain better than what they ended up with in the video. And I happen to have an almost perfect empty bookshelf for it.....hmm, really tempting to try this one myself.
-
Kevin, Congrats on finishing the scratch-built boat. She's a real beauty.
Regarding that forward hatch/companionway: The bluejacket kit deck plan has a note about it. It says "While some paintings show a companionway forward of the capstan, others show a hatch. Quite likely a removable booby hatch -- which appears like a usual companionway -- was fitted over hatch coamings.". For what it is worth, the bluejacket kit does not show the forward curved hatch at all. These plans have "Copyright 1983 Arthur C. Montgomery, USA". I hope this info is useful to you.
-
Jon.....I have purchased a variety of acrylic sheets (for non-modelling projects) from https://www.inventables.com/. You might check them out and see if they have something useful for you. They seem to have a limited range of sizes....I thought in the past they had more variety listed. Other sizes might be available if you ask.
Gary
-
Thanks for the looks and likes. Progress has slowed to a crawl as I have been occupied by other things lately. The picture below represents pretty much all of the progress I have made in the last three weeks. I cut the two masts to the proper length, and began tapering the fore mast (the lower one in the photo). It is close, though it still needs some sanding.

America by BlackSeraph - BlueJacket Shipcrafters - 1/4" scale
in - Kit build logs for subjects built from 1851 - 1900
Posted · Edited by gsdpic
typo correction
Hey, another Bluejacket America build! I'll follow along. Mine is about 80% complete but has been languishing all year as other things have gotten in the way. But I keep saying I will get back to it soon. Maybe this will help inspire me.
I made that same mistake you did, of cutting the notches in the keel based on the lines instead of based on the actual thickness of the frames. Makes me feel better now, thanks.
Otherwise I like your approach. I also took a lot of material off the frames, maybe even more than you. I can also say there were about 3 or 4 different times I thought I was done adjusting the frames, then went back for more, and probably still did not quite have them as fair as they could have been.
Feel free to check out my build log (in the signature), my hope was that it would help someone. Or if you wish to ask questions....that is fine too. I am far from expert, but I have been where you are going.