
Beckmann
-
Posts
347 -
Joined
-
Last visited
Content Type
Profiles
Forums
Gallery
Events
Posts posted by Beckmann
-
-
Hi, what a wonderful model, I hope you post a video of the maiden voyage!!
Matthias
-
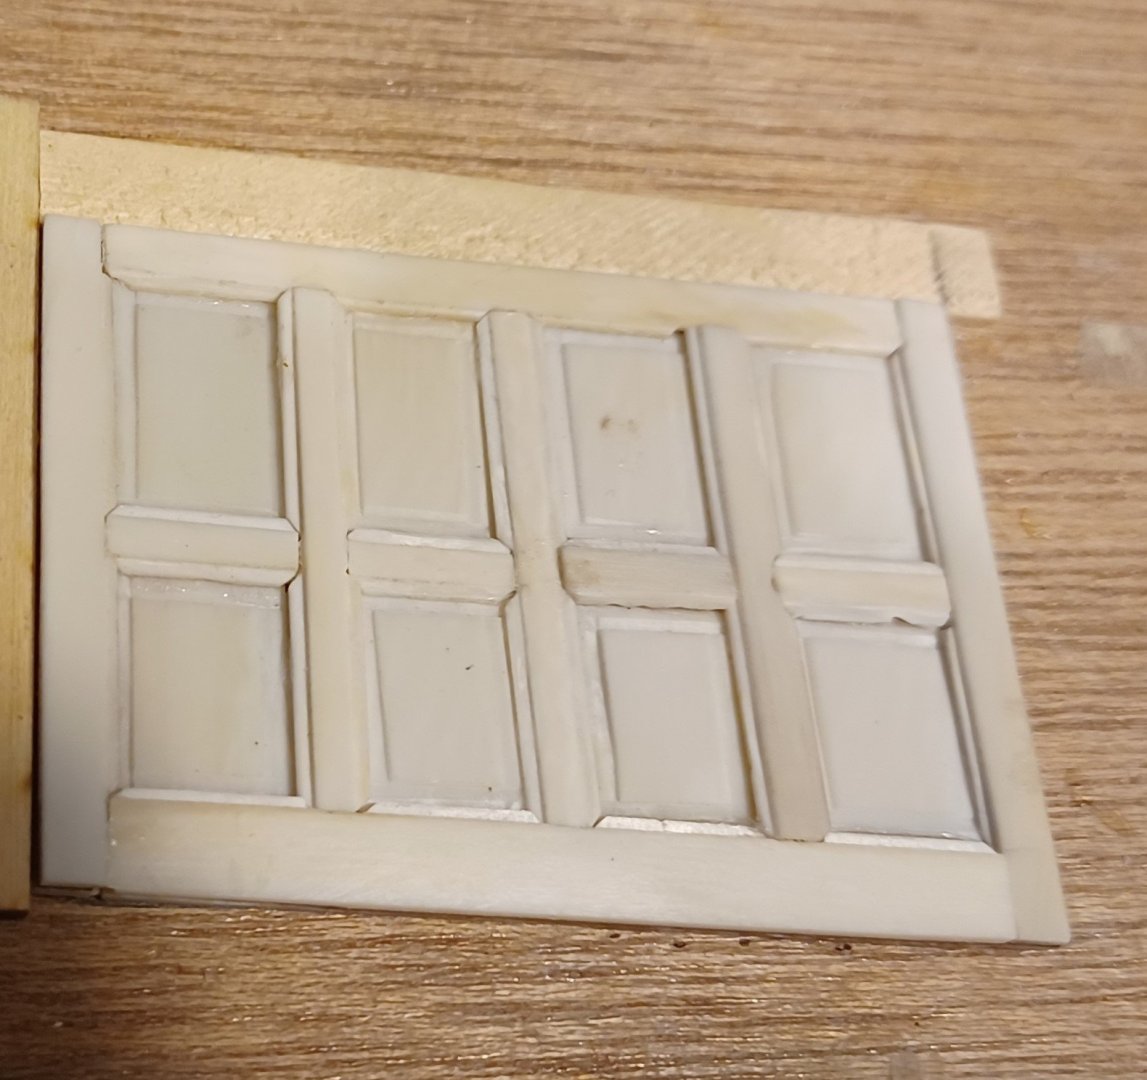
Hi everybody,
today just a small update,
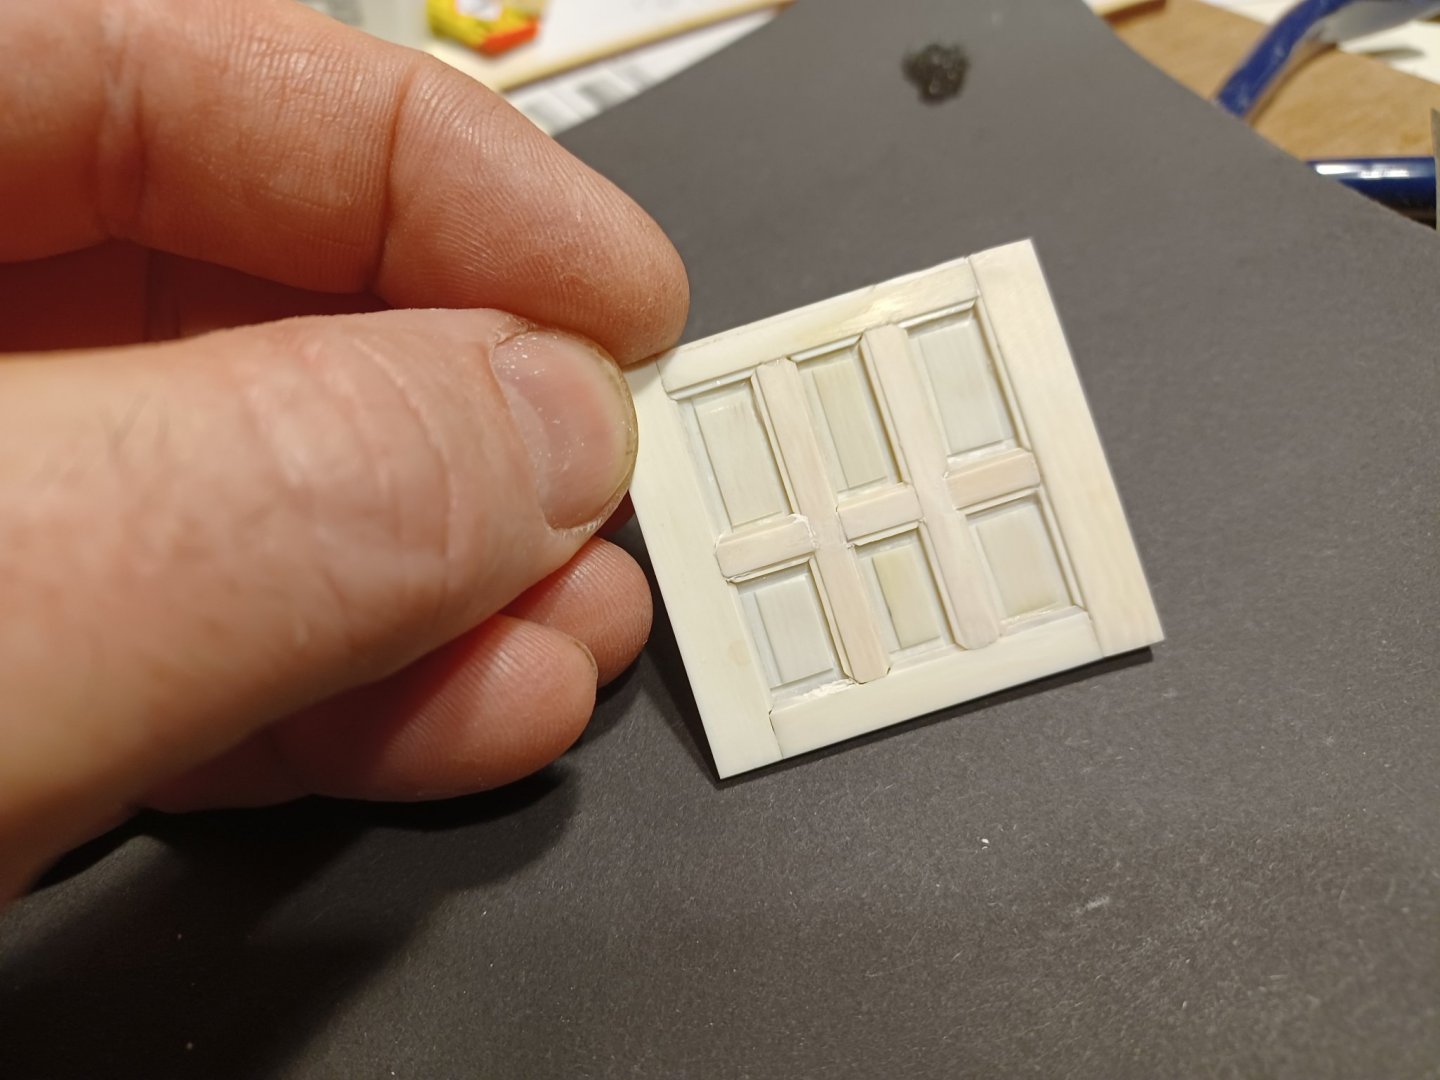
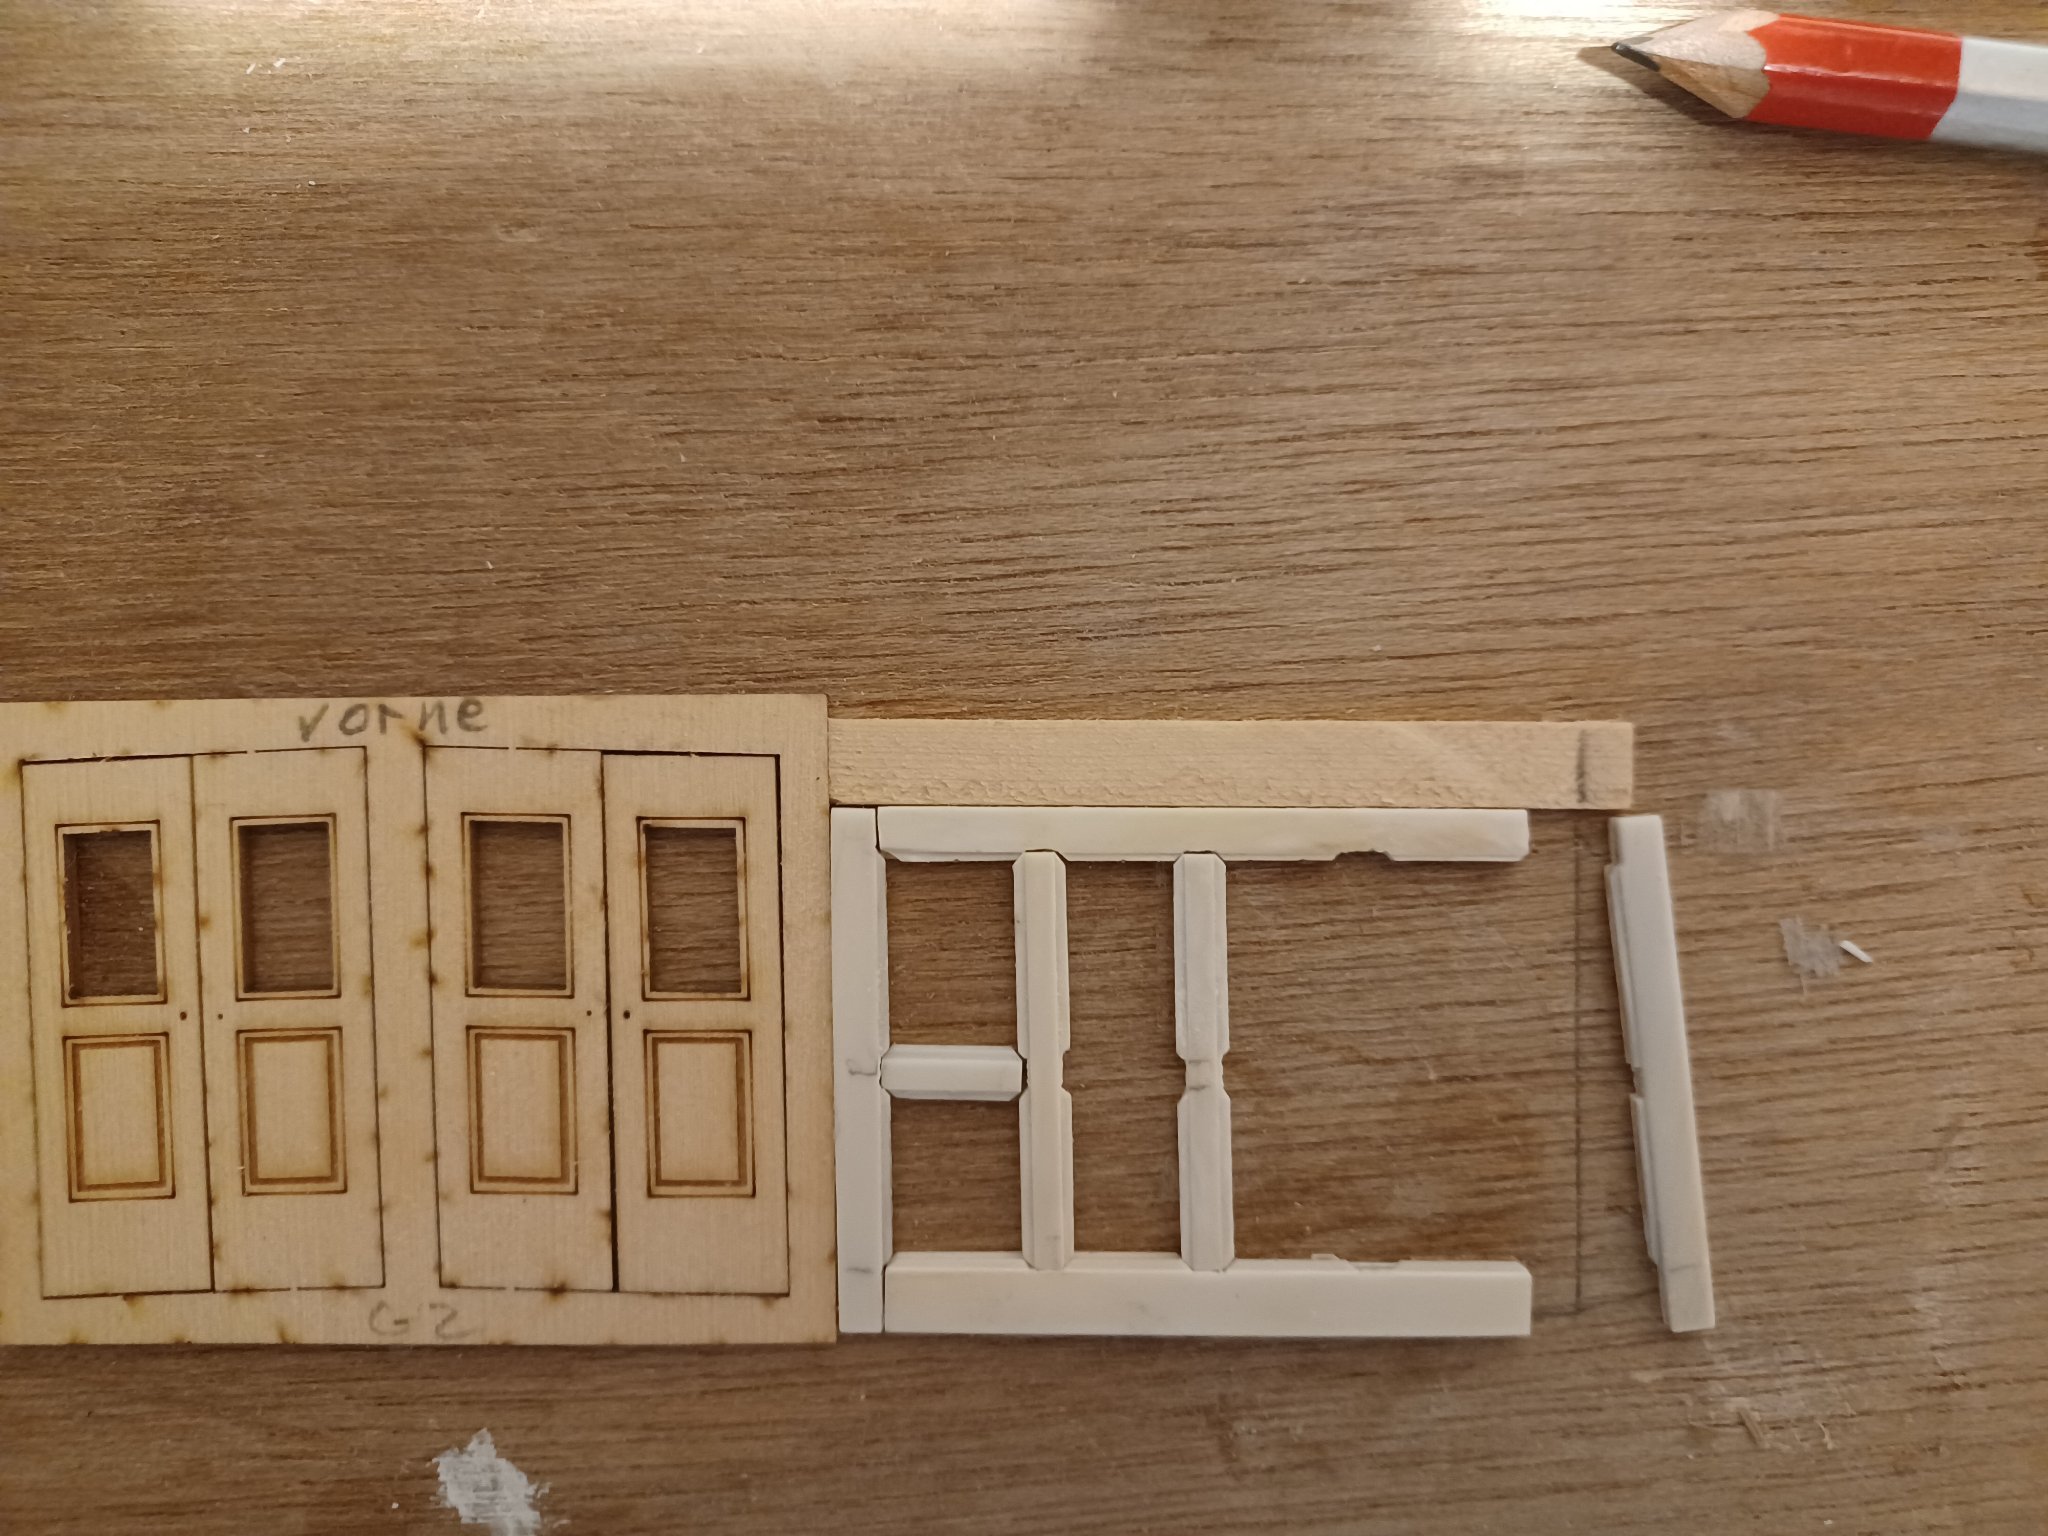
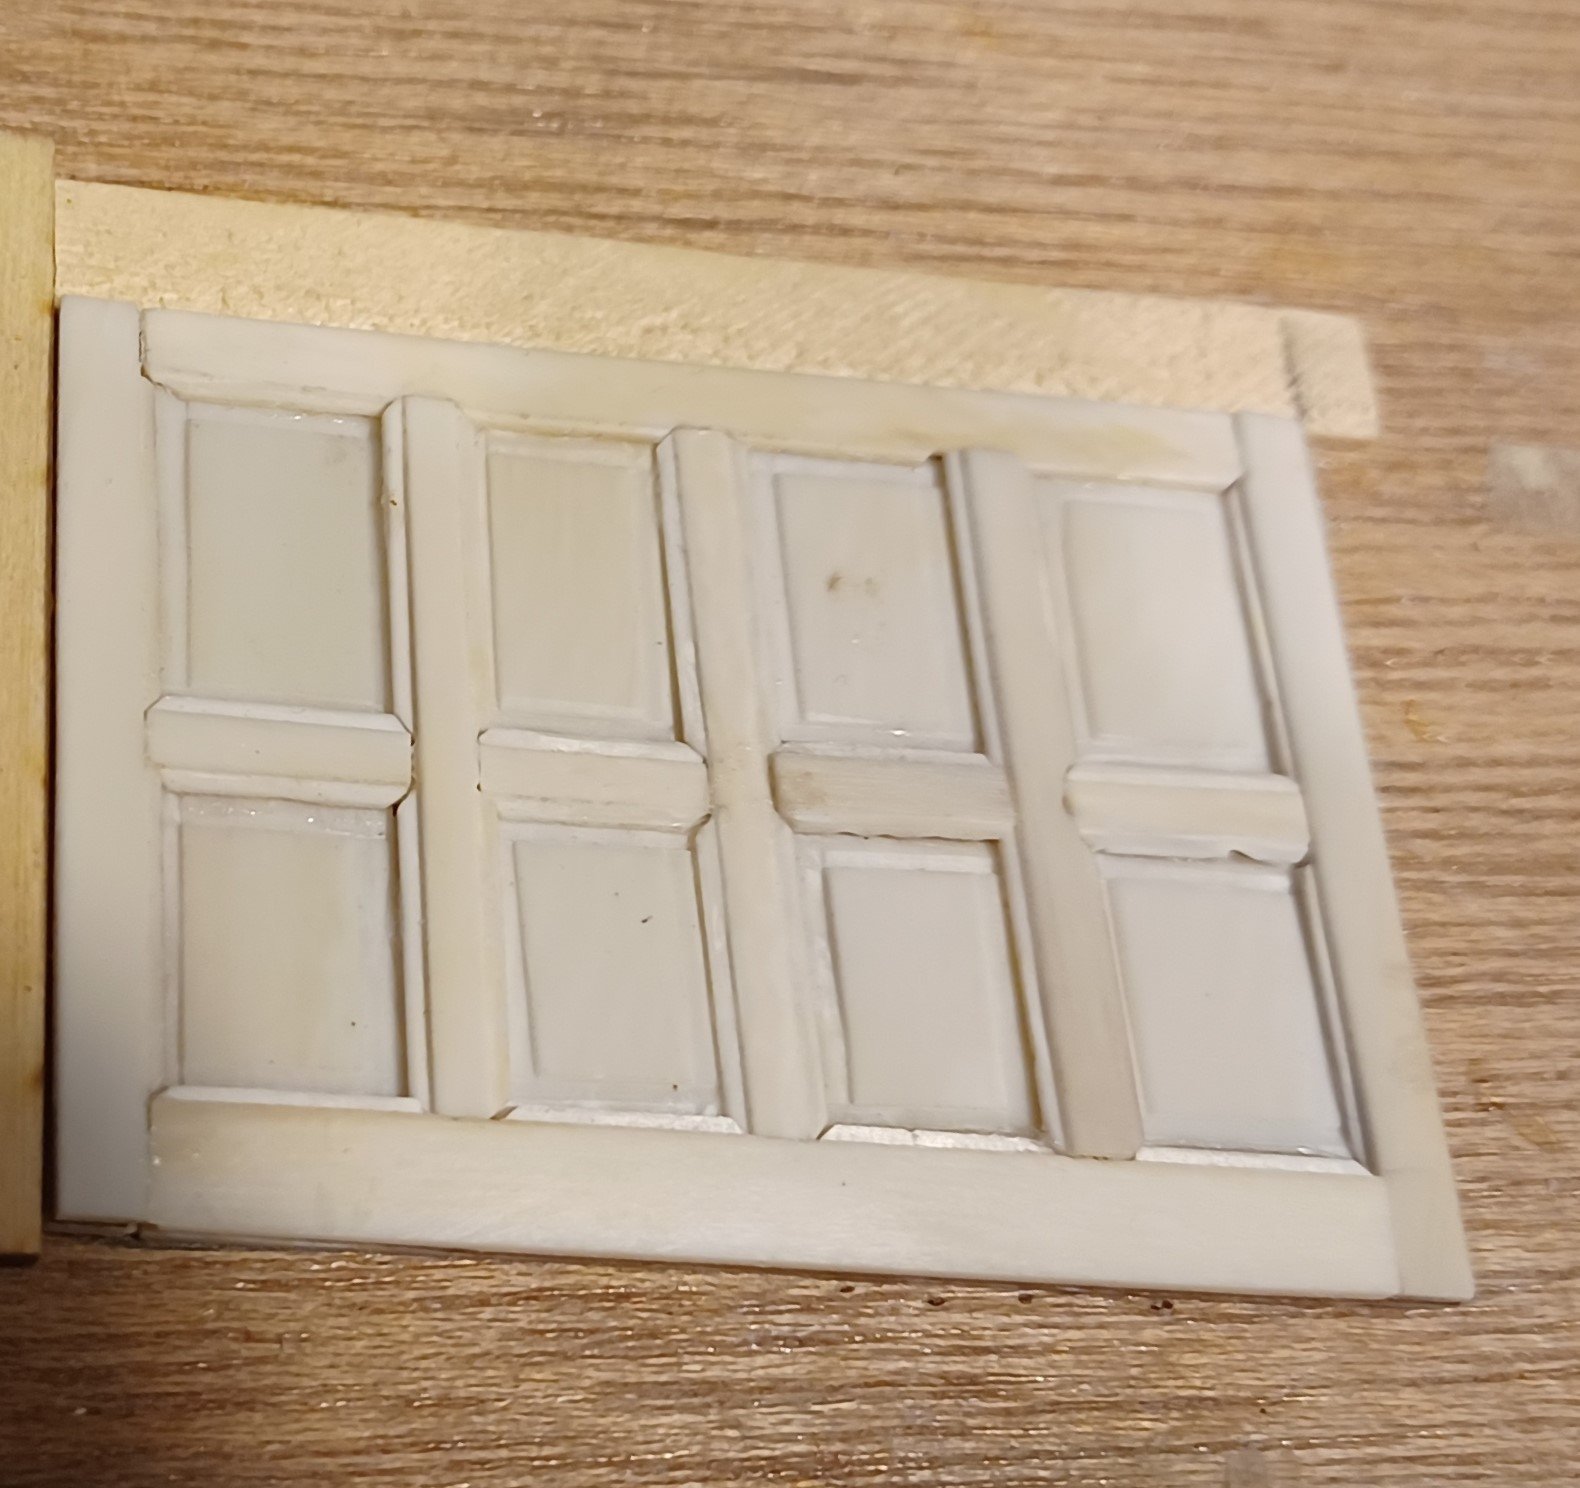
I proceeded with the next bulkhead, wich is half wooden, half ivory.
The way to build it is almost the same as shown above. The difference is just the two materials being glued together in advance.


Next will be the doors.
Matthias
-
Hi Cisco,
These ivory keys were cut a century ago. But you can cut it with a circular saw.
I glued it with superglue?? I dont know the englisch expression. It is dry within seconds.
Matthias
- WalrusGuy and FrankWouts
-
 2
2
-
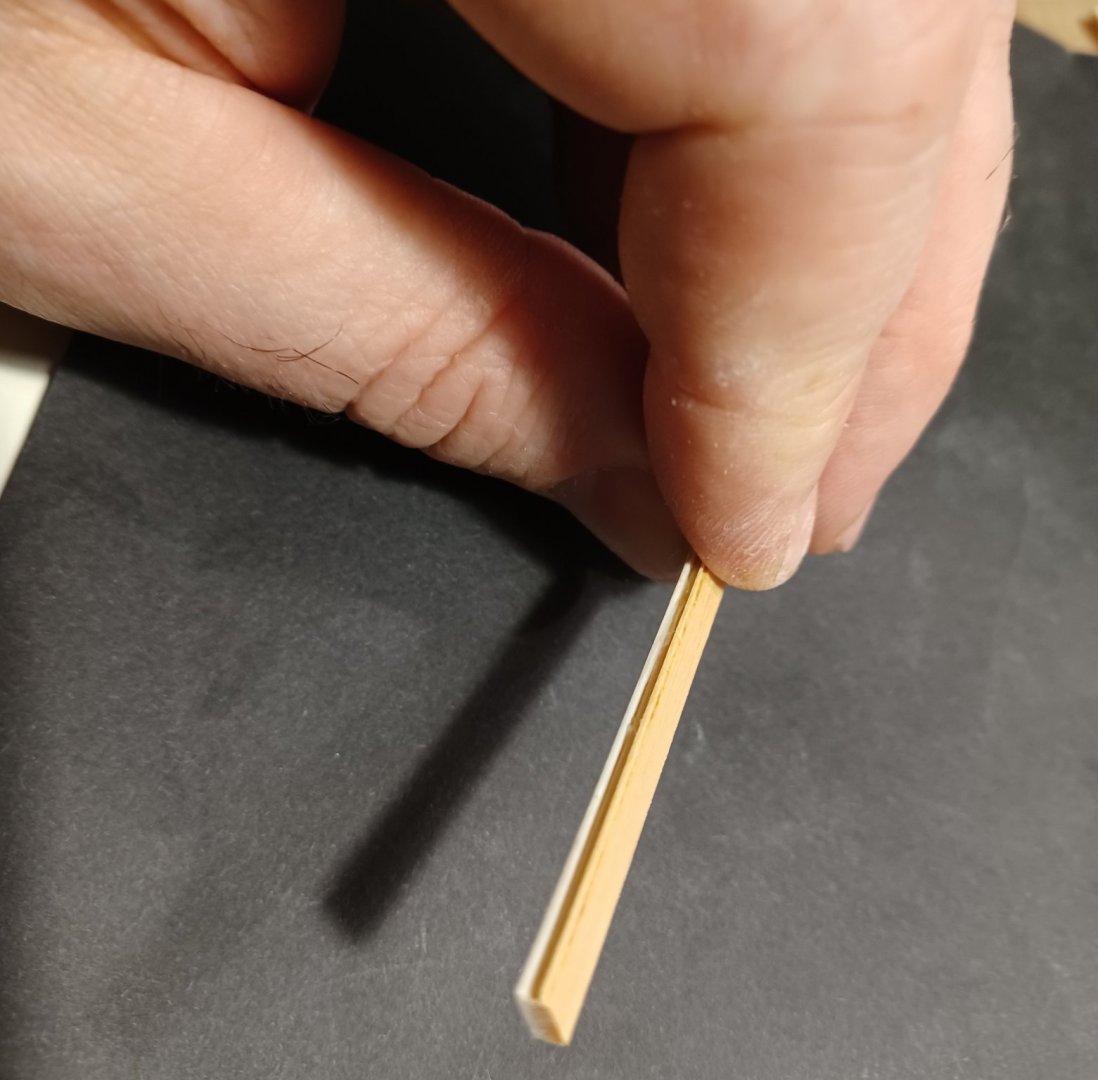
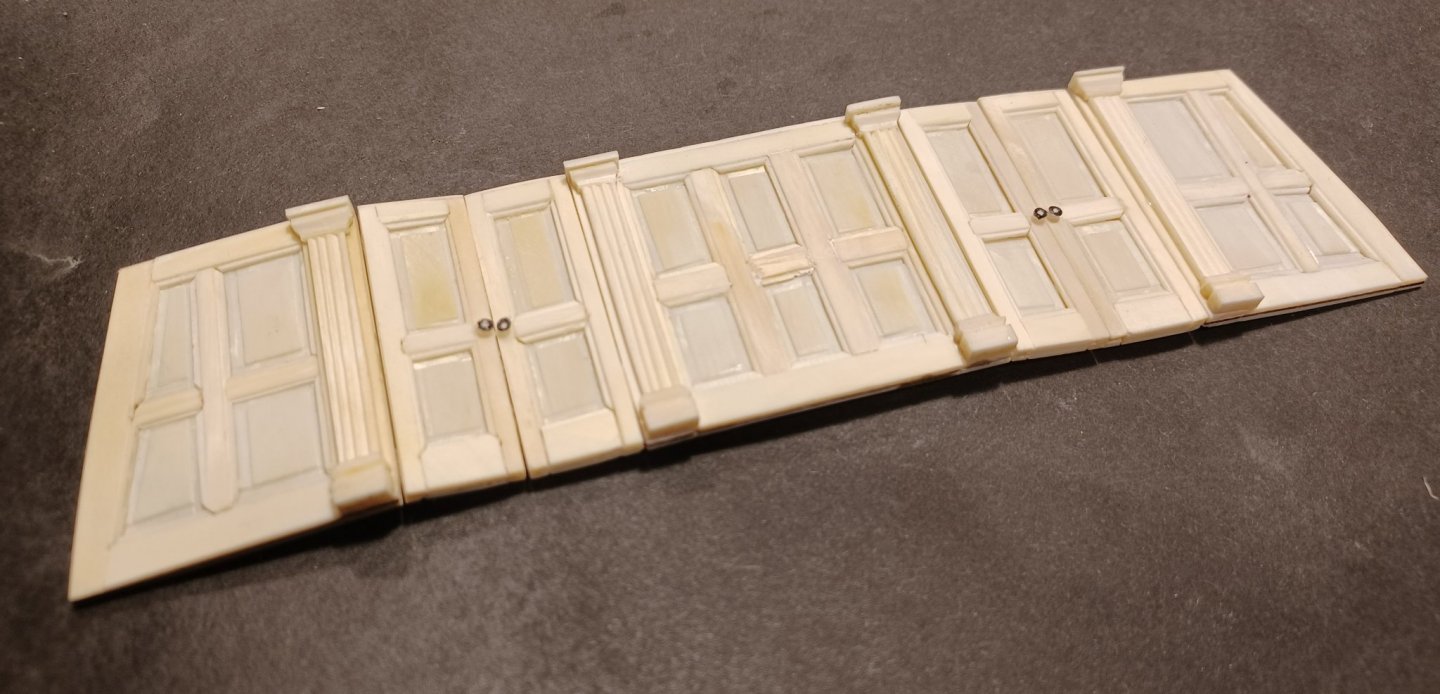
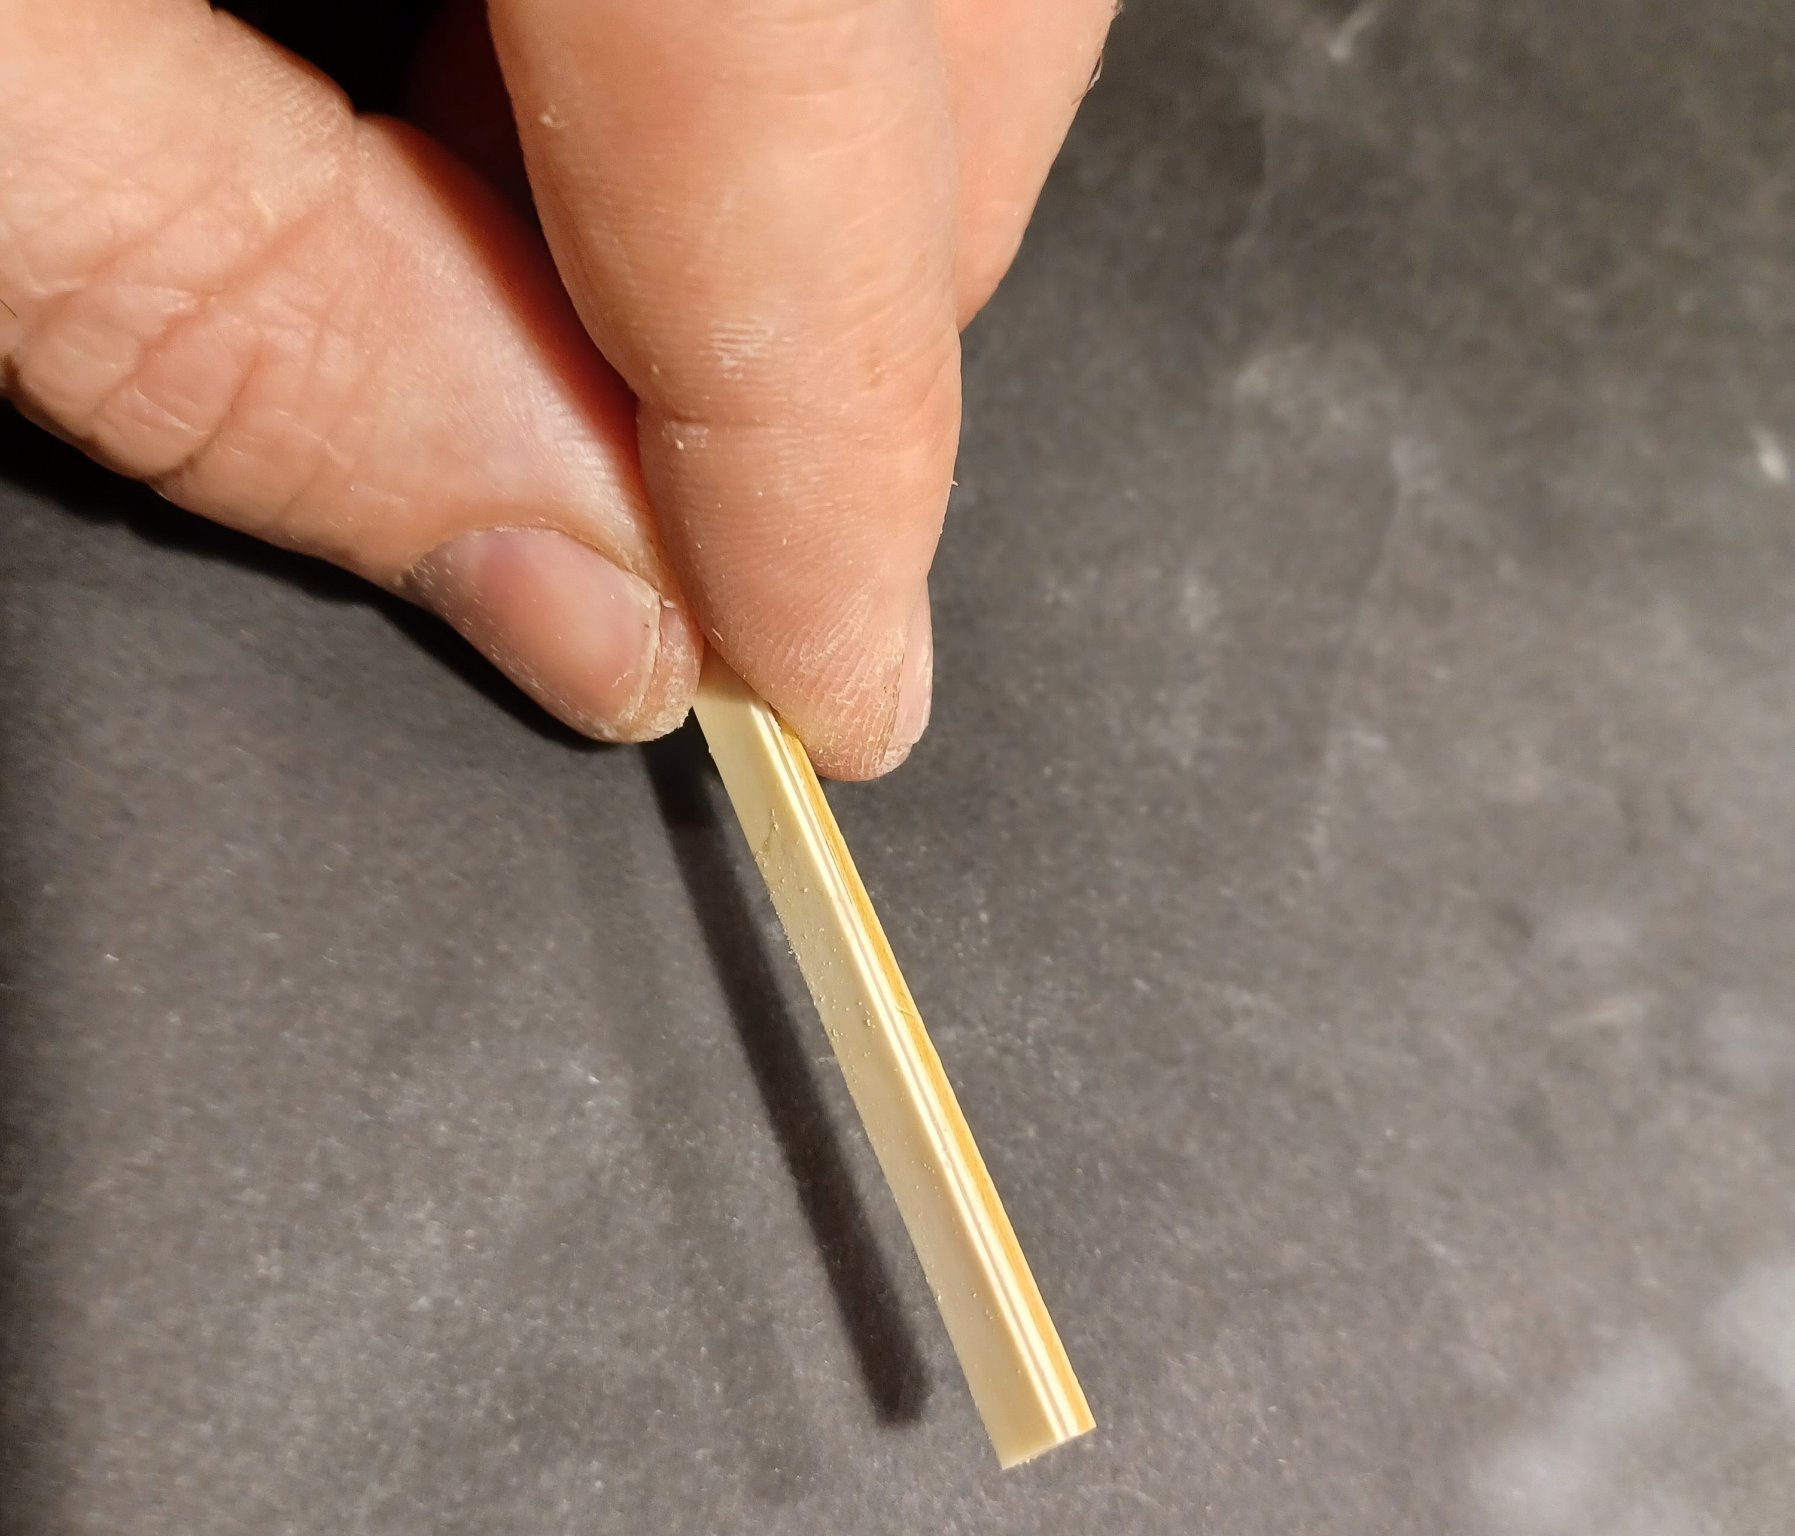
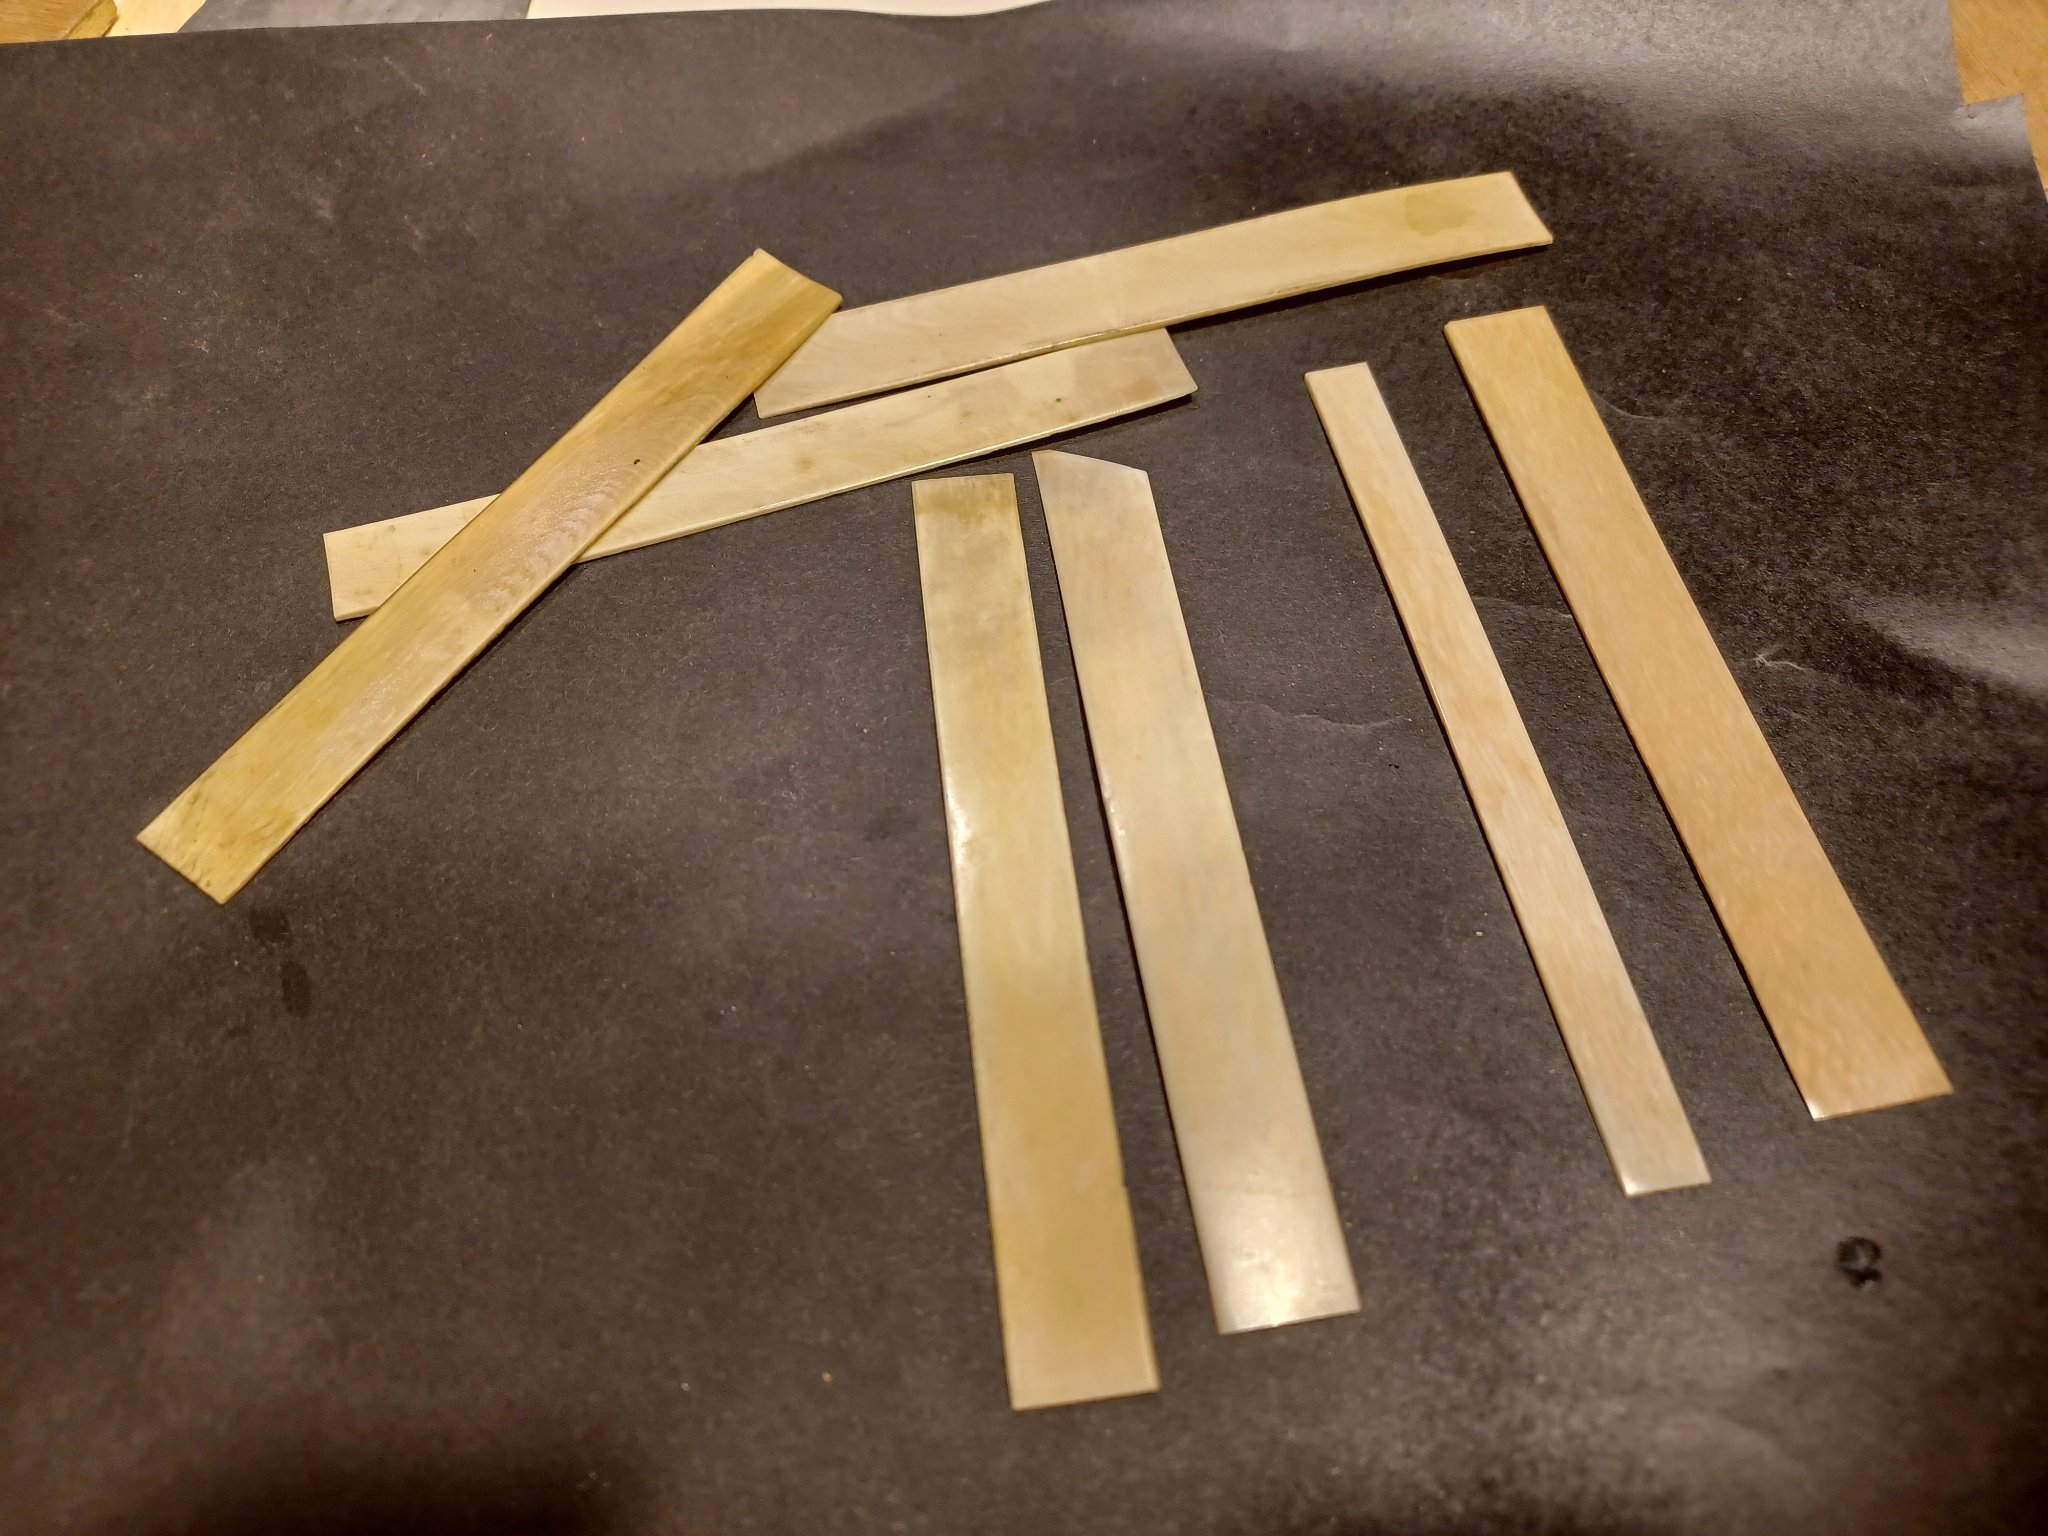
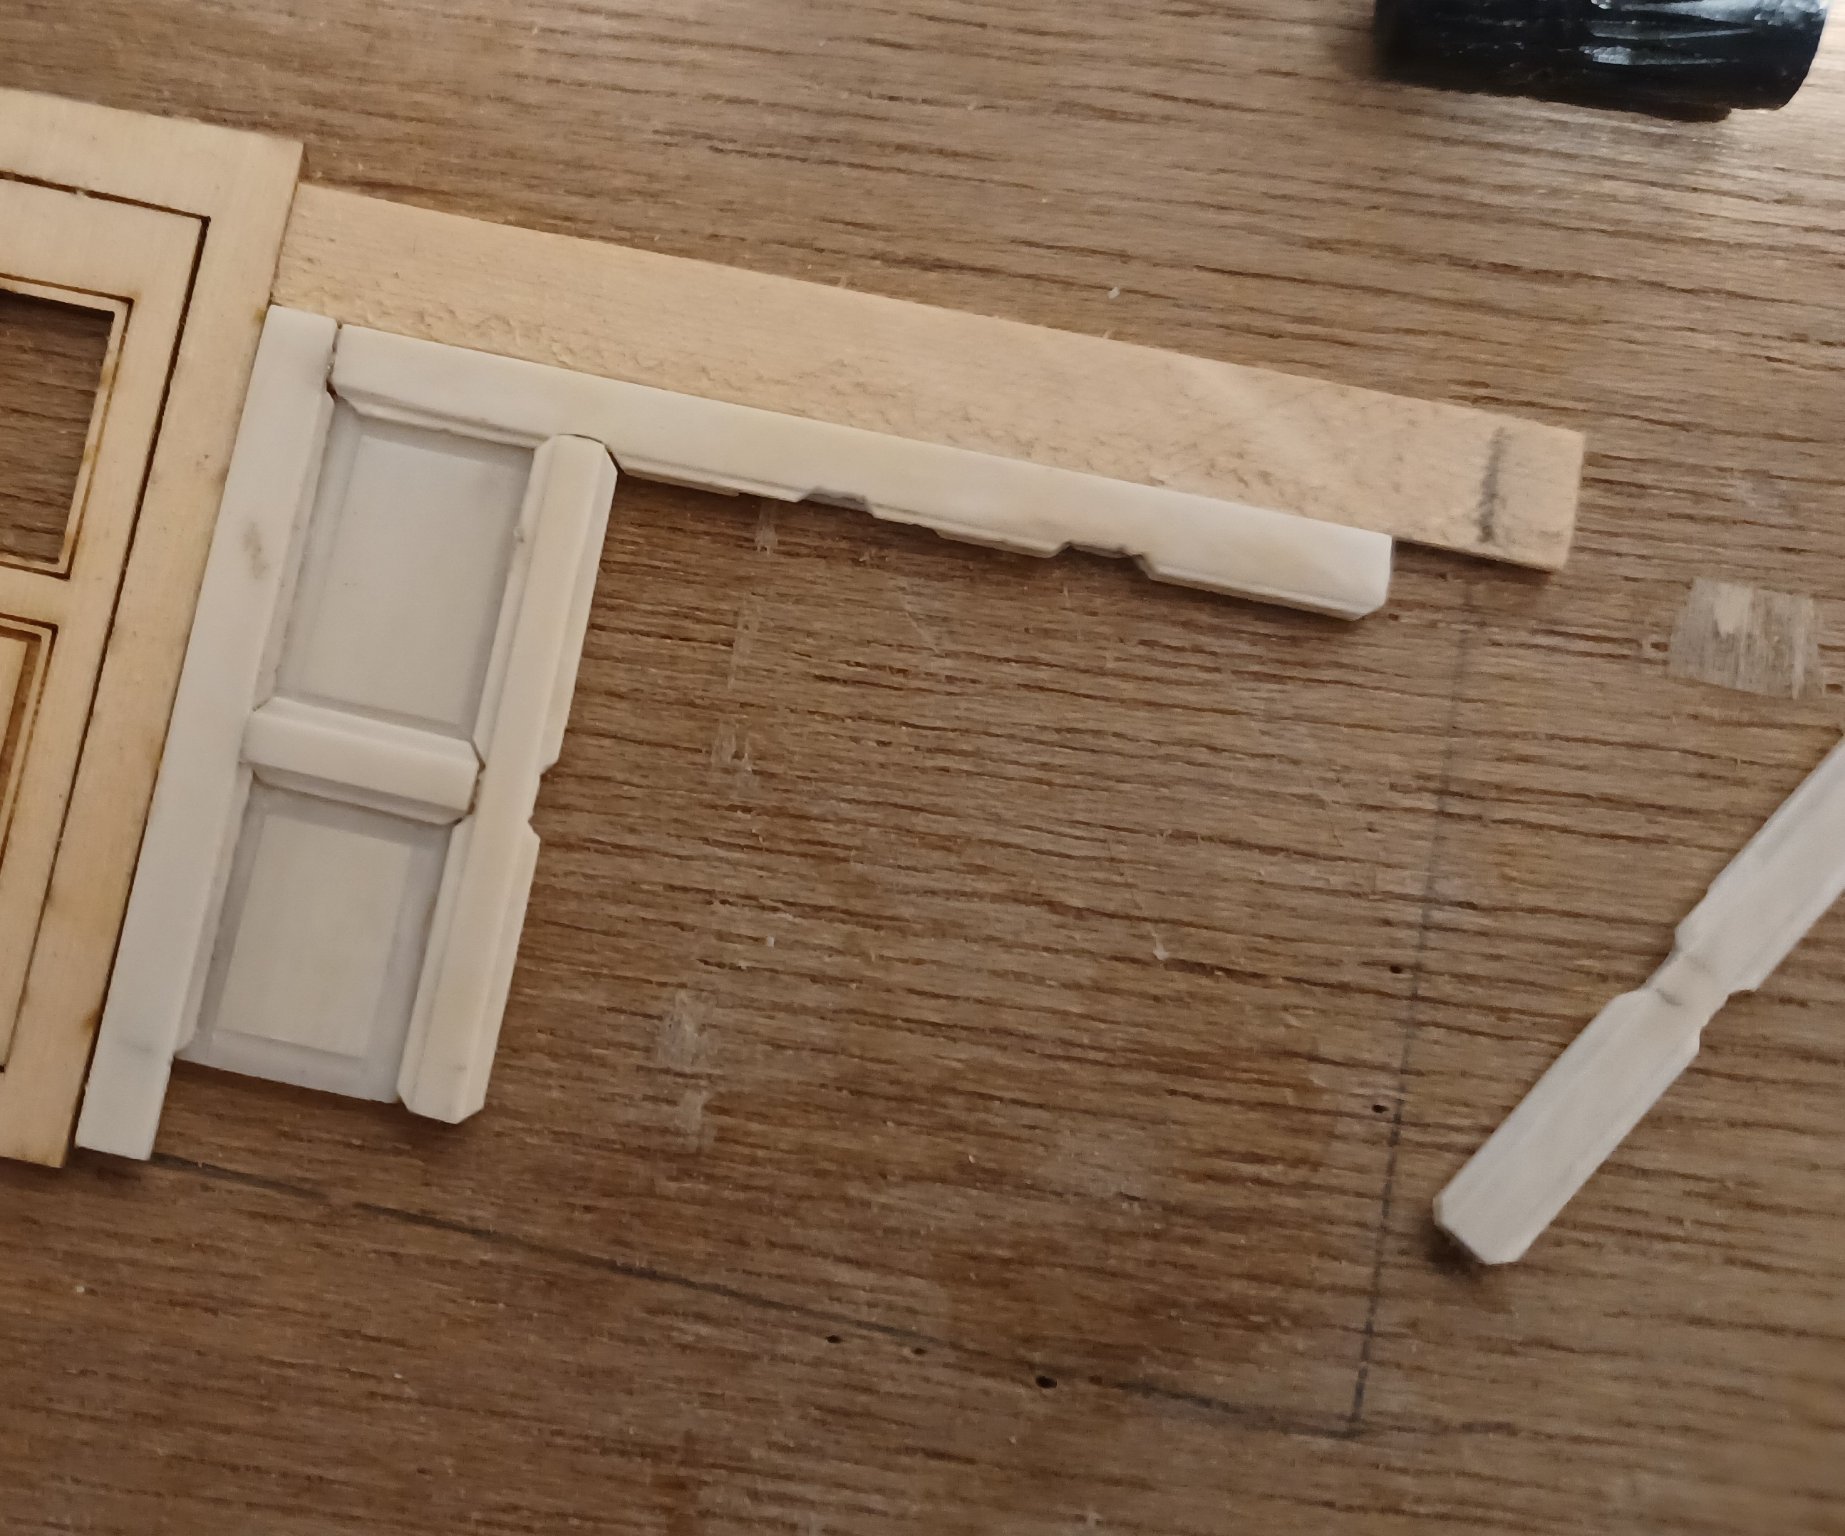
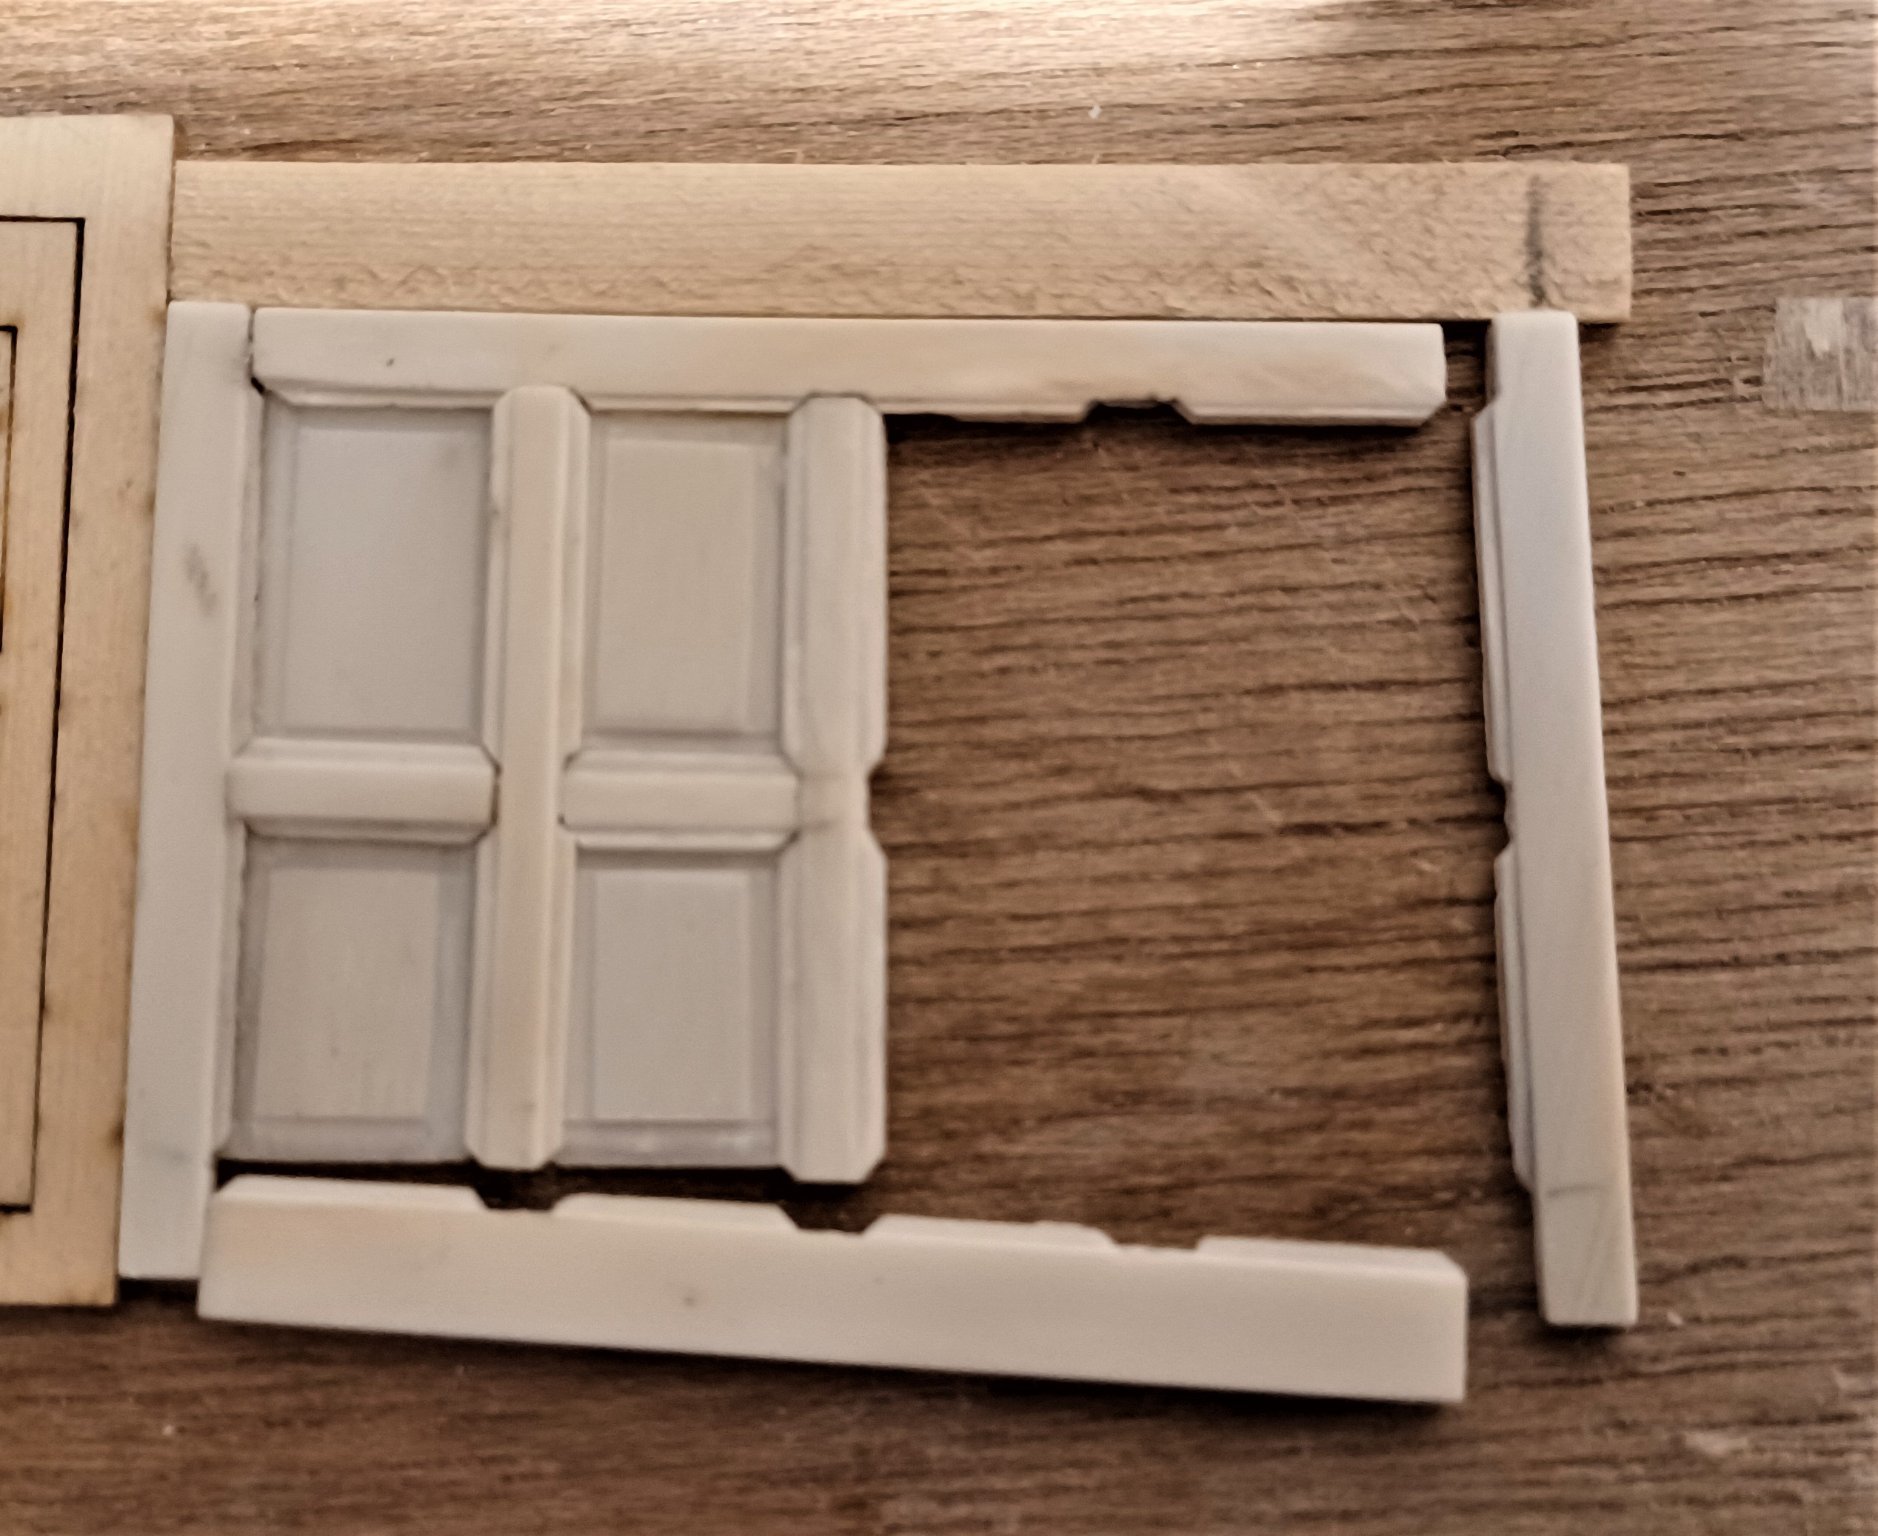
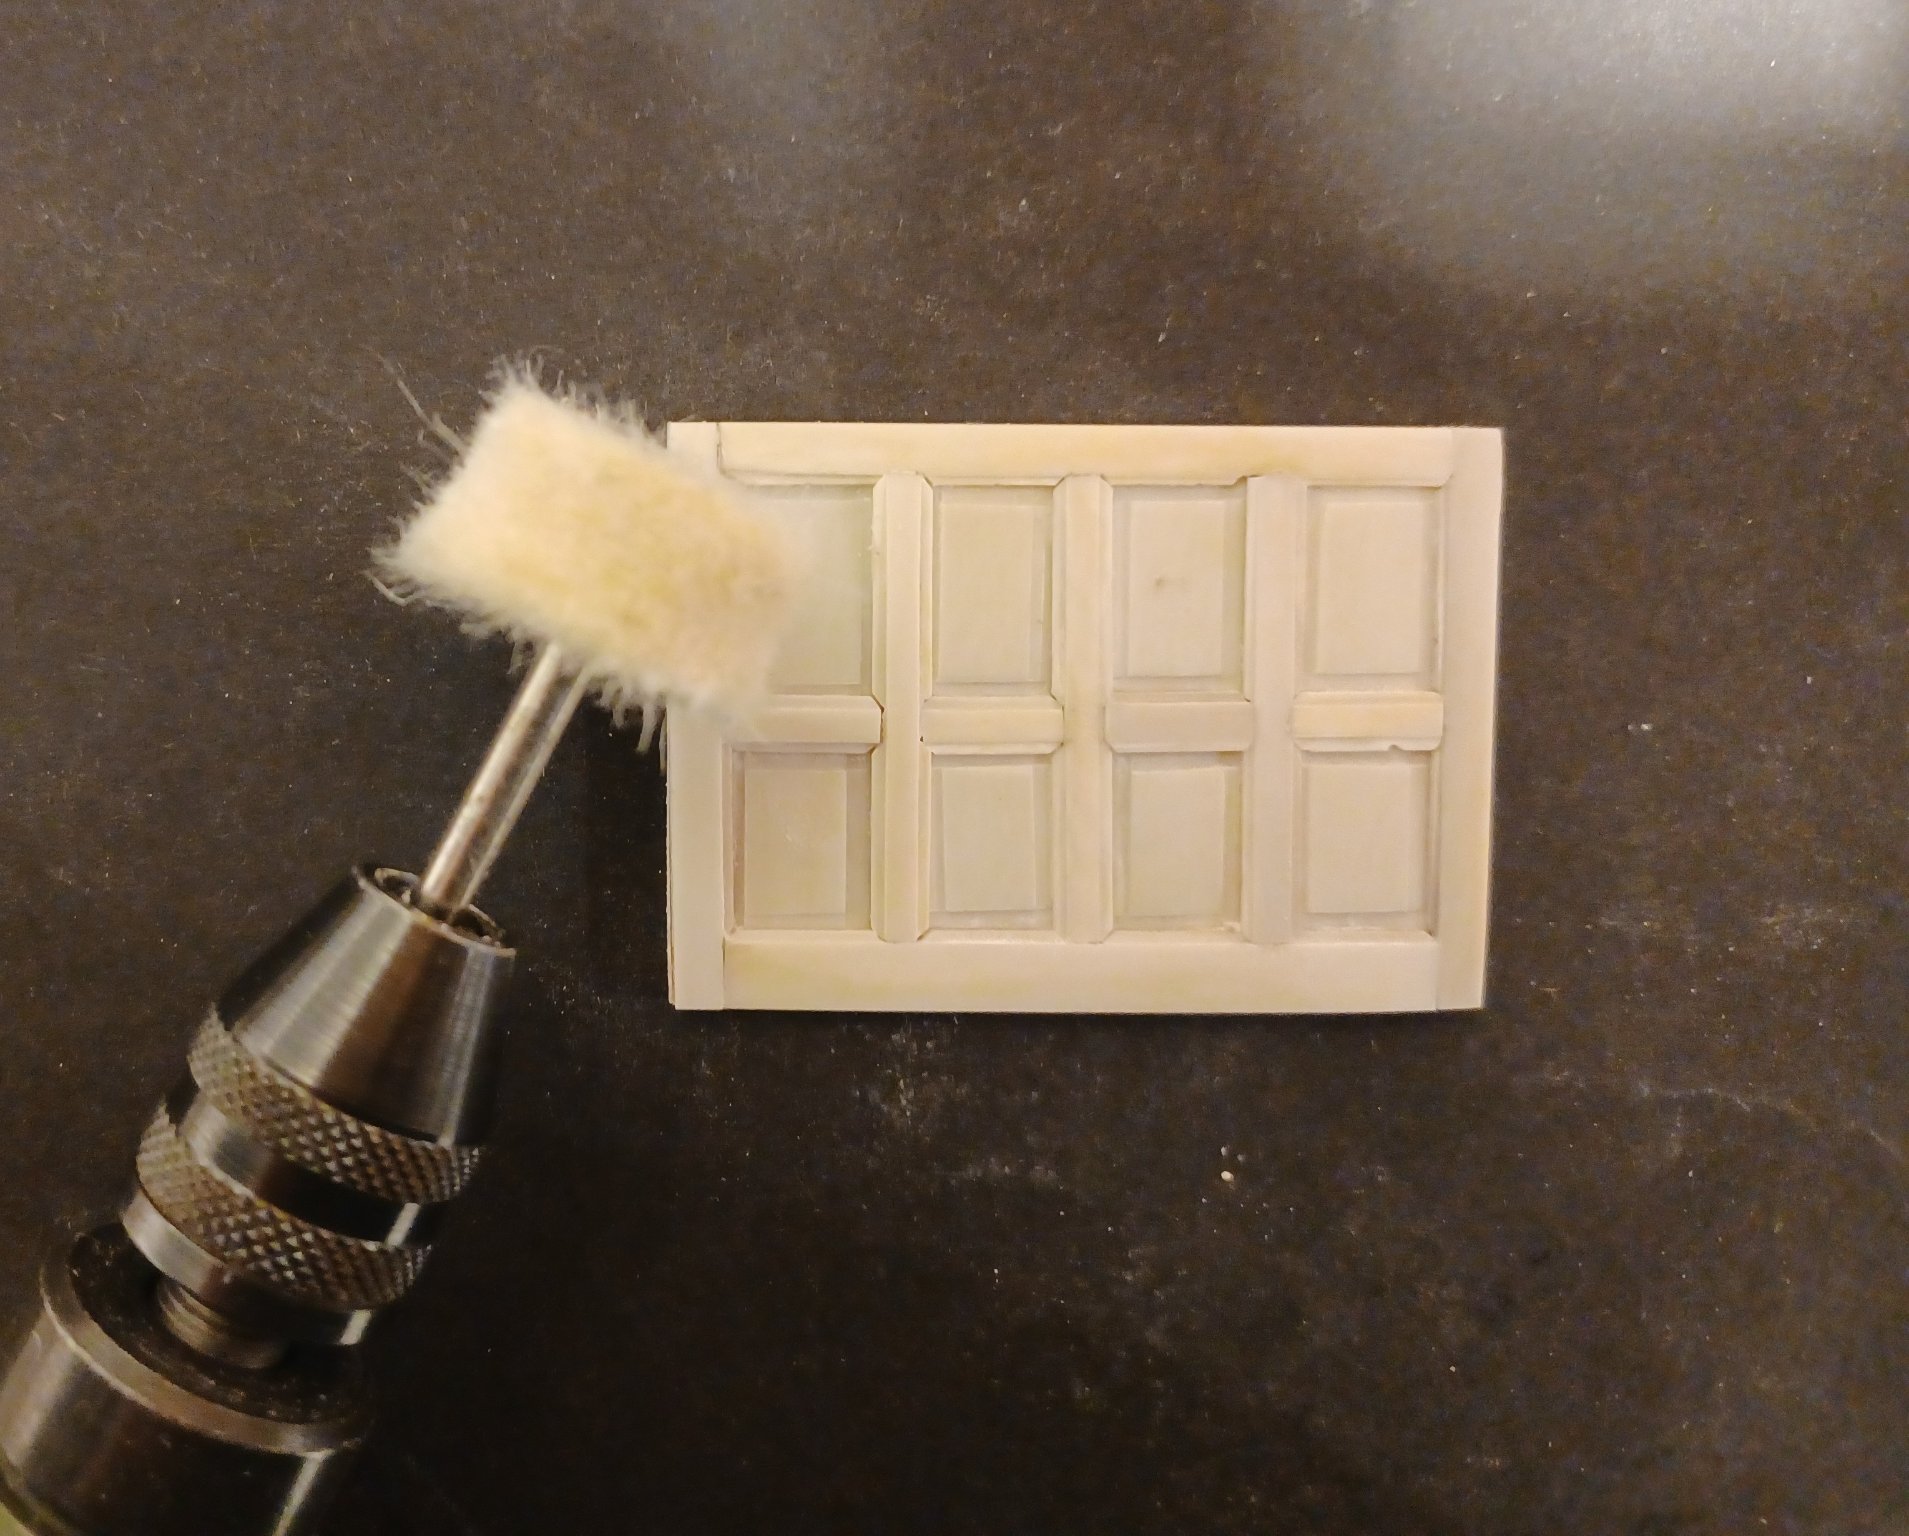
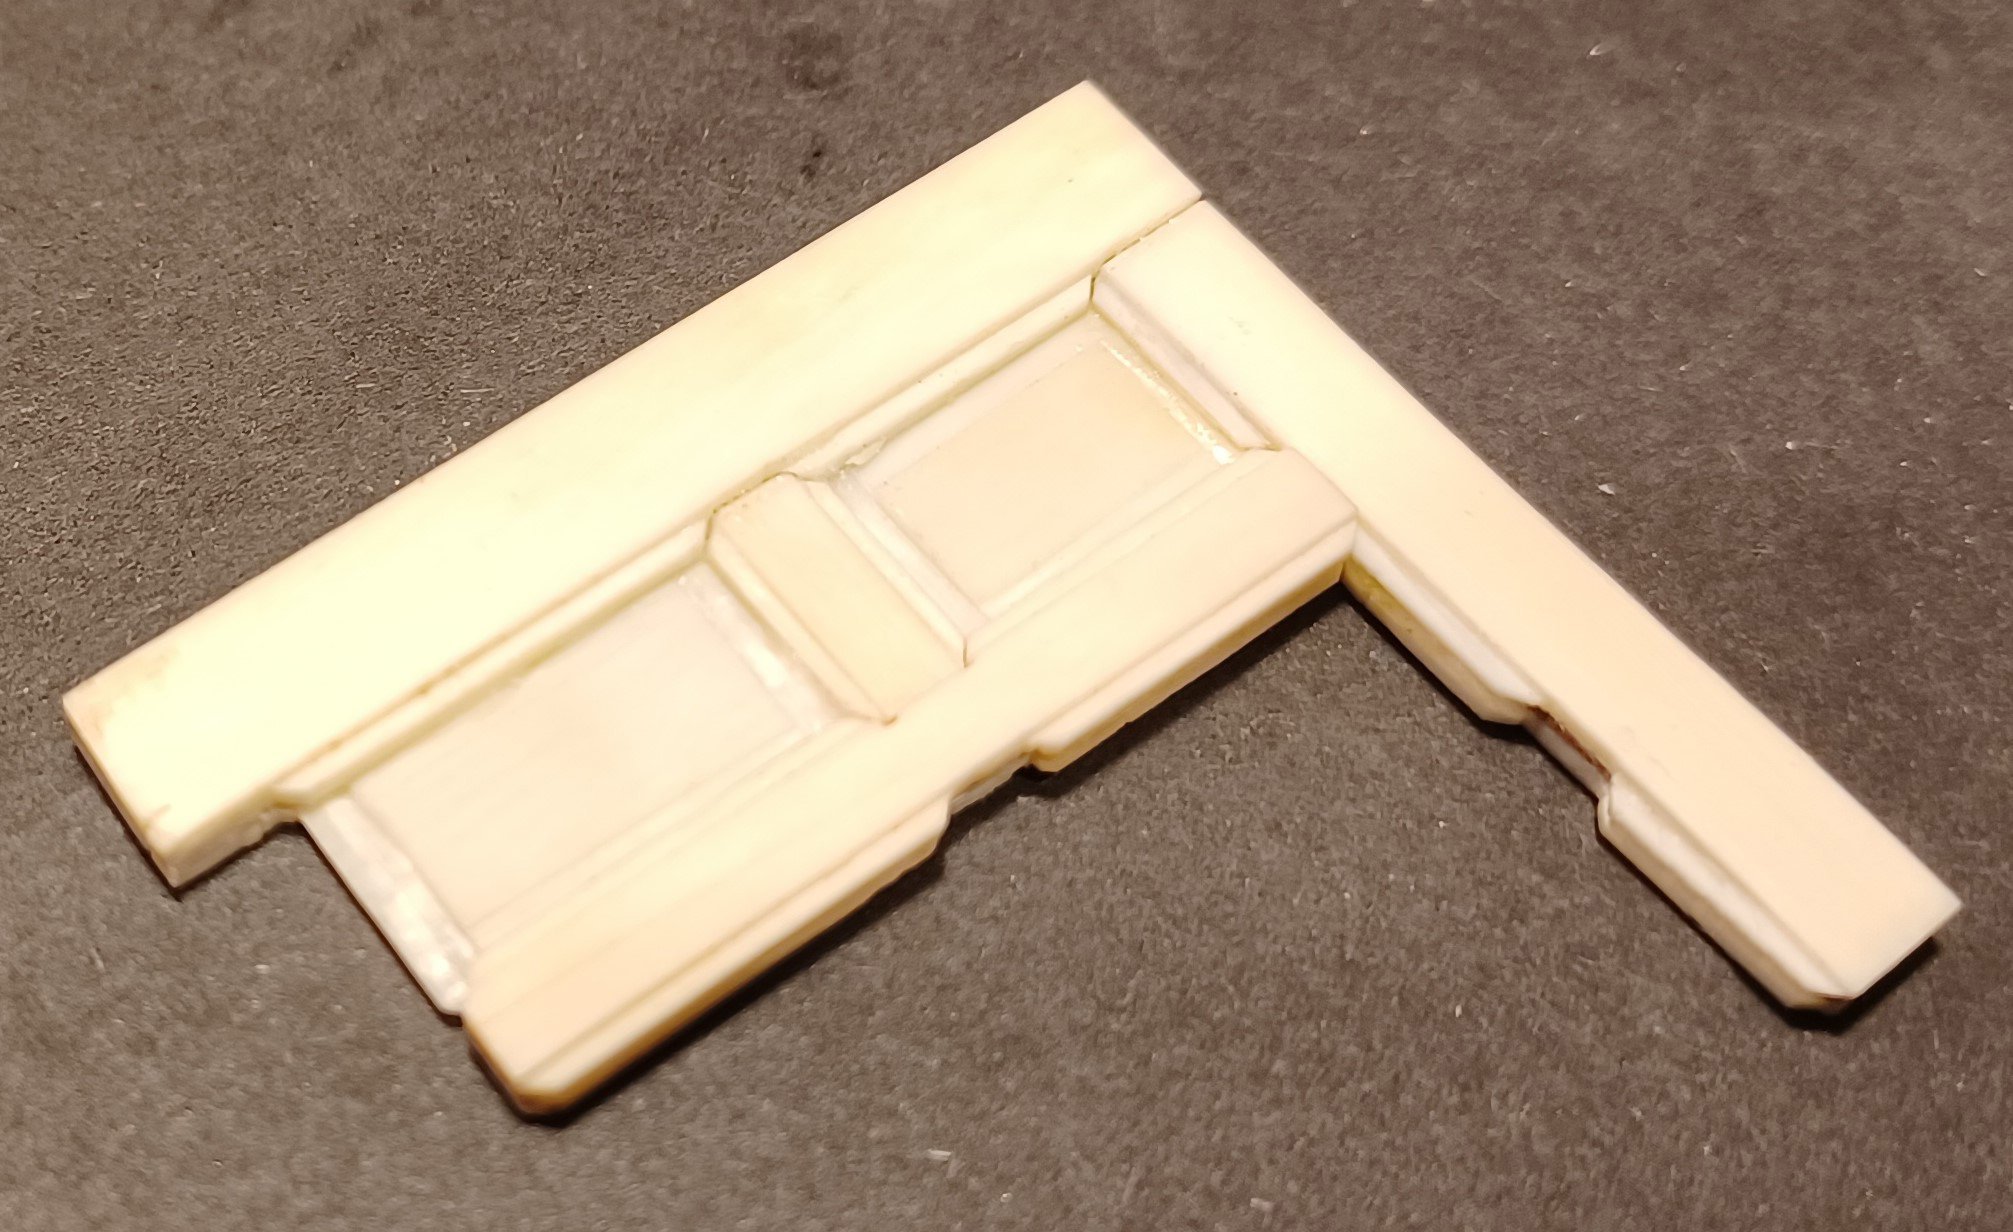
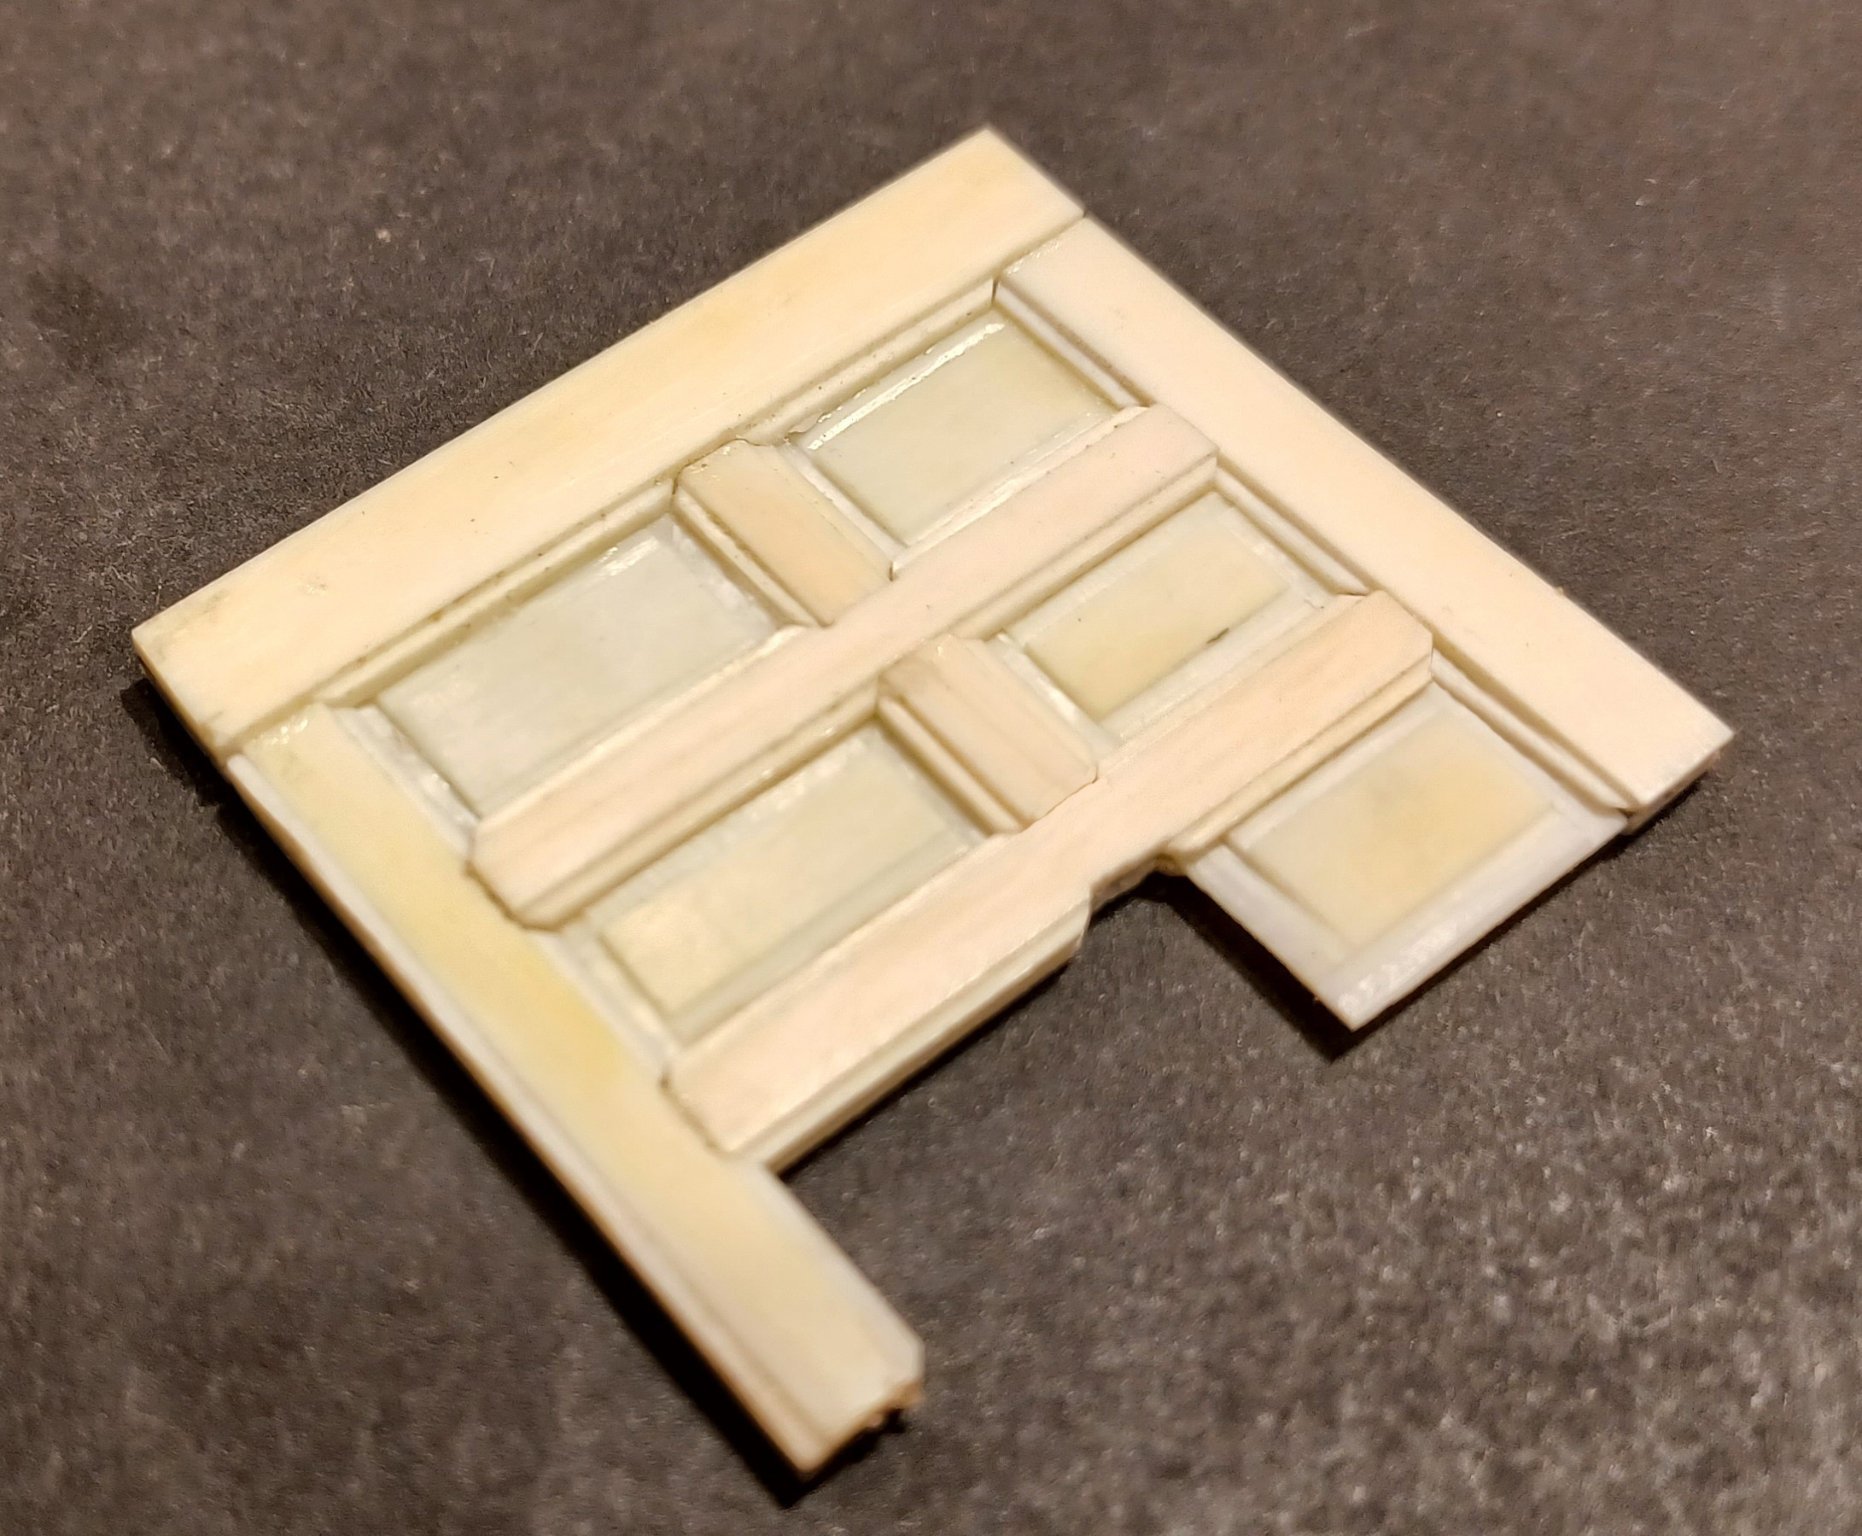
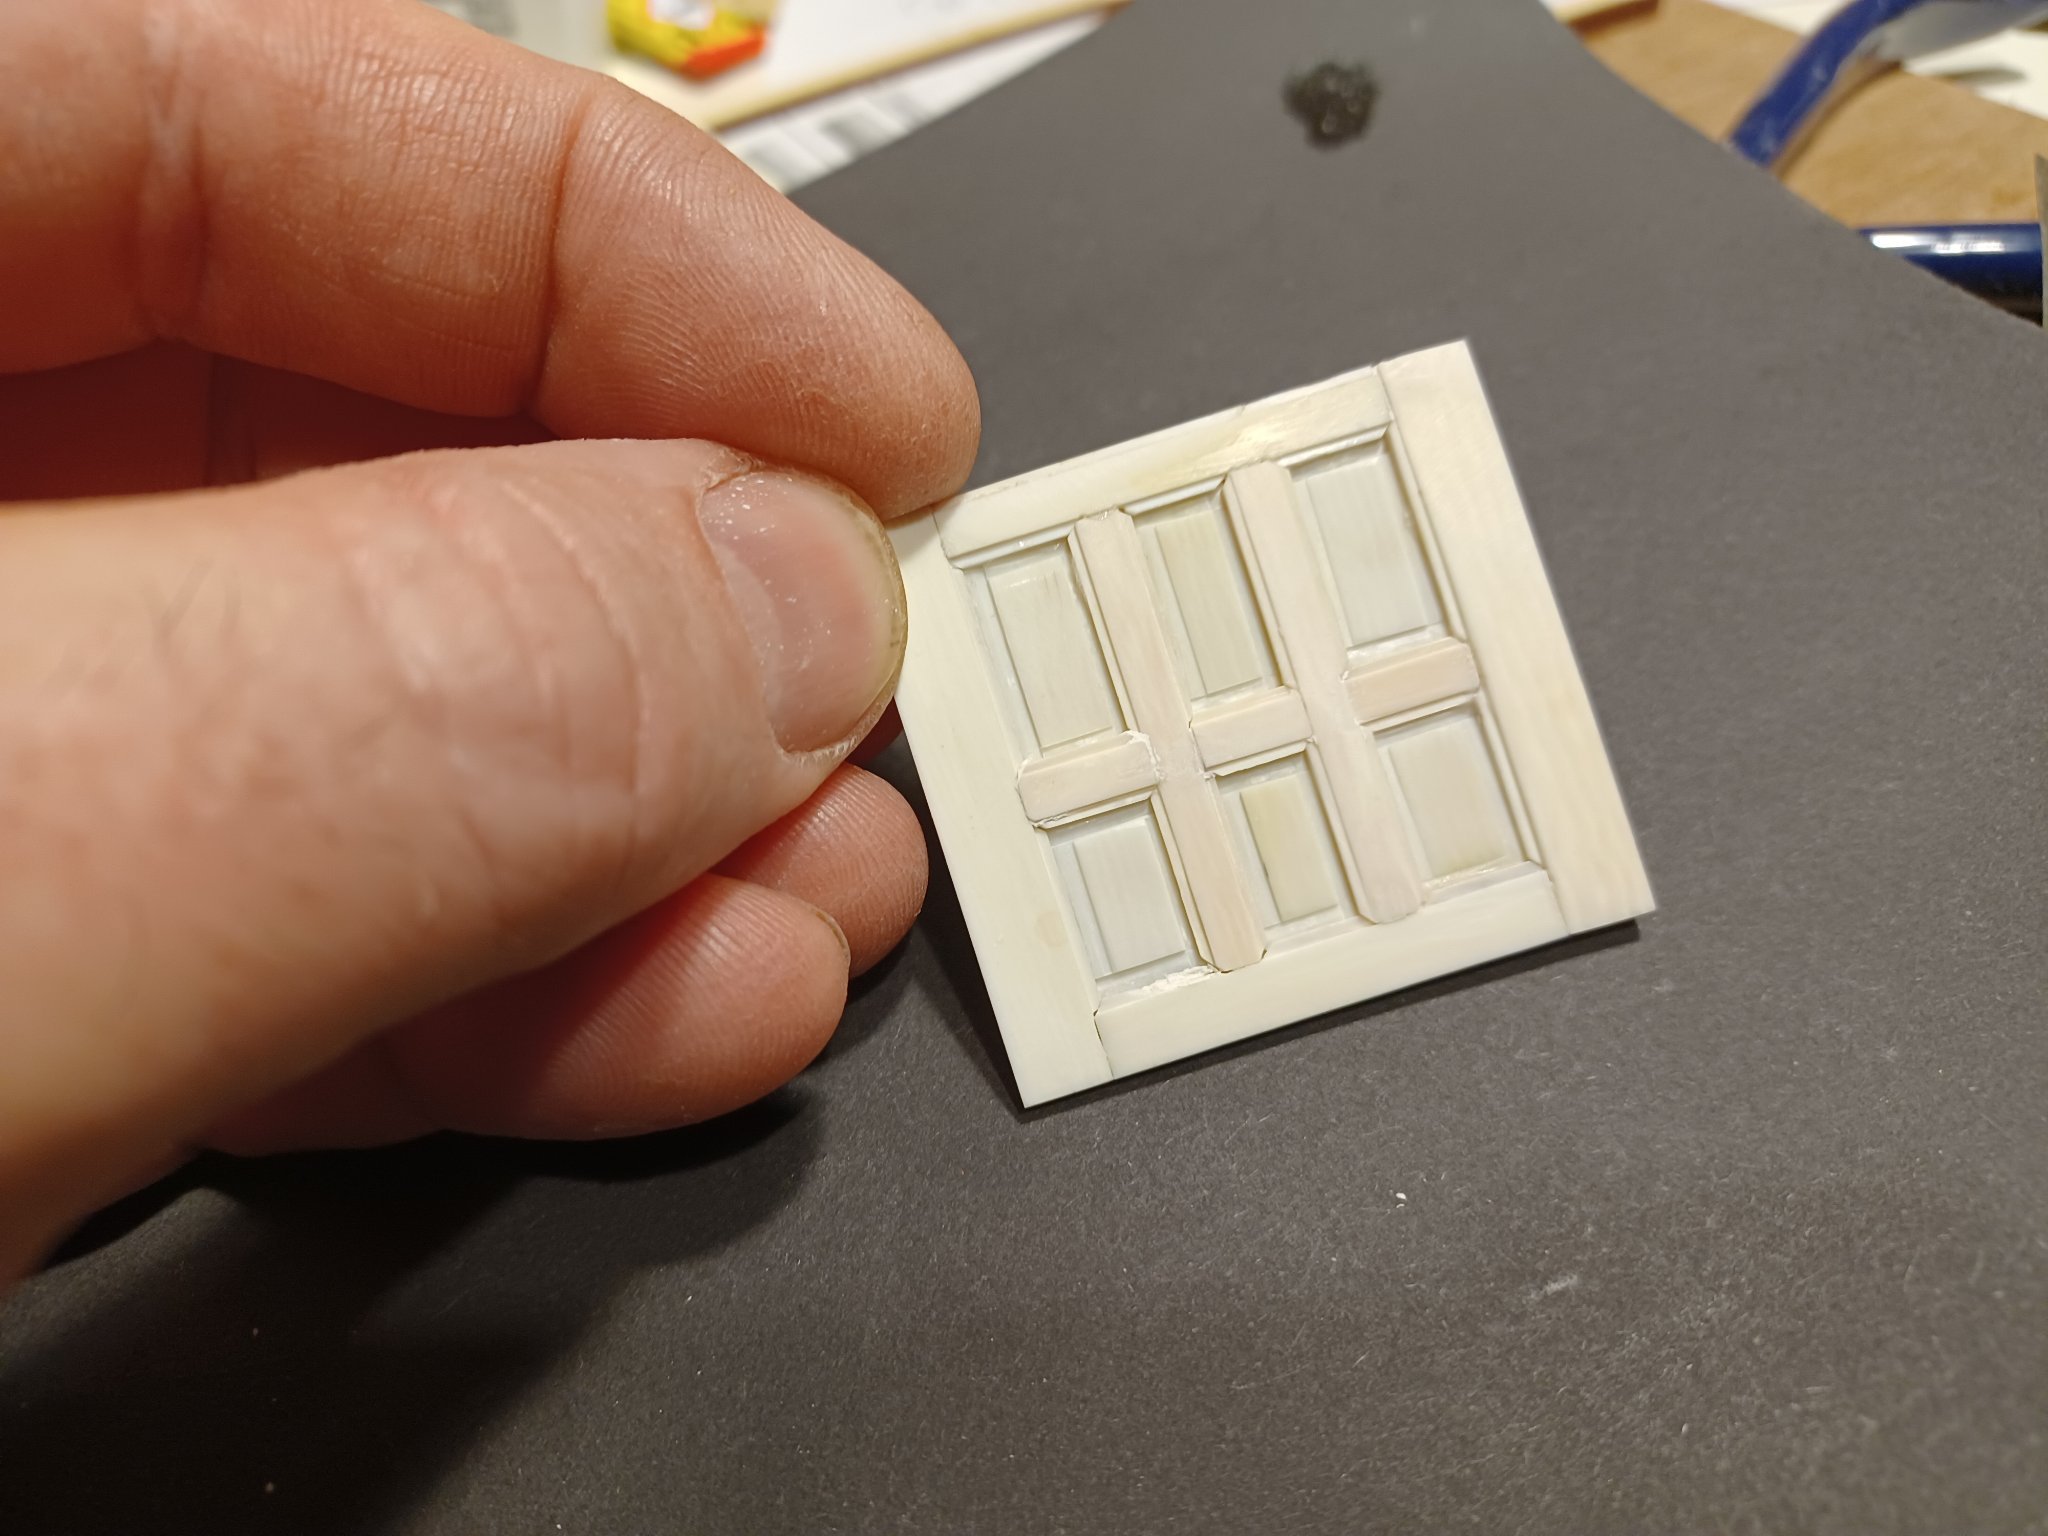
Here we go step by step:
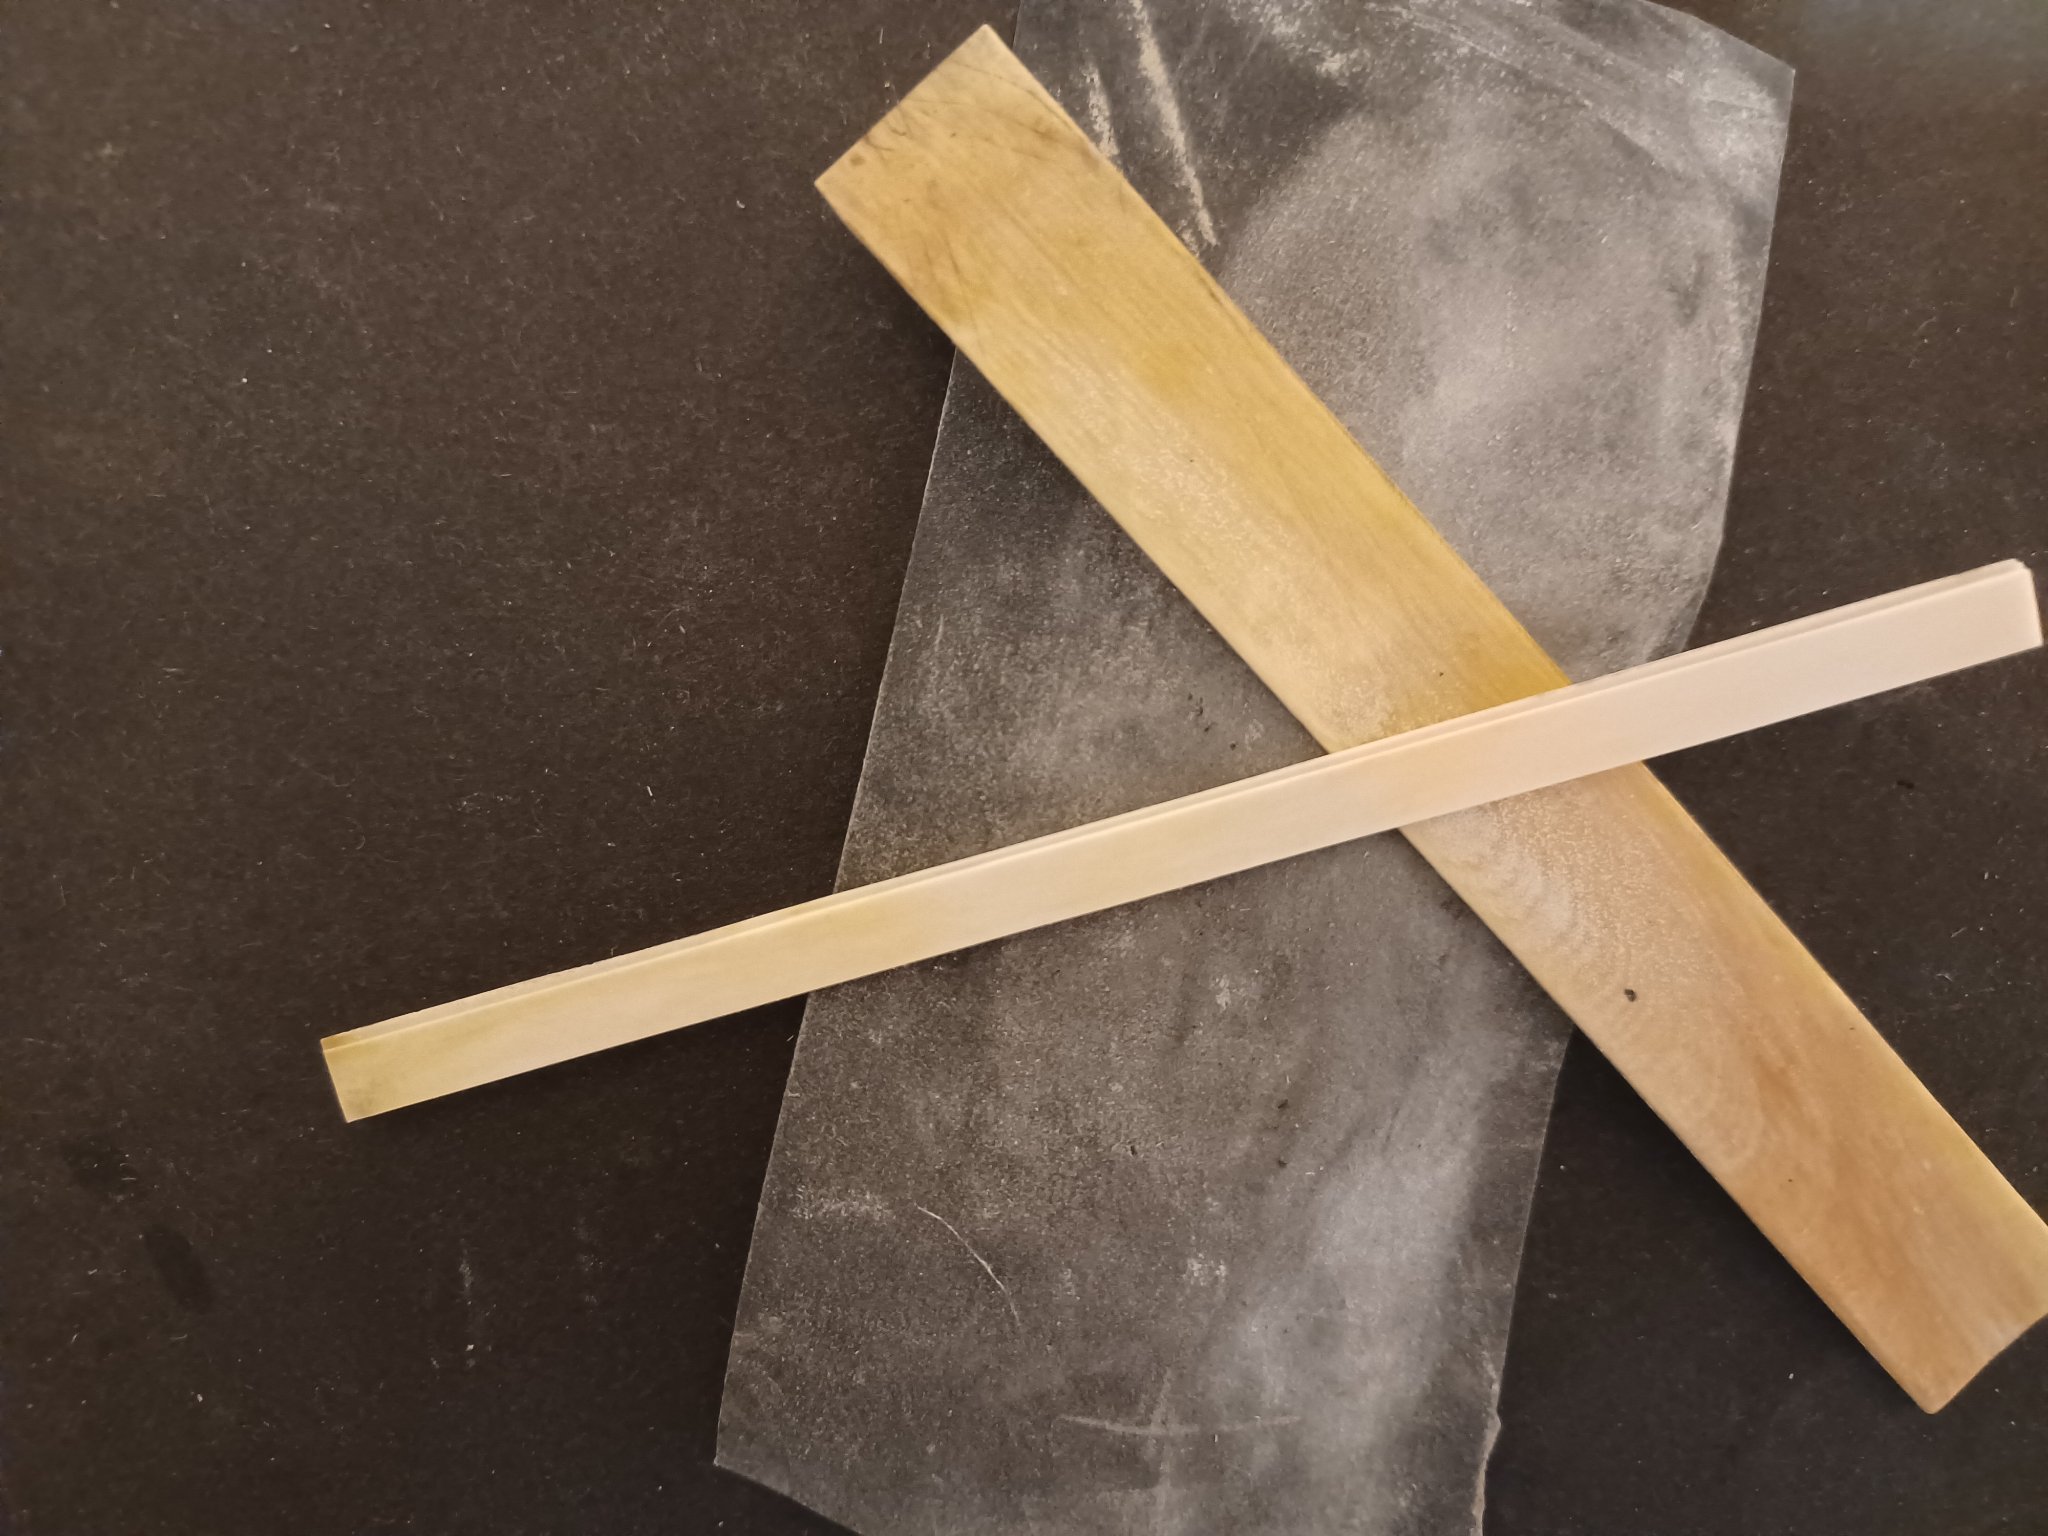
1. The material:
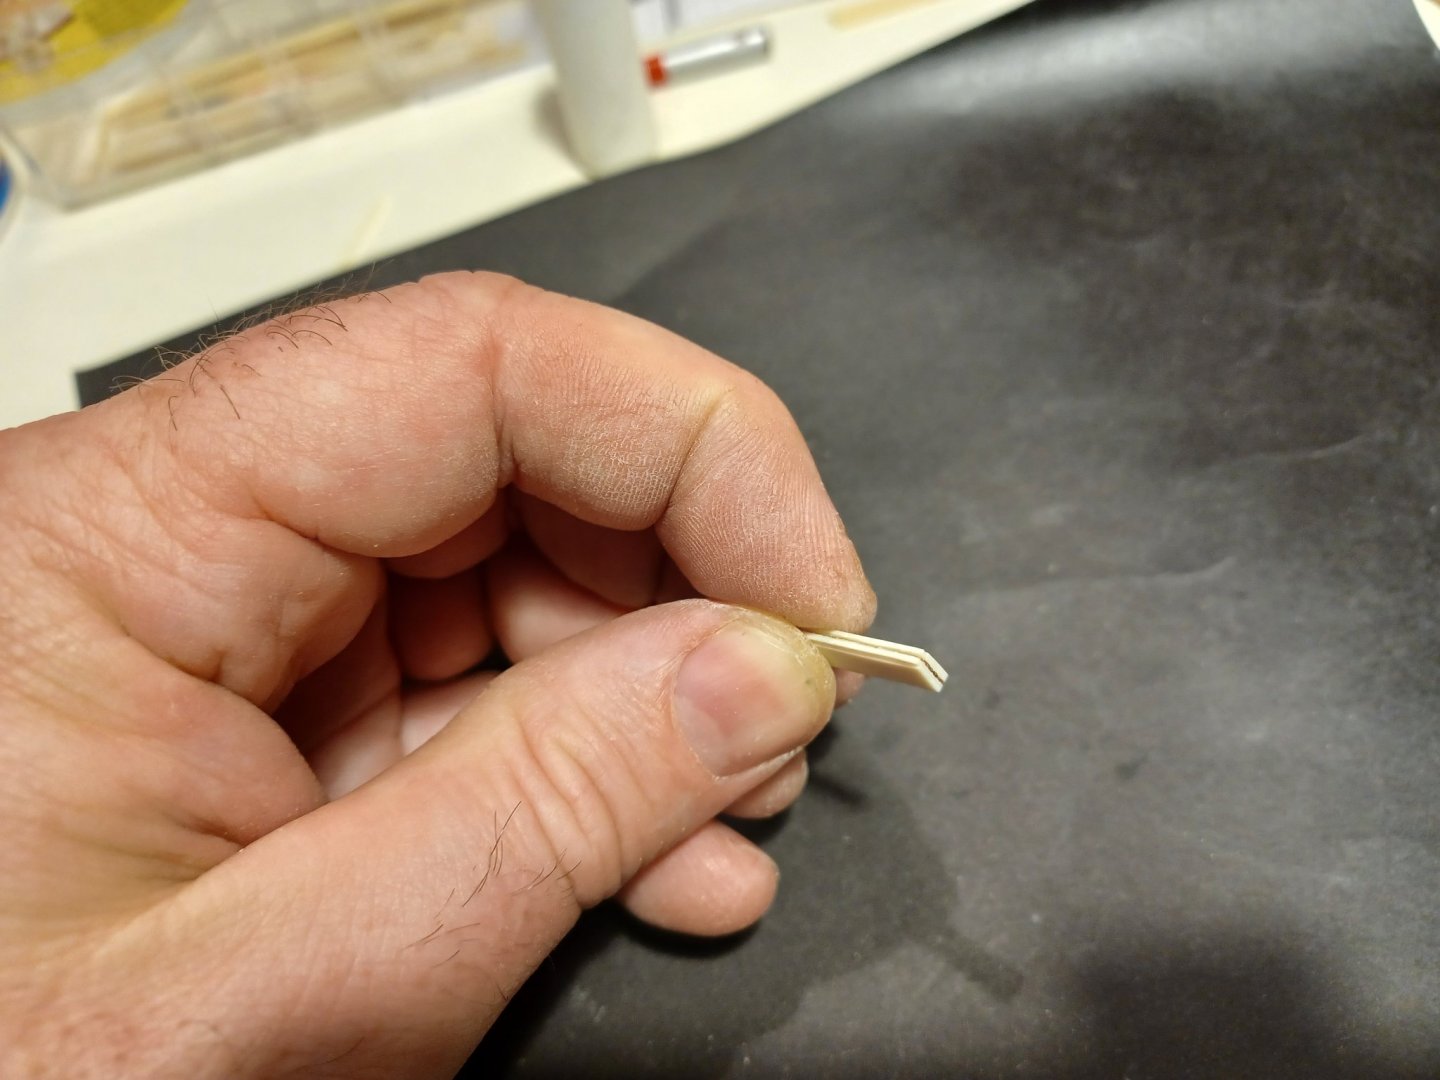
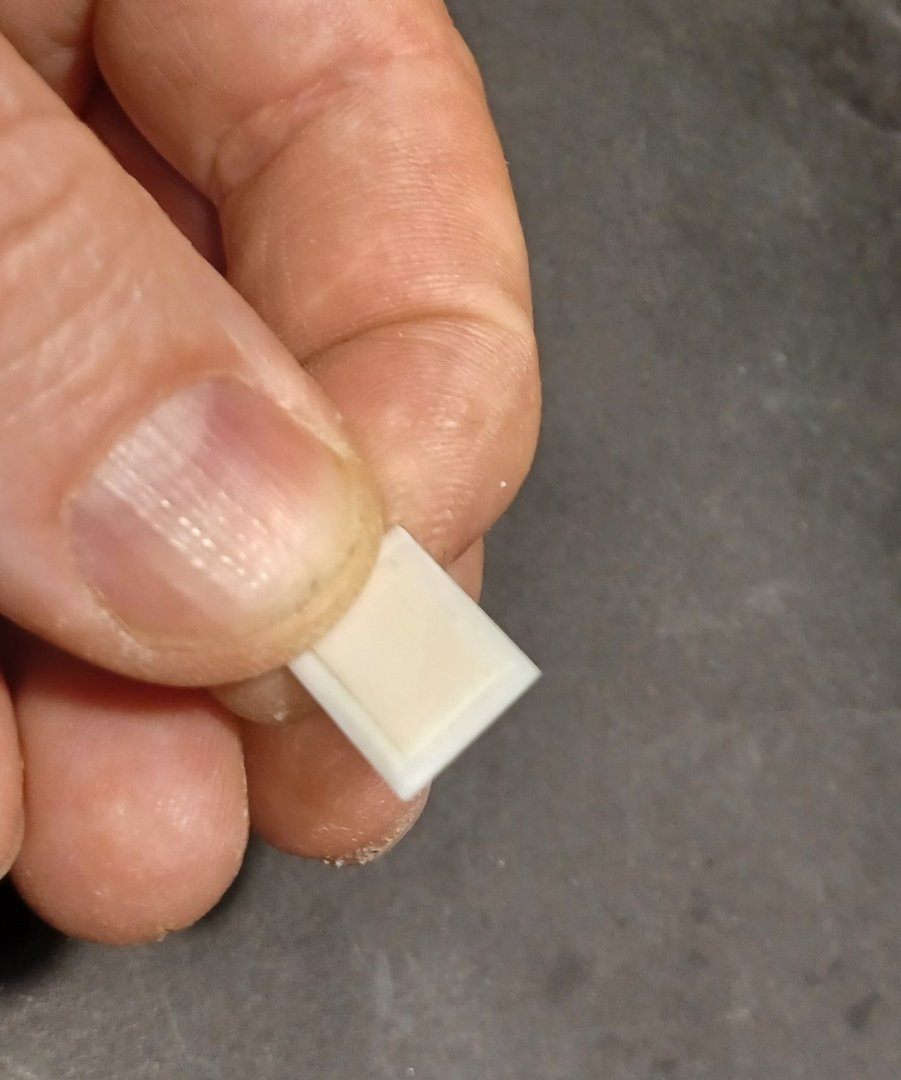
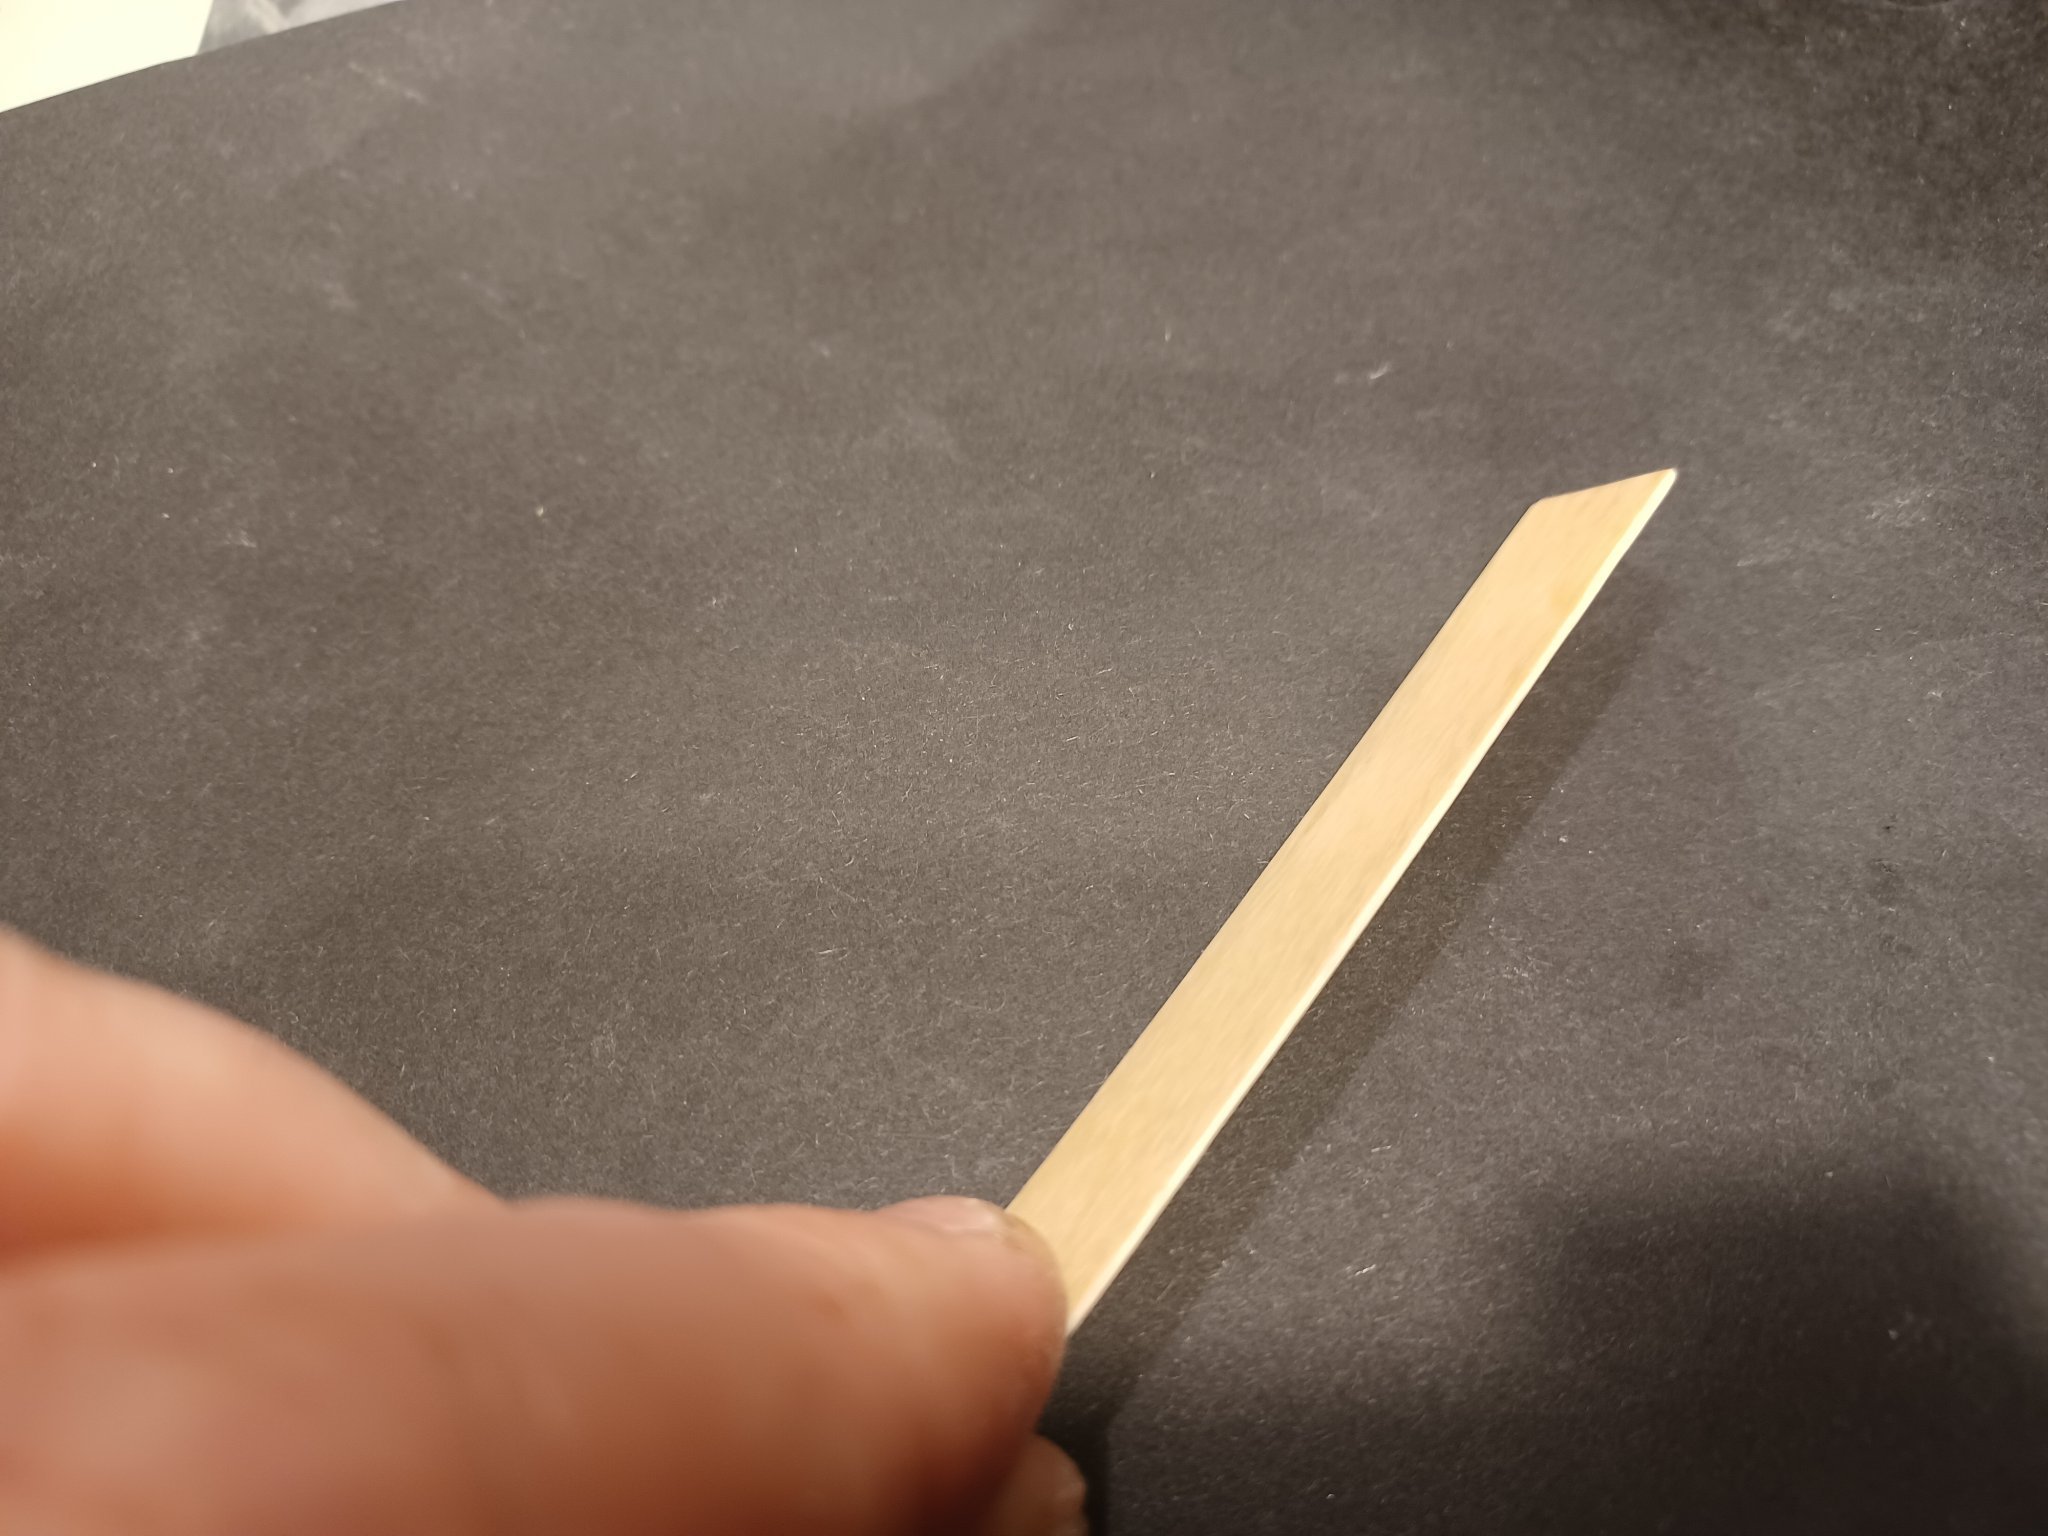
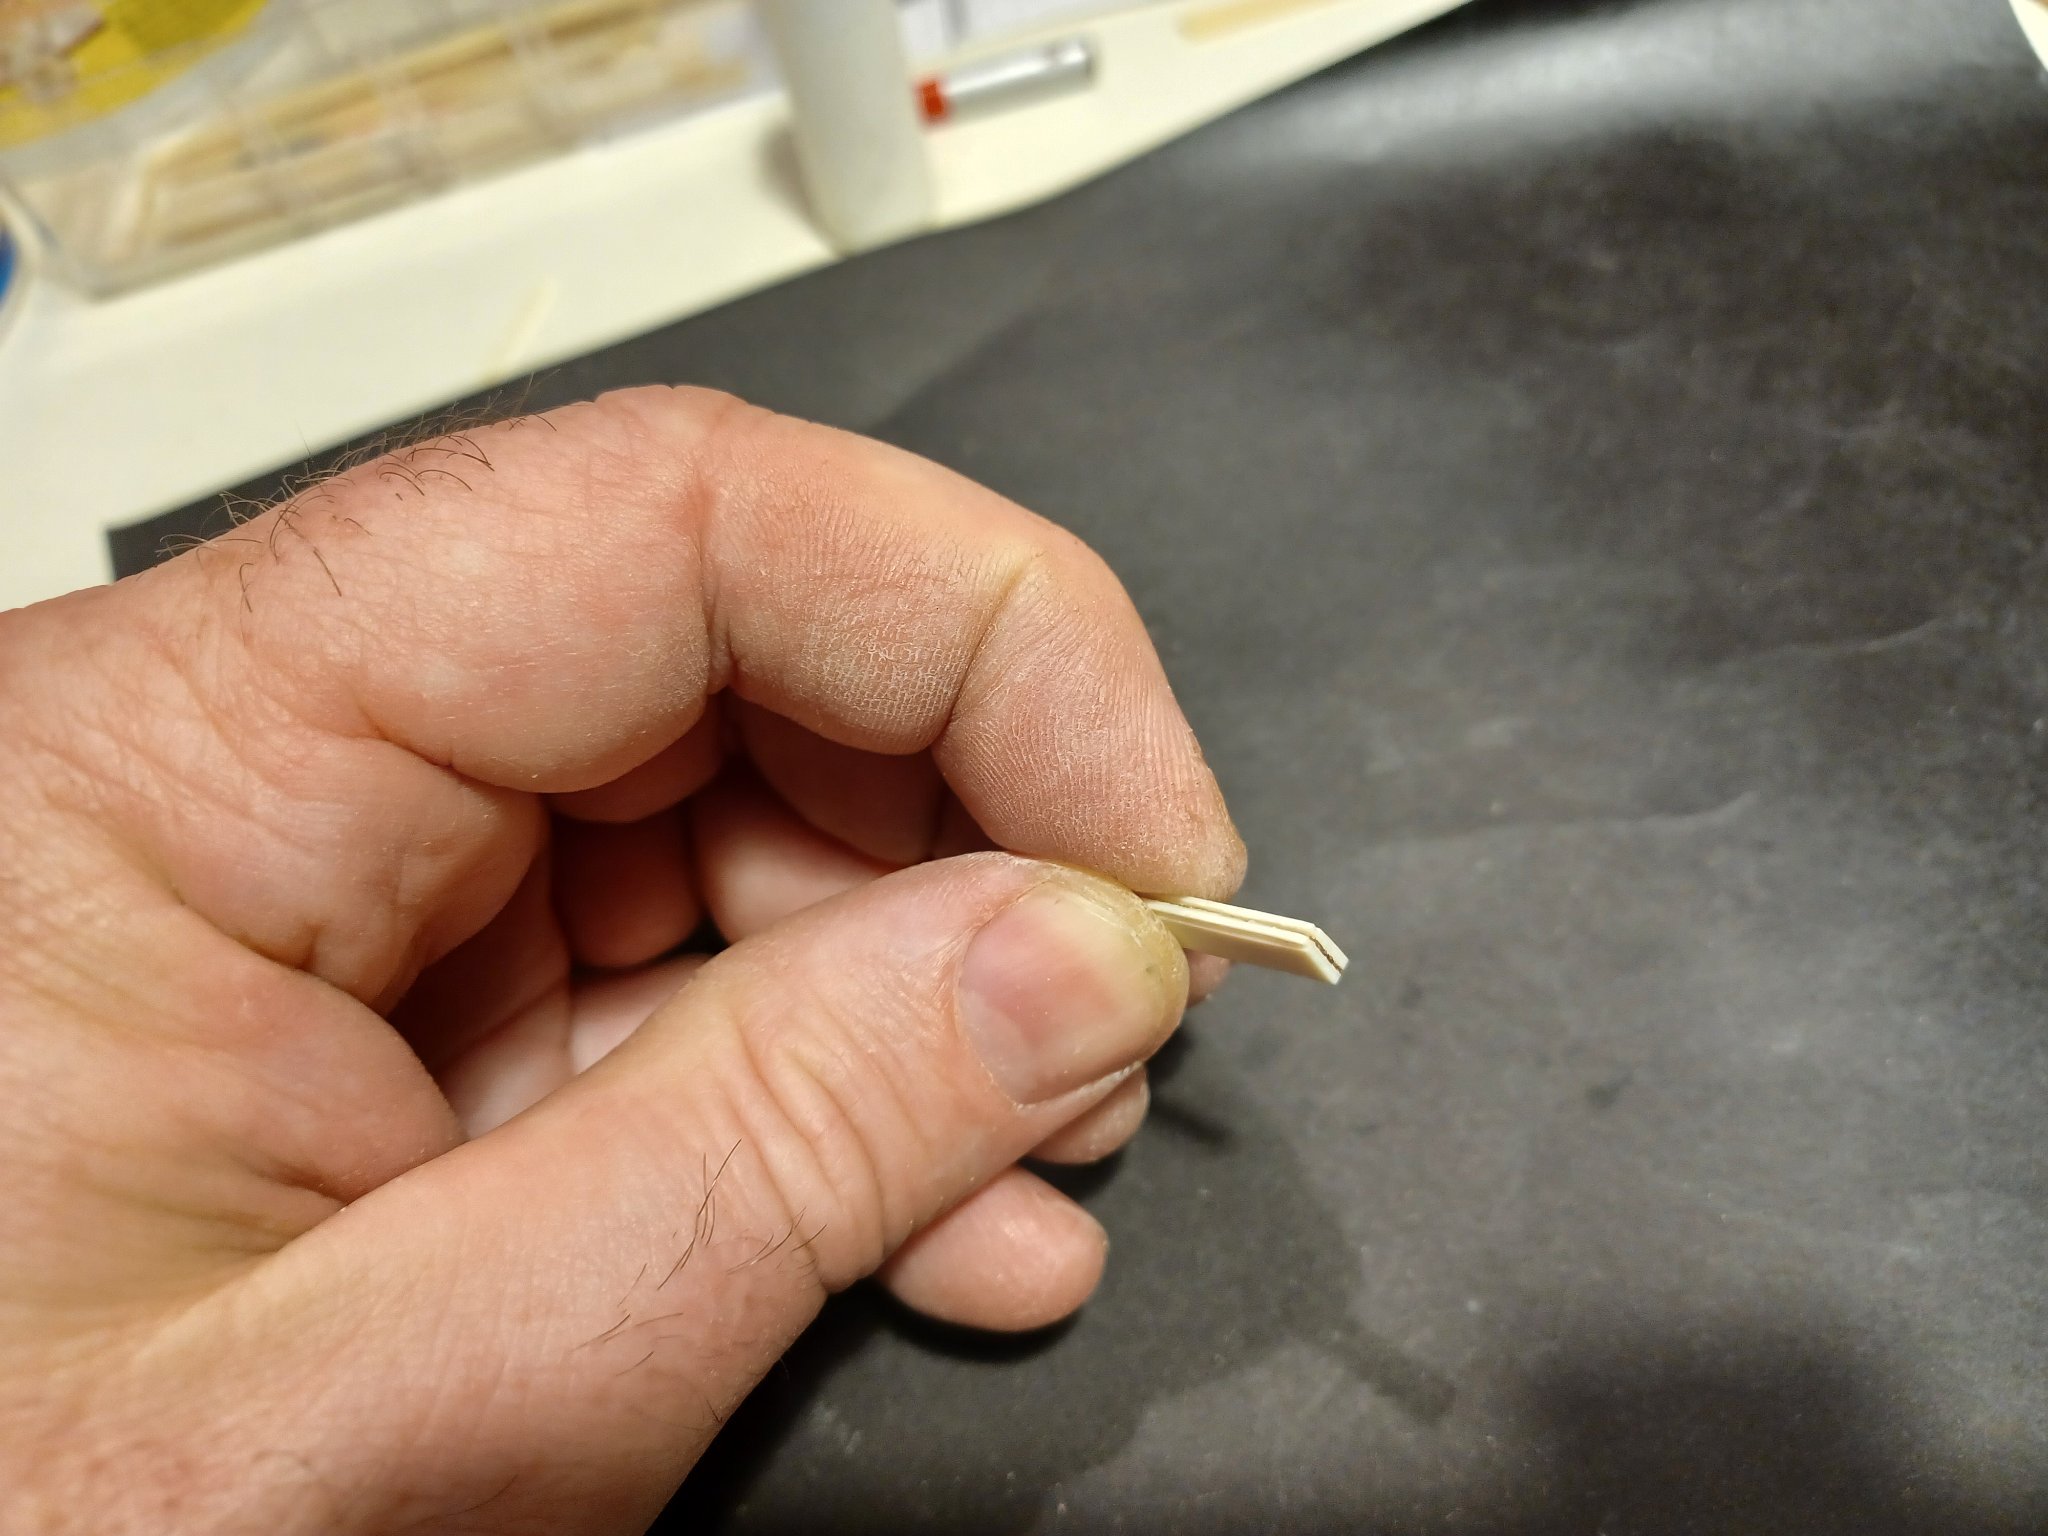
I use old piano-keys, if you don't have some, just use bone. From cattle for example, Cut it into strips of about 1,5 mm thickness.

2. Sand the edge

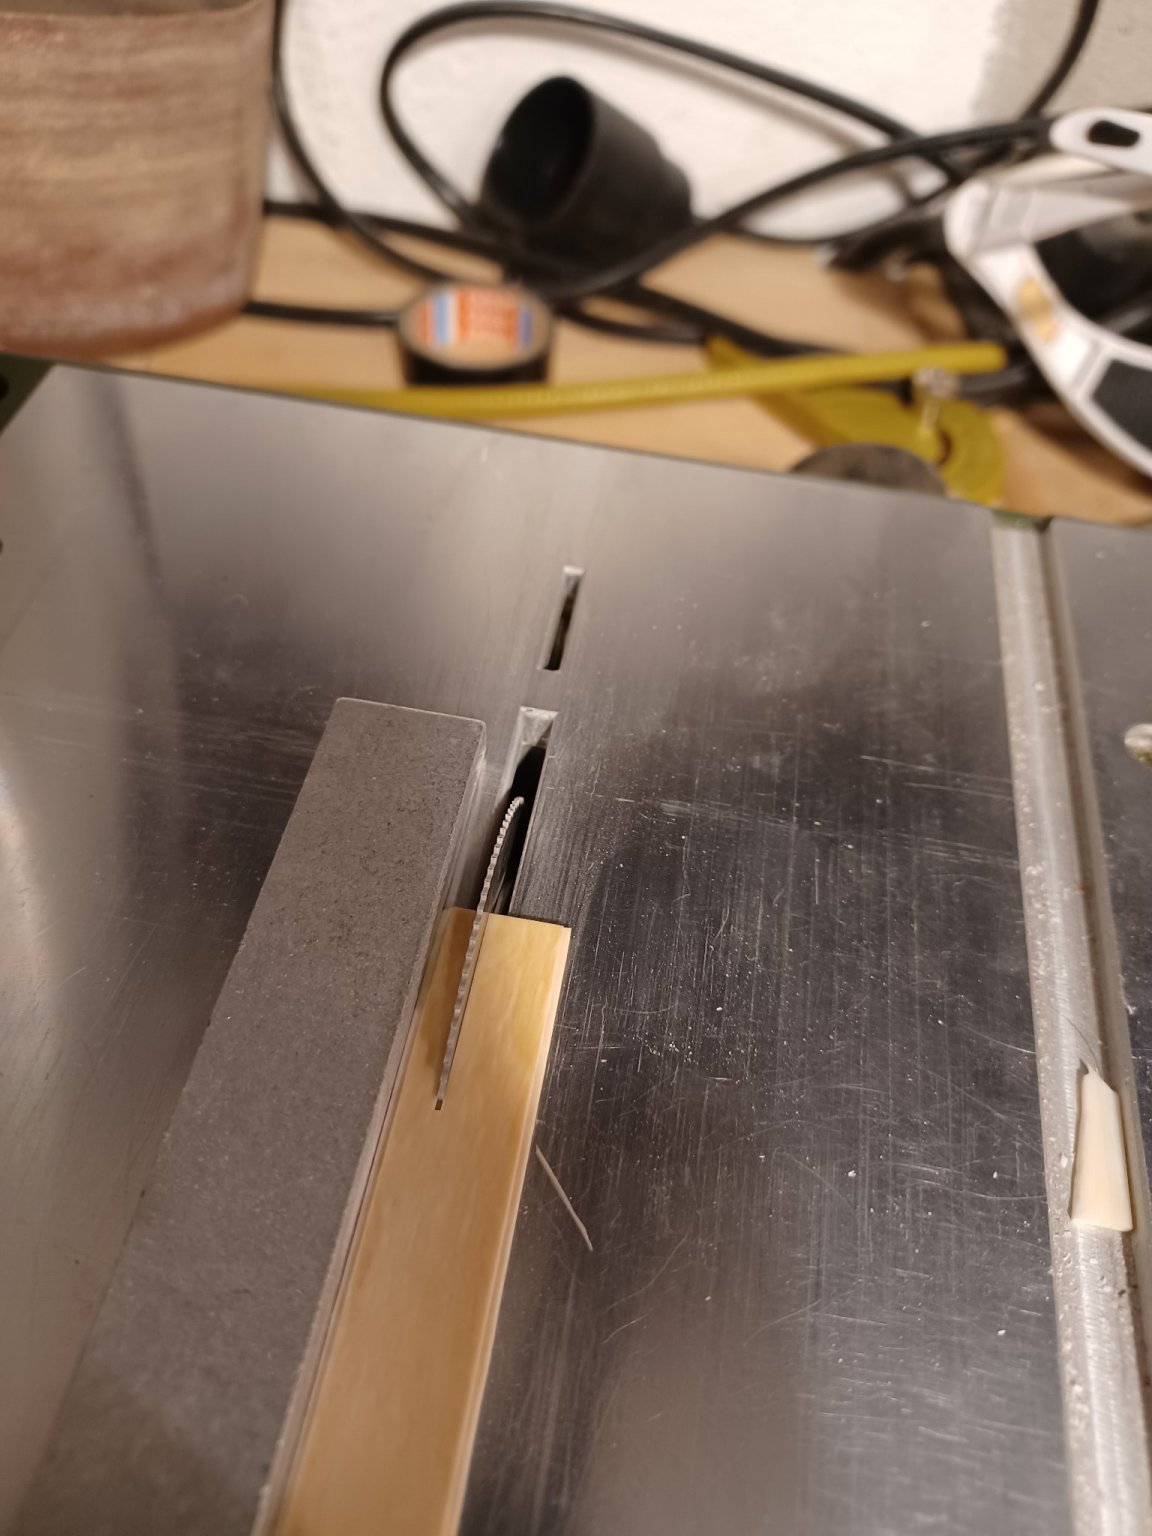
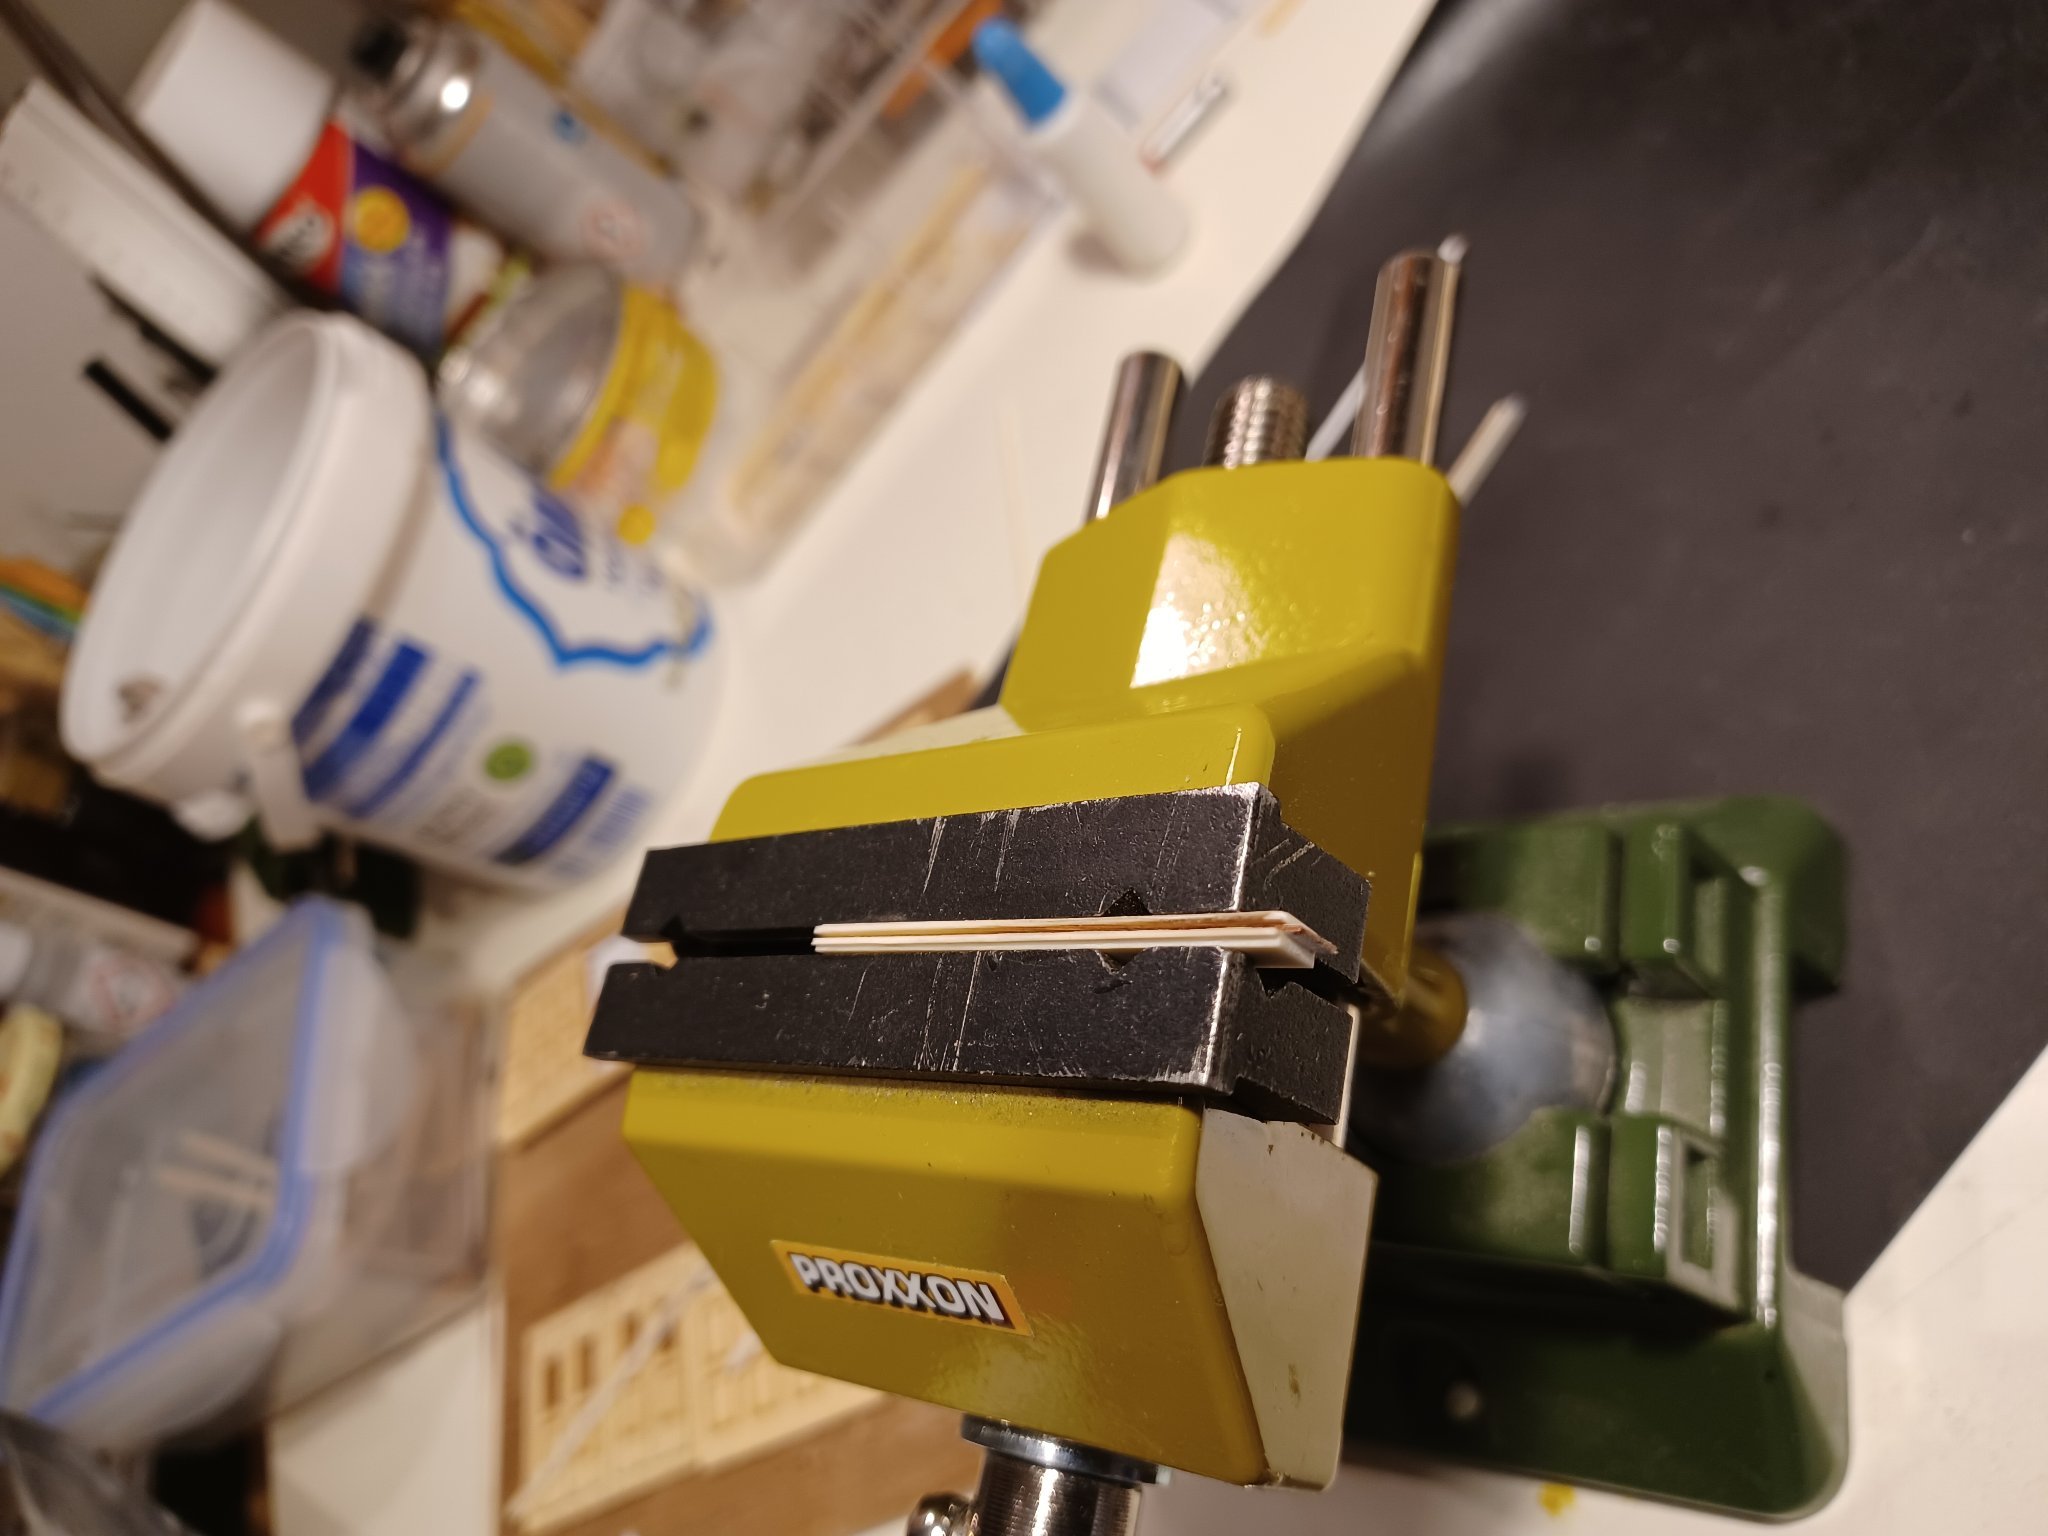
3. Cut a mortise in the edge with your saw
.thumb.jpg.78c8185c920d81ea525d5c9d14dbc080.jpg)
About 0,5 / 0,5 mm
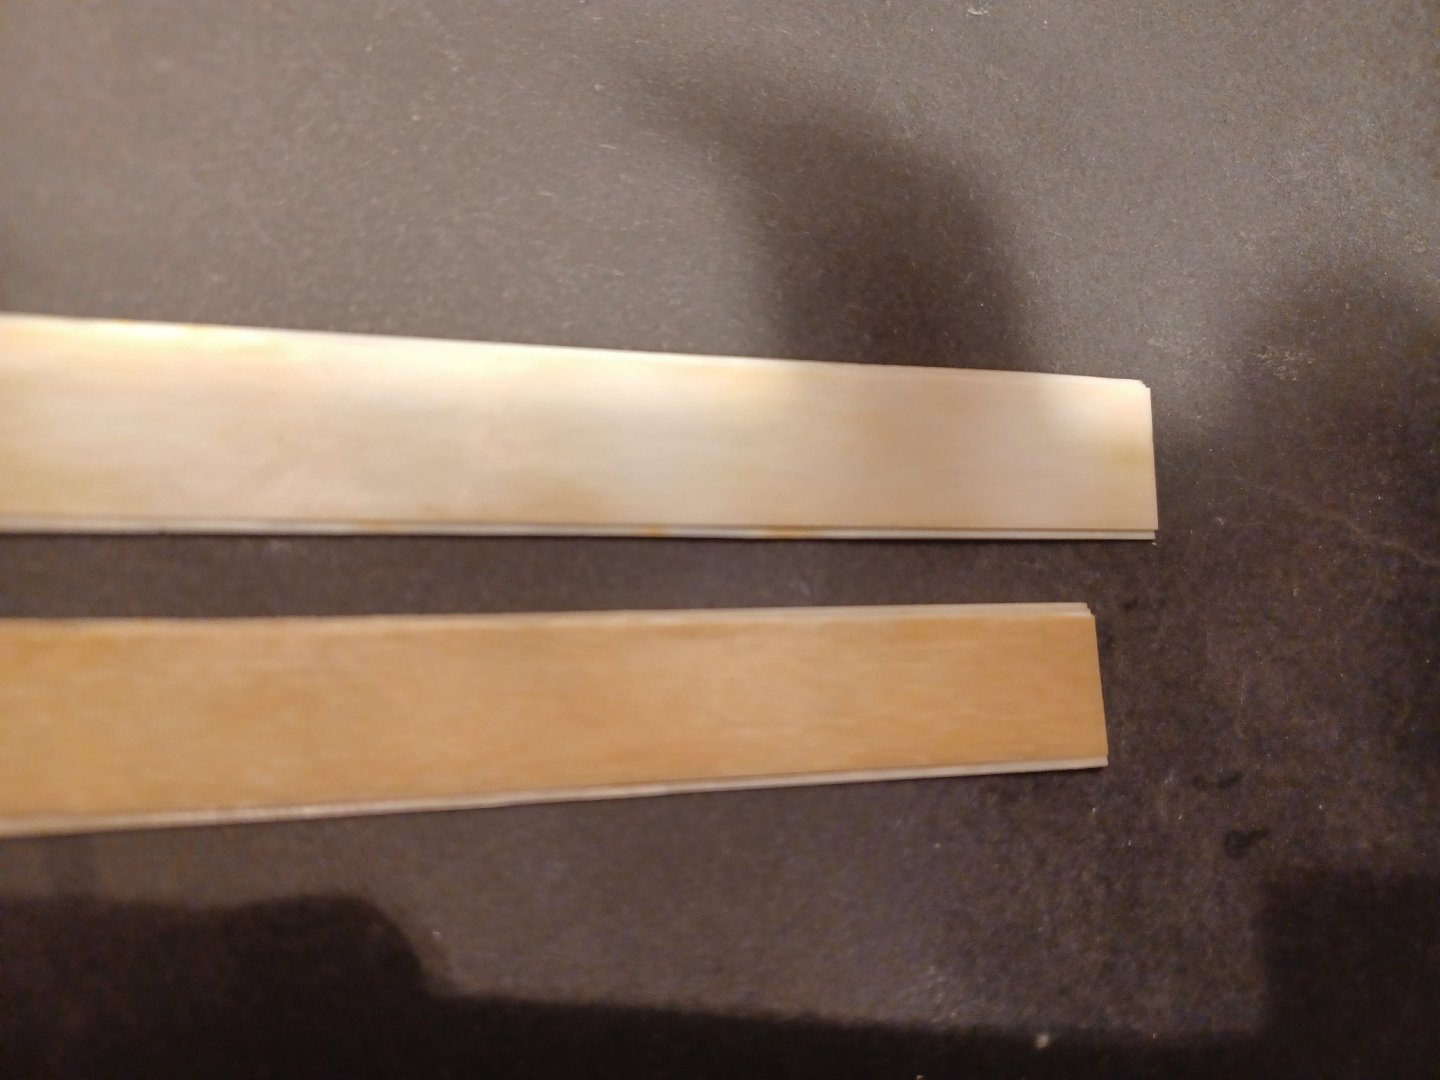
4. Then cut the strips into the proper width of the framings:

5. Clean them with fine 400 sand paper

5. Glue them in 3 layers together. In the middle put a small veneer strip to create a gap between the ivory strips.

6. Then make a little jig, to get the shape right and cut and dry-assemble the framing
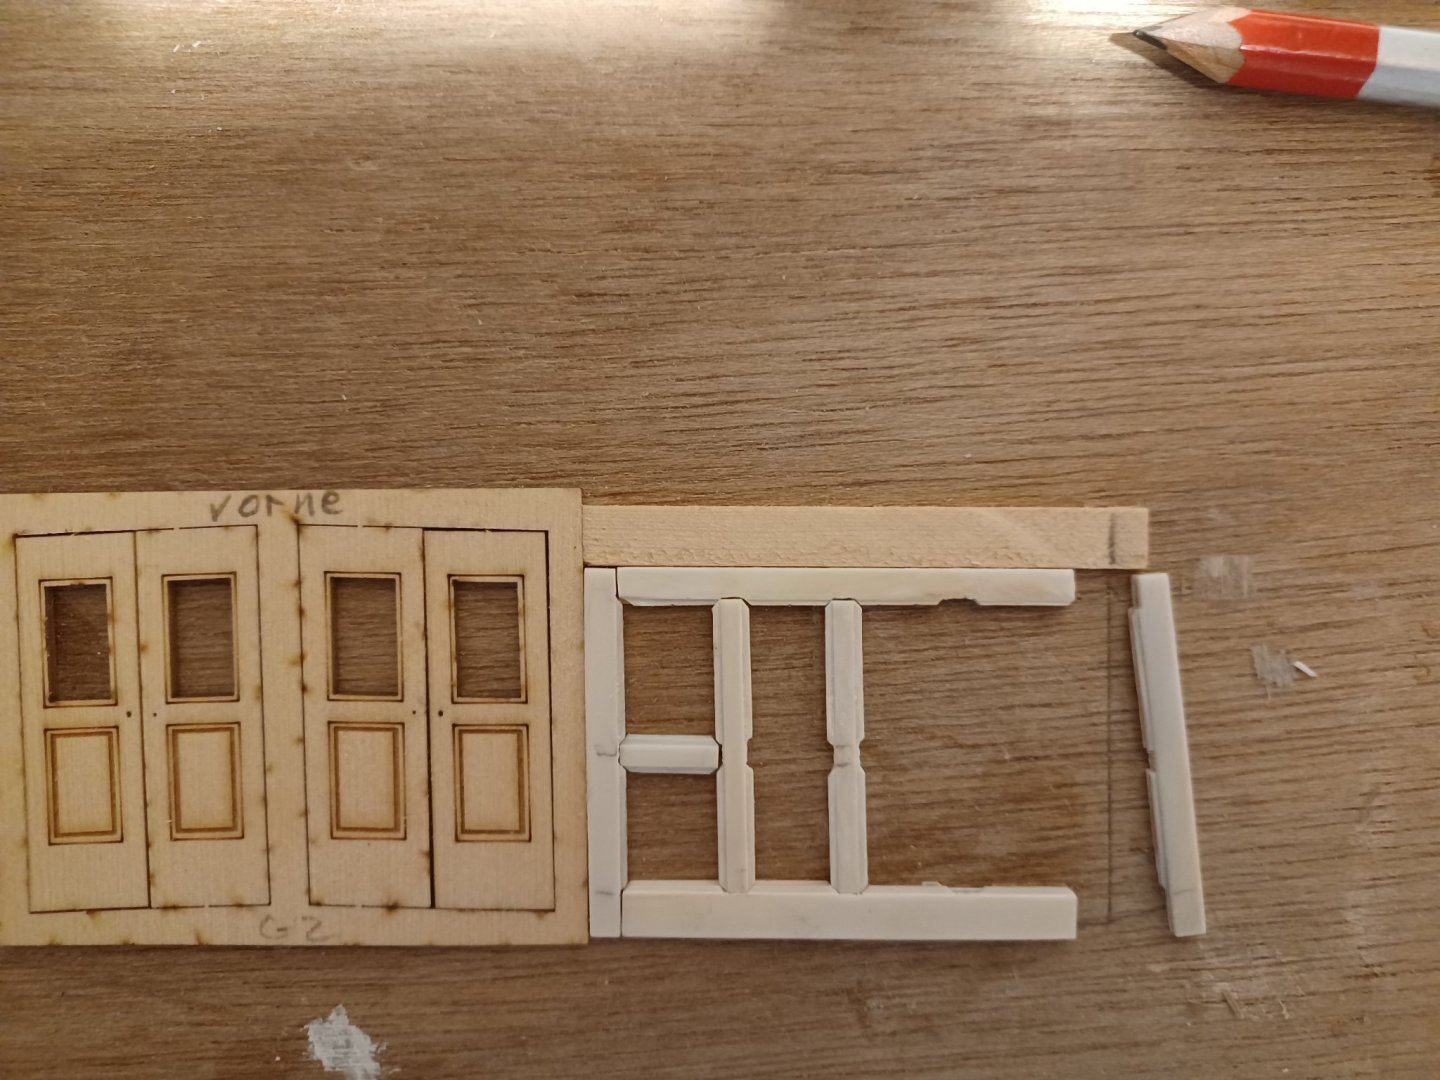
7. Then make the fillings
8. Afterward you assemble it part by part and glue everything together

9. Finally clean and polish it with the dremel

And that's it
Matthias
- Rustyj, Ryland Craze, Jorge Diaz O and 21 others
-
20
-
 4
4
-
Hi Cisco,
I will make some photos from the next panels I make, and post them here. Then you can see how it is done, it is not very complicated. Everbody can do this.
Matthias
- Jorge Diaz O, FrankWouts and CiscoH
-
3
-
I indeed play the piano. And I don't want to stop playing... it is just increadible, what people throw away nowadays. Such lovely, valuable materials like ebony and ivory and you can pick it up from the bulky waste. I use a lot of old stuff like that at my home.
- FrankWouts, Saburo and Matt D
-
3
-
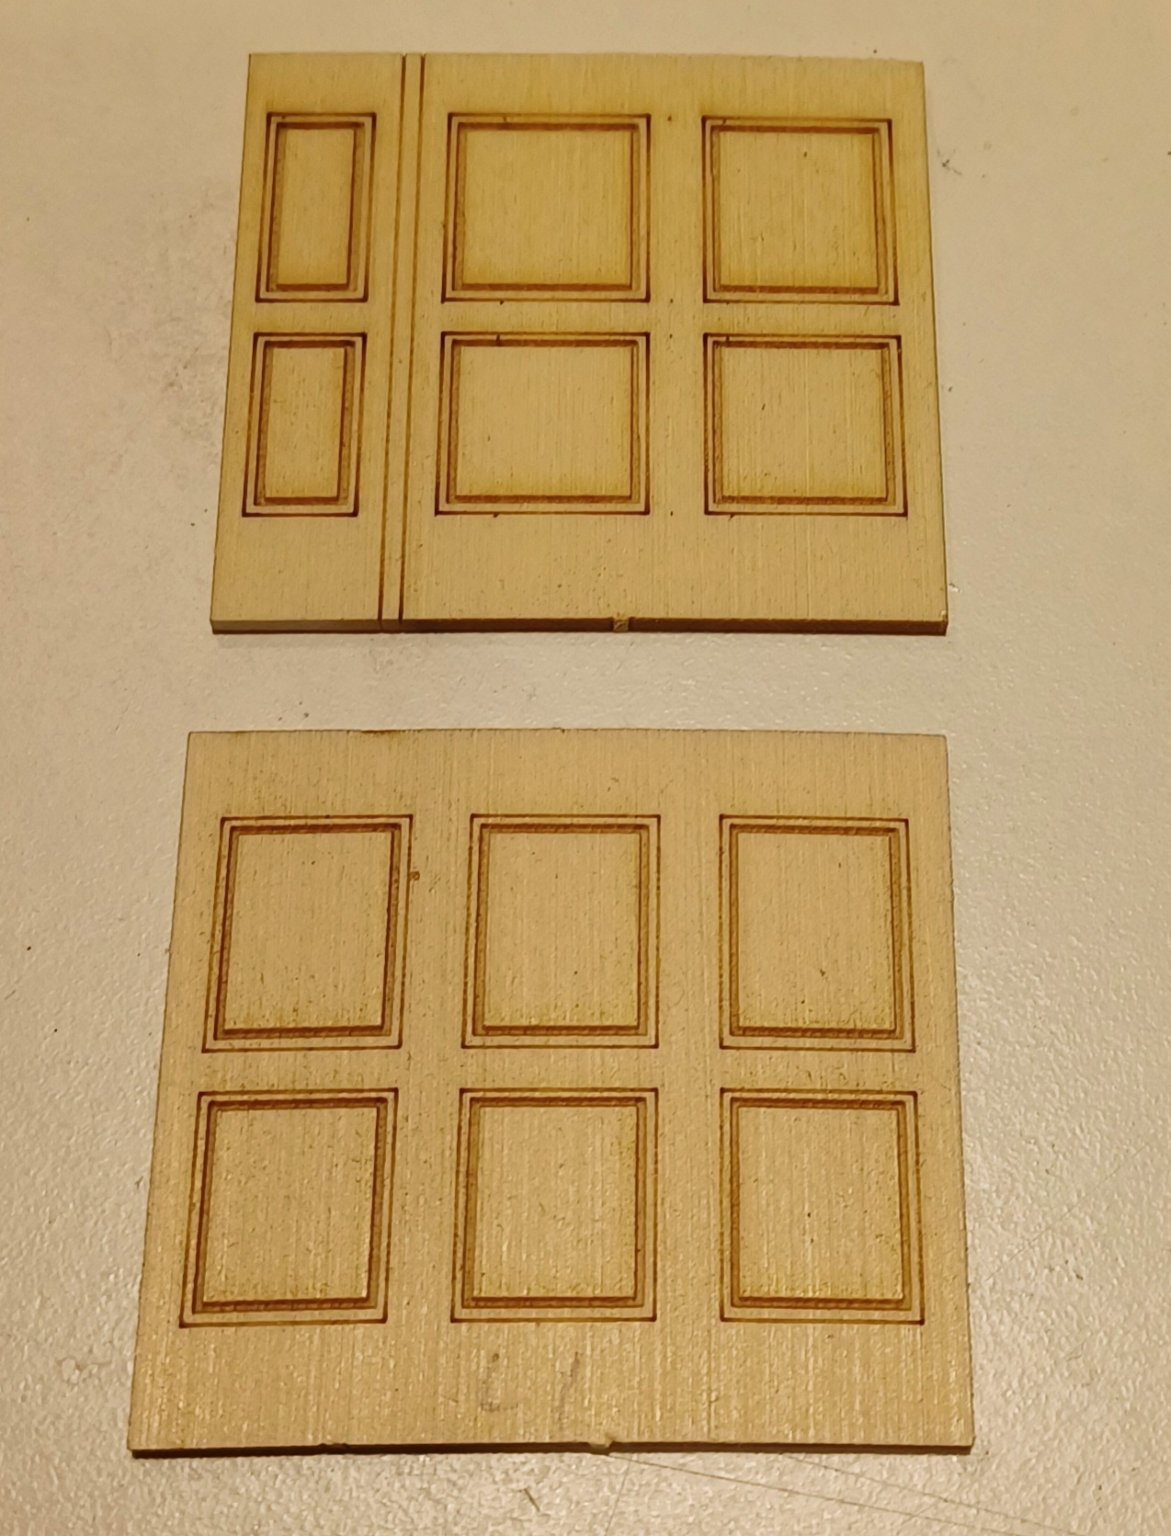
Thank you for the feedback.
The flooring and panels are not painted, it is the colour of the material (old piano bars, ivory and ebony)
- FrankWouts and glbarlow
-
2
-
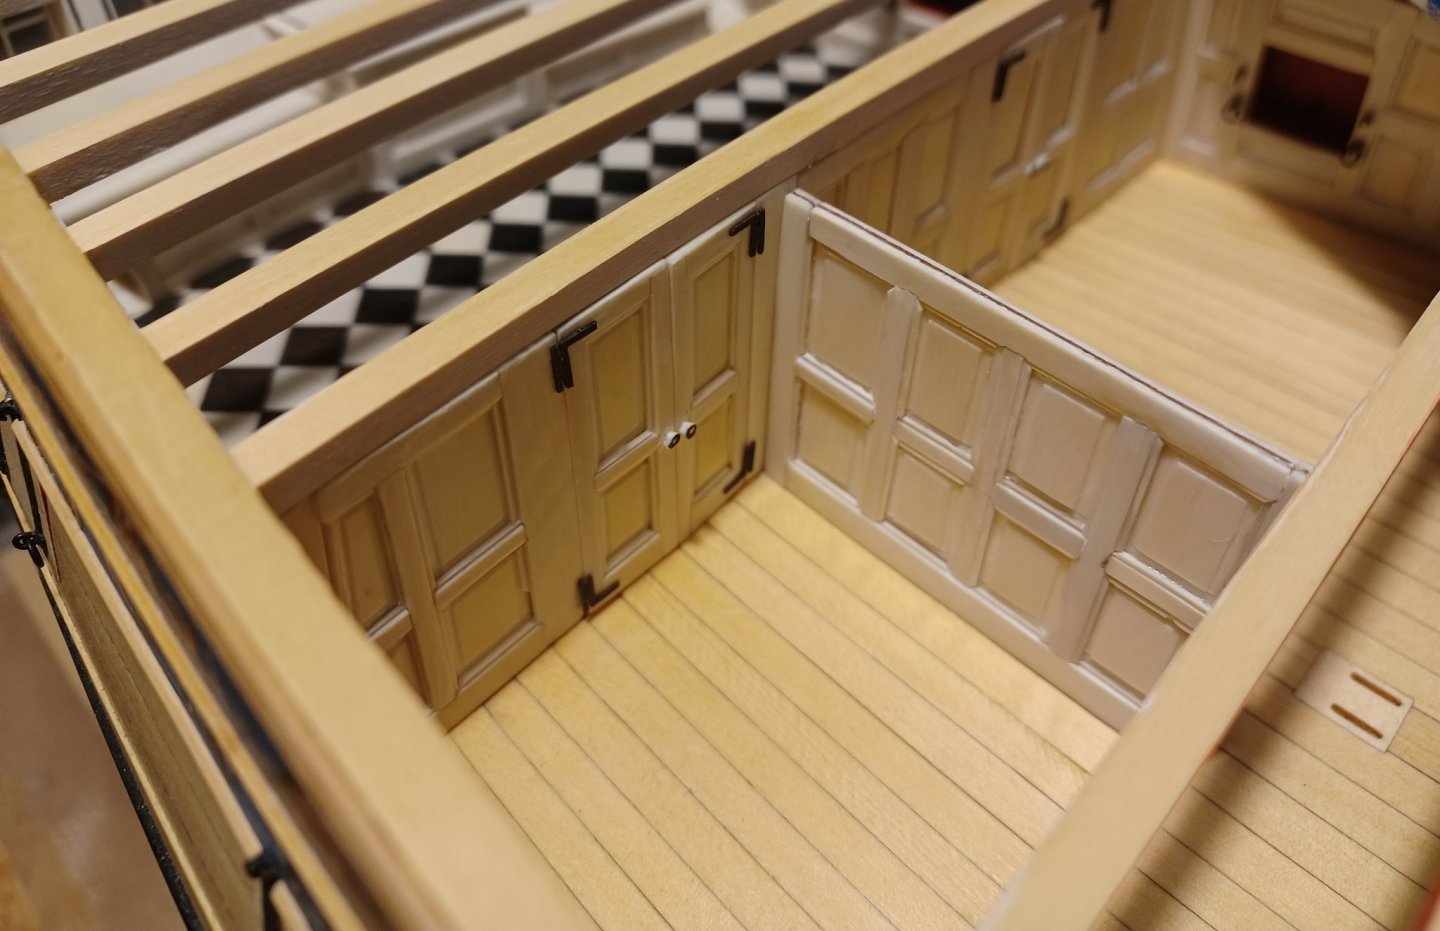
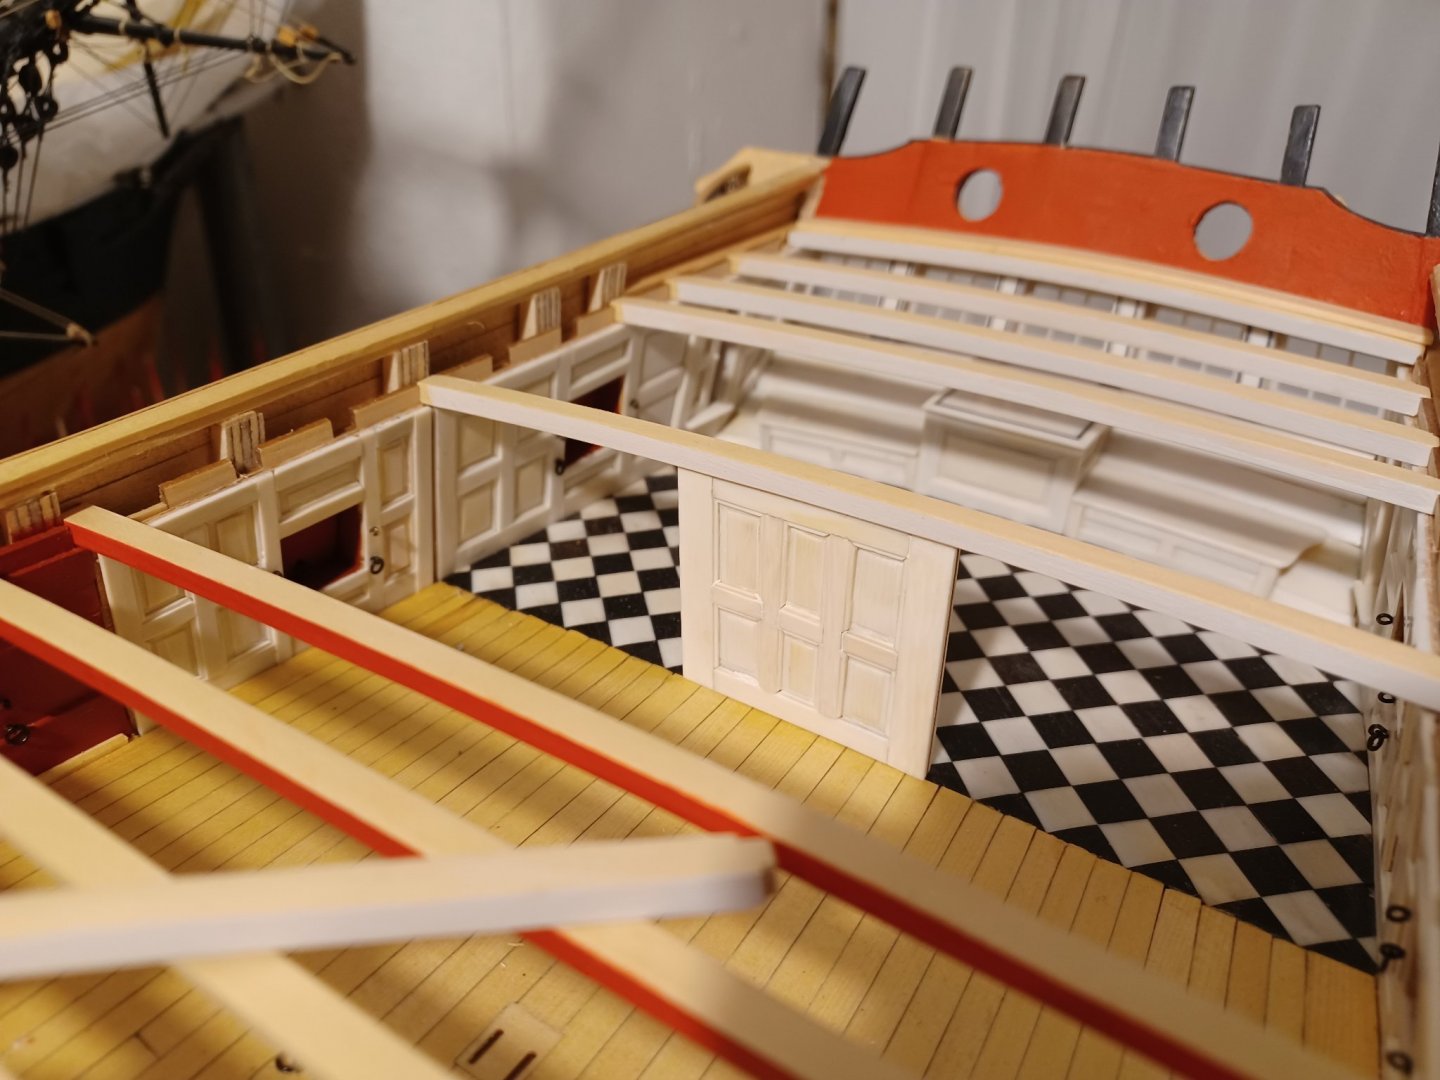
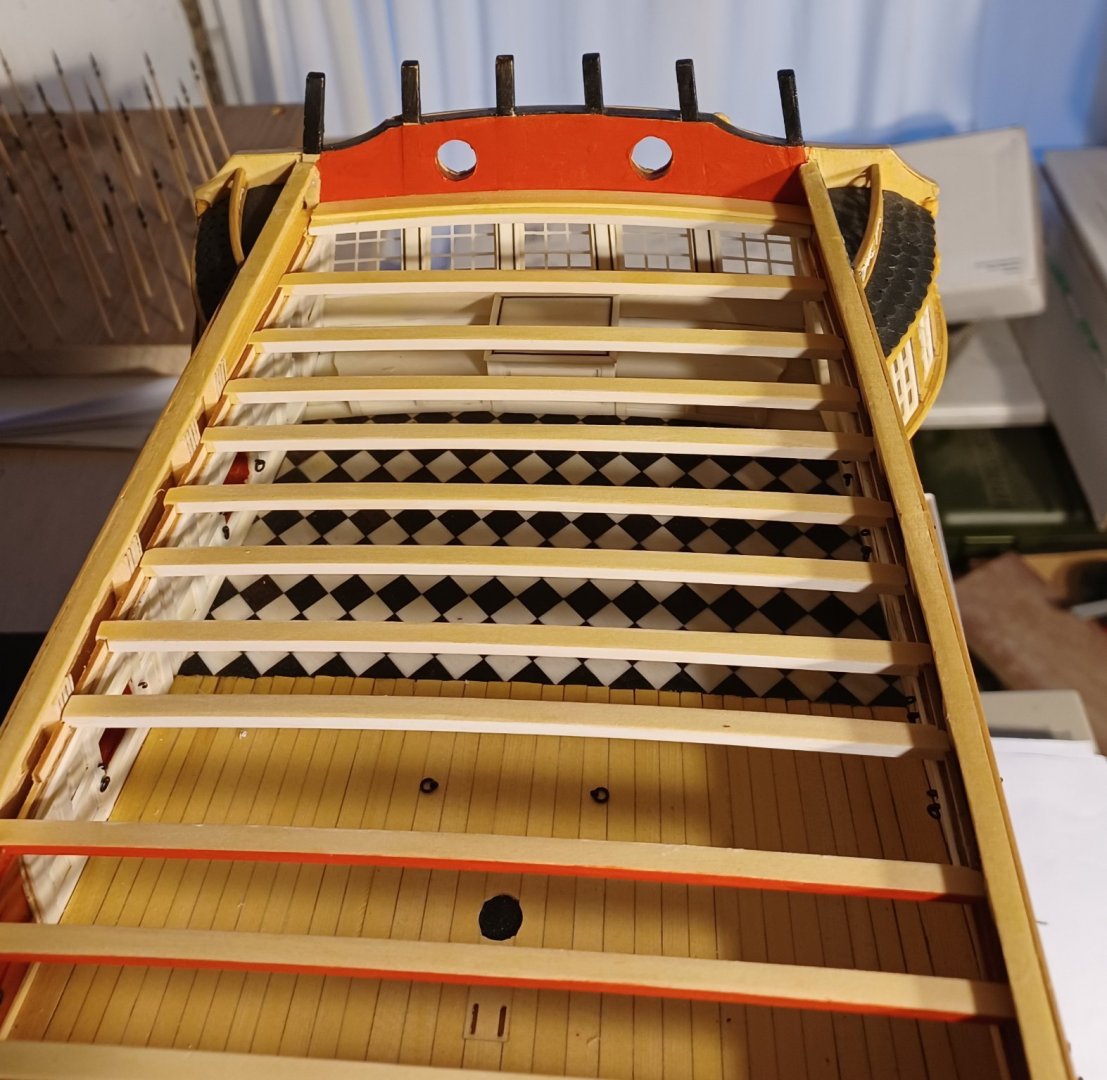
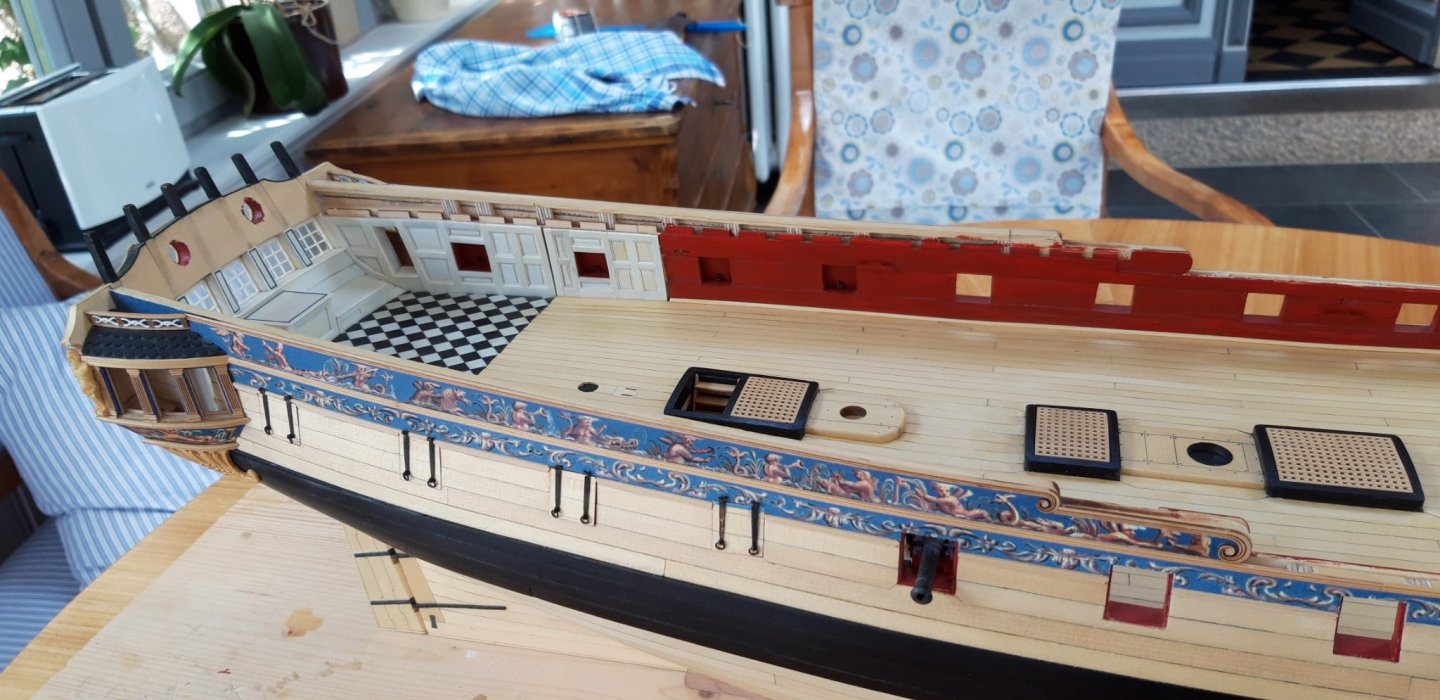
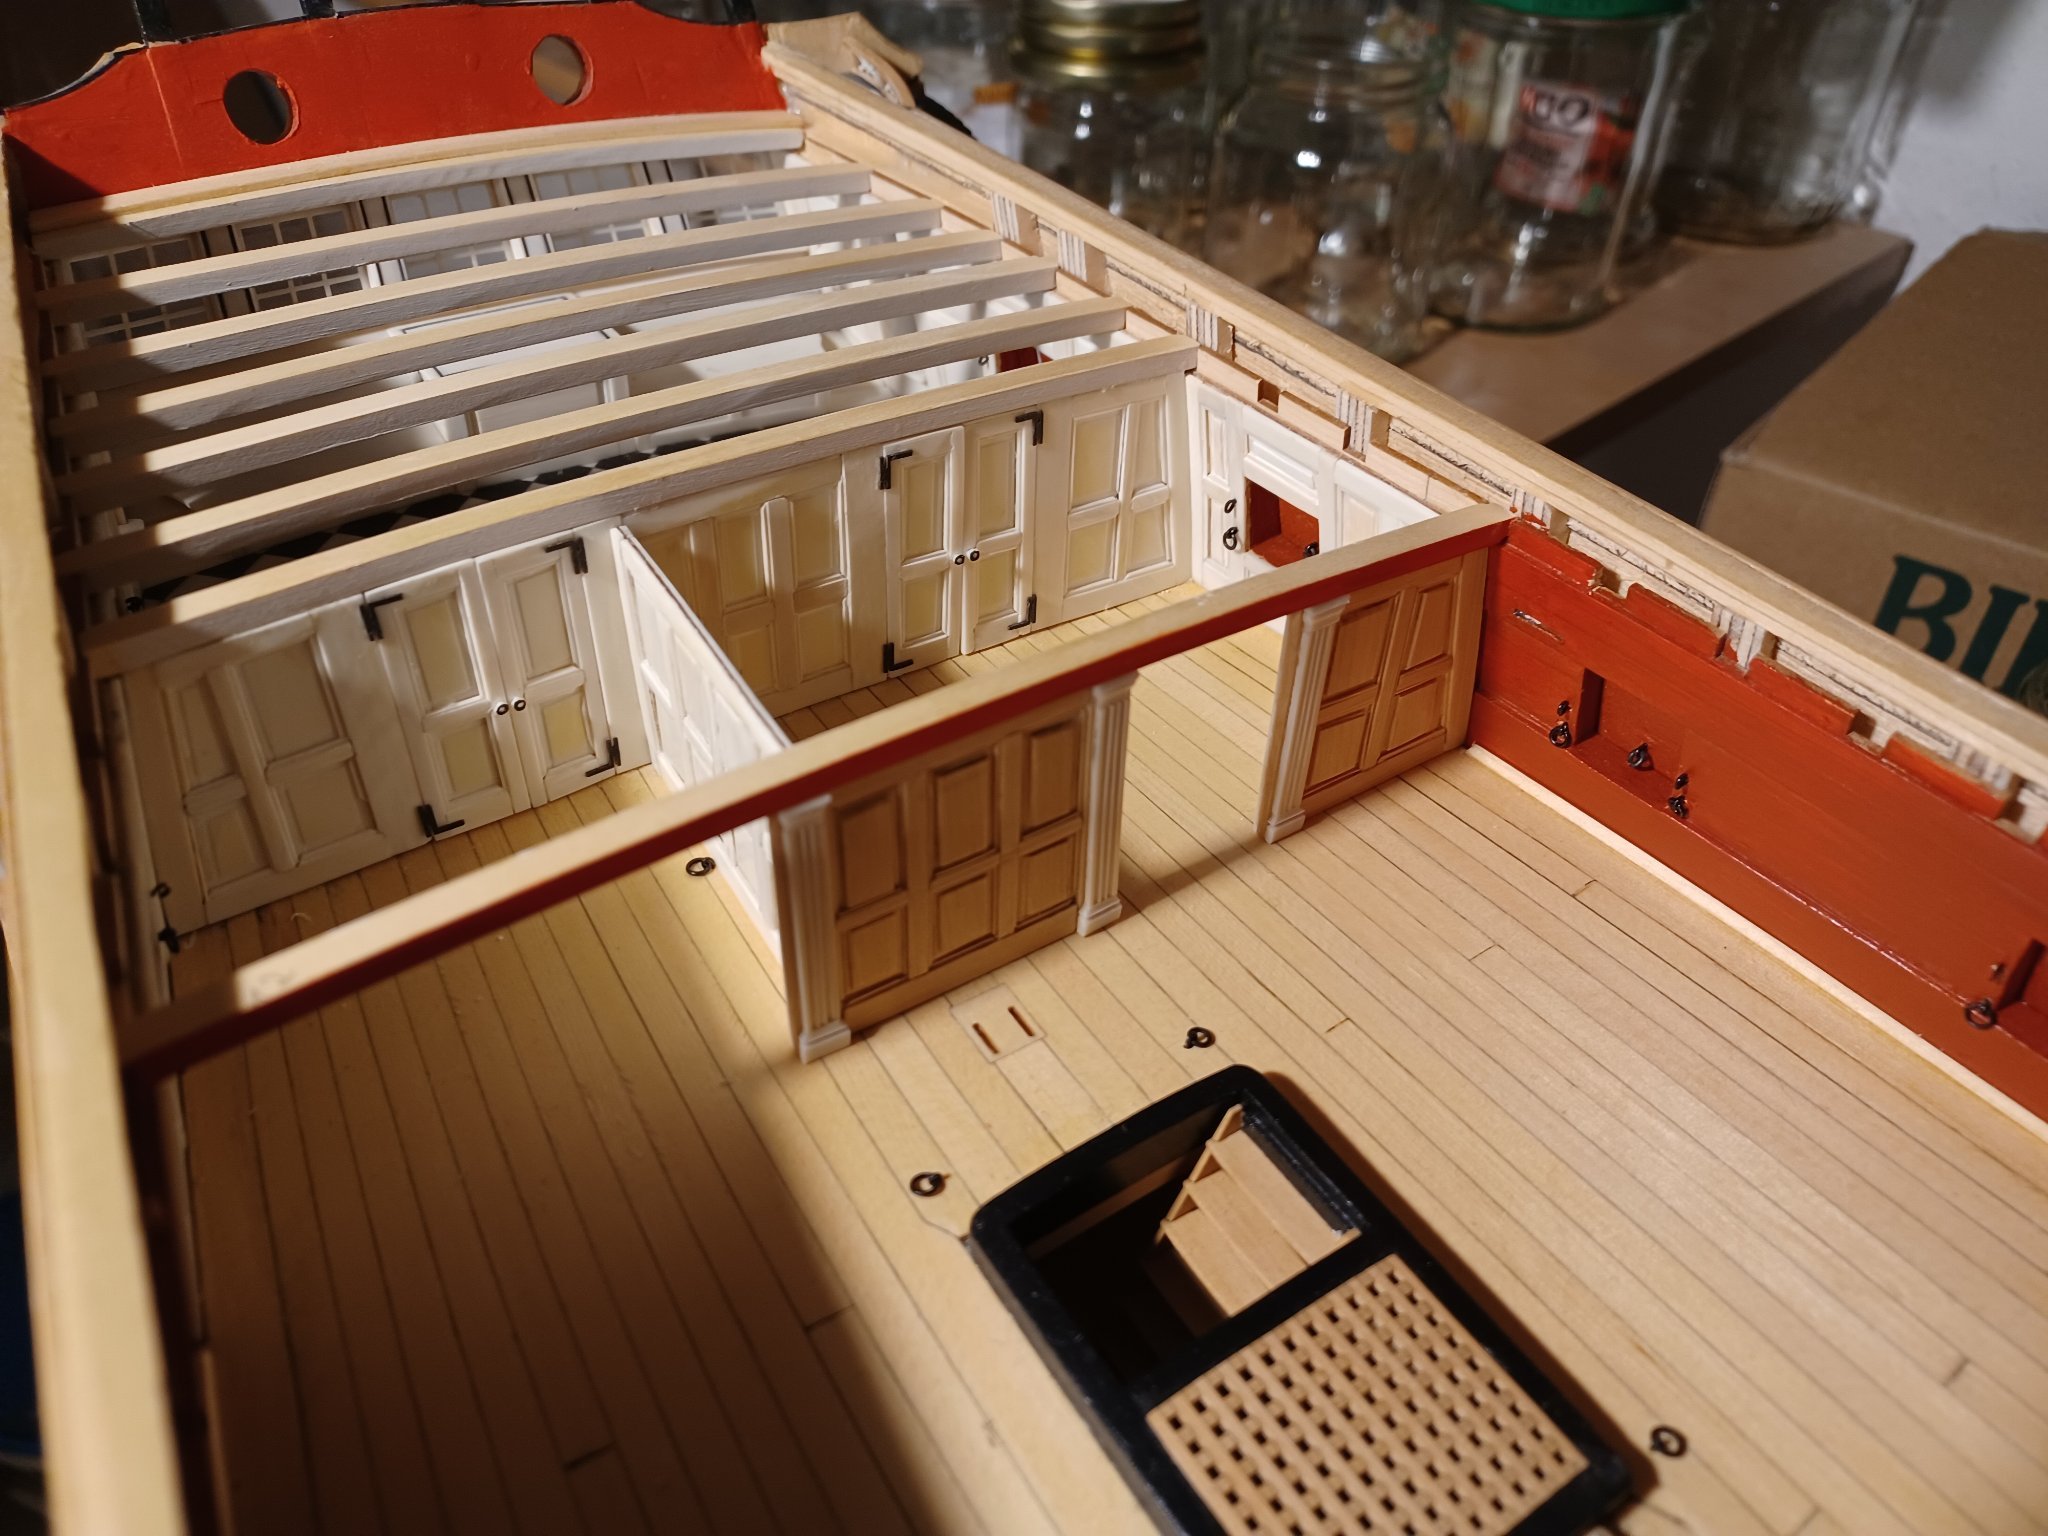
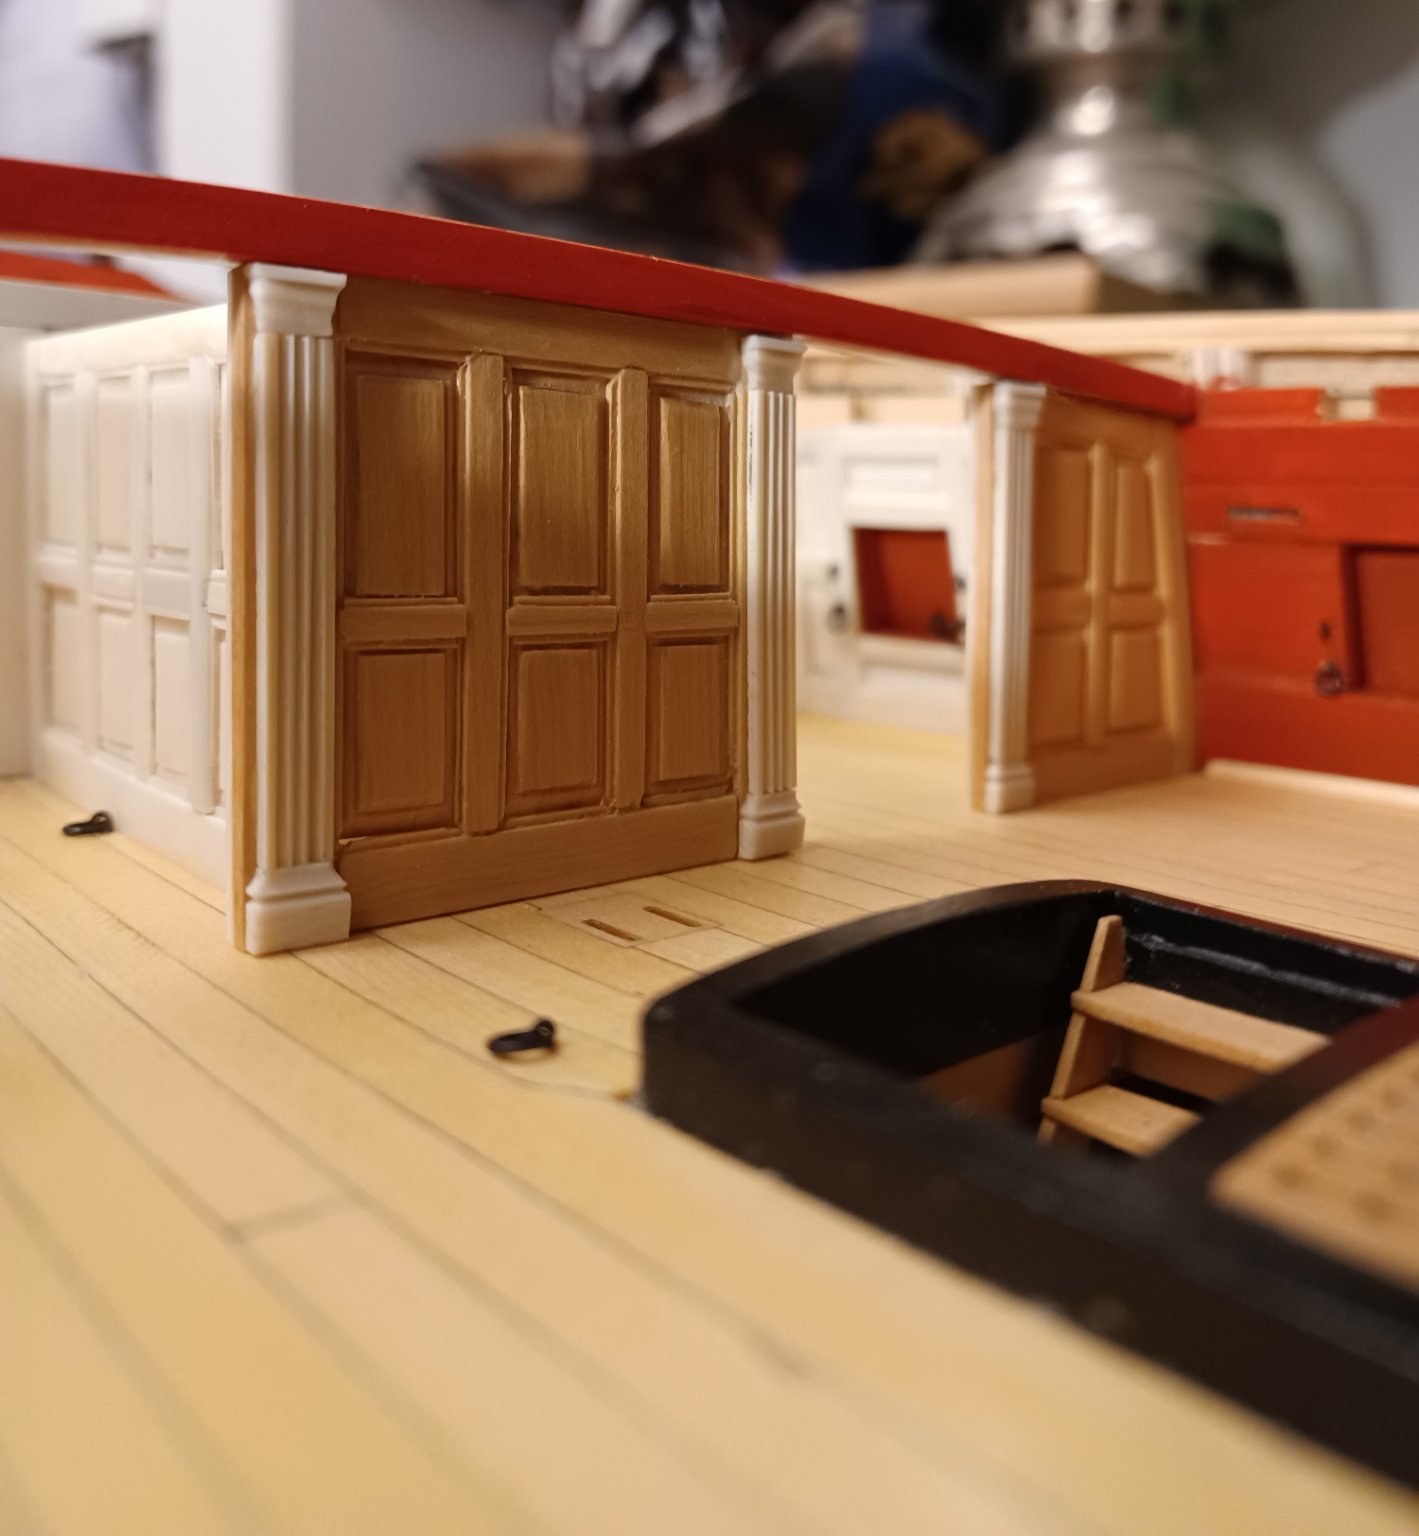
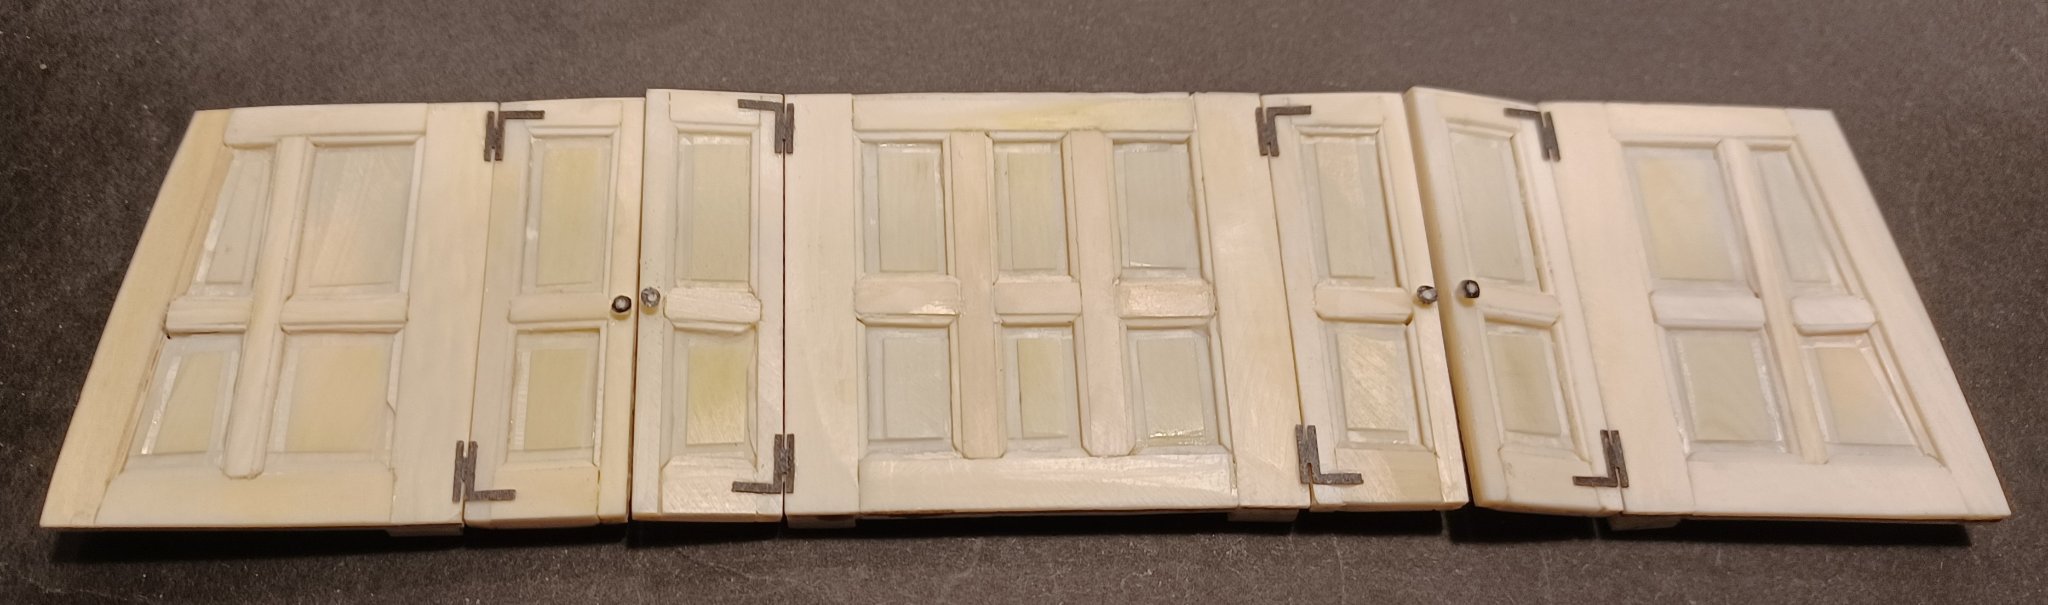
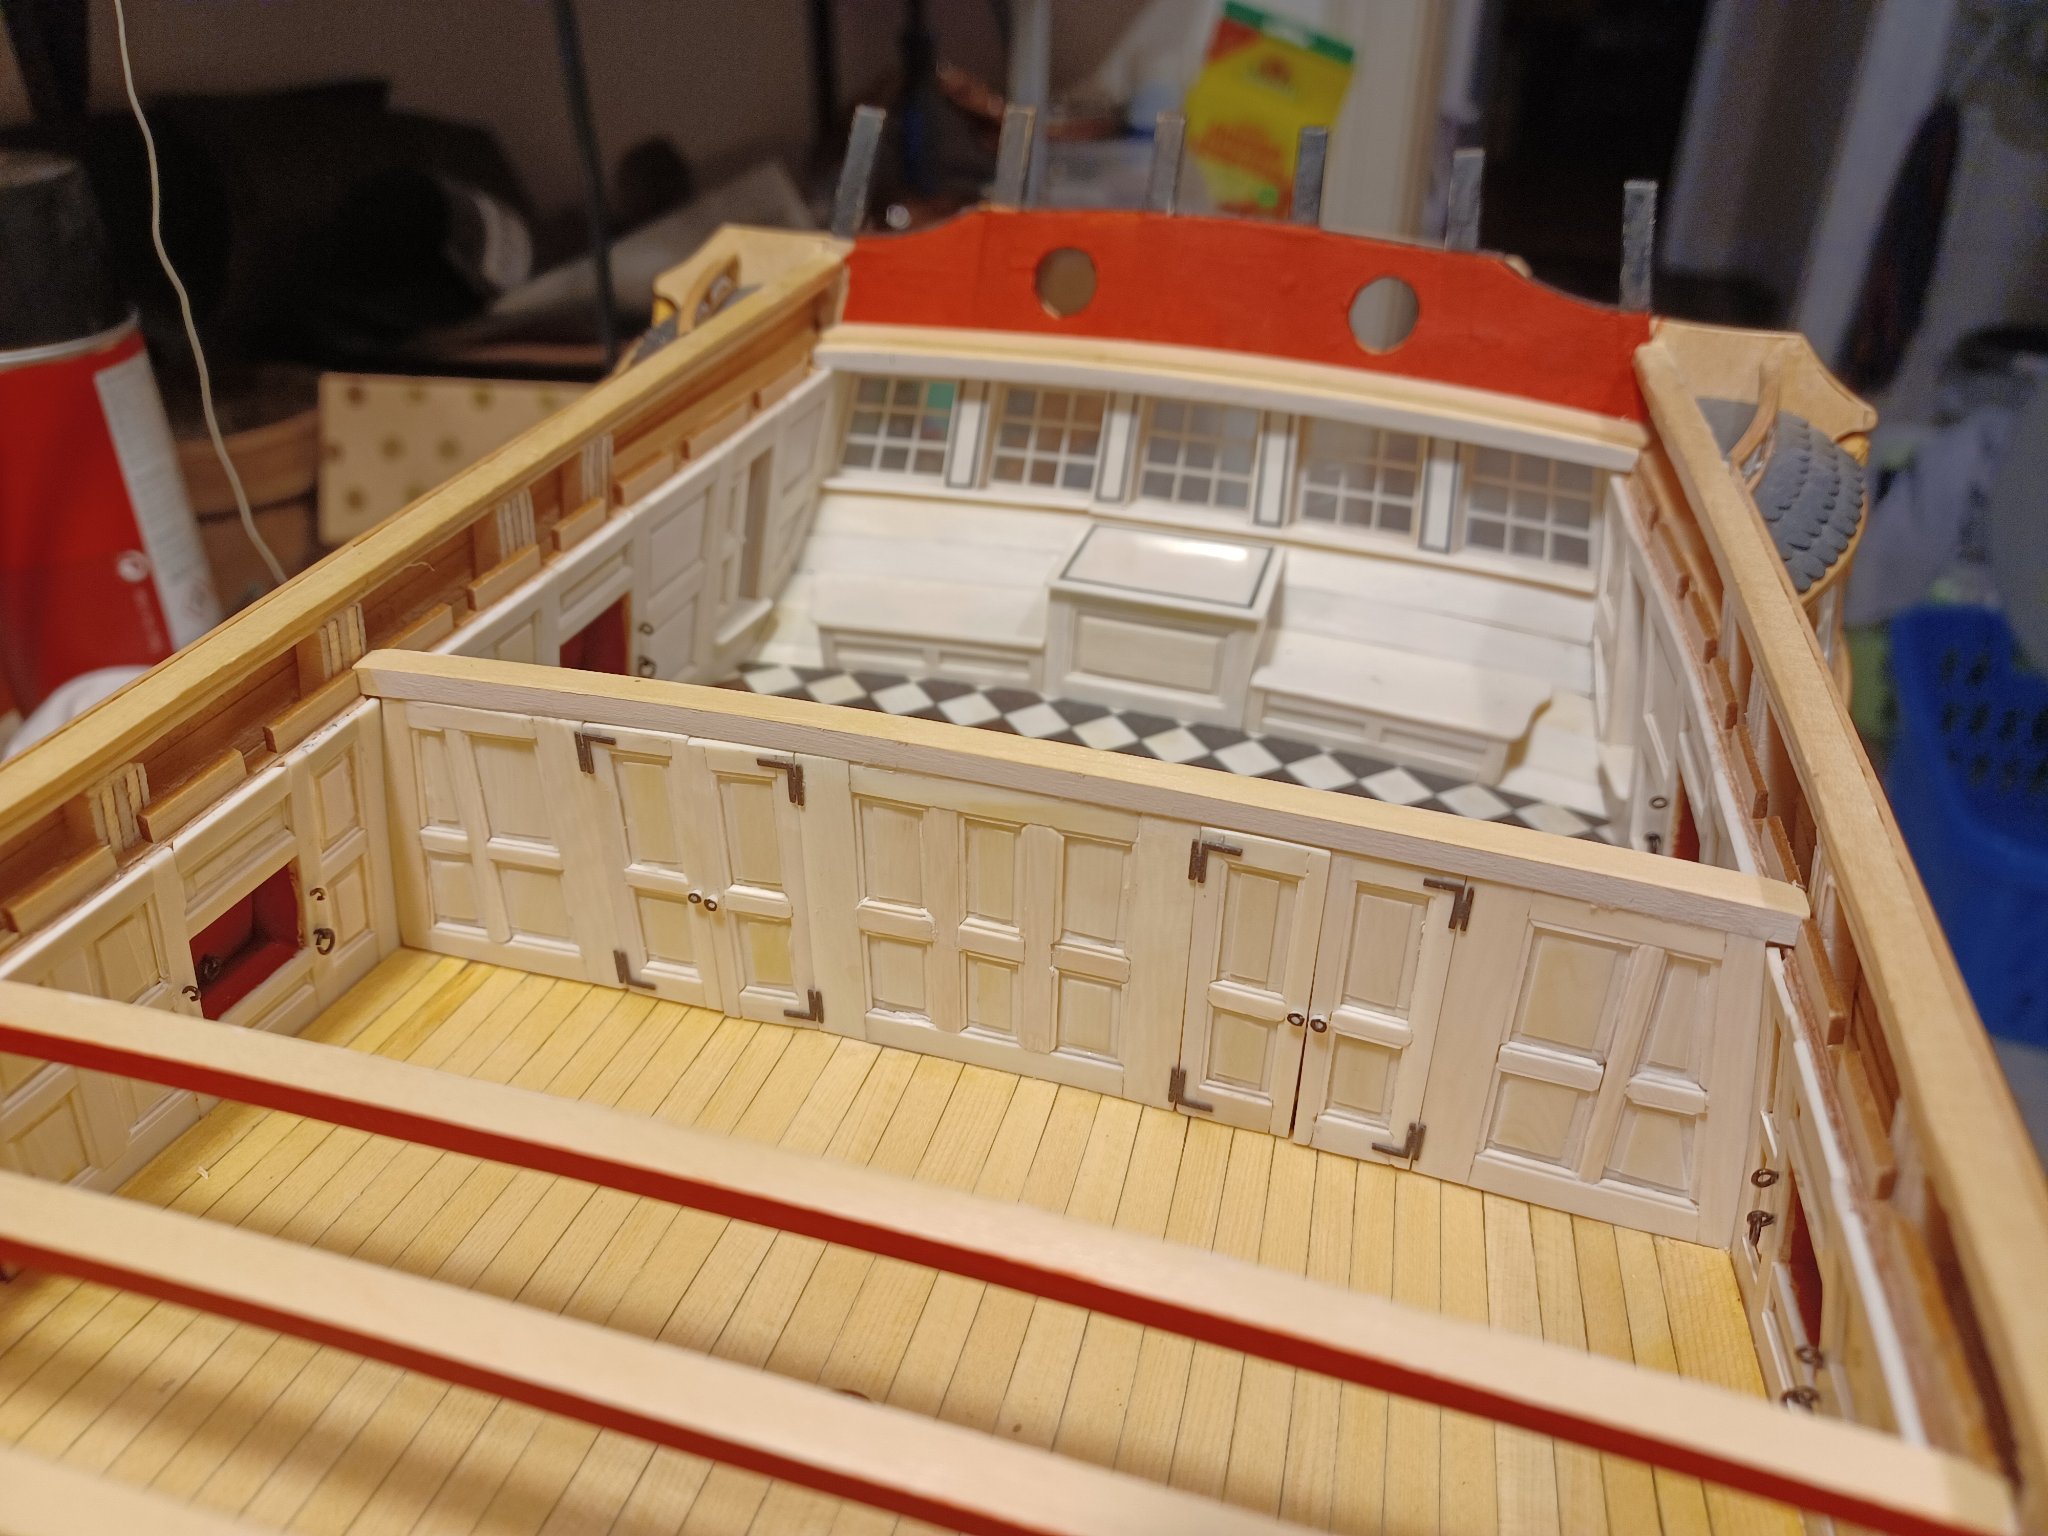
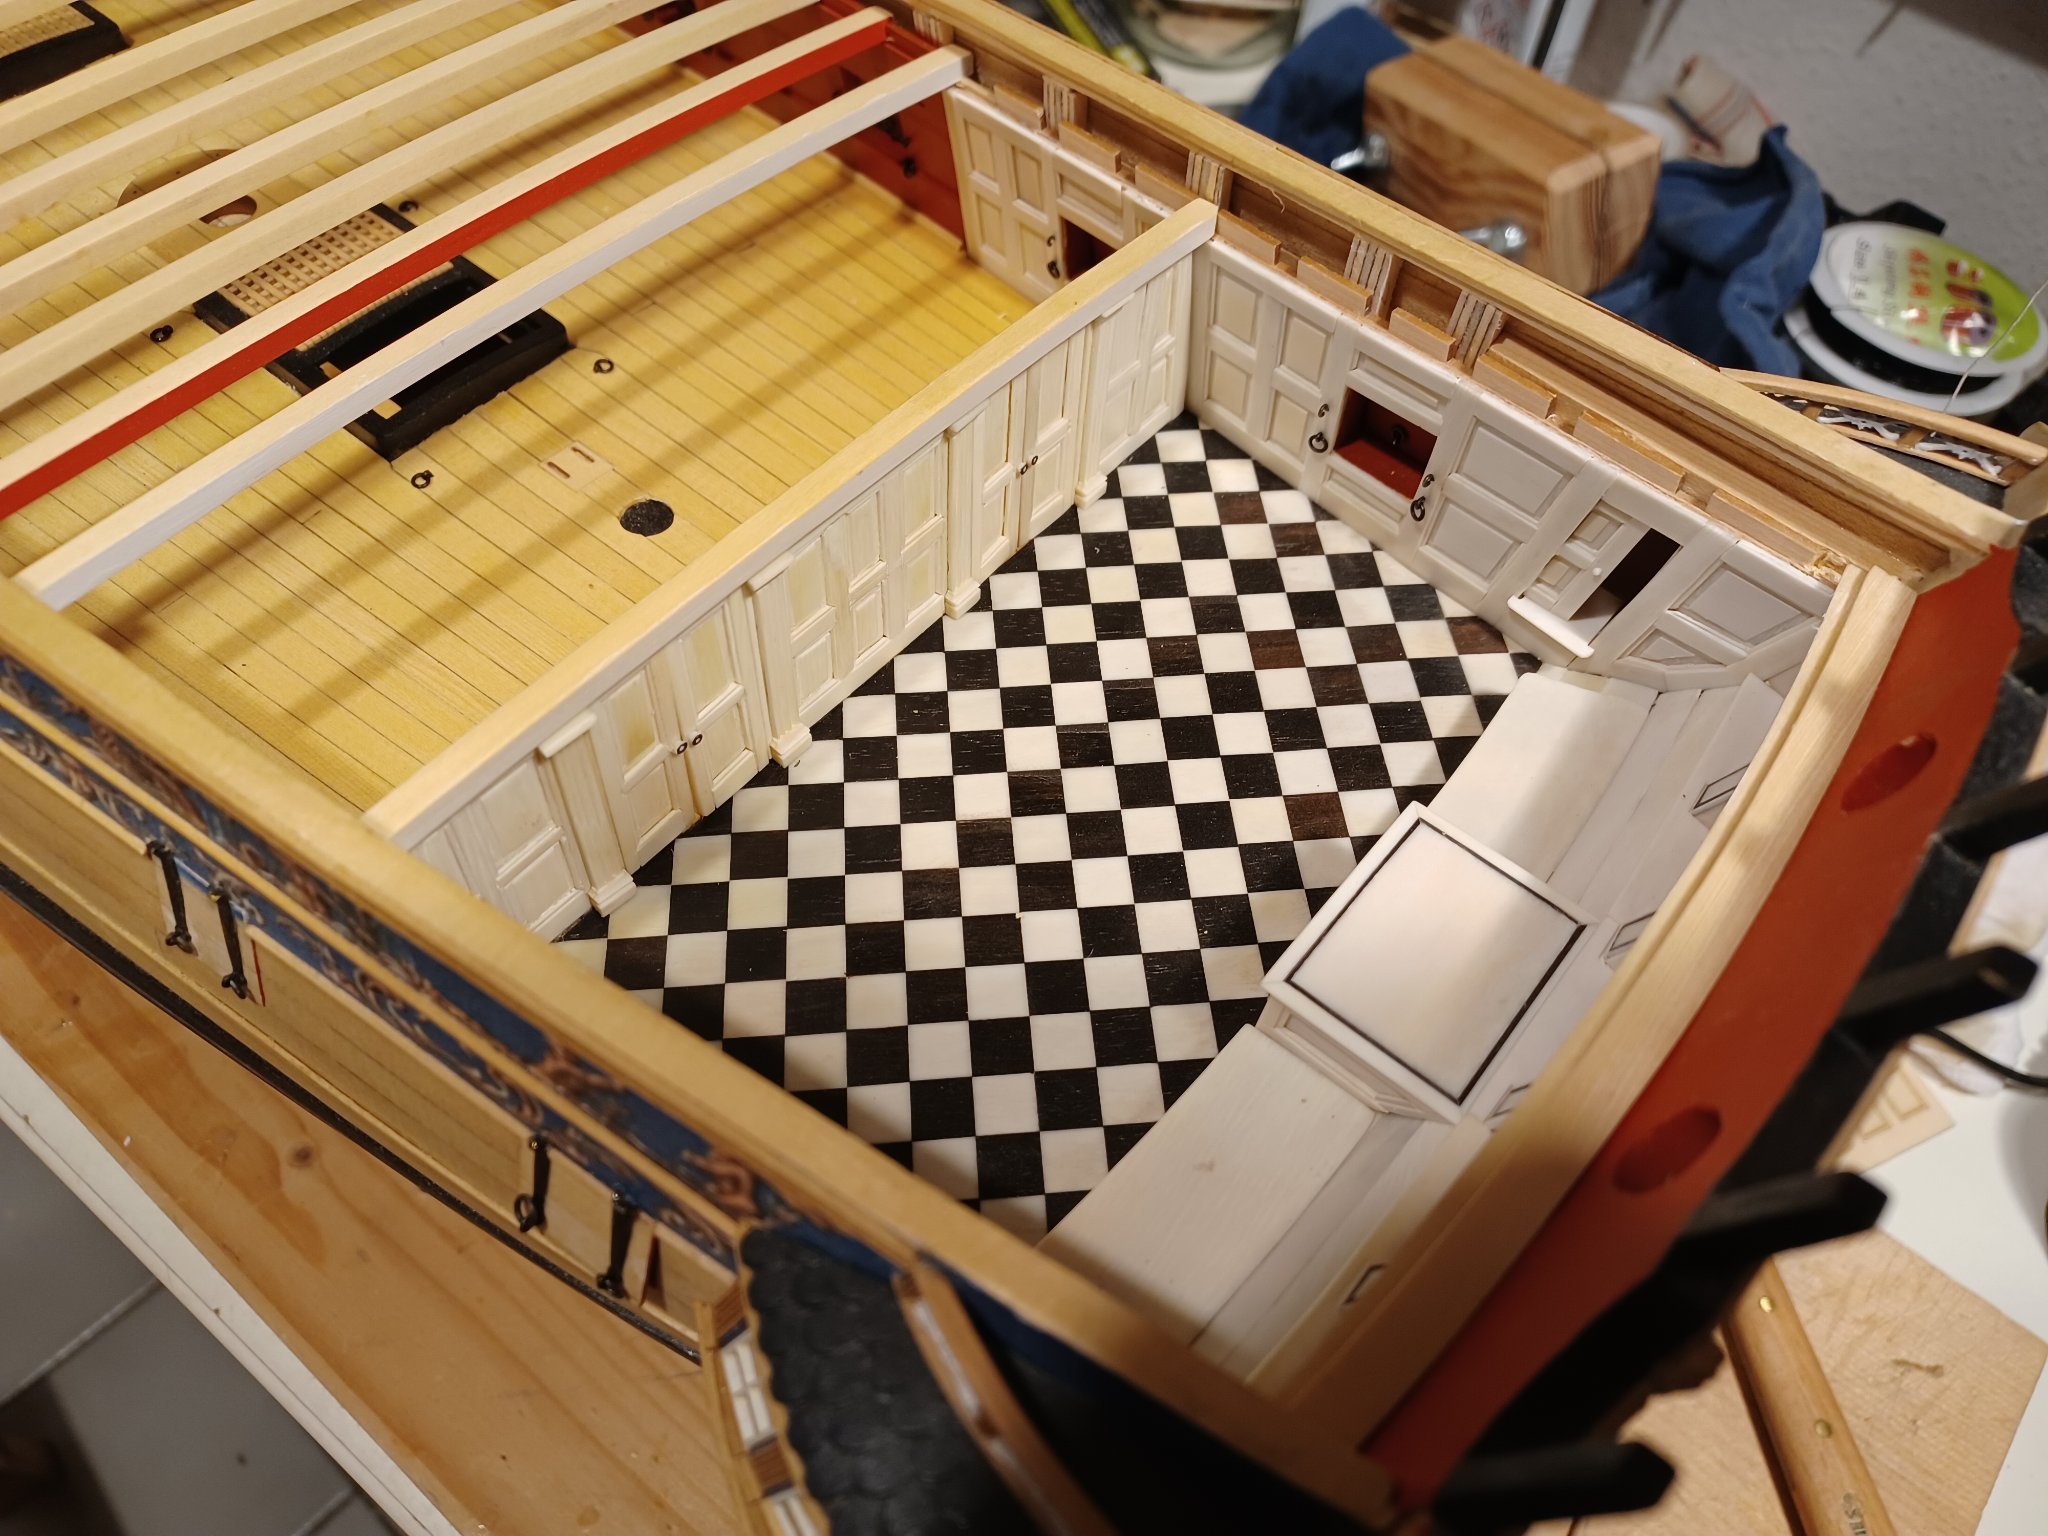
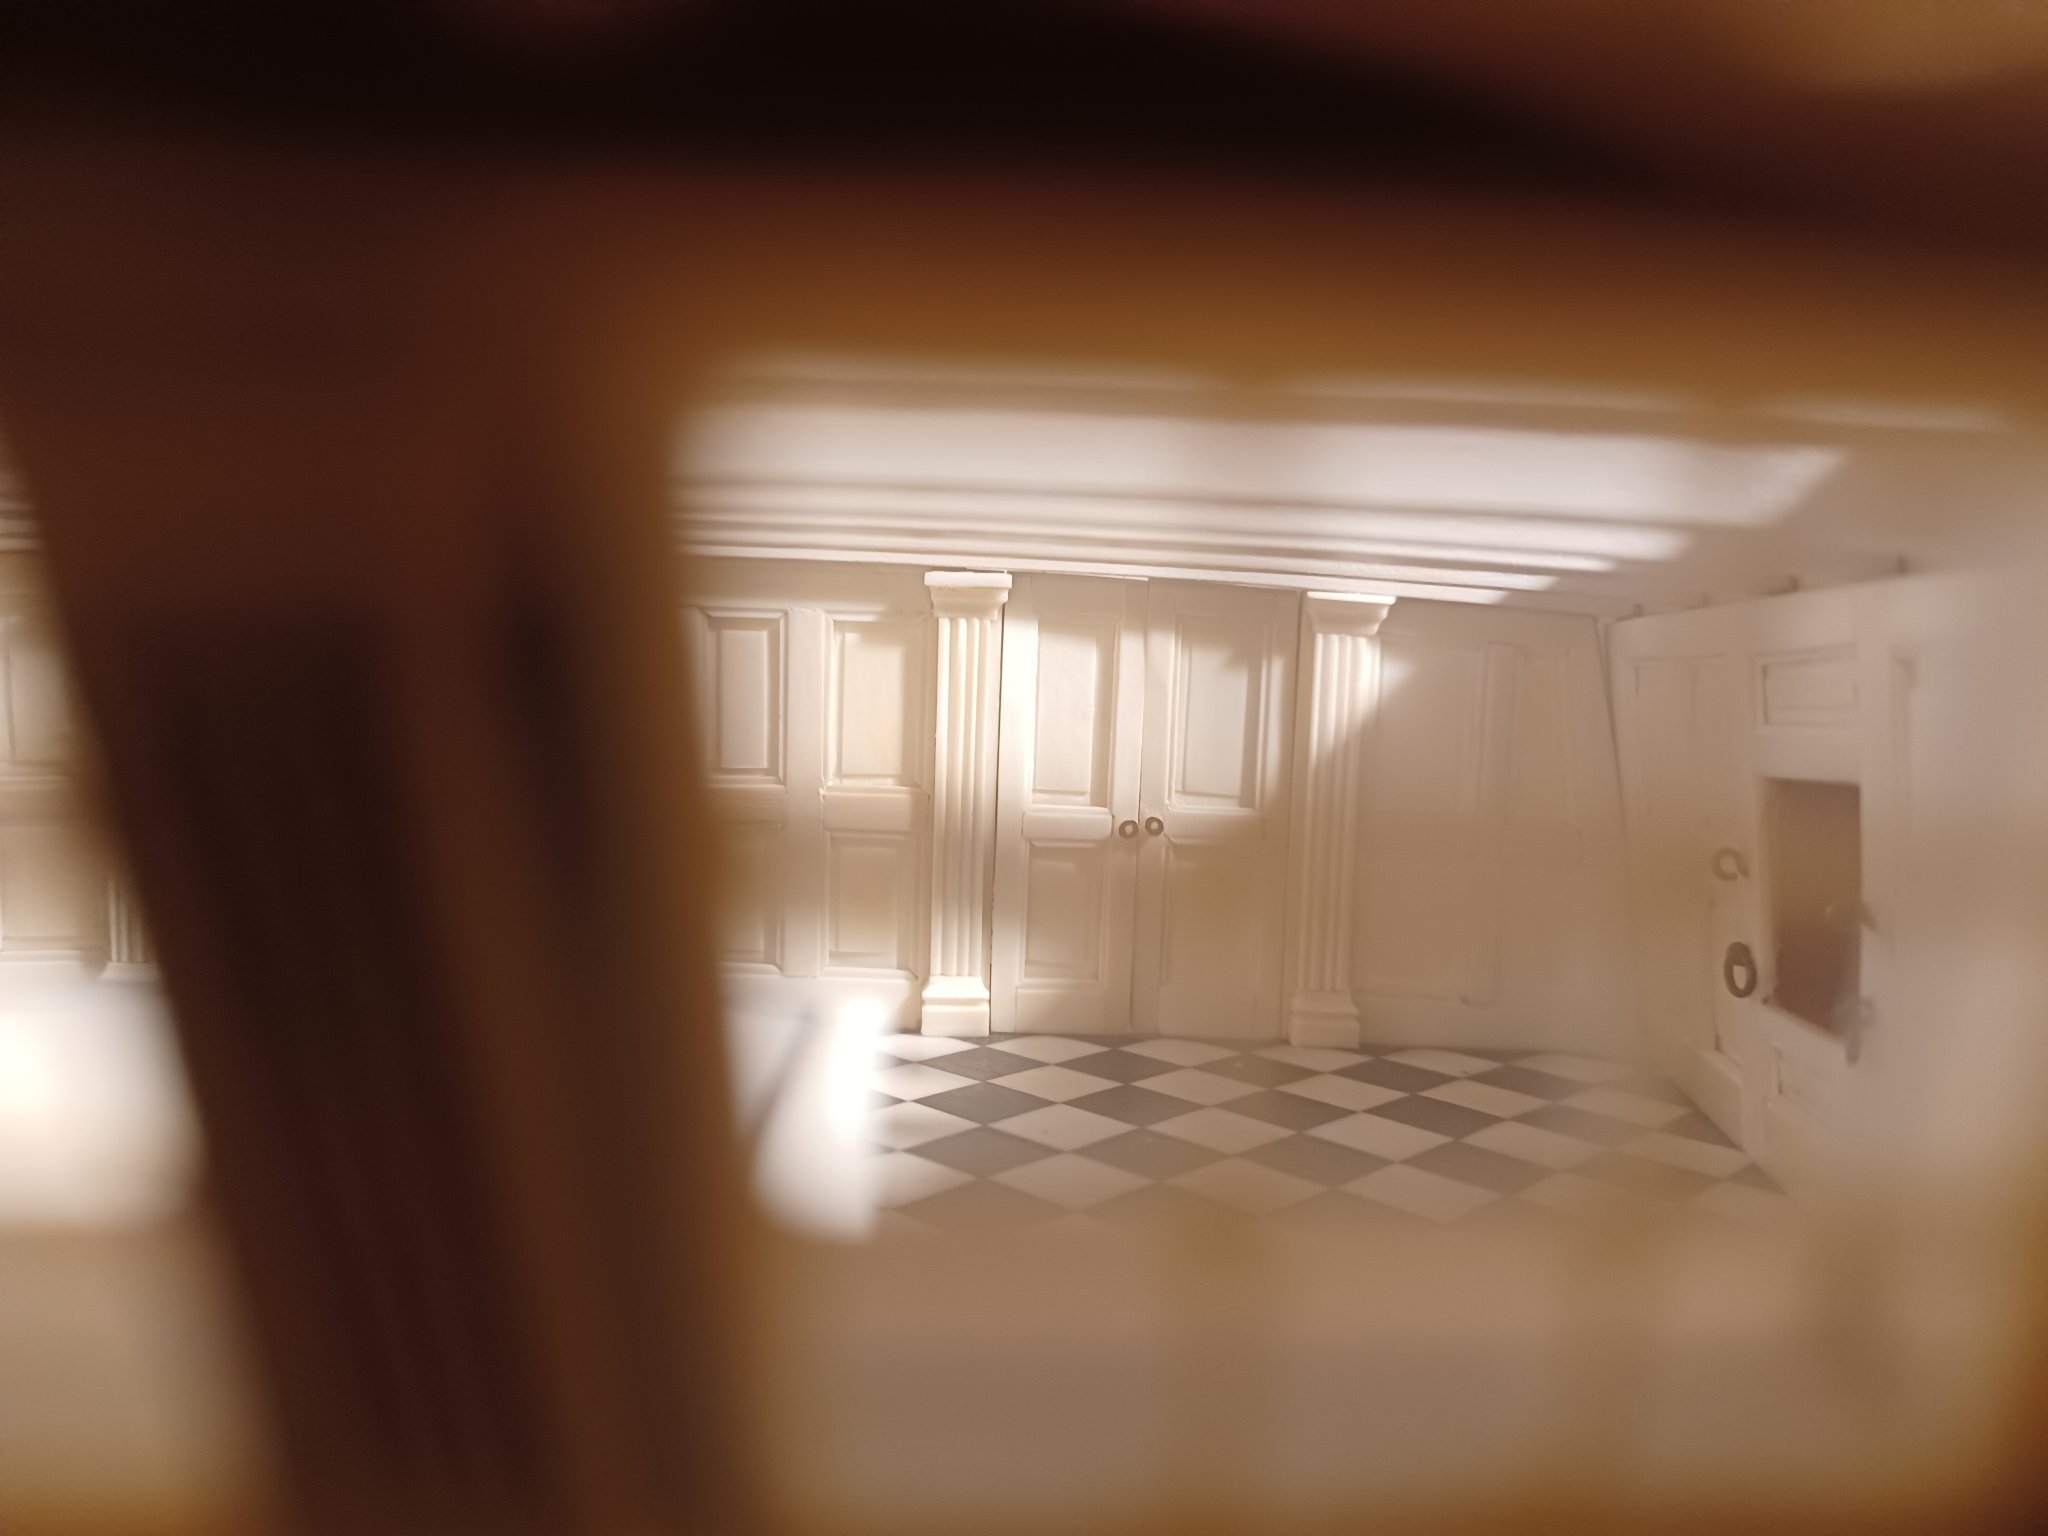
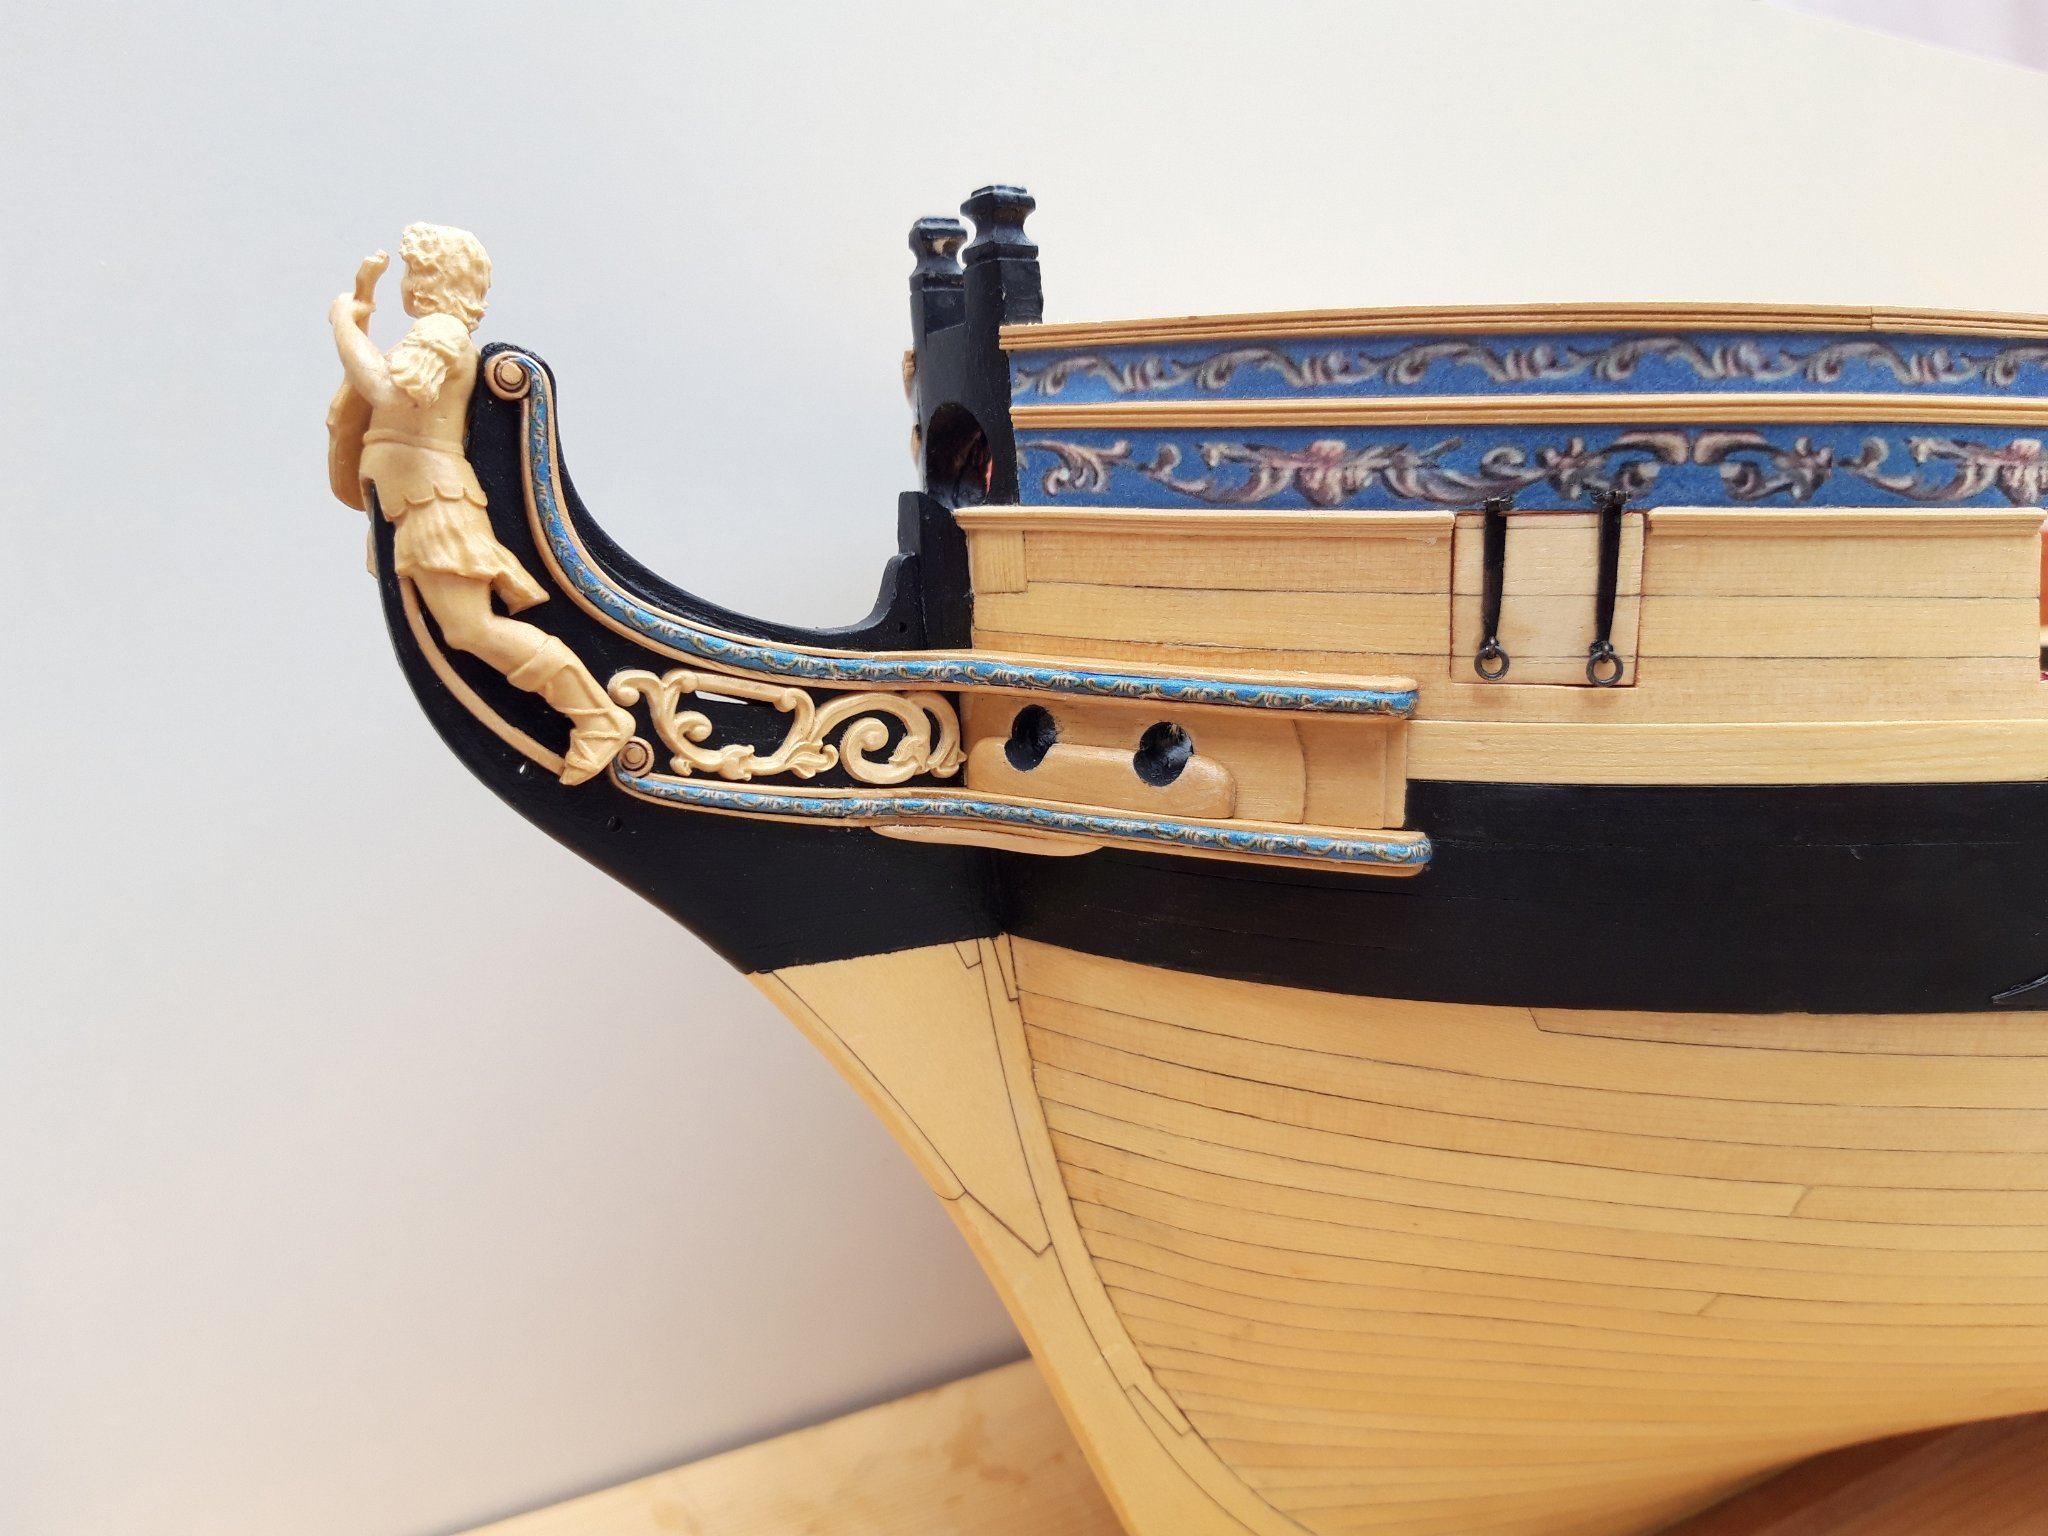
Hi everybody,
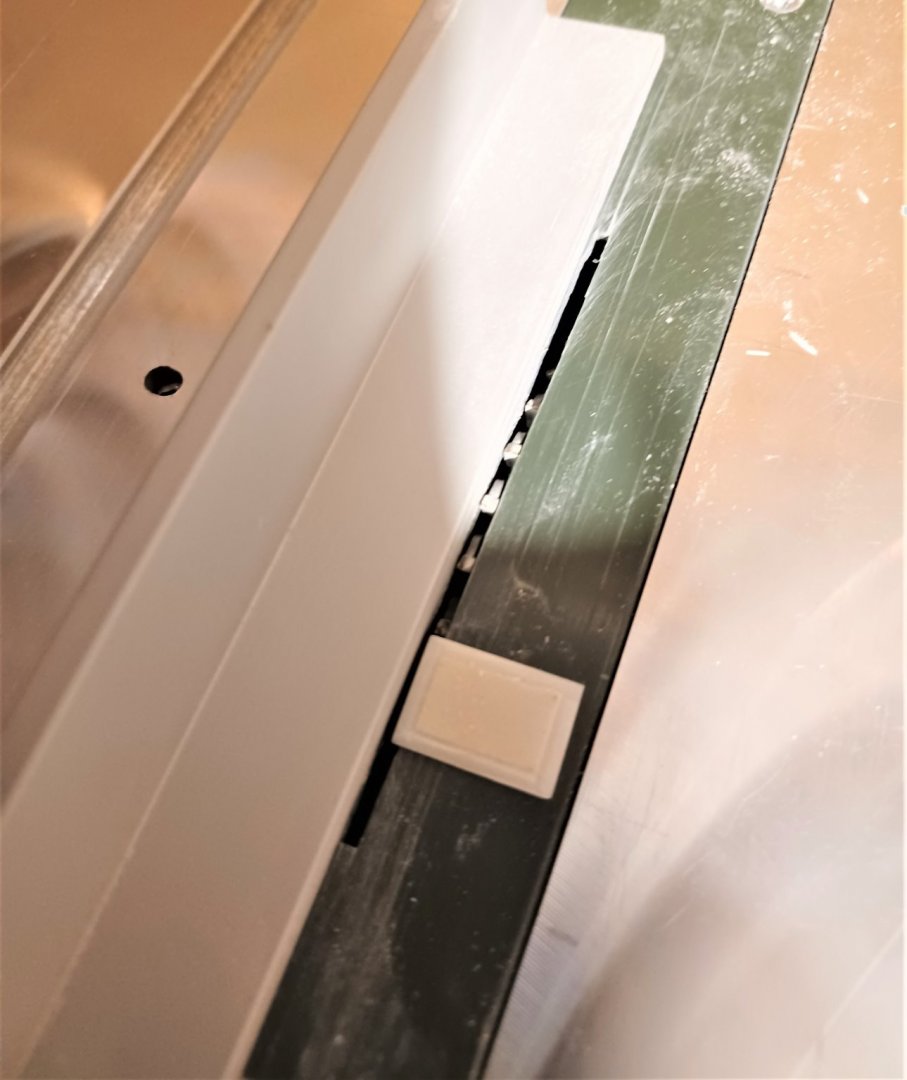
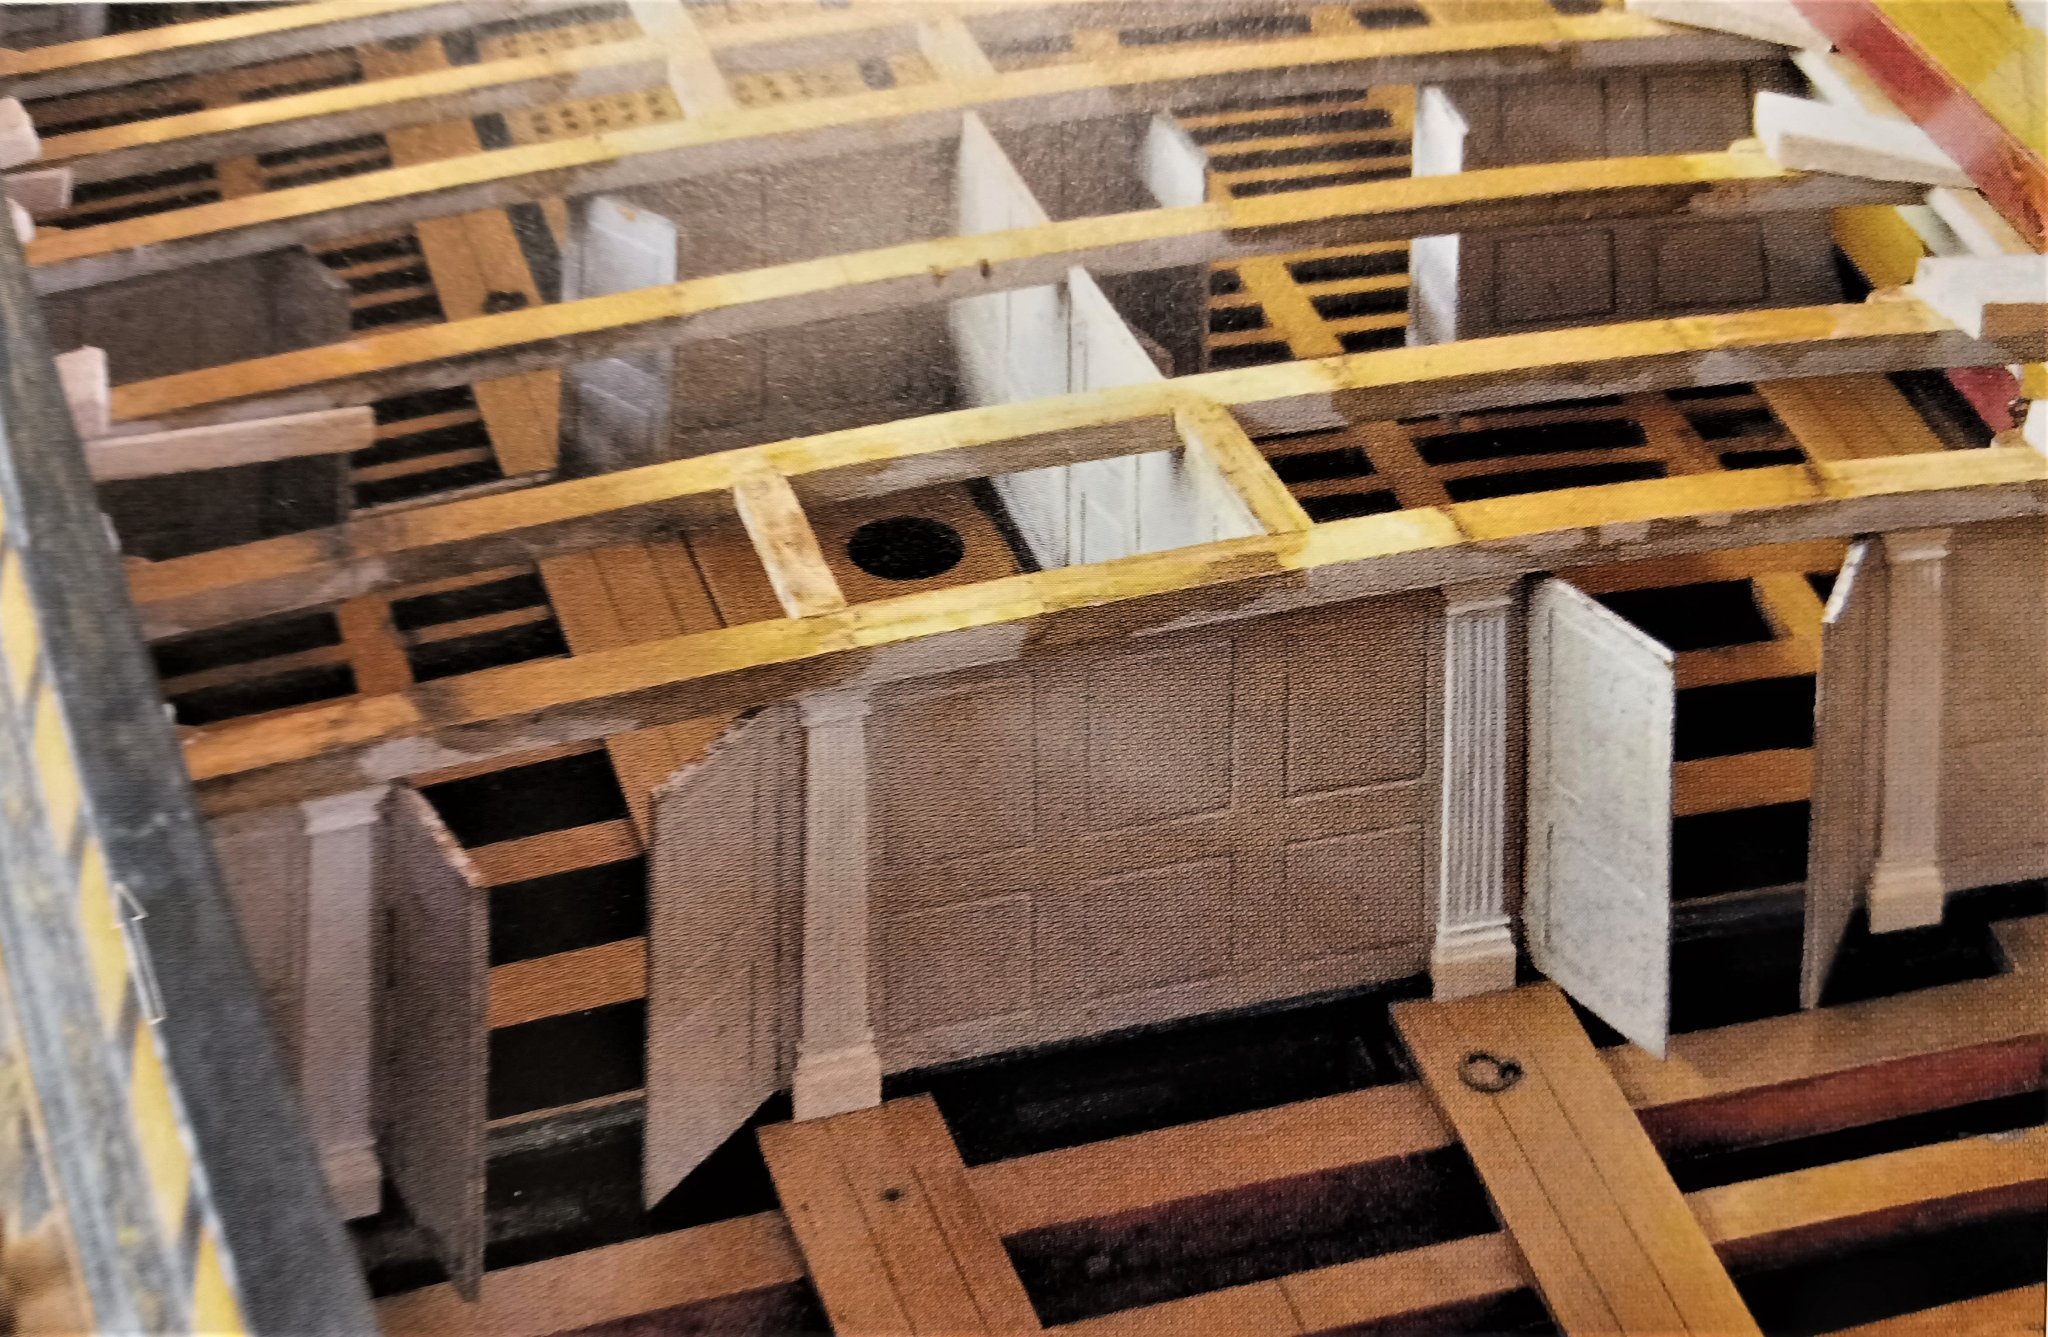
I continued with the aft bulkhead, wich separates the captains cabin.
The bulkhead panels and doors were assembled and glued in place, underneath the deck beam. The doors can be opened, but for now, I leave them shut, because of the danger of being damaged. I am not shure yet, I propably leave them closed anyway.
Here are som photos of the result.


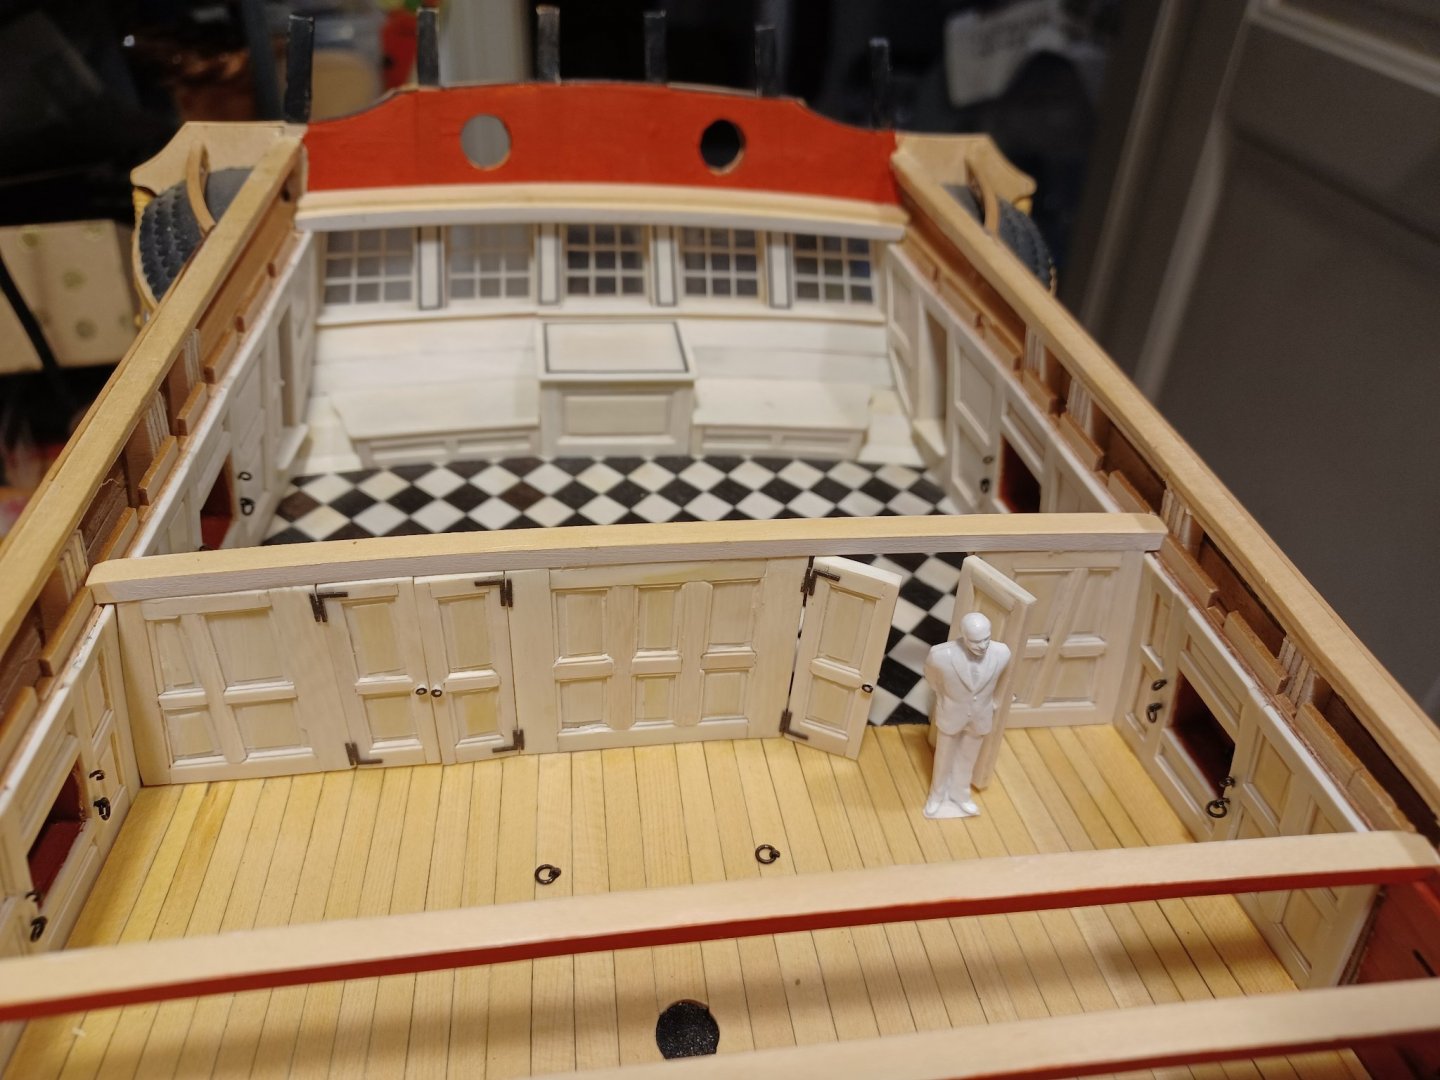

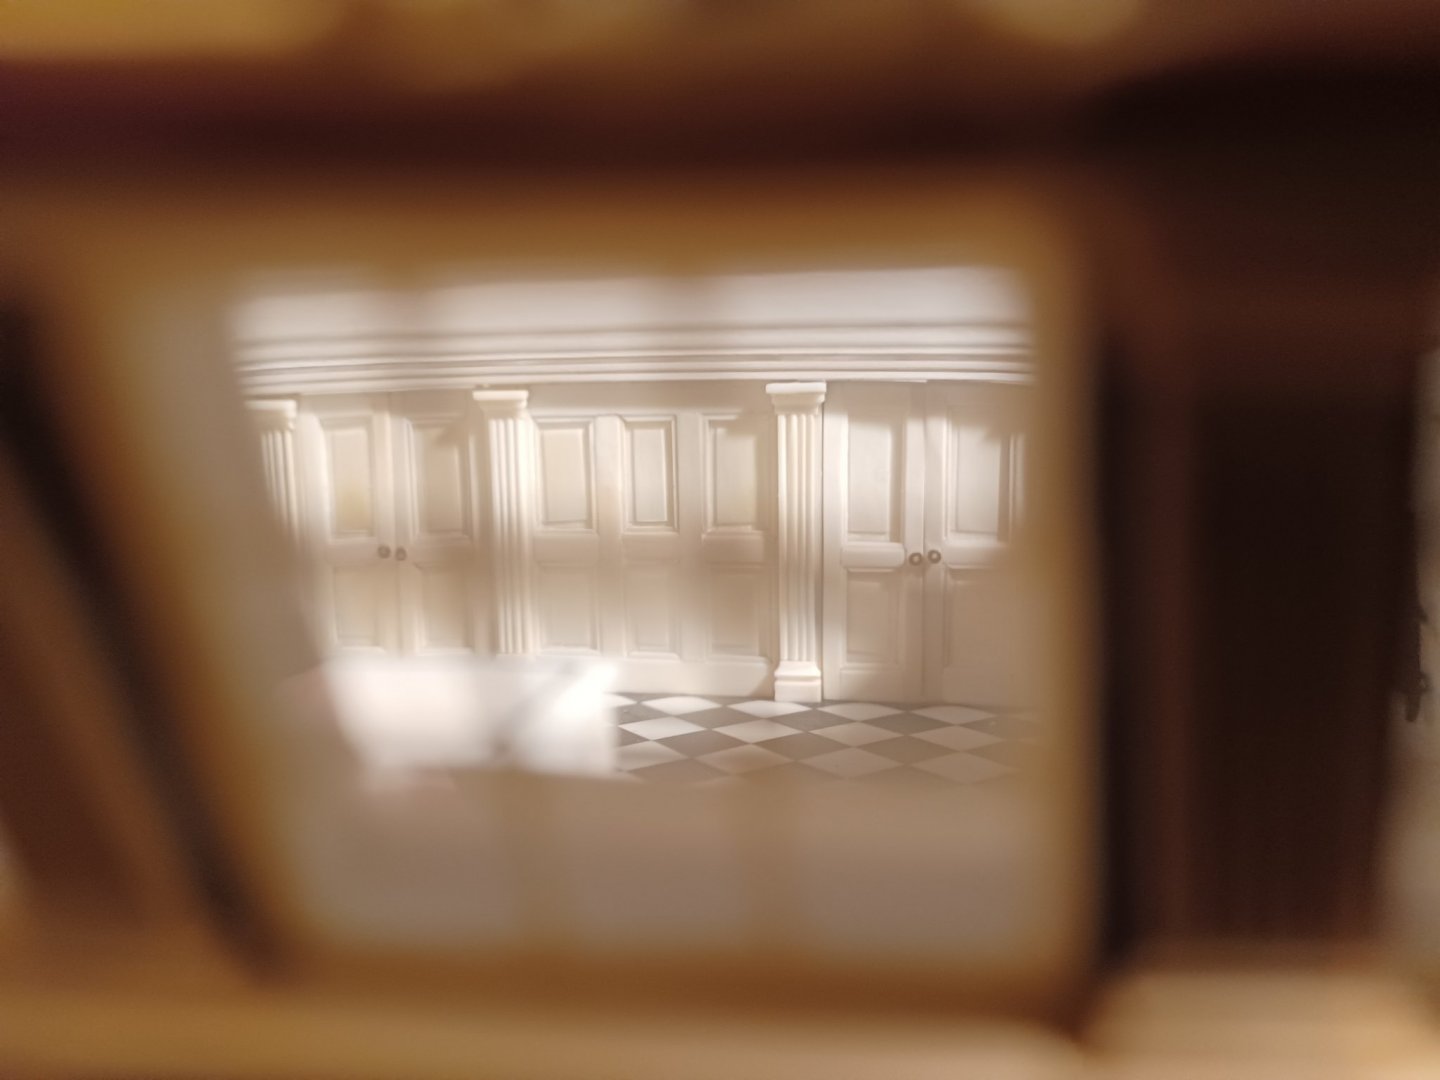
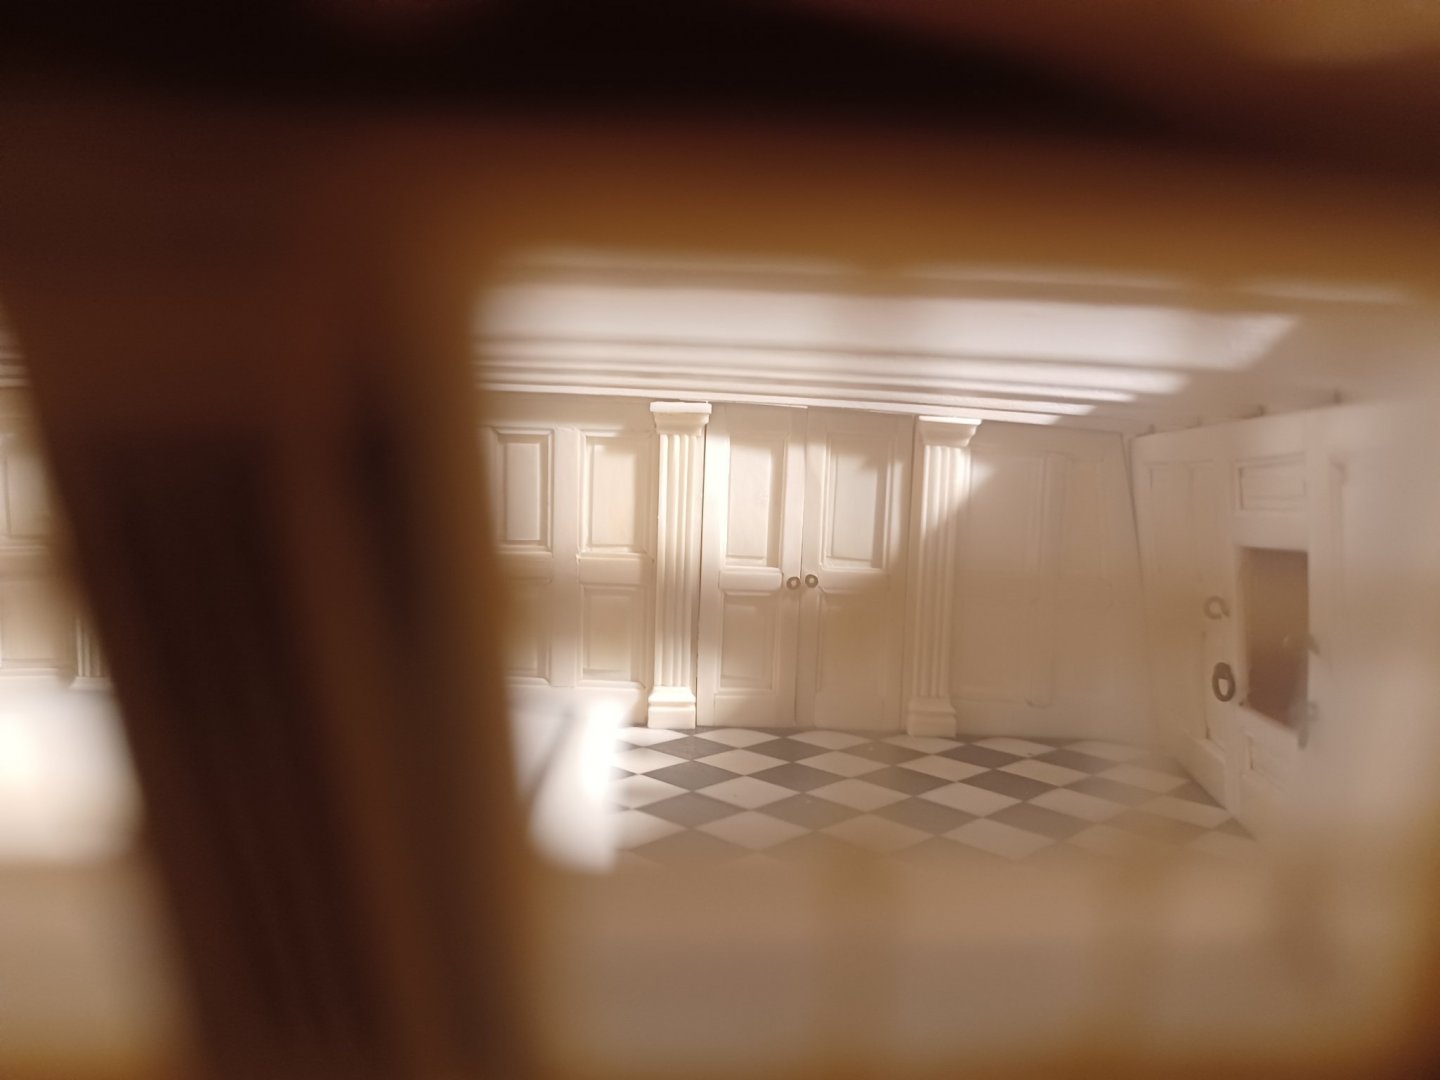
Matthias
-
-
Chuck, will you add the bumpkin at the bow? The original model has some rigging here, propably just to keep it in place. Will you go here for a similar design?
-
These fittings are really nice. And they are not too difficult to build, for they are already provided in the right shape and cut out. Of course it is worth the effort. I think you are making it very easy for us, to build an extraordinary impressive model with our average skills and average tools. Keep this level, I am enjoying it.
- Ryland Craze, BobG, JpR62 and 1 other
-
4
-
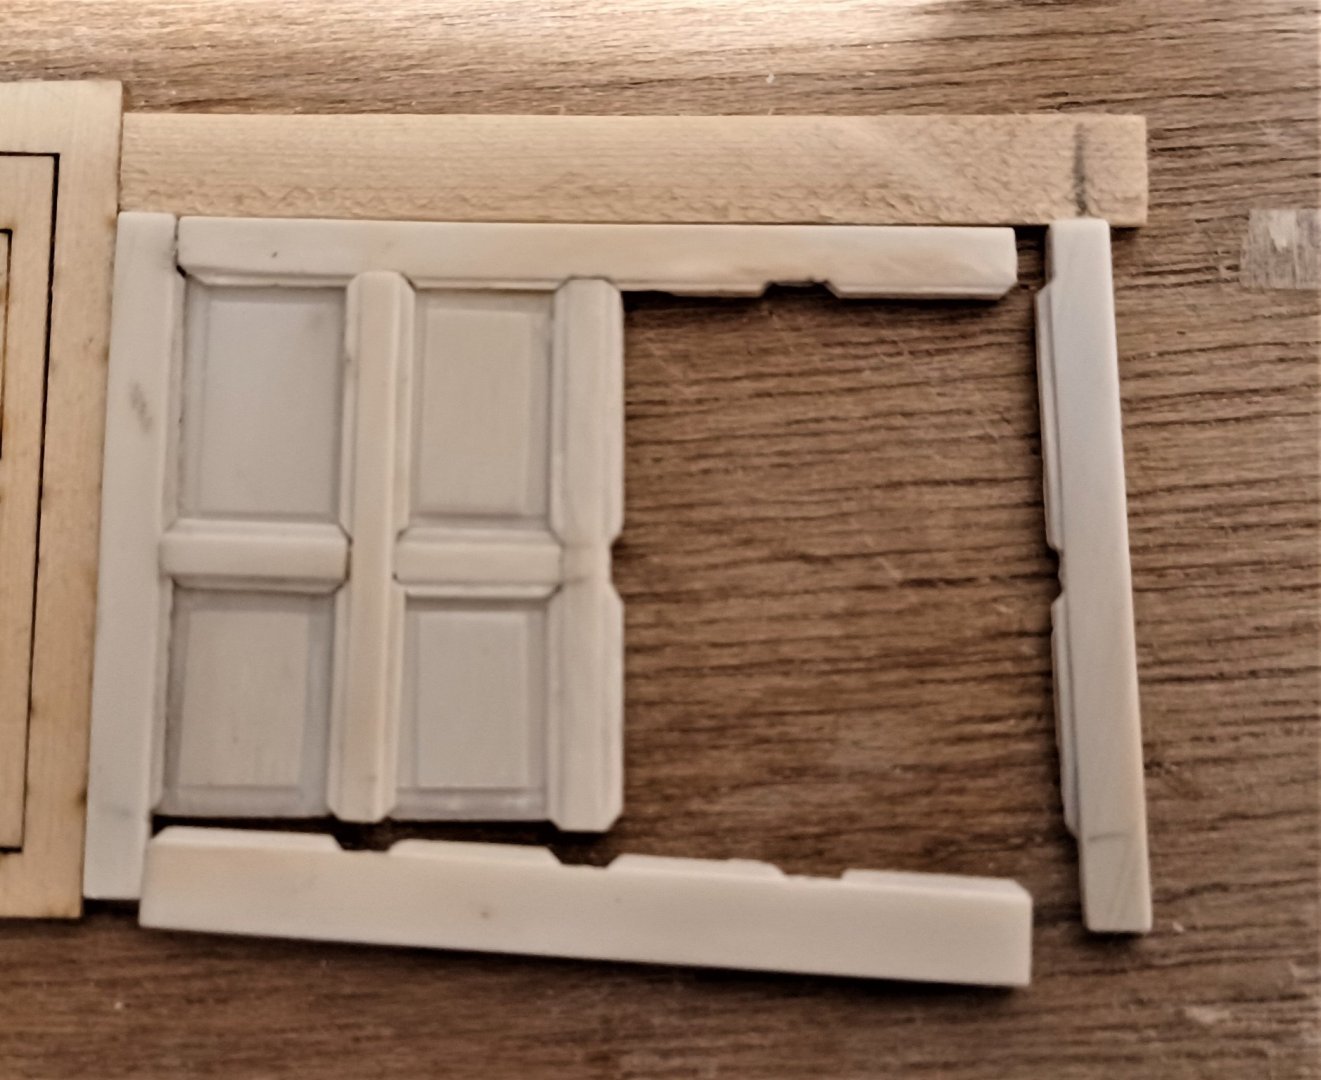
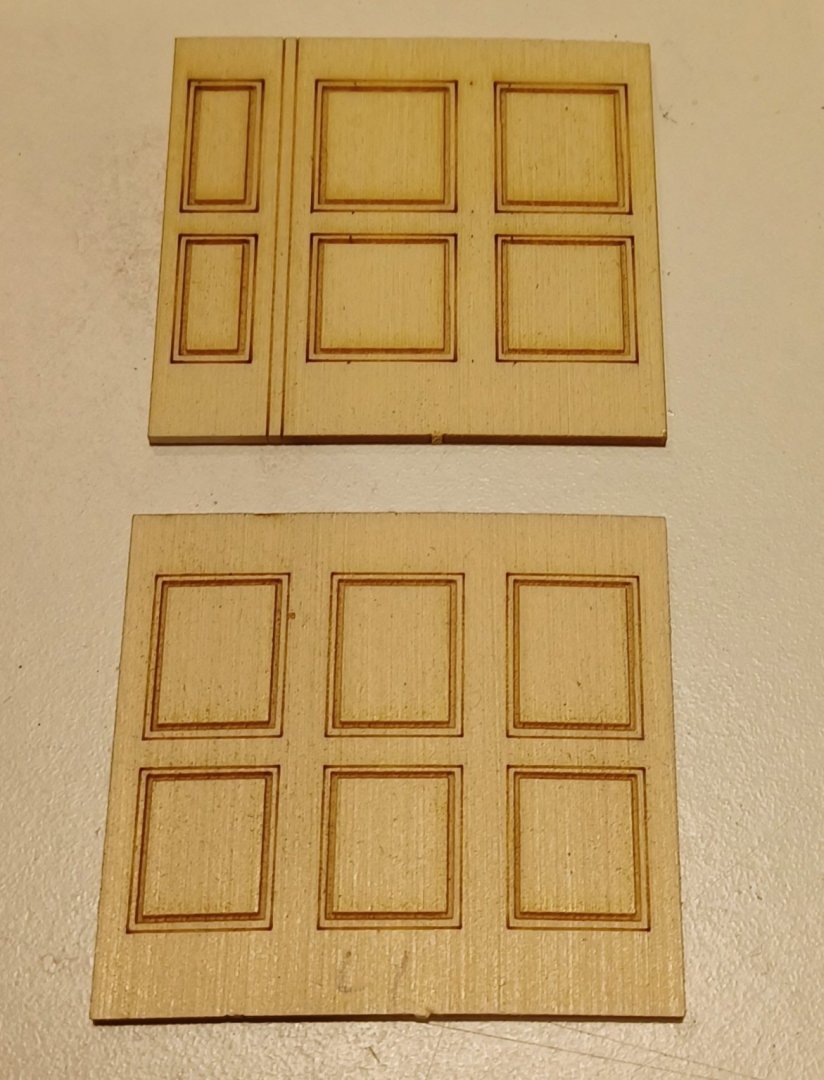
Hello Everybody,
here is just a brief comment about my attempt of building the bulkheads around the cabins. I started with the centerpiece of the aft bulkhead. It is more difficult than the panelling of the surrounding cabin walls, because it has to look good from both sides. So it is like building them in 1:1 scale, just without "slit and cone".
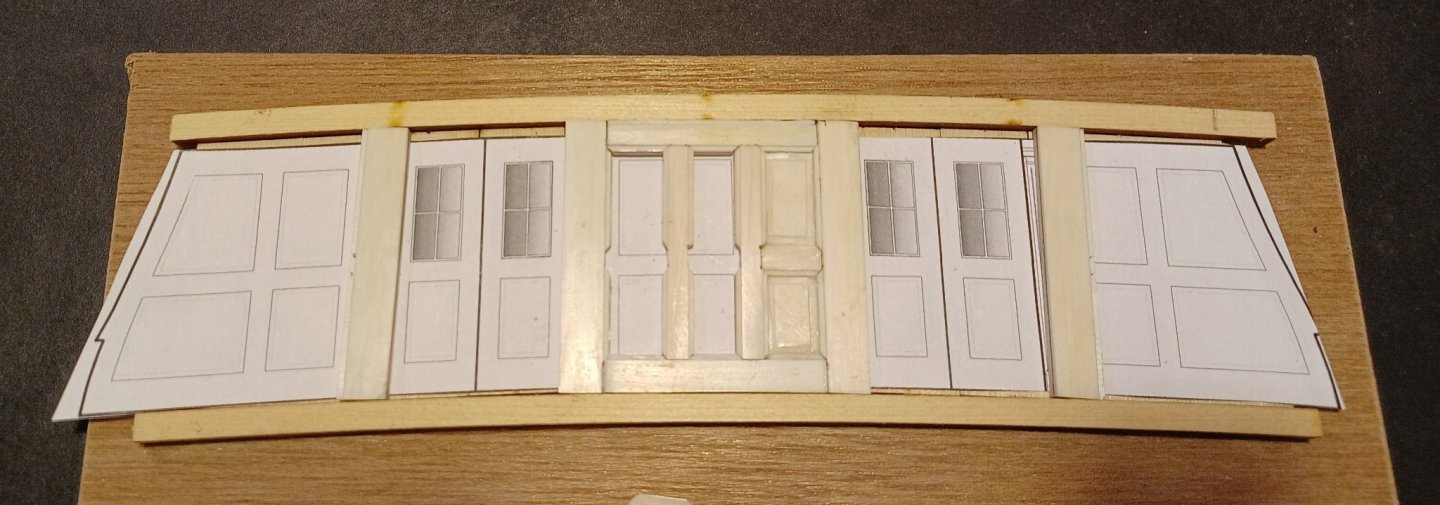


Next thing will be the doors.
Matthias
- BenD, CaptMorgan, Captain Poison and 15 others
-
15
-
3
-
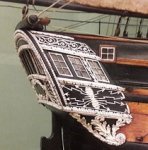
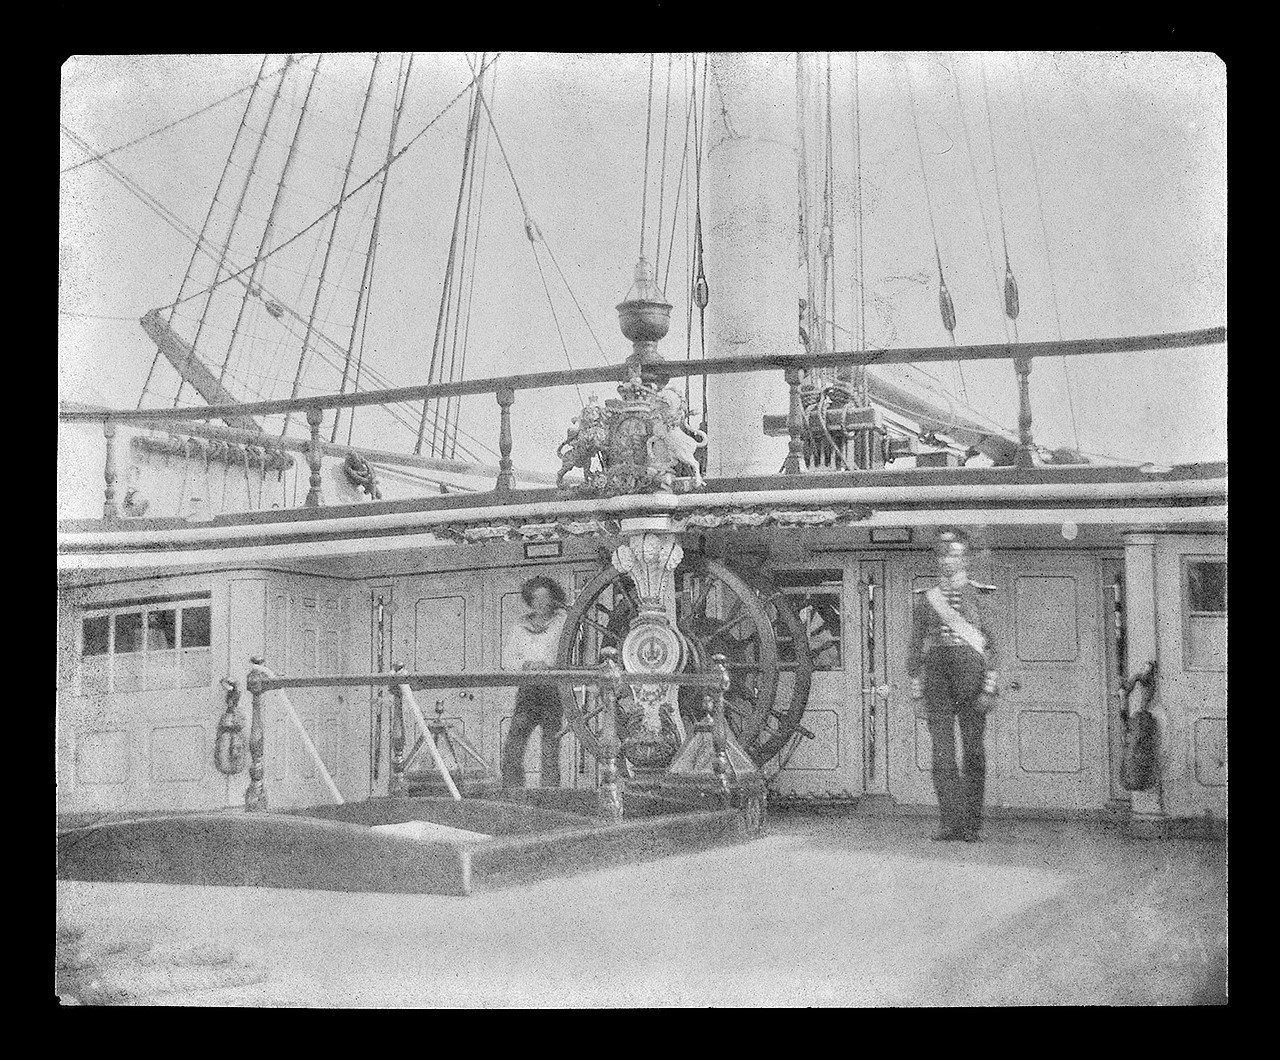
Thanks for your opinions,
I found another two examples from the book about the restauration of Princess Royale. I hope it is ok, if I post them here, otherwise please delete them.
These photos show the arrangement very well.

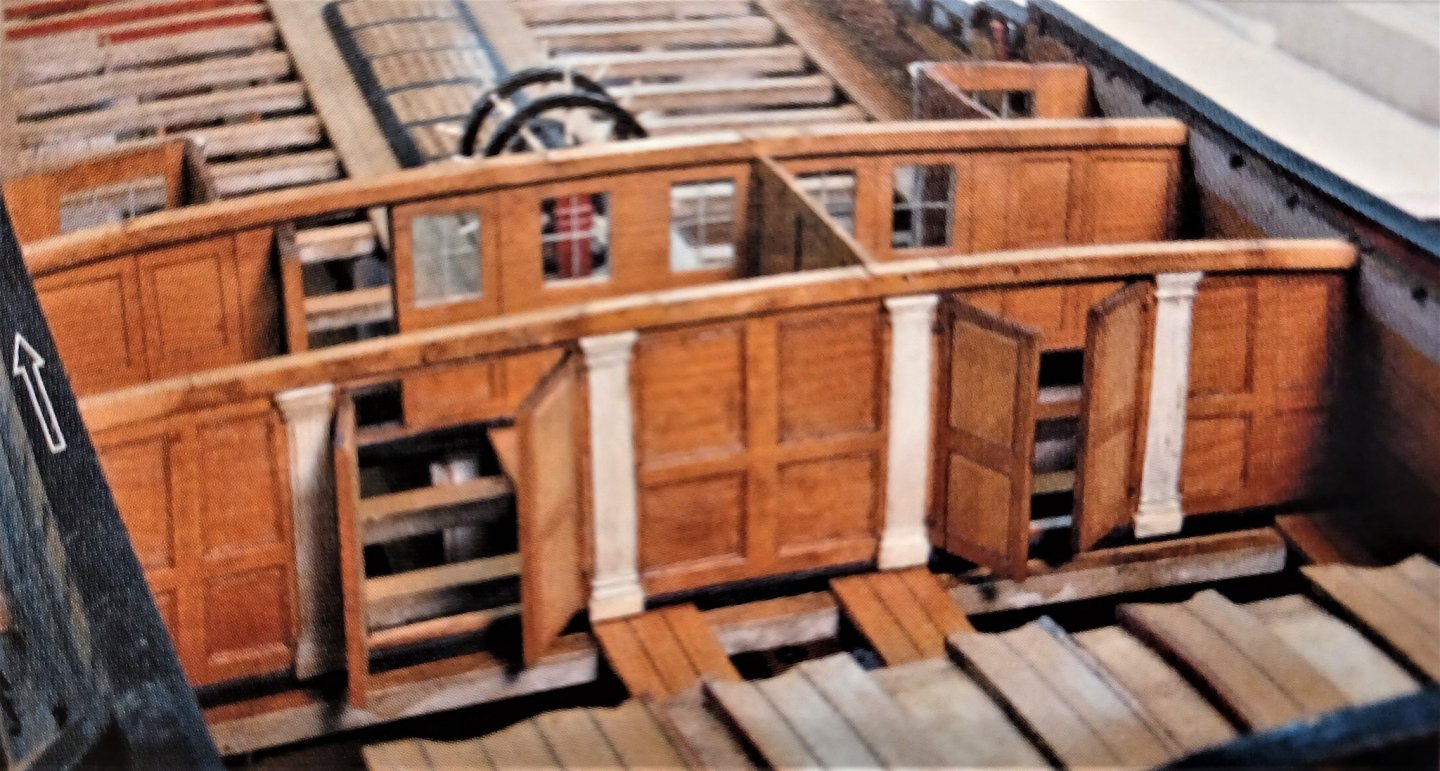
So my bulkheads inside the cabins will be made from ivory, the forward side of the forwand bulkhead, will be made from boxwood. I hope, I can somehow bring this together. If not, I will just paint it red.
Matthias
-
Hello everybody,
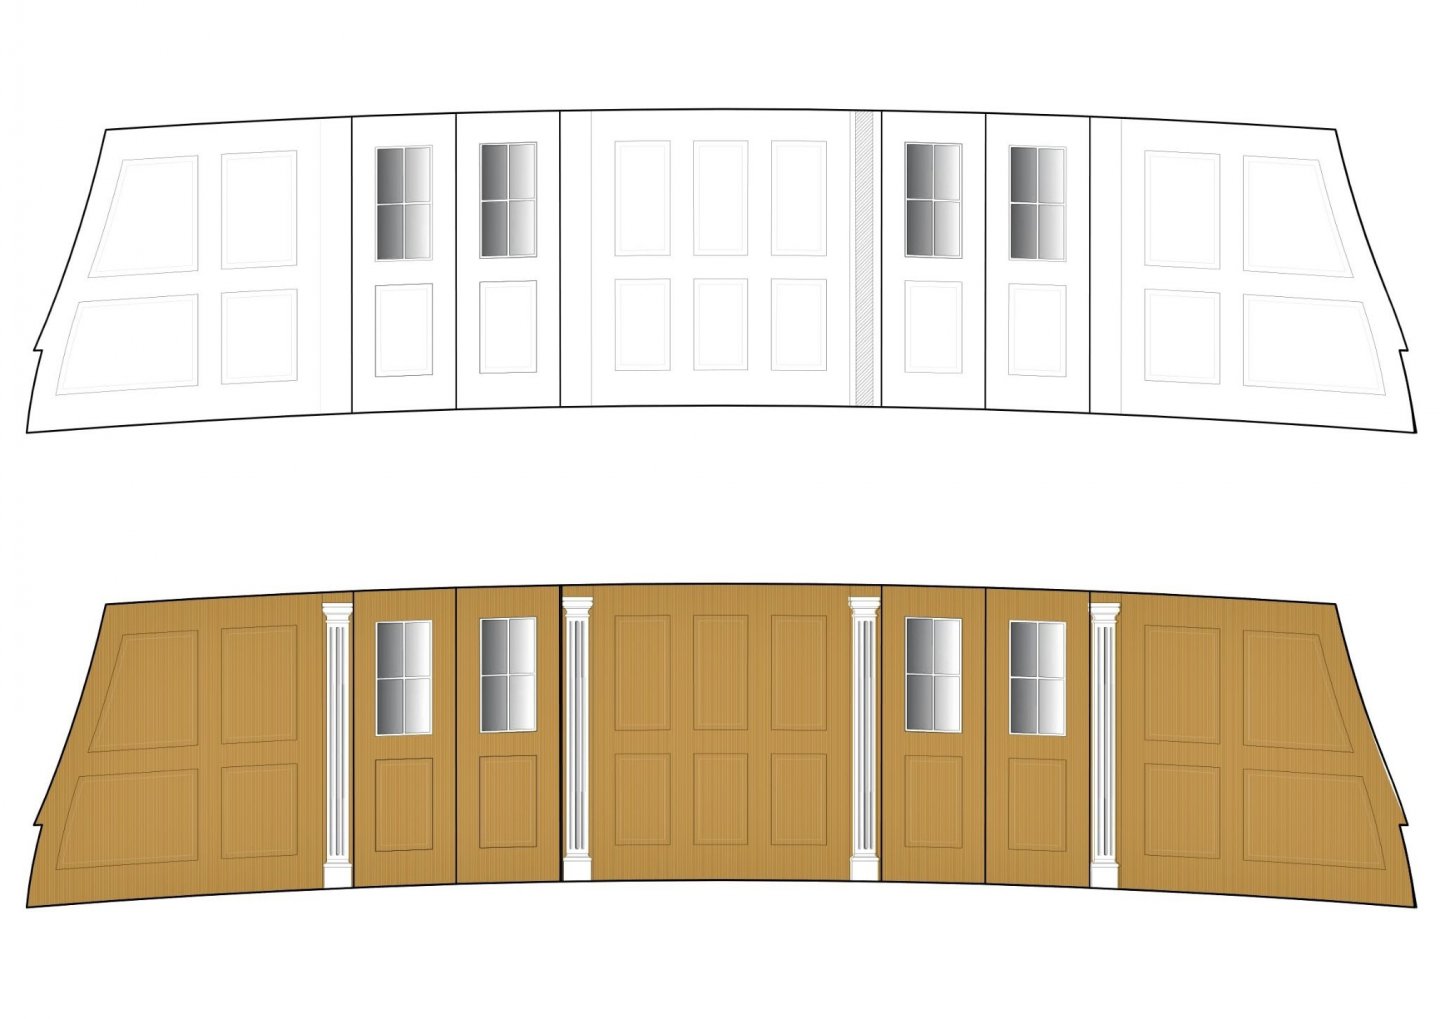
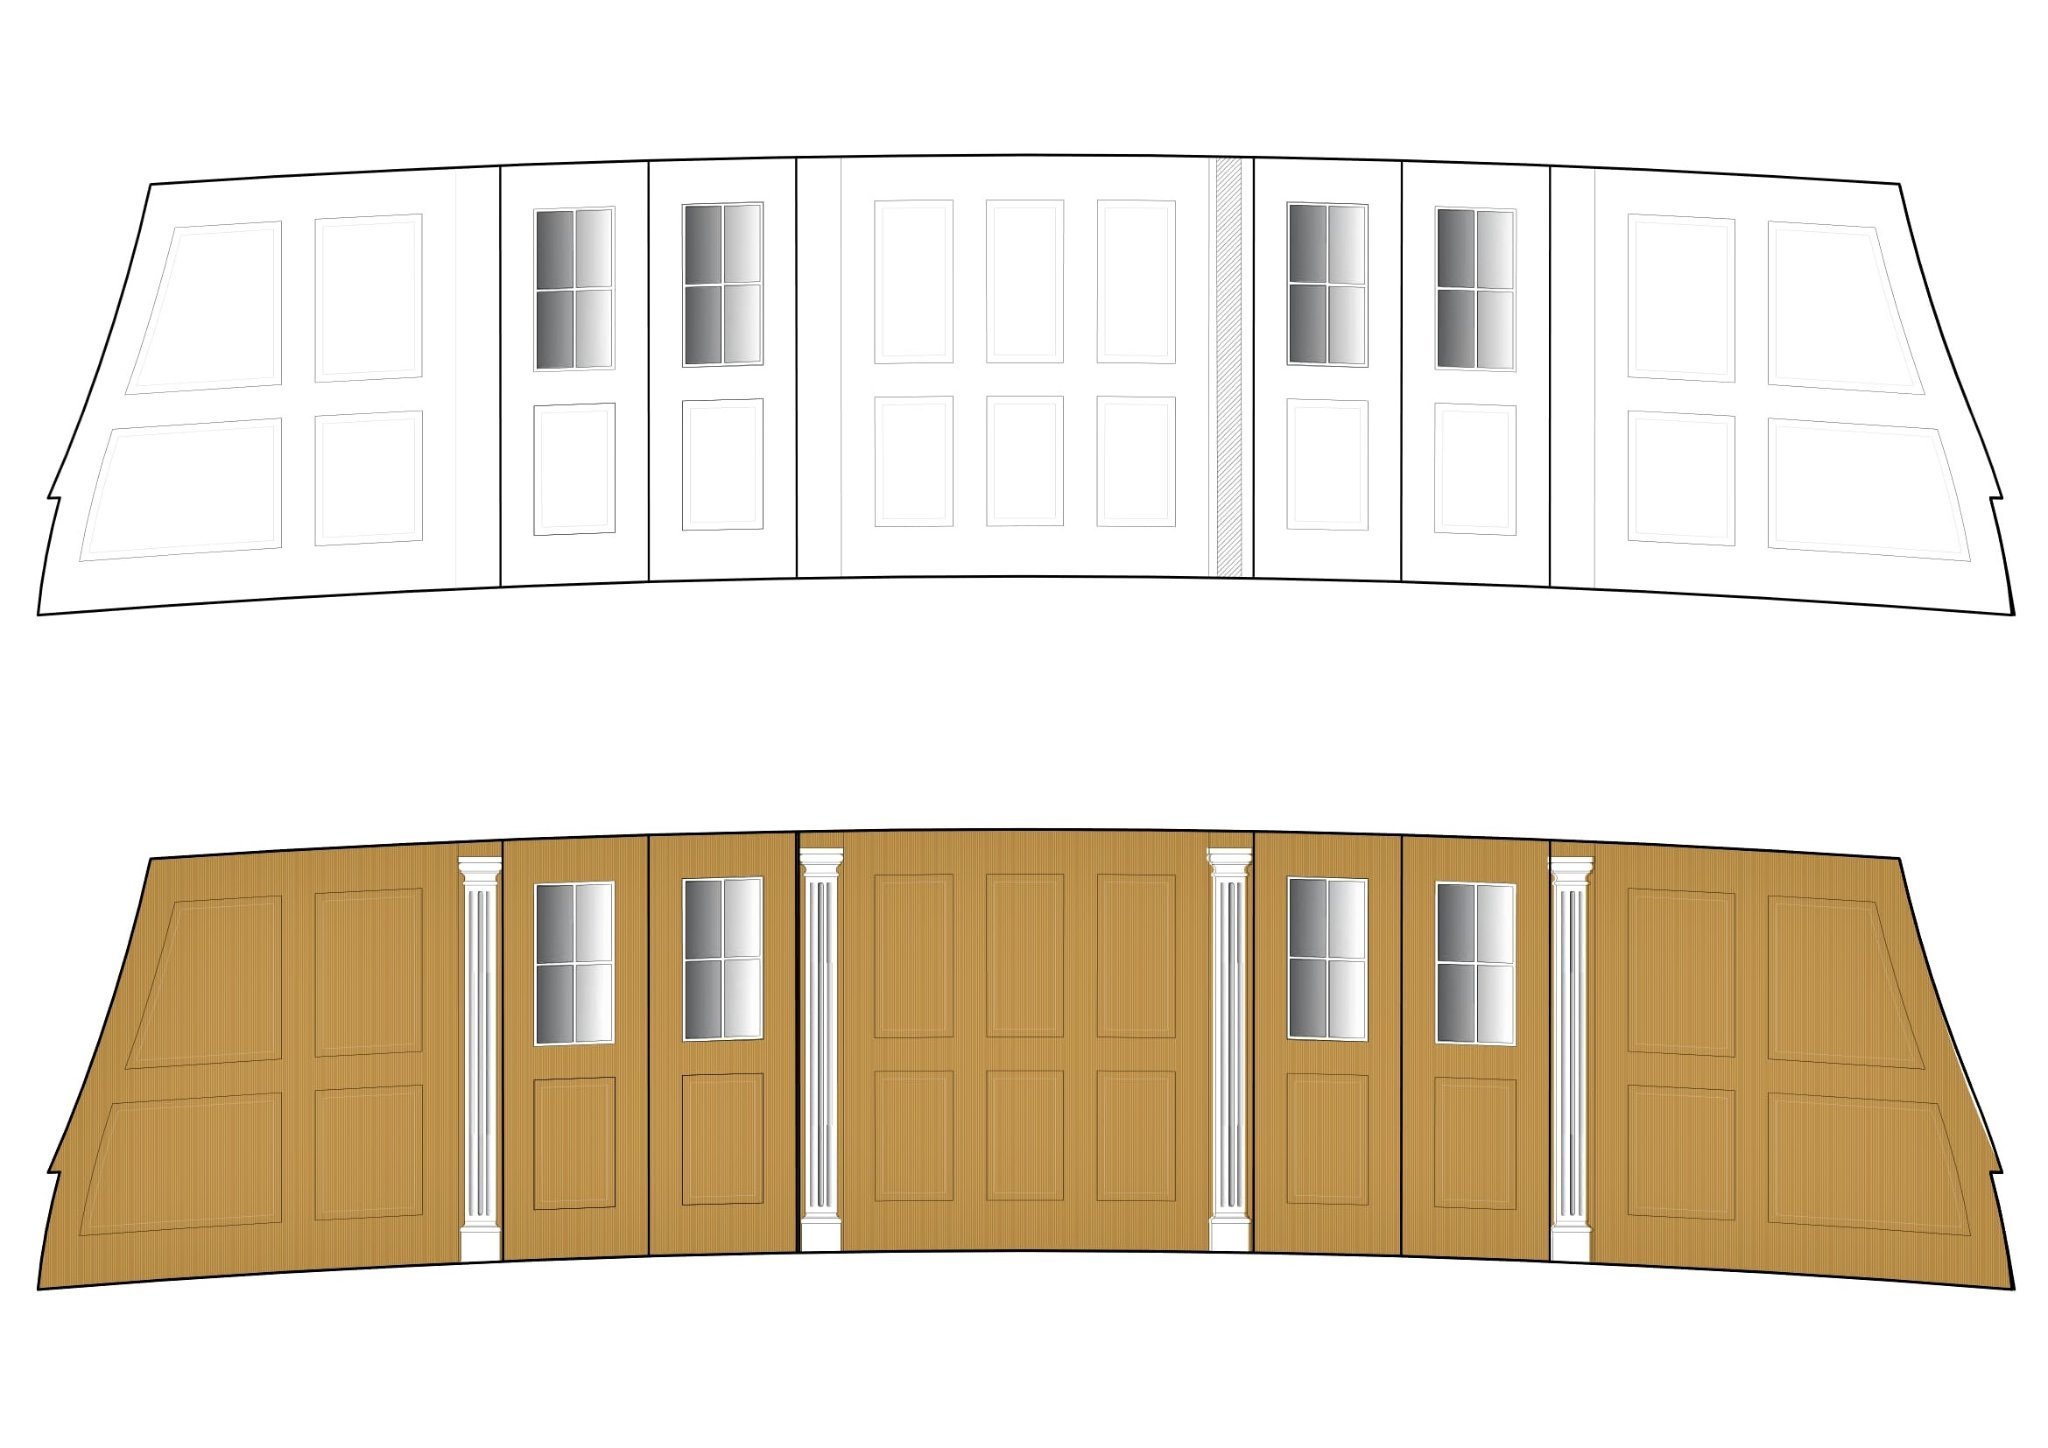
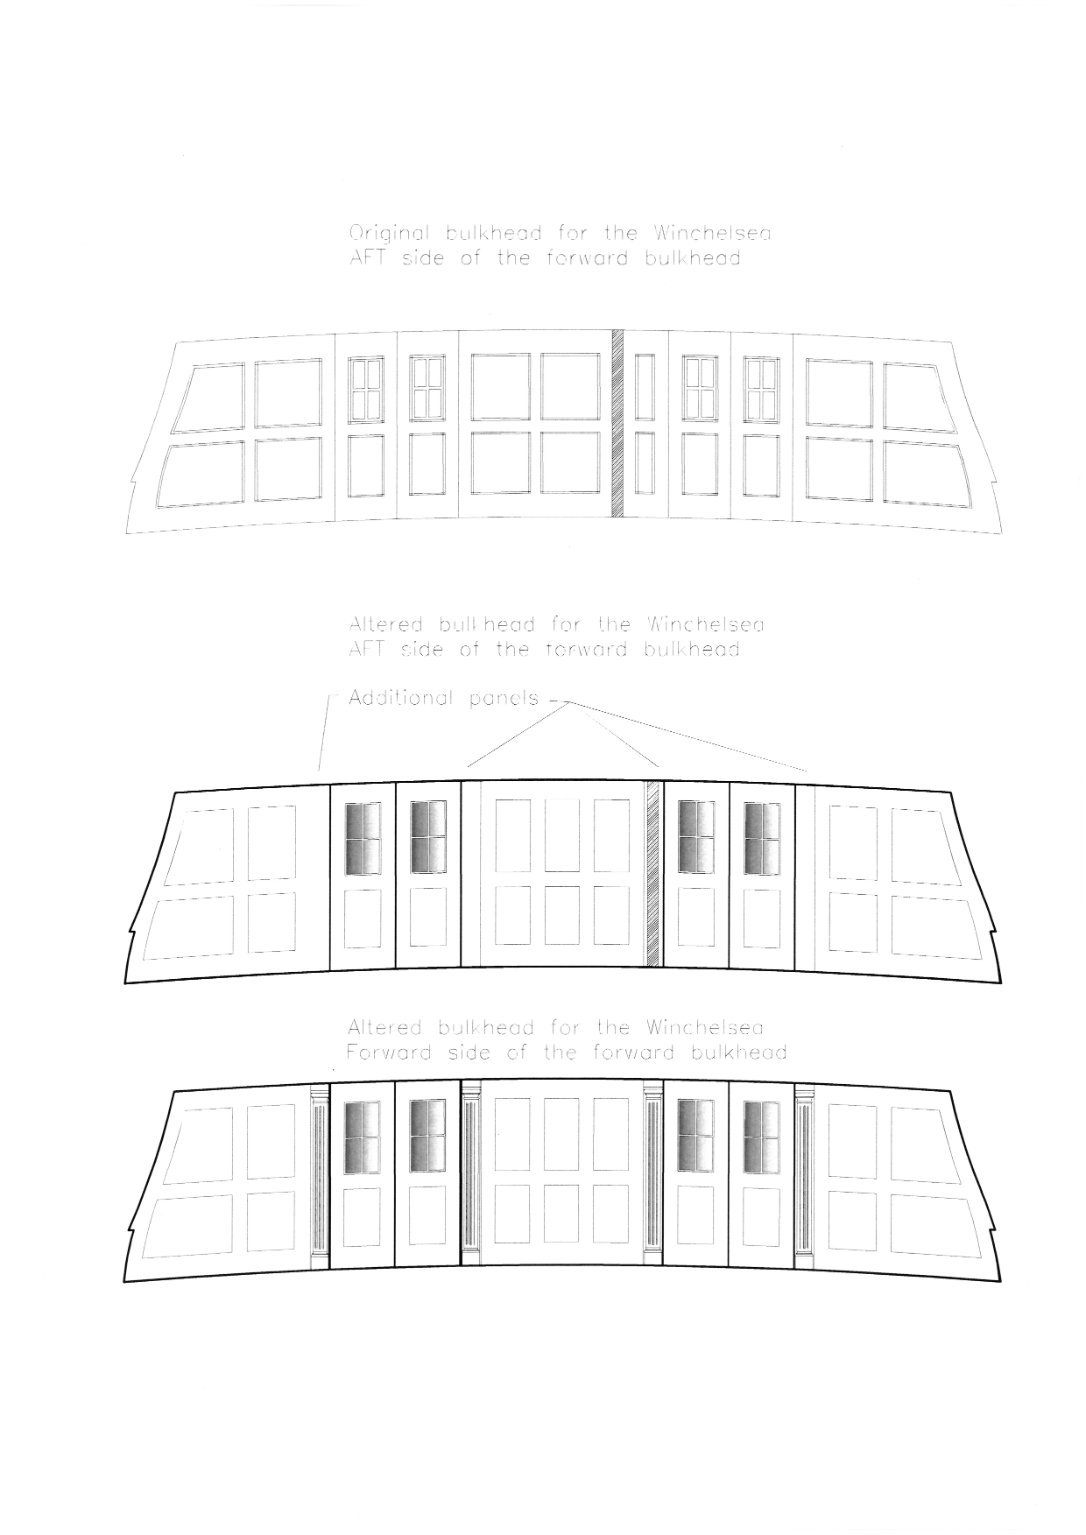
I have a special problem, and I would like to hear your opinion about this:
As you have seen in my build log, I built the panels of the cabins unterneath the quarterdeck with frames and panels. I want to do the same with the bulkheads, wich separate the captains cabin from the forward chambers and the main deck. The problem is, that the center pieces don't look equal from both sides, wich is necessary, if I build them my way.
I had a look around, on old photos and drawings and models like HMS Amazon, and some of them show a panel next to the doors.
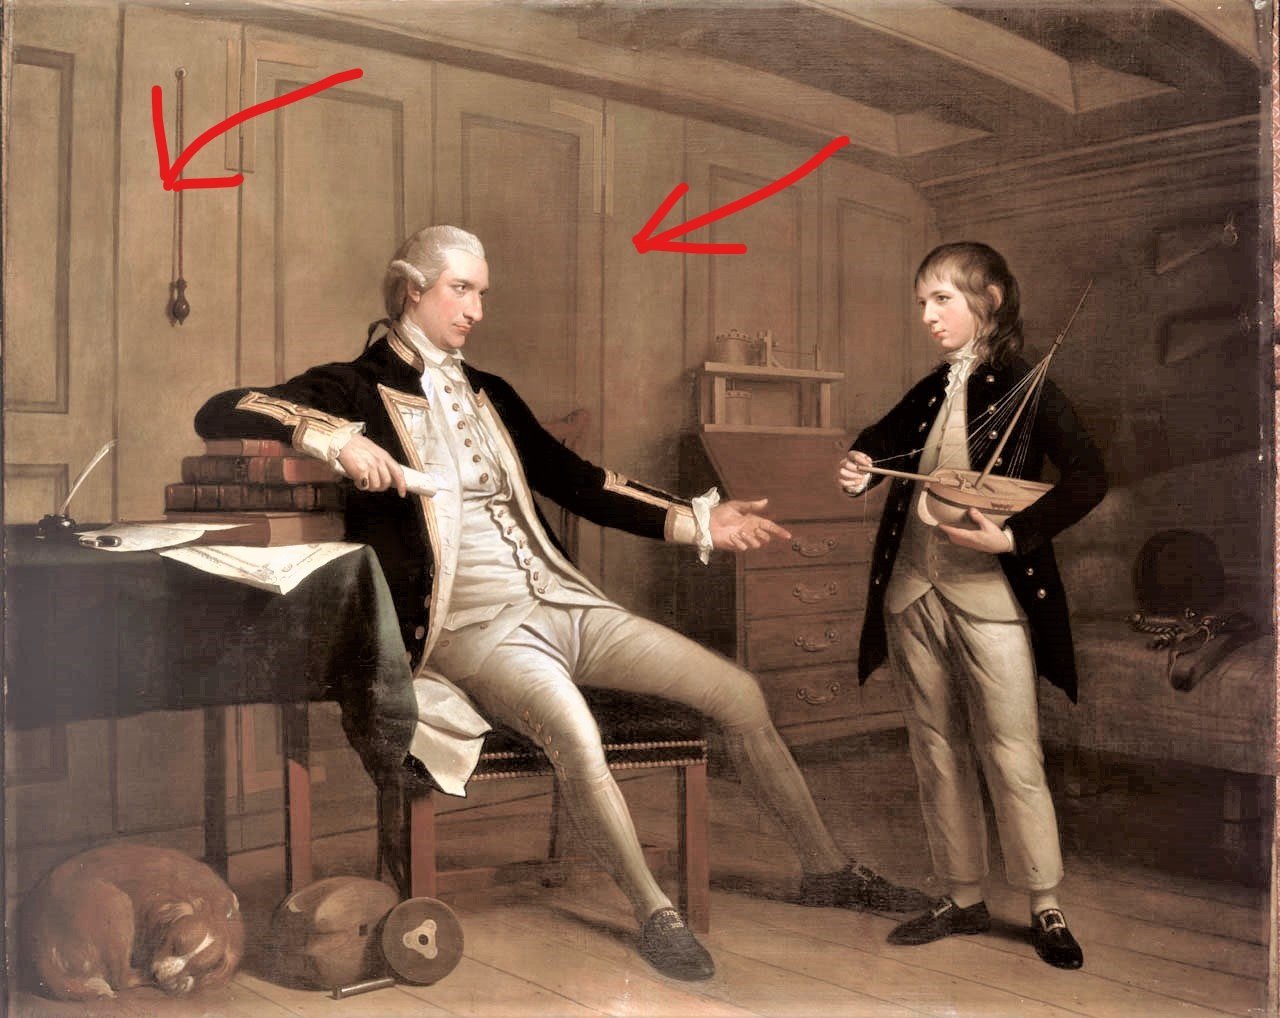

HMS-Victory has them as well
An old photo of HMS Superb shows a similar construction
And the most important one: the frigate-model AMAZON has them as well.
Here I like the little columns between the doors to the main deck.
I made an attempt to add this panel which allows a center-piece-arrangement wich is equal on both sides of the bulkhead.
Her is my drawingto of the bulkhead. What do you think?
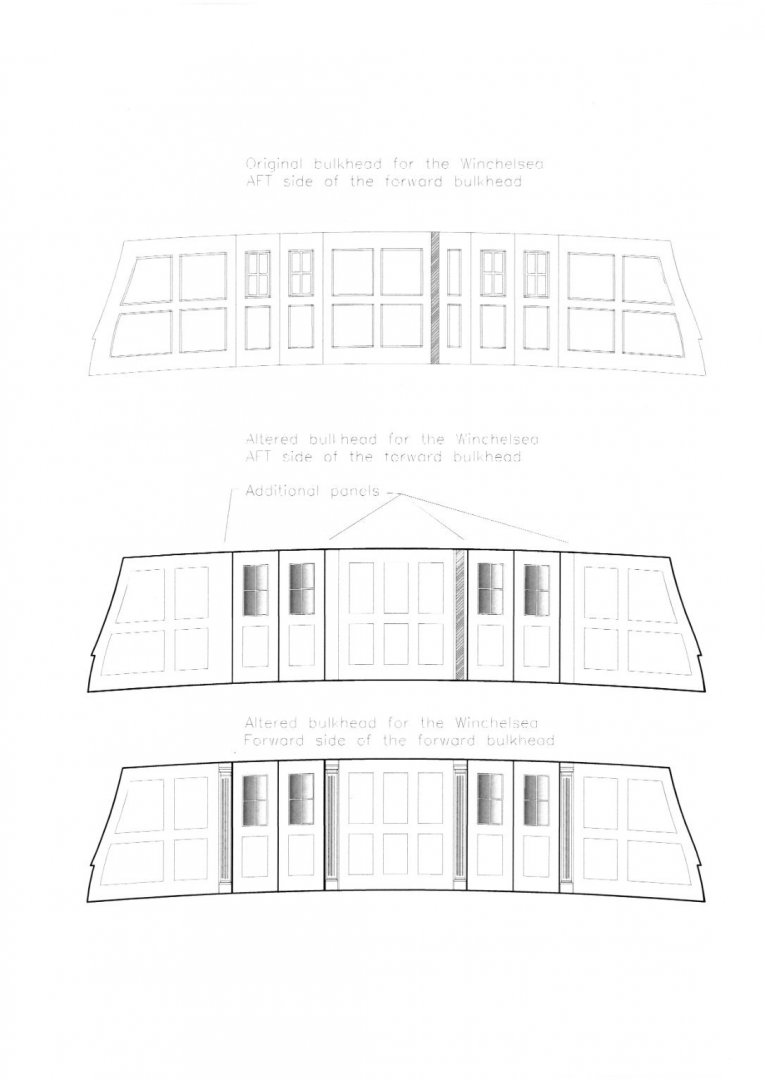
By the way, how can I insert pdf-files? I scanned the drawing, because my pdf of the drawing would not apear in this message.
Lastly a picture of my model, with the deck-beams painted like on the AMAZON-model,
Matthias
- Jorge Diaz O, Saburo, Edwardkenway and 5 others
-
8
-
-
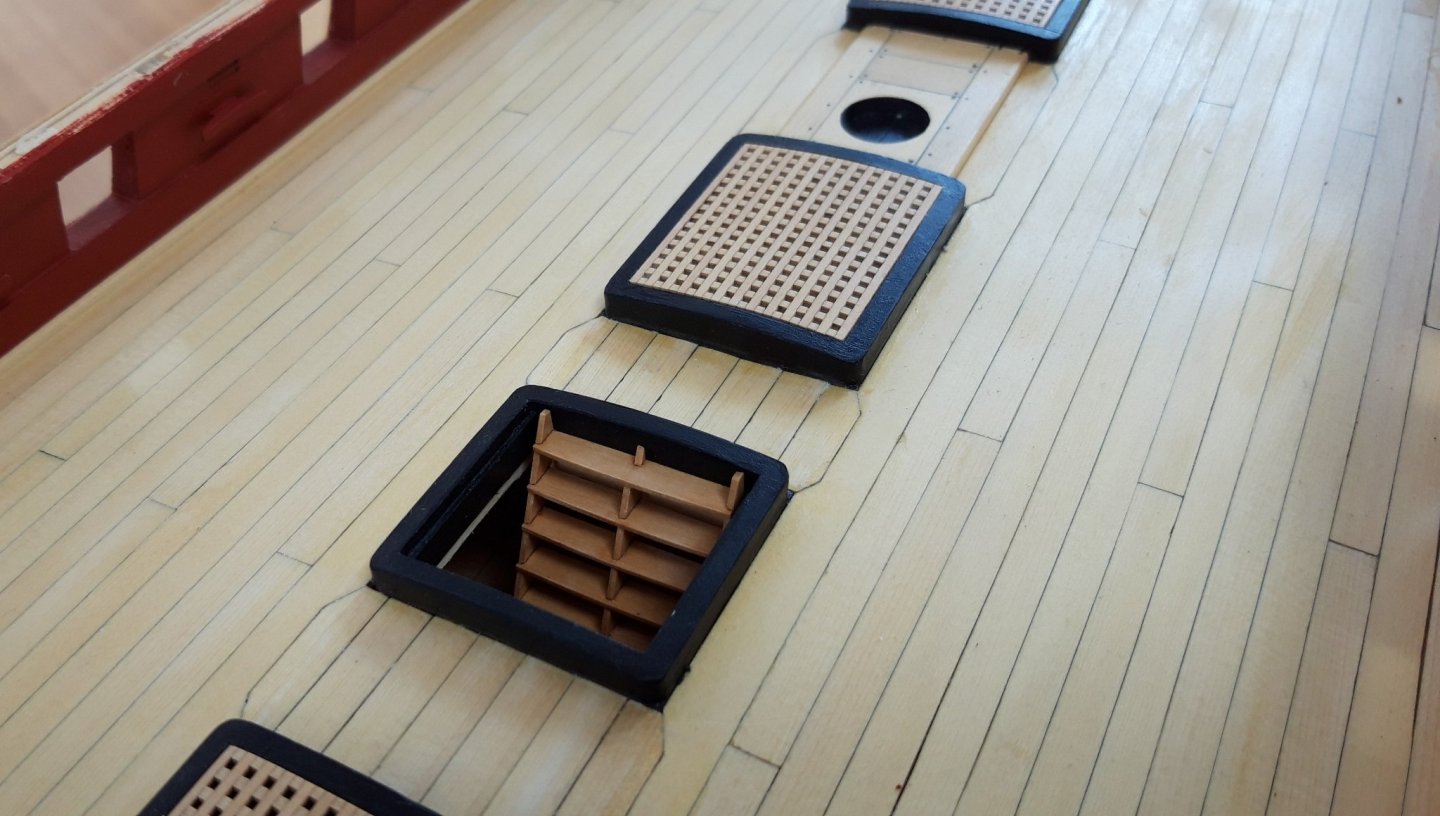
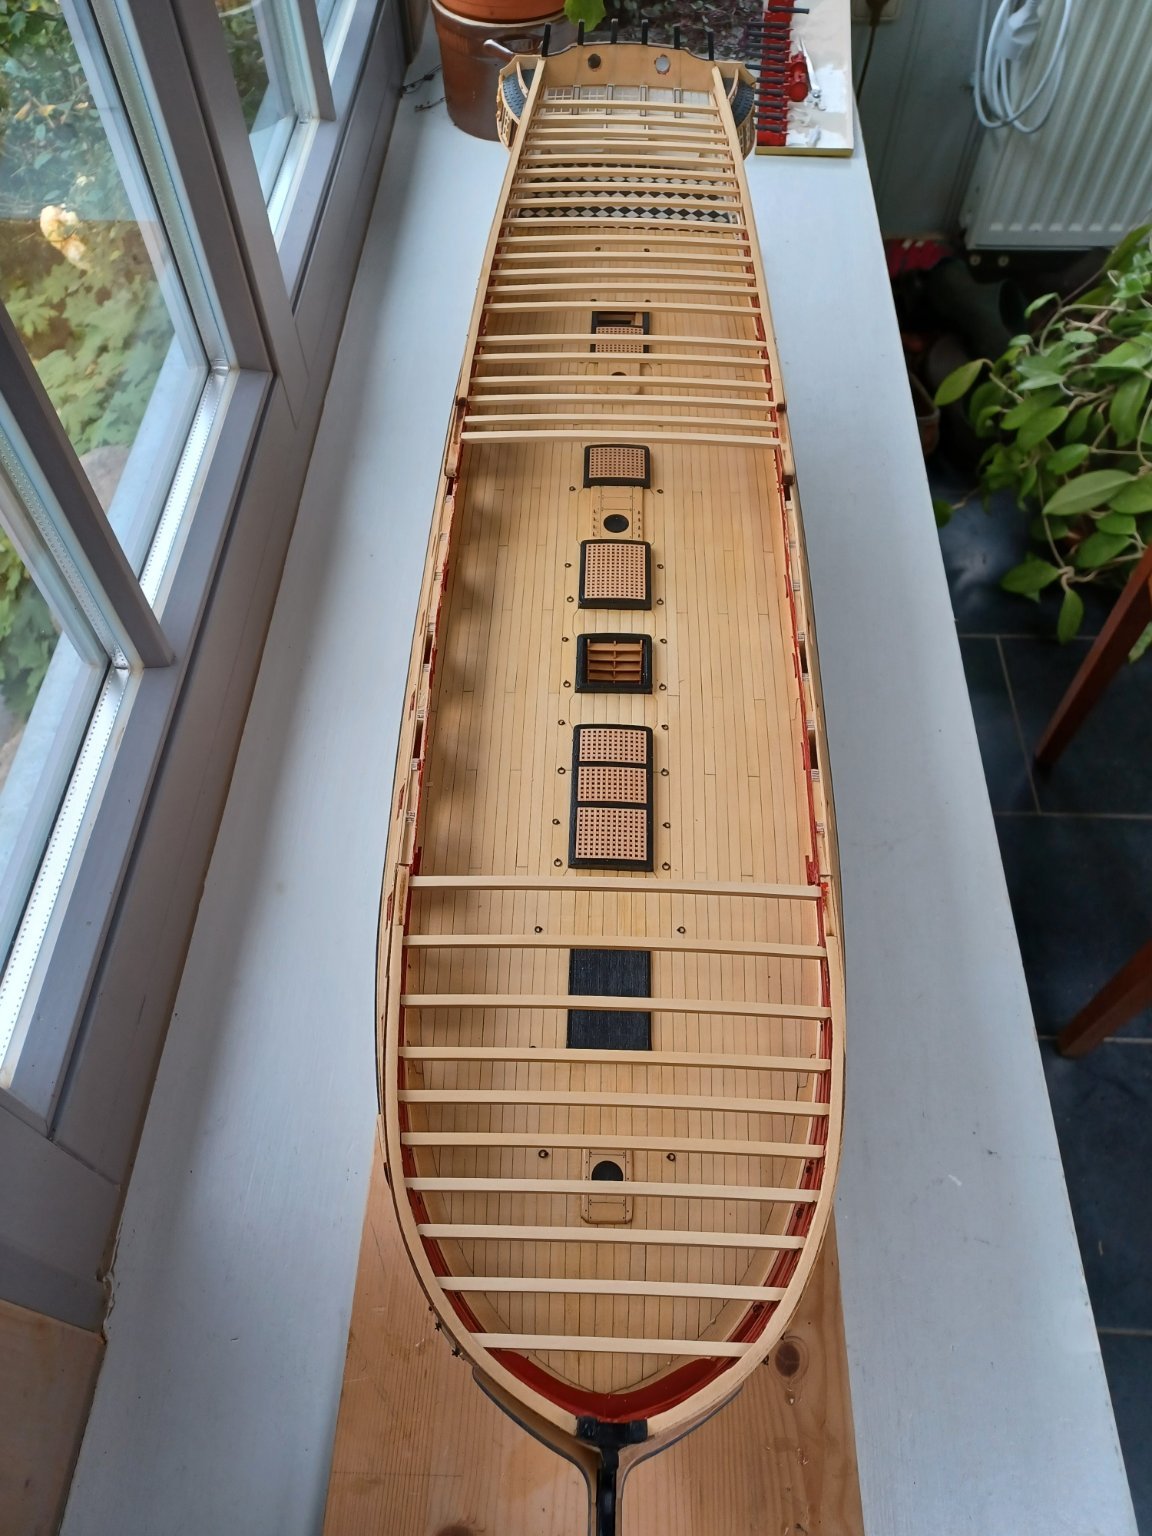
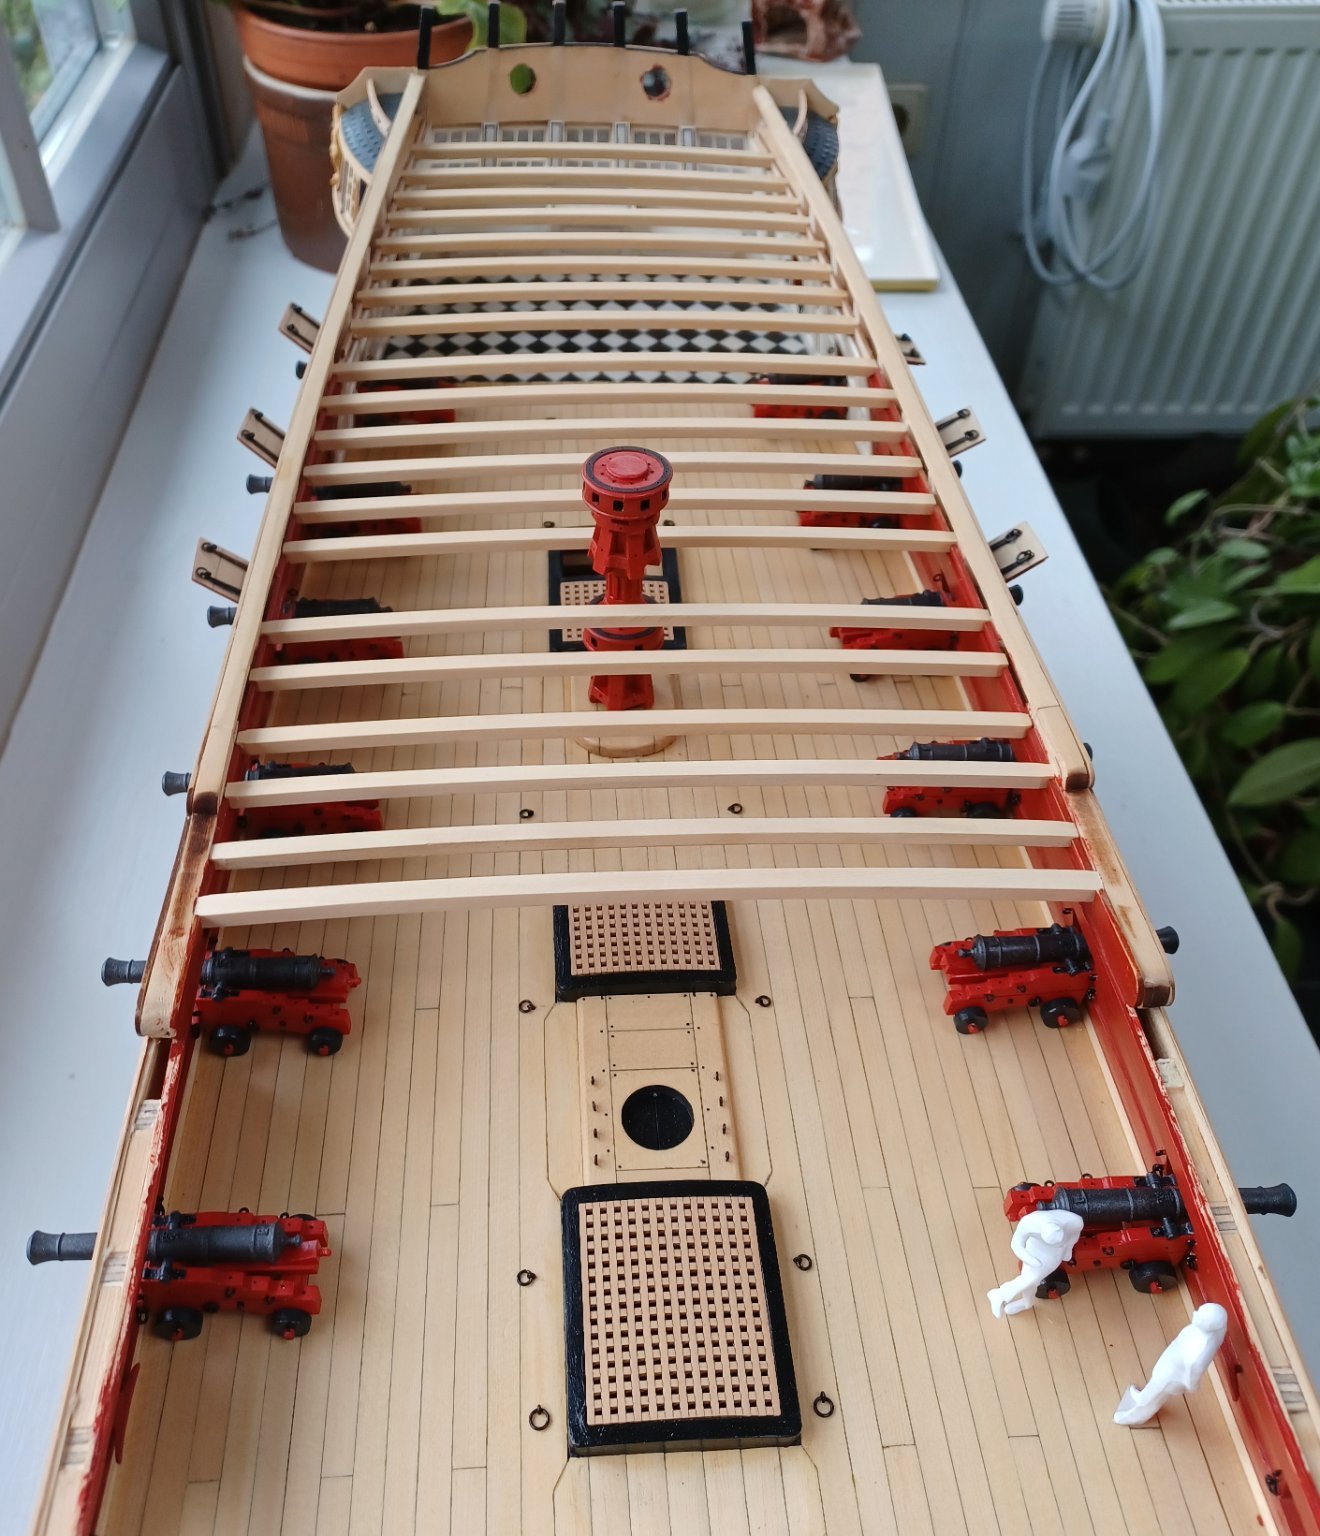
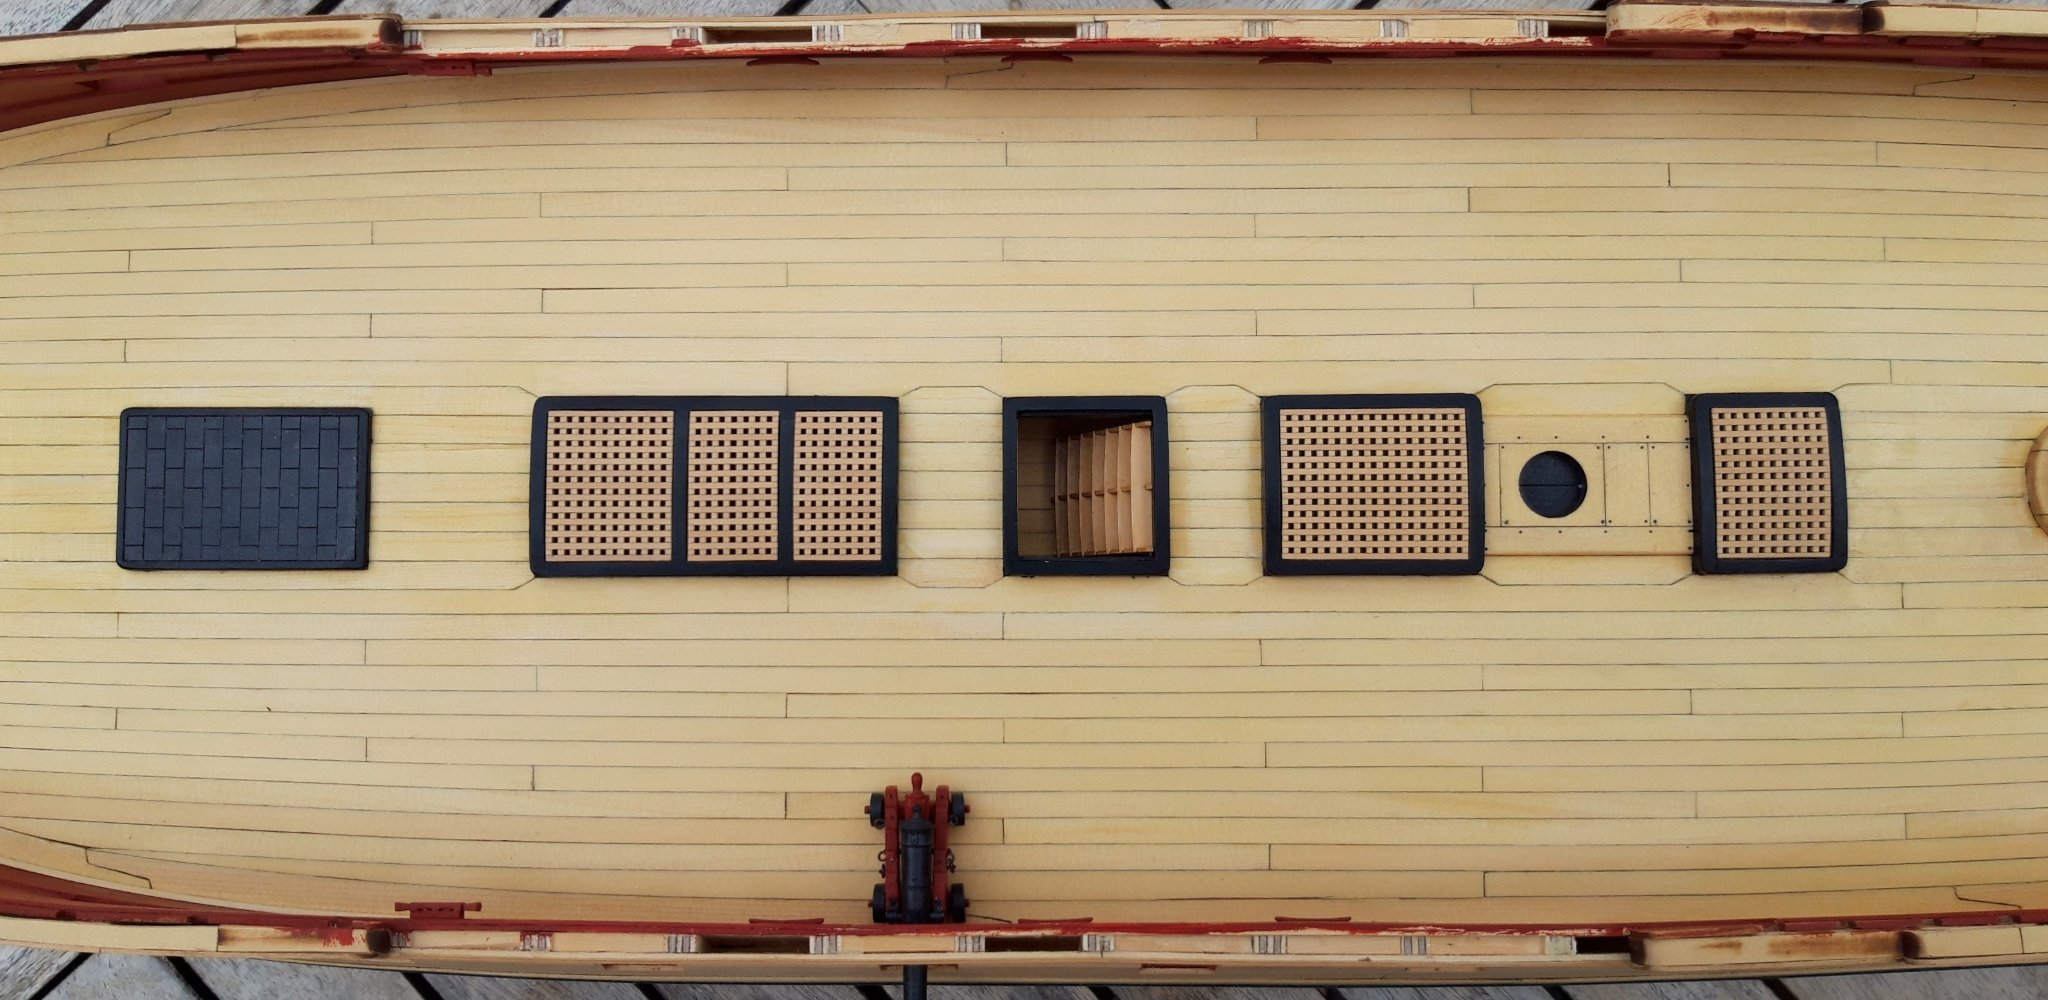
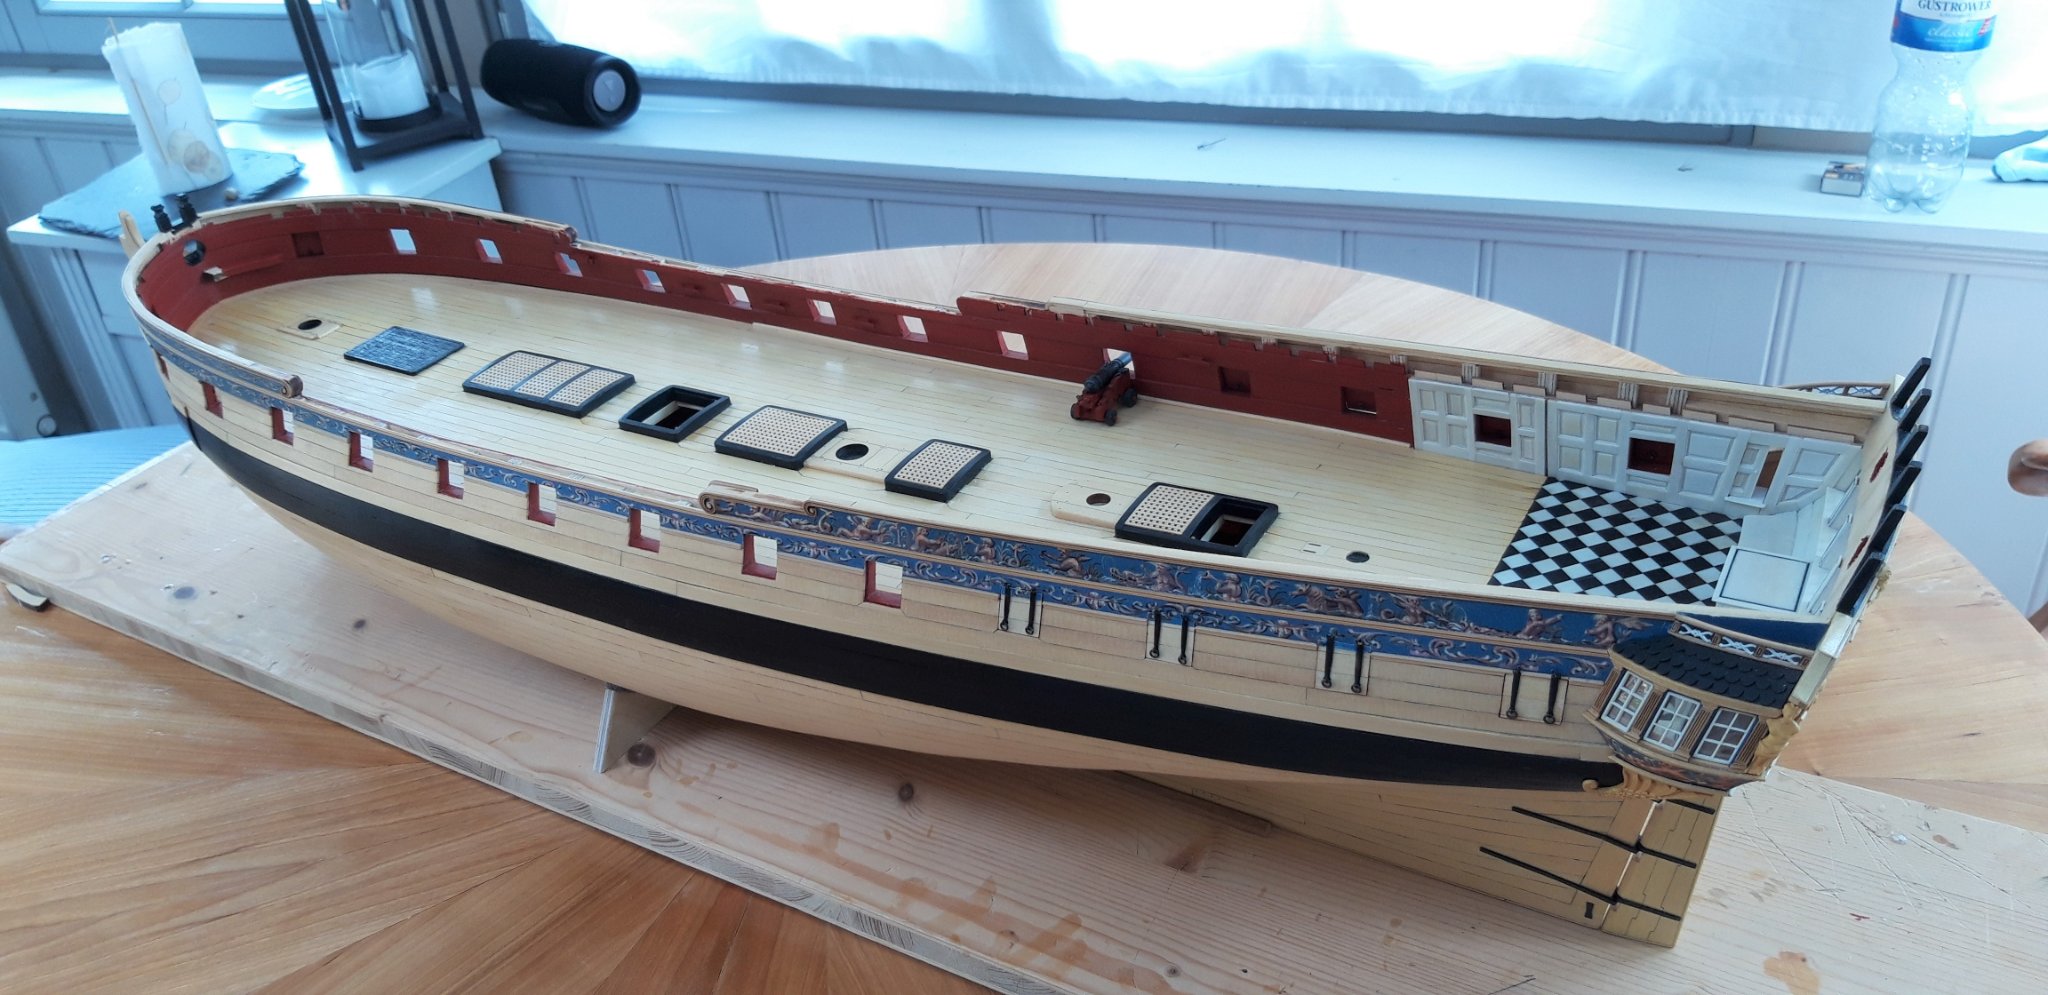
Hello everybody,
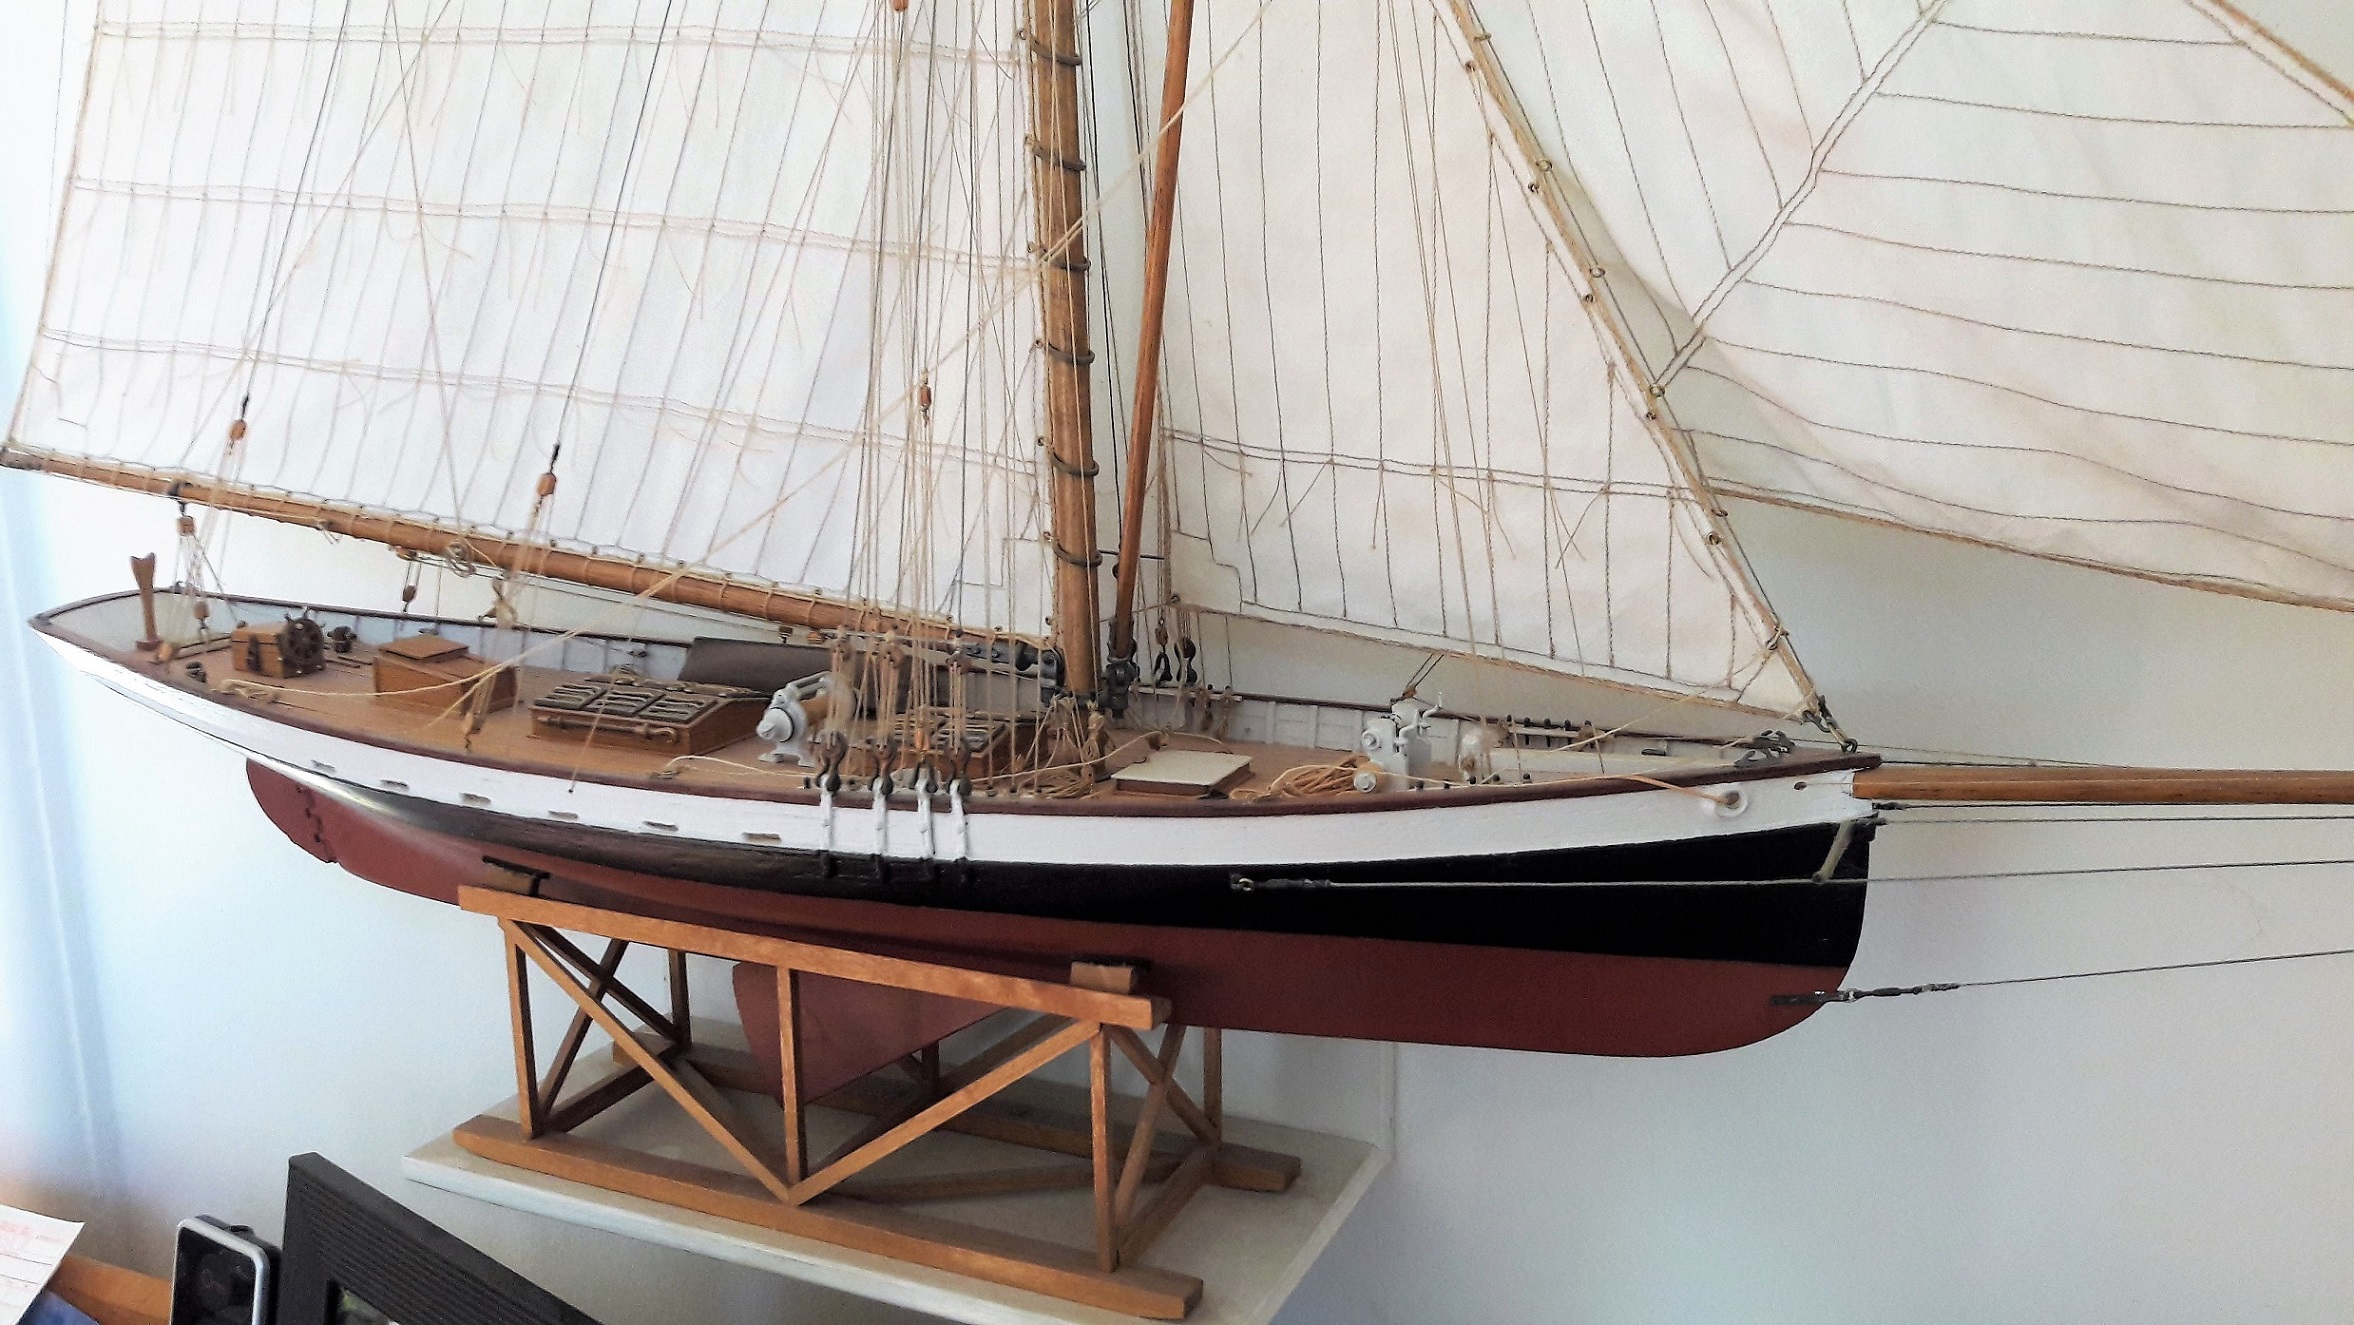
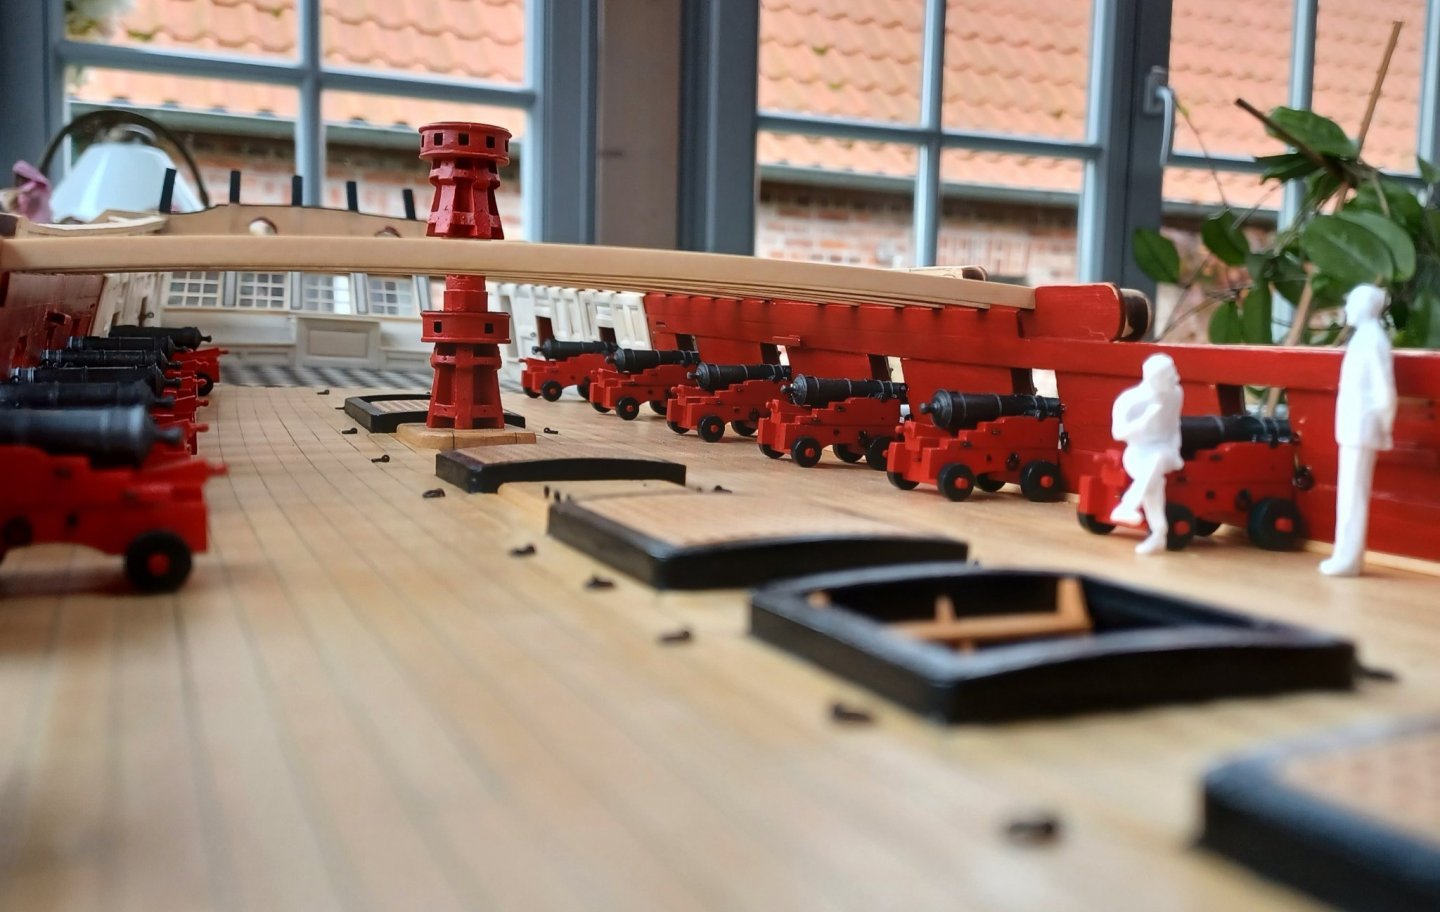
After adding all the ring-bolts to the model, I proceeded with chapter 7, preparing and dry -fit the deck beams, here are some photos of the model, what a beauty, this is great fun modelling.


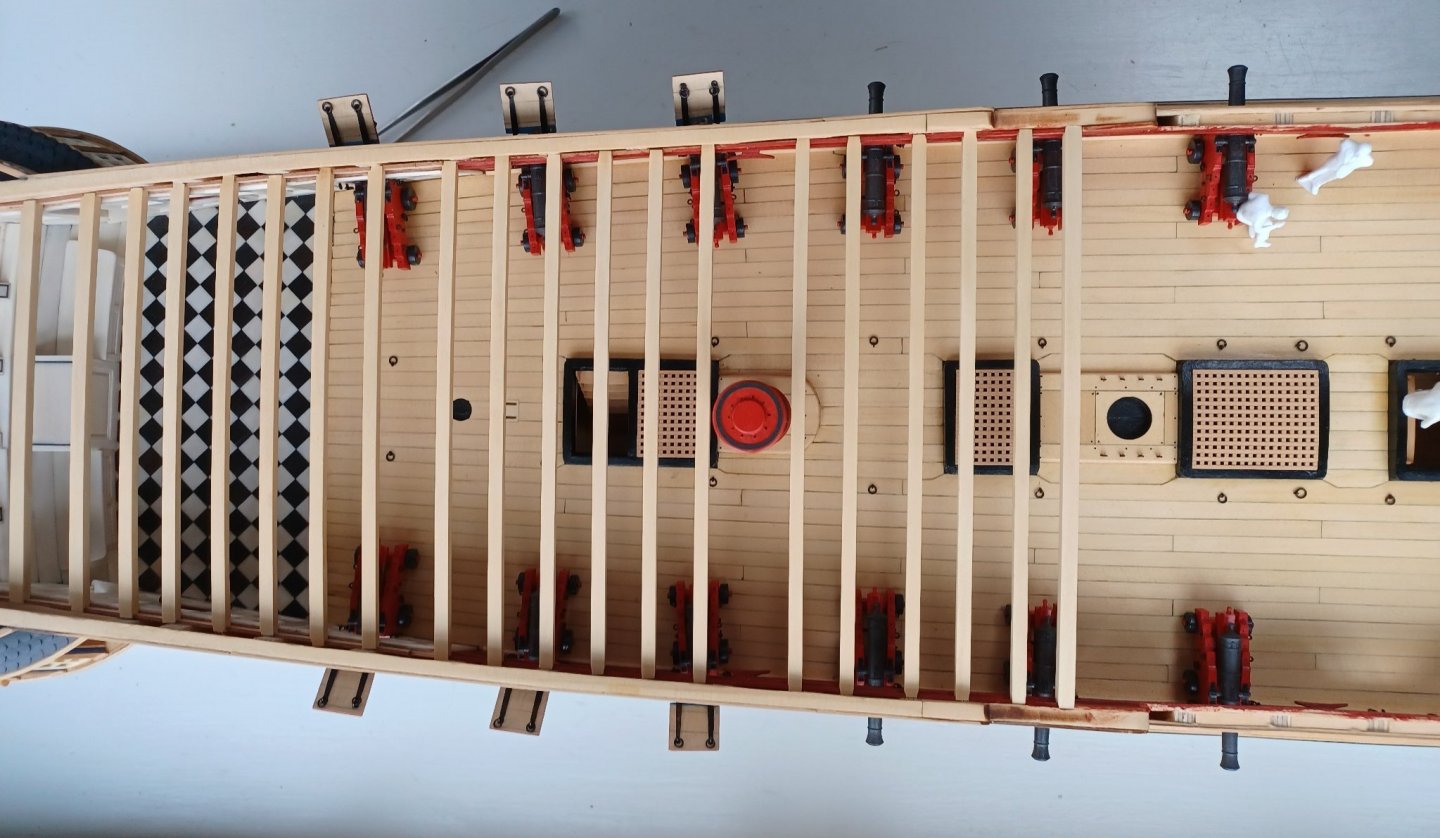
Matthias
- FrankWouts, ccoyle, Edwardkenway and 16 others
-
17
-
2
-
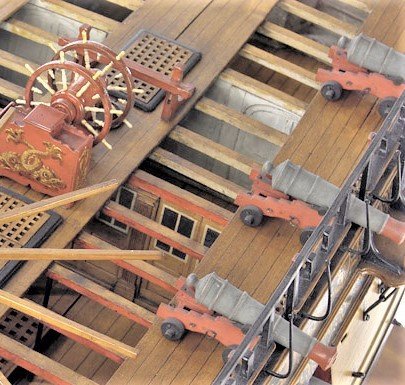
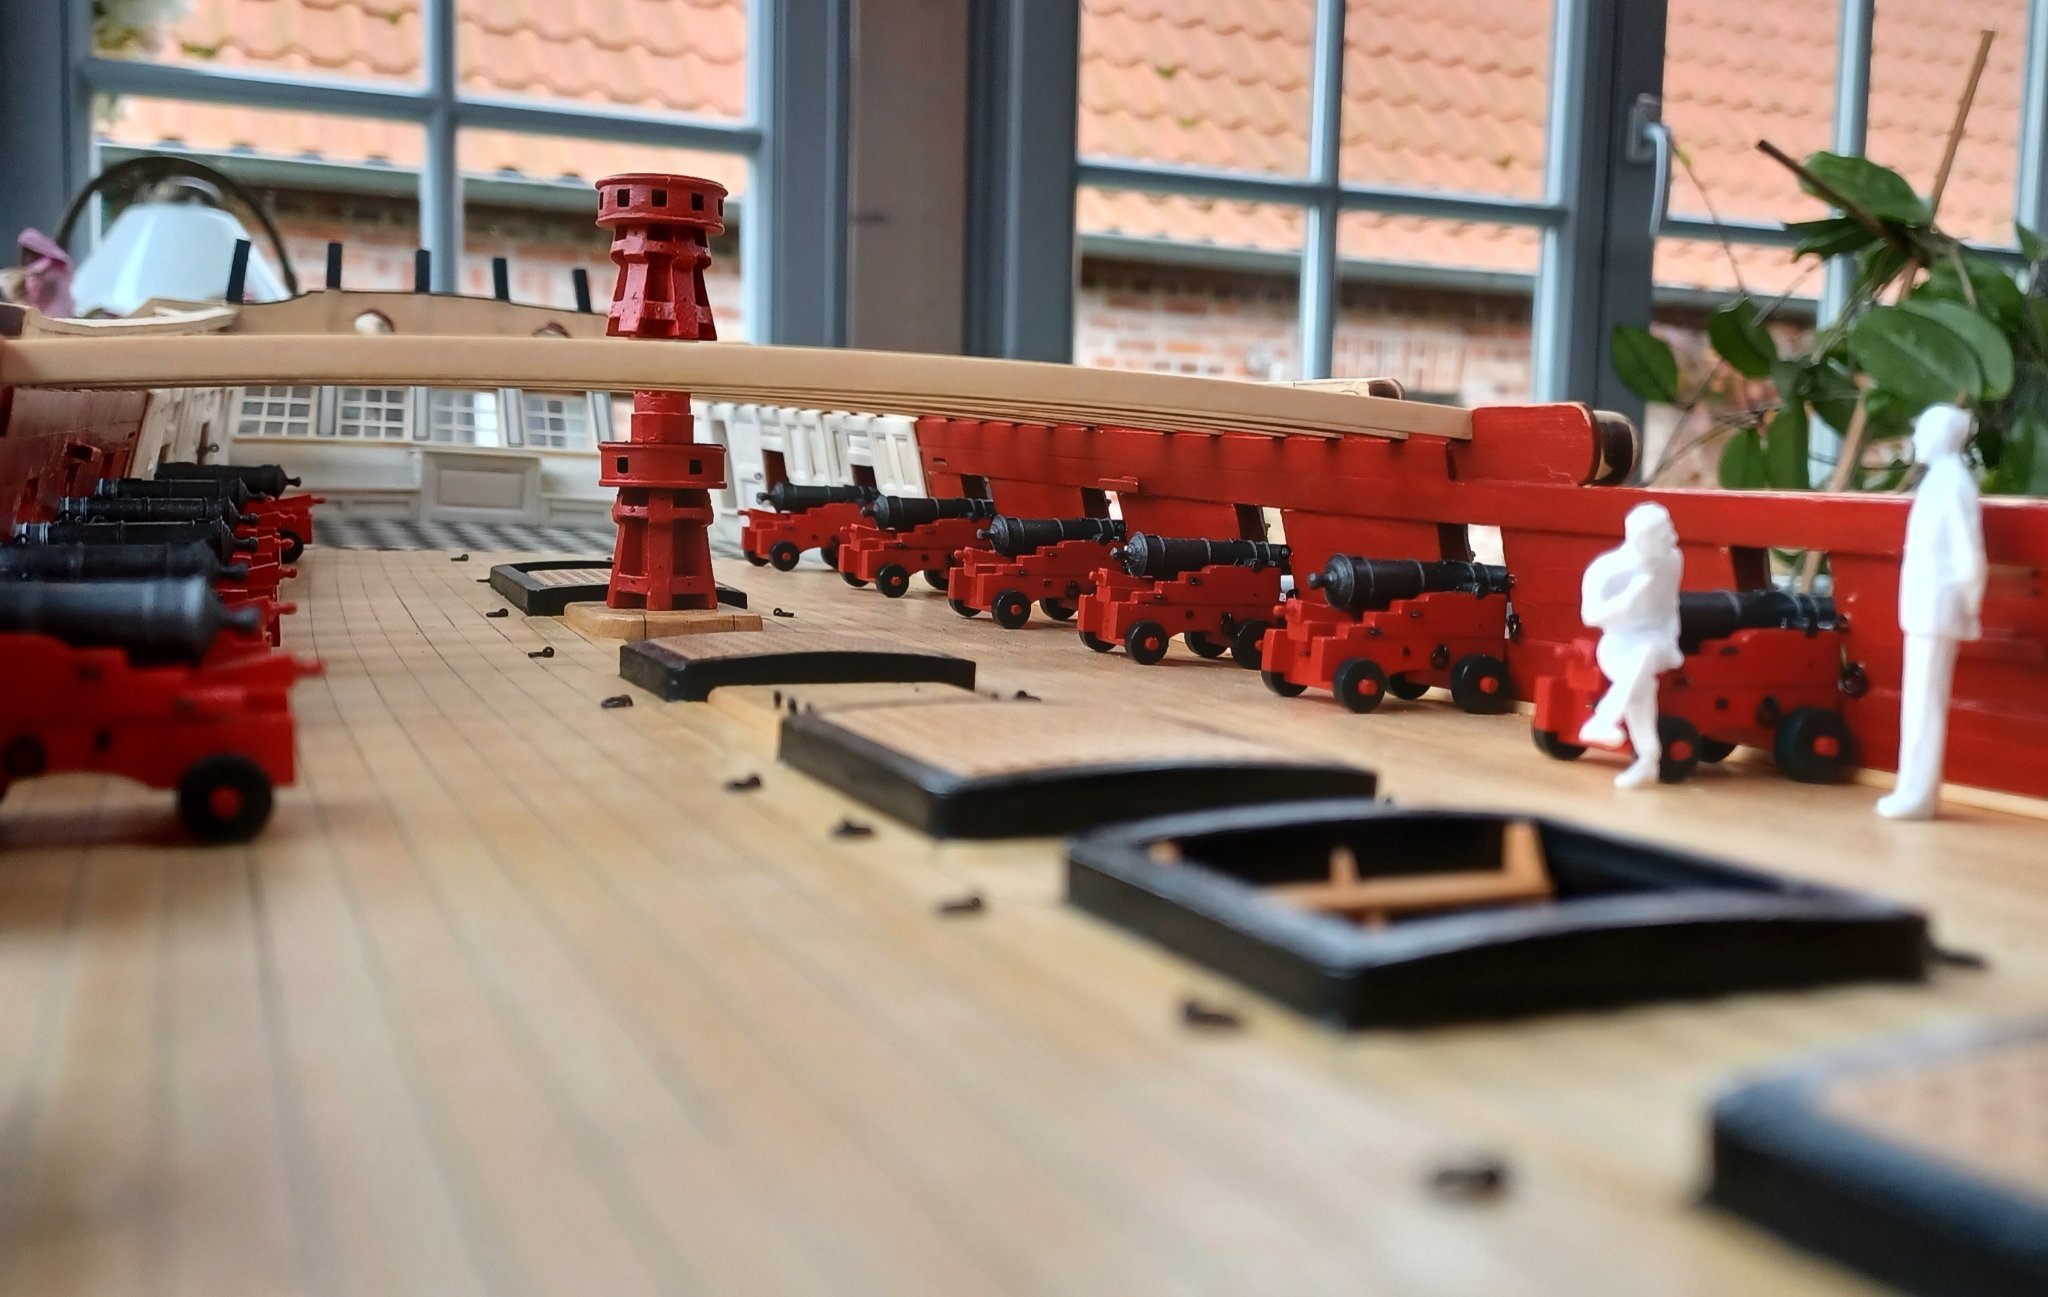
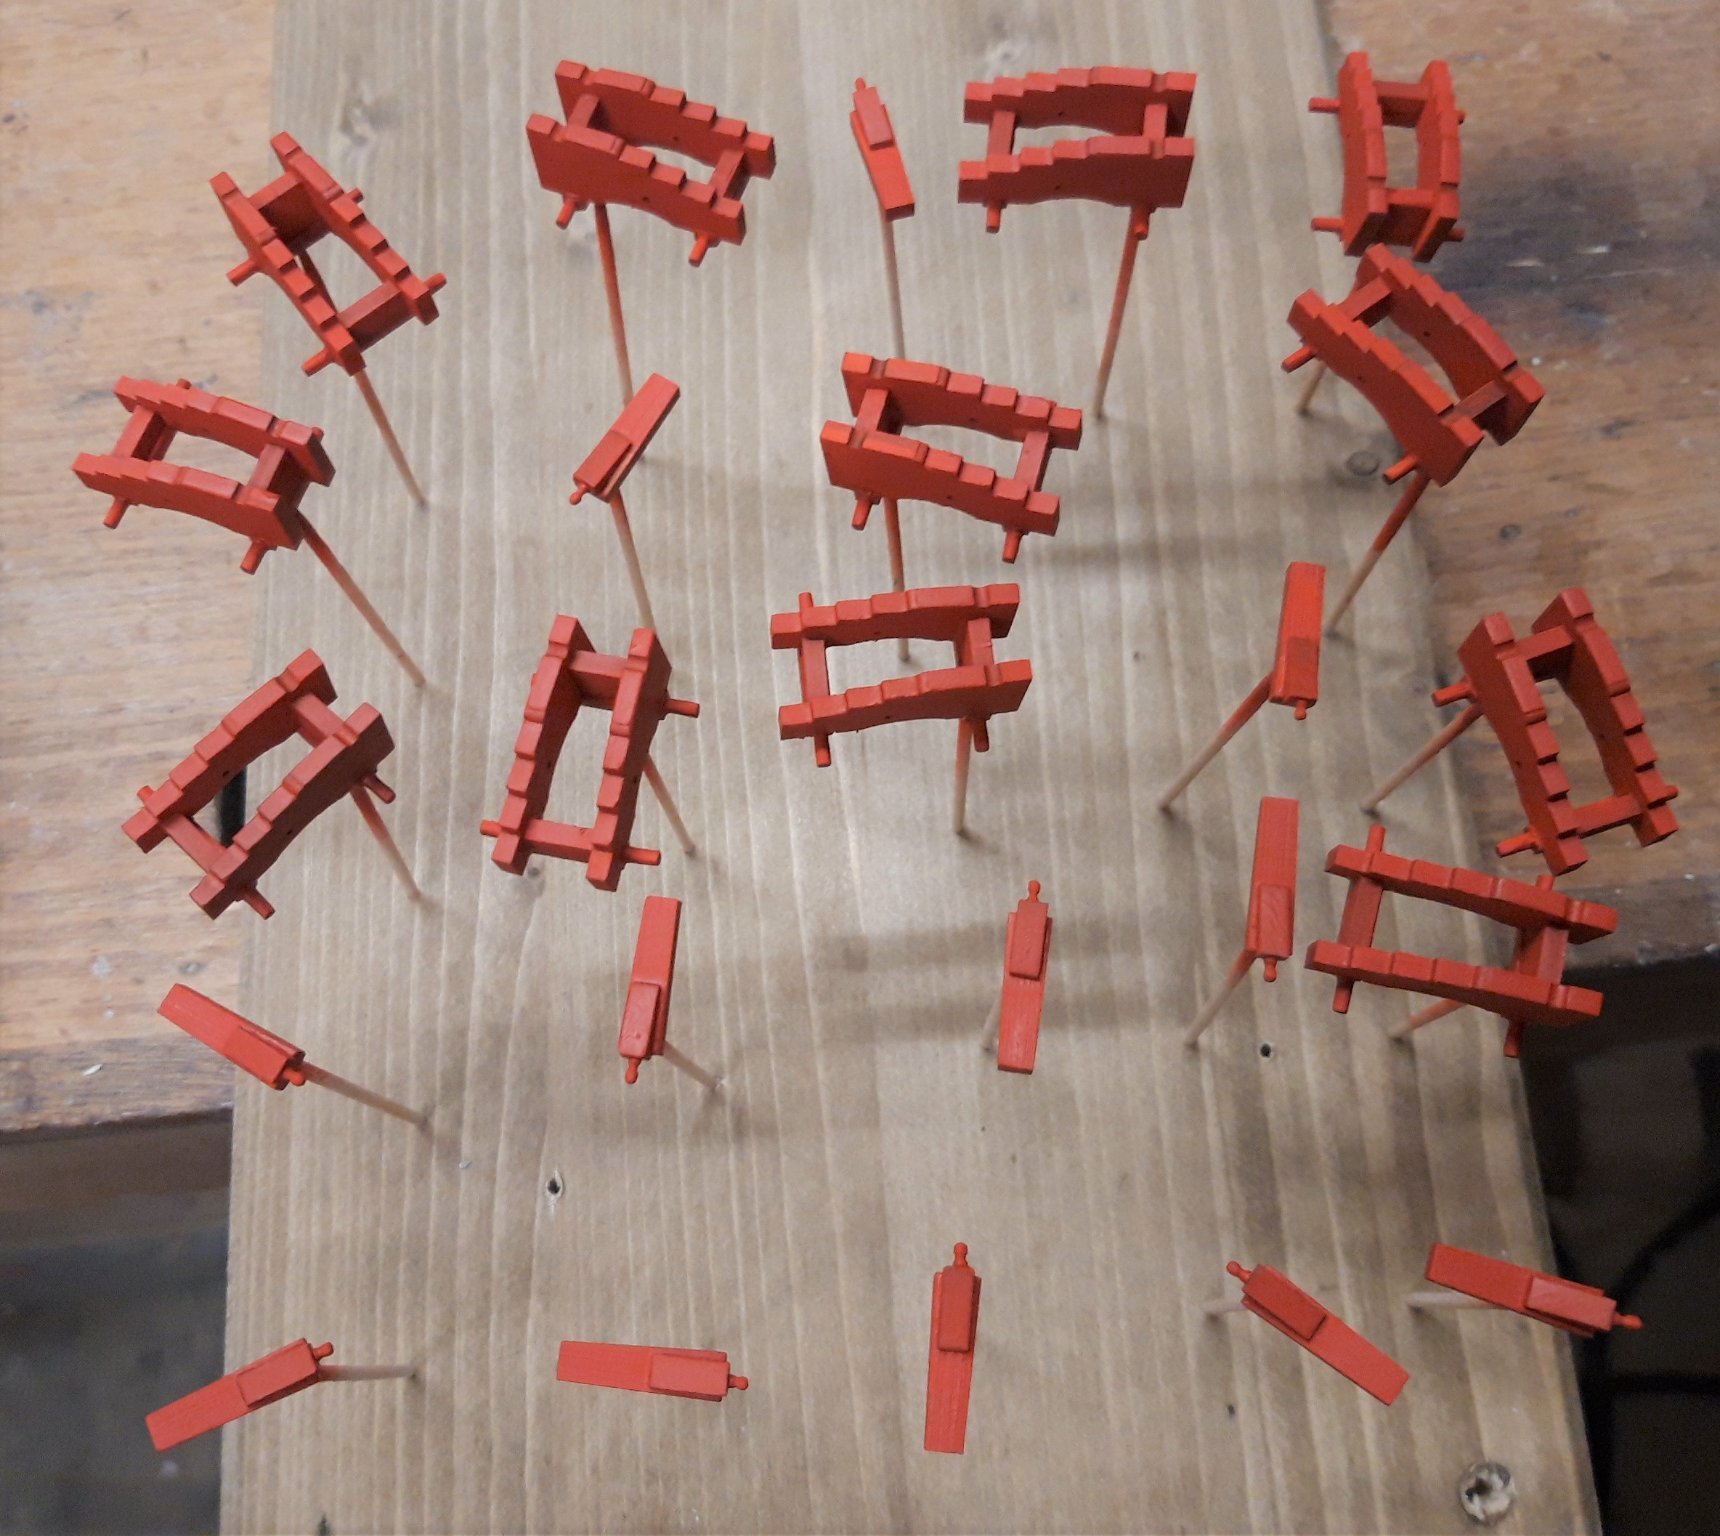
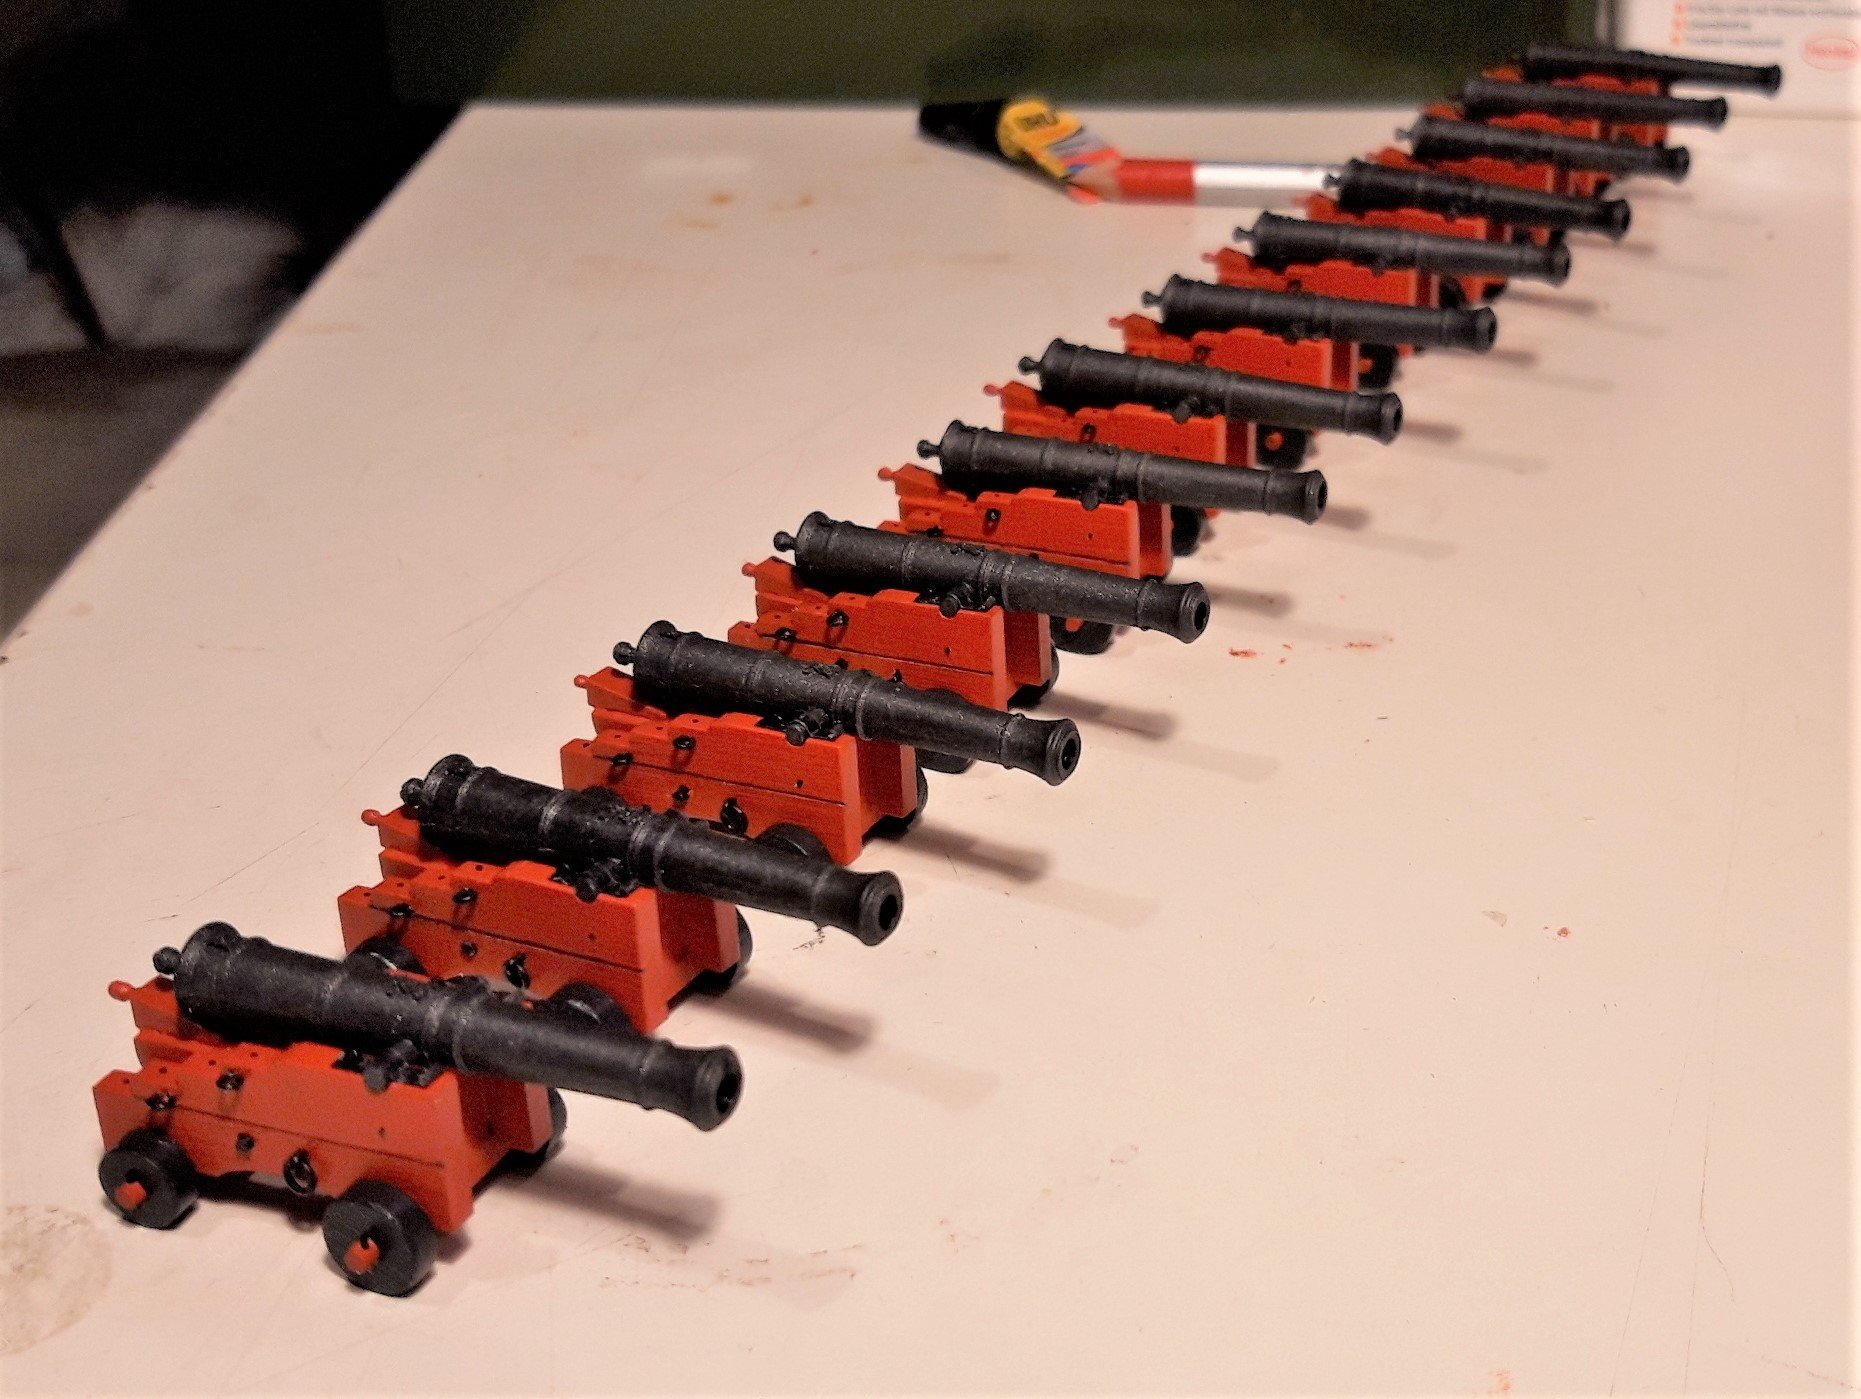
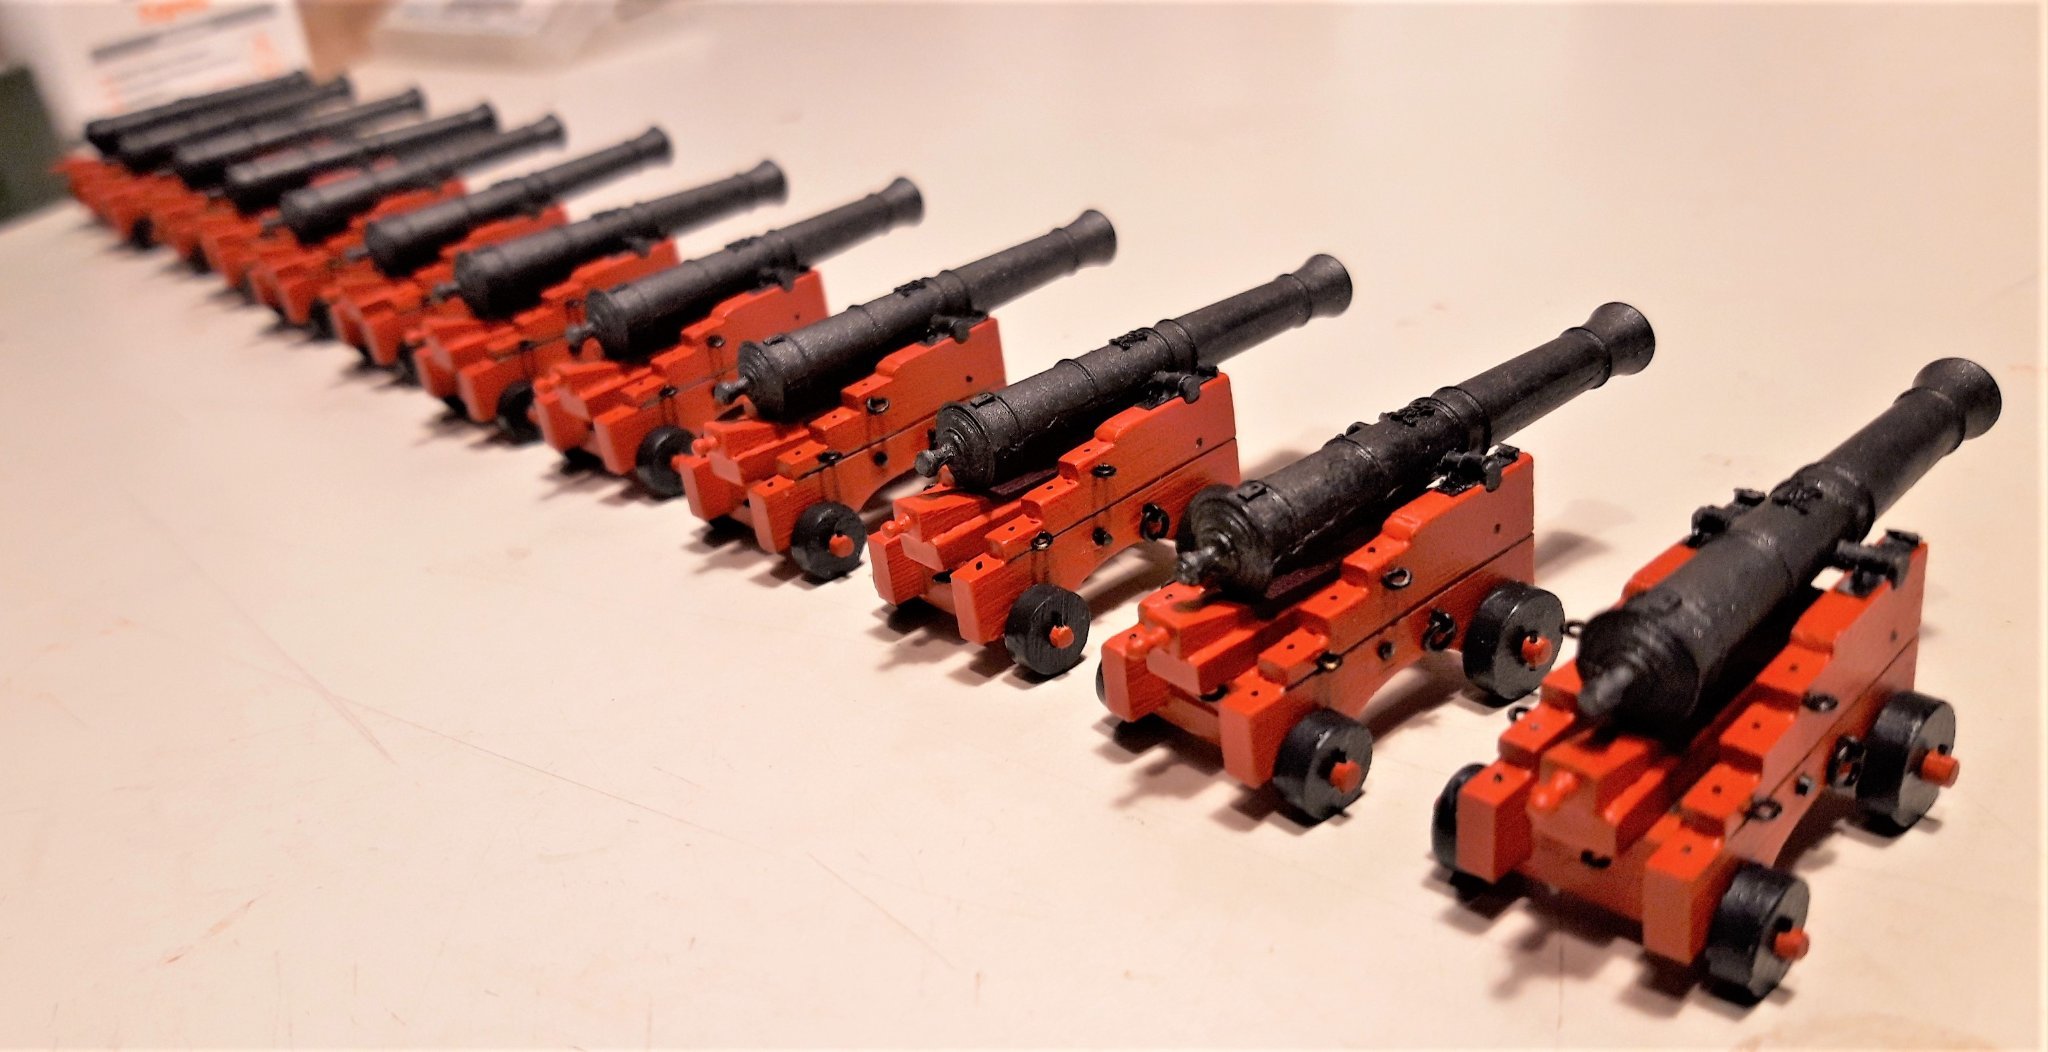
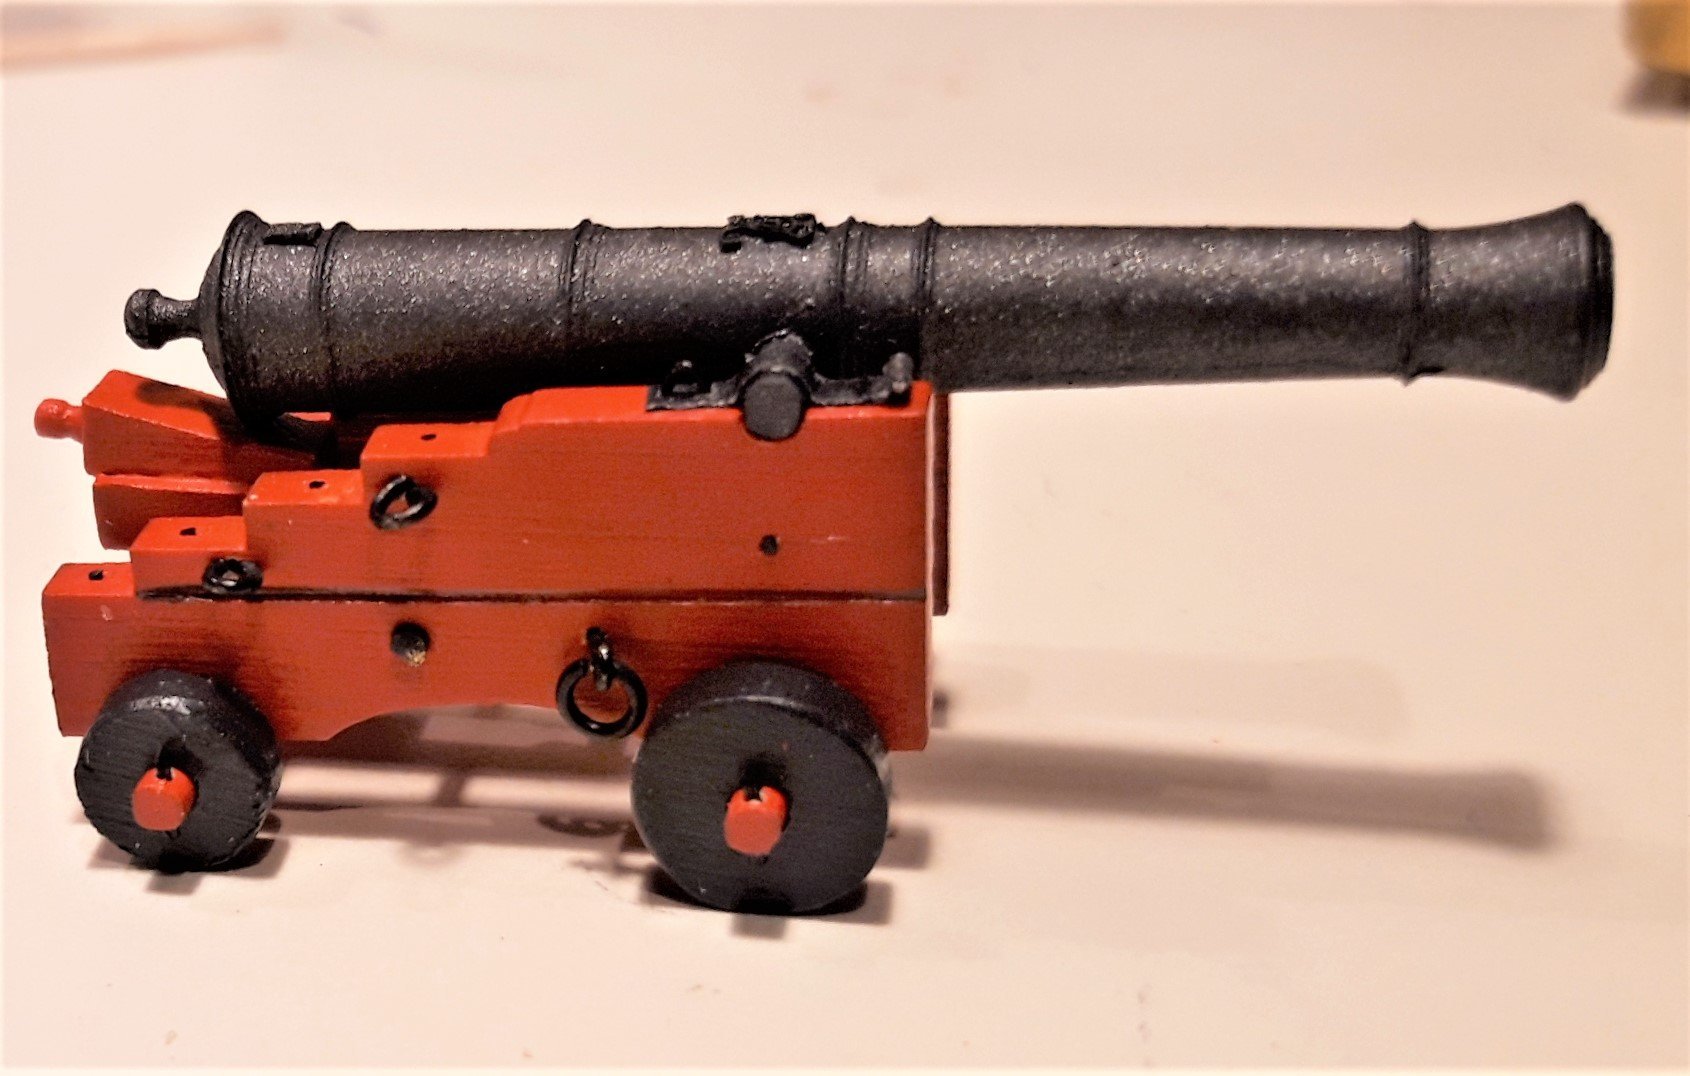
Thank you all for the likes and comments,
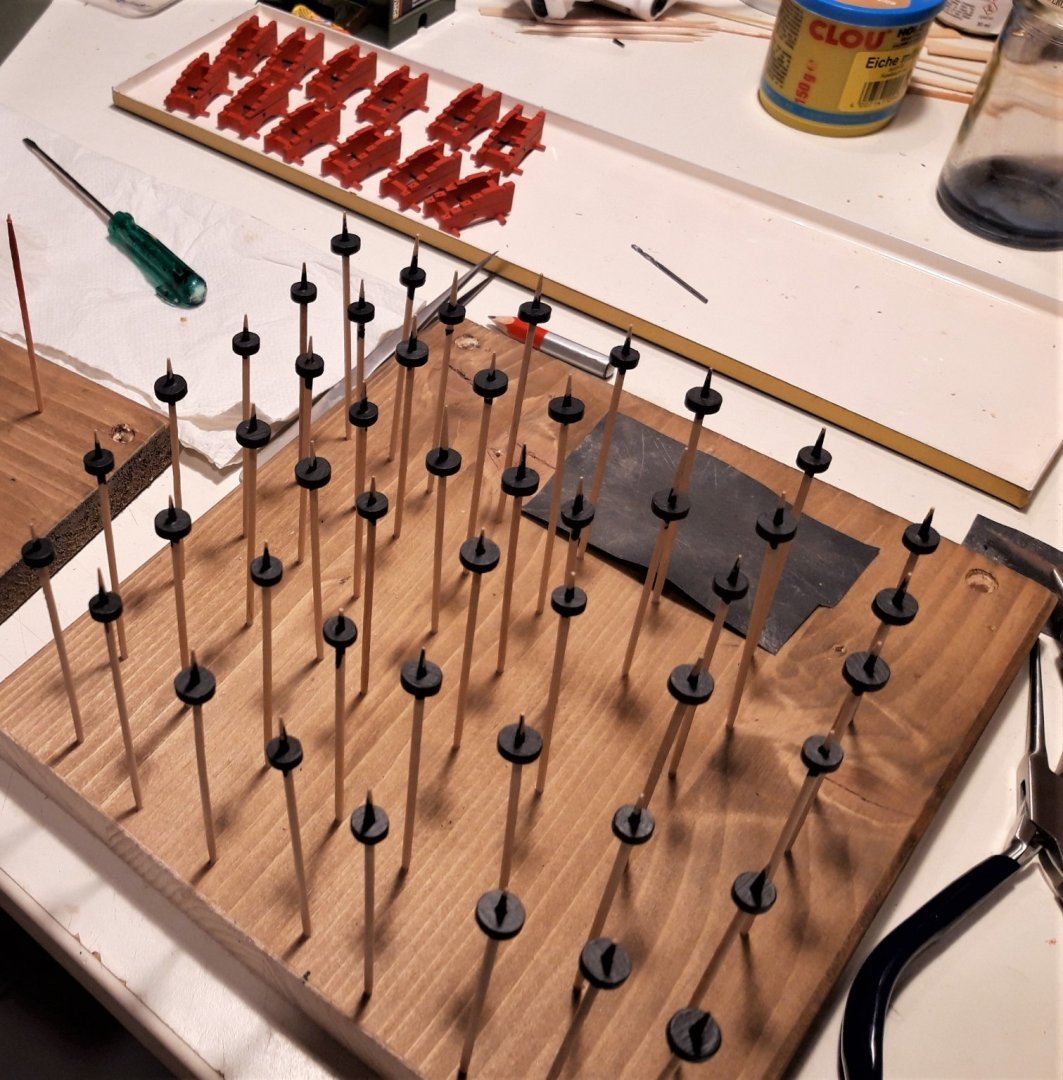
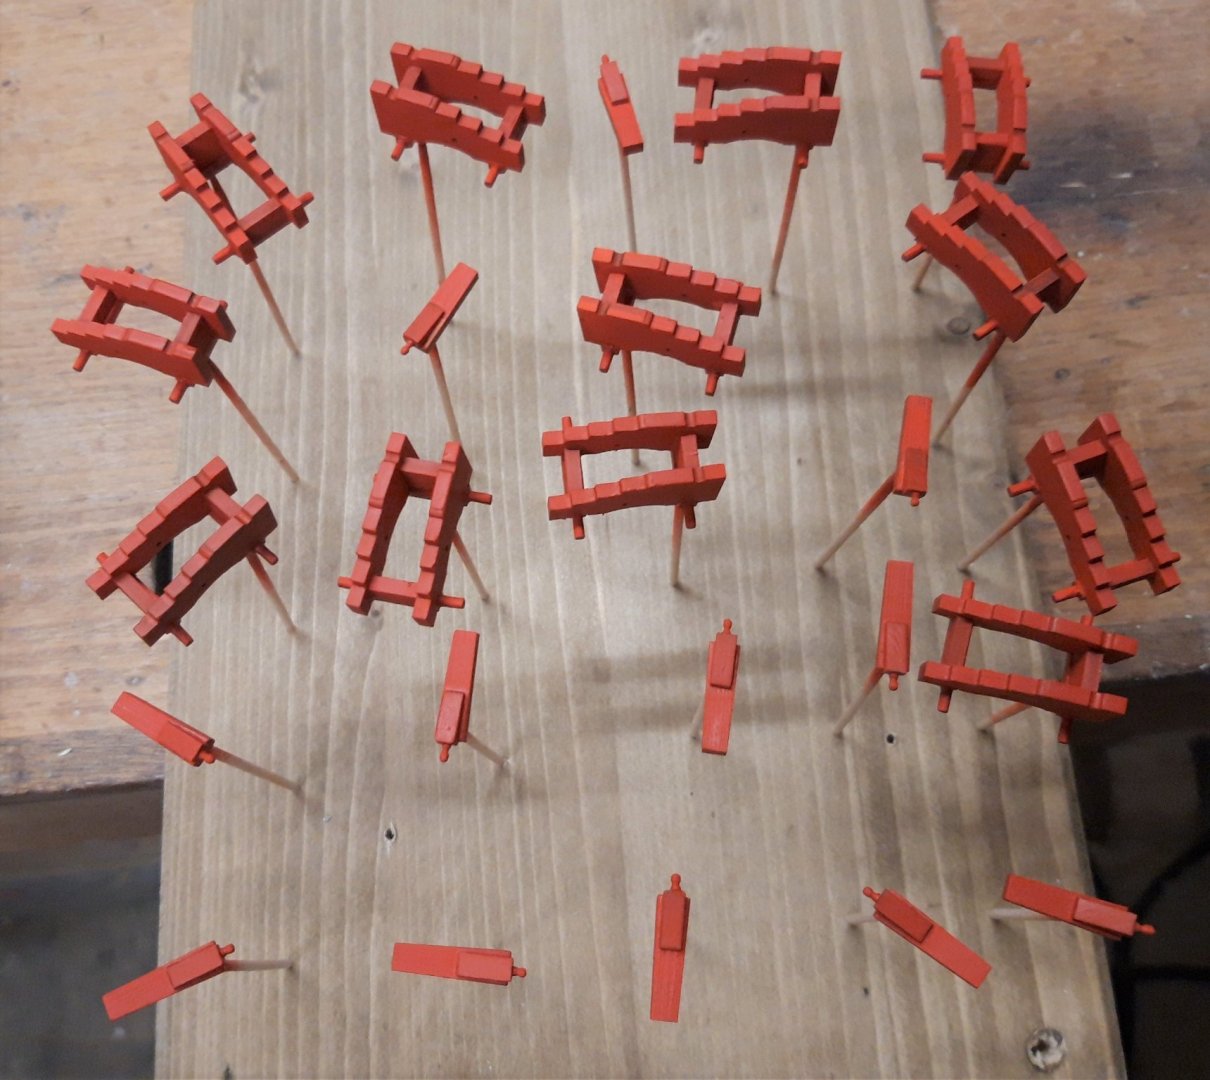
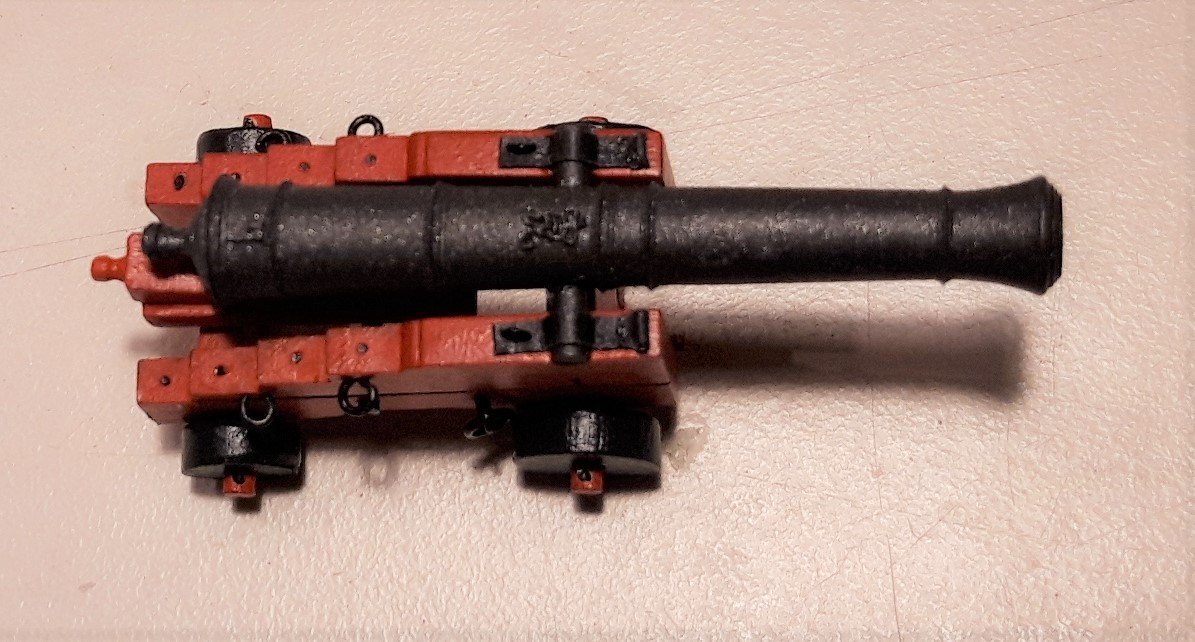
I finished half of the guns yesterday. They are all little mini-projects and take some time.
I bought a paint-brush for the carriages and it I am quite happy with the result.
The wheels are painted dark grey by hand.
Here are some photos:


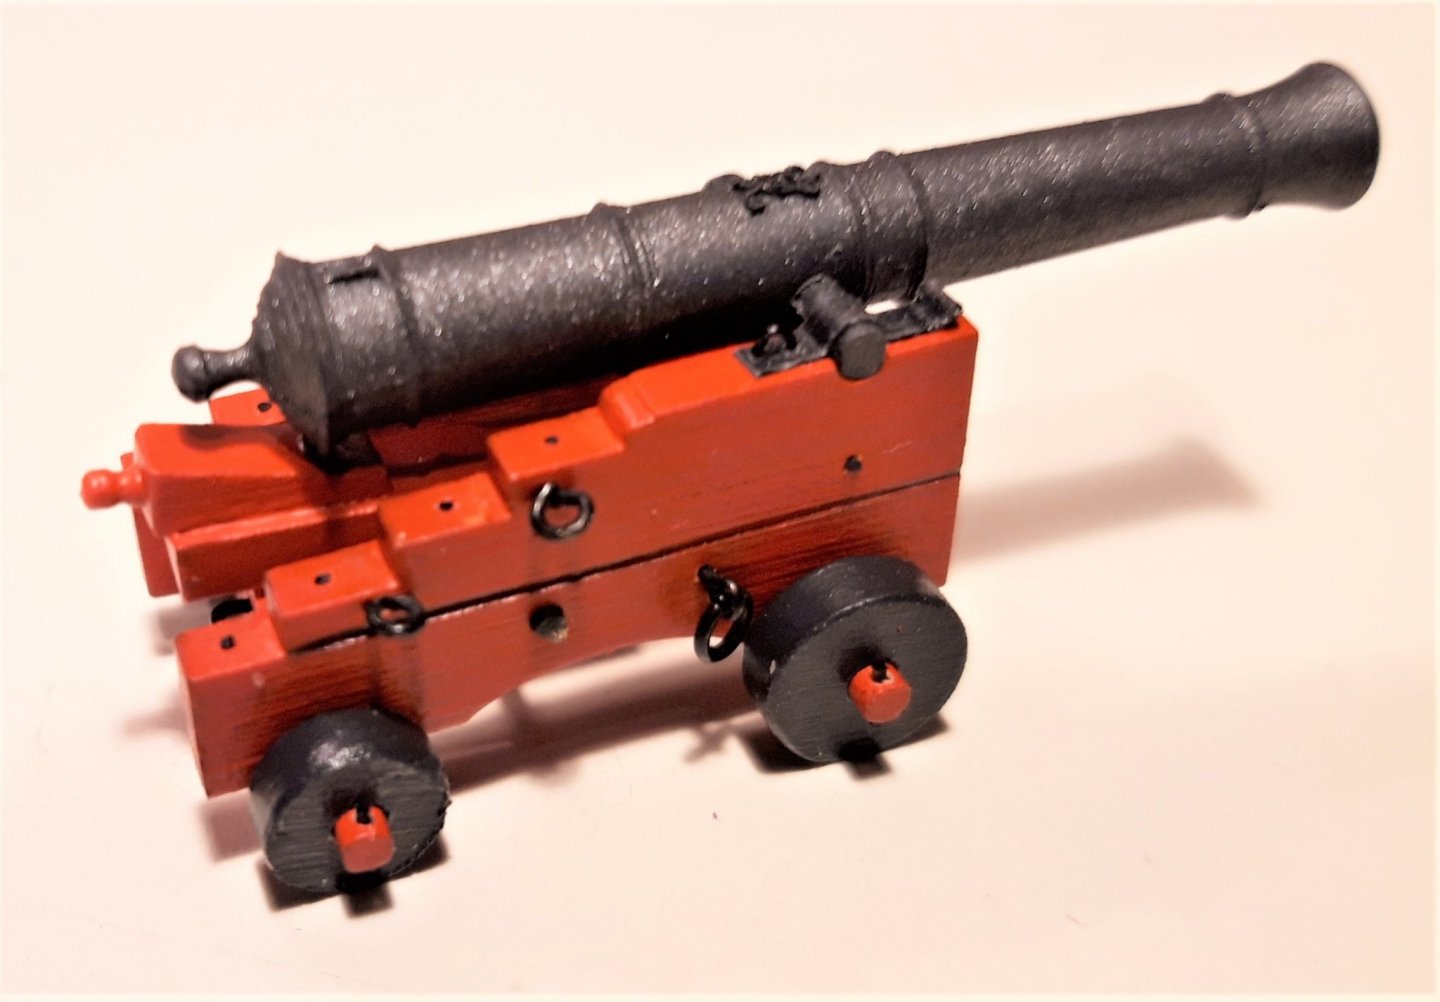
Next I will add the bolts and rings to the model and start with chapter 7.
The rest of the guns will be made later, once I need them for the model.
Matthias
-
Hi Mike,
That is an excellent method!! I am close to mounting the carriages as well, thanks for sharing this! How do you manage to get the angles of the cannon barrels all in a good alignment?
- FrankWouts and Stuntflyer
-
2
-
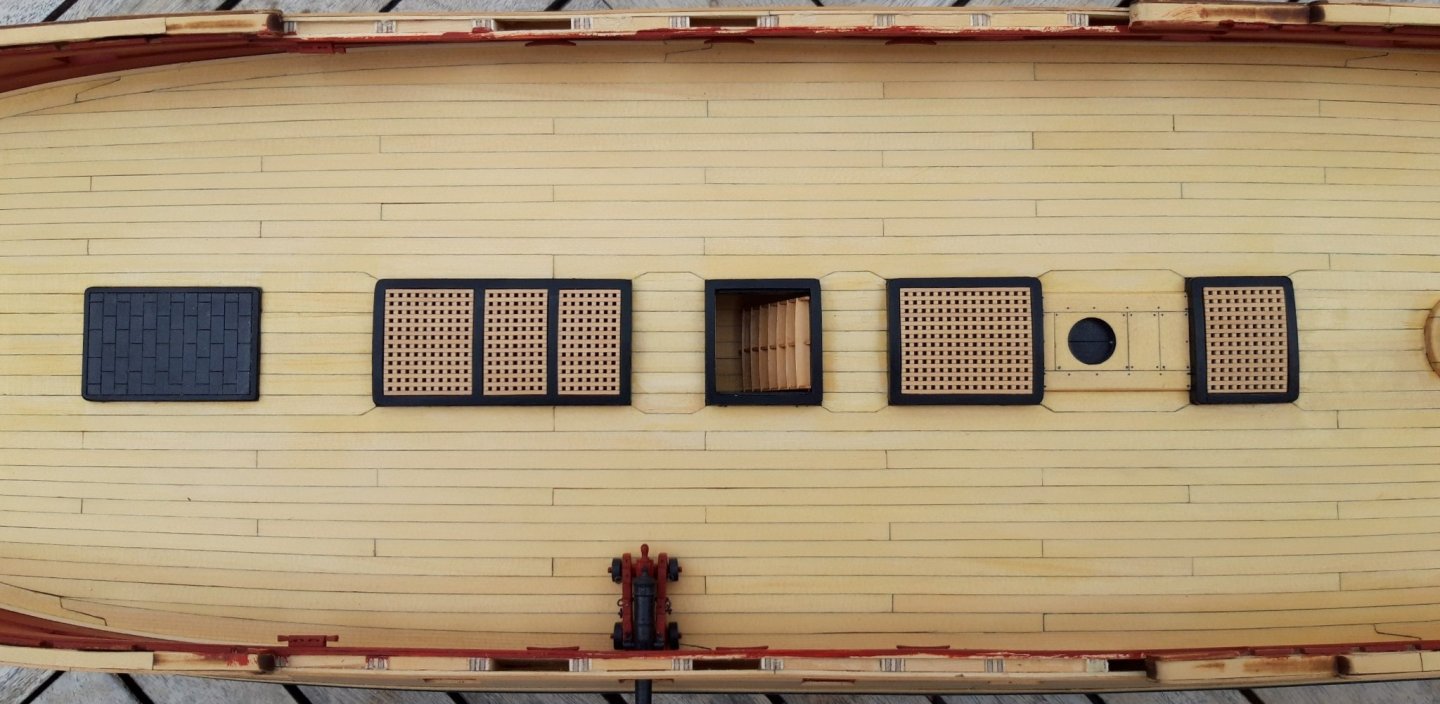
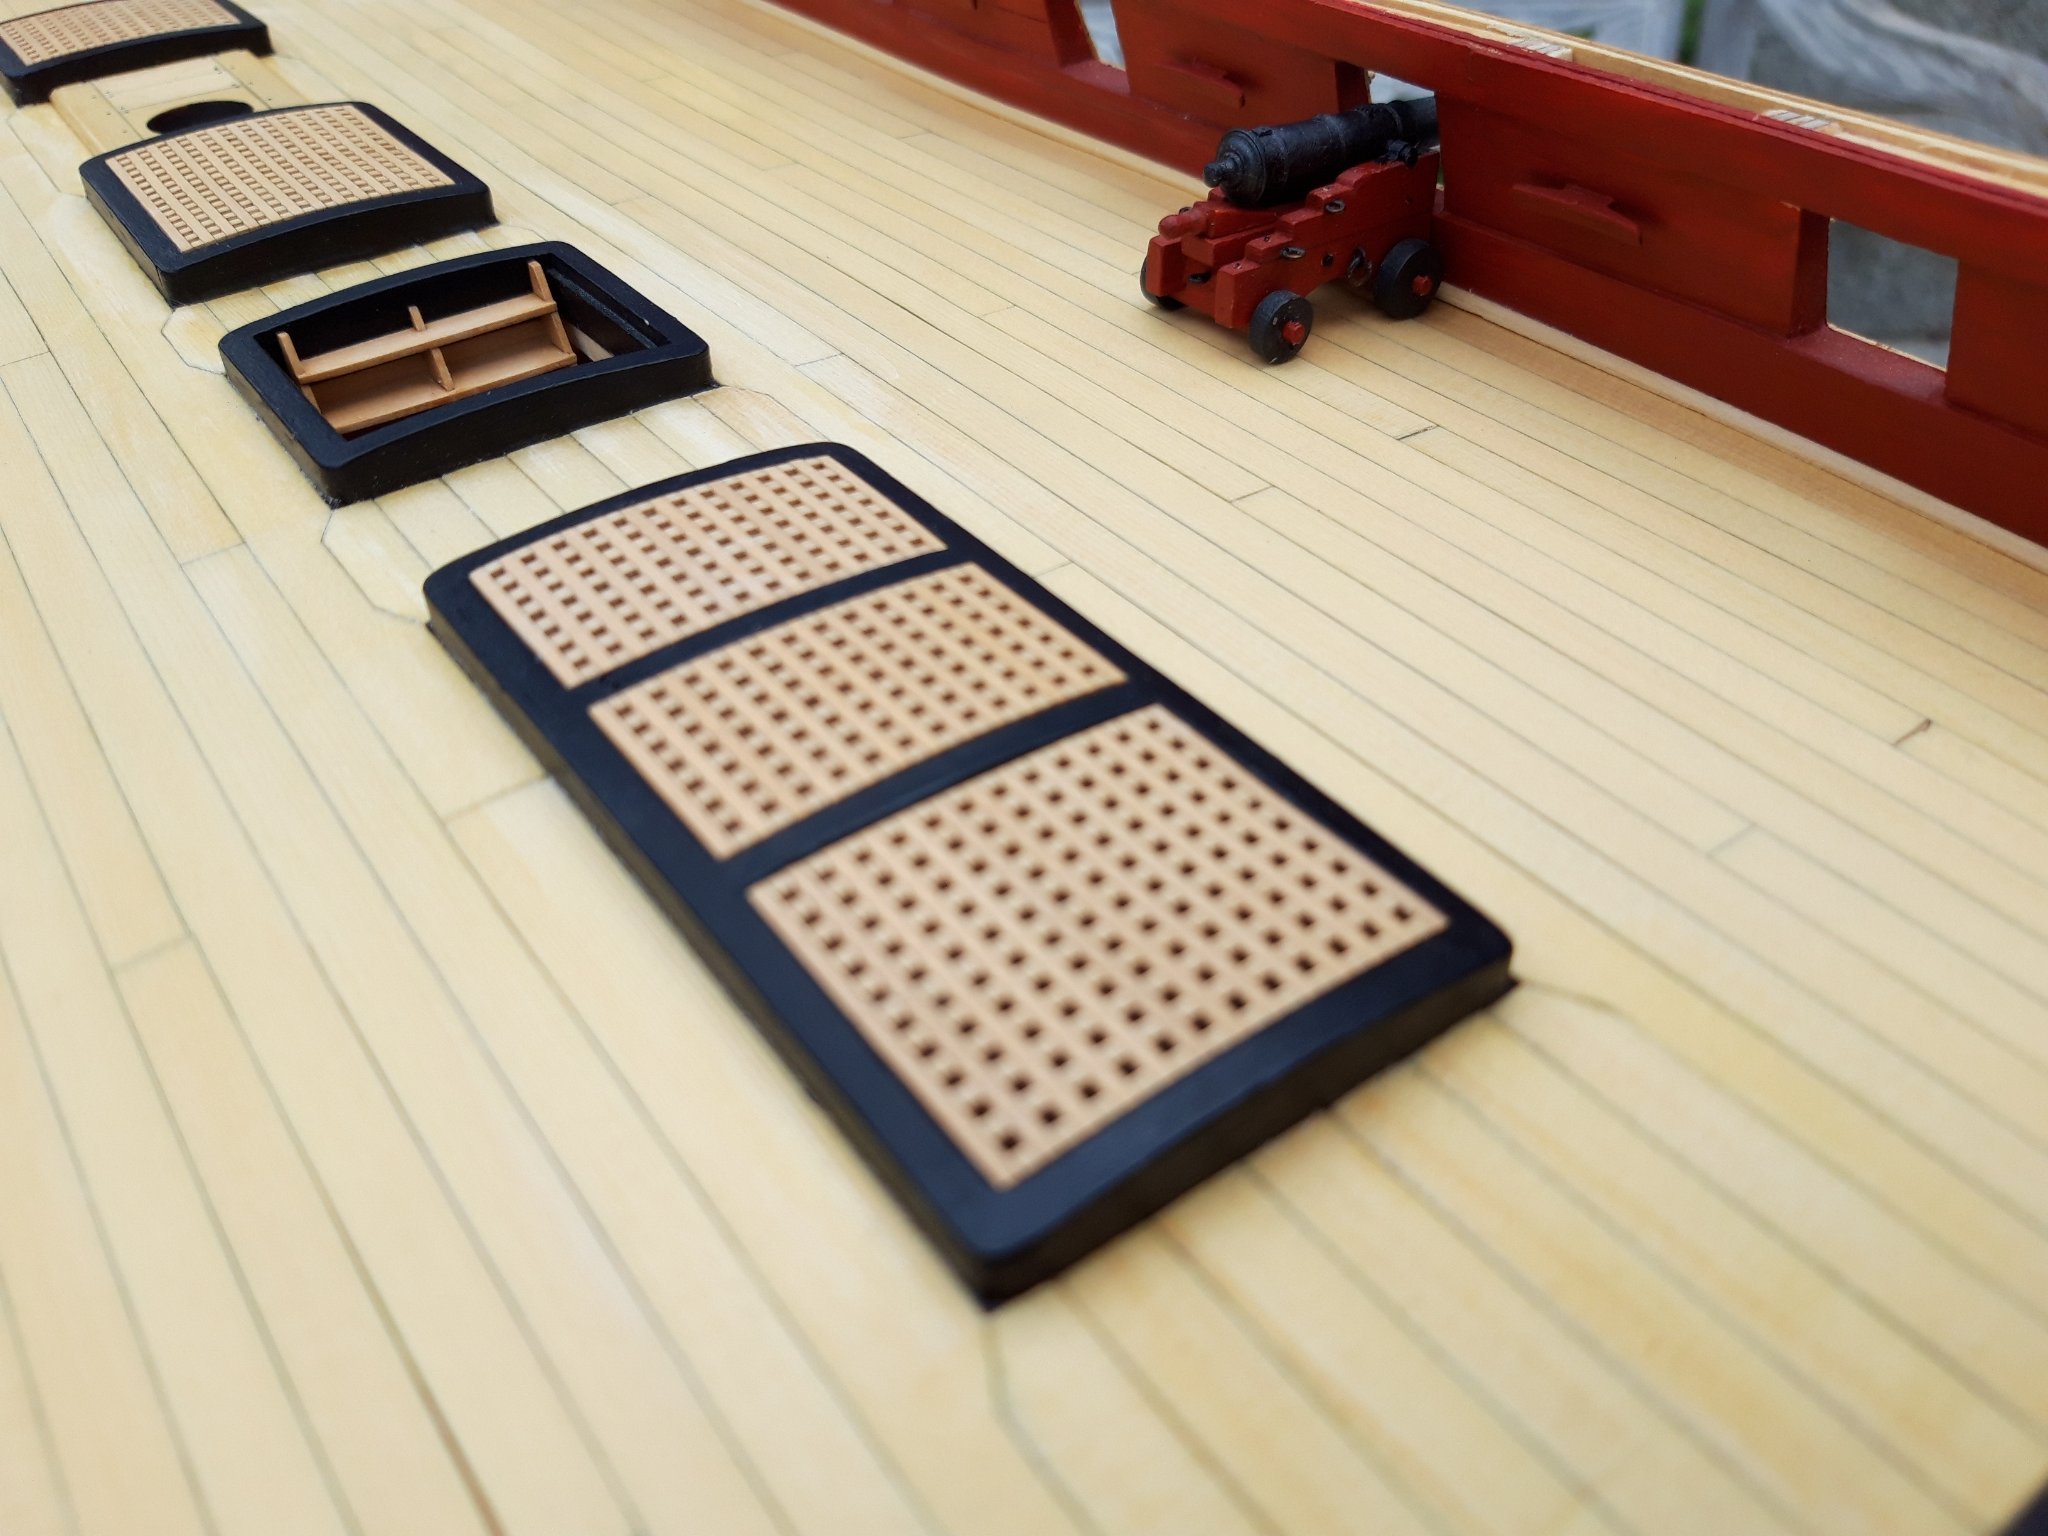
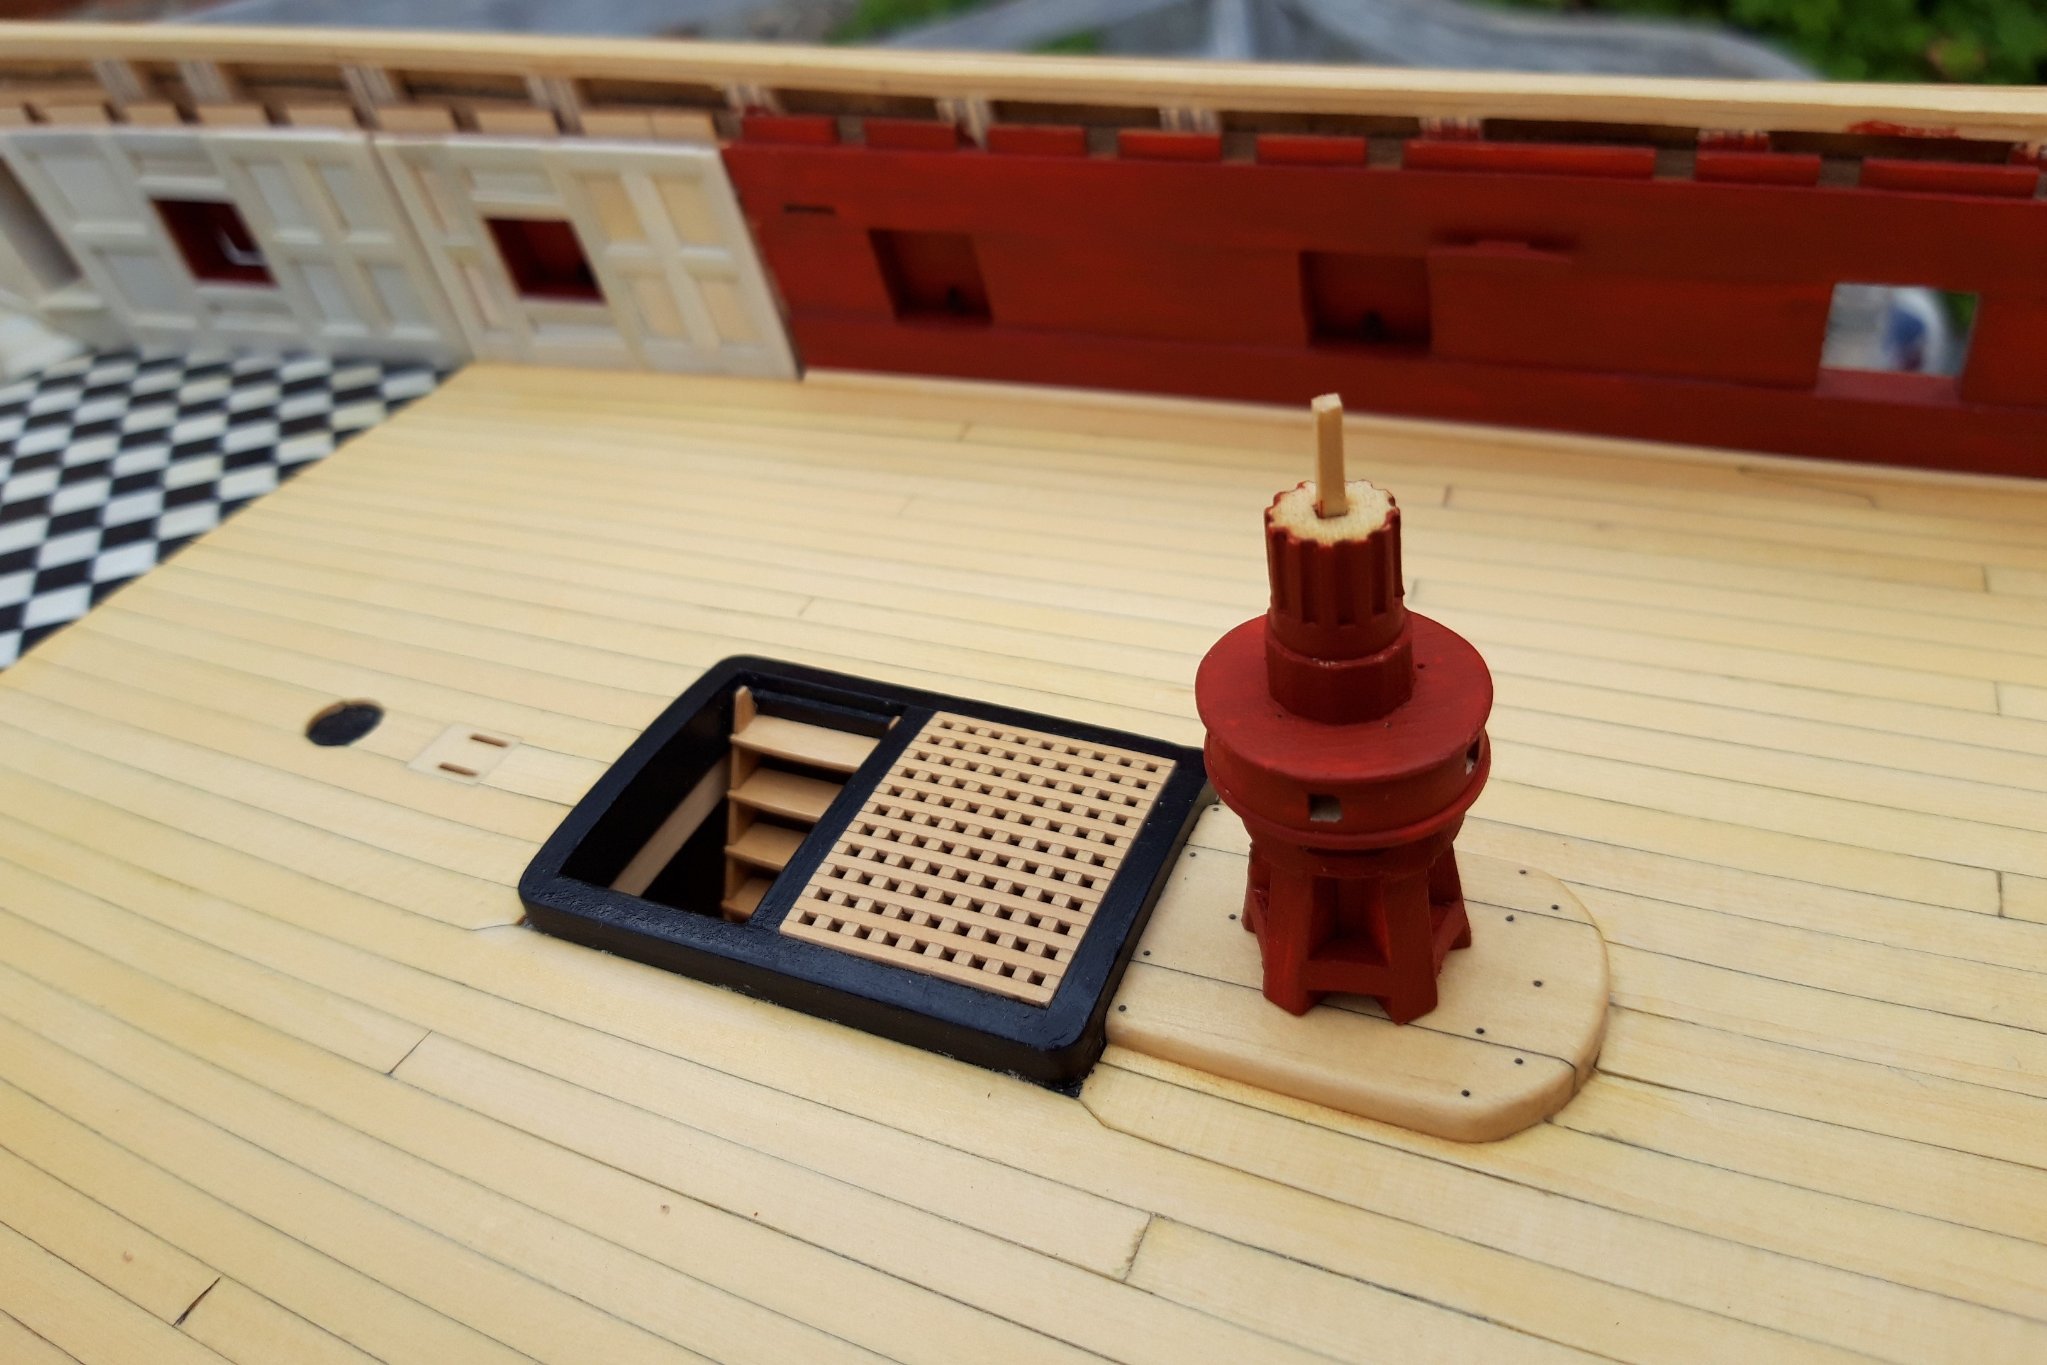
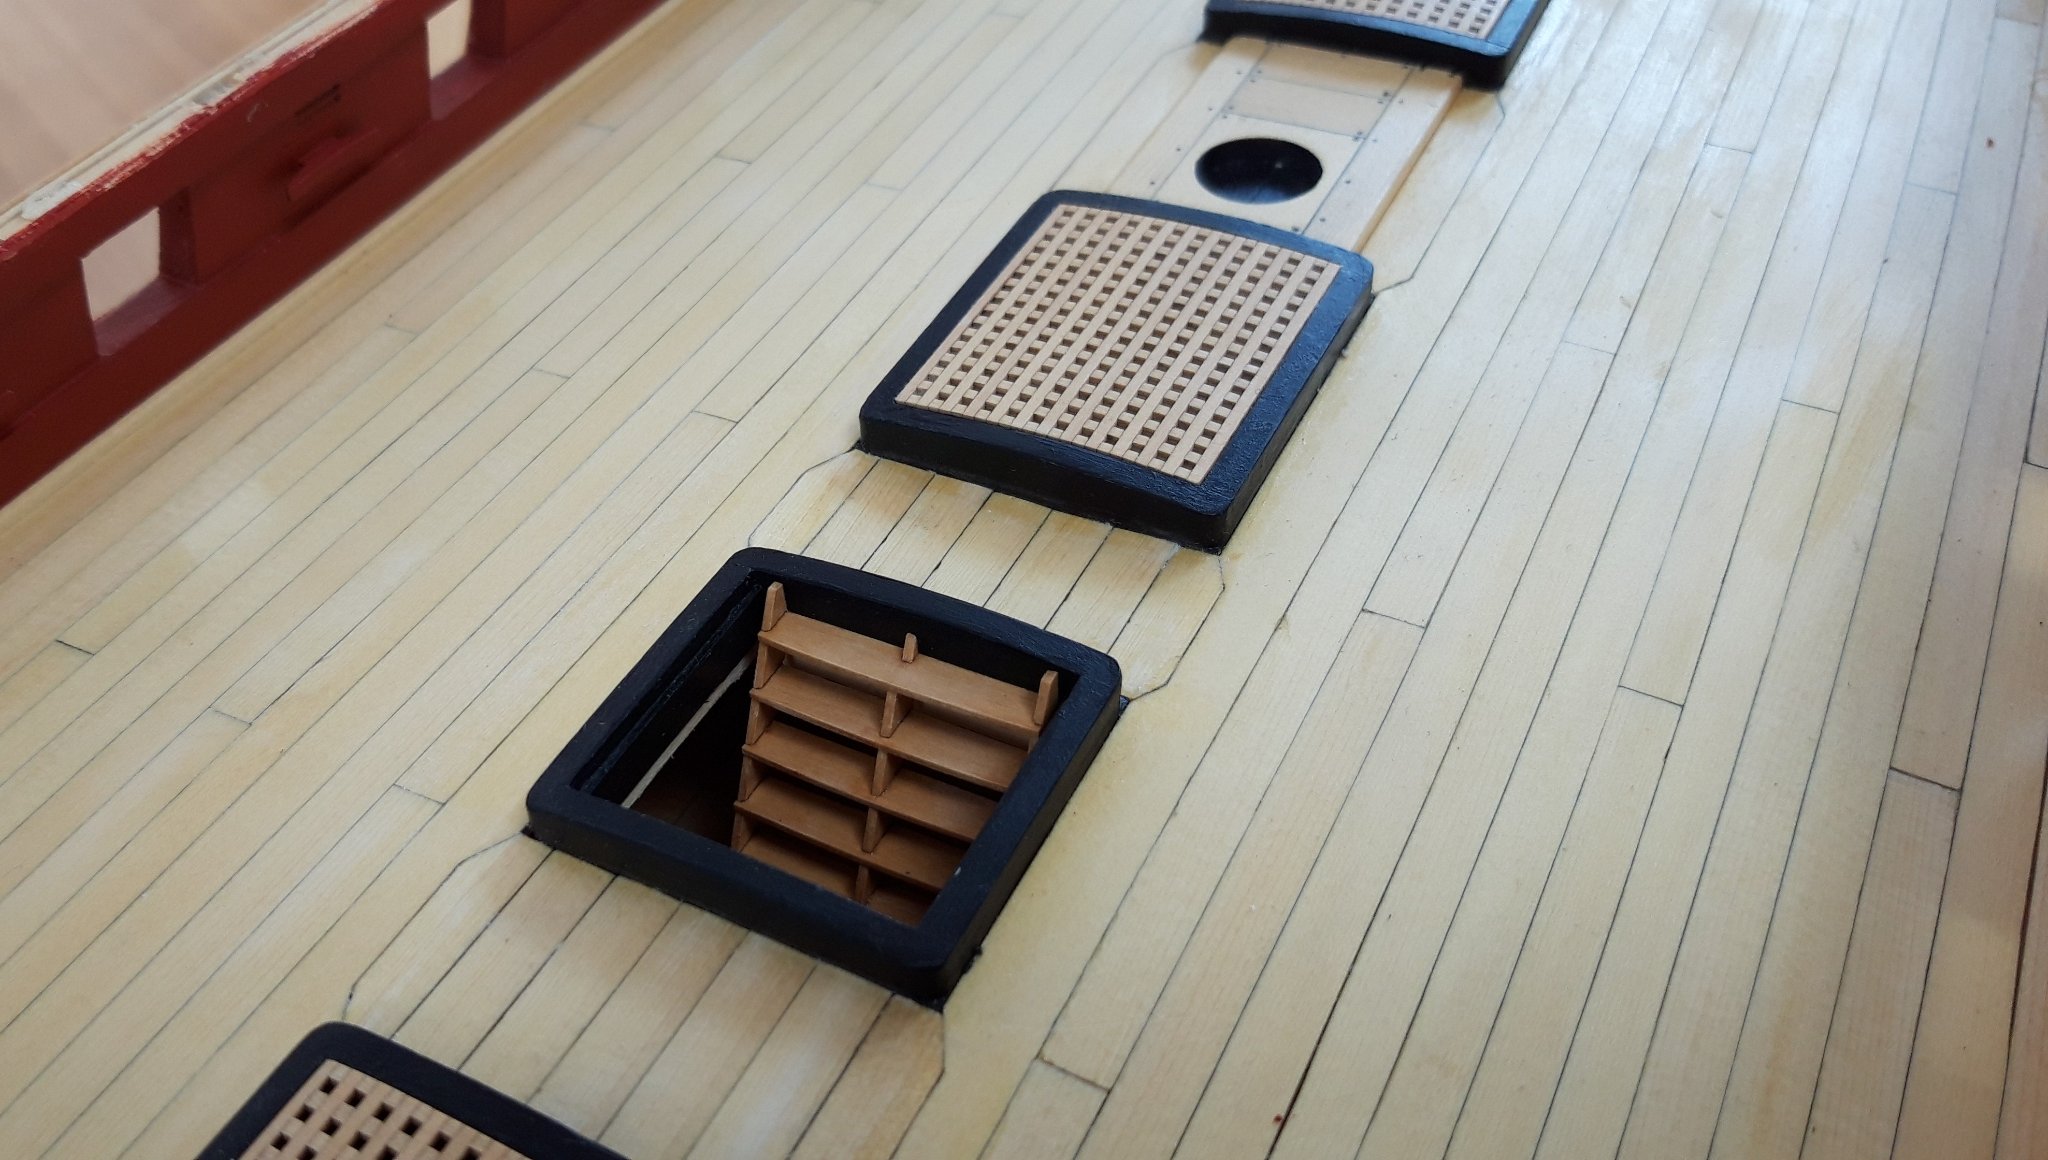
Hello everybody,
this weekend, I almost finished chapter five. Just the capstan needs a second coat of colour and the nailings.


Matthias
- Captain Poison, FrankWouts, dvm27 and 17 others
-
20
-
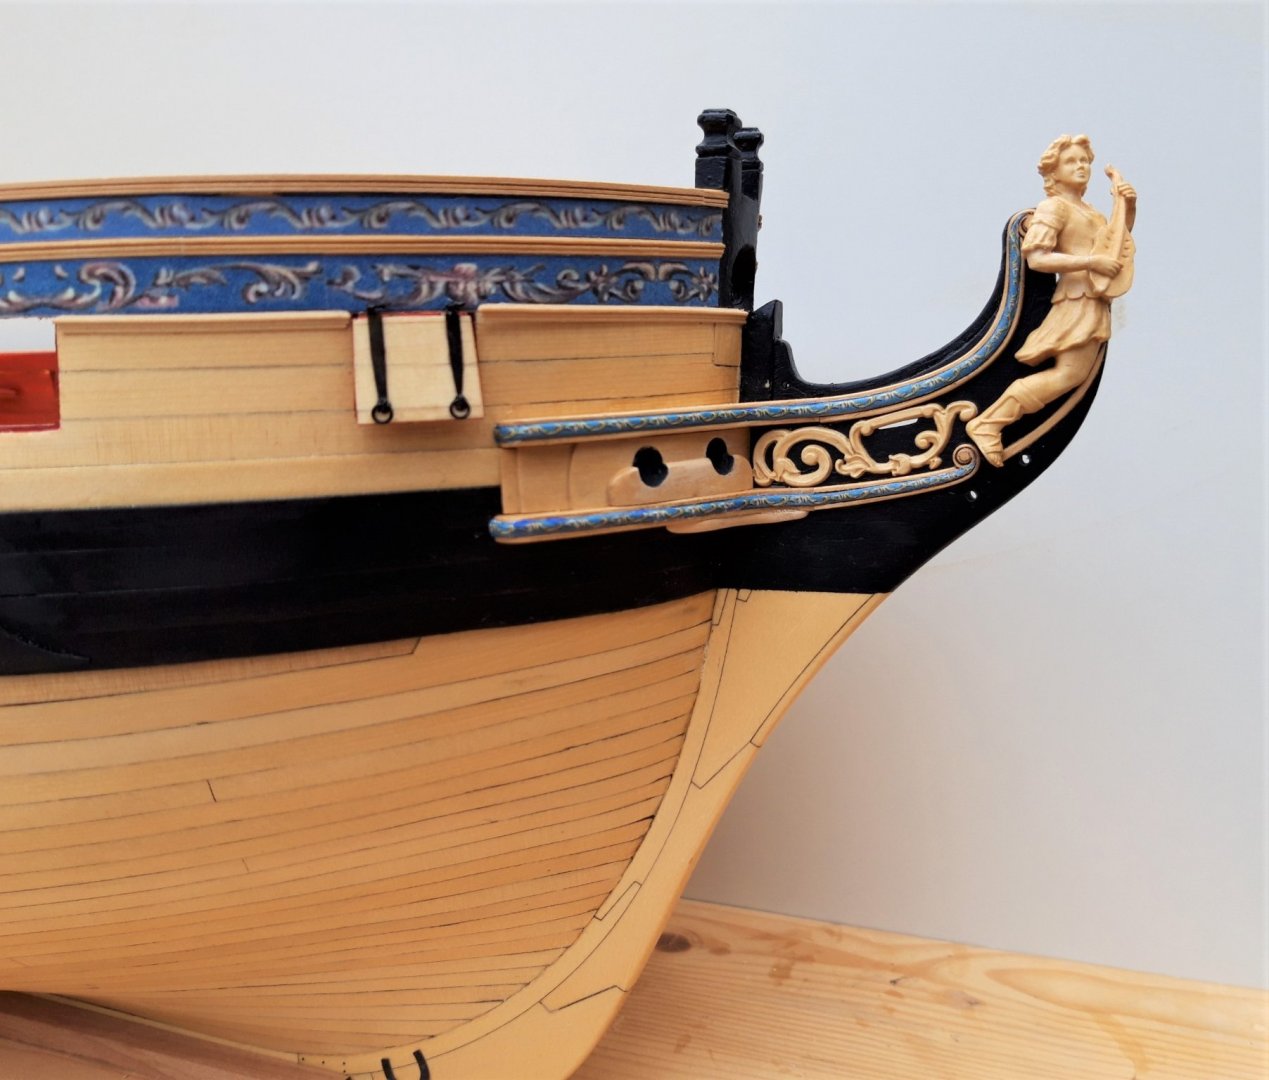
Hi Mike,
very well done!!! How did you position the figurehead, so it does not sit too much forward of the stem? Did you remove a bit of the stem behind the back of the figurehead? And did I understand that right: You glued the wooden pieces of the hair brackets to the model and afterwards added the paper frieze?
Matthias
- Stuntflyer and FrankWouts
-
2
-
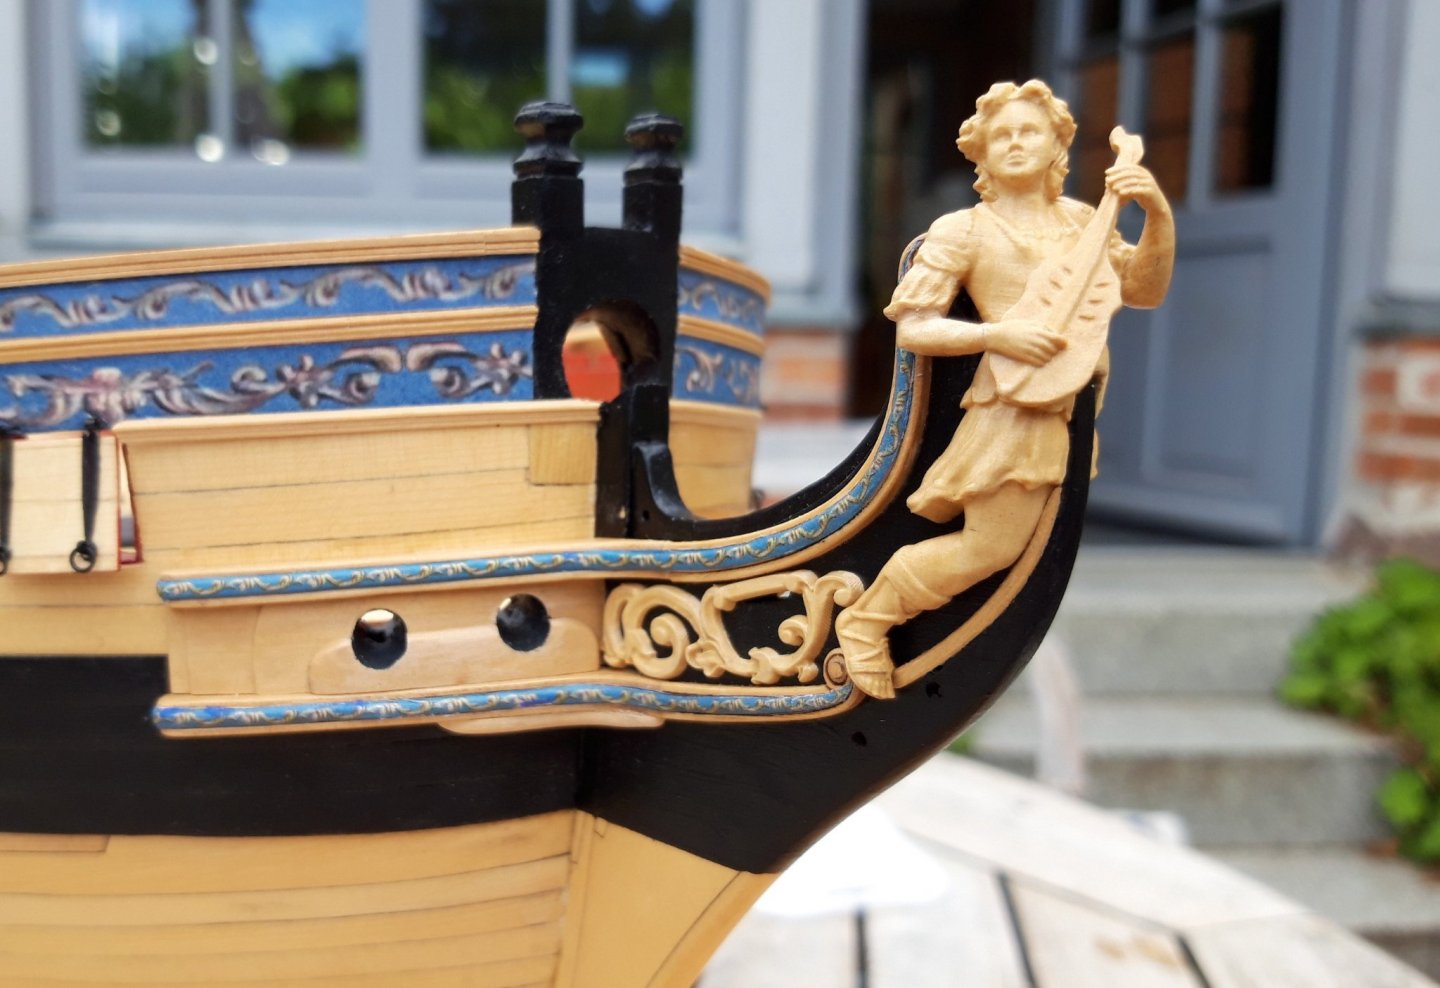
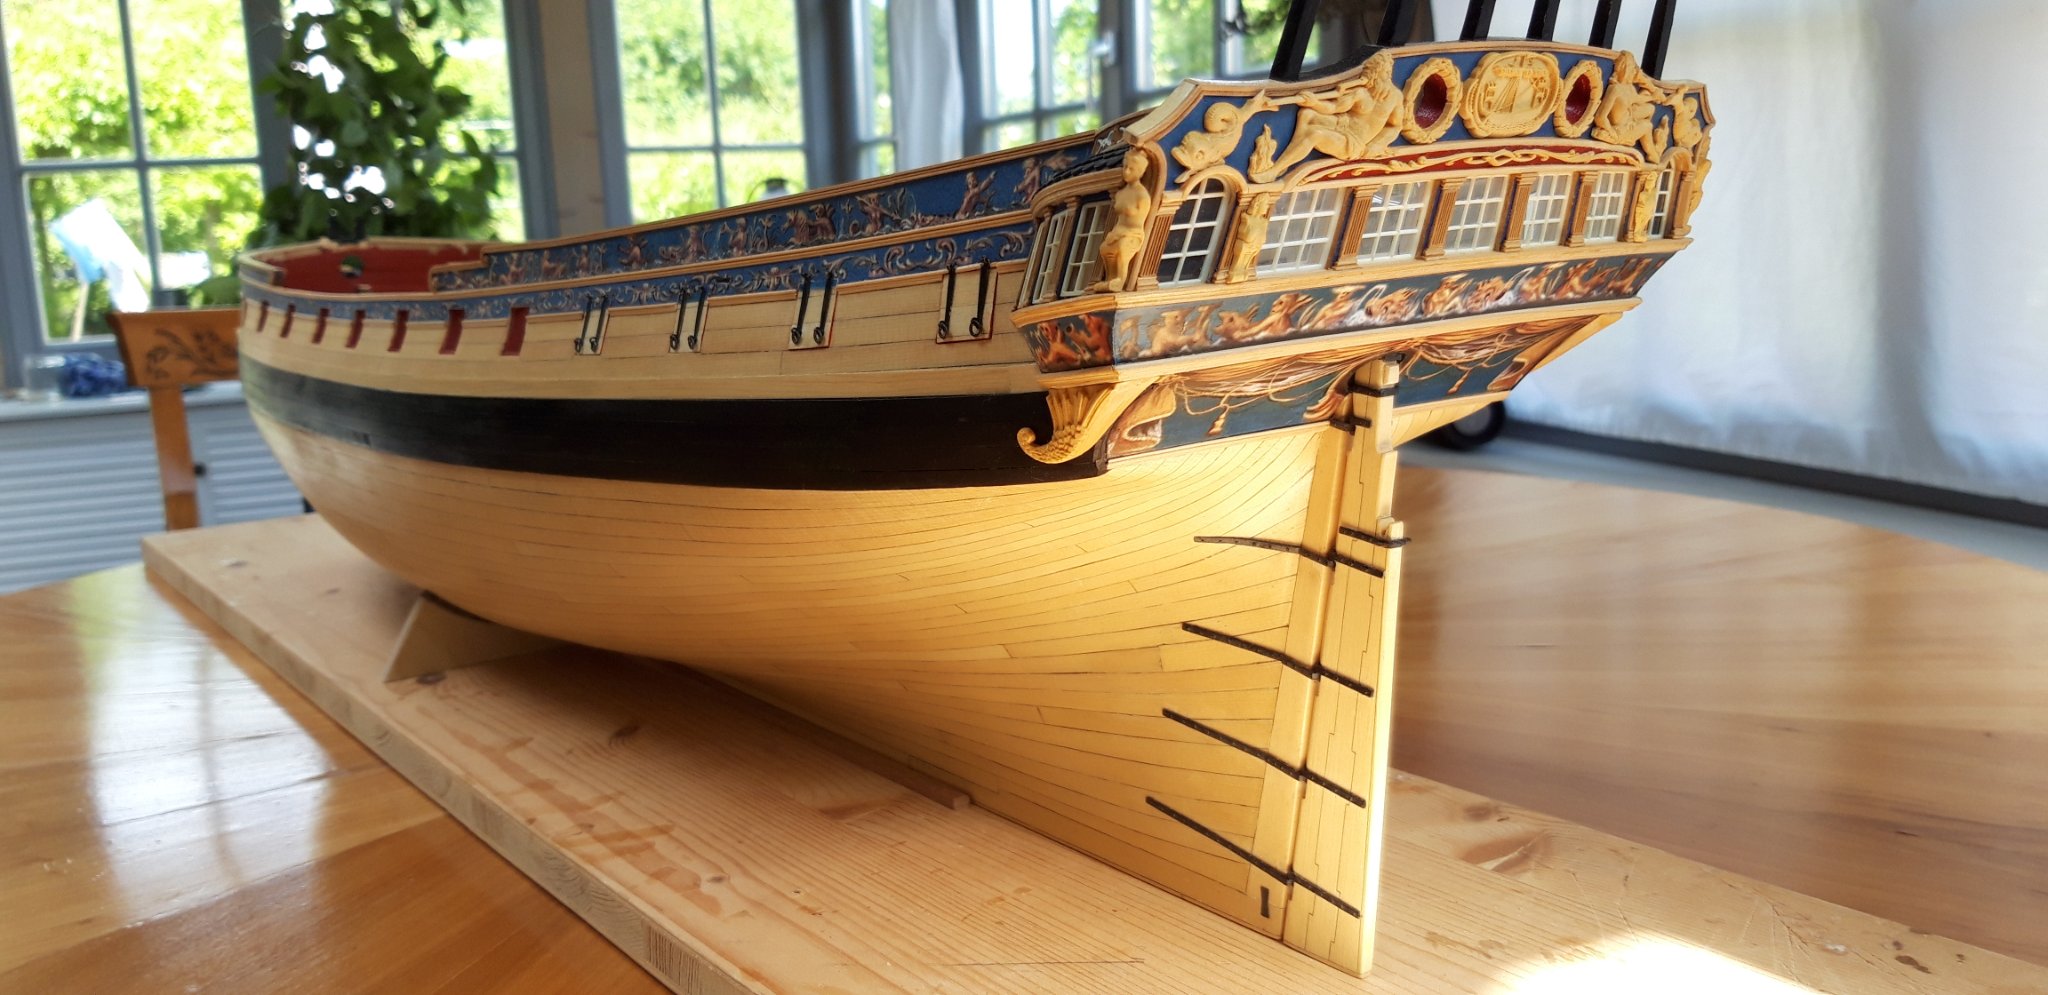
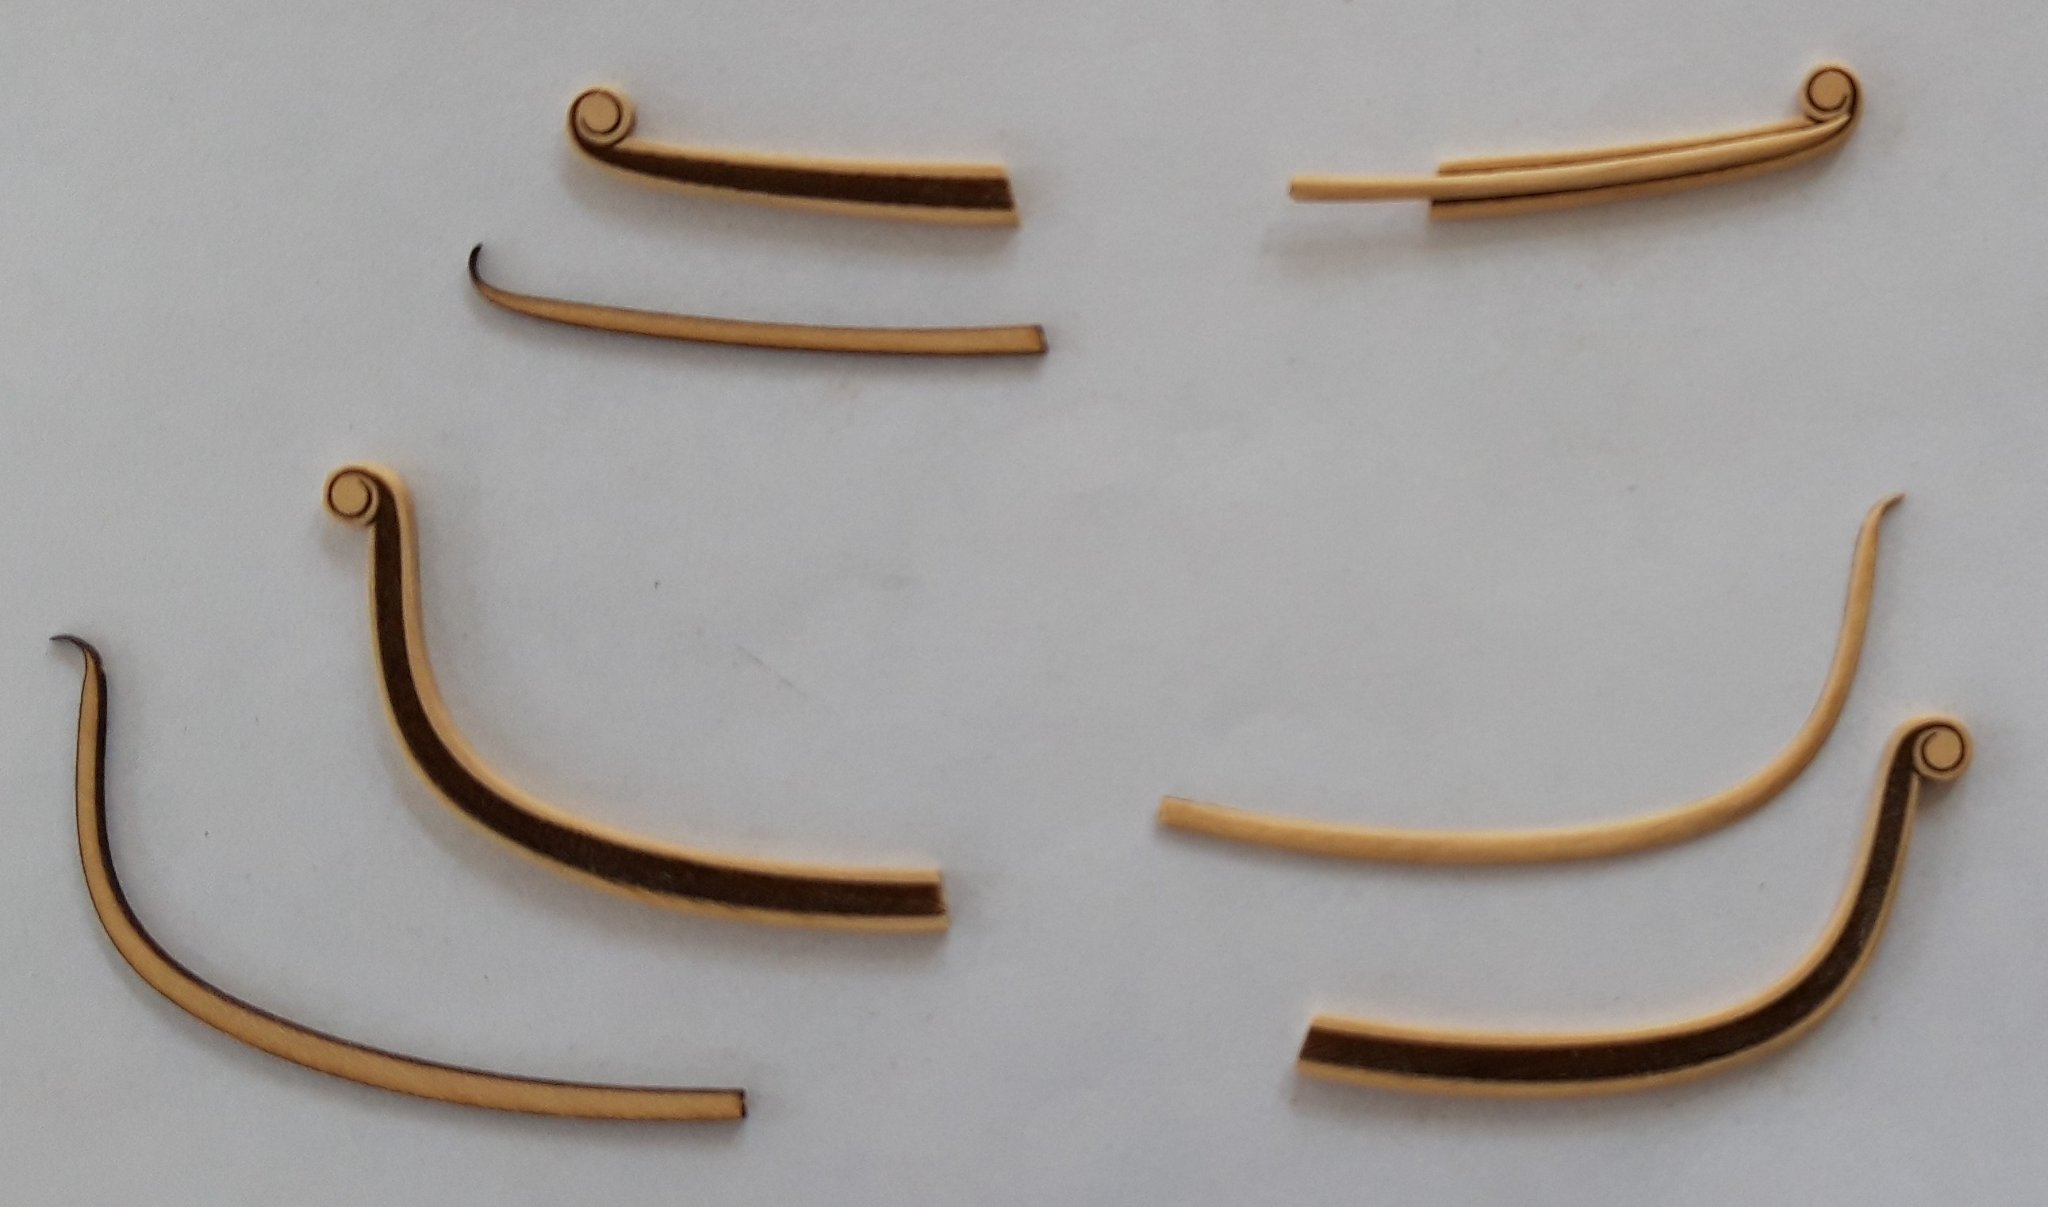
Thanks everybody for the likes and comment.
I proceeded with chapter five. The ladders are now installed and I took the model to daylight, to make some photos.


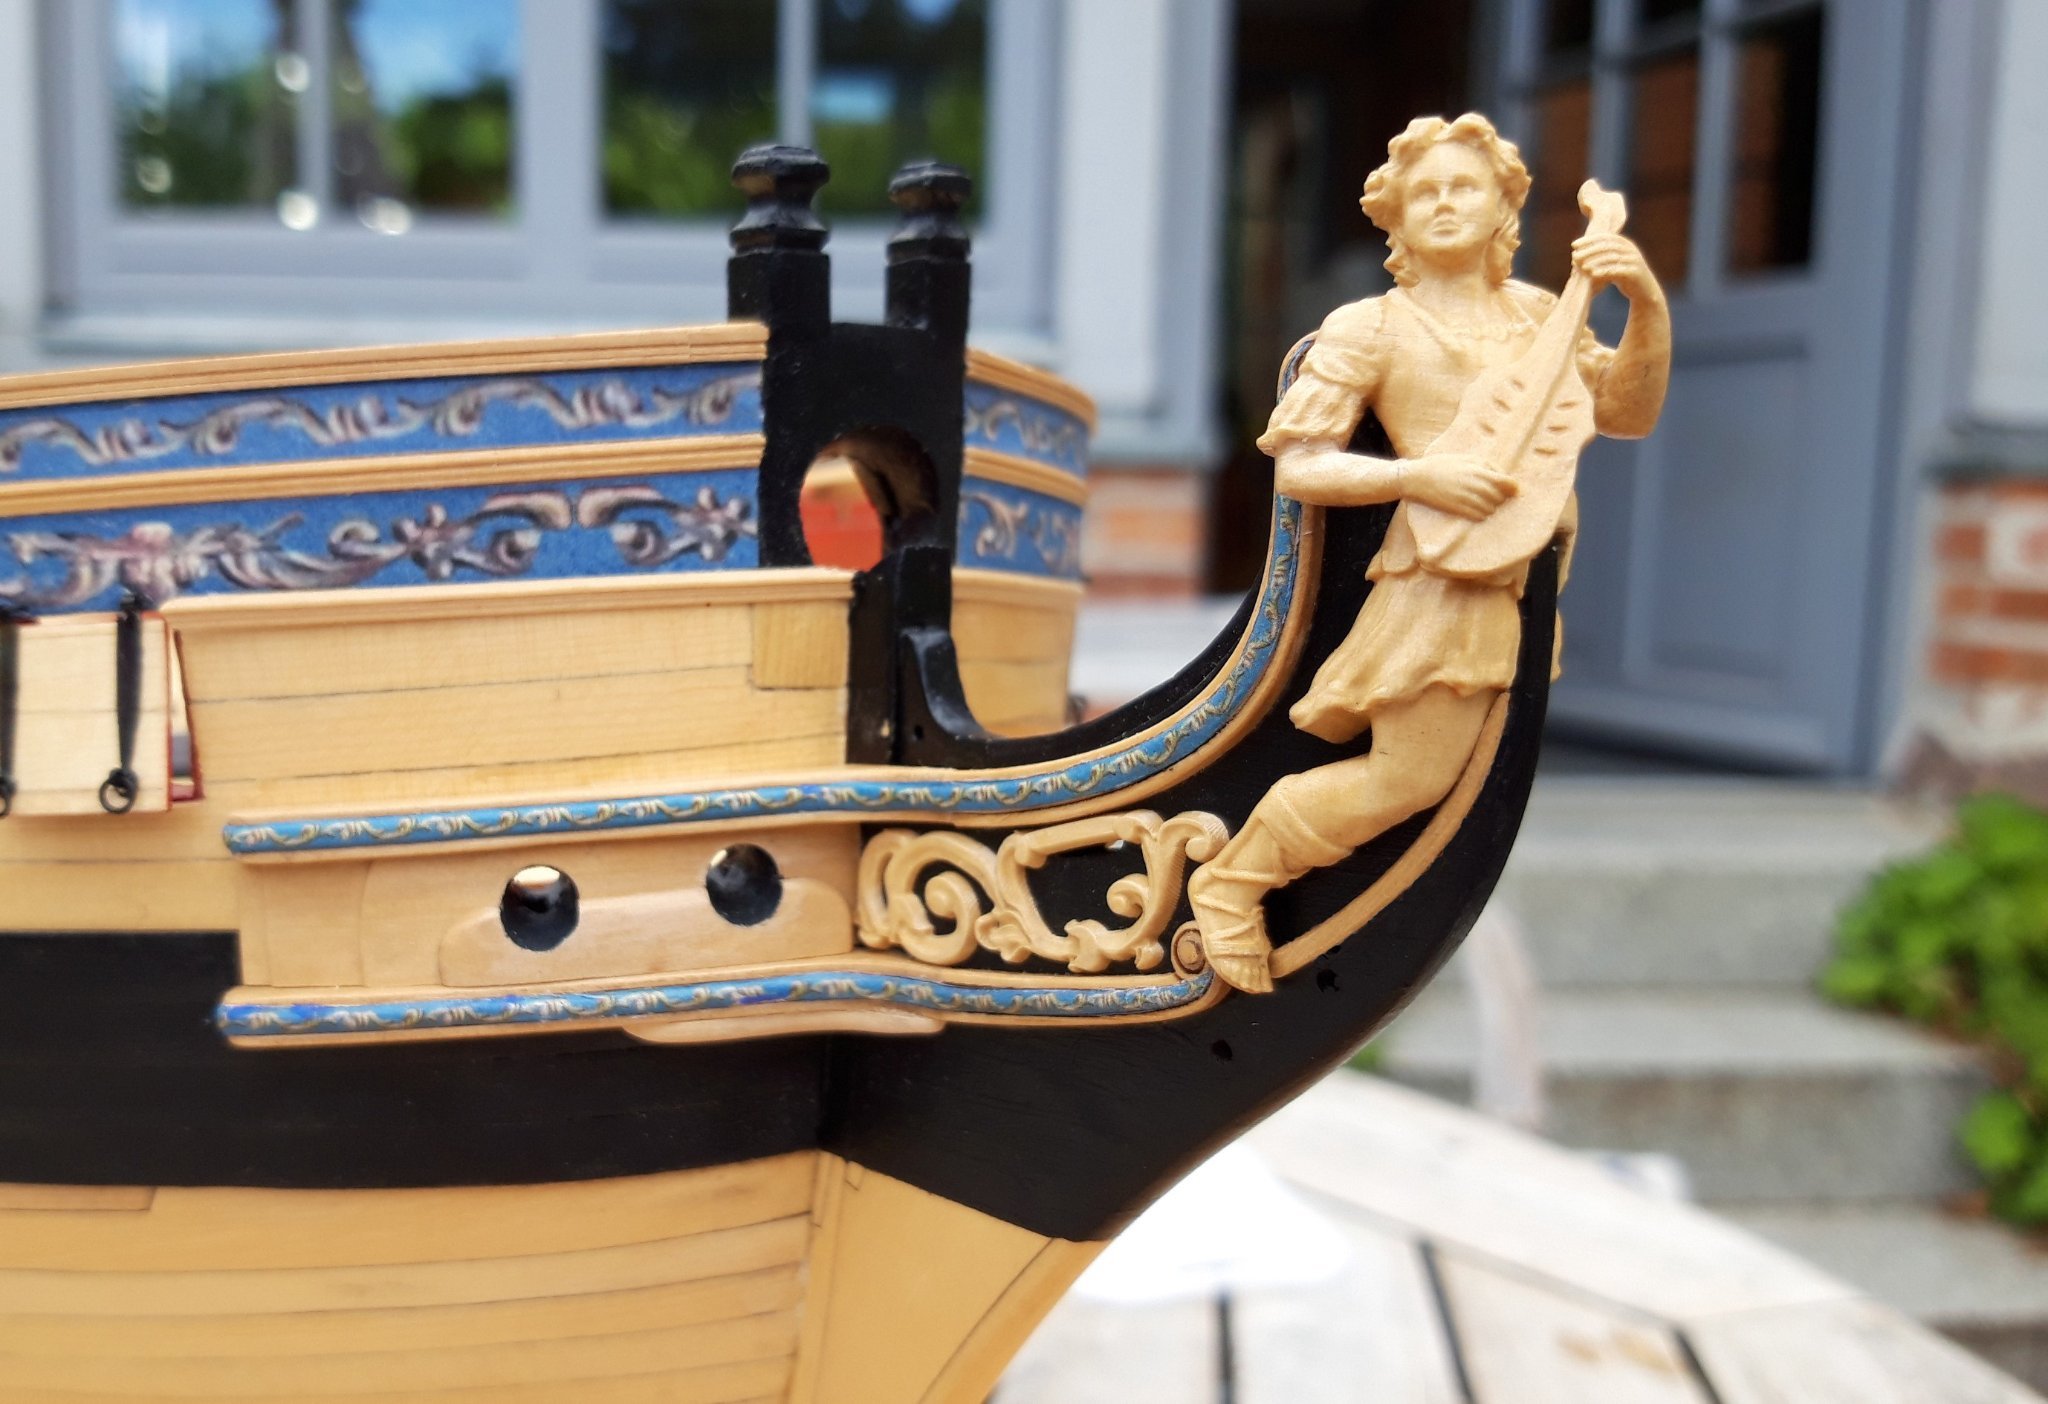
Next thing to do will be the hair brackets at the bow and all the lovely scrollwork there.
I am especially looking forward to this part of the chapter.
Here are the first steps:


Matthias
- Edwardkenway, CaptMorgan, egkb and 15 others
-
18
-
-
-
I agree with Christian, that the basic version is my favorite. The prebuild version gets close to the kind of modelshipbuilding of plastic kits. Nothing else to do, than gluing everything together. That is not much of a challenge and not much to be proud of afterwards. ( I know, there are real artists among the plastic-kit builders, who are able to make them look extremely realistic, that is very impressive, but putting together the parts of the kit is usually easy)
I think, shipmodelbuilders, who build such a model, should have enough skills to shape these parts by themselves. Otherwise, they will struggle later on, when it comes to planking and making fancy modlings etc. You need some woodworking skills, to start such a project.
Matthias
- mtaylor, scrubbyj427 and Jack H
-
3


.jpg.c5c39e9131df0a2f883b34fa4dd1217e.jpg)


HMS Winchelsea - FINISHED - 1764 - by Chuck (1/4" scale)
in Member Build logs for the HMS Winchelsea
Posted
A POF-kit from Syren is a wonderfull perspective!! I am thinking of these pictures you posted from the two Thomas-Burroughs models, Winchelsea and the big one, half open, with a view into the framework, half planked on the other side. That would be beautiful.