
Beckmann
-
Posts
349 -
Joined
-
Last visited
Content Type
Profiles
Forums
Gallery
Events
Posts posted by Beckmann
-
-
-
Beautiful!! You should publish some of these photos in a calendar or something like that. They are exceptional.
Matthias
- FrankWouts, JpR62 and WalrusGuy
-
 3
3
-
-
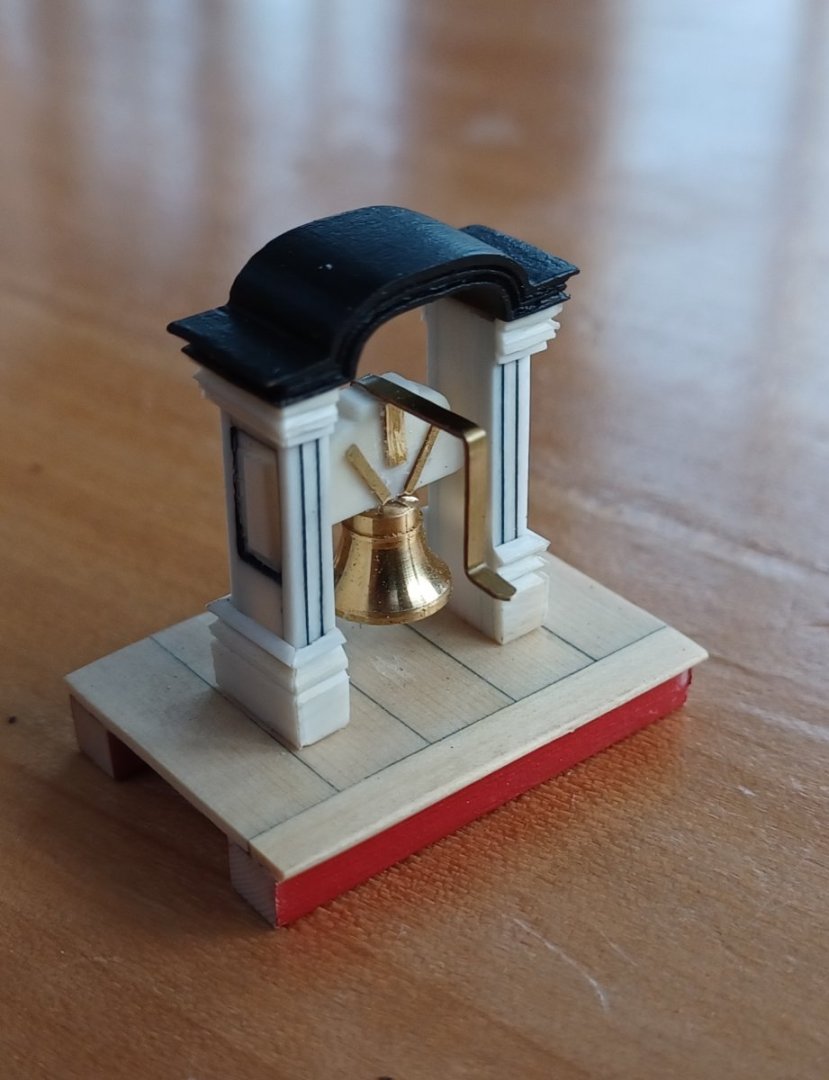
Thanks Chuck!
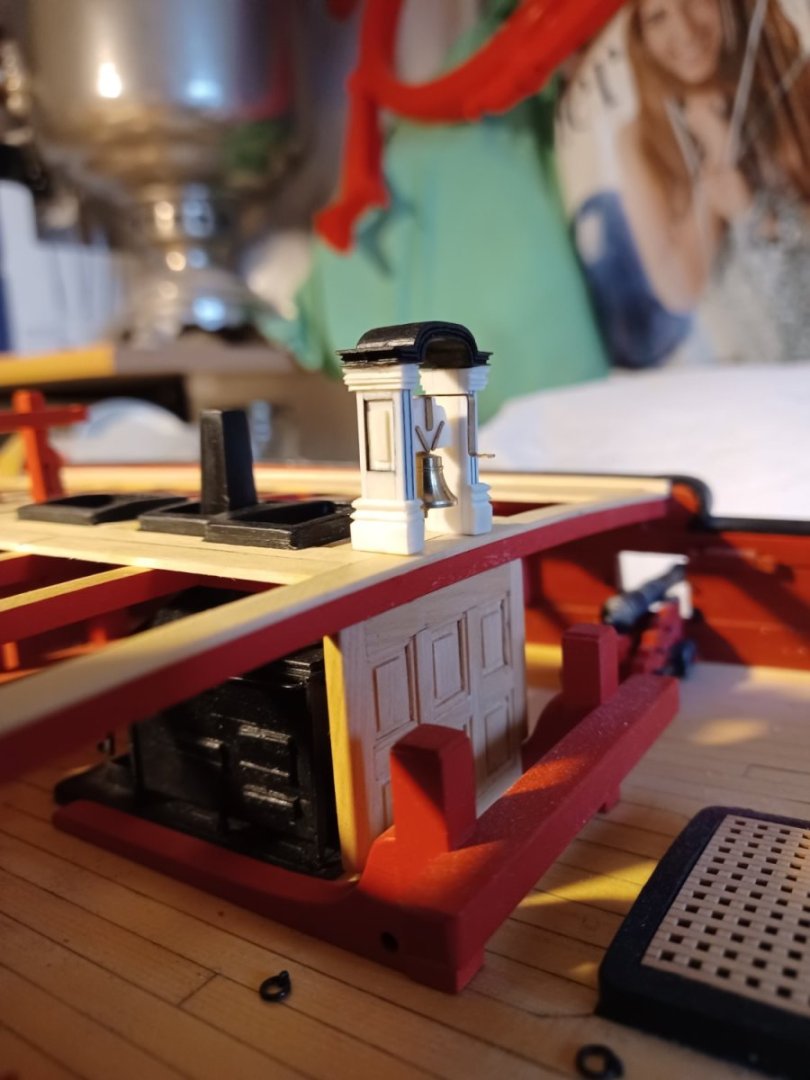
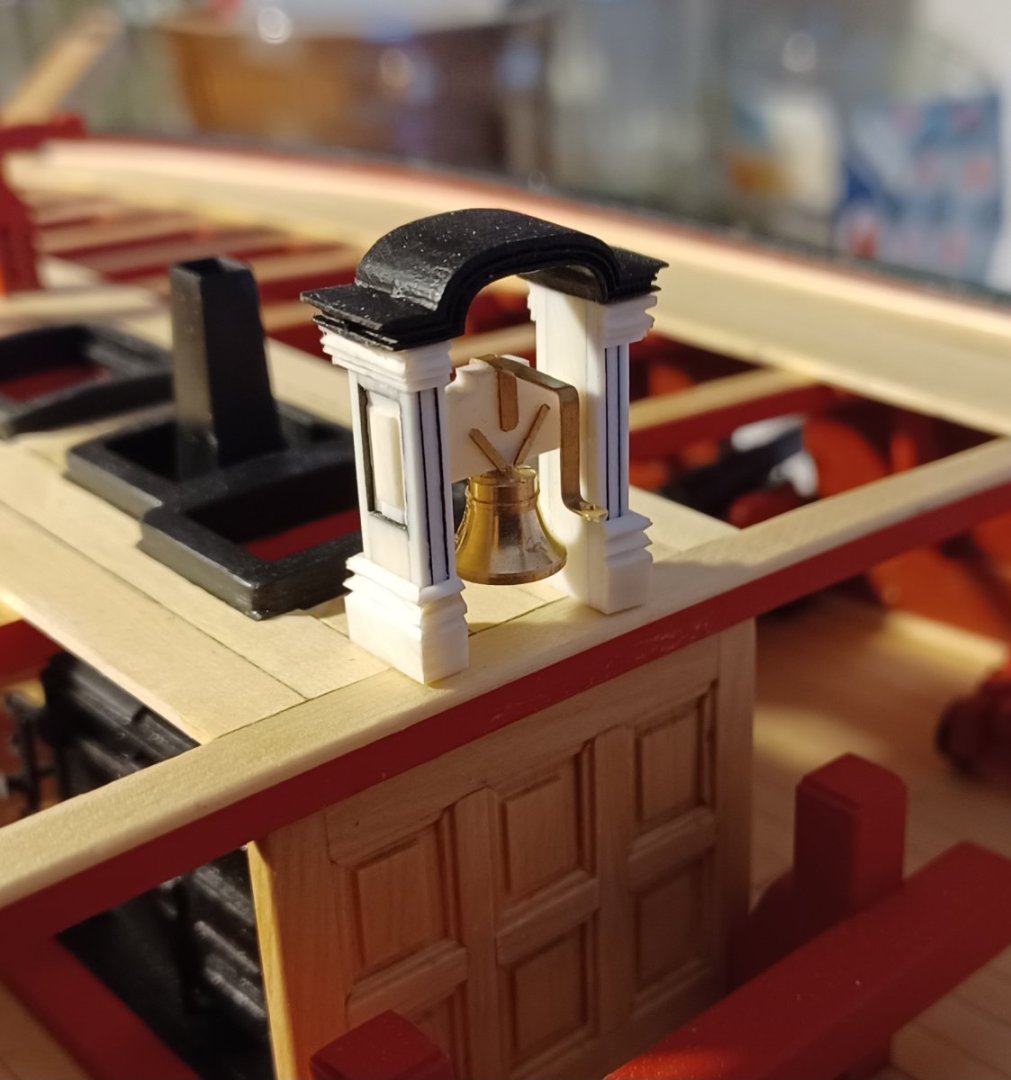
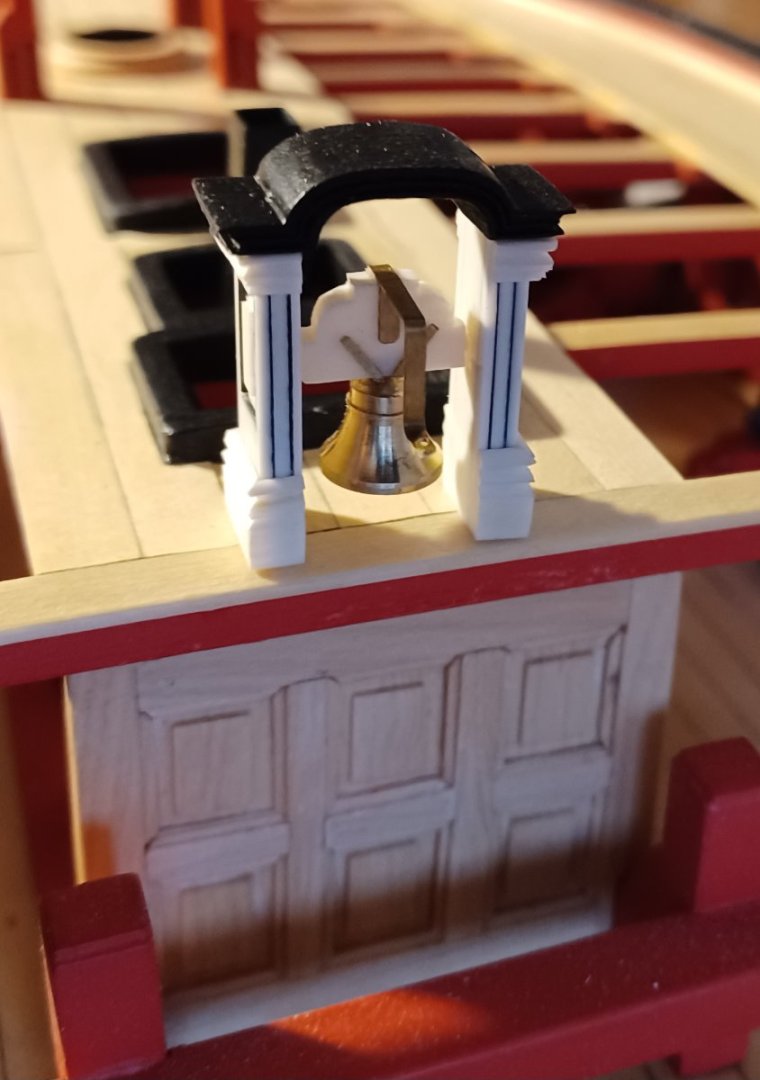
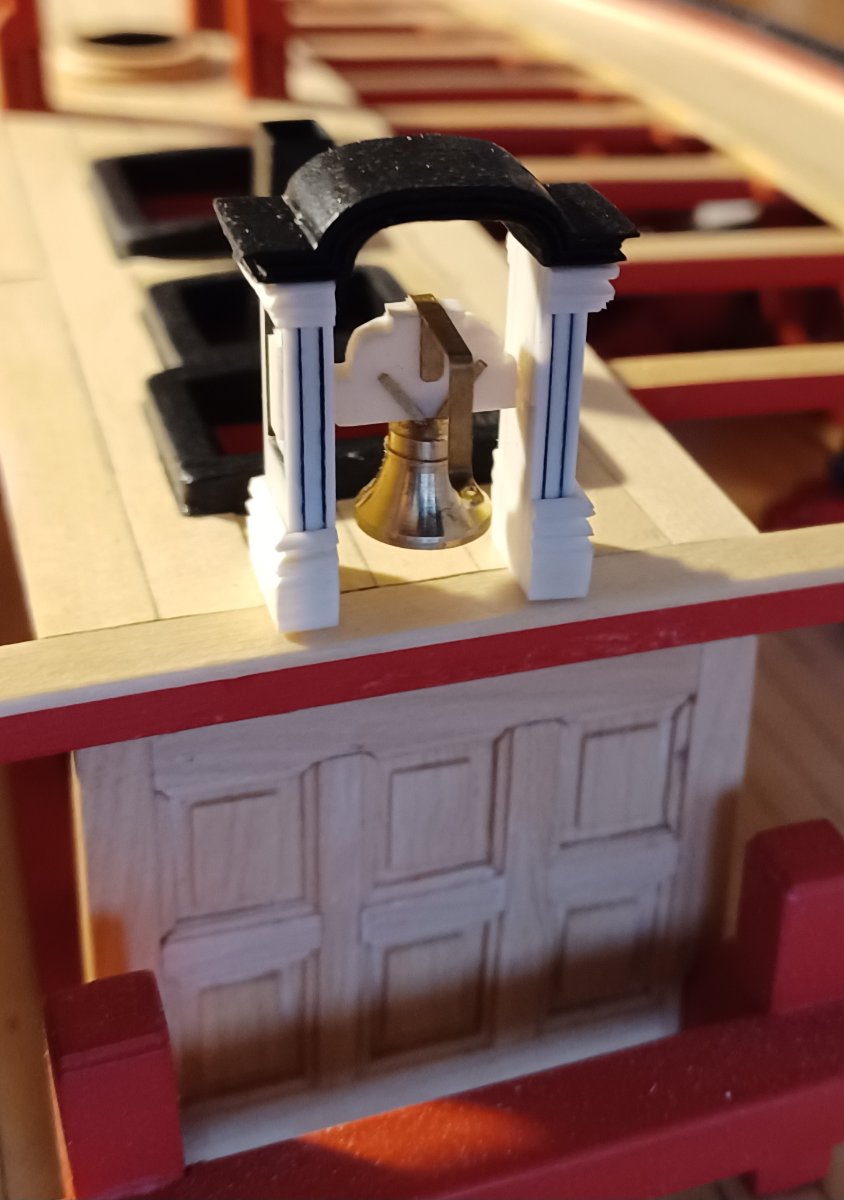
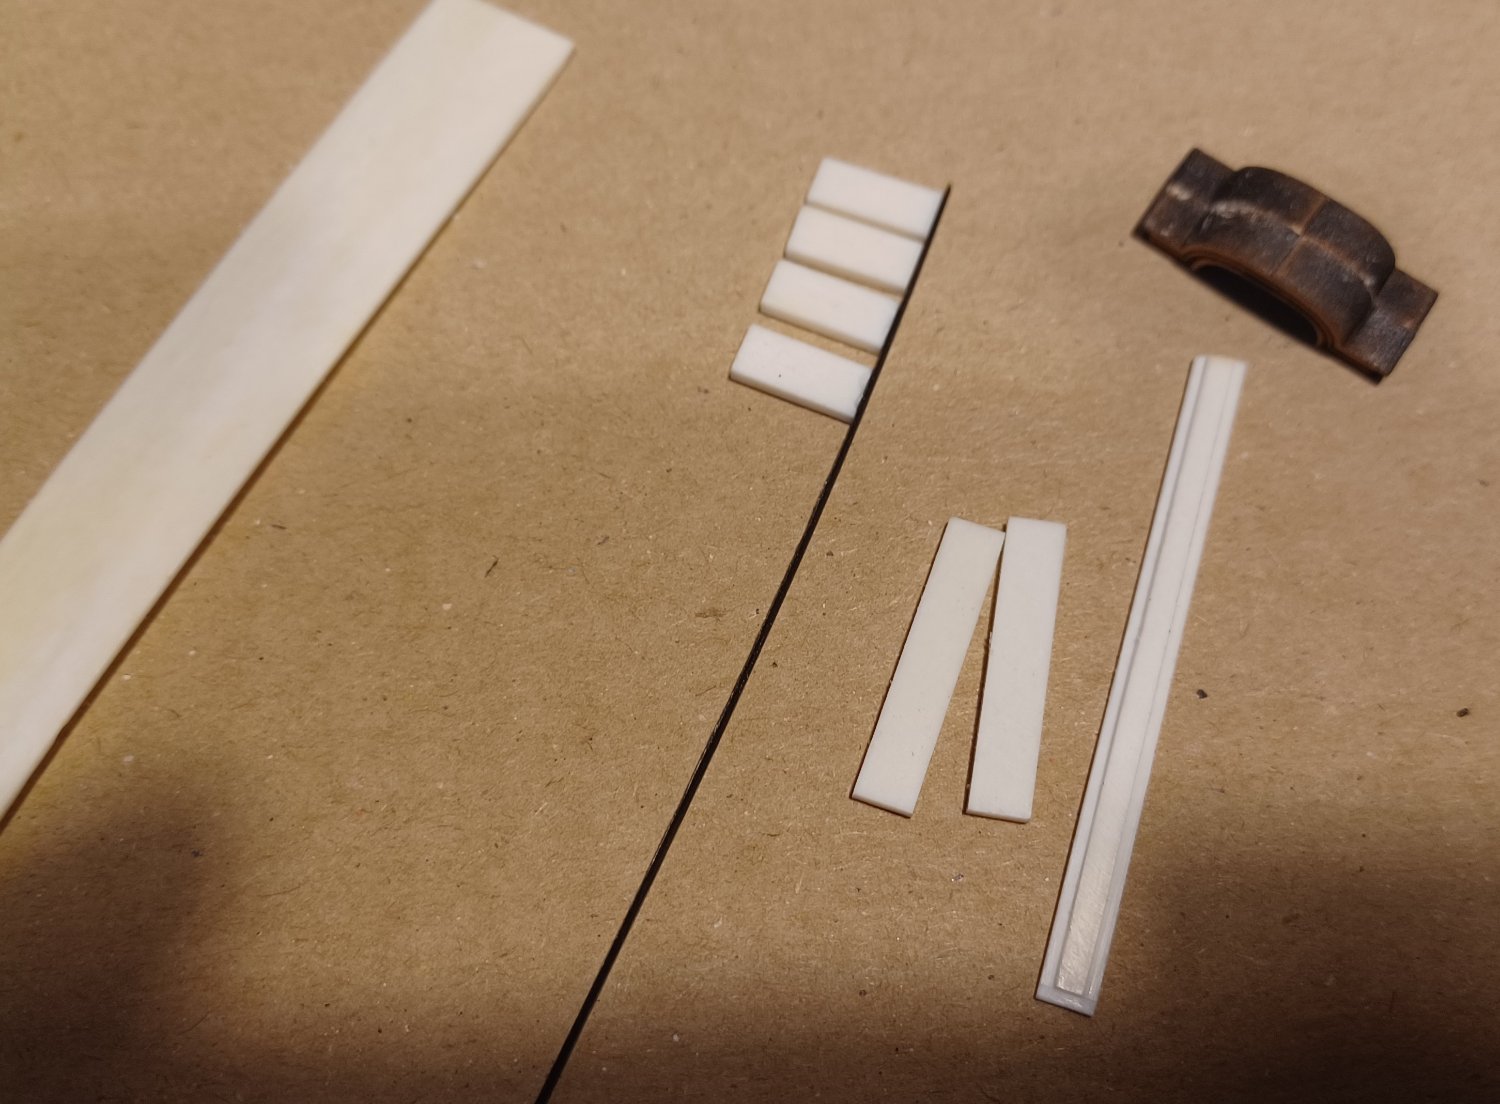
I made two more belfrys. I think they came out better then the first one.
One of them is a gift.

Guess what this is!!
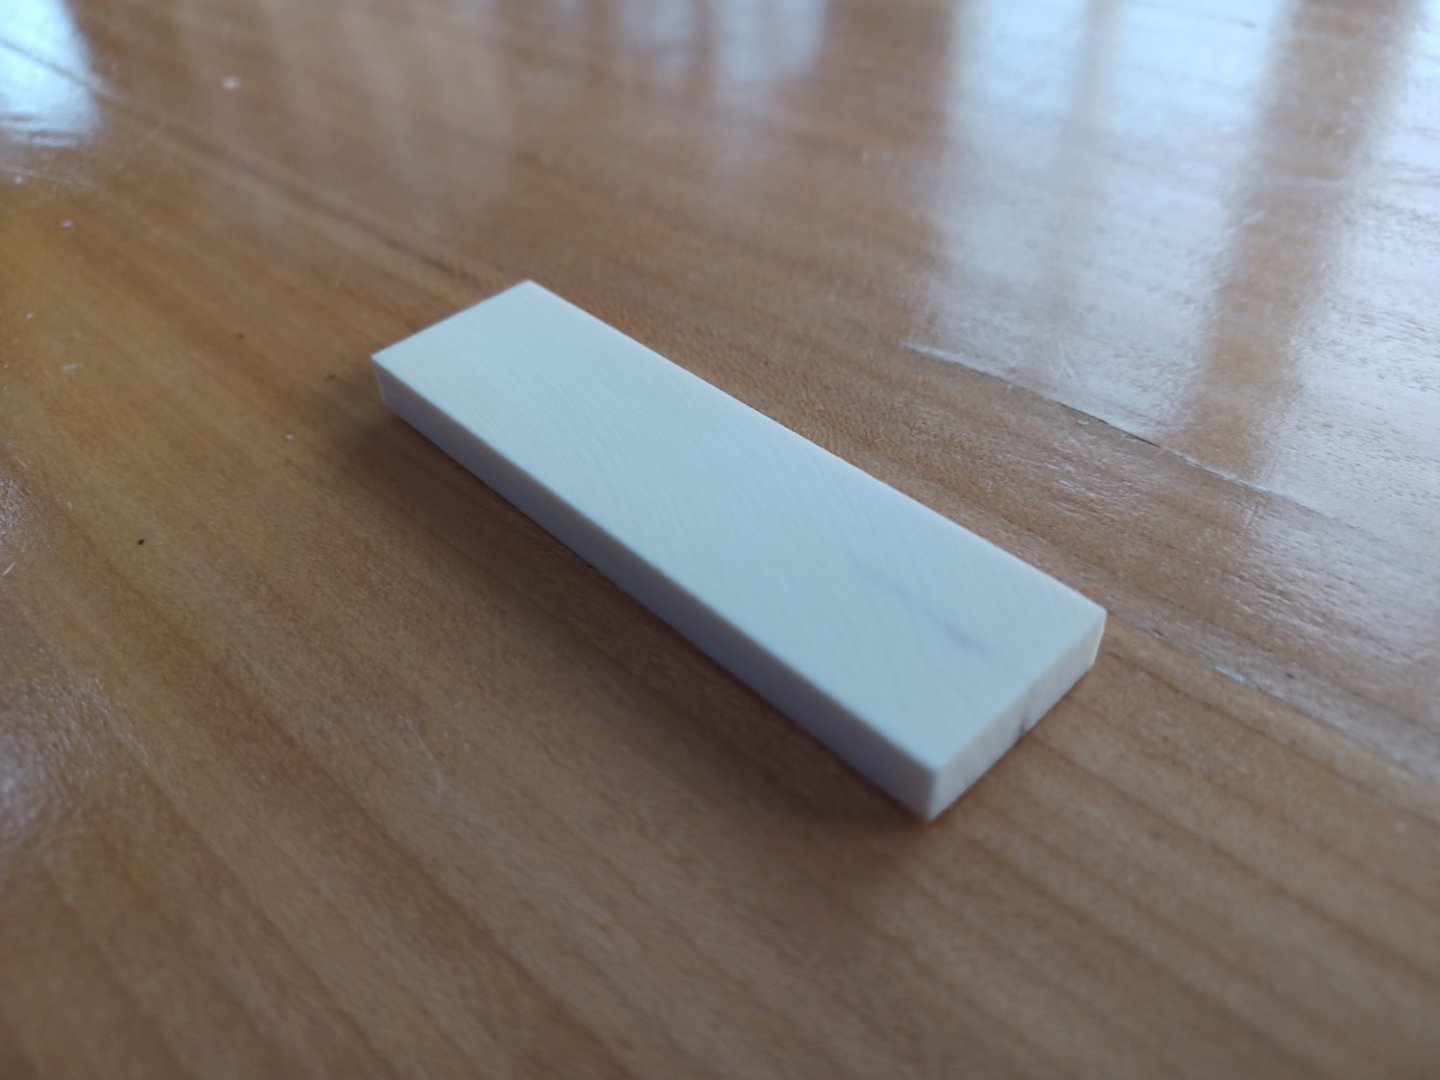
It is a piece of mammut ivory. About 50 mm long. Remember, the last mammut died about 12000 years ago.
I hope it will be enough for the breastrail columns.
Matthias
-
-
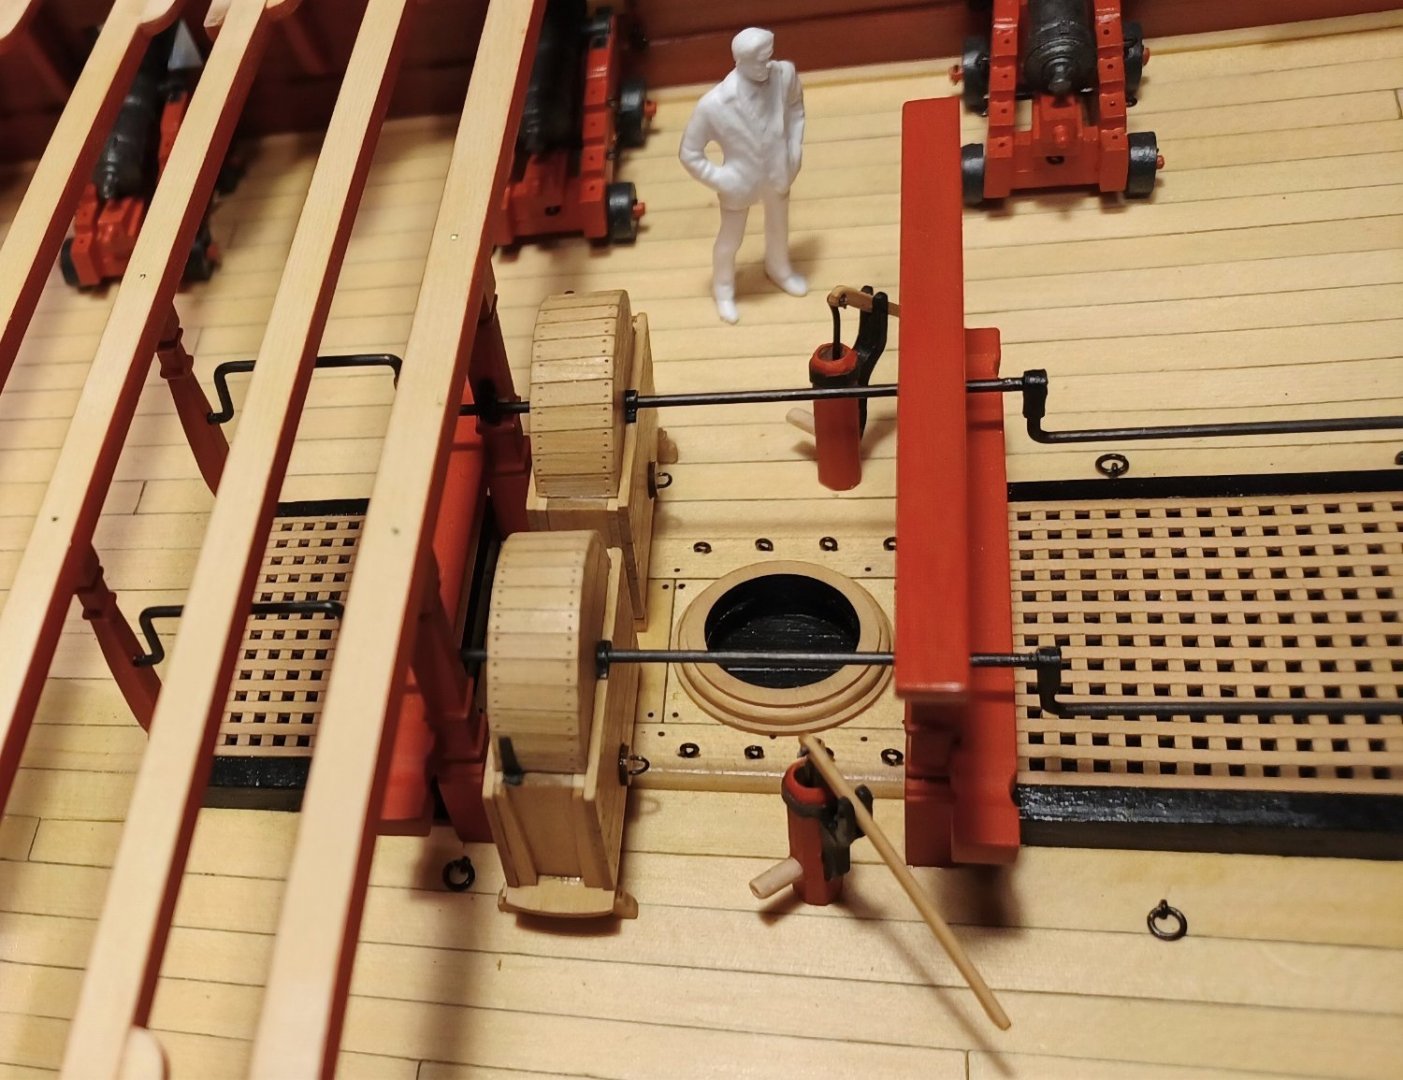
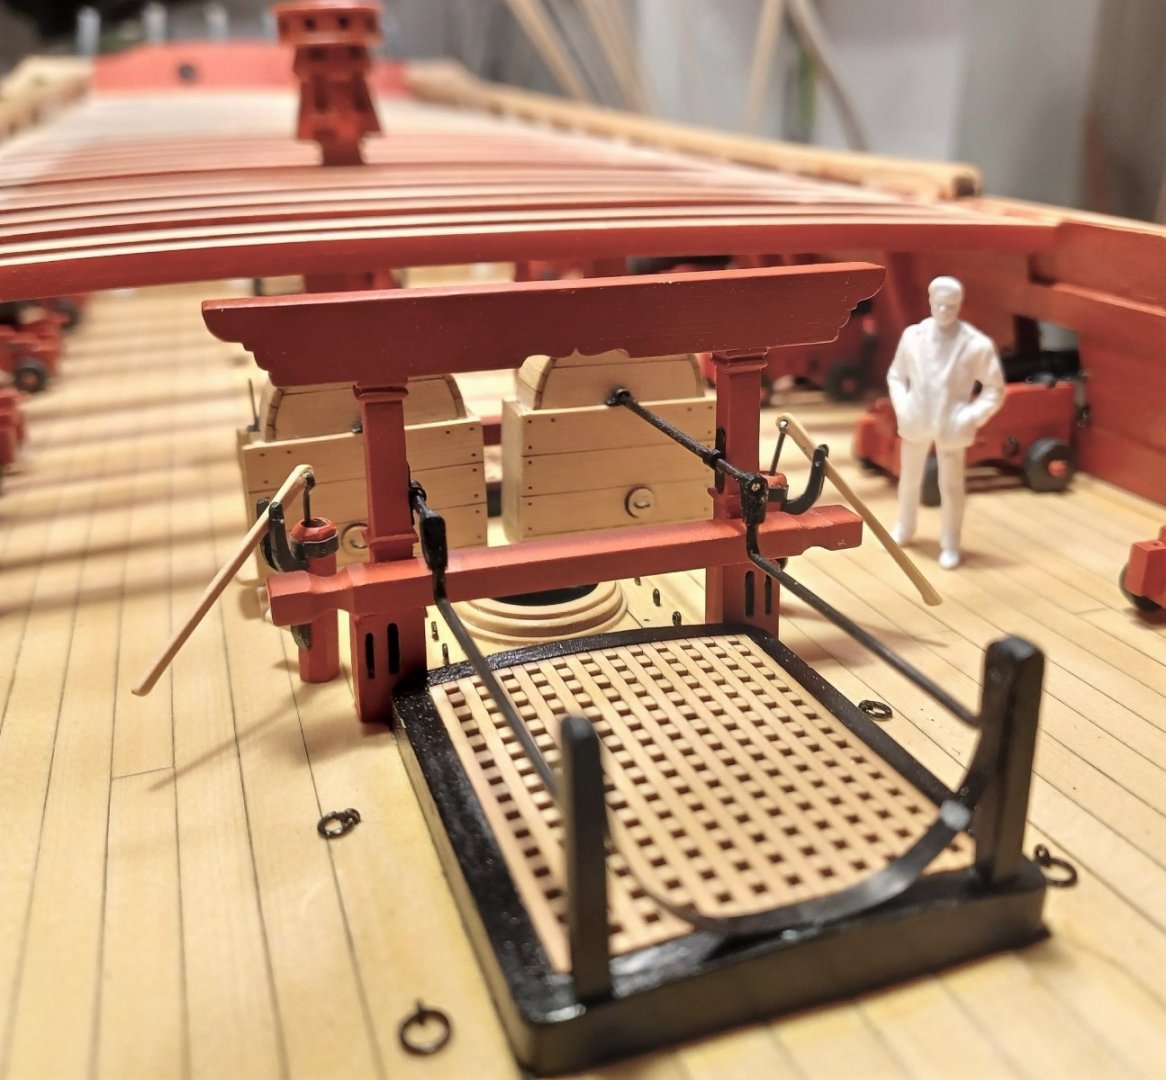
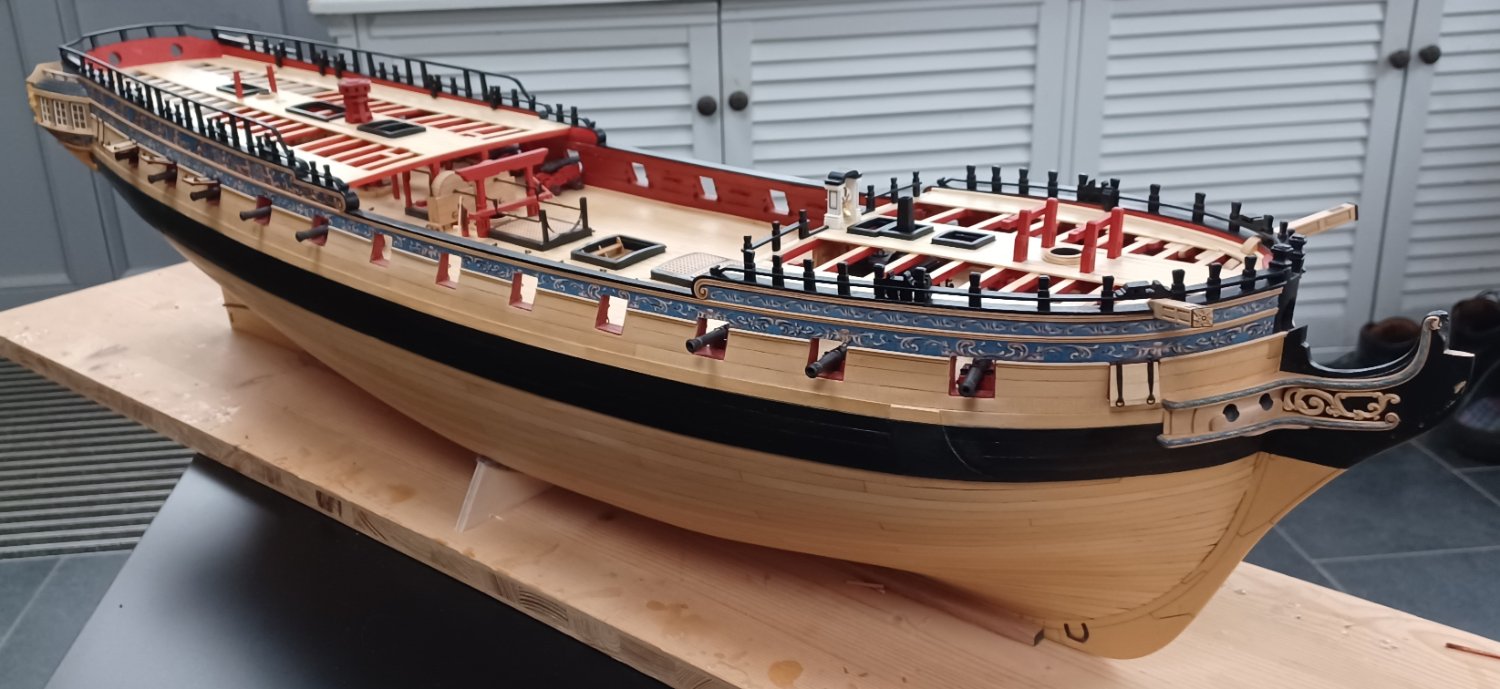
Hello everybody,
today I want to show the latest progress.
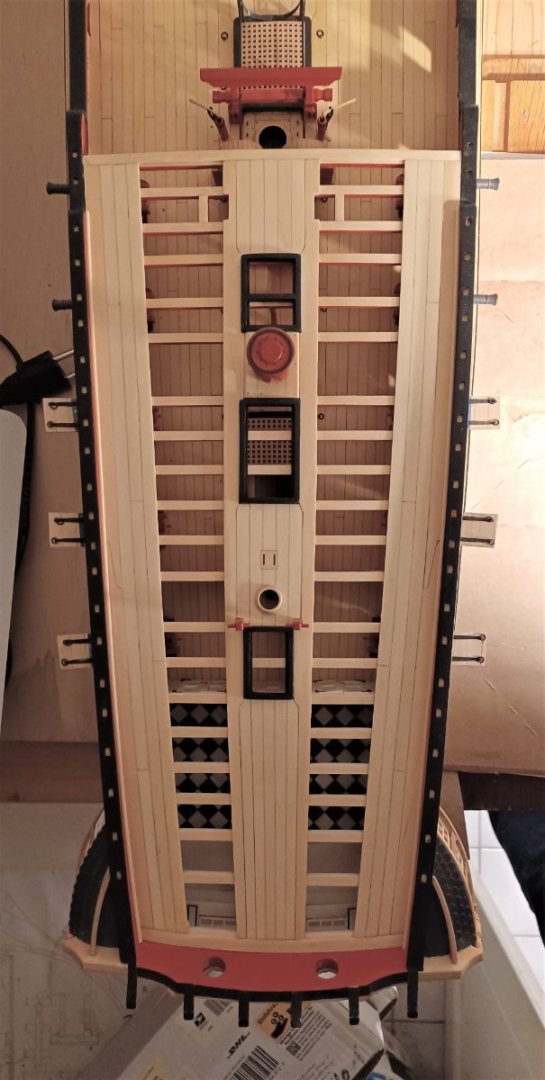
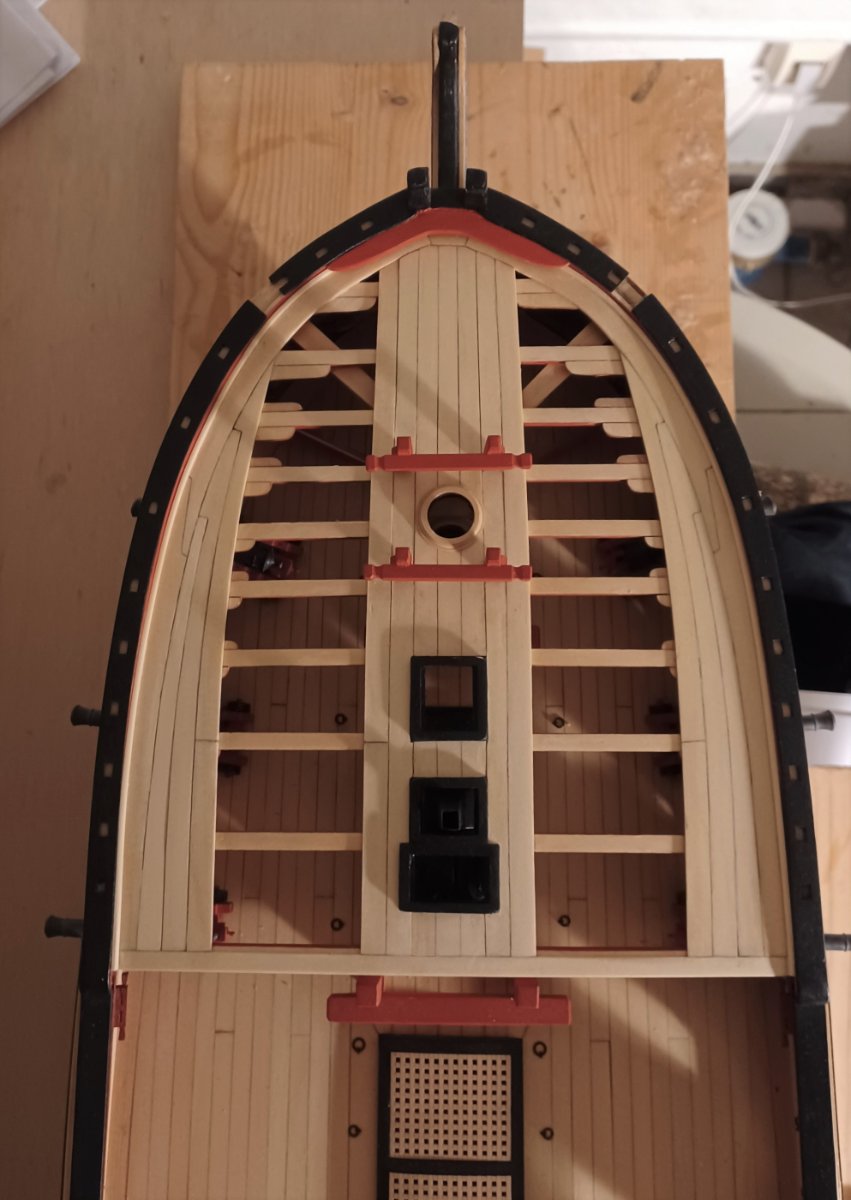
First of all I finished the planking of the forecastle and quarter deck. I know, this does not actually belong into chapter 9, but I wanted to get this done and clean the model, before I add the deck fittings.

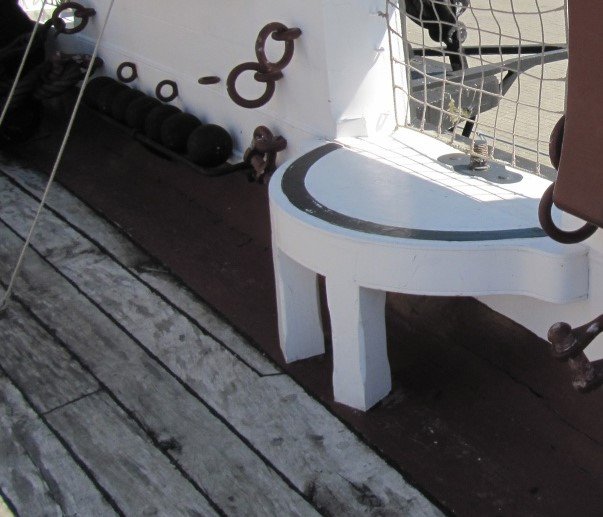
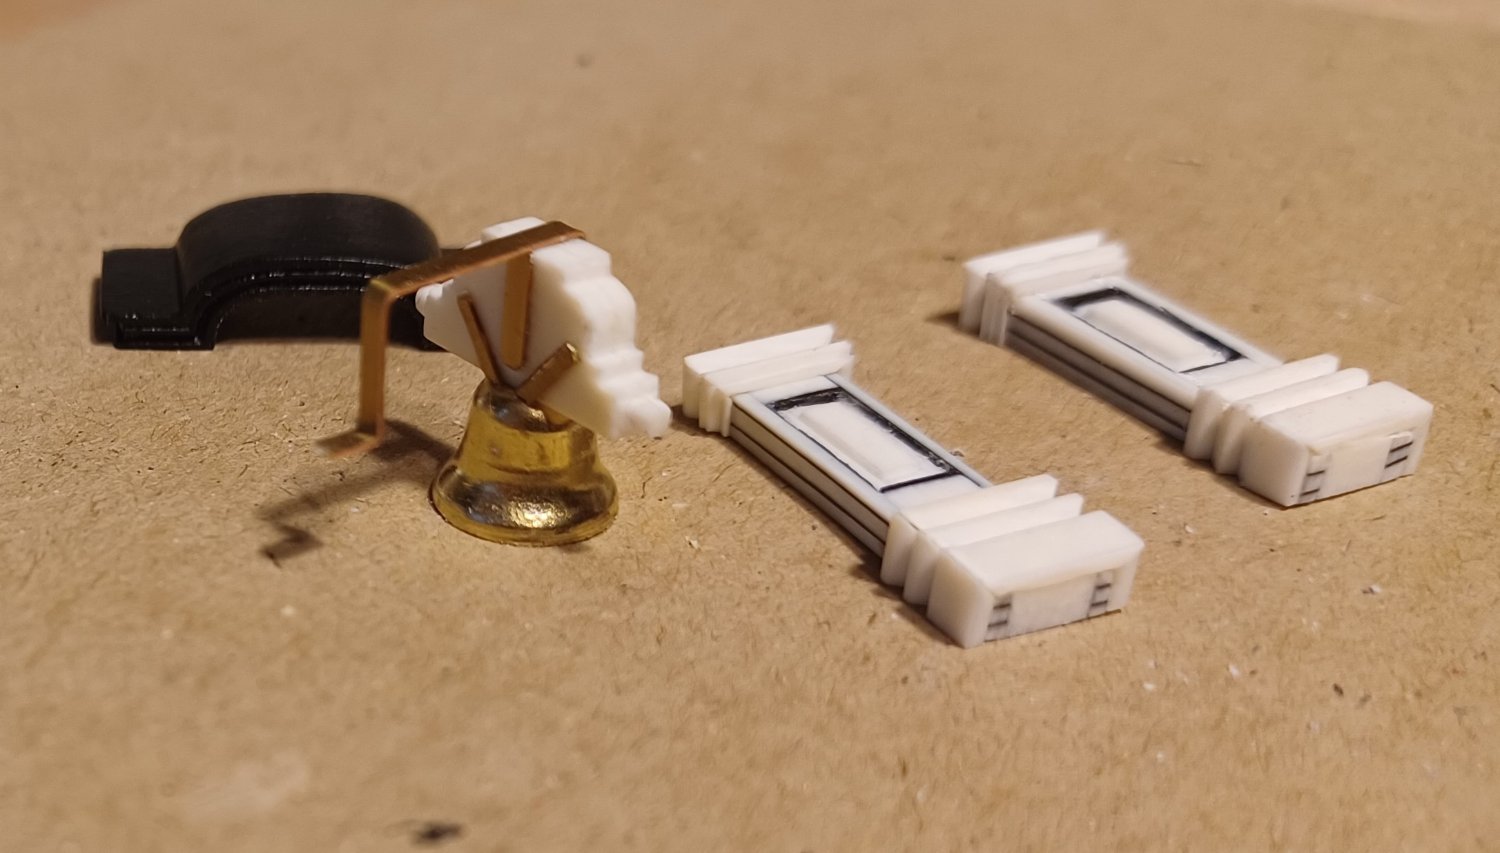
The first fitting wich will be added to the forecastle ist the belfry.
Some of you might remember me using the ivory for the captains cabin. Now most of this is hidden unterneath the quarterdeck planking. So I thought about using this material for some of the upper deck fittings as well.
Chuck provided a wonderful mini-kit for the belfry and I follow his way of building it, but replaced a few materials as you can see on the following photos.


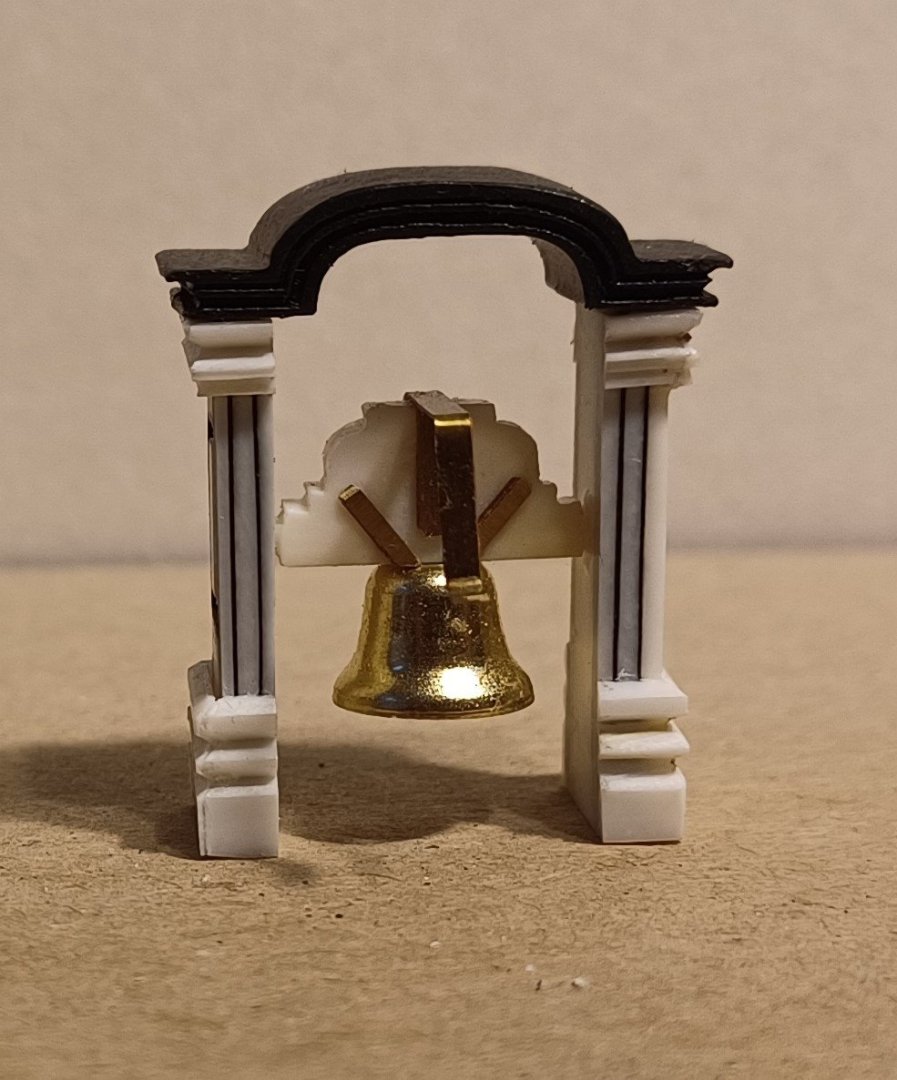
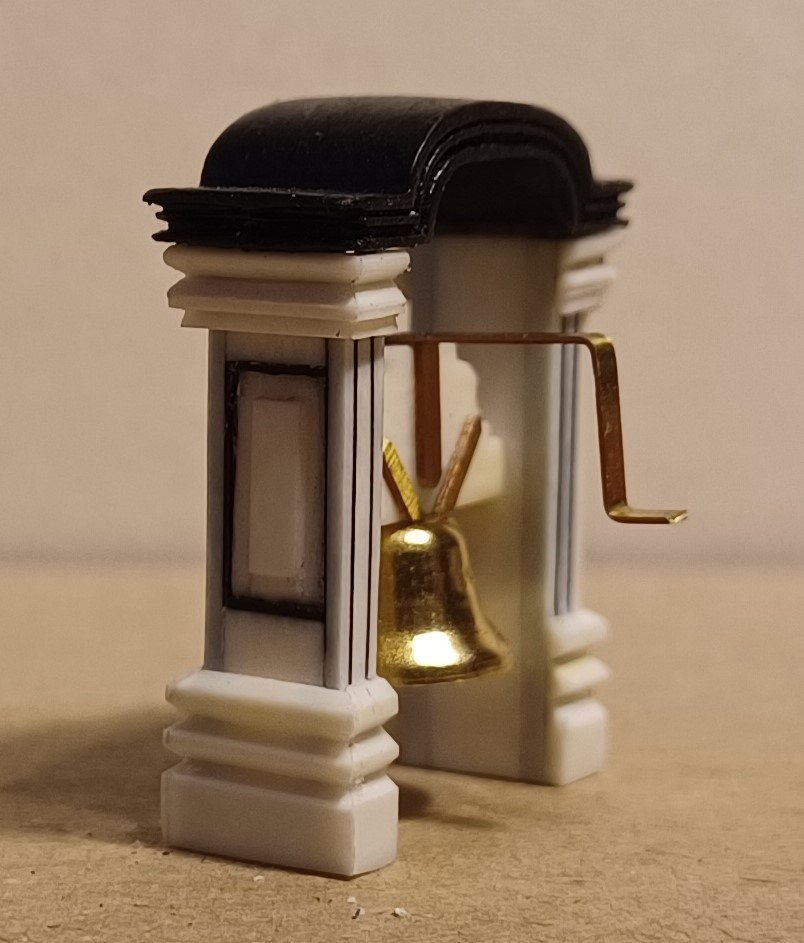
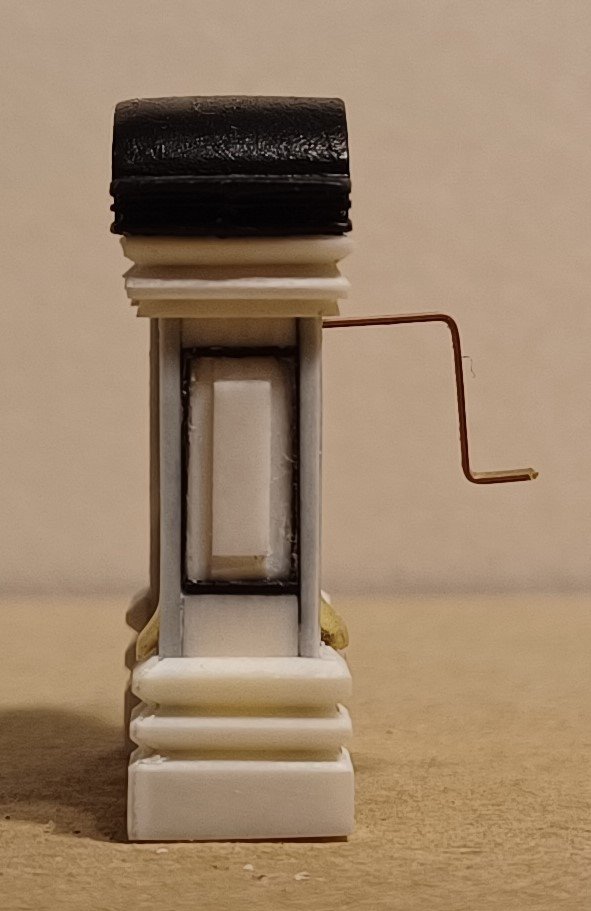
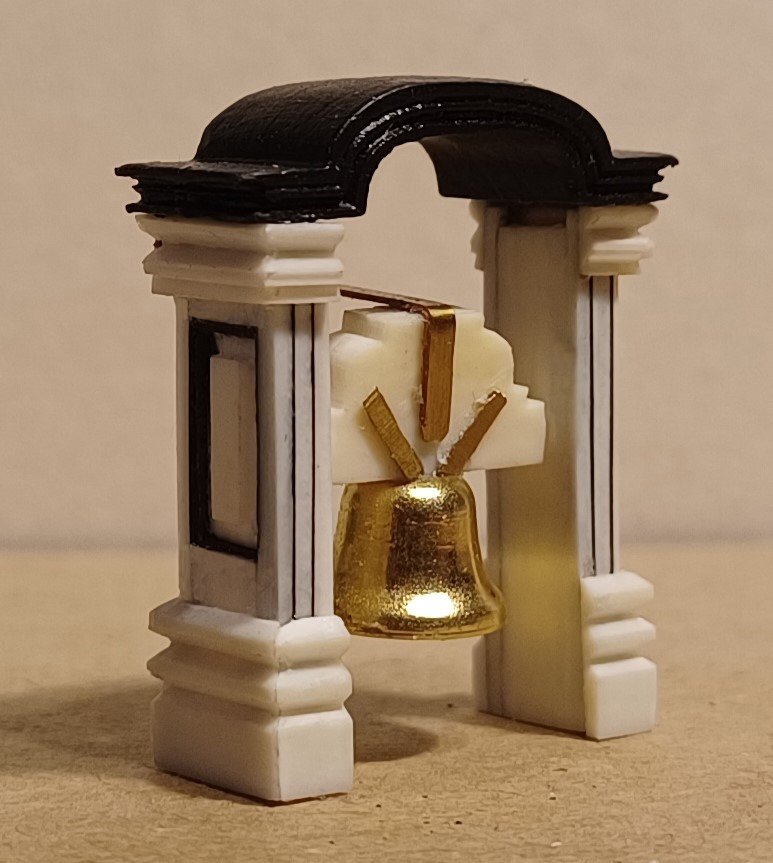
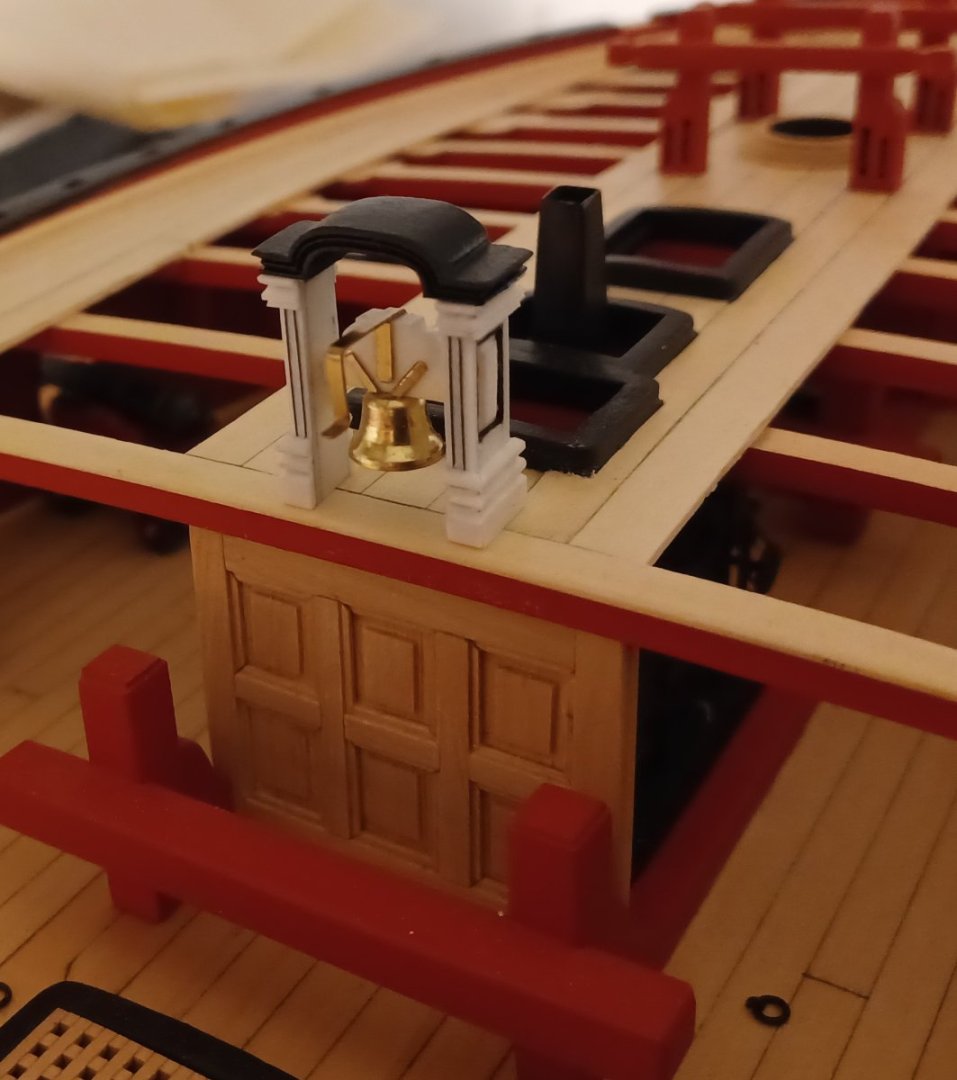
Matthias
-
Impressive work, well done!!
- westwood and FrankWouts
-
2
-
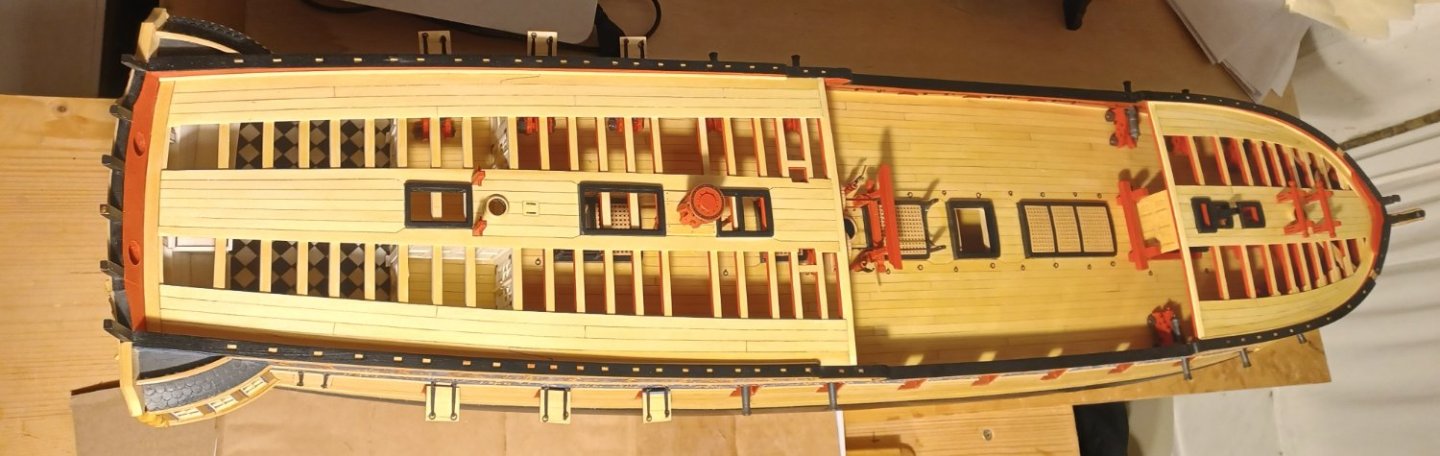
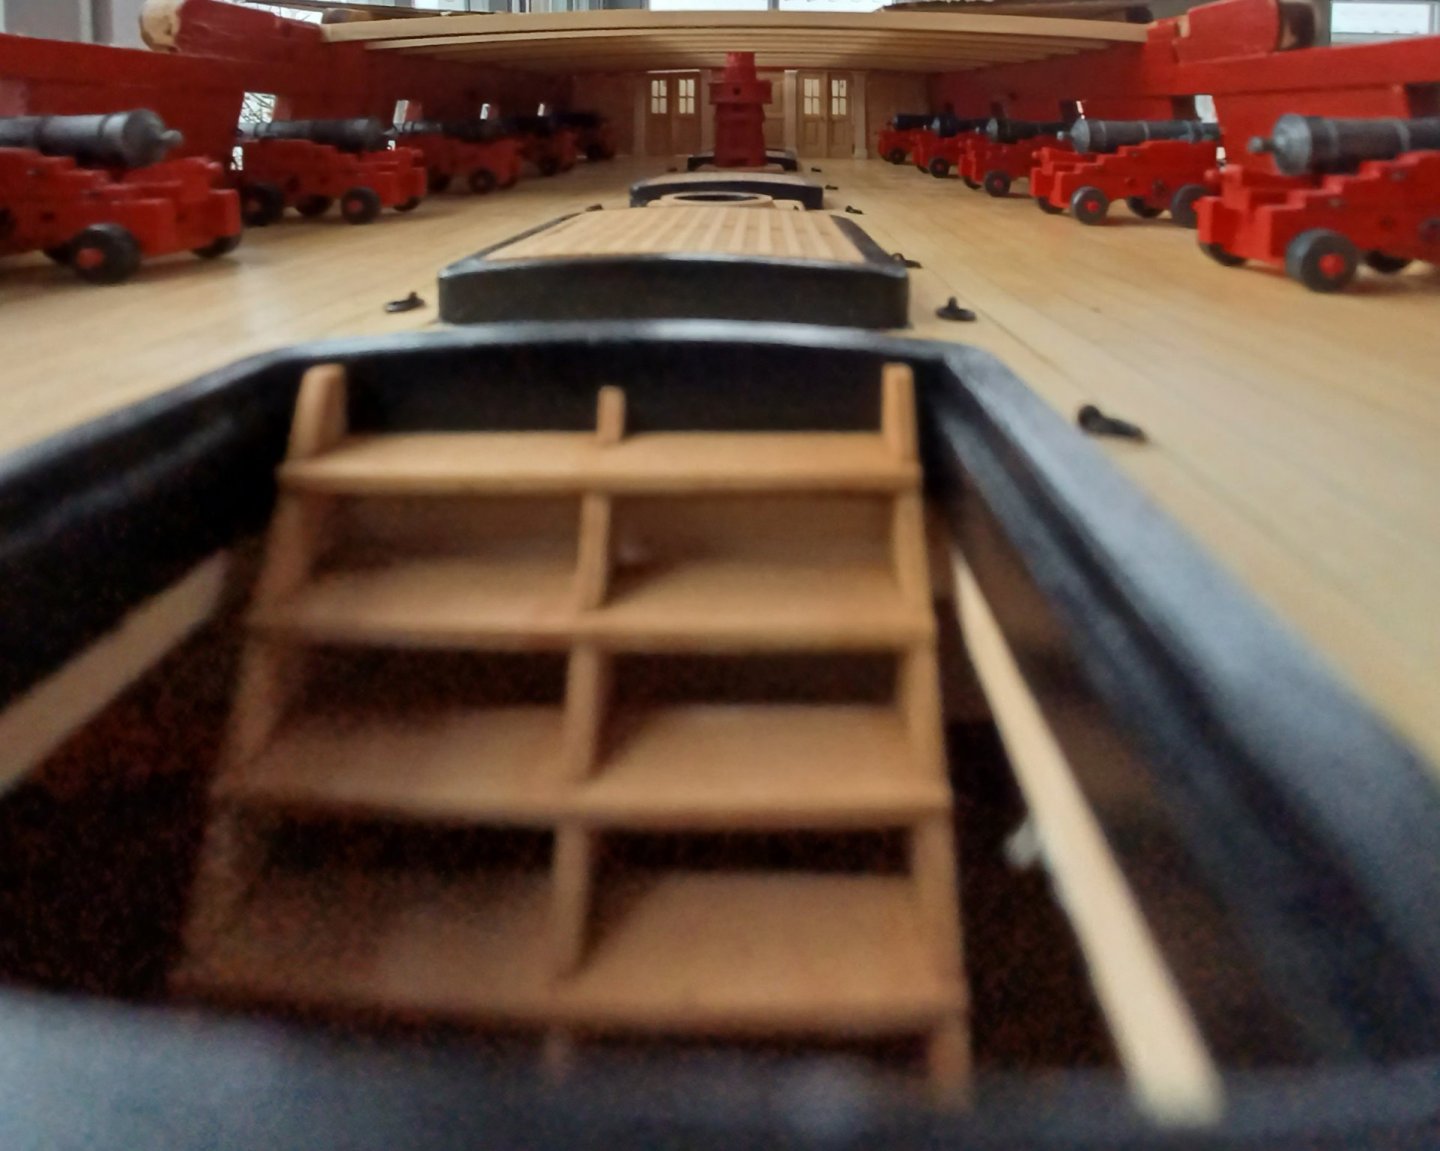
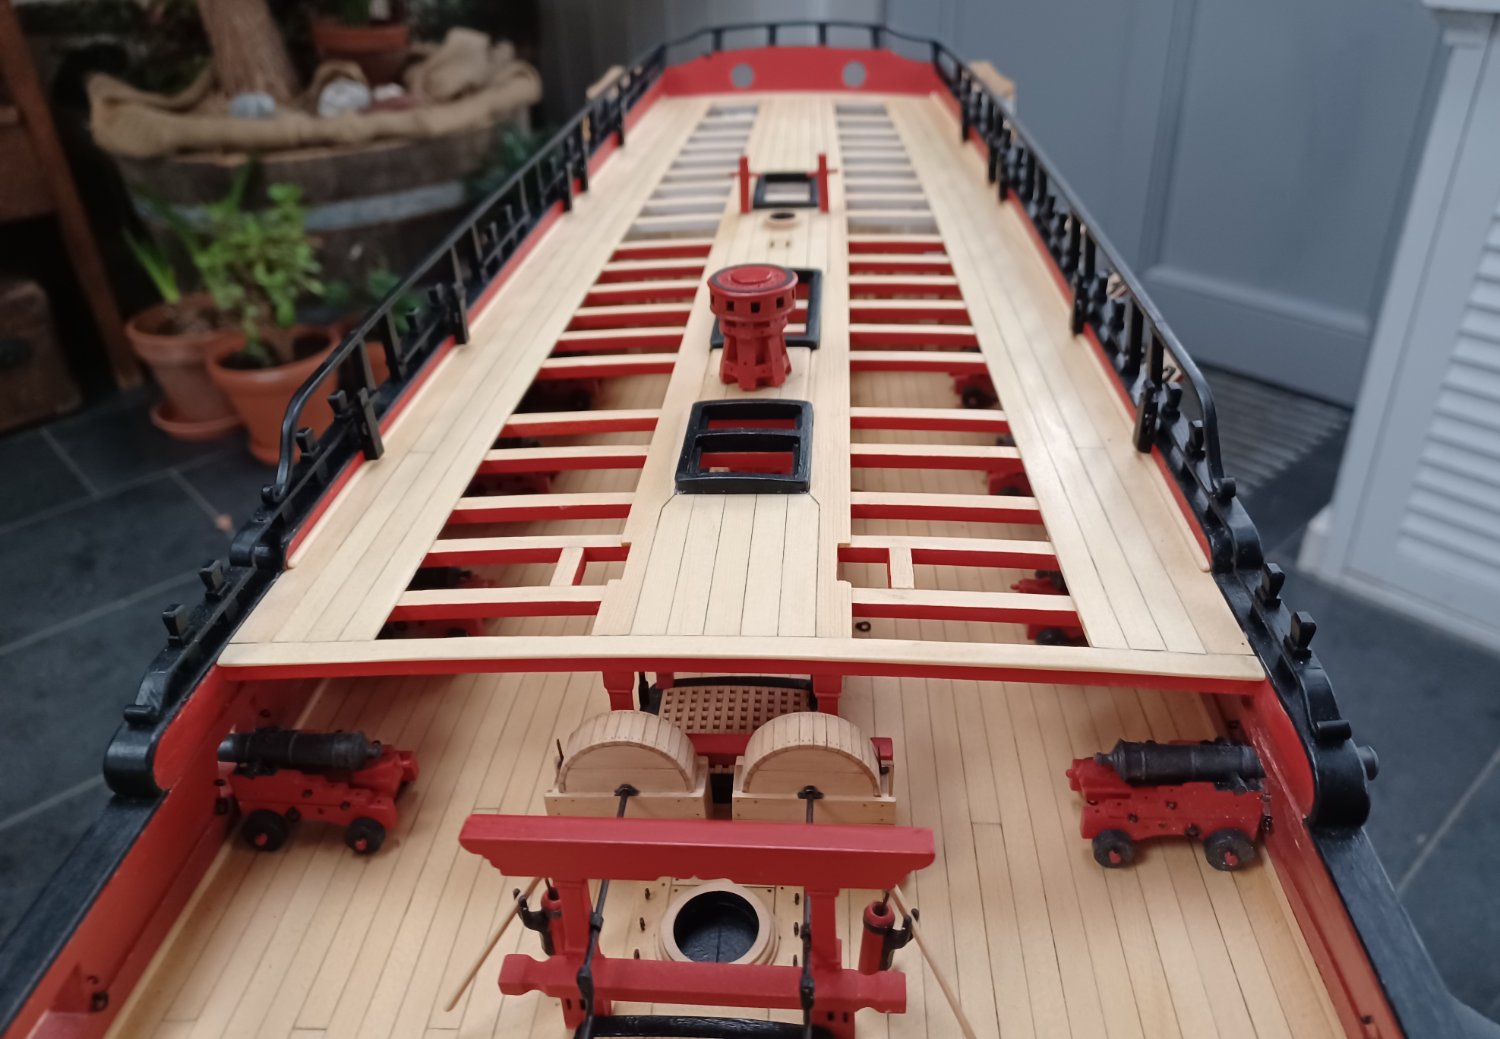
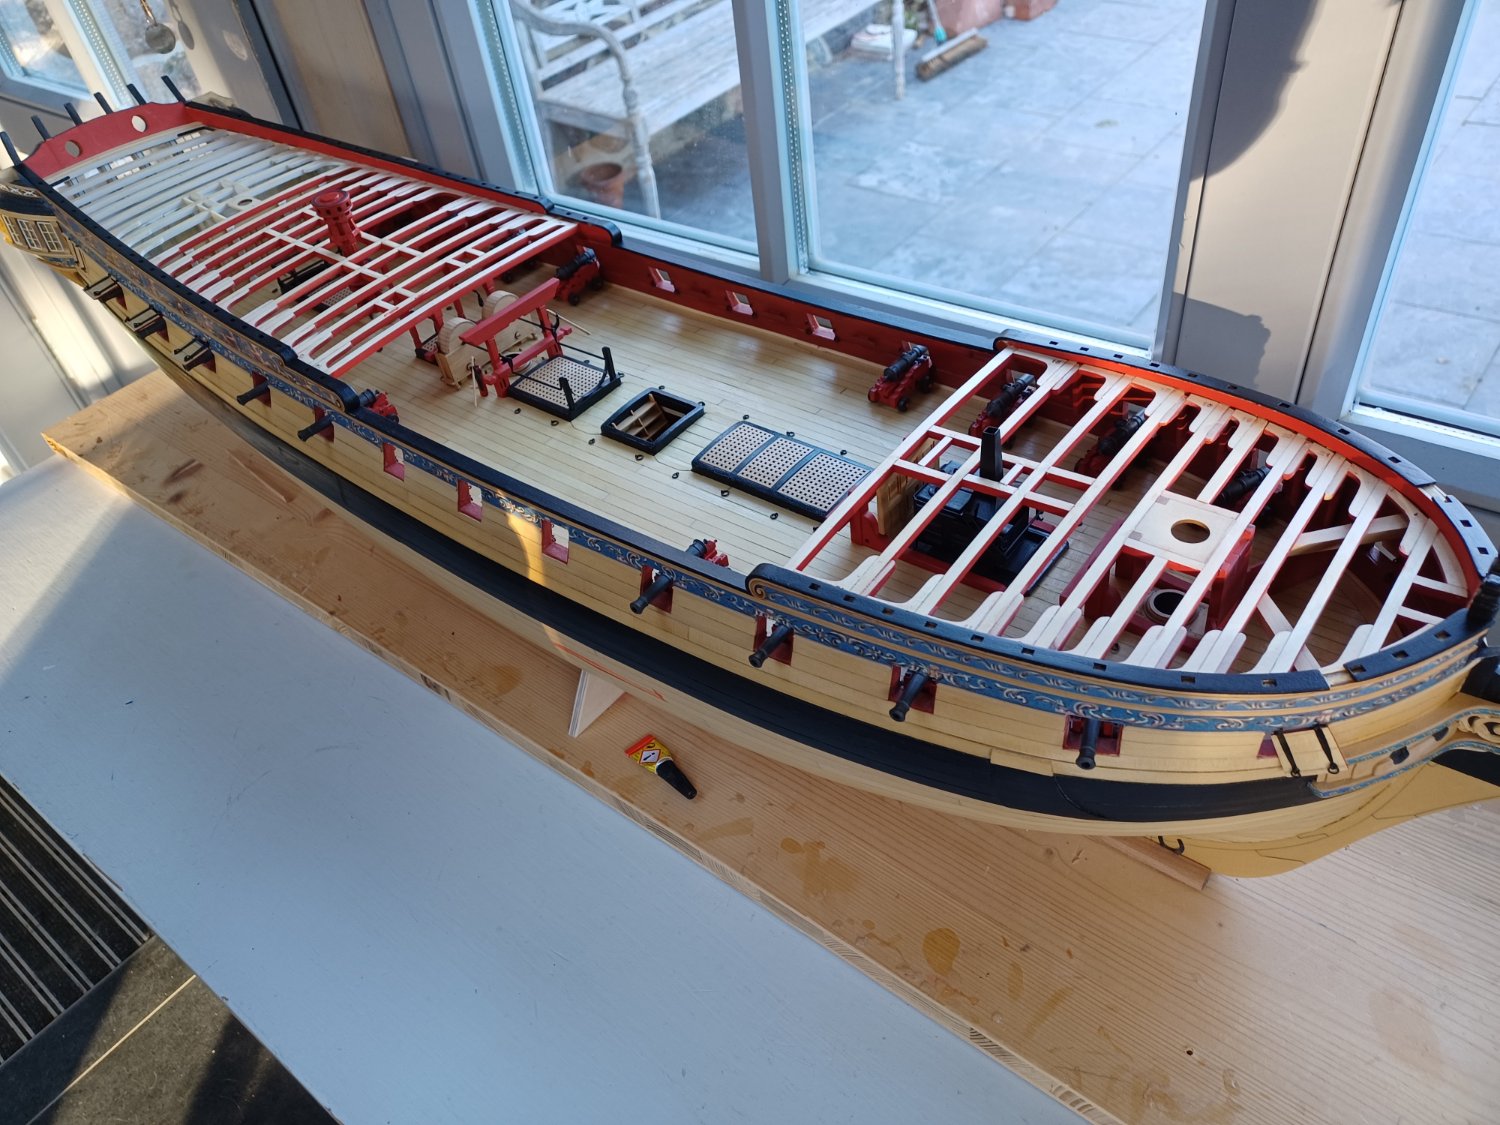
Today's update is all about the first steps of chapter 9
The caprail was added first. This is a nice step, it changes the overall impression of the model so much.

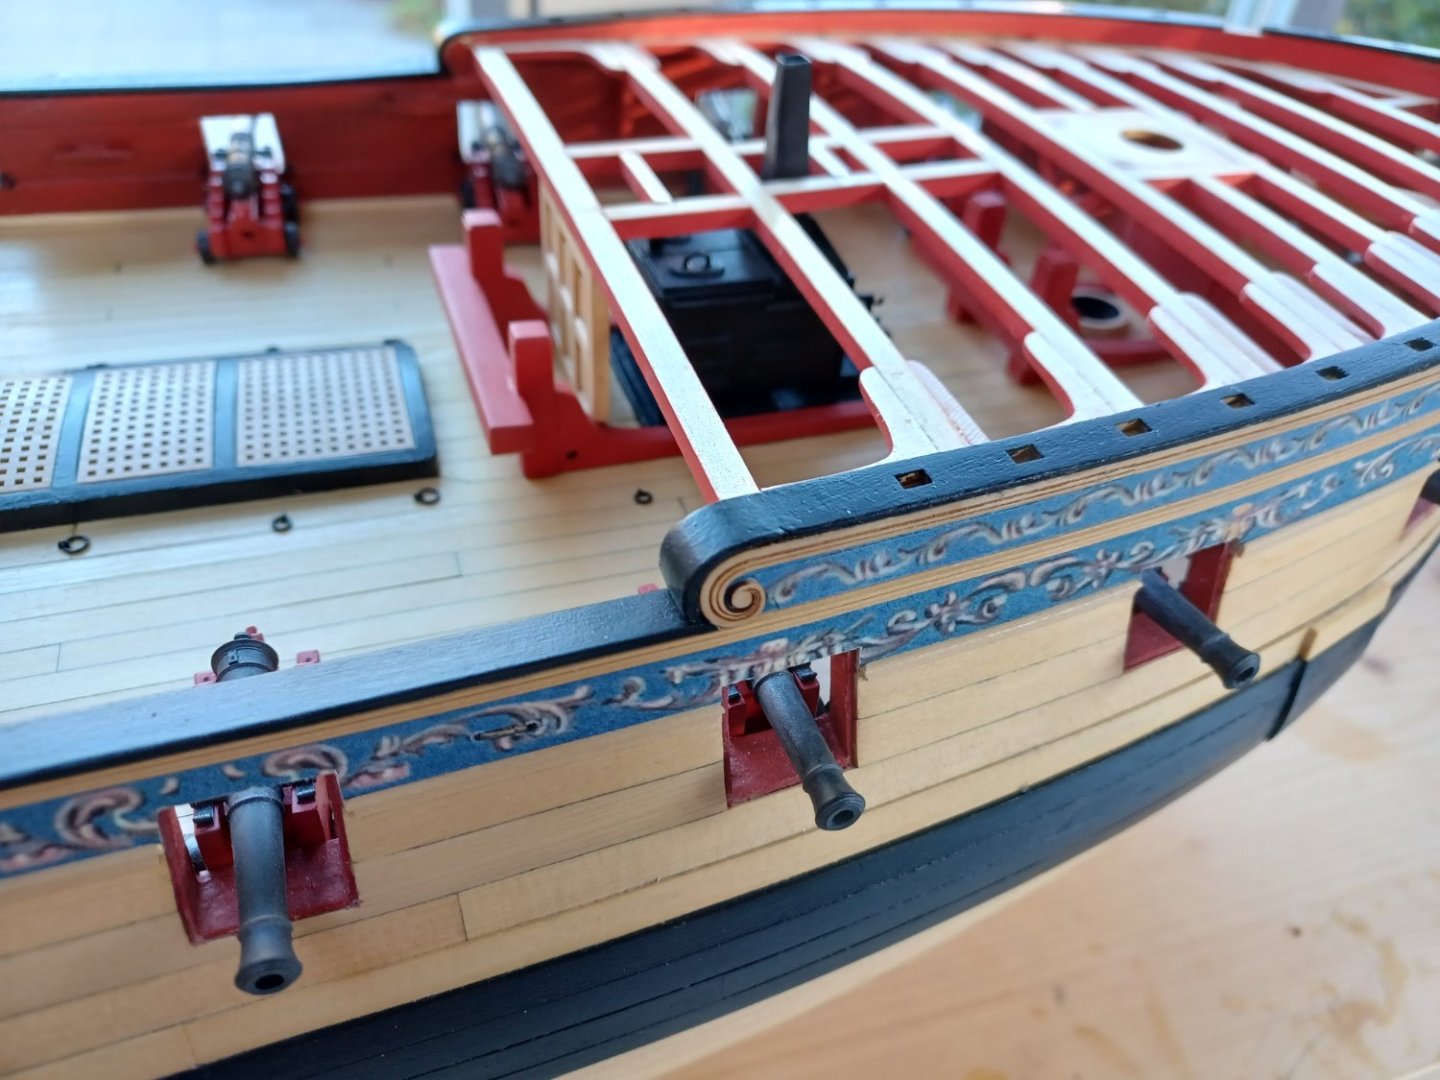
Continuing with the margin plank wich I joined before gluing it in position.

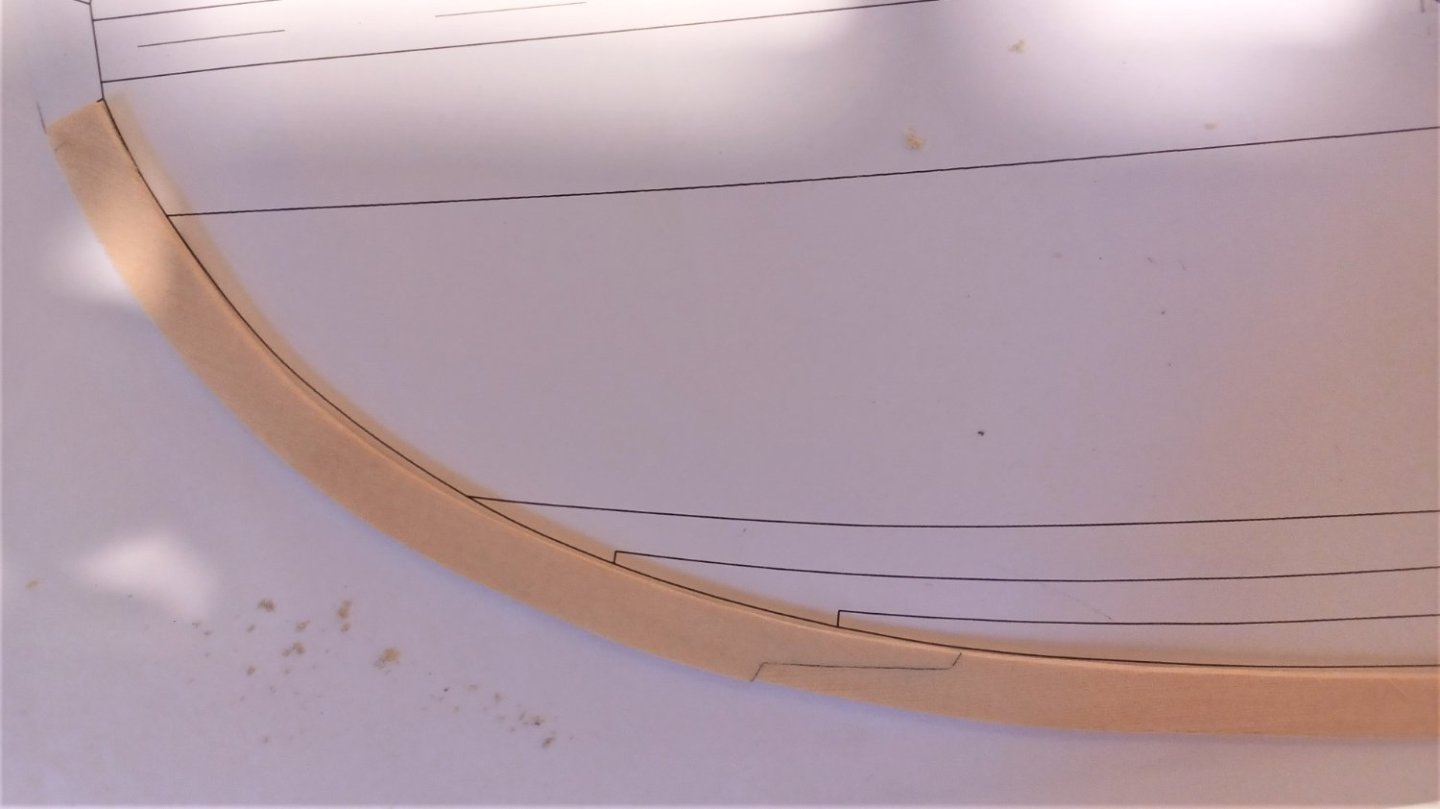
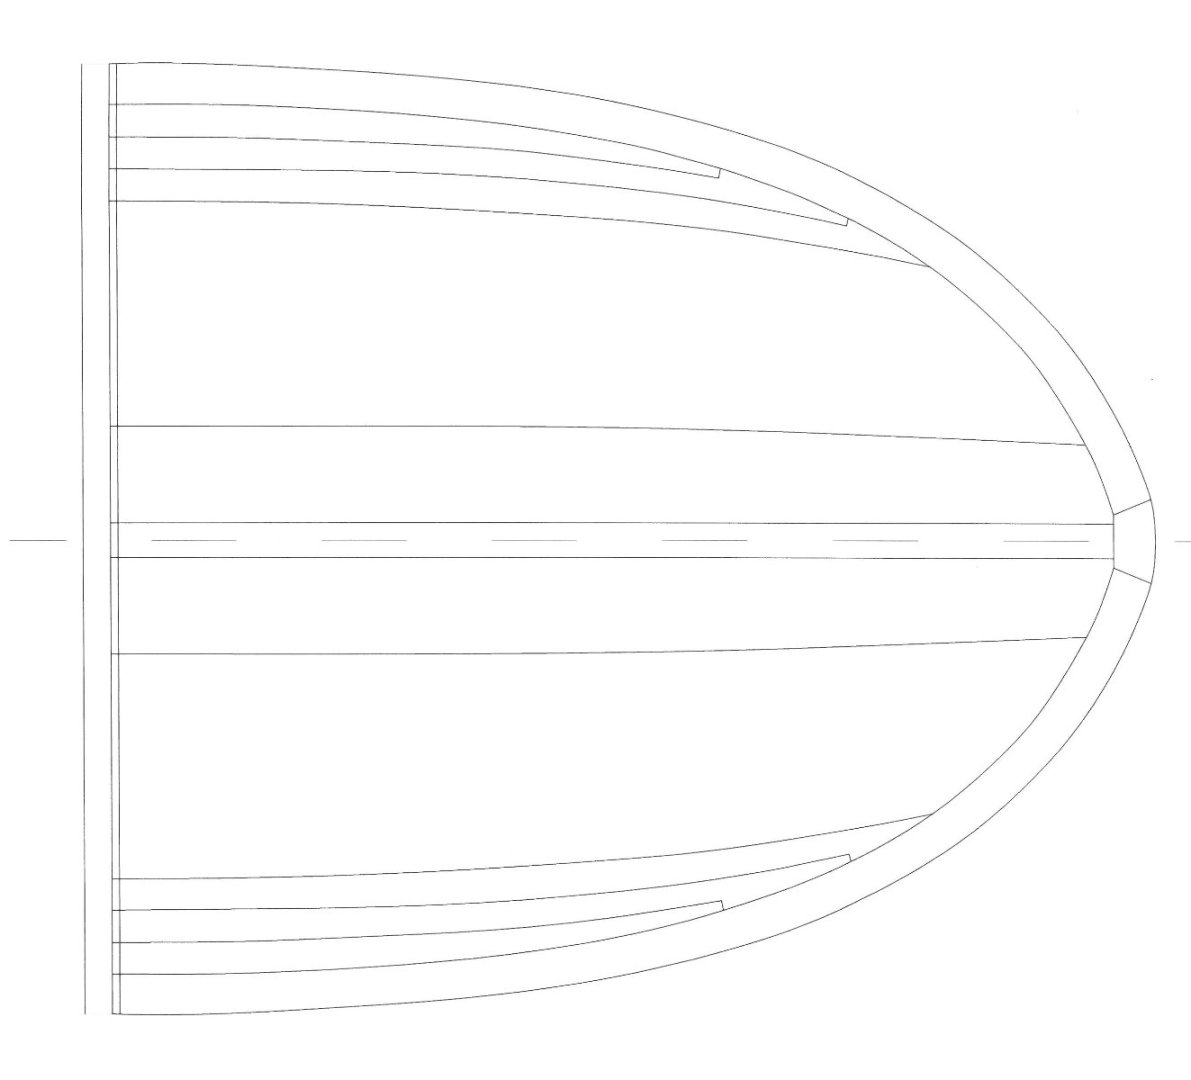
The planking of the outside bands on the forecastle and quarterdeck is to do next.
I reduced the size of the hooks at the top of the planks a bit, as I have seen on the frigate Jylland at Ebeltoft in Denkmark.

For this I made a new forecastle template.
And here we got with the result on the model.
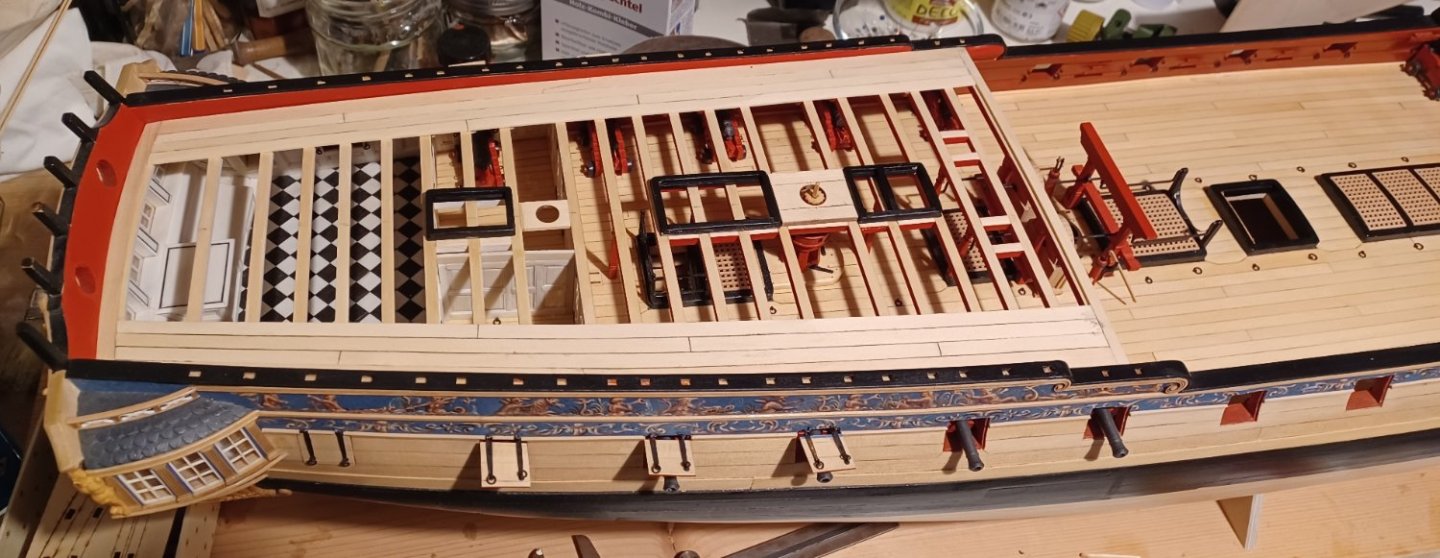
The planking is not cleaned yet, that will be the next thing.
Matthias
-
If I would be a seller on eBay, I would also take your photos!! 😏
The model looks perfekt. Well done!!
Matthias
- mtaylor, captain_hook and yvesvidal
-
2
-
 1
1
-
-
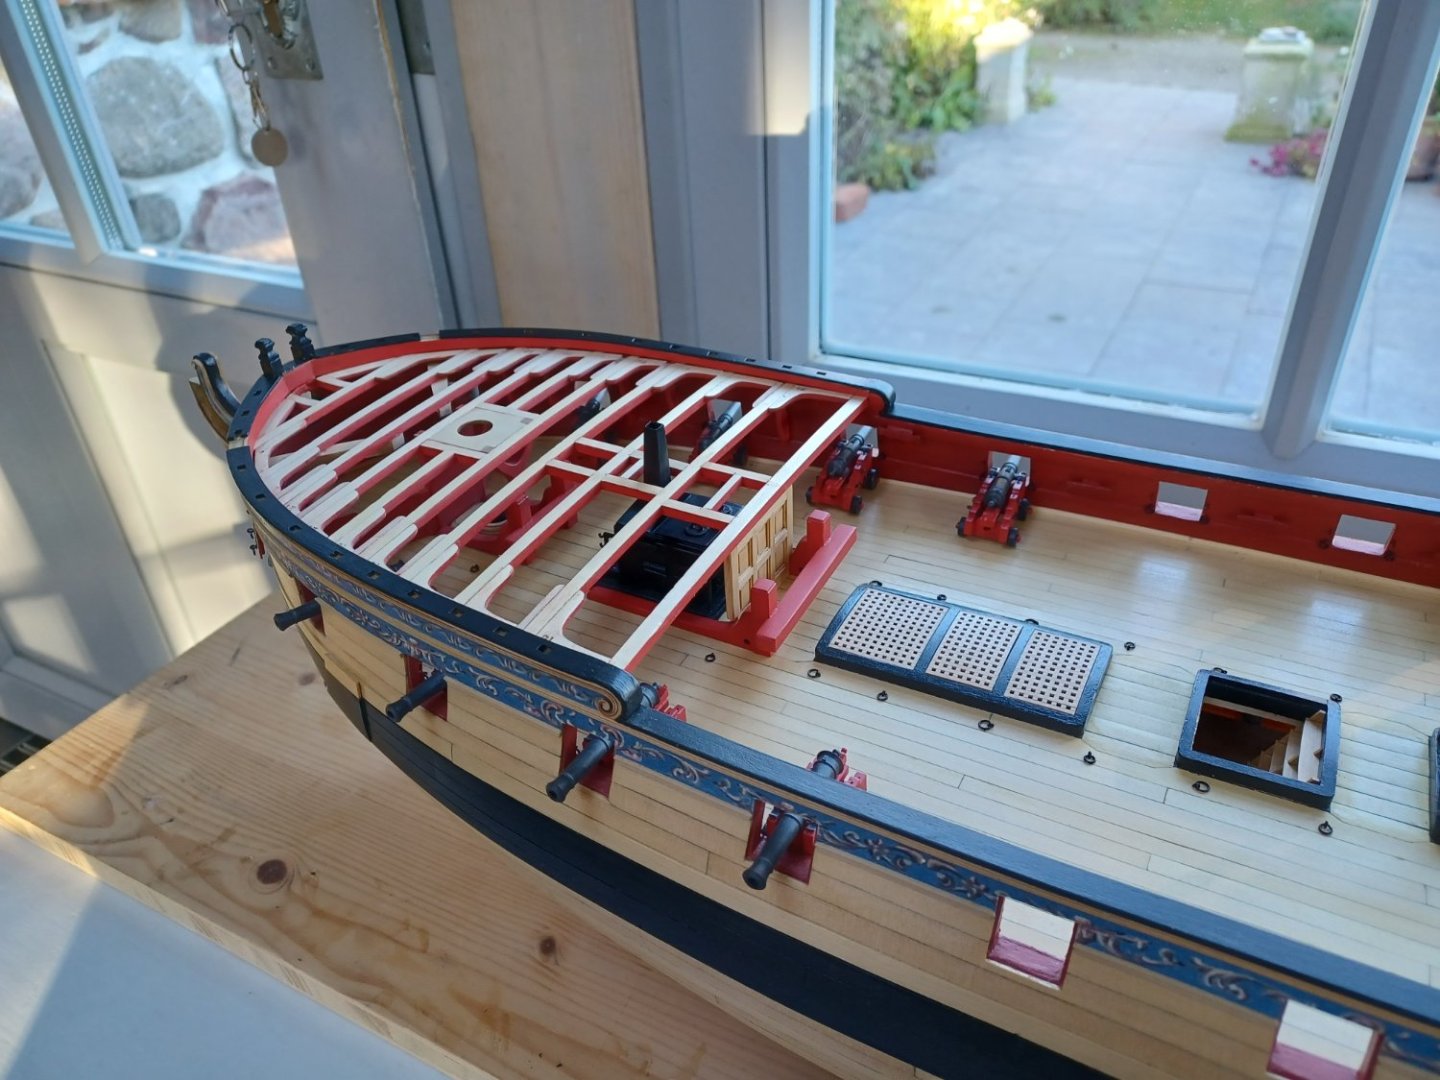
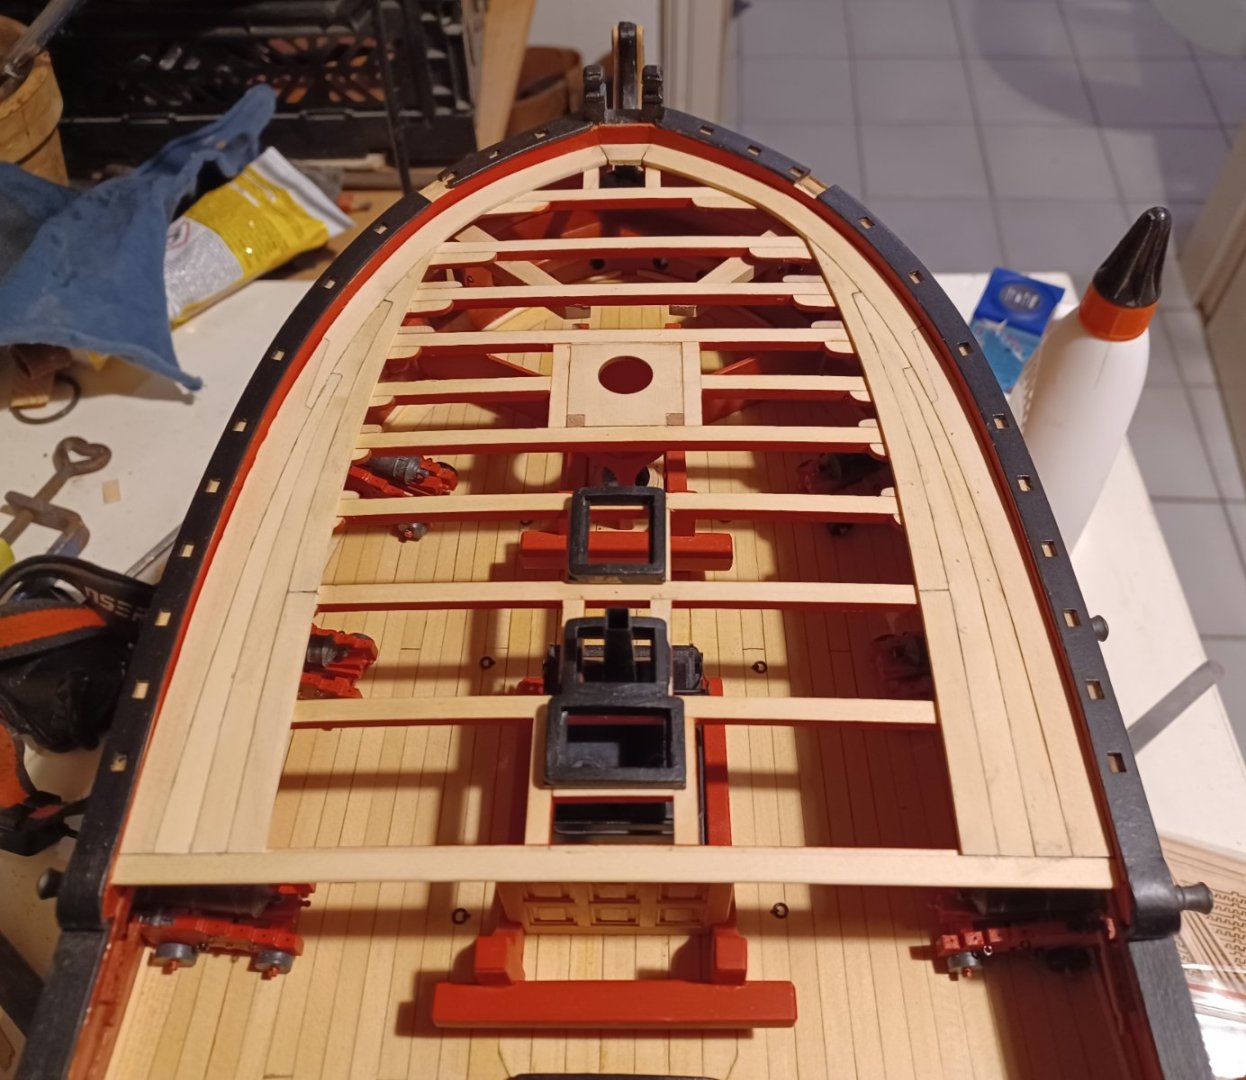
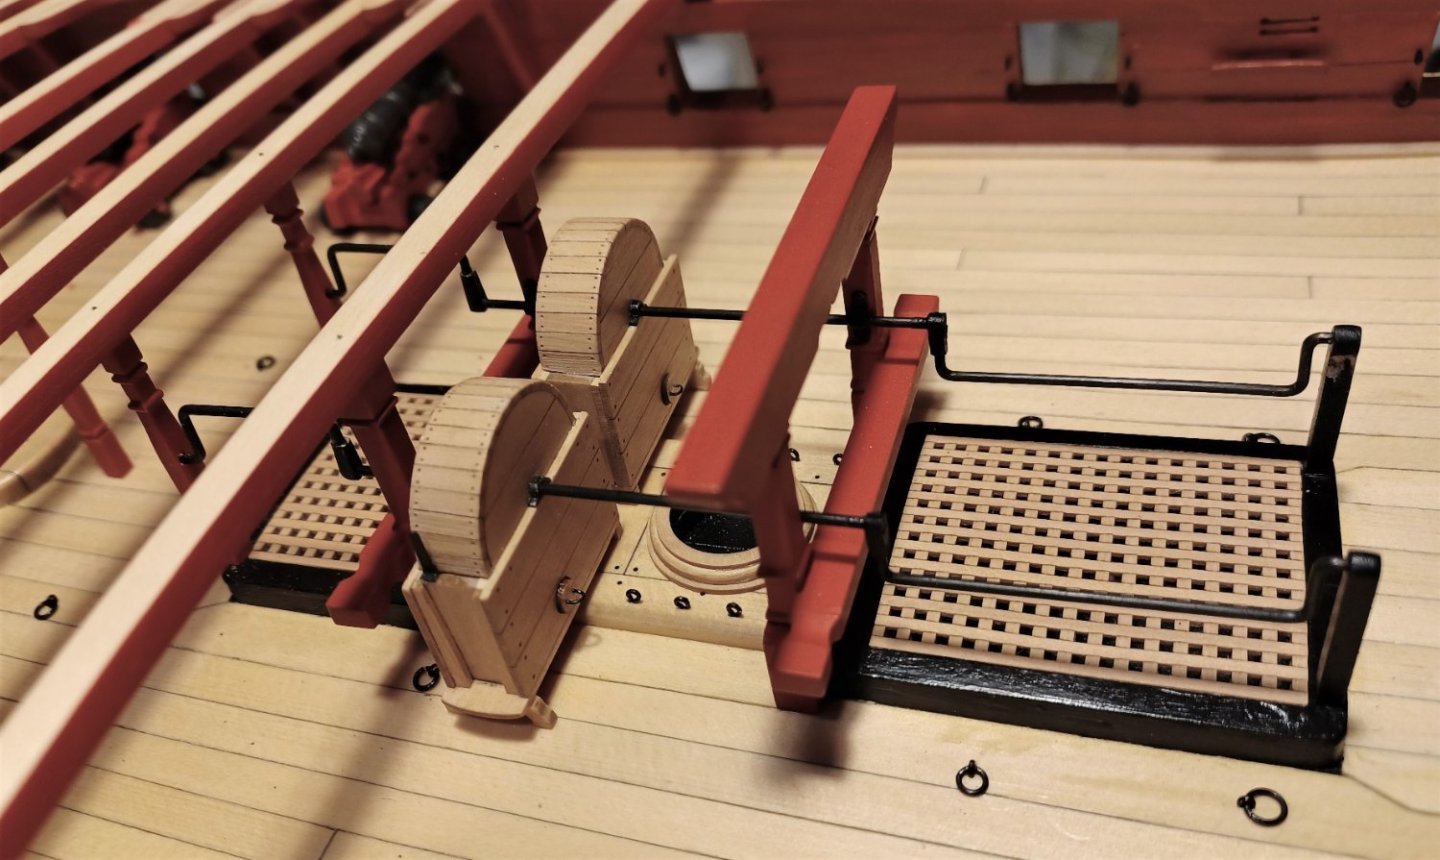
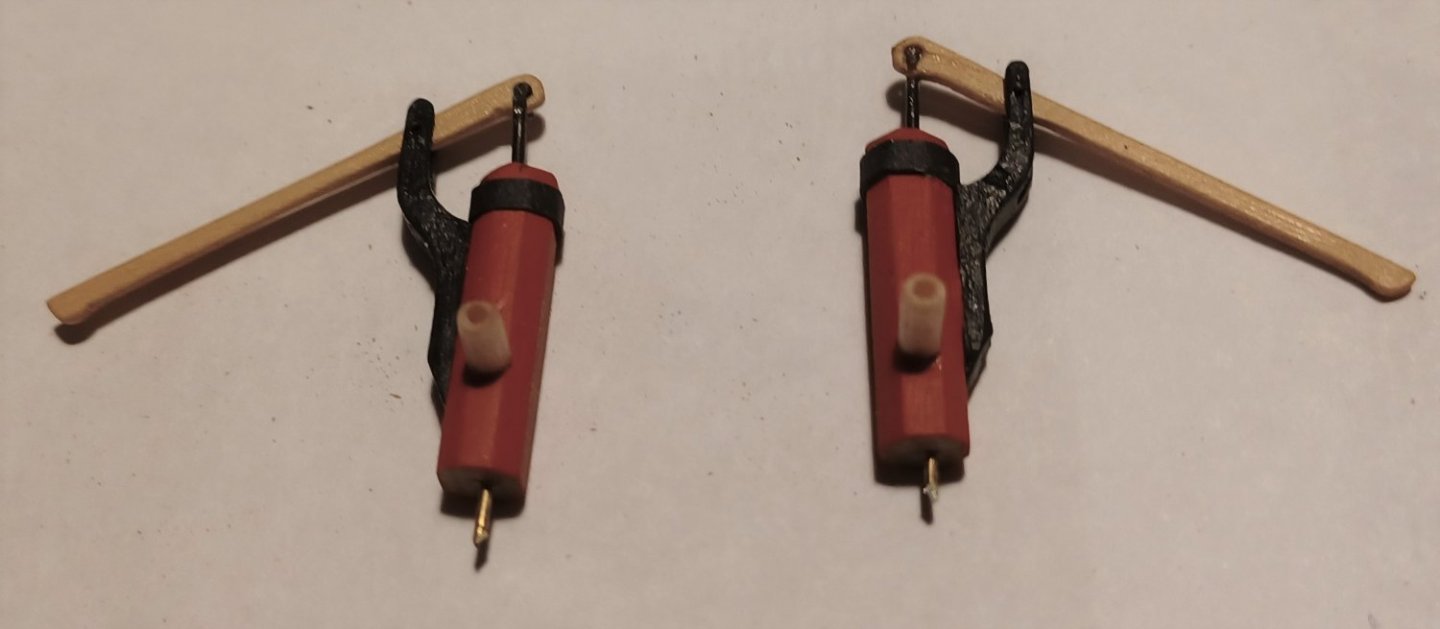
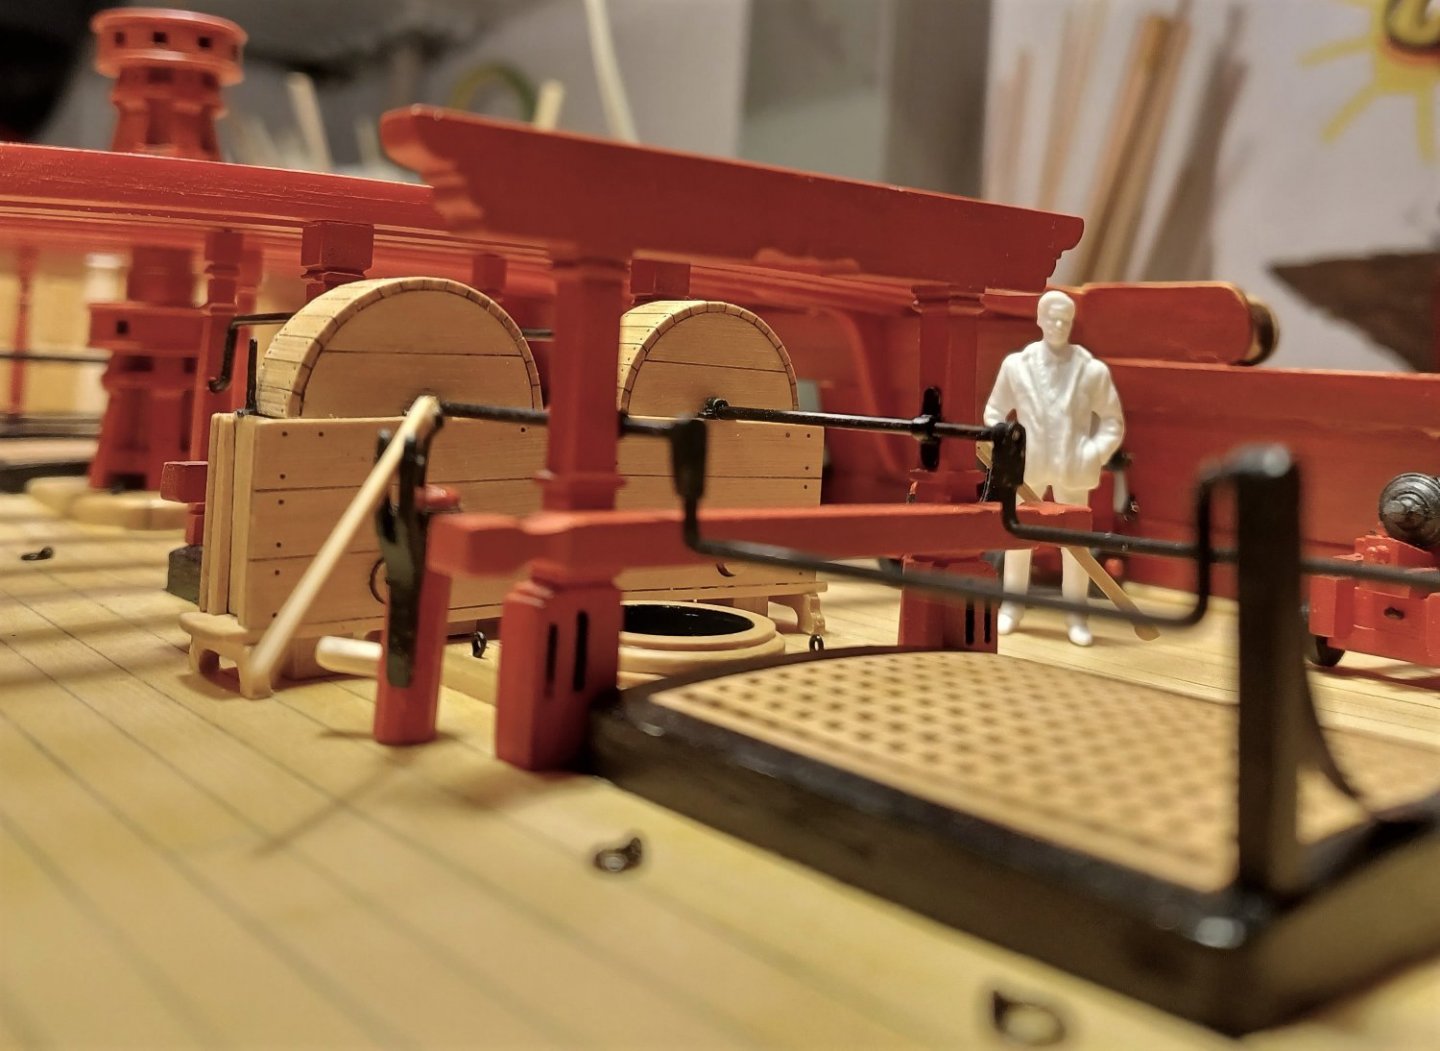
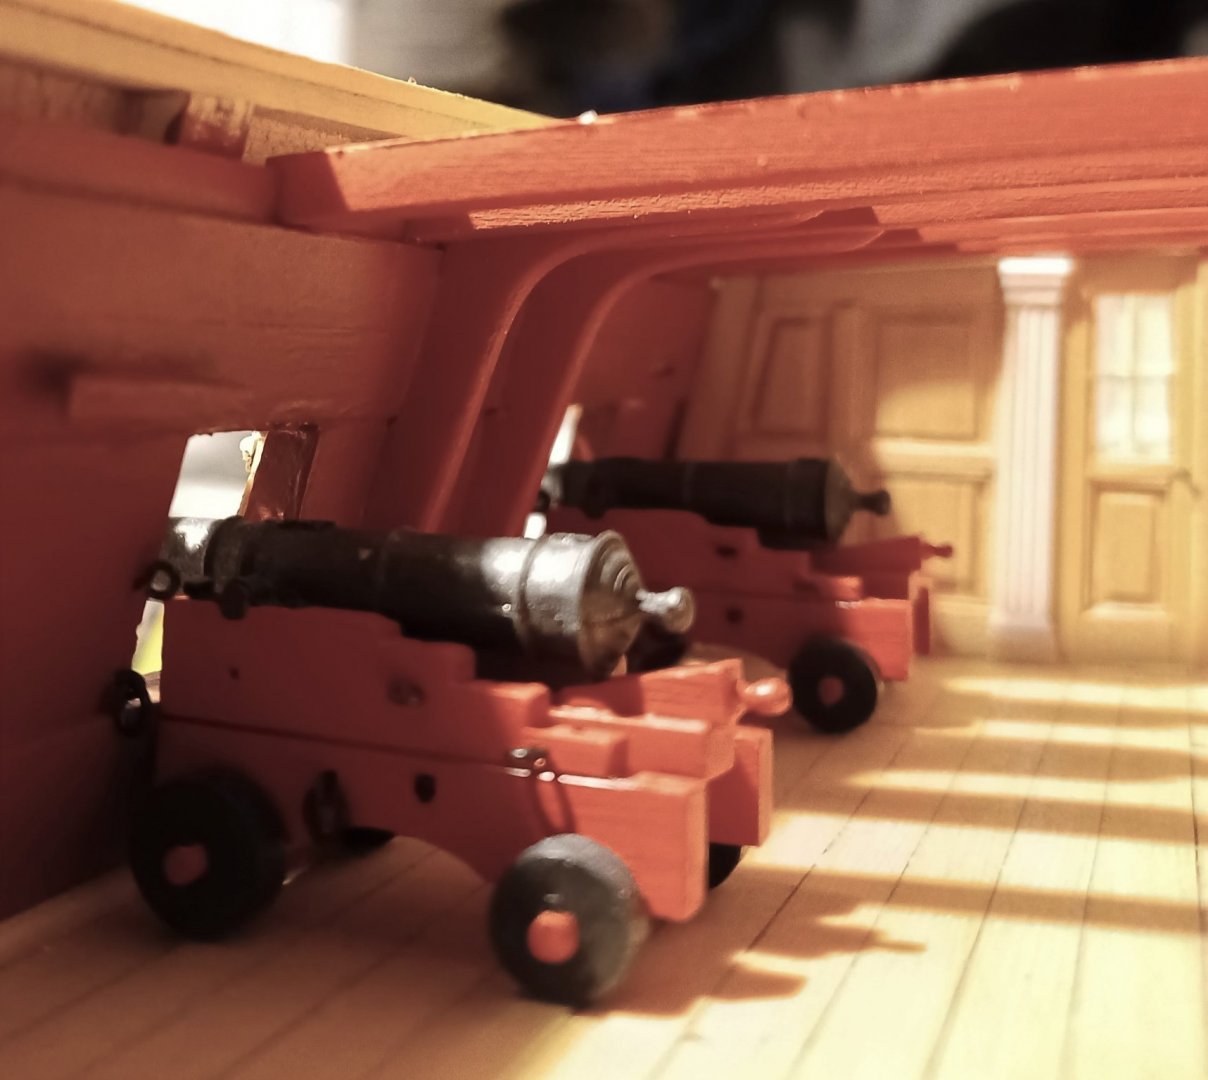
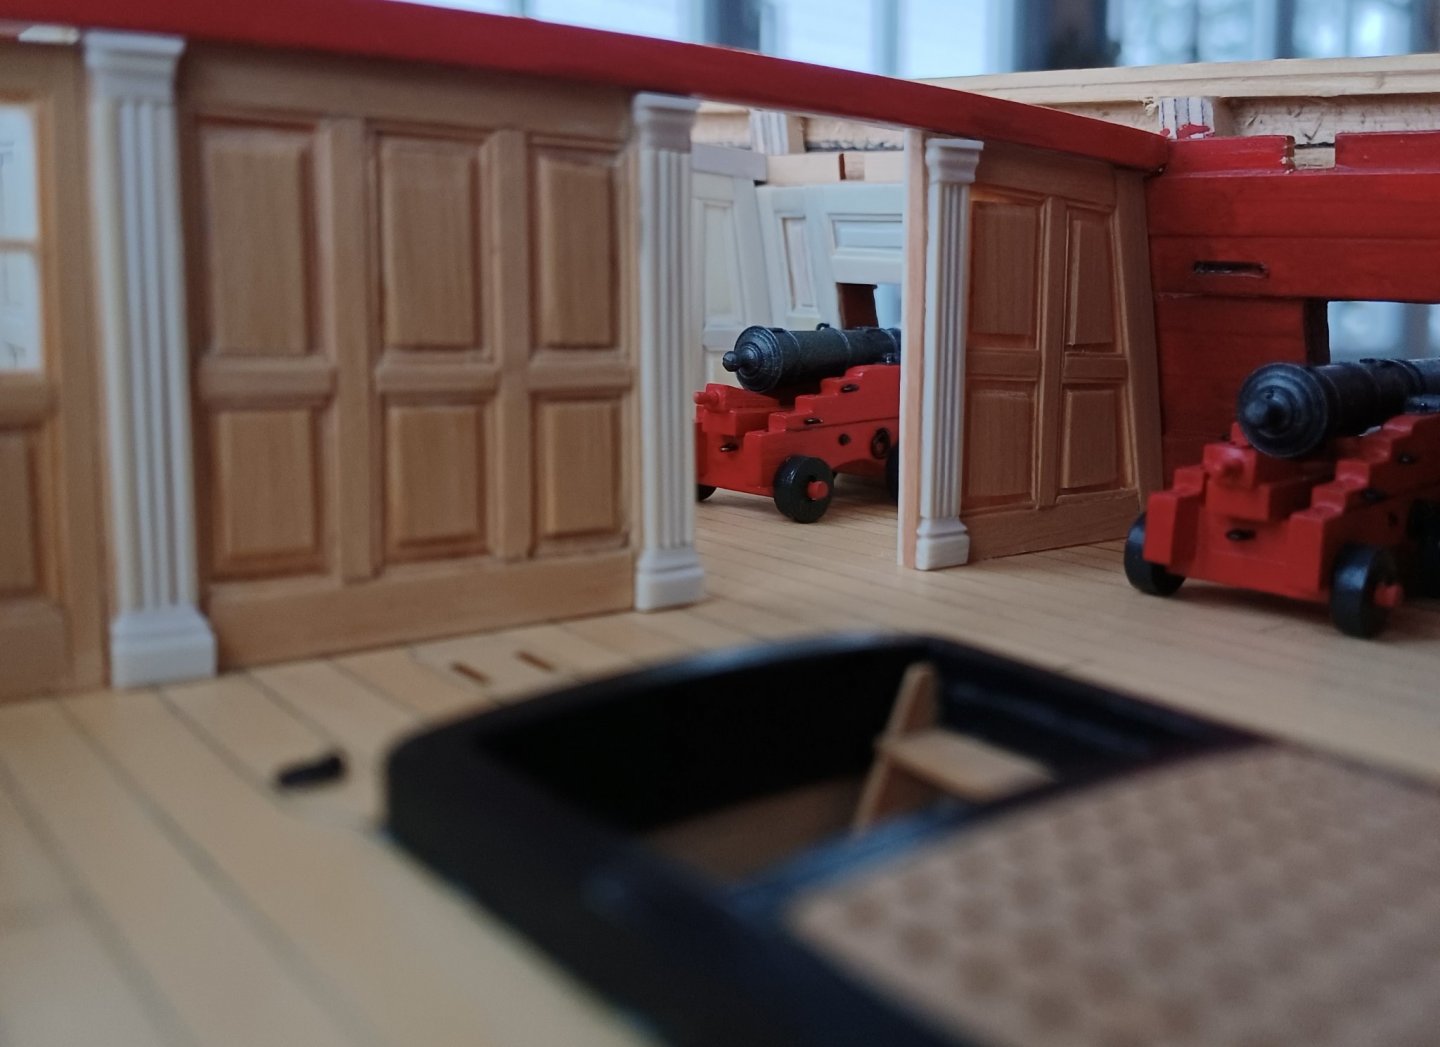
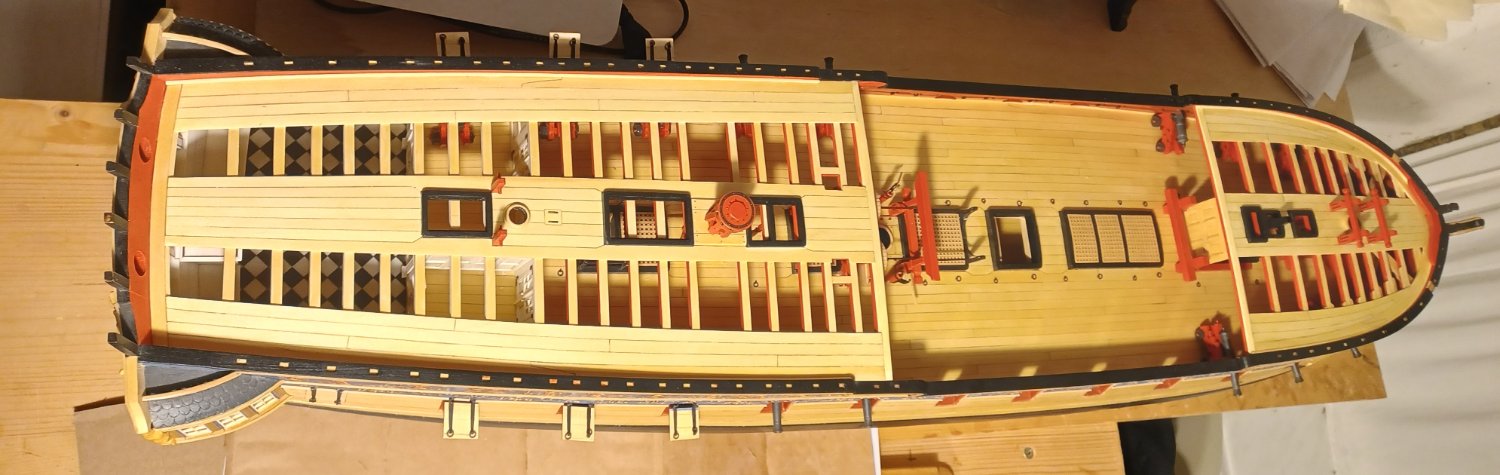
I needed a rest from modelling and painting water, so I continued with Chapter 8 and installed the forecastle fittings, deckbeams etc.
Nothing much to tell about, it was as always perfectly prepared by Chuck and no serious problems occured.
Next thing will be the front panel, I want to build it from boxwood like I did for the cabin front below the quarterdeck.
Matthias
- FrankWouts, Steve20, hollowneck and 16 others
-
19
-
-
Superb!! I really like this crew. Will you offer them in 1:72 scale as well?
- mtaylor, thibaultron, Canute and 2 others
-
5
-
Hi Chuck,
no progress since my last post, but I will continue soon!
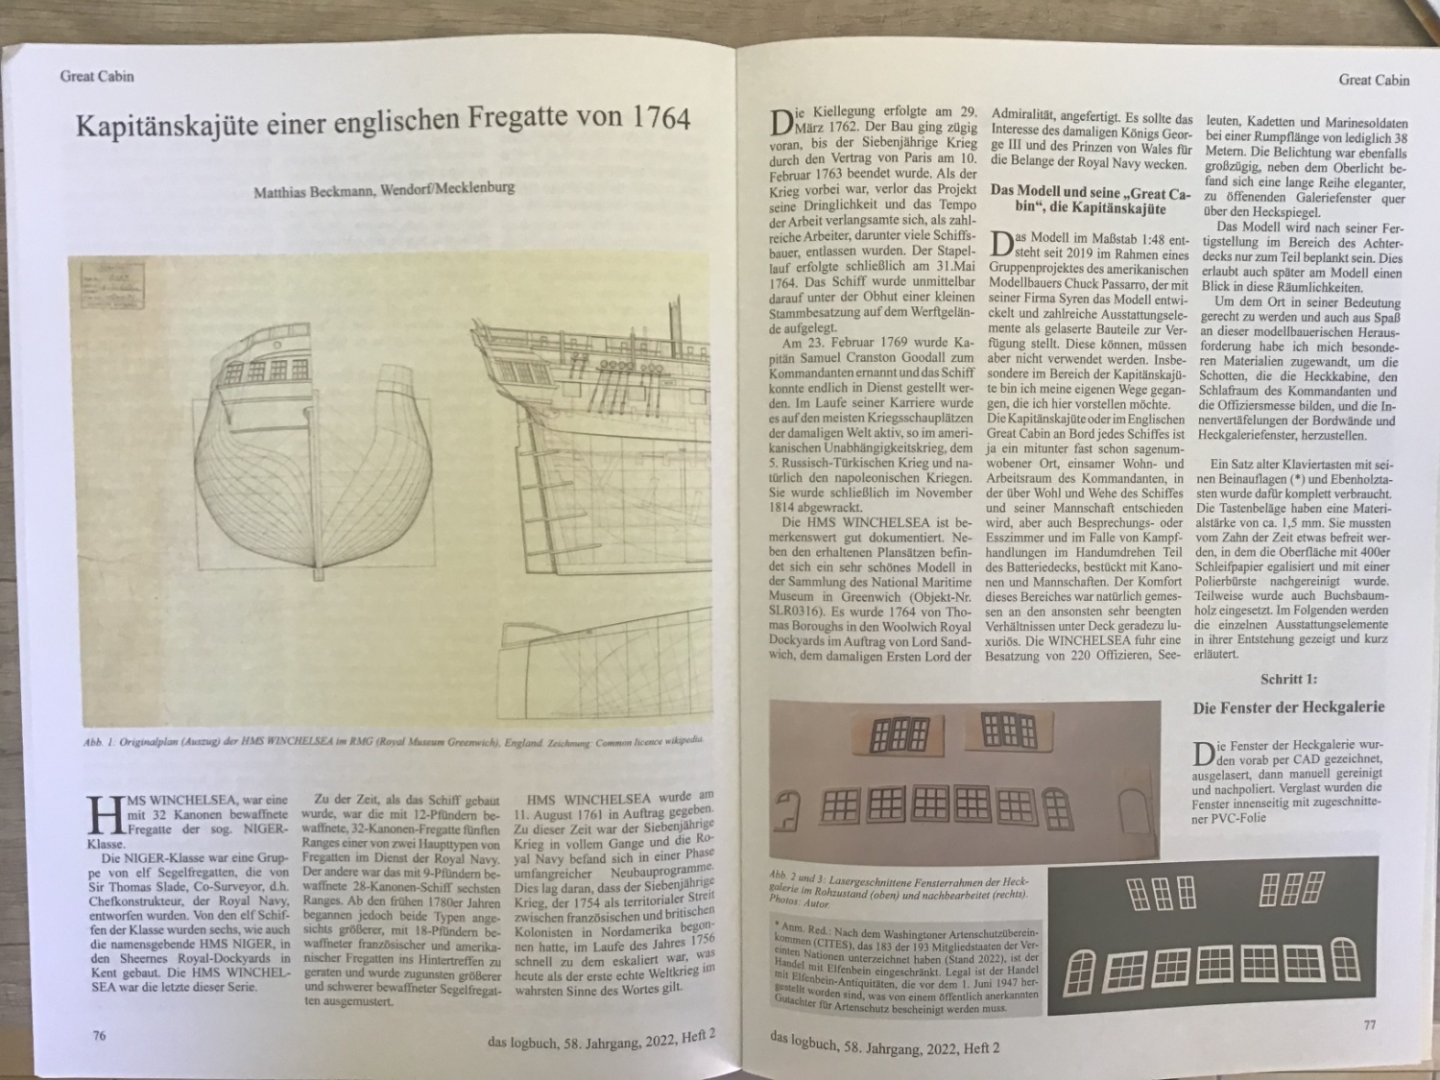
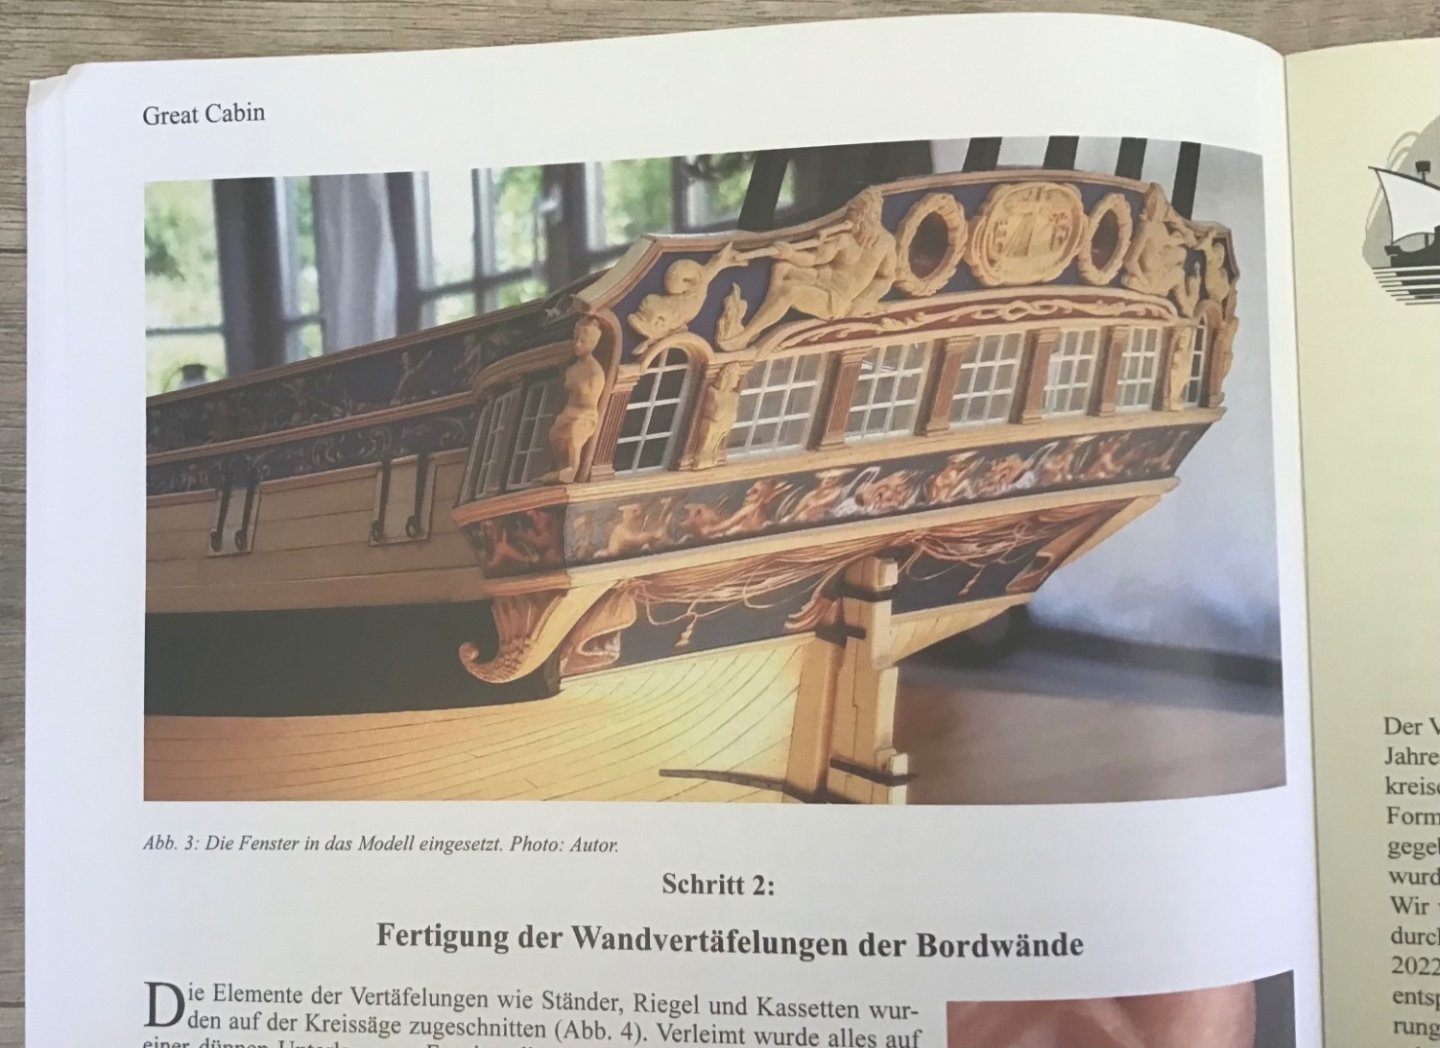
I was asked to write a little article about the Winchelsea, and especially the great cabin for the magazin „Logbuch“ of our Arbeitskreis Historischer Schiffbau. So I was busy doing that. I hope, that is some good promotion for you as well. I put your contact information in the article.
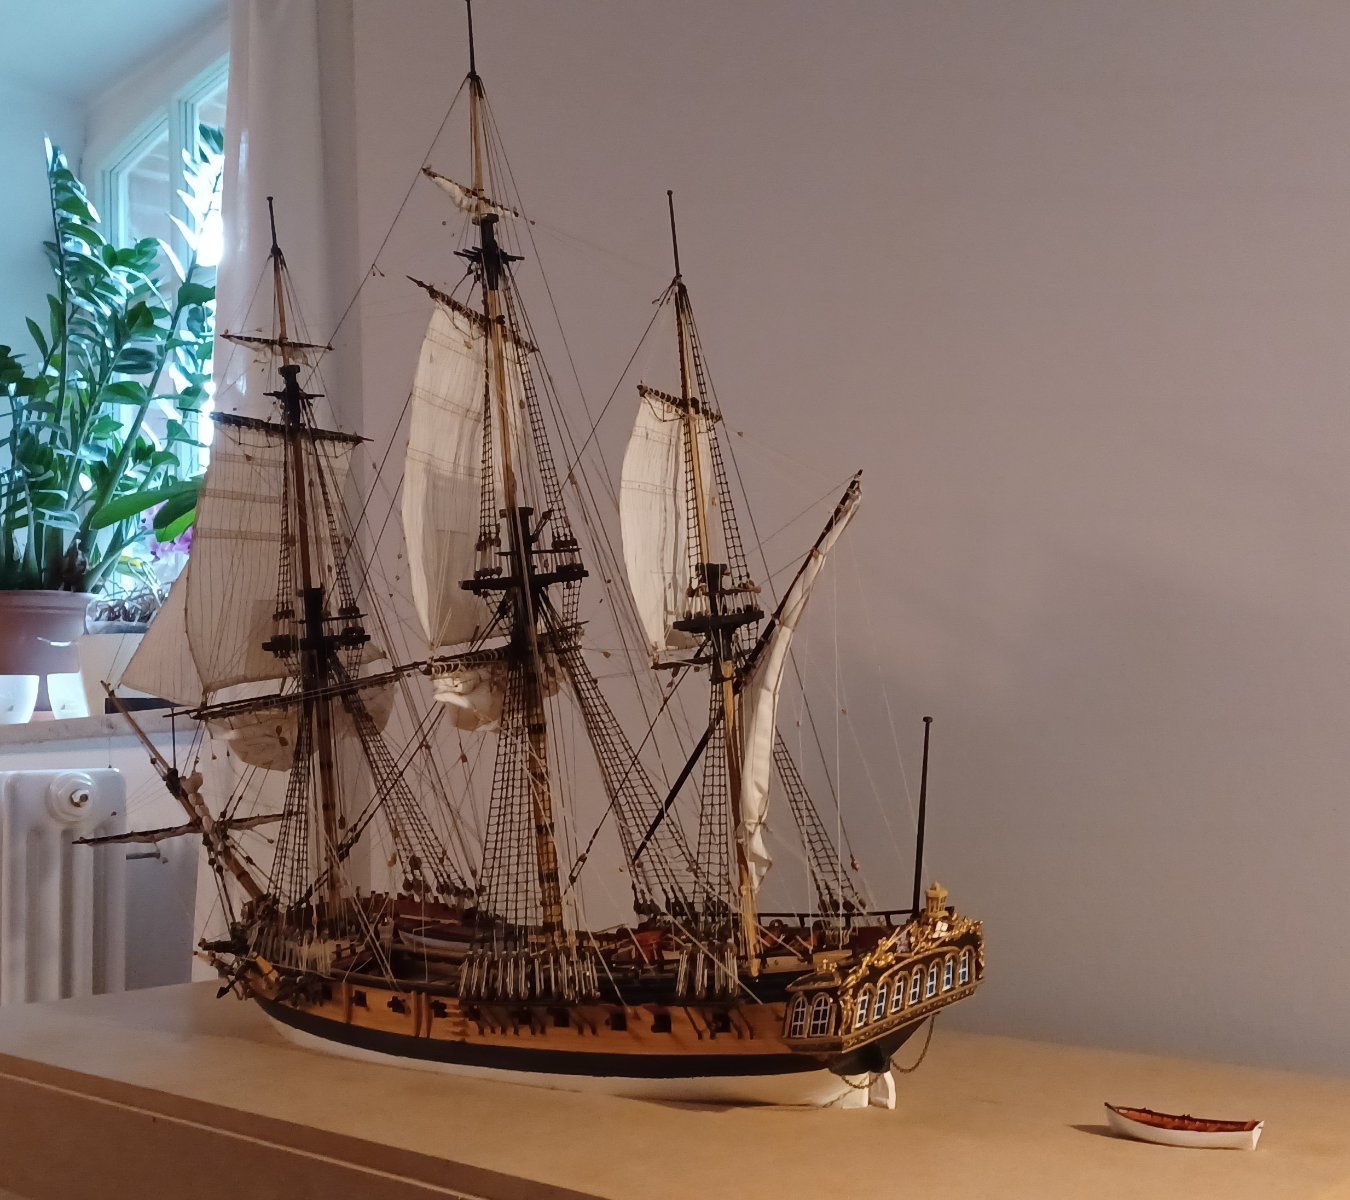
At the moment, I am finishing an old project, wich I startet 10 years ago. It is the HMS Unicorn, a frigate from the 1740’s. Scale 1:72, fully rigged. I had to finish some rigging, now I am working on the display case.
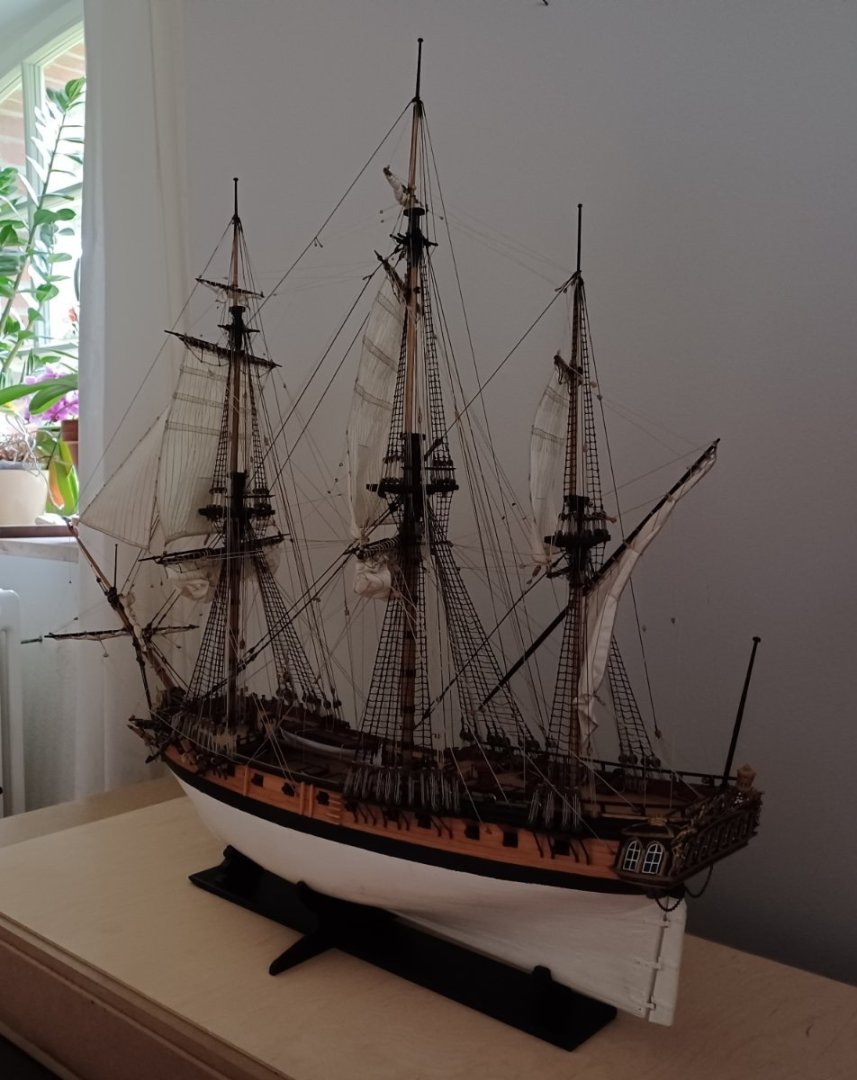
I want to make this as a waterline-model, because the ships hull is not as well built, as I wish it would have been, and I like the idea of a waterline-scenery.

After this is done, Winchelsea will be continued.
Matthias- JpR62, scrubbyj427, CiscoH and 13 others
-
16
-
Perhaps: "slow and steady"?
-
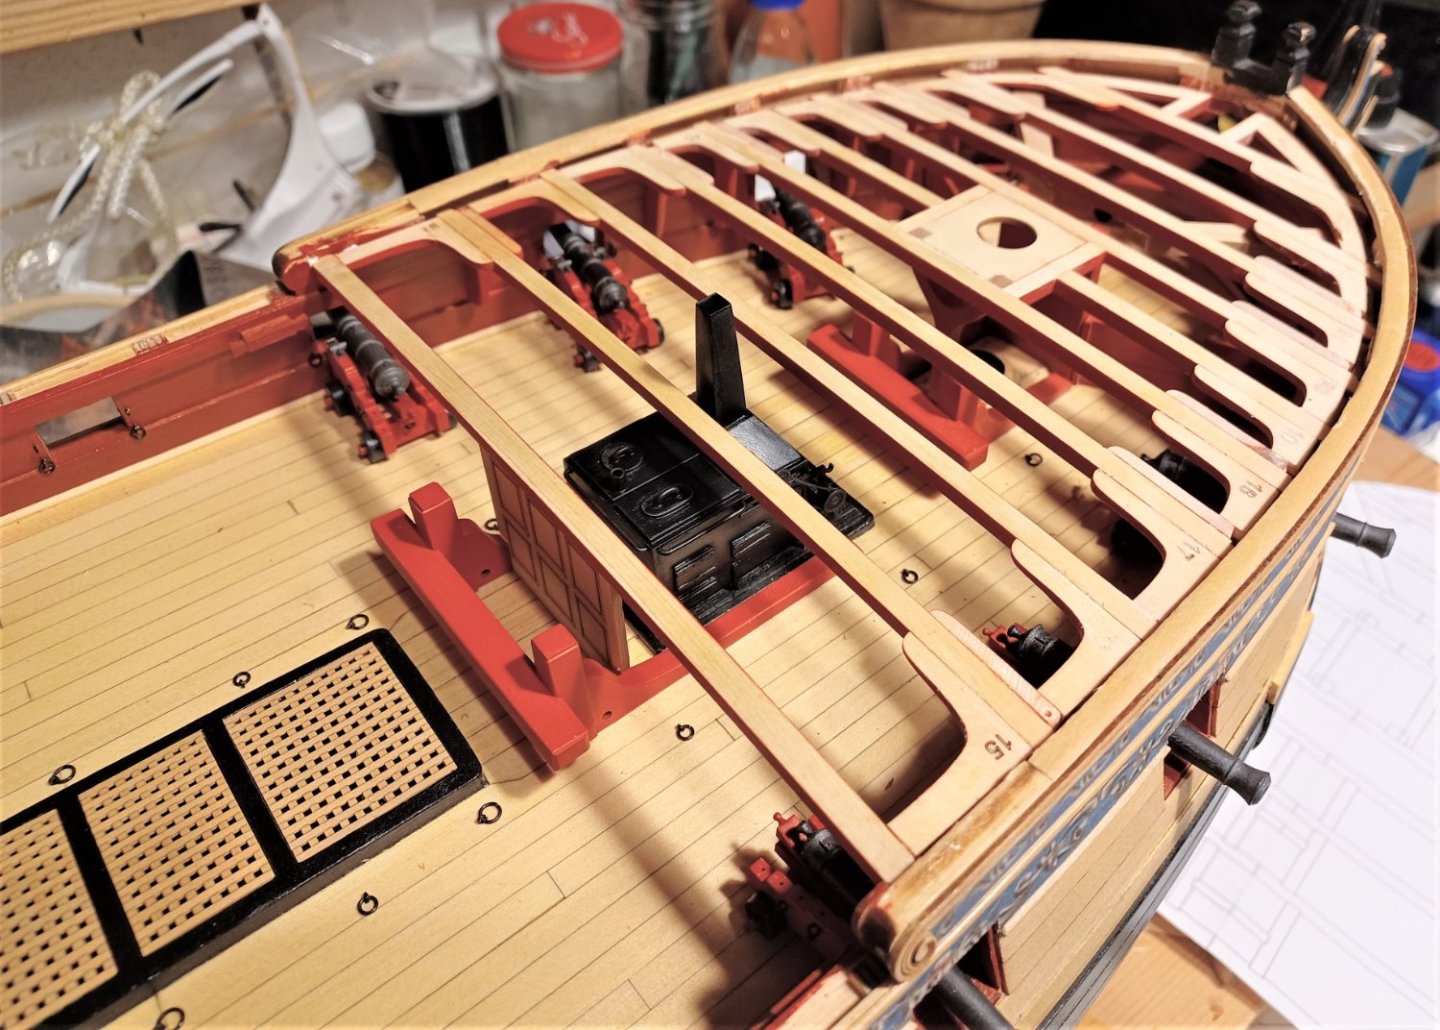
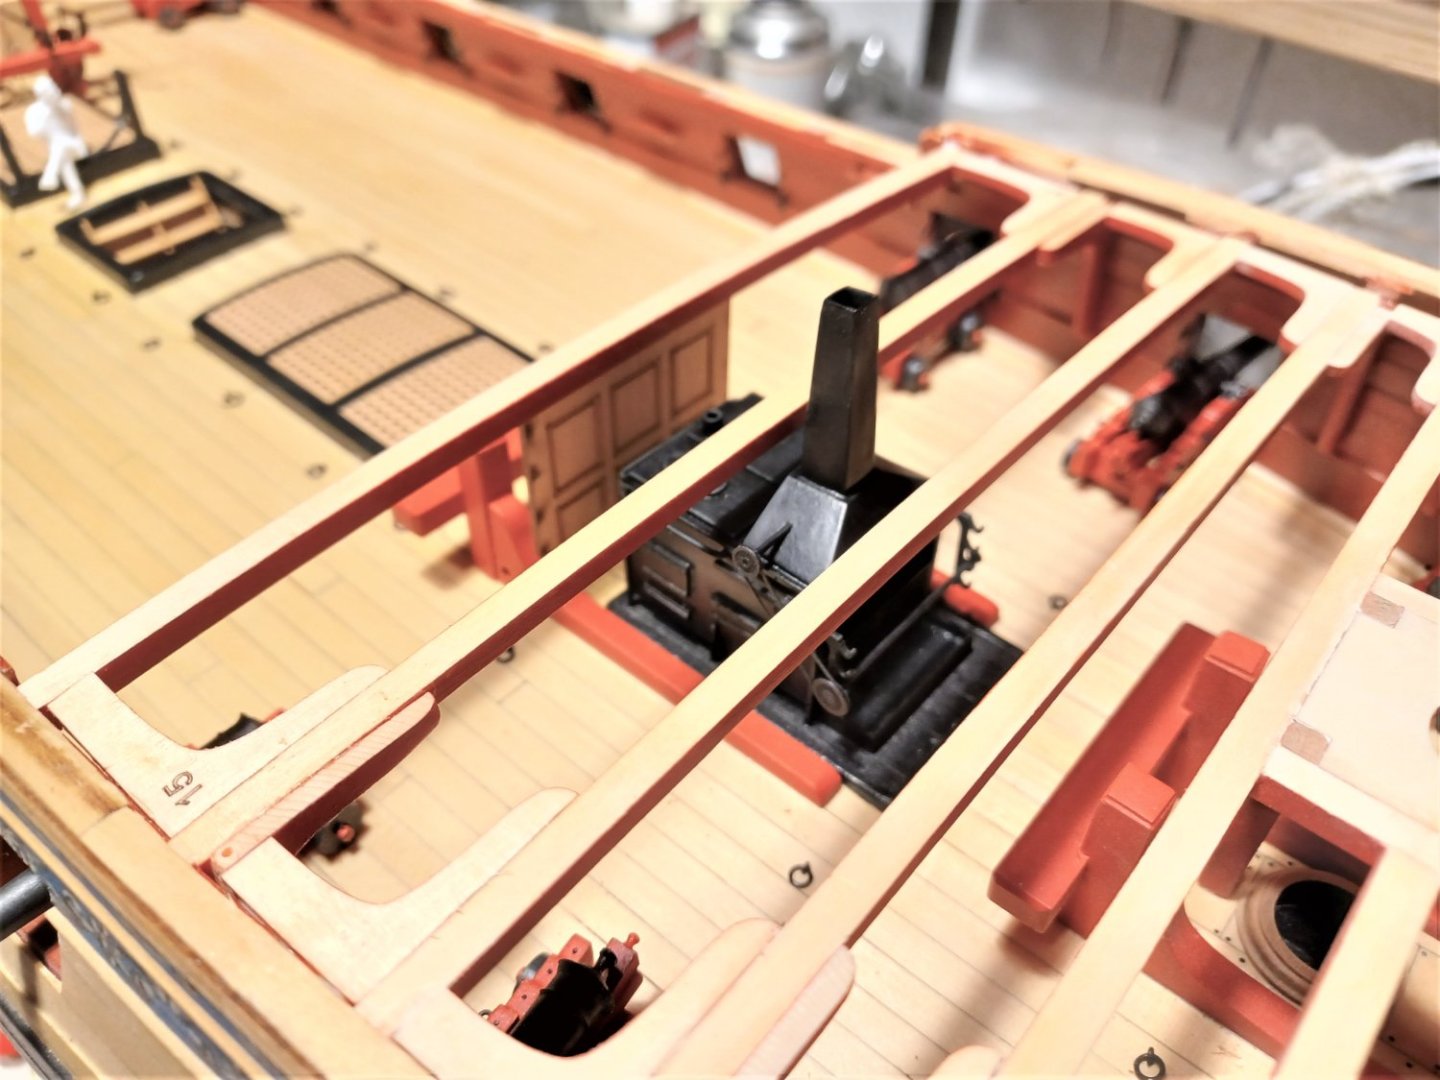
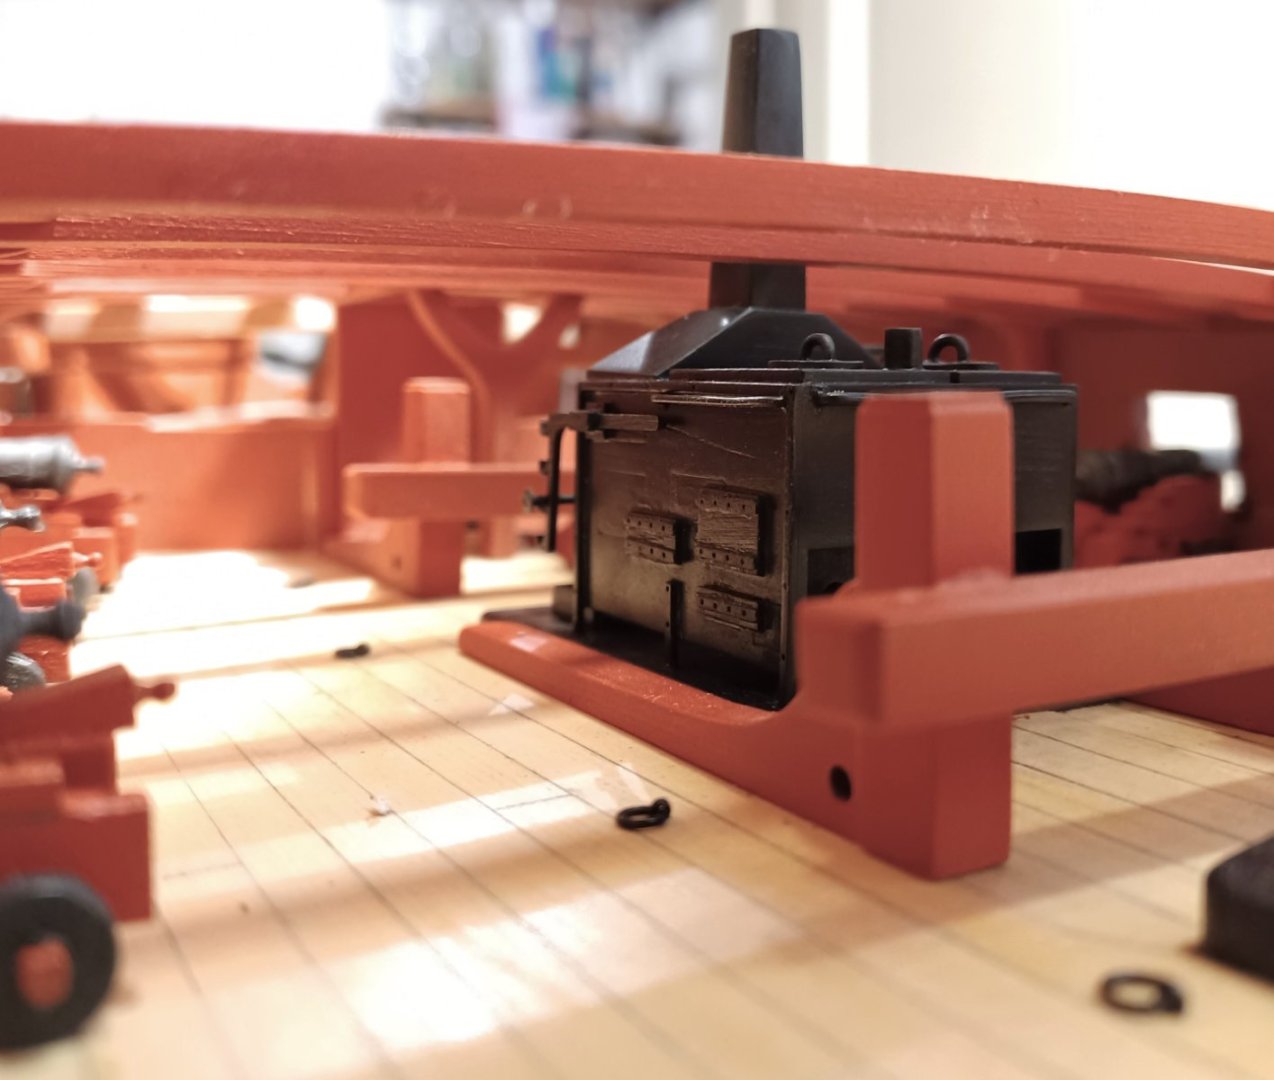
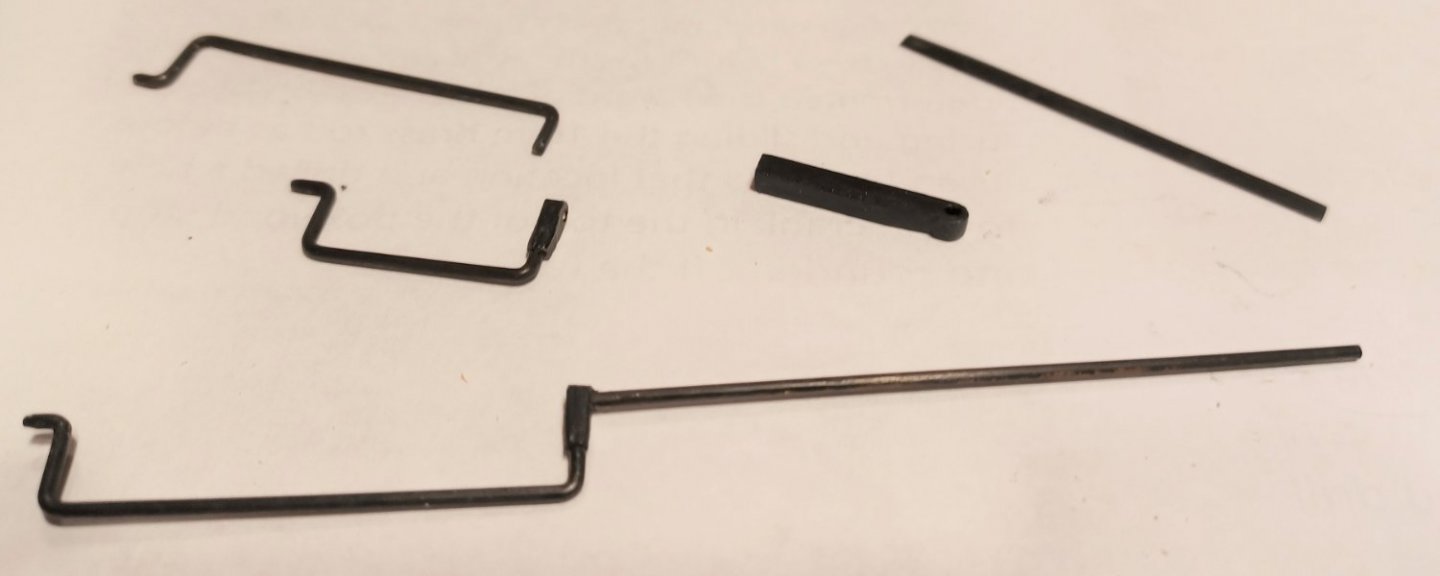
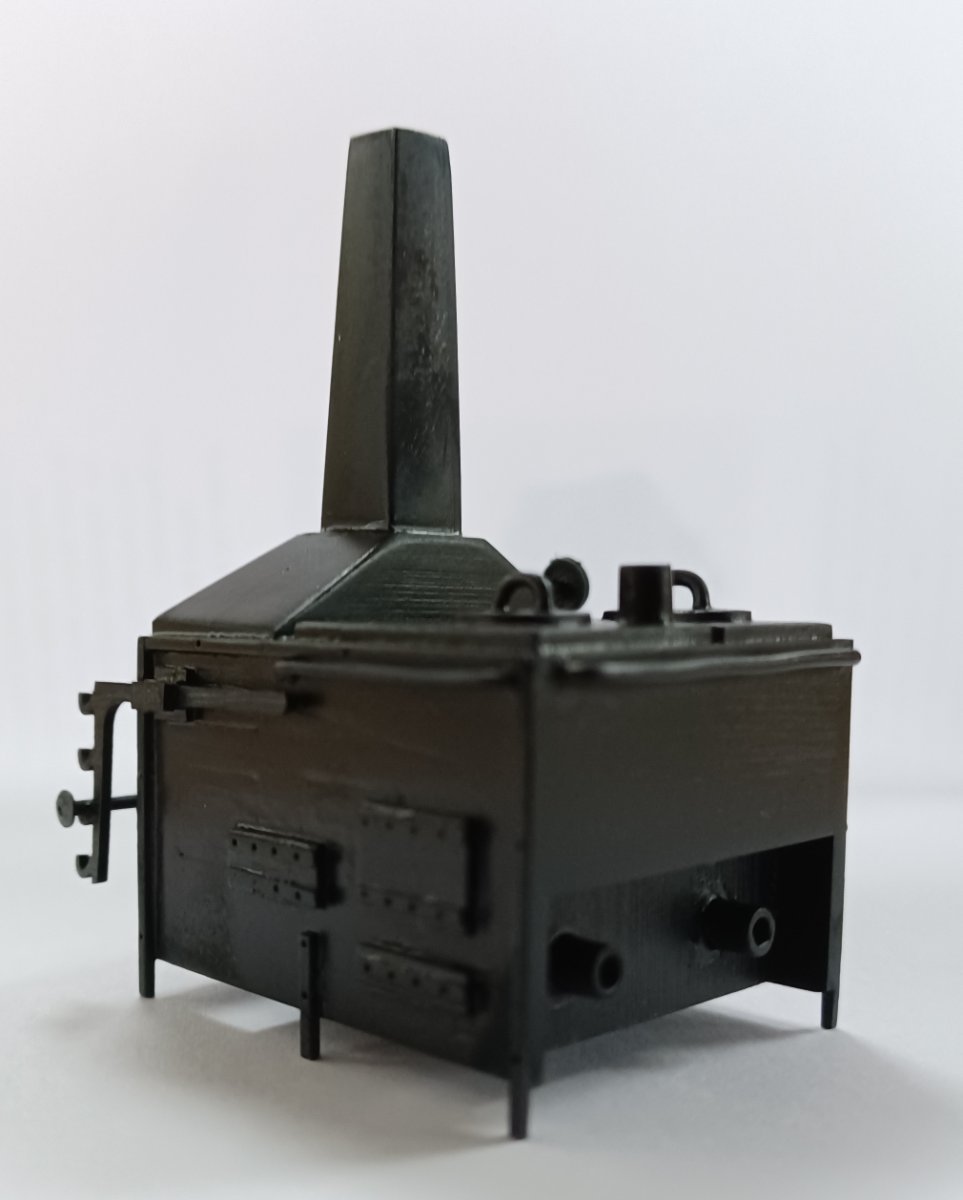
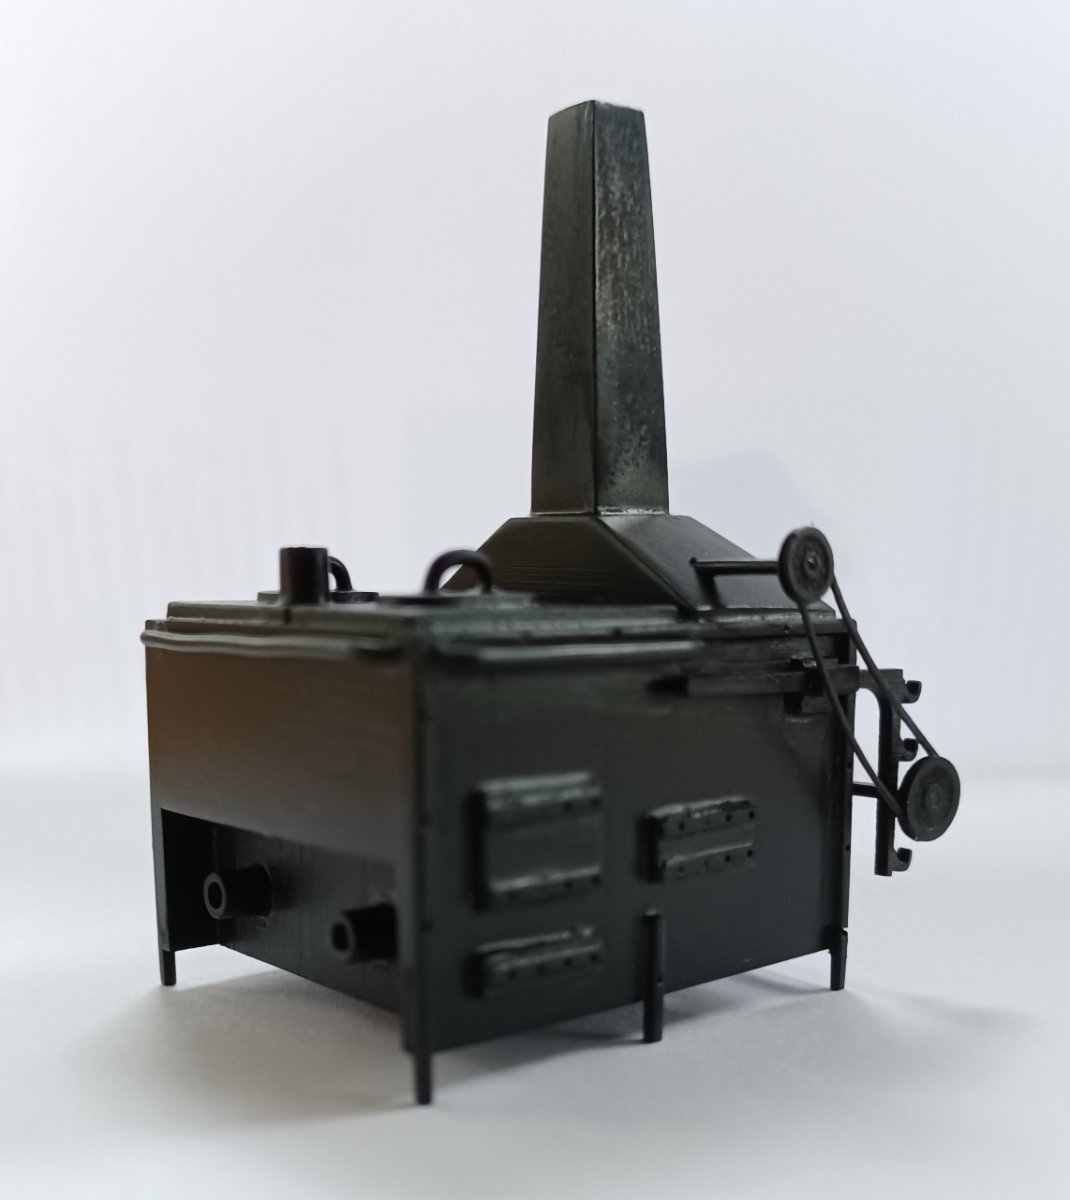
Hello everybody, I didn't have much progress for a while, In preparation for chapter 8 I just recently finished the mini-kit for the stove.
Here are some pictures, not very sharp, but it is somehow difficult to take good photos of black objects.
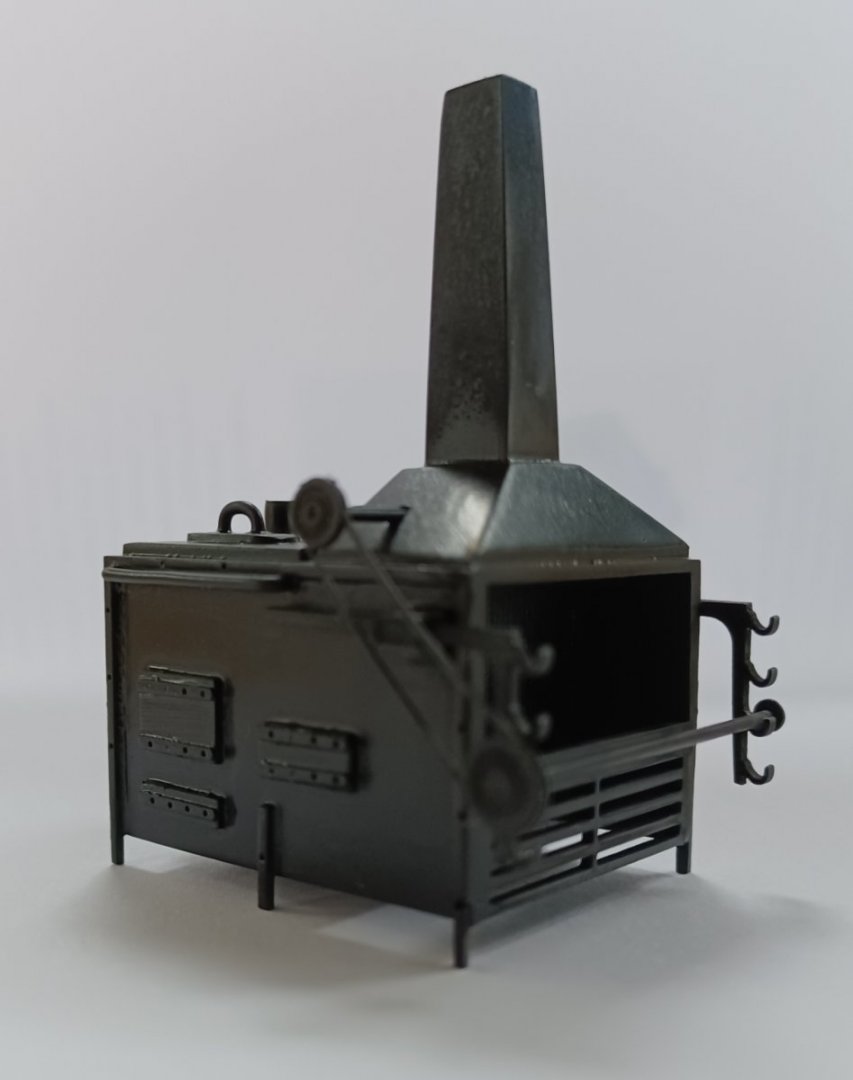


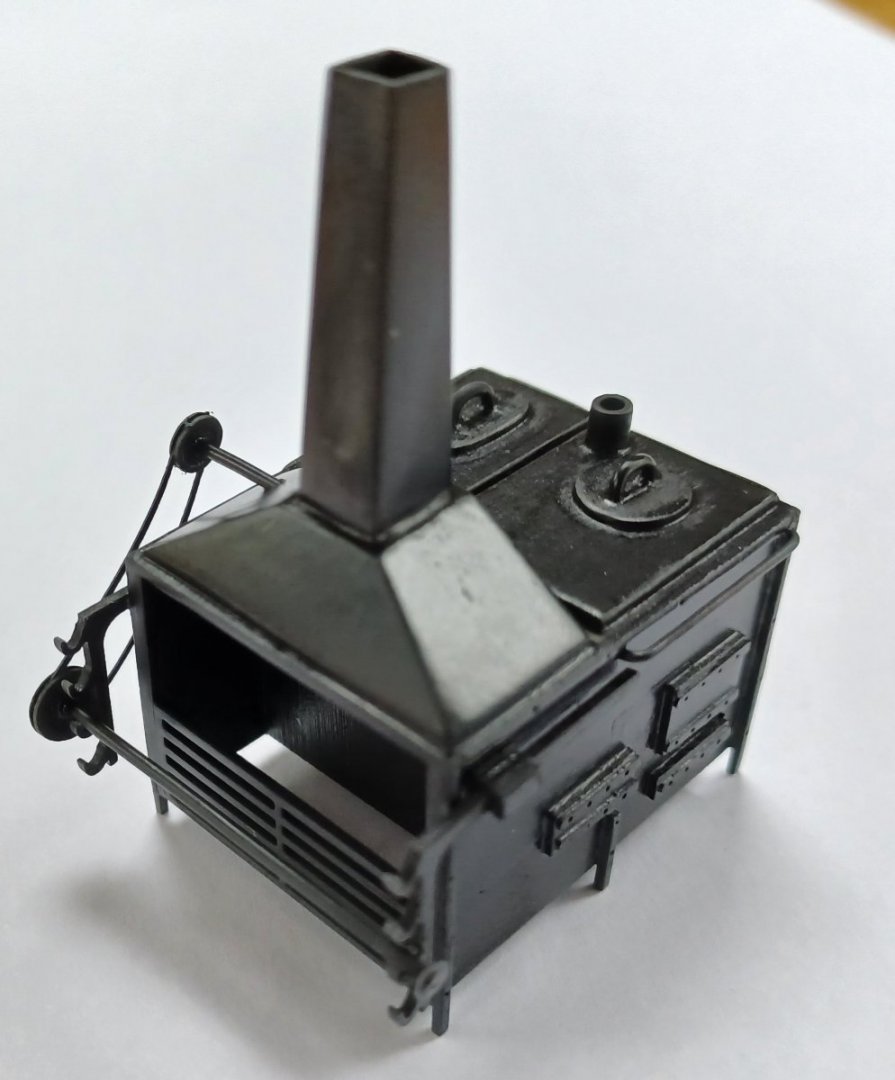
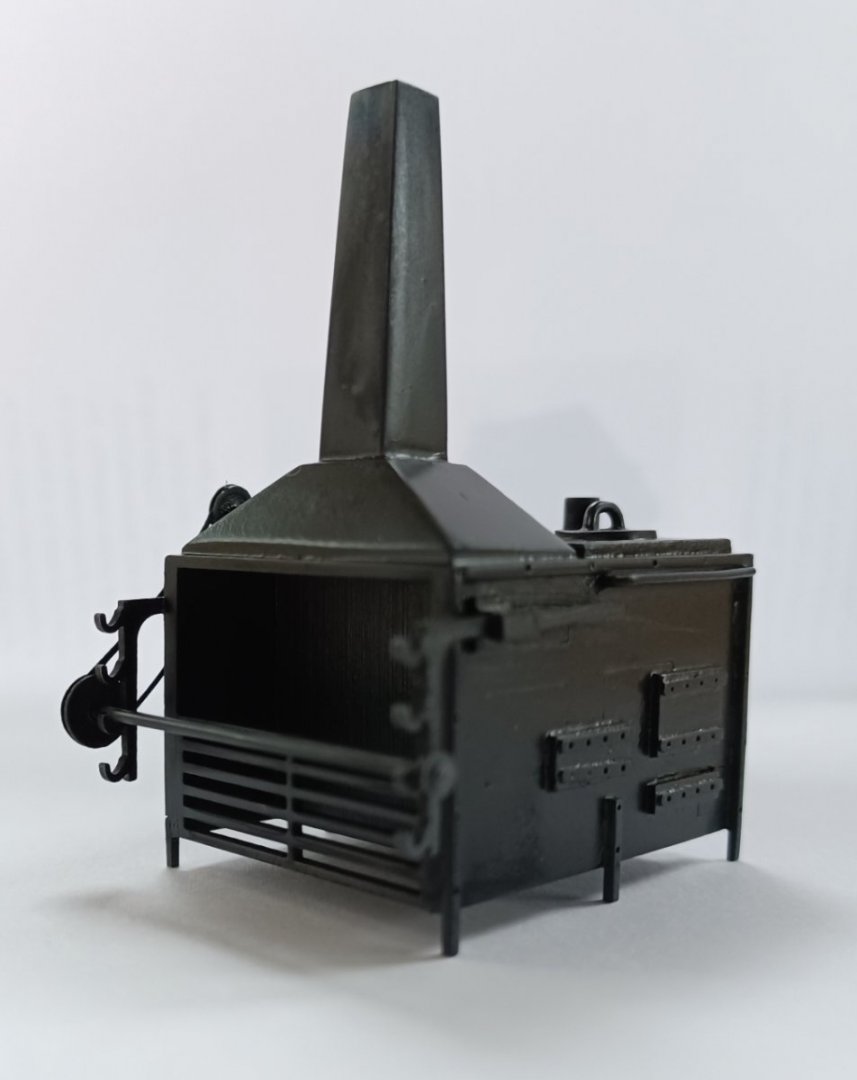
I am not shure about the wheathering yet. Maybe I will try to wheather it a bit, maybe I leave it as it is.
Matthias
-
Close to perfection. Well done!!
-
-
-
Hello everybody and a happy new year!!
Thank you all for the likes and comments. In the last days I finished chapter 7.
Matthias
-
Hello everybody,
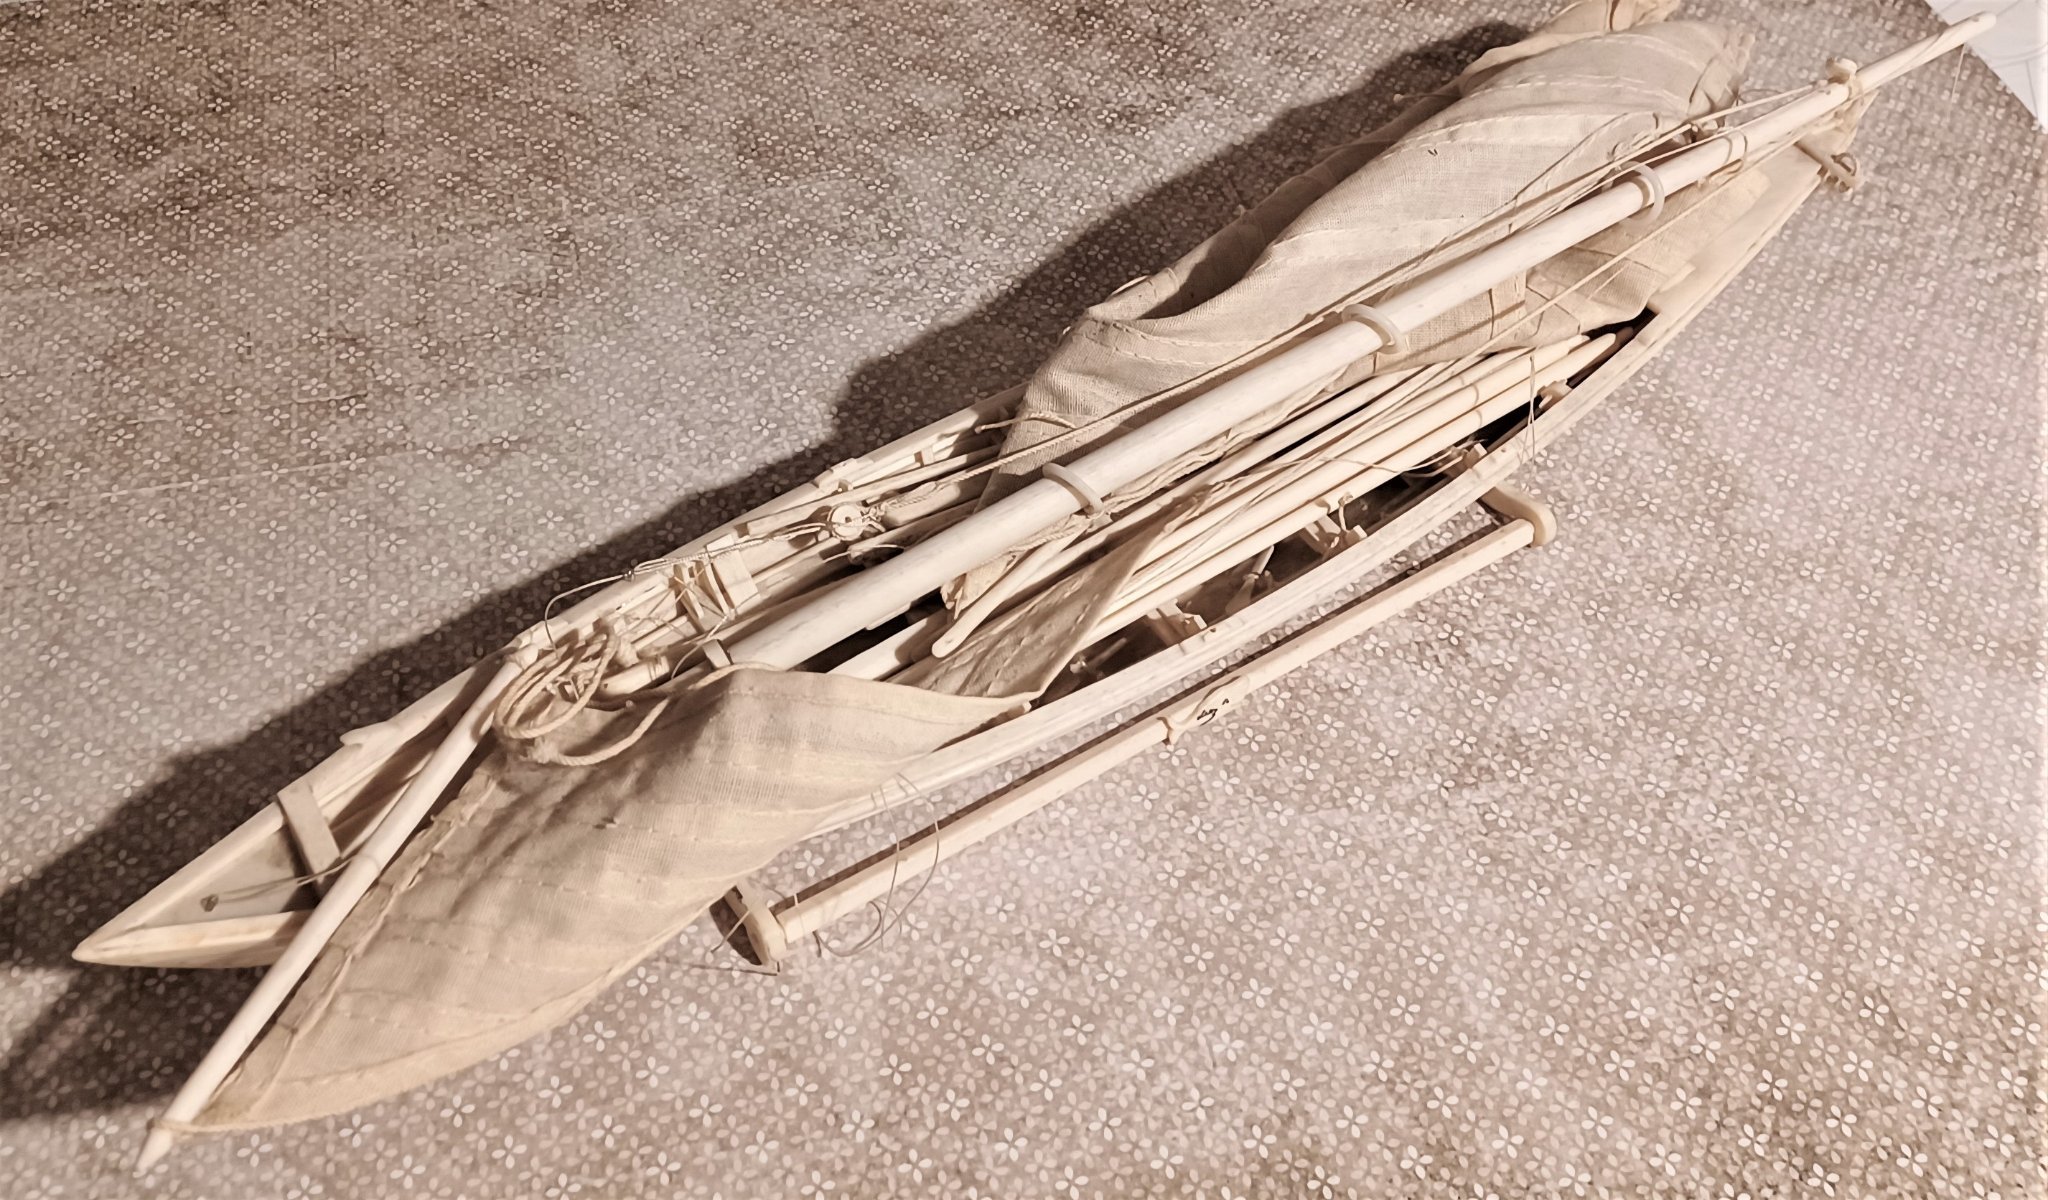
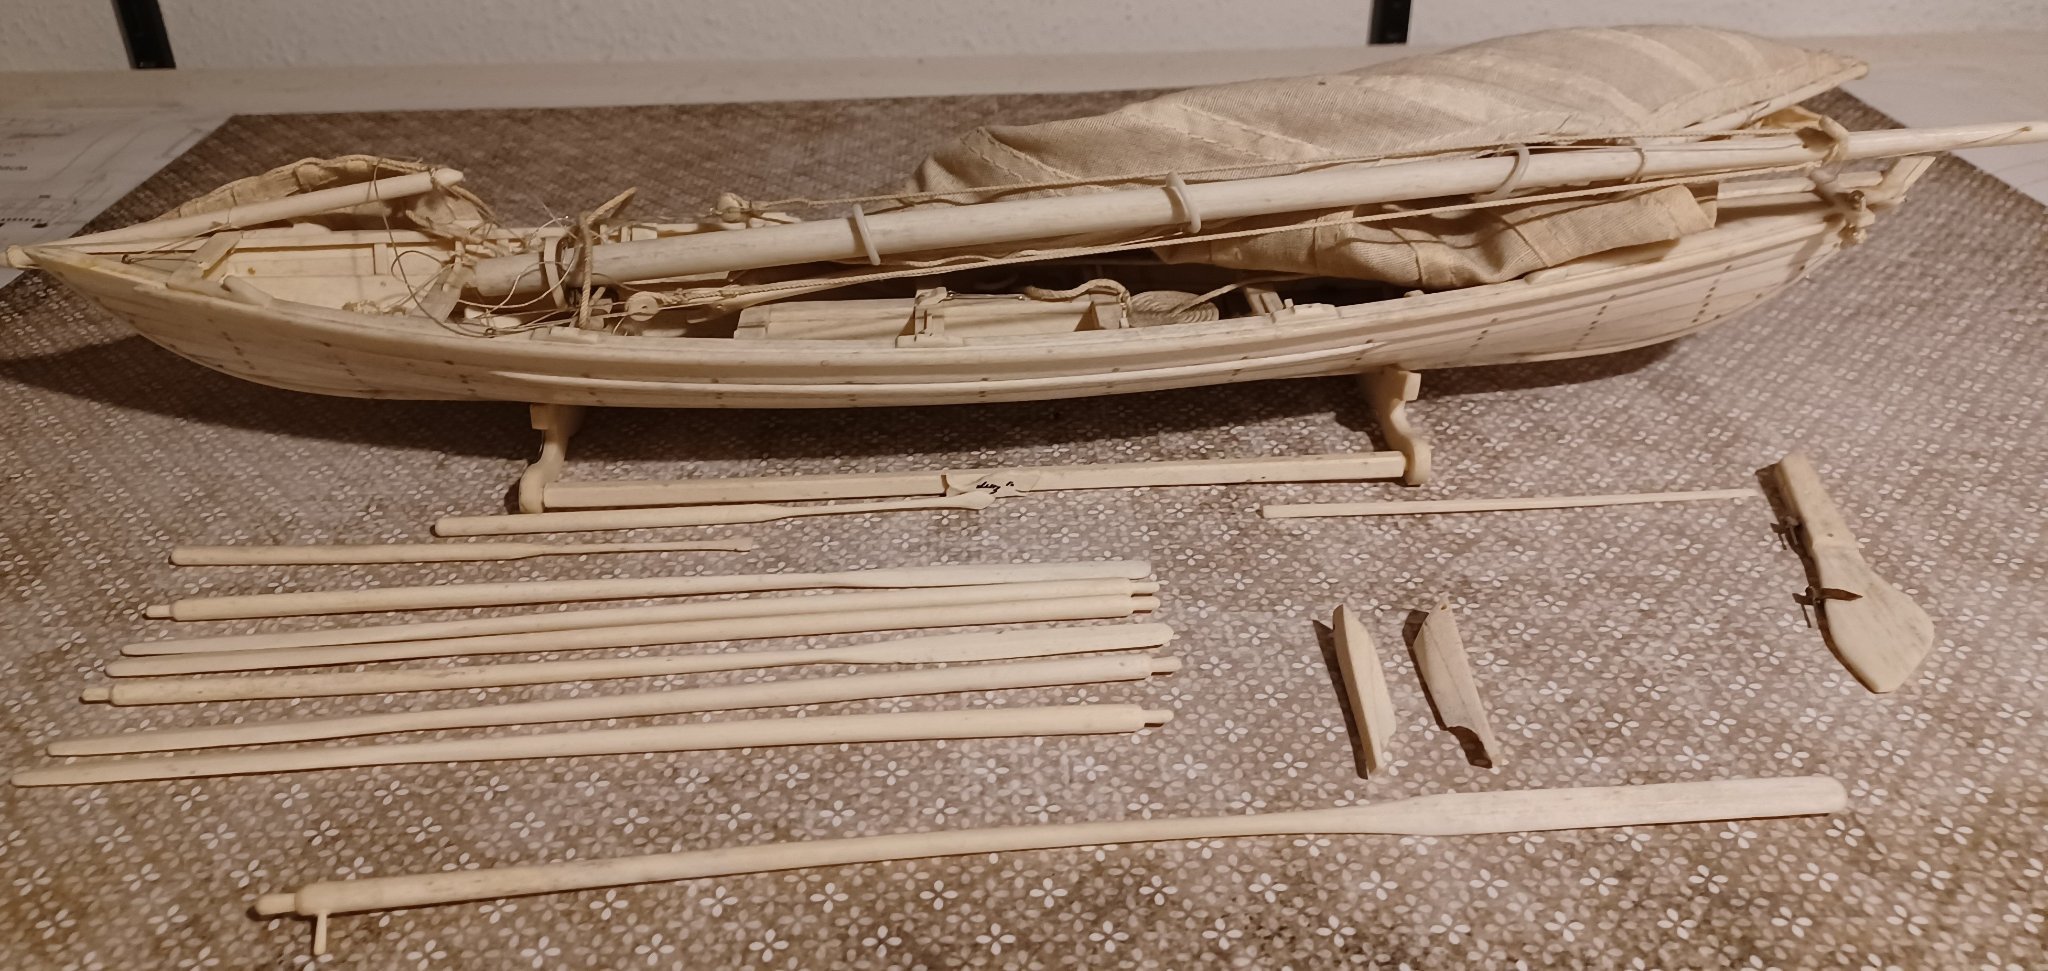
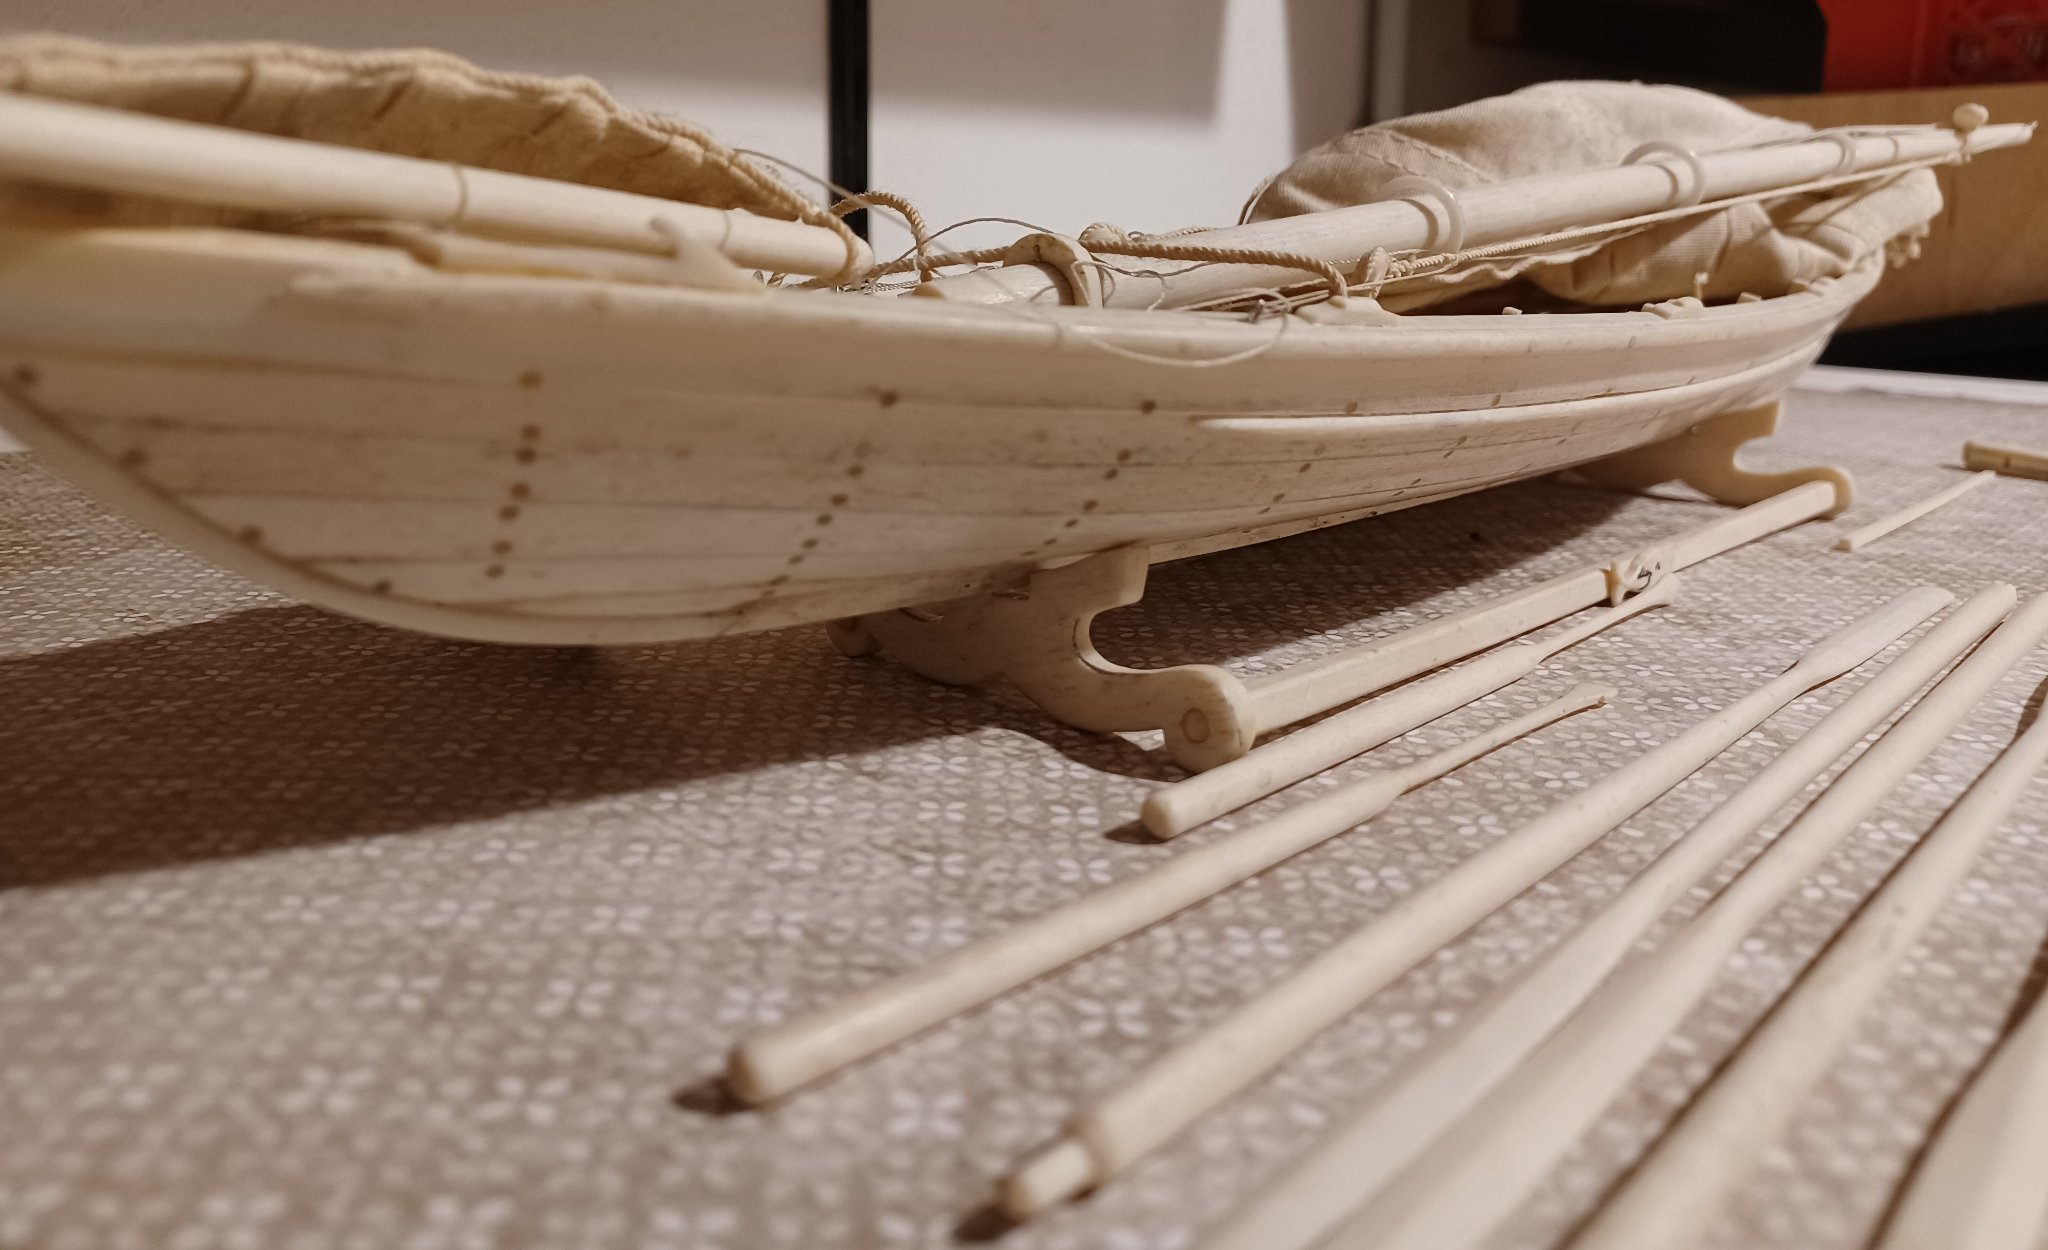
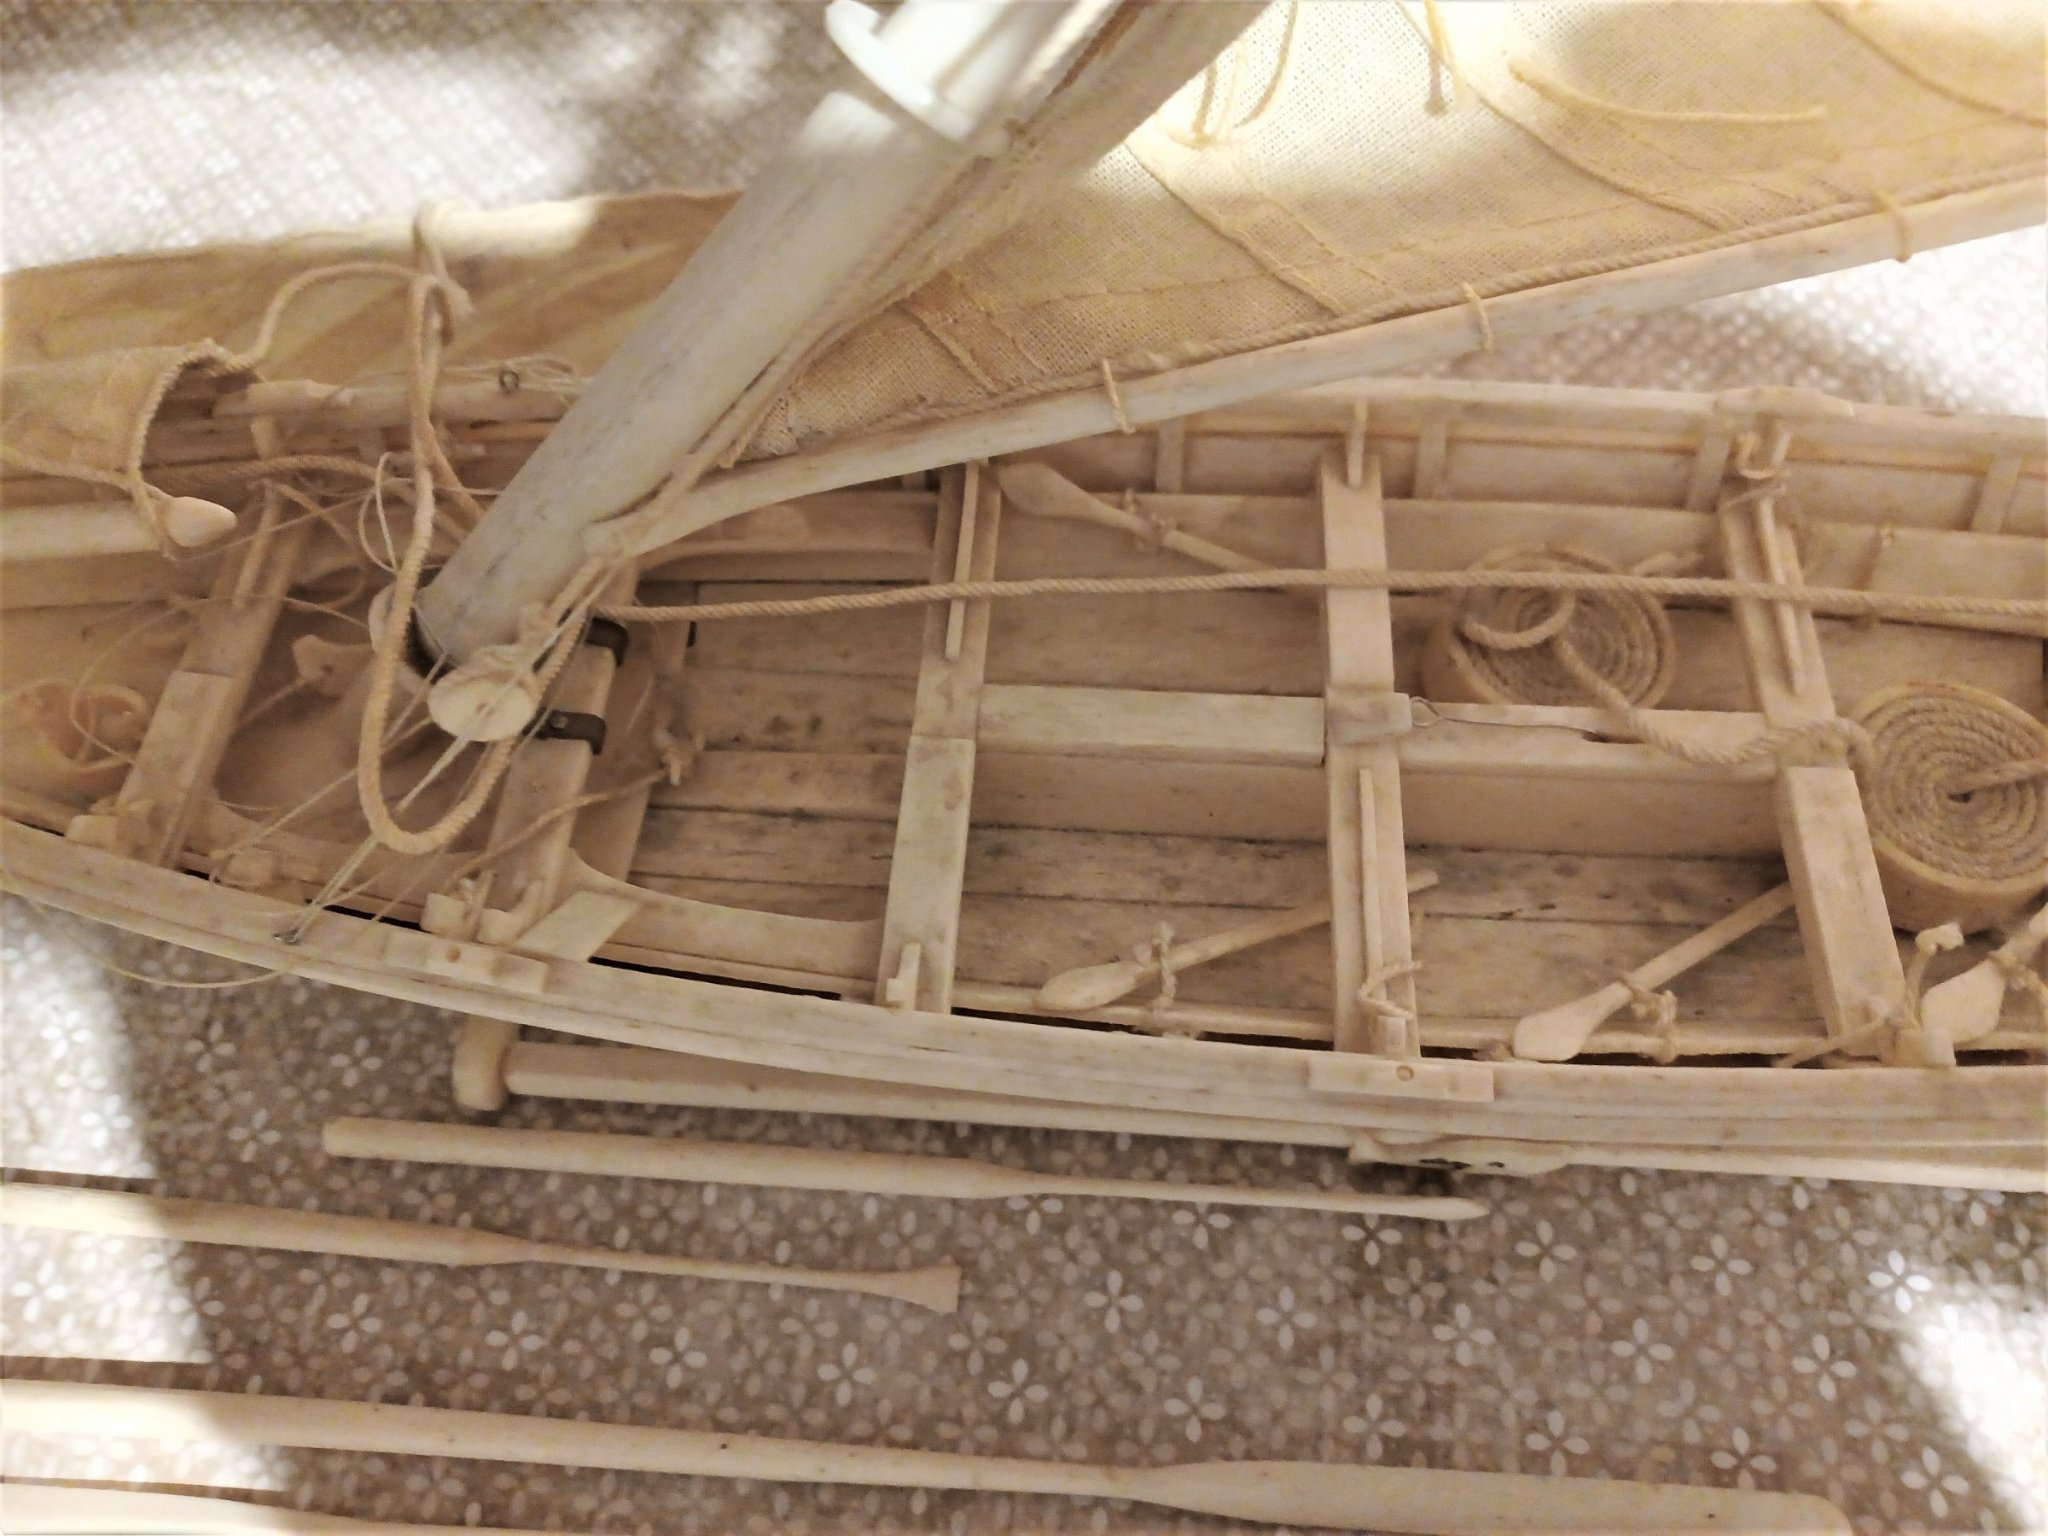
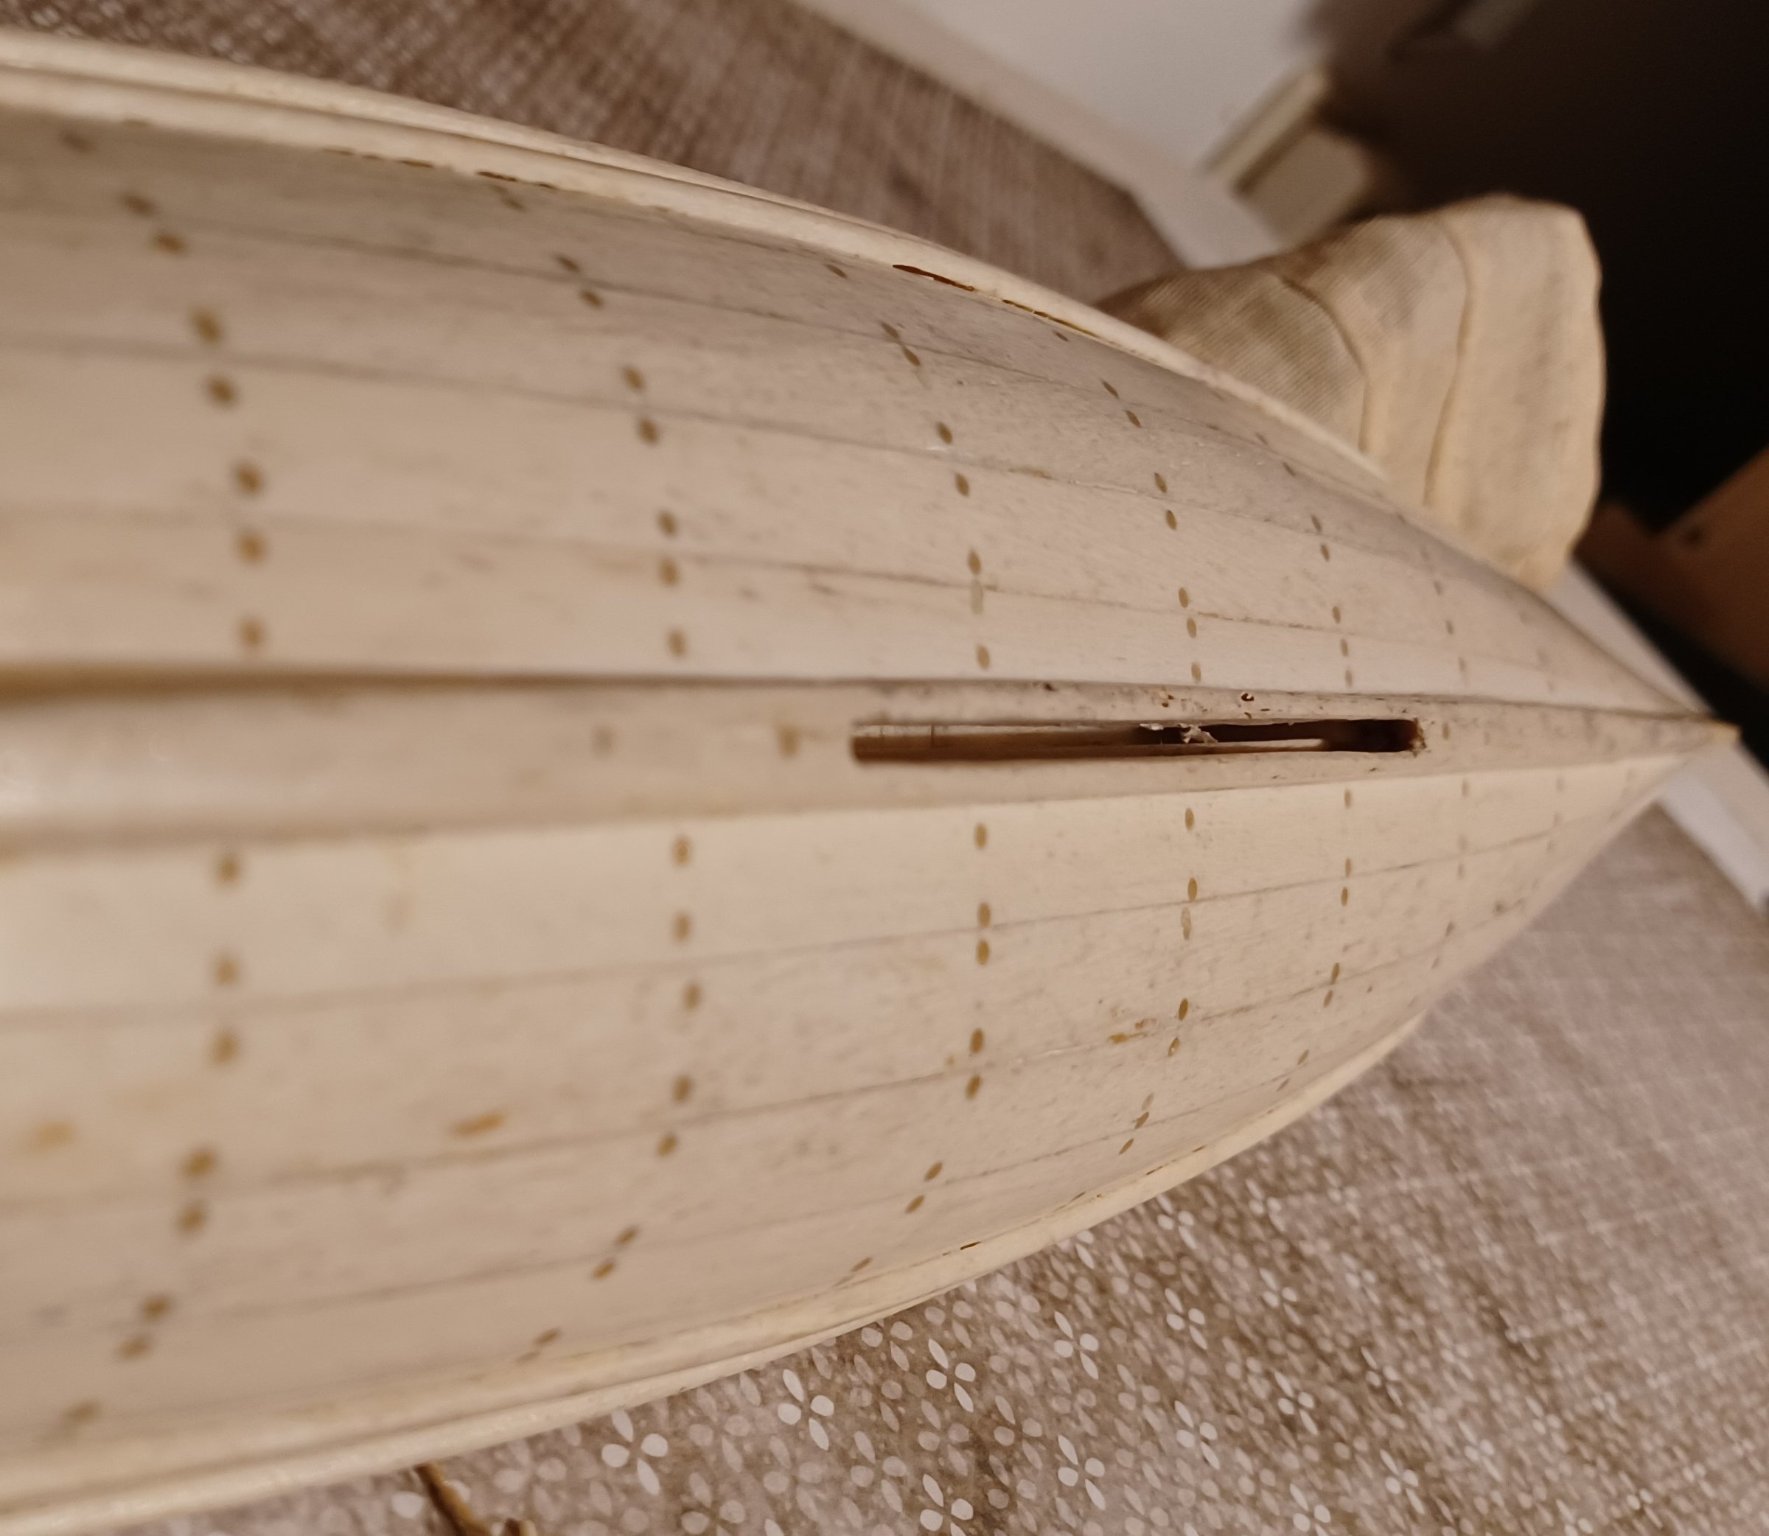
I recently got this model of a small boat, entirely made from bone. It is about 35 cm long and completely equipped with a collapsible mast, sails, 6 oars and one long oar for steering, a rudder, harpoons and knifes etc. It is a beautiful work of art. Very nicely crafted. it has some damage and is quite dirty. The stand is made of bone as well and bears the name LUZ.
Here are some photos of the model:
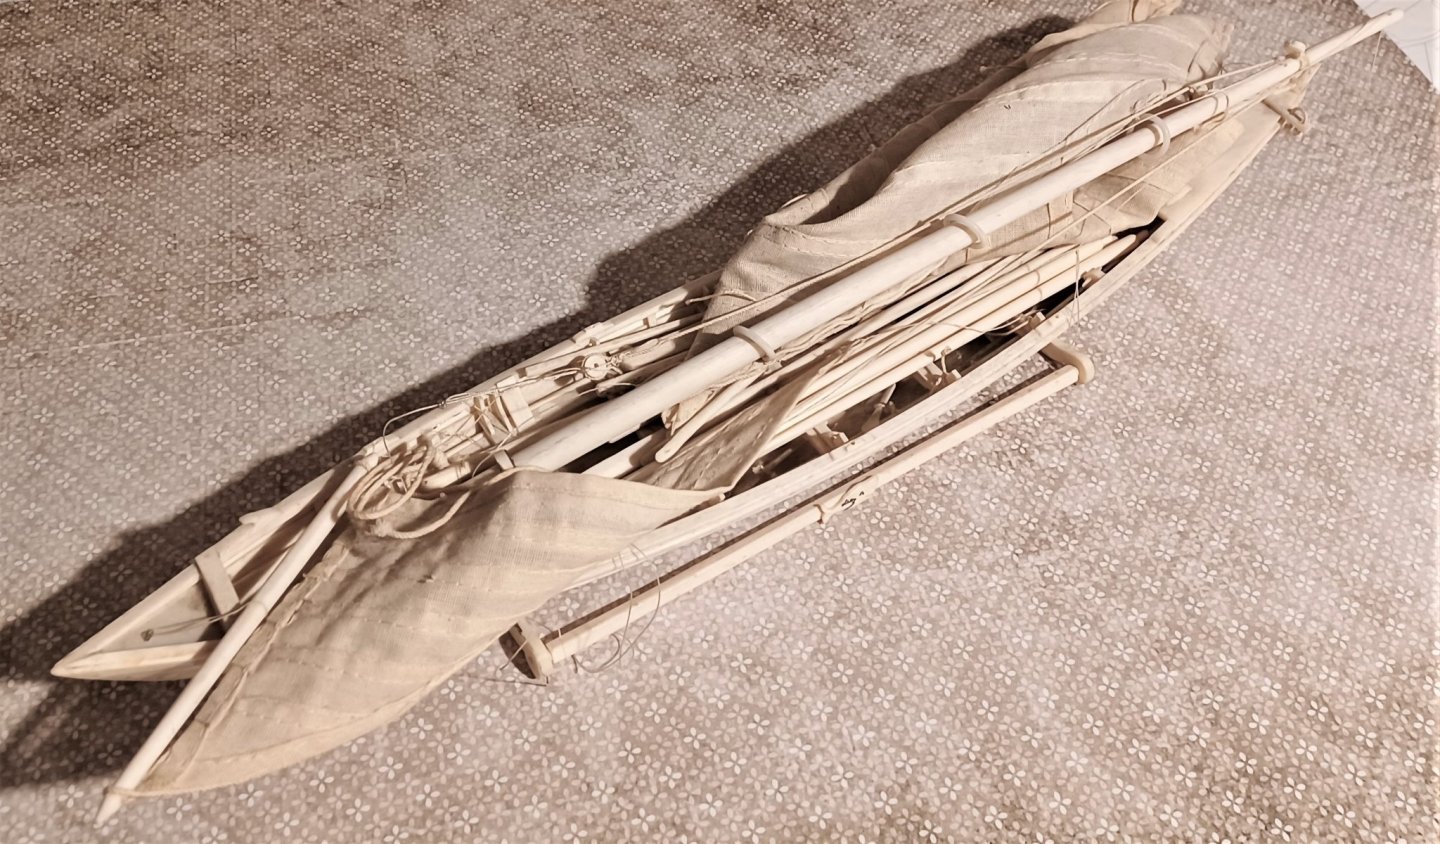
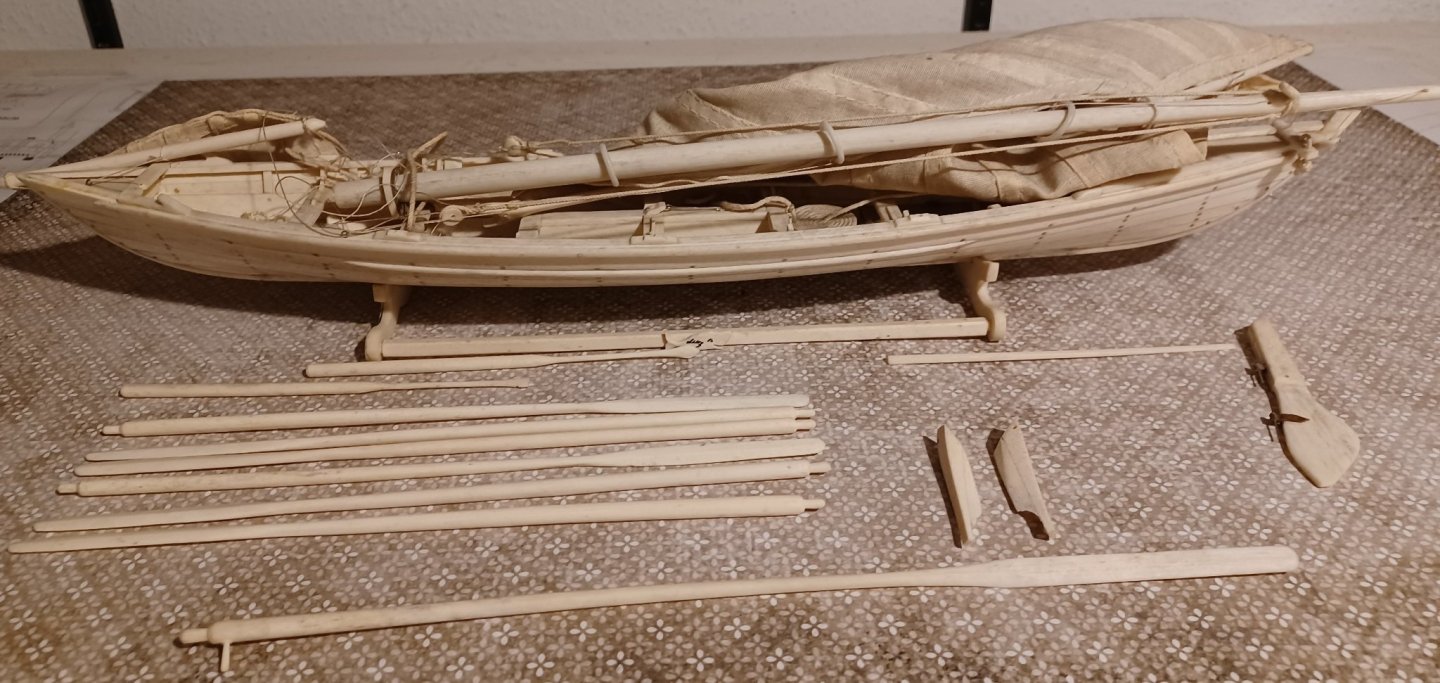

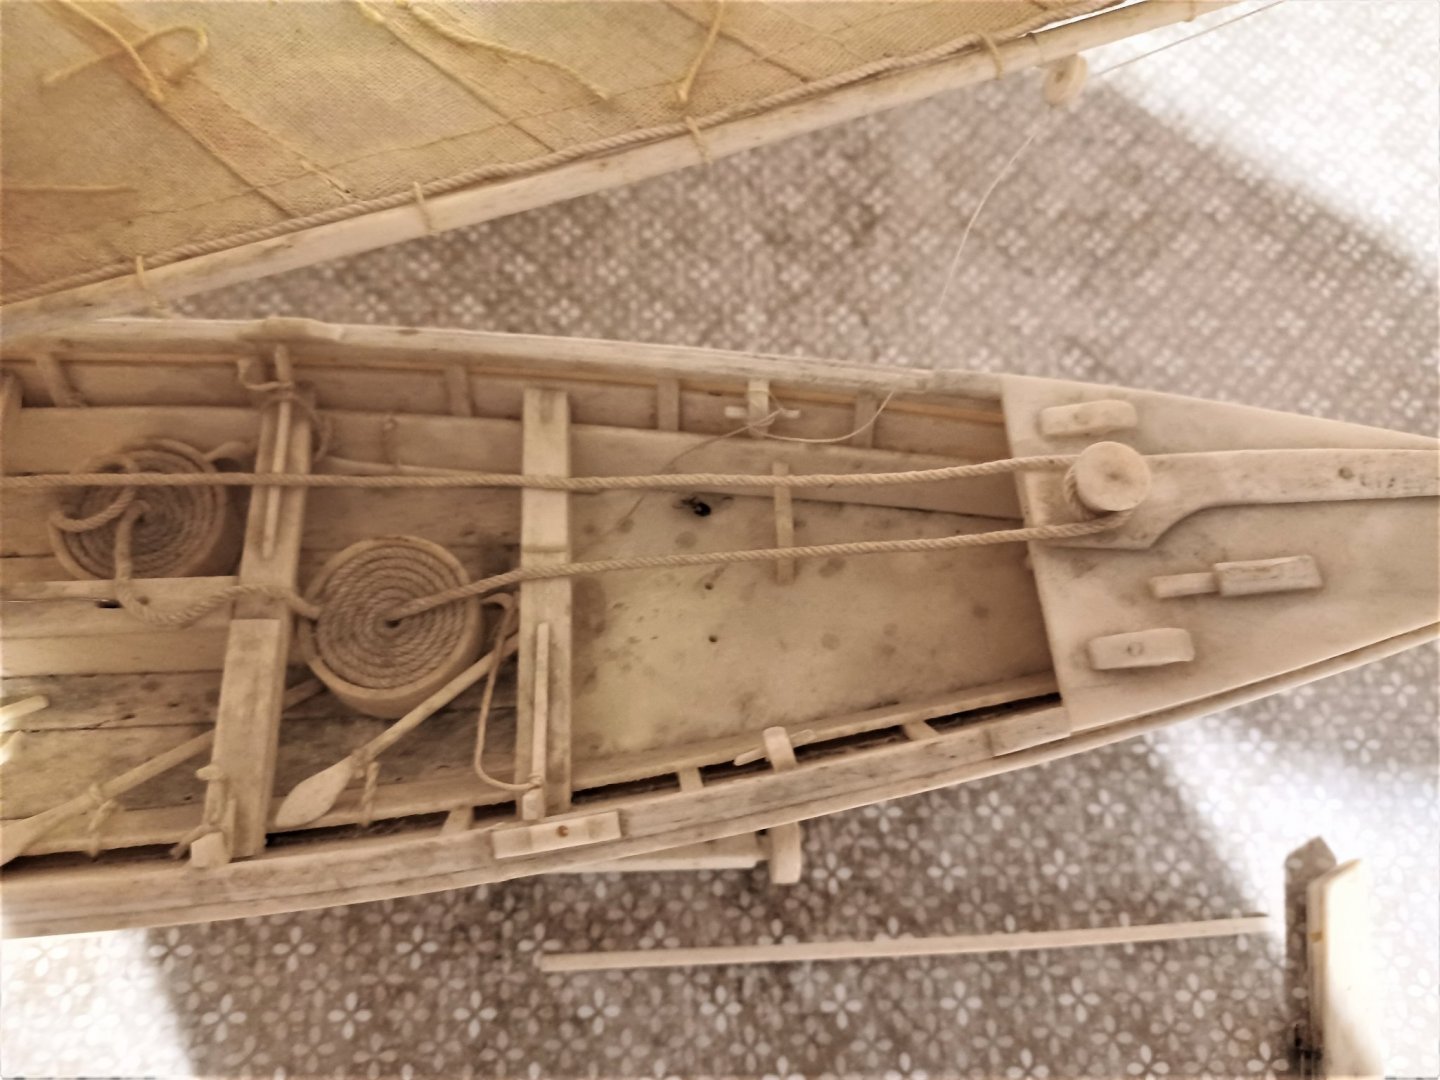


I had a look in the internet and found some similar models in a couple of maritime auctions. On one or two models the name LUZ appeared as well on the stand and it was mentioned, that the guy, who built these models was called Albertino Sousa Luz and that these ships come from the AZORES. Does anybody of you know more about the background of these models? Was there a sort of manufacture for whale-bone-models? Or did the owners of the whalers made them for themselves, like some captains of sailing-ships did in the past?
I would be grateful of some background information.
Matthias
-
Thank you all for the likes and comments!!
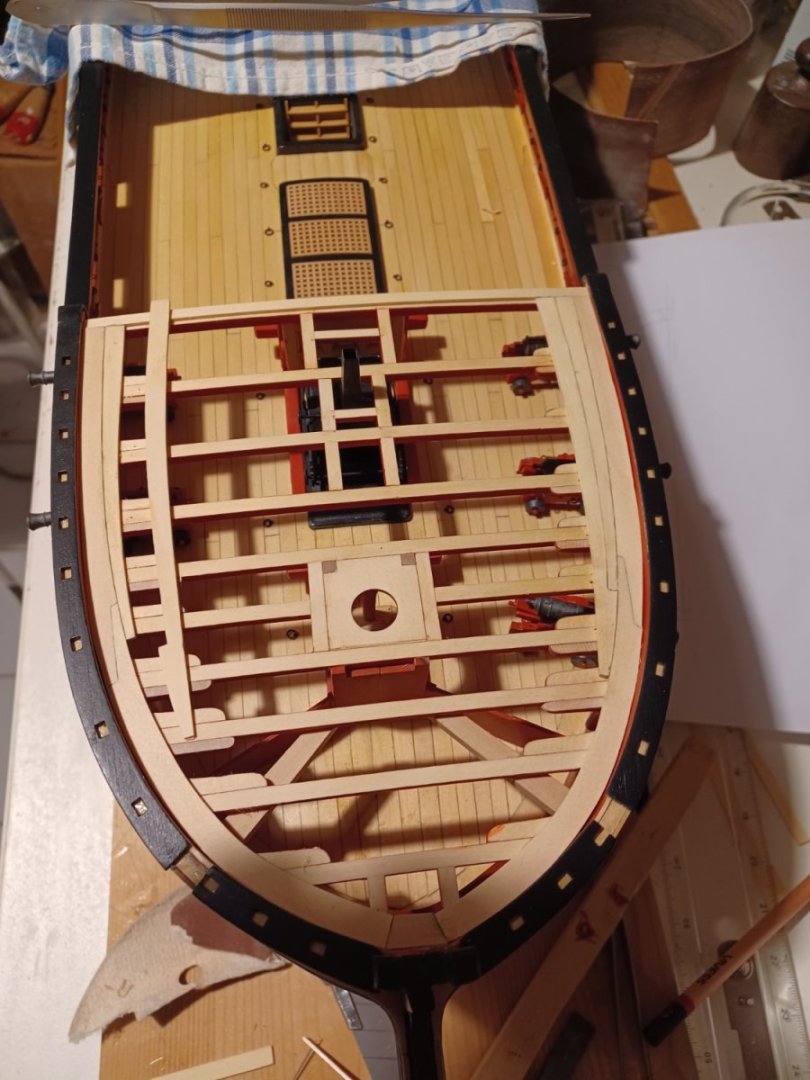
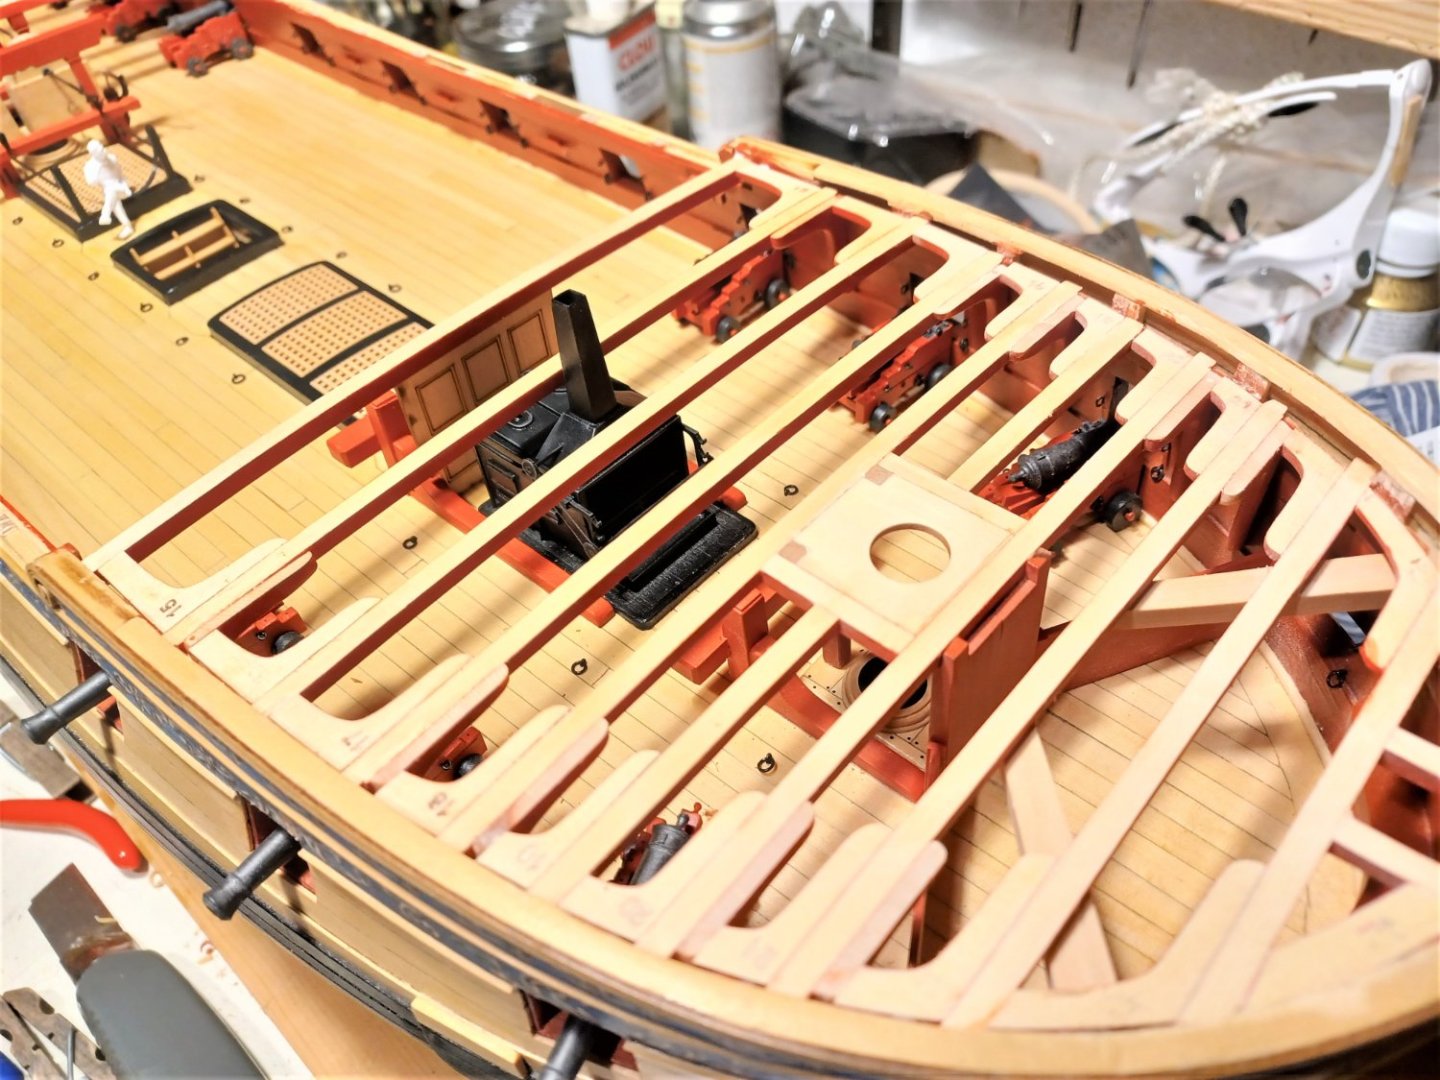
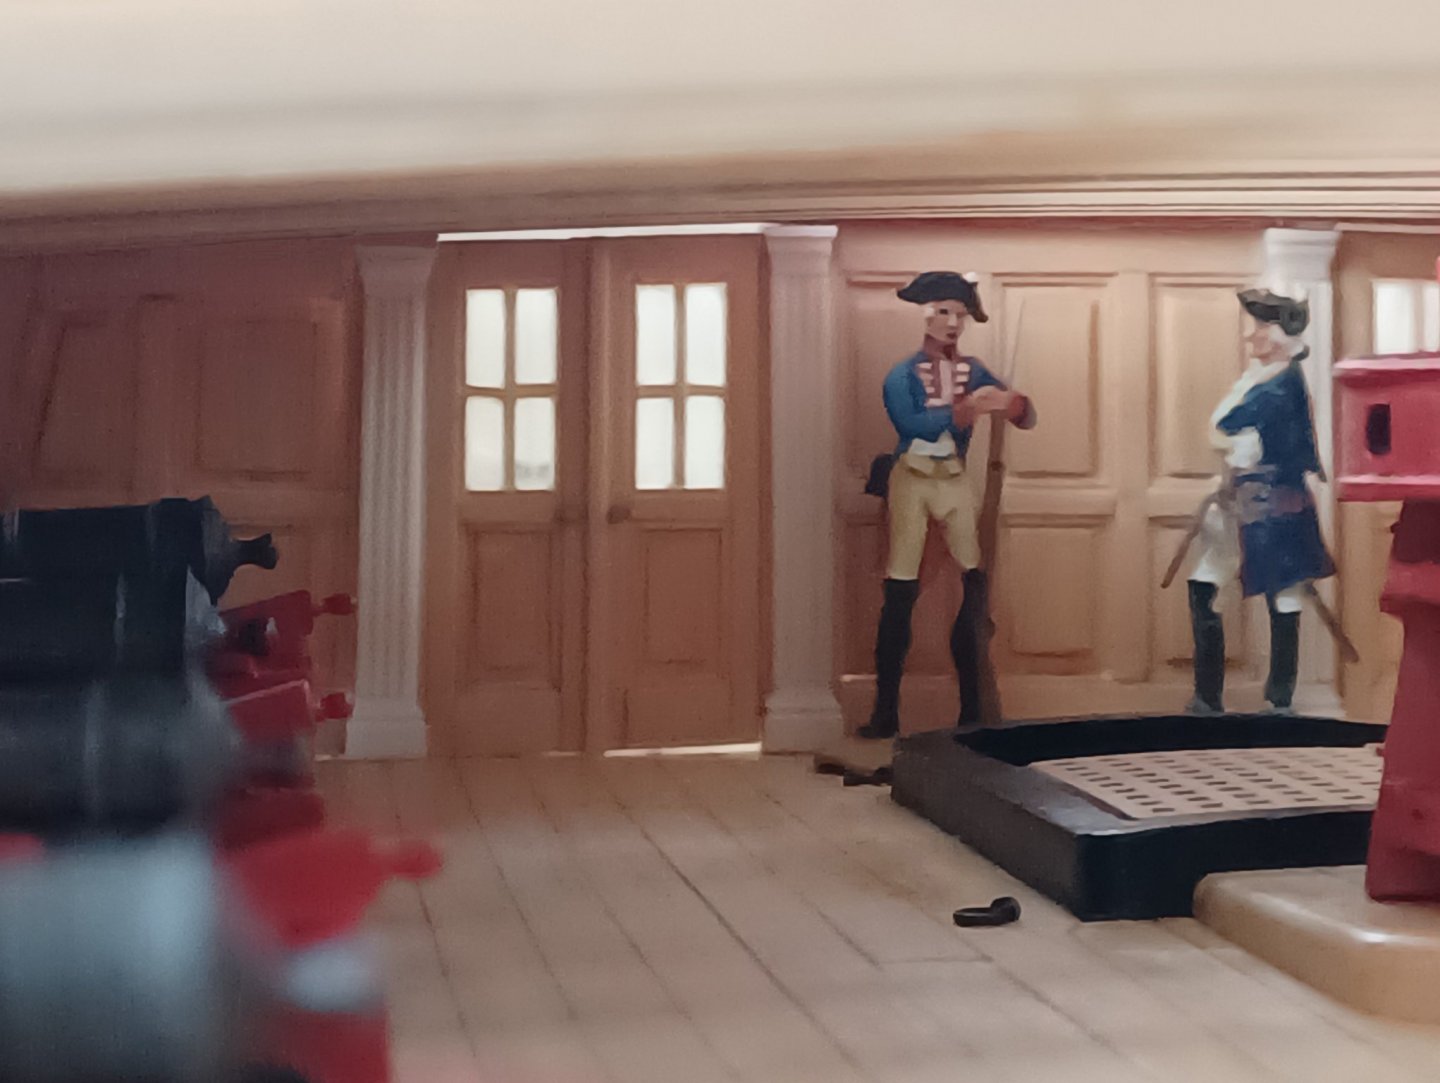
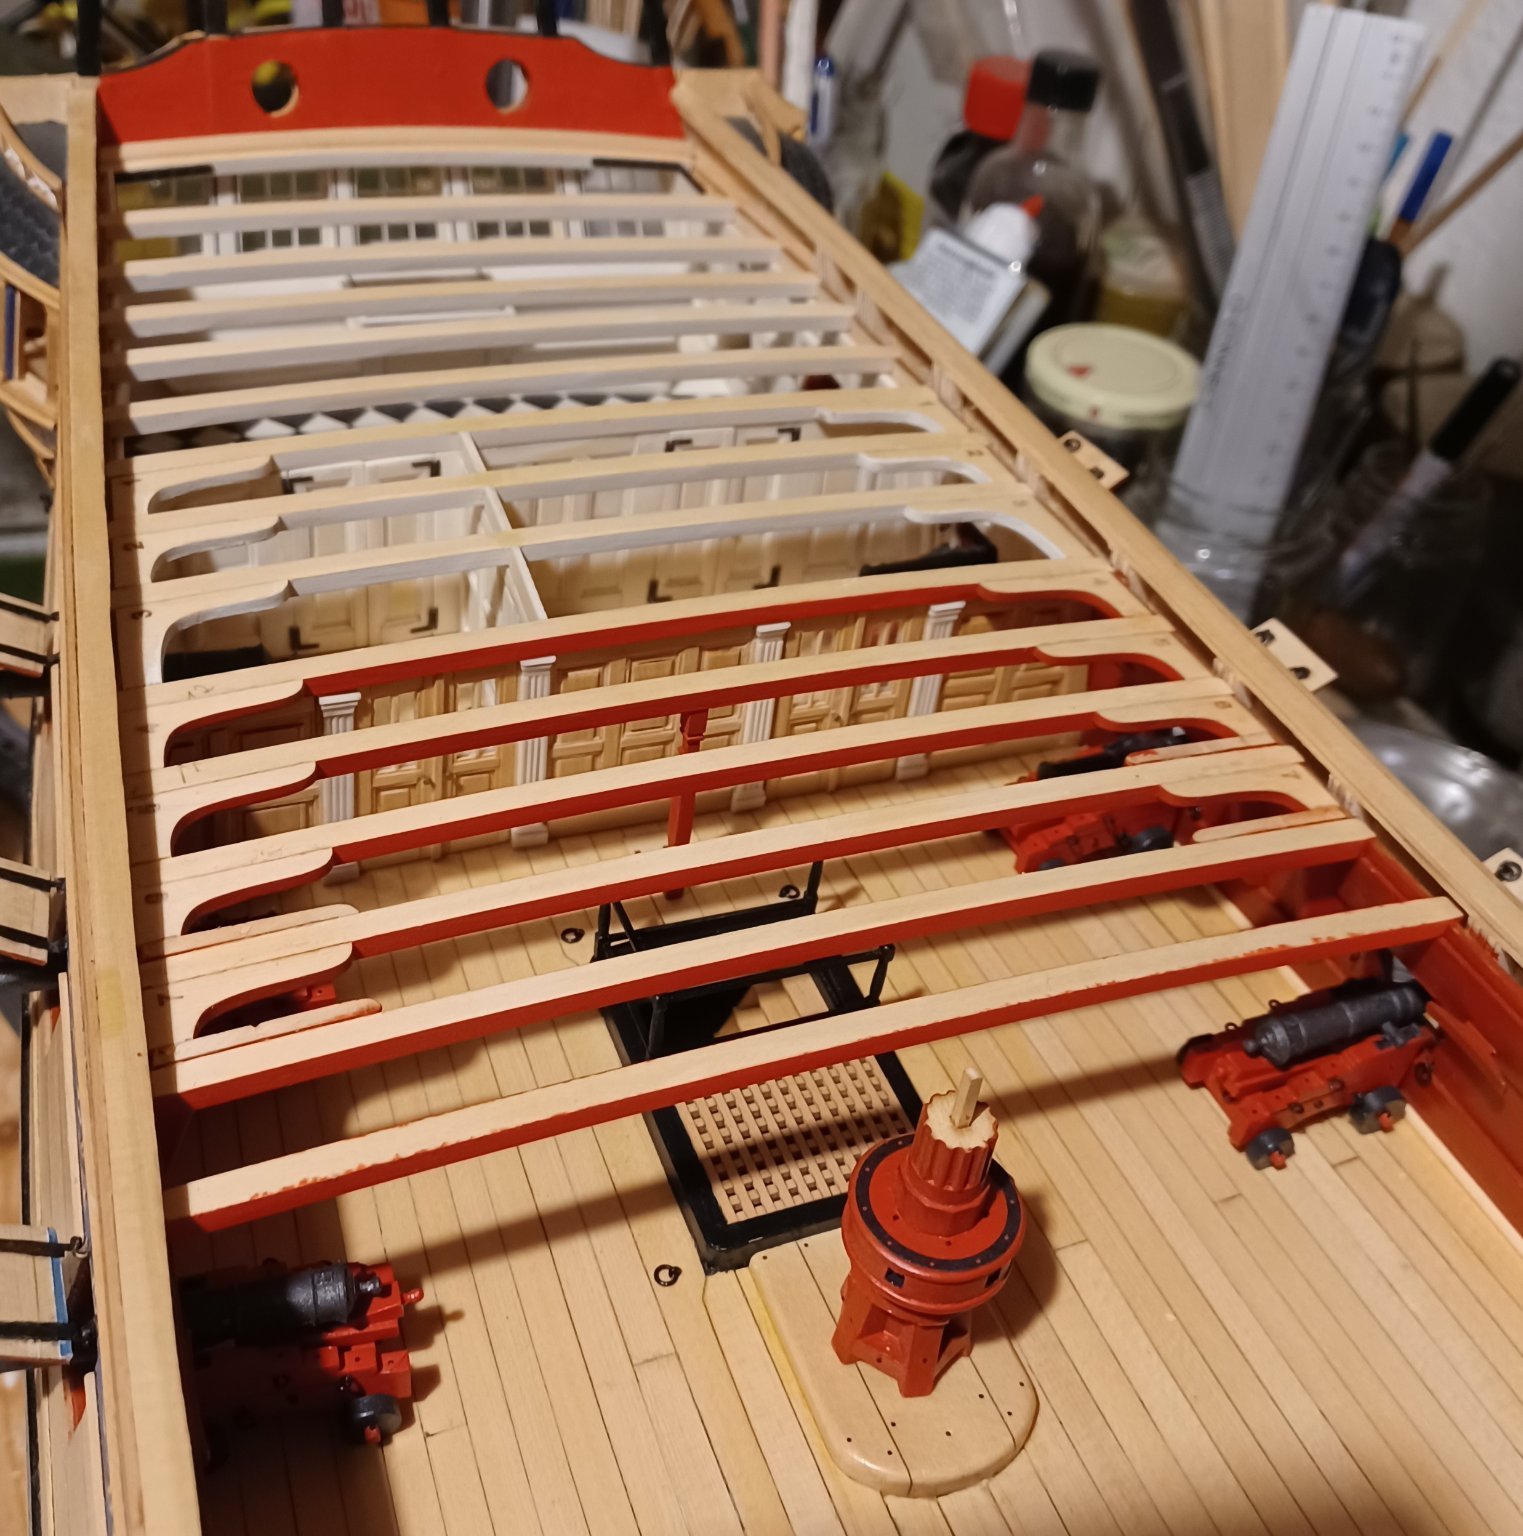
After finishing the bulkheads, I continued with the deck beams, knees and fittings, wich is great fun to do. Everything comes together now, and you get an impression, how the model will look, once finished.
I have this idea of a photo from the main deck under the quarter deck with a little camera, if that is possible some day. So I painted the beams and knees from the underside, to have it all in color, .
Here are photos from the current stage of the building:


I will clean the top side of the deck beams once they are all finished. The numbers on the knees will be covered by the planking later on.
Matthias
-
That looks almost perfect!! Well done.
Matthias
-
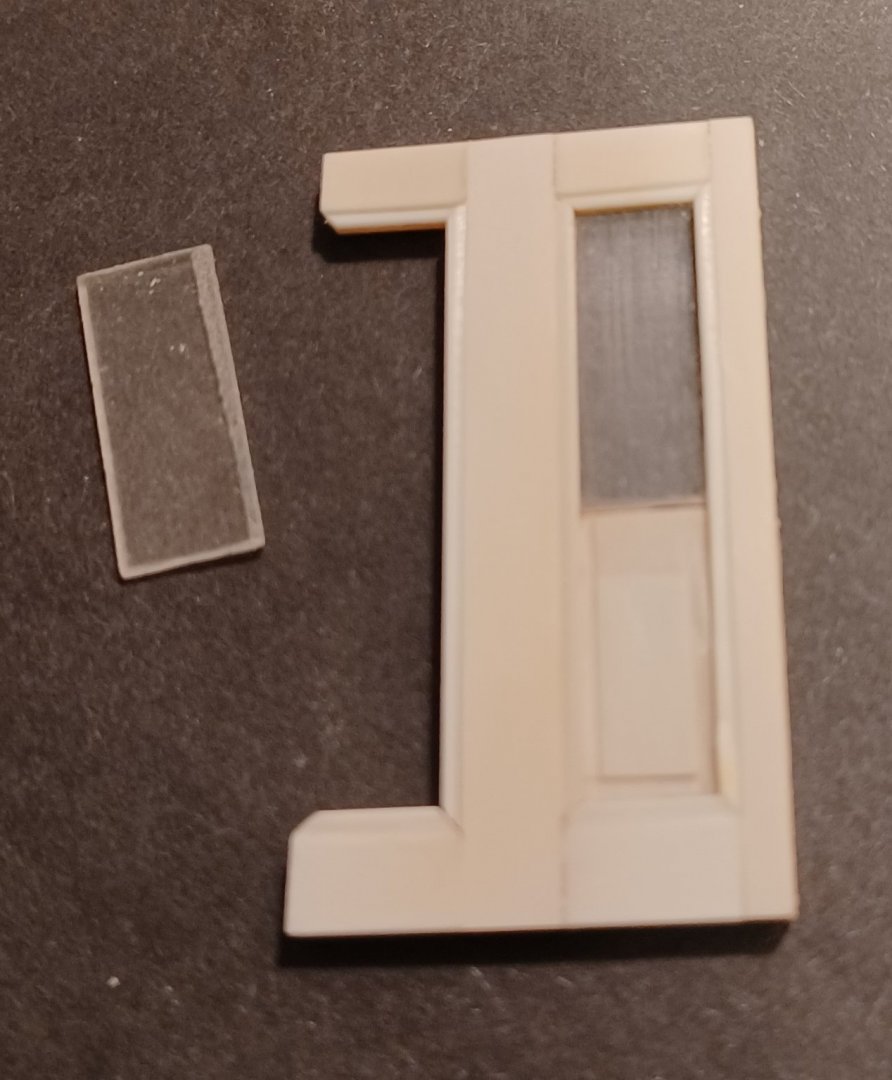
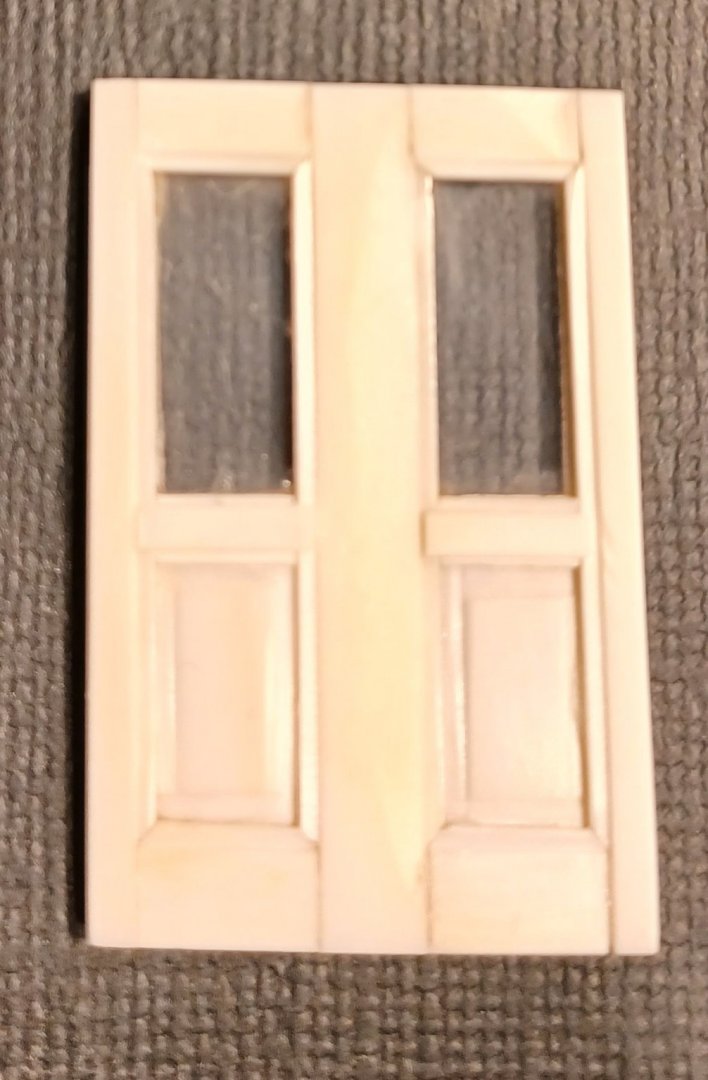
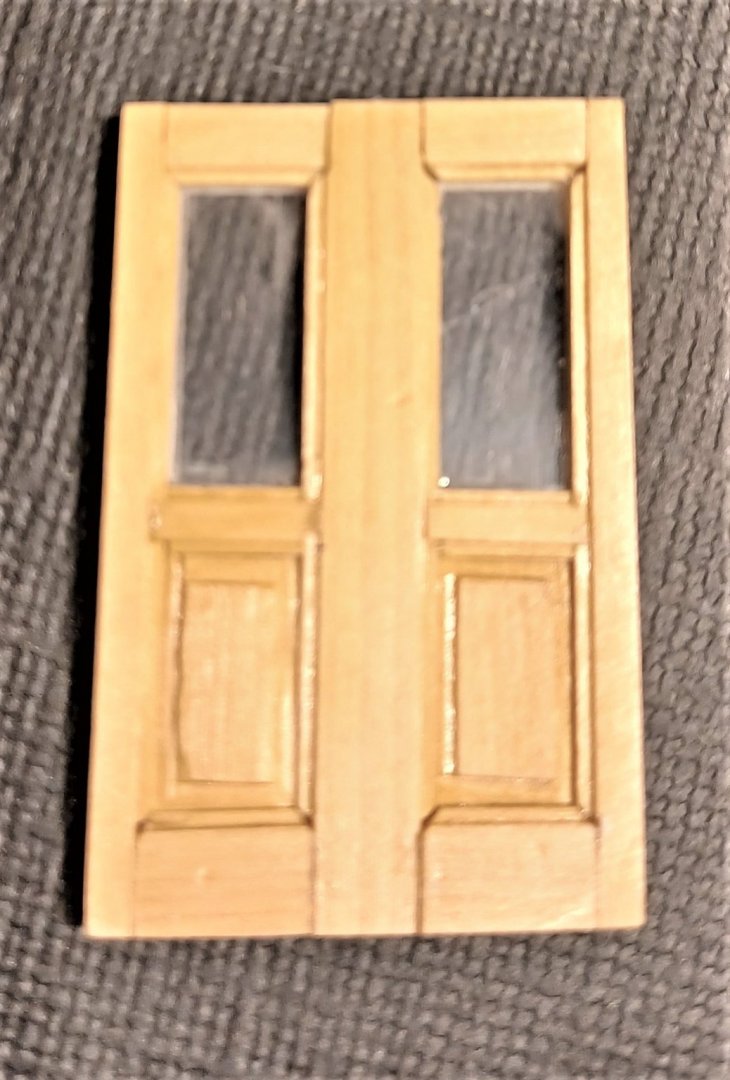
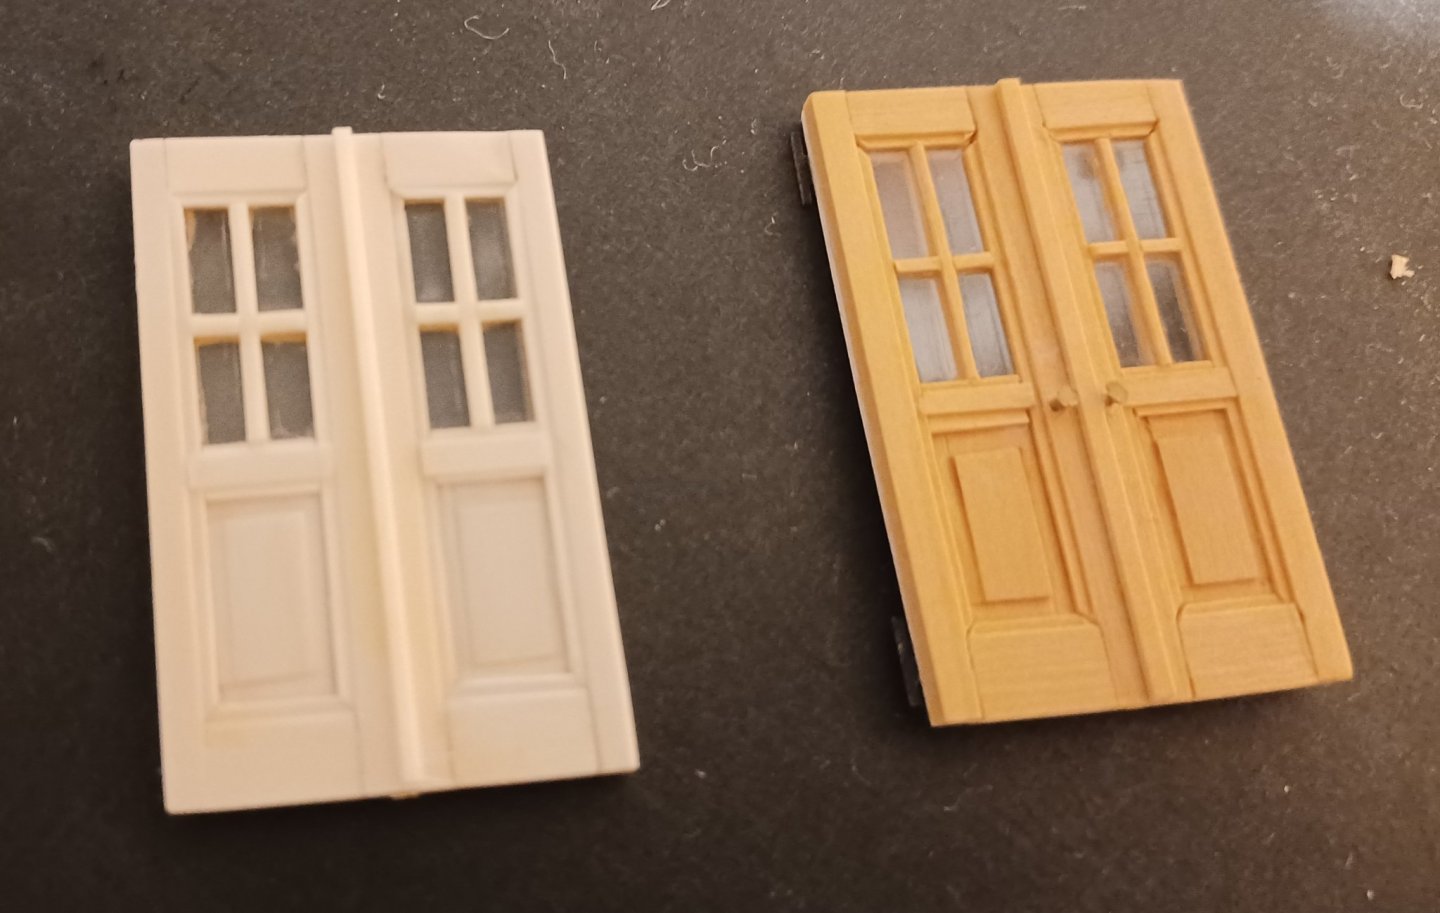
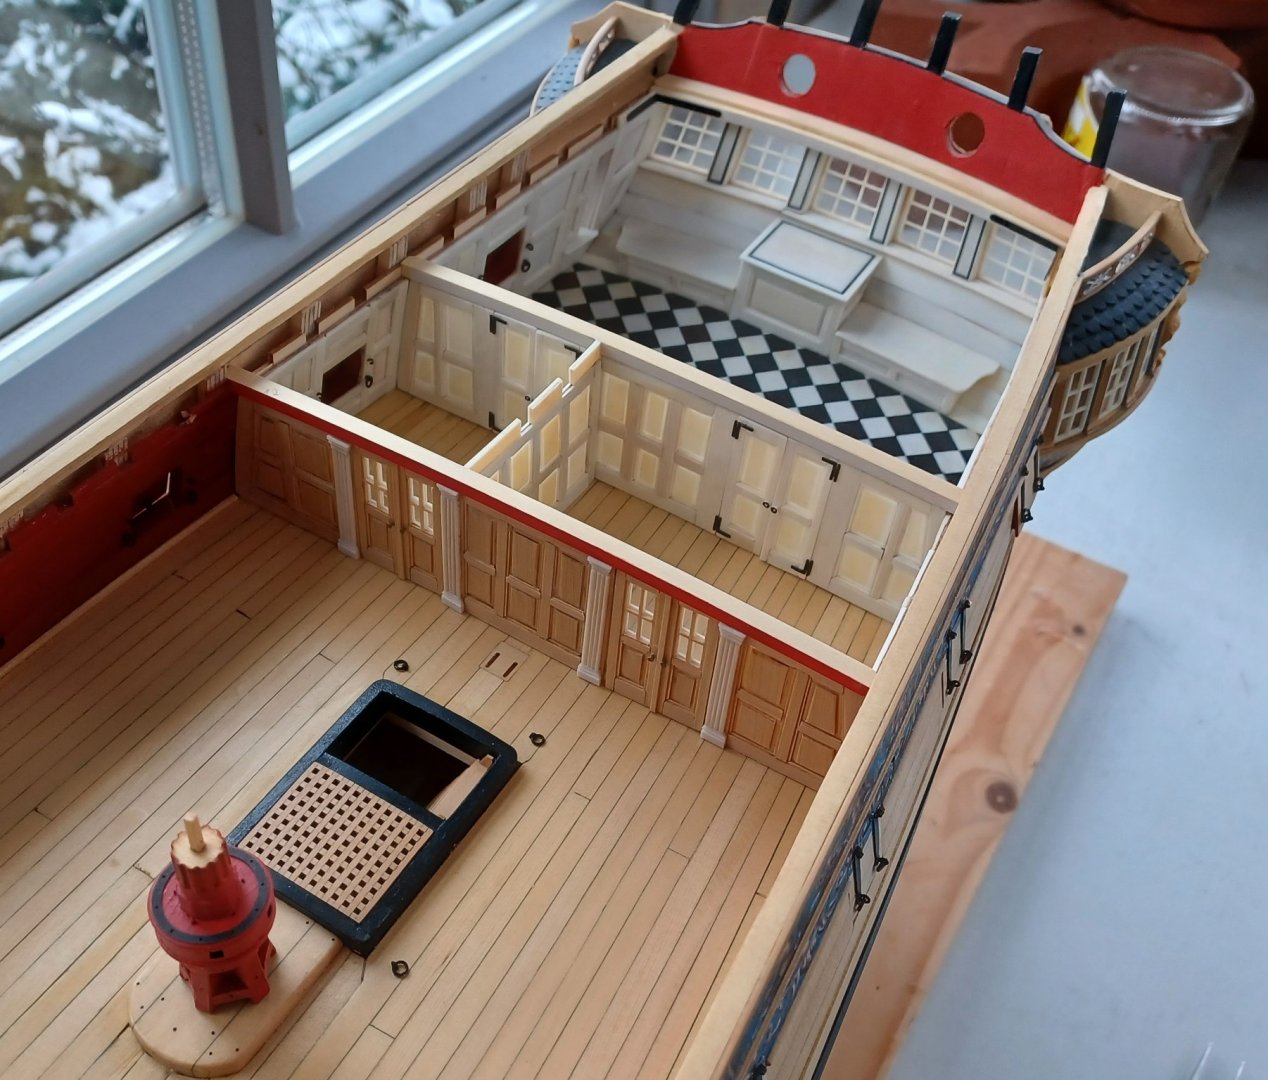
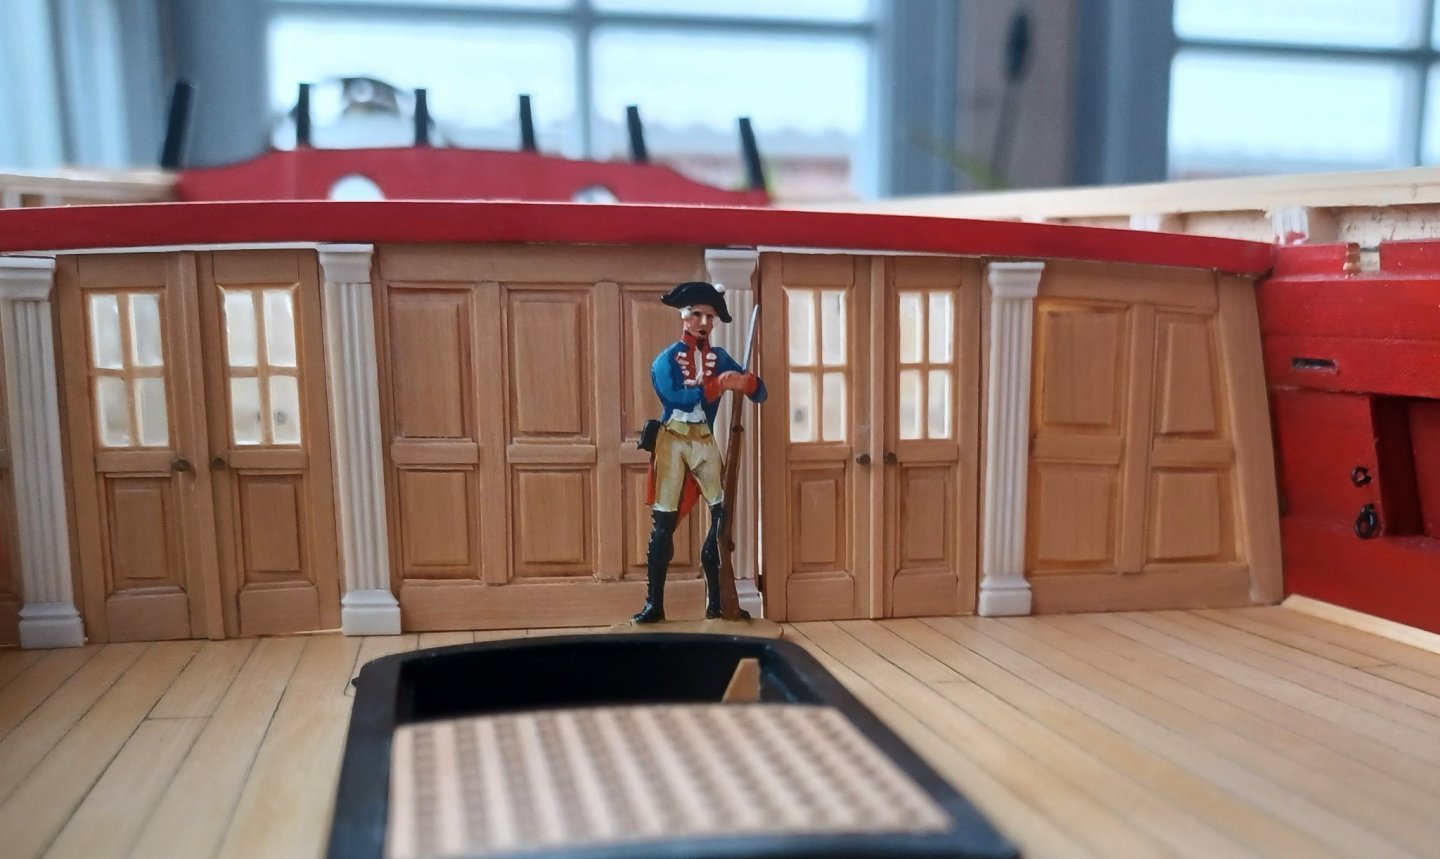
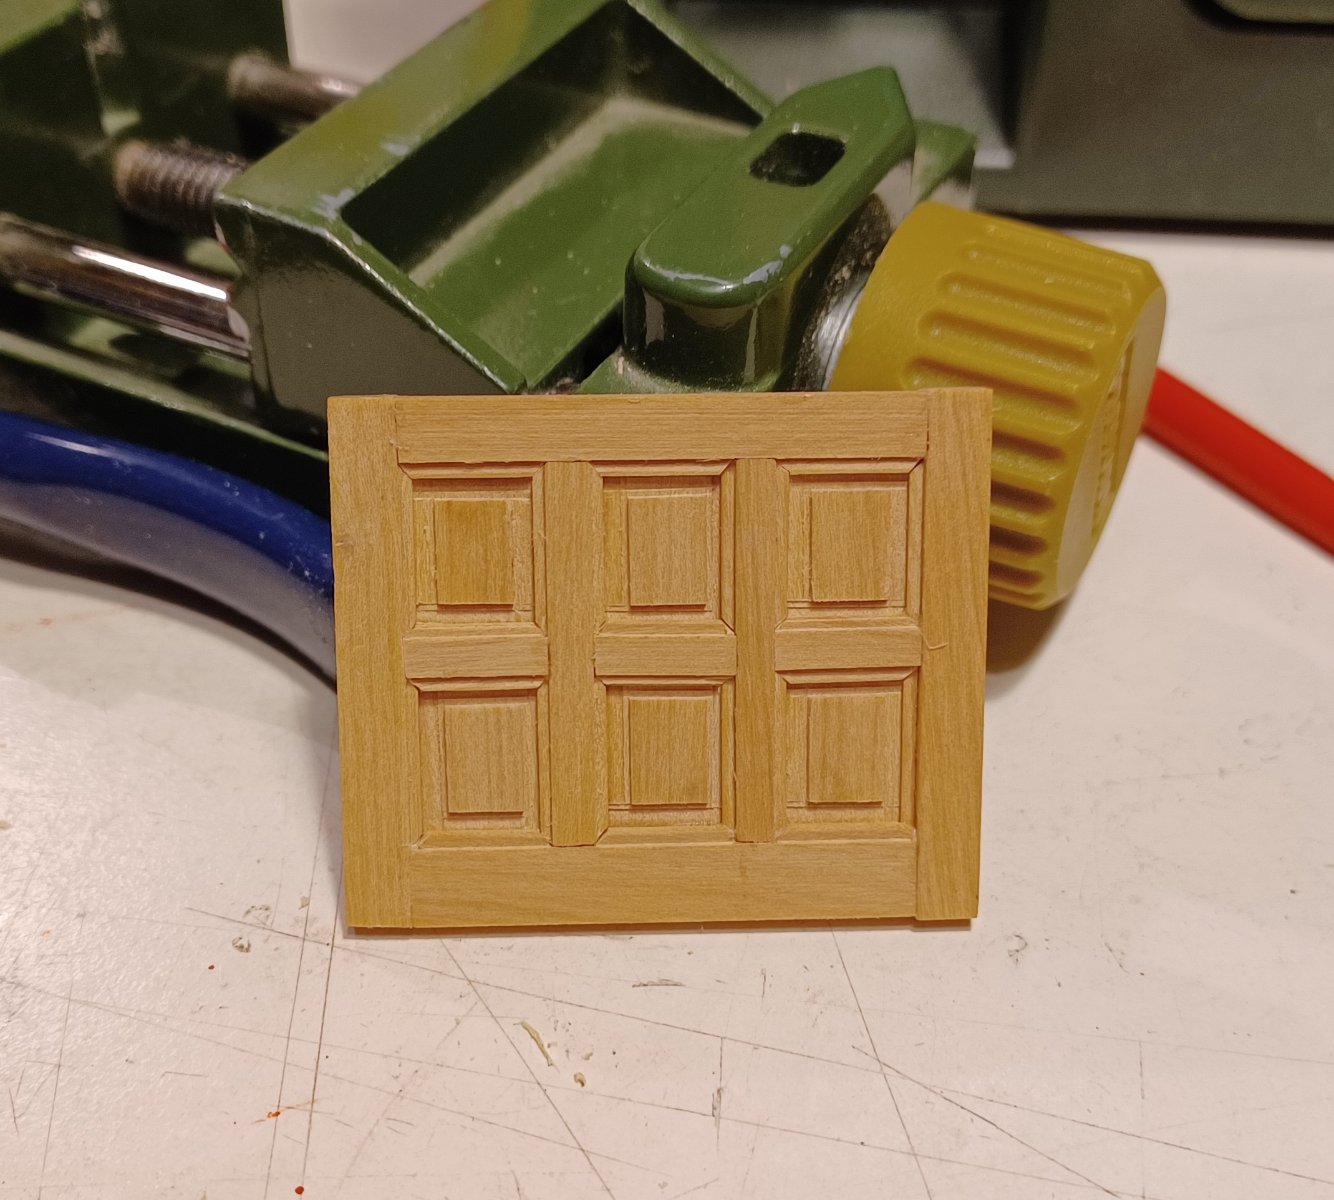
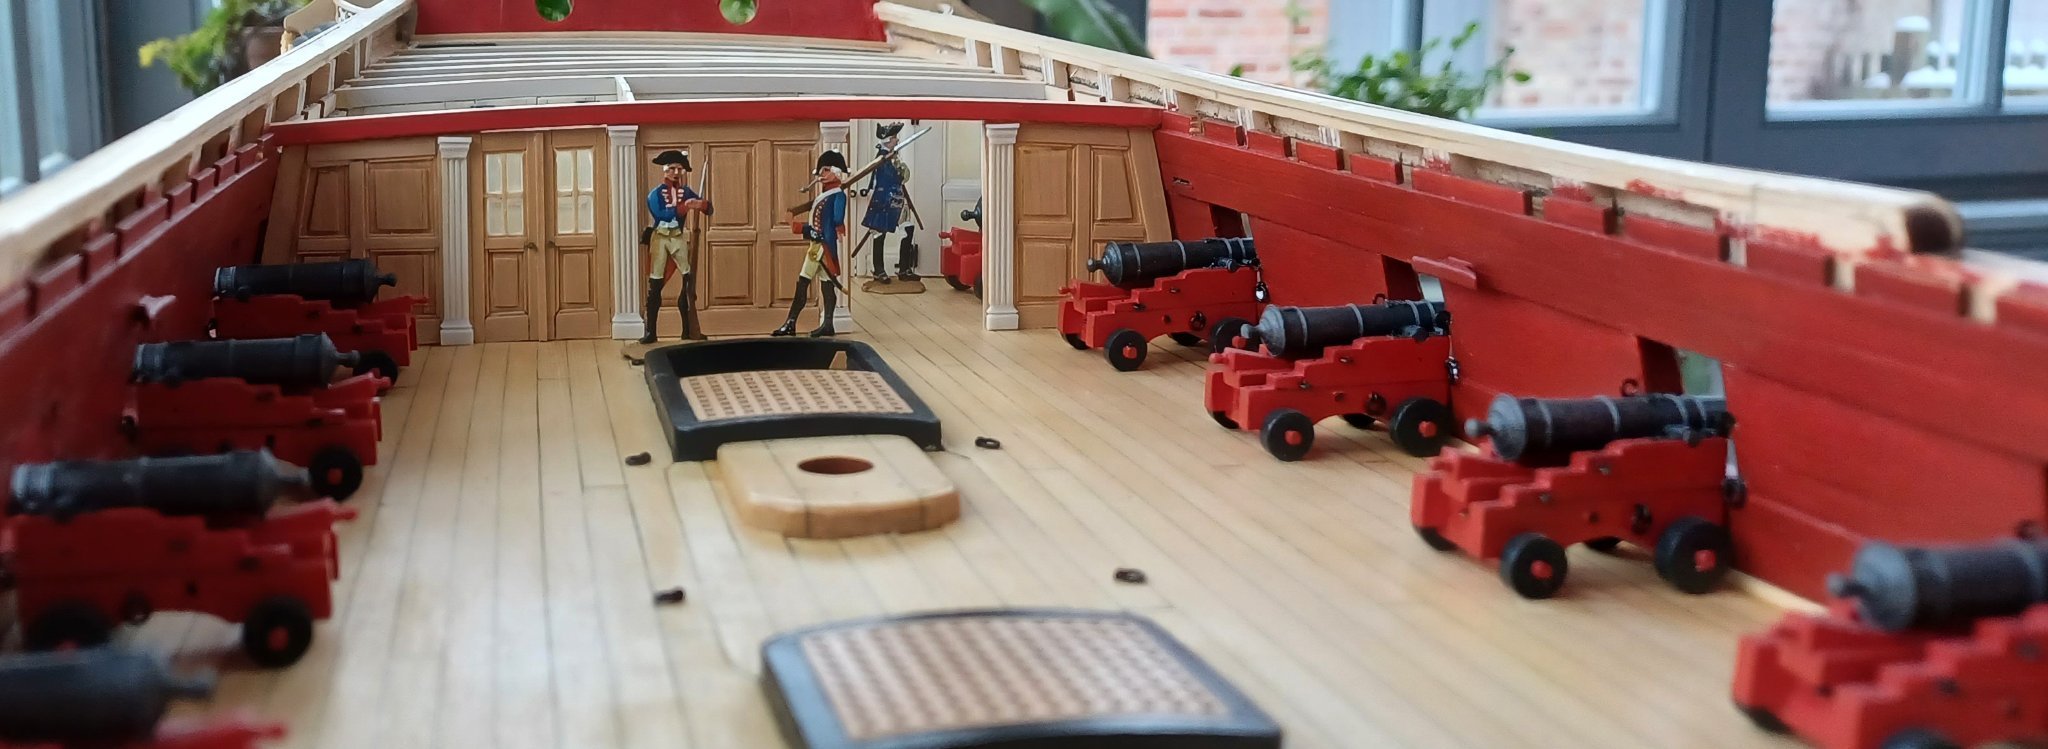
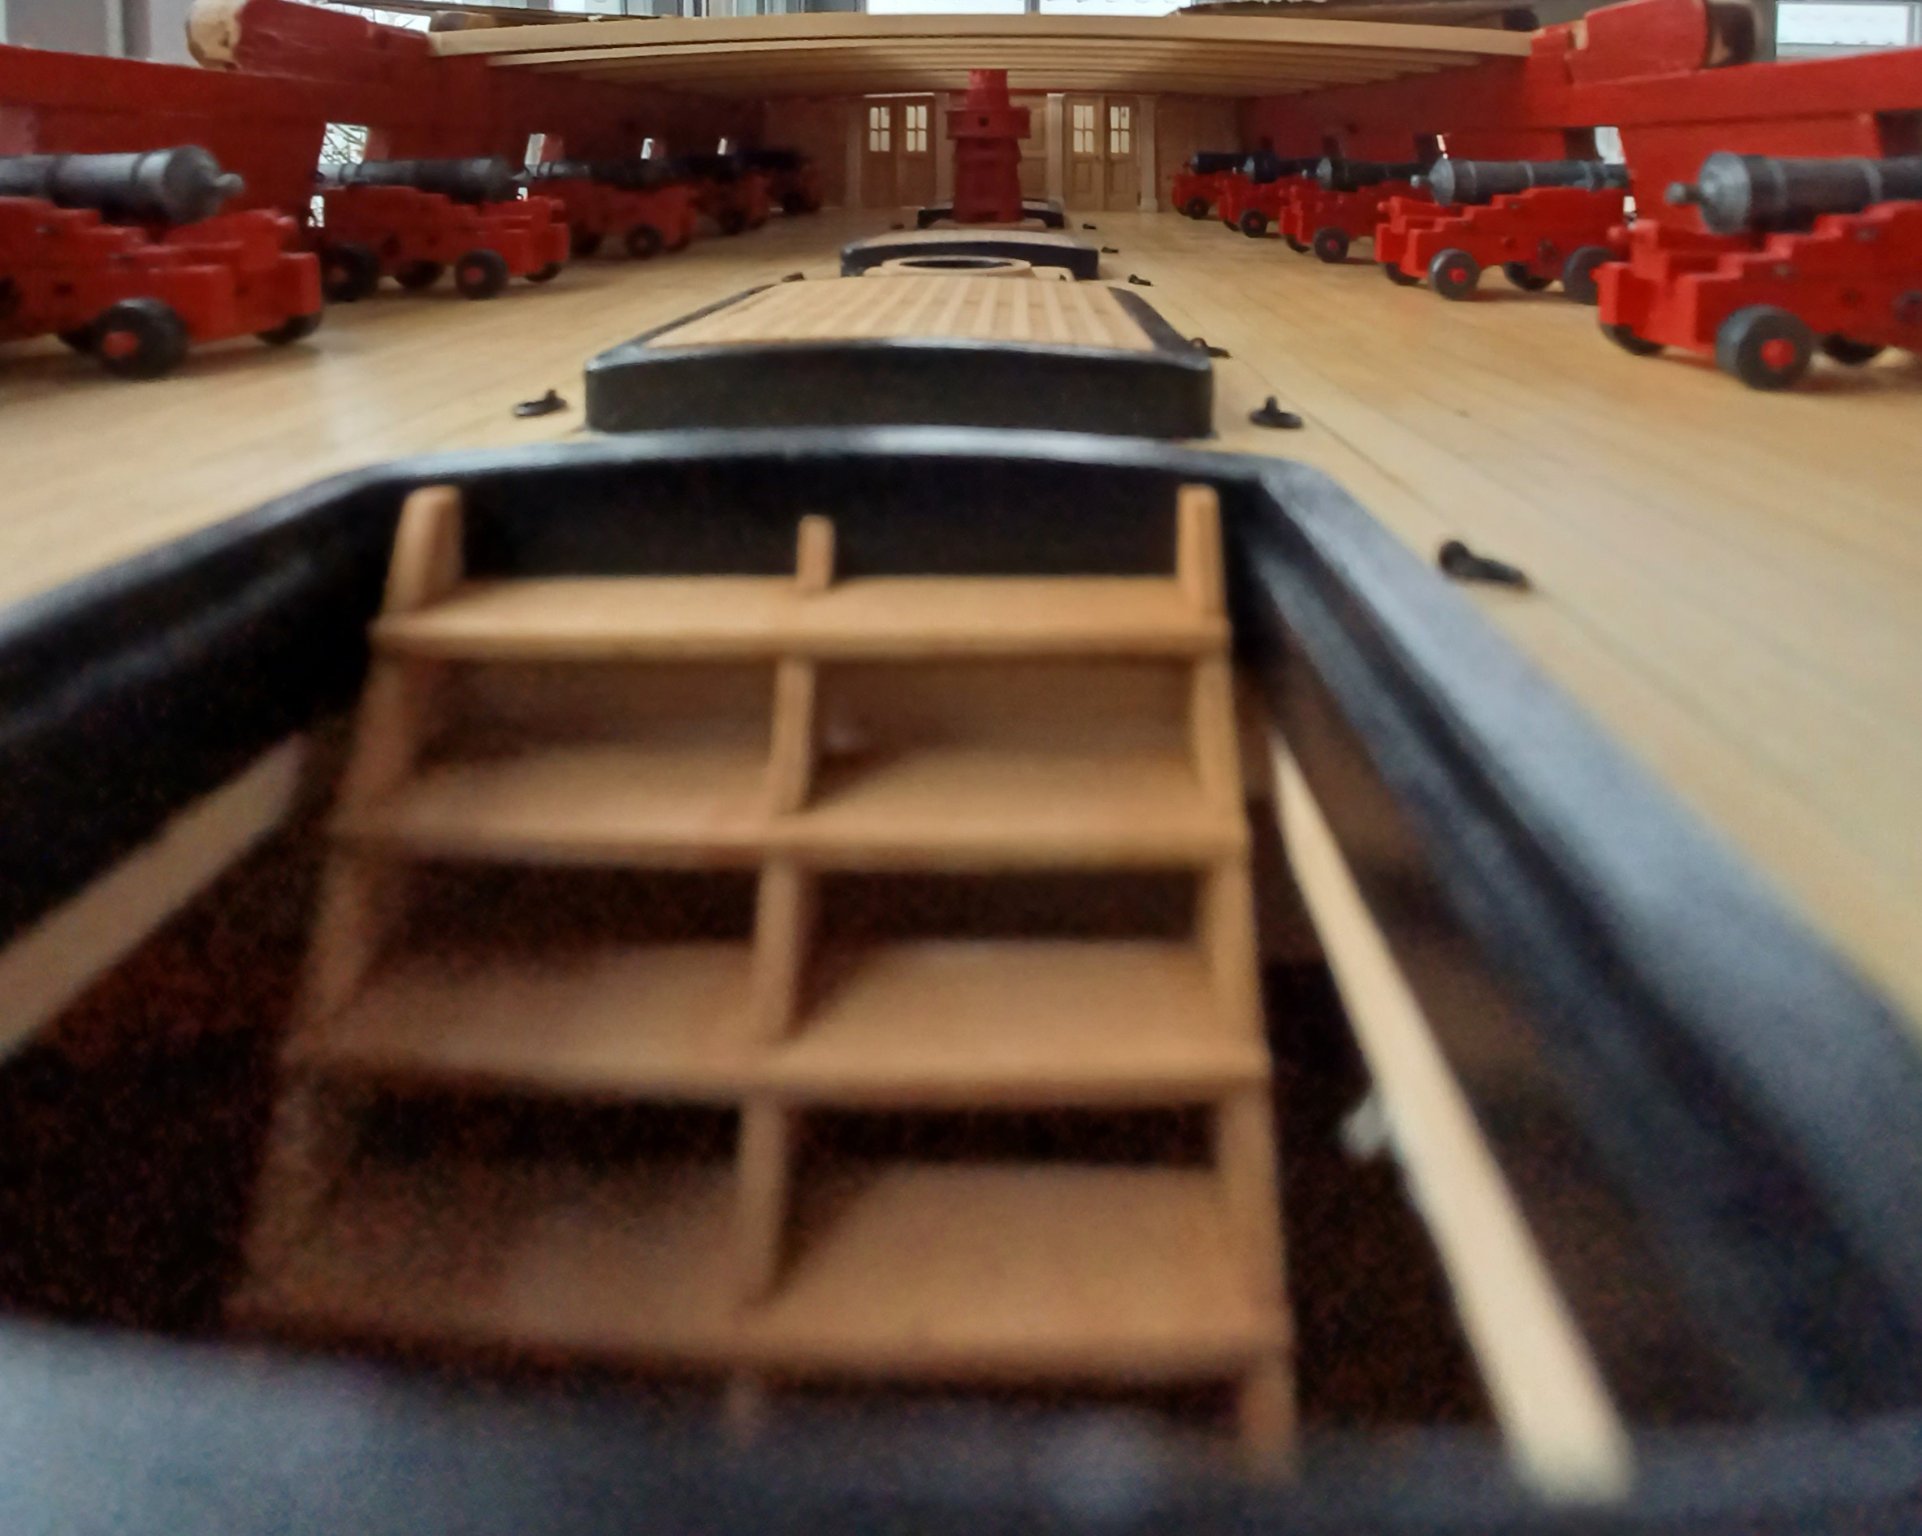
Hello everybody,
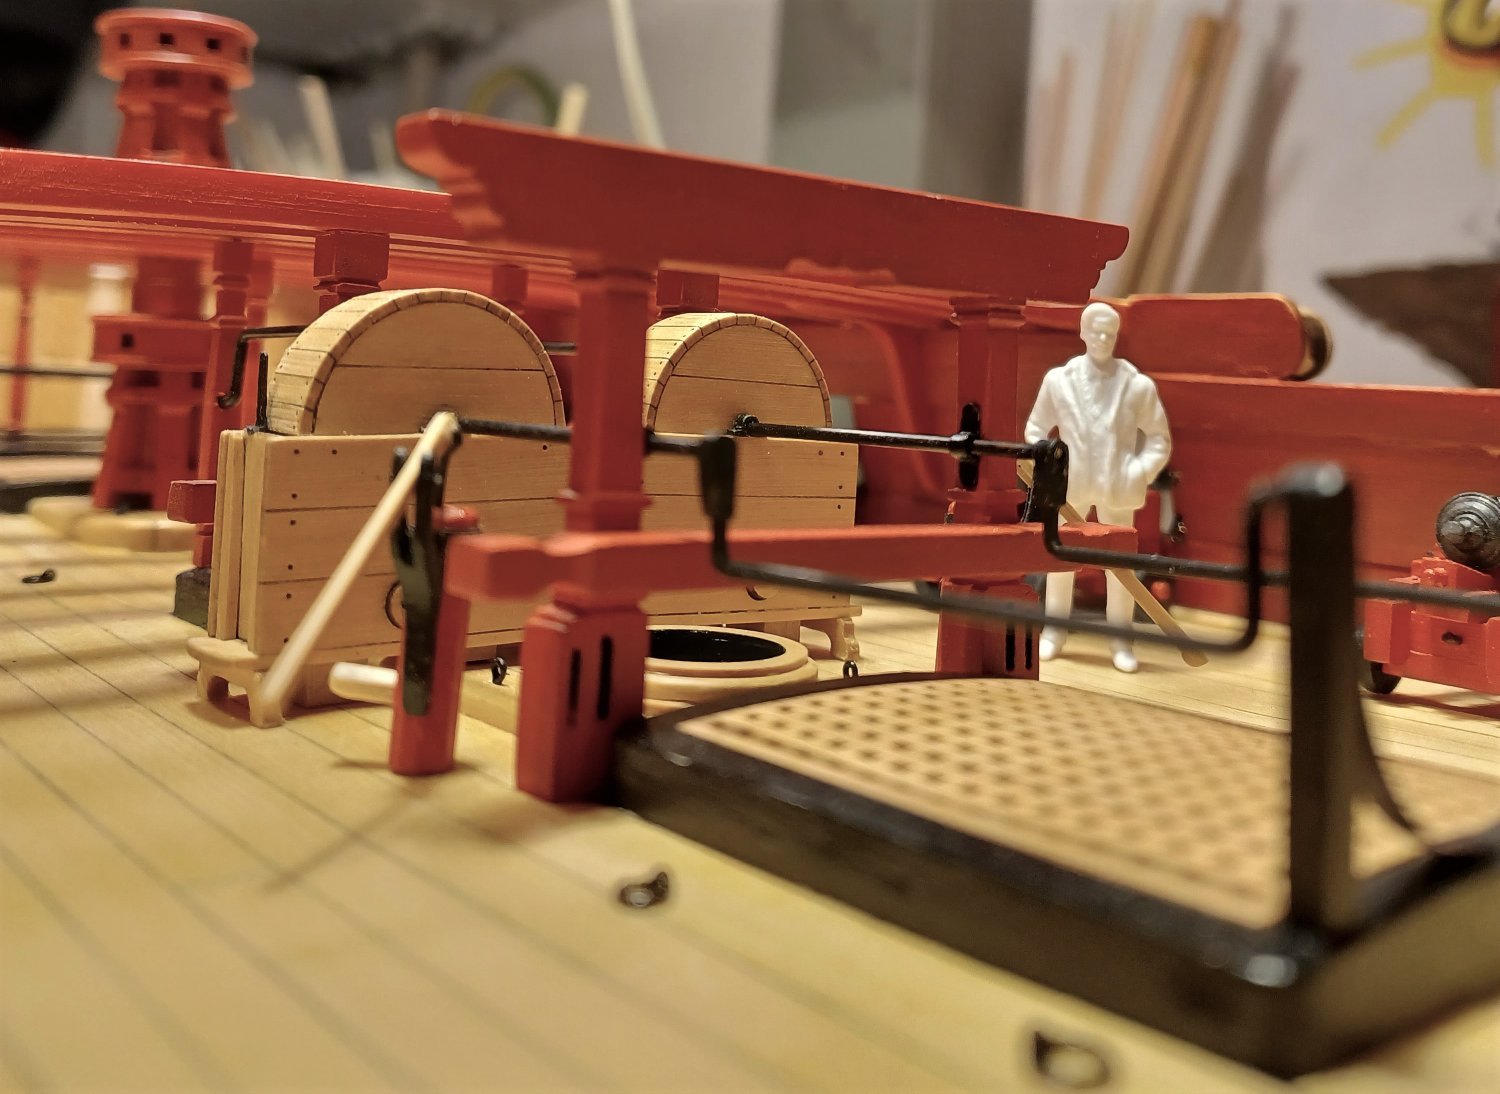
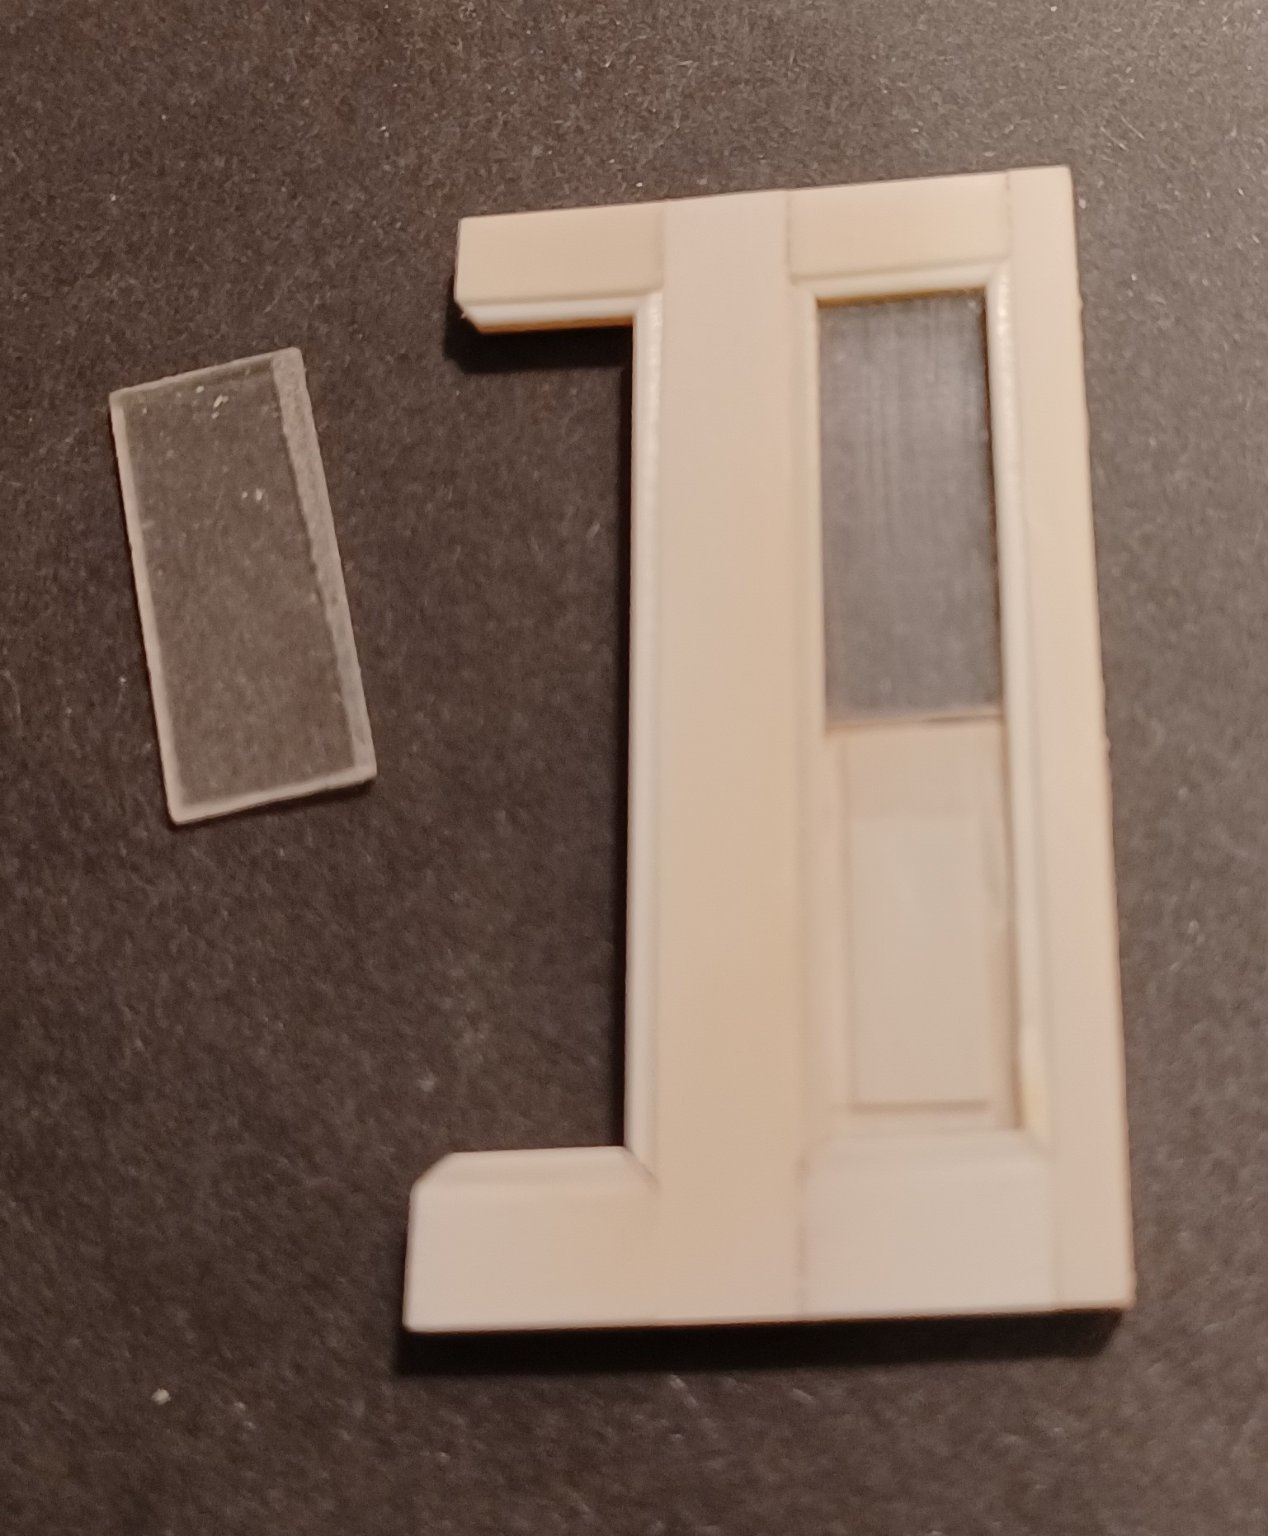
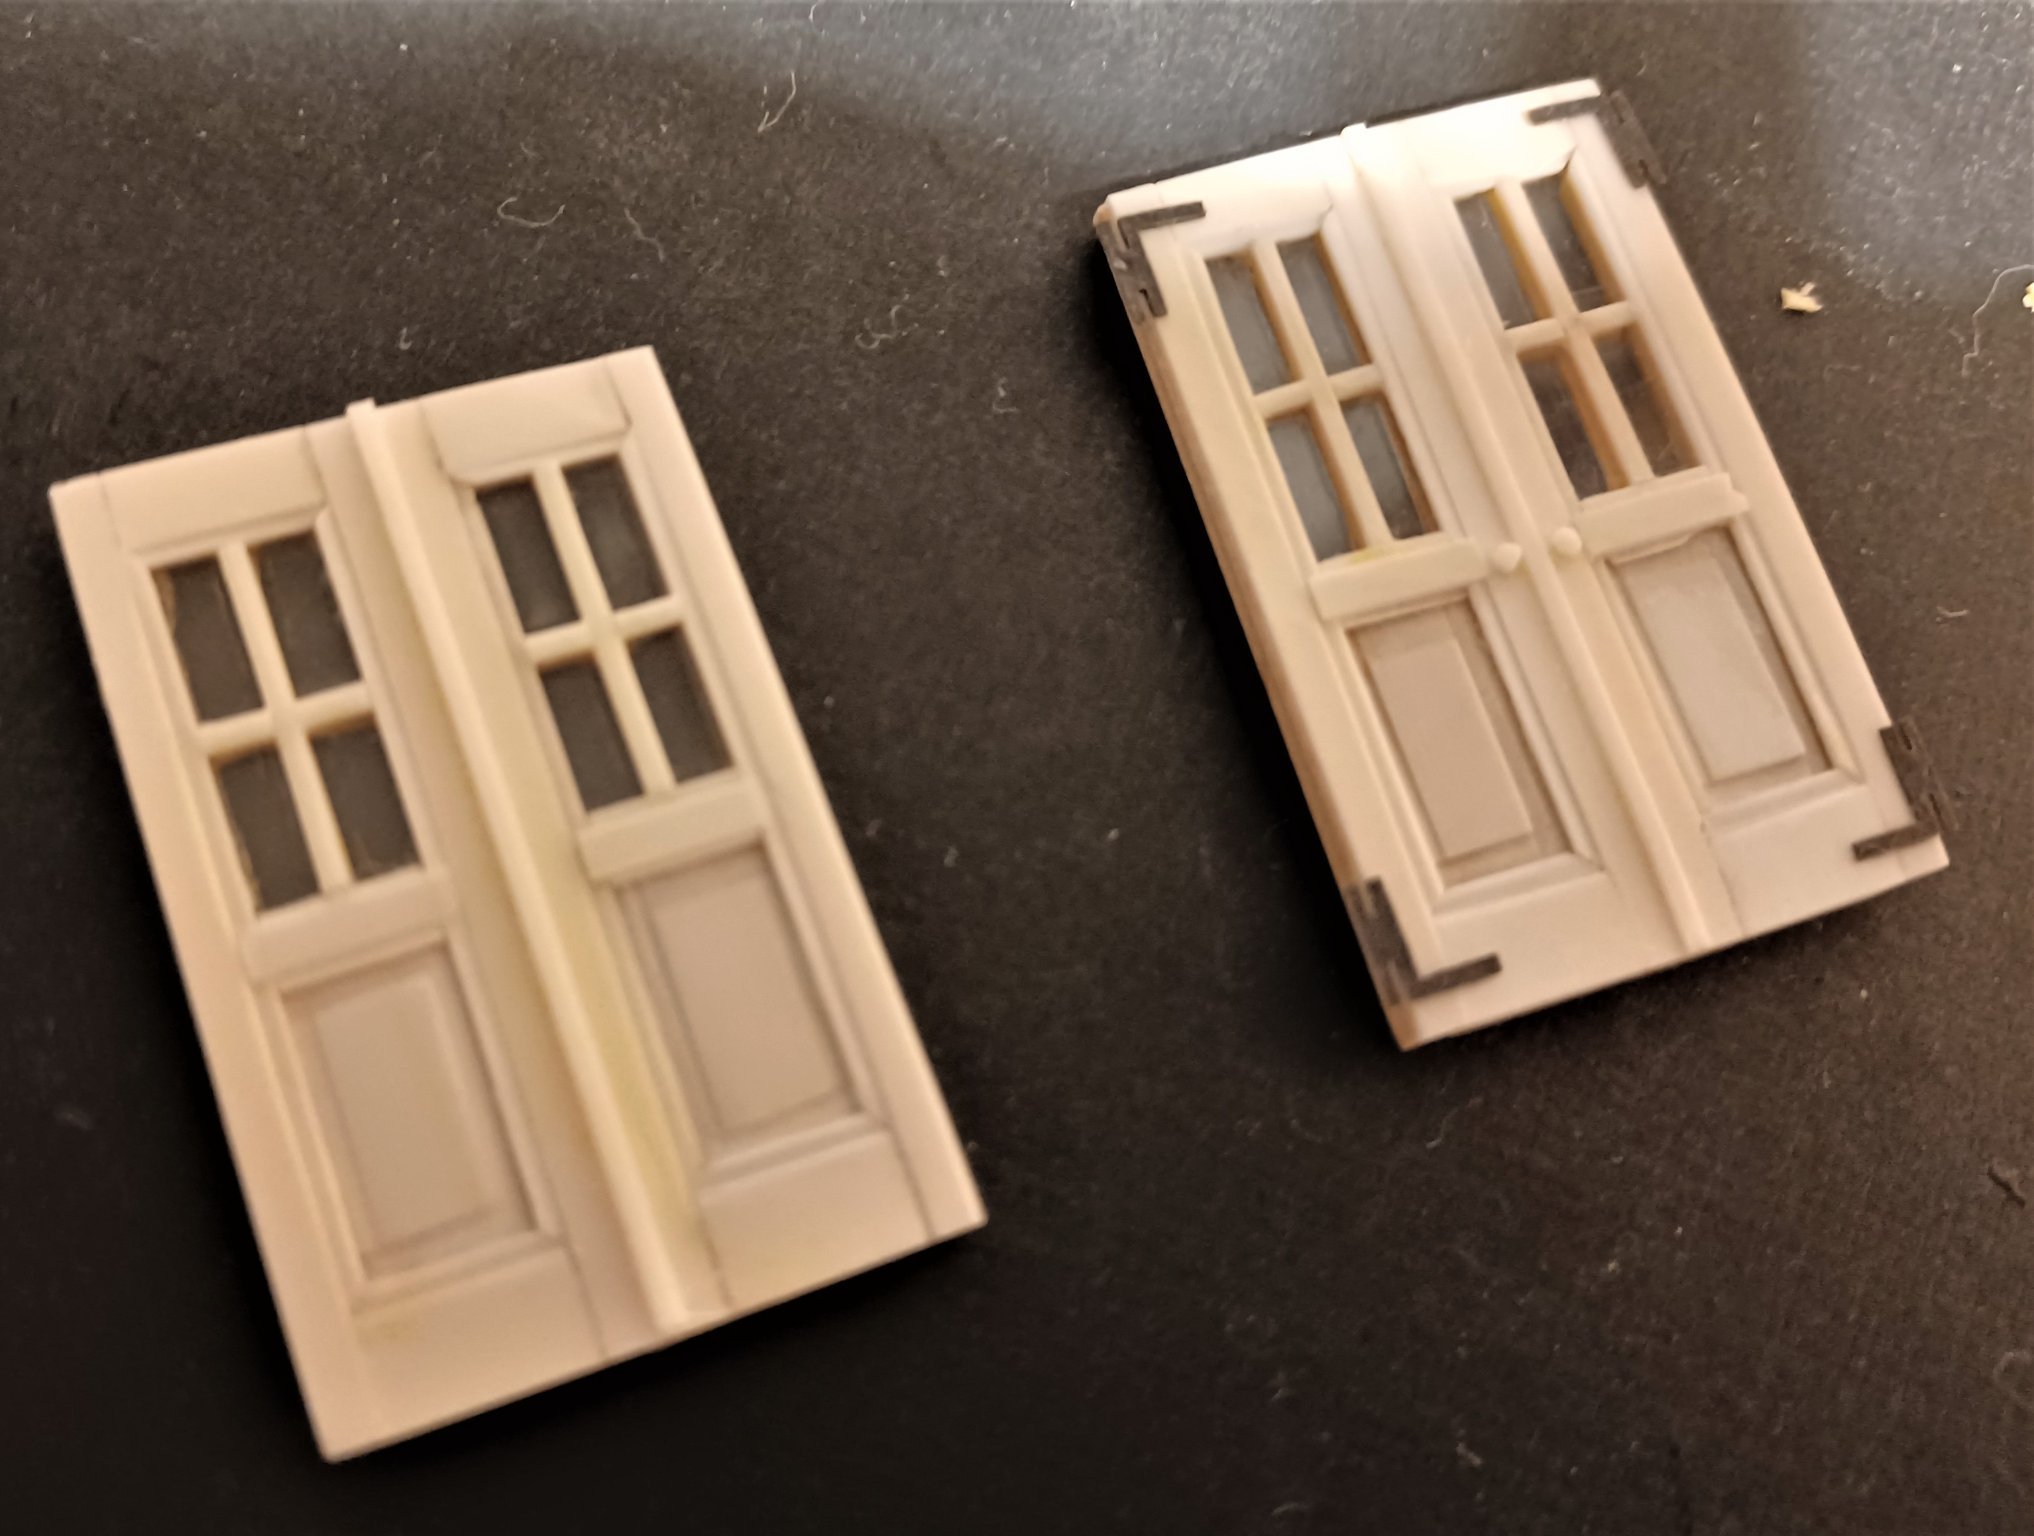
This weekend I proceeded with the building of the doors for the front bulkhead. And I finally installed the bulkhead-arrangement to the model.
The doors were built the same way as the rest of the front-panel: inside ivory, outside boxwood. For the windows I needed something more stable because of the glazing bars on both sides. After looking around a while I decided to cut a ferrero-rocher-box into peaces, they are from acryl and really thin an nice. Perhaps 0,3 mm thick. That worked quite well.

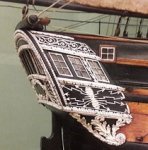
After finishing this, I took the model out of the workshop and made some photos, because some prominent visitors came around to have a look at the great cabin. I think it was Tomas Slade himself.

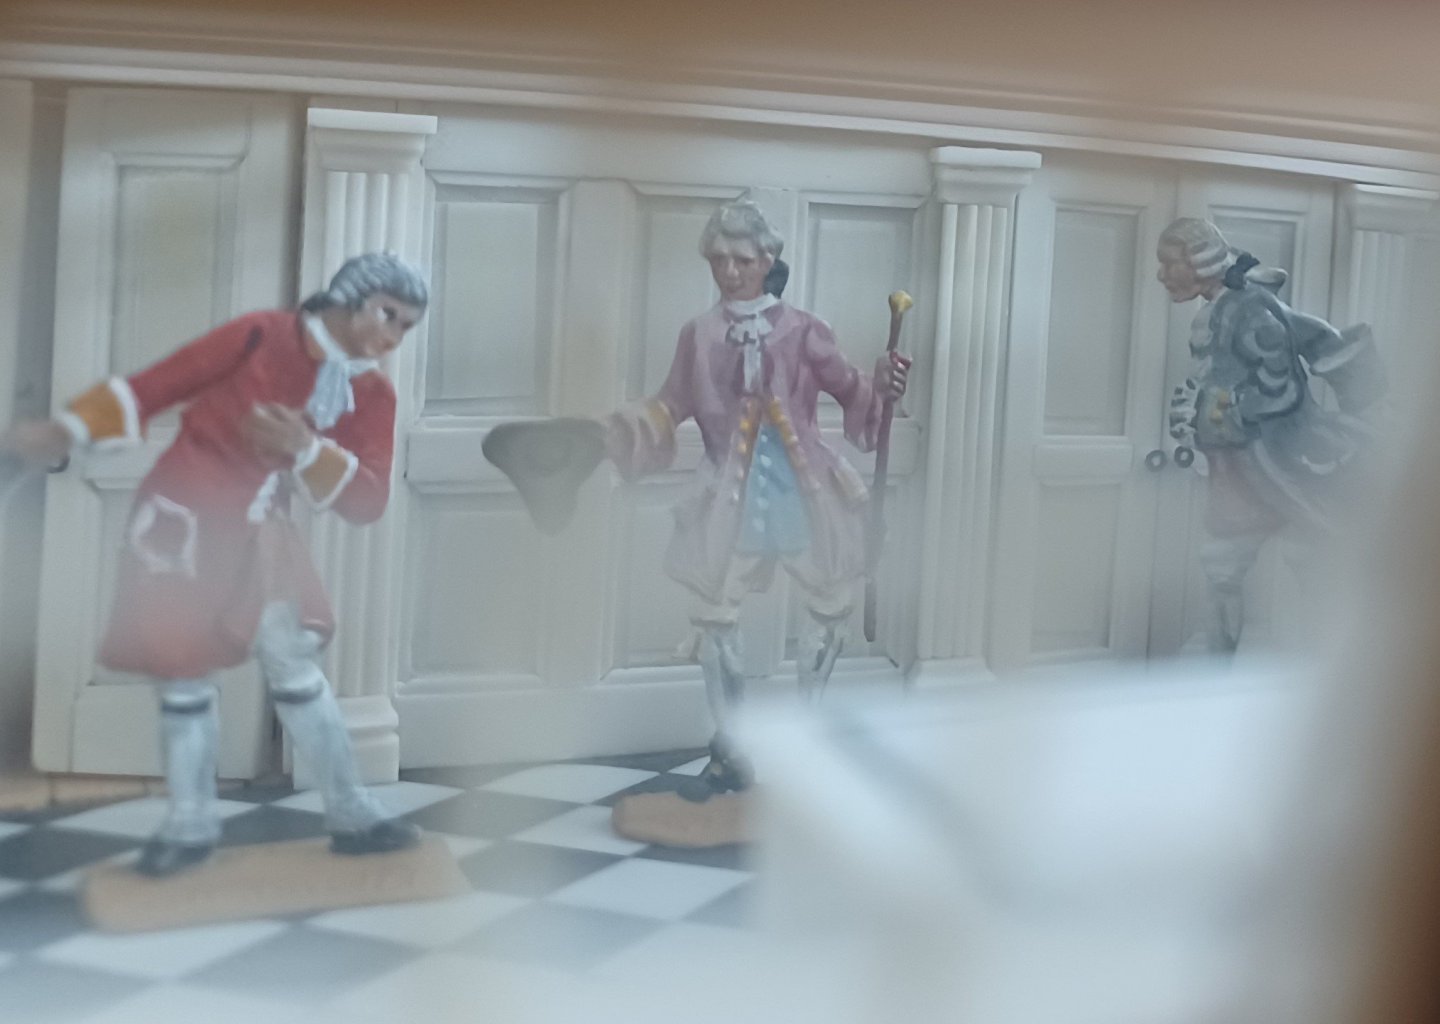

Matthias


Sloop Speedwell 1752 by Chuck - Ketch Rigged Sloop - POF - prototype build
in - Build logs for subjects built 1751 - 1800
Posted
Will there be optional a boxwood set of the carvings, like you provided for the Winchelsea?