
Beckmann
-
Posts
349 -
Joined
-
Last visited
Content Type
Profiles
Forums
Gallery
Events
Posts posted by Beckmann
-
-
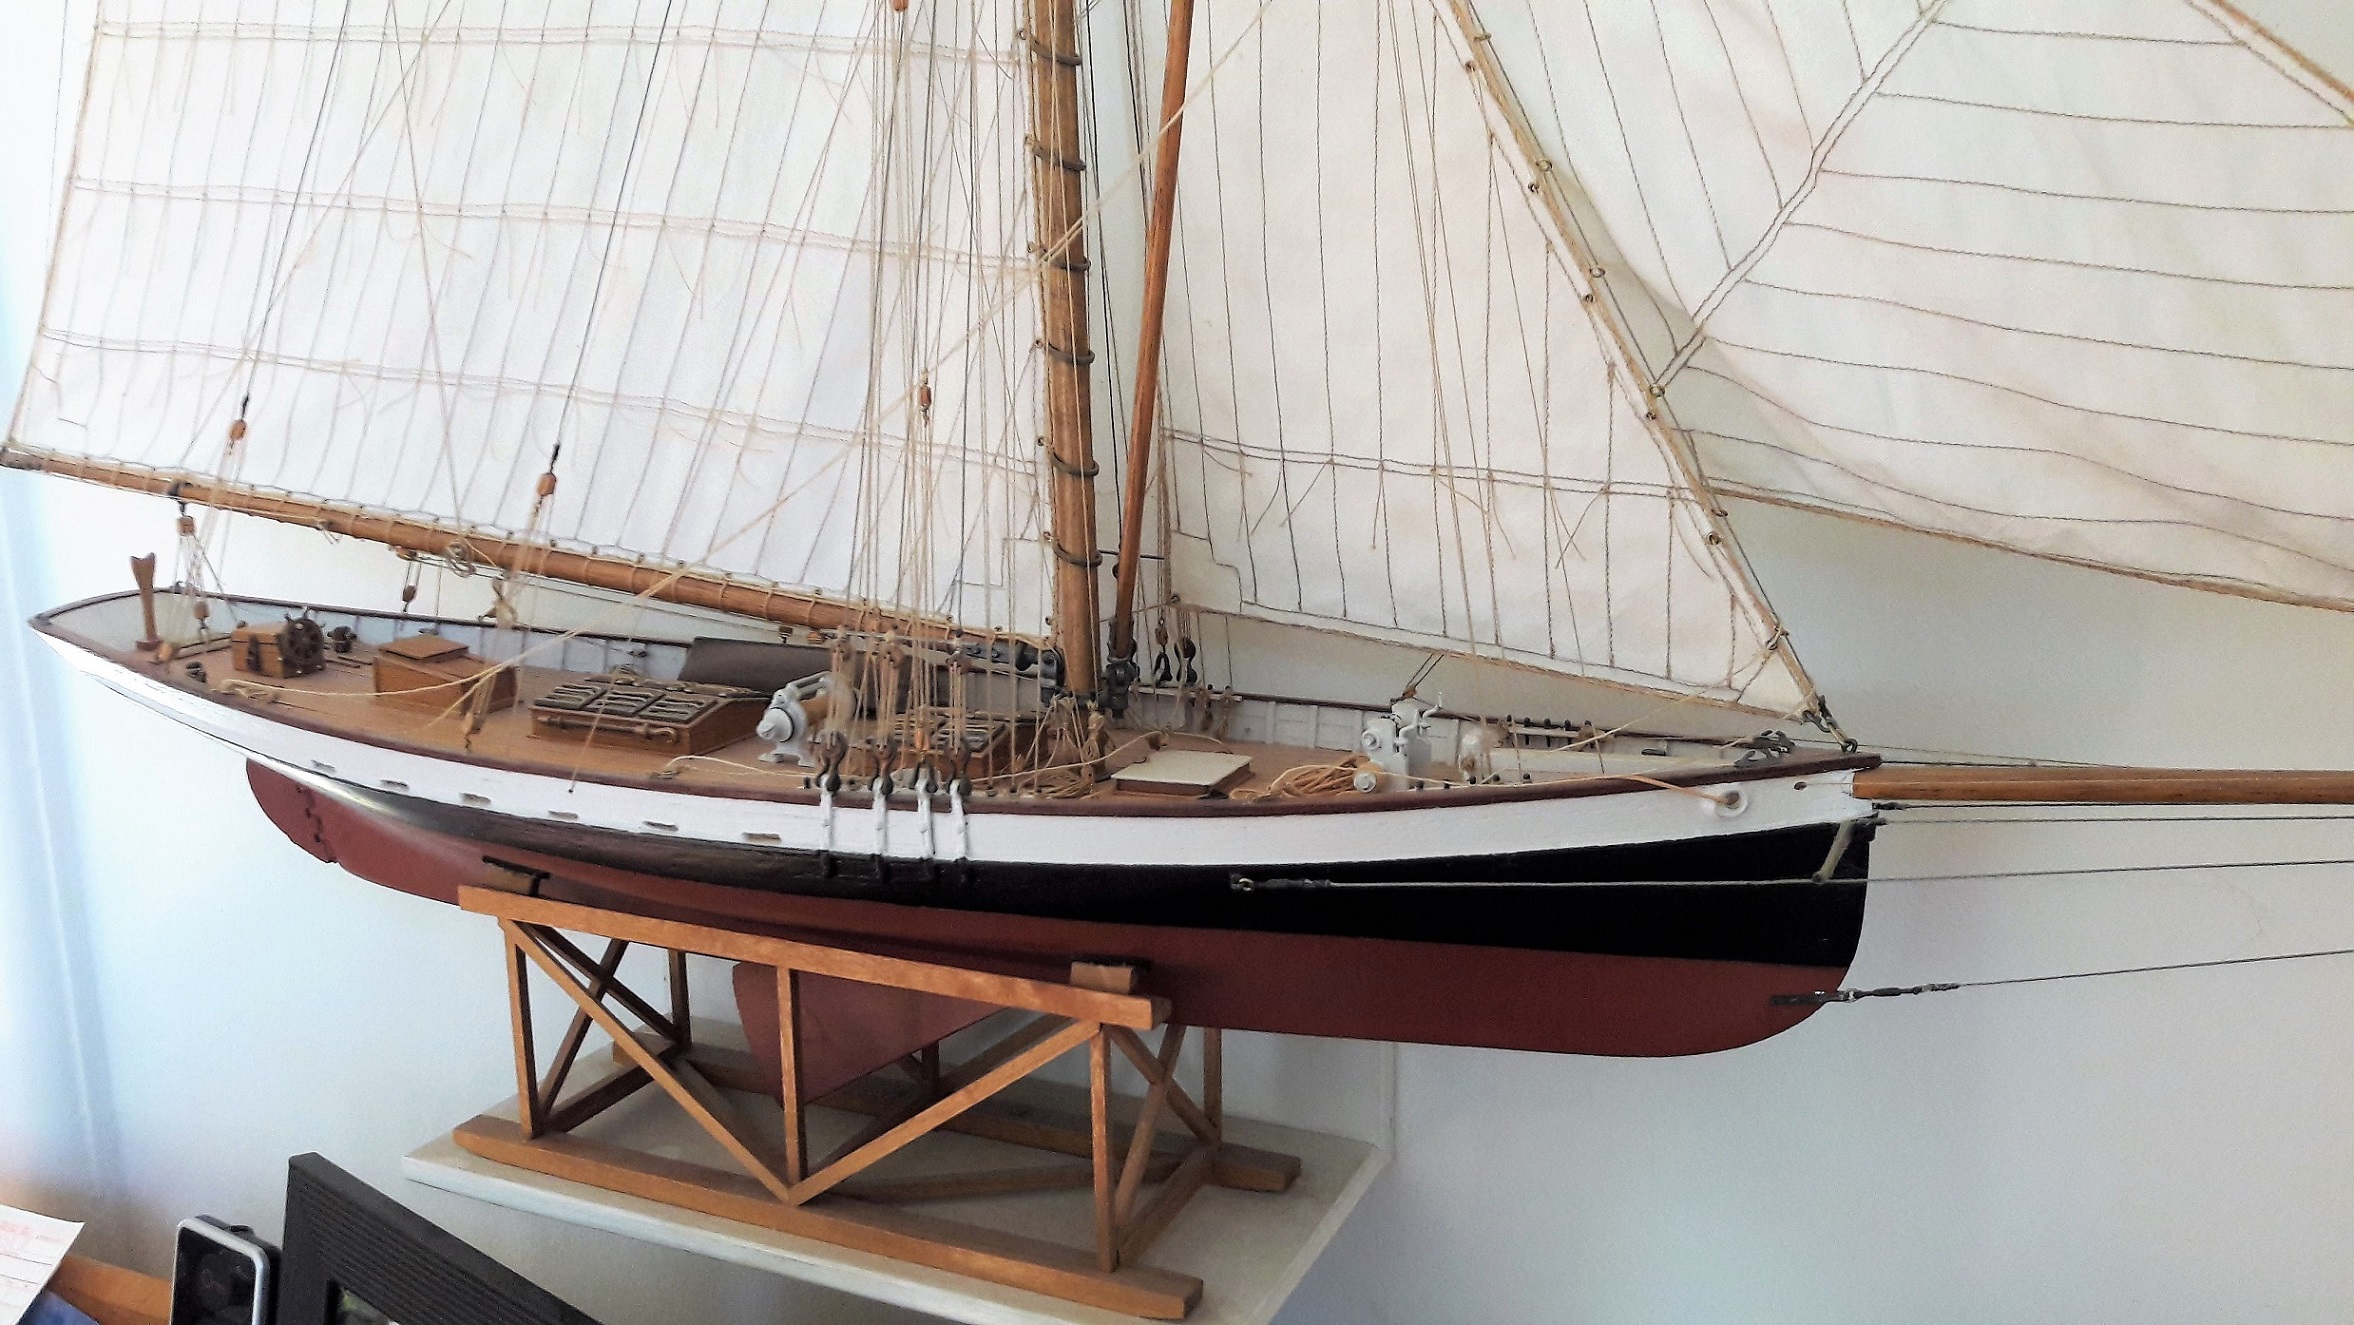
After being busy with other projects, I now want to continue with the restoration of the bone model I already showed you back in 2021.
I found a couple of similar models in auctions around the world, several of them made by the same builder Albertino Sousa Luz.
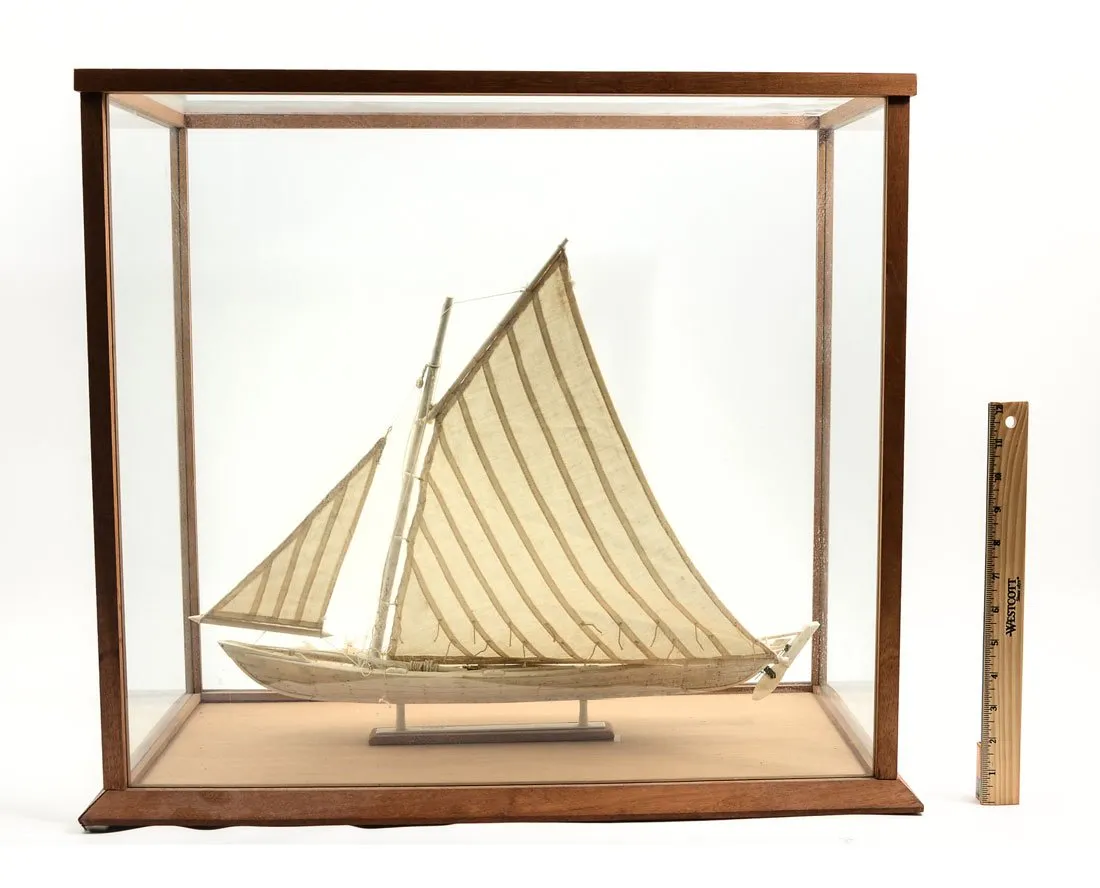
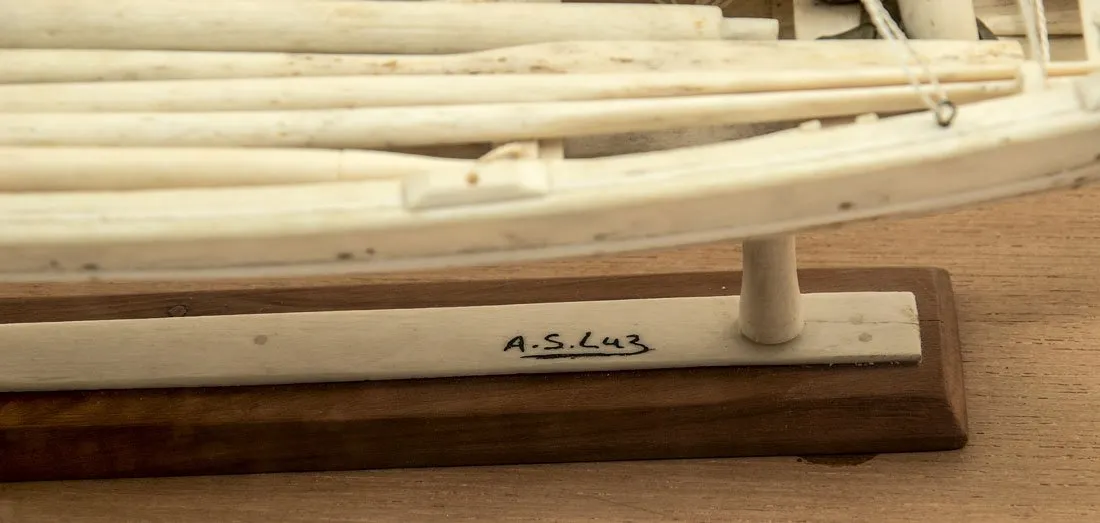
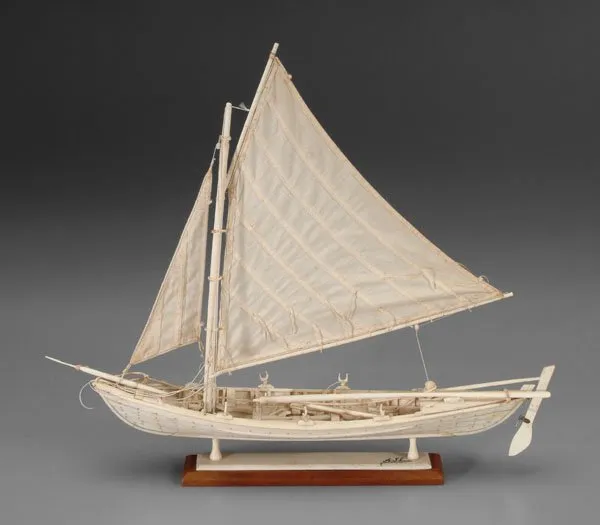
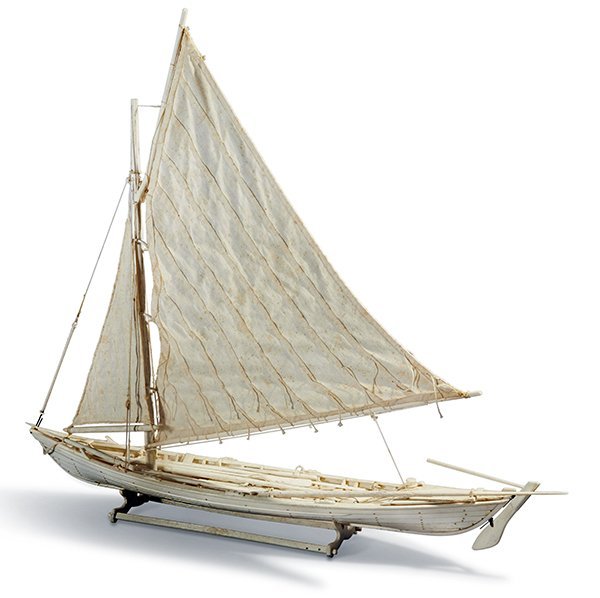
In fact, almost all of the models seem to be signed by A.S.Luz.
So it is propably a retired (and very talented) whaler who made them rather then a local tradition.
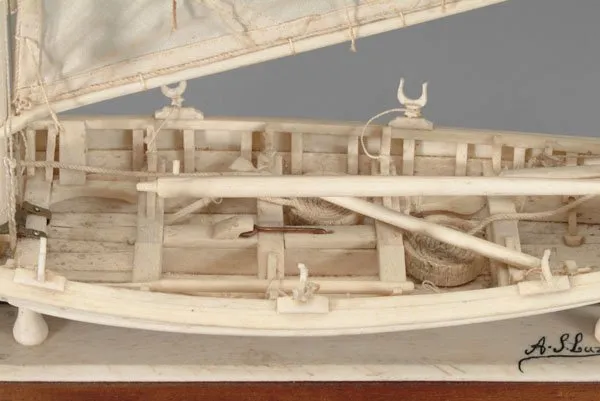
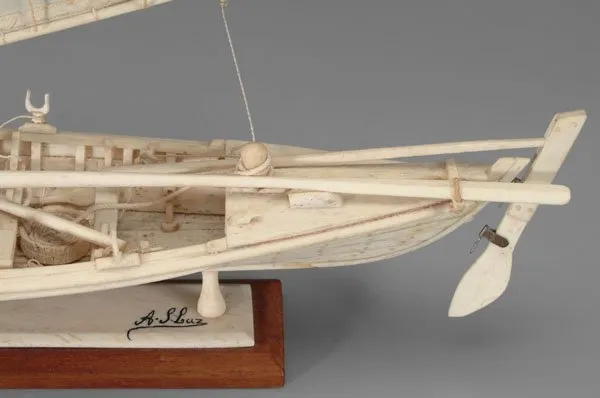
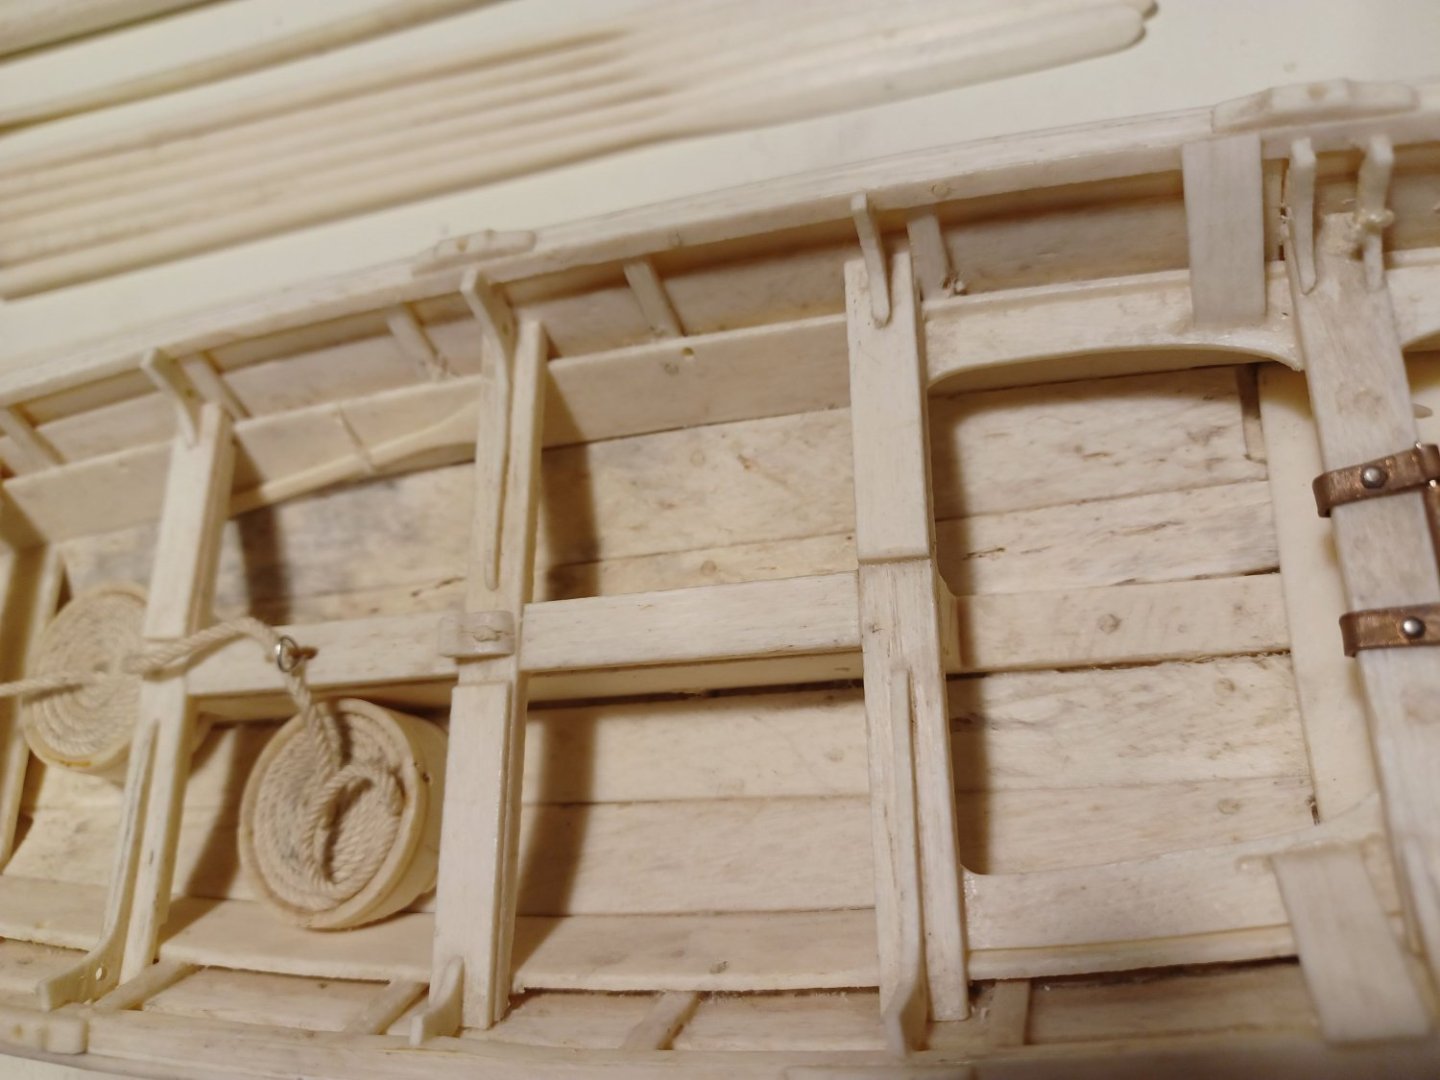
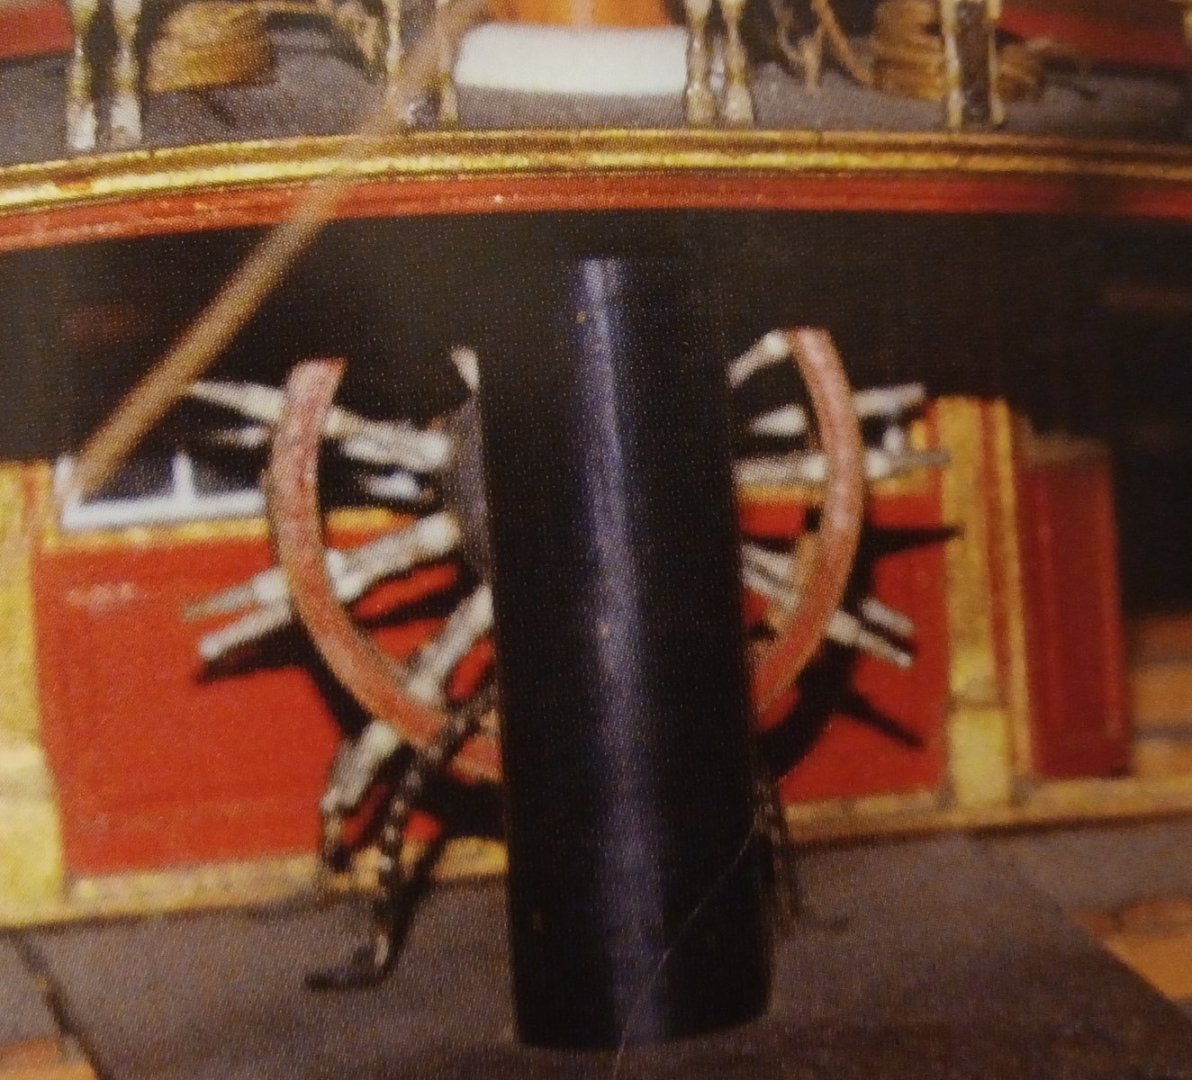
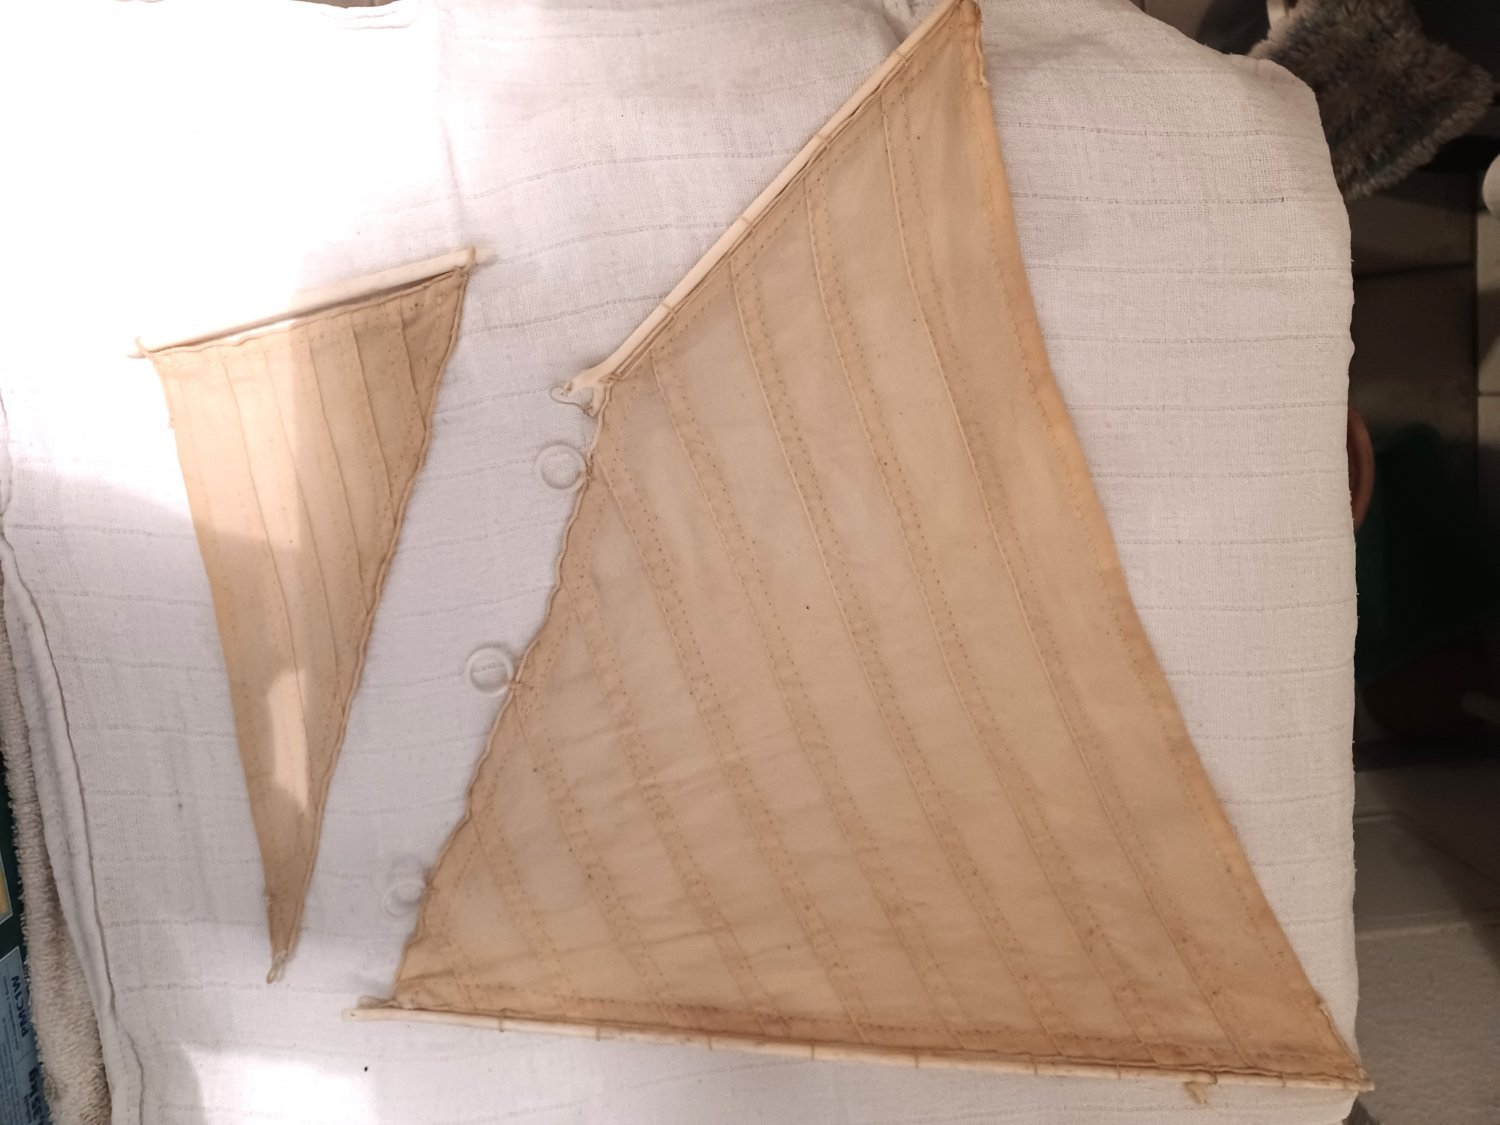
I dismantled my model, becaus it was a dirty mess and started to clean it first with a dry brush and then with a wet ear stick.
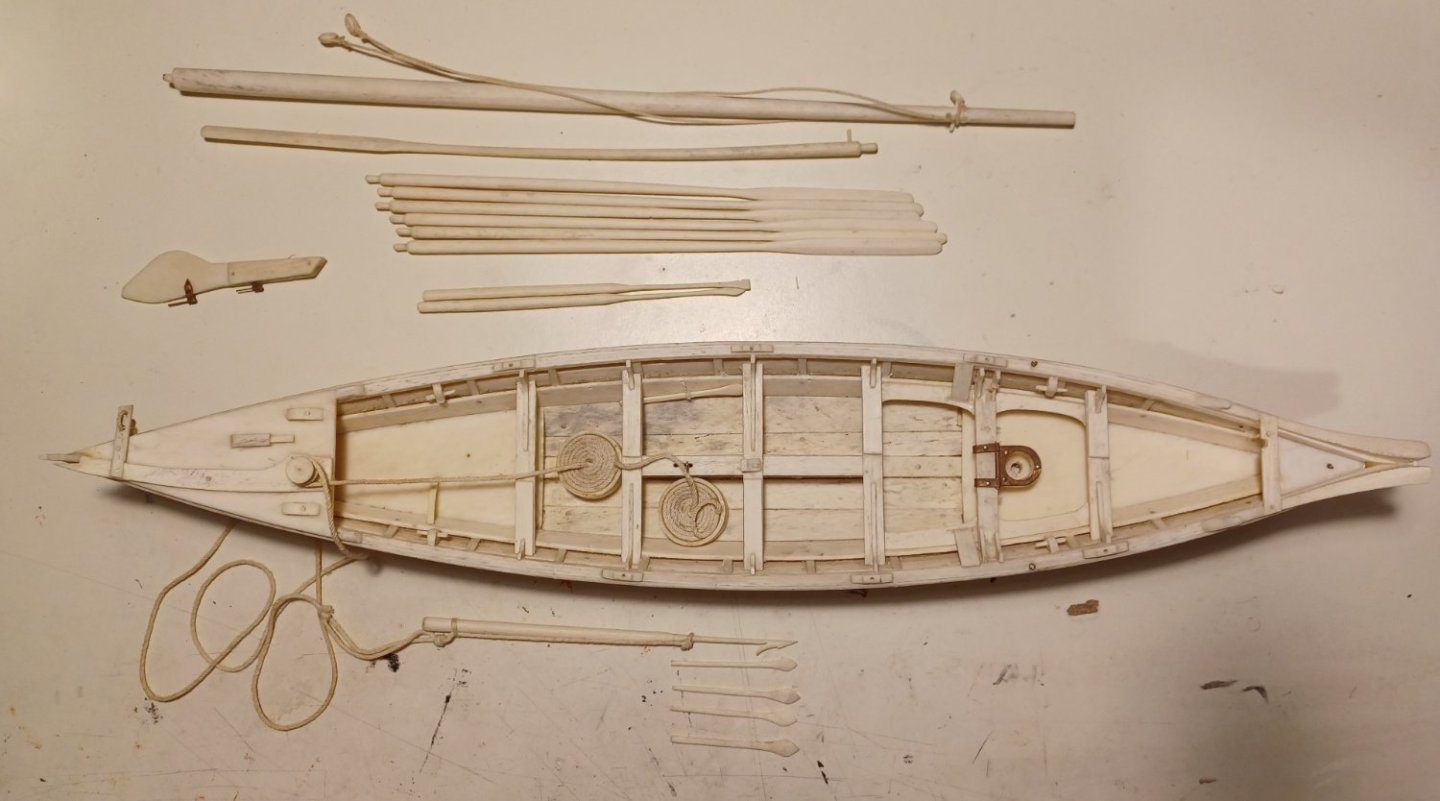
I am happy to say, that no parts are missing. All of the long oars, the steering oar, the paddles, the rudder, the rowing oarlocks and the hunting tools are still there. Some of them were fixed to the model with rope. I removed these ropes, because they were very dirty and partly unraveled, I will replace them.
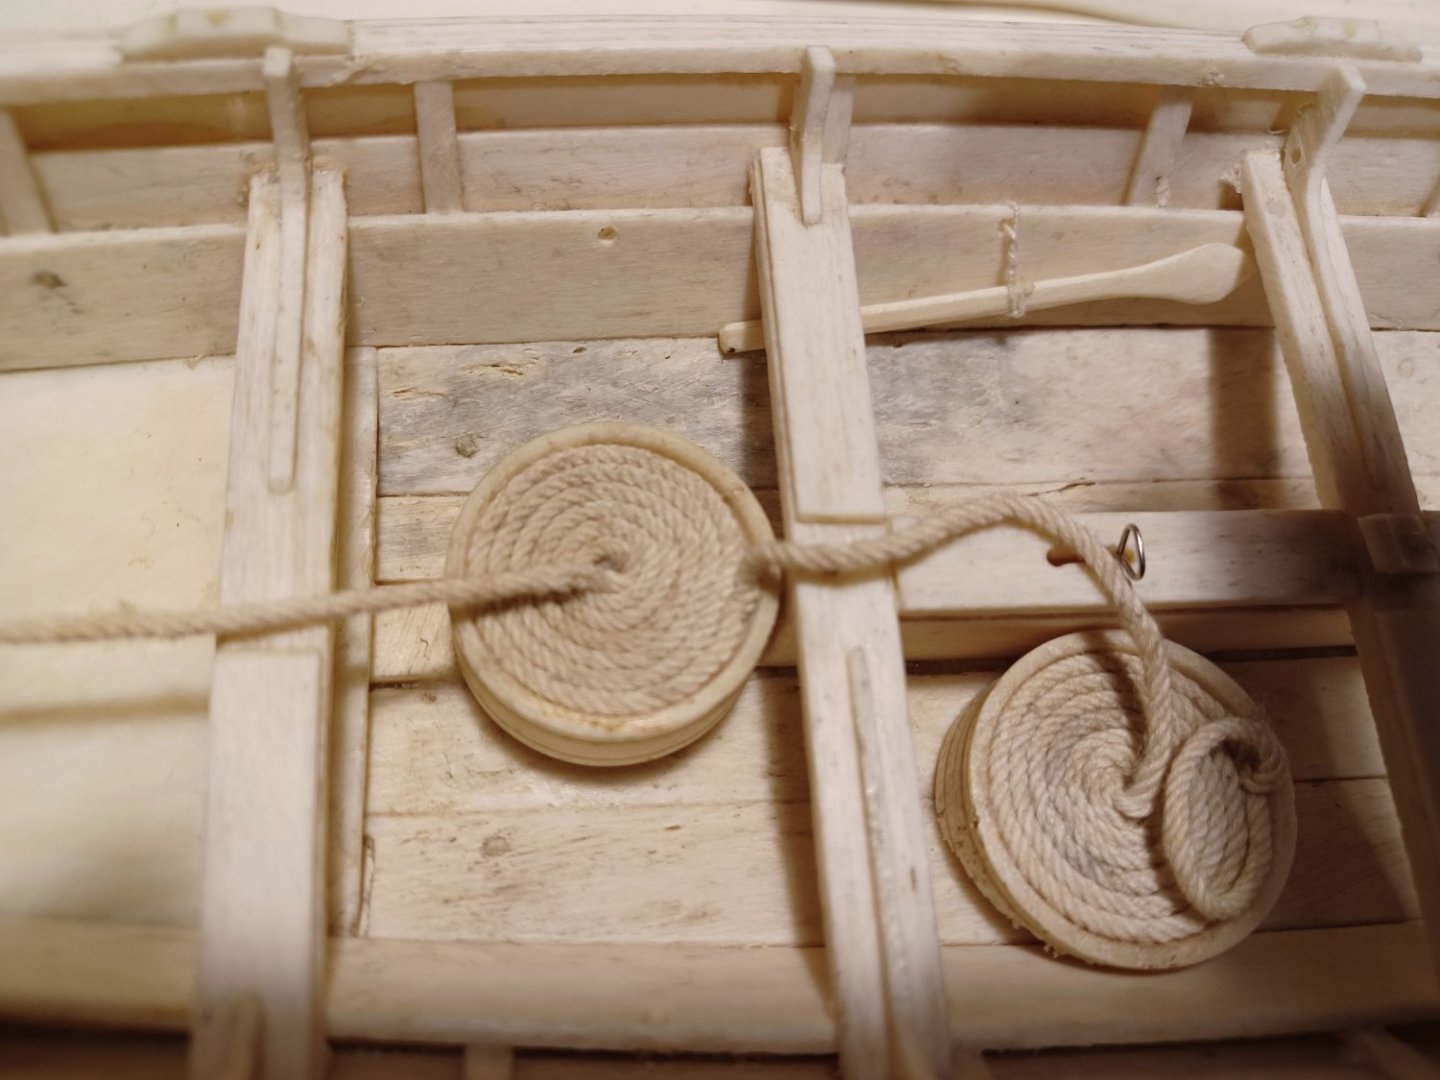
Here you can see the harpune rope-drum.

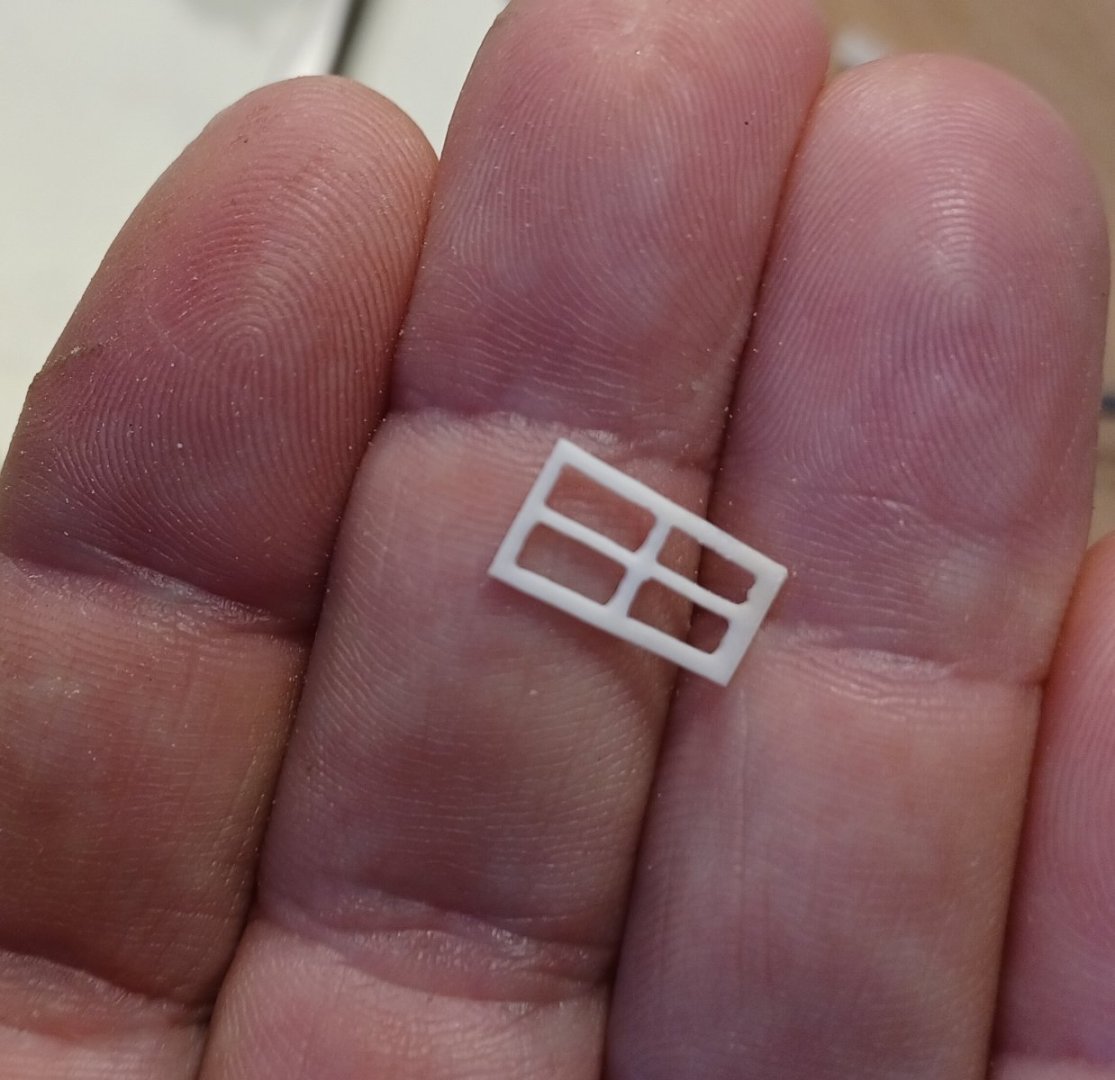
I also cleaned the sails.
The mast-rings are made from plastic and don't look very nice. I will propably replace them by rings made from bone.
Matthias
- Ainars, GrandpaPhil, ccoyle and 6 others
-
 9
9
-
Hi Everybody,
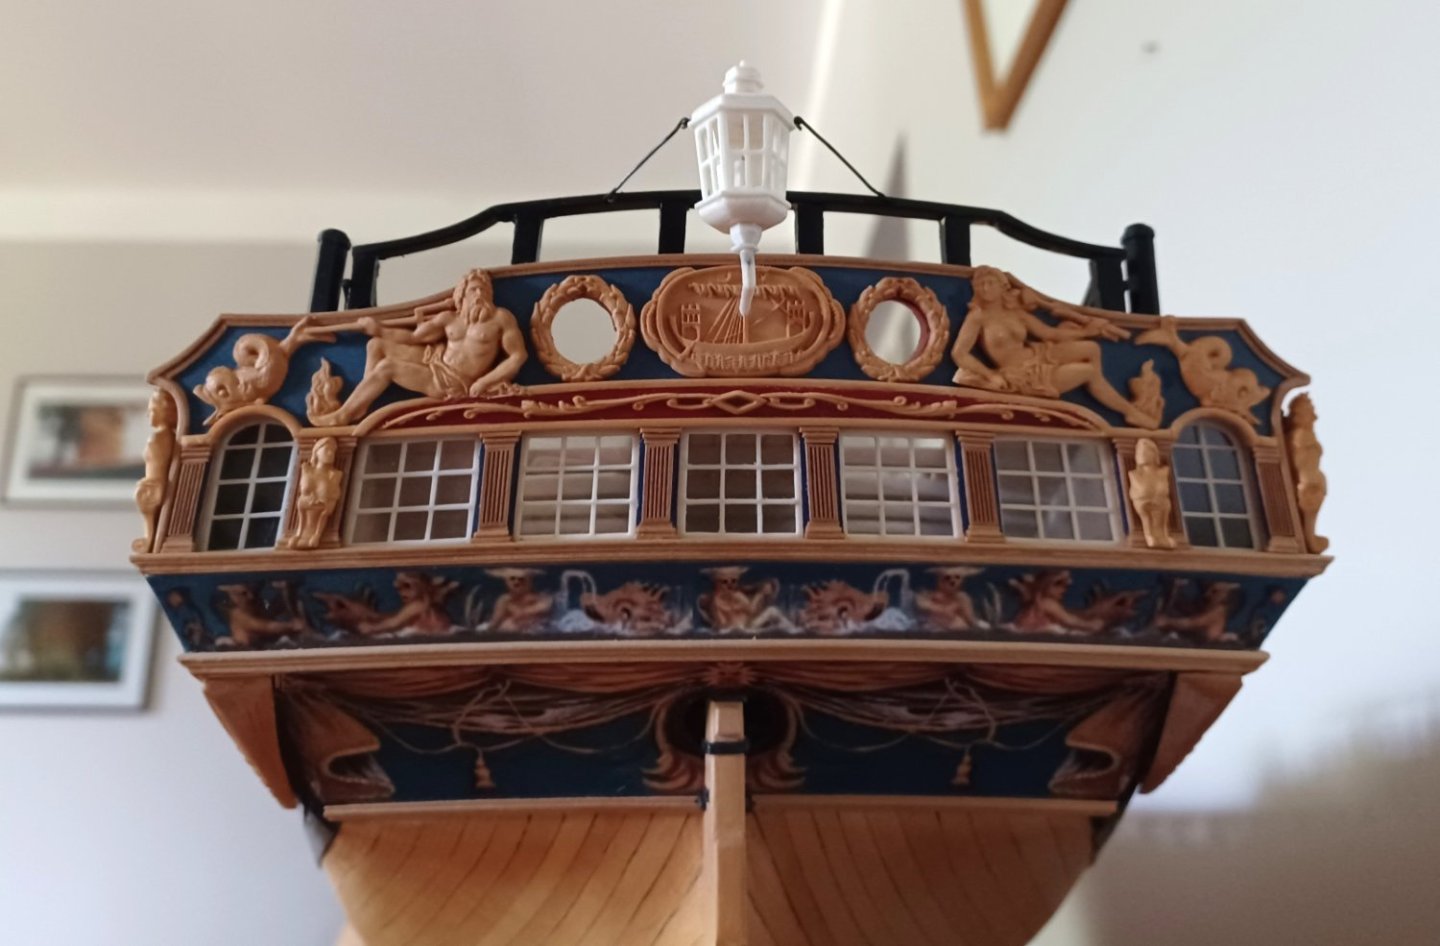
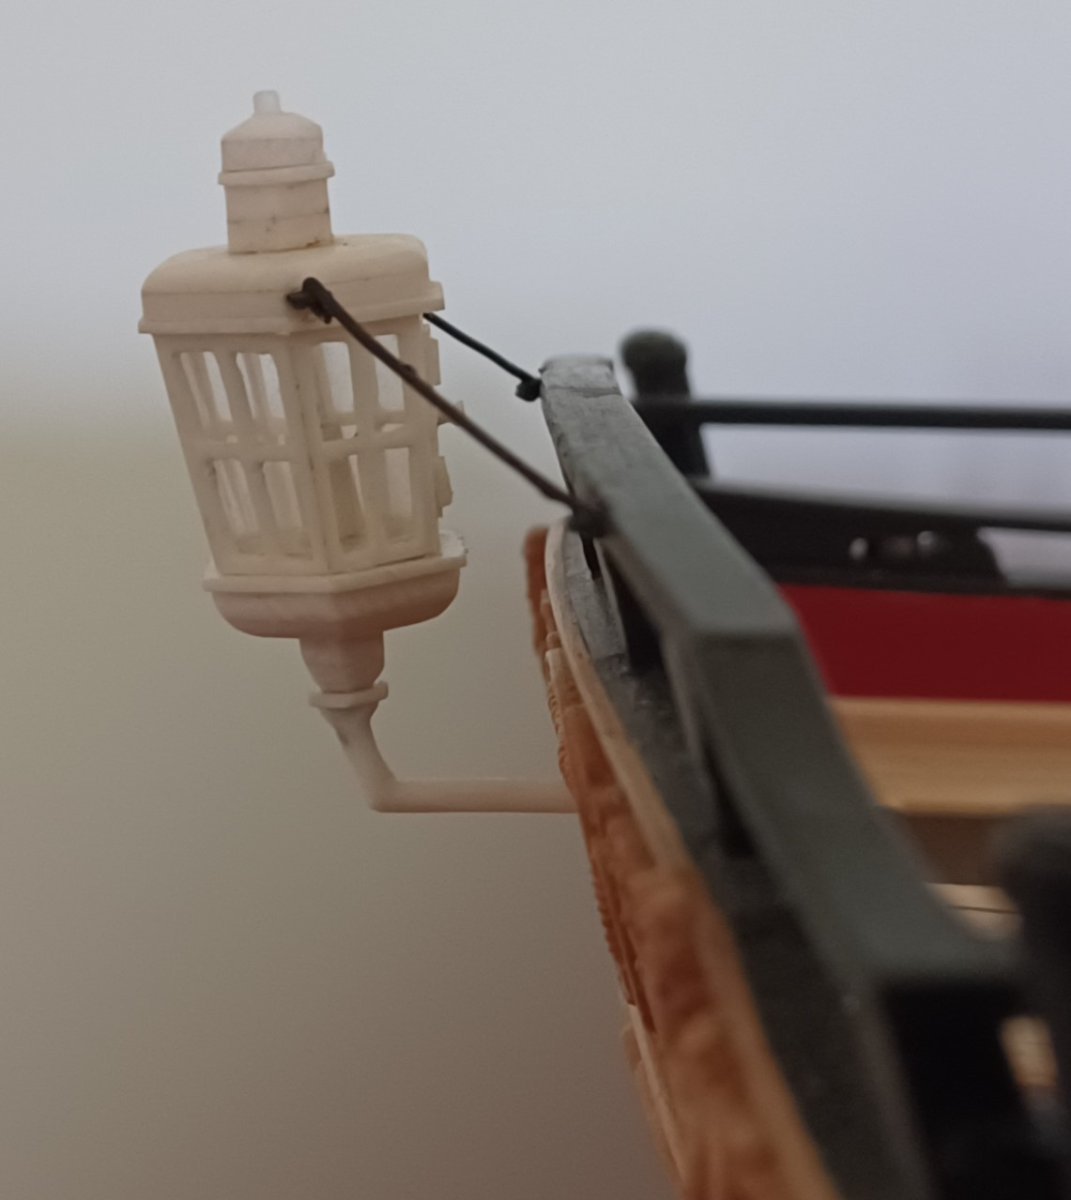
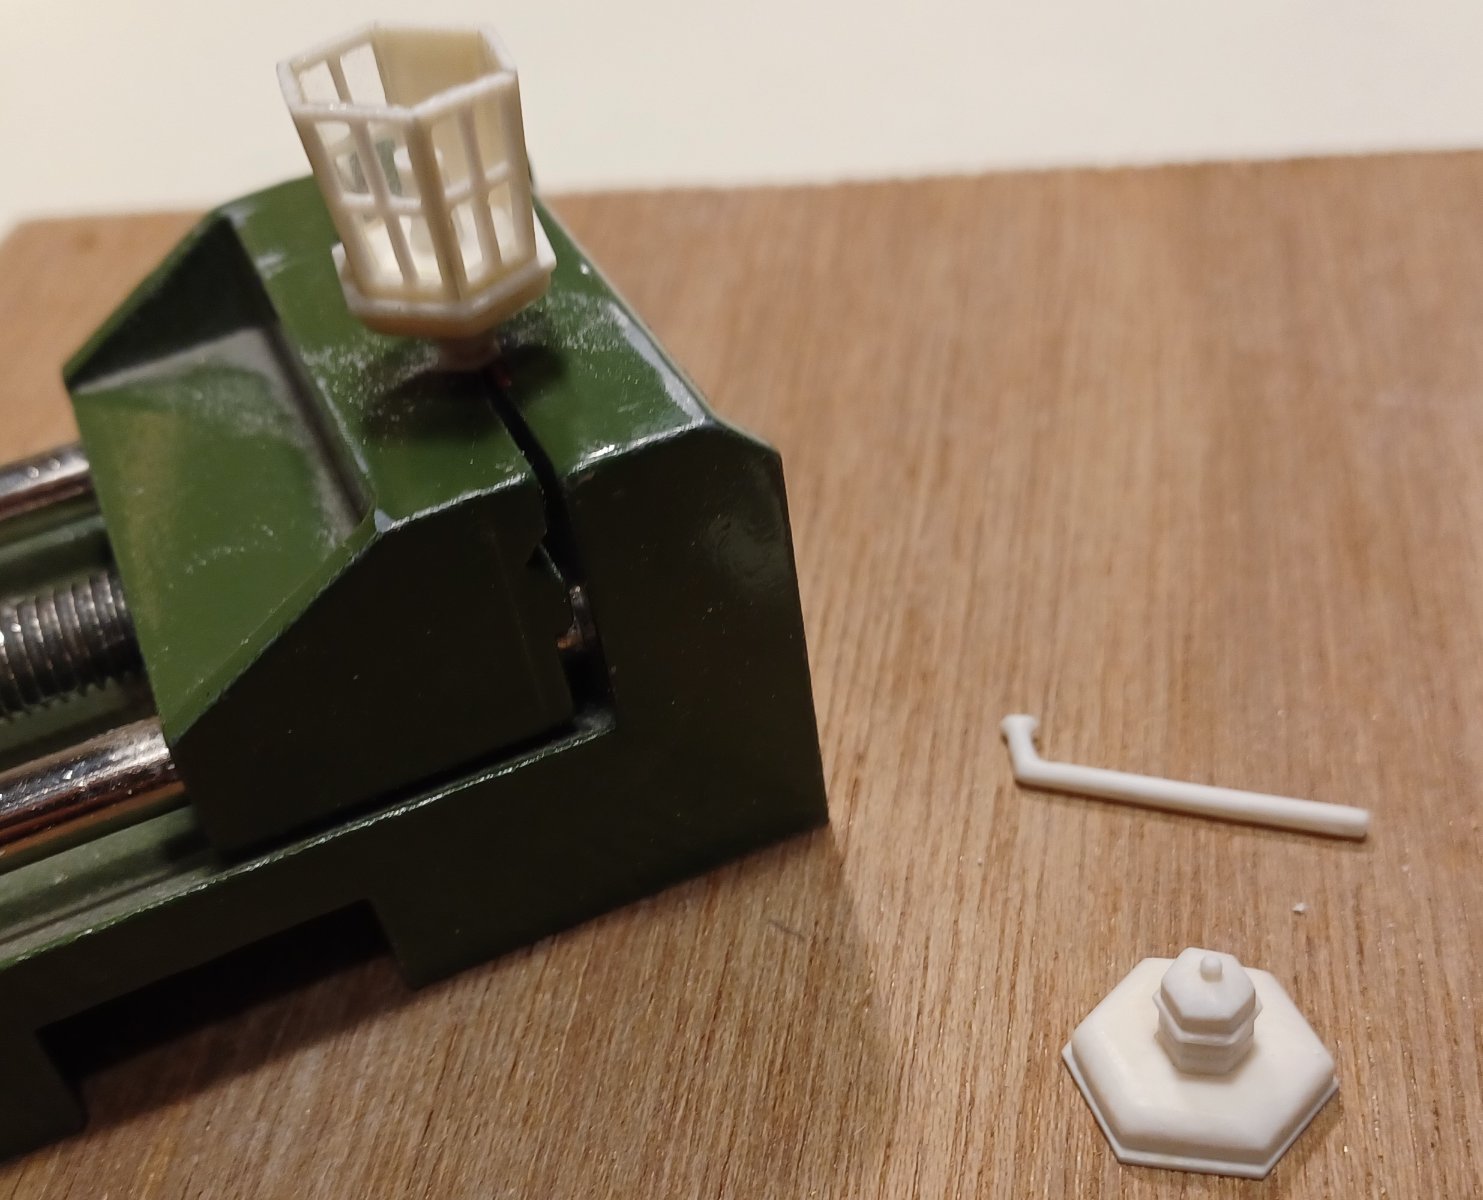
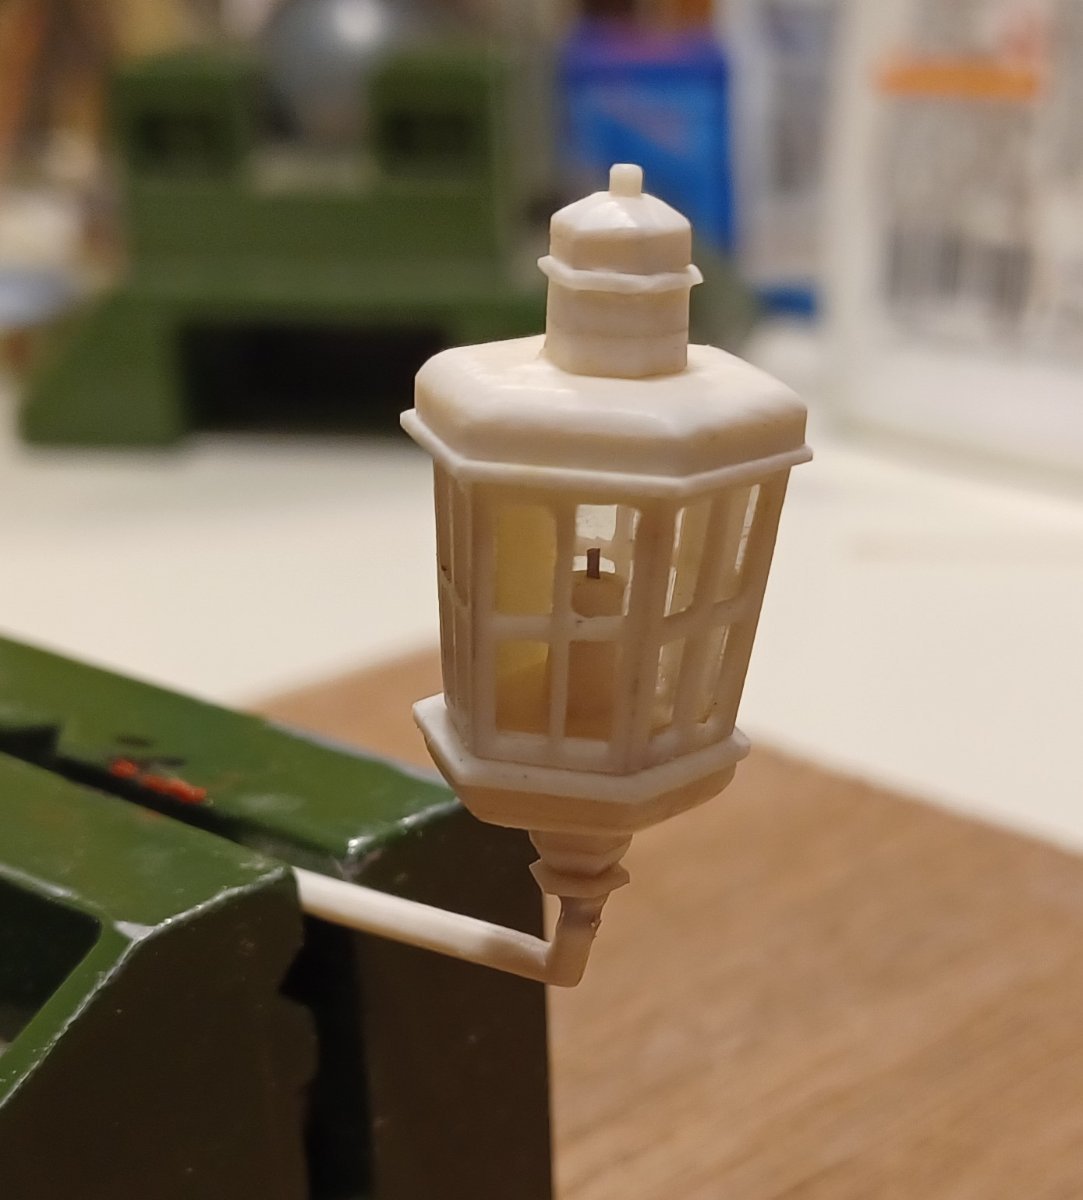
still no progress with my display case, but I mounted the stern lantern on the model.


Matthias
-
Thank you!
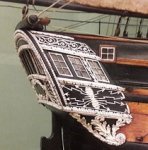
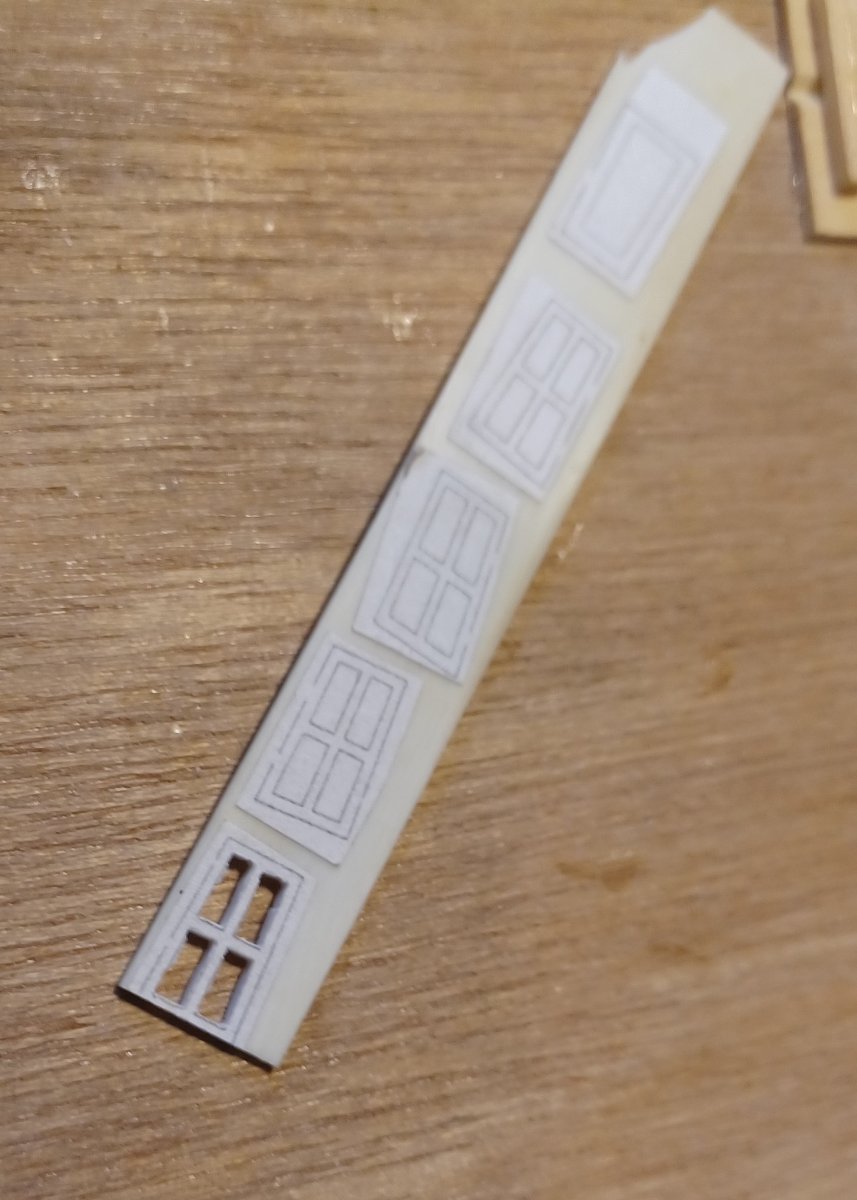
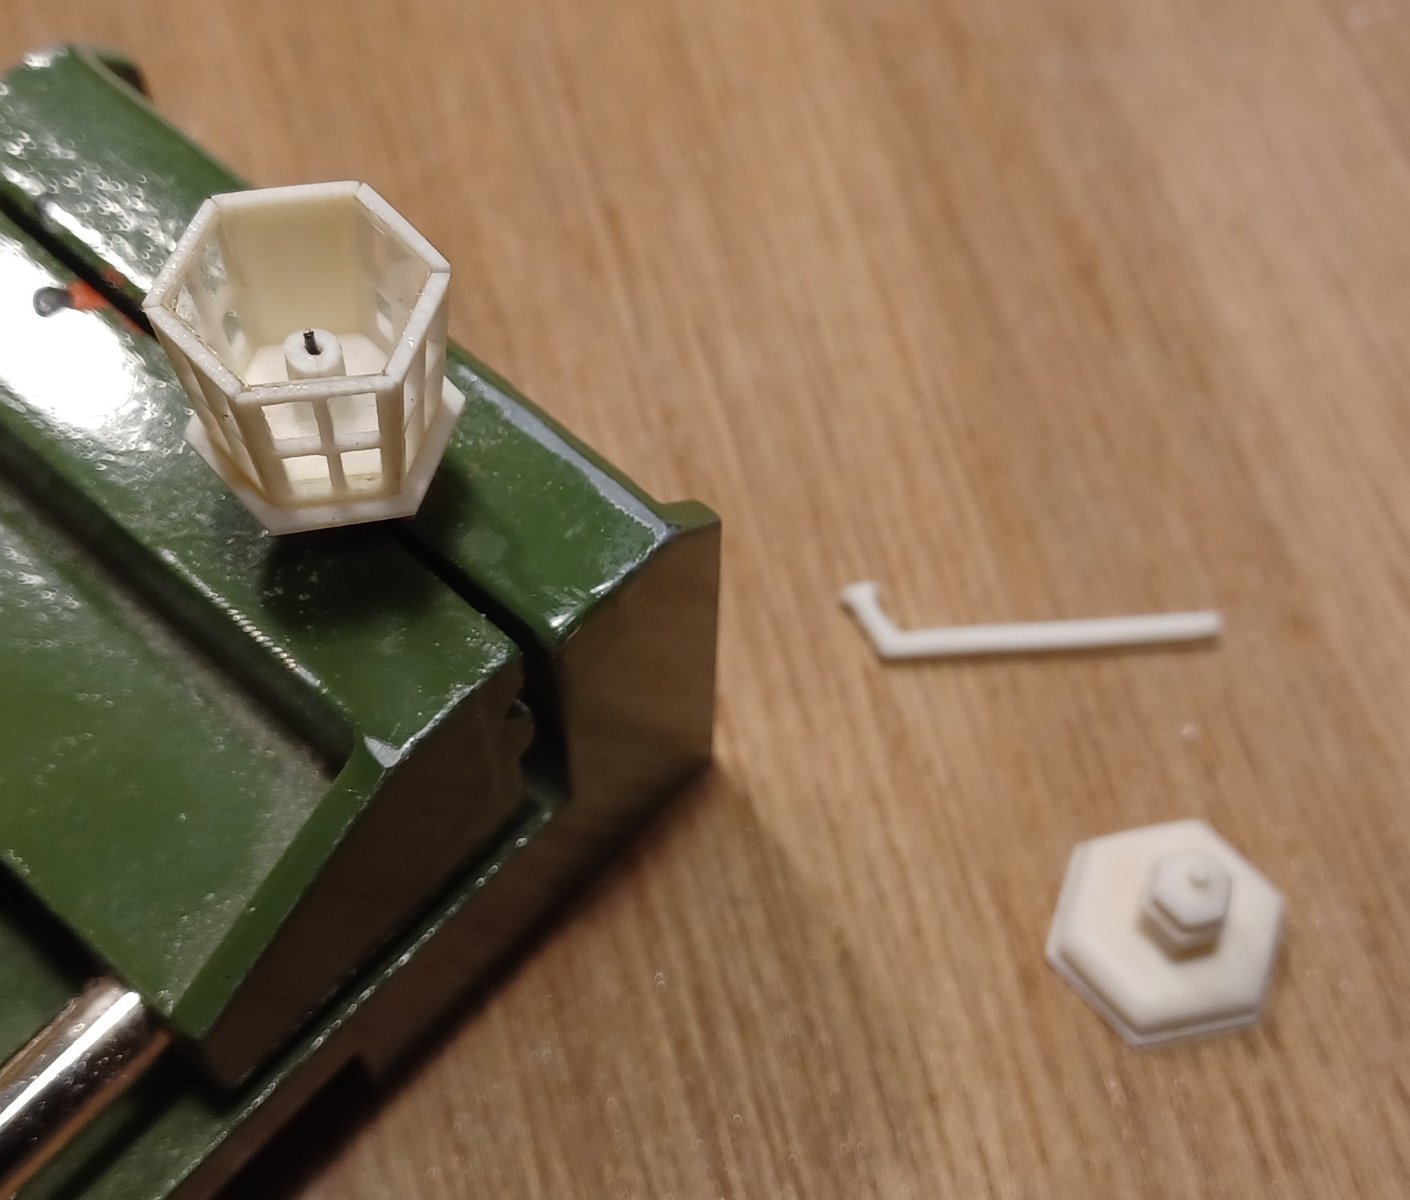
This weekend I made the stern lantern, as I said from ivory agein, like some of the other features.
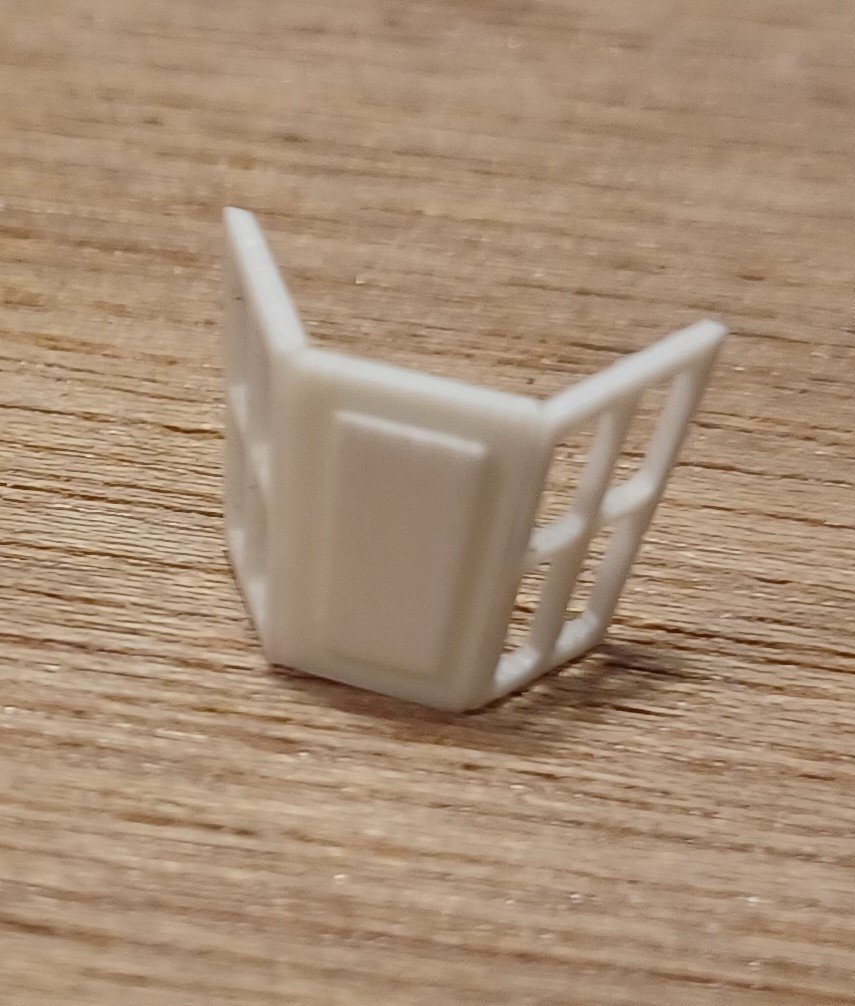
I did not use laser cut, like I did for the galery-windows, but cut the parts with a jigsaw. I must say, this is better than laser cut, because the heat of the laser somehow affects the material and makes it a bit yellow and more fragile.

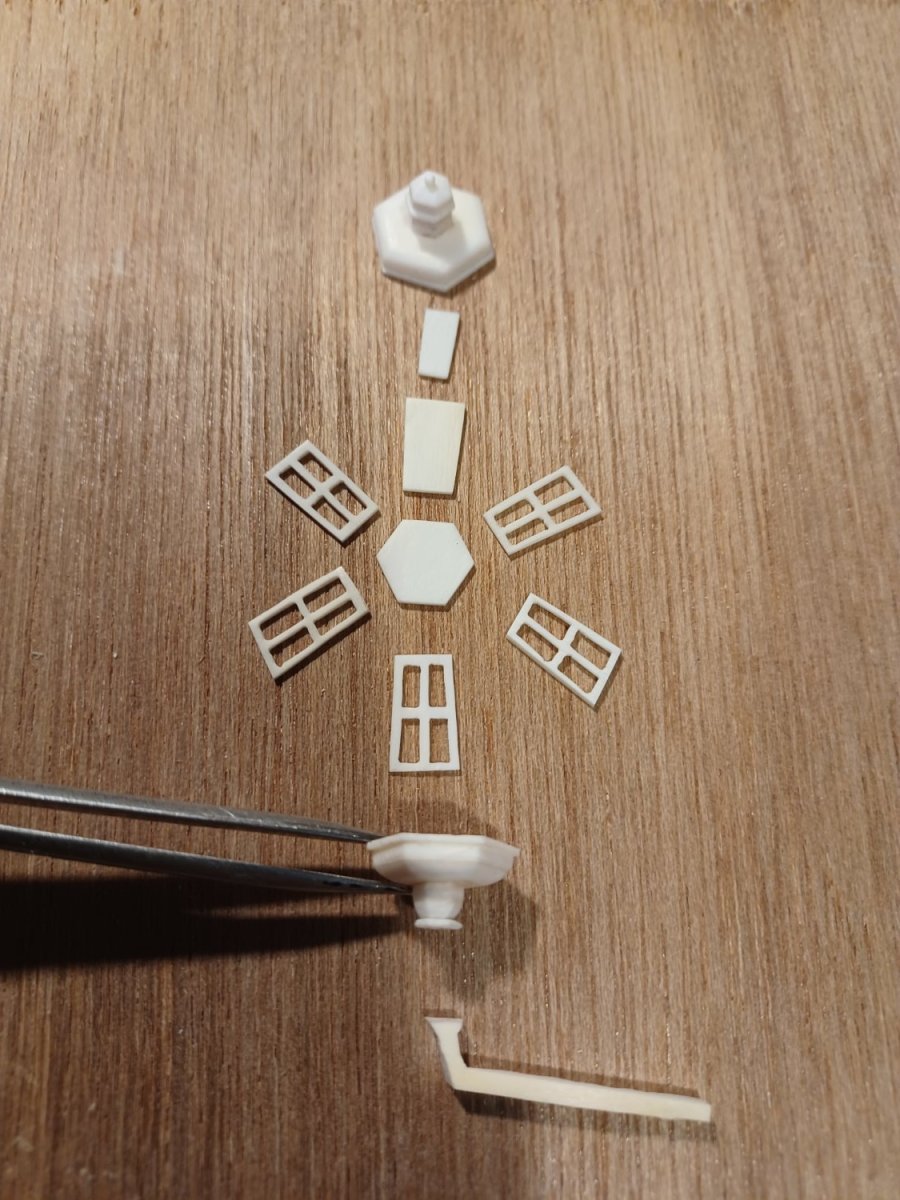
After cutting out all the parts I made the bottom and the roof, wich are assemblied from several parts.
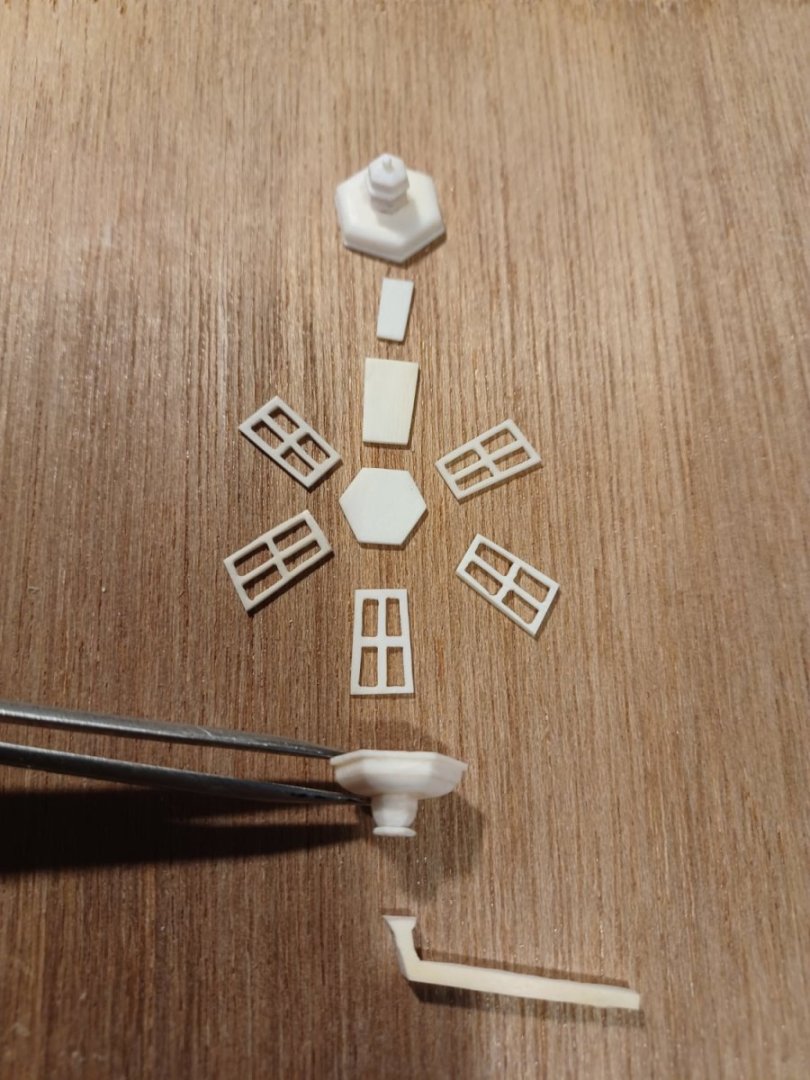
The windows needed a careful sanding, to not look too crooked.
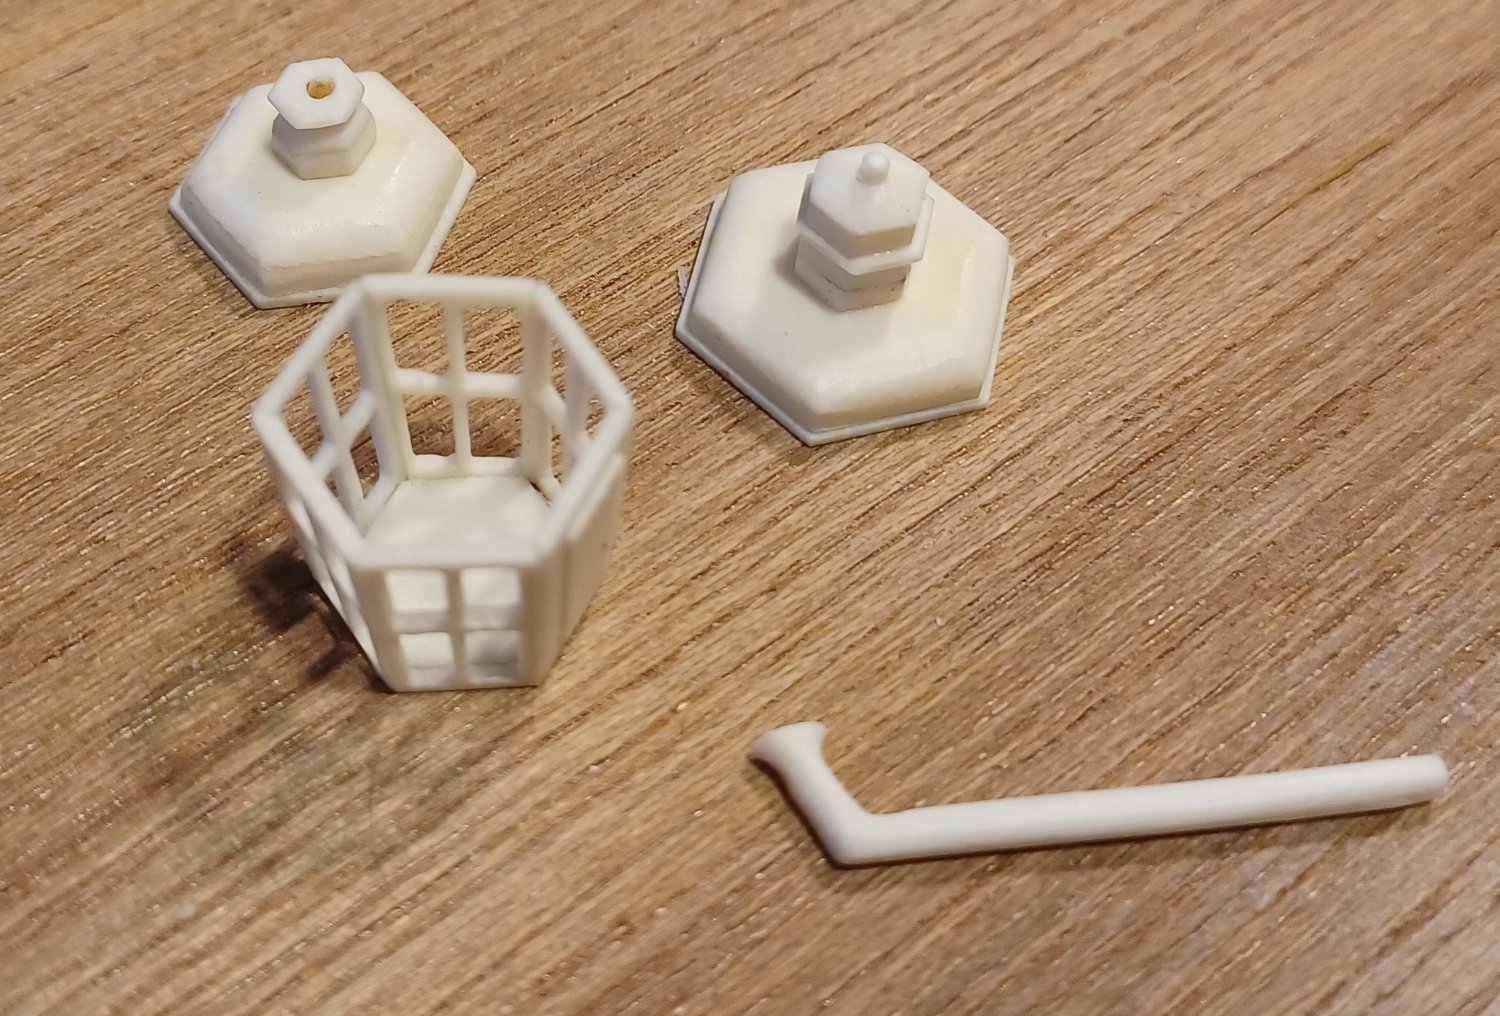
Then I glued the parts together...

...added the candle and the glazing...


and here we go, everything finished for being mounted on the model.

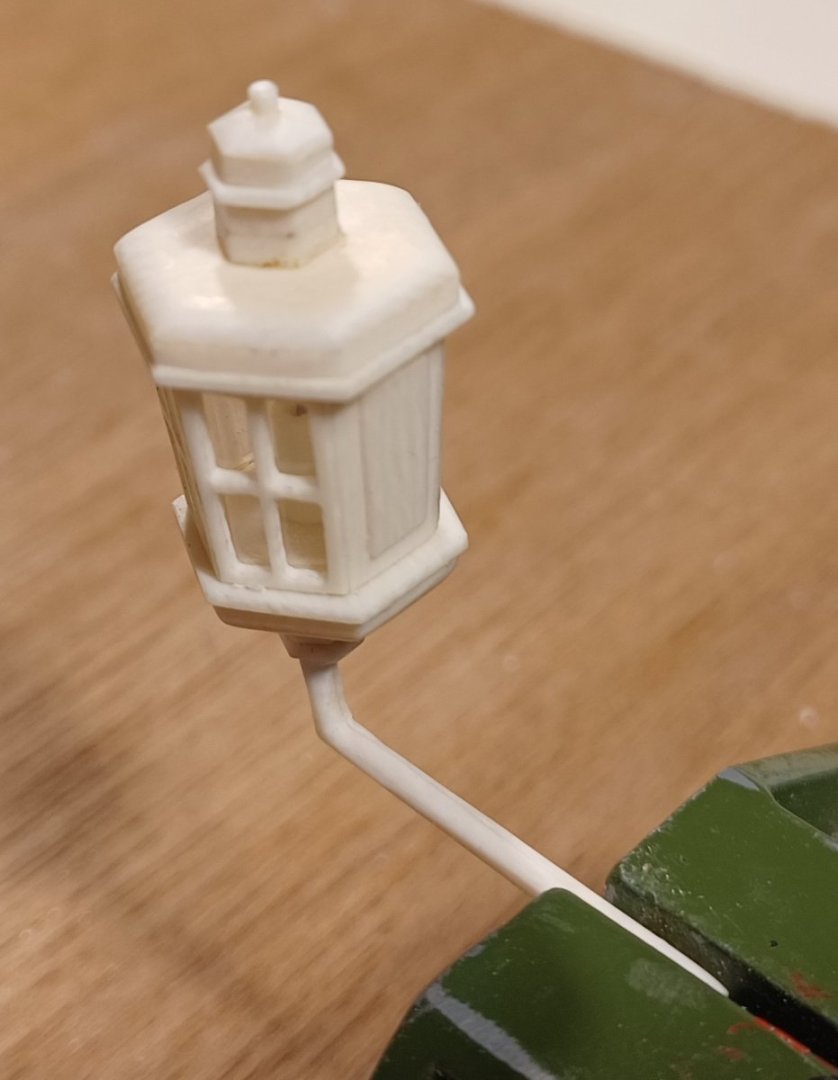
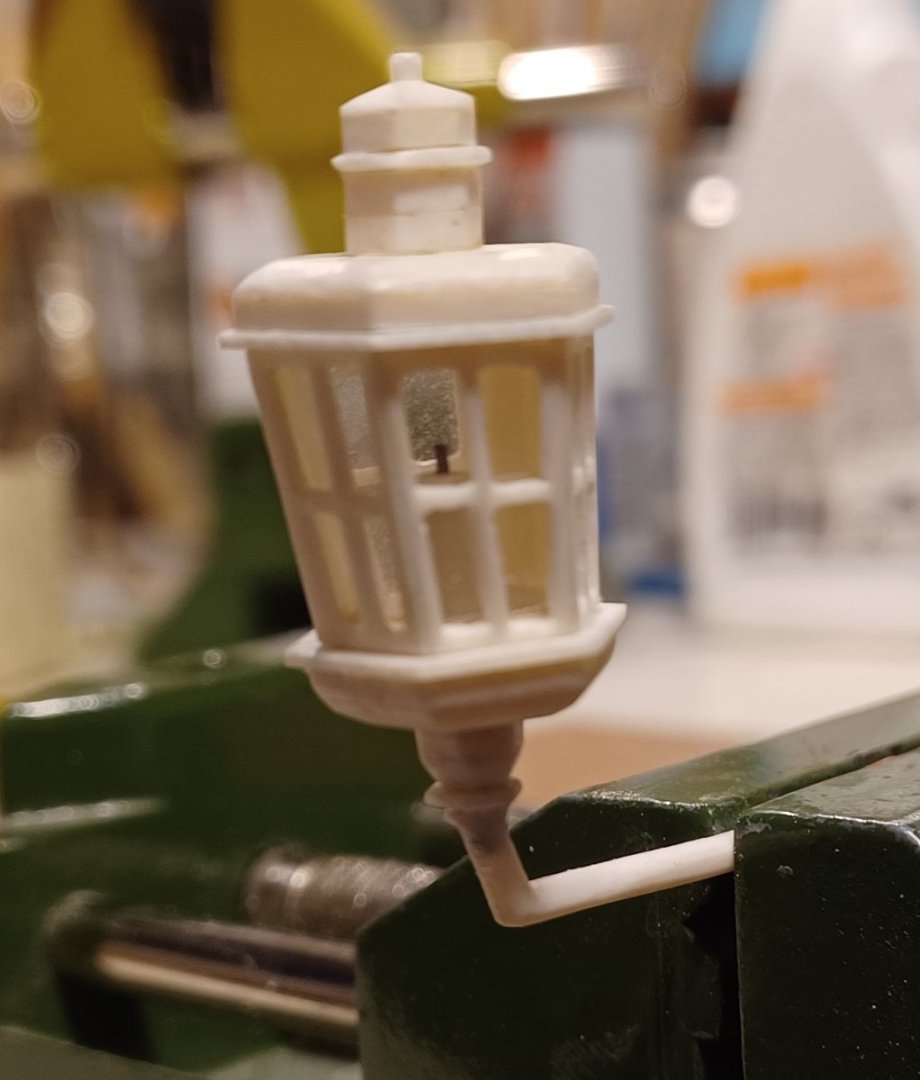
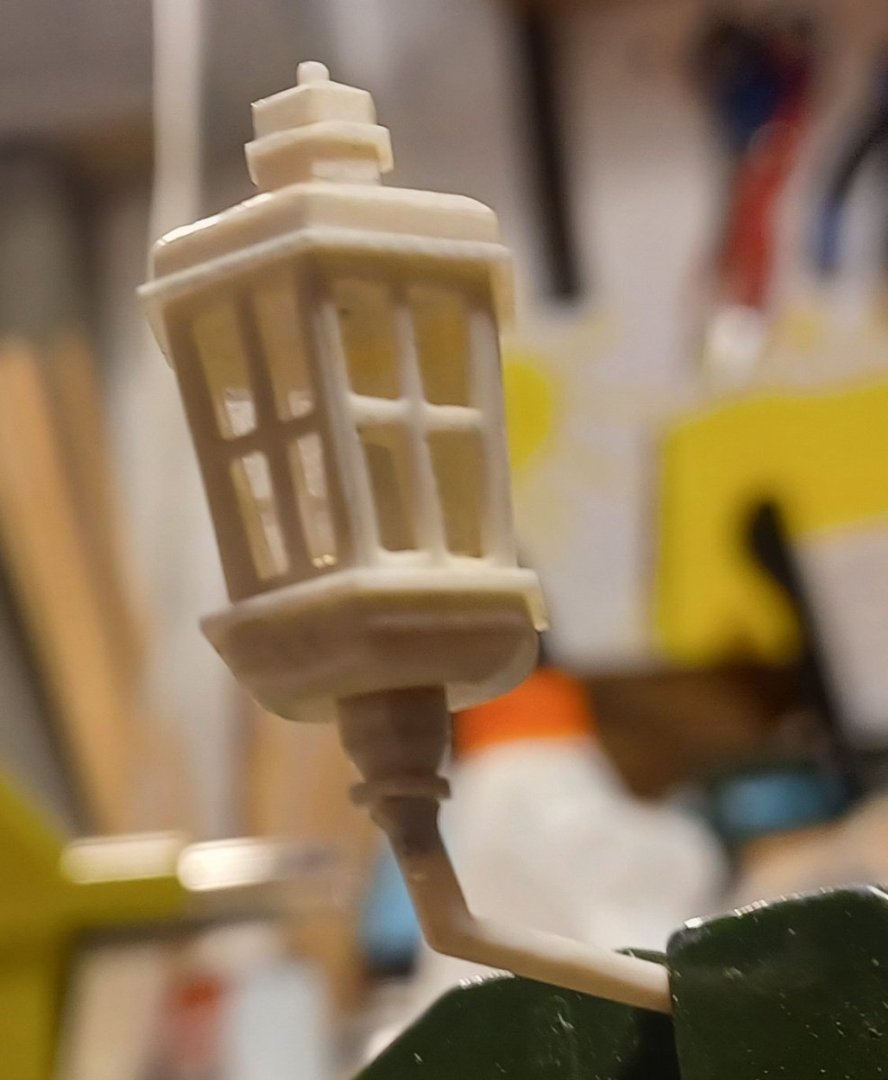
I will add the lantern to the model, once the display case is completed. Otherwise I will break it of for shure, while carrying the model around.
Matthias
-
On 8/14/2023 at 10:54 PM, Nunnehi (Don) said:
Matthias, your Winnie looks great, well done! What kind of case are you going to do?
Don
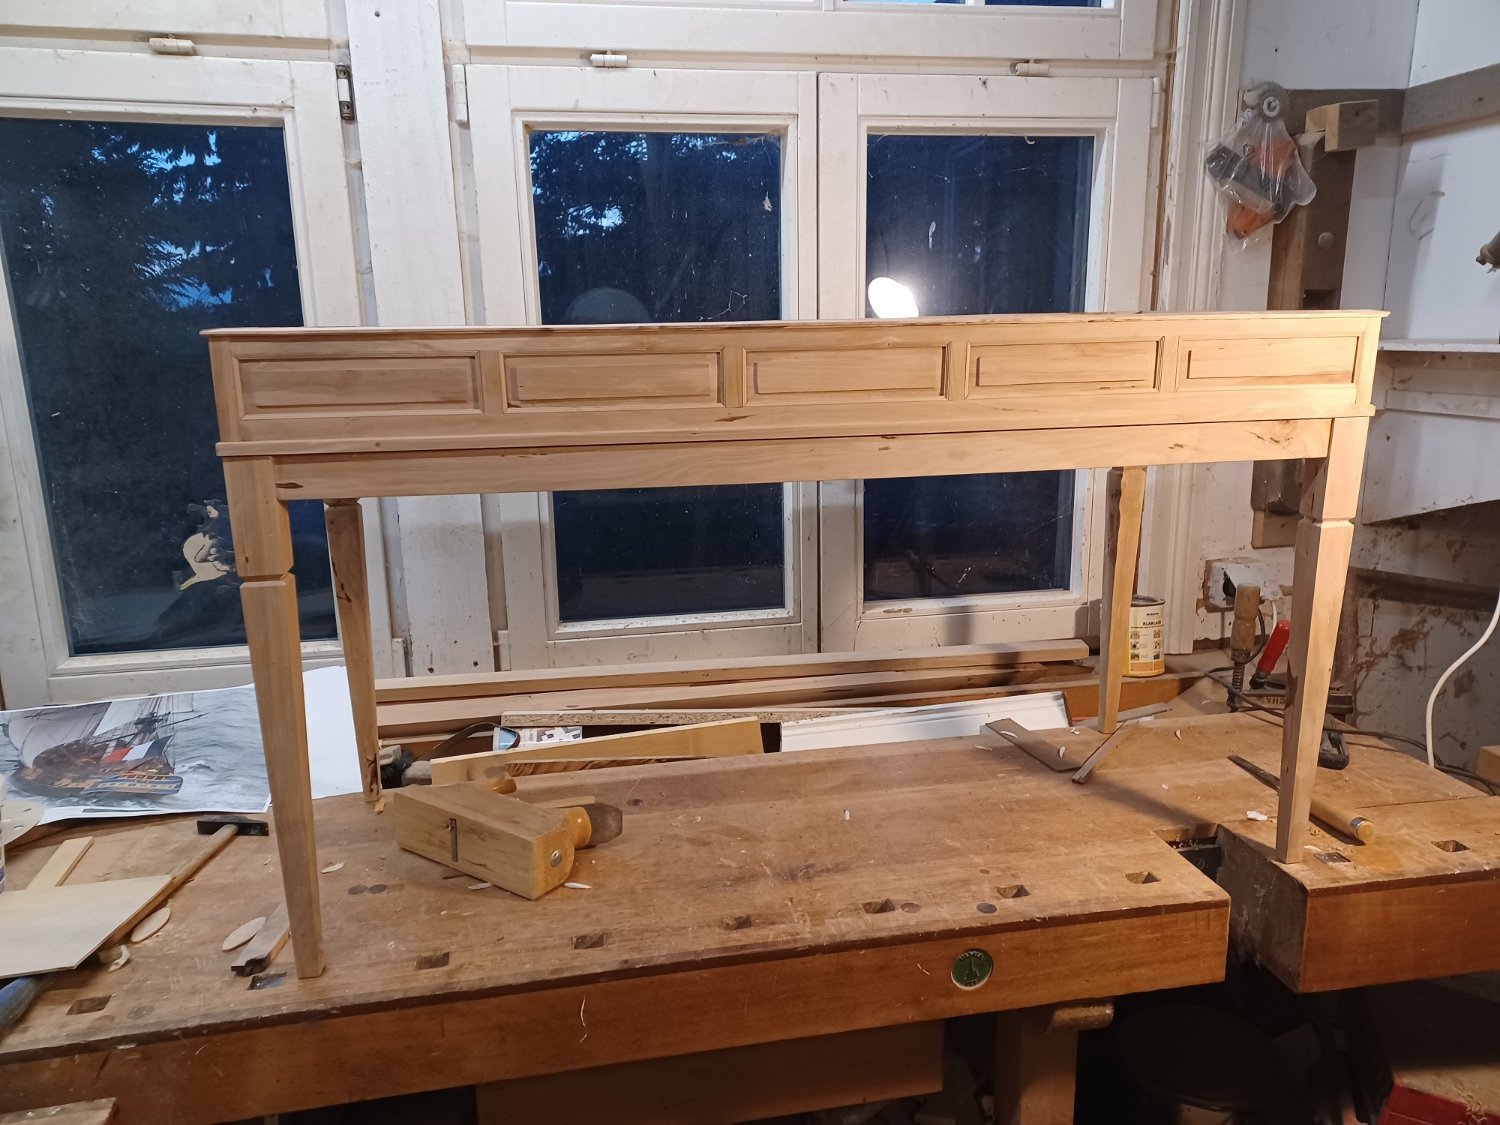
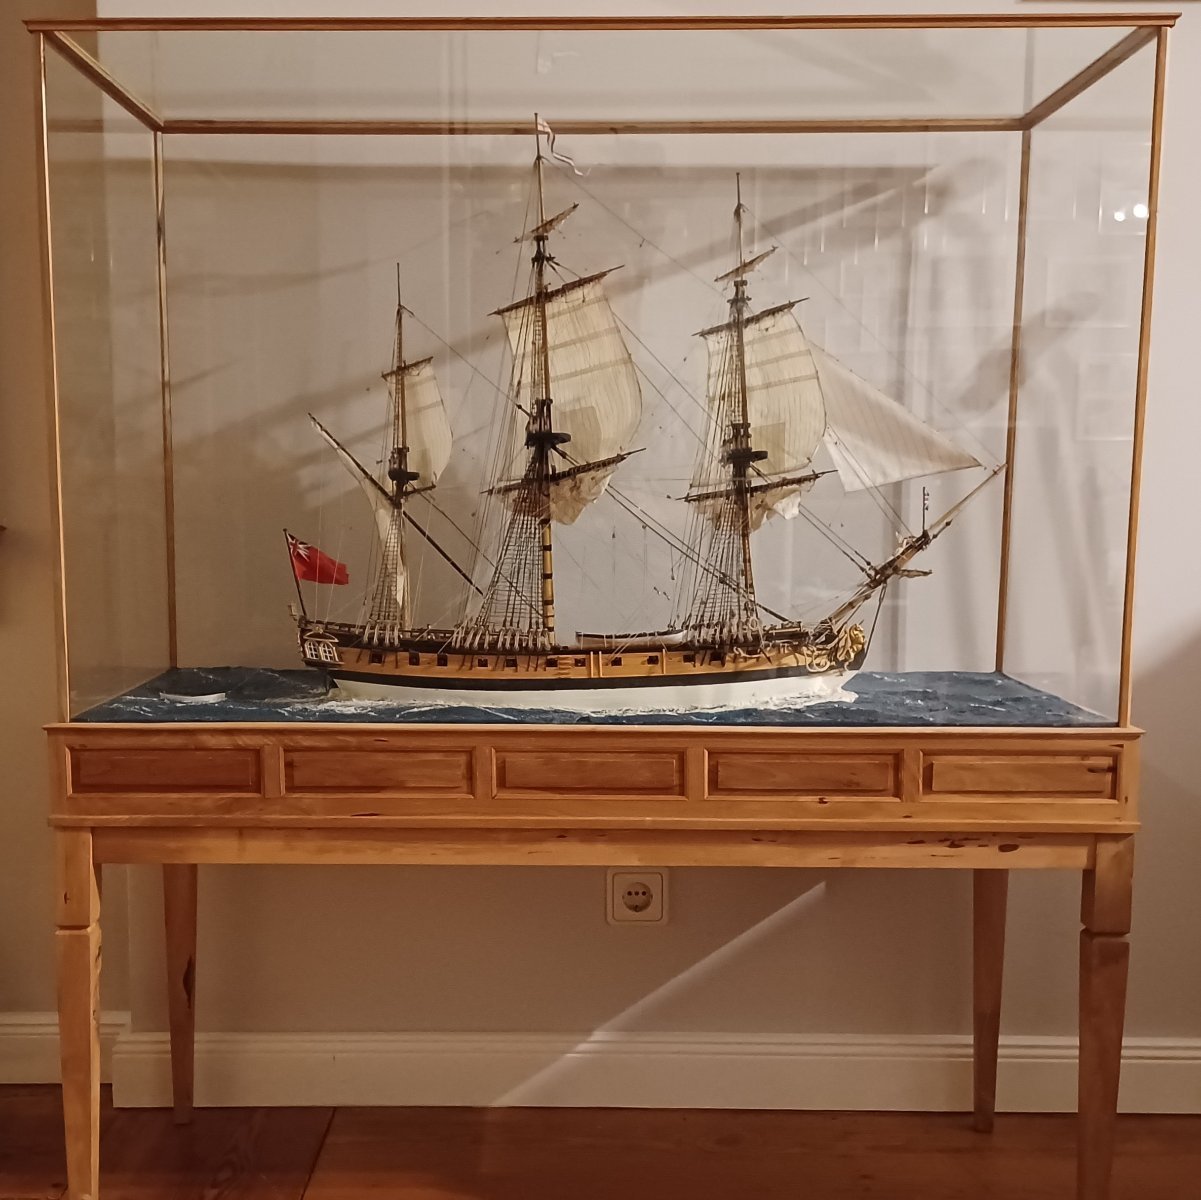
Hi Don, I will make a display-case similar to the one I made for my HMS-Unicorn model.
I have got same pear-wood for this wich I plan to use.
Here you can see the case I made and the drawing for the new one.

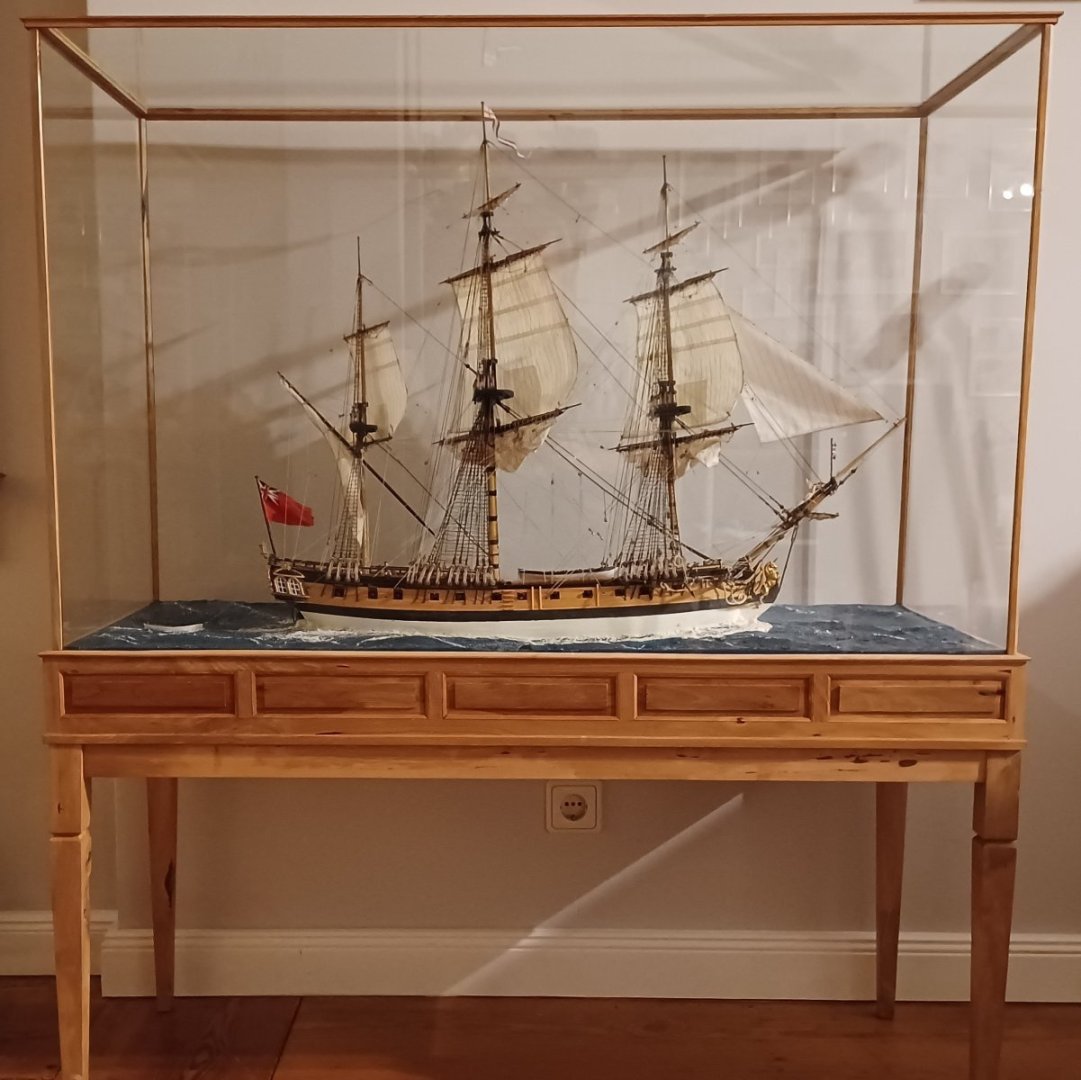
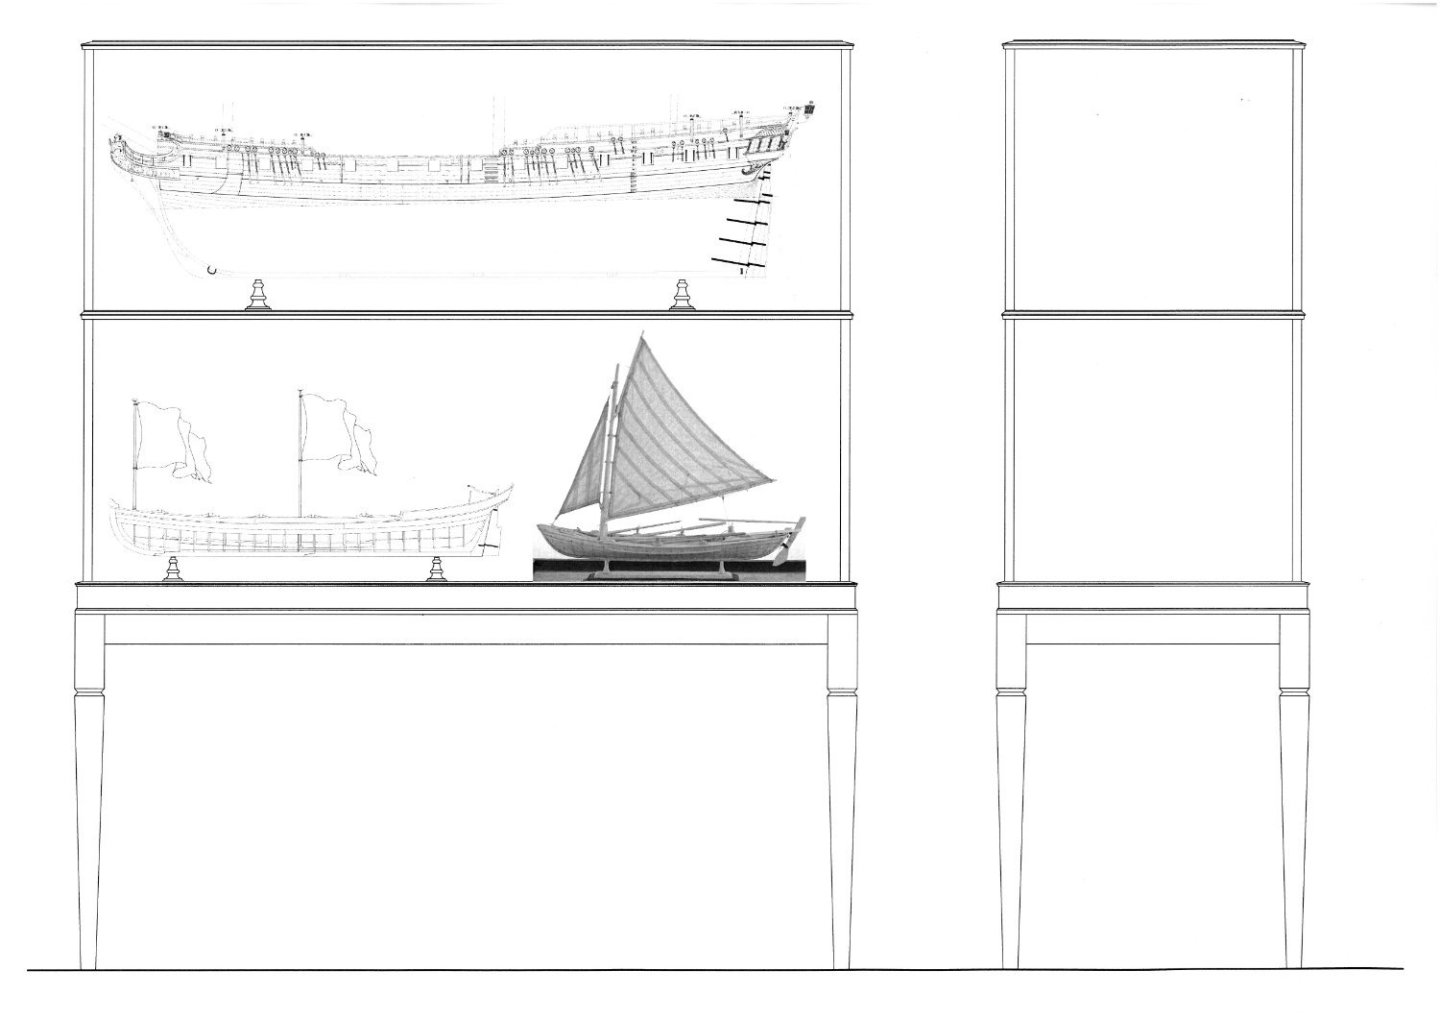
I will post pictures, when I build it.
Matthias
- FrankWouts, scrubbyj427, CaptMorgan and 9 others
-
8
-
 4
4
-
Thank you all for the kind words and the likes. What's next? Well, the stern lantern and display case of course. And then I circle around a special project of a danish ship. Designed by a french shipbuilder in 1742 and decorated by a german master-carver. It is a bit early to show something here. A contemporary model survived in Copenhagen and a few quite detailed plans.
Matthias
- Saburo and FrankWouts
-
2
-
Hello everybody and thank you for the kind words and the likes.
At the moment I am working on finishing the last parts of equipment. Guns, swivel-guns and the stern lantern.
The model is a bit dusty, but here are some photos.


The stern lantern will be the last step. I will make it from ivory again.
Matthias
-
Congratulation. That looks superbe!
Matthias
-
Can you already tell something about the release of the first chapter?
This is so tempting.
- Jack12477 and FrankWouts
-
2
-
Hi Greg,
I actually don't know. I used all the laser cut parts and did not alter anything. But when I put the figurehead on the model, it somehow did not fit properly. The position was too far forward. So the only posibility was to cut the scrollwork or to cut away a part of the arm of the figurehead. I took the scrollwork.
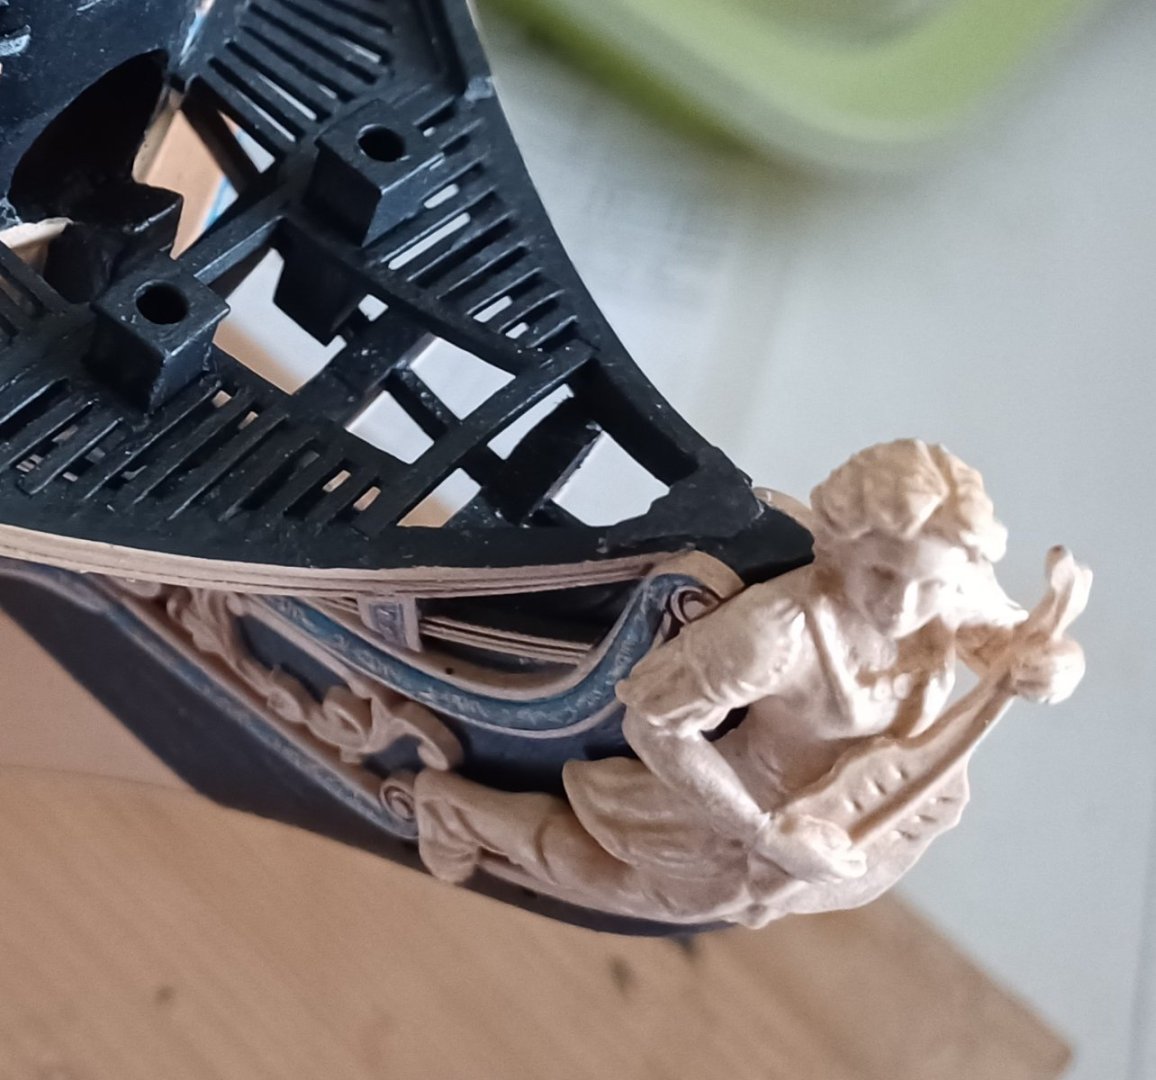
Matthias
- Saburo, Edwardkenway, Rustyj and 5 others
-
8
-
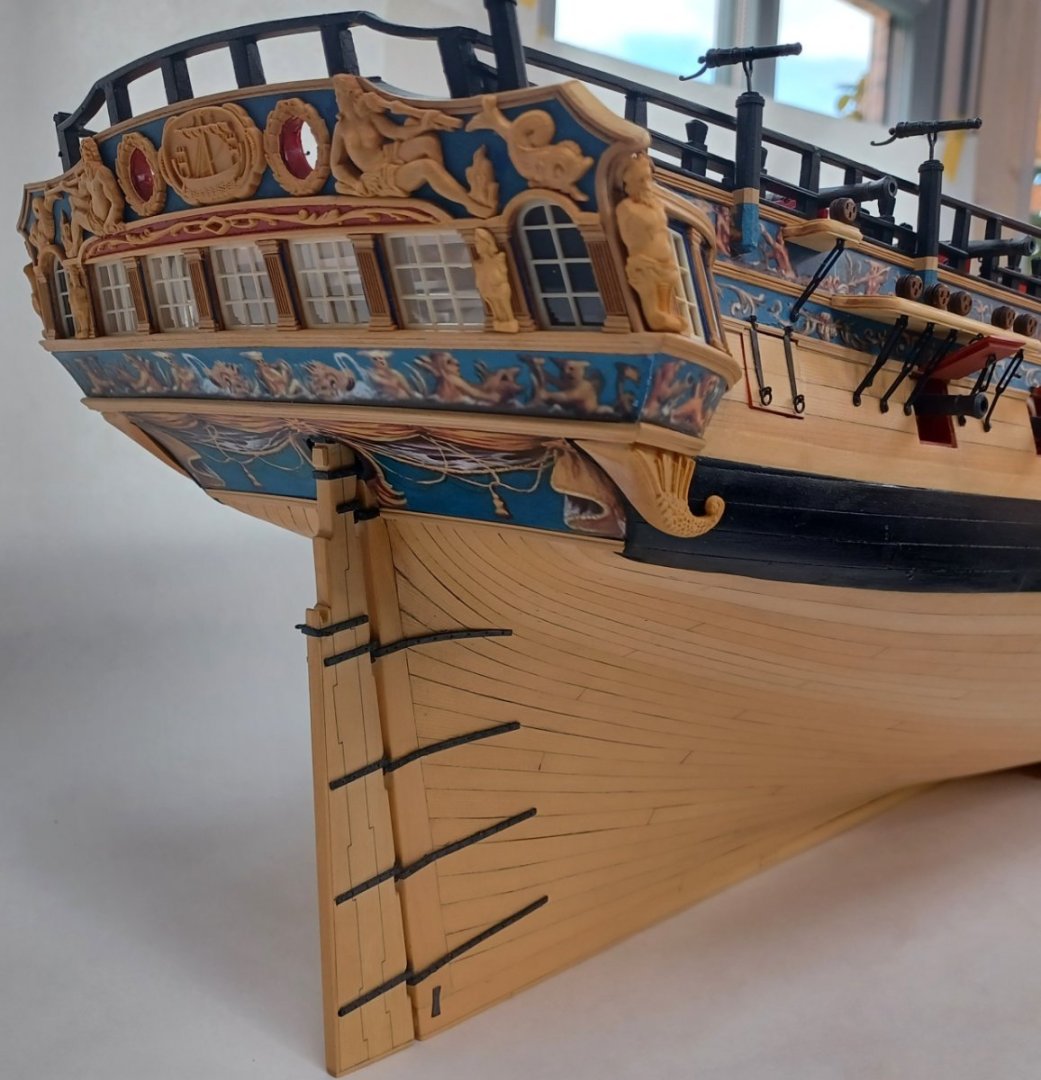
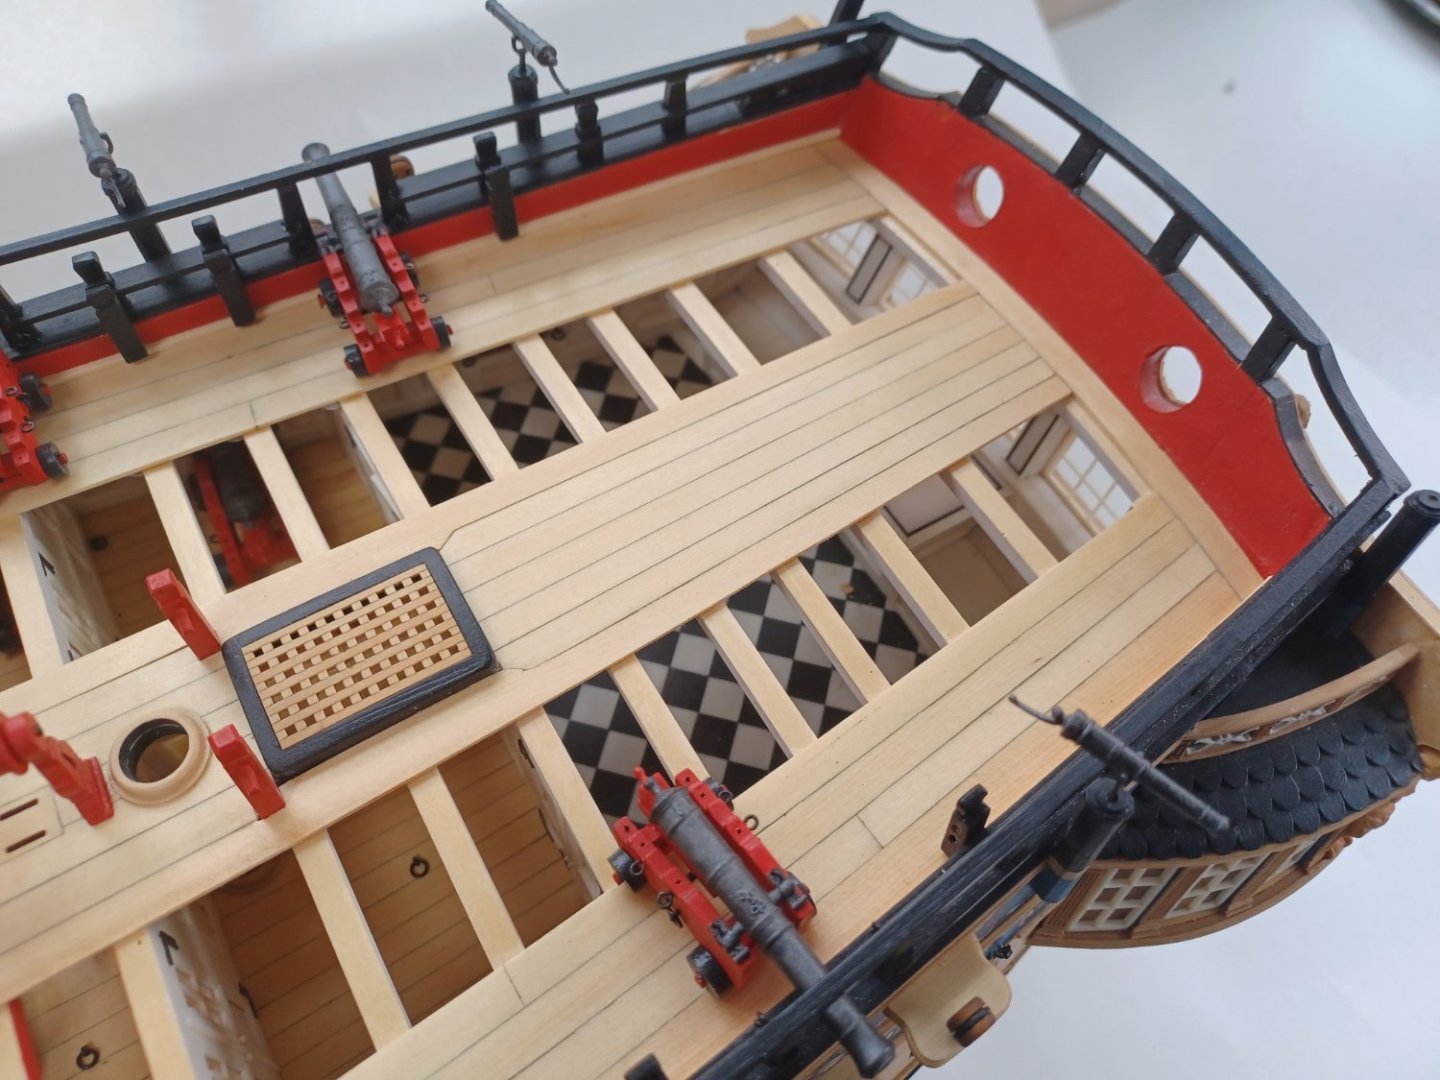
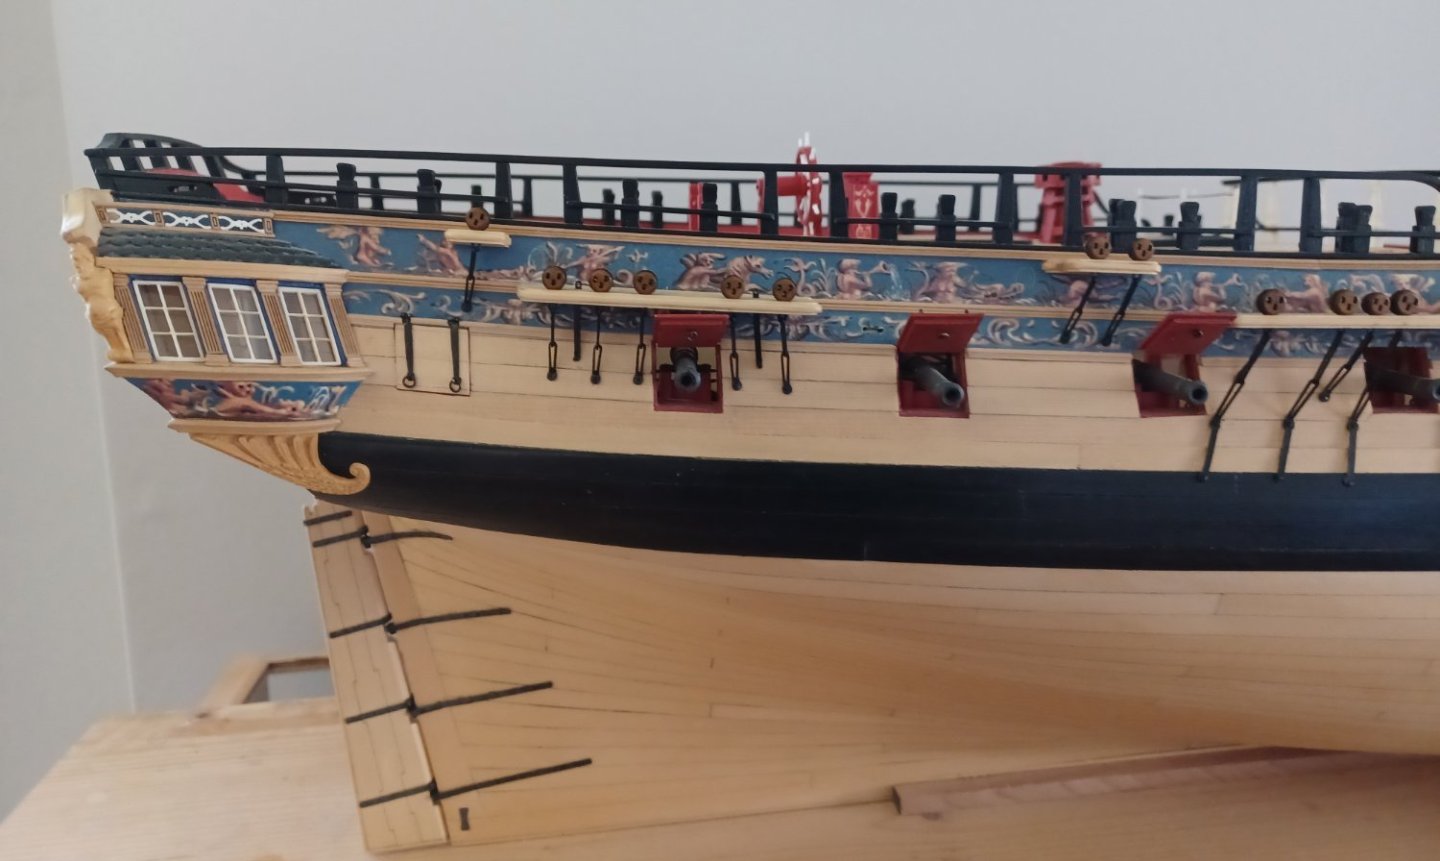
Thank you,
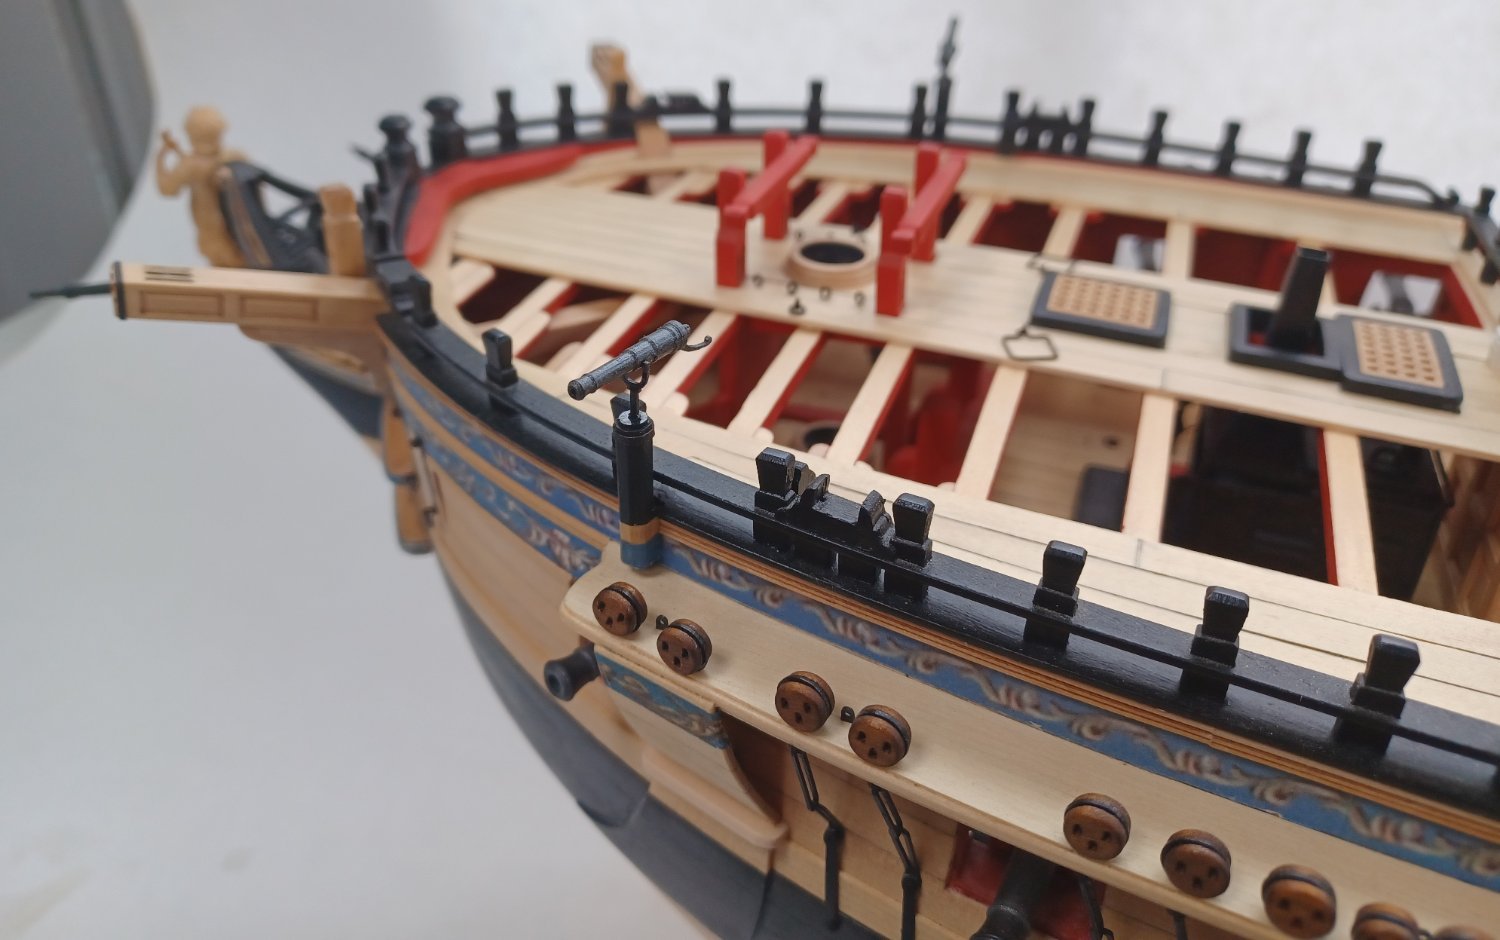
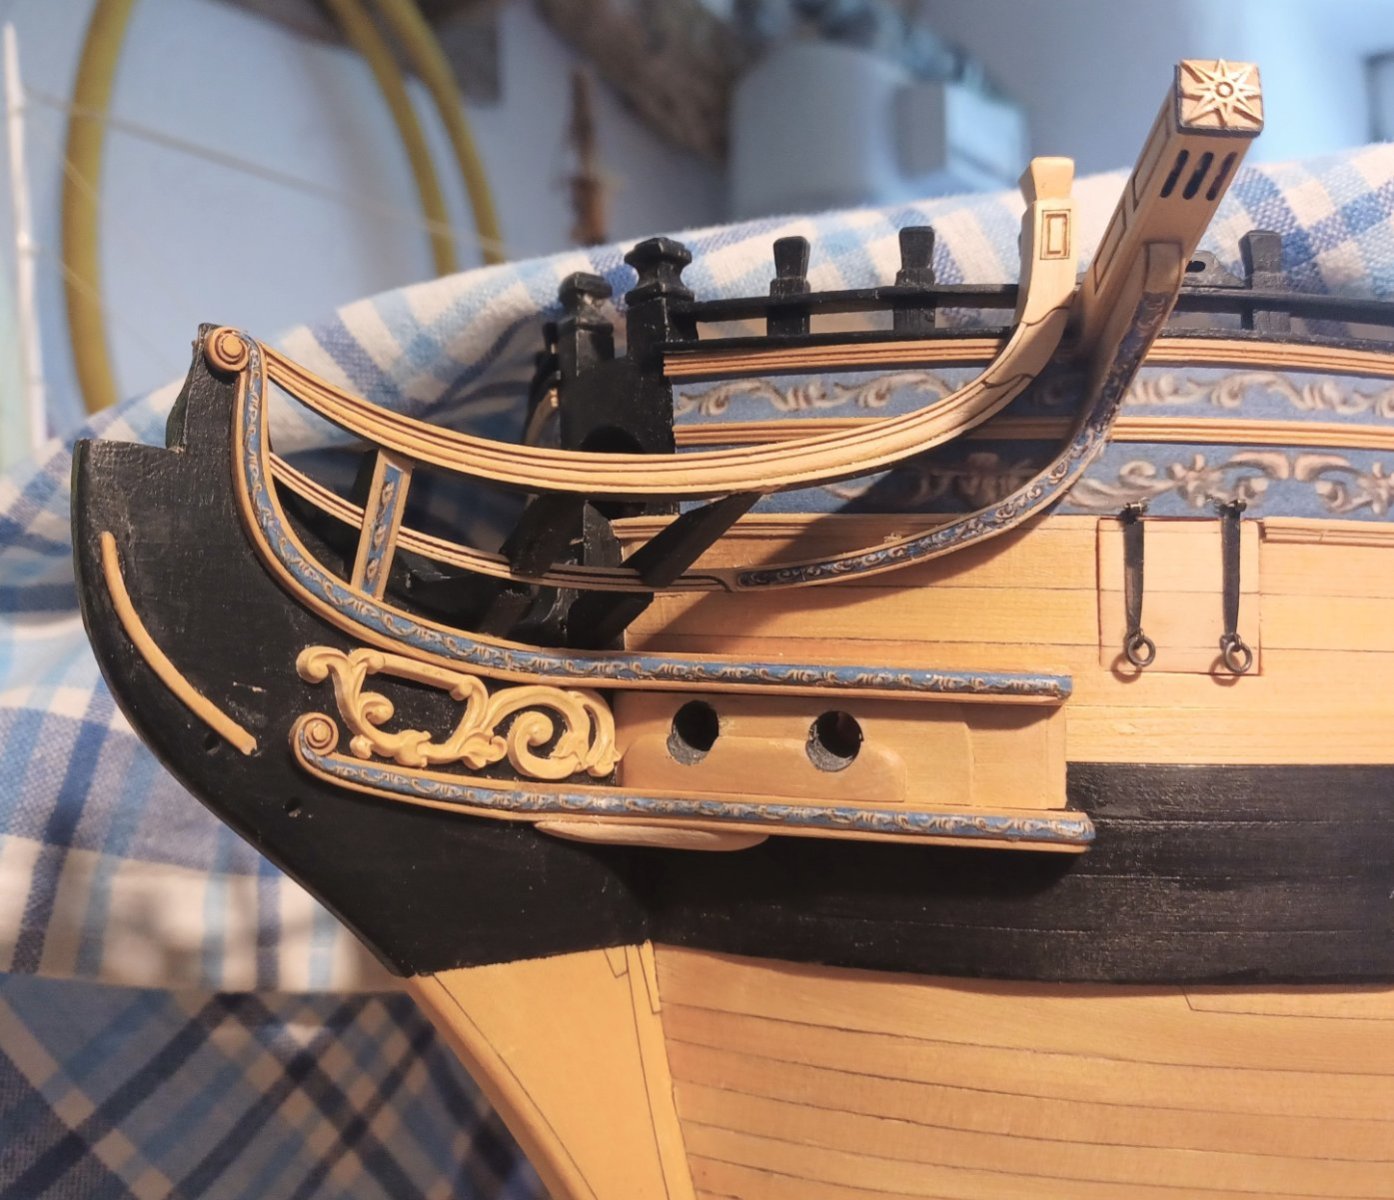
I continued with the gratings between the rails.
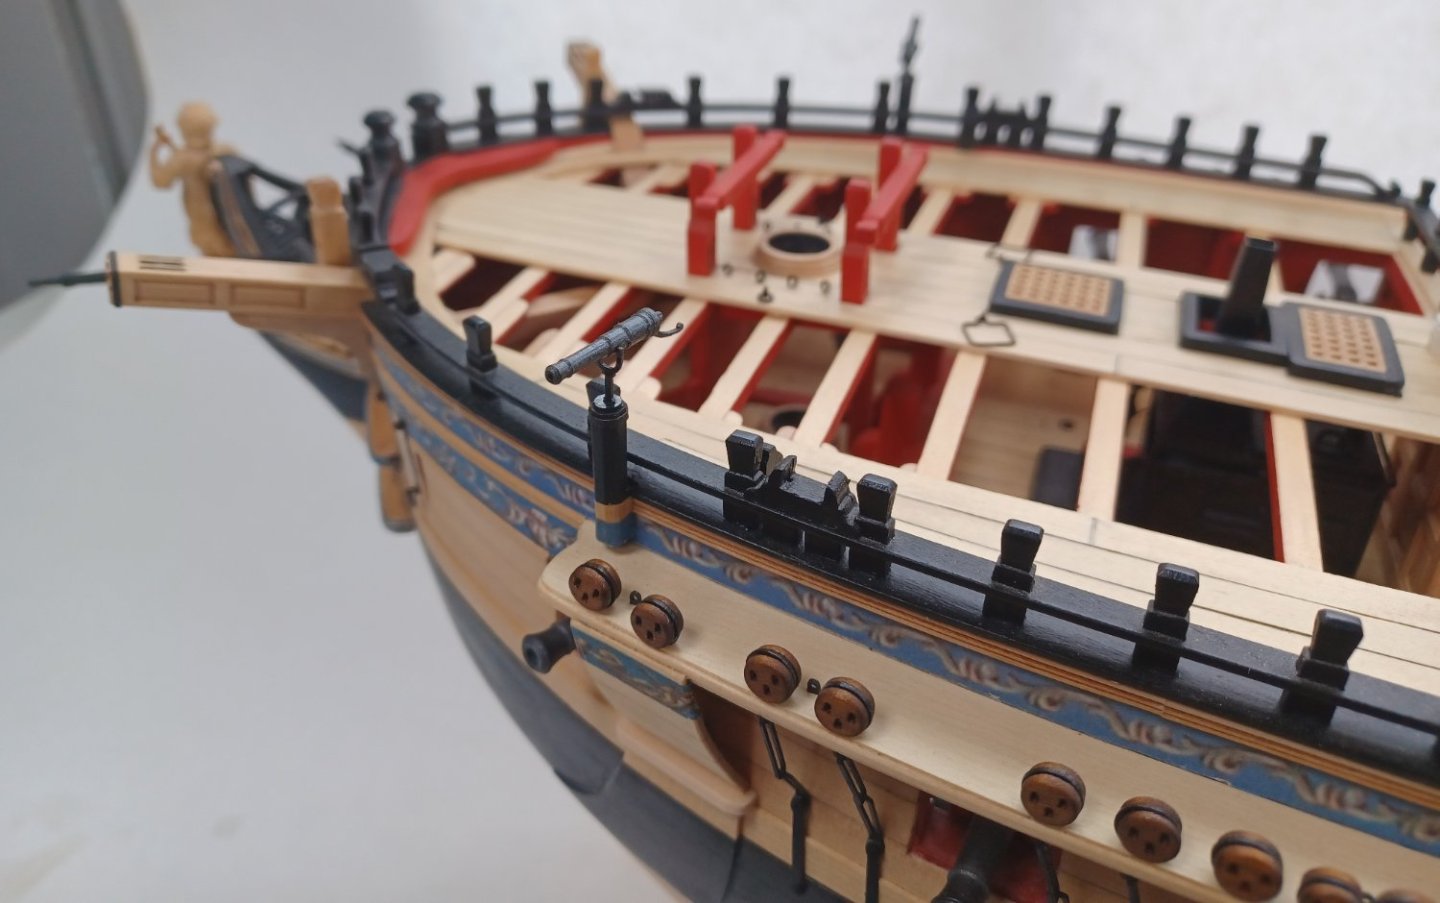
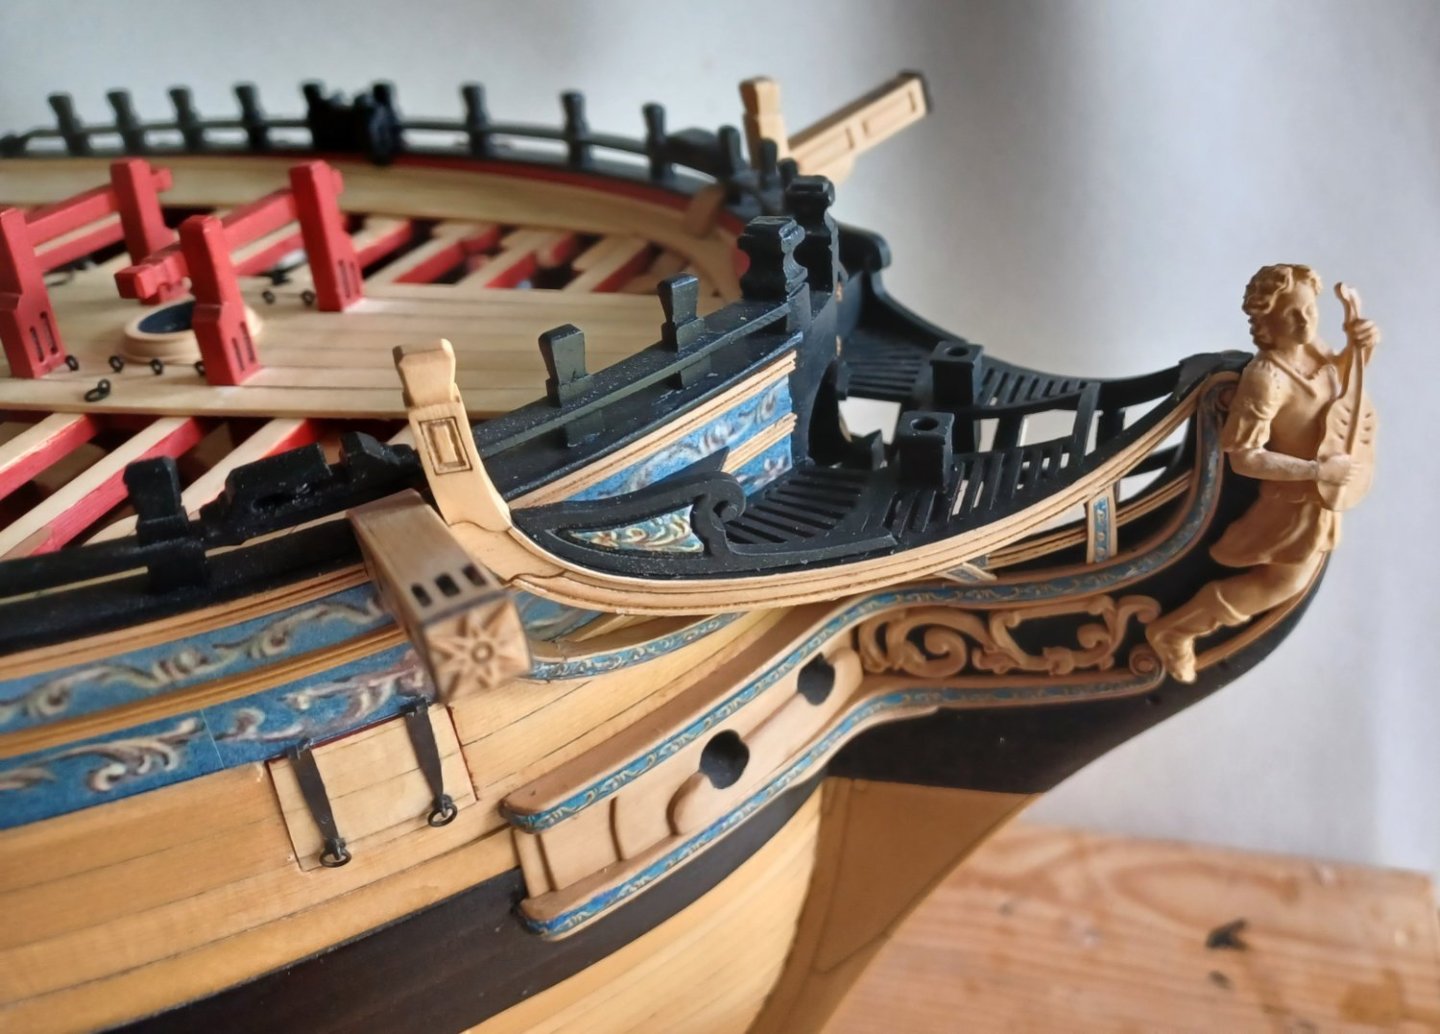
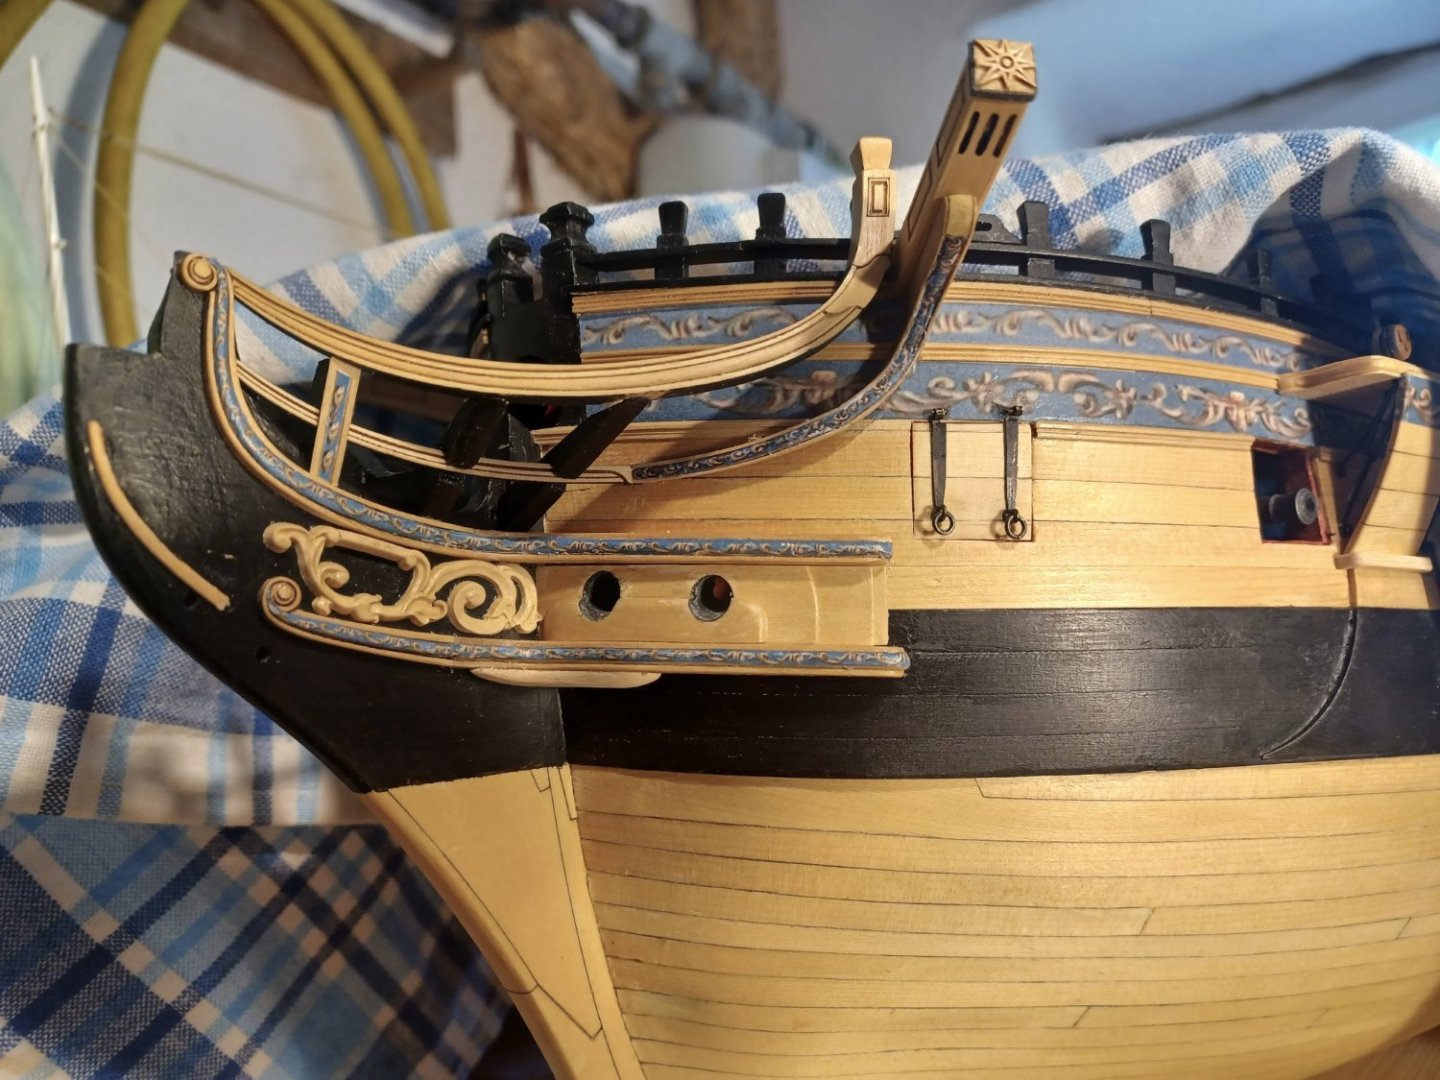
The triangular gratings in the corners of the bow-area, I made separately with a template. I glued the parts on the template, assembled everything, cleaned it, painted it again an glued it to the model.

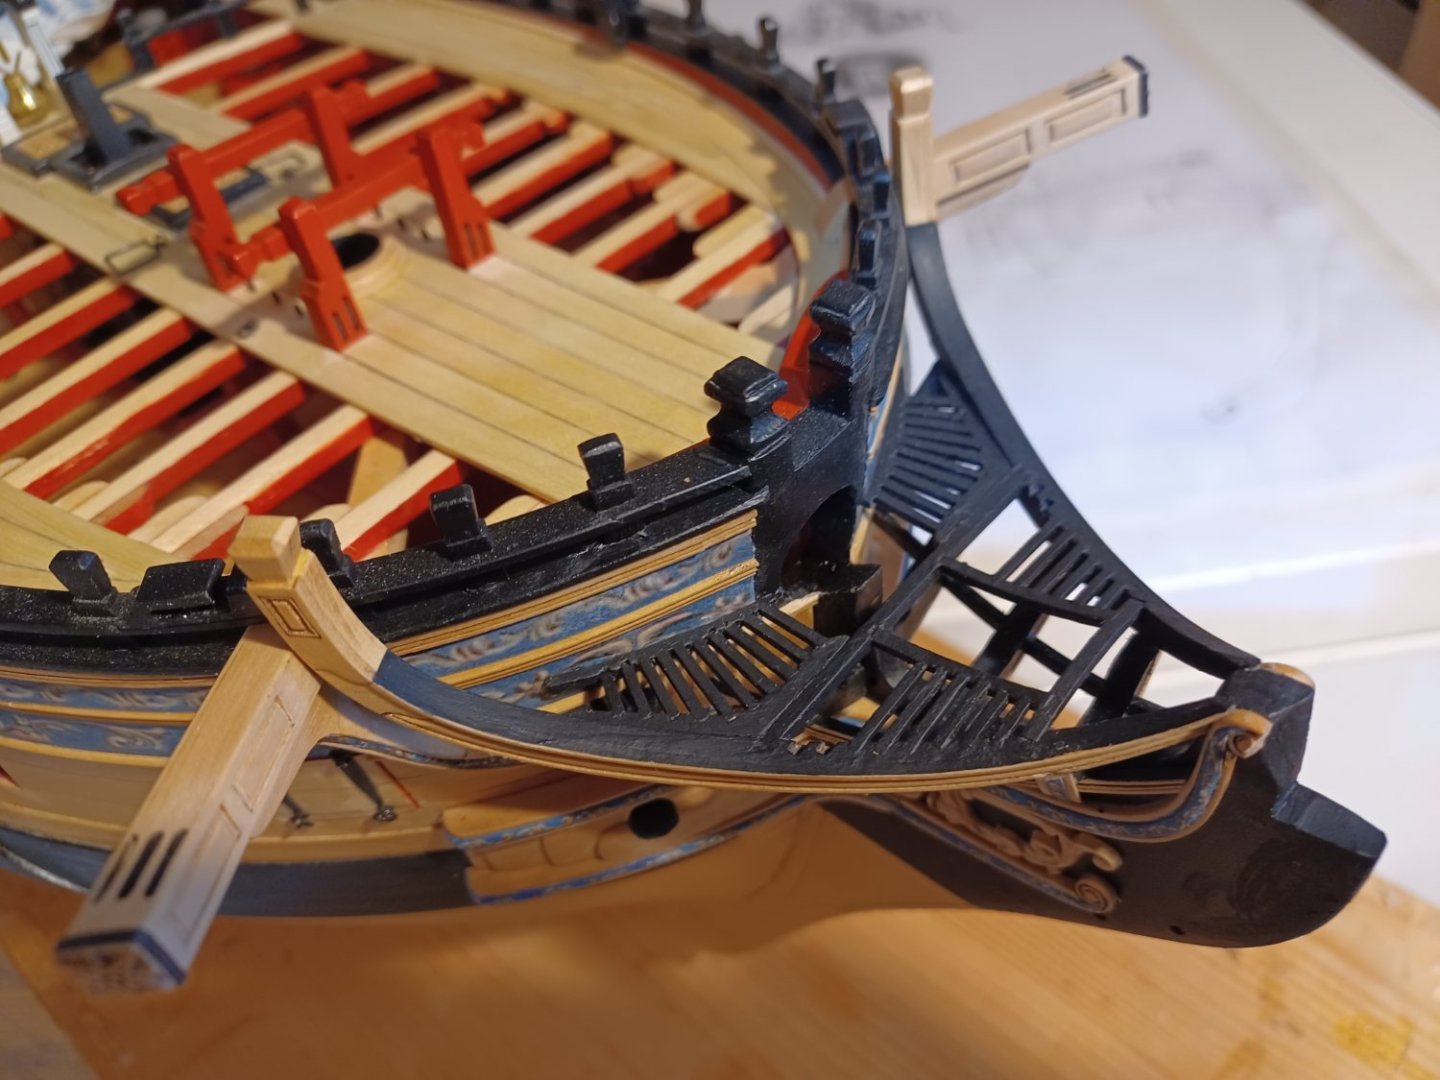
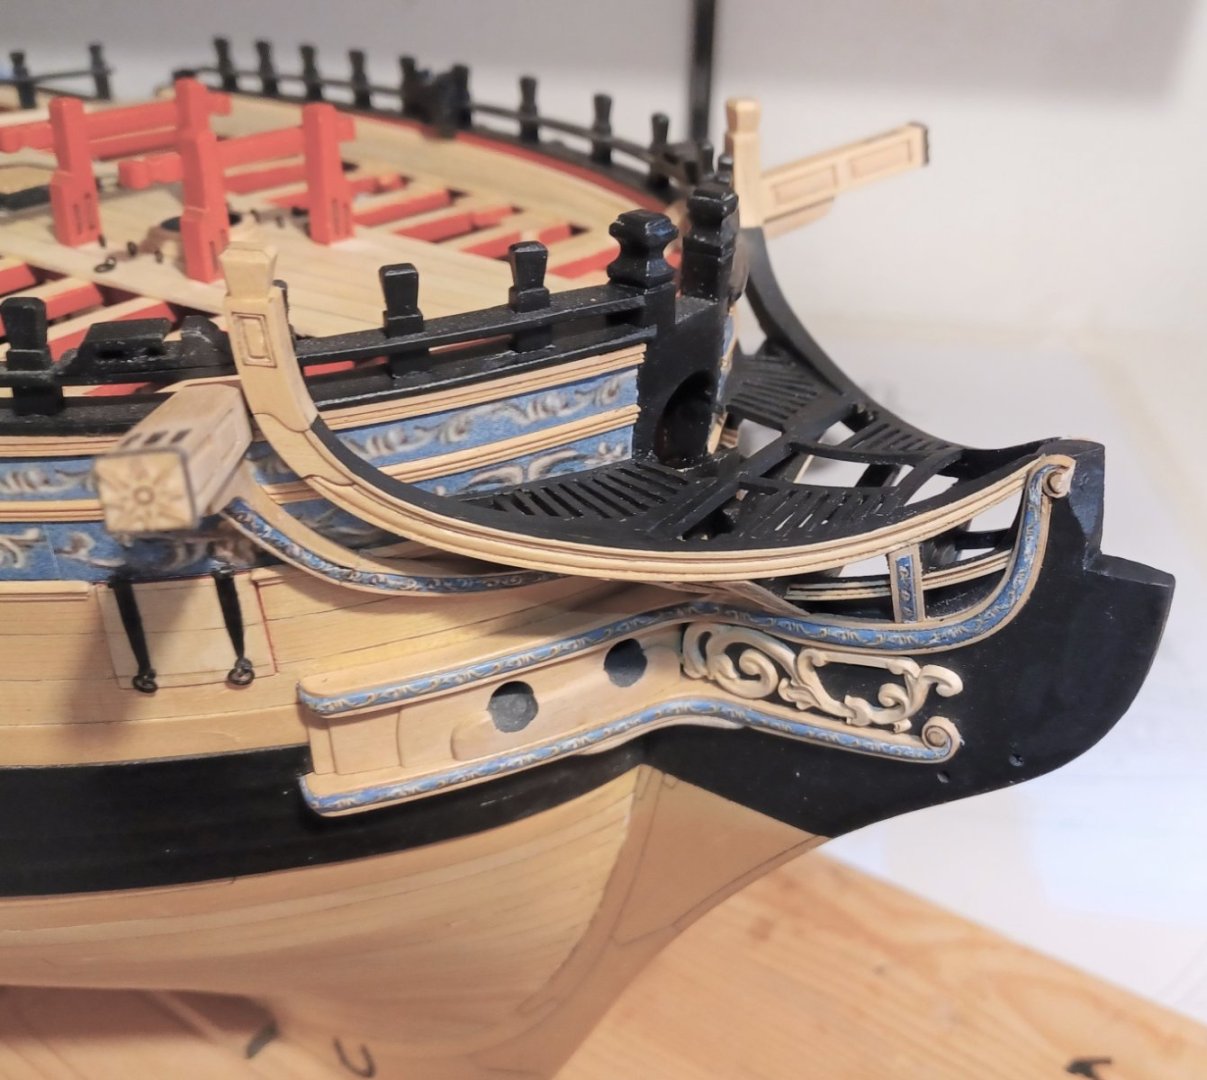
Then the facilities and false rails were added,
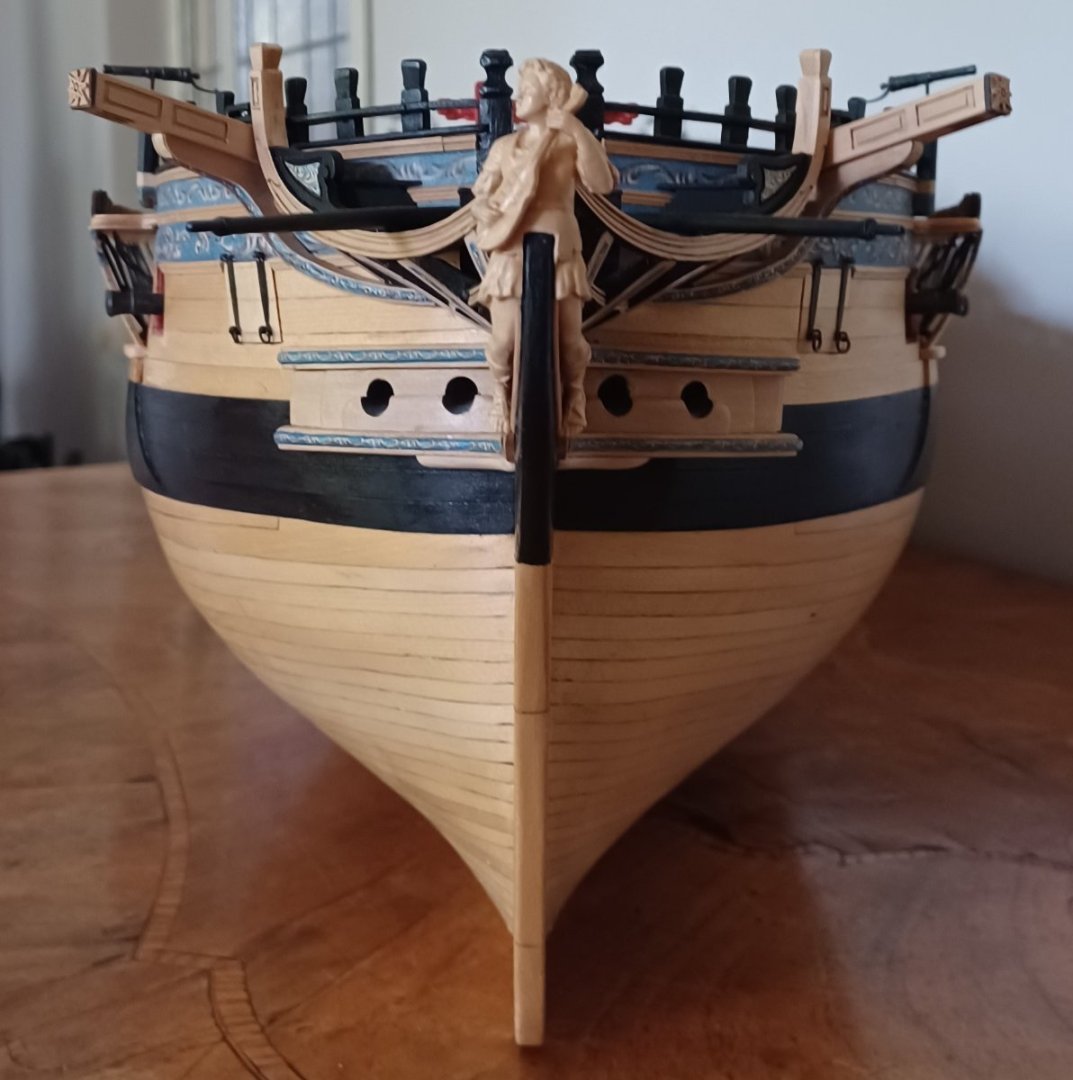
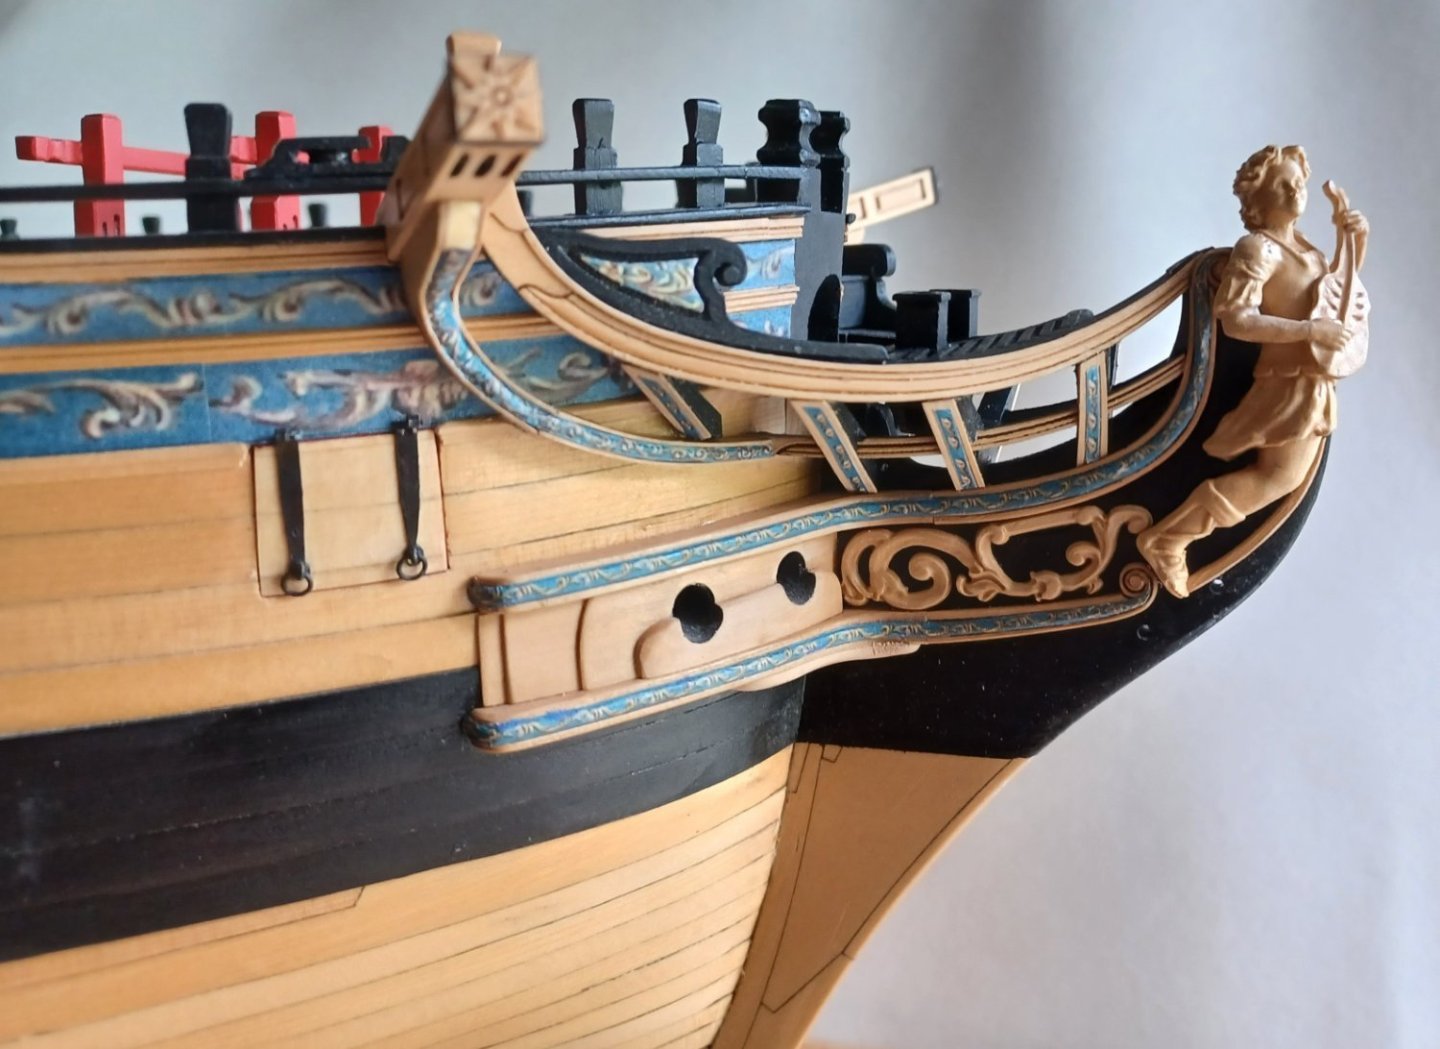
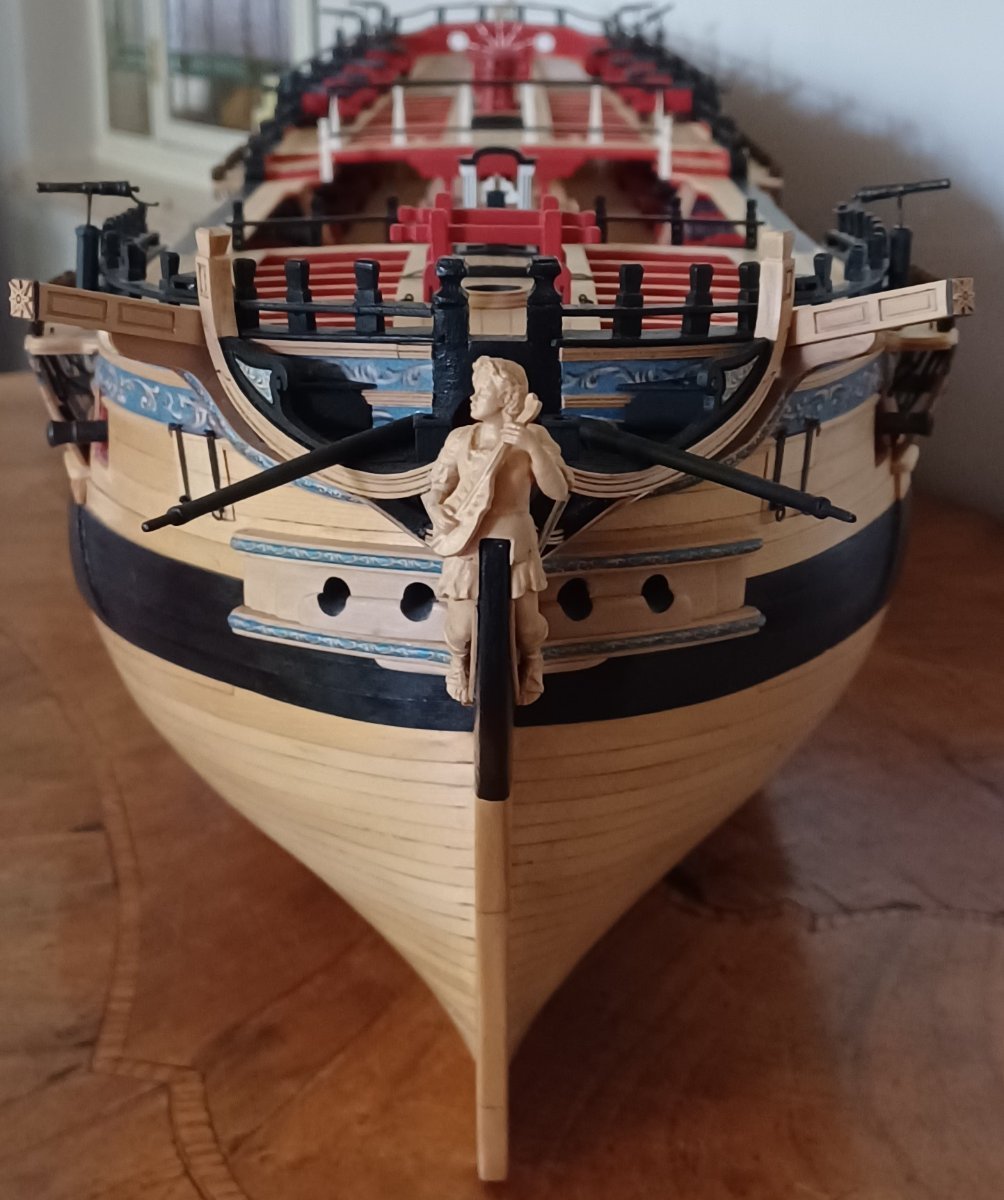
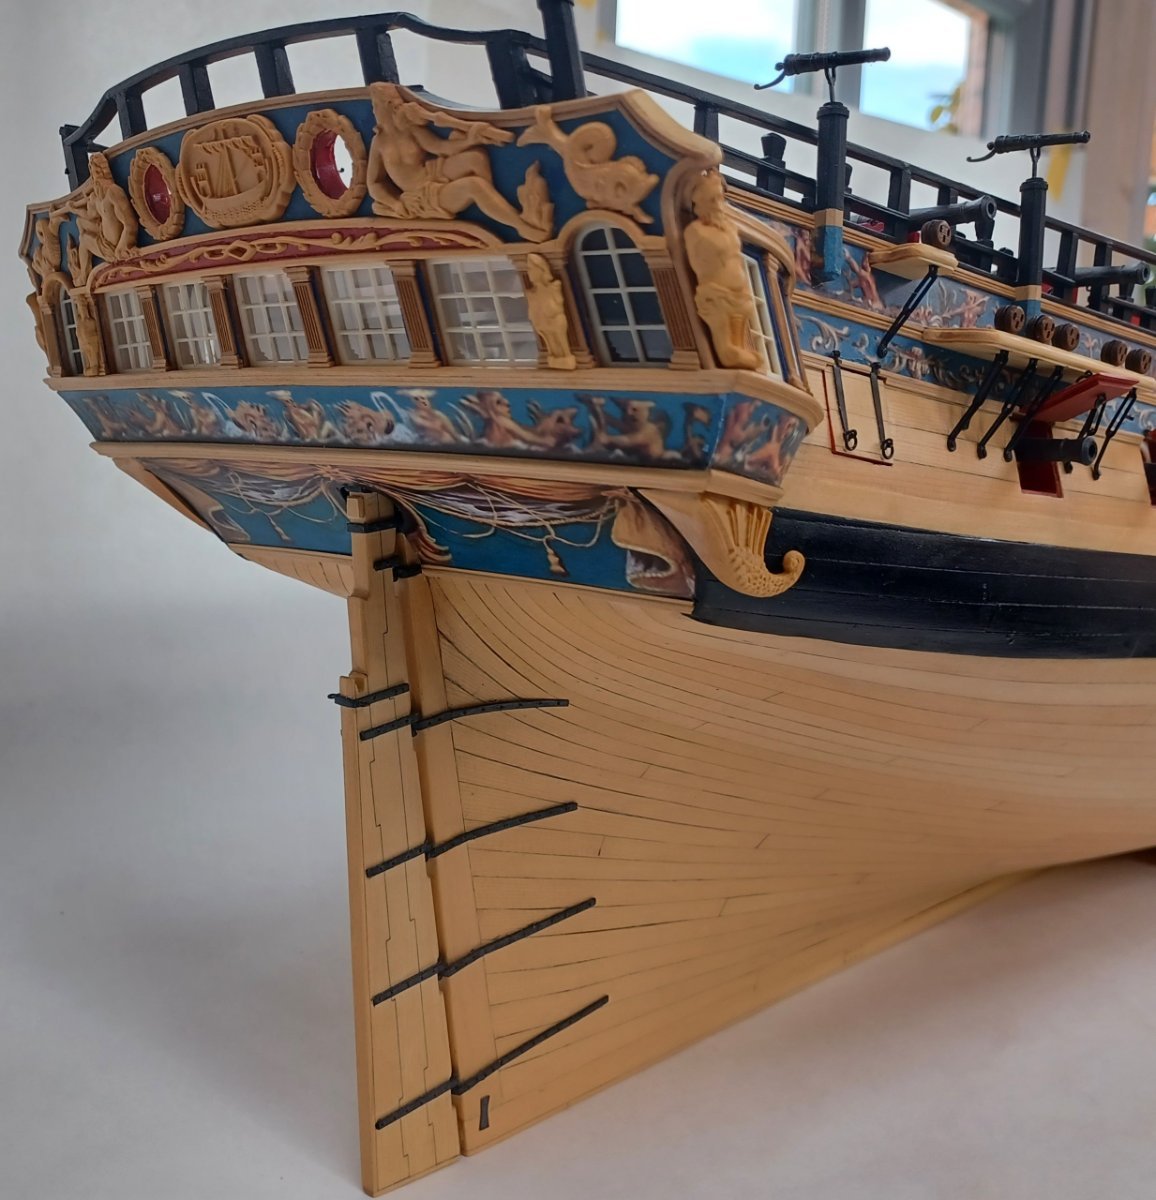
and finally the figure-head.
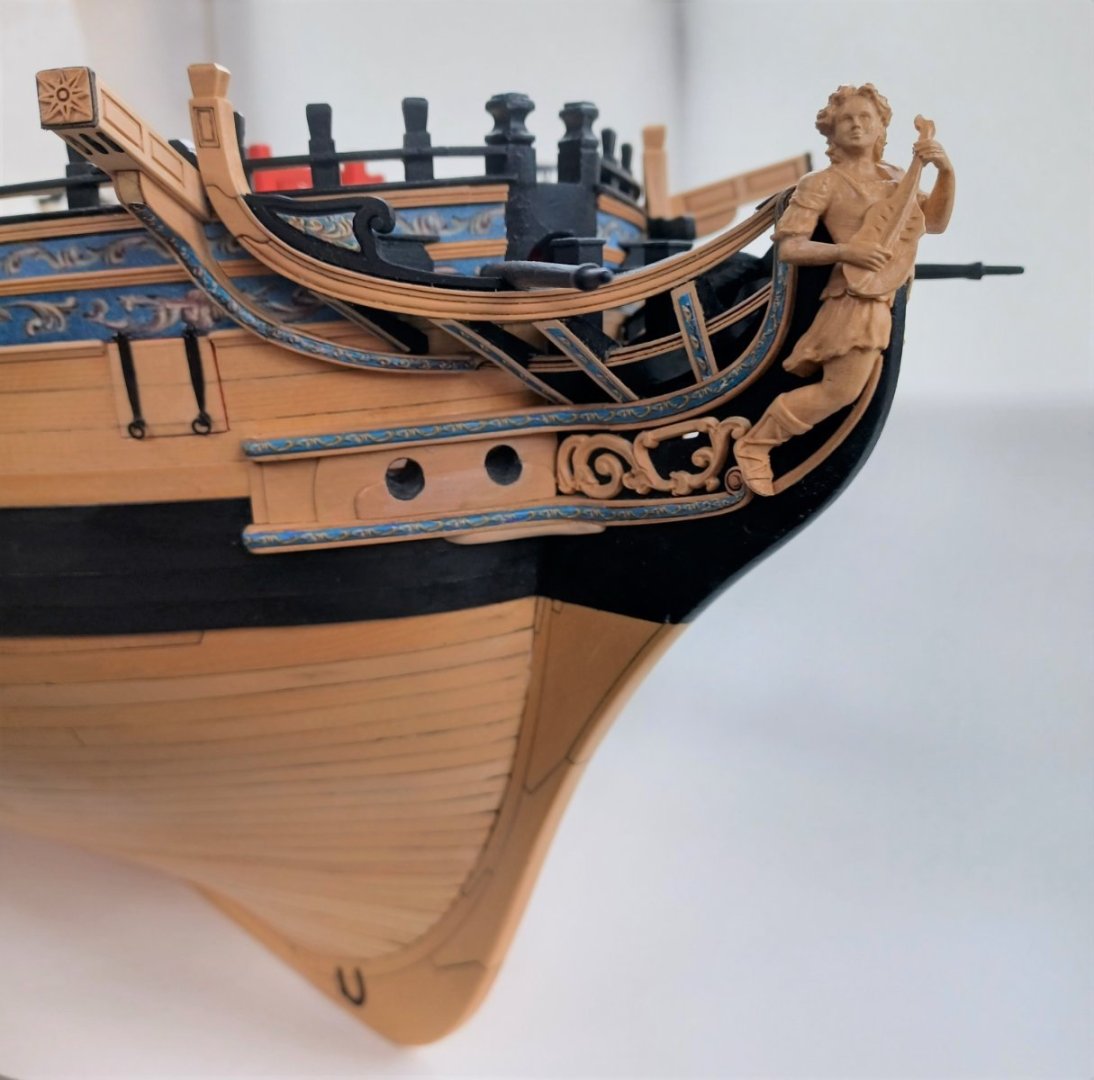
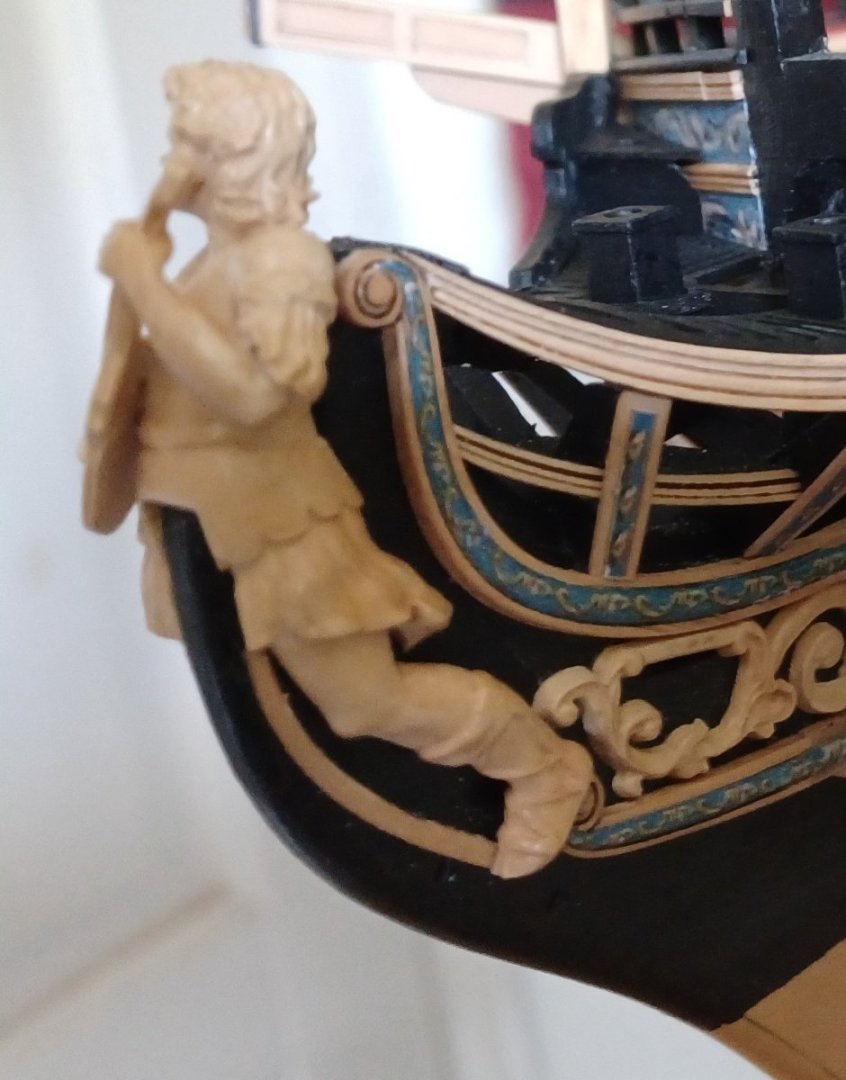
I have been waiting long for this point.
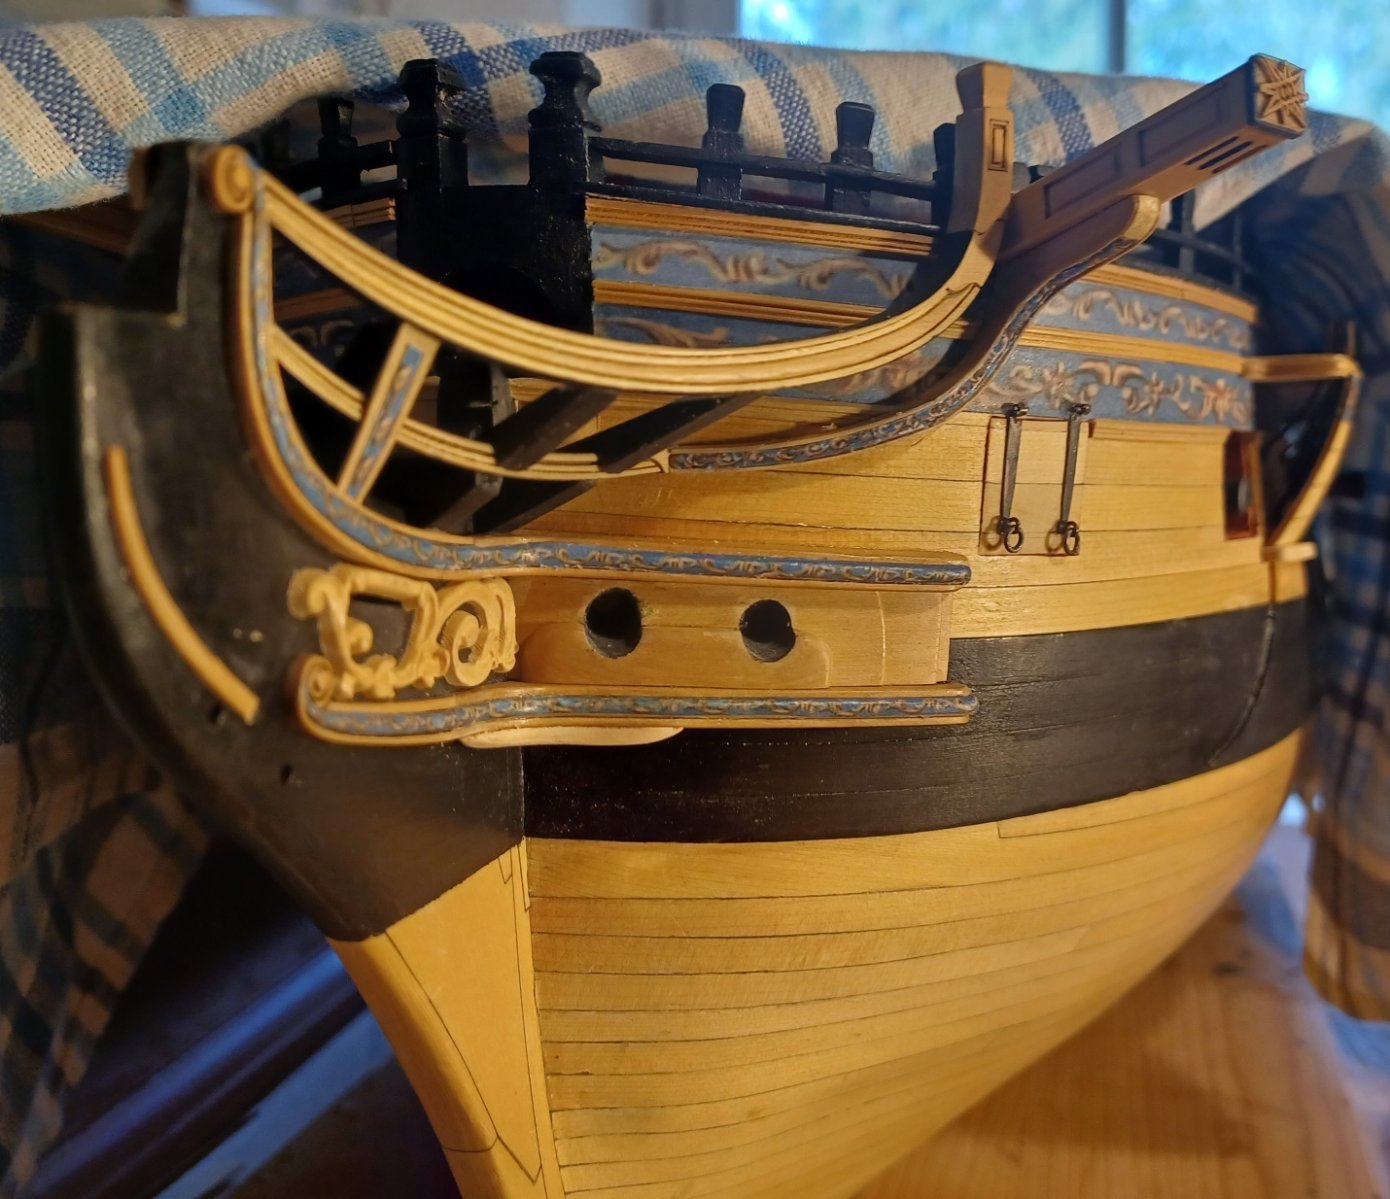
What a lovely figure. I actually like it, that it is not a warrior or something like that, but a musician. Remembering, that securing the peace should alway be the goal for every army or navy.

Matthias
-
Thank you,
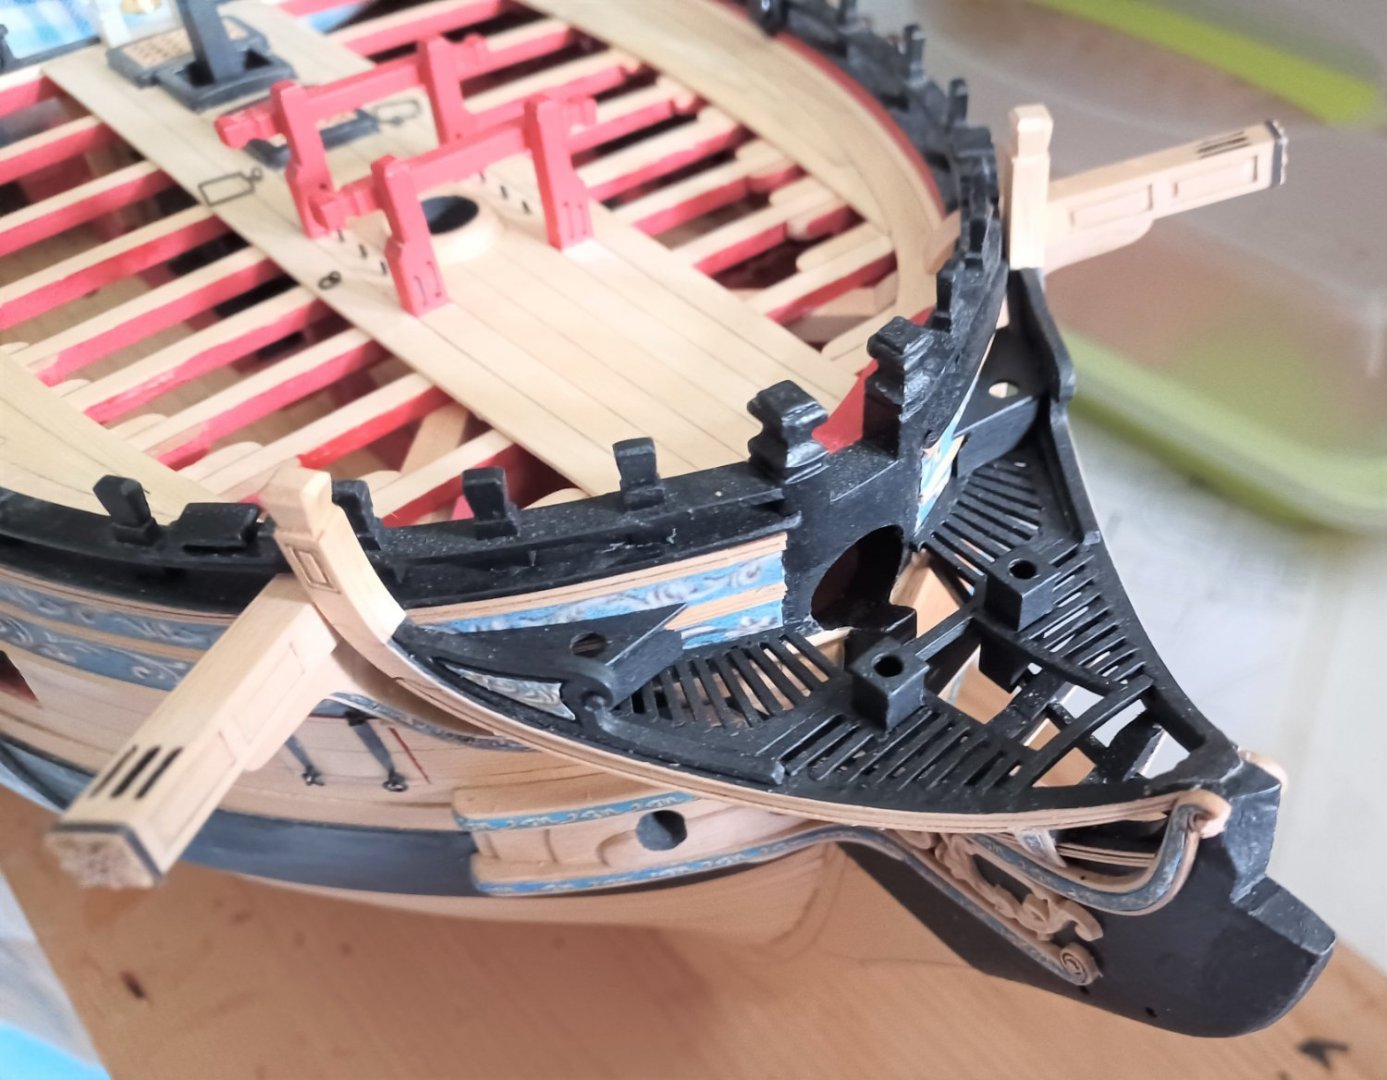
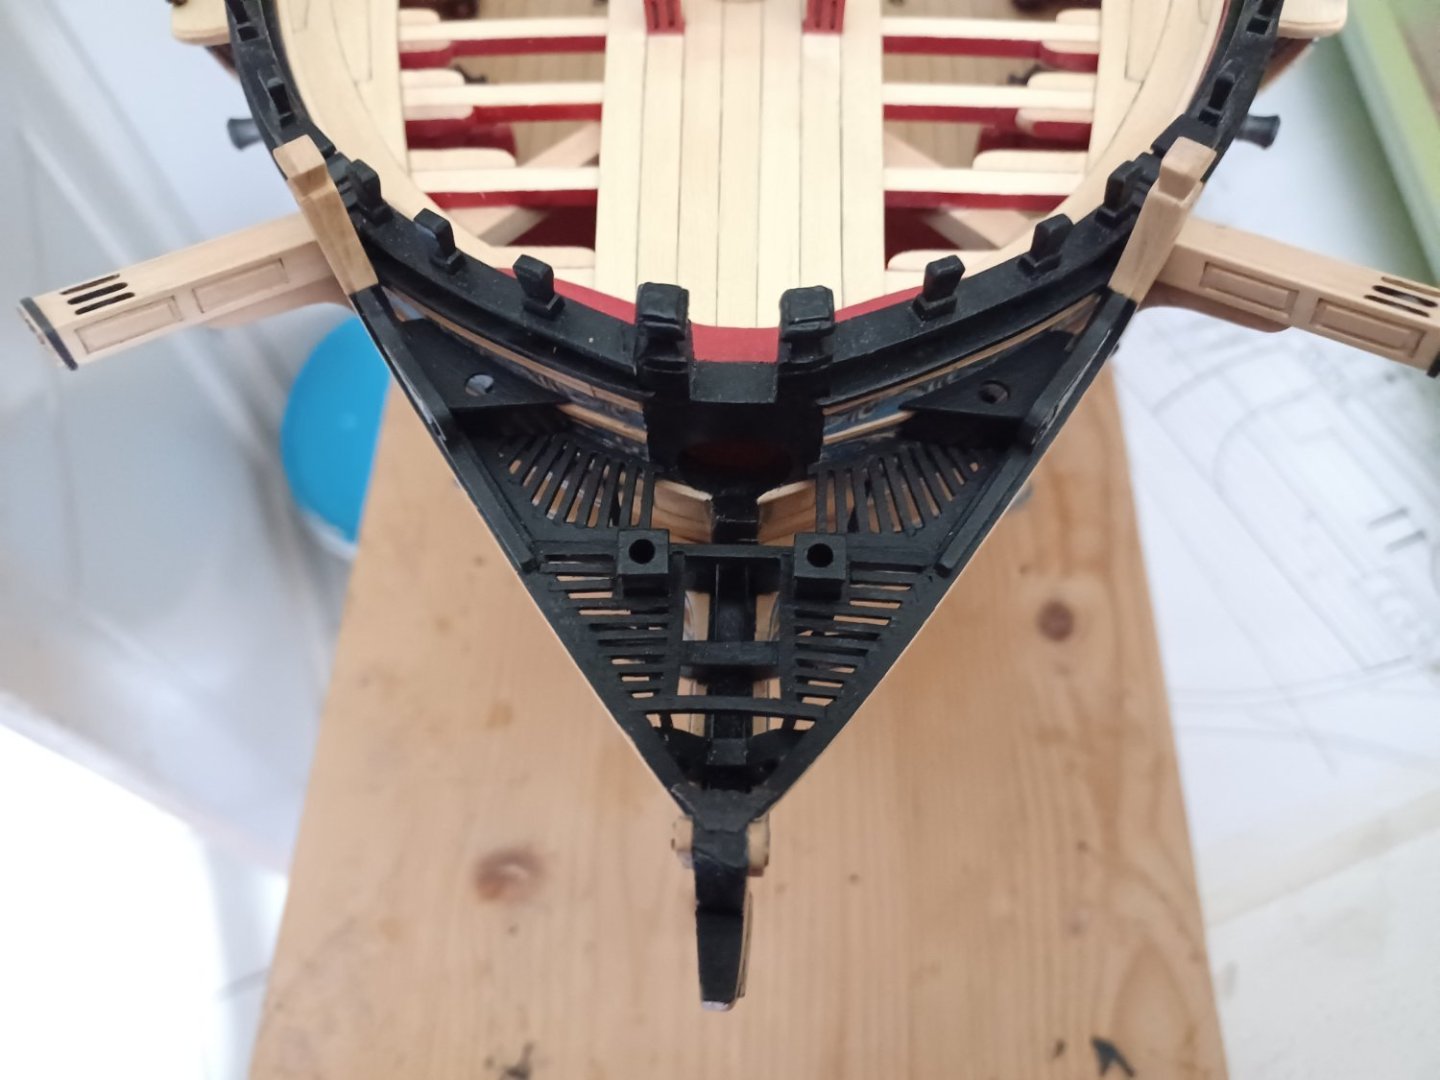
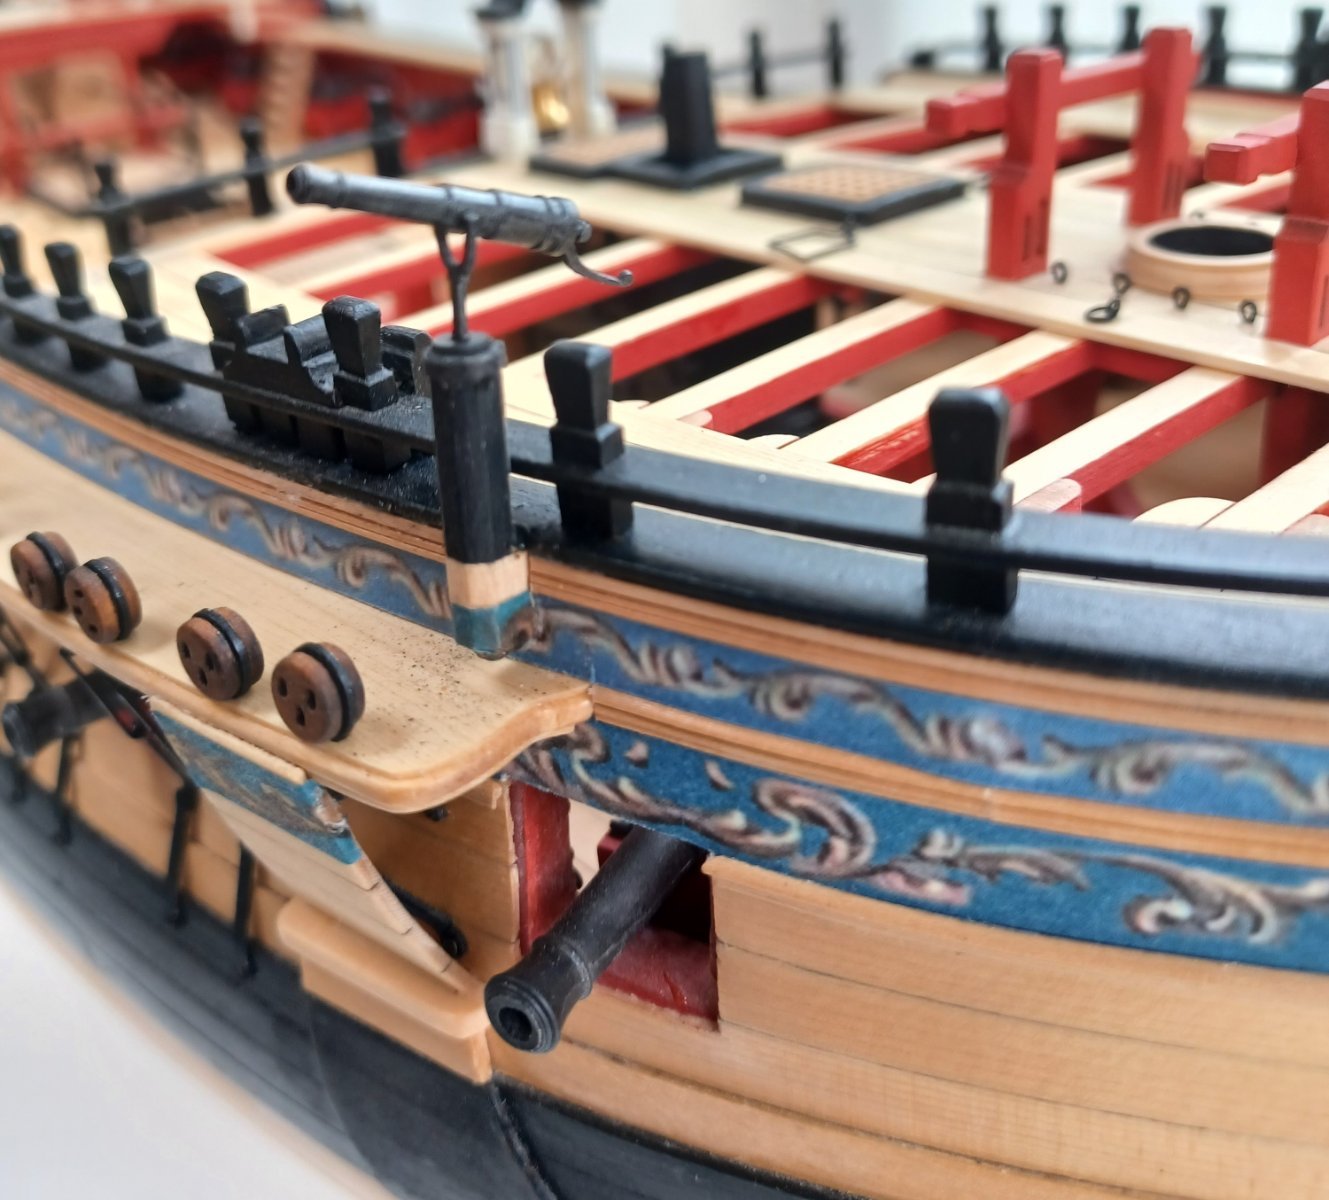
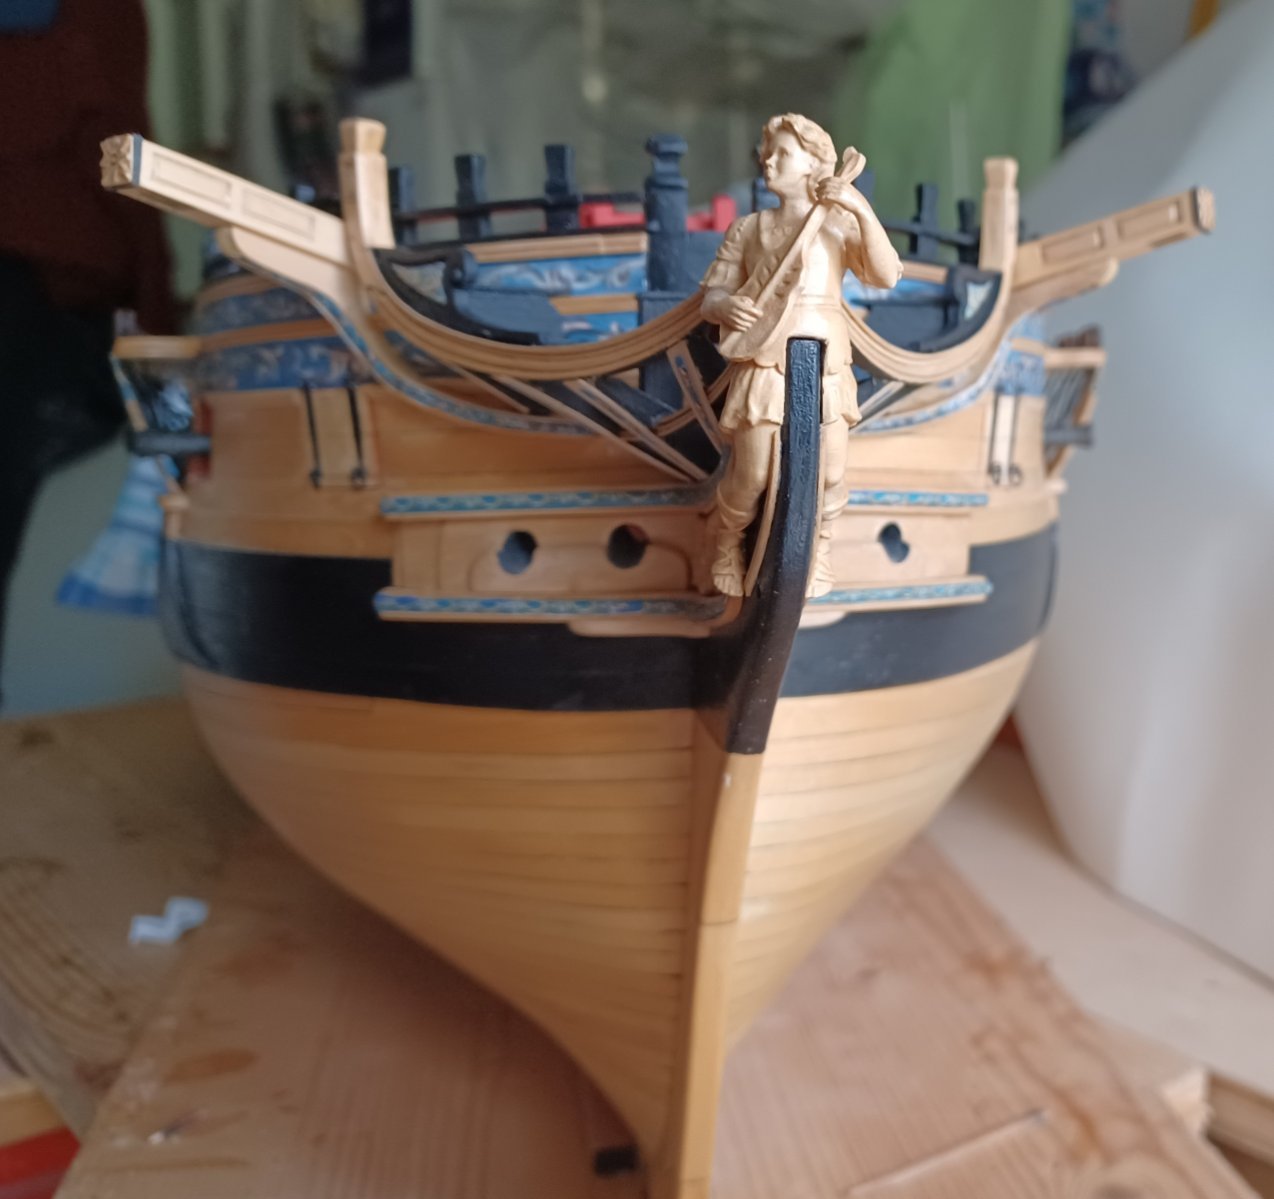
I continued with the head-rails of the gallion.
I must say, this is by far the most challenging part of the whole model. I messed up the first pair of headrails and had to ask for a new set, wich Chuck immediately sent to me. Thanks for that!!
I started all over again. Every part here is important for the whole appearance of the construction. Ther are plenty of graceful curves and angles. If any of them are out of place, the whole construction looks weird.
Here are the new headrails, I tried to remove most of the laser-char.
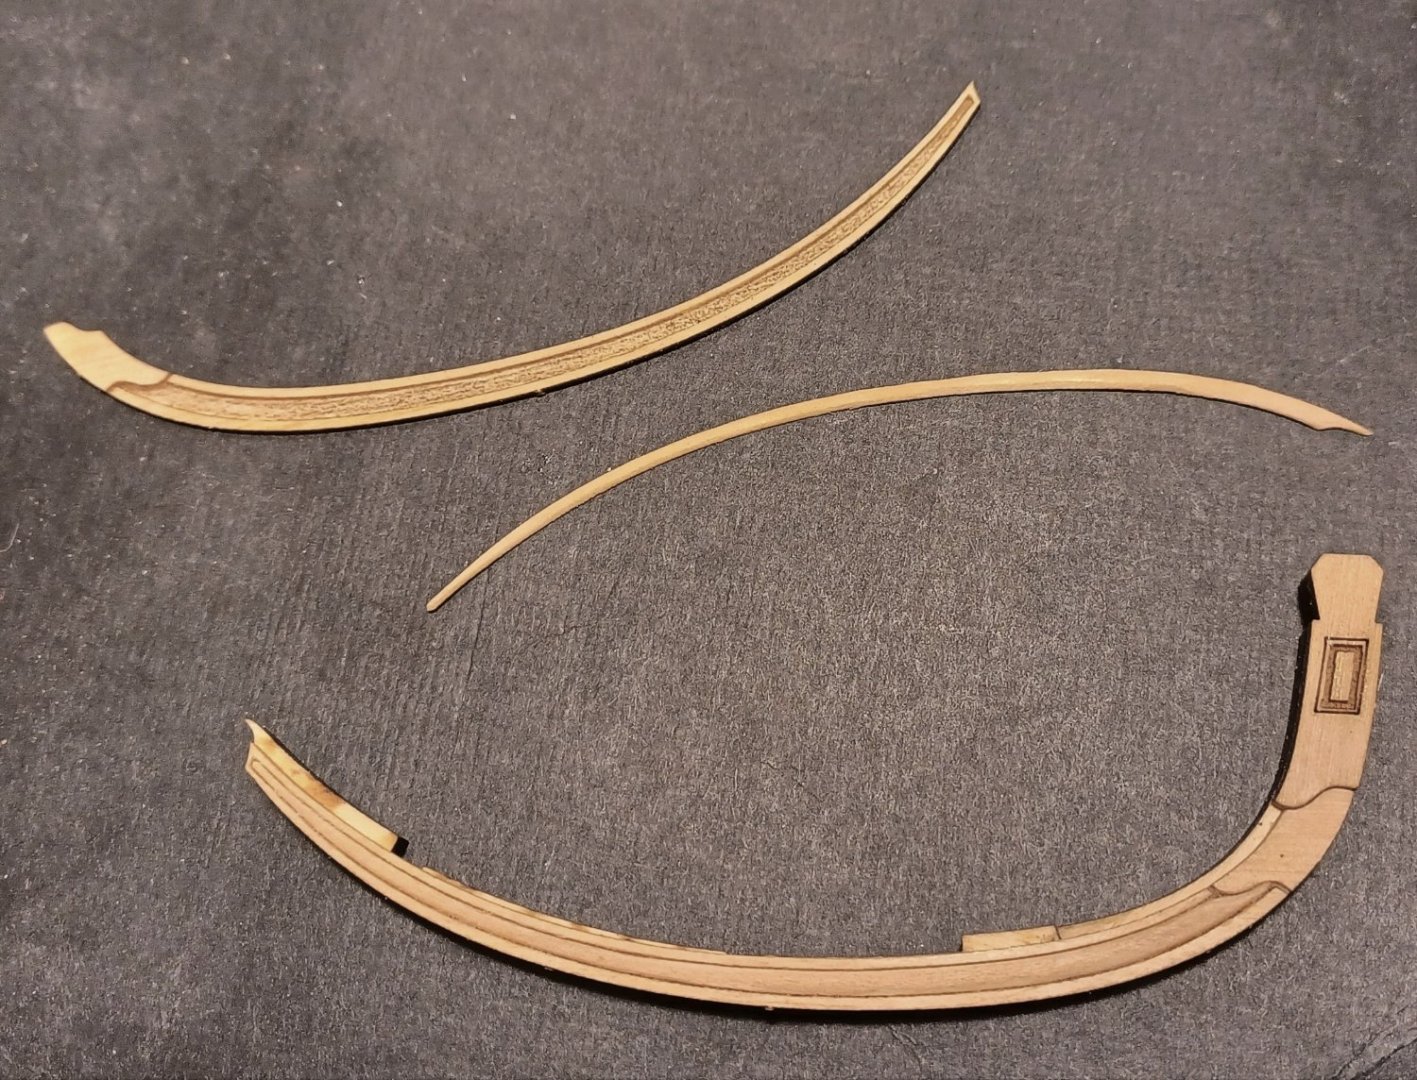
First parts are in position now.


Matthias
-
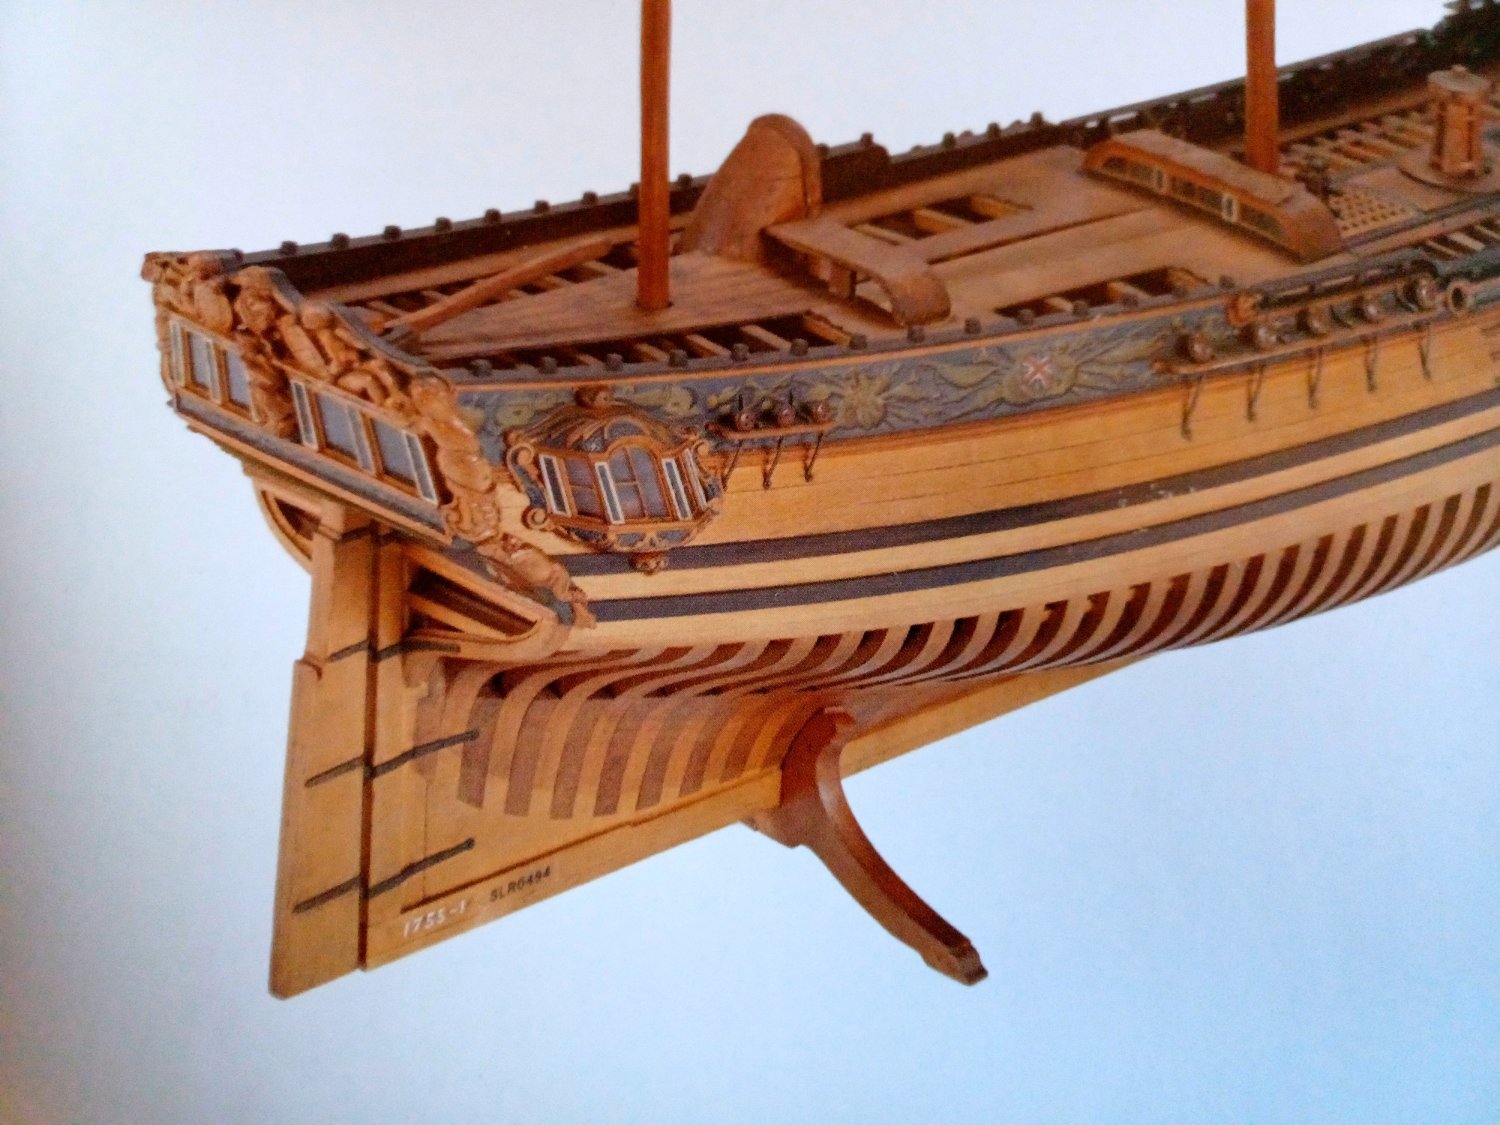
This is a lovely project. I like it very much. And these little working boats should not be forgotten. So many folk earned their daily bread on them.
- hollowneck, BobG, Chuck and 4 others
-
7
-
So well executed!! You can be very proud of this beautiful model. I look forward to your display case. I still have no idea about a suitable stand and display case for my Winnie-model, wich is about to be finished very soon as well.
Matthias
- hollowneck, Rustyj, FrankWouts and 1 other
-
4
-
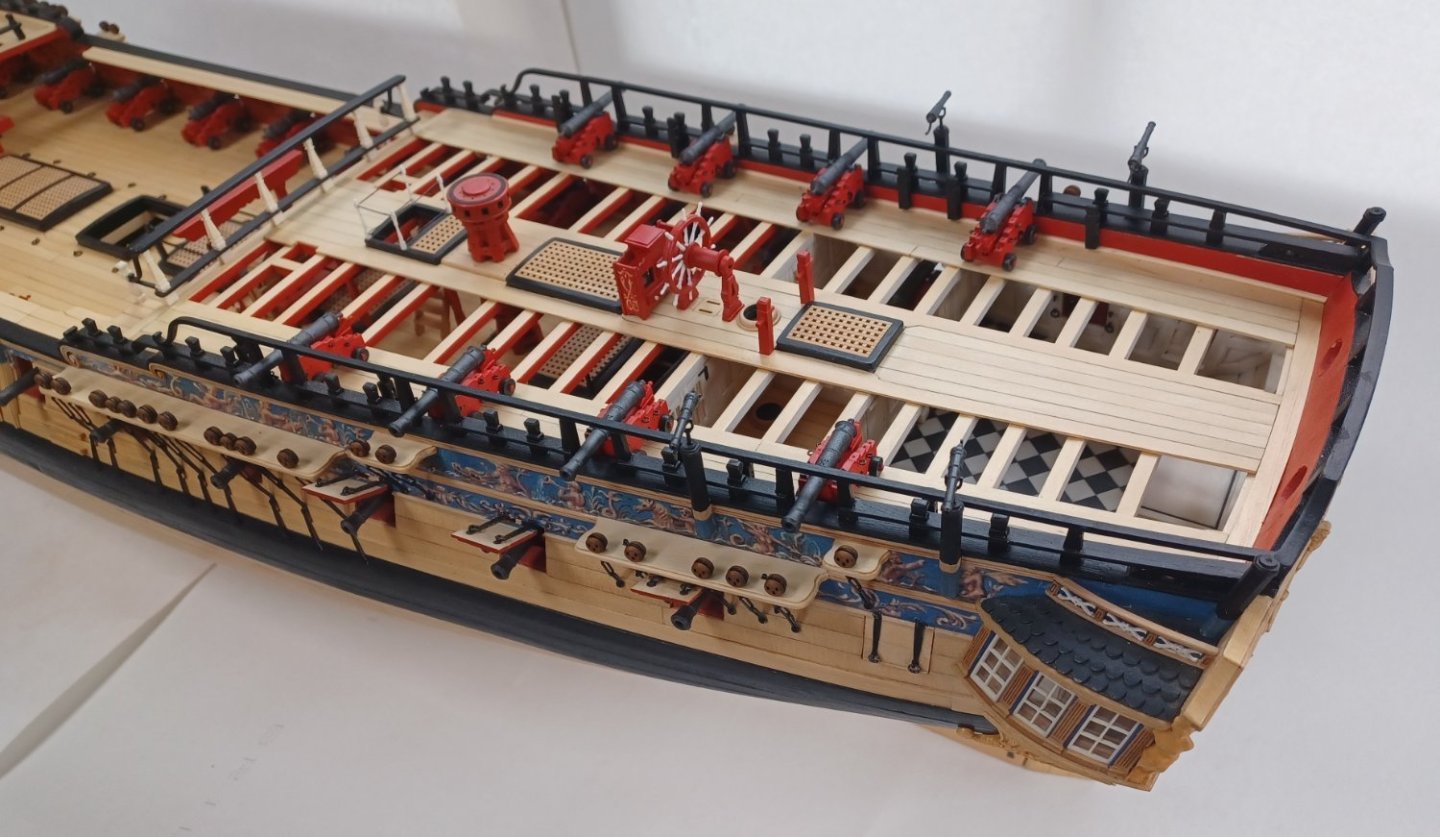
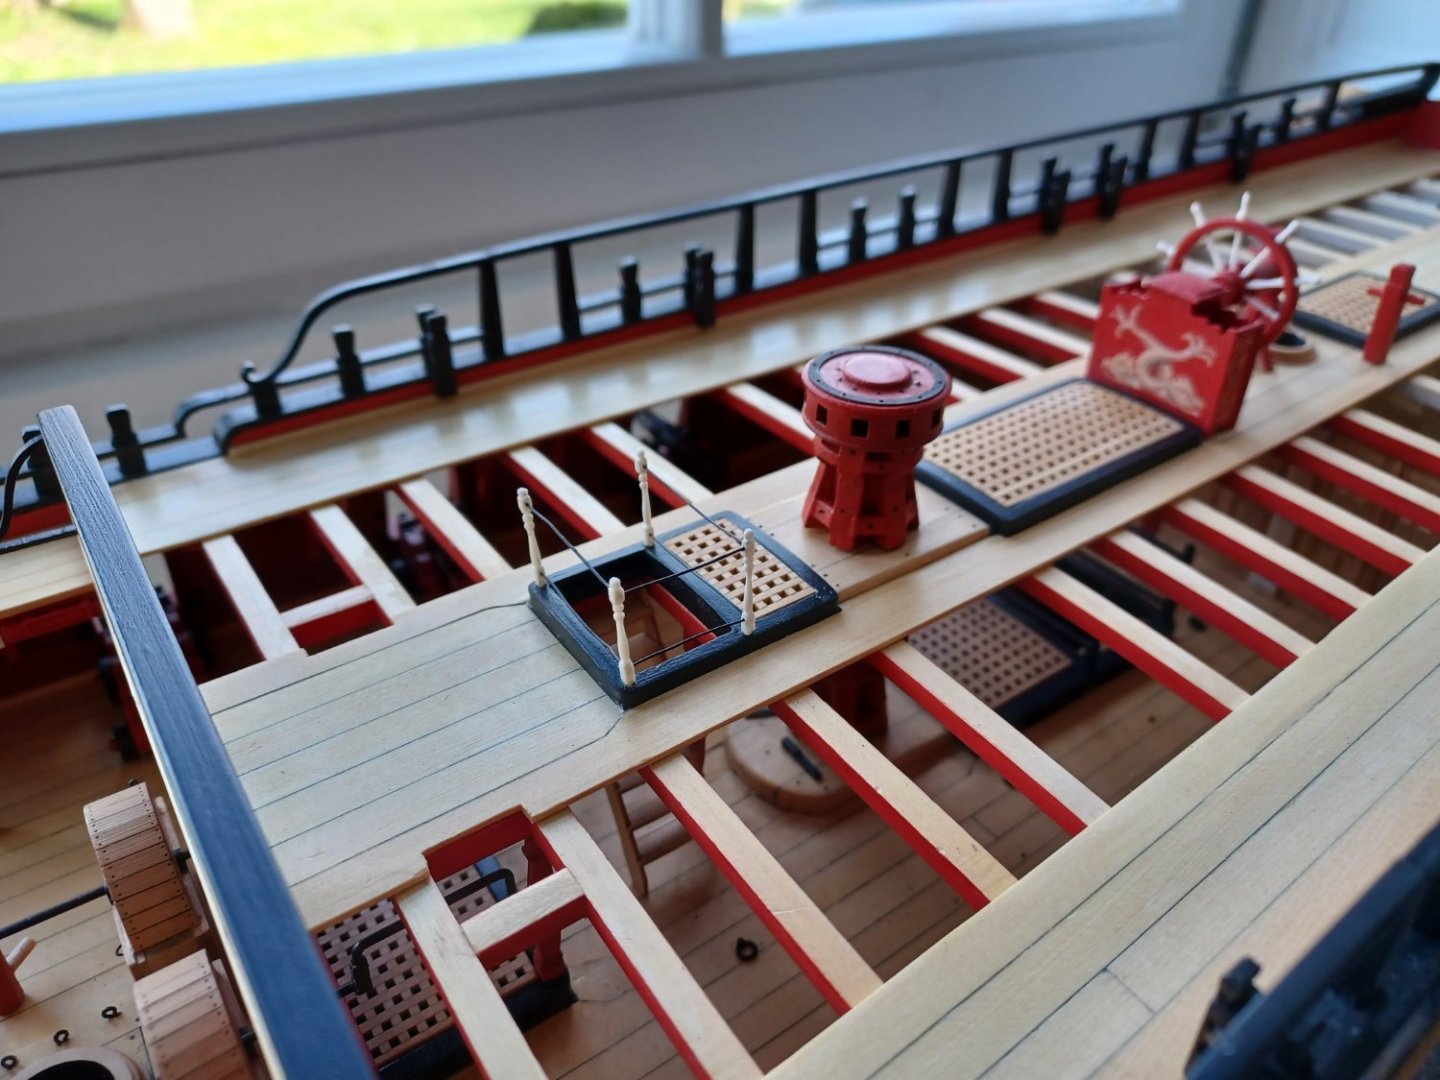
Hello Everybody,
thank you very much for your nice comments!
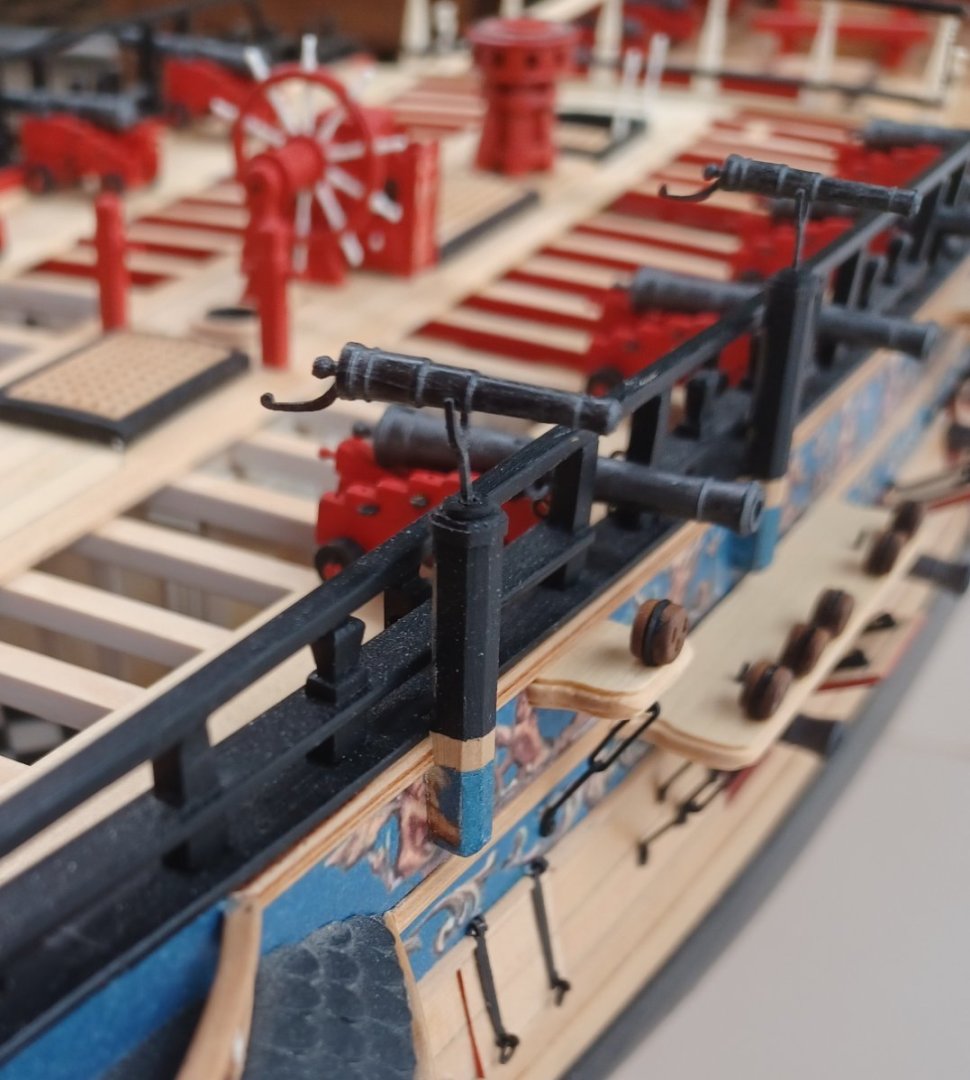
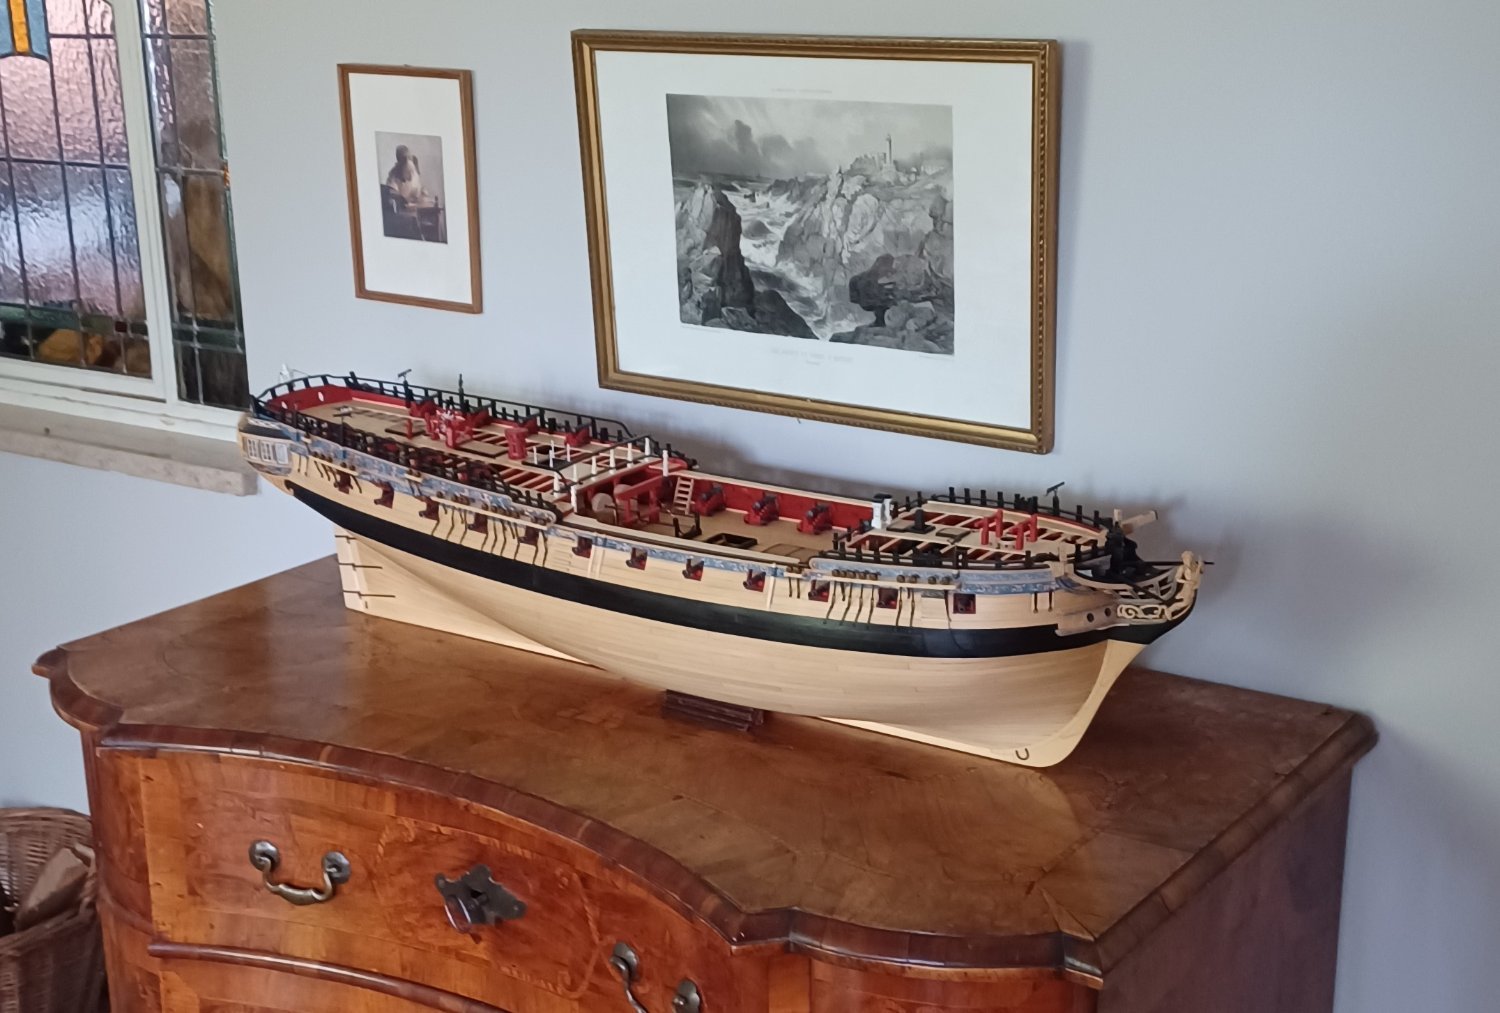
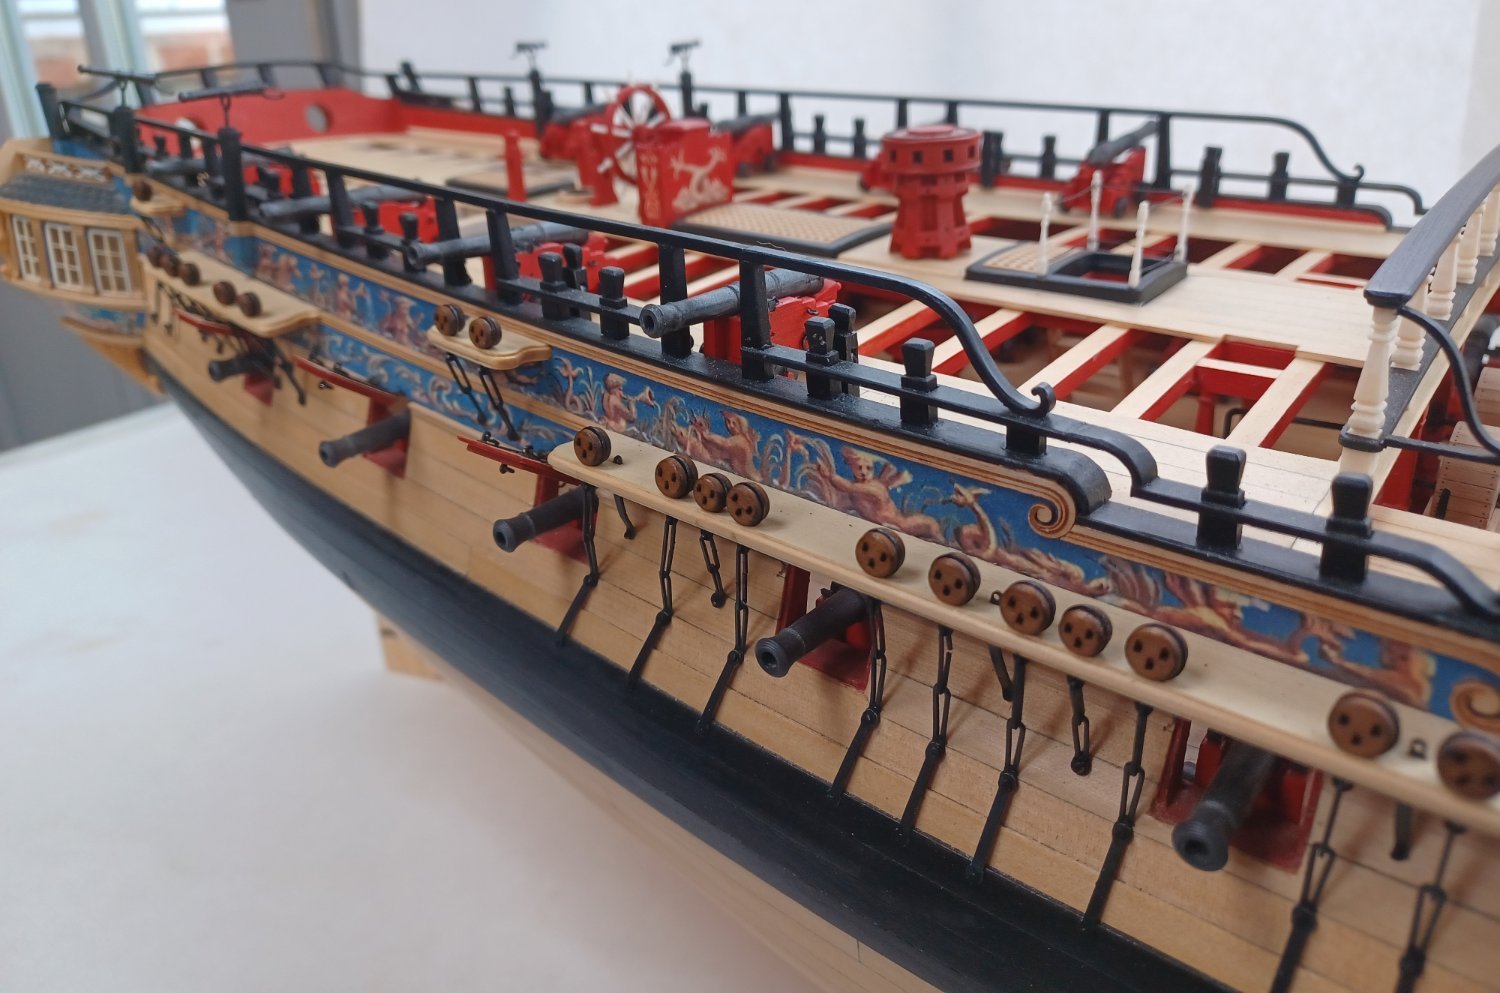
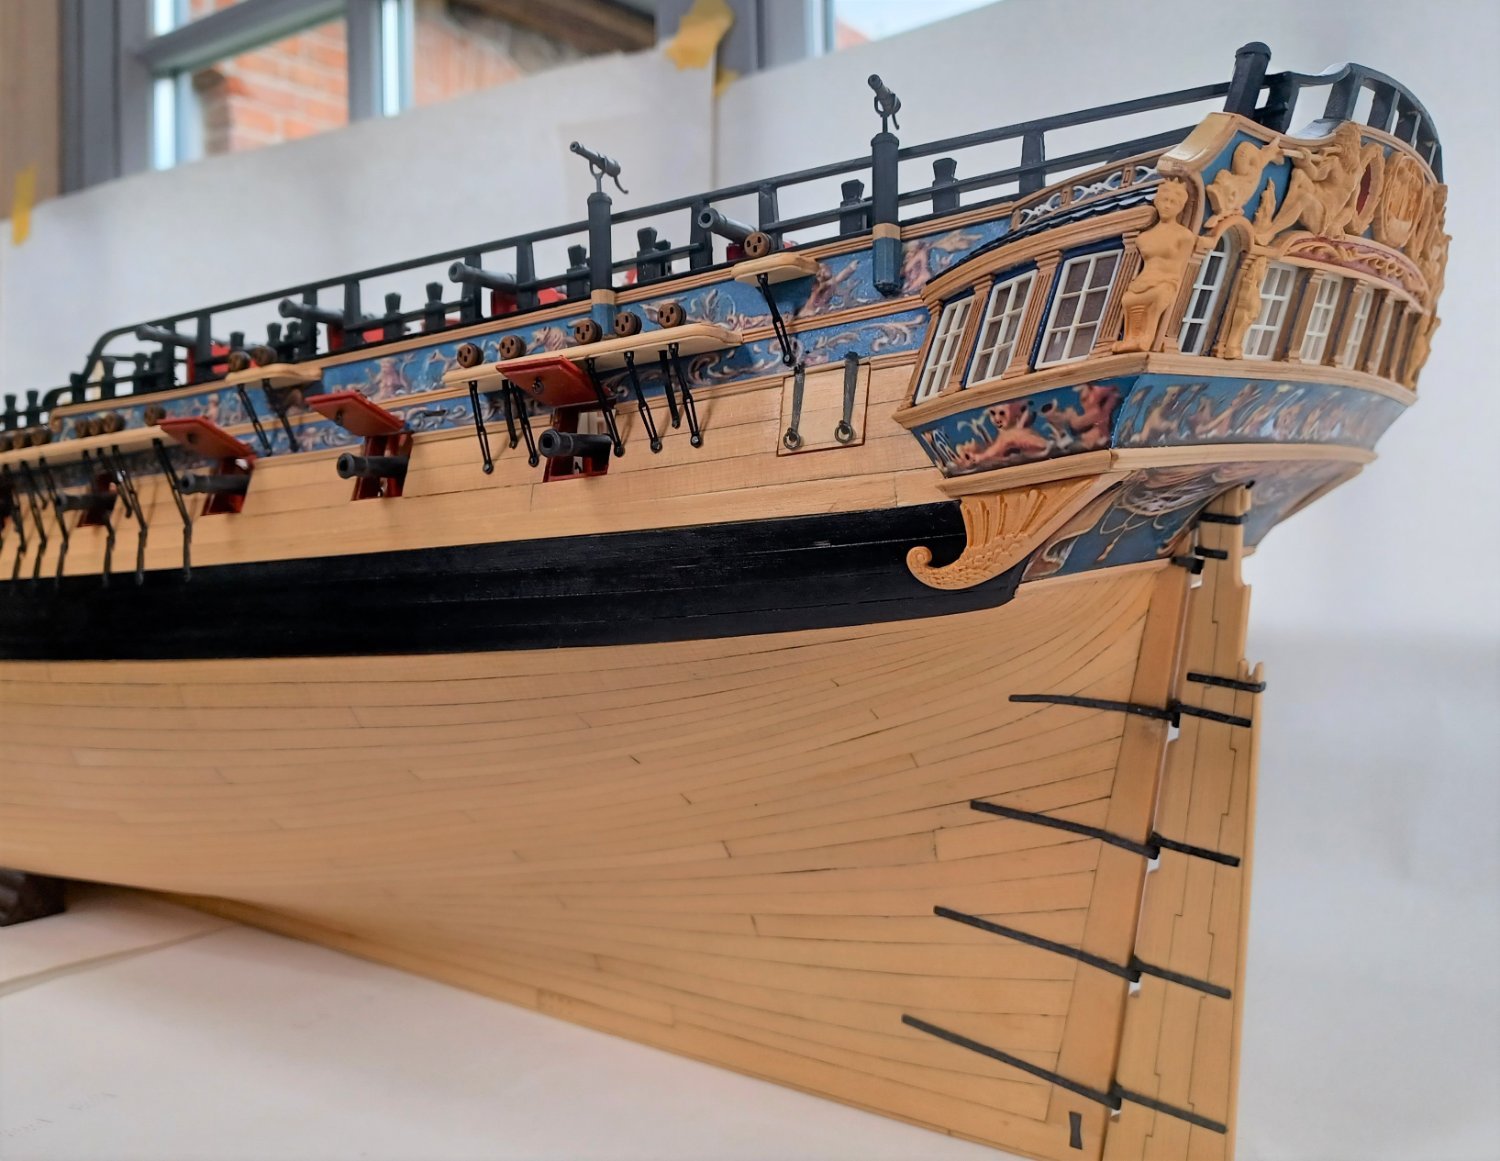
I continued chapter 11 with the deadeyes and chainplates. It is all so well explained in Chucks instructions, there is not much to say about it. It all worked very well. The only bigger problem was to not stretch the acrylic chains too much, so they remain close. I tried the position in advance and made a hole with a needle, where the brass-nail is supposed to be. That worked quite well, I hope you know, what I mean.
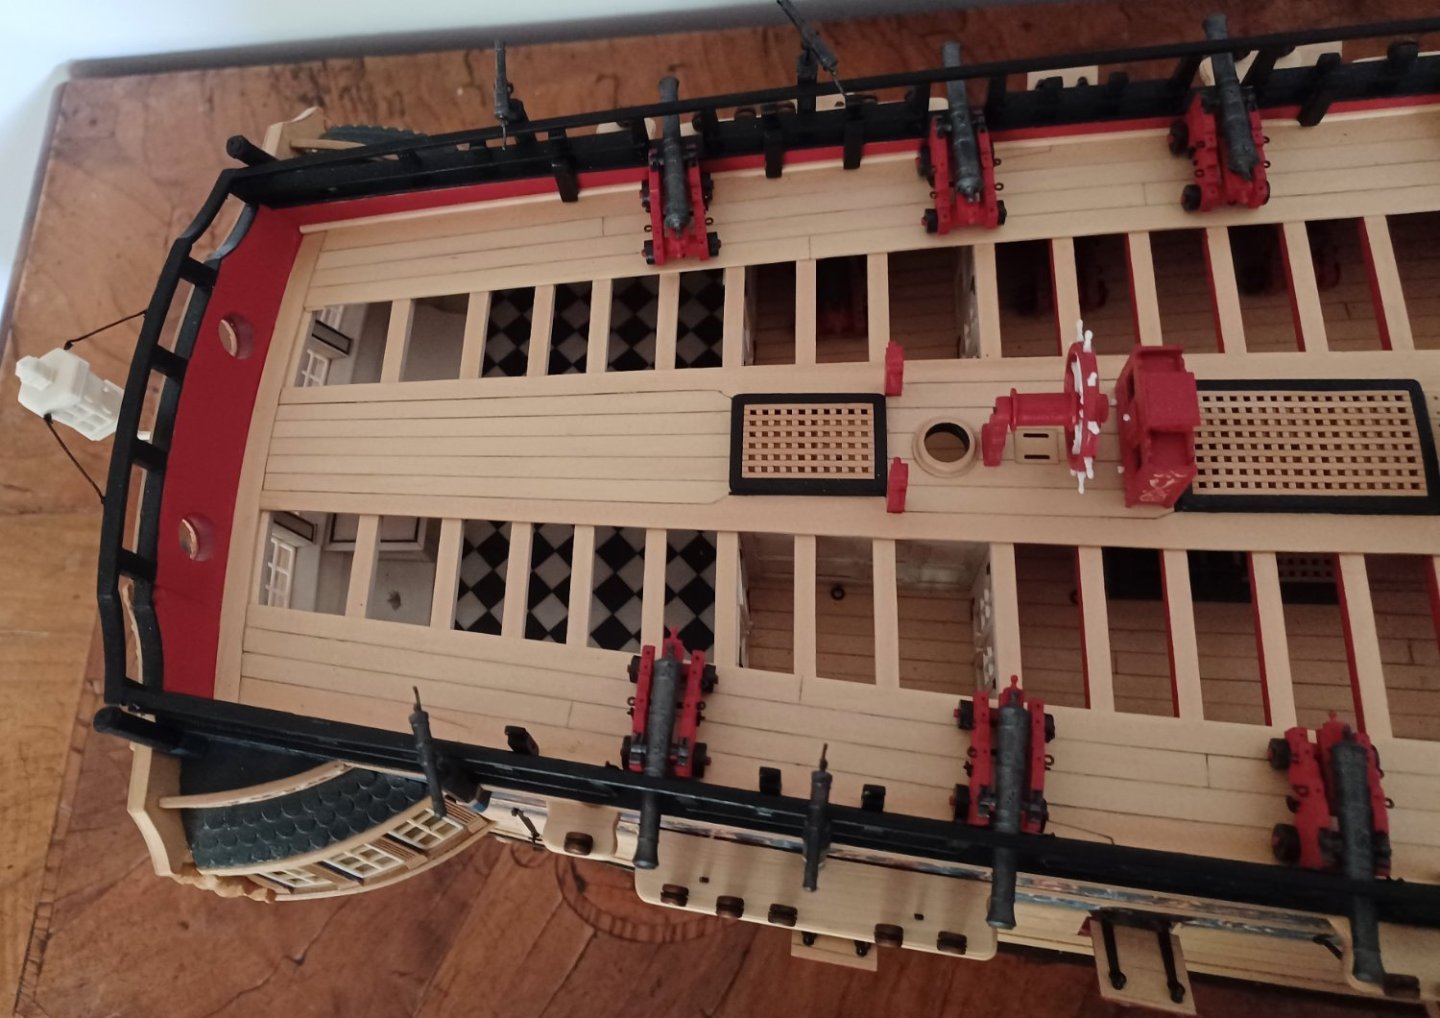
So here are some photos of the result.
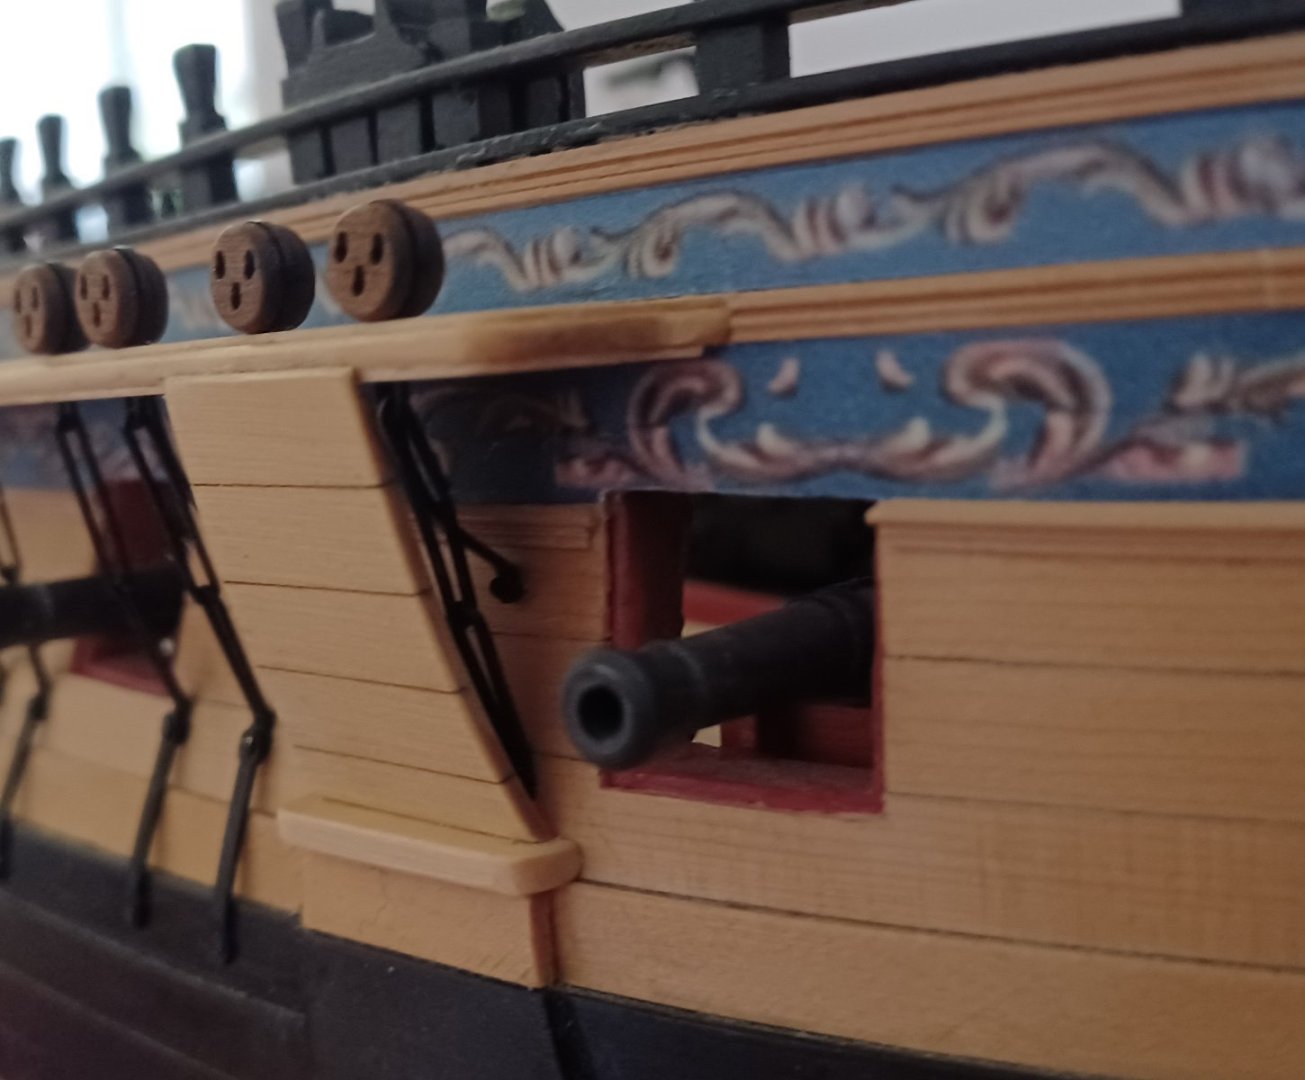
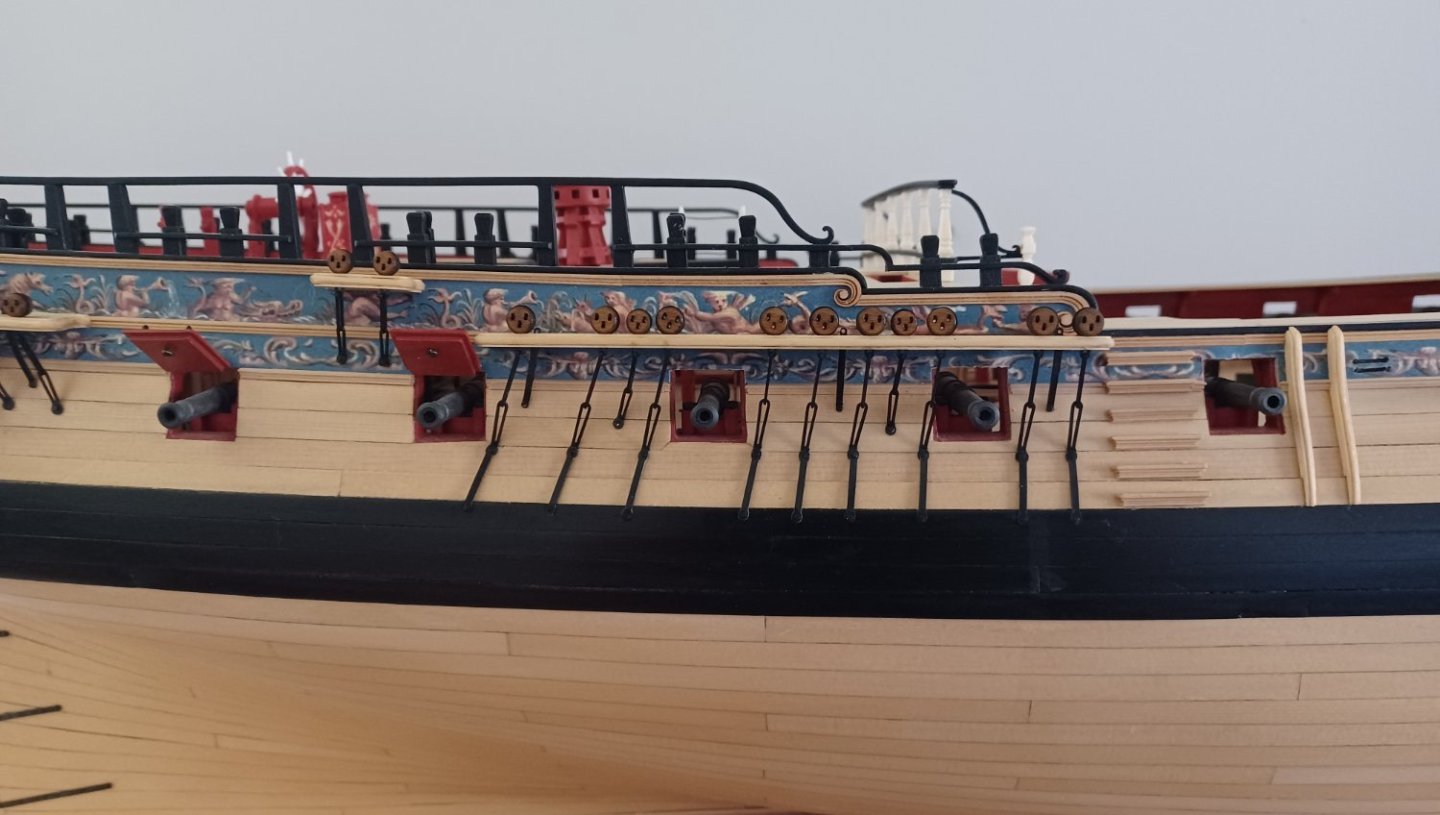
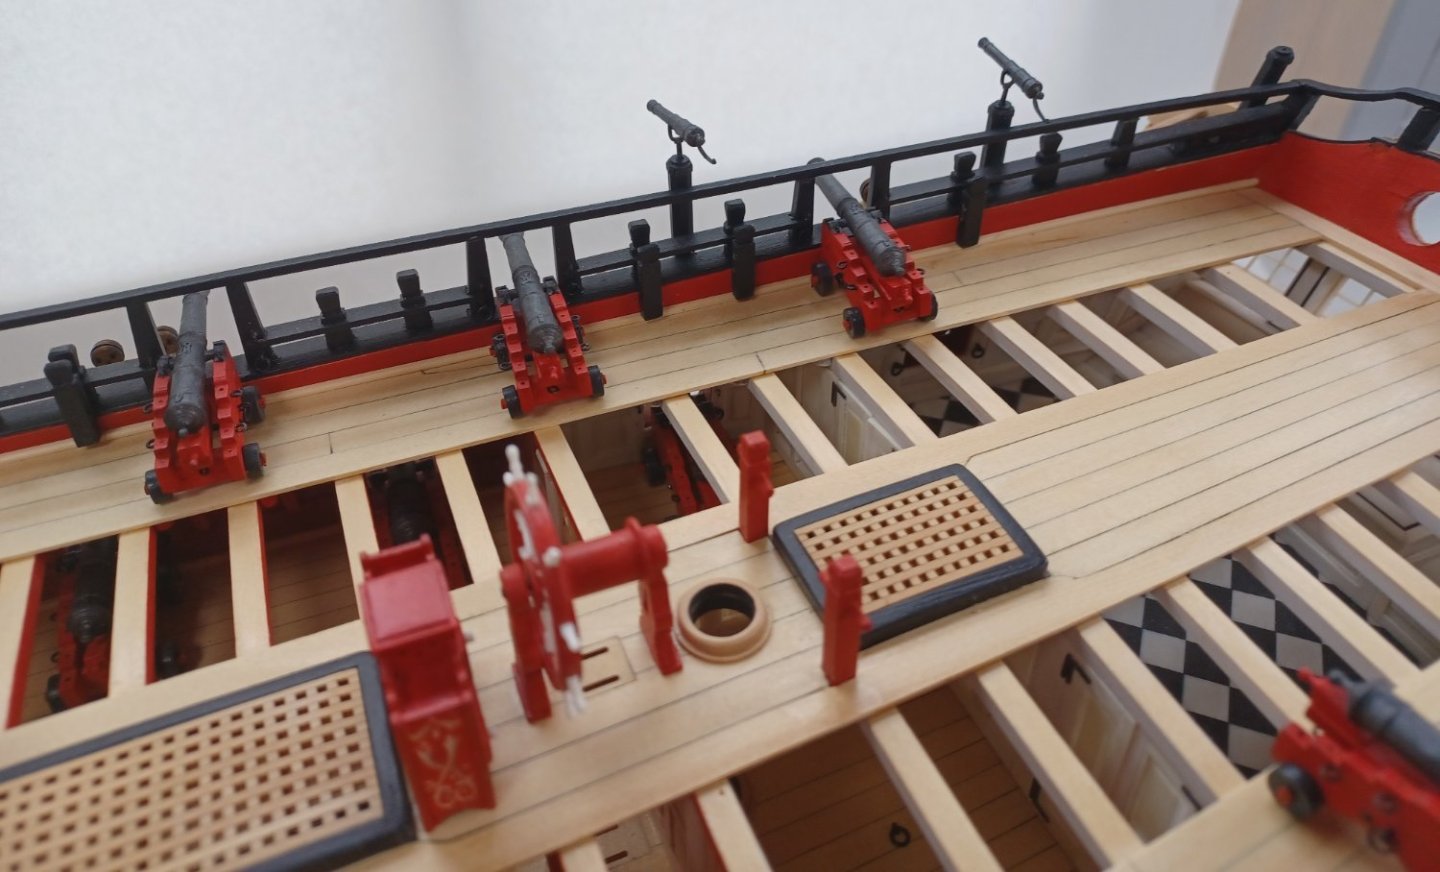
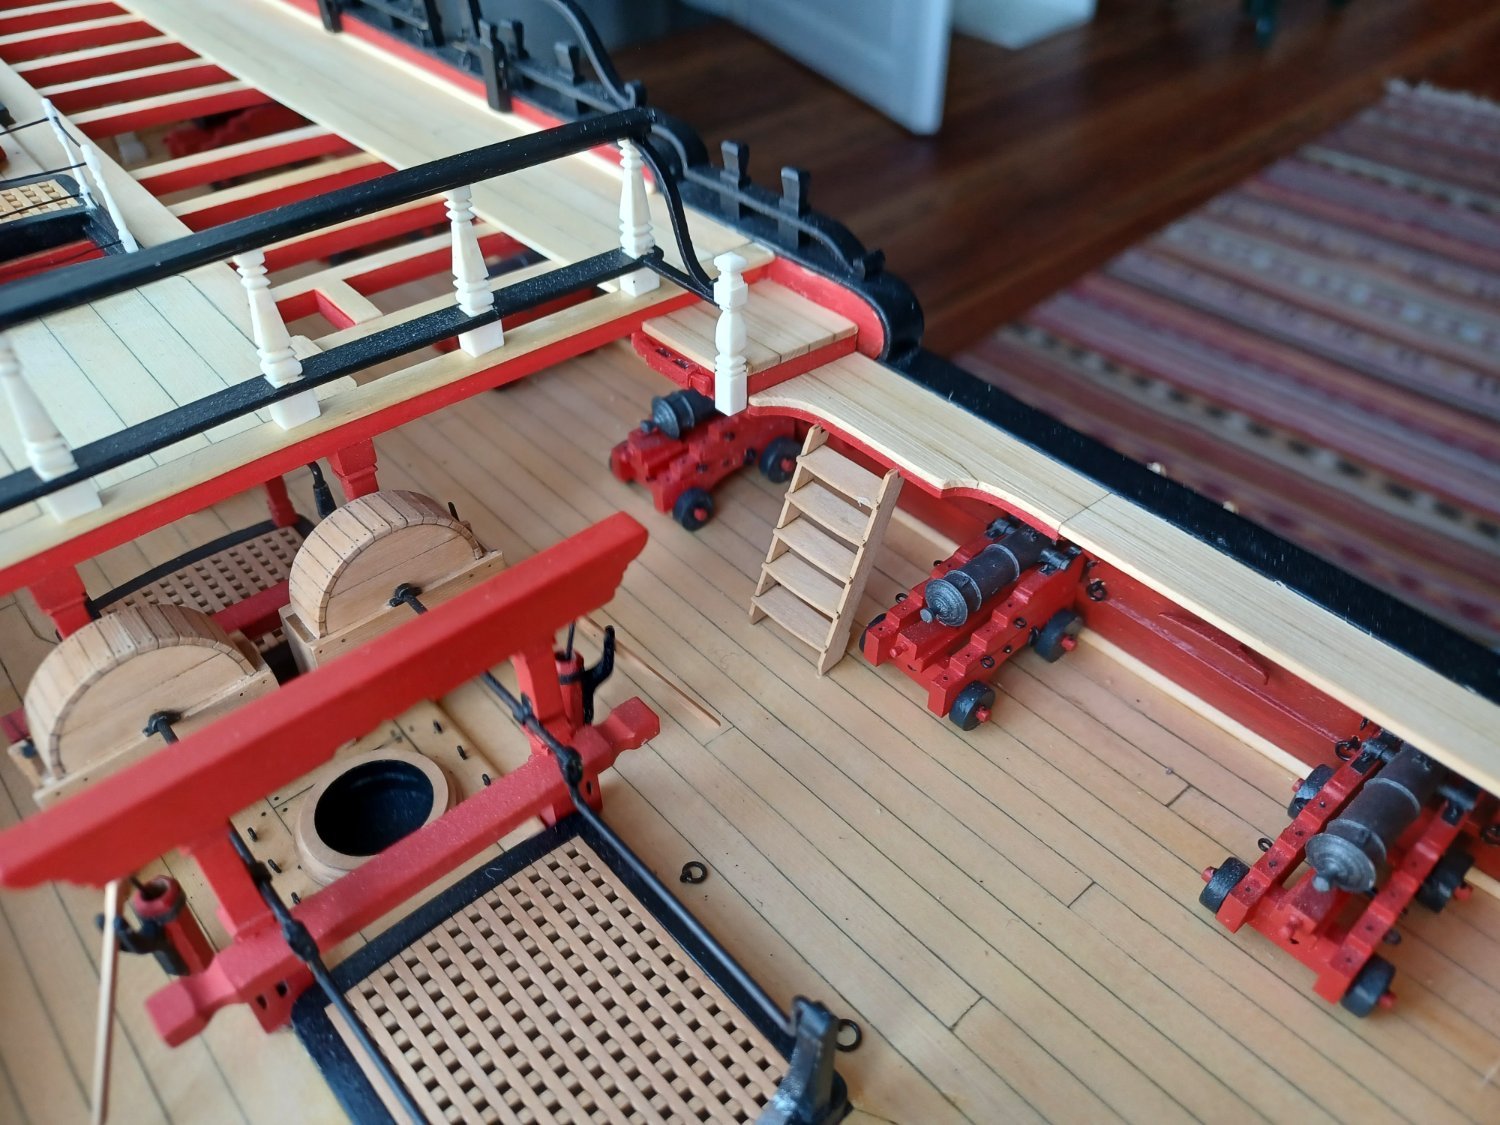
I also installed all the guns on the lower gundeck. I followed stuntflyers method and pinned them onto the deck with brass-nails, so they cannot get lost. I will now proceed to the next chapter and think about, if I will add the swifel guns or not. They are a nice feature, but somehow interrupt the lovely flow of the quarterdeck-rail.
Matthias
-
-
Hi Chuck,
the decorated frieze is a good choice in my opinion. Many 18th century models show them.


That will look very good.
Matthias
- GrandpaPhil, hollowneck, JpR62 and 2 others
-
5
-
Hello everybody,
Thank you all for the comments and likes.
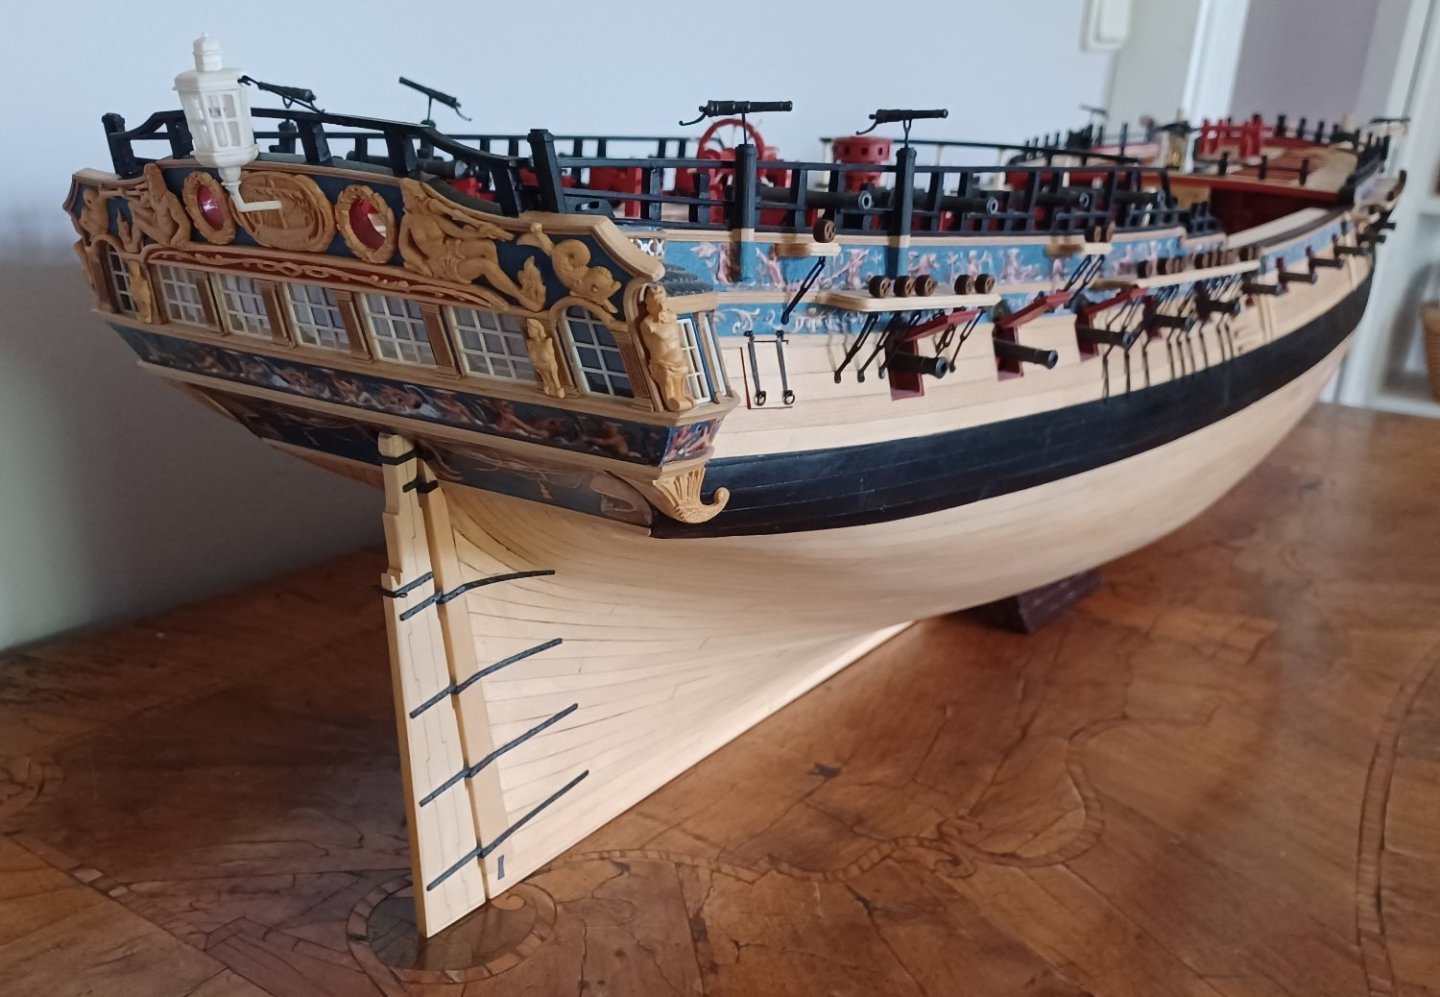
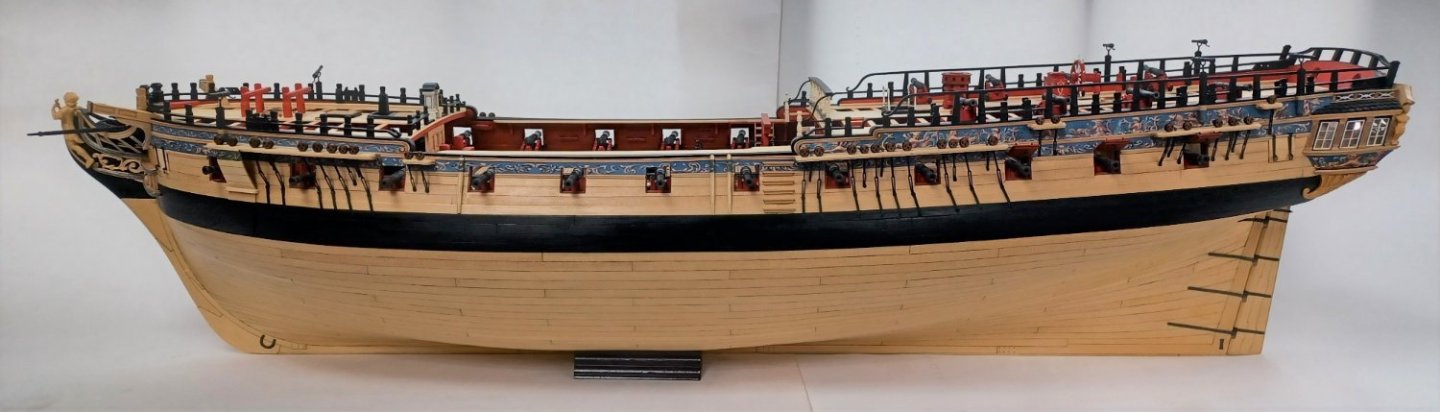
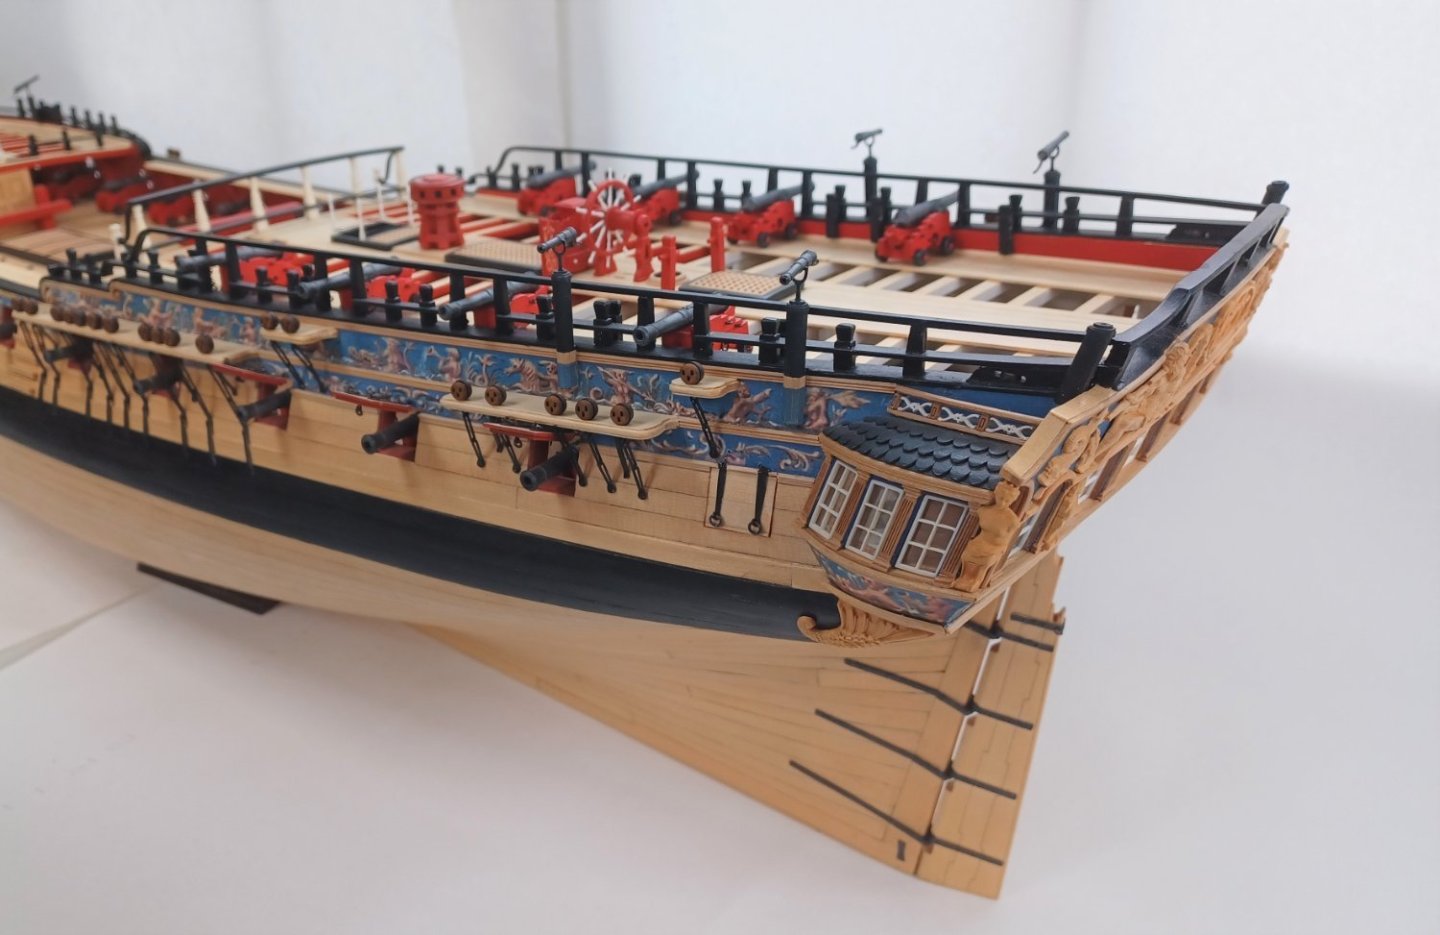
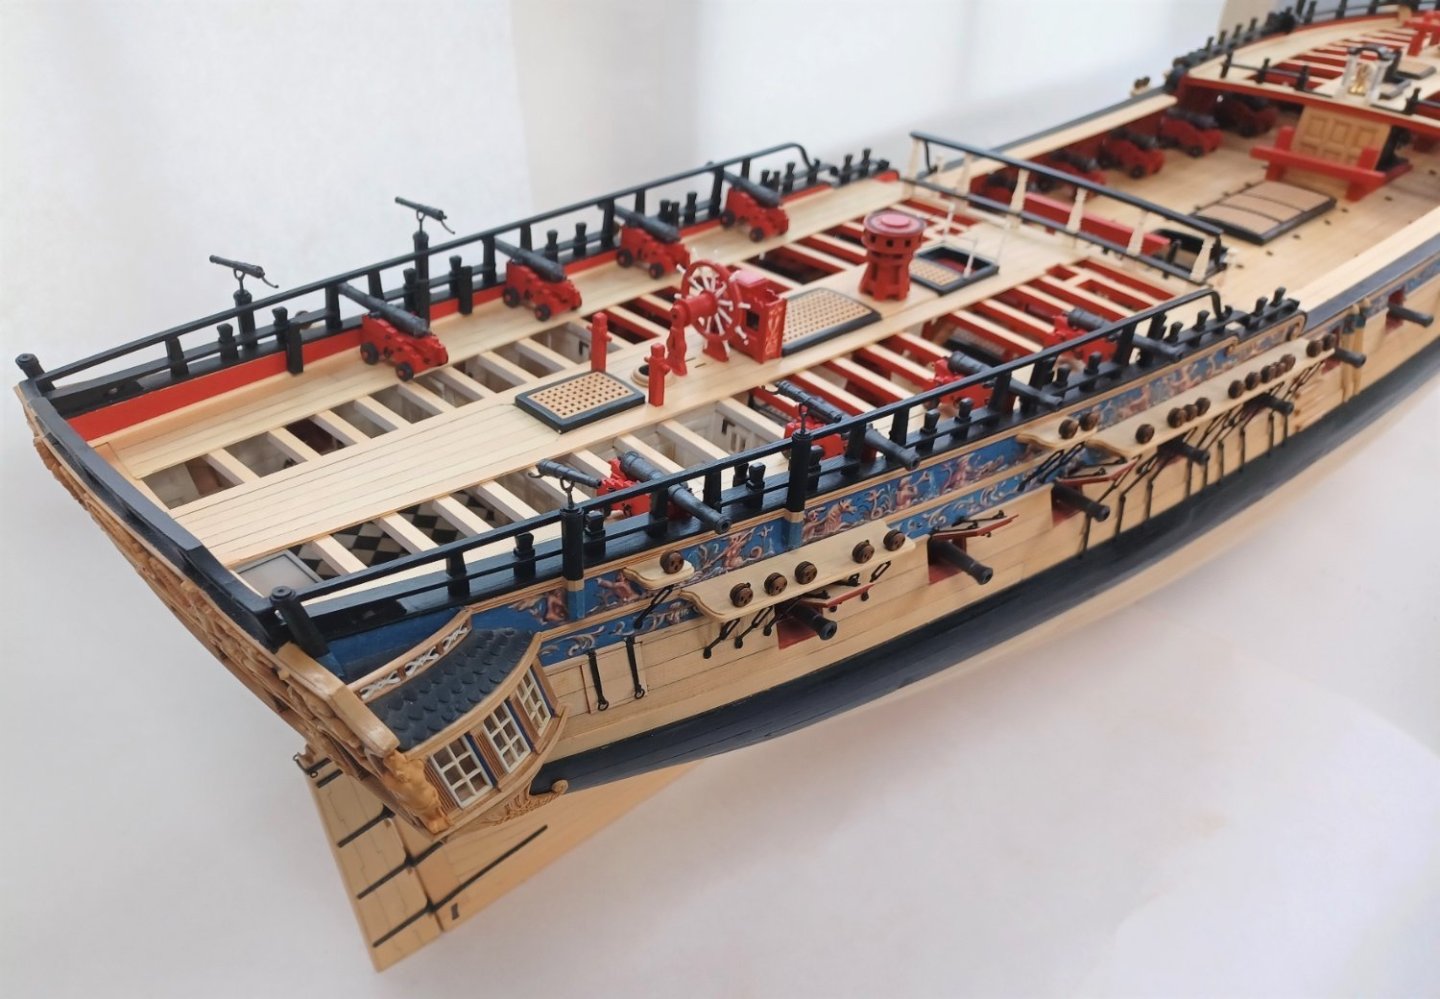
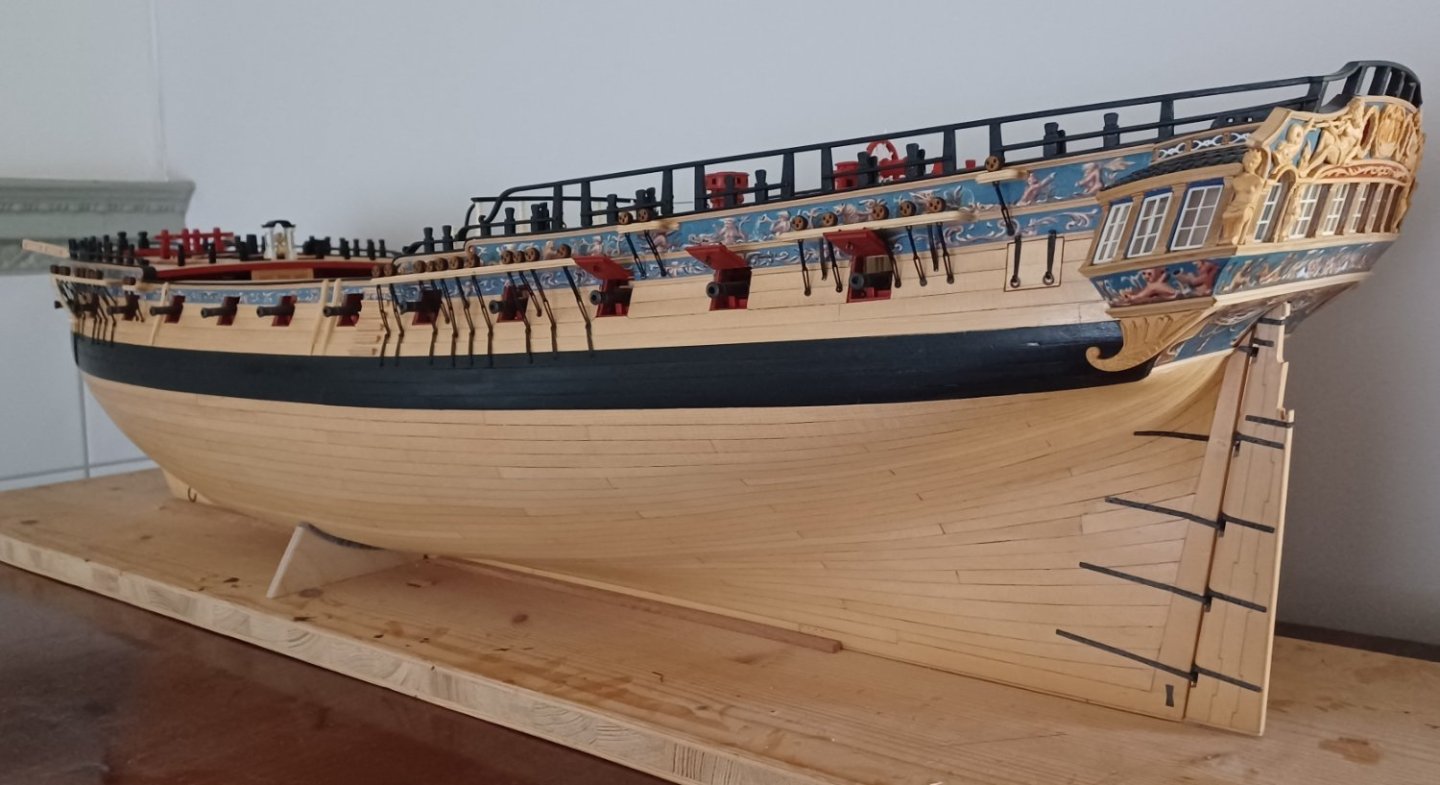
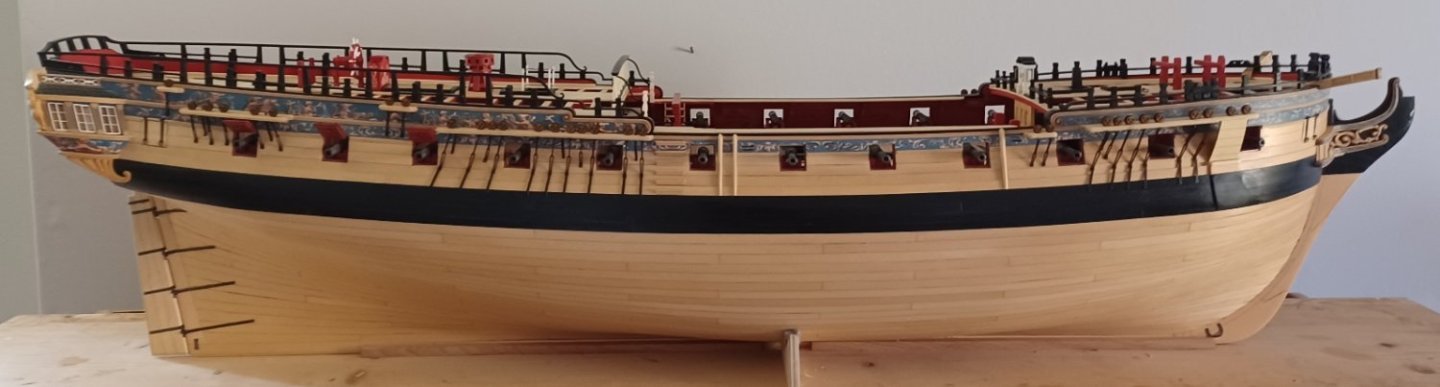
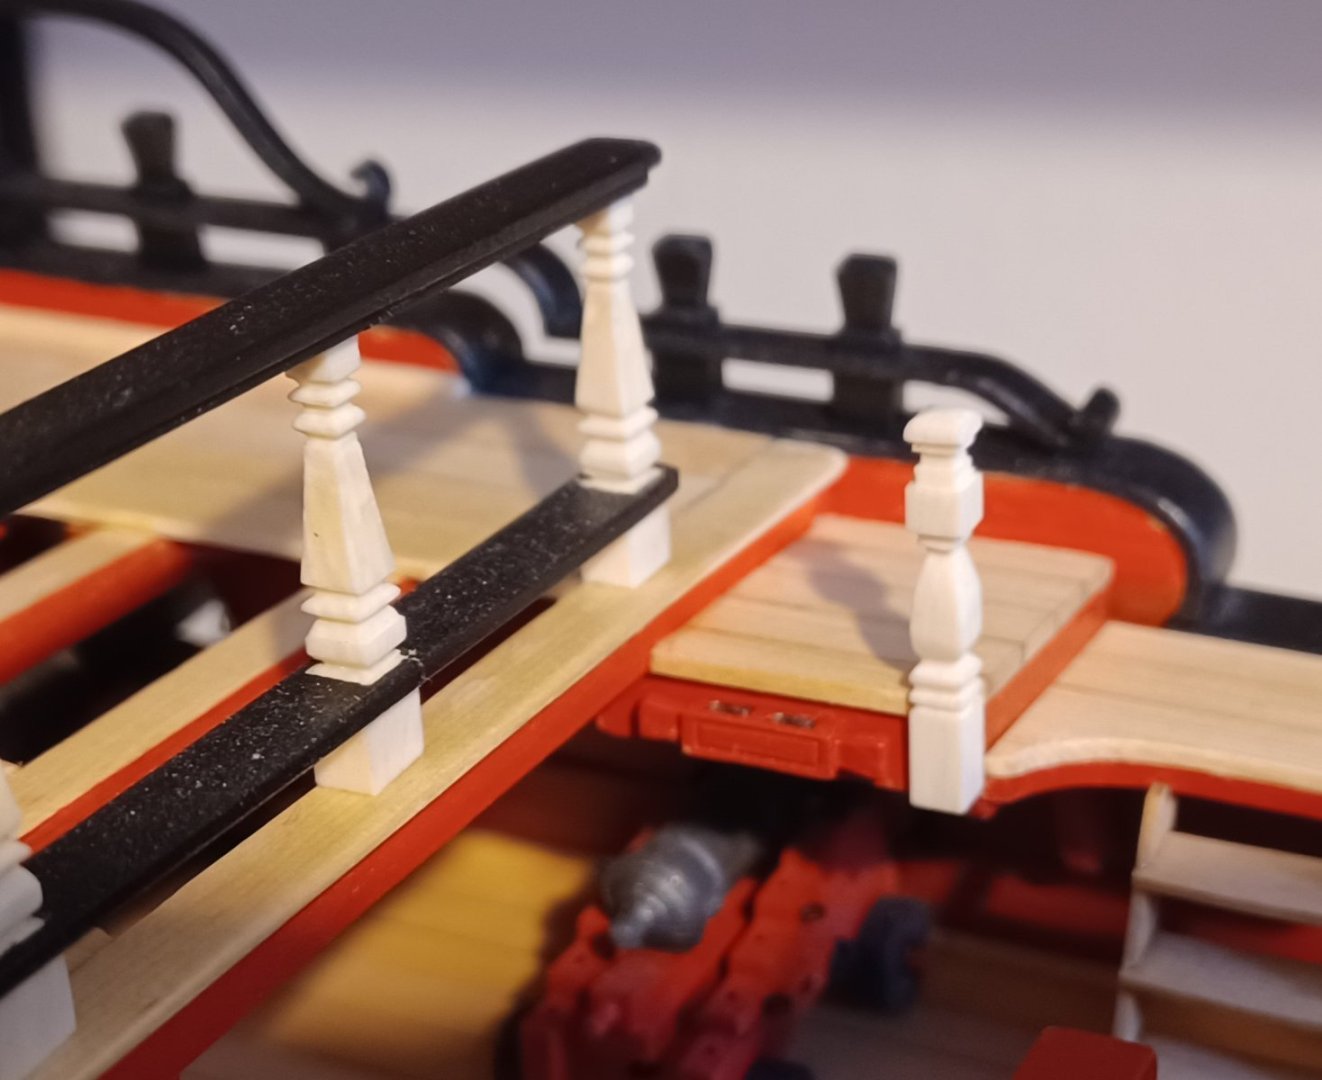
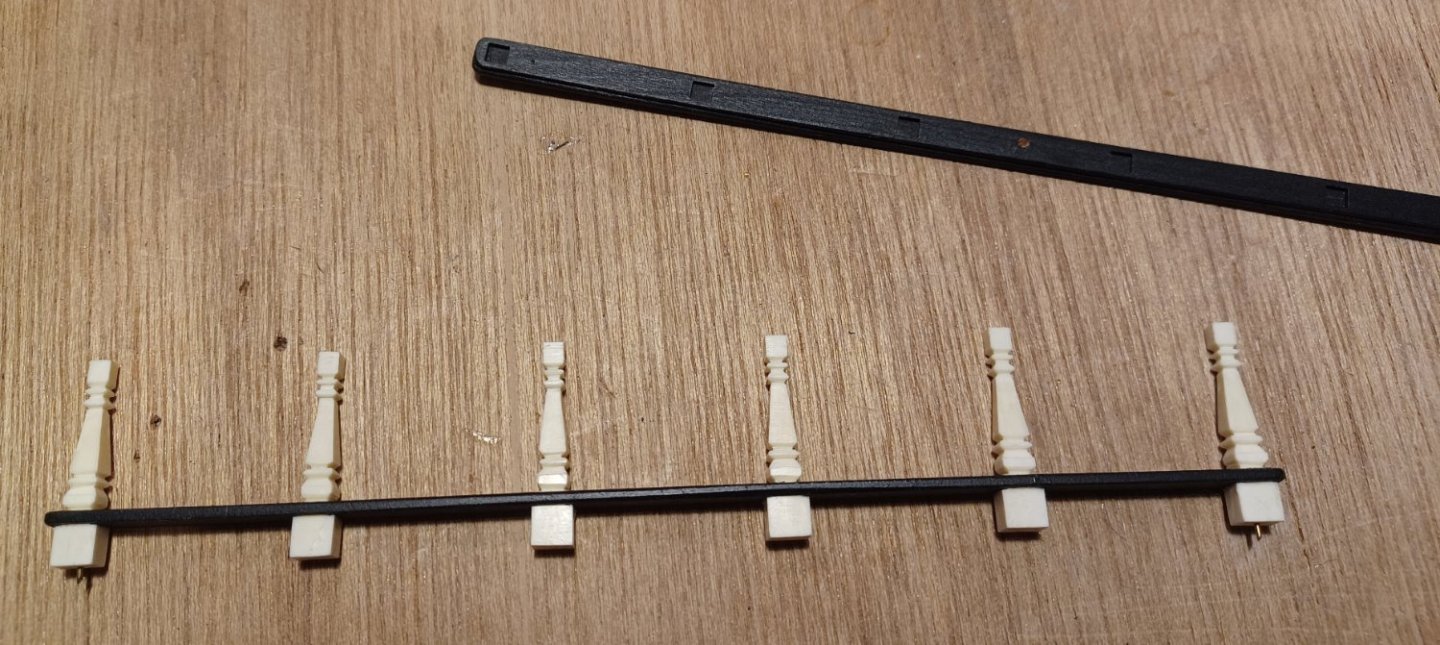
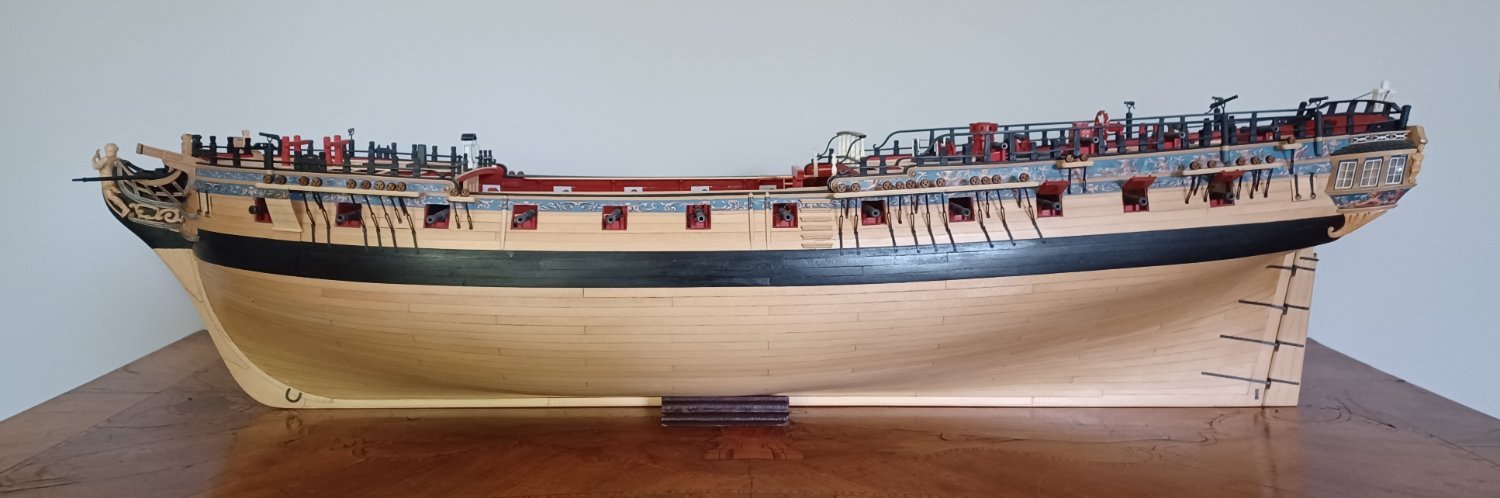
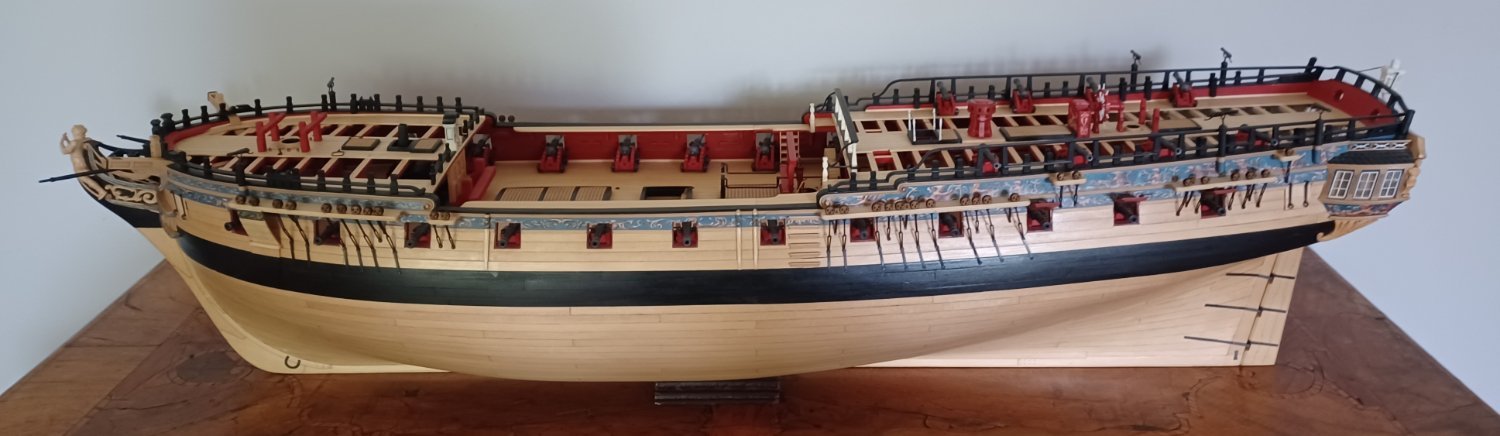
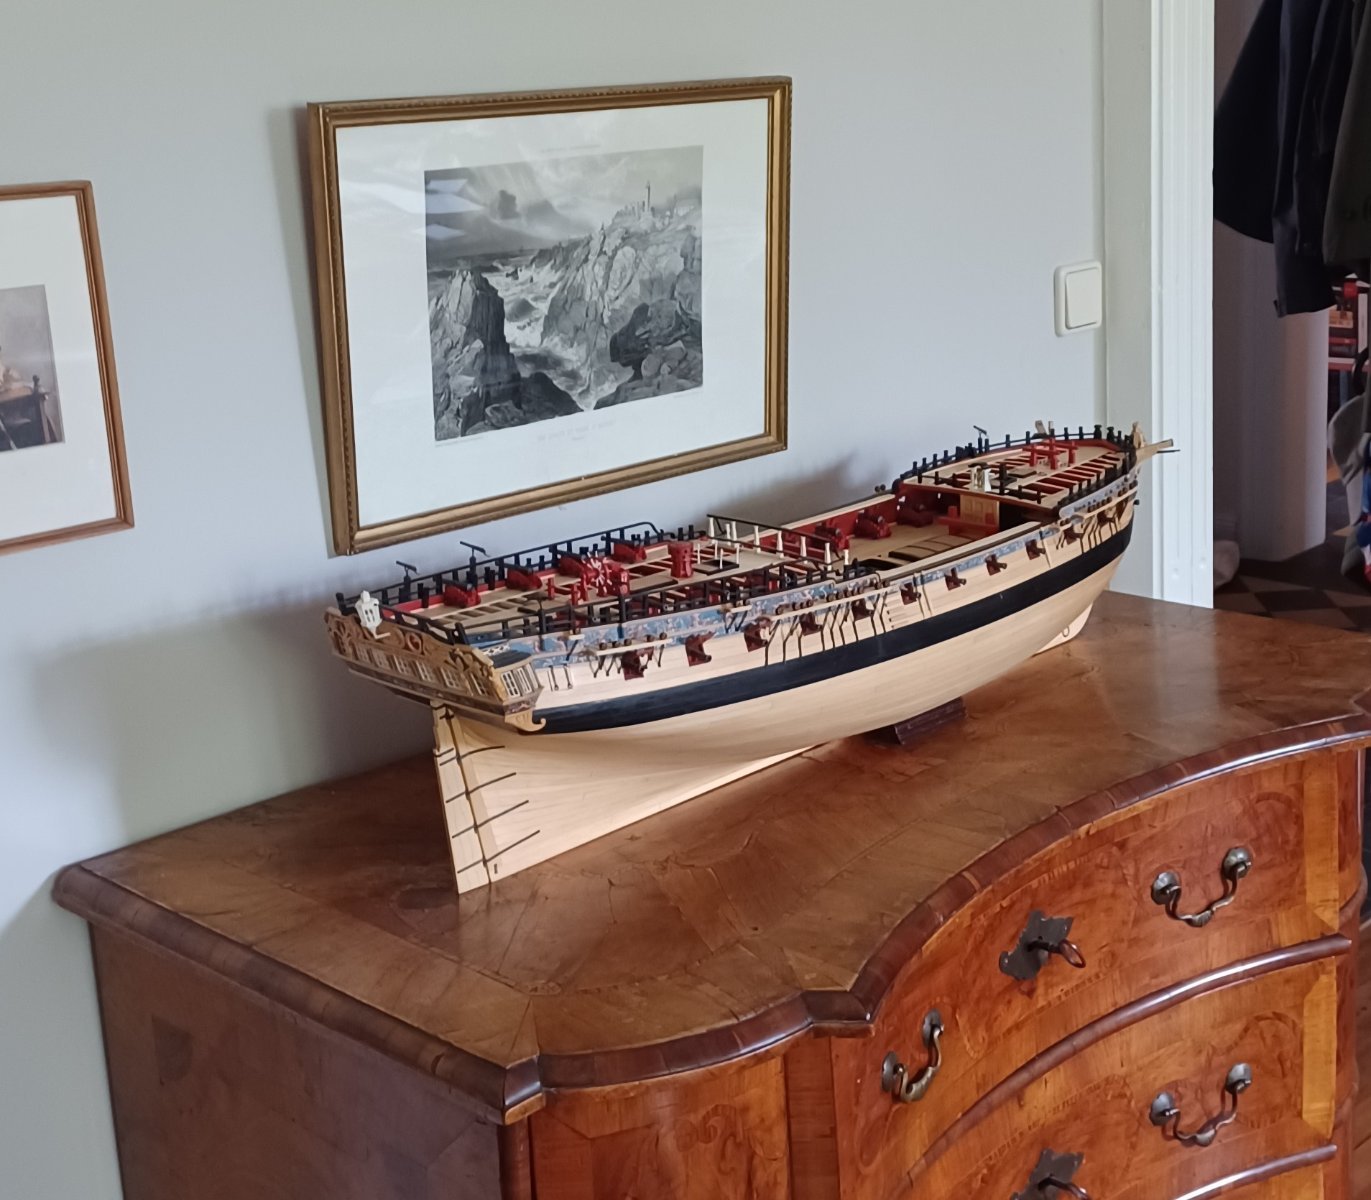
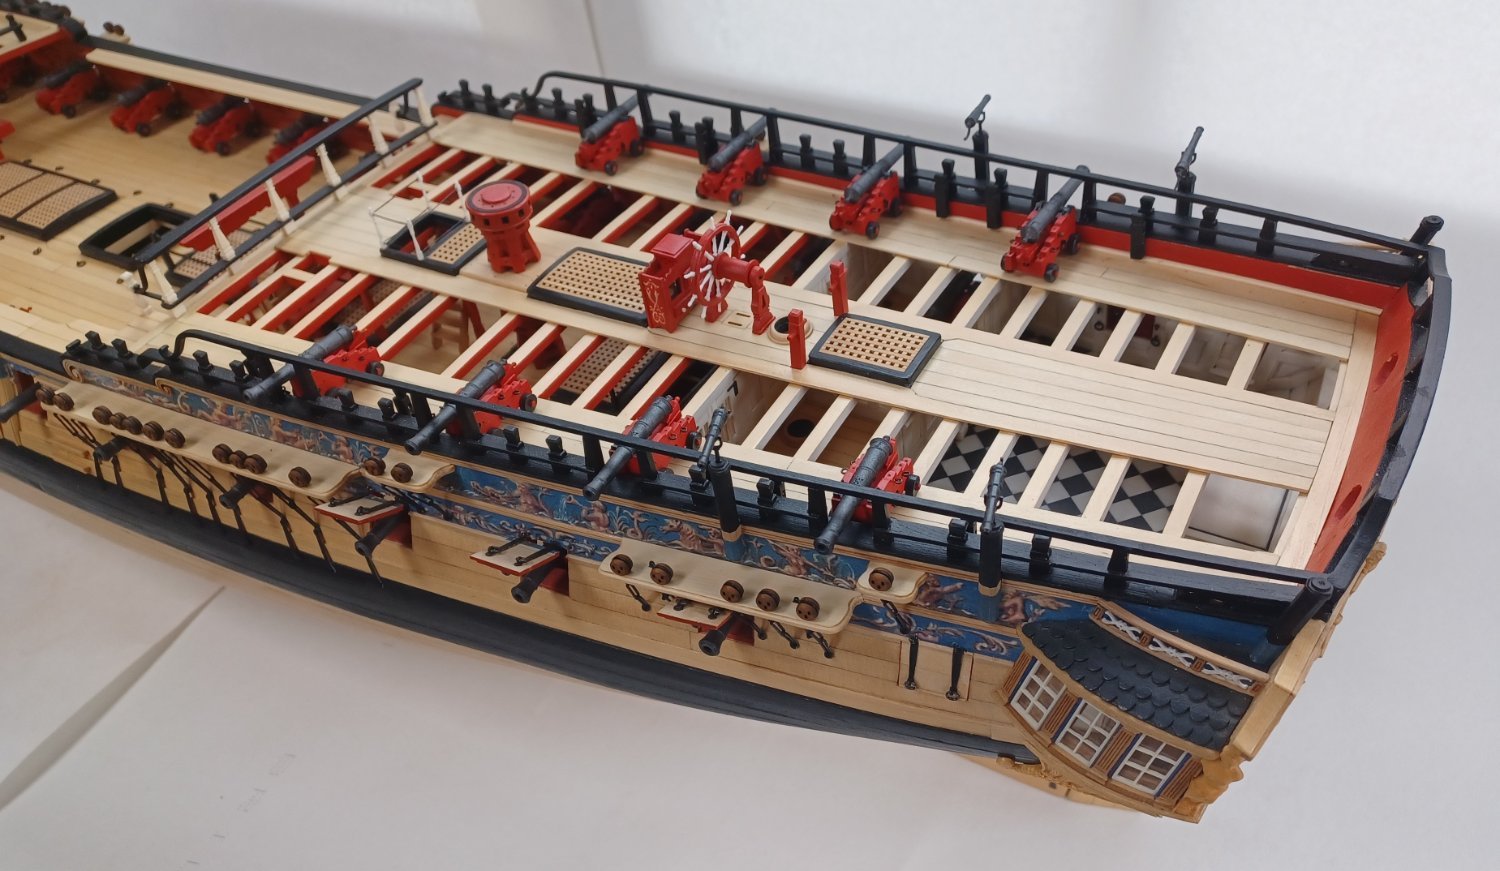
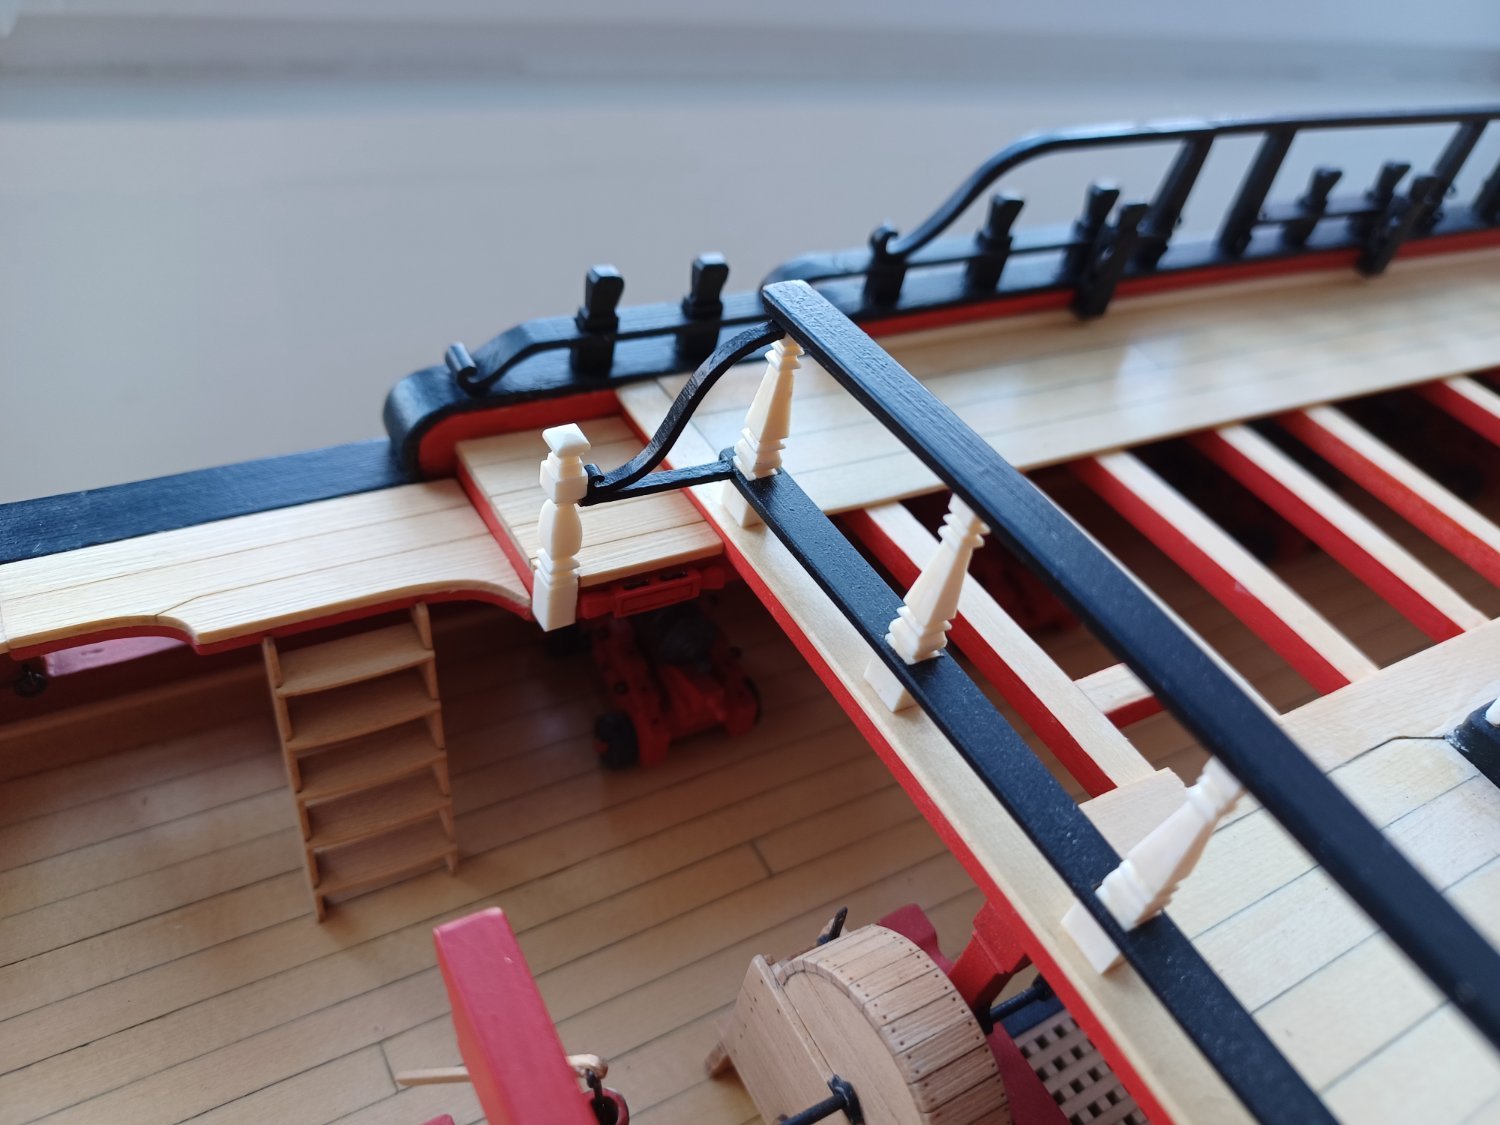
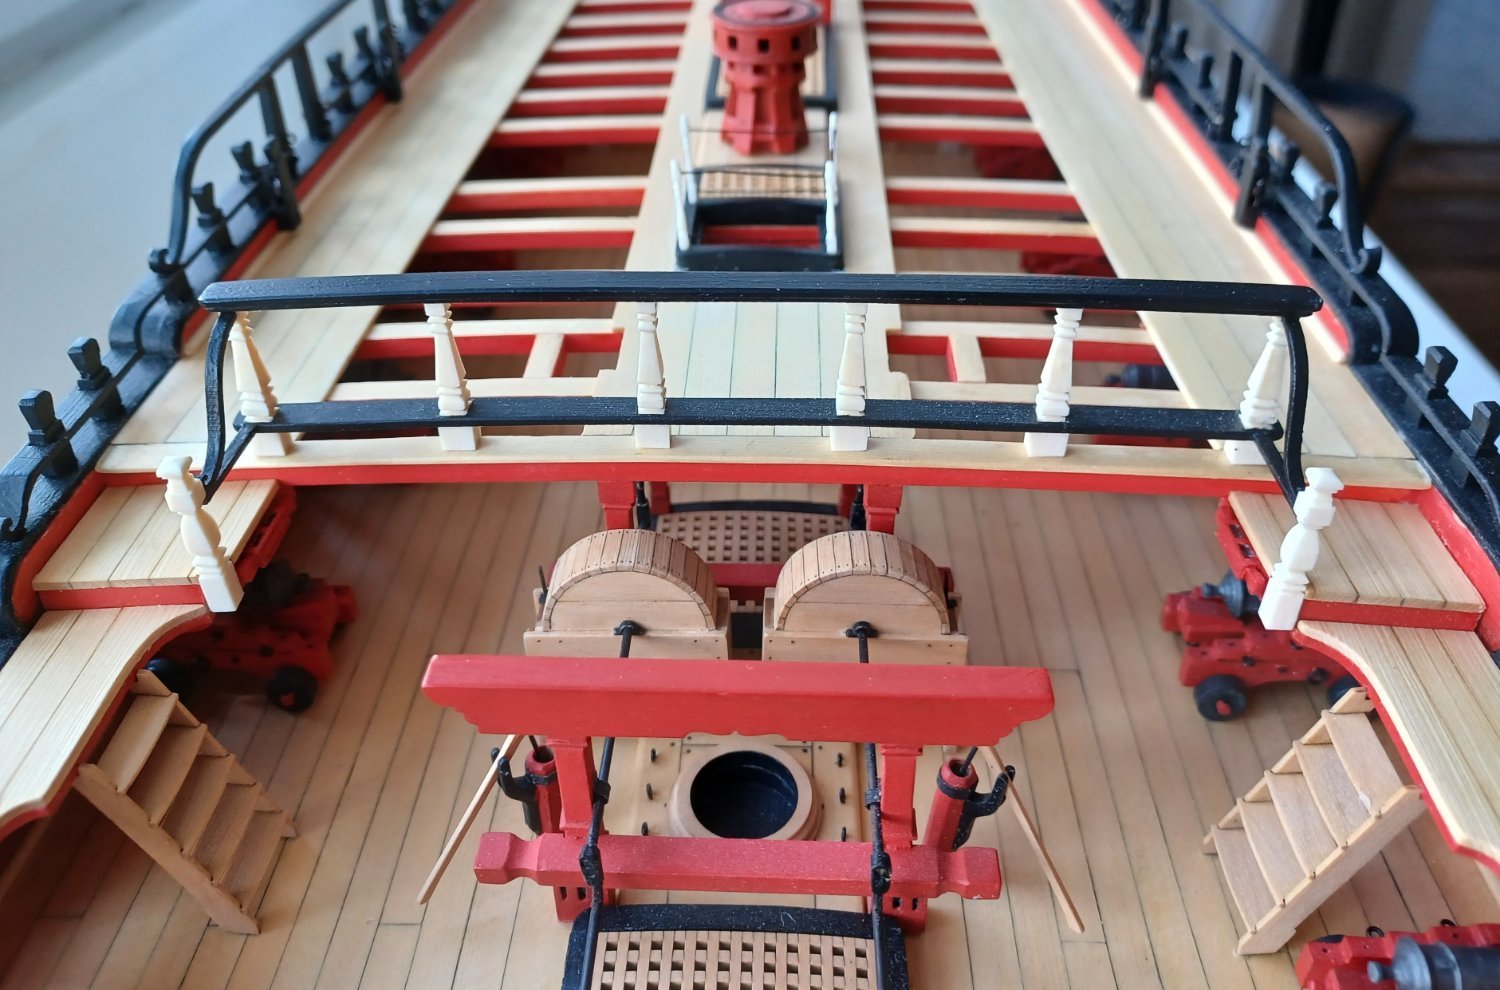
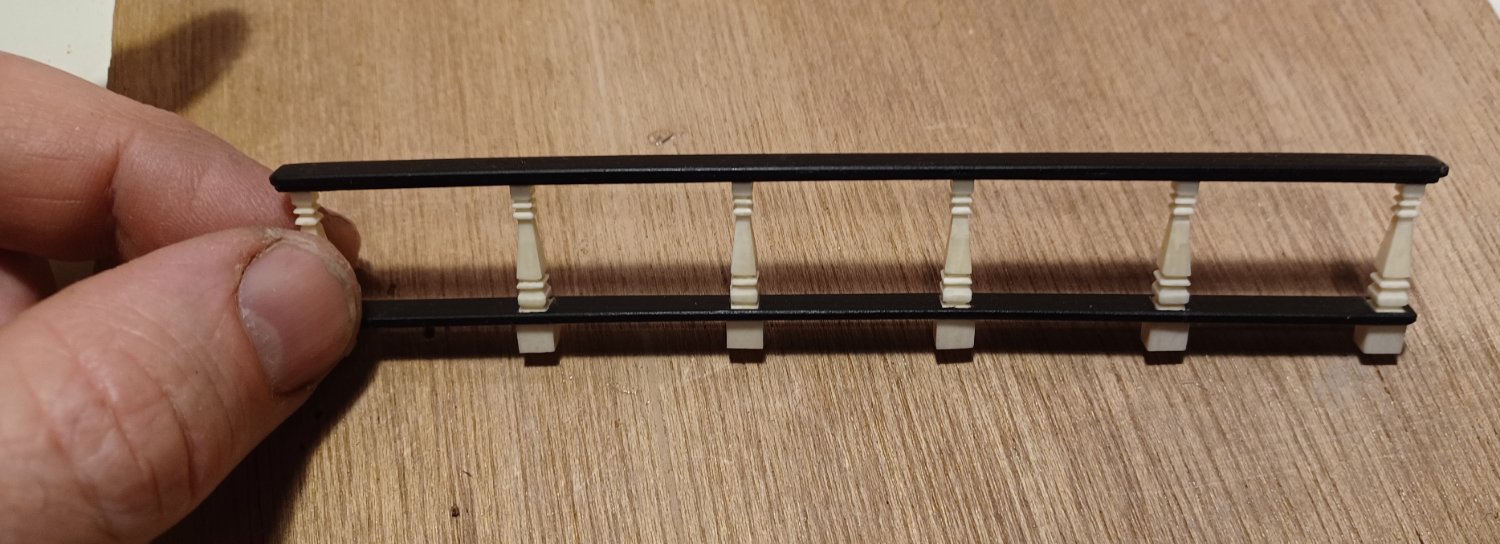
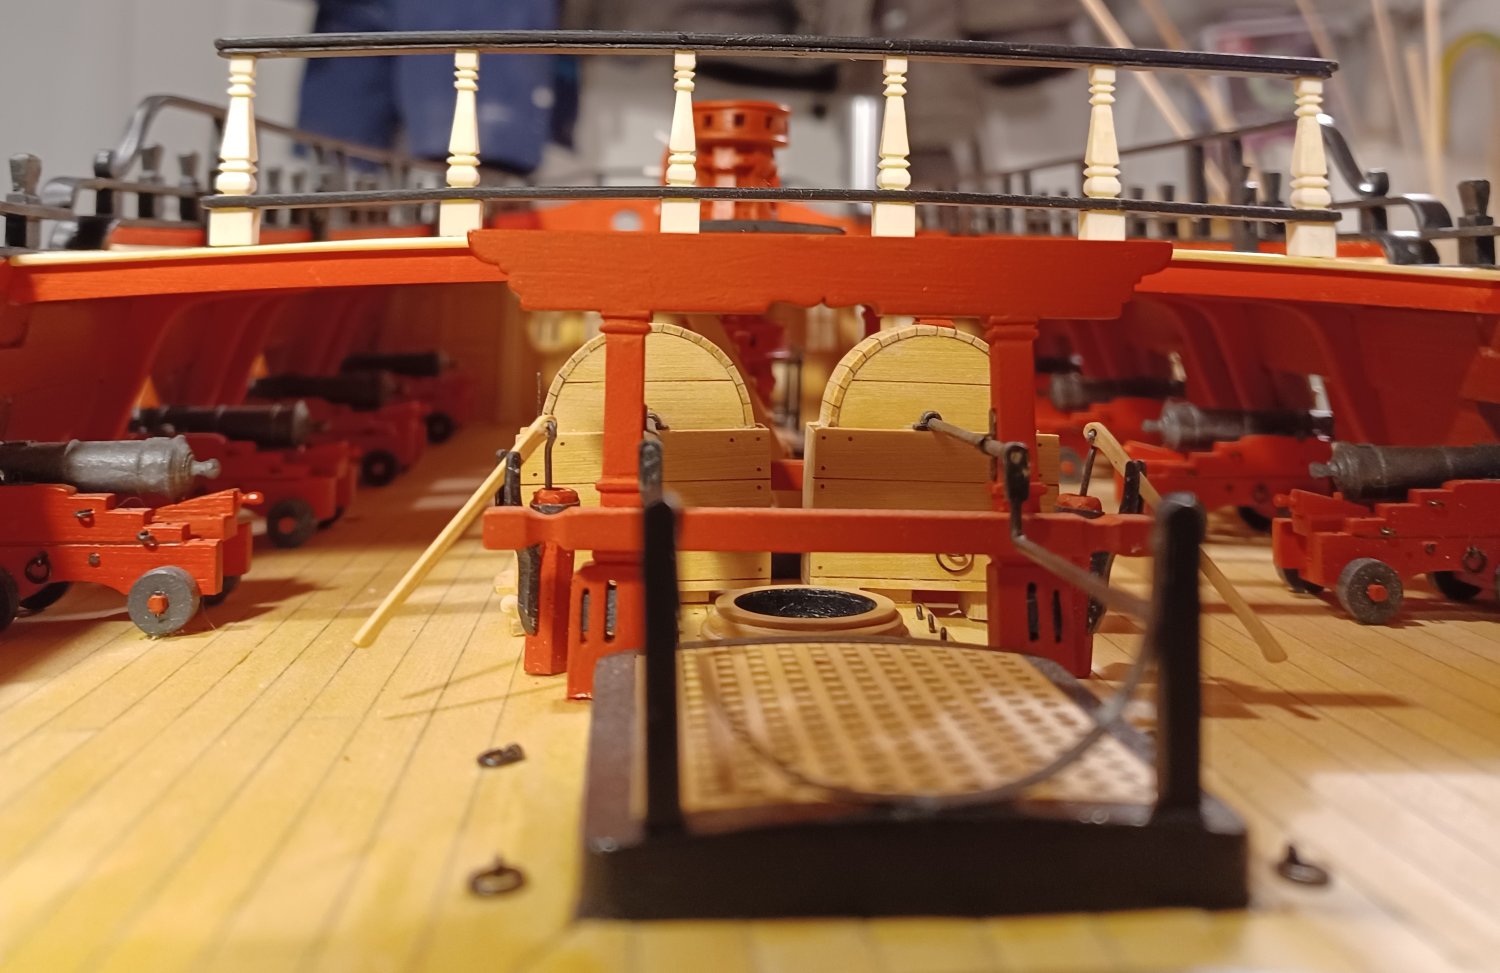
Work continued with some deck details, I finally finished the breastrail and the gangways.


Matthias
- Hubac's Historian, FrankWouts, JpR62 and 16 others
-
12
-
7
-
So there will be a 3/32" scale Speedwell for us mortals or not? I would prefer this scale for a rigged model of Speedwell like the one, Philipp Reed made. He made a wonderful waterdiorama of Speedwell as well if I remember correctly. I must look that up again.
- mtaylor and Ryland Craze
-
2
-
I would try this scale. It is very tempting. If you realise it, I will built Speedwell in both scales. Go for it!
Matthias
- mtaylor, Chuck and Ryland Craze
-
3
-
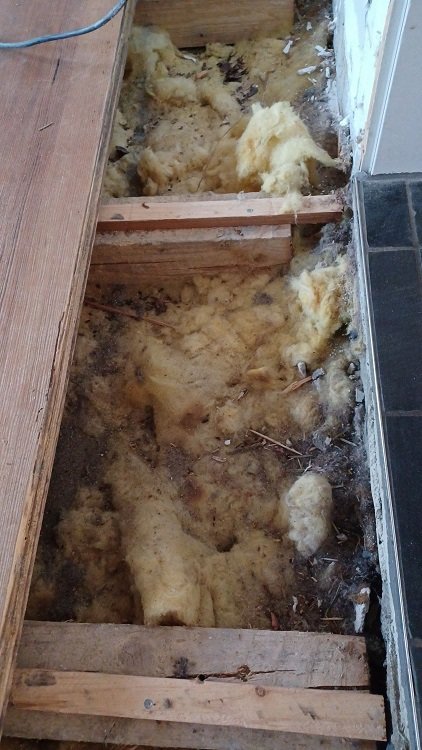
Thank you for your comments and likes. The mice are gone. I filled the hole they came in with concrete and completely filled the space under the flooring with insulation. It is actually much wormer now.
- scrubbyj427, CiscoH and FrankWouts
-
3
-
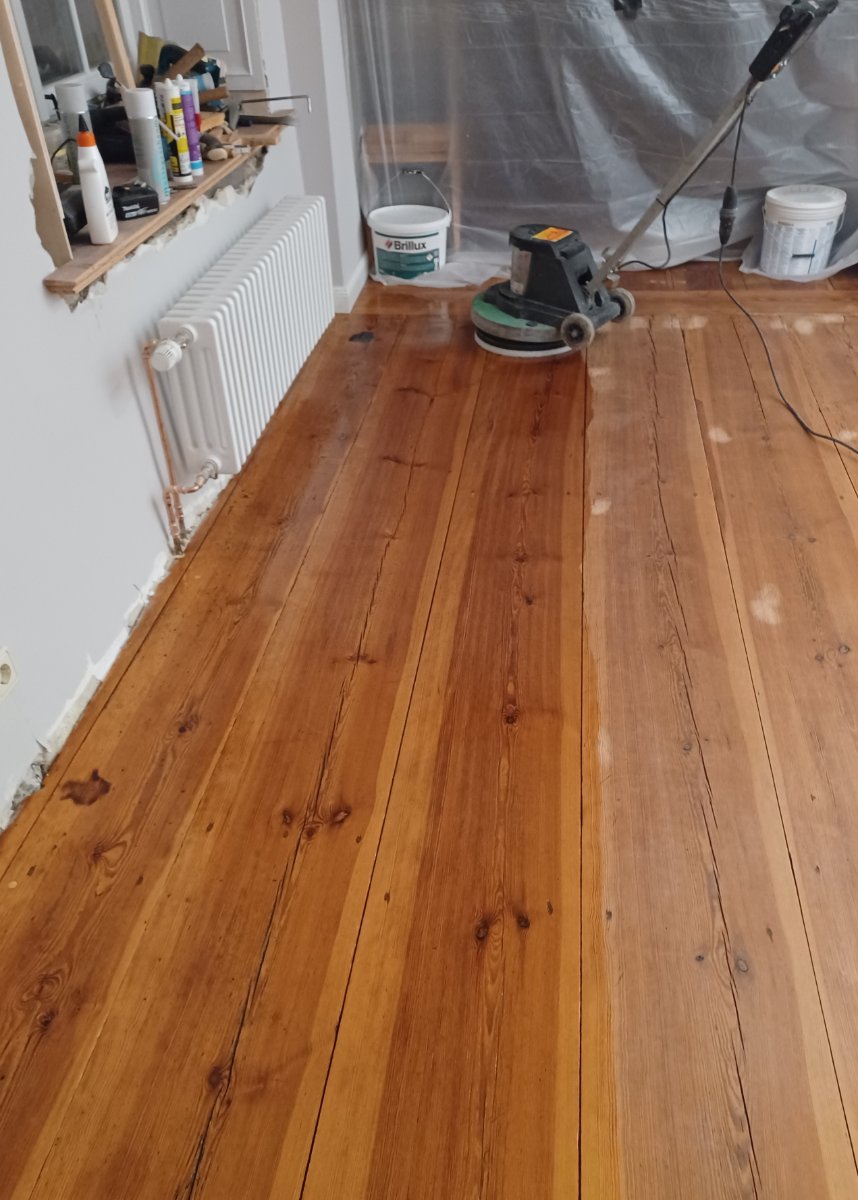
That was a long break for Winchelsea now, I had to do something against the mice under our living-room flooring.
Then, more fun, some macro planking

These old Floorboards are wonderful stuff. About 200 years old. Just lovely.
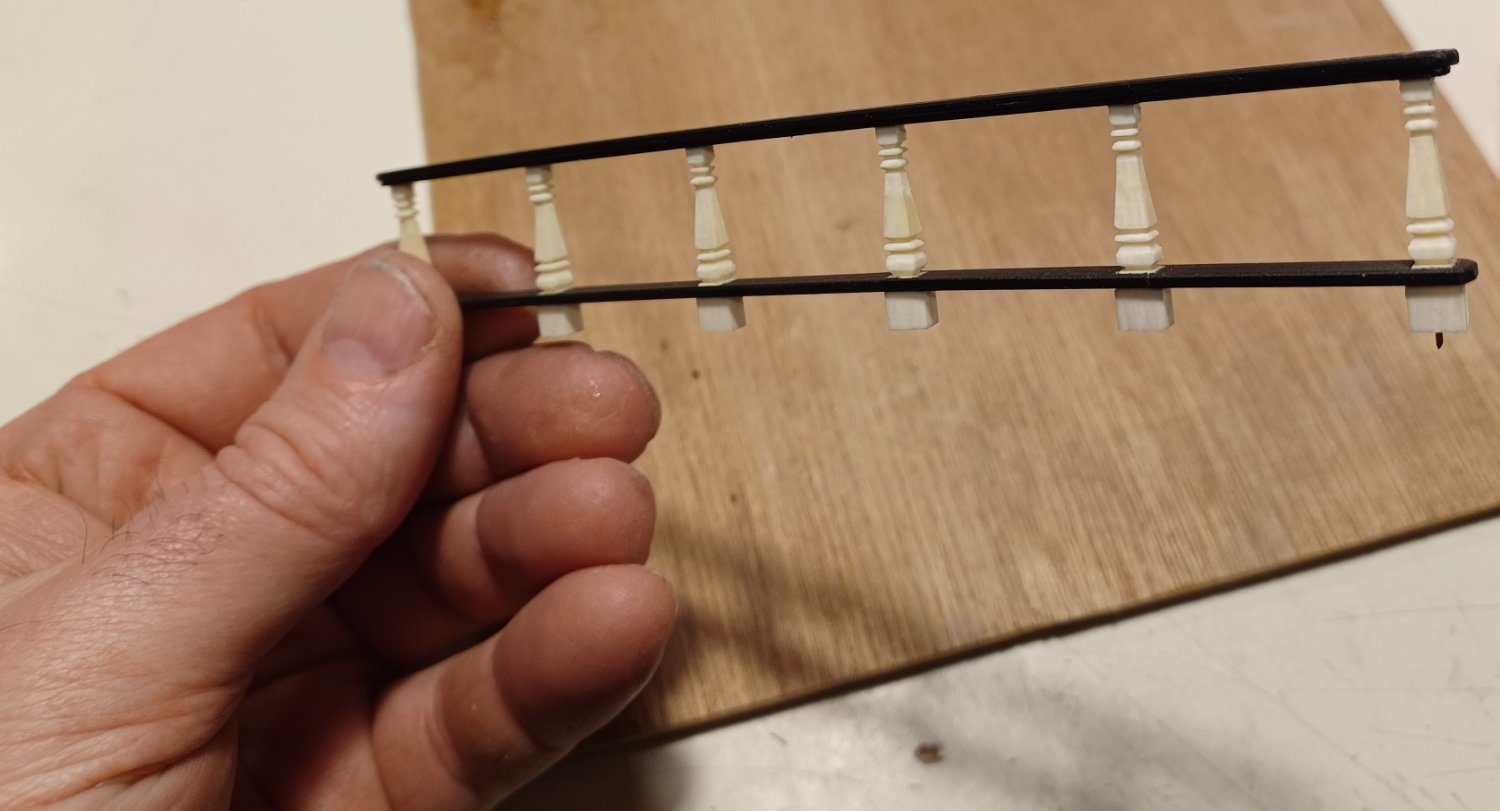
Anyway, back to my breastrail
I first made a jig for the detailed profiles, to get them all in line around the columns.
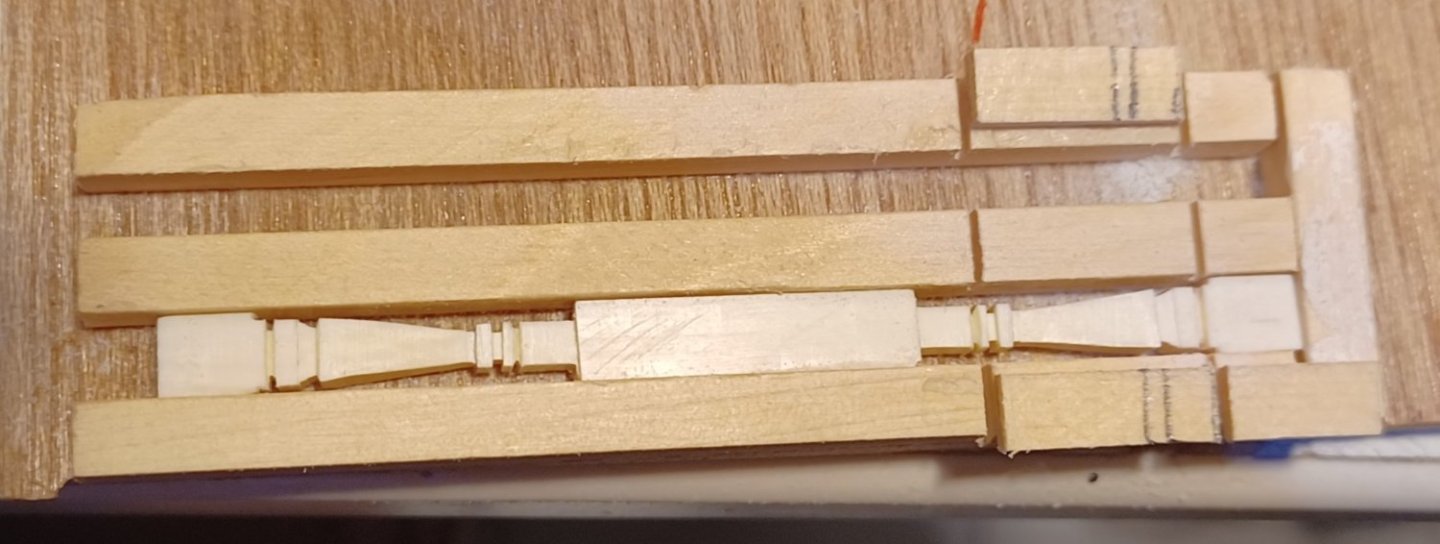
Next step was sanding the profiles in a nice shape
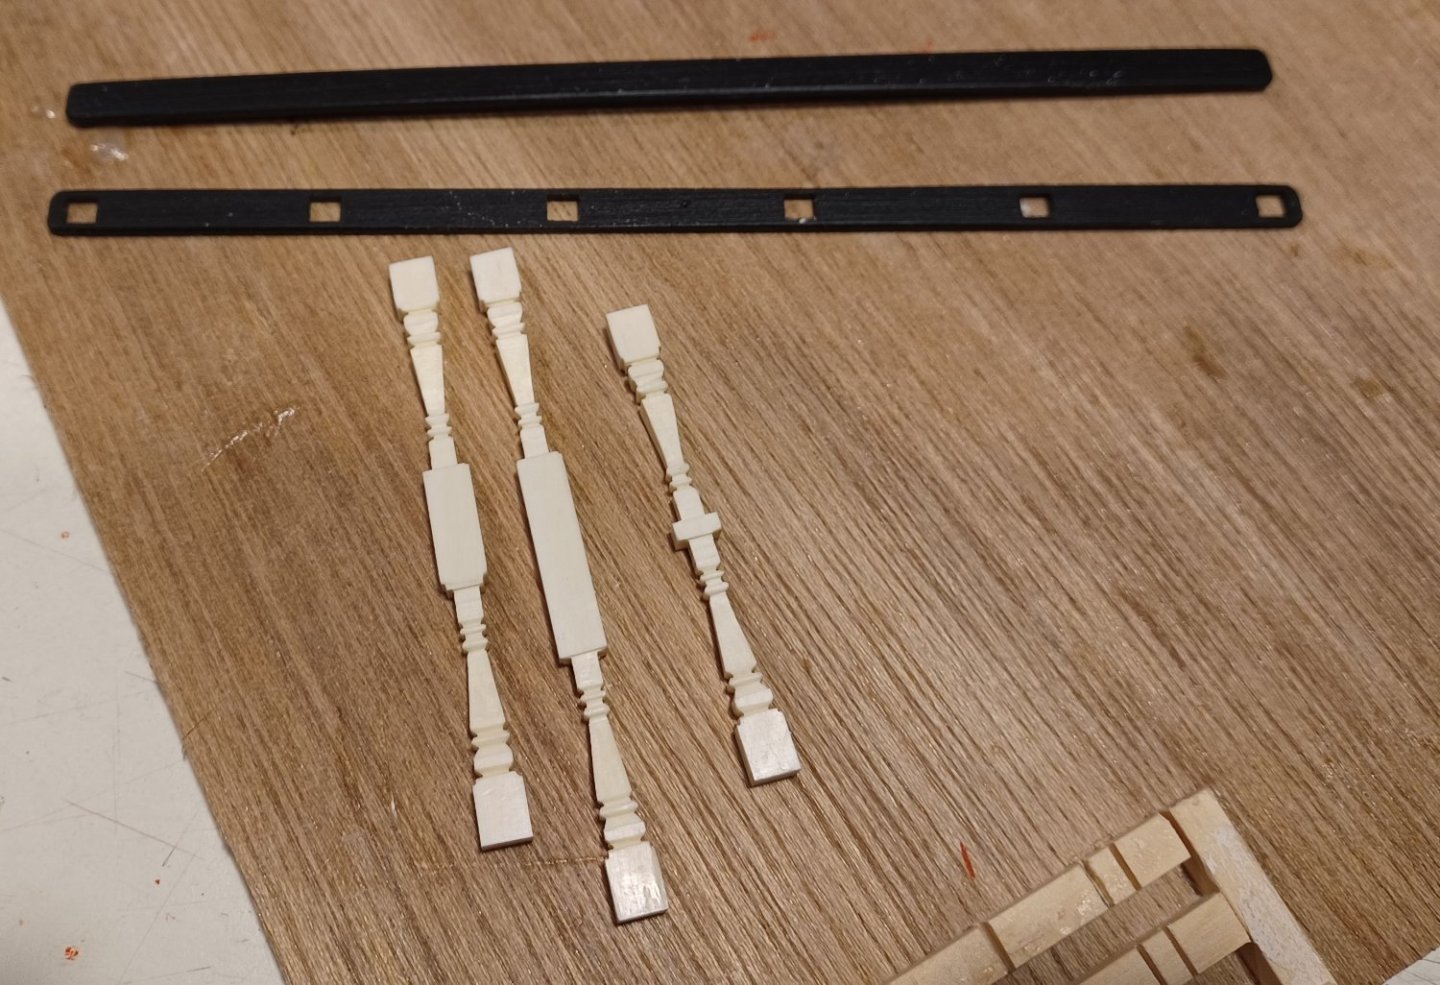
... and polishing each corner to get this lovely dull gloss, wich this material has, when being polished.
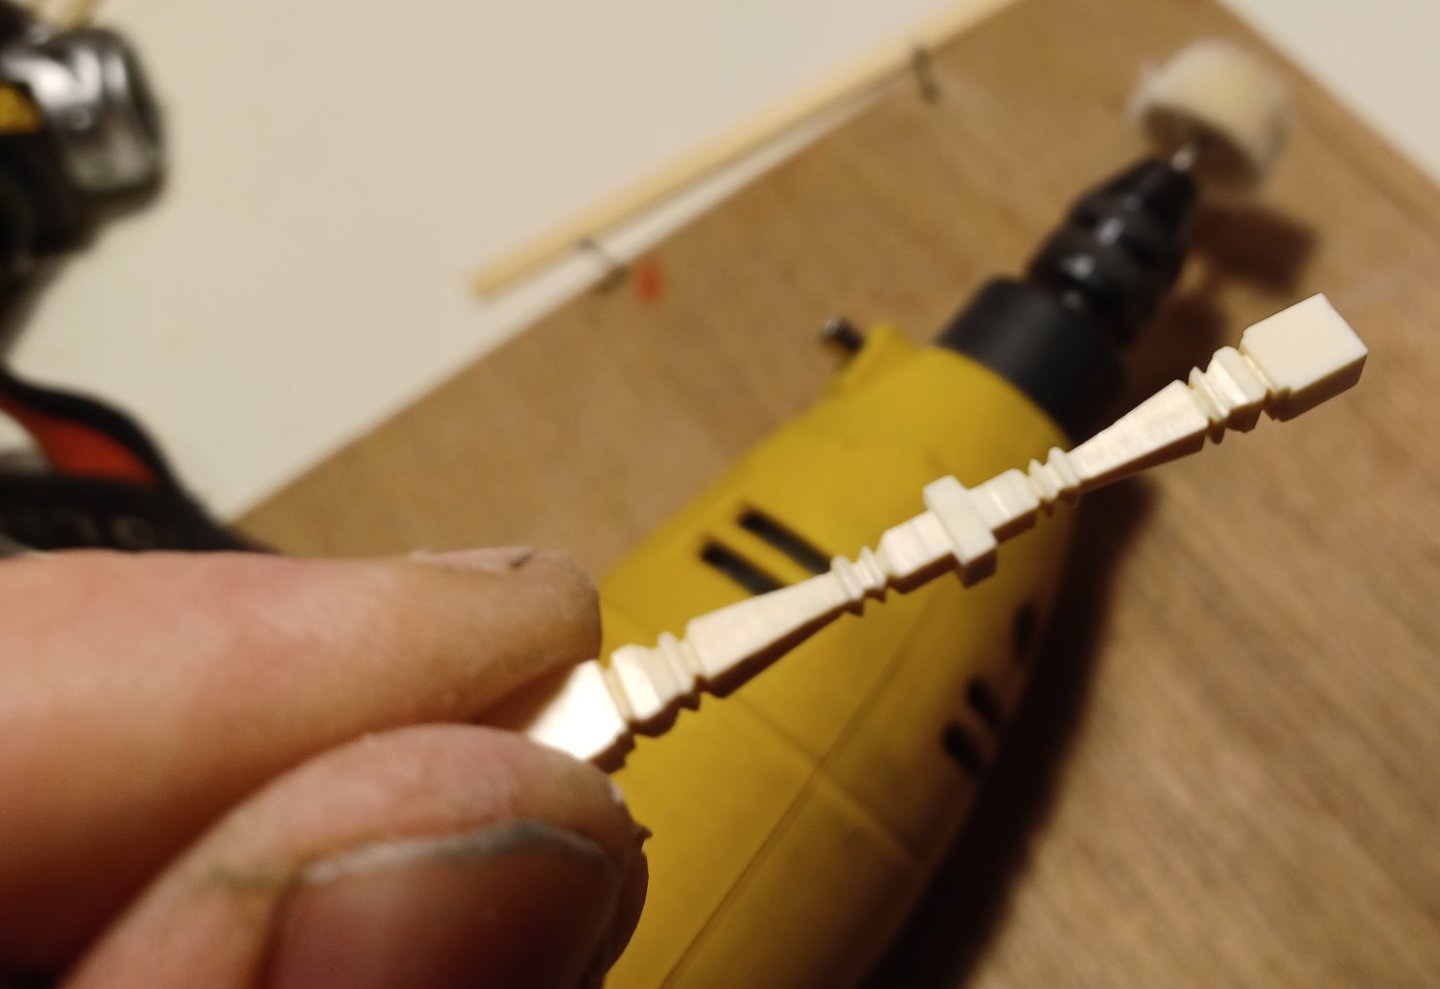
... cutting the collumns in the right length and assemblying everything...
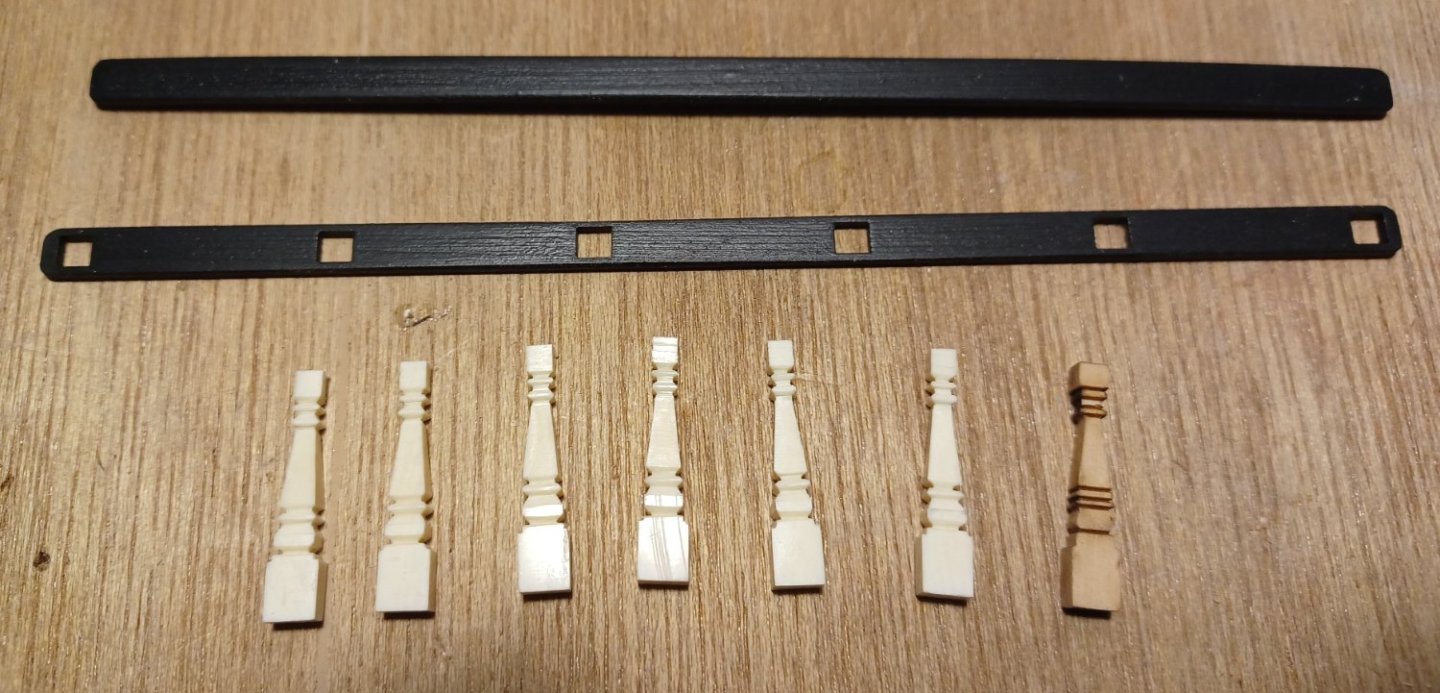

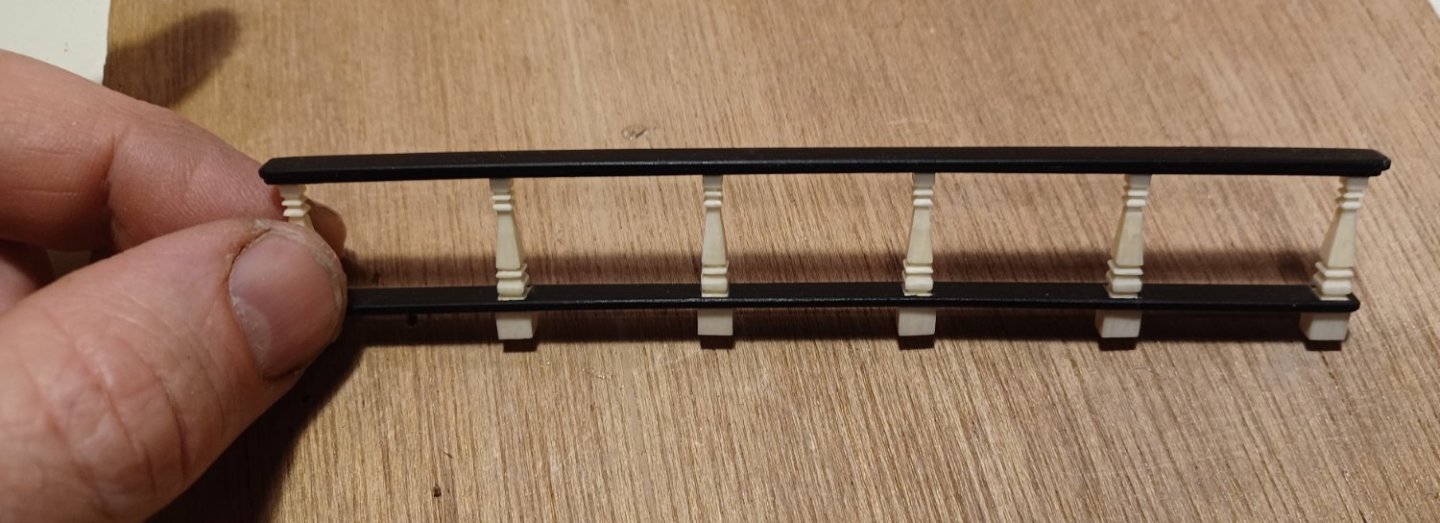

Finally the installment on the model...


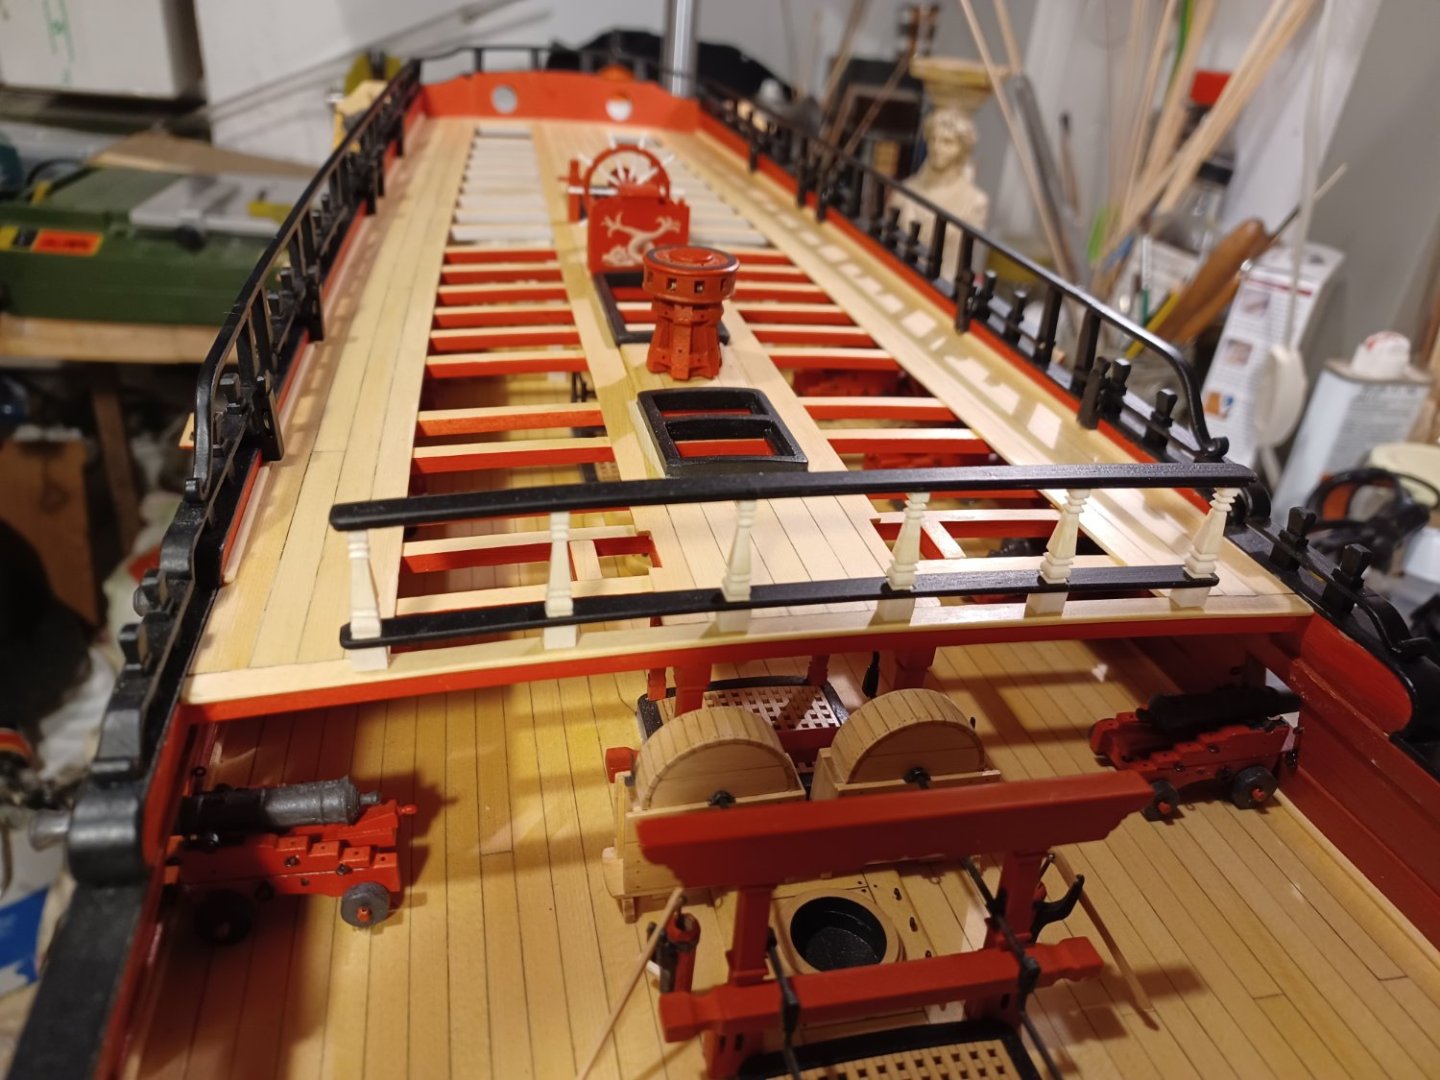
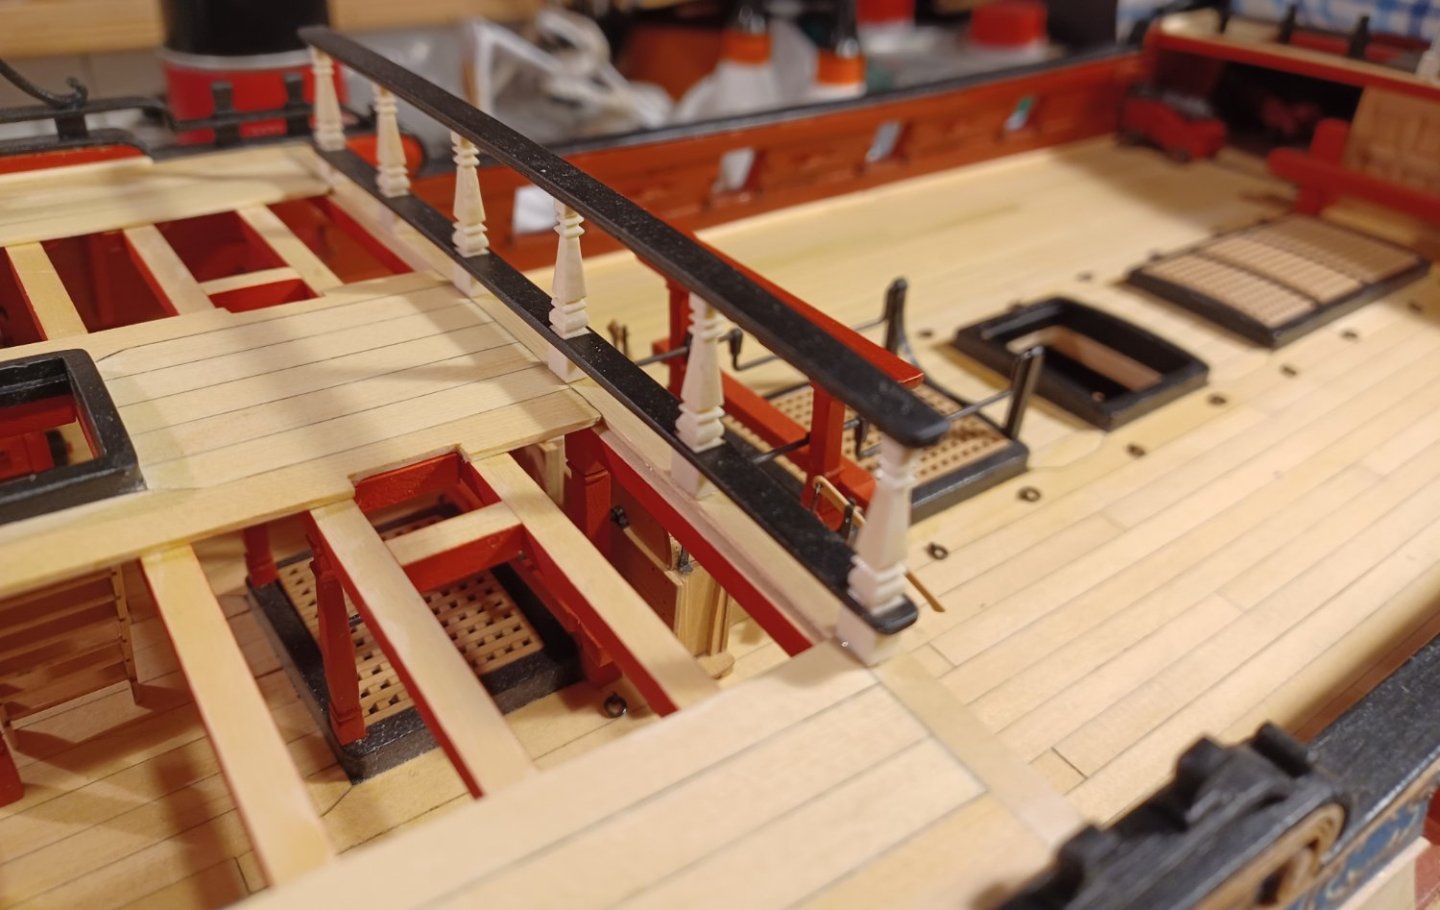
This almost finishes chapter 10. I have to do the eyebolts for the guns on the quarterdeck and then proceed to chapter 11.
Matthias
-
-
-
Thank you.
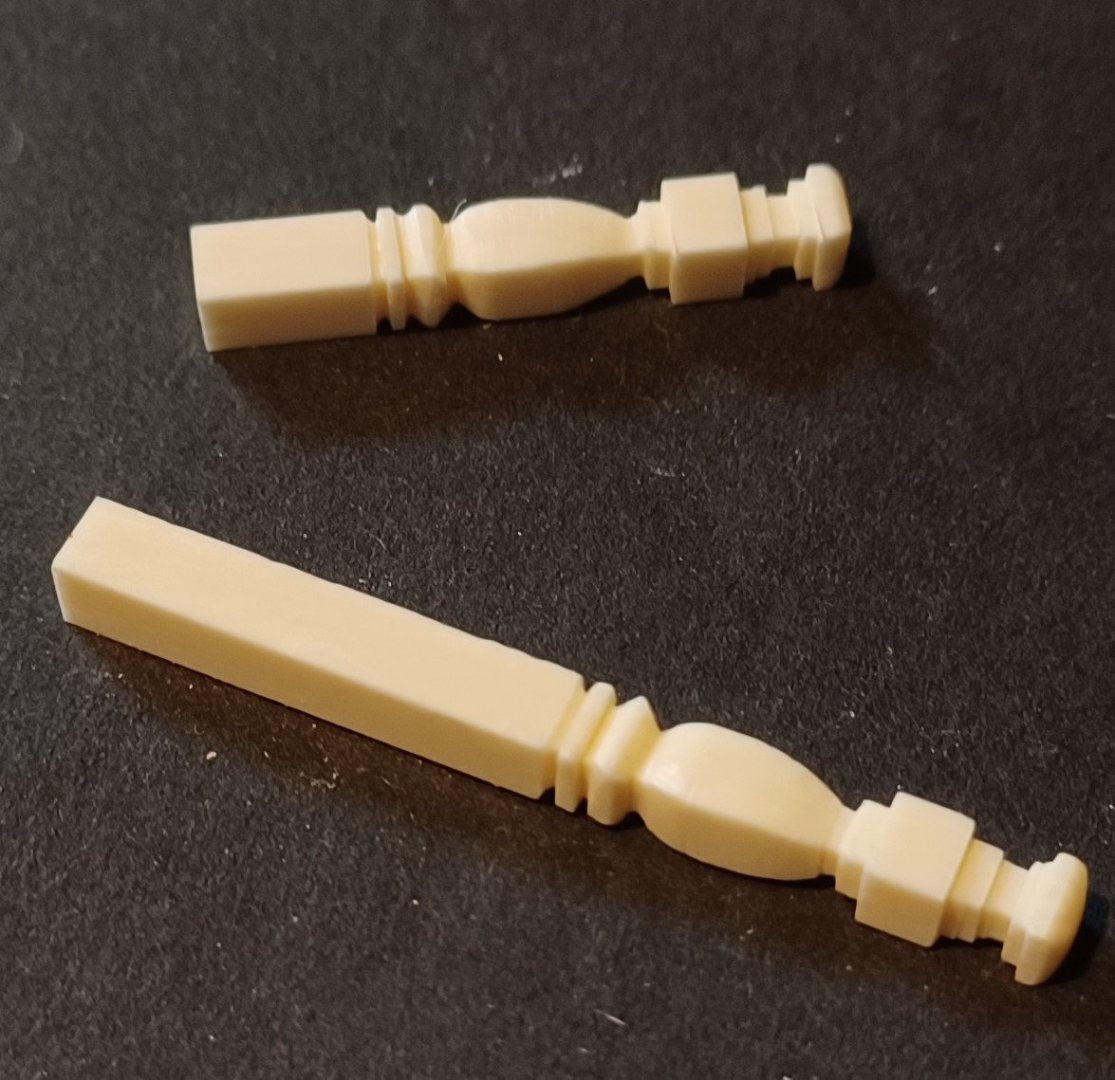
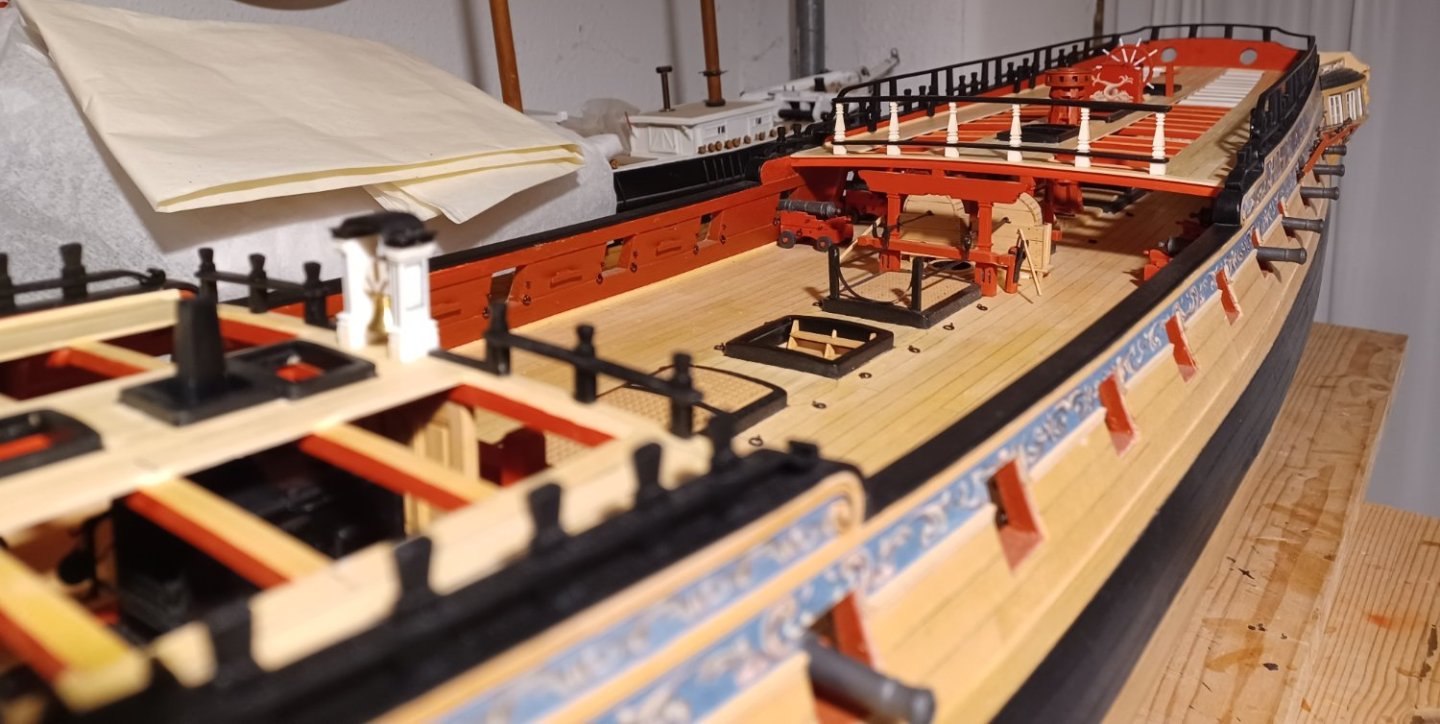
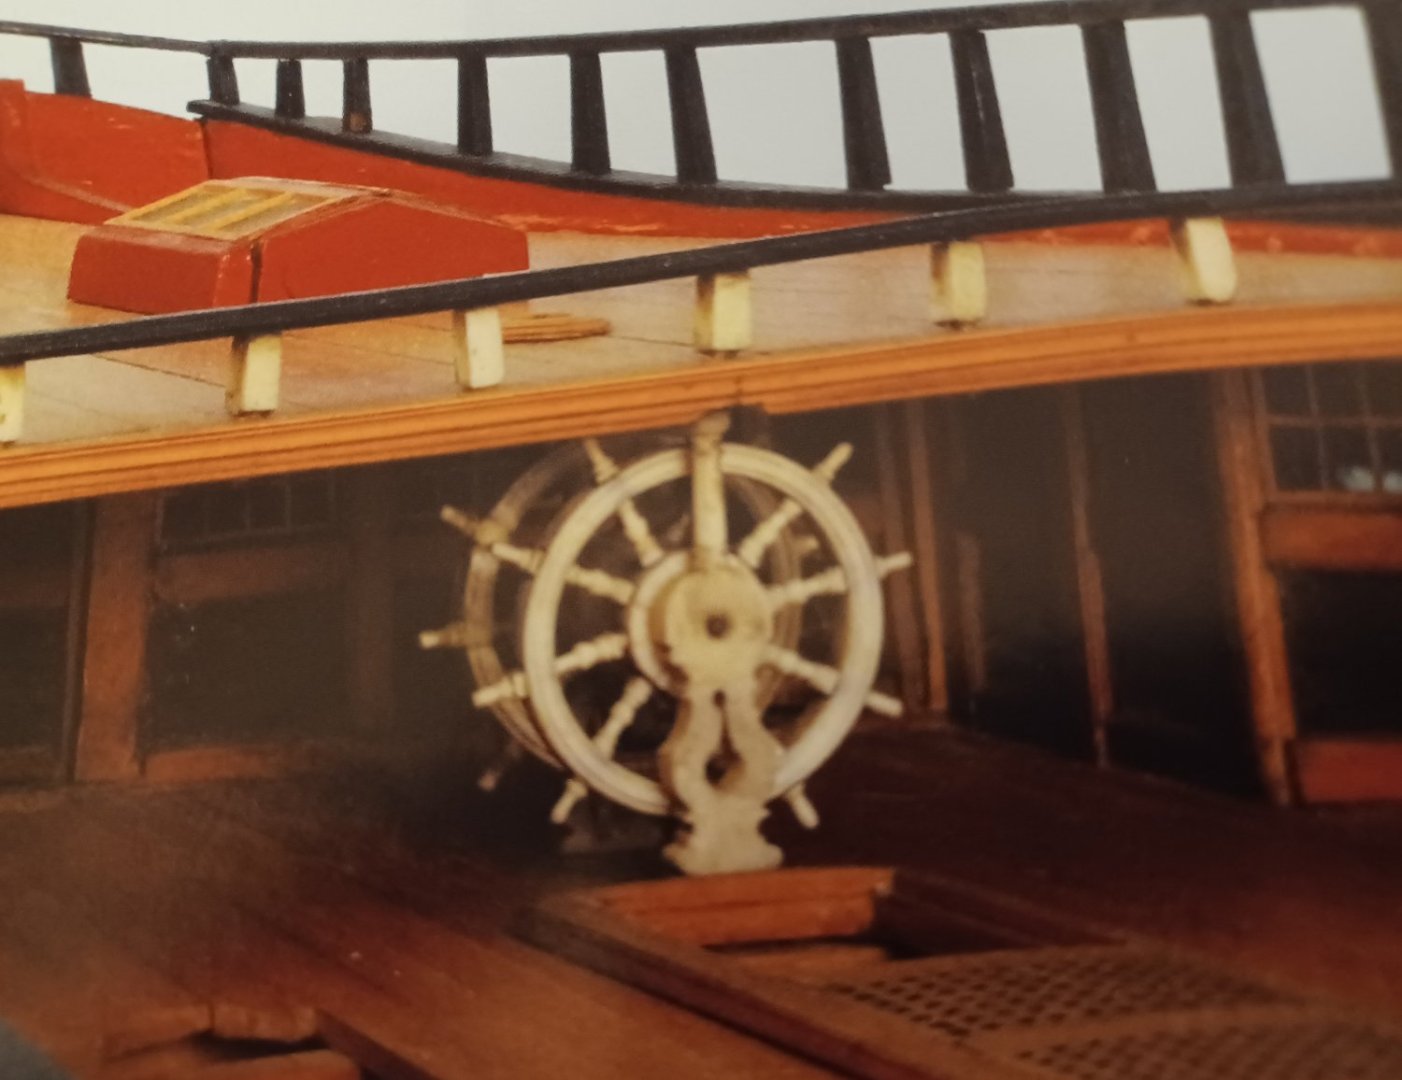
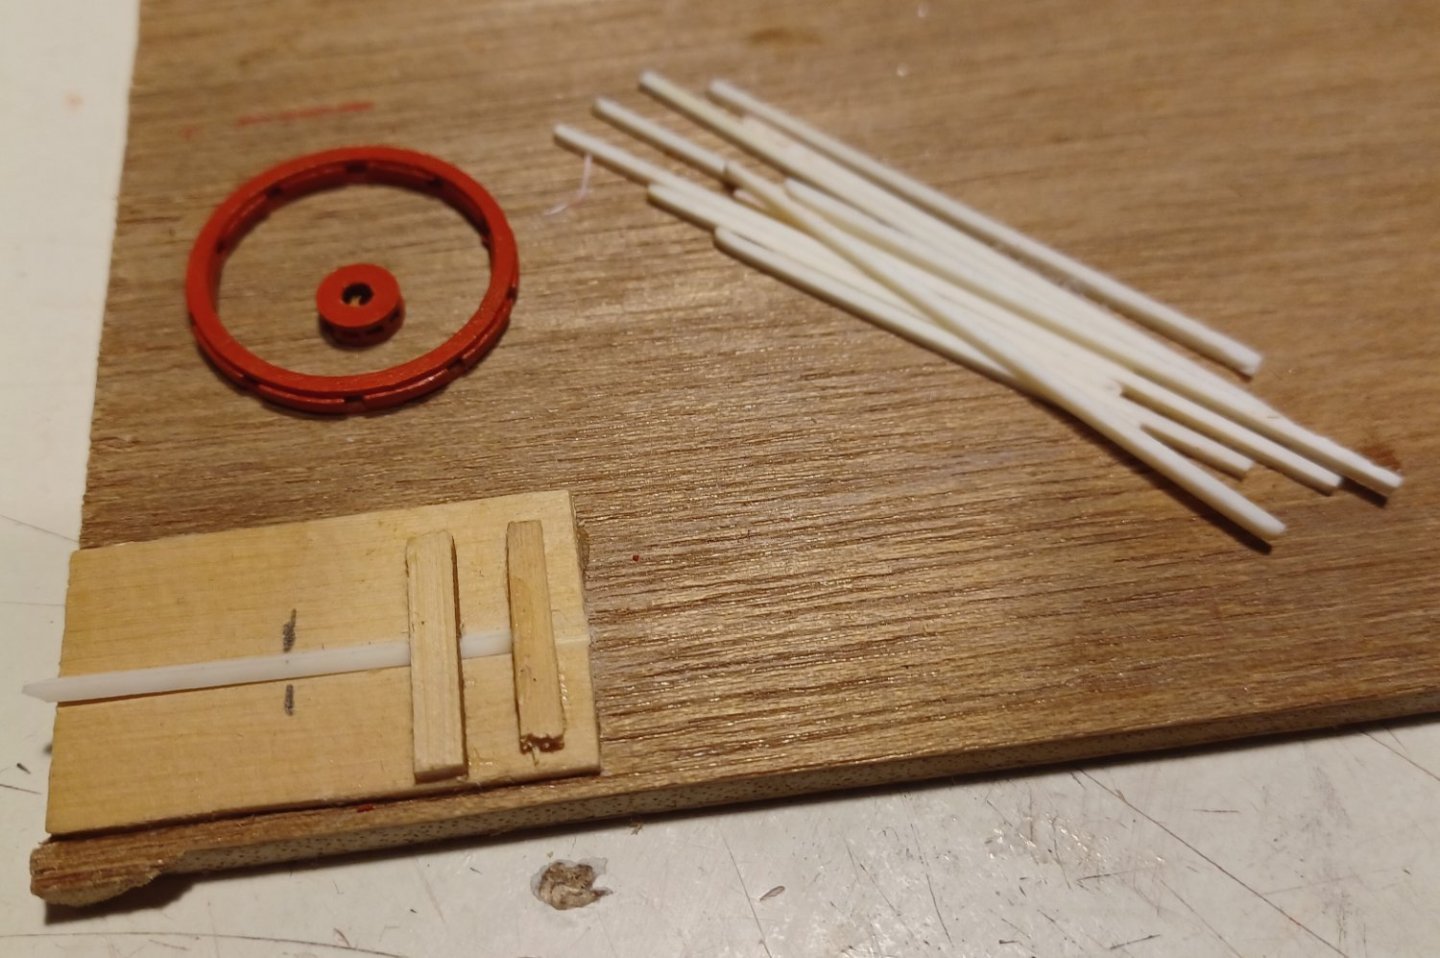
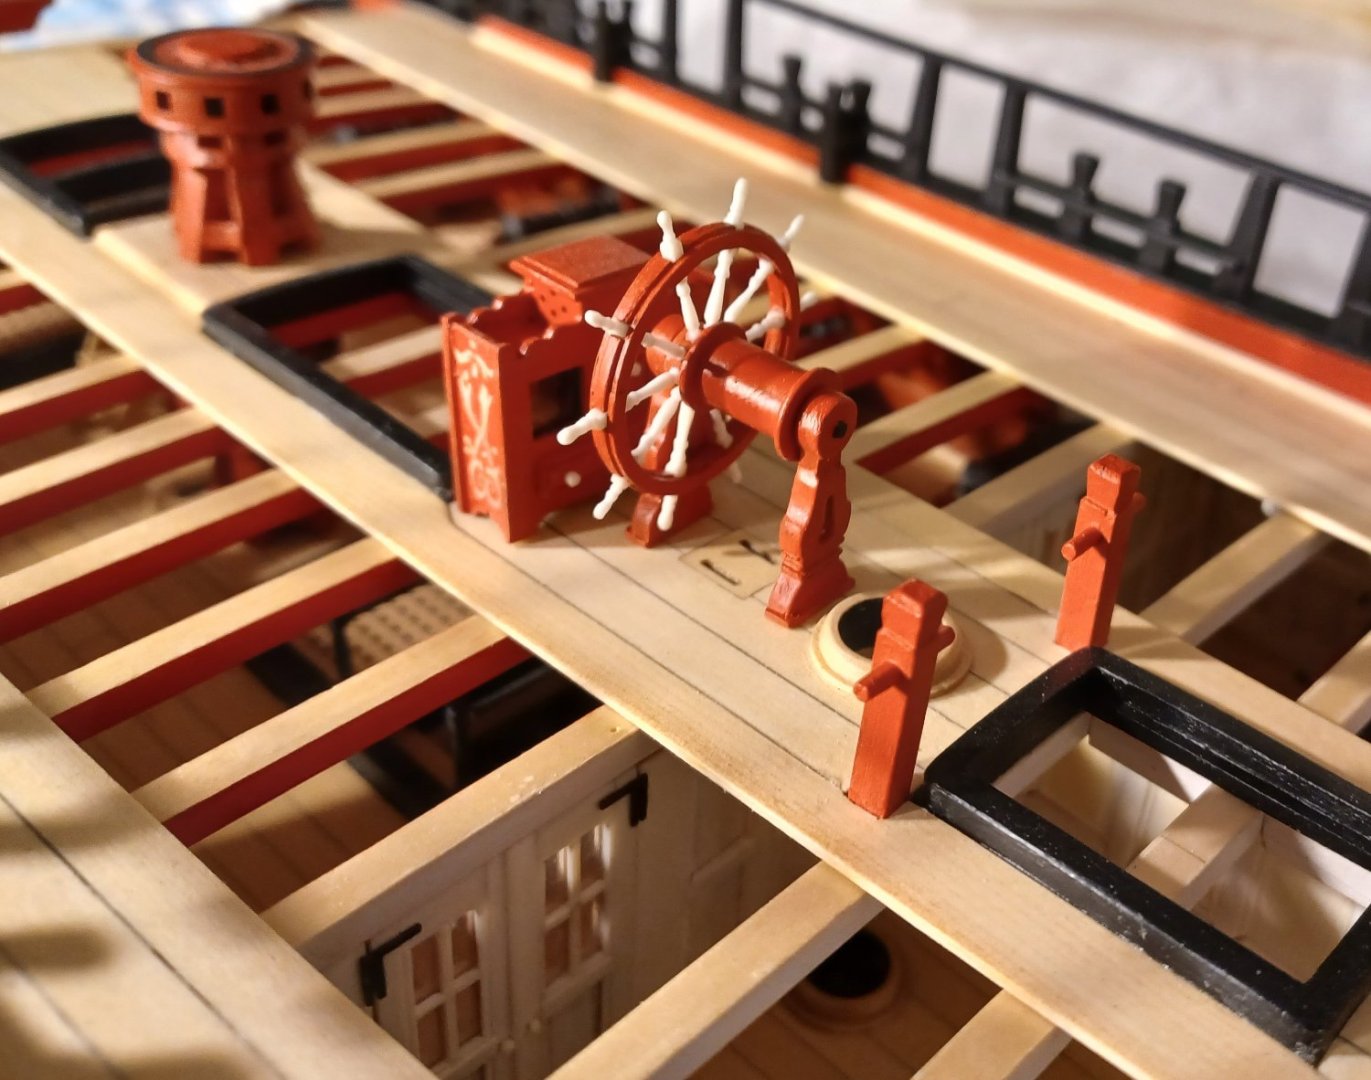
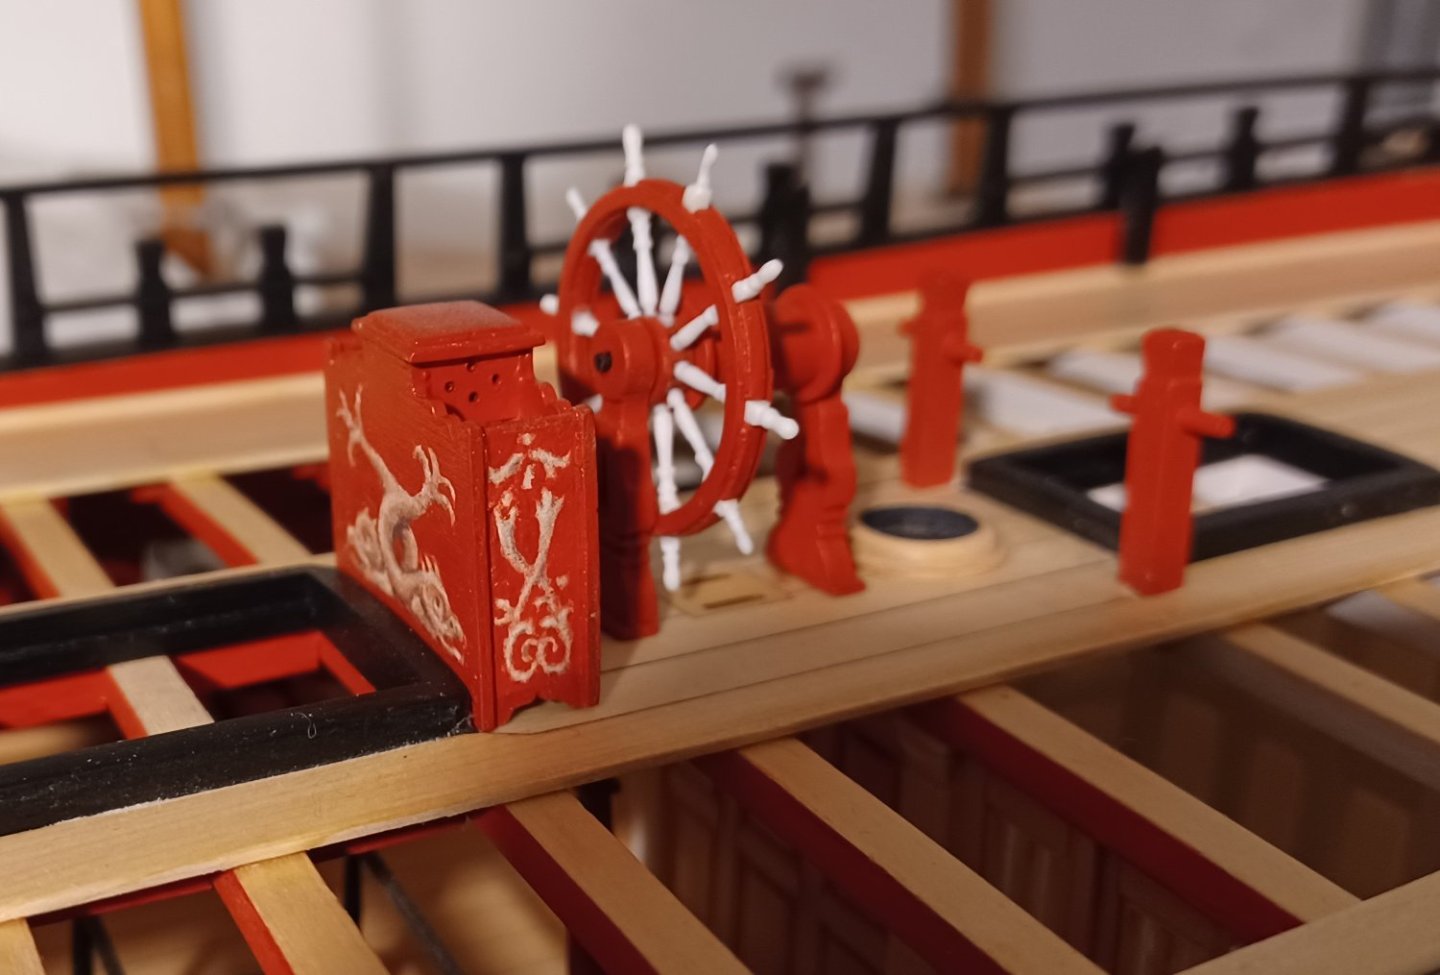
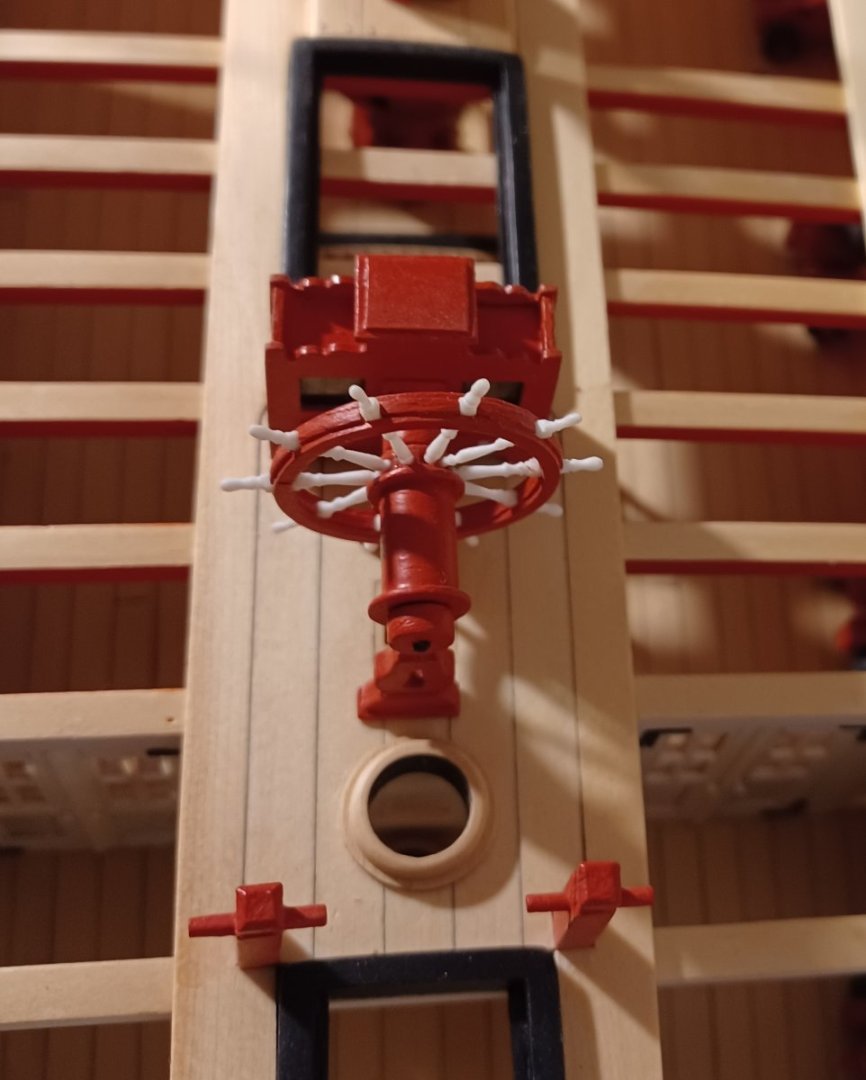
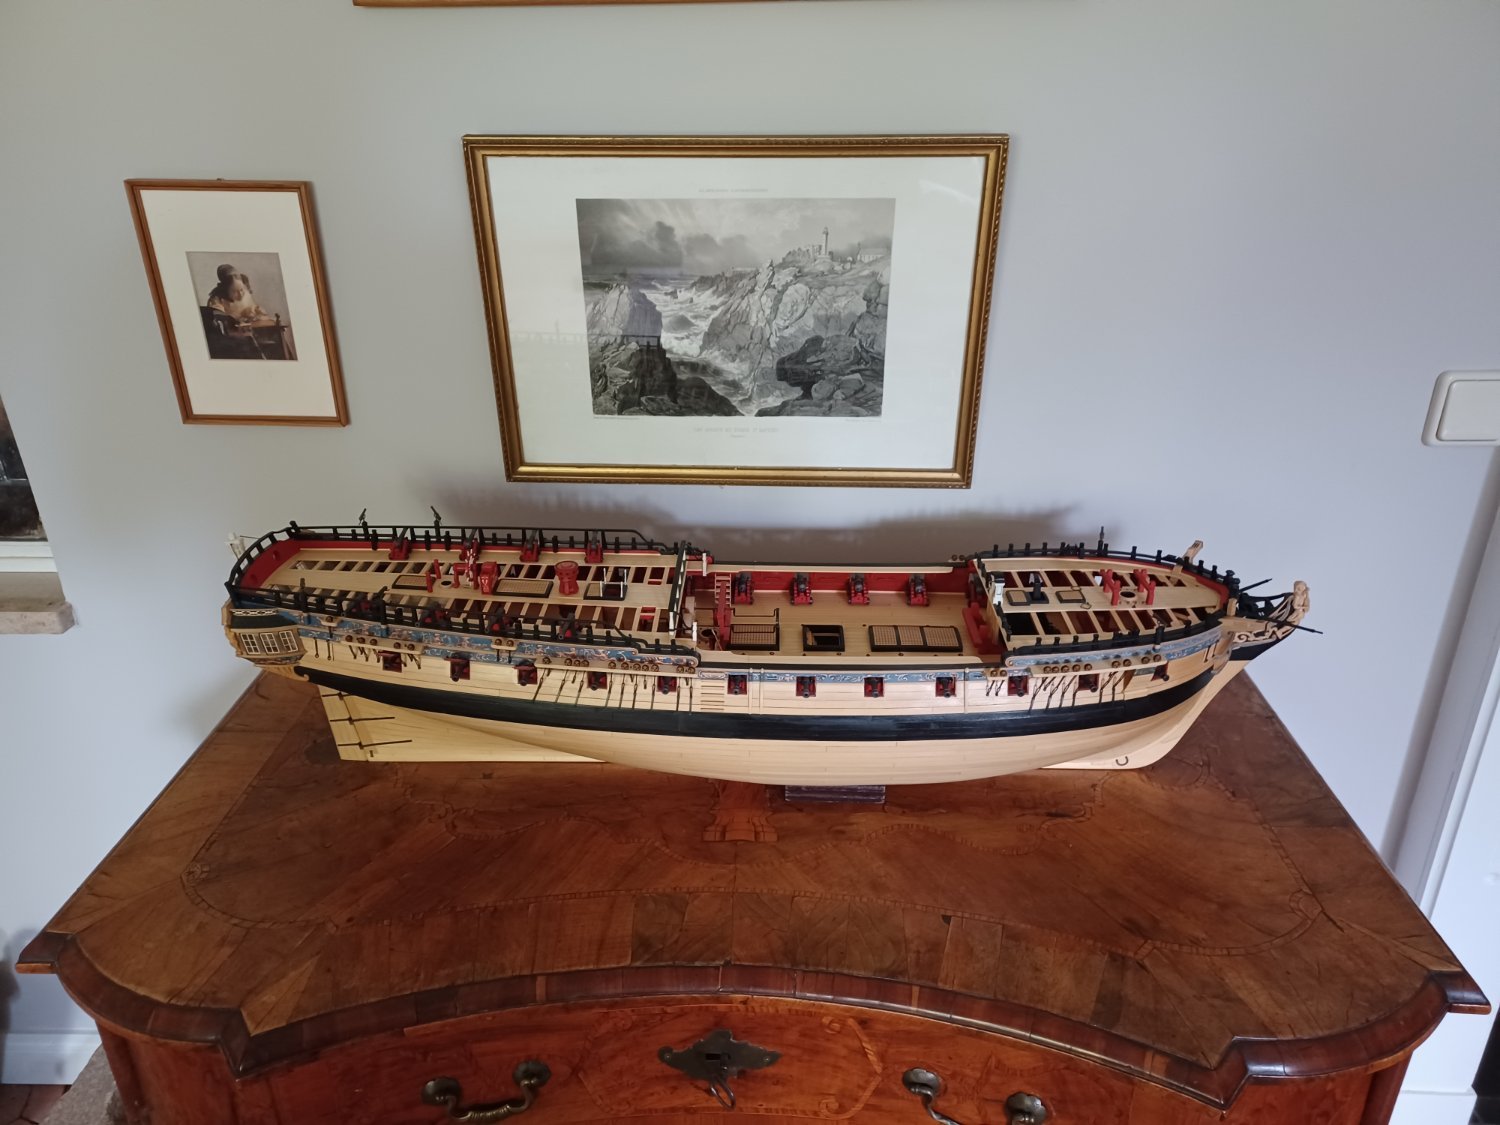
I continued with some of the deck fittings.
There are quite a few contemporary models, showing excellent deck fittings, including wheels made from ivory. Of course I had to try my best and make one for my Winchelsea model.
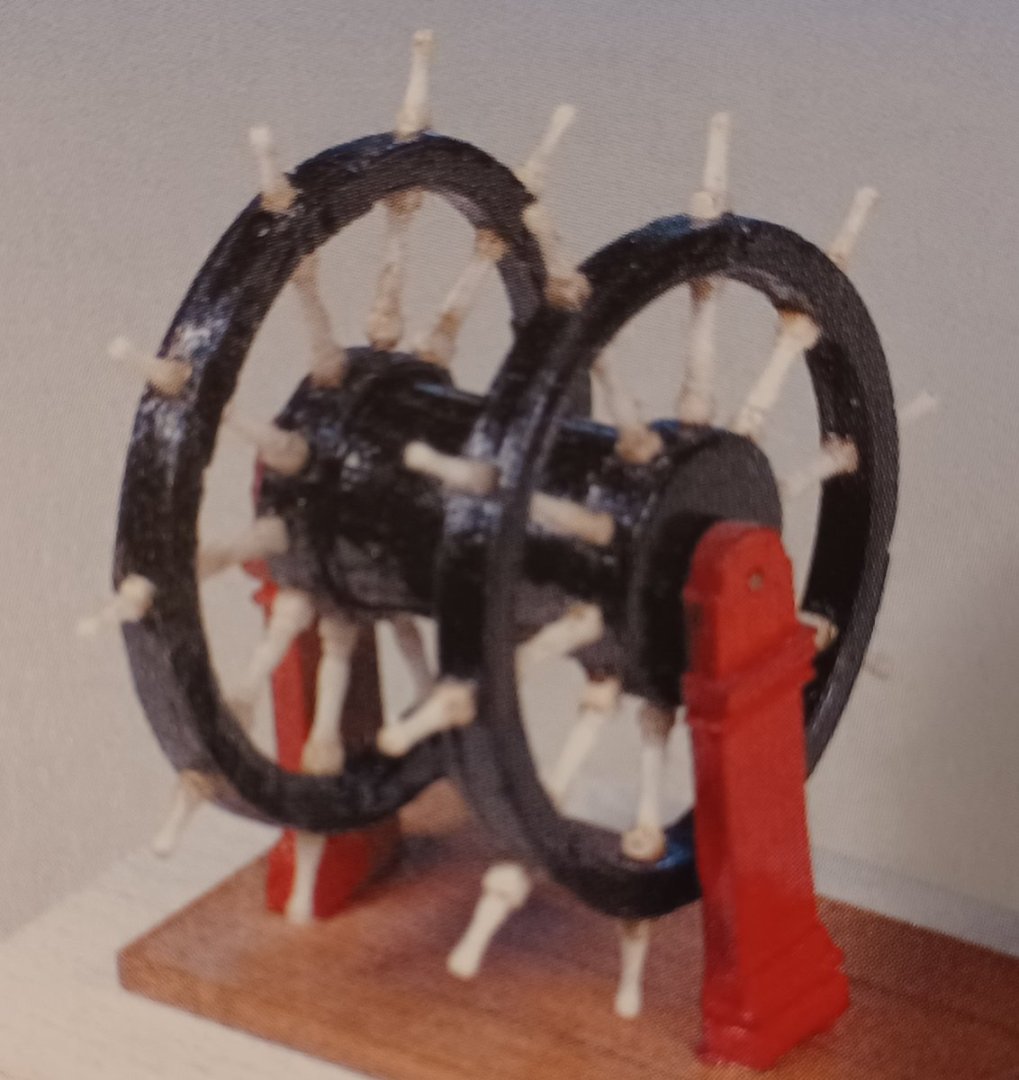
First I cut the strips and made a jig, so I can sand them to a oktogon.
For the red painted parts of the wheel, I used Chucks wonderful mini-kit.
After that they were turned and the profiles were made with sanding sticks and files
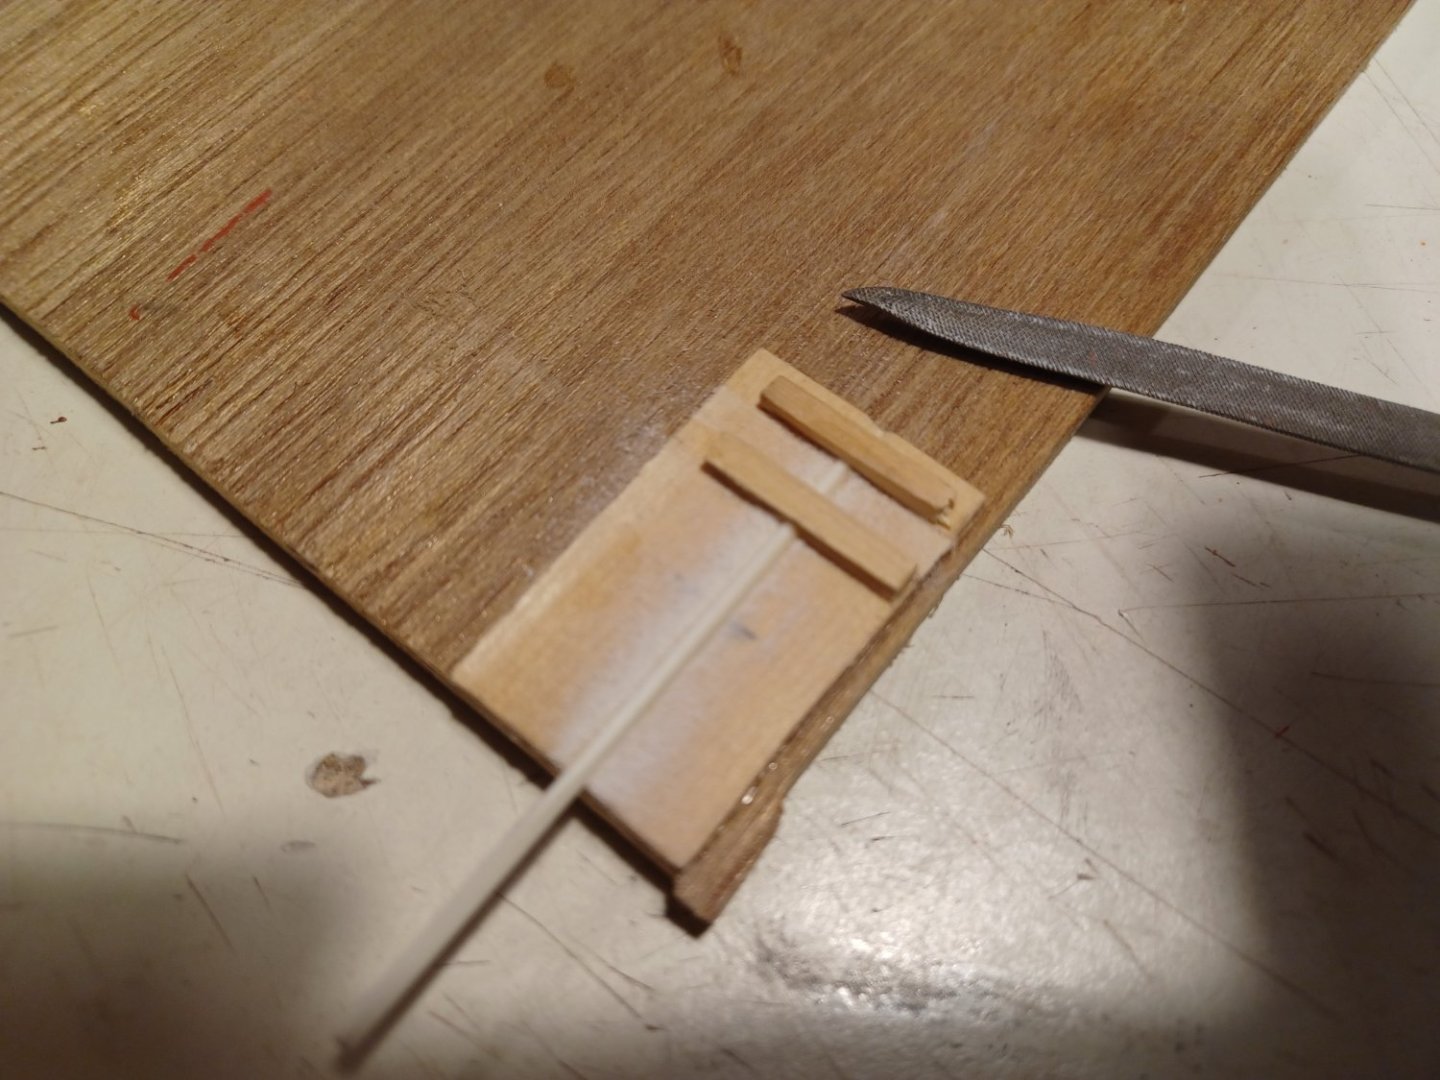


Ivory is a fine material for turning. It can brake if you are not careful, but with some patience one can make nice profiles.
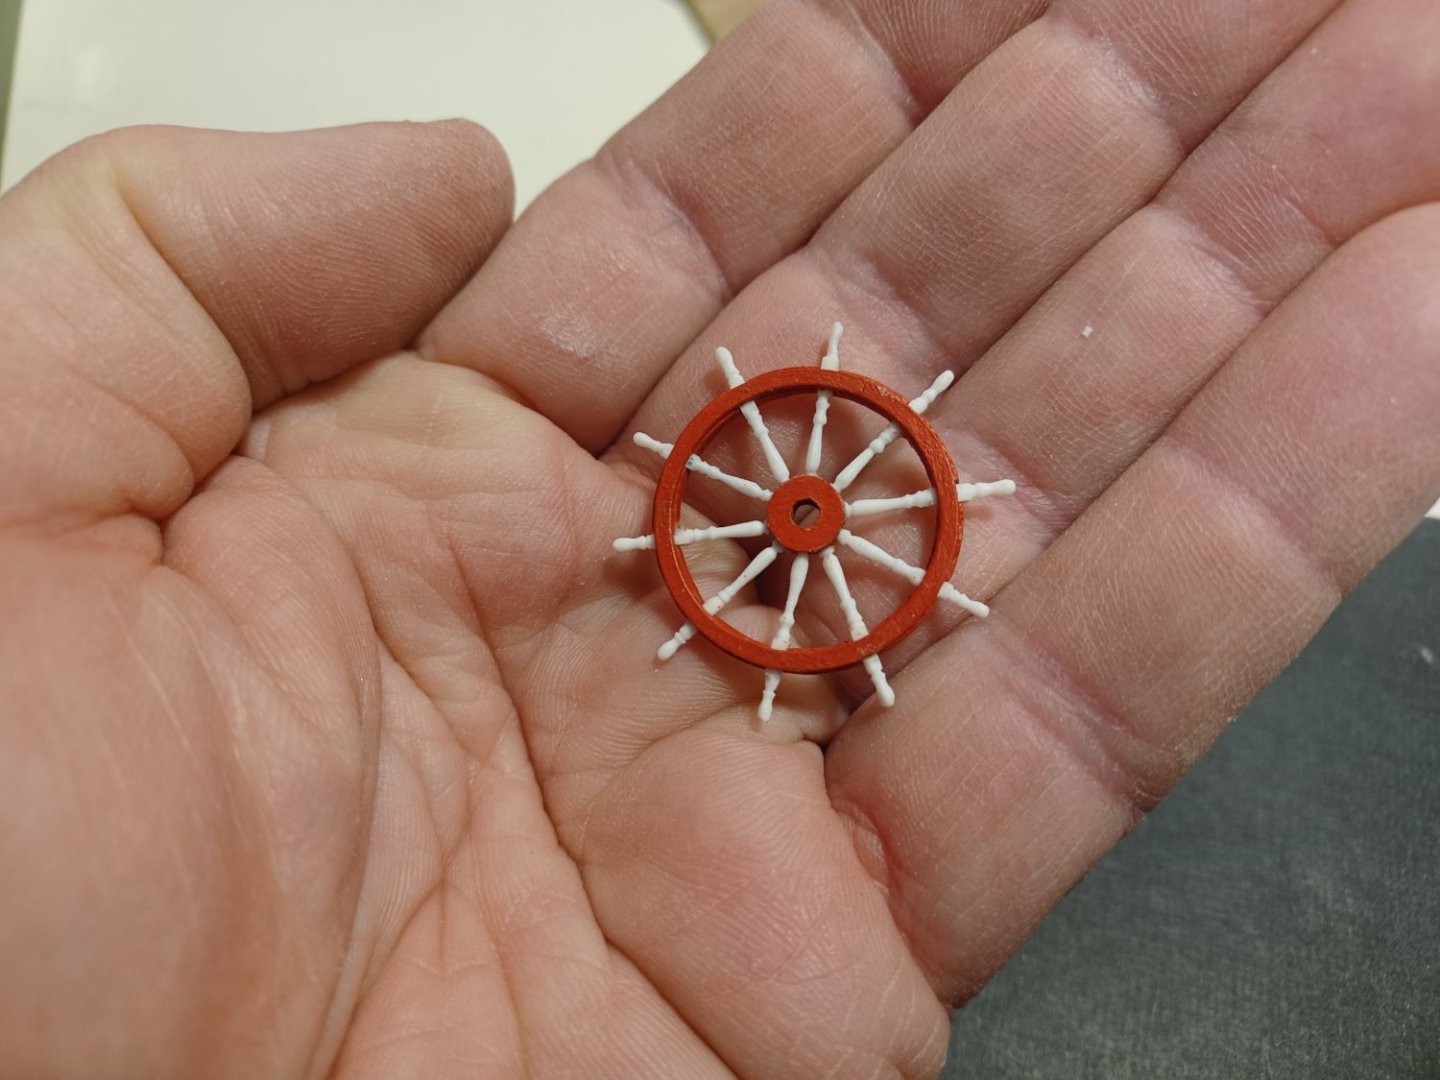
The final assembly. Not perfect, but the little incorrectnesses wont be visible later.
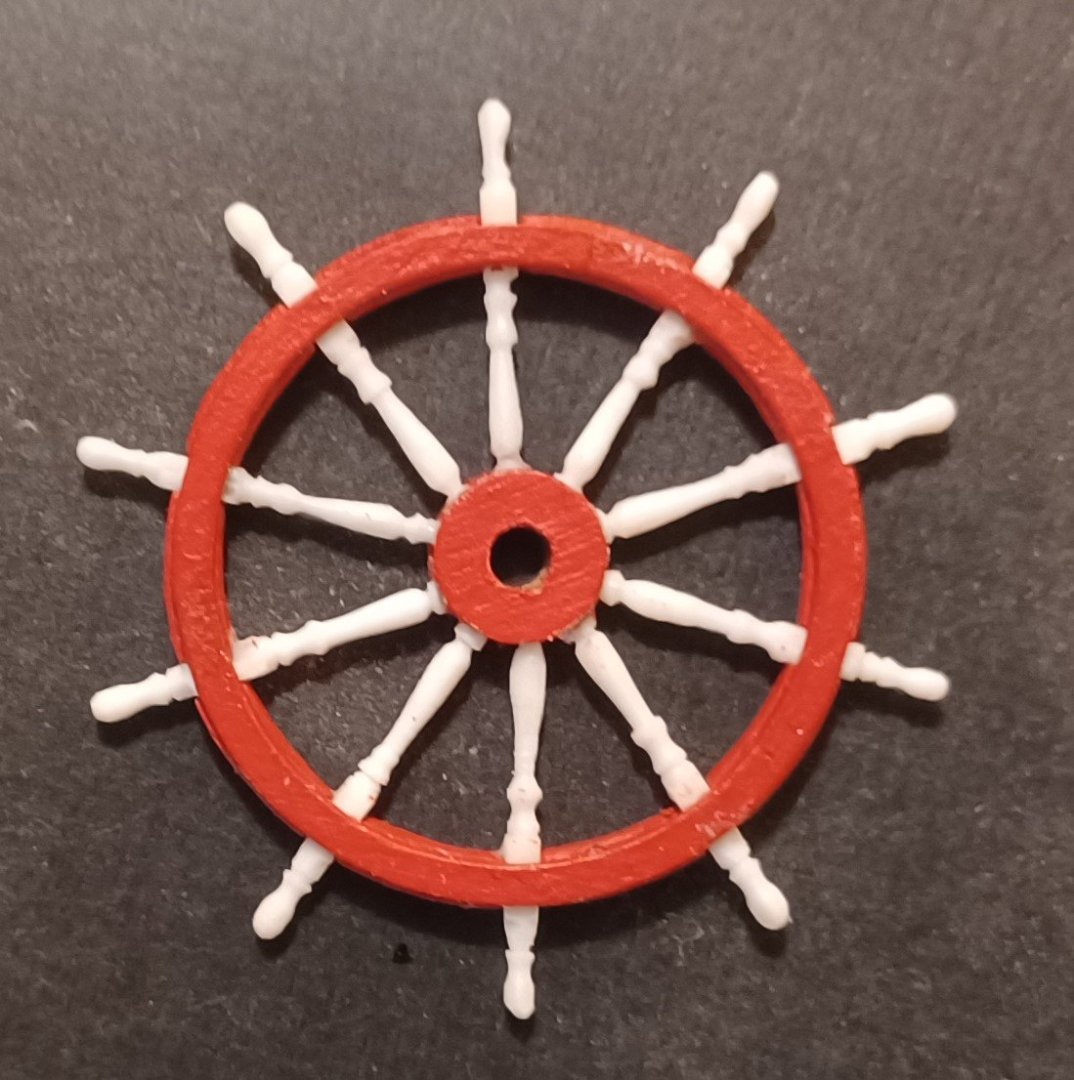
And here the arrangement on the model. It will be glued onto the deck later, I don't want it to be damaged.
Matthias


Syren Ship Model Company News, Updates and Info.....(part 2)
in Traders, Dealers, Buying or Selling anything? - Discuss New Products and Ship Model Goodies here as well!!
Posted
Hi Chuck,
in my opinion, the costs of a single chapter are more important than the total cost of the whole model. I never counted together, what I payed for all the chapters of the Winchelsea, because it does not matter. But I always had a look on the price of the next chapter + tax + delivery. So for most of the people it is probably best to not make a chapter more expensive than 250 to 300 $. You probably need 750 to 850 $ for the framing, so you better make 3 chapters for the framing and there will be many folk able to afford it. I am shure, everybody wants to build this model.
Matthias