
Beckmann
-
Posts
349 -
Joined
-
Last visited
Content Type
Profiles
Forums
Gallery
Events
Posts posted by Beckmann
-
-
I agree with Christian, that the basic version is my favorite. The prebuild version gets close to the kind of modelshipbuilding of plastic kits. Nothing else to do, than gluing everything together. That is not much of a challenge and not much to be proud of afterwards. ( I know, there are real artists among the plastic-kit builders, who are able to make them look extremely realistic, that is very impressive, but putting together the parts of the kit is usually easy)
I think, shipmodelbuilders, who build such a model, should have enough skills to shape these parts by themselves. Otherwise, they will struggle later on, when it comes to planking and making fancy modlings etc. You need some woodworking skills, to start such a project.
Matthias
- Jack H, mtaylor and scrubbyj427
-
 3
3
-
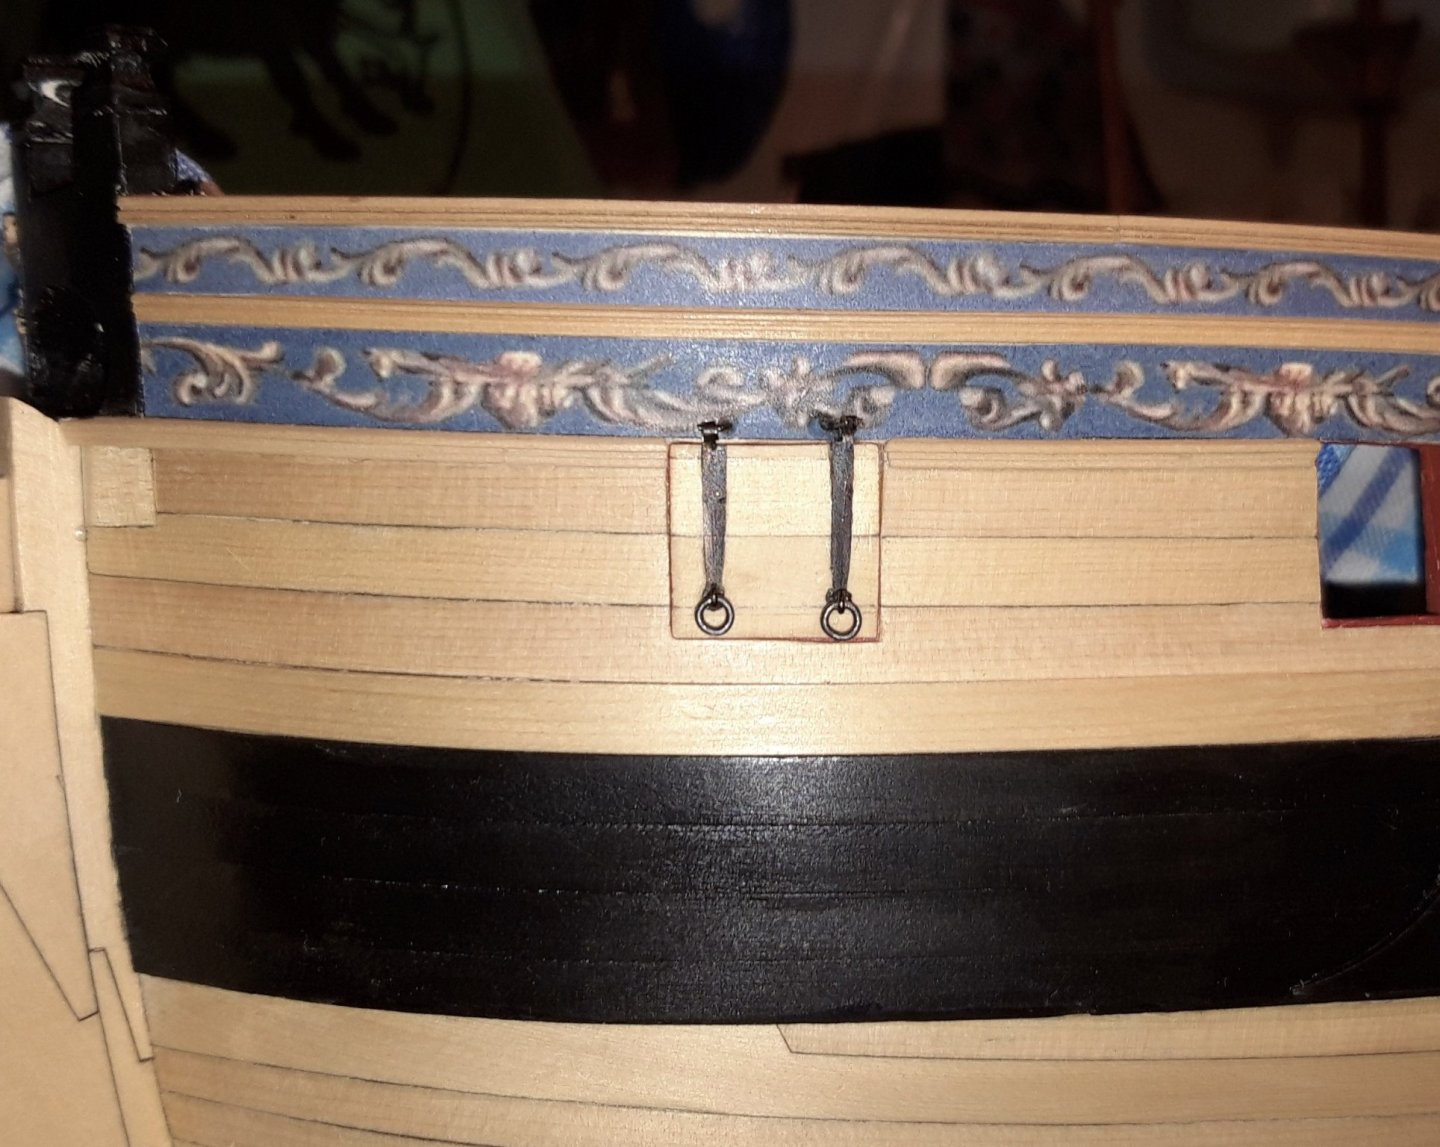
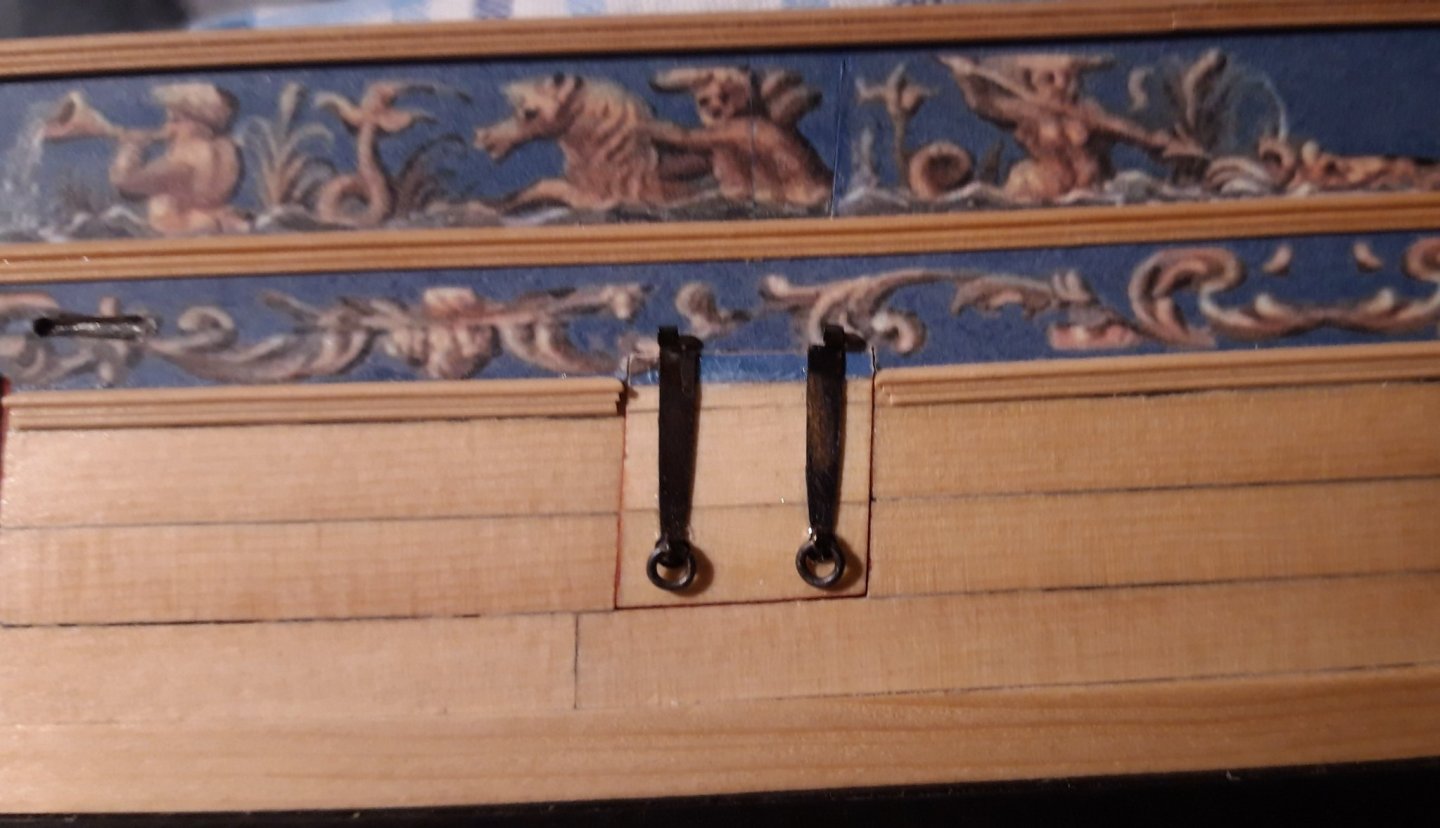
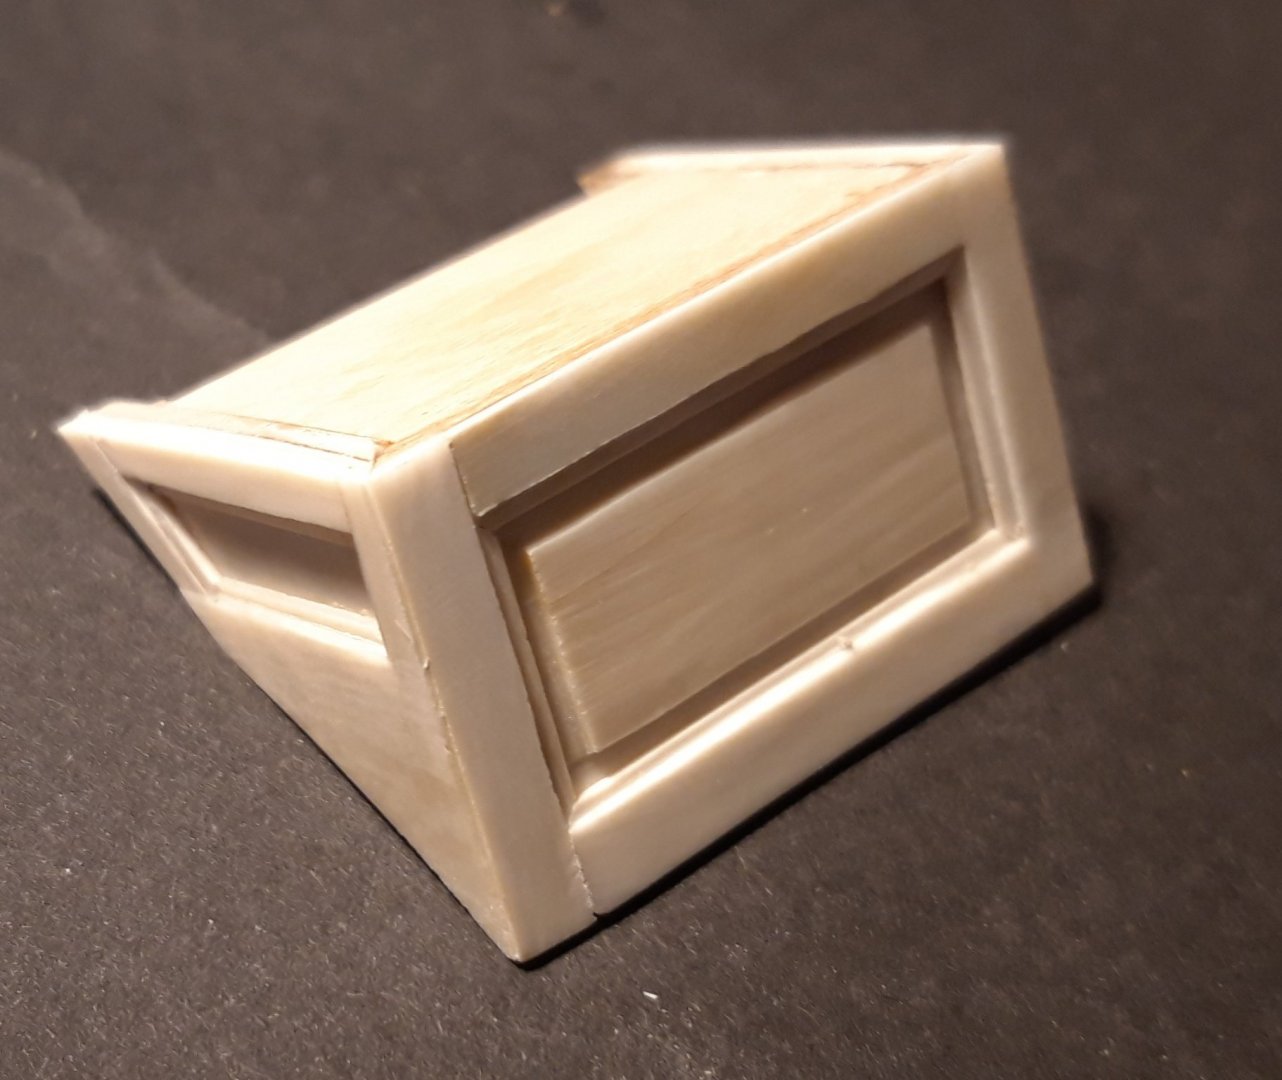
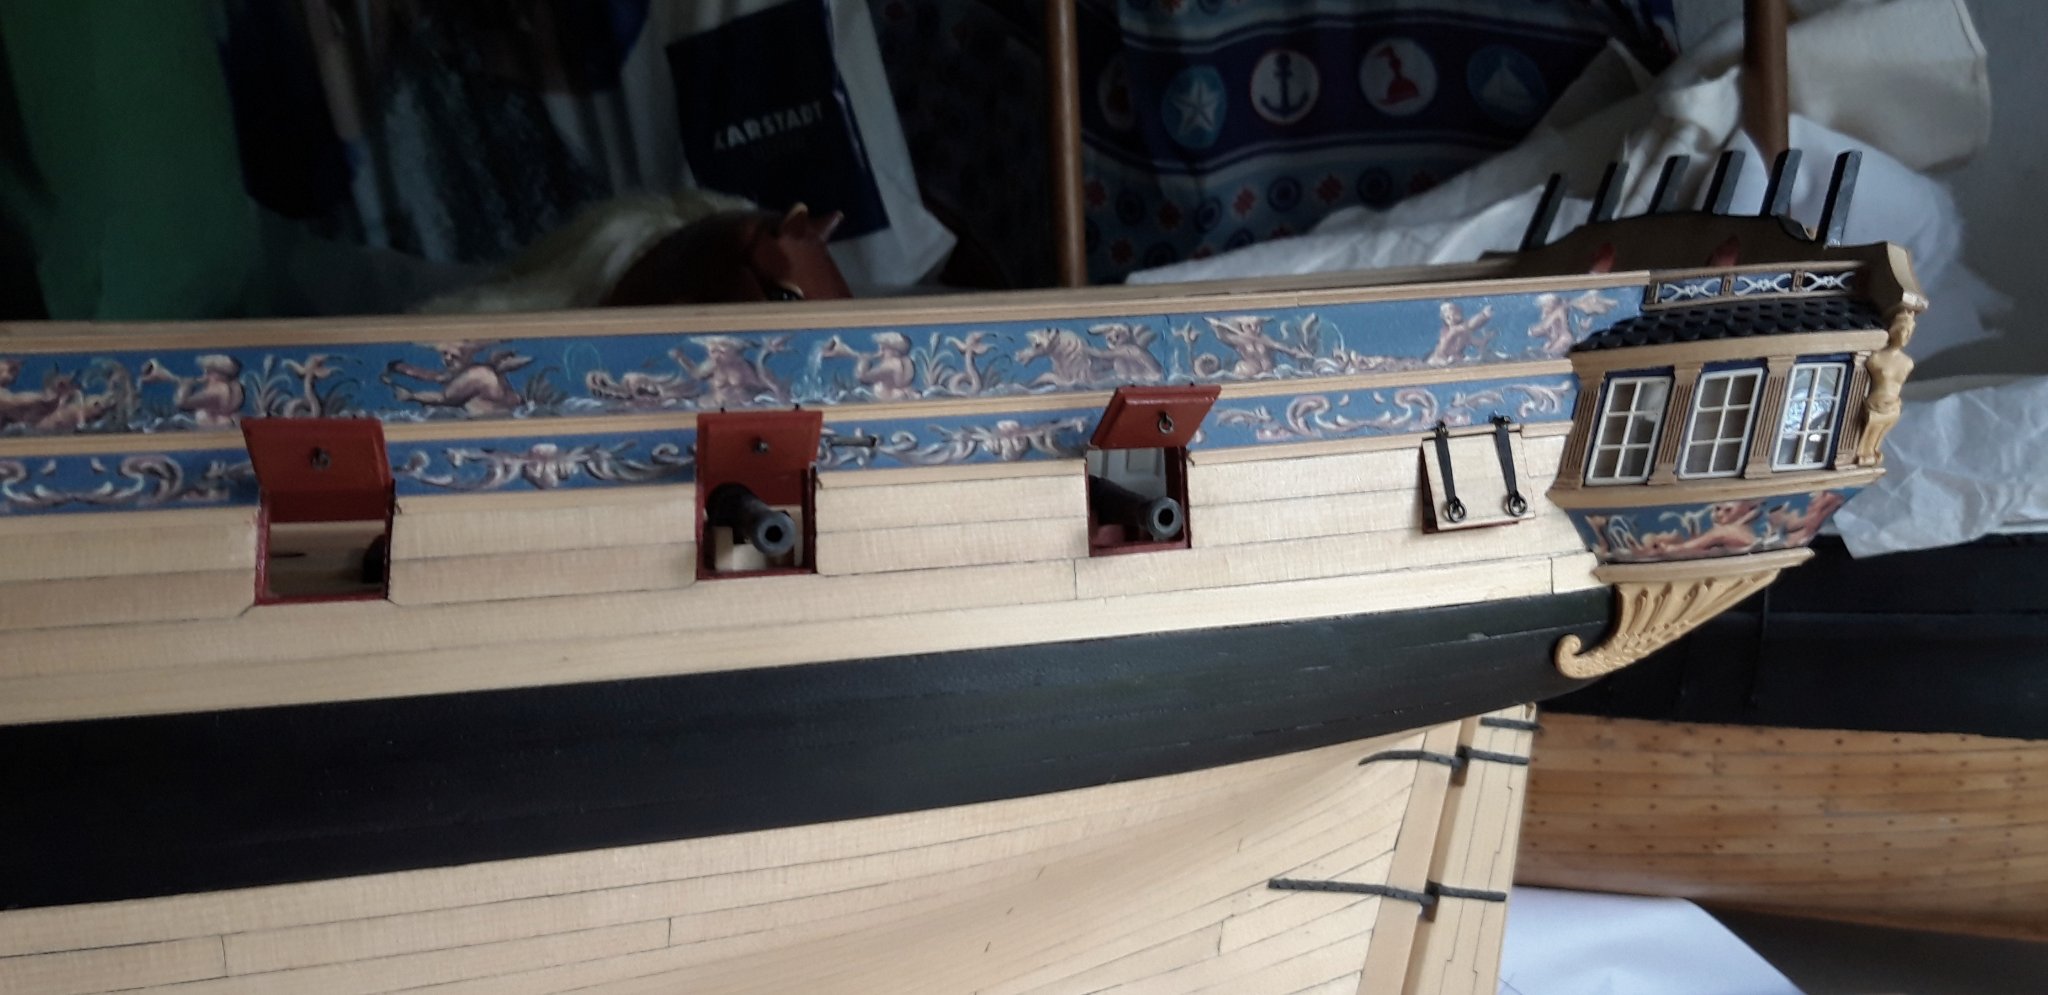
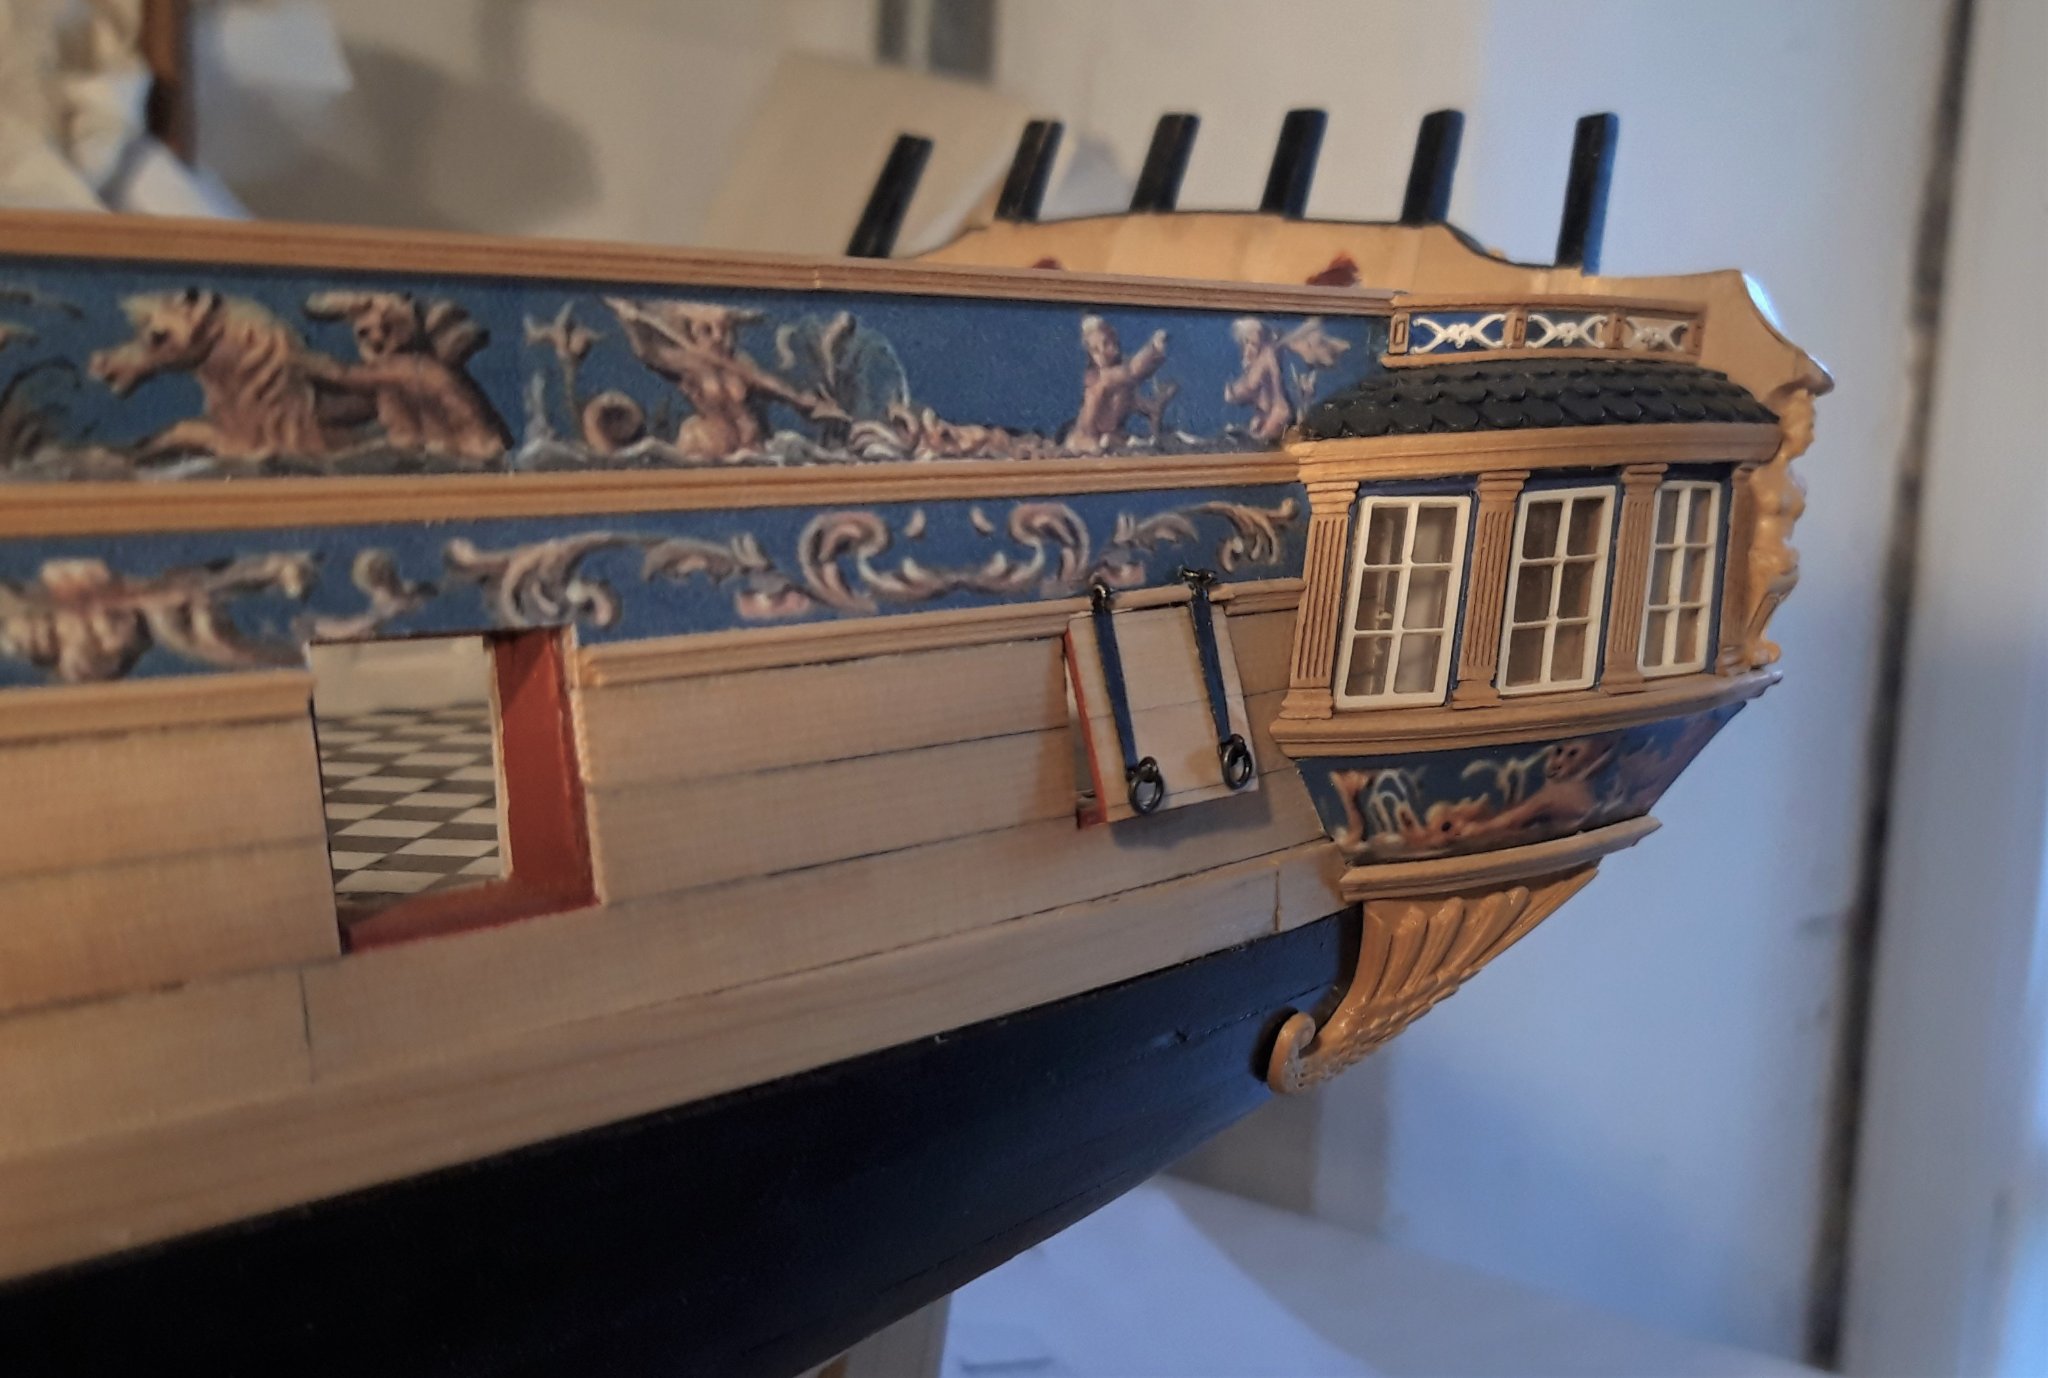
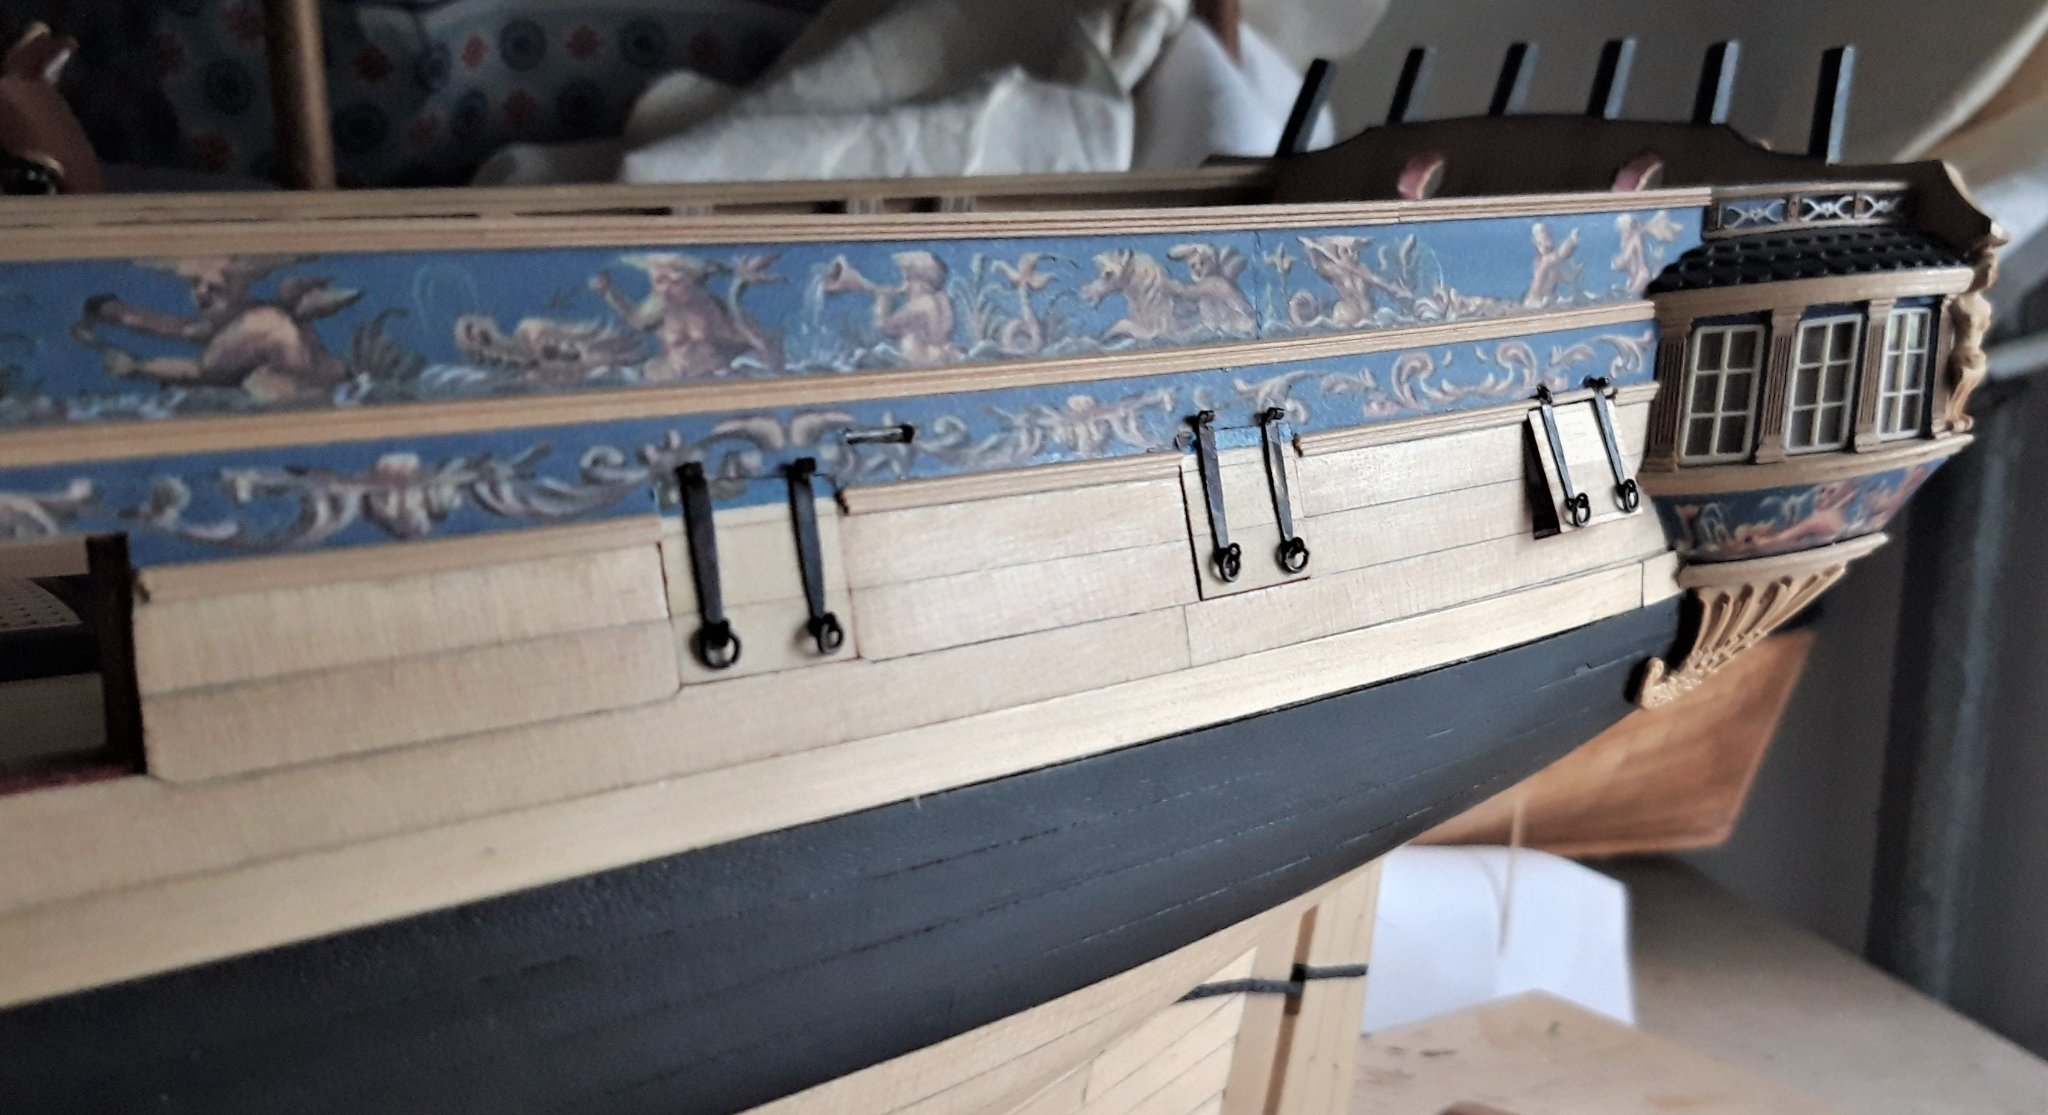
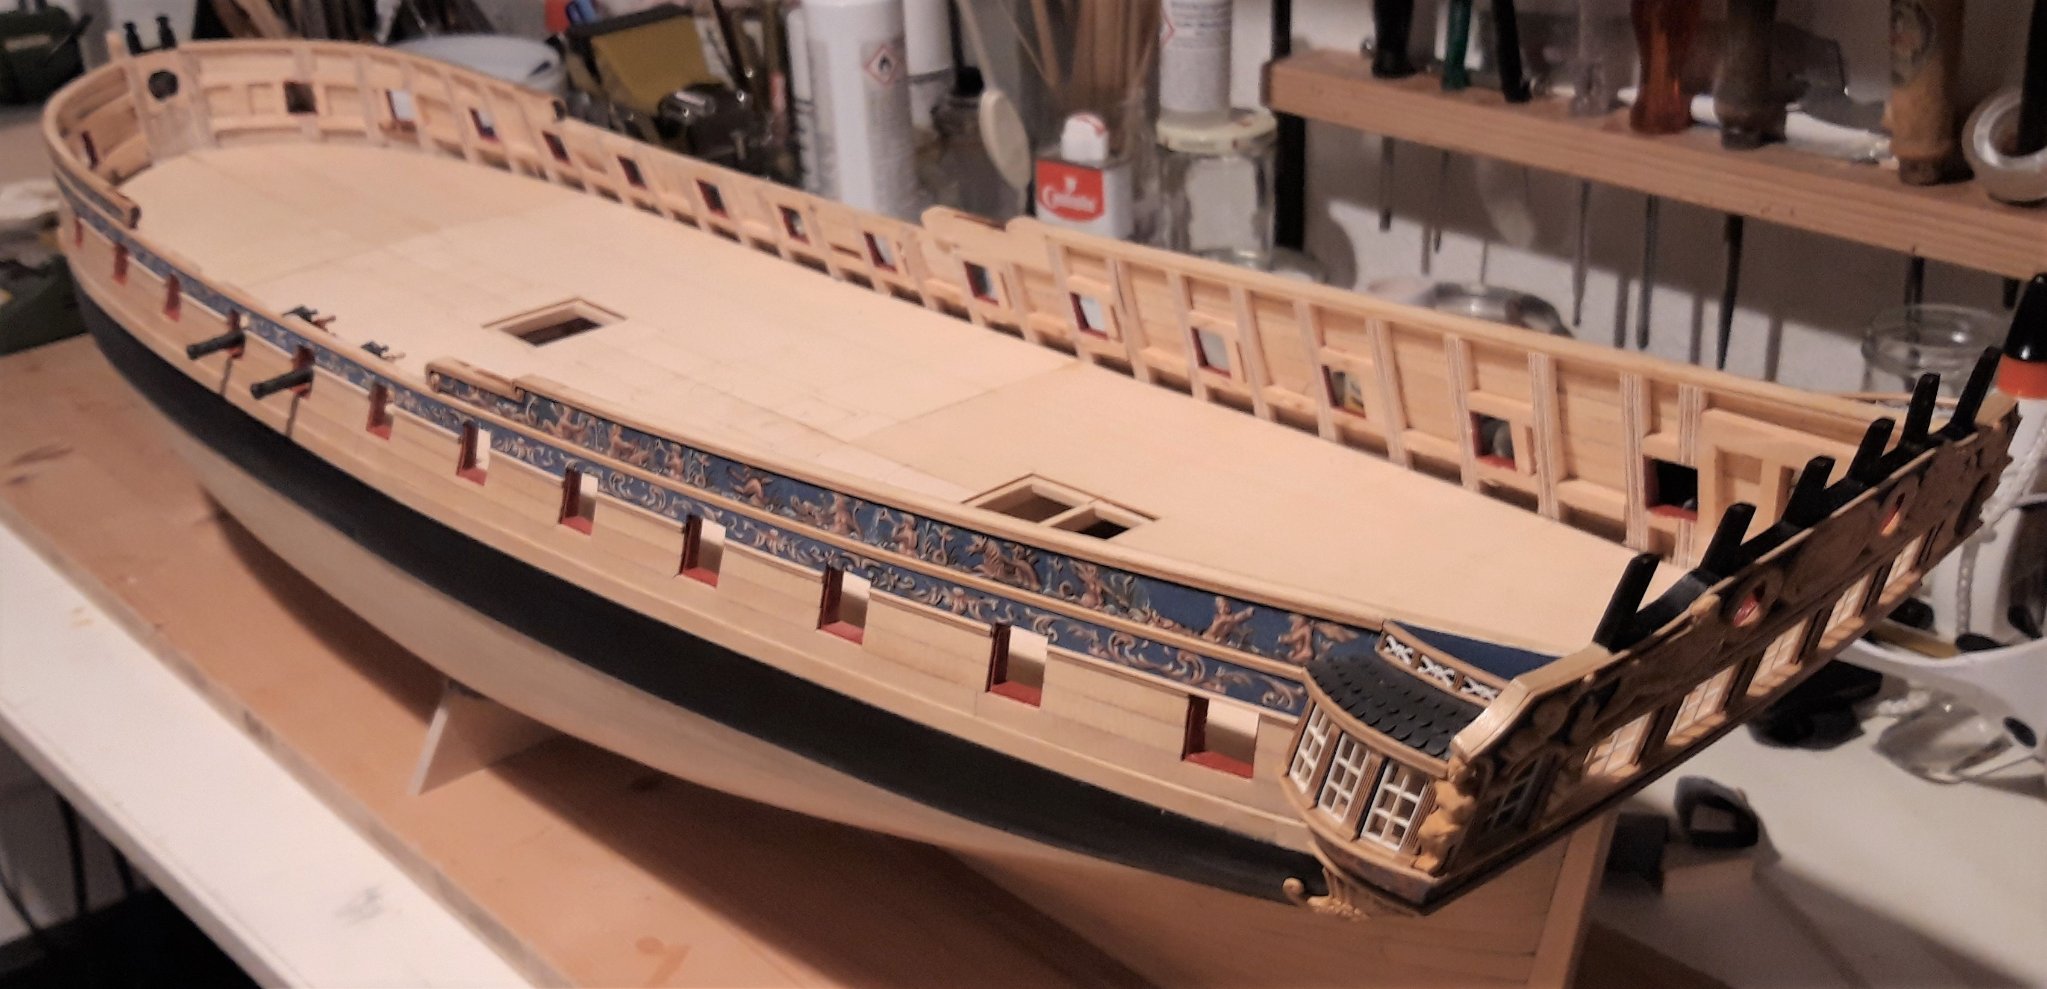
Here are the finished gunport lids.
I added one inner ringbolt.
Matthias
-
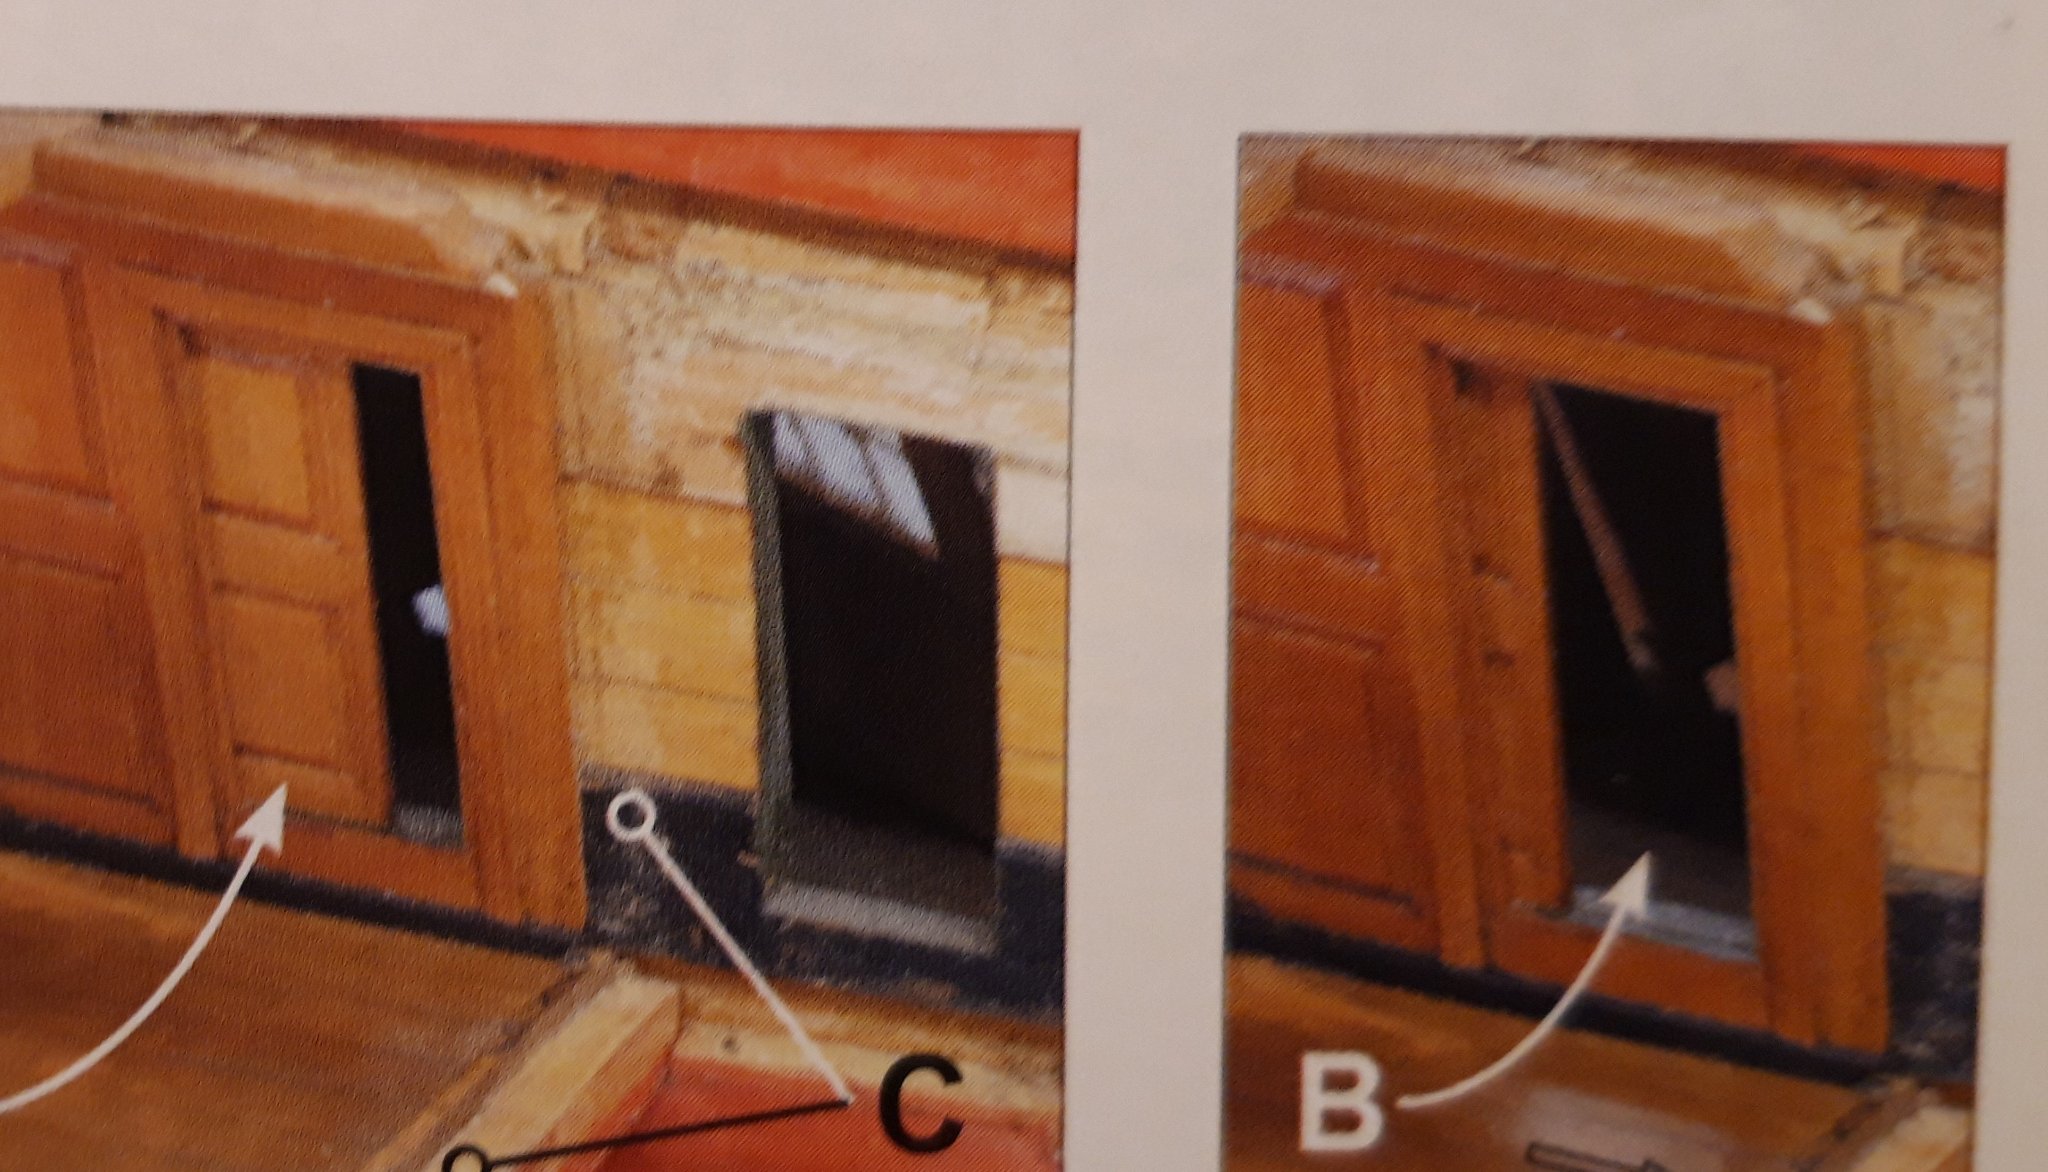
Should one maybe add the Ringbolts inside the gunport lid as well?
Many of the contemporary shipmodels show them.

 ,
,
Matthias
- bruce d, Jack H, Captain Poison and 3 others
-
6
-
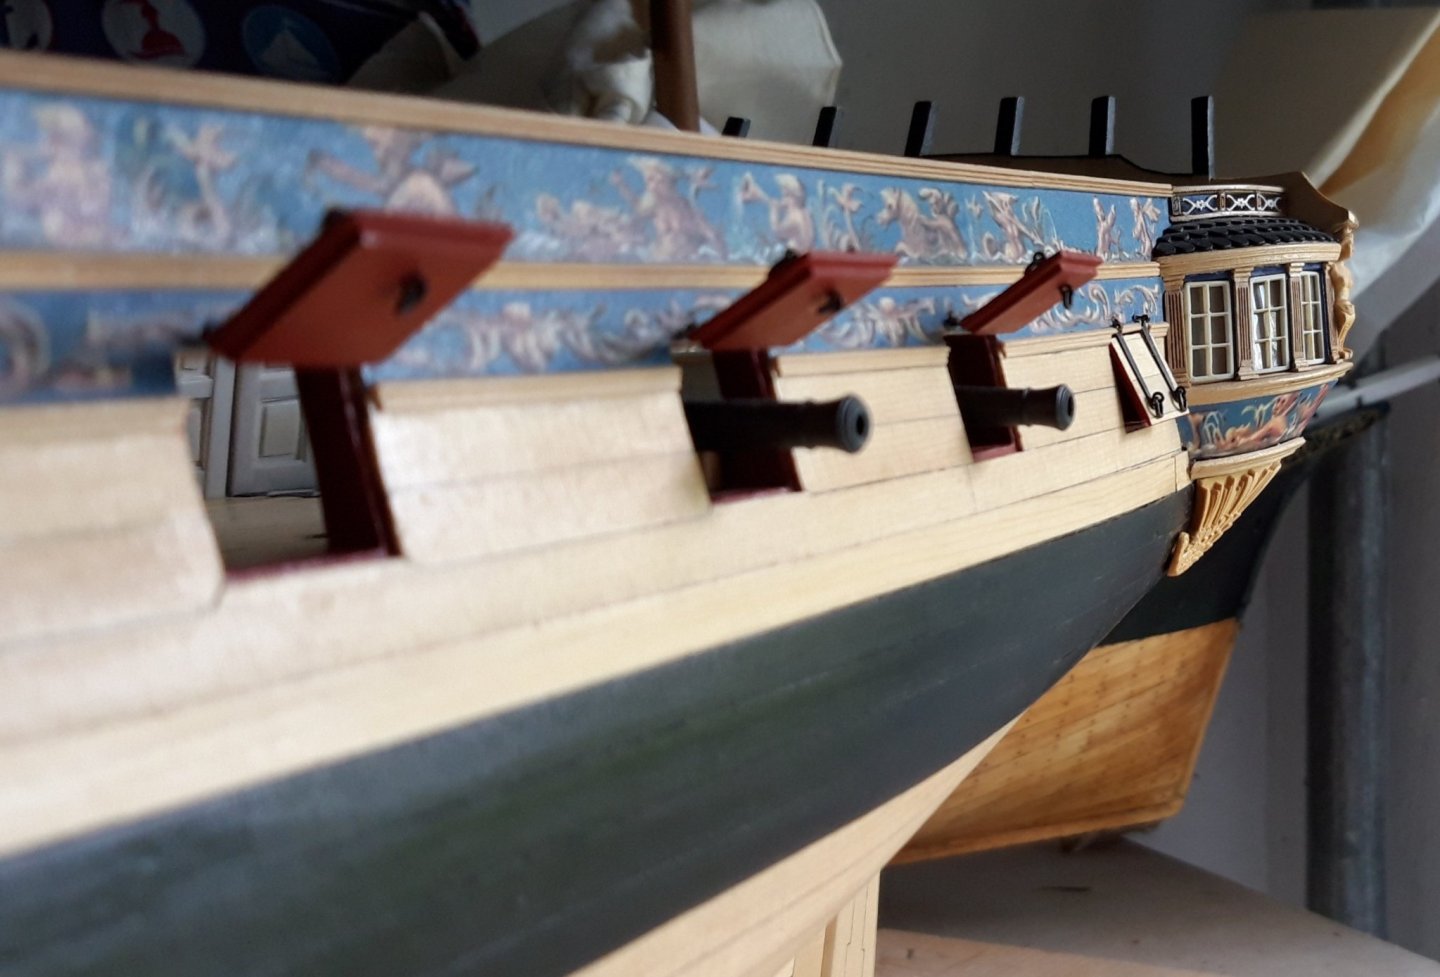
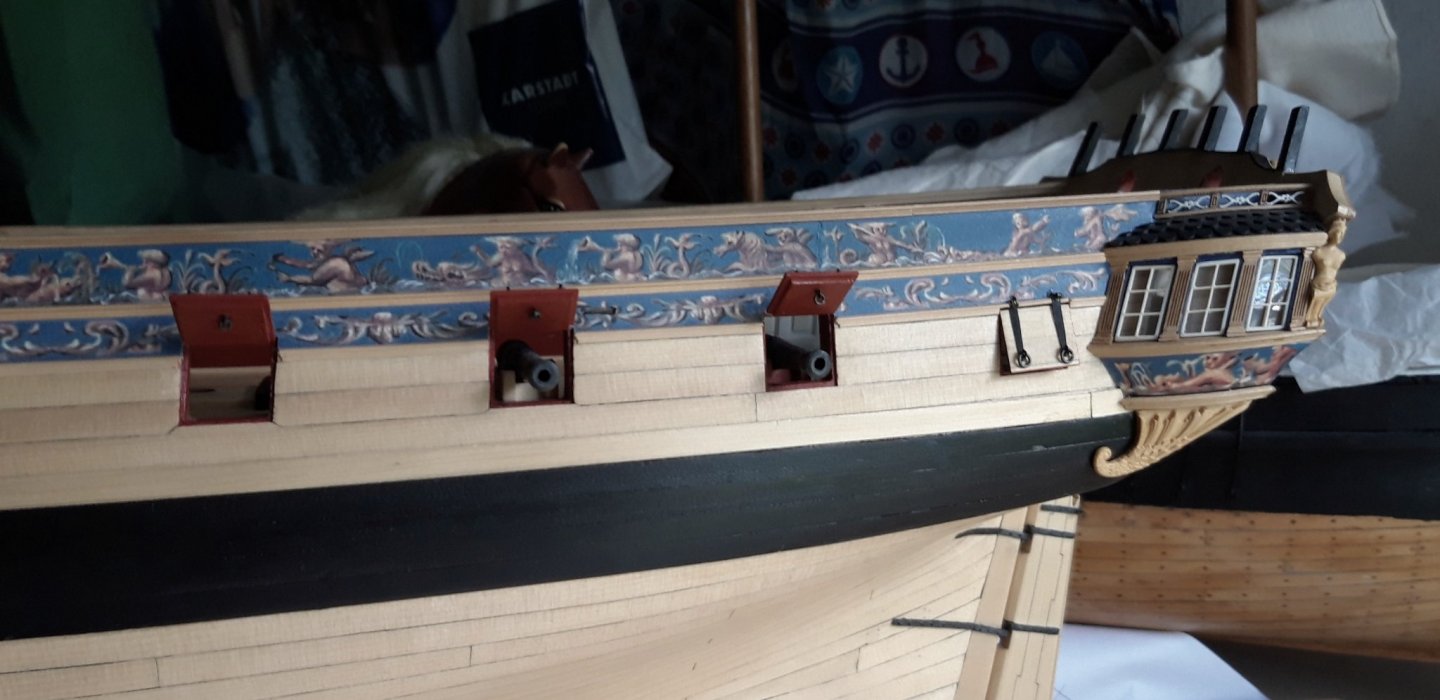
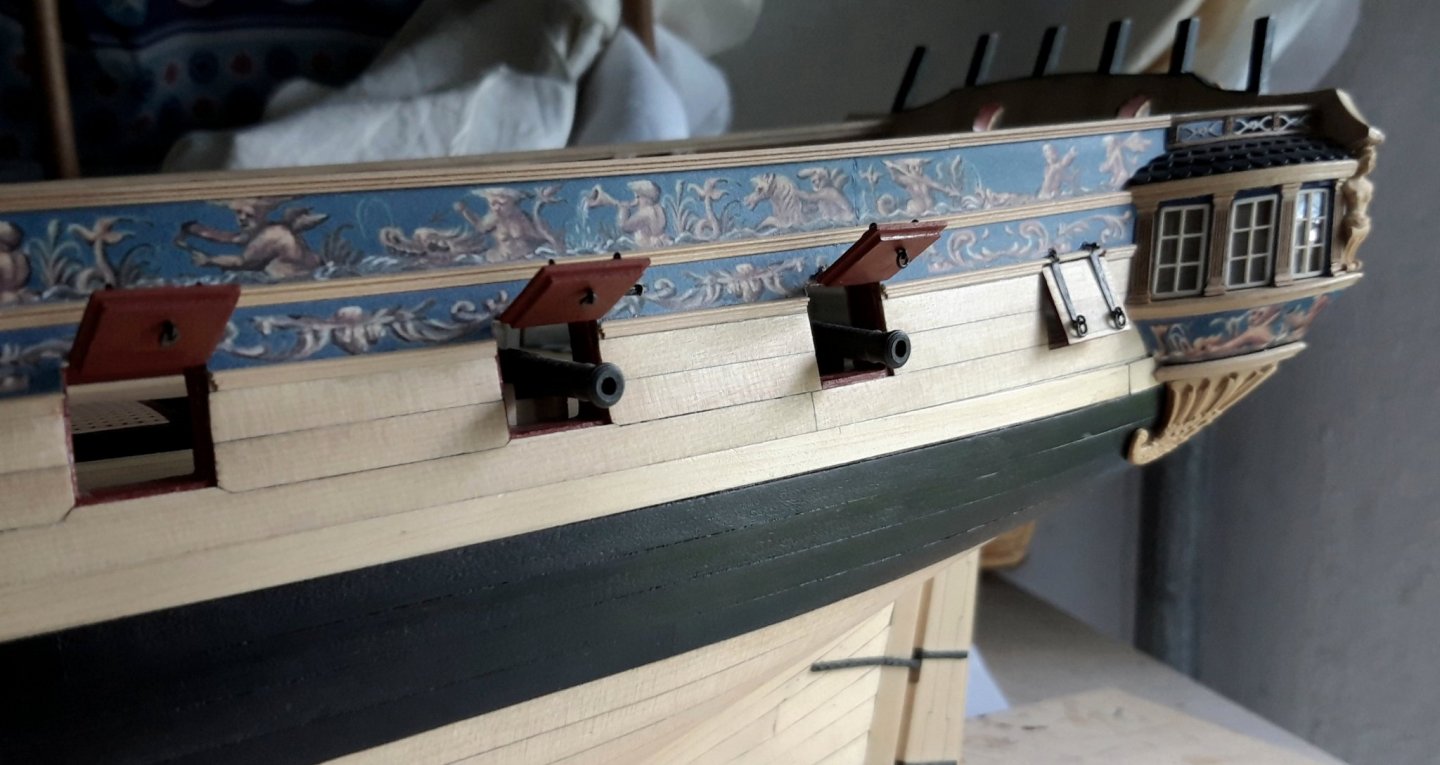
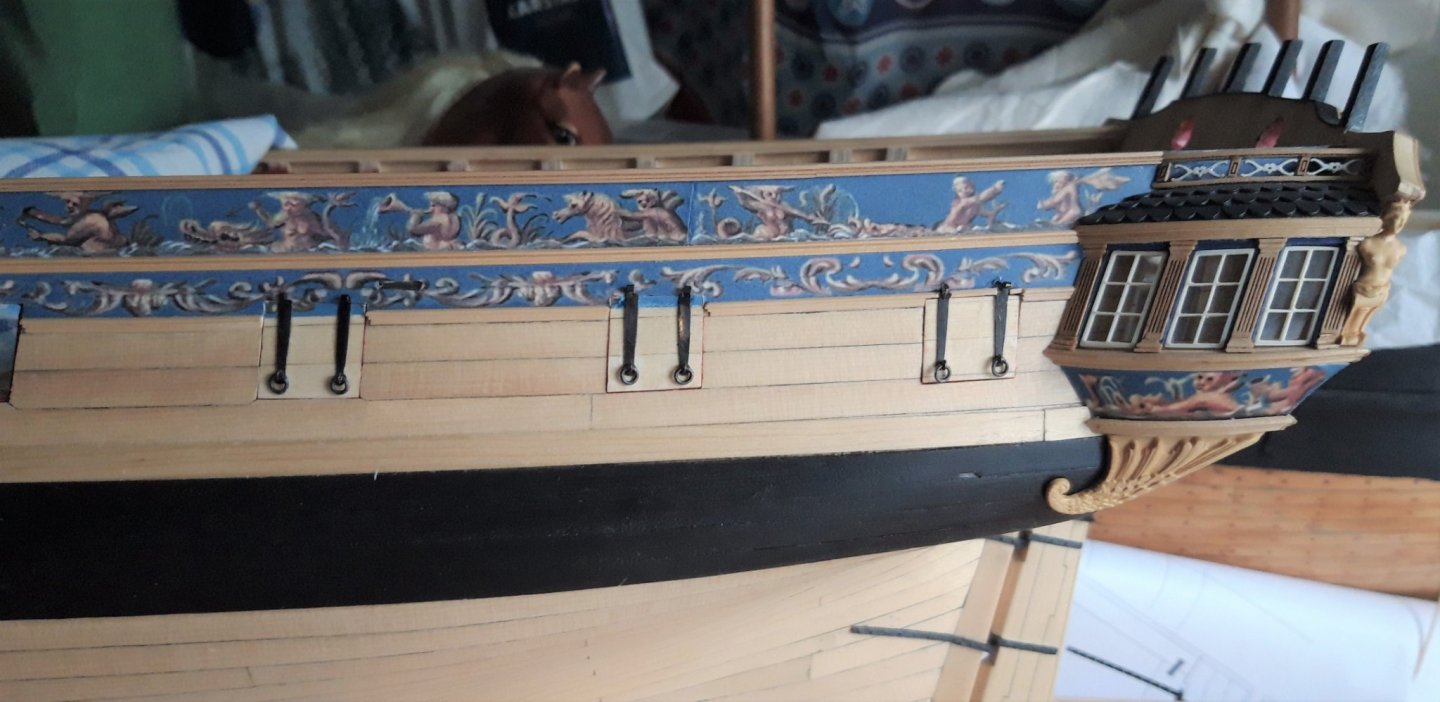
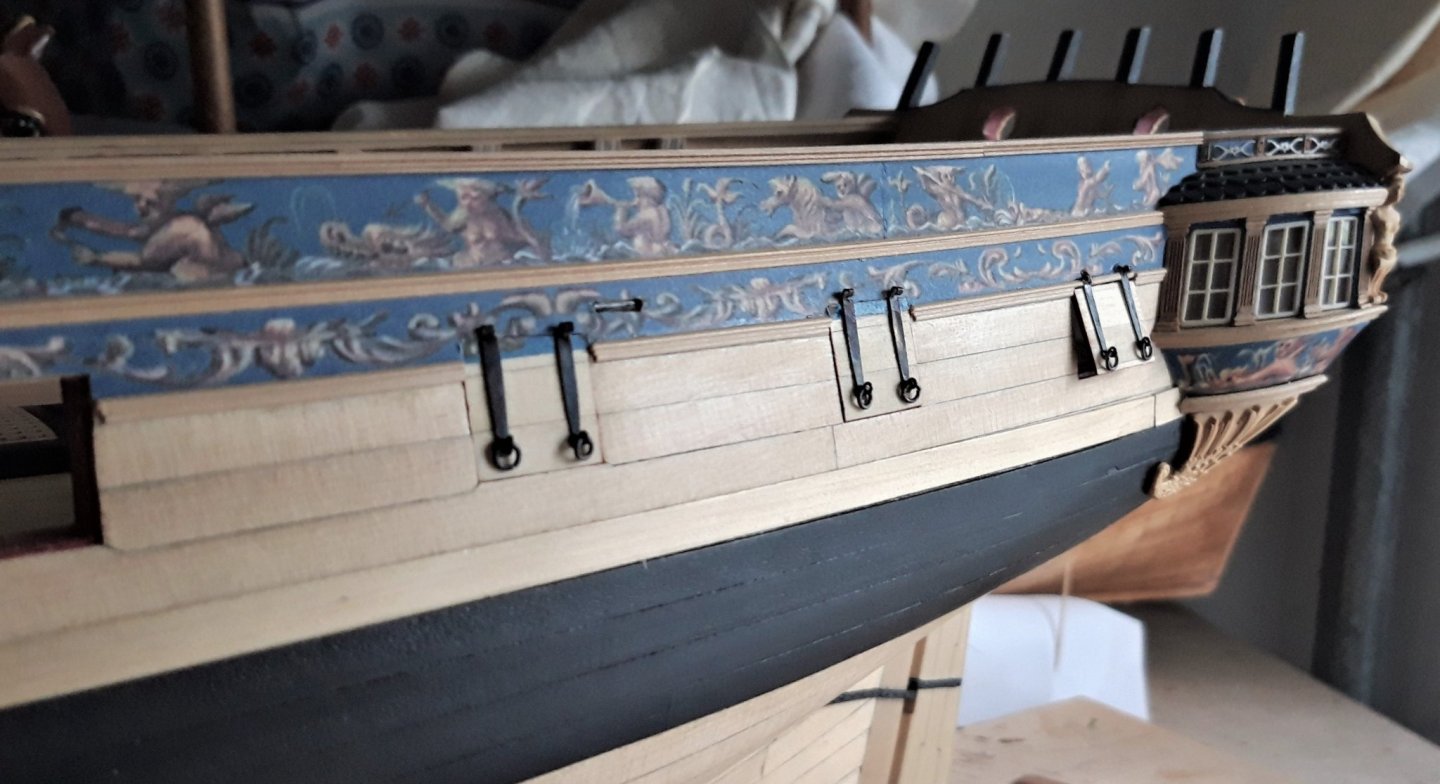
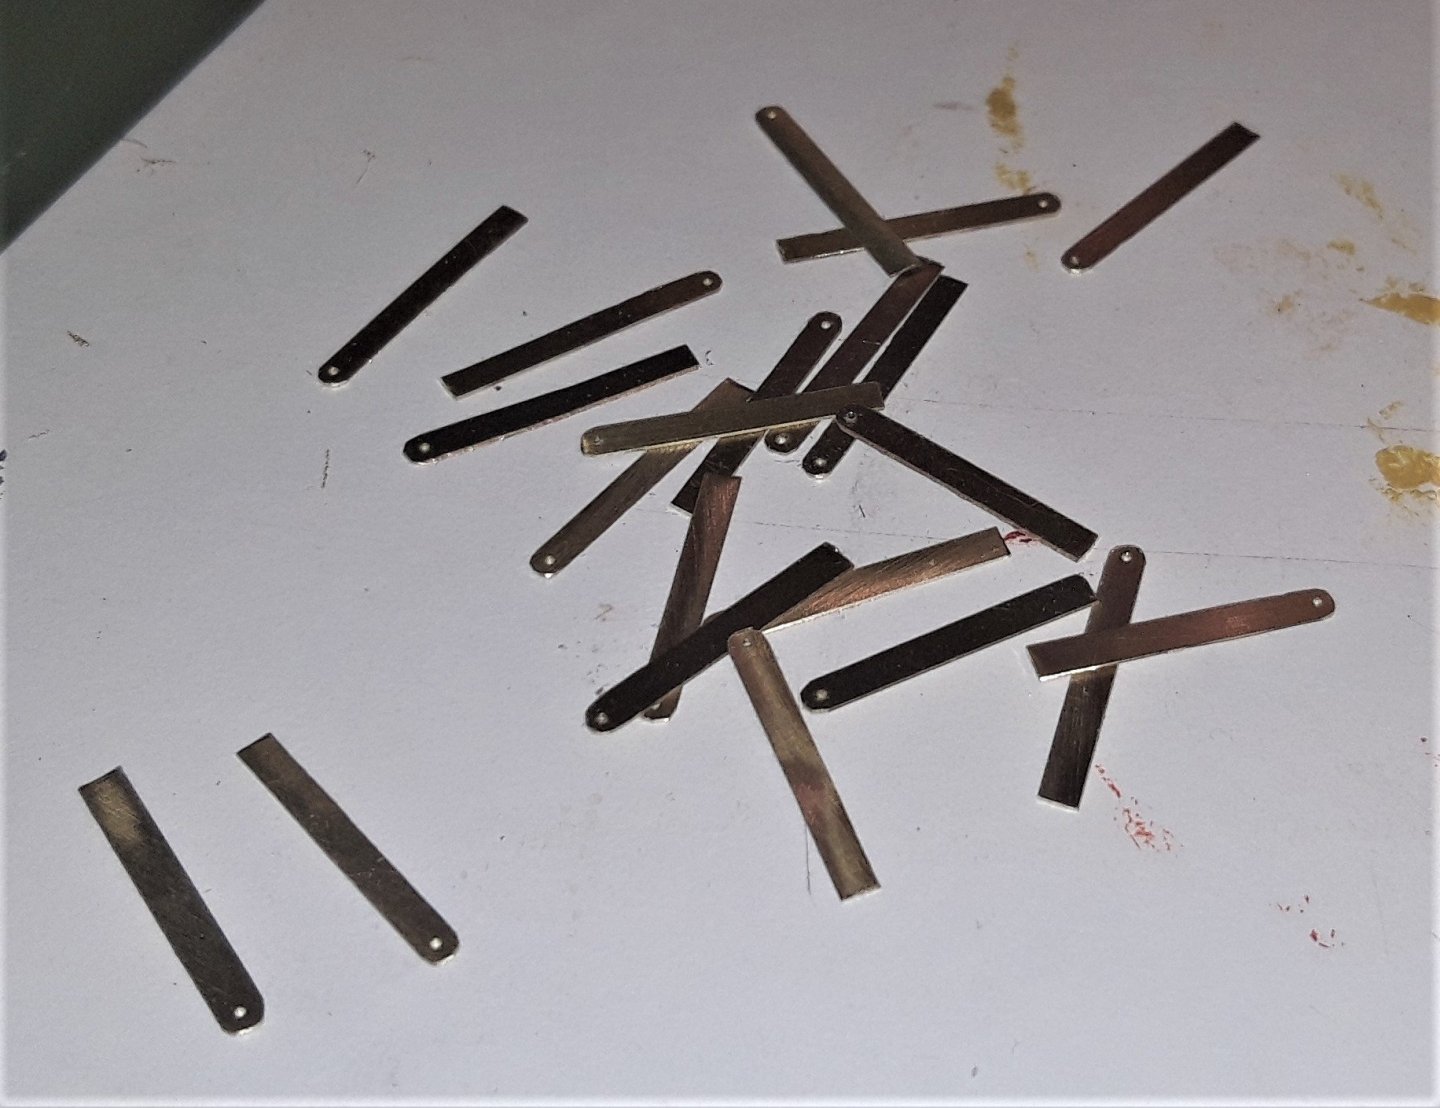
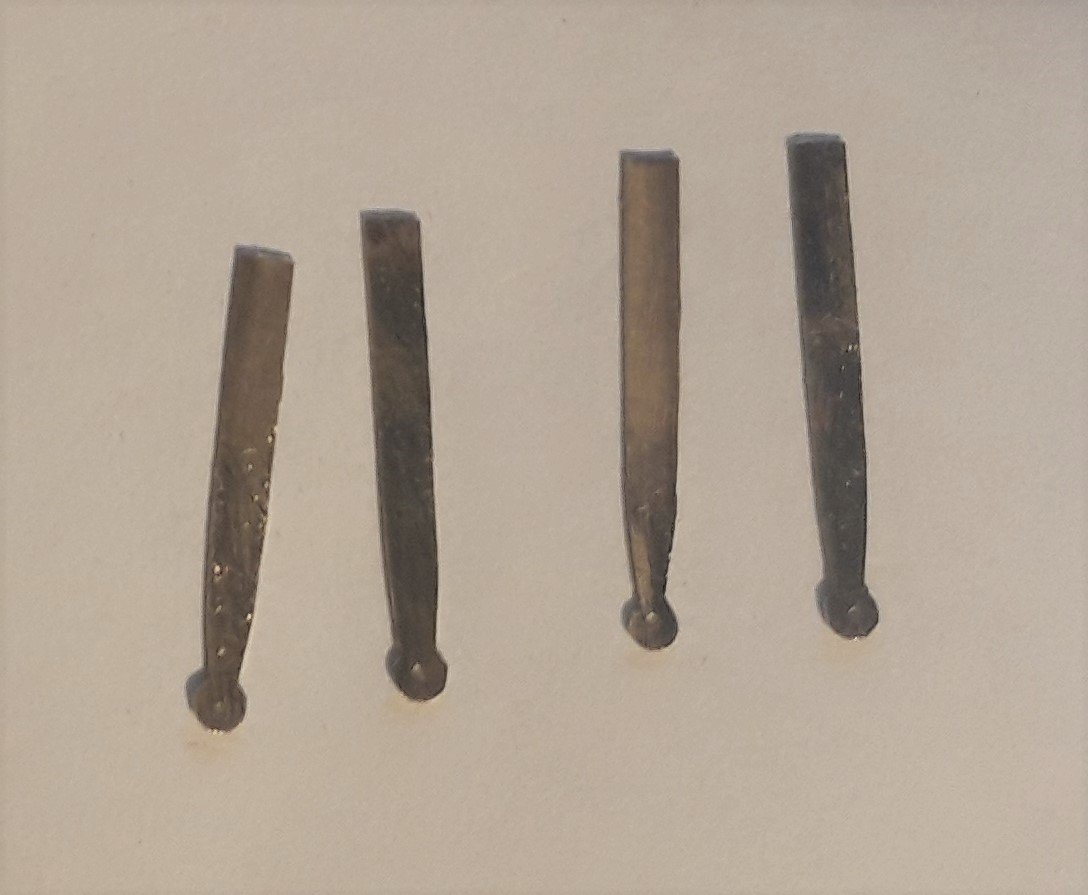
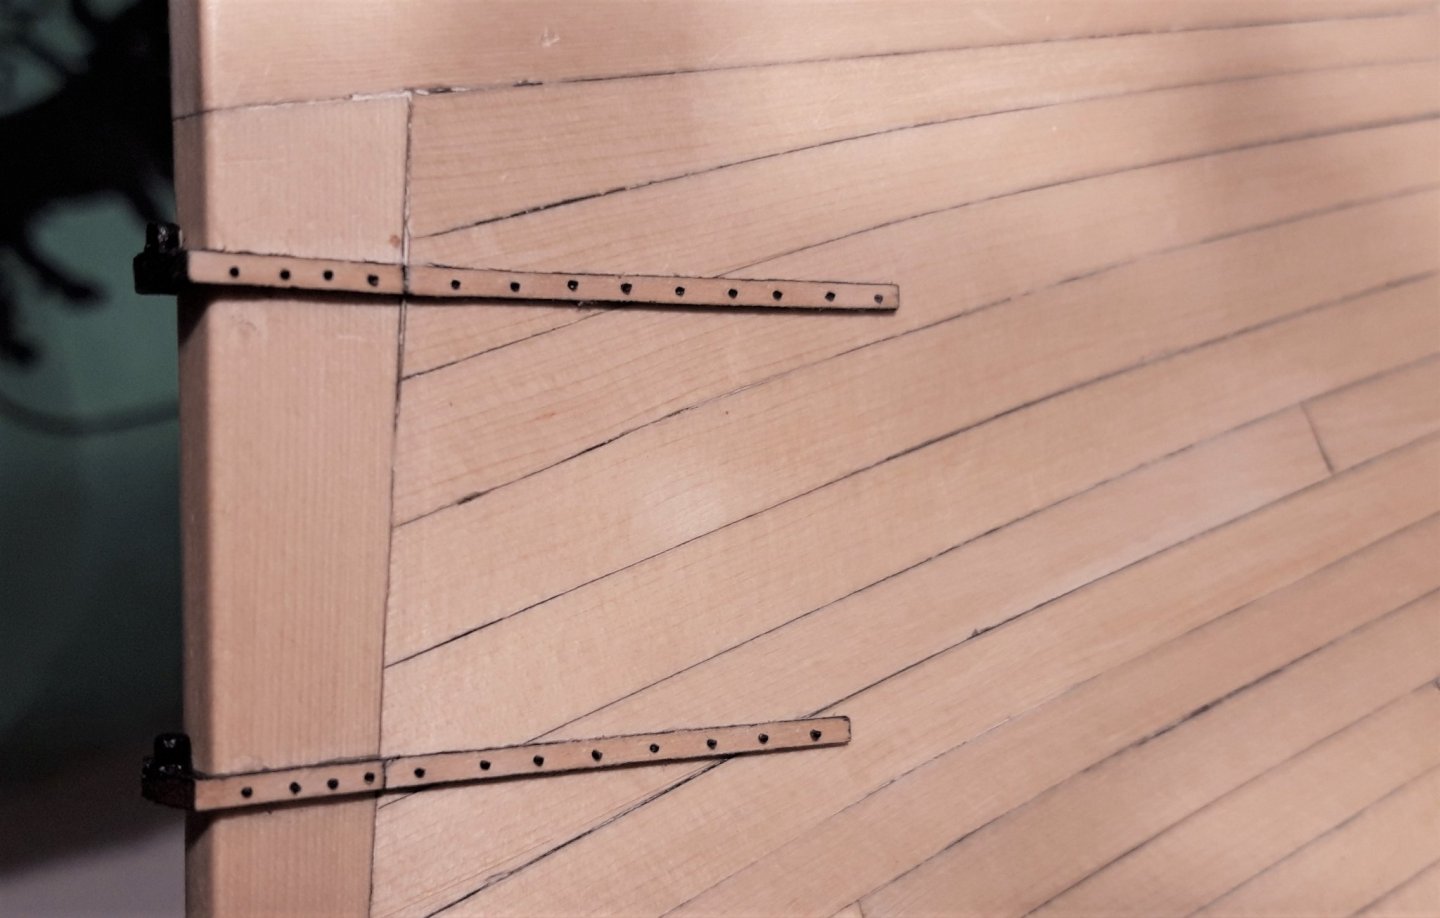
I decided, to overwork the hinges and make them narrower, the gunport lid at the bow and the captains cabin are installed and working, here are some pictures, I think they look a bit more in scale now.

Matthias
- egkb, Ryland Craze, captain_hook and 9 others
-
12
-
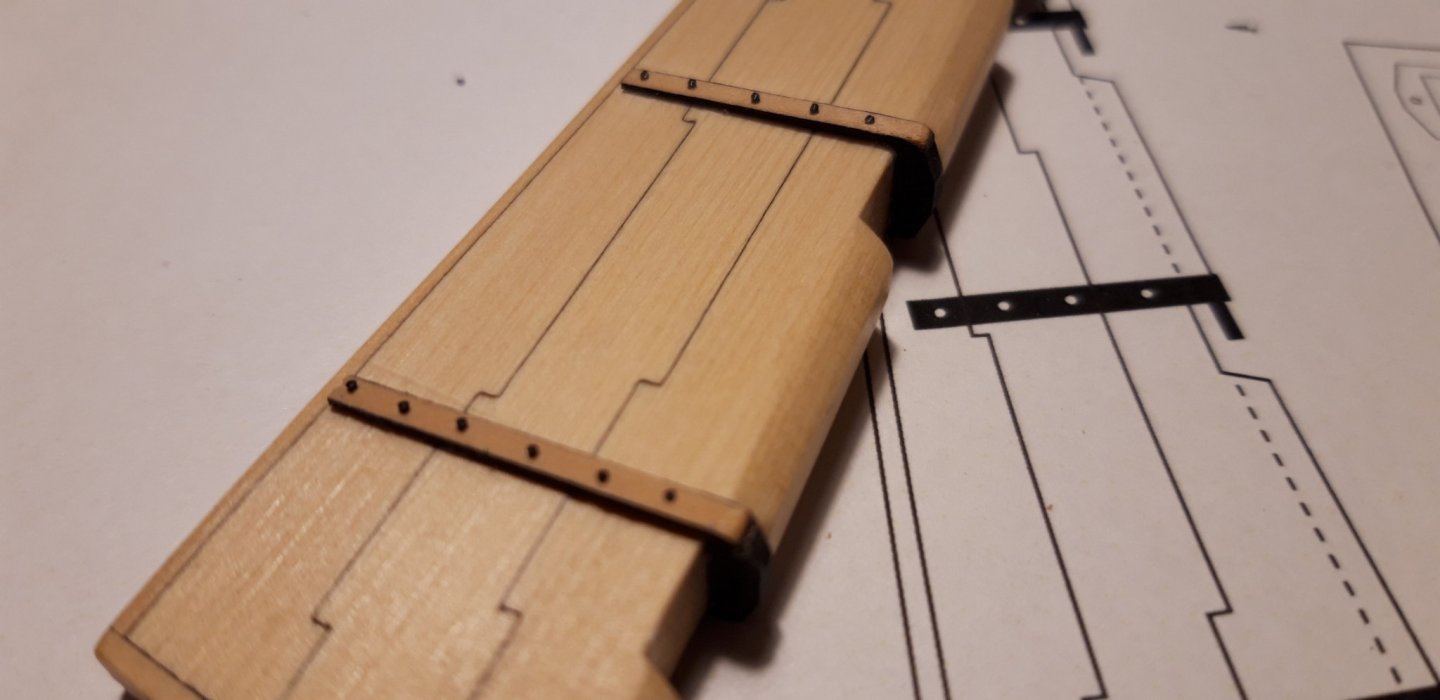
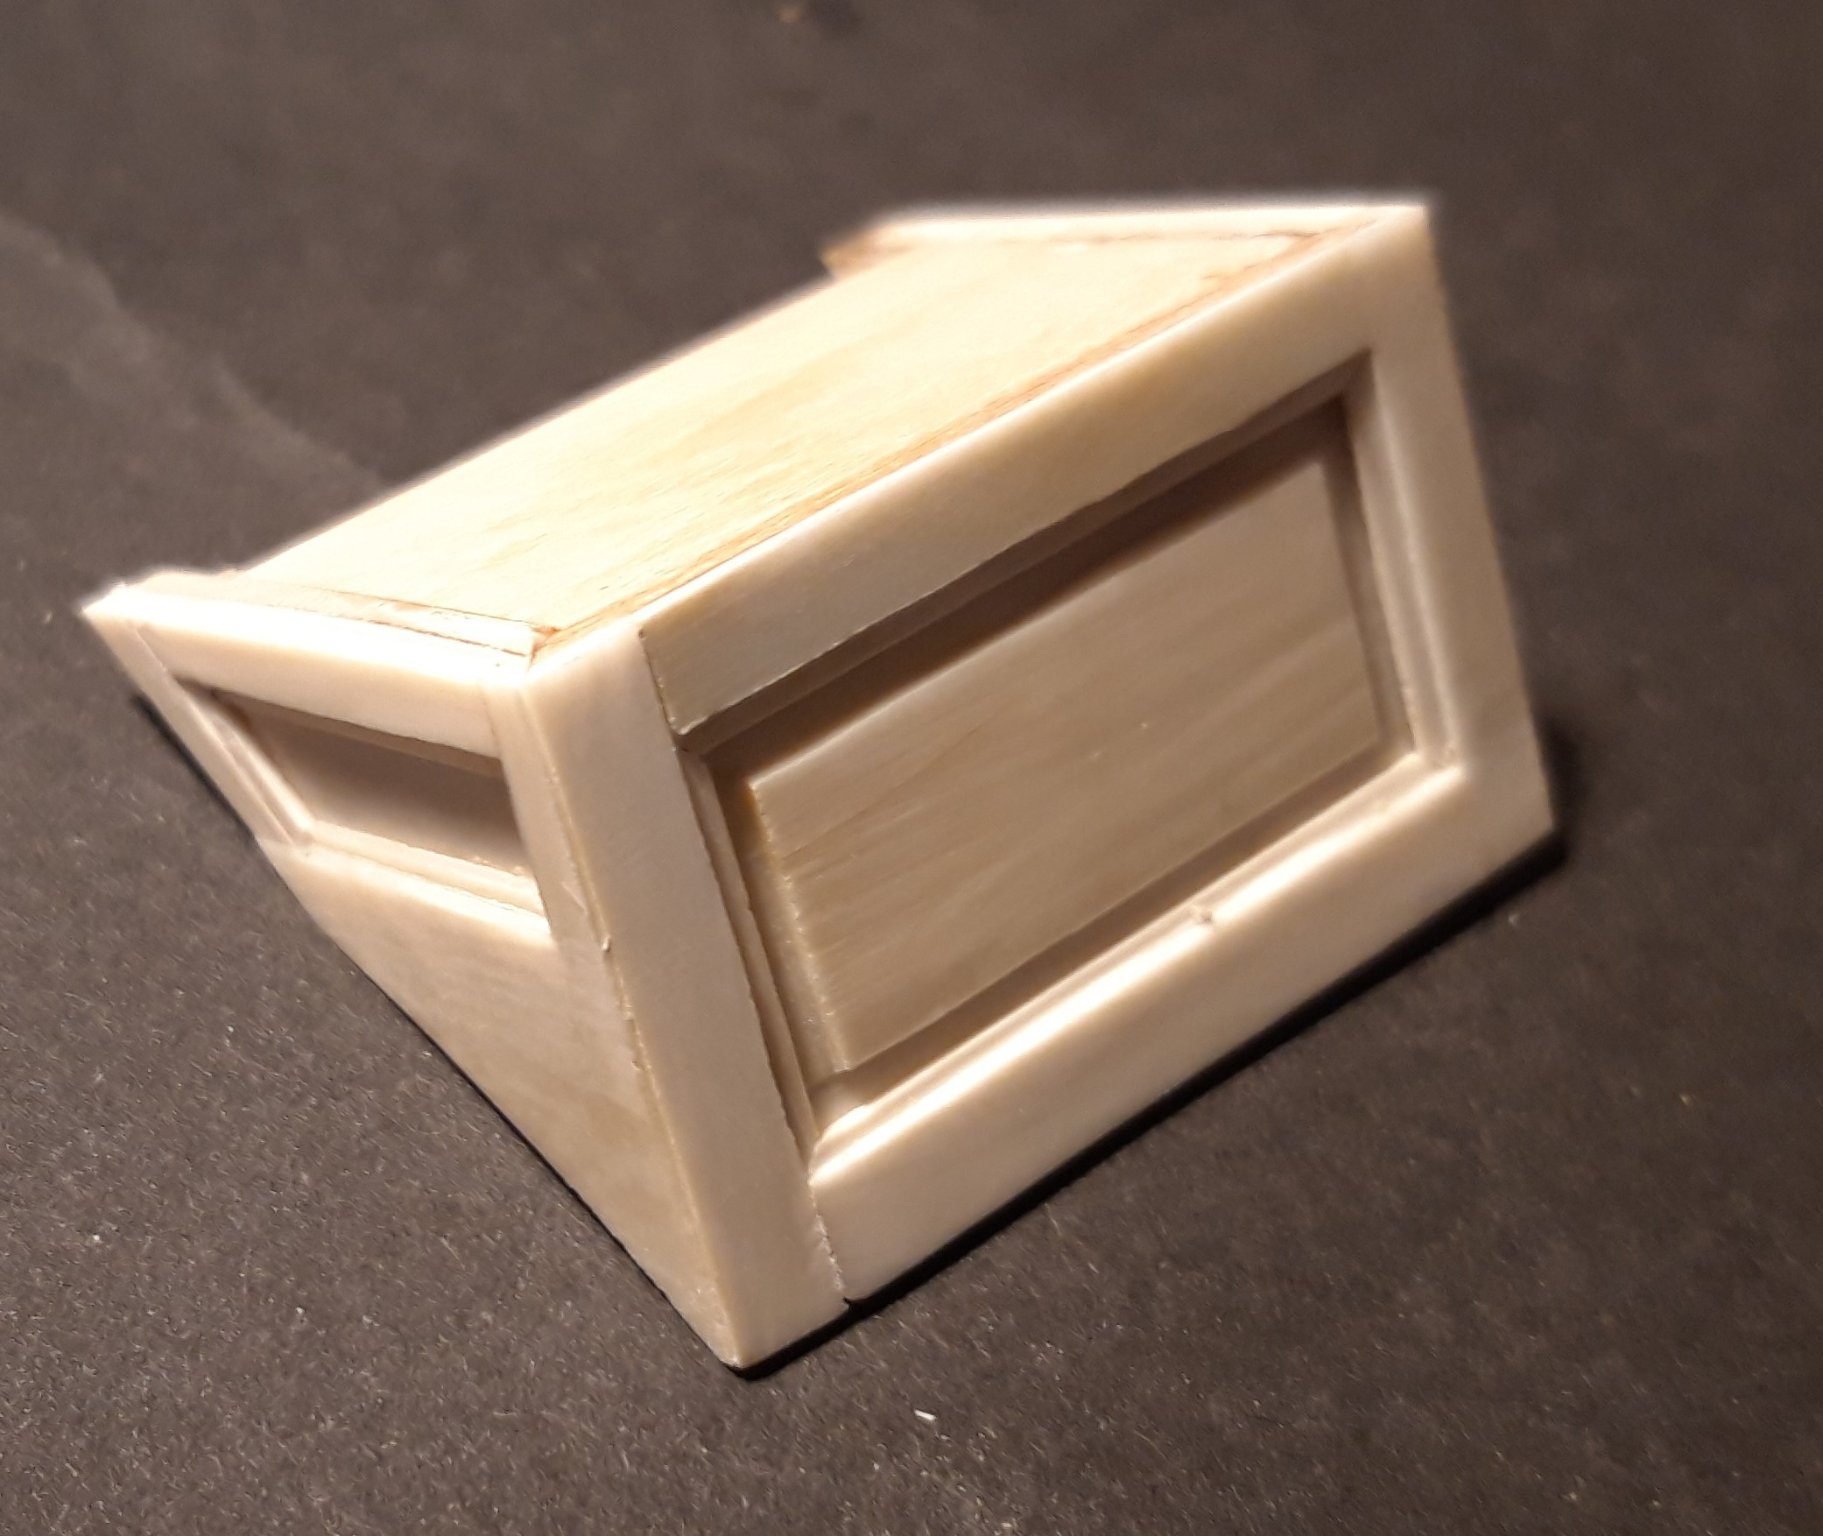
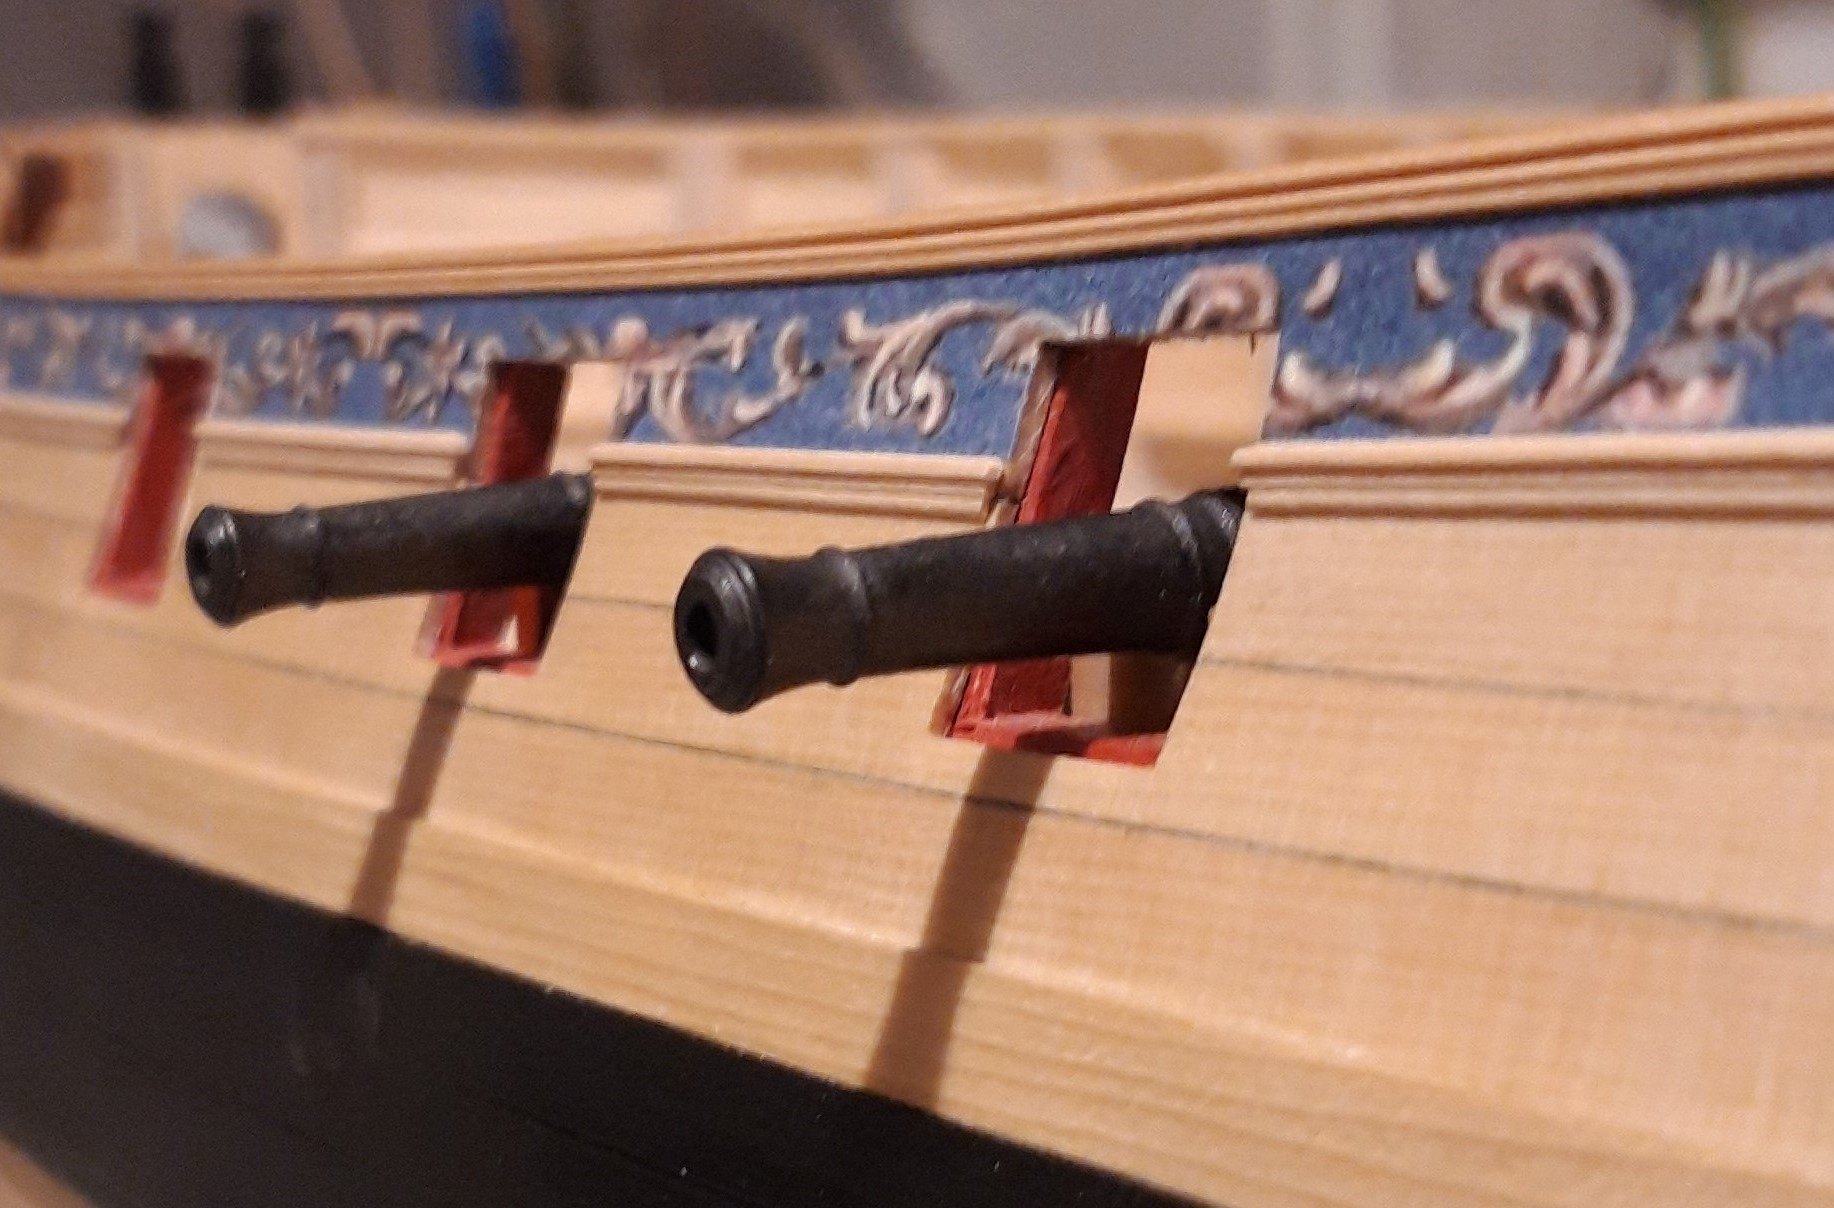
I proceeded with the gunport lids,
what do you think, are they too clumsy? I could make them a bit more narrow.

Matthias
- rafine, FrankWouts, JpR62 and 6 others
-
9
-
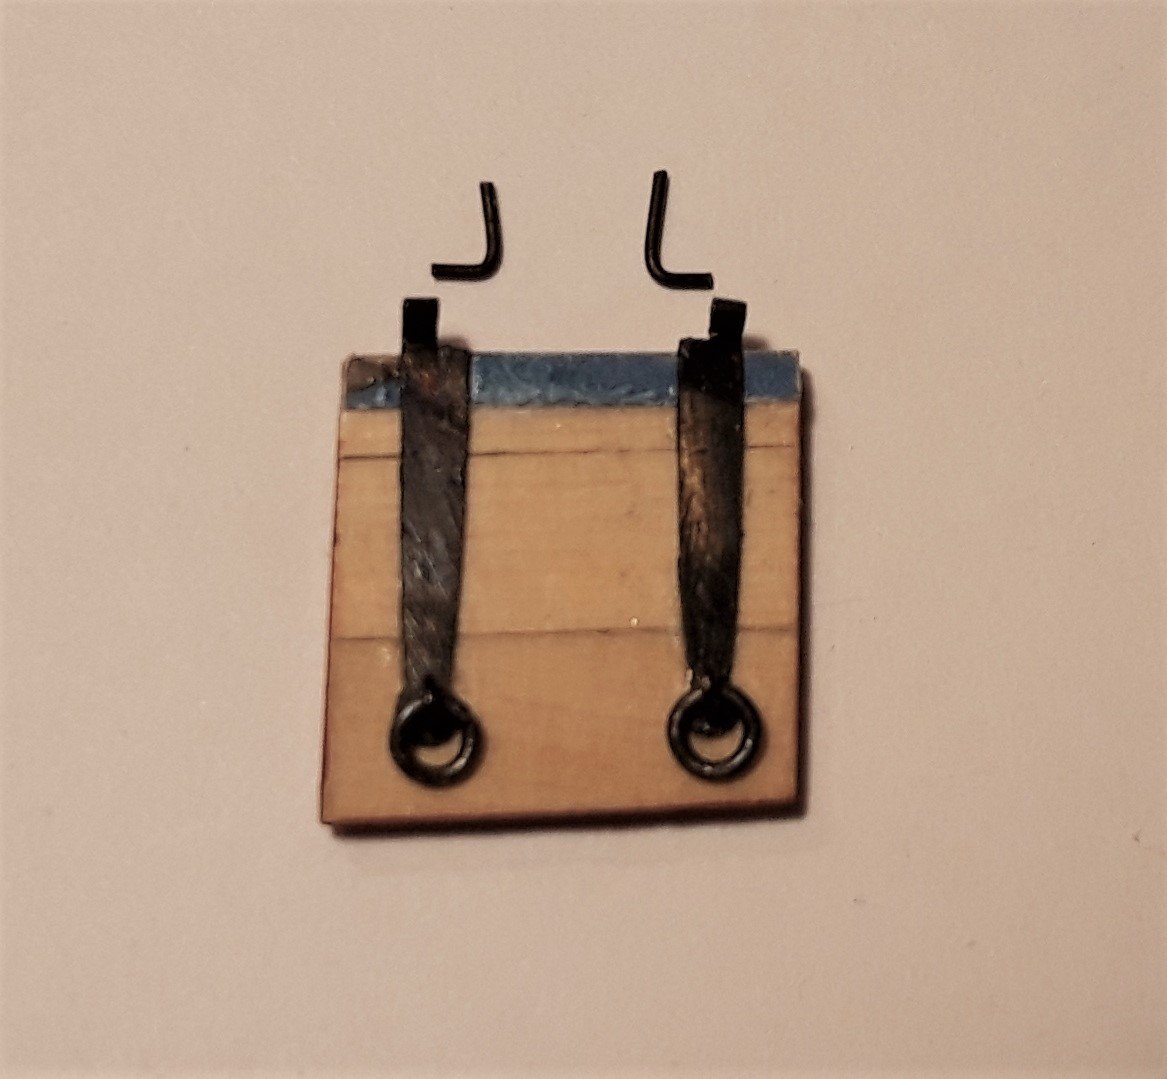
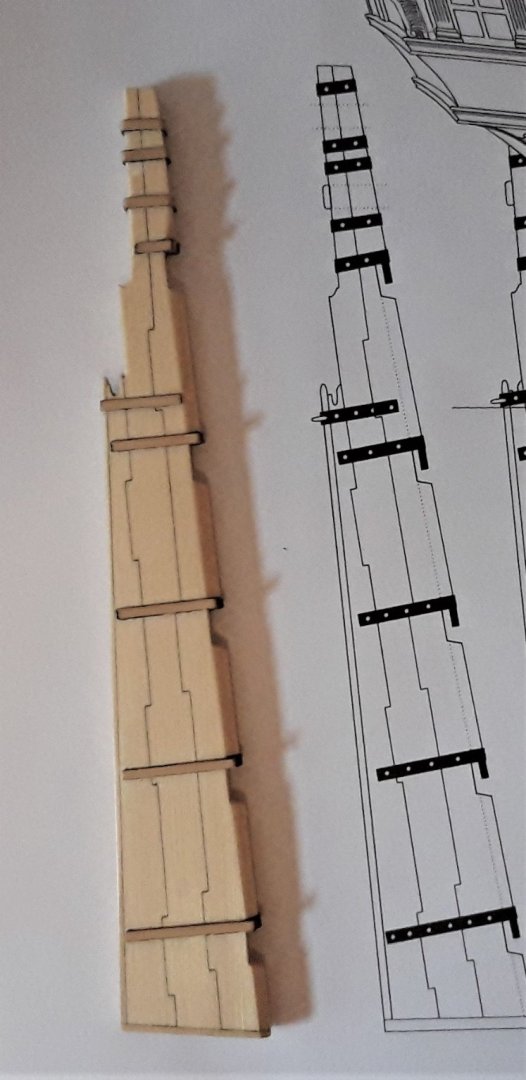
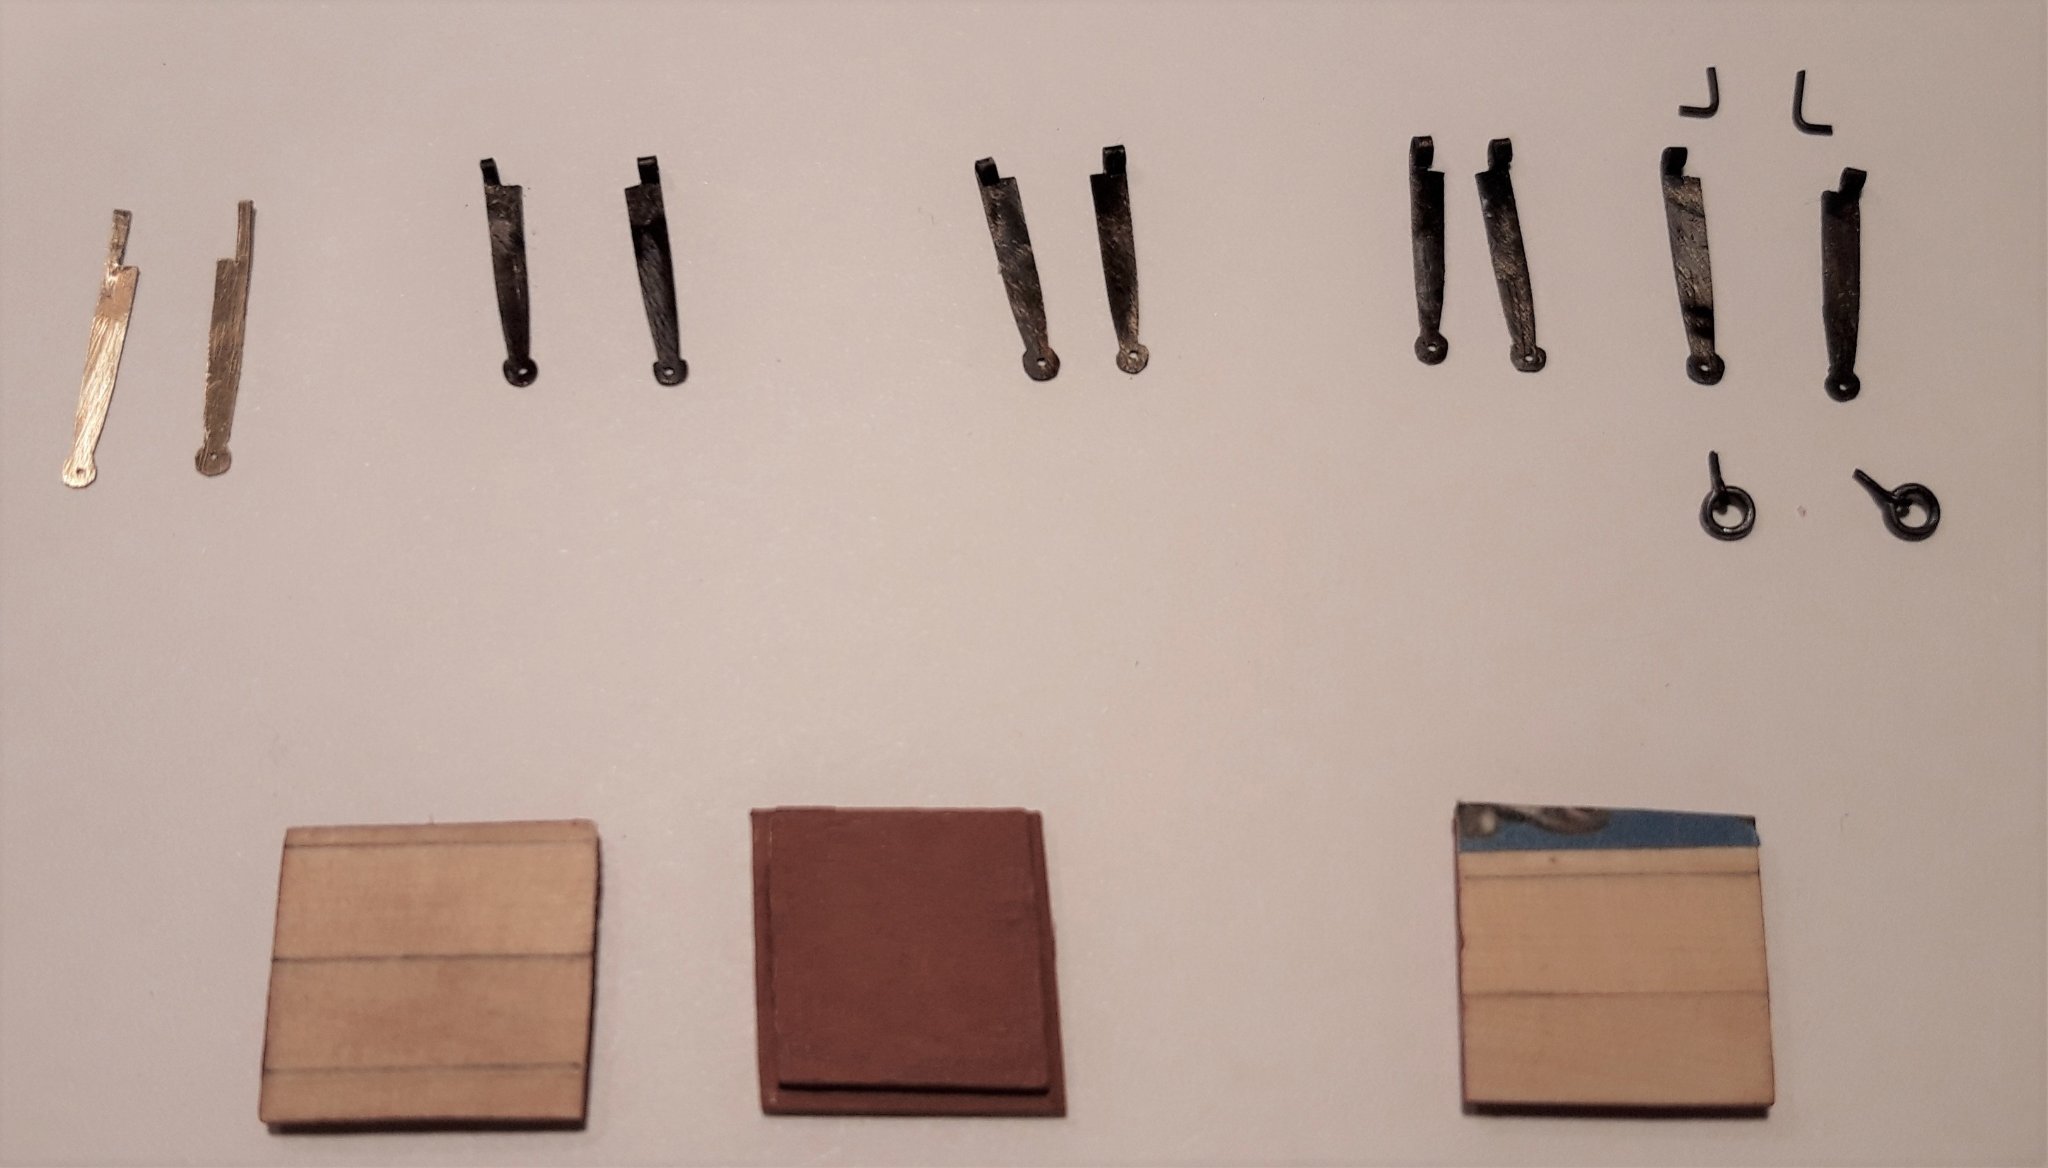
I started with the gunport lids. That is more difficult as I thougt.
First of all I made the wooden lids, it took me some time to make a tight fit.

Then I started with the hinges from brass.
So far for now.
Matthias
- Ryland Craze, Chuck, JpR62 and 11 others
-
14
-
Thank you.
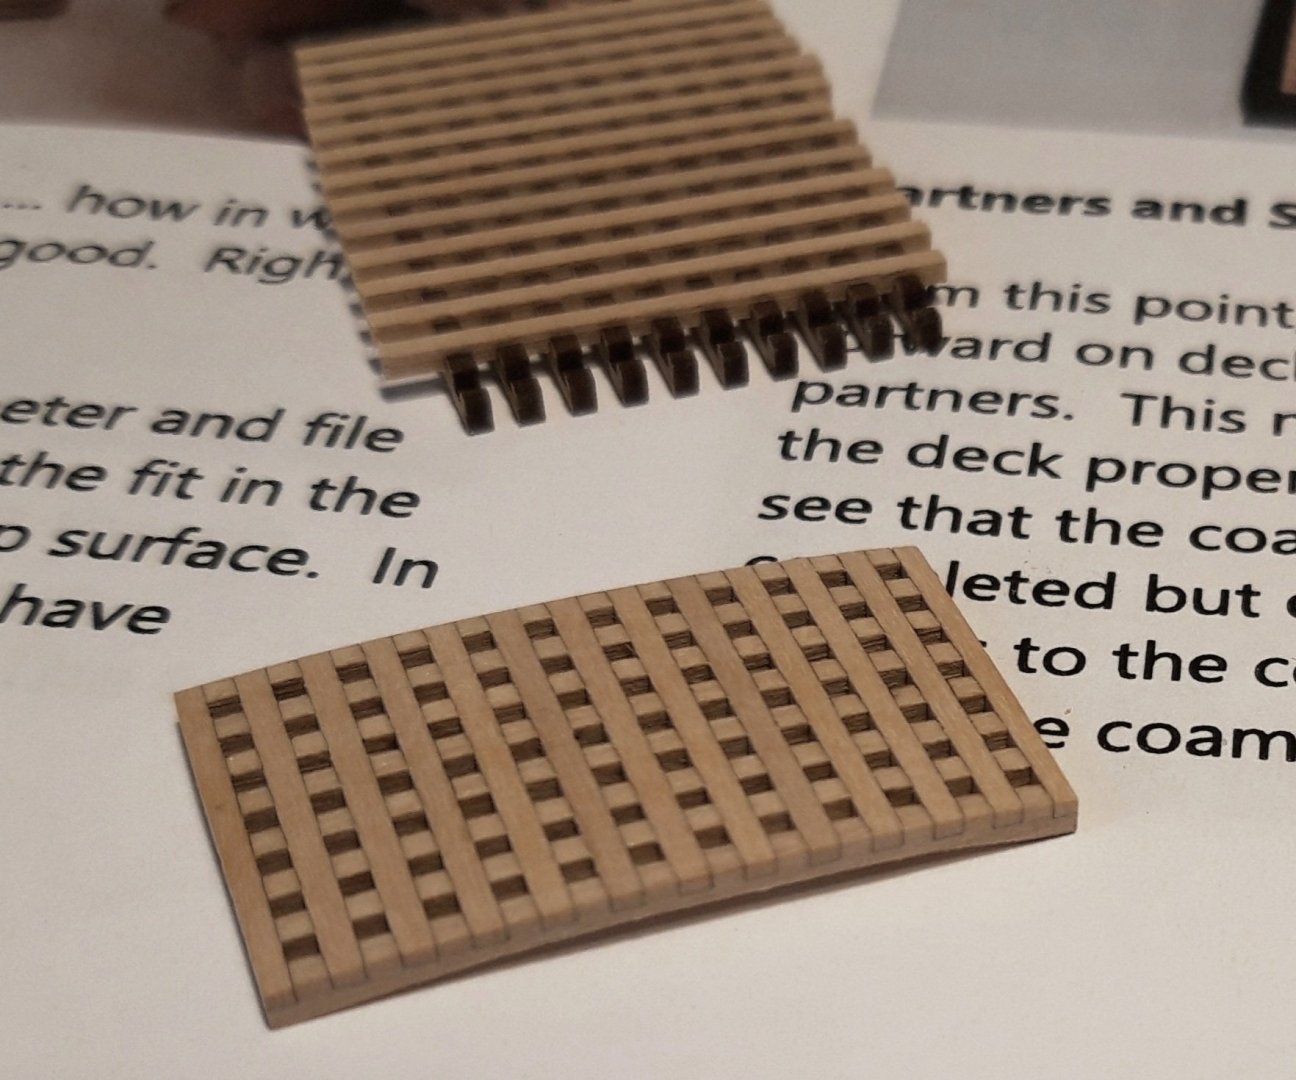
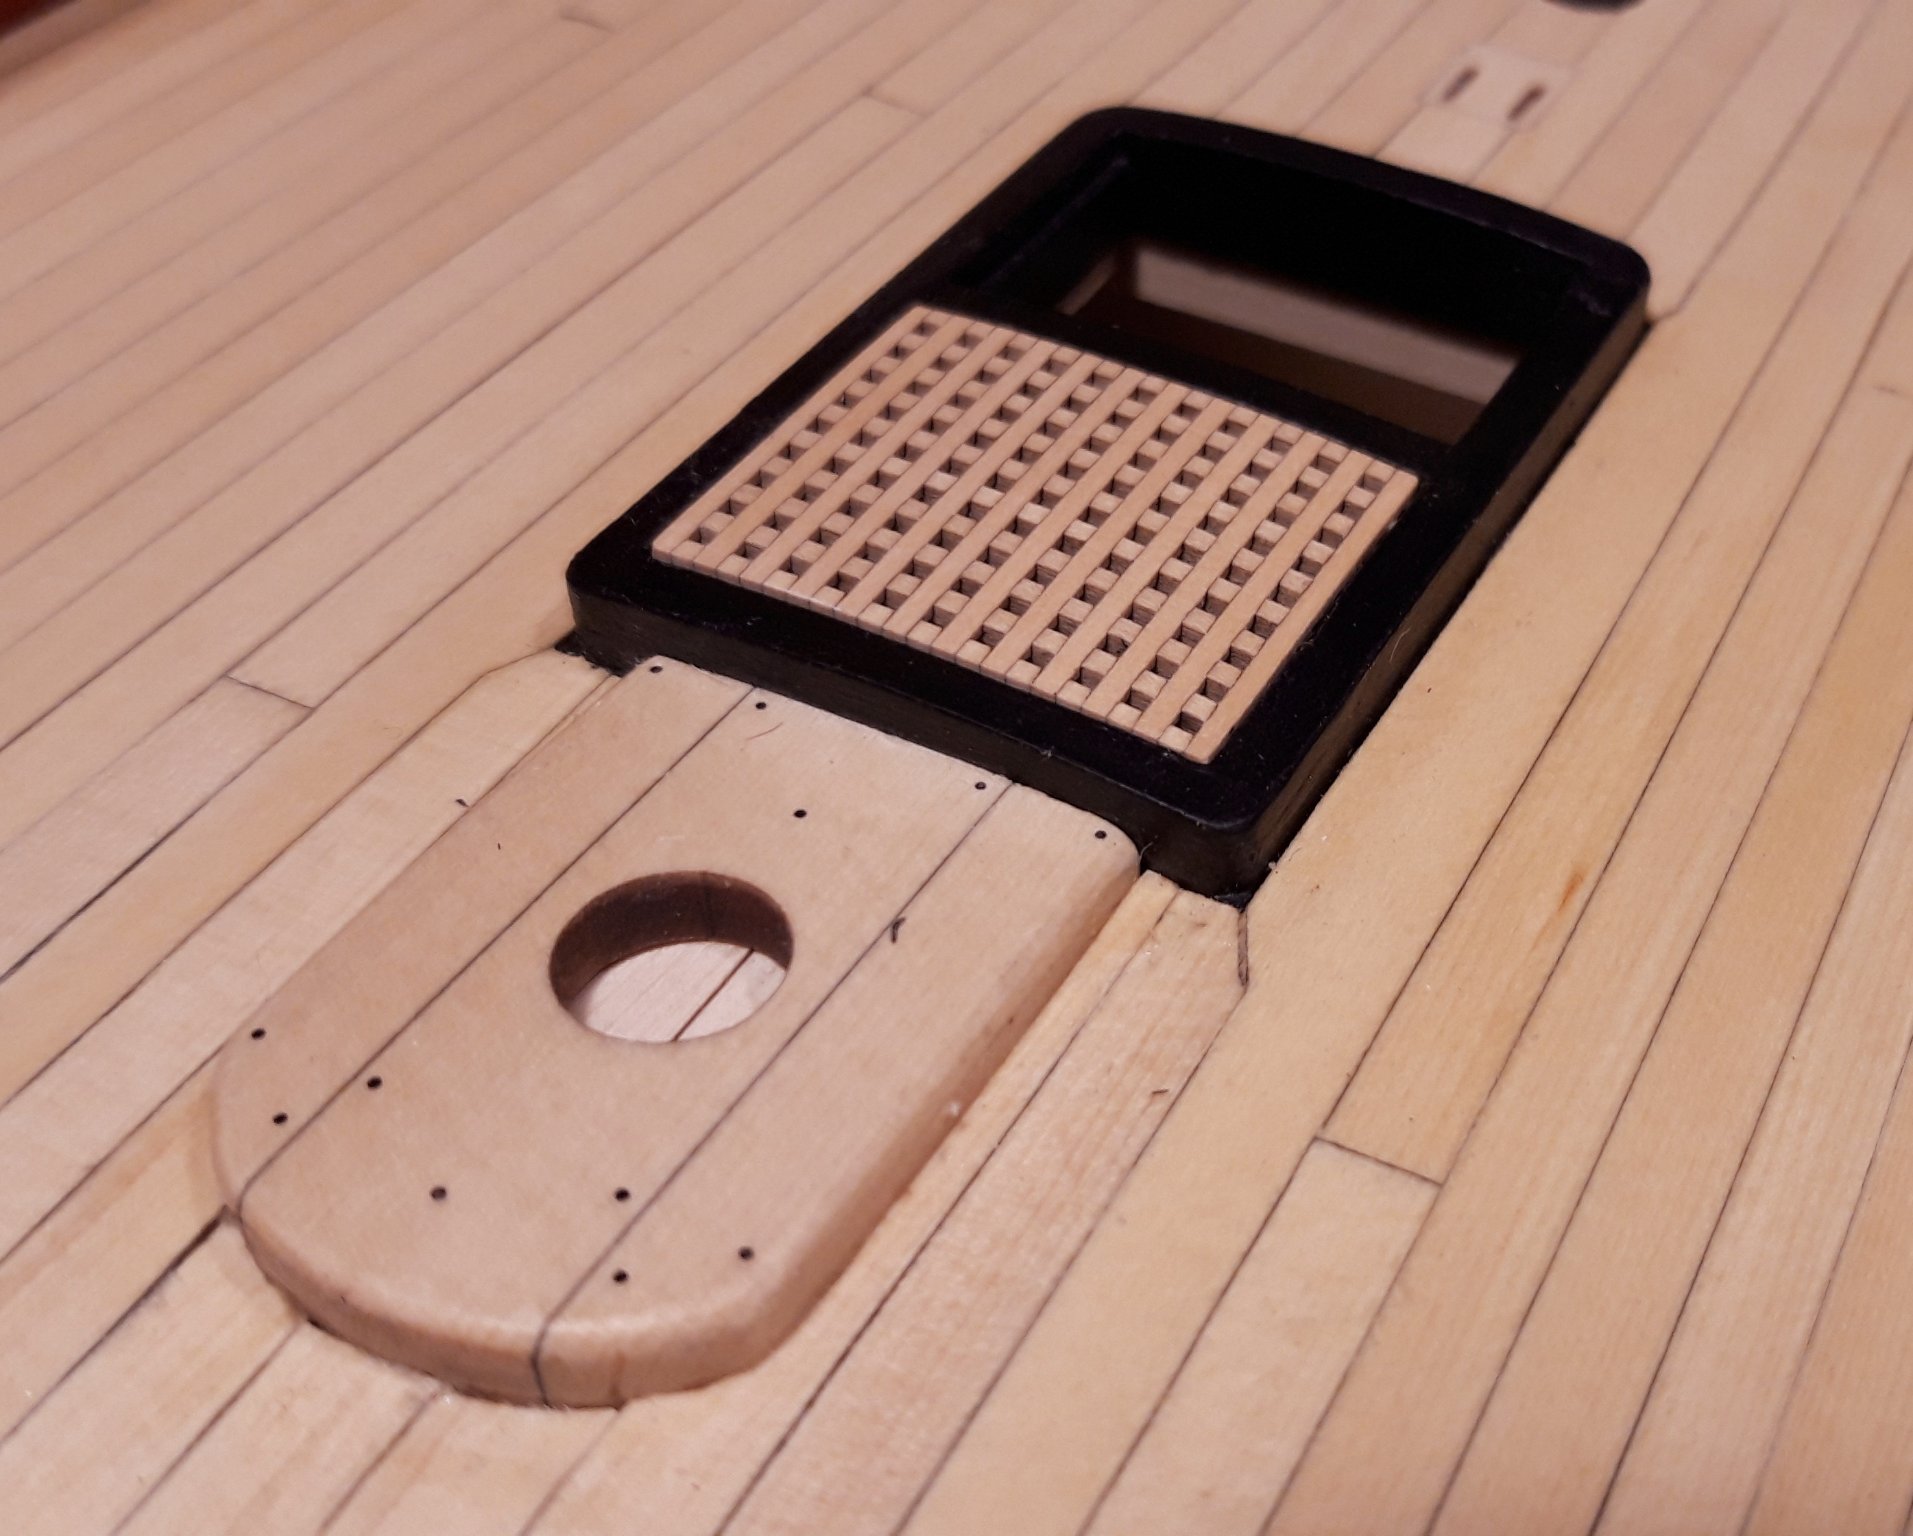
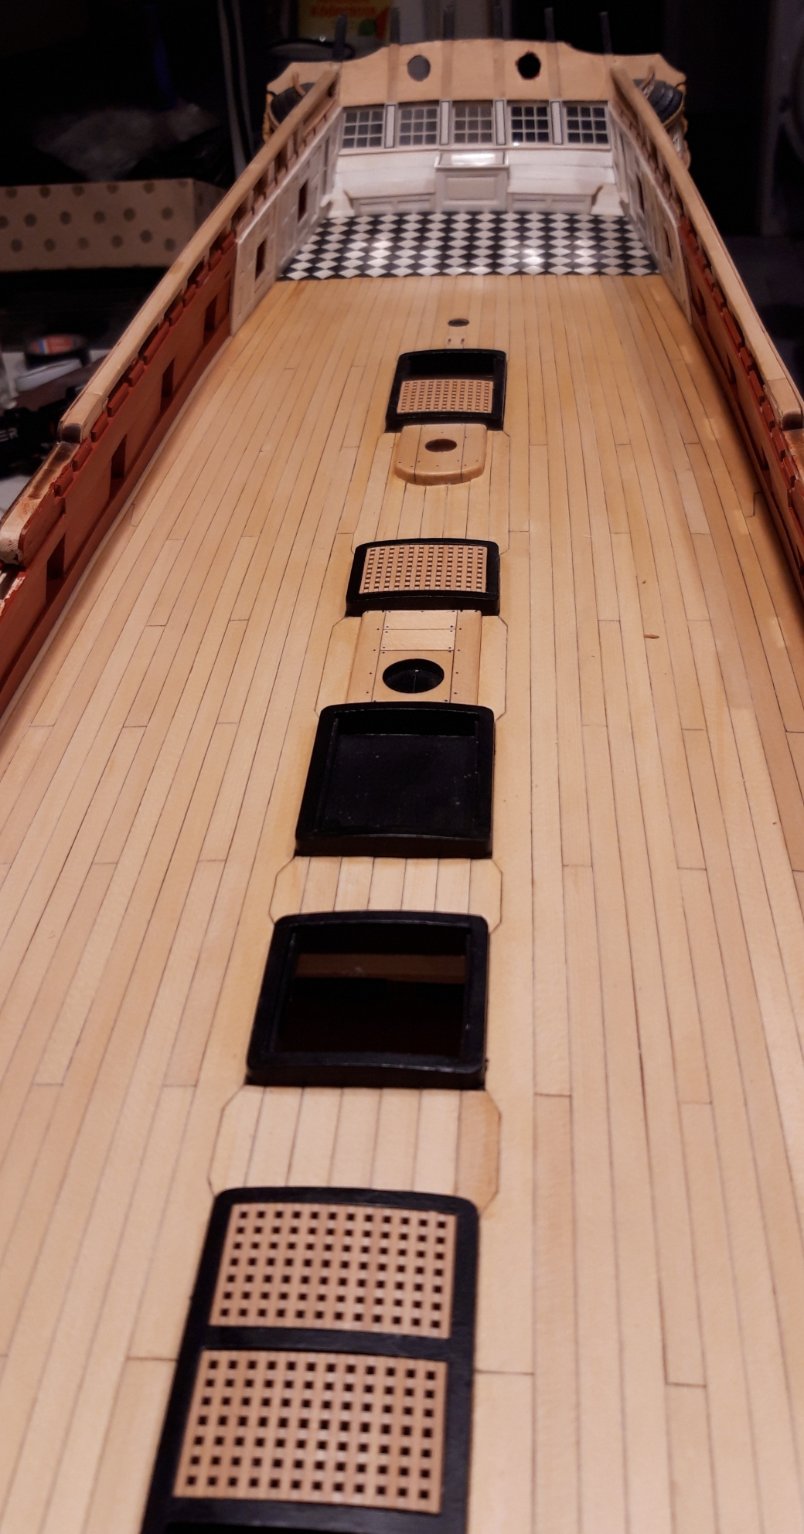
The gratings are almost done now. Two of them have to dry over night, I will complete them tomorrow.
I sanded them down to almost 3/64" now. Twice one of the strips Fell out, so I had to work very careful.
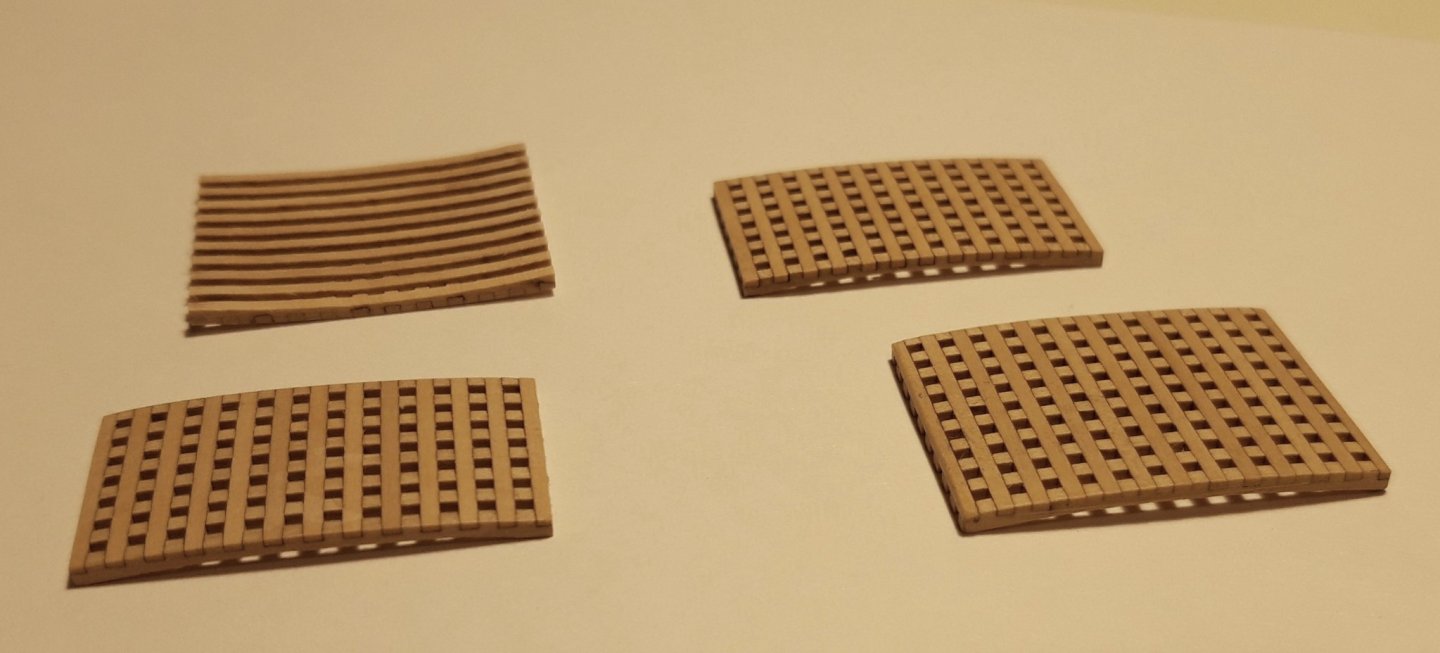
I also had to increase the hight of the rabbet for a good fit in the coamings.

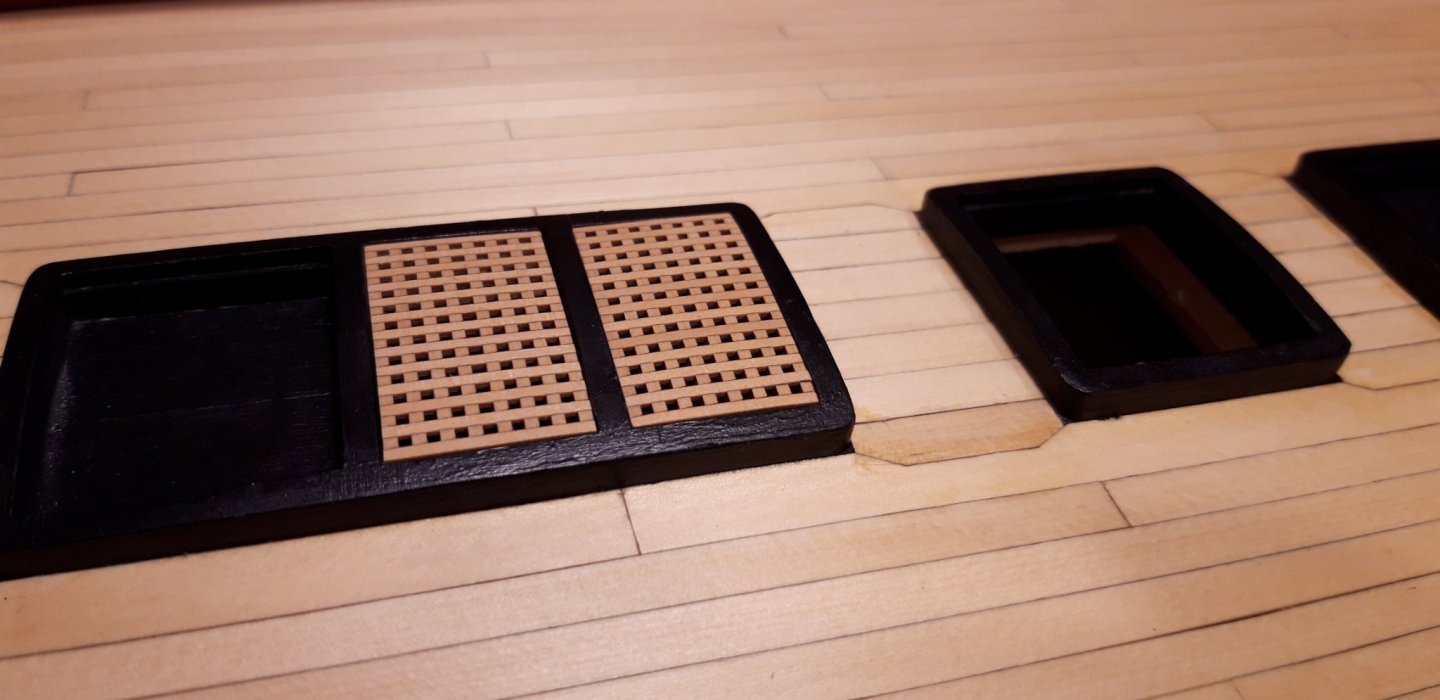
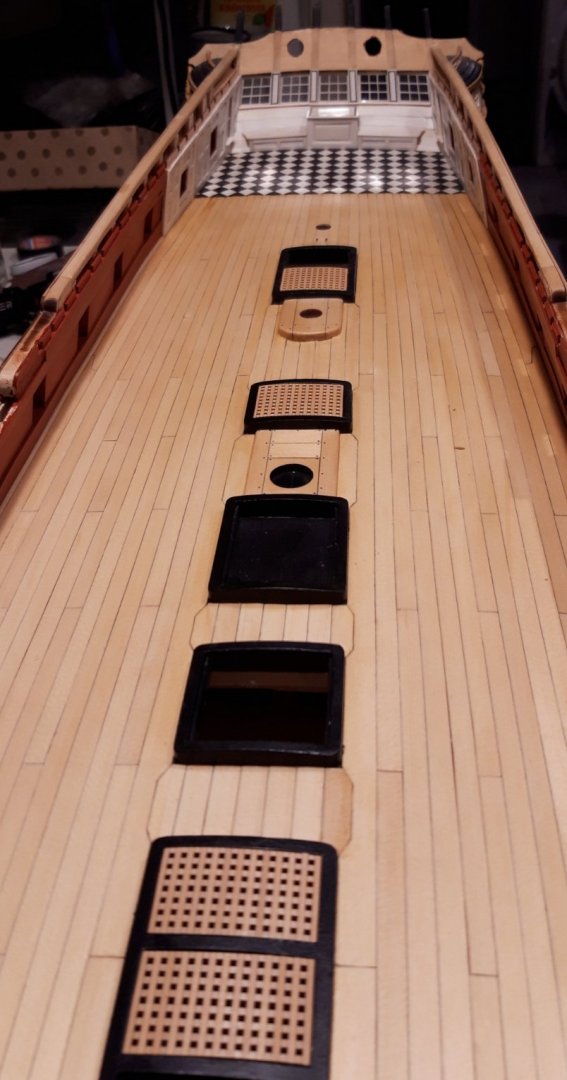
So well designed! Thank you Chuck!!
Matthias
-
The grating is about 1,6 mm or 1/16" thick now. Is that how you do it Chuck?
- Matt D, Saburo, Ryland Craze and 2 others
-
5
-
-
Thank you all for the likes and comments,
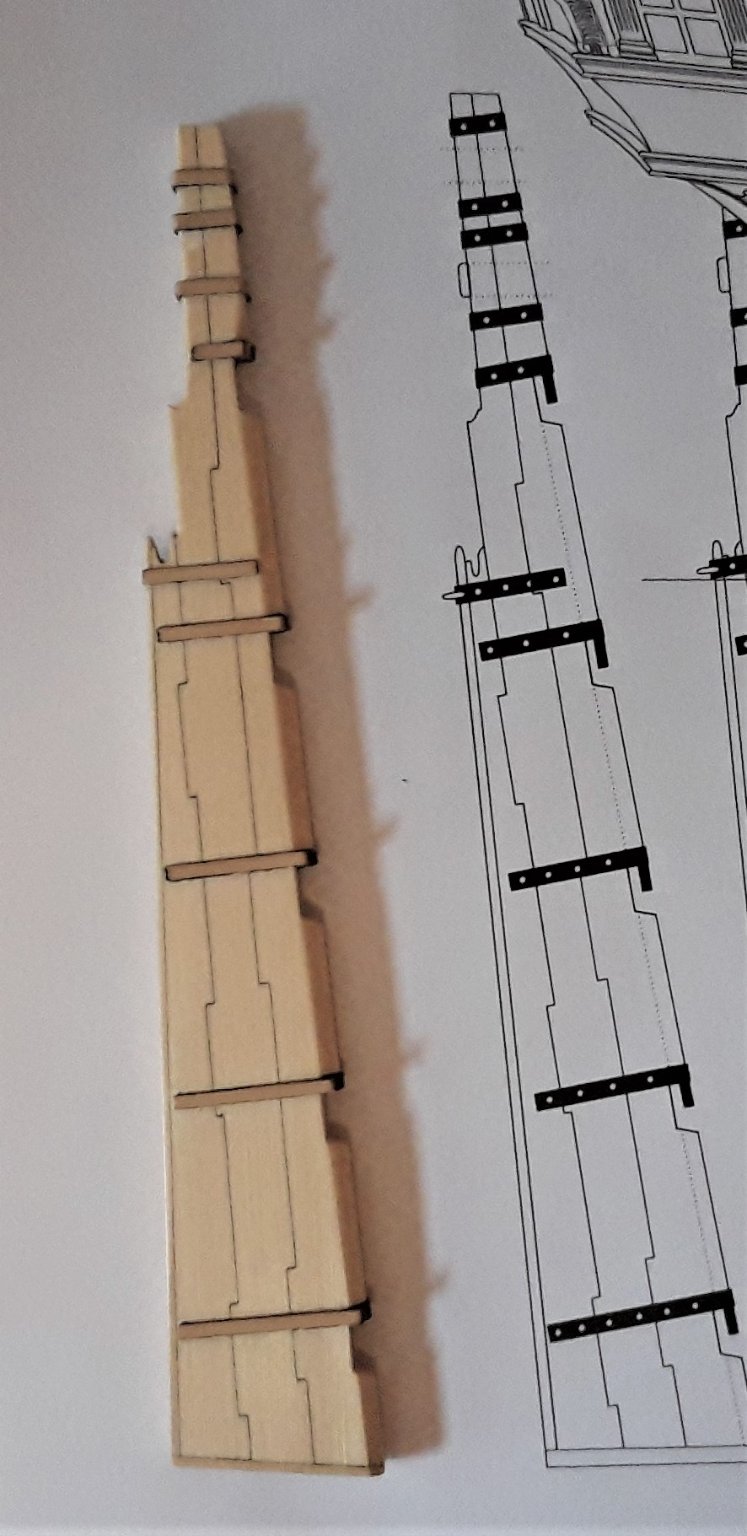
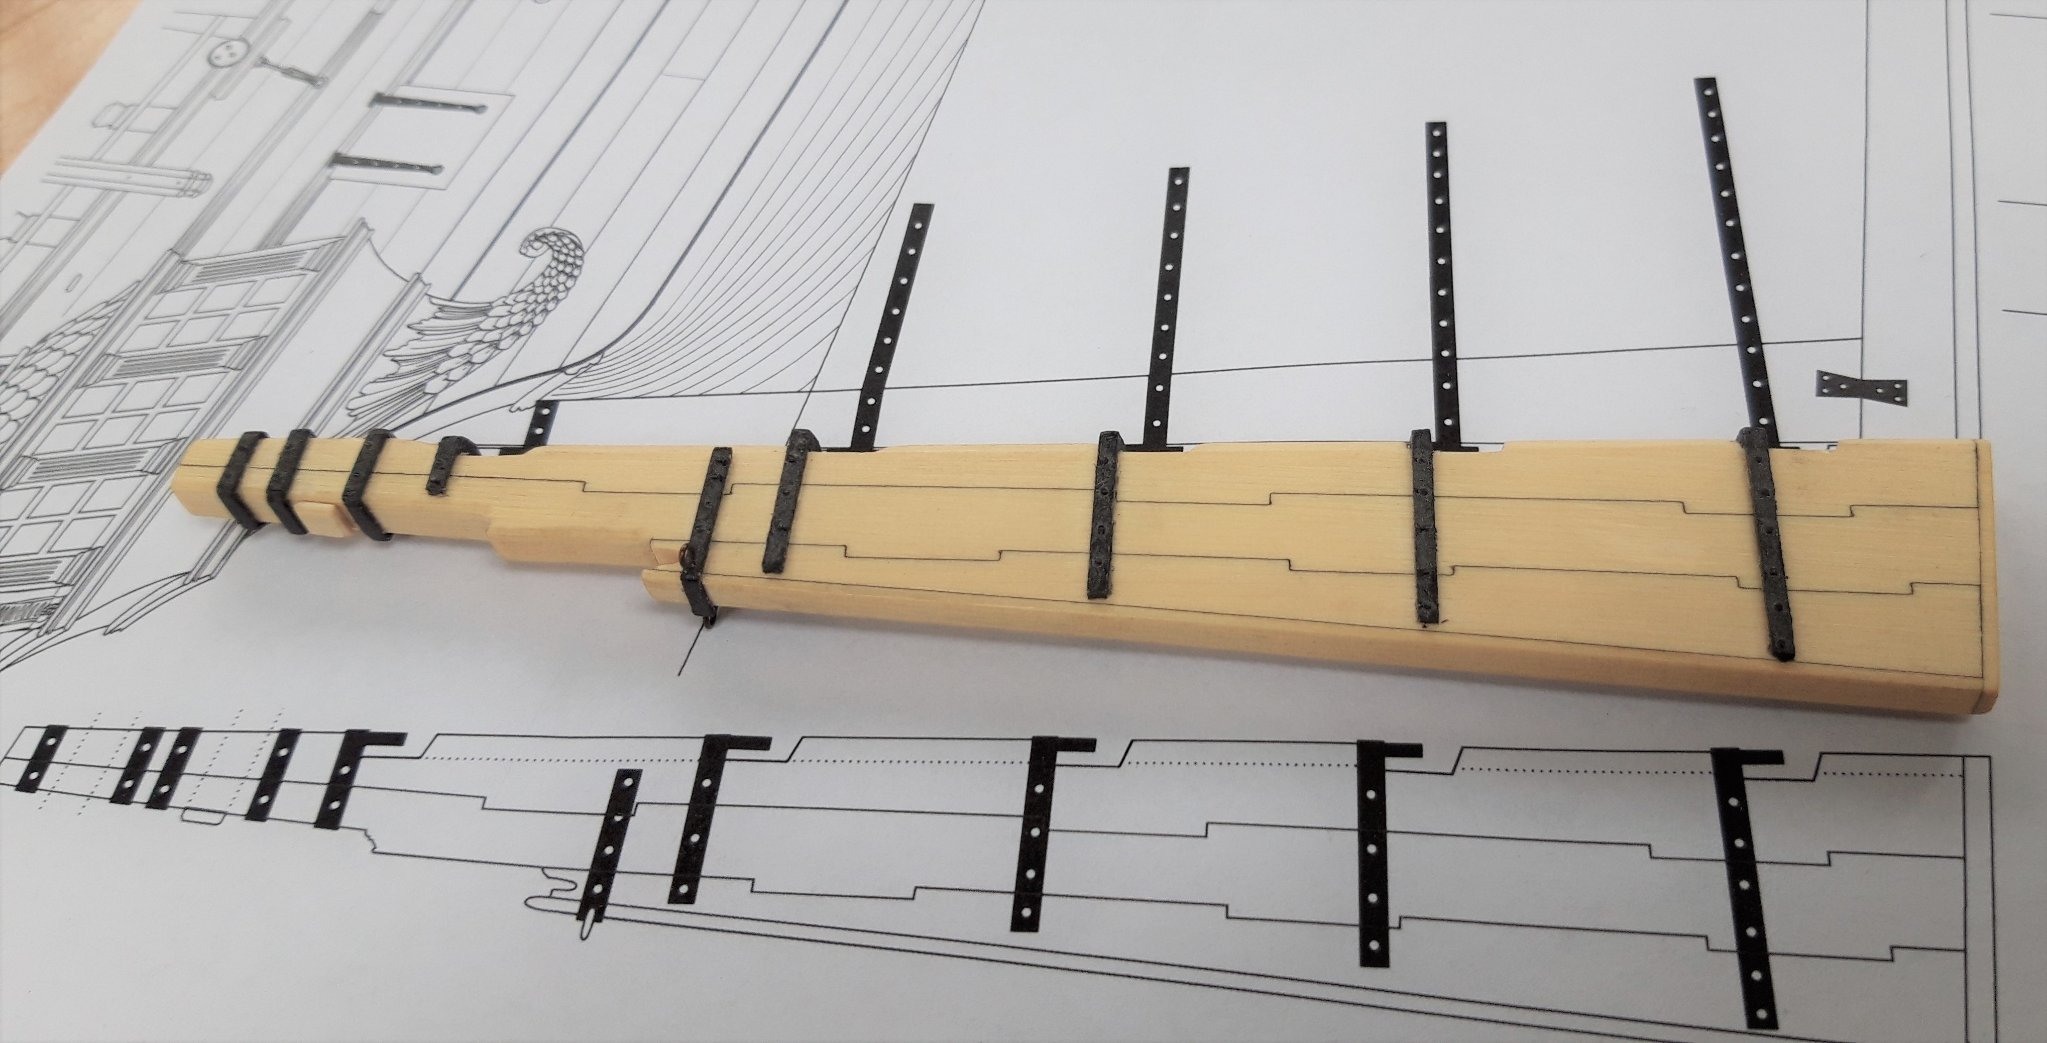
I proceeded with the rudder, wich was so incredibly well designed by Chuck.
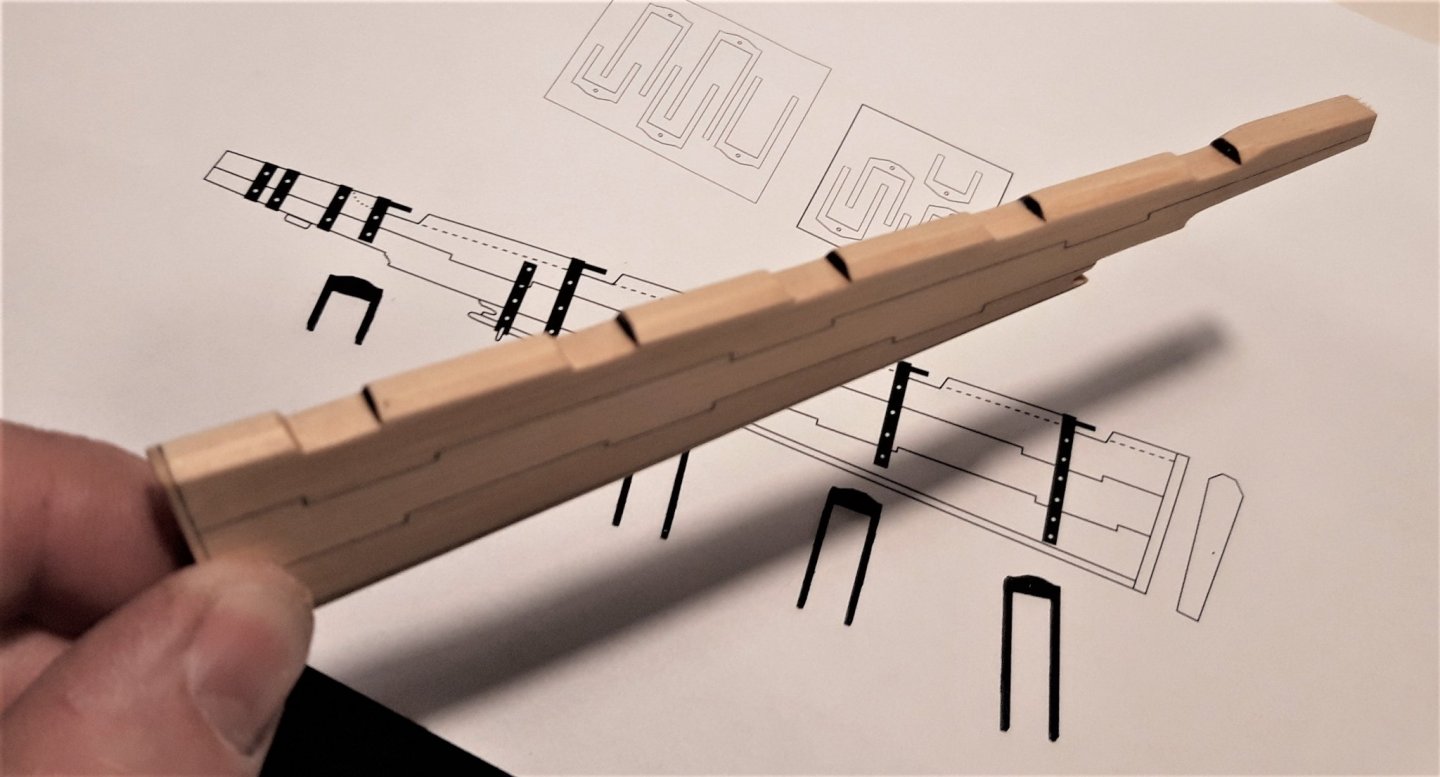
Just following the step by step instructions


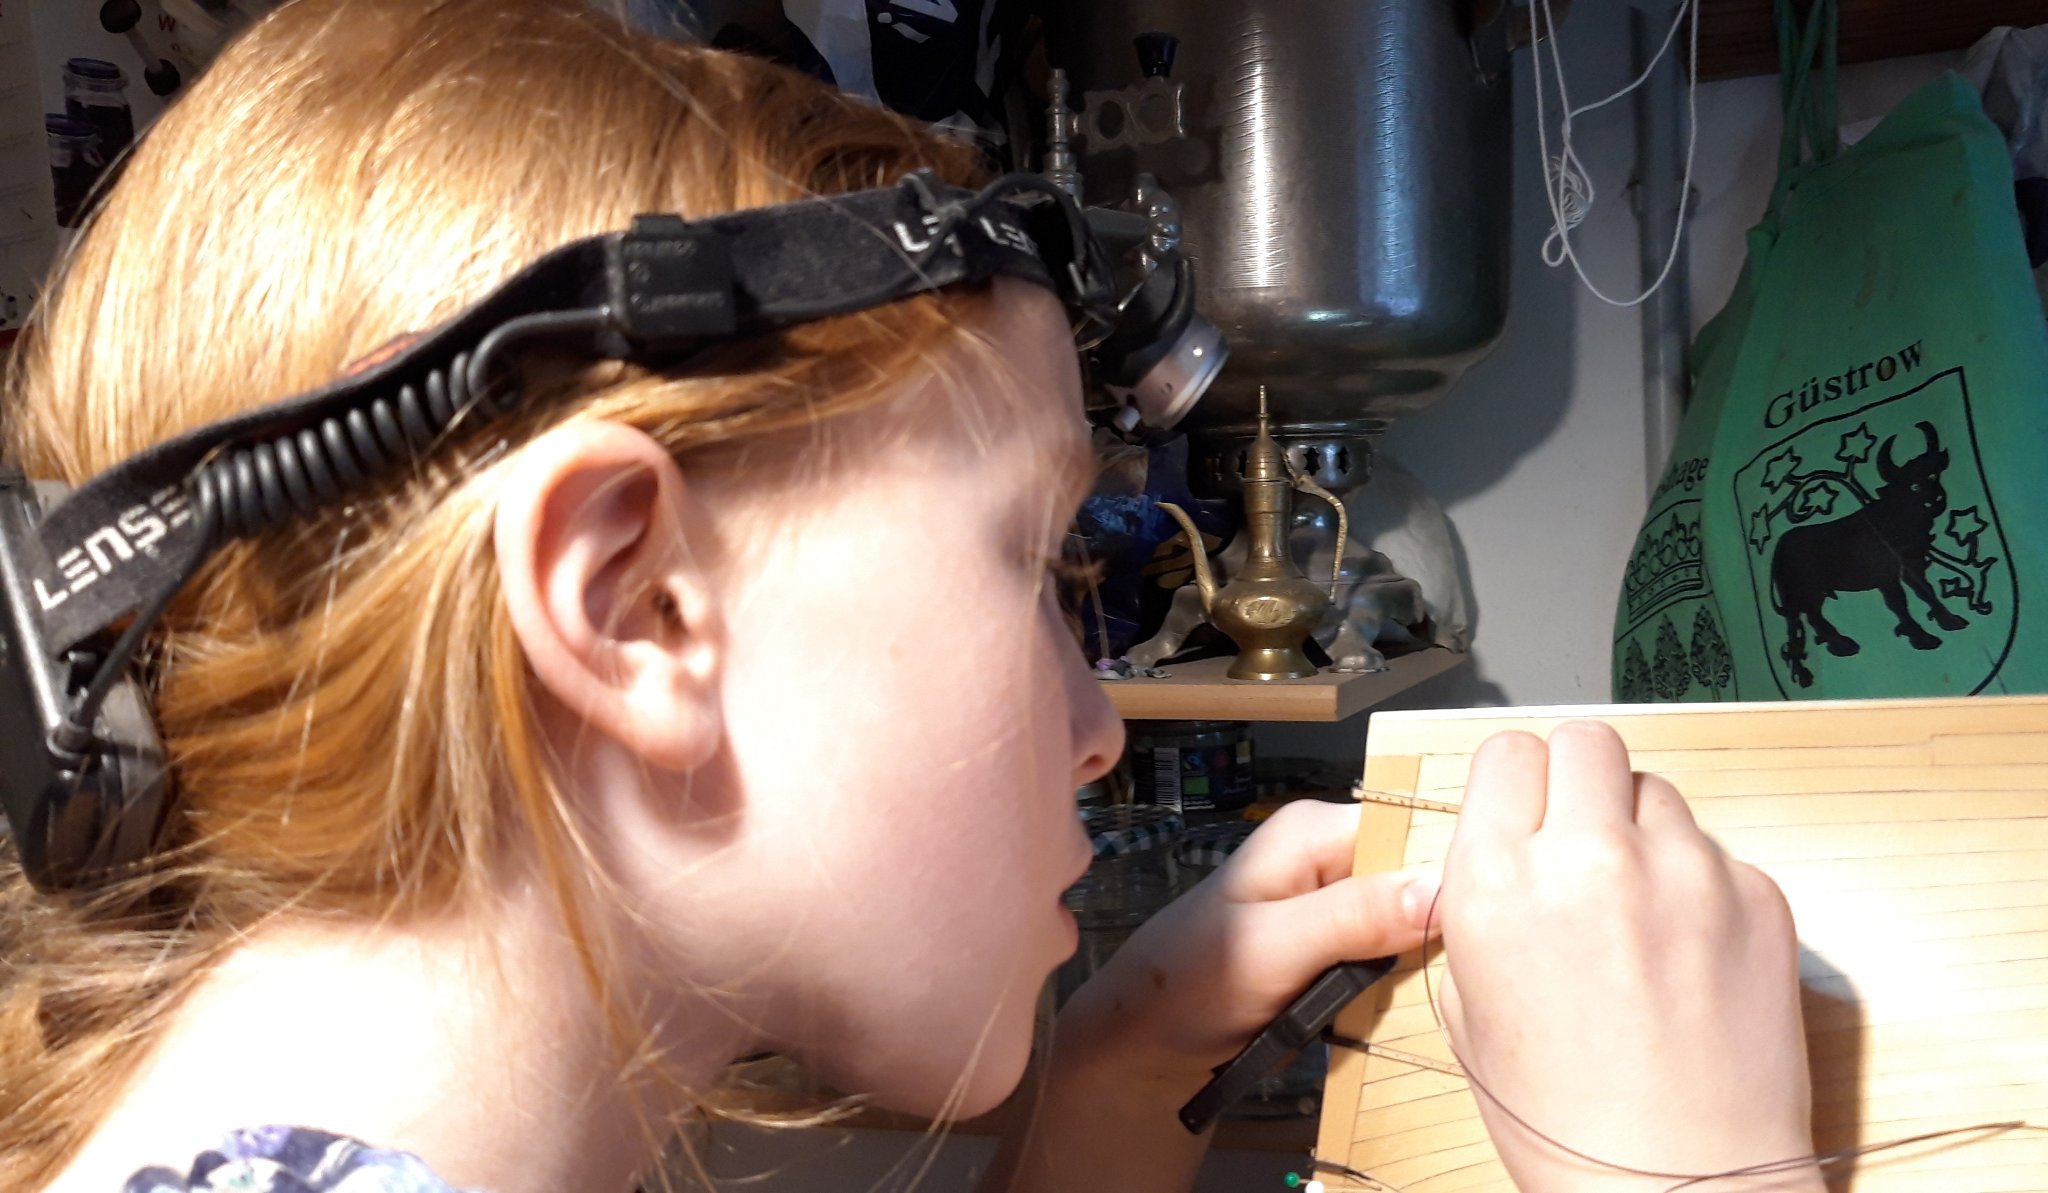
She loves doing the fiddly things and her eyes are better than mine anyway...
Not much left to do, and I can turn the hull back over and mount the rudder in its place.
Matthias
-
-
-
-
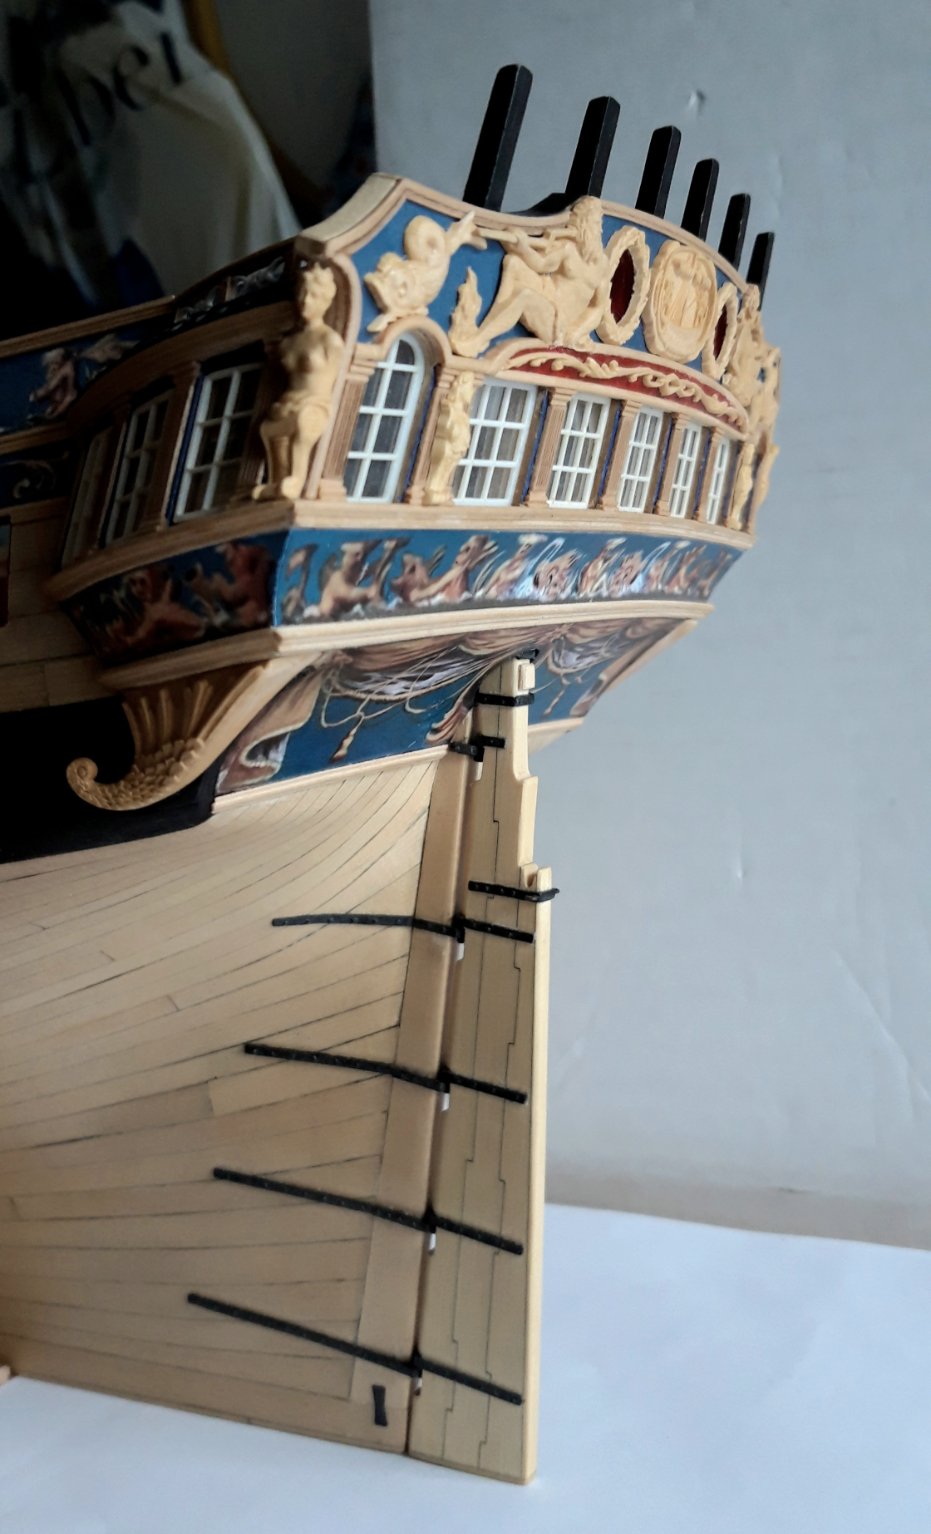
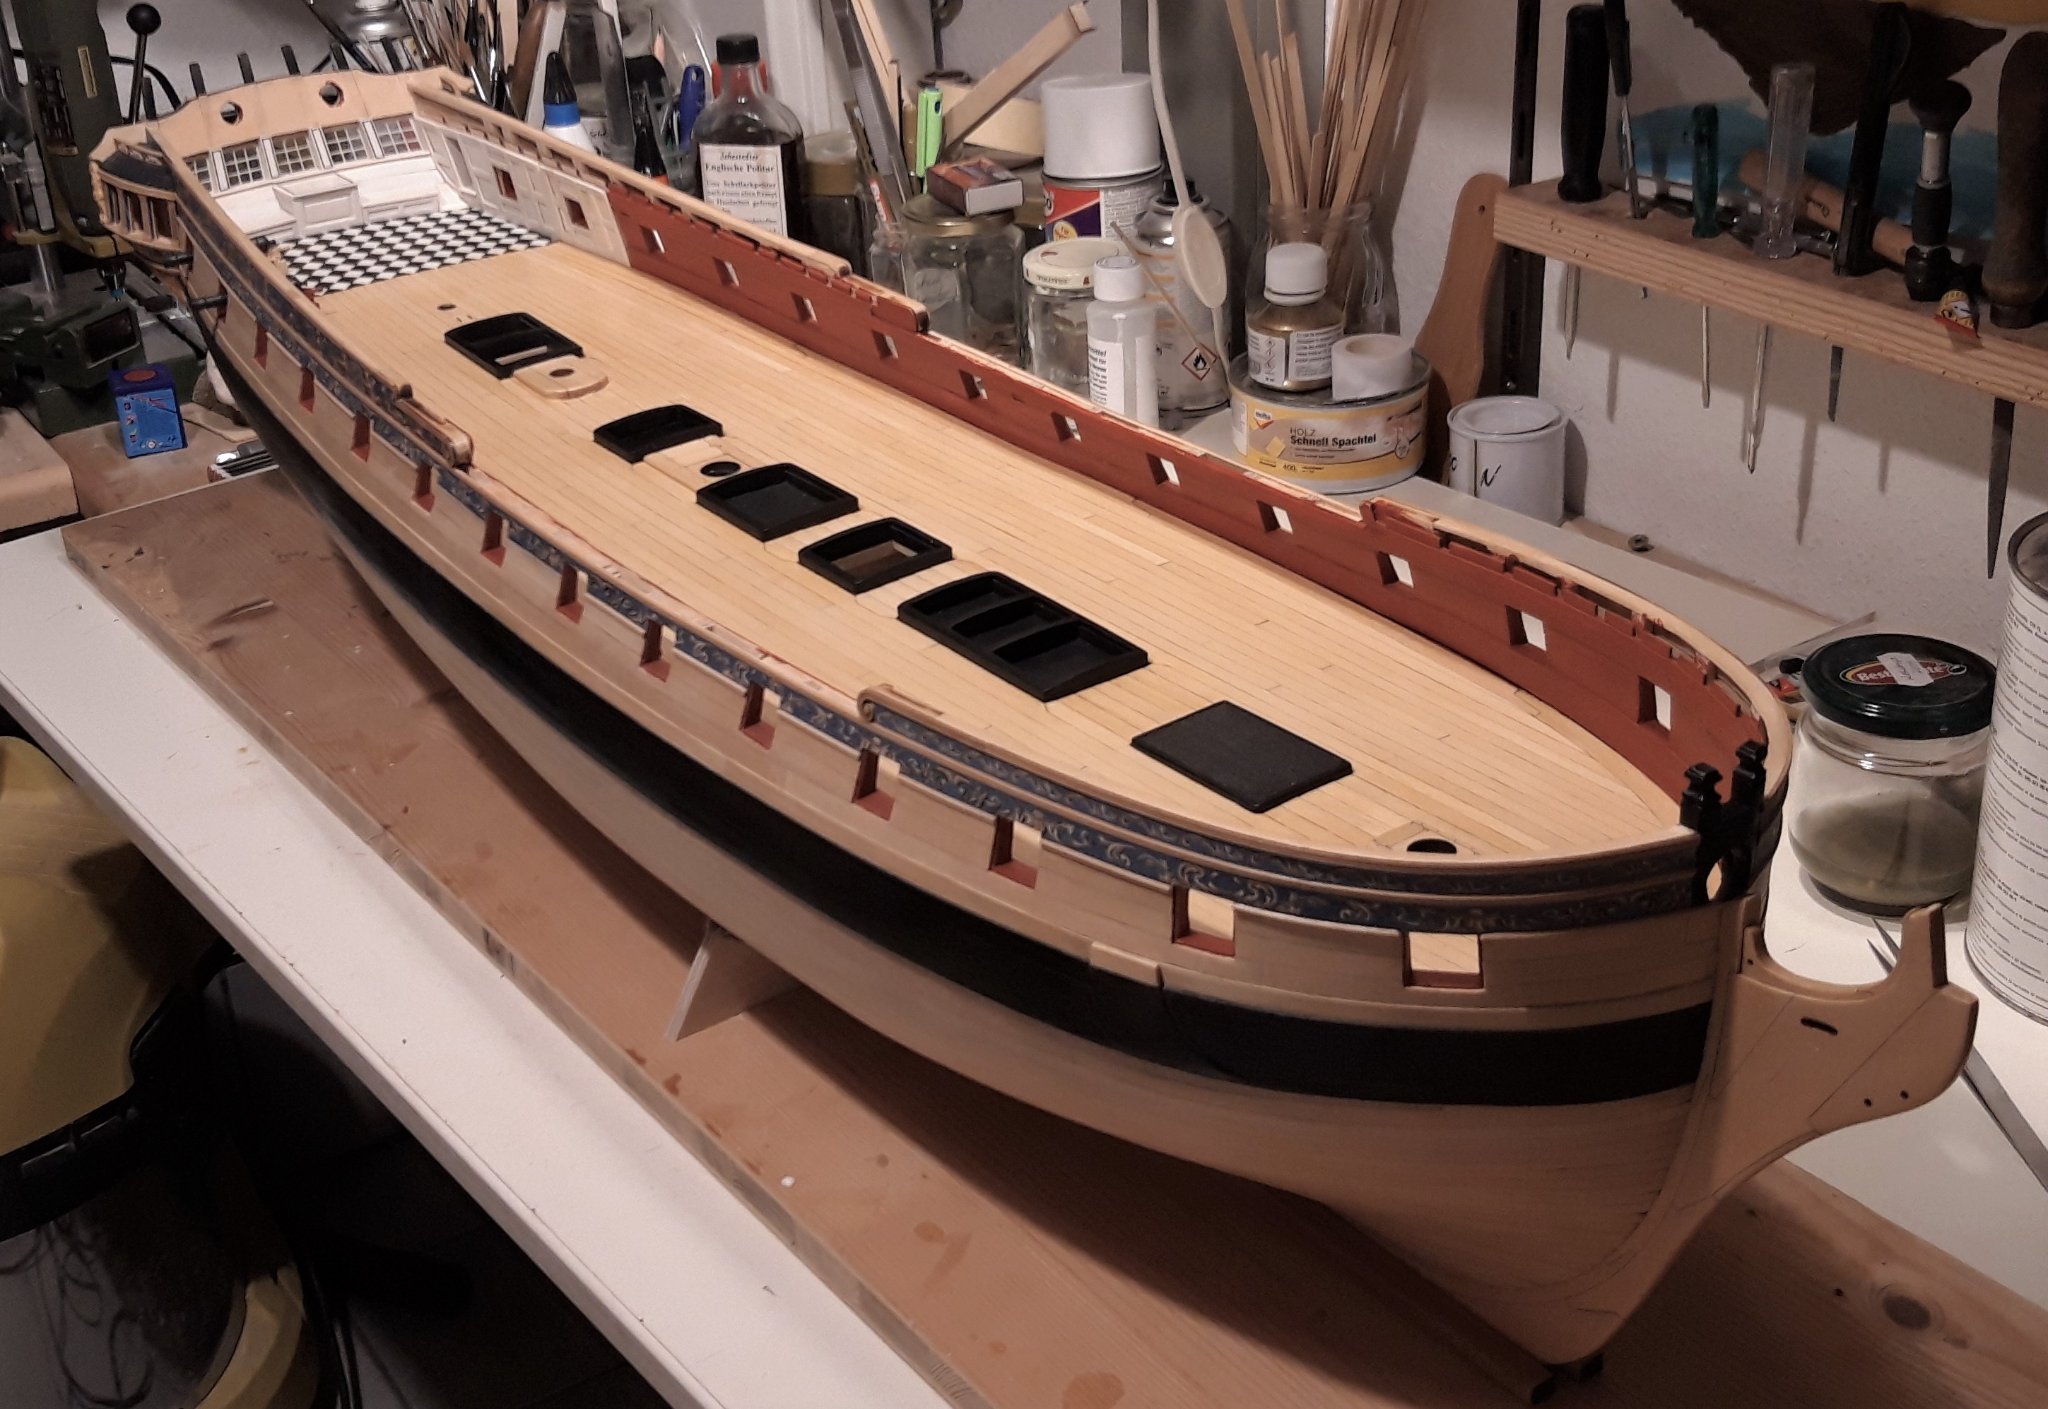
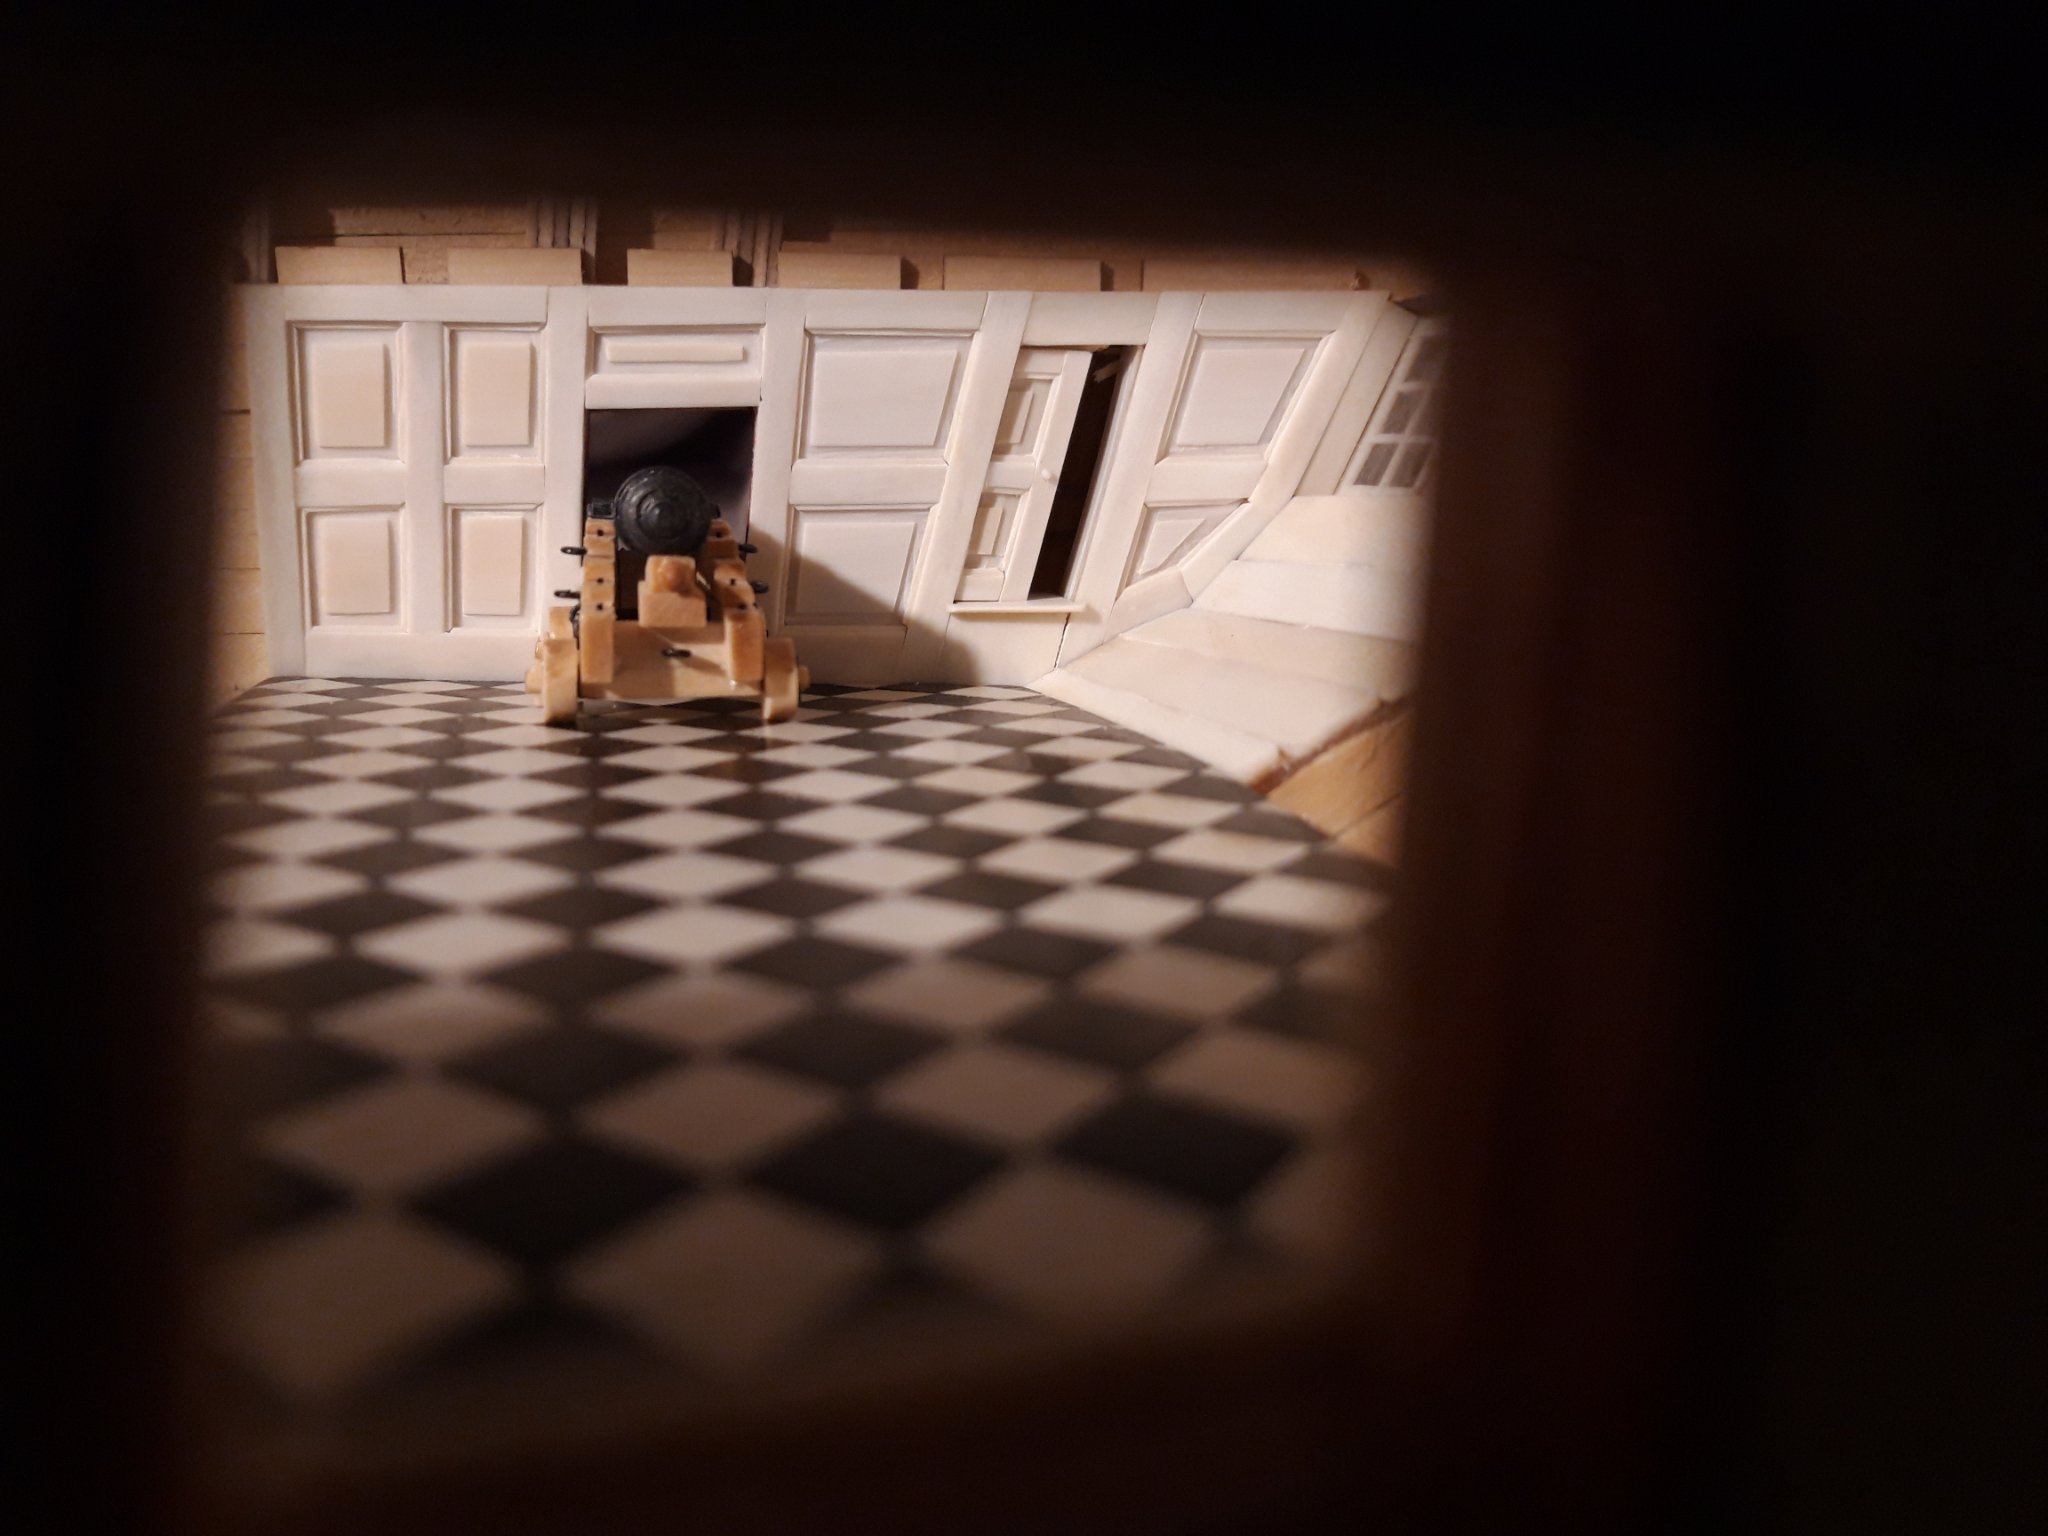
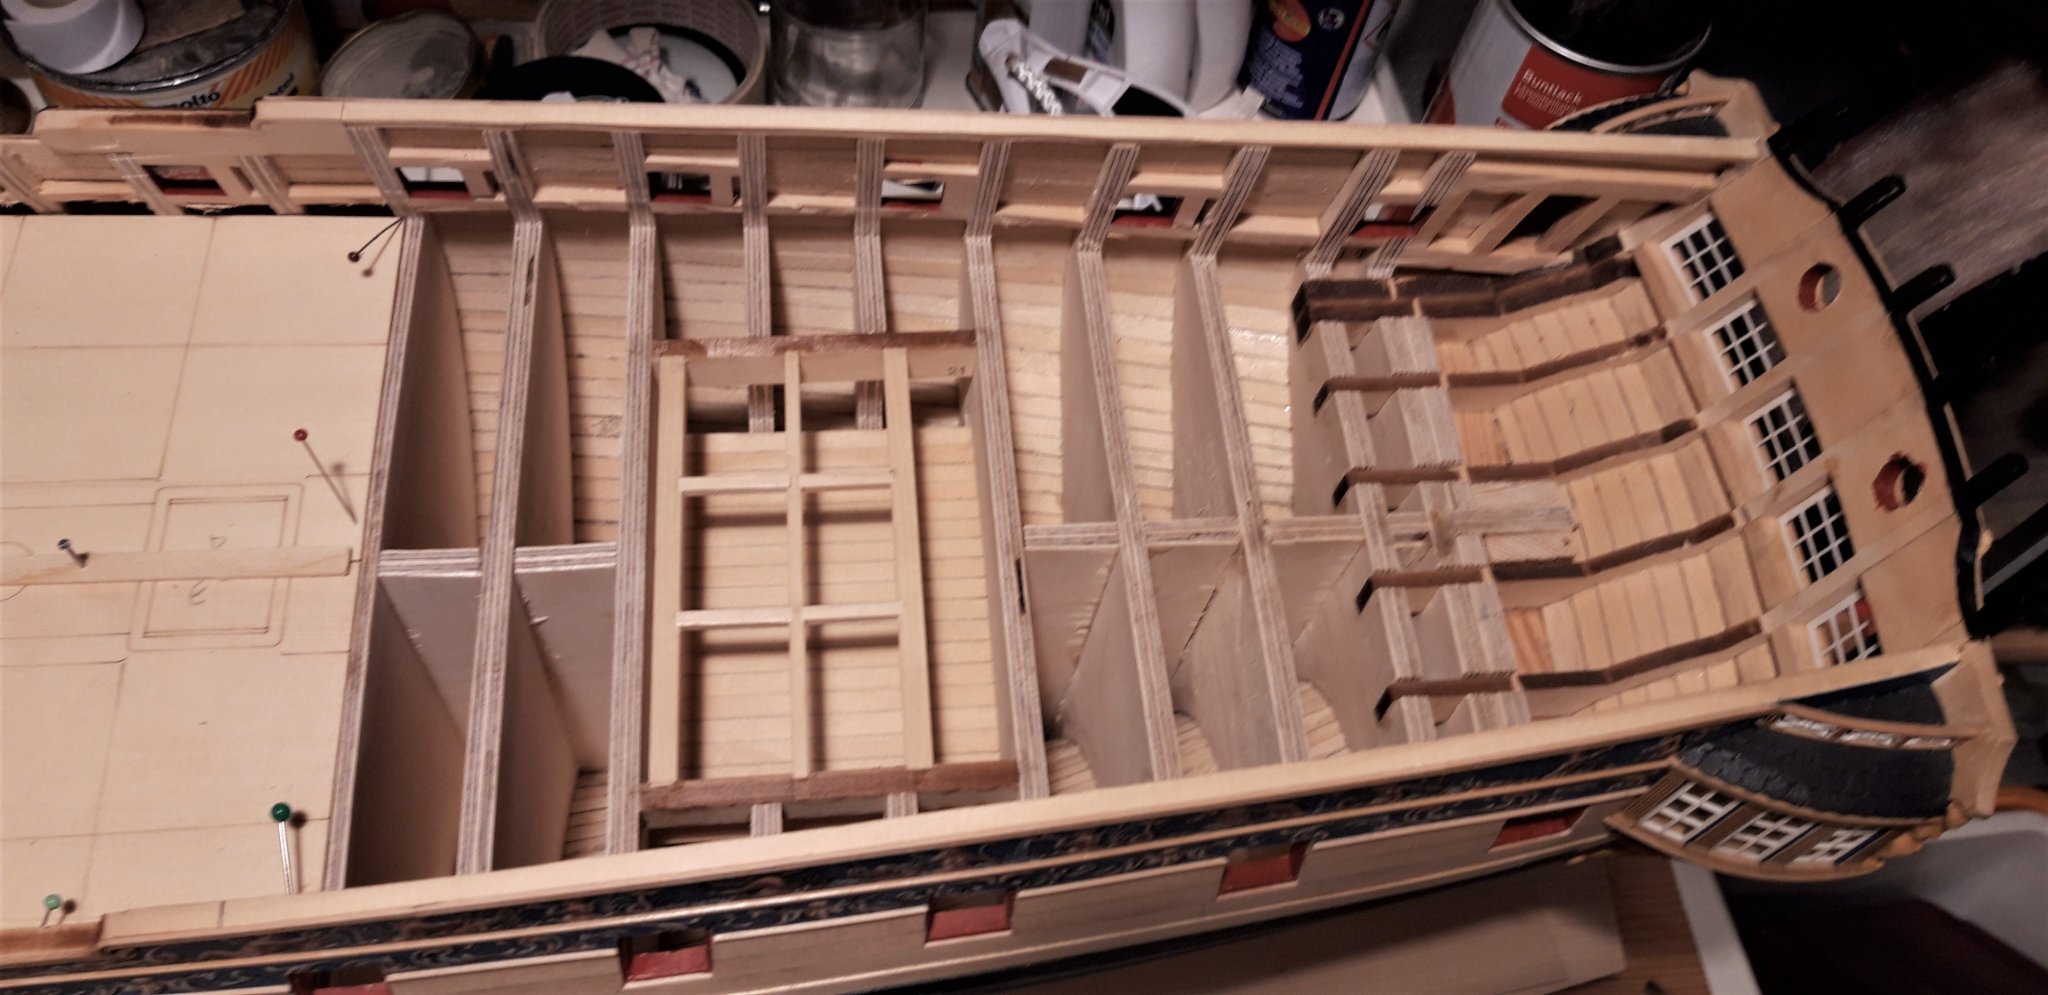
Hello Everybody,
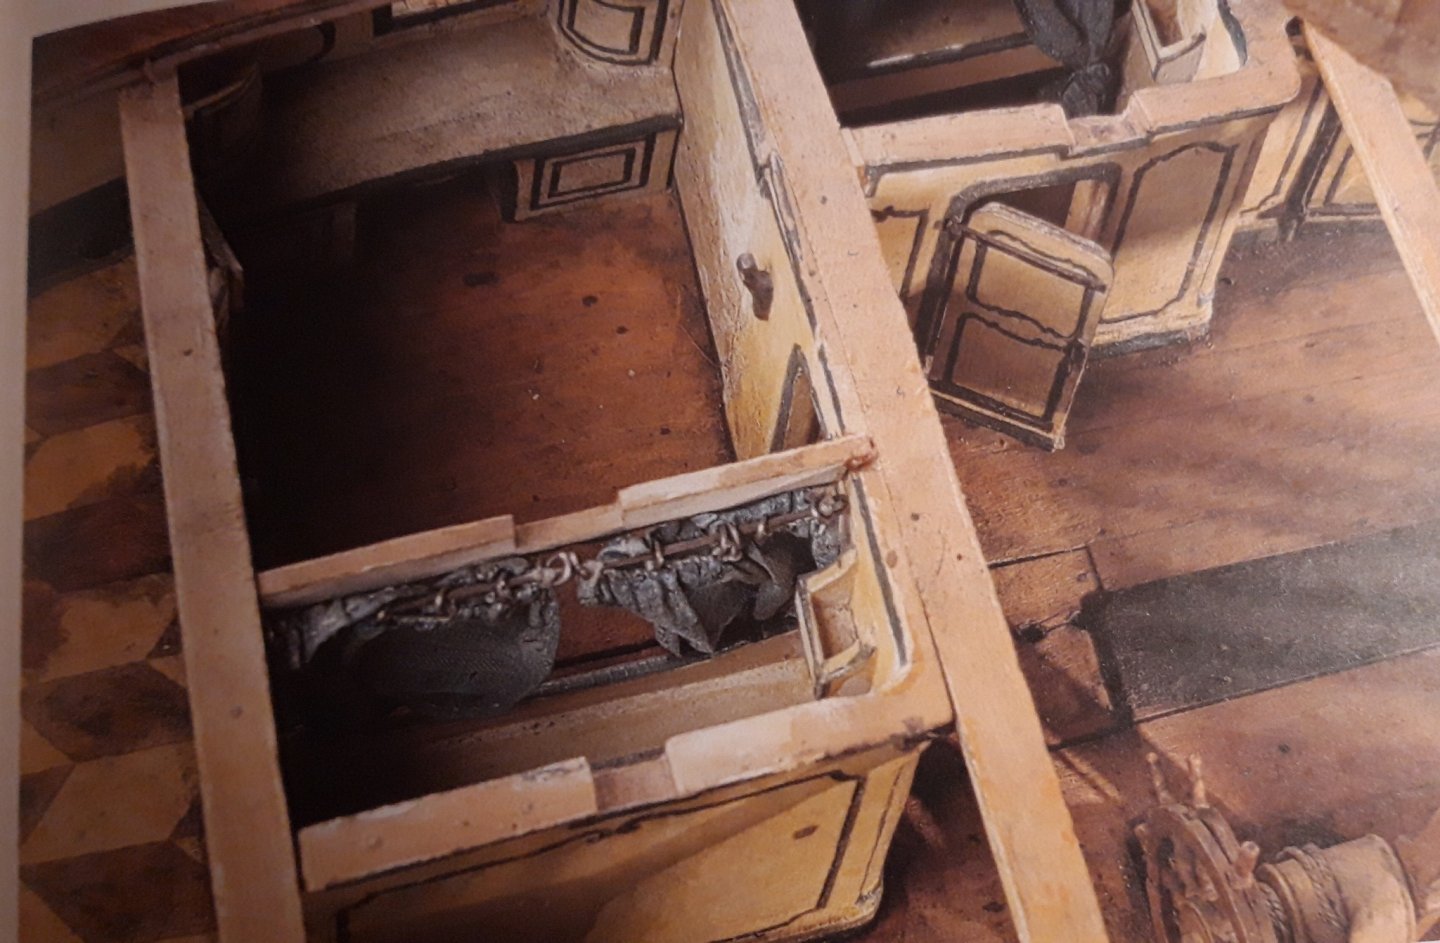
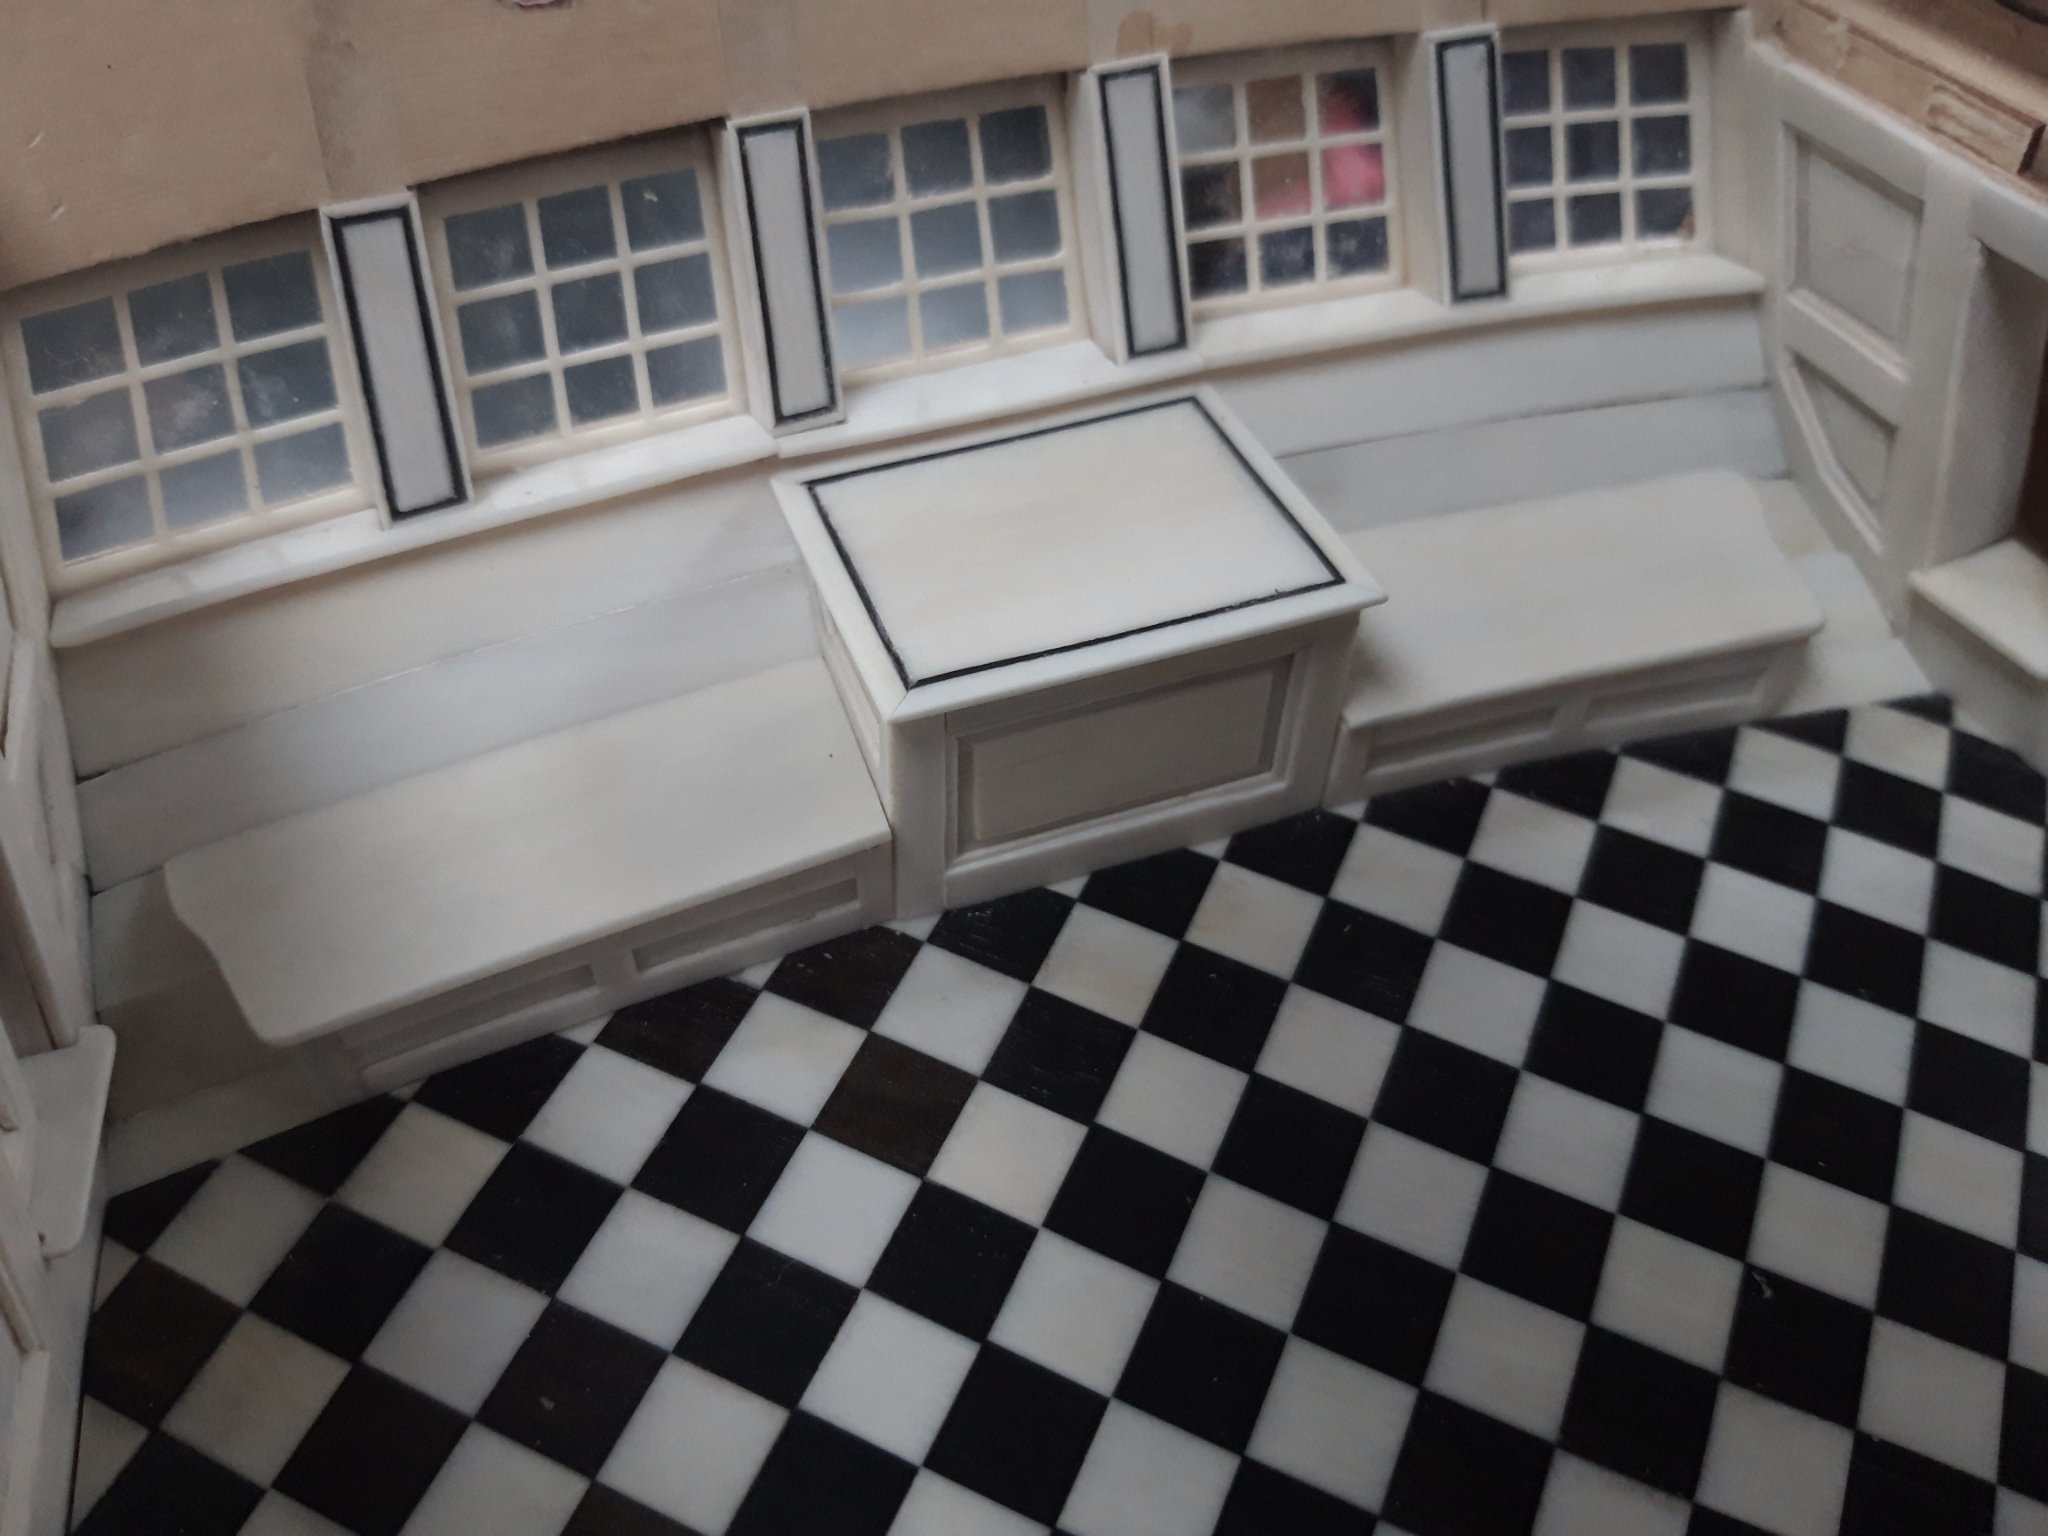
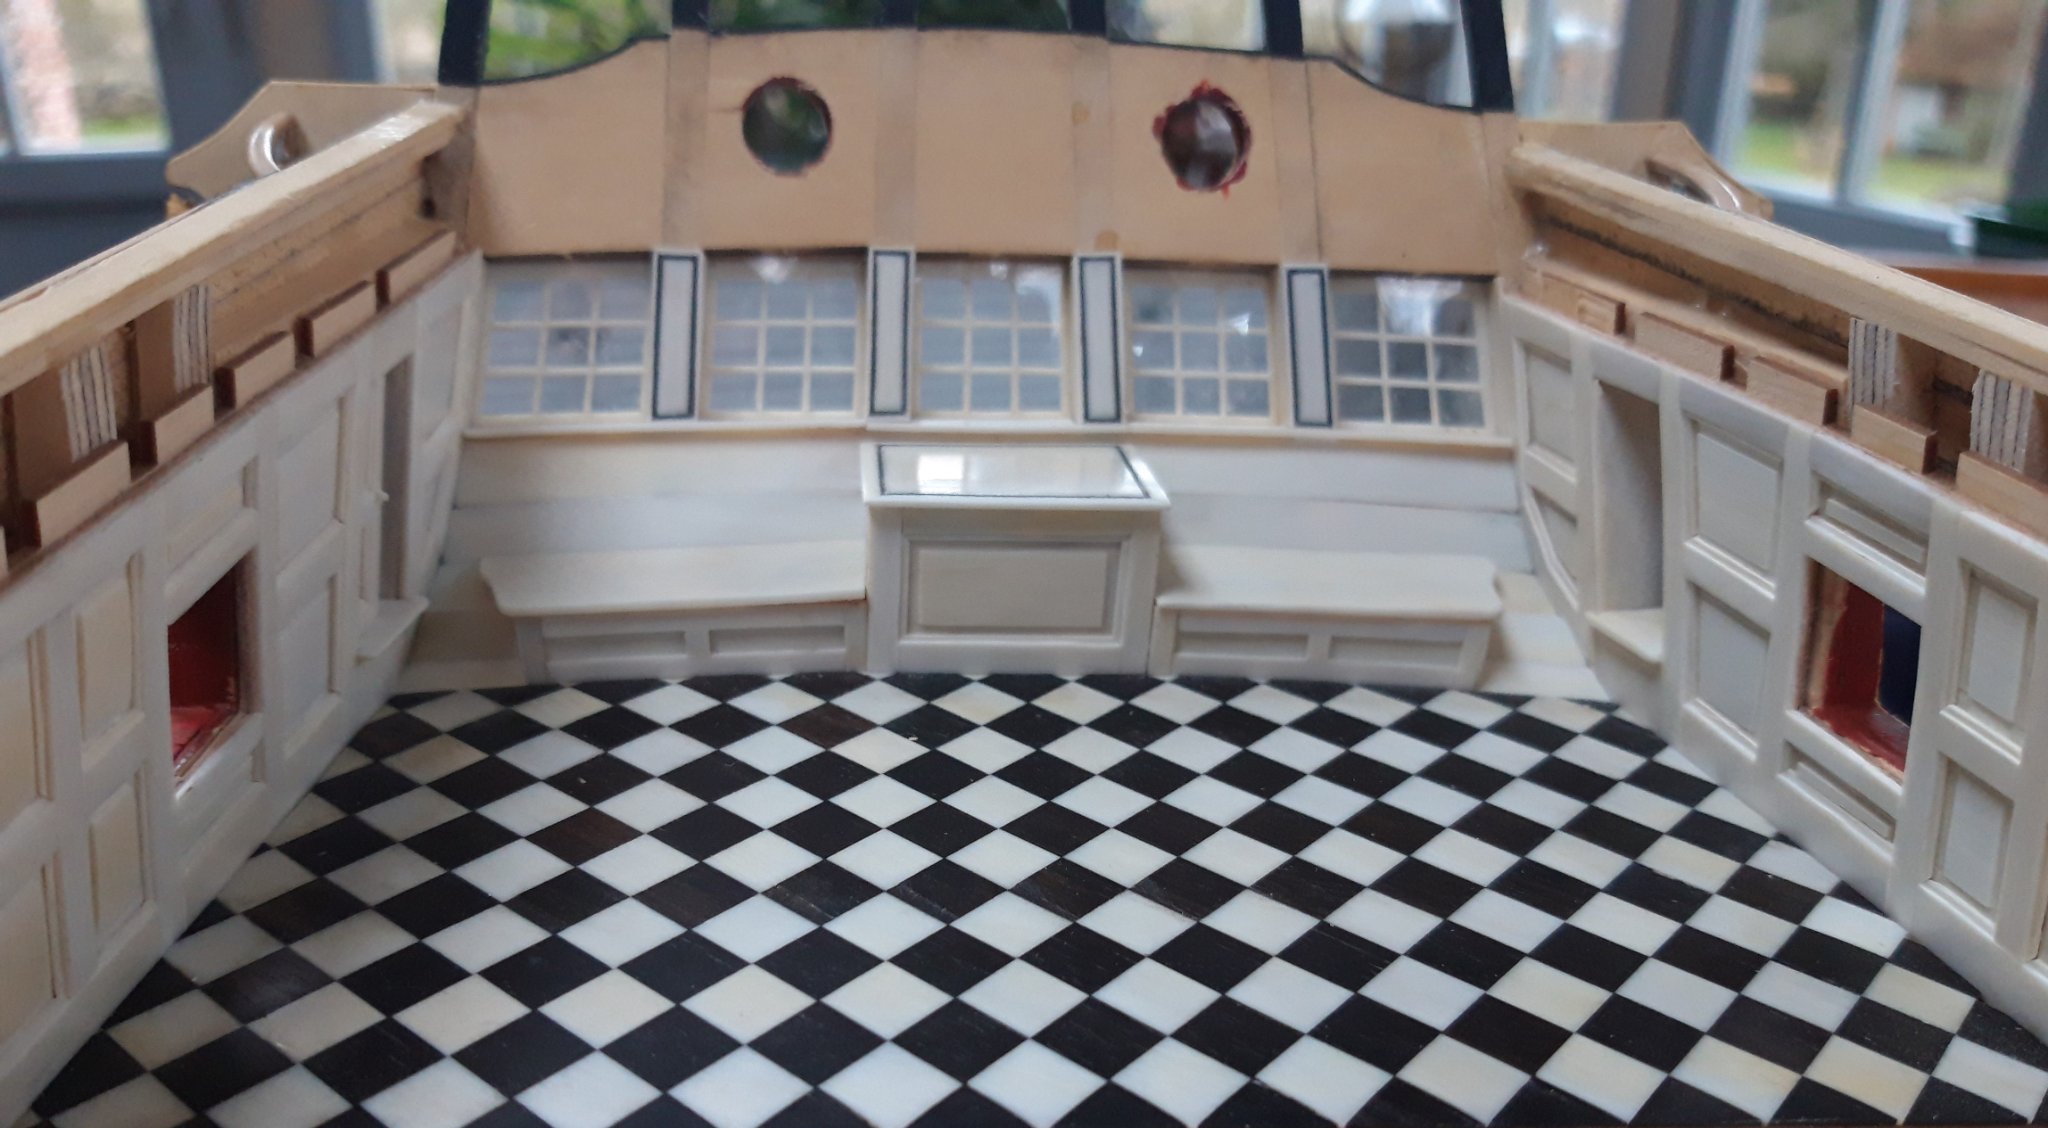
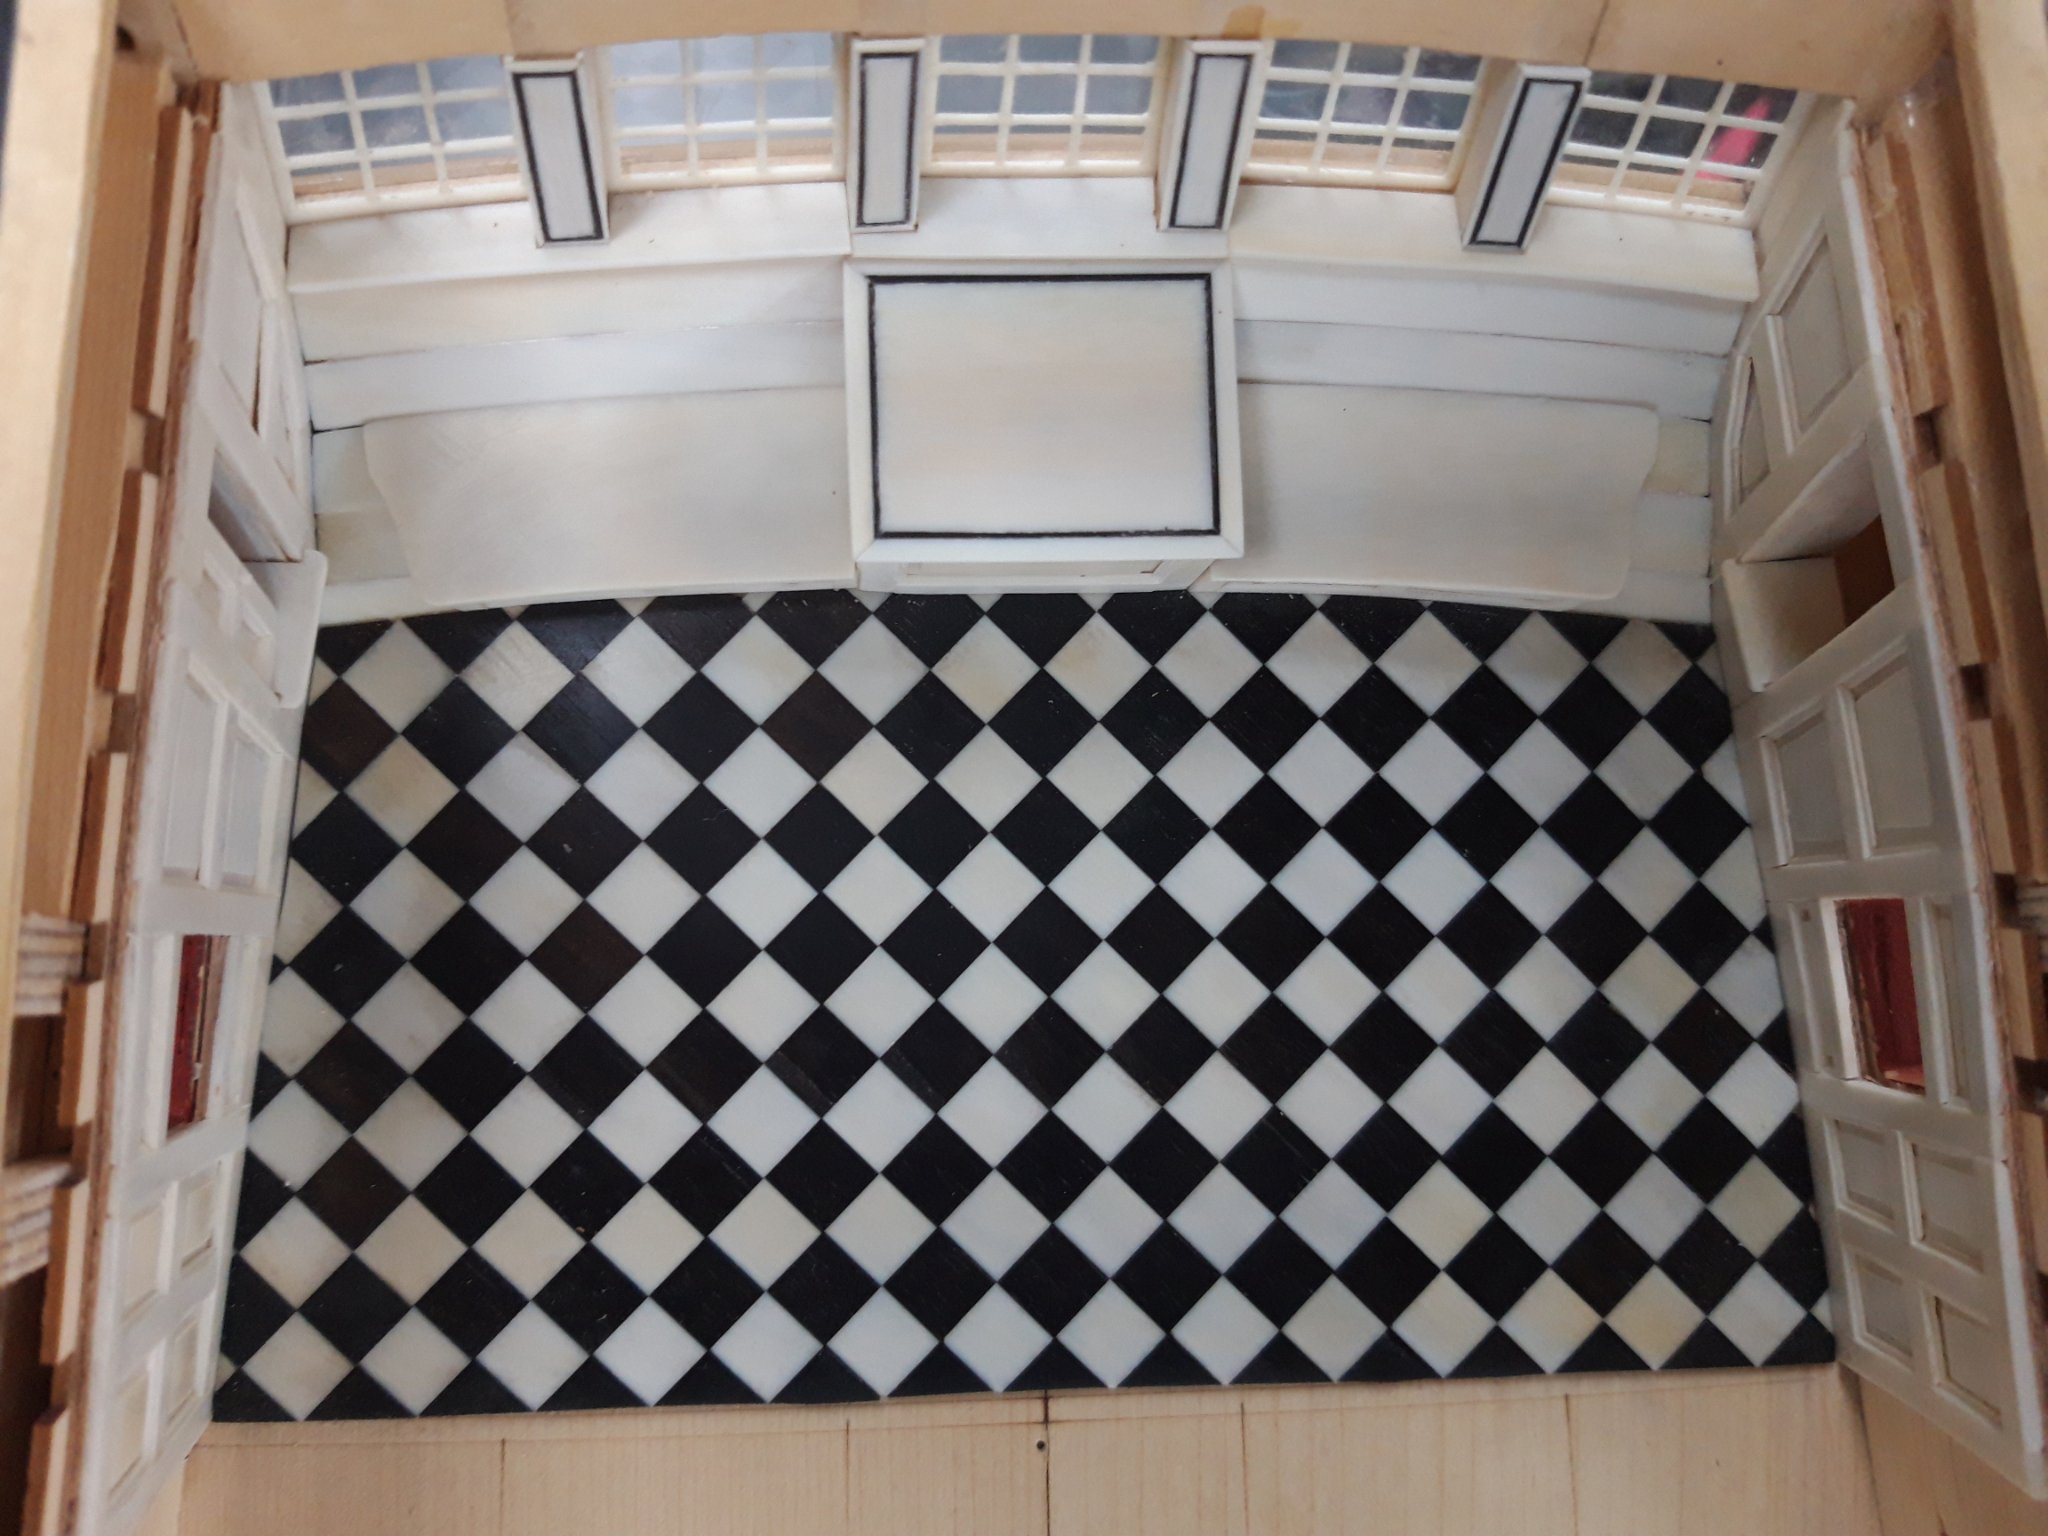
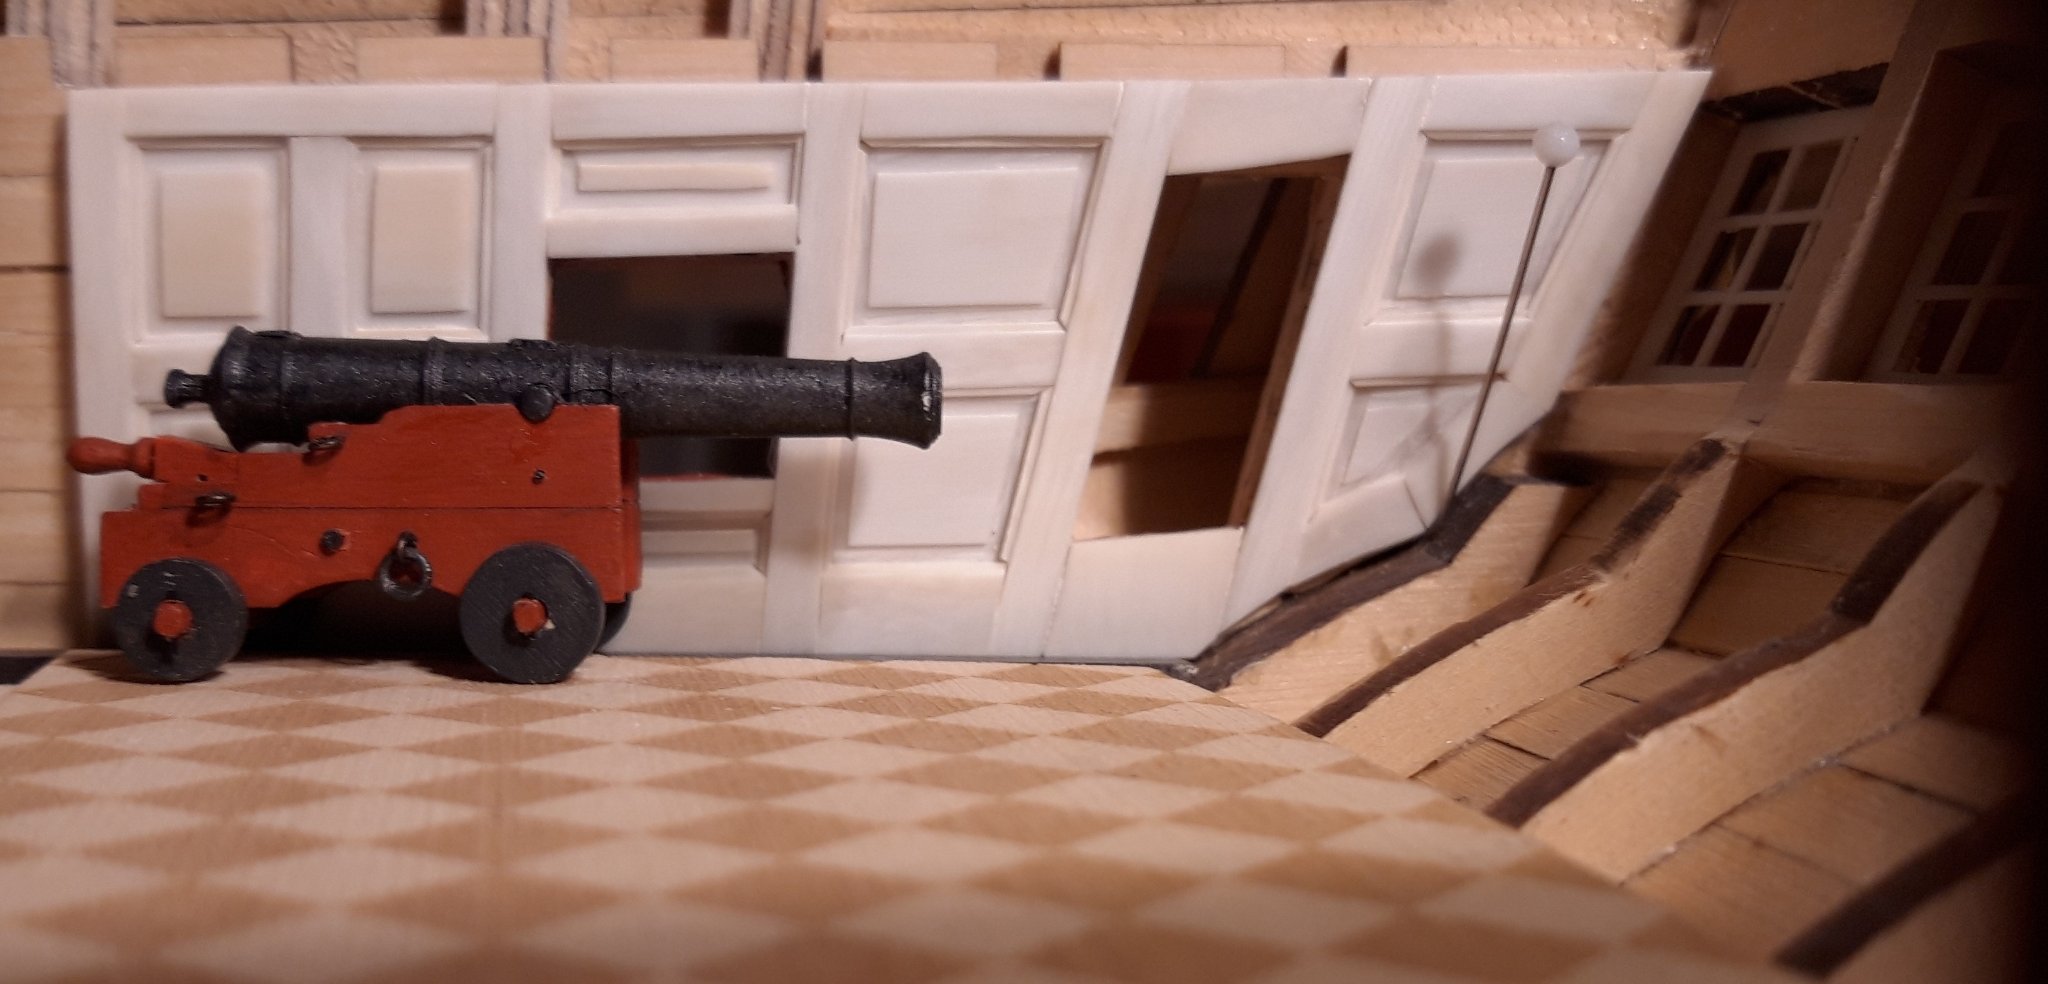
I finished the captains cabin rear gallery with the installation of the rudder trunk and the benches. For the small panels between the windows, I made small ebony decoration strips as framing.
First picture is the rudder trunk befor installation:
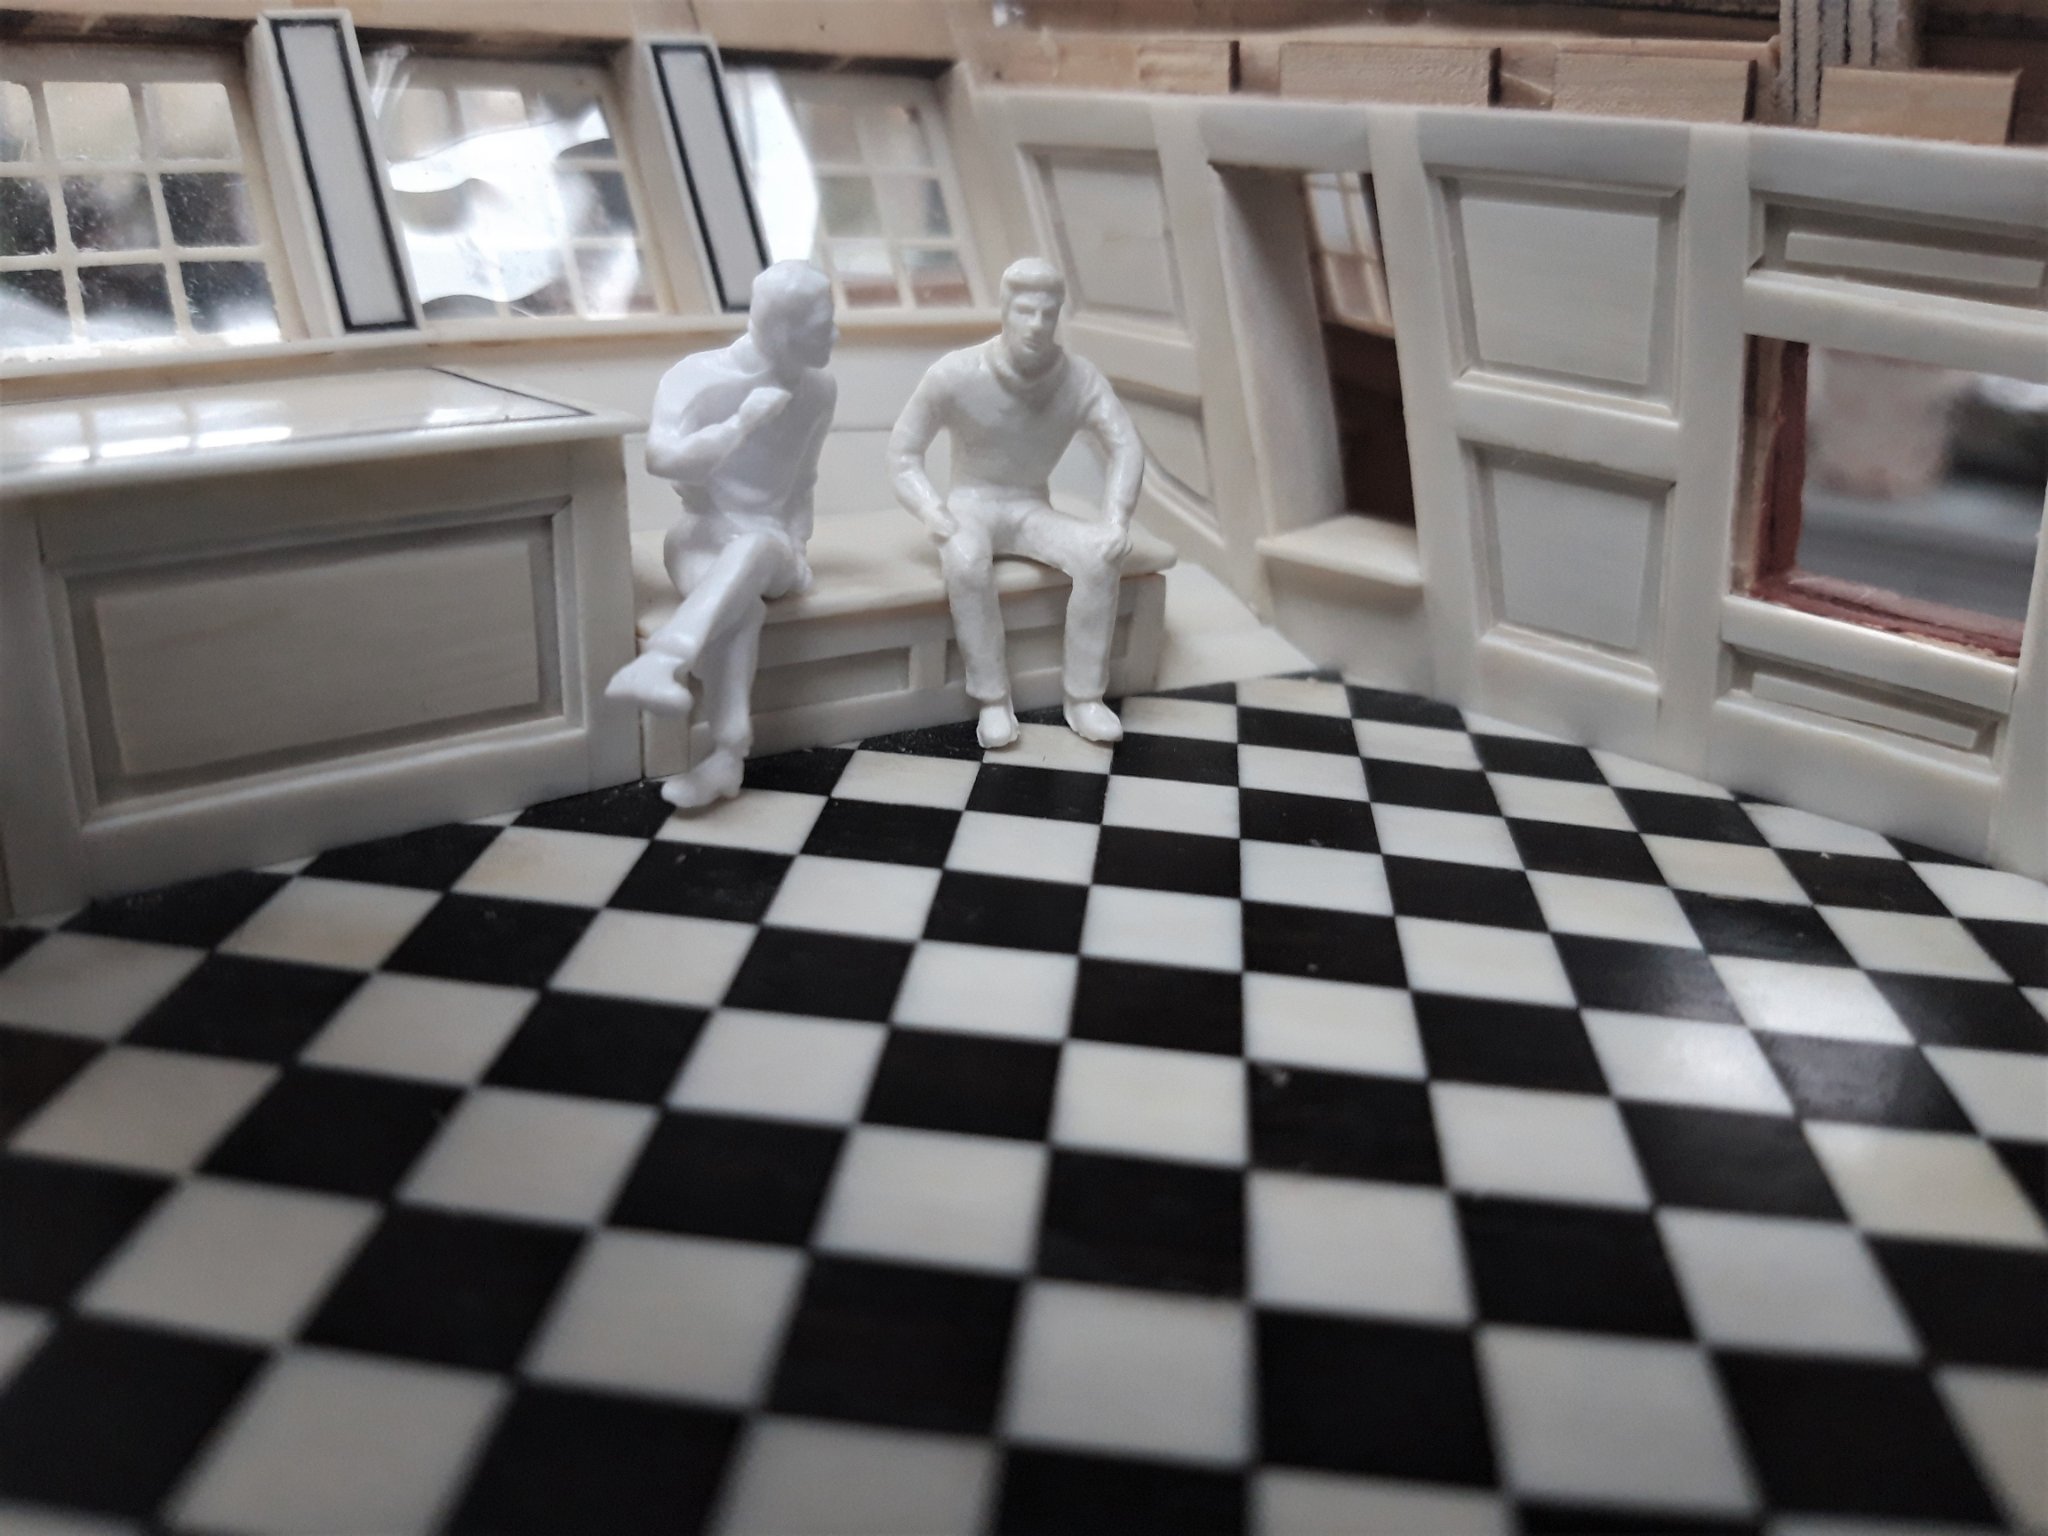
Here you can see the Captain Sir C. Passaro is giving order for the next work to do
")
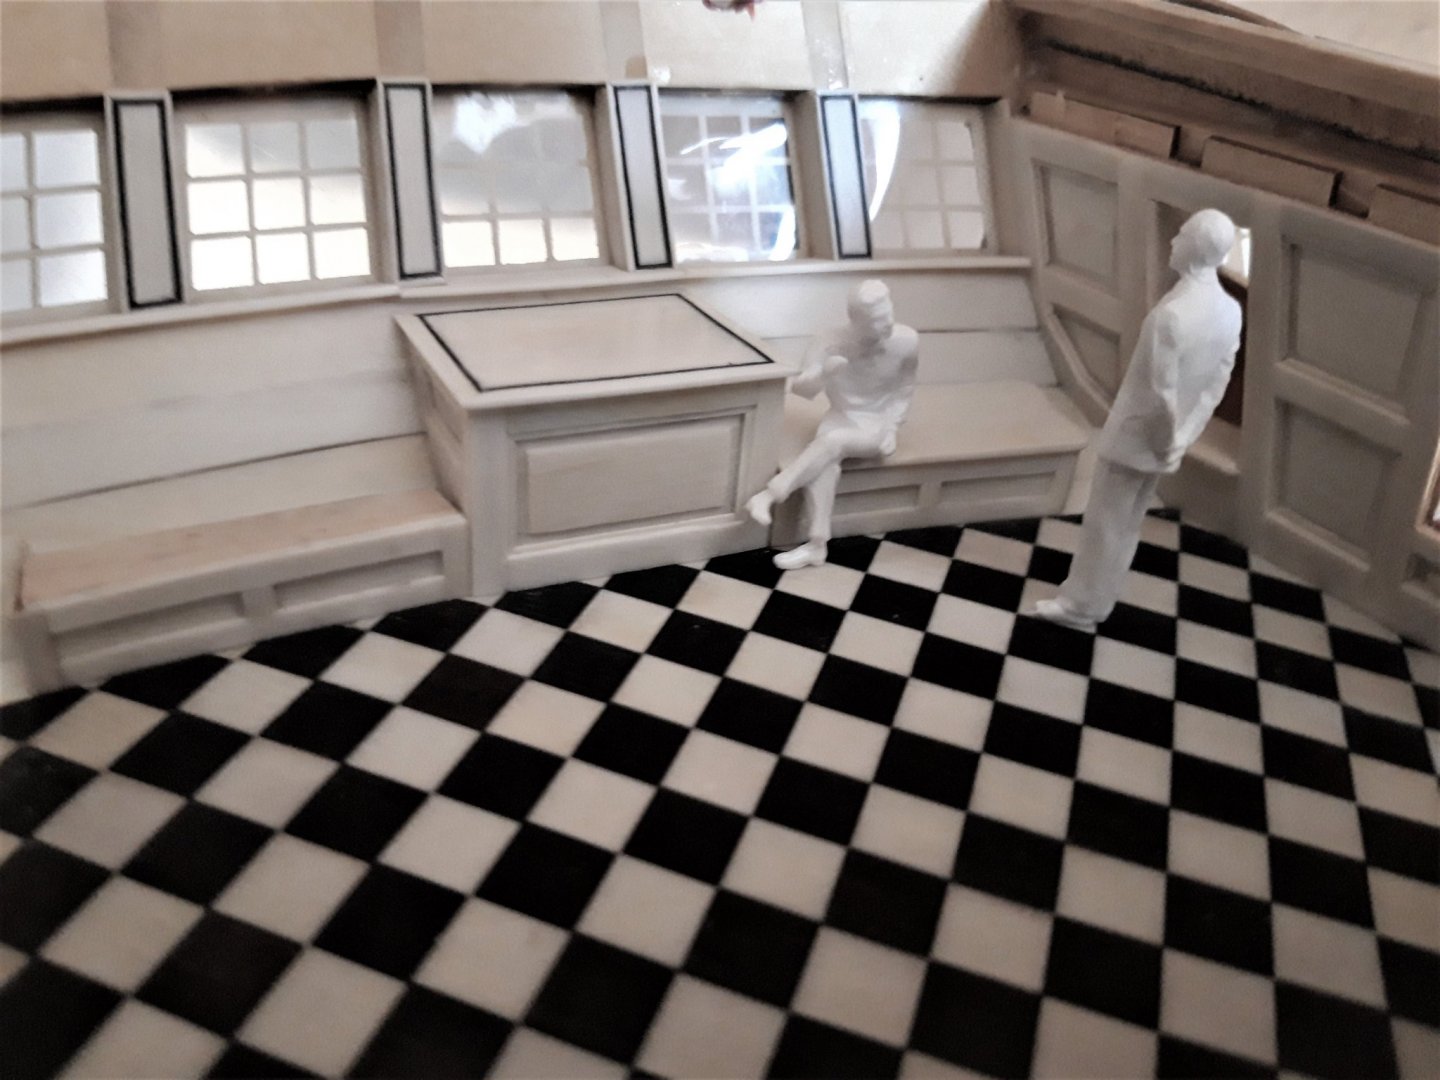
The paneled front of the bench were glued against a curved template, to follow the curved edge of the flooring.
And the finished arrangements:


A little talk after everything is done.
Matthias
-
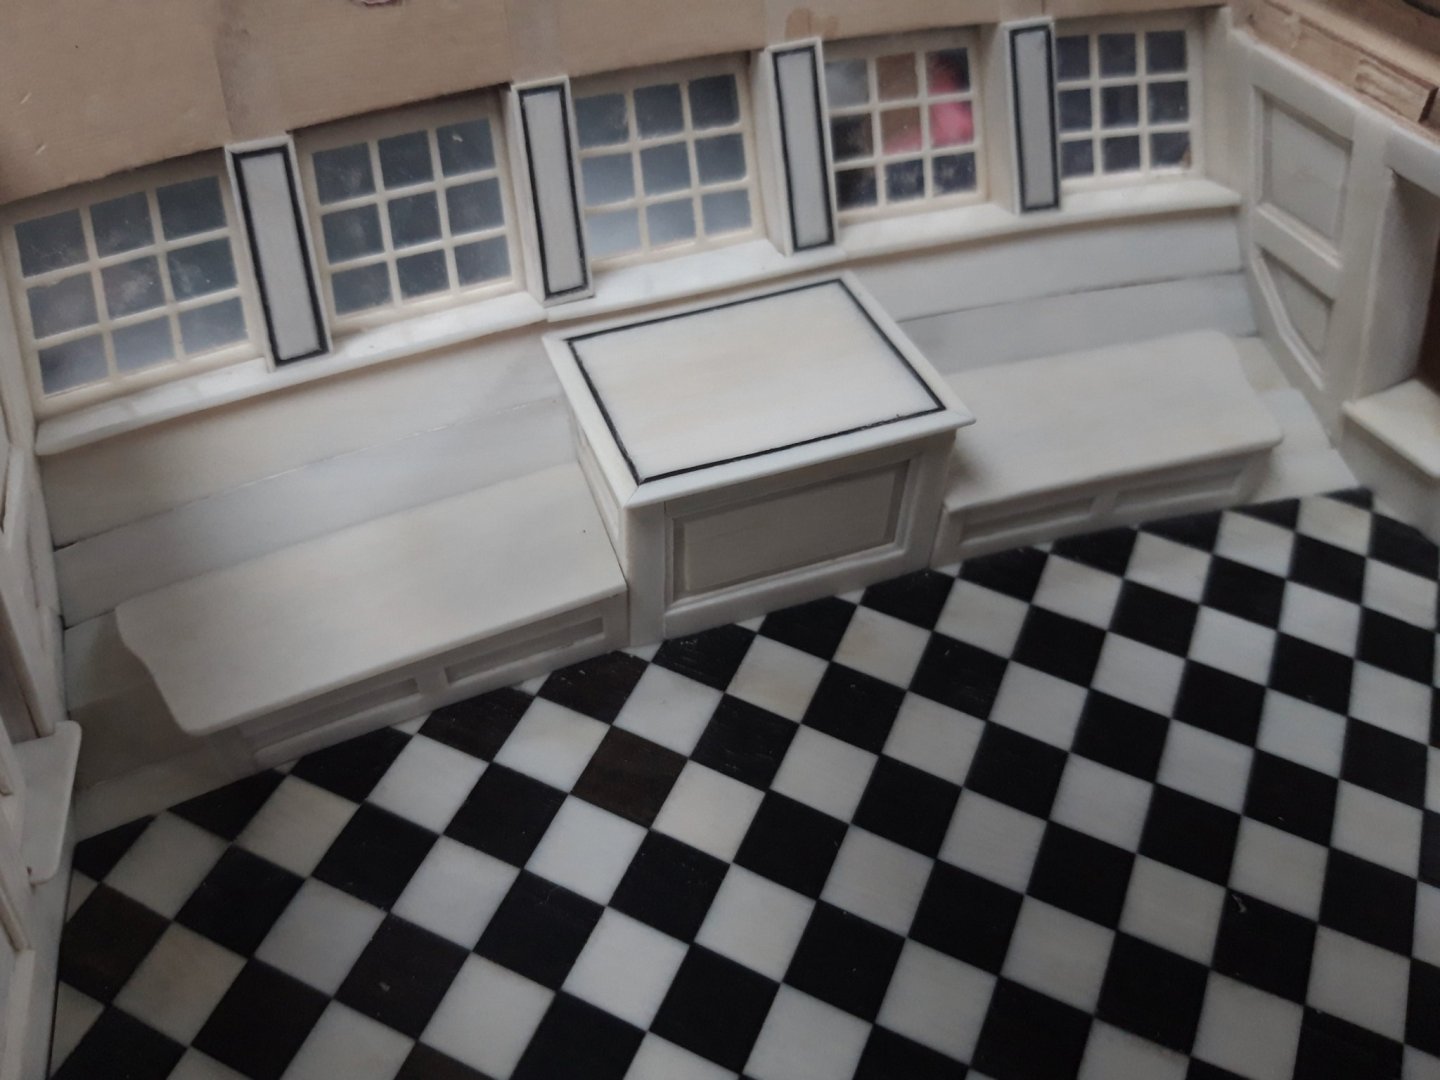
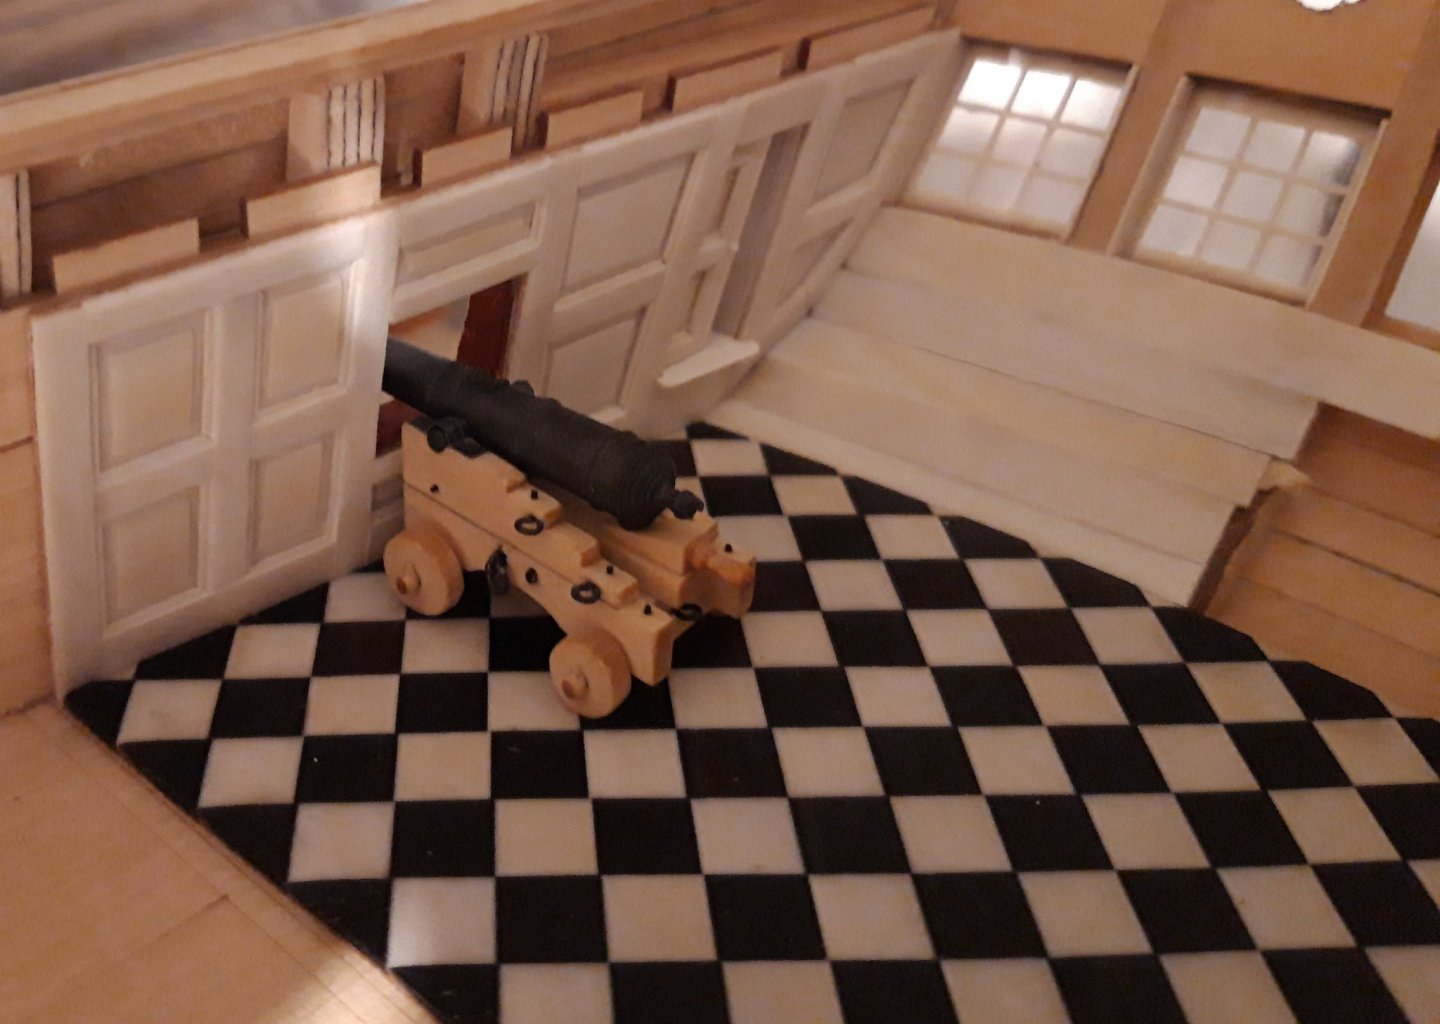
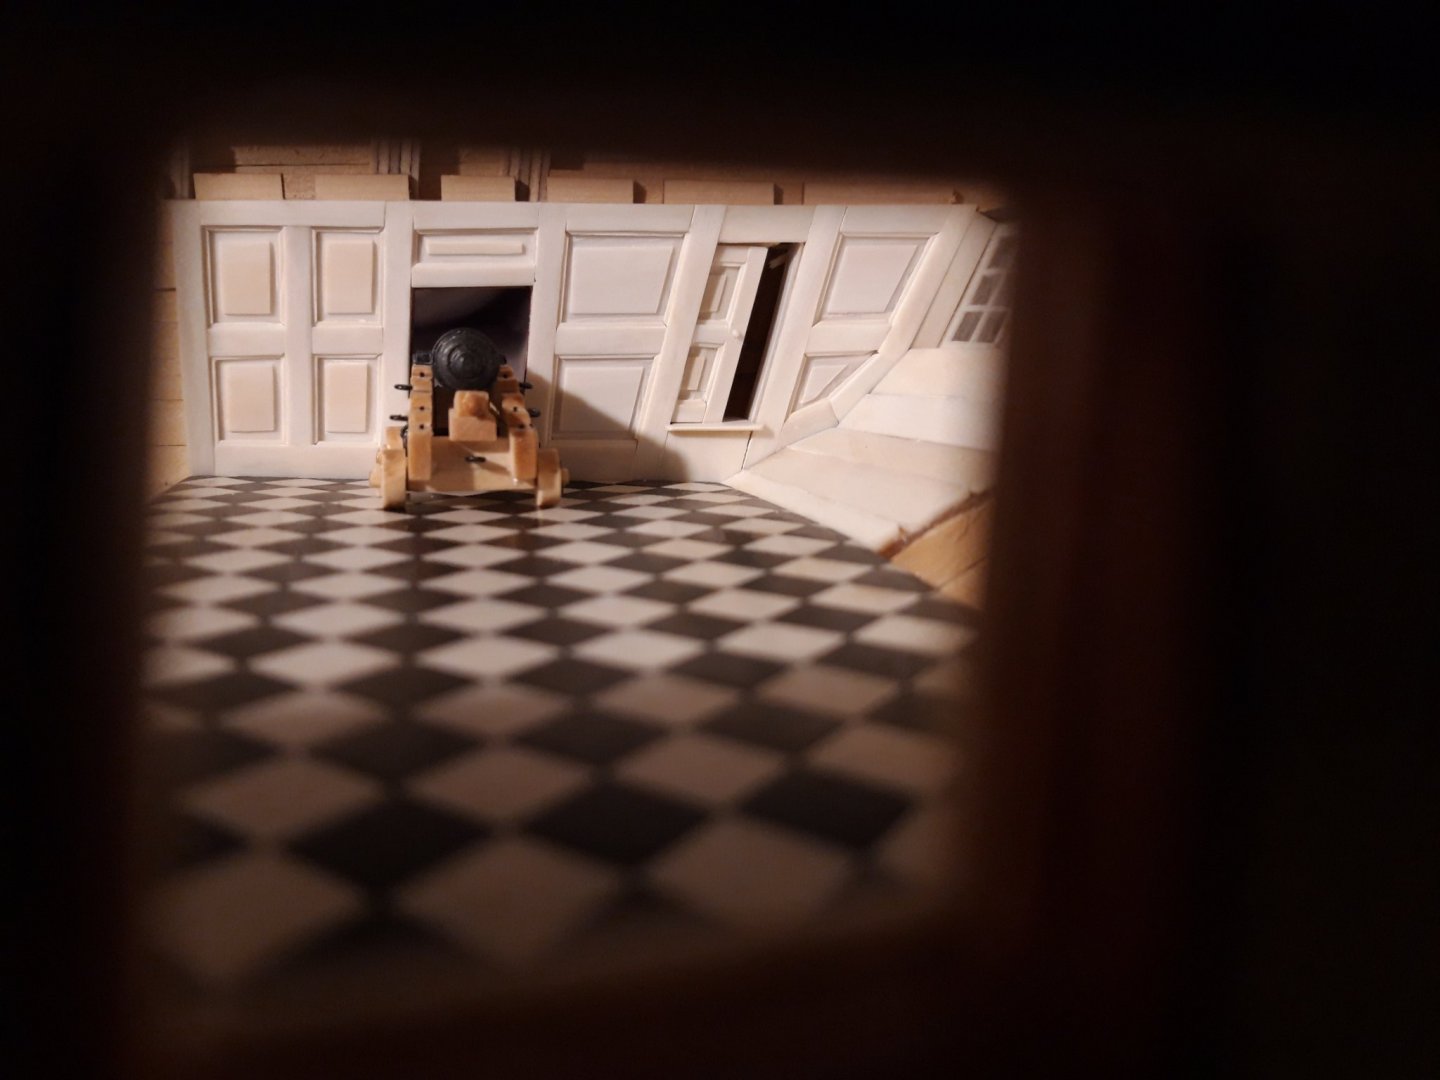
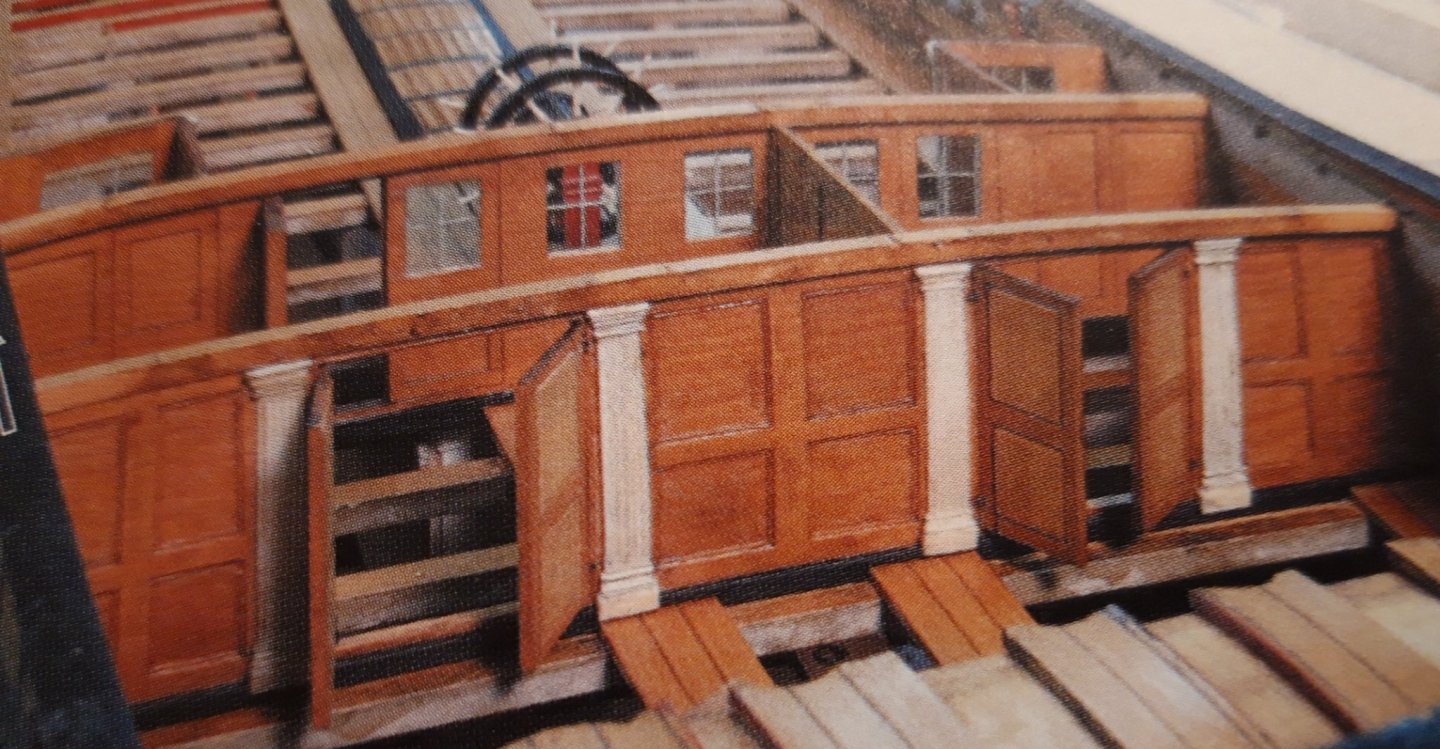
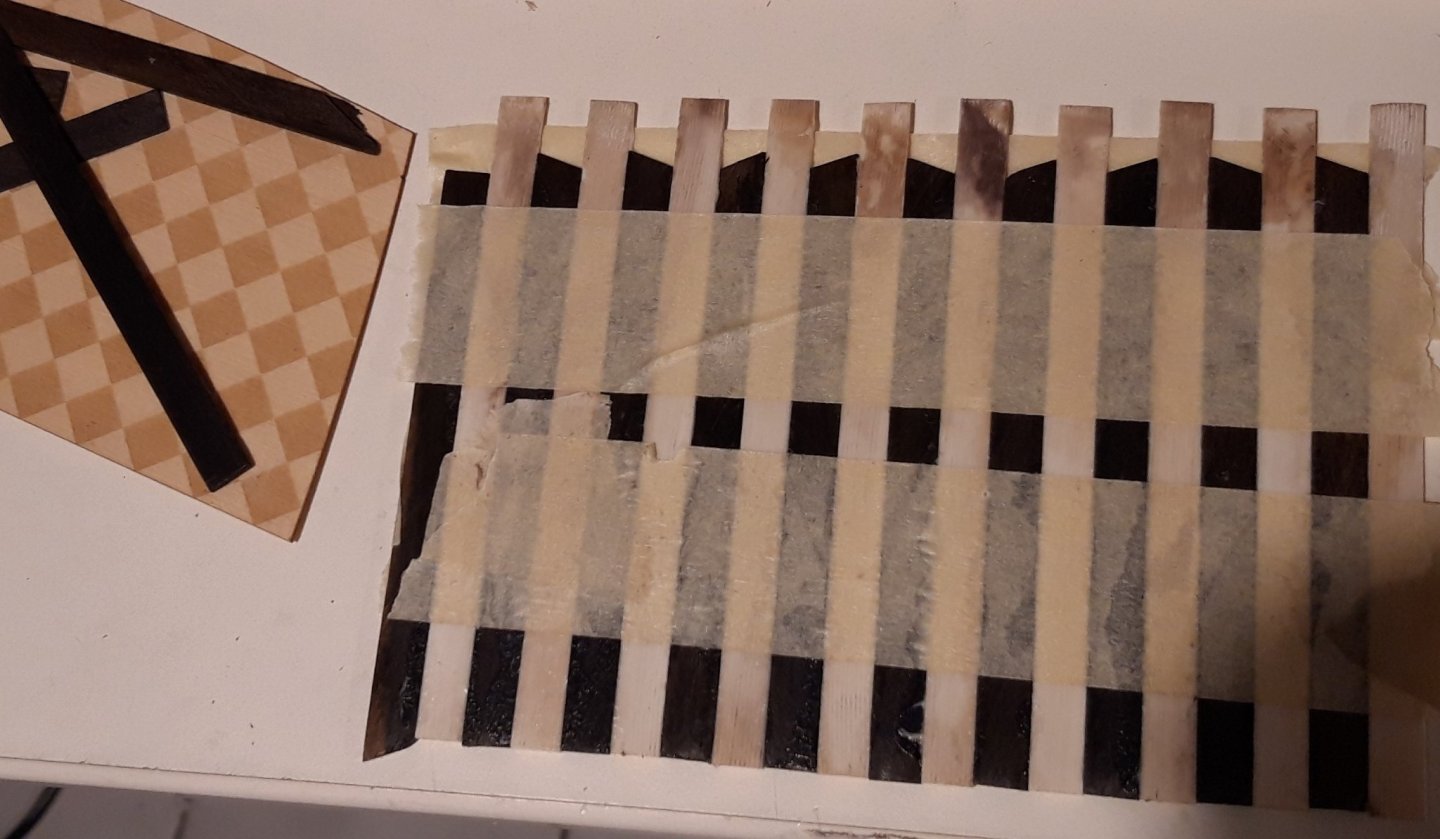
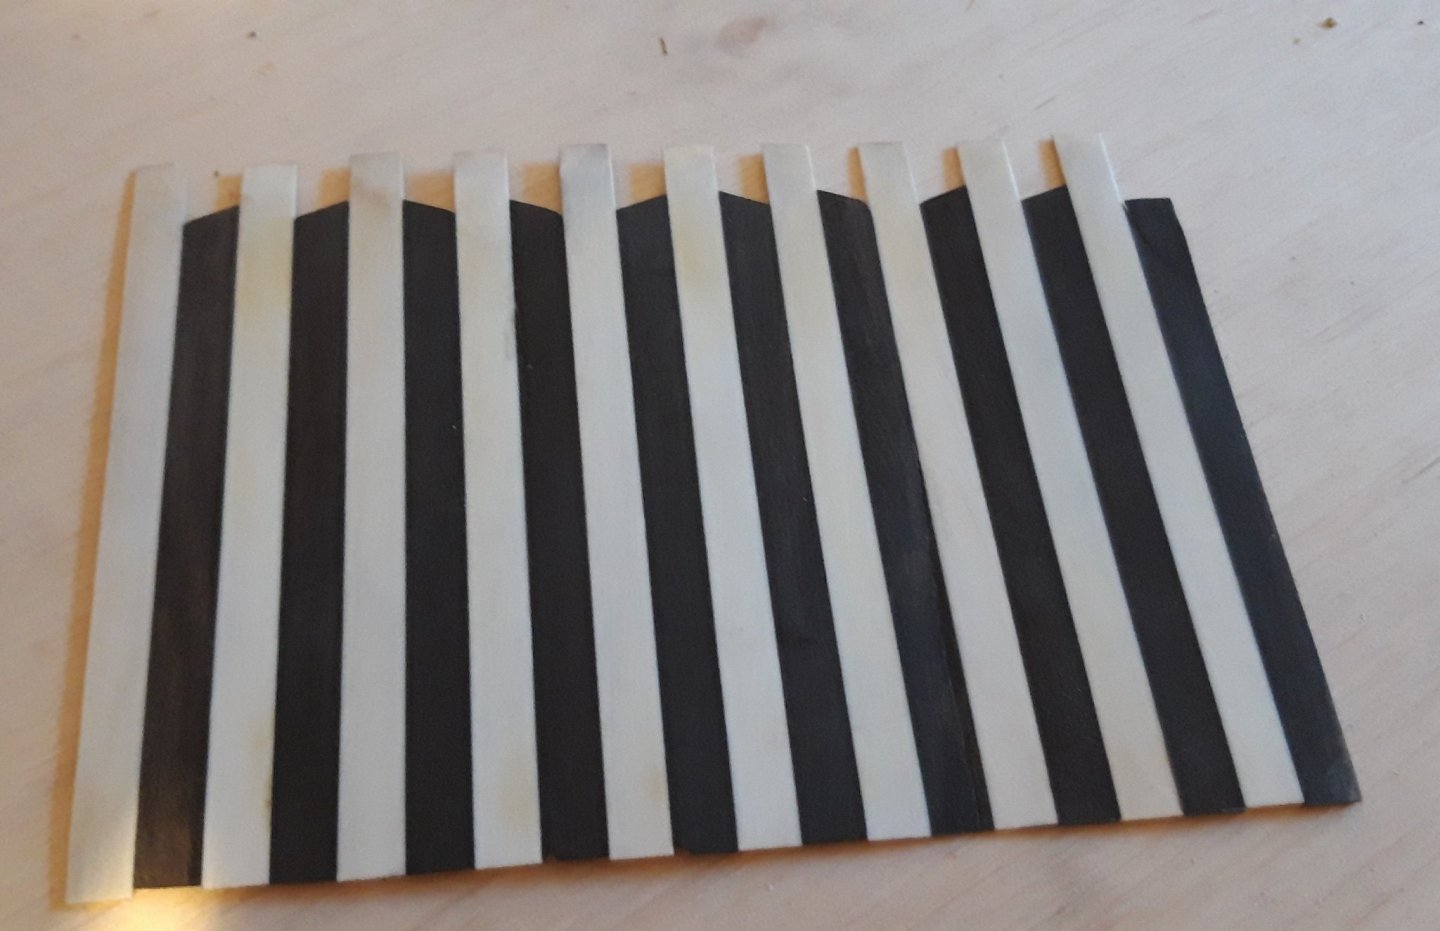
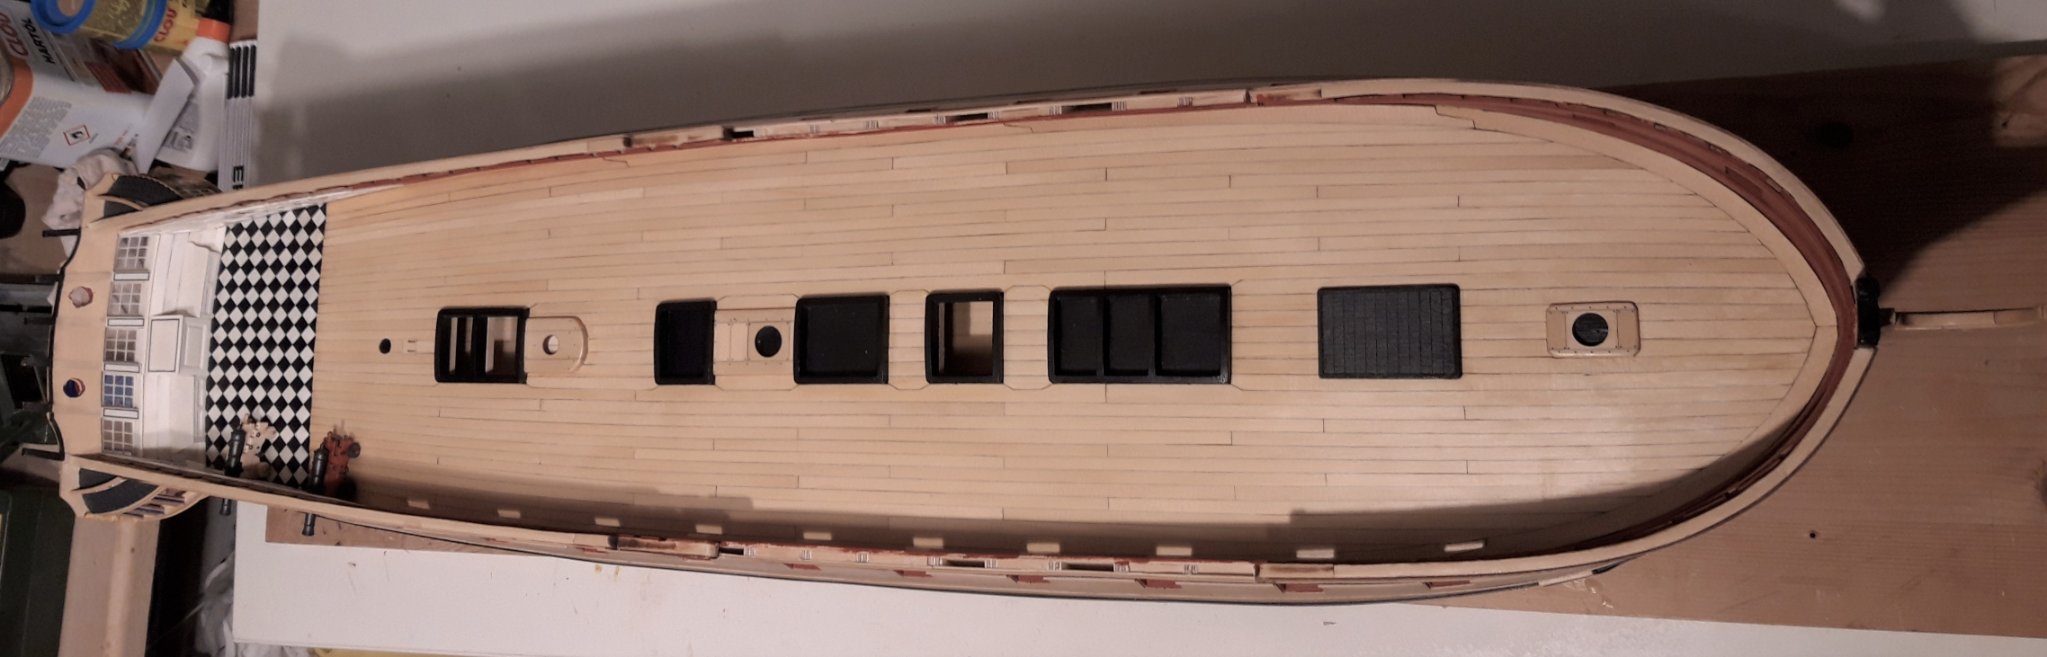
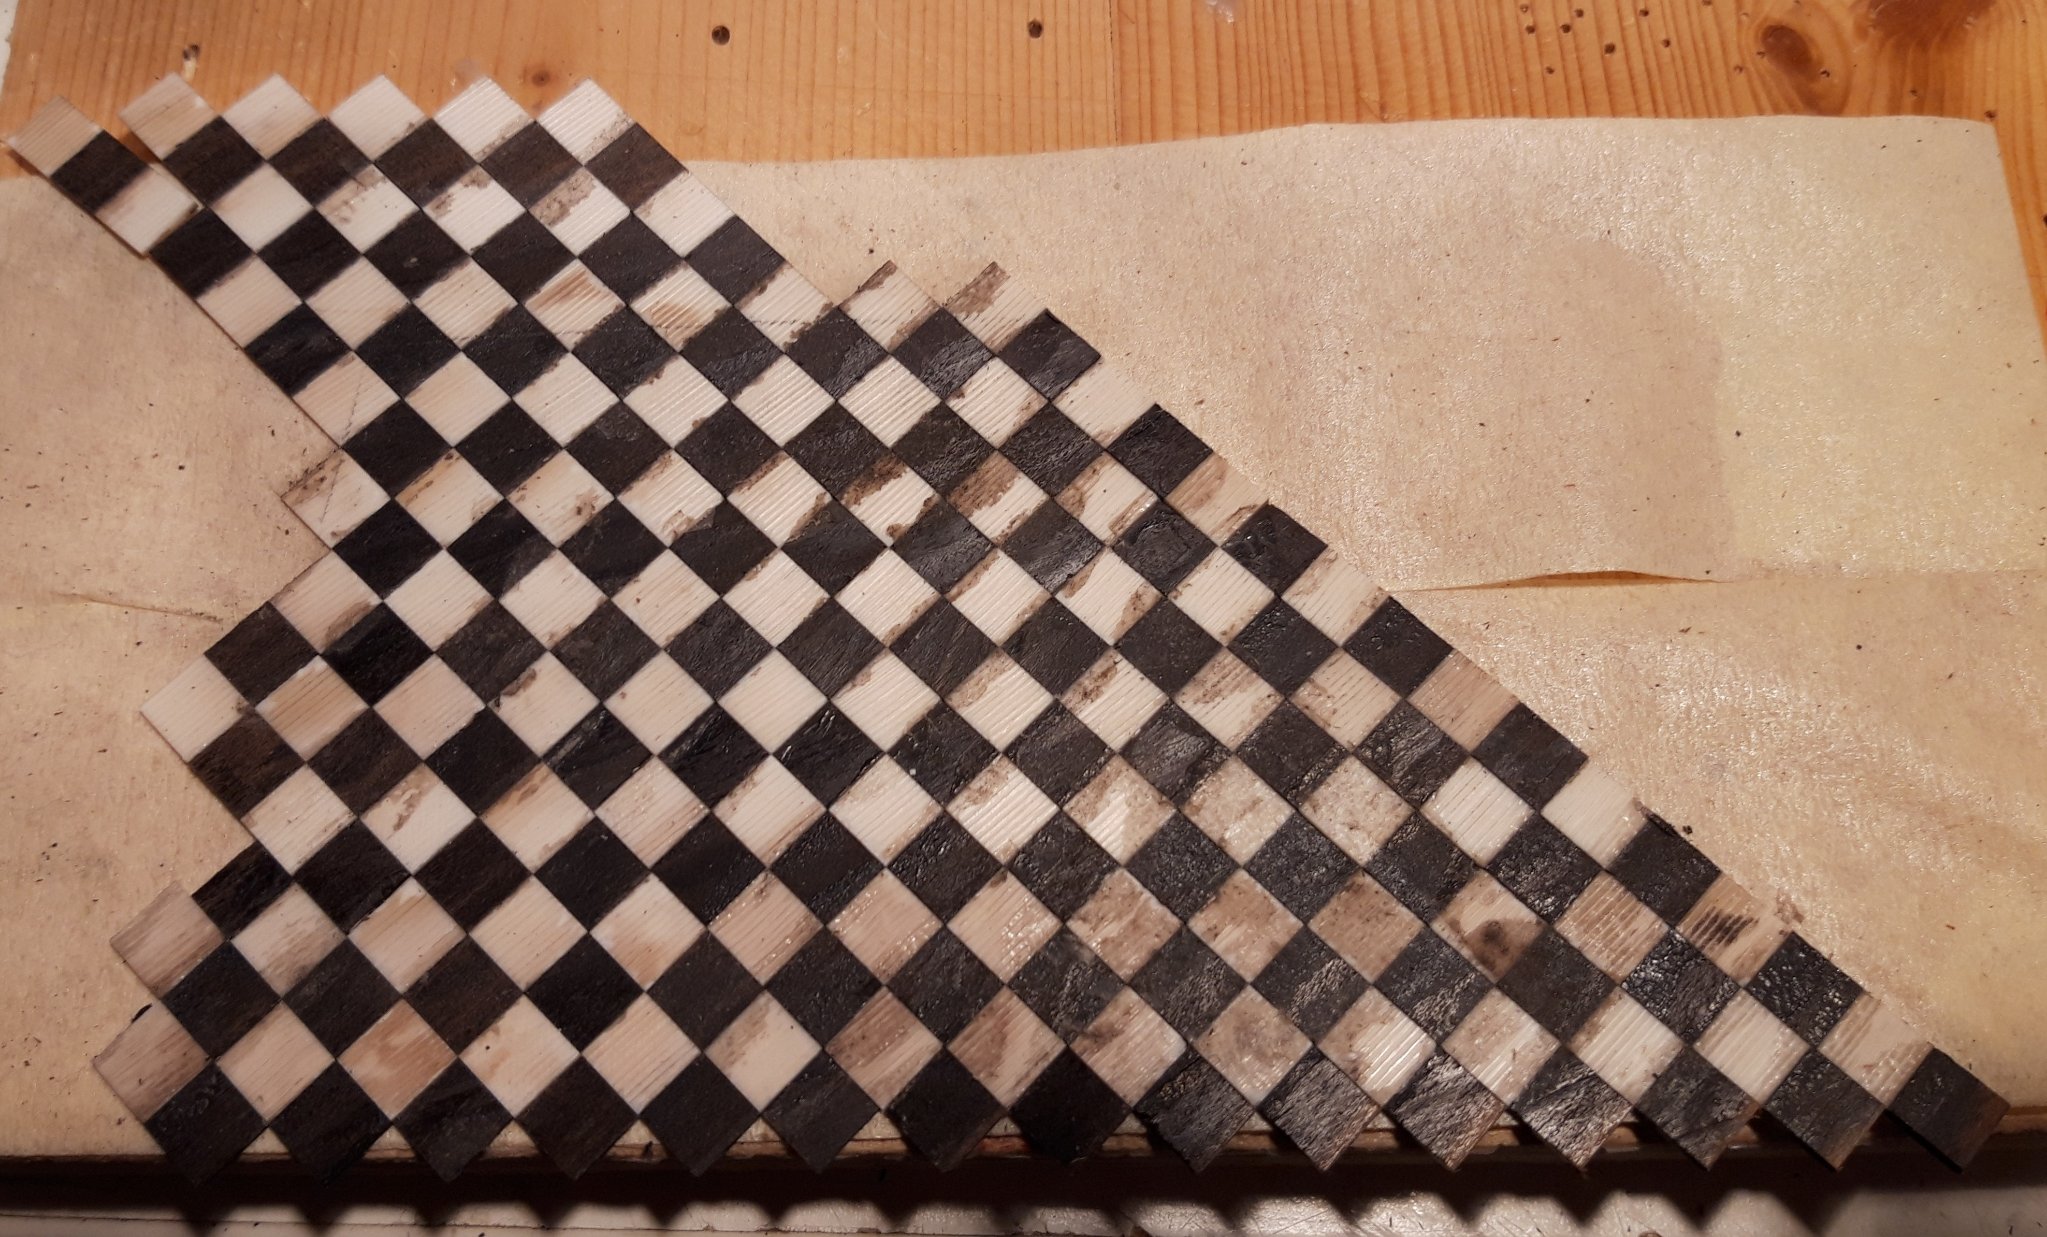
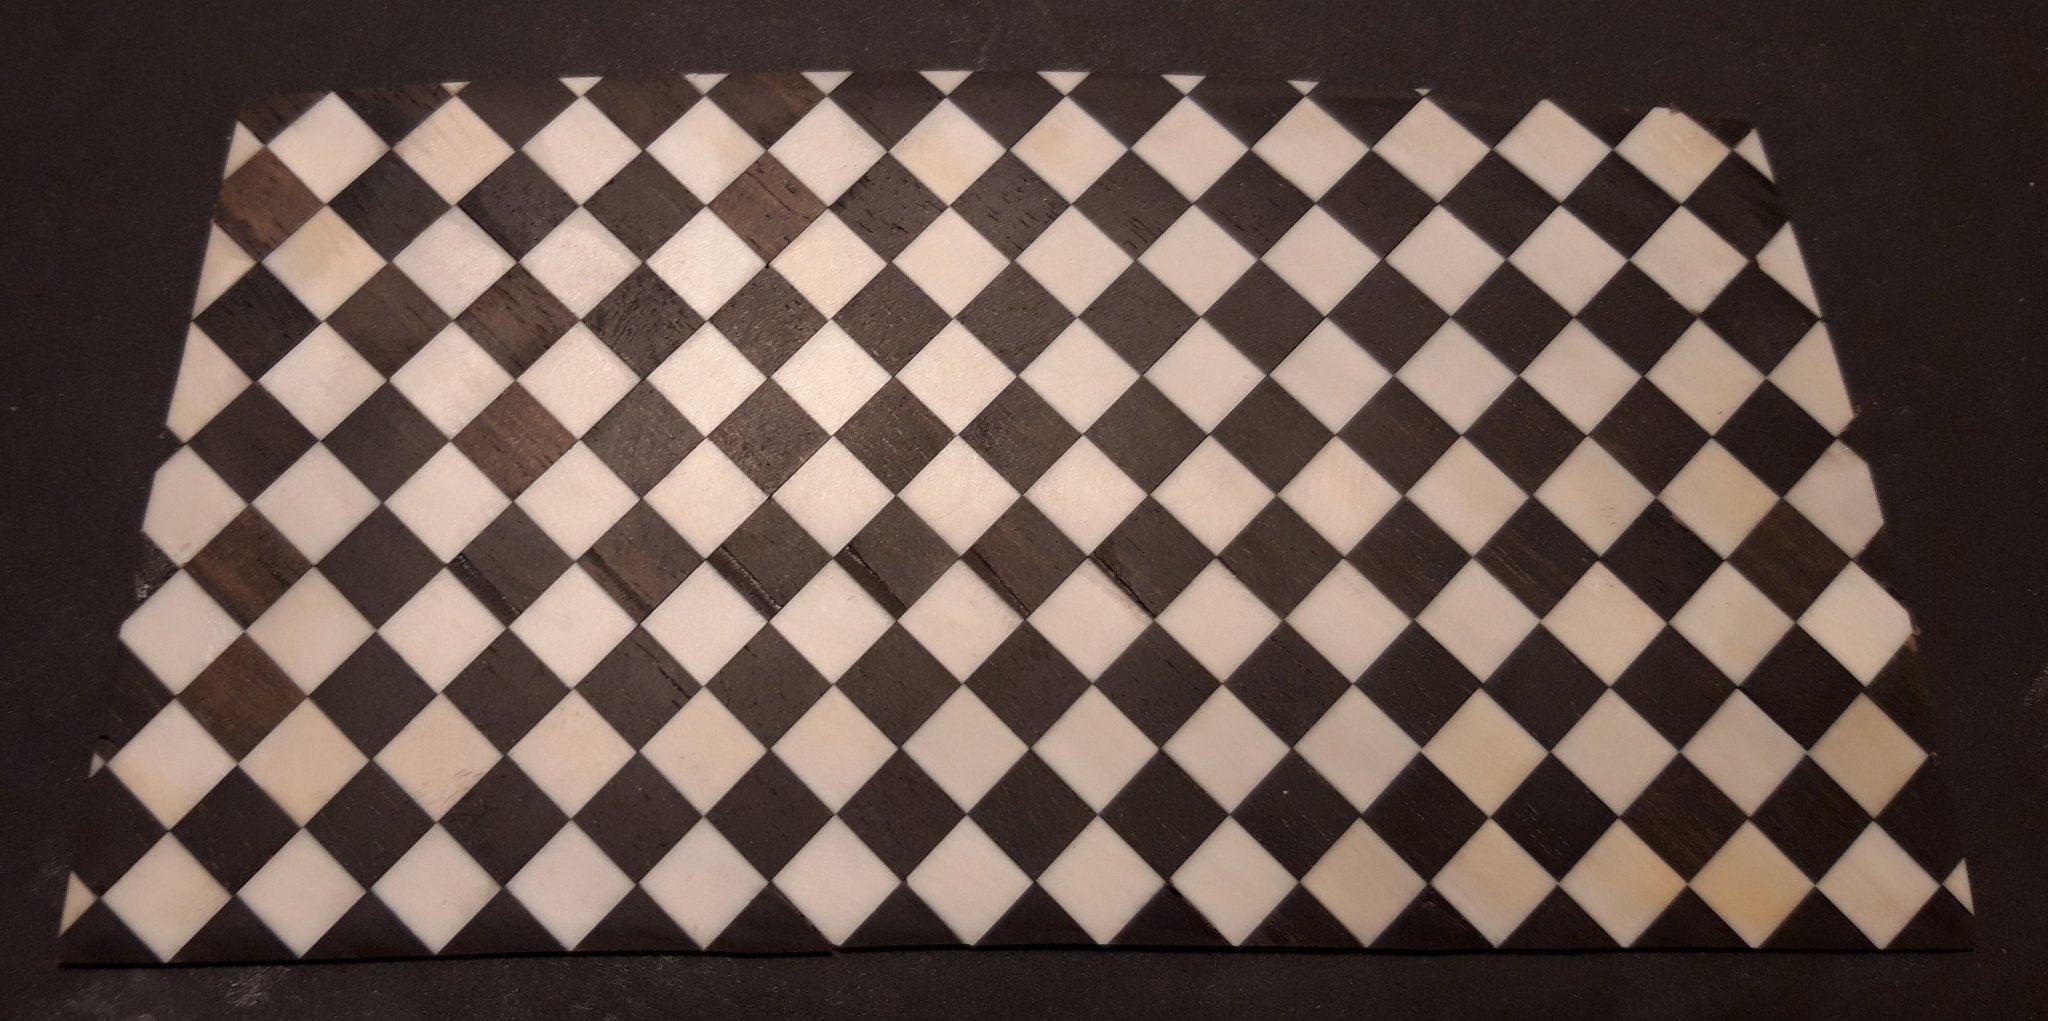
Hello everybody, I made the checker floor for the captains cabin.
I wanted it like on the pictures on the captains cabins:

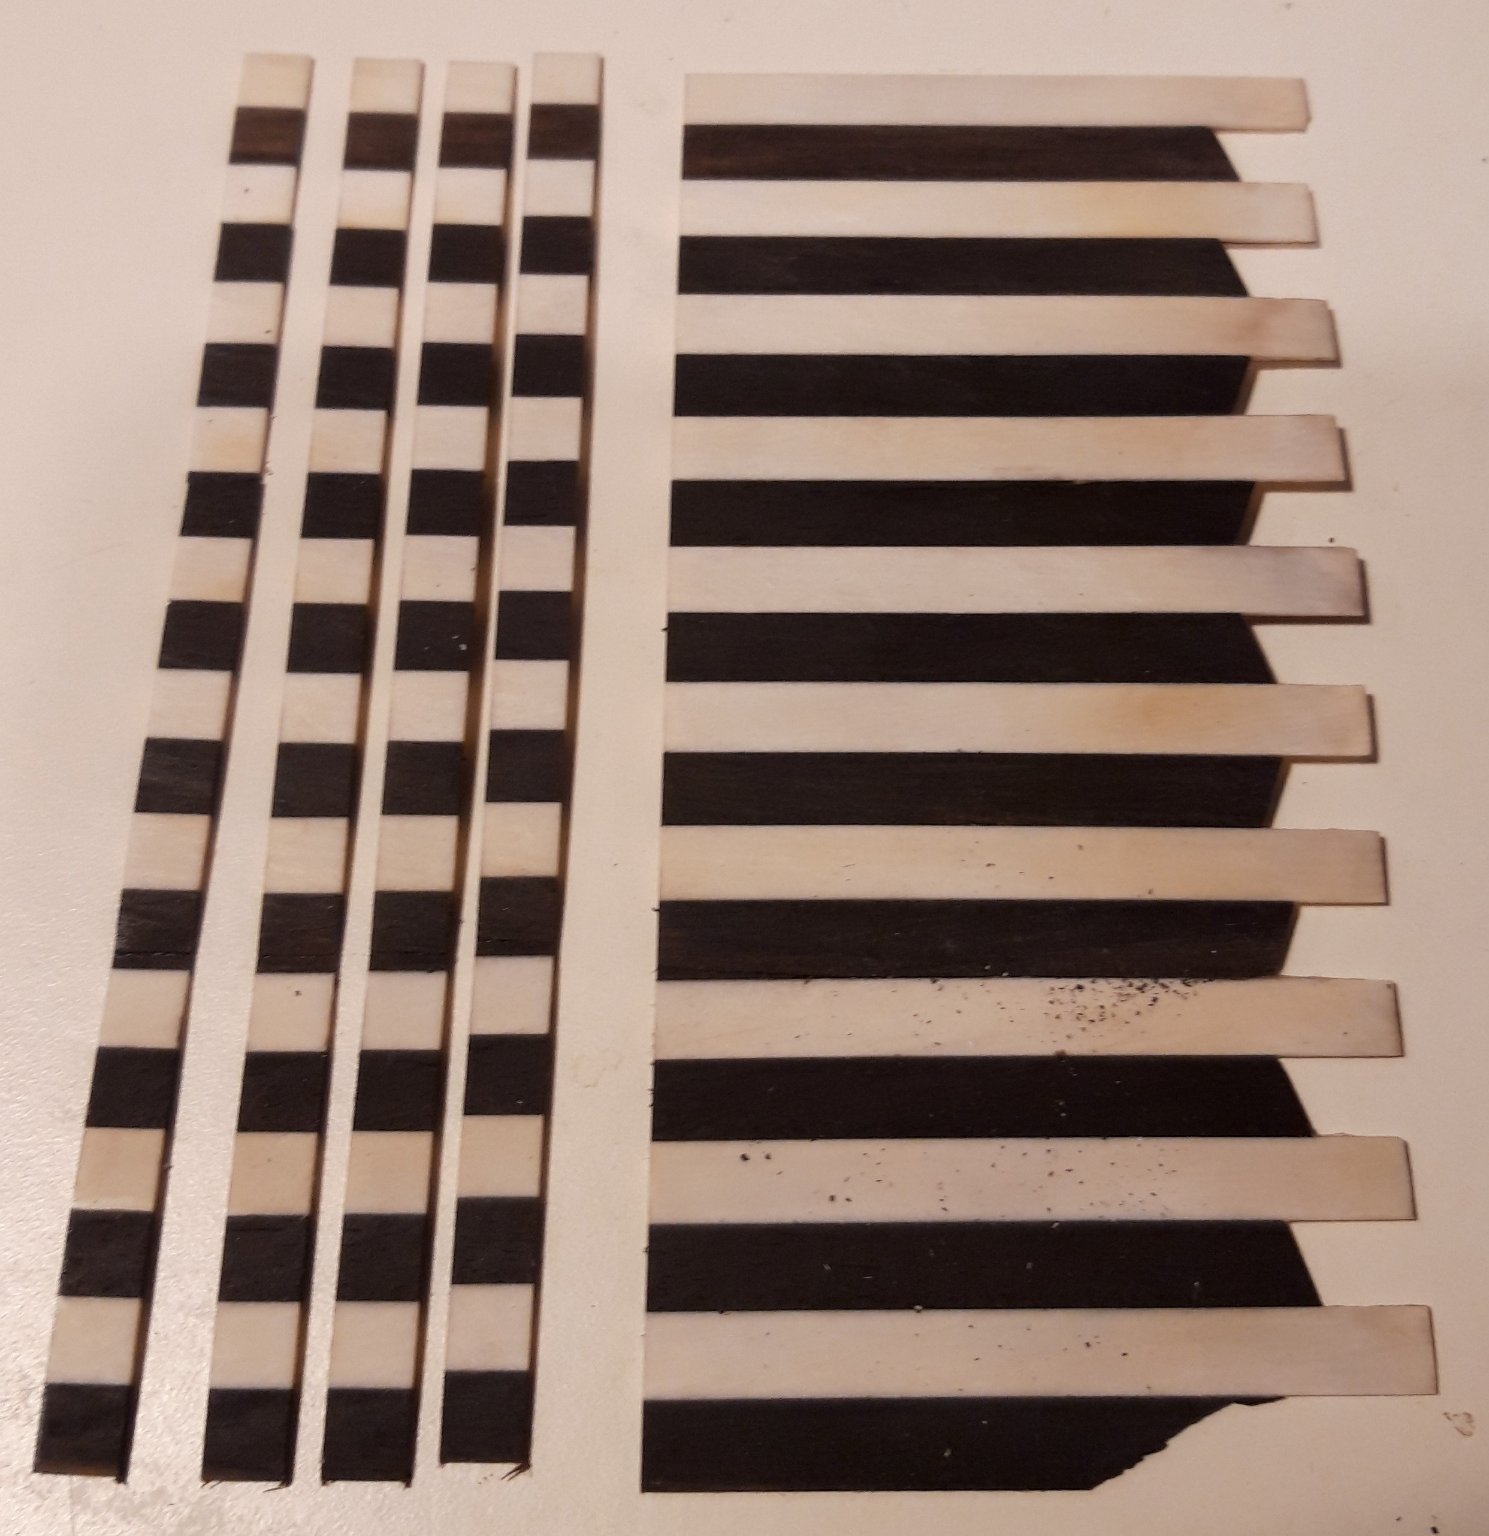
First thing was to provide the stripes and cut them without breaking them.

Next step was to stick them upside down on a tape.

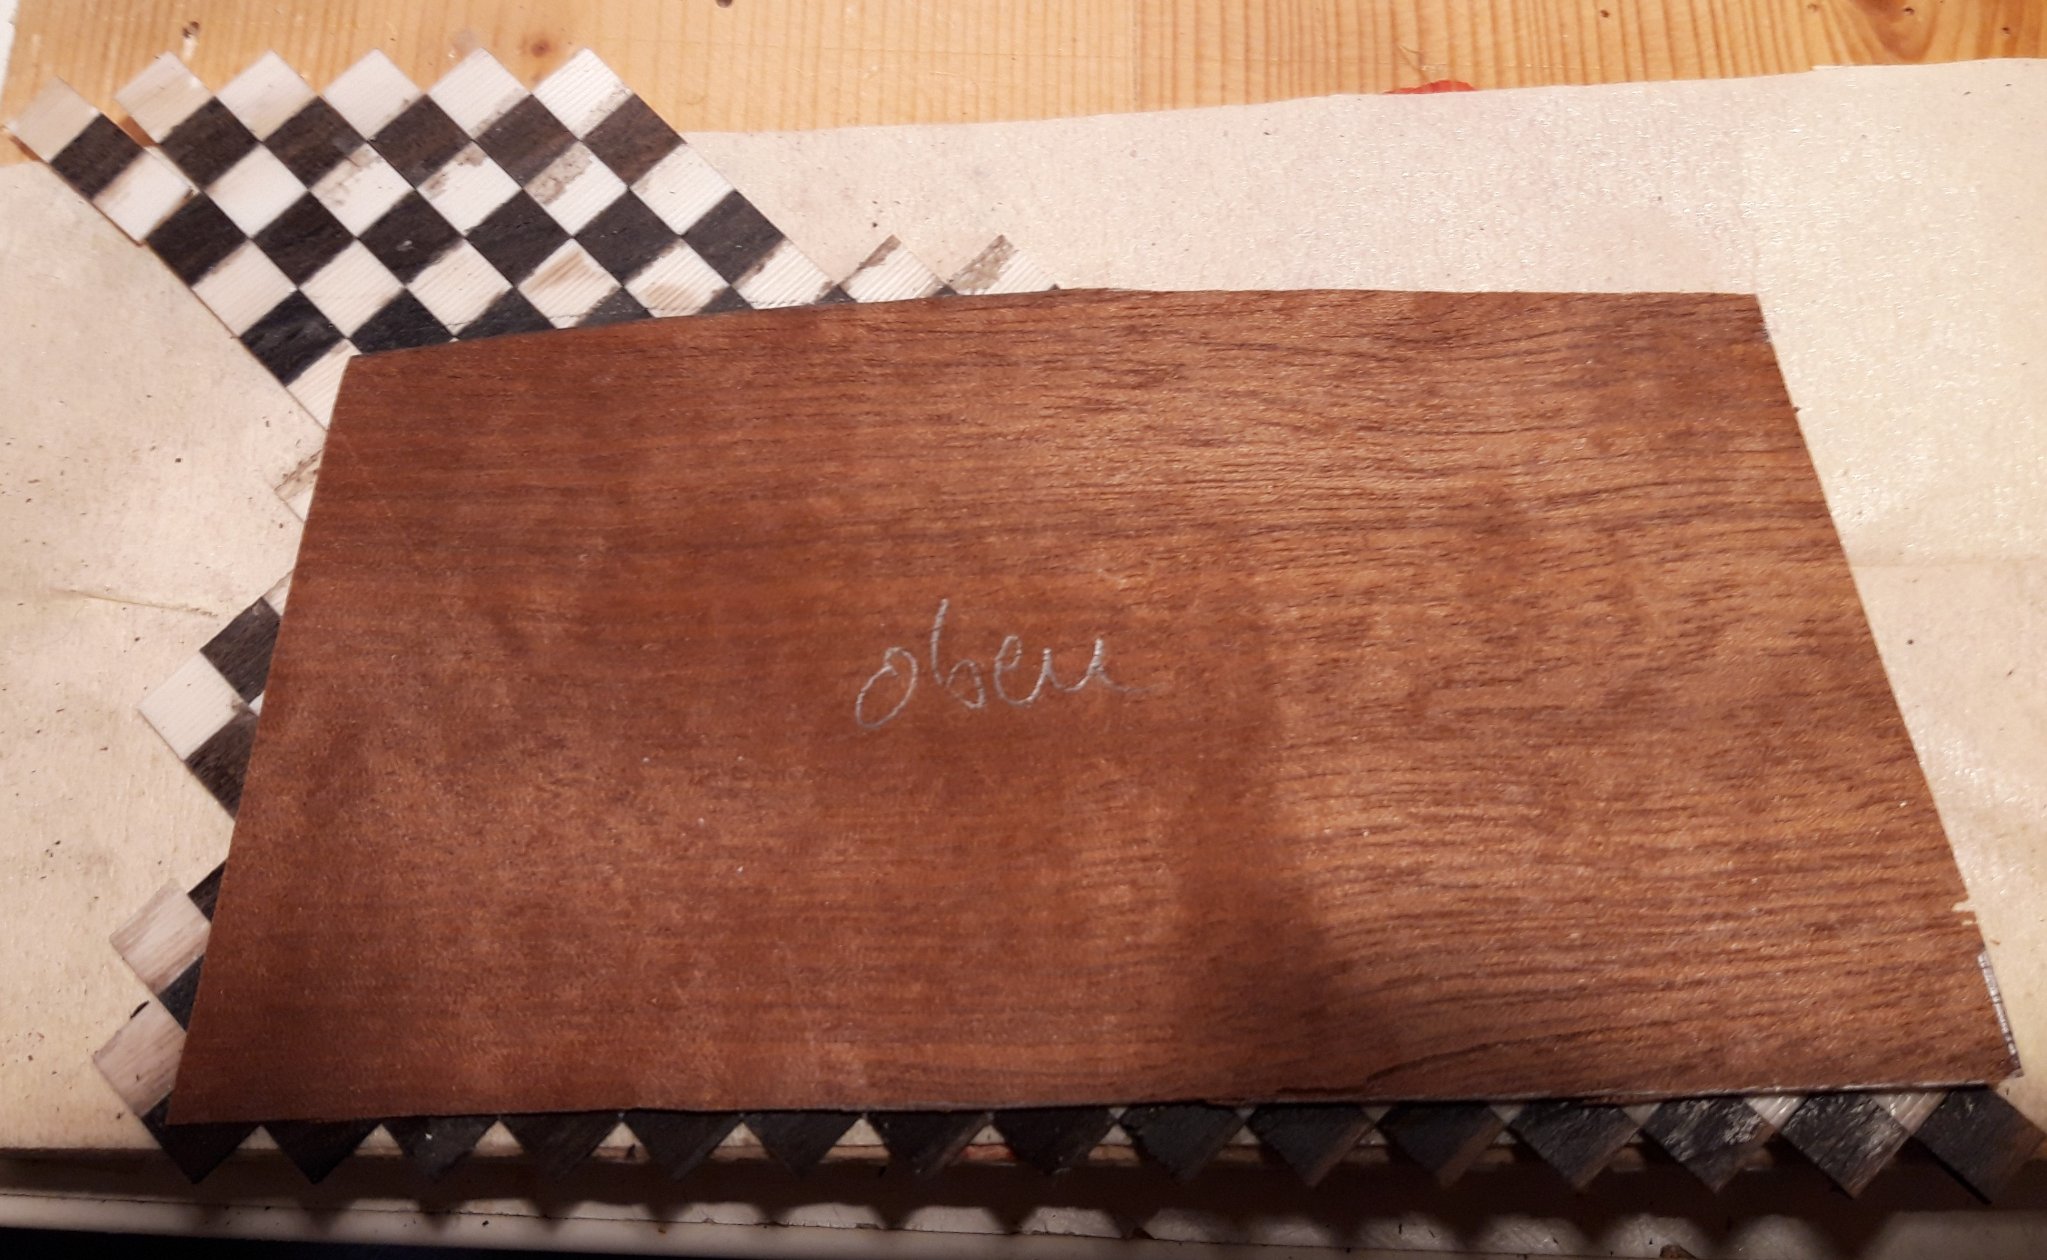
after that was done, a veneer template, wich had the size of the later flooring was glued to it upside down.

Afterwards the edges were cut and sanded in shape and the surface was polished.
Her you see the flooring on the model:
Matthias
- CiscoH, shipcarpenter, JpR62 and 21 others
-
24
-
-
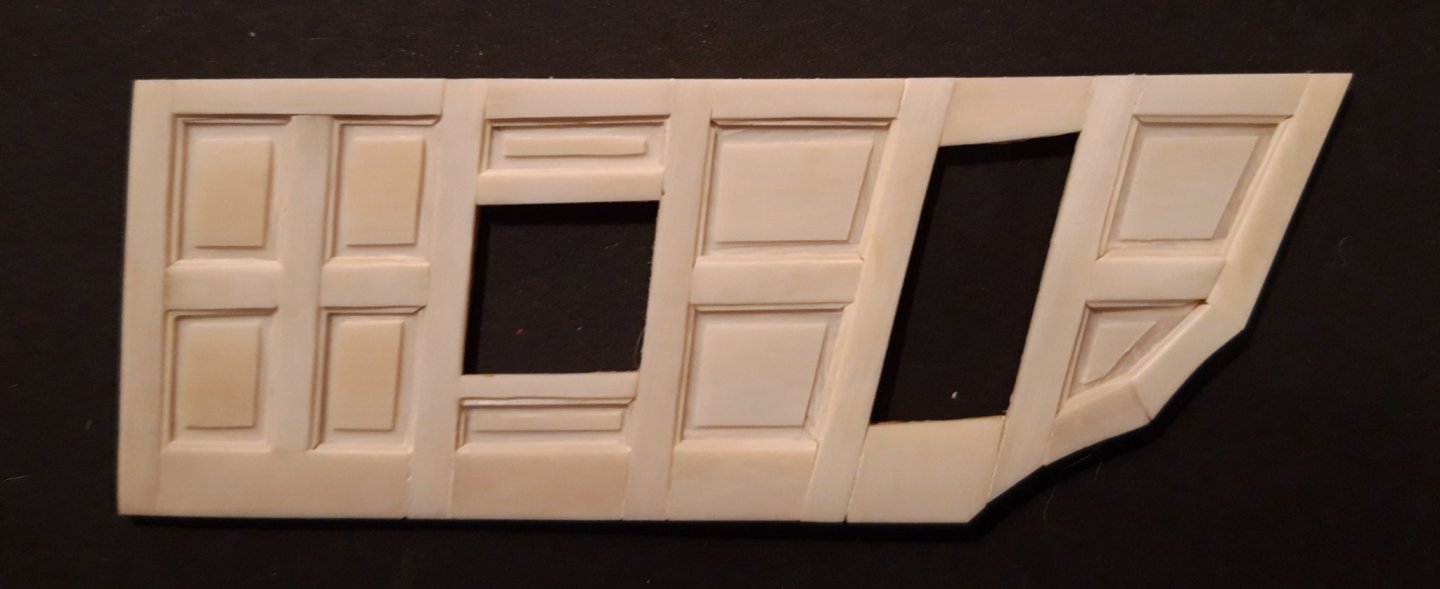
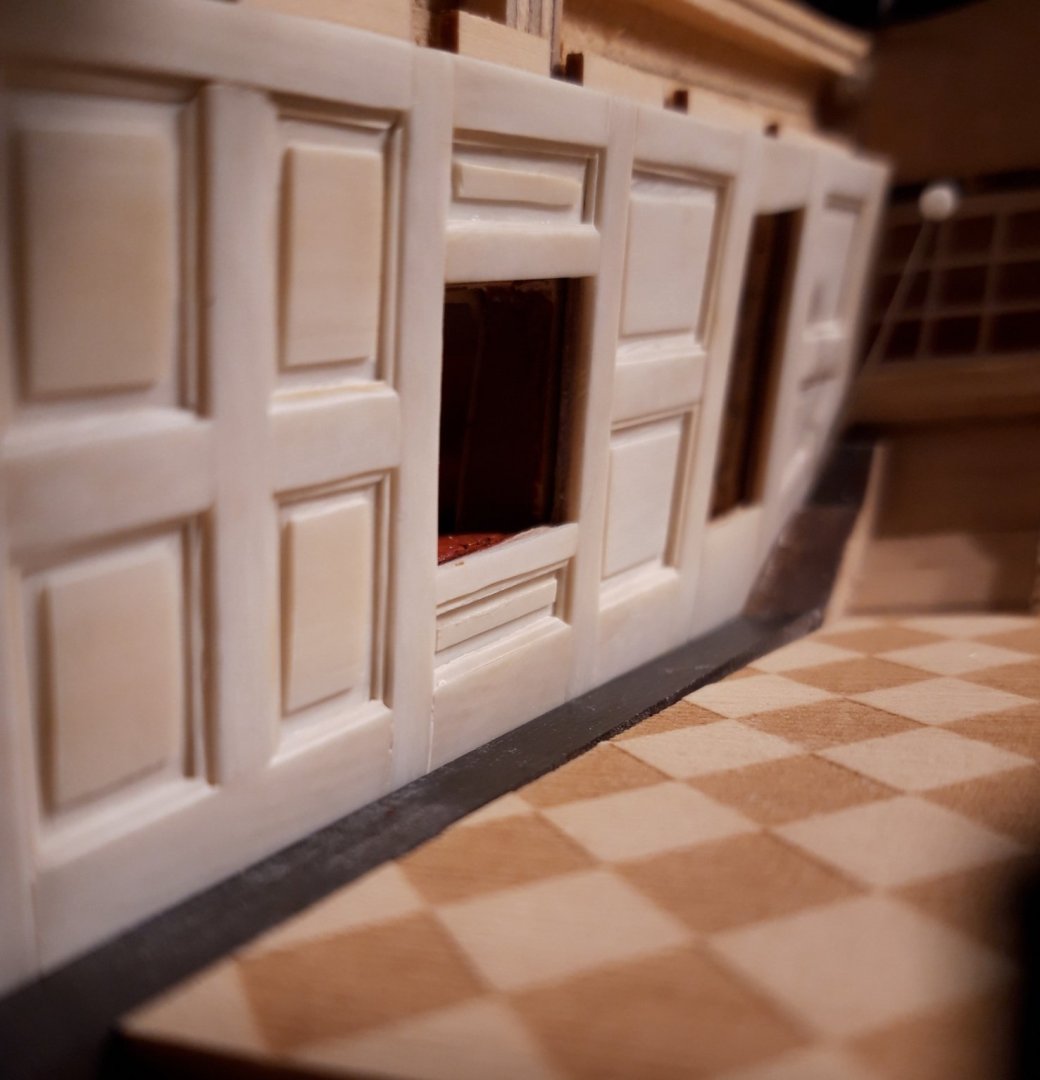
I glued the panel to the model now and added the sliding door. Next will bet the port side panel.


- usedtosail, Gregory, Edwardkenway and 19 others
-
21
-
 1
1
-
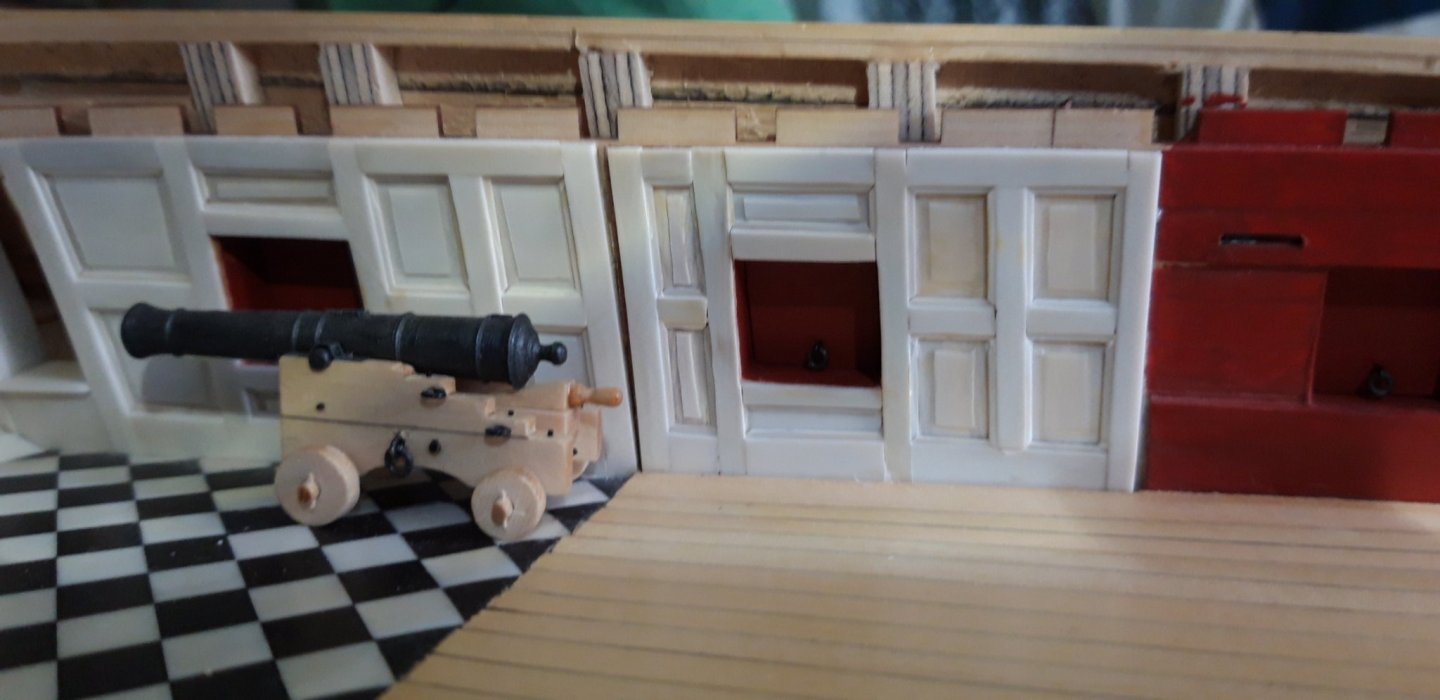
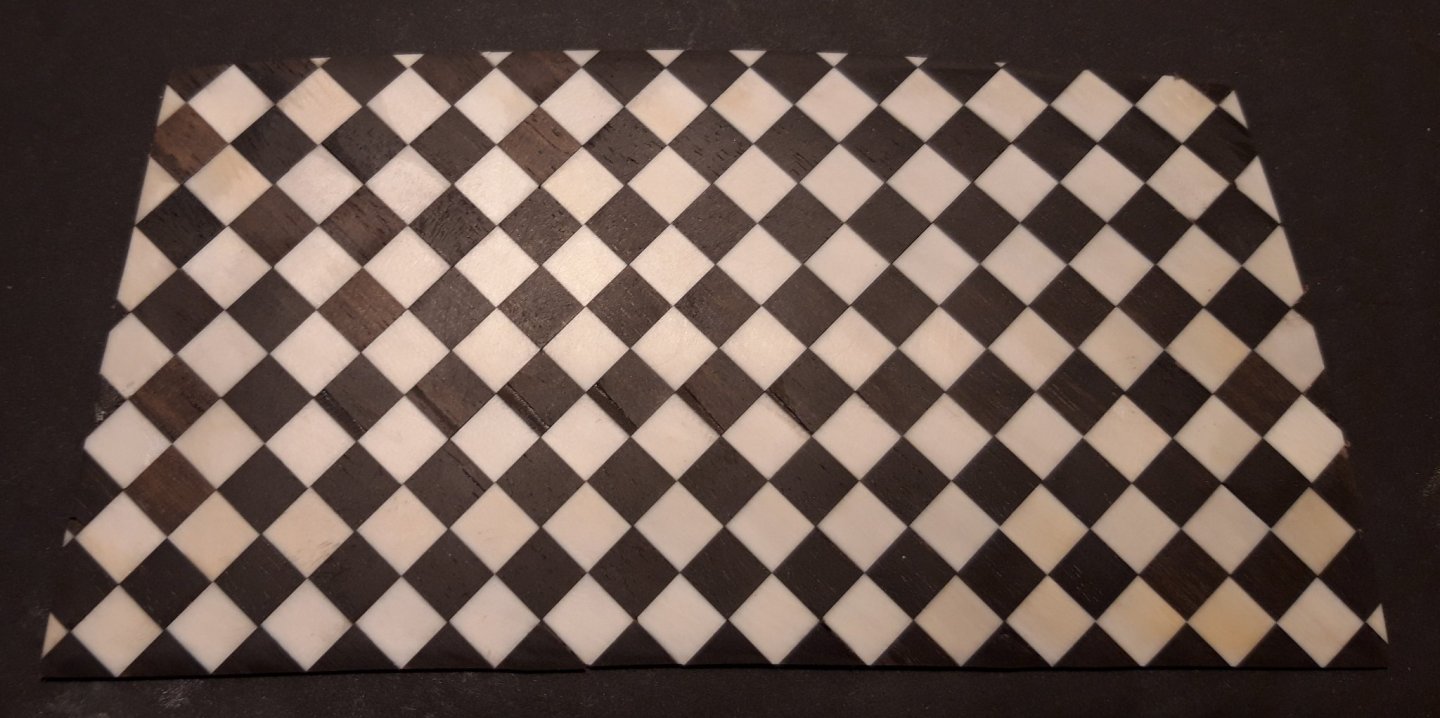
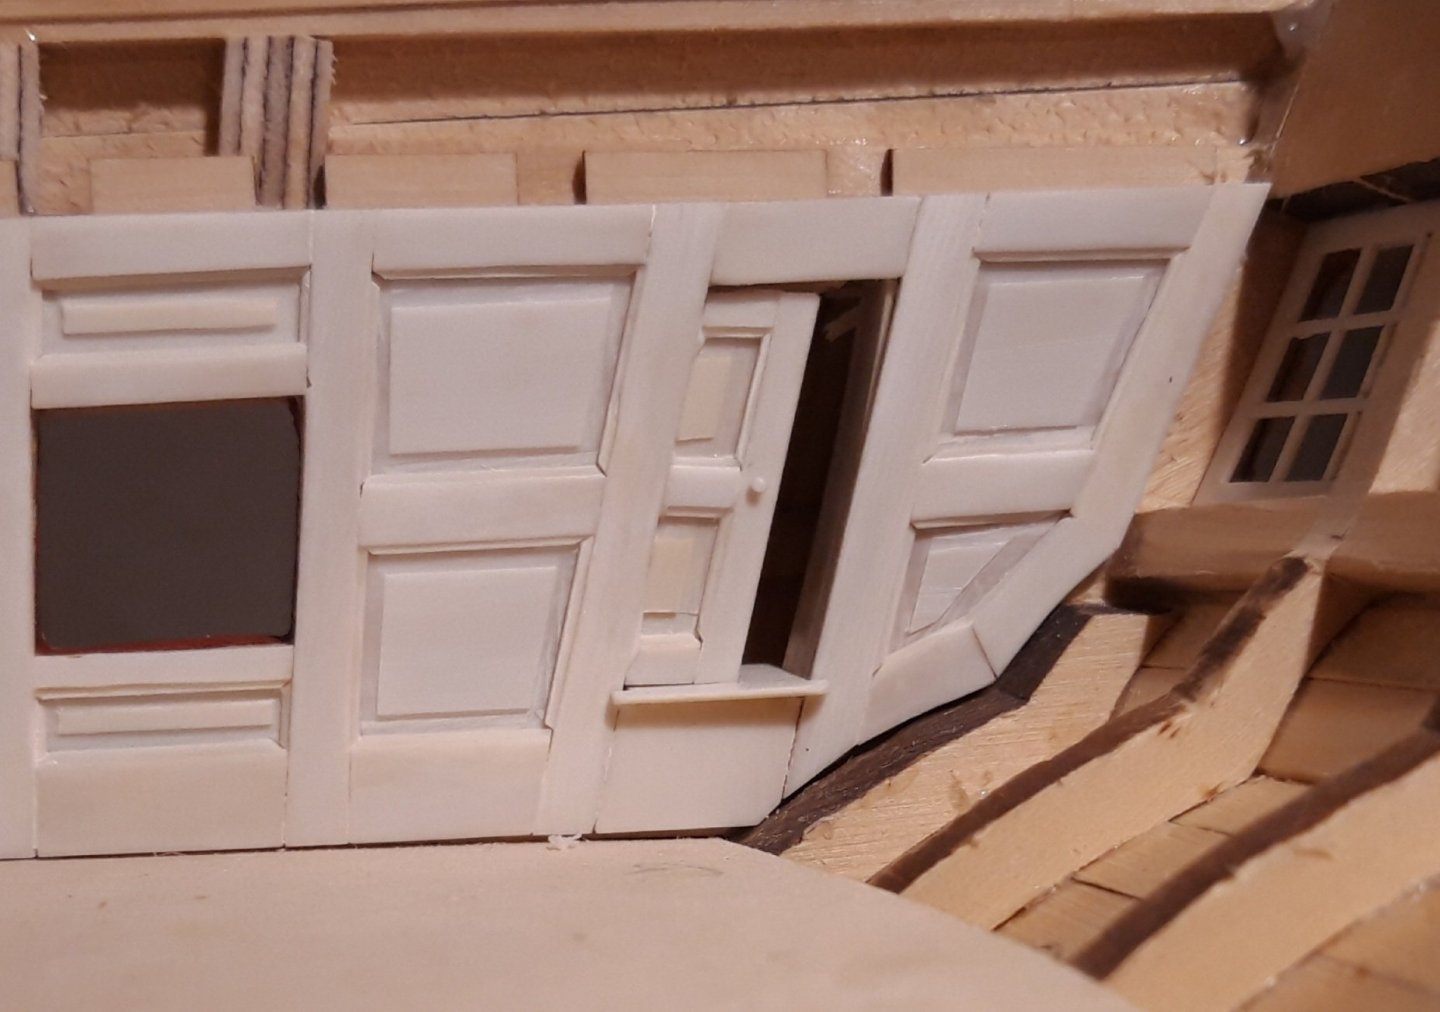
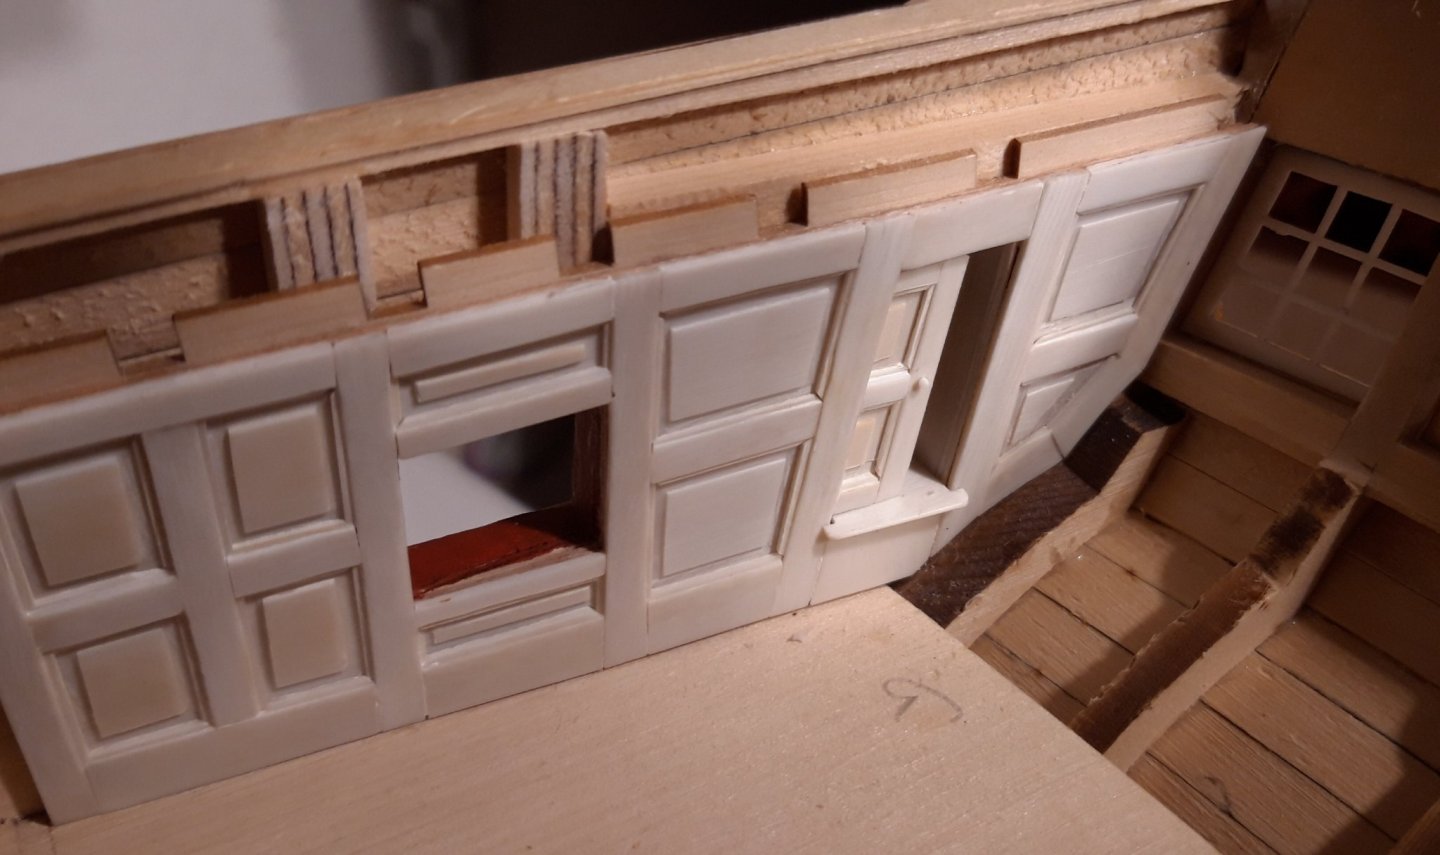
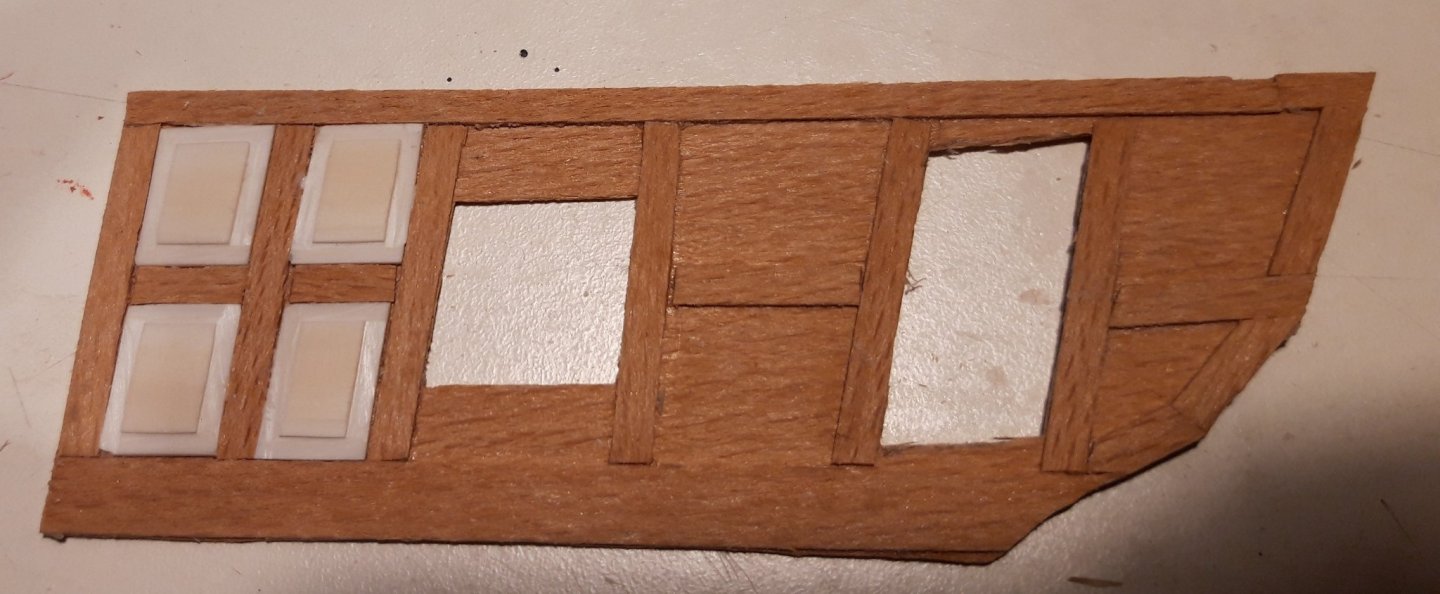
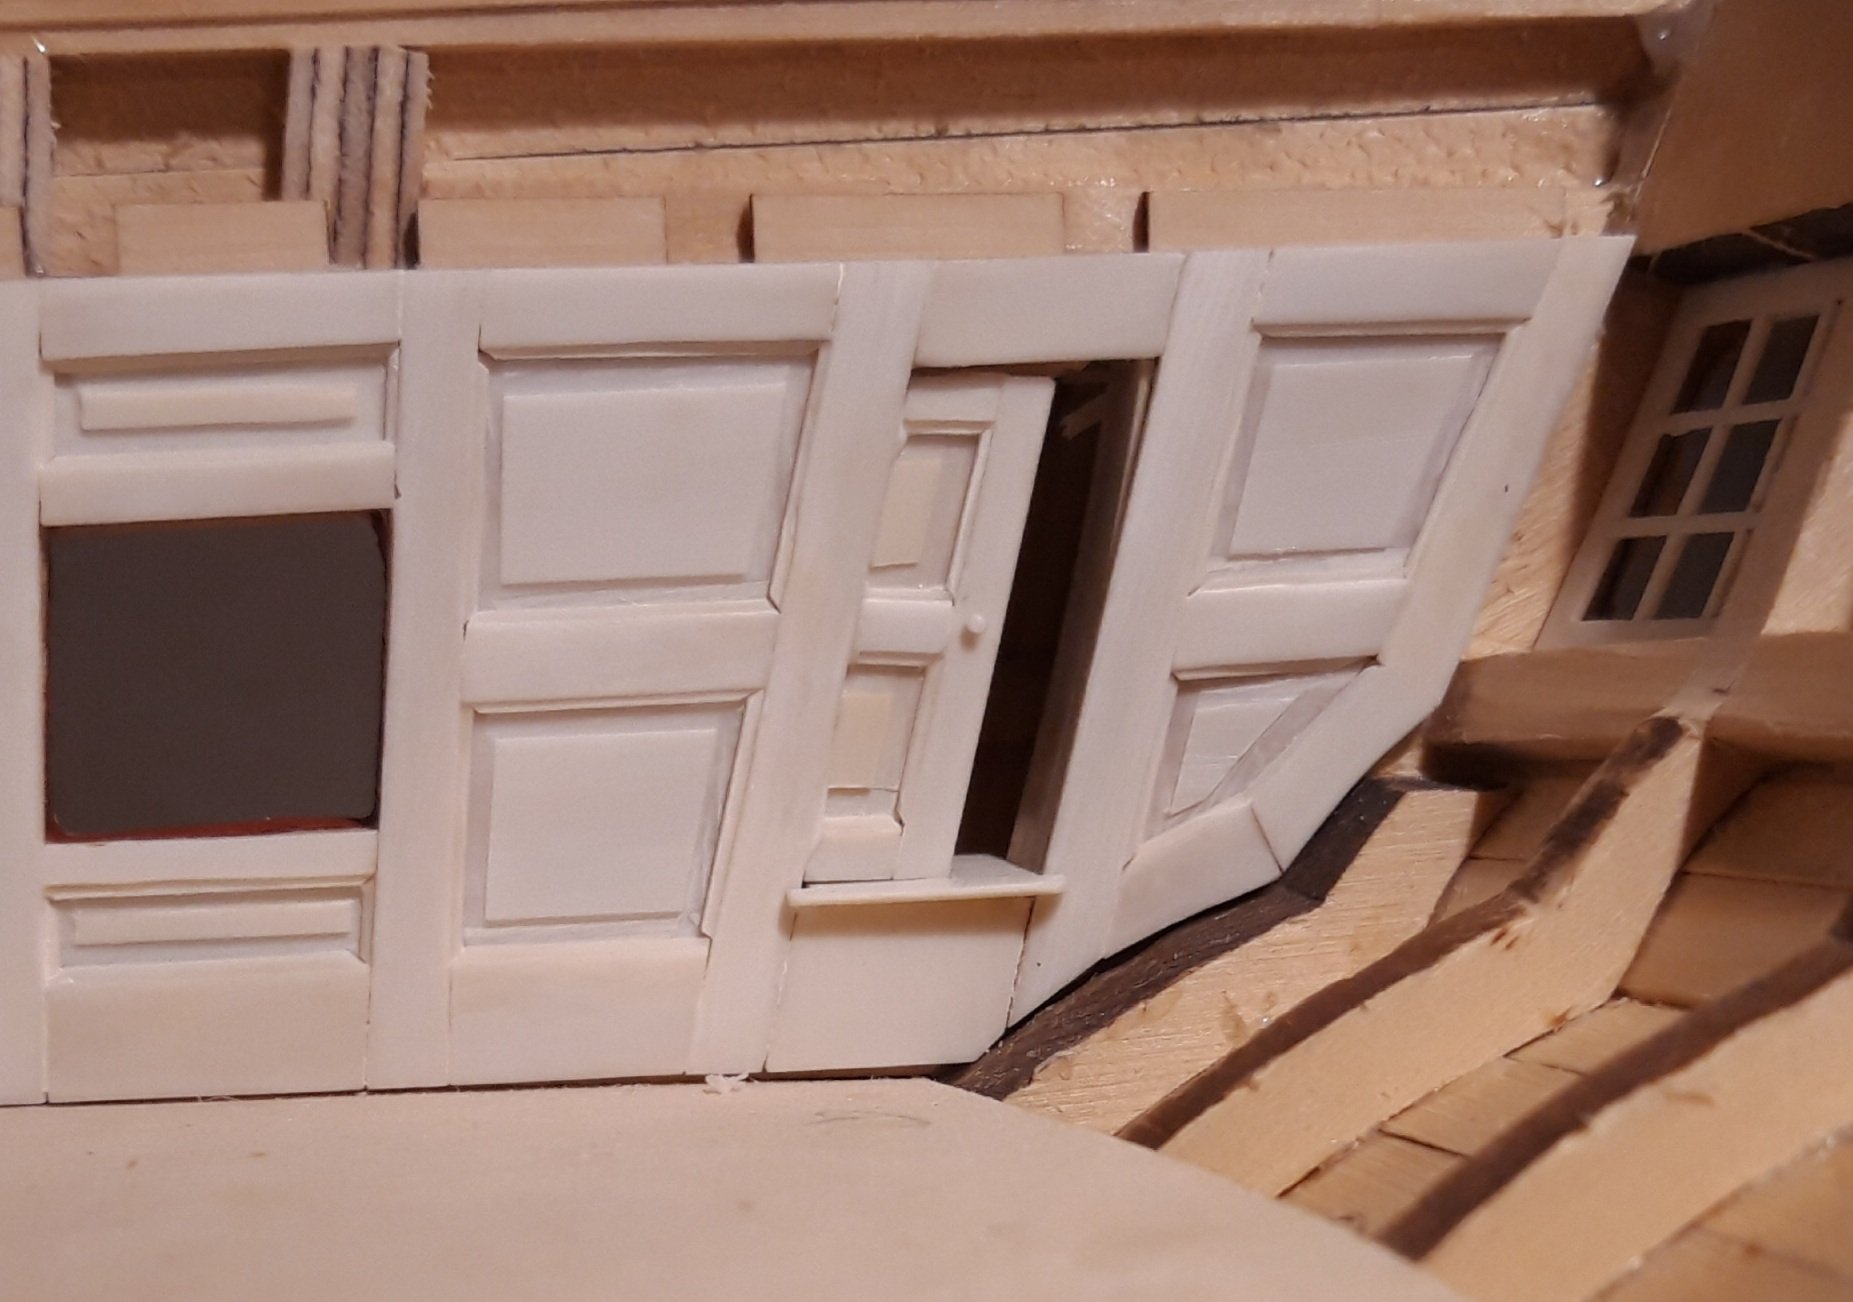
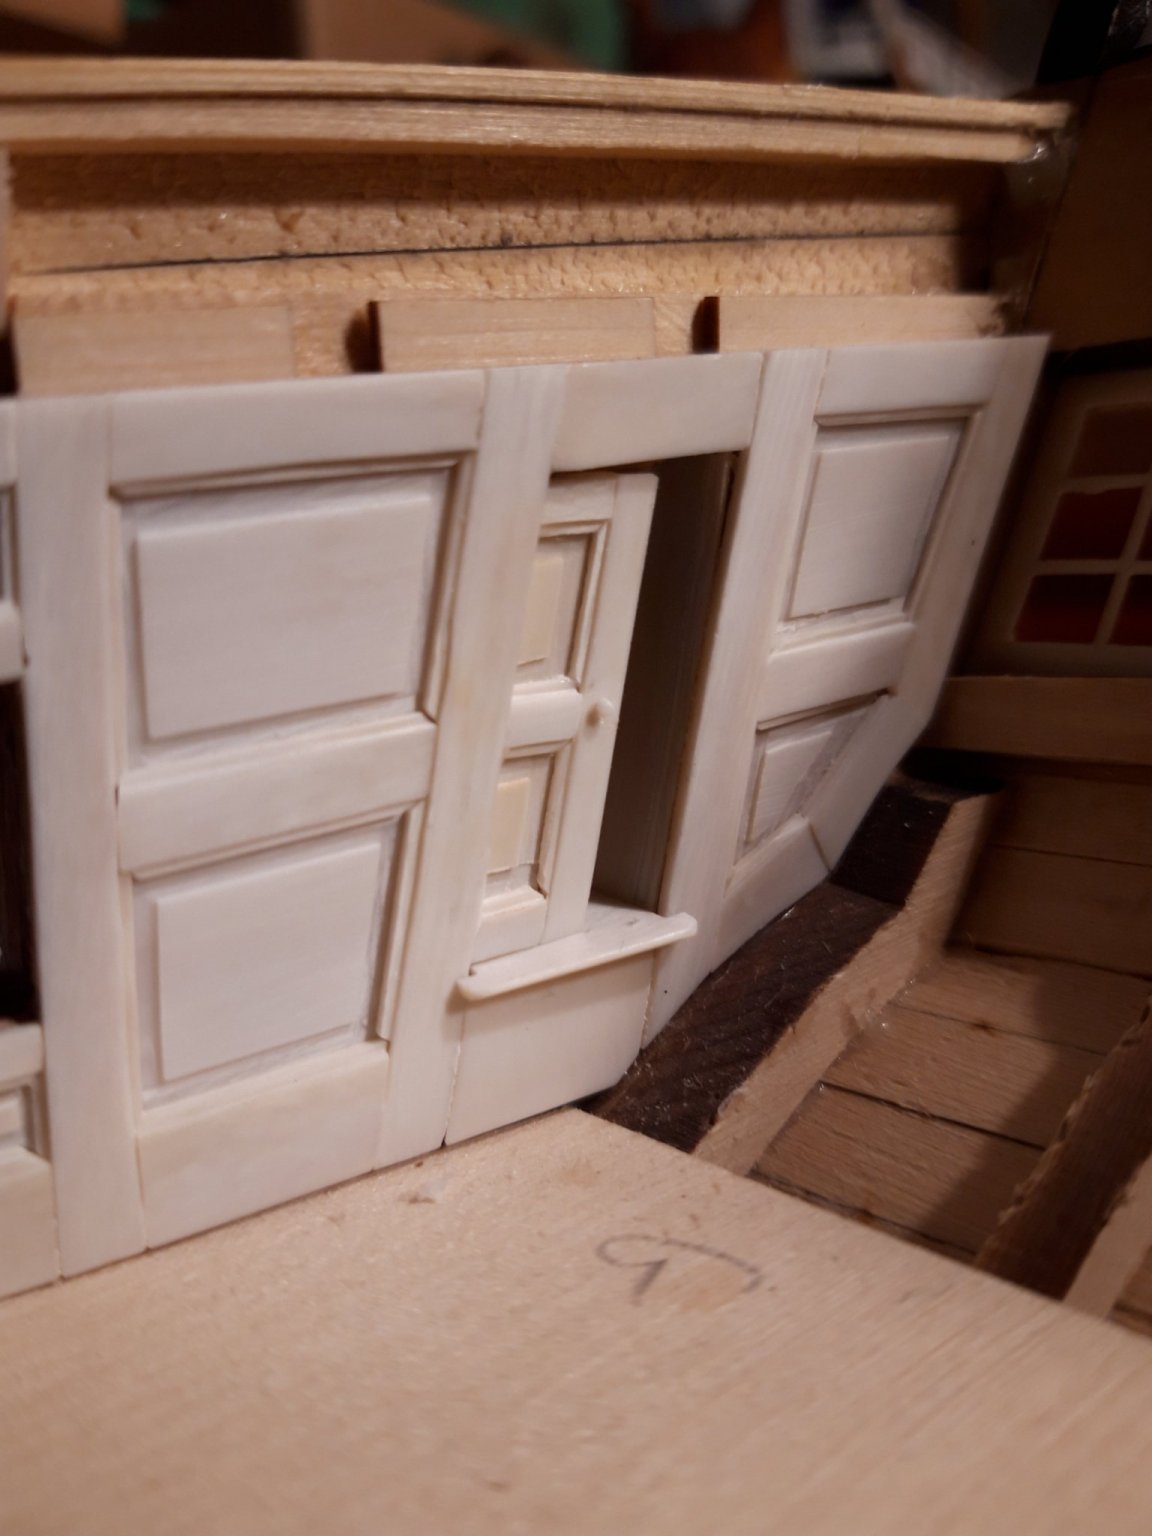
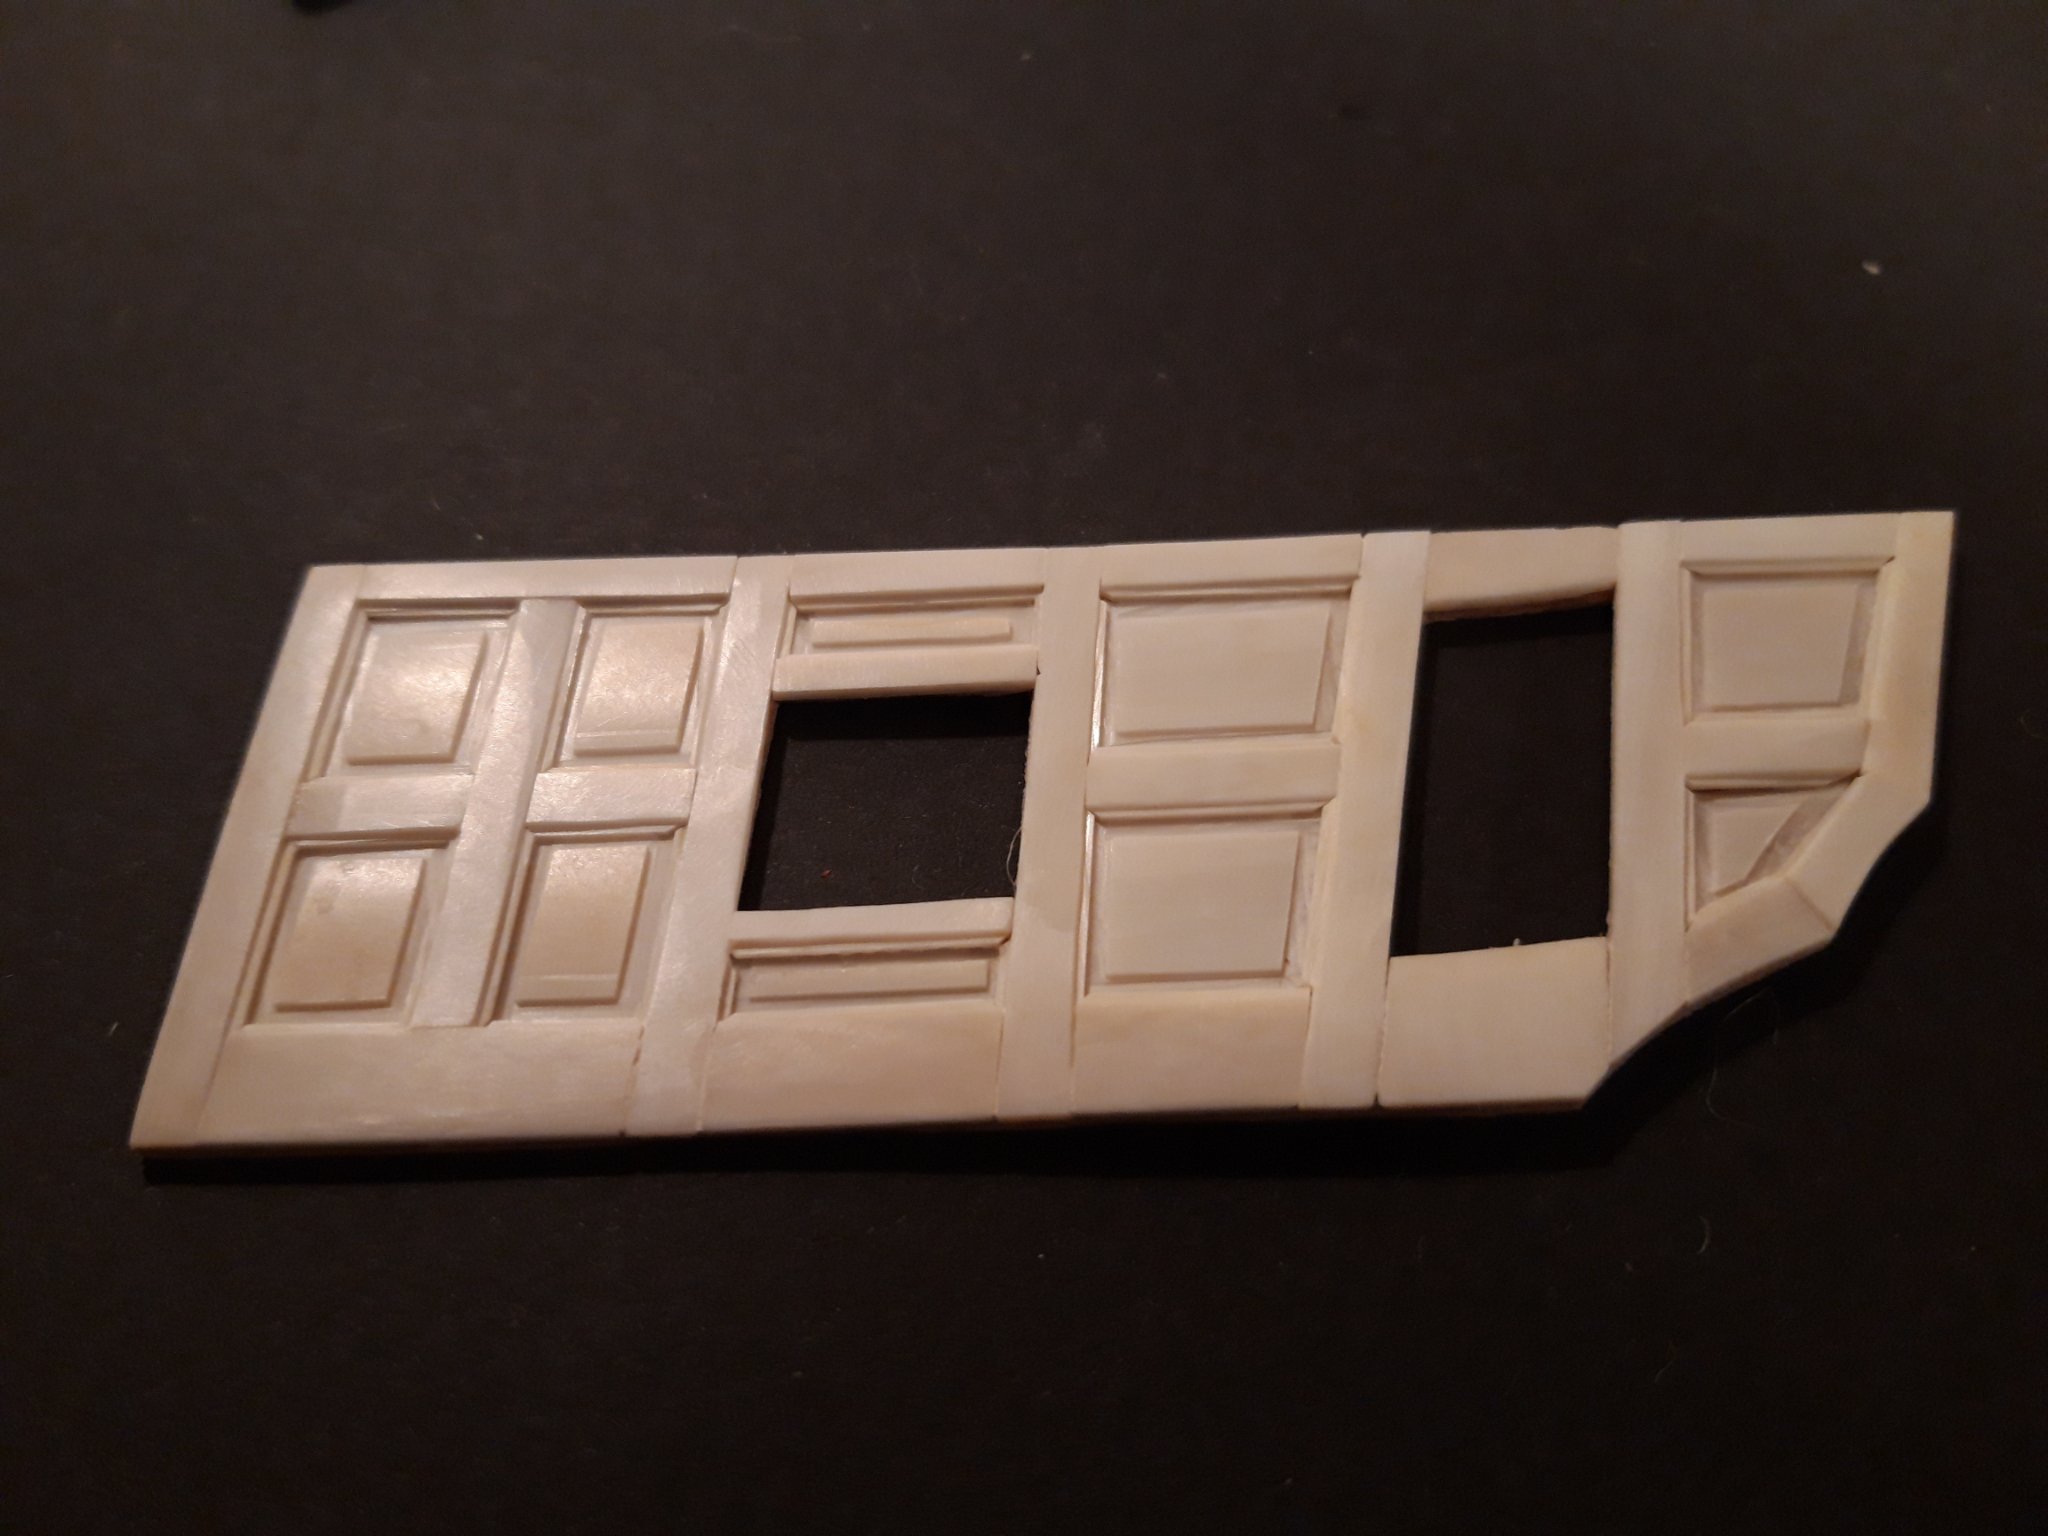
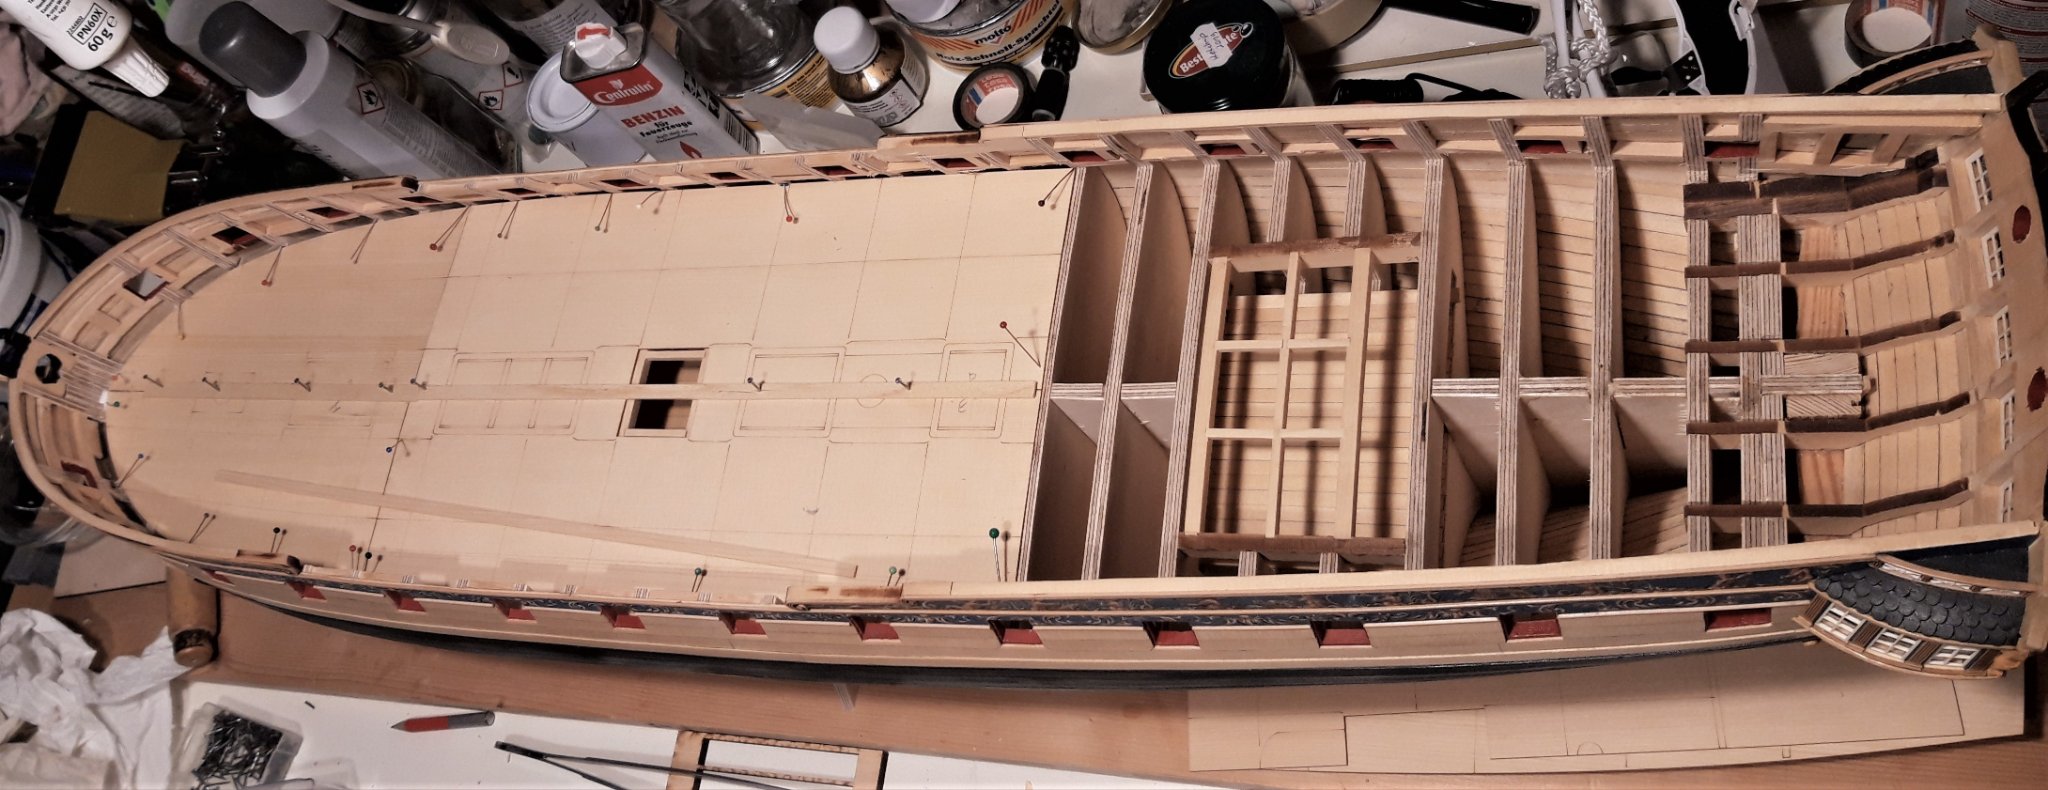
The next thing for me to do is the panels and flooring of the captains cabin. I wanted to use my ivory for the panels and started with the starbord panel.
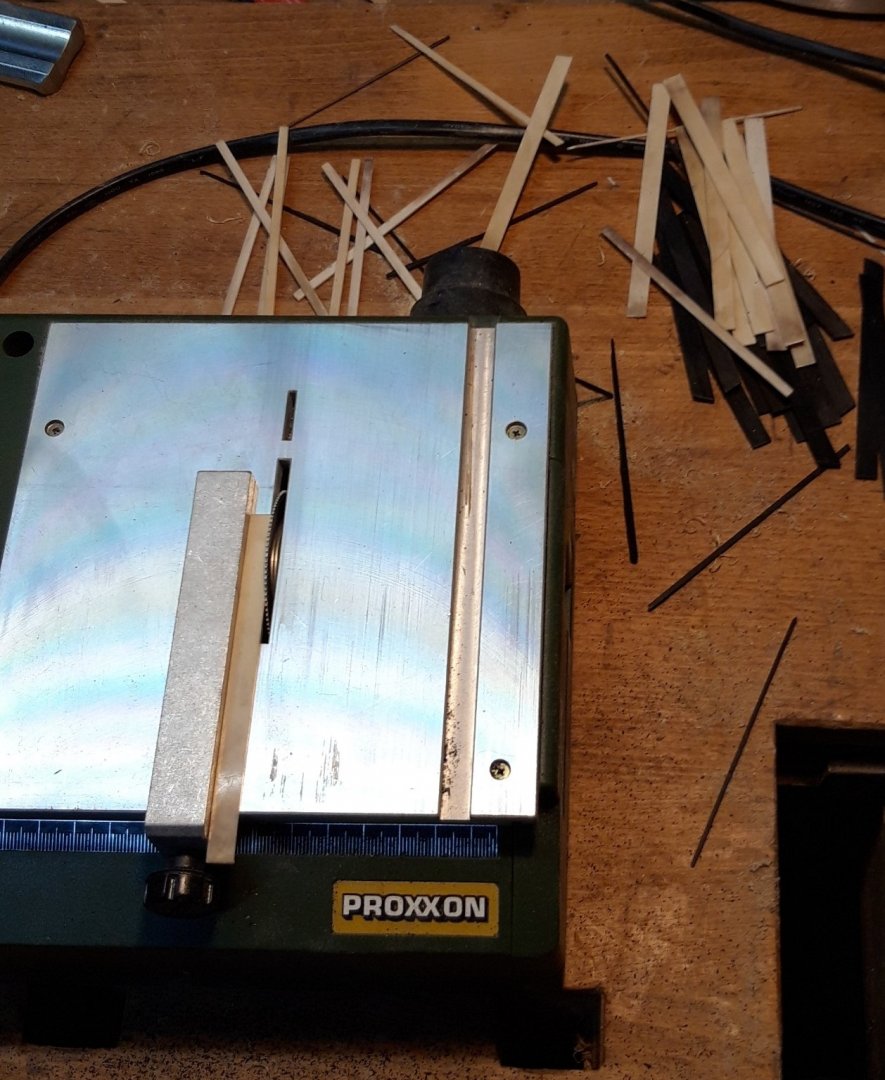
I made a base from a thin veneer and cut out door and gunport in the right position. Then I glued small strips of veneer onto it, for the placement of frames and panels. The ivory parts were cut and profiled on the saw and afterward sanded an glued on the base. Here you see the result.
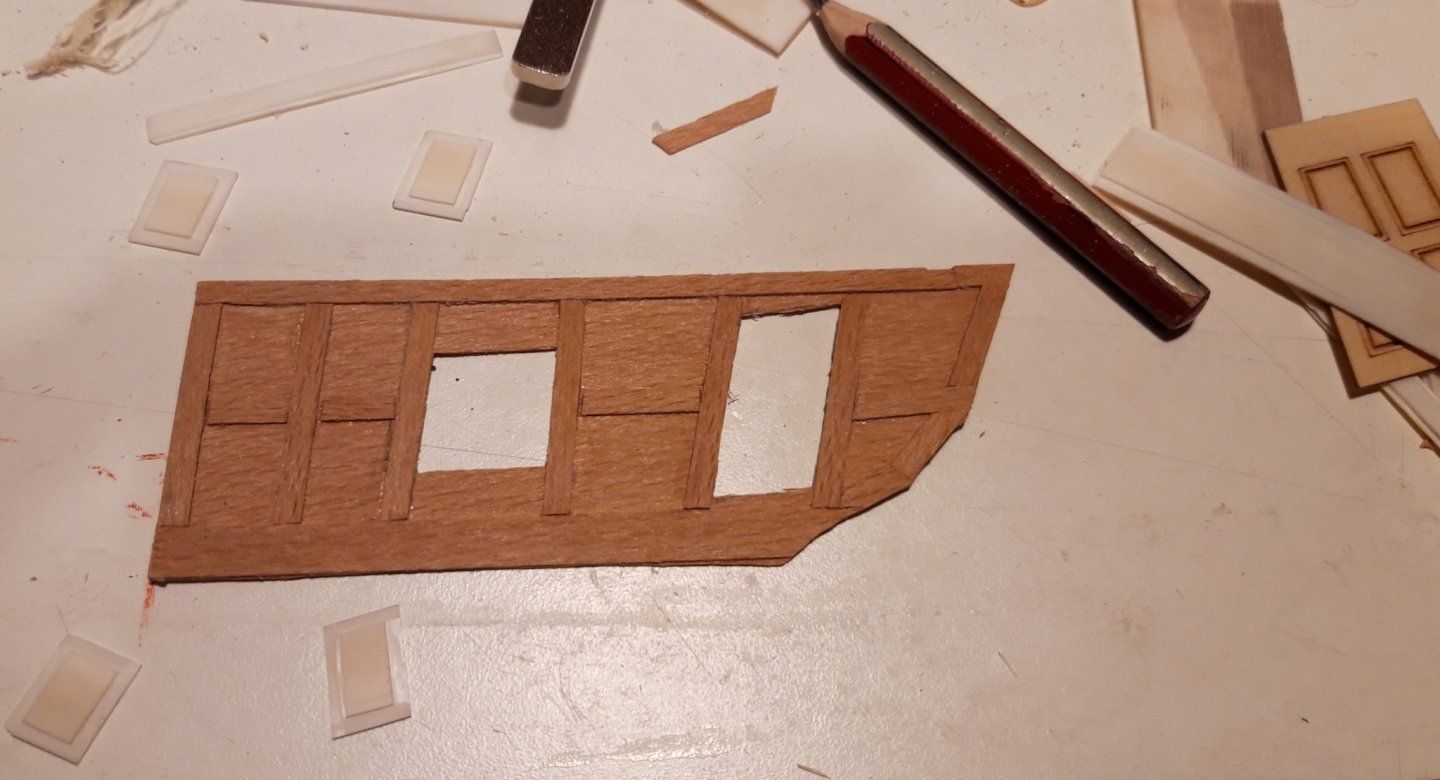


My material will be enough for the captains cabin, but not for the rooms infront of the cabin. I plan to make that with wooden panels like this one here:
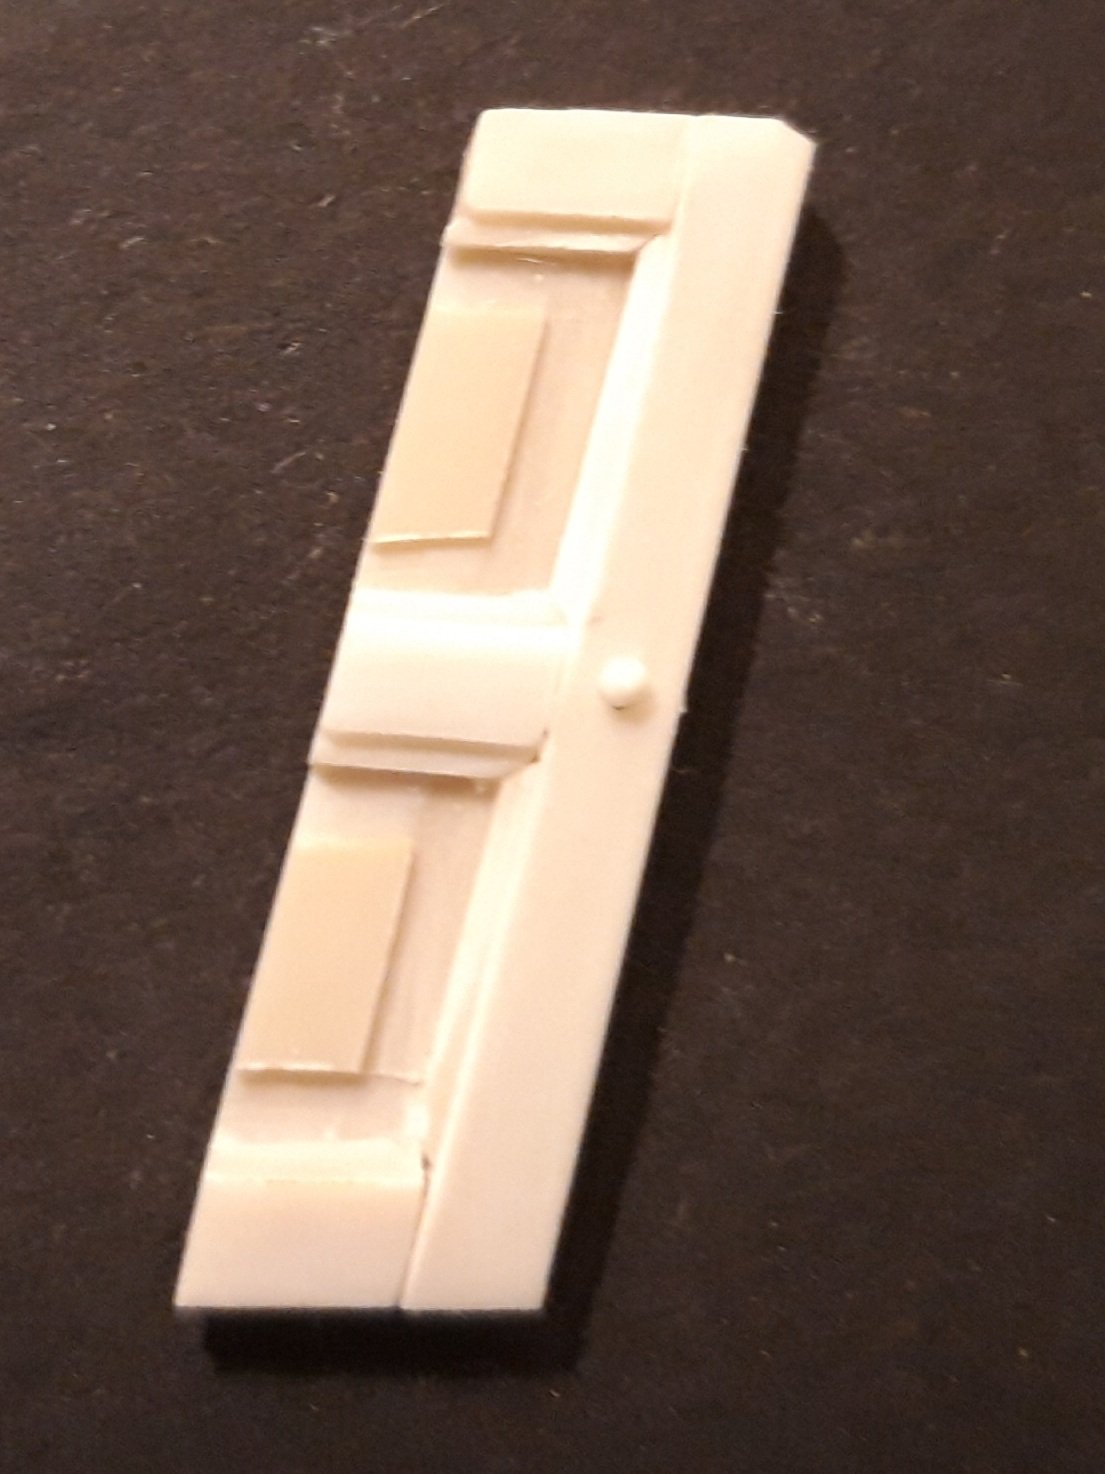
One thing I still have to add, before gluing the starbord panel in position is the door to the Quartergalerie. I am thinking of a sliding door like this one:

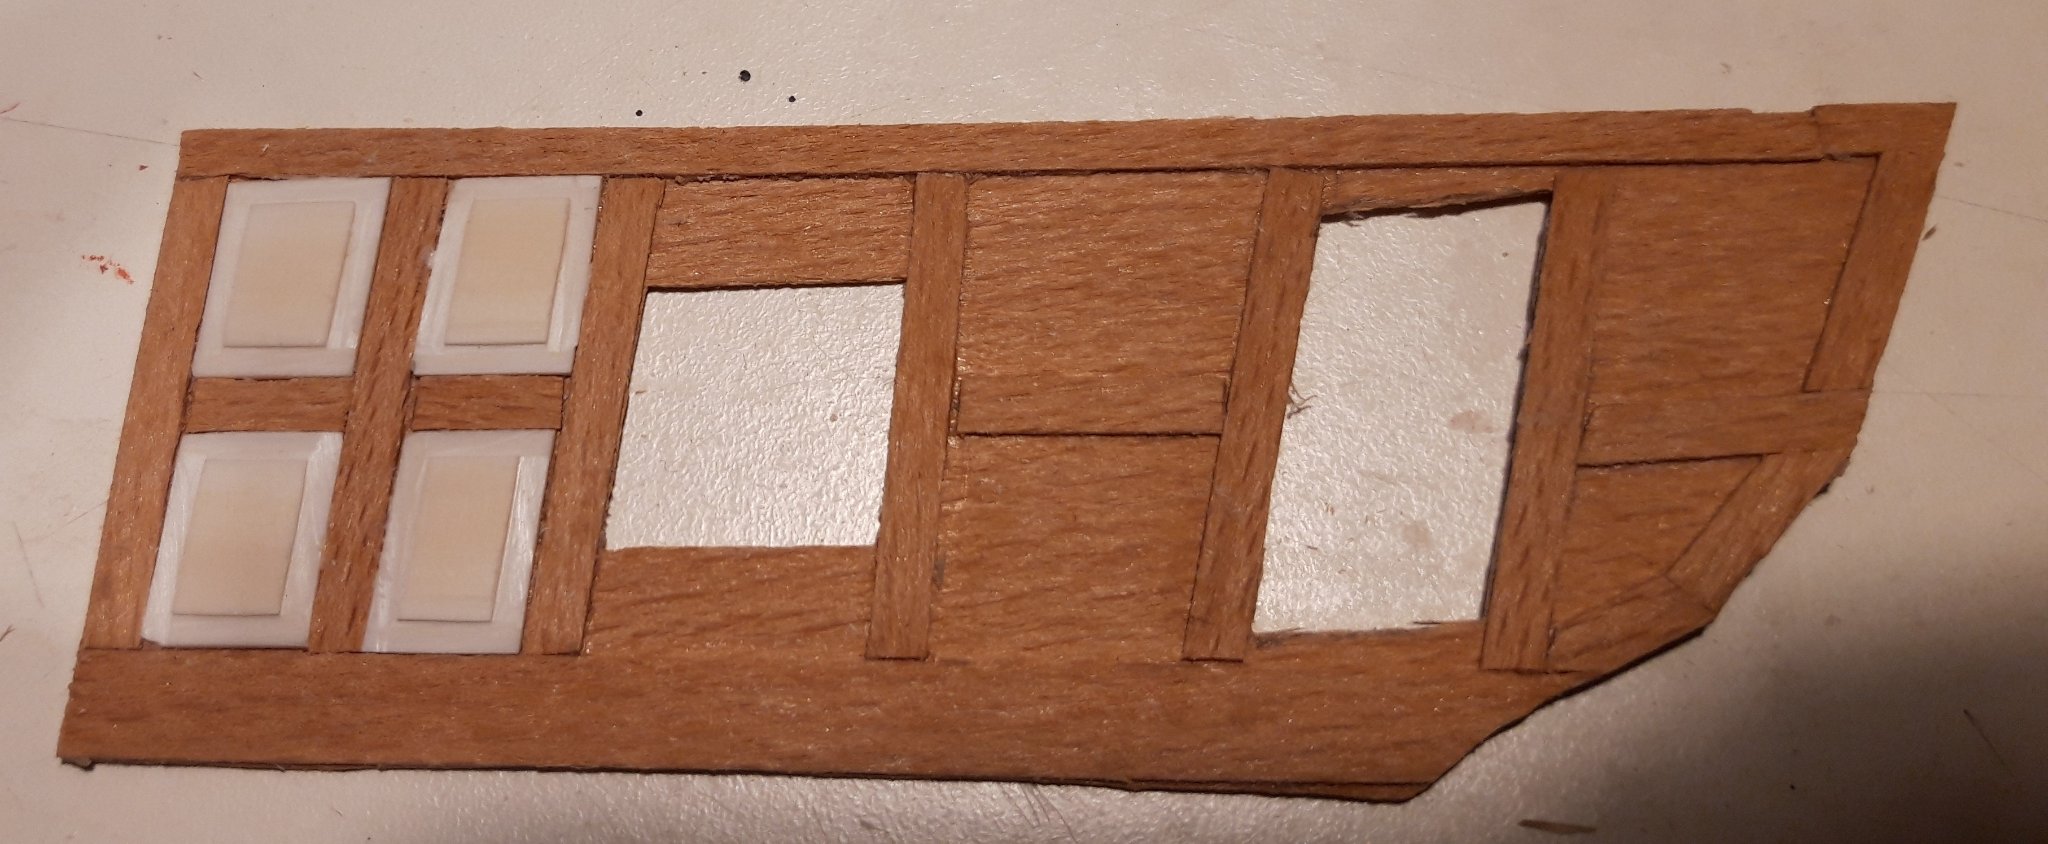
After that, I will make the checkerbord flooring, using the material of the panels and some ebony. I started the preparation on this one:
Here you see the strips glued together and sandet roughly, next they will be cut apart and glued on a veneer-basebord as well and then sanded and polished.
Matthias
-
Thank you Mike, I corrected that.
- Stuntflyer and FrankWouts
-
2
-
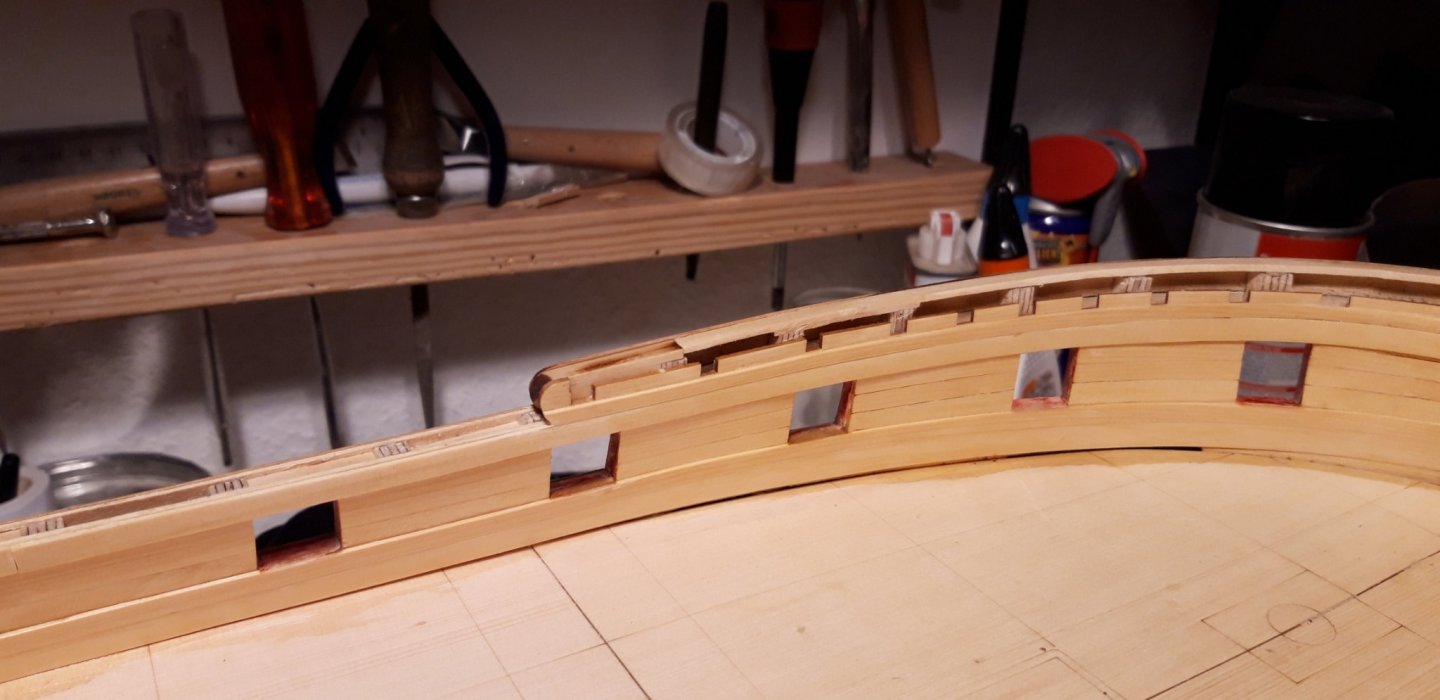
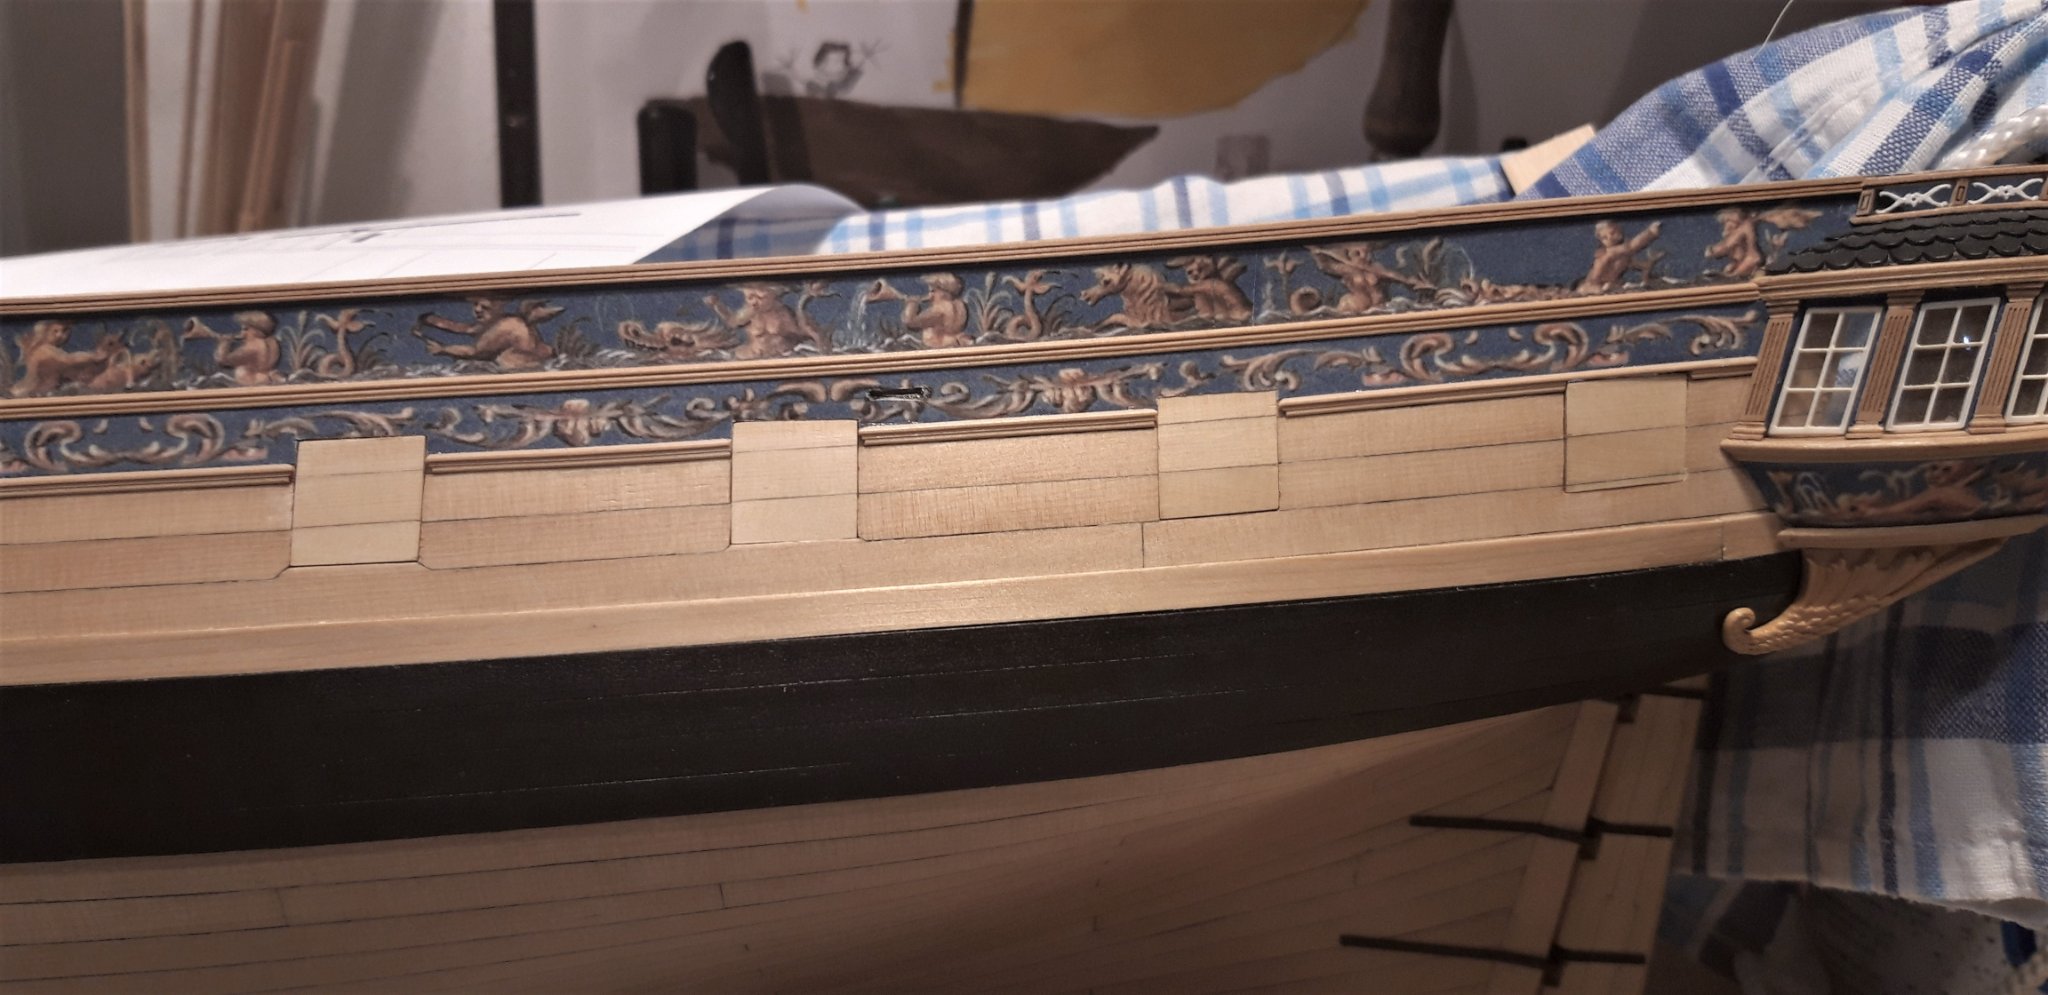
I made the inboard planking of the bulwarks, and of course forgot to insert the little shells in the second layer, I inserted them in the first layer. So I have do drill the holes in the right place and somehow create the notch between them.
After painting everything, I will continue with the paneled captains cabin.
Matthias
- scrubbyj427, Rustyj, Matt D and 6 others
-
9
-
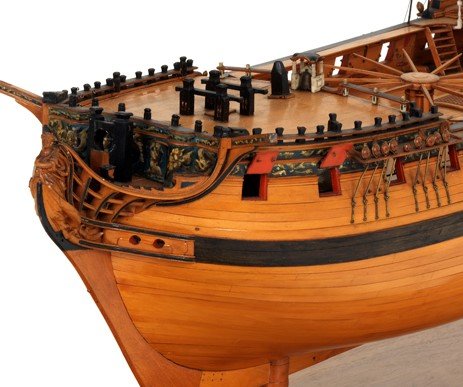
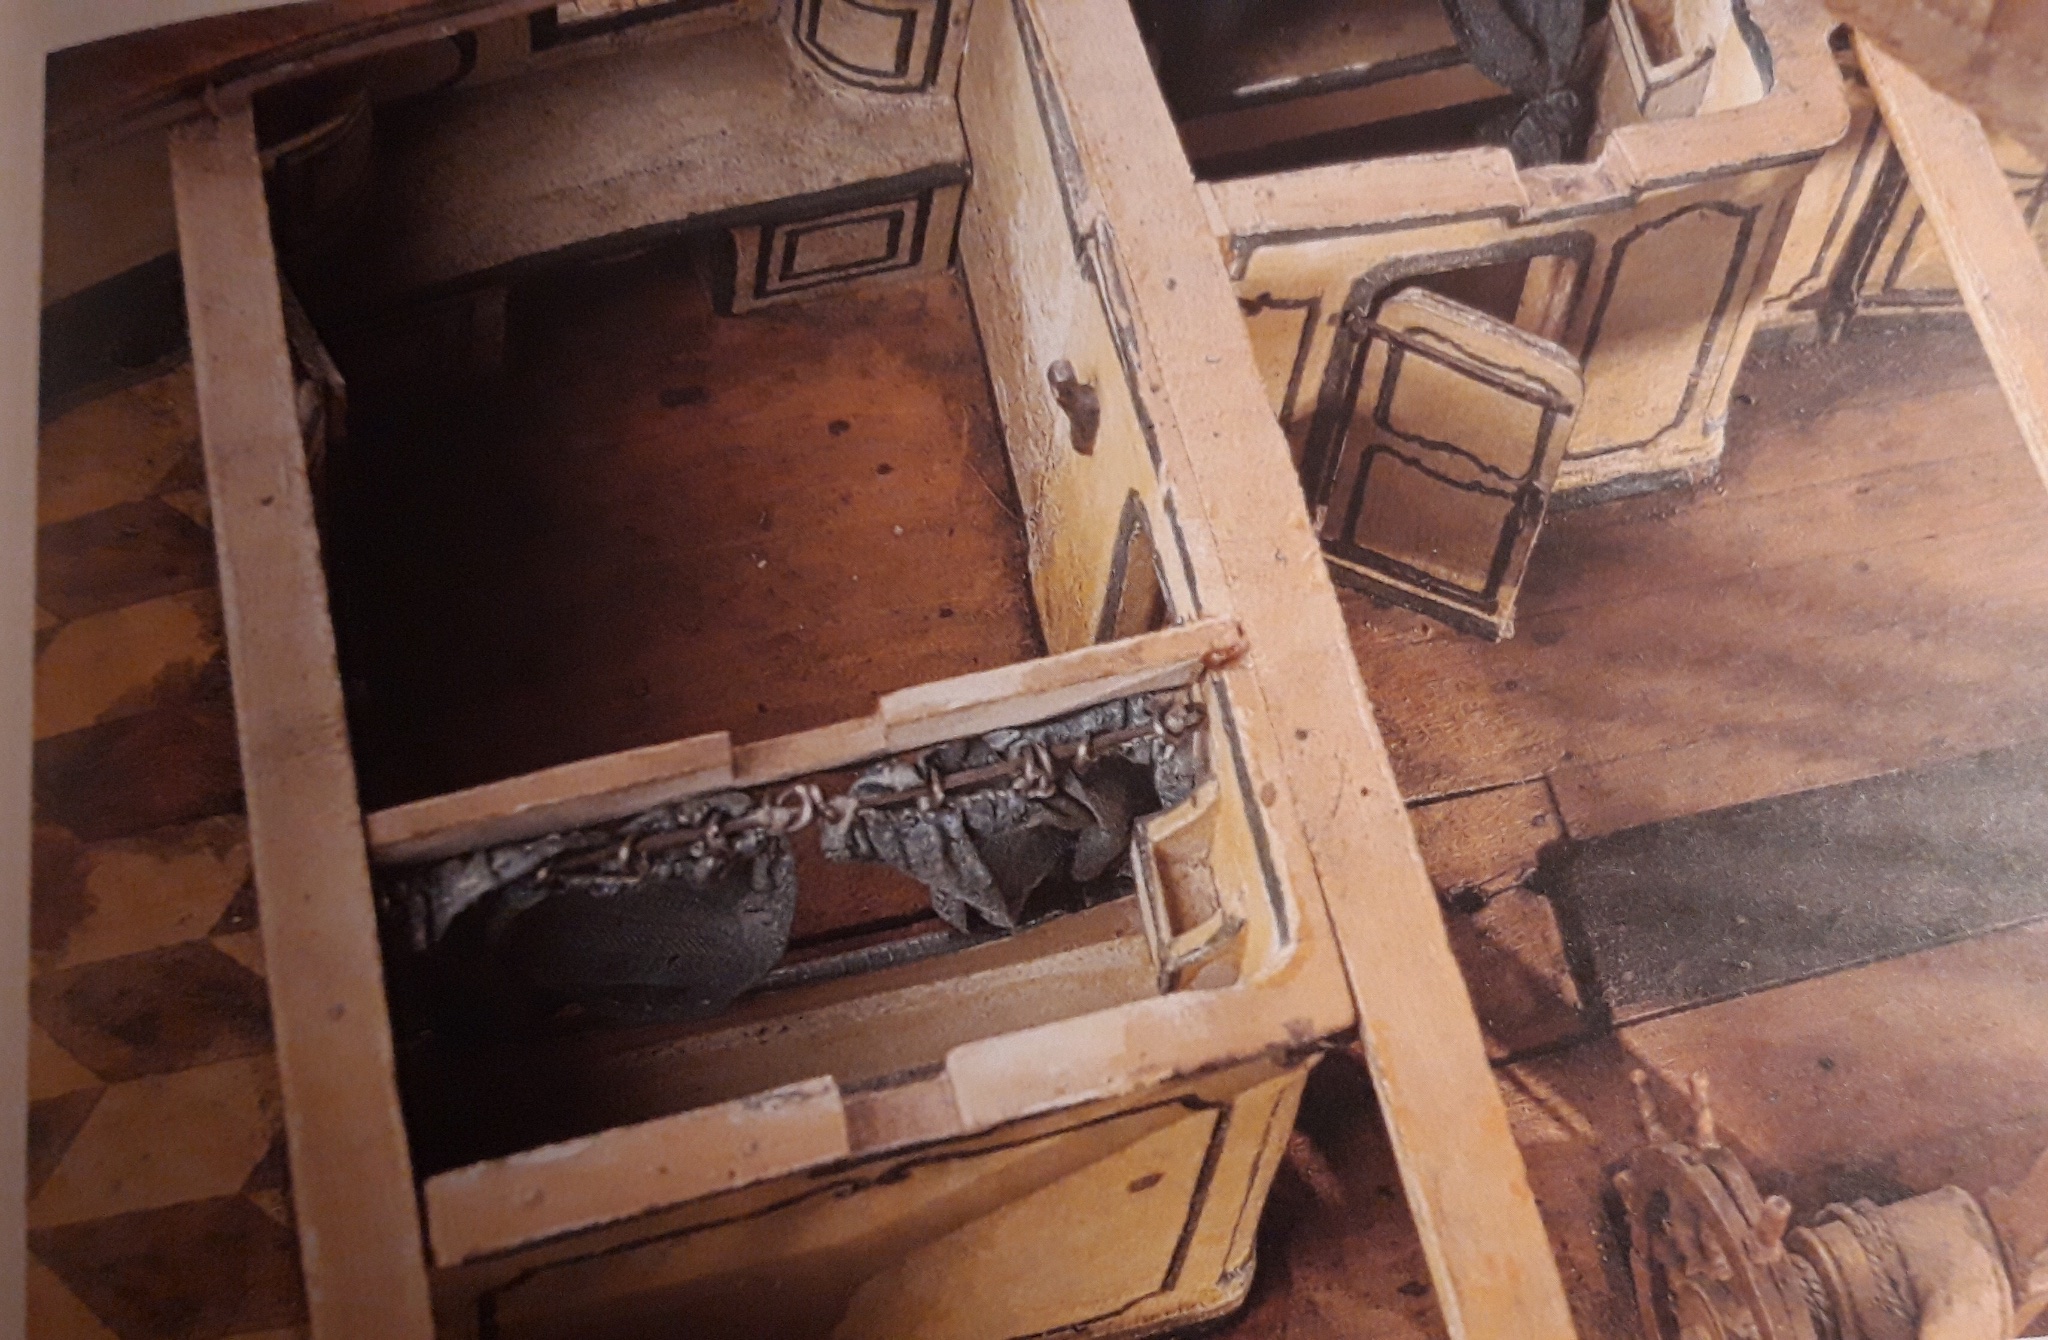
I think it is a question of, what kind of model we want to build. There are different traditions of modelshipbuilding. The more puristic English Royal Navy dockyard model, or the models of the French Naval yards, or the famous Trianon collection. They show virtually every possible detail. Look here these cabins. They are like little dollhouses.
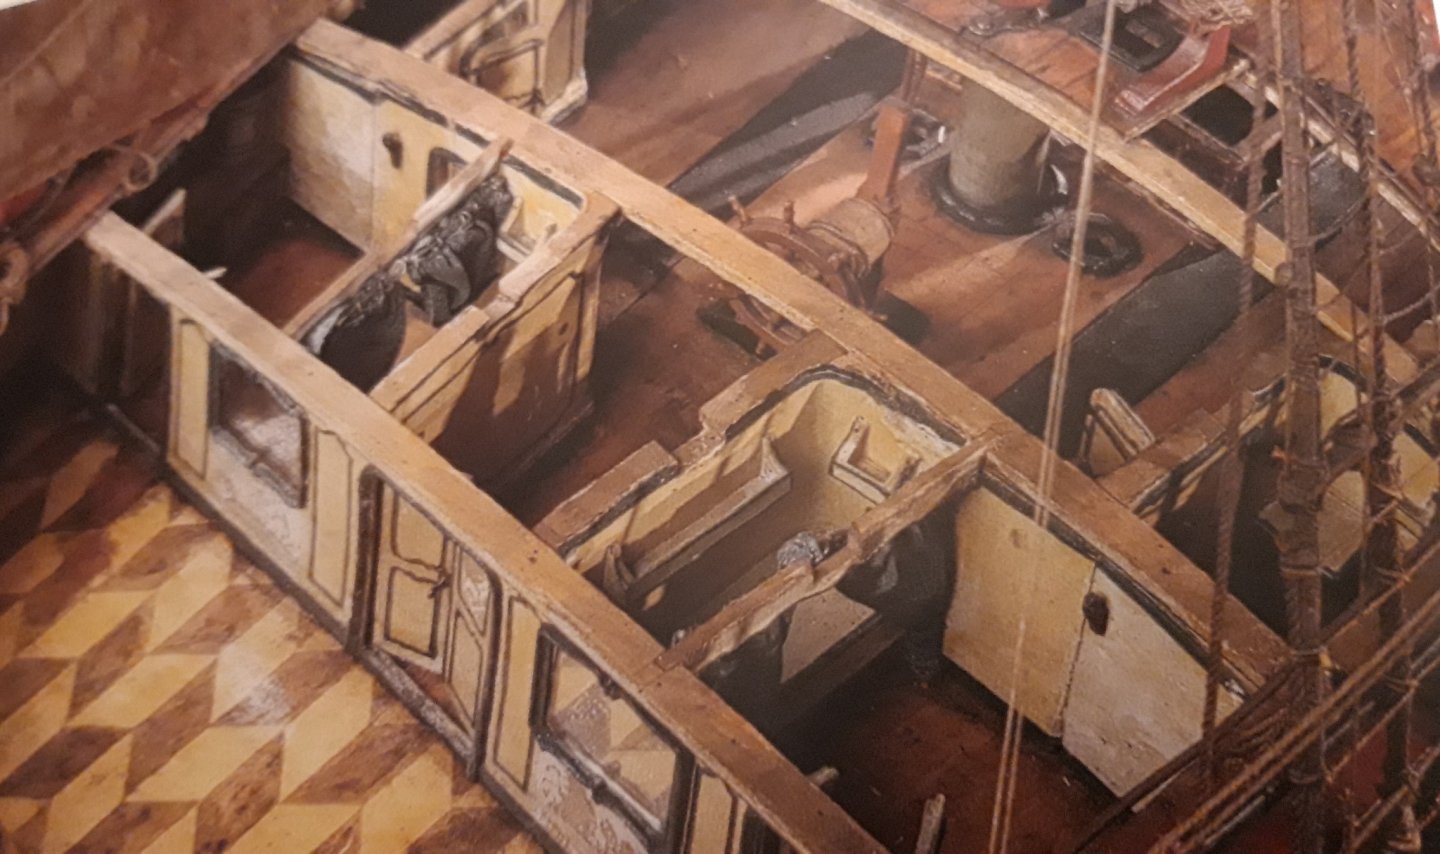
The focus is on the details. They cover up the beauty of the hull. Very interesting and a document, but for the Winchelsea, I would prefer the English style.
- Mike Y, KentM, Ryland Craze and 3 others
-
6
-
Sorry Chuck, but what means scupper? I can't find it in my dictionary.
-
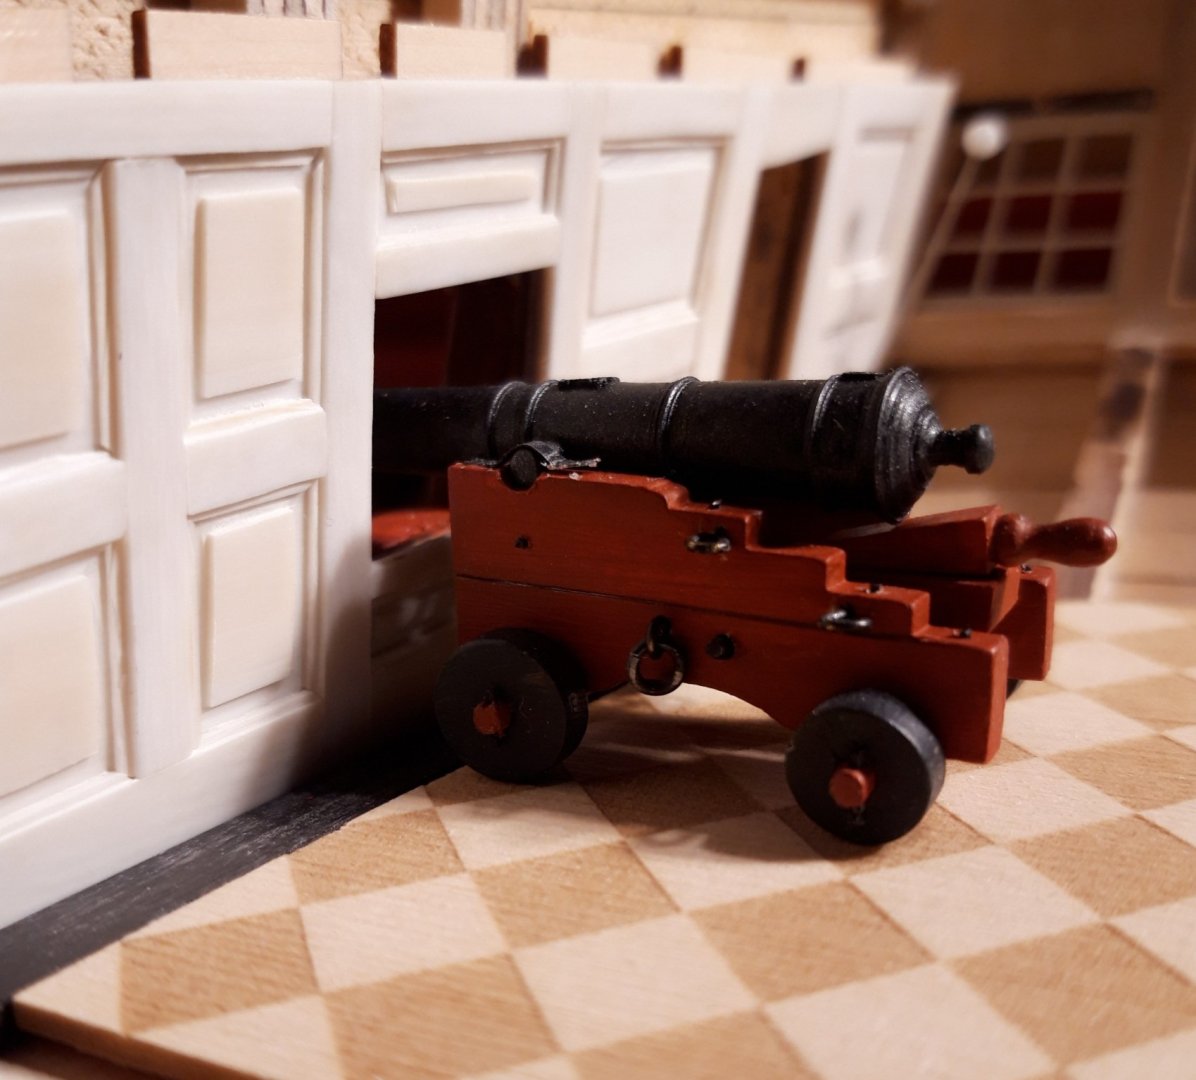
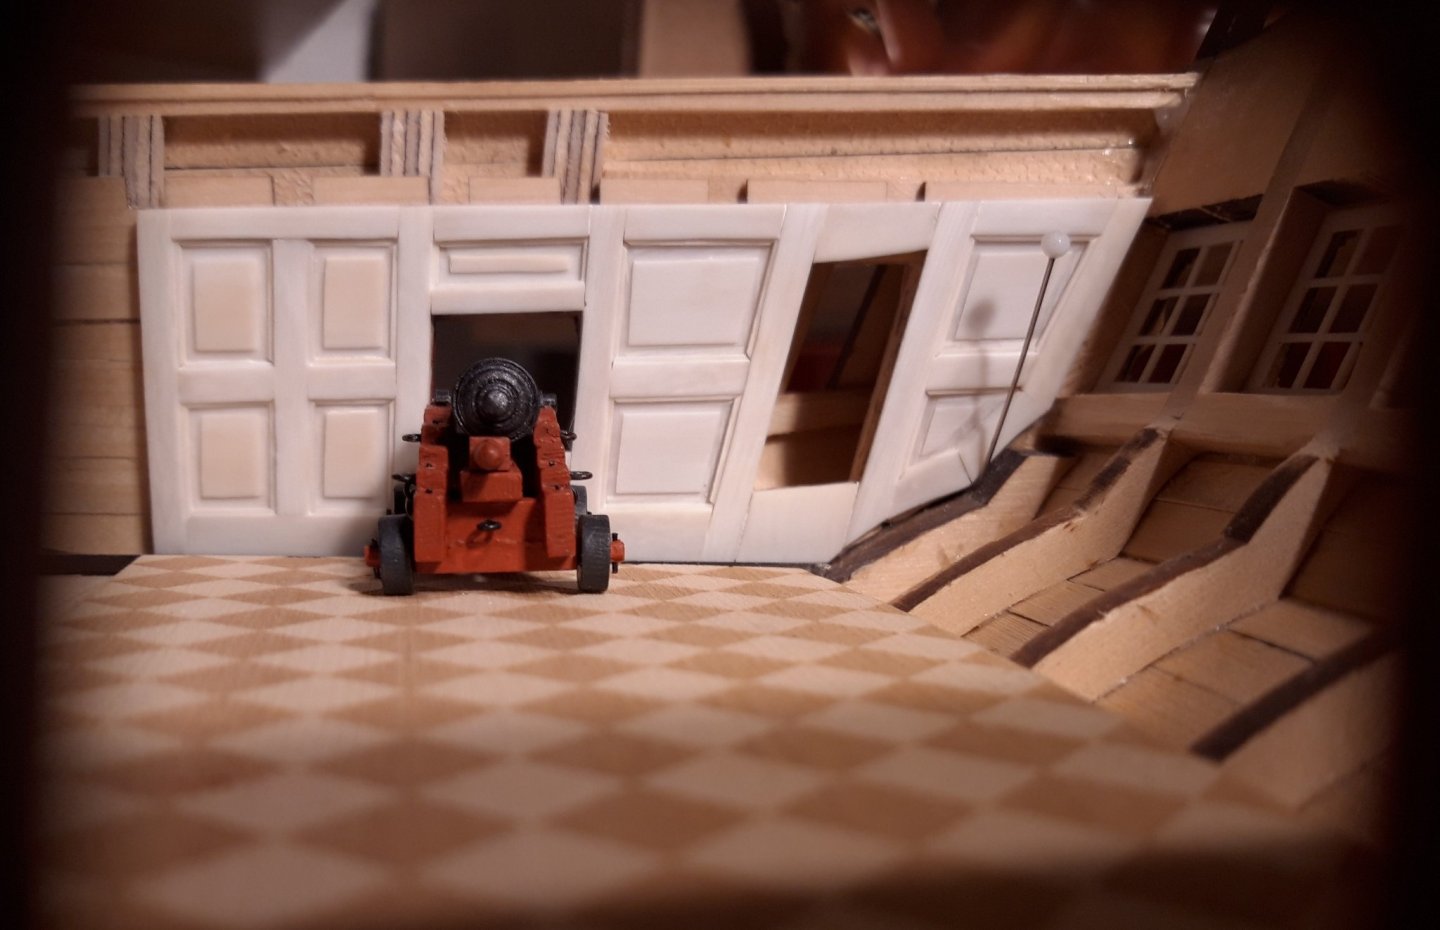
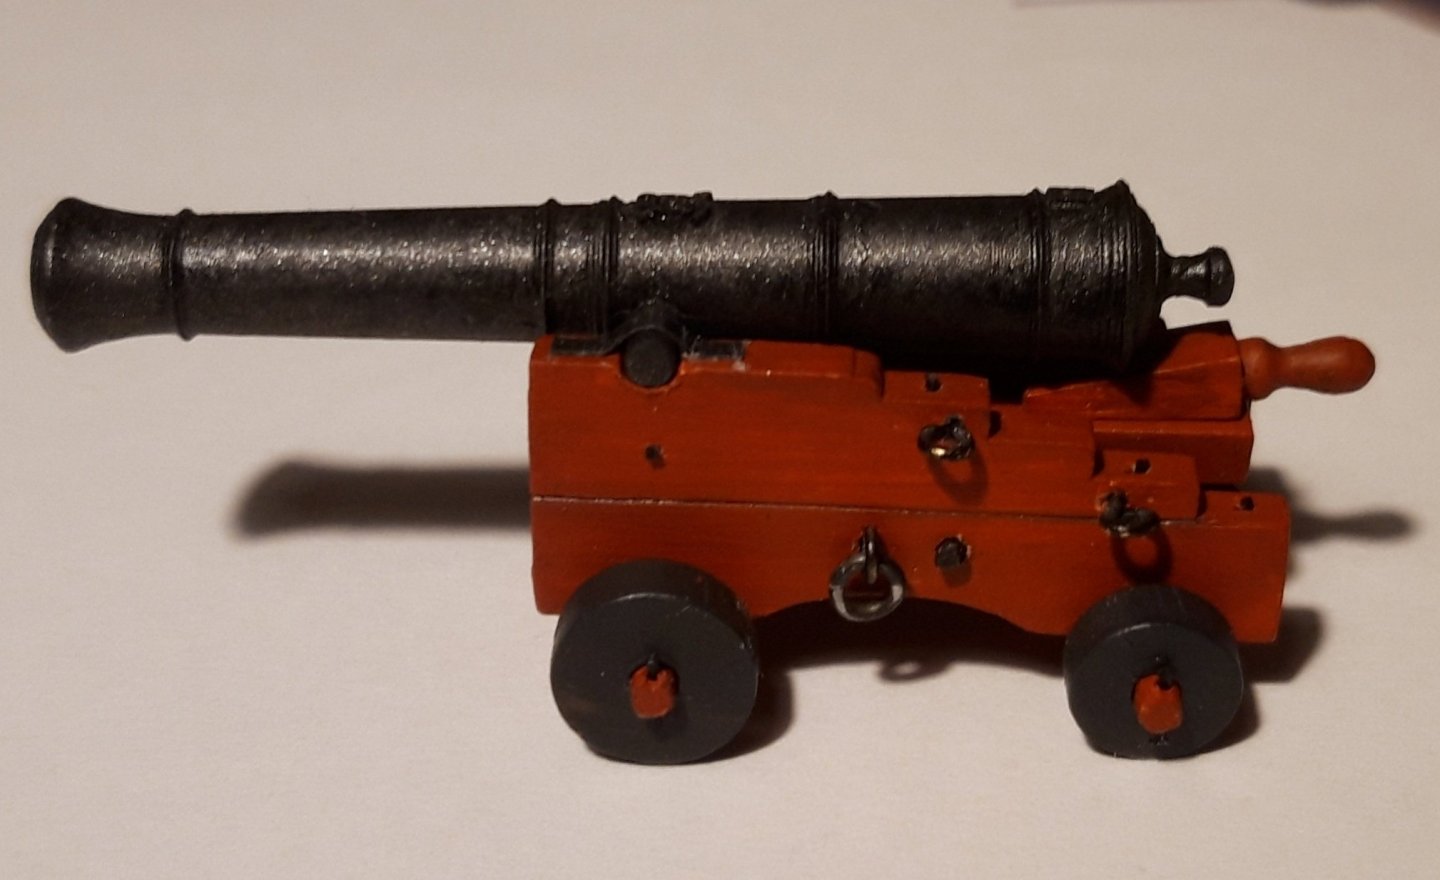
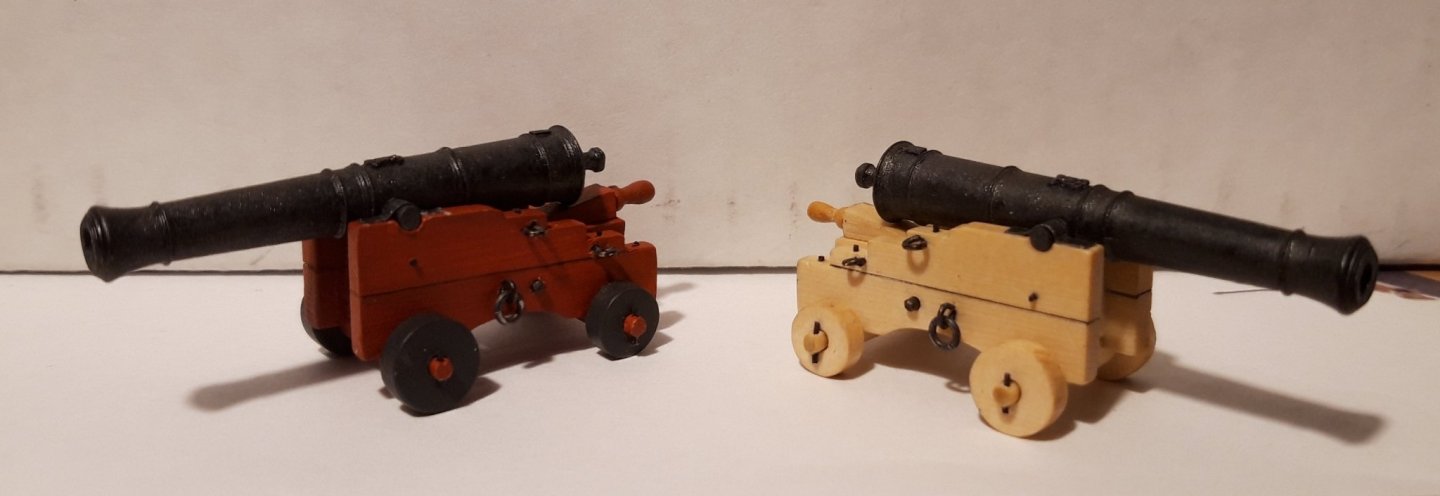
Hello everybody,
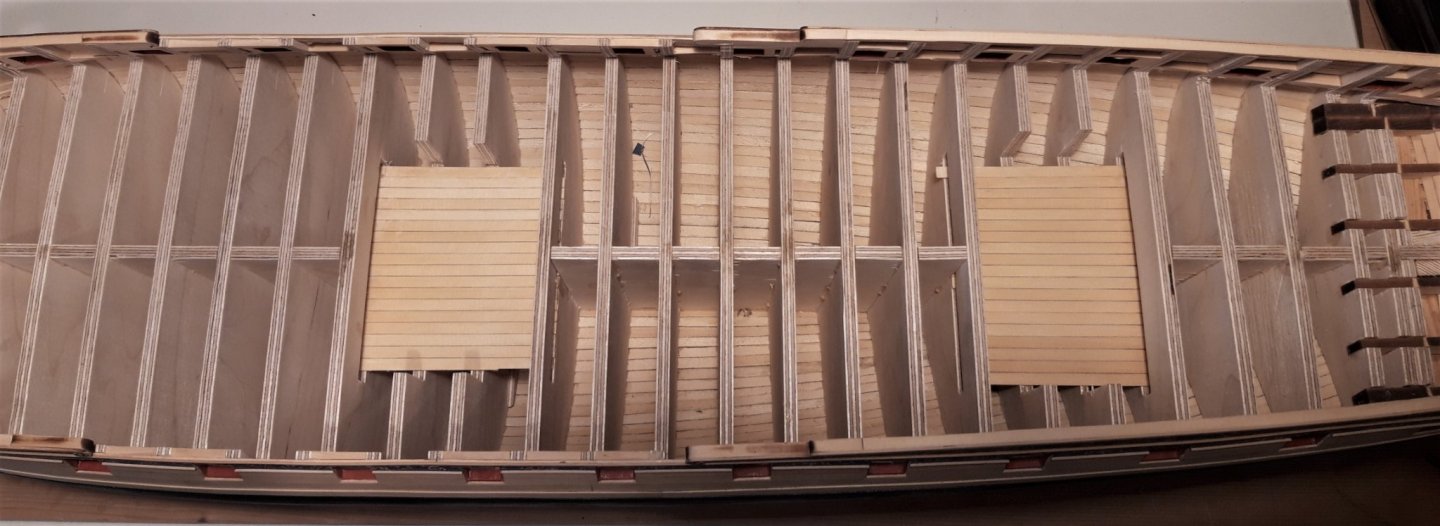
I started chapter 4 now, and made 2 of those fantastic gun's at the beginning. I think the red carriage suits better, but the natural carriage is beautiful as well.
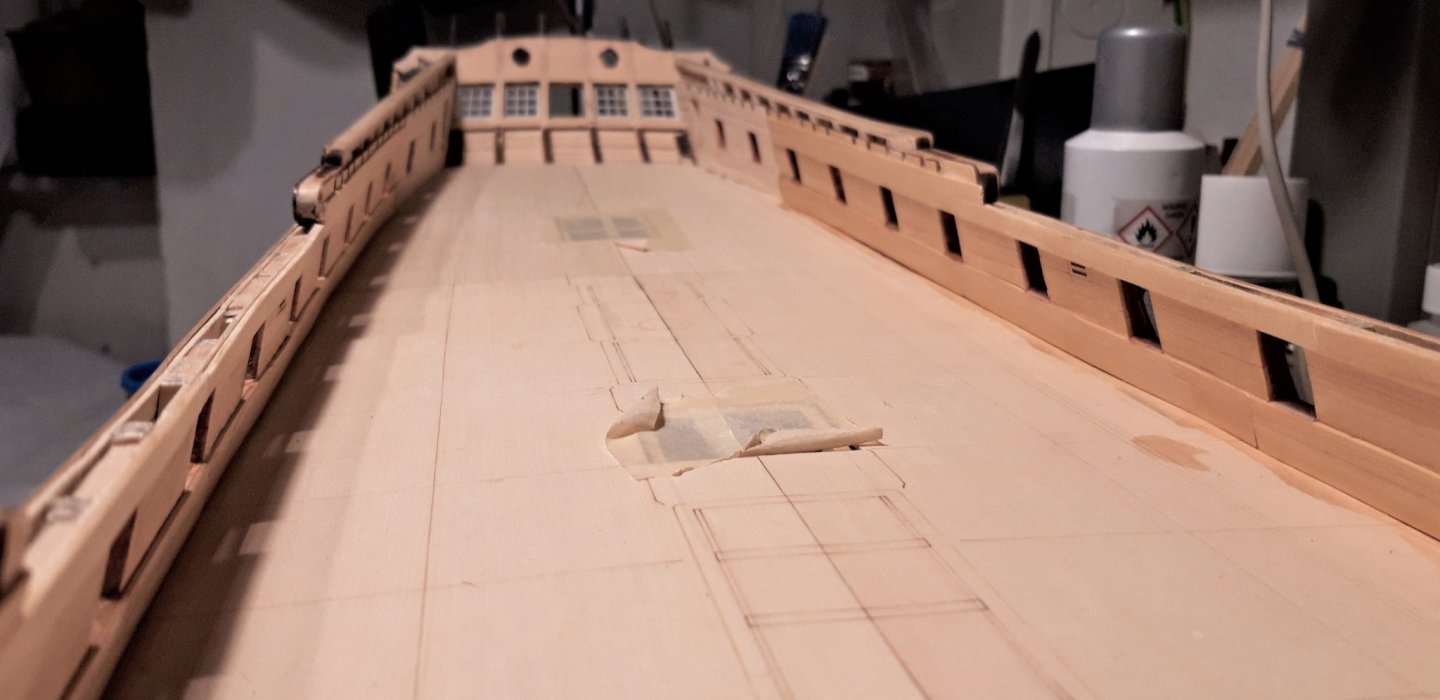
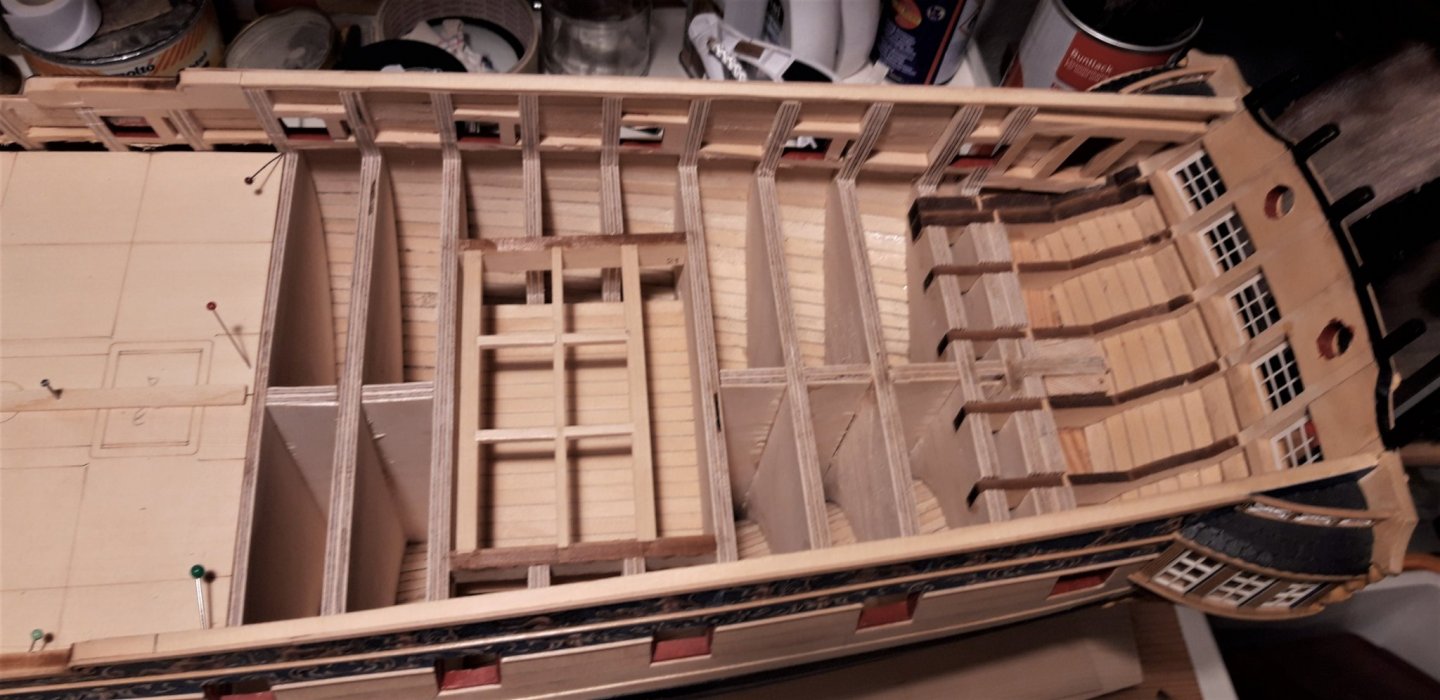
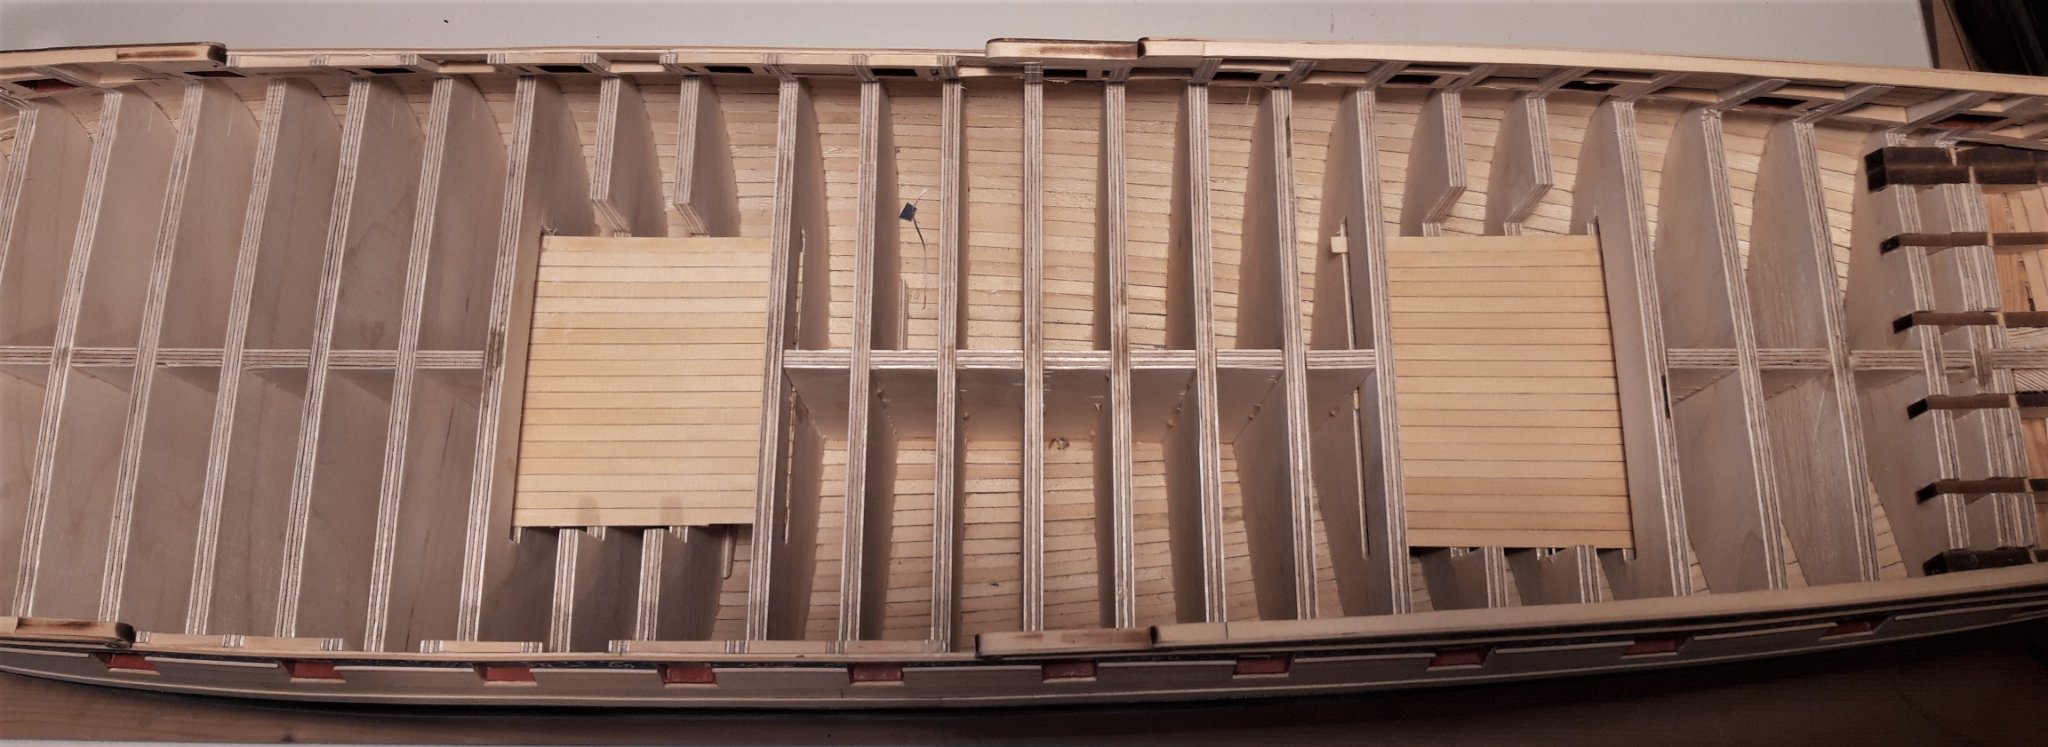
Next I planked the lower deck platforms and glued the deck beams an deck sheats in position. All turned out well, no problems so far.


This broadside will look wonderful, once completed!!

Matthias
- scrubbyj427, Matt D, Freebird and 15 others
-
18
-


HMS Cumberland 1774 by Jack H - 1:36 &1:48 - POF - kit development for True Image Models
in - Build logs for subjects built 1751 - 1800
Posted
Very nice design!! Looking forward to see the next steps!
Matthias