


GrandpaPhil
-
Posts
5,048 -
Joined
-
Last visited
Content Type
Profiles
Forums
Gallery
Events
Posts posted by GrandpaPhil
-
-
Try using a ceramic tile as a work surface.
Ceramic tile is inherently heat resistant.
Did you have to use a welding mask for that?
- Canute, mtaylor and modeller_masa
-
 3
3
-
-
Very nicely done, Craig!
- CDW, mtaylor, Edwardkenway and 3 others
-
6
-
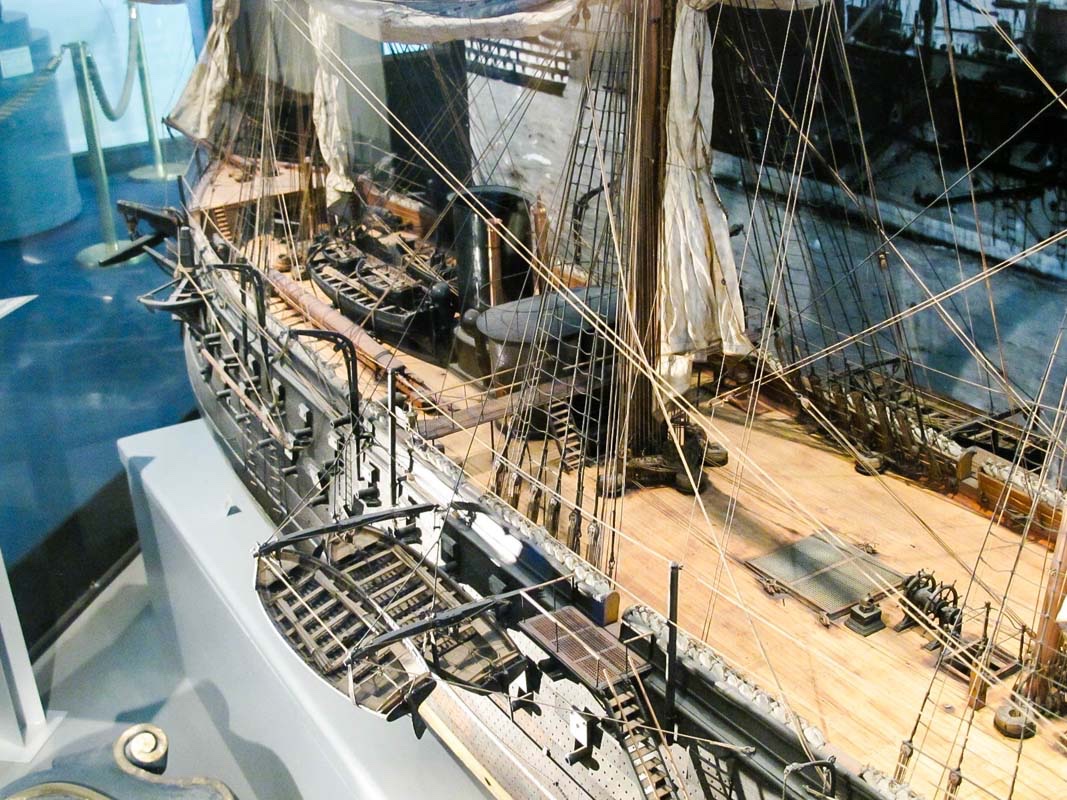
I’m going to make some actual railings for the observation deck and the top of the blockhouse as shown in the model in the Paris Maritime Museum.
- clearway, yvesvidal, Keith Black and 6 others
-
9
-
Life is busy!
Welcome back!
-
-
I know, I am going to.
I should have for the last set and I regret not doing so.
- Keith Black, Canute, Edwardkenway and 1 other
-
4
-
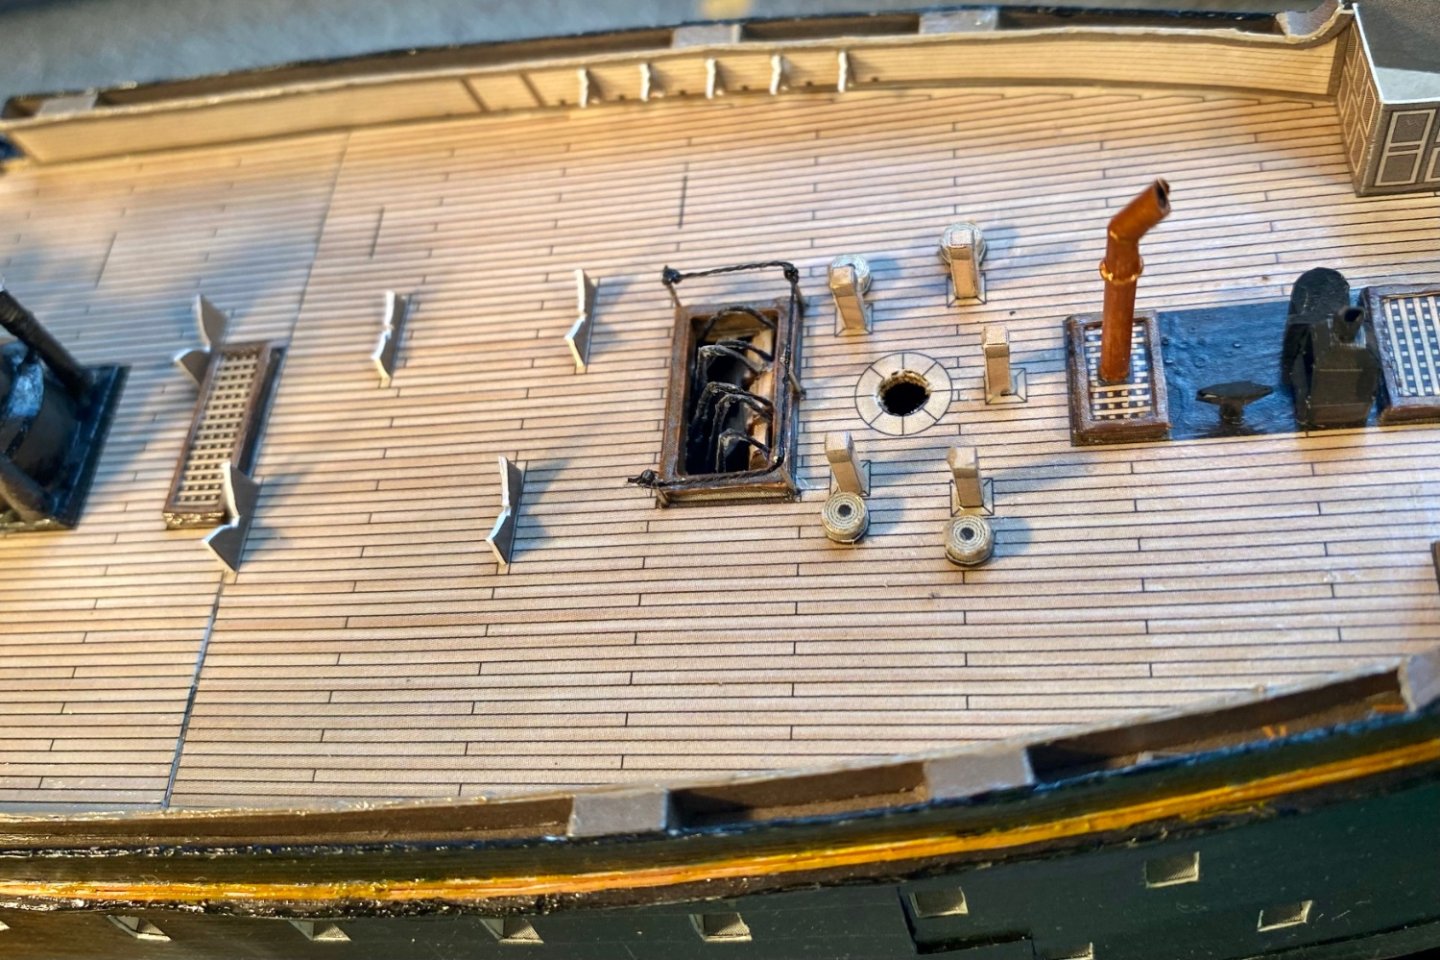
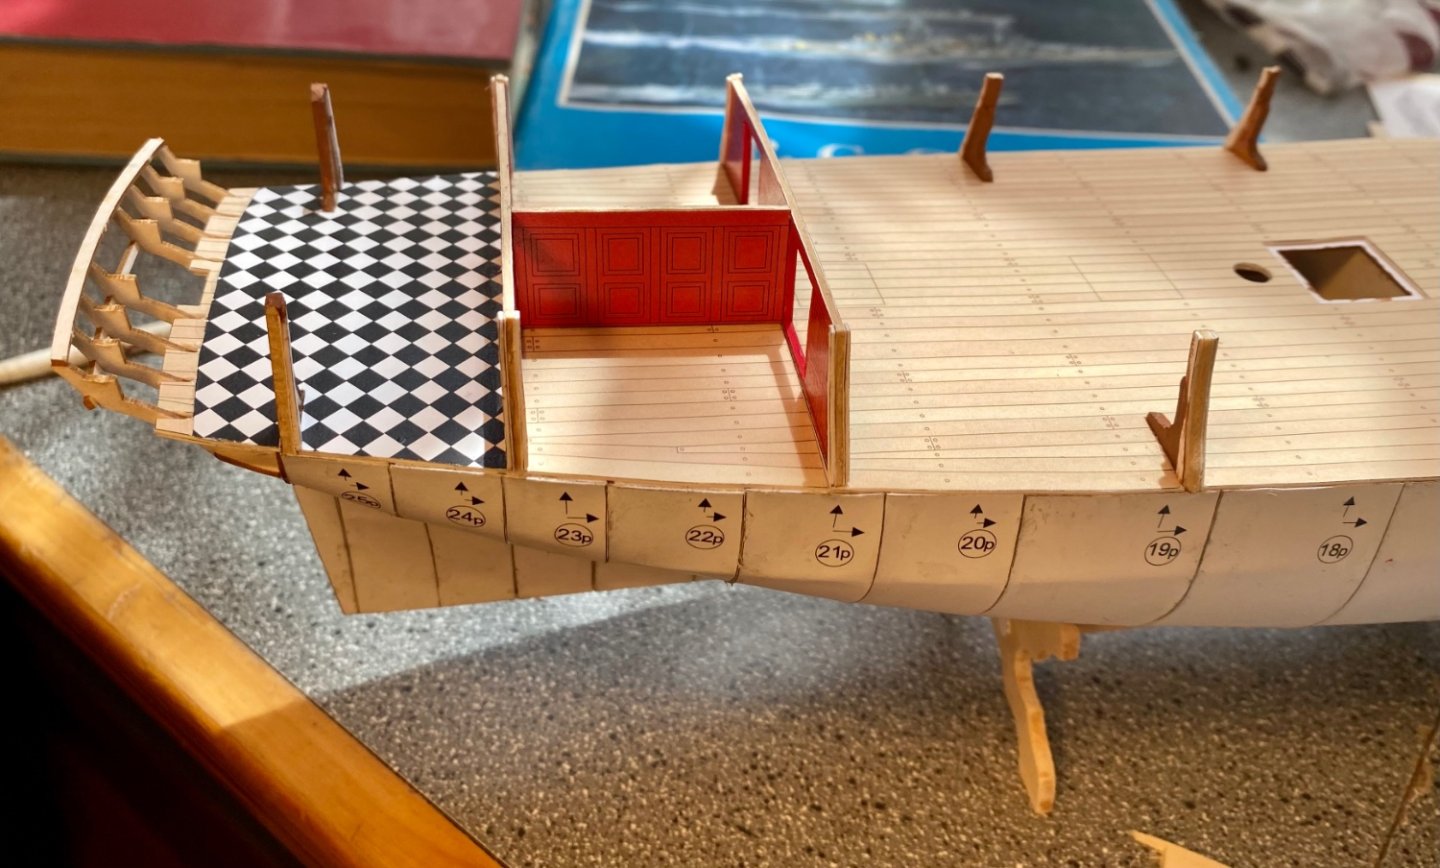
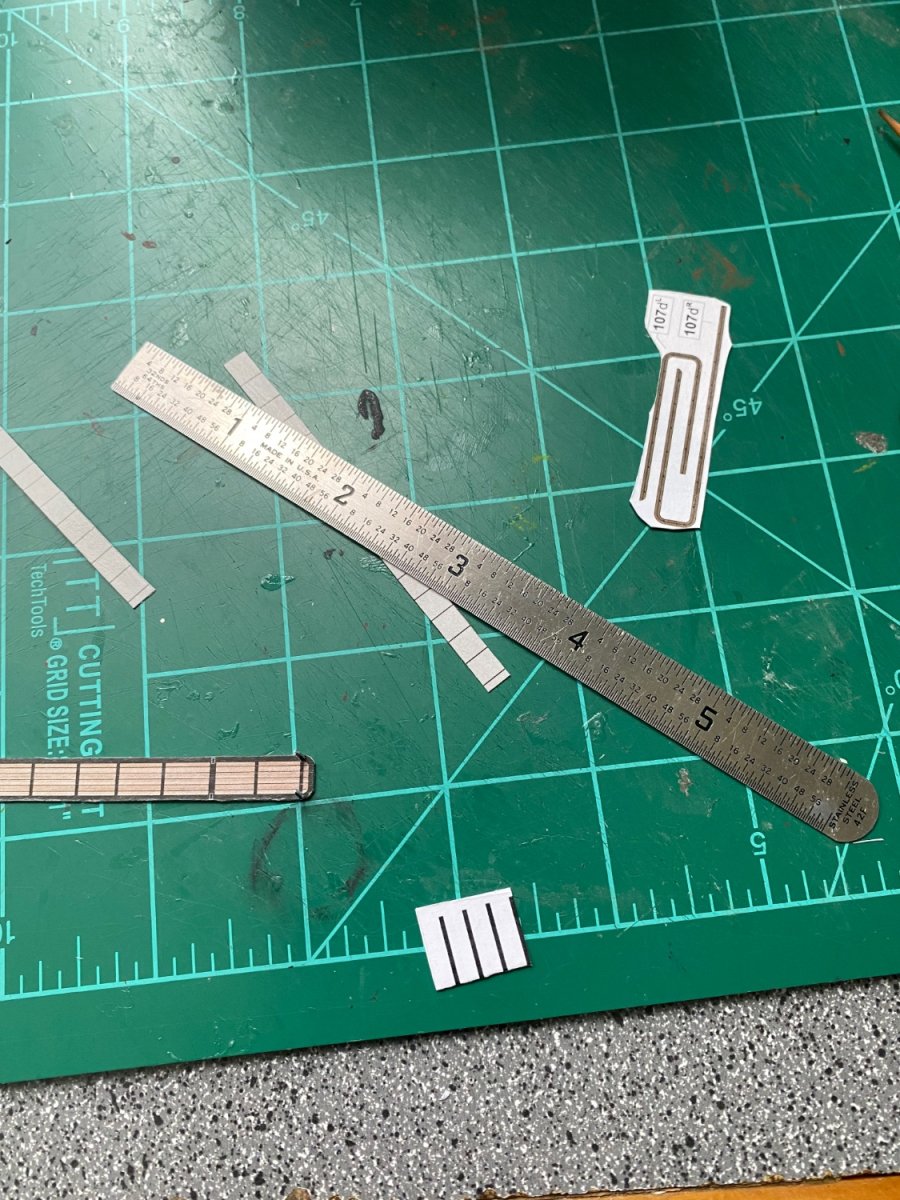
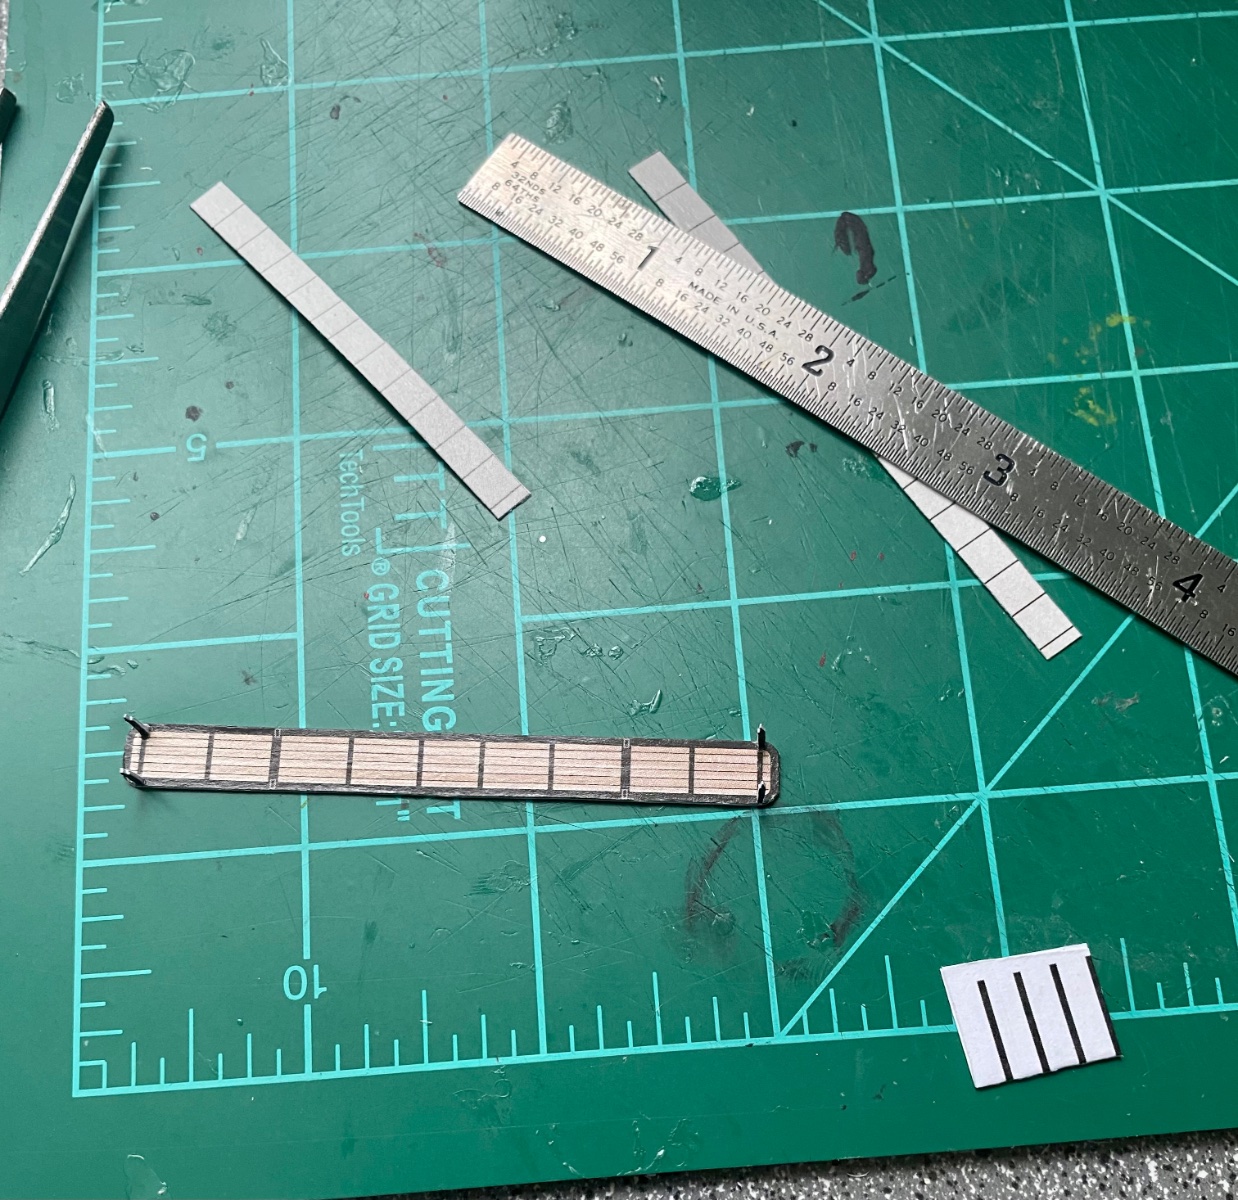
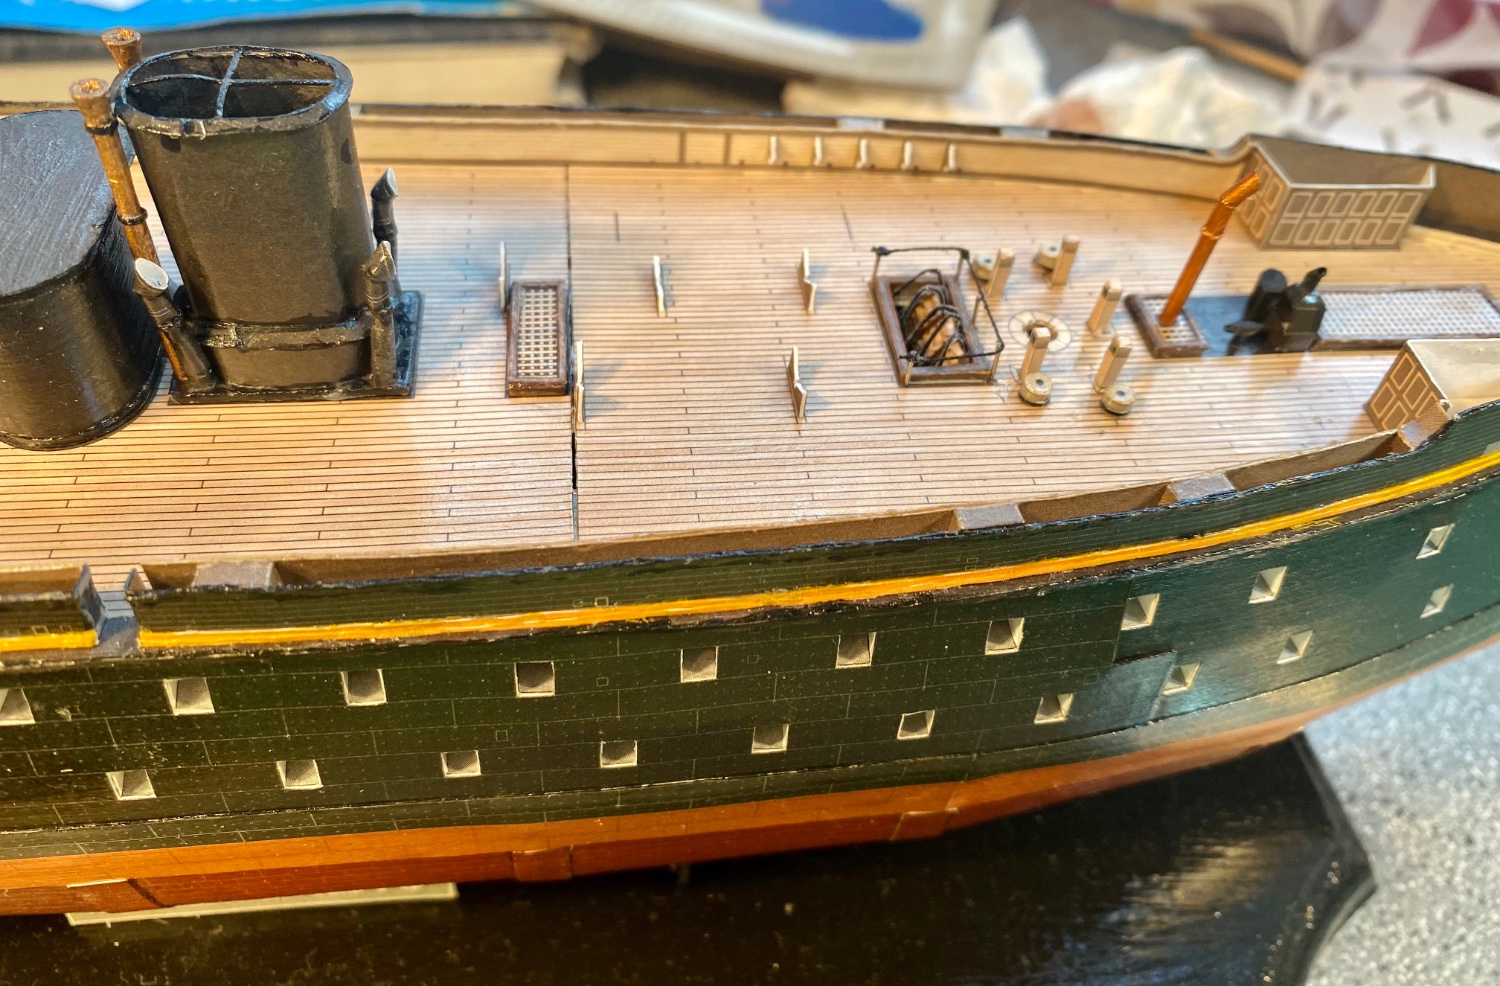
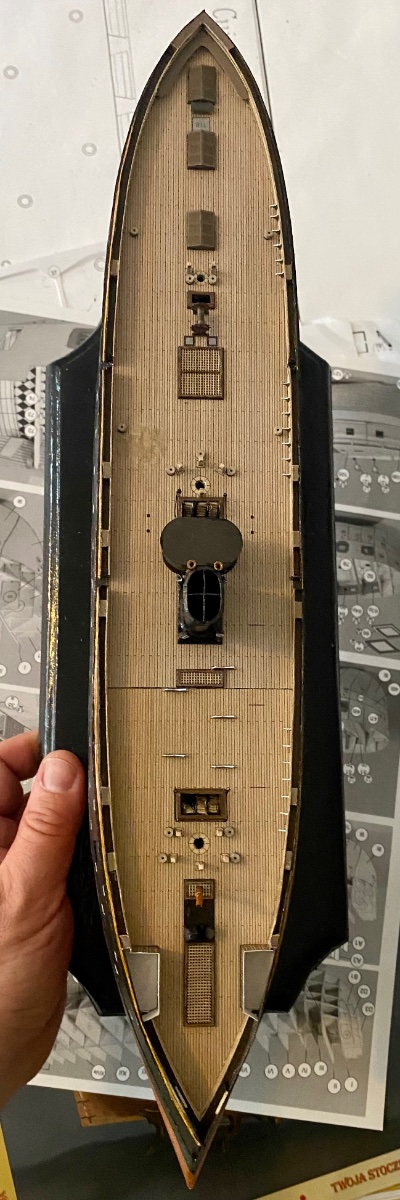
The pin rail supports and pin rails are on:

Everything is now edge painted.
The wire safety cover over the aft companionway:
Working on the middle platform now:

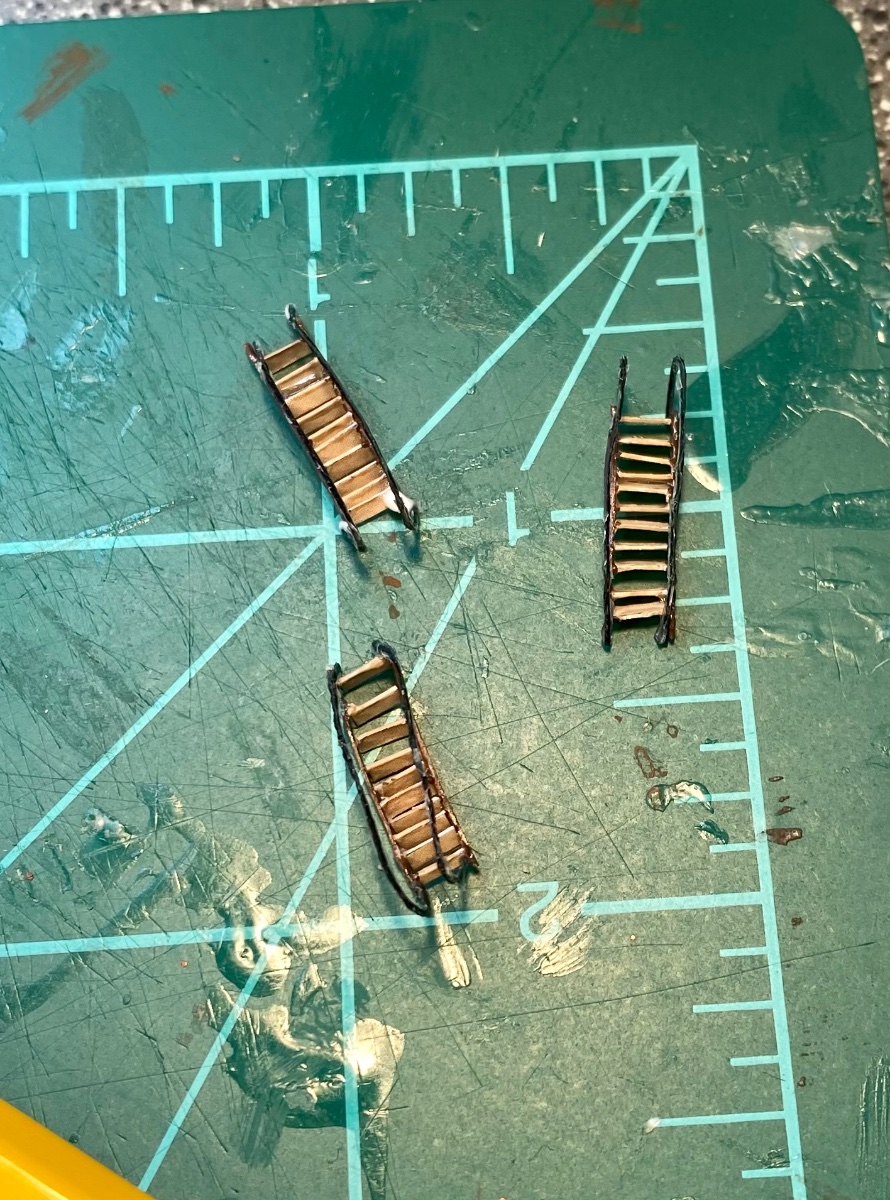
Which also means that I have more ladders to make, grr…
Oh well. I am going to make a proper ladder making jig a la Zu Monfeld, this time.Now is a very good time to learn!
-
-
Very impressive build!
- Canute, Old Collingwood, Dave_E and 2 others
-
5
-
Dusek Ship Models, owned by @Daniel Dusek on this forum, bought the rights to Mamoli’s kits.
His kits are excellent!
-
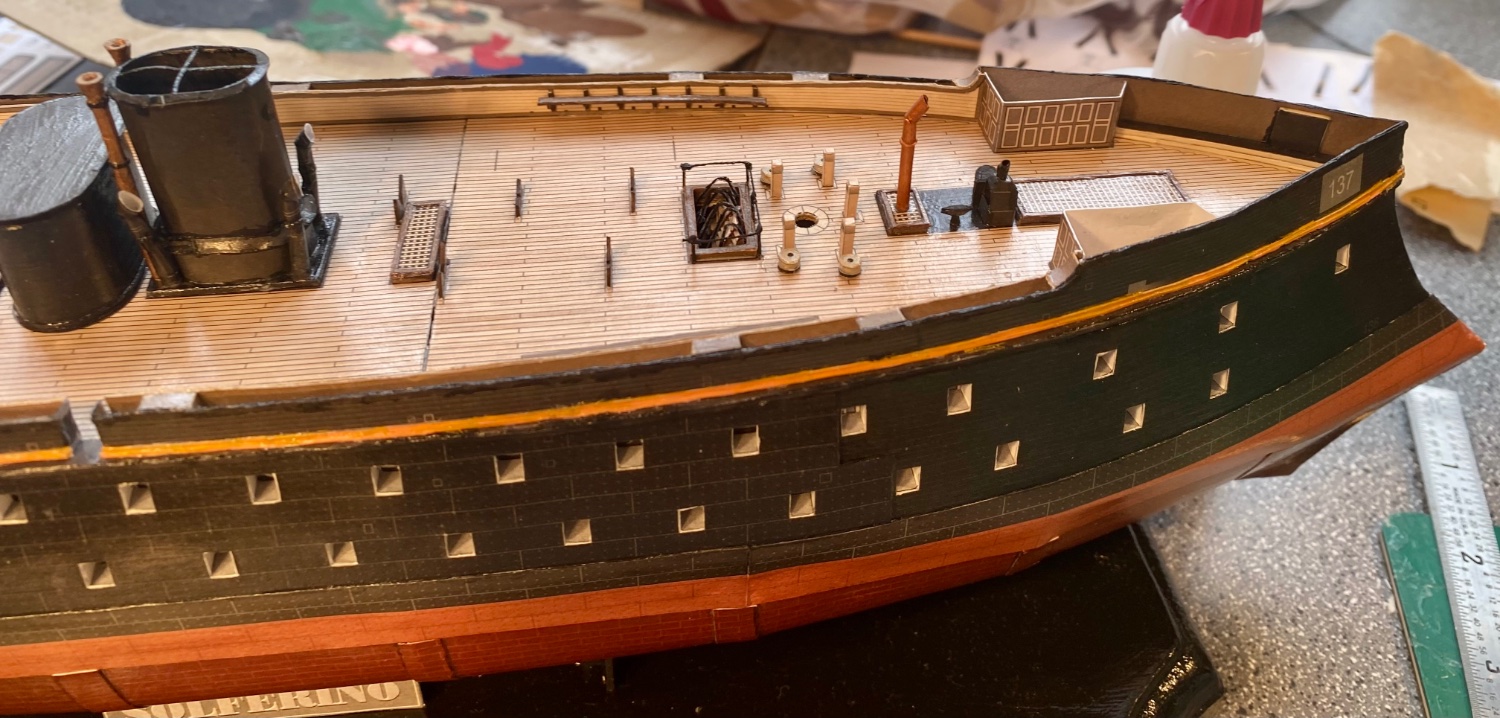
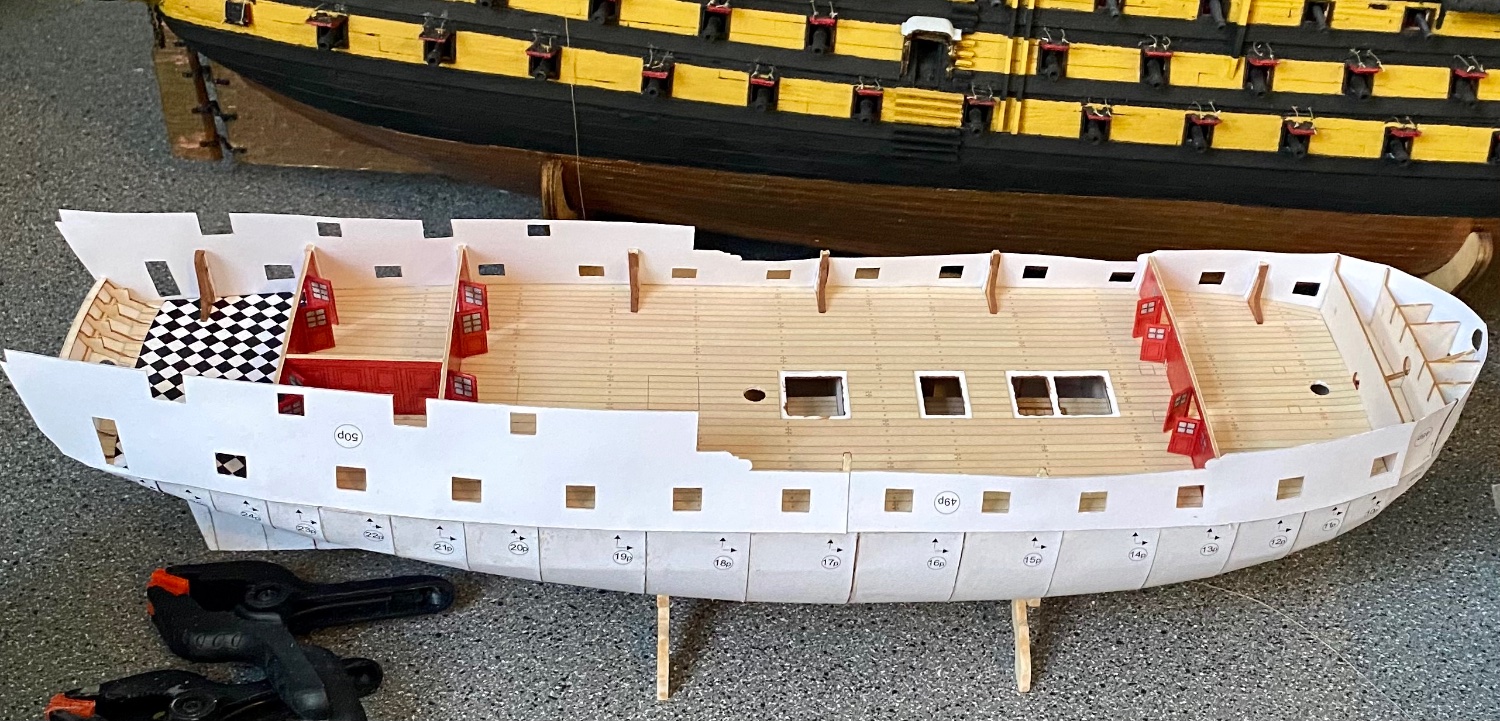
Main deck outer bulwarks on:

- Edwardkenway, Richard44, Paul Le Wol and 13 others
-
14
-
 2
2
-
I don’t need the above ladders.
I’ll be making new ladders for the ladders above deck.
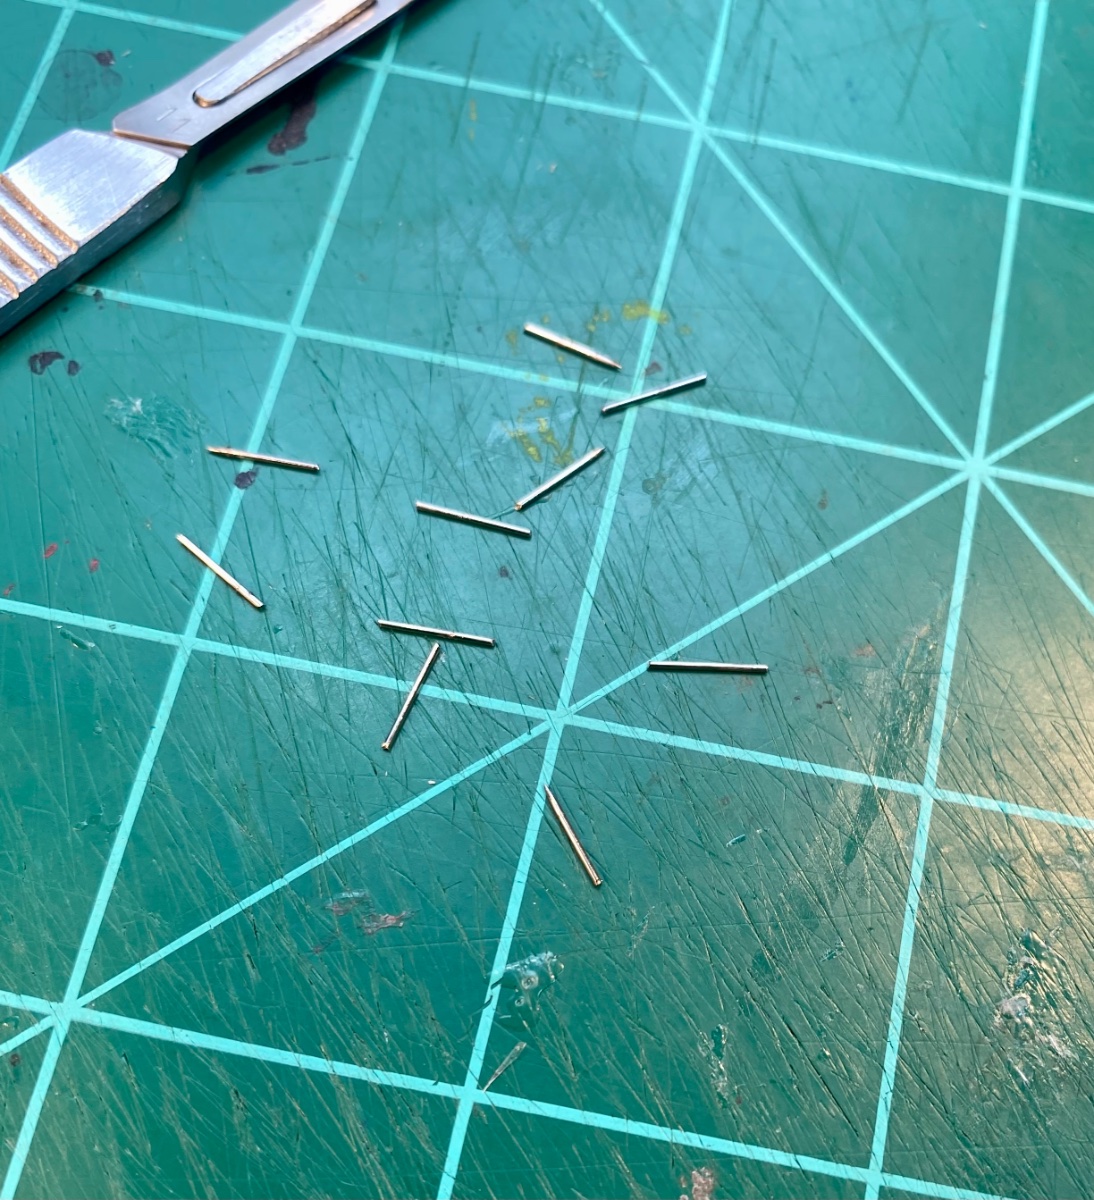
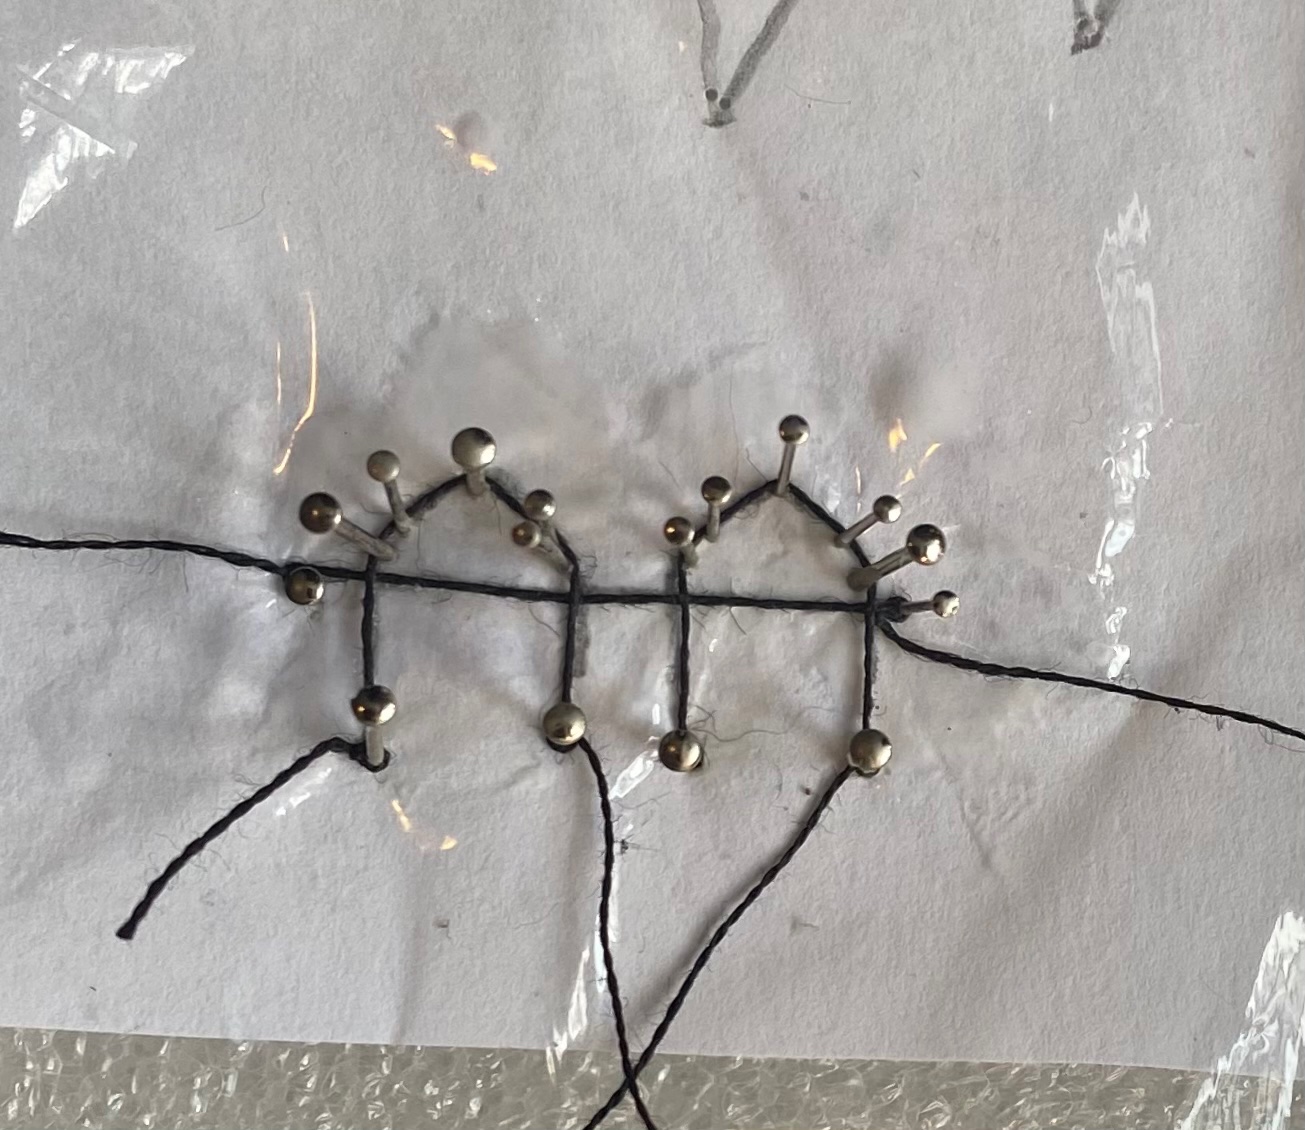
I made the rope fence around the forward two companionways from steel pins and thread.


The aft one had to be made from thread.

Made and installed the boat stands and the some supports for the pin rails.

Everything will get edge painted and sealed when I get the rest of the pin rail supports installed.
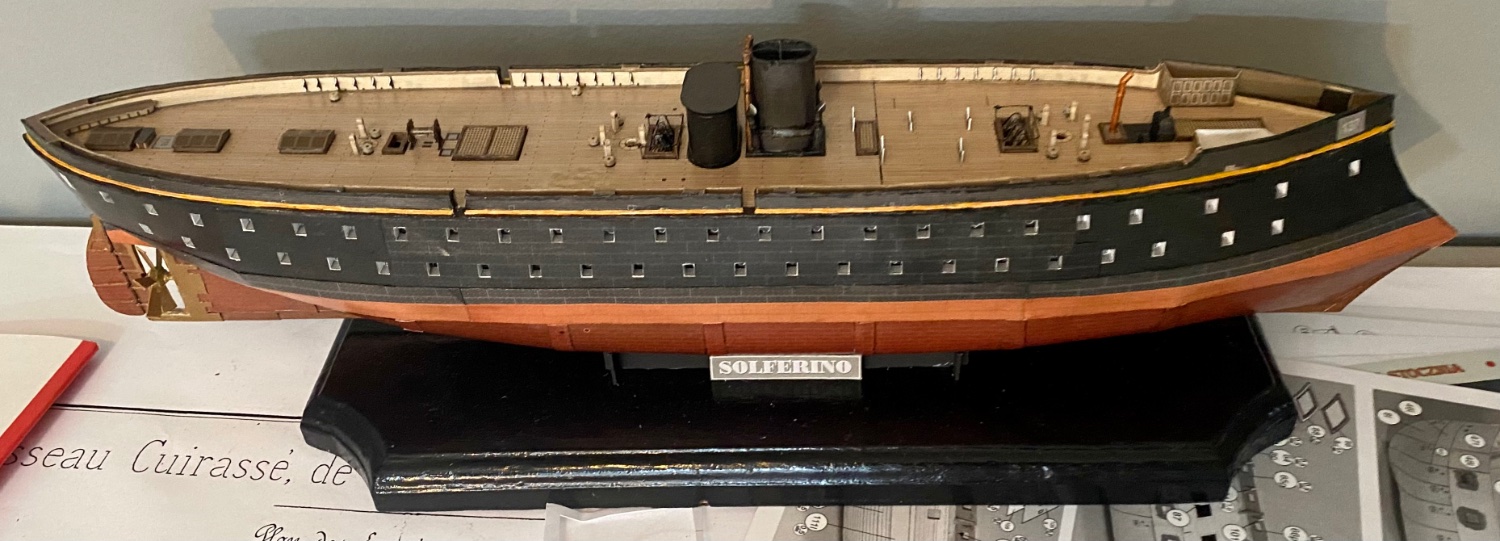
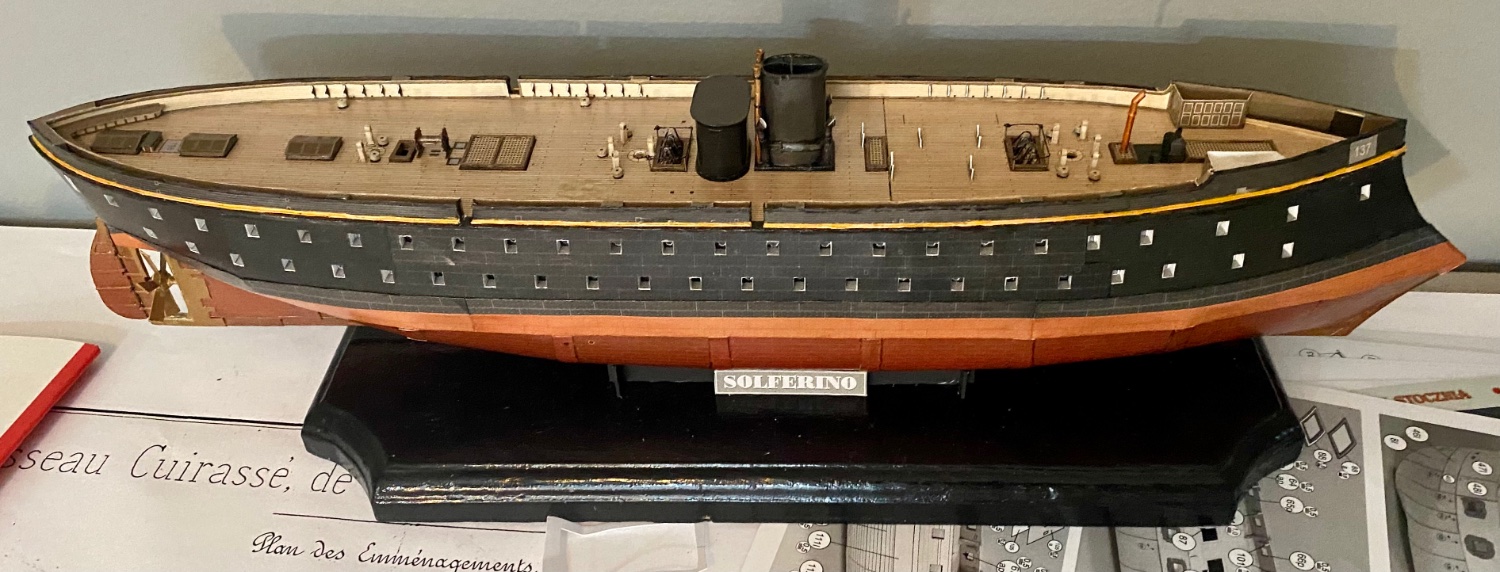
Here’s the full model as of now:


-
The remaining ladders from this set:

They are not the greatest, but they’ll do.
The next set will look better because I’m going to make a proper ladder making jig.
- Captain Slog, Ryland Craze, ccoyle and 7 others
-
10
-
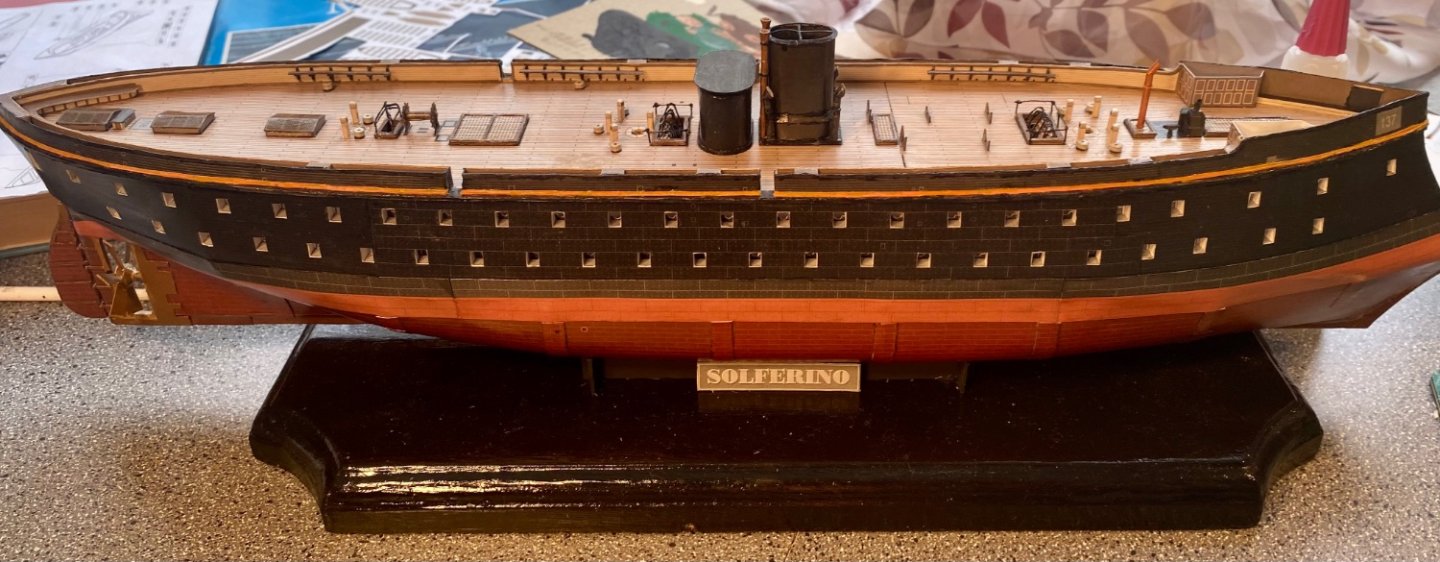
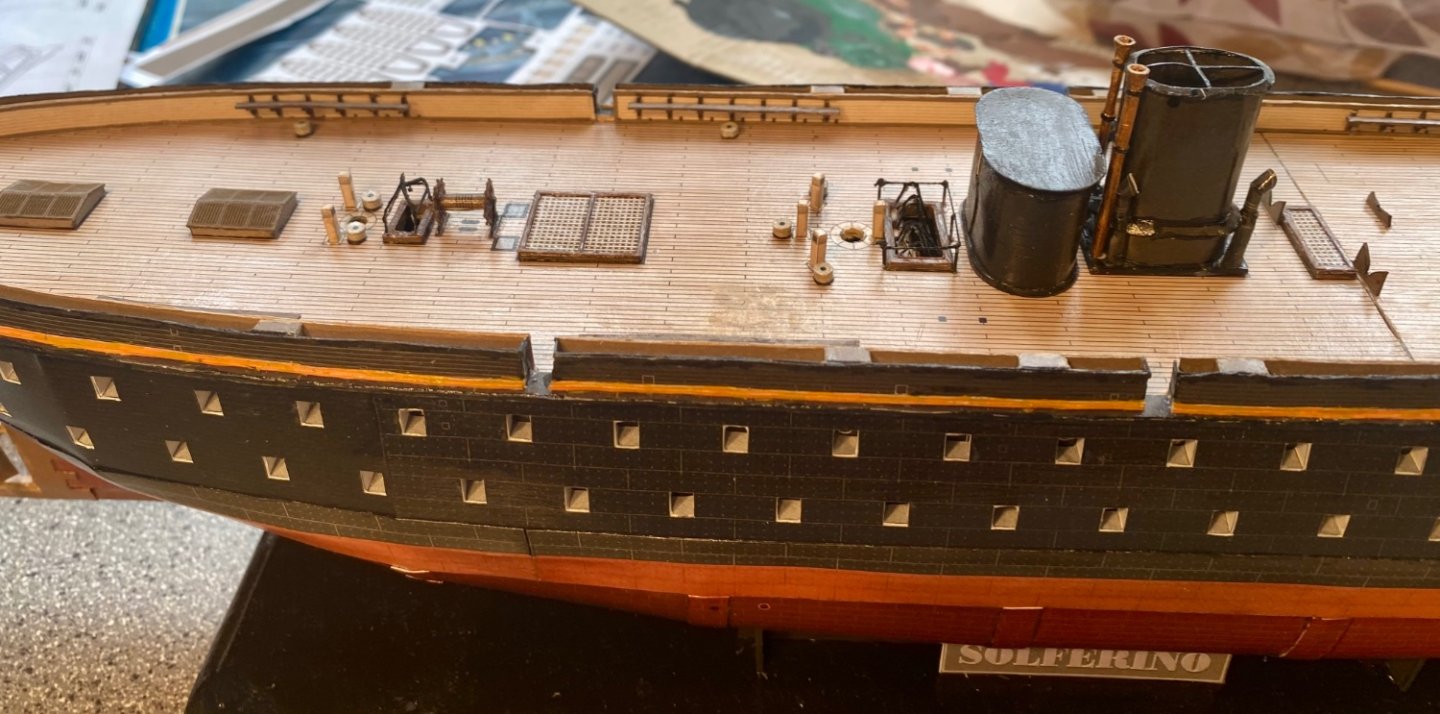
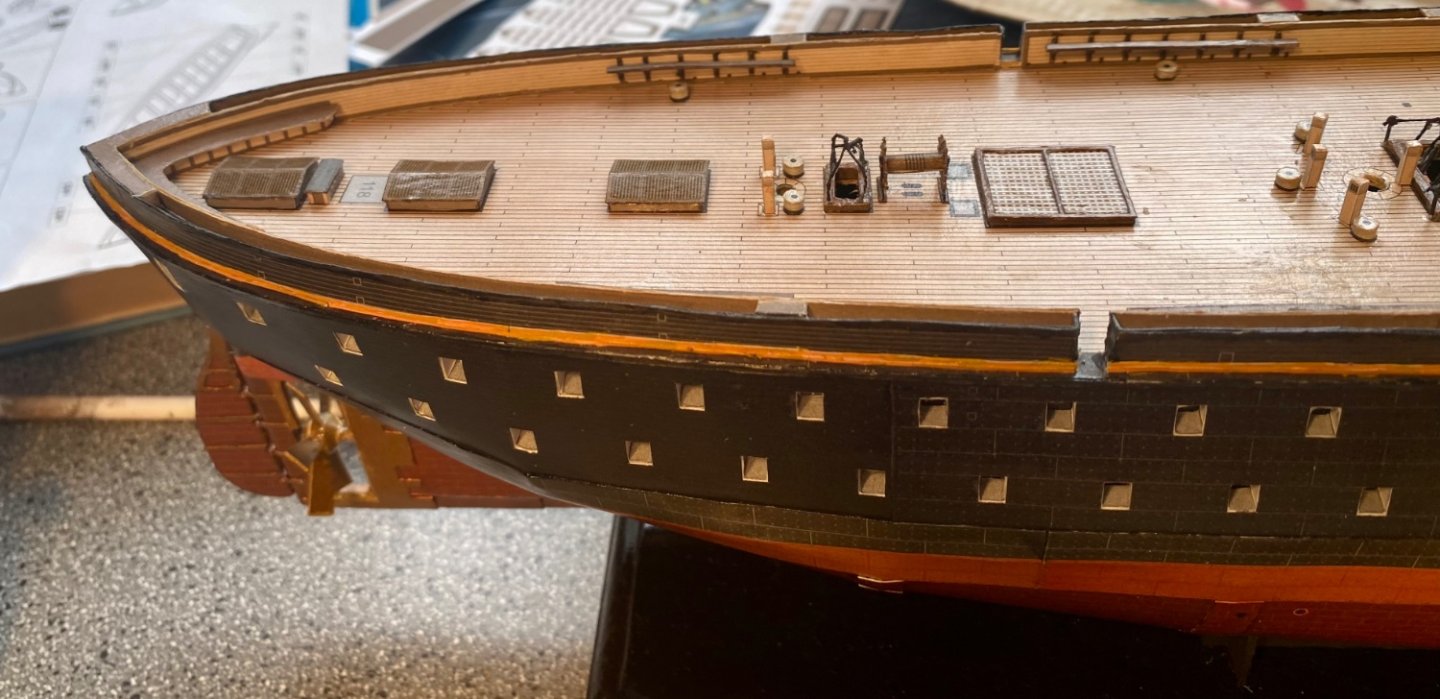
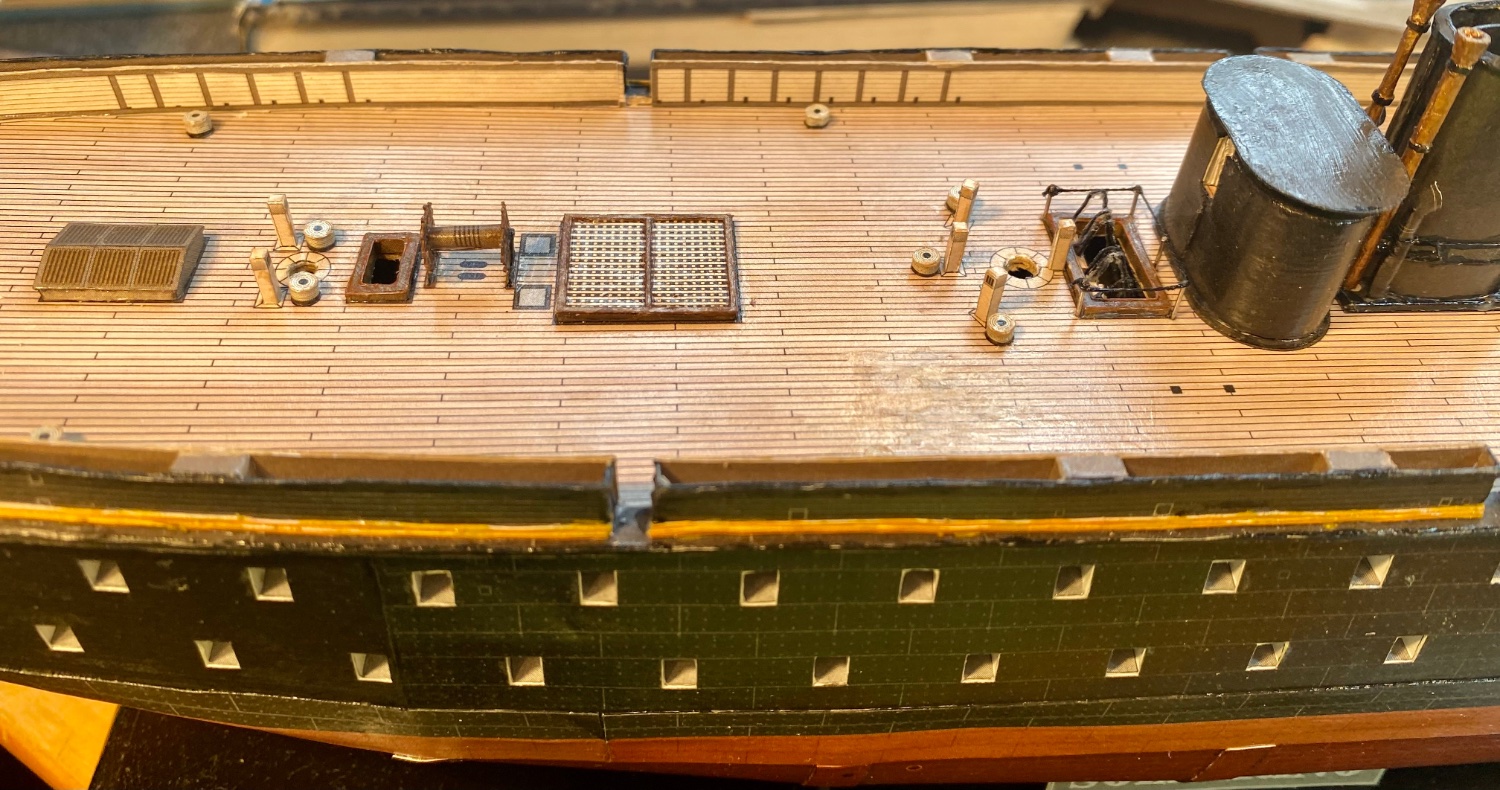
Worked on Solferino today.
A discussion on another build on this forum got me really wanting to work on Solferino again.
So, I installed 6 ladders.
Then I added 2 more railings to the remaining ladders.
Now I’m working my way aft on the main deck.
Here is a picture: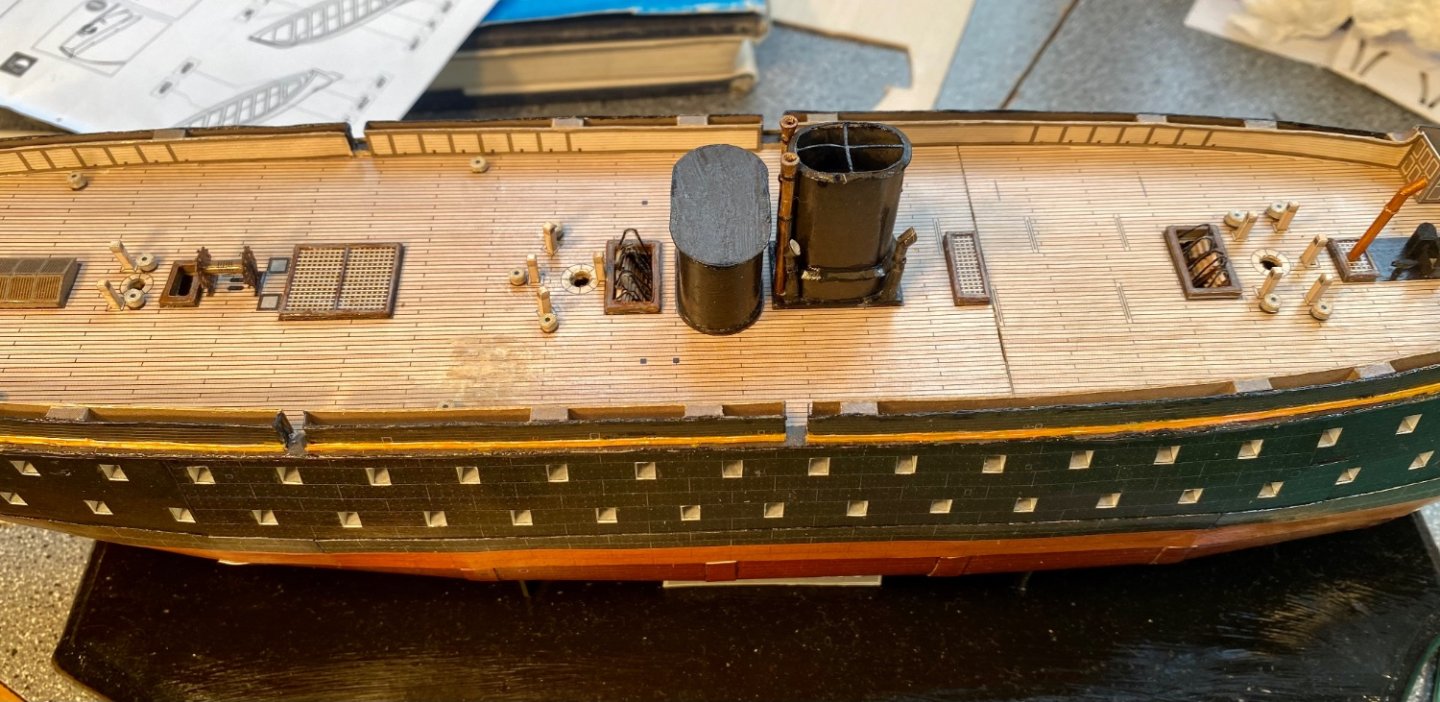
Installed ladders. -
-
-
10 minutes ago, ccoyle said:
I know, I know. I'm getting too accustomed to spending $20-30 for a complete airplane combo (kit, frames, canopy).
But it is something compared to a typical card kit. But -- it is an extremely nice kit and accessories, and that much is certain. I'm gonna have to try one someday.
Just remember, the Shipyard 30th Anniversary combos are only $85 after shipping, from Age Of Sail, lol.
And they come with 3 models.
- Dave_E, Edwardkenway, ccoyle and 2 others
-
5
-
@catopower kindly told me about them (thank you very much, by the way!).
I usually scratch build all that stuff anyway. I learned how while building my Prince de Neufchatel and found out that I really enjoy it.
I’m almost to the fitting phase now. I’ll be making all of the eyebolts and double blocks for the guns soon.I’ll carve the guns from dowel rods like the ones for my last three ships.
I’ll play the rest of the fittings by ear when I get to them.
- Edwardkenway, catopower and Dave_E
-
3
-
For anyone interested in building the Shipyard 1/96 HMS Mercury, there is a very nice lasercut detail set available directly from Shipyard models: https://shop.model-vessel.com/index.php?id_product=323&controller=product&id_lang=2
It looks like it runs about $17.- Dave_E and Edwardkenway
-
2
-
-
The interior bulkheads are on:
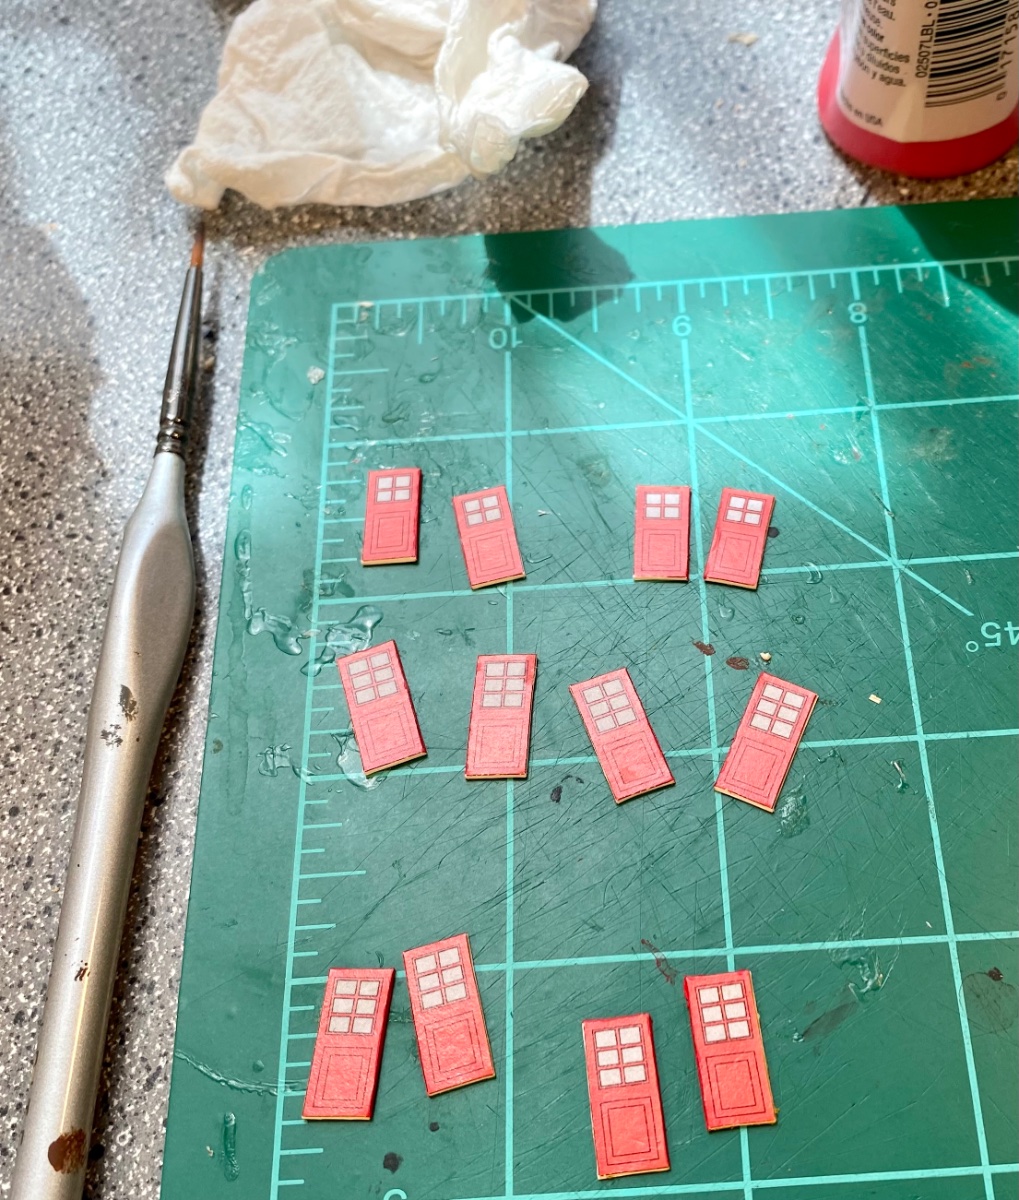
The doors:

The stern covering:
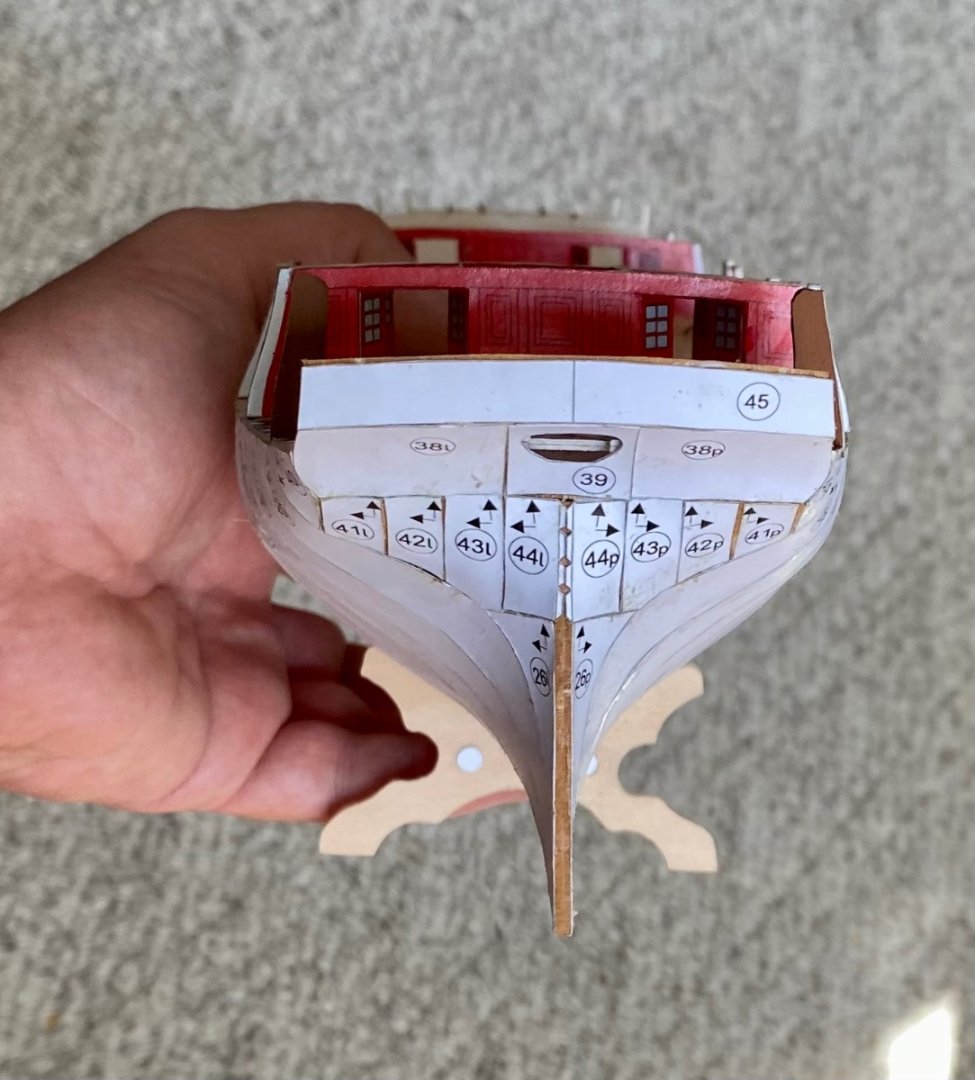
The Mercury is farther along than what I have pictures of.
The interior doors are finished and installed.
The bow hull is covered.
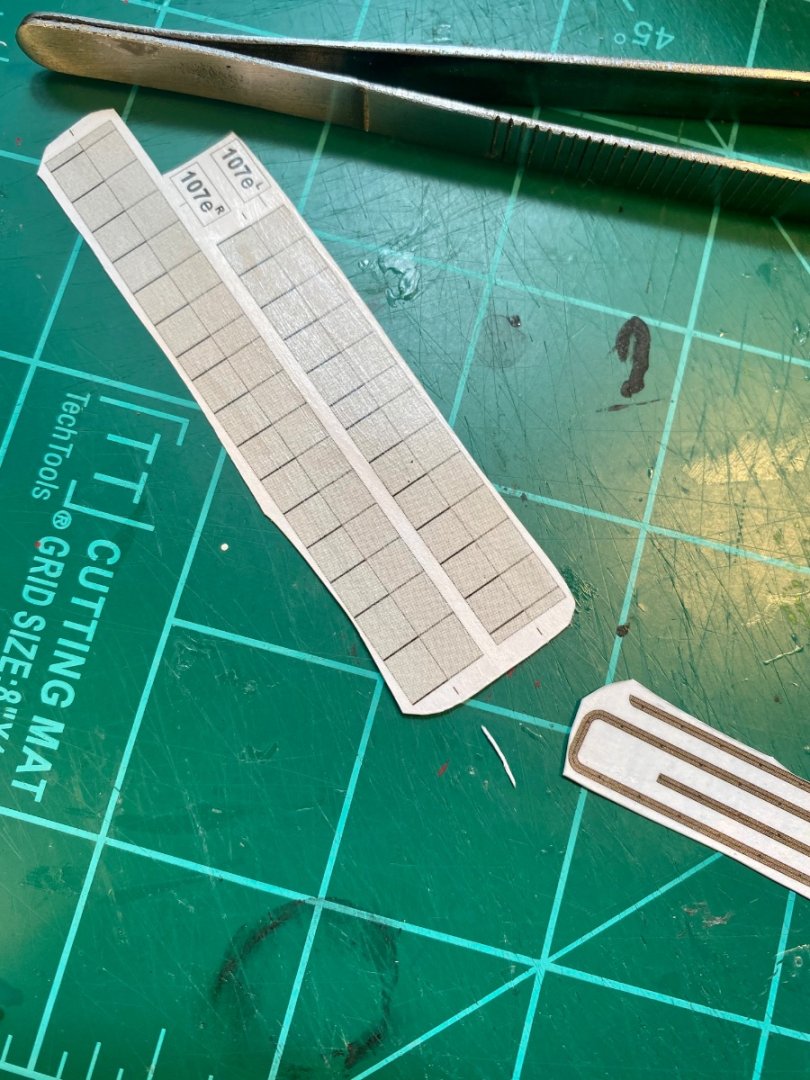
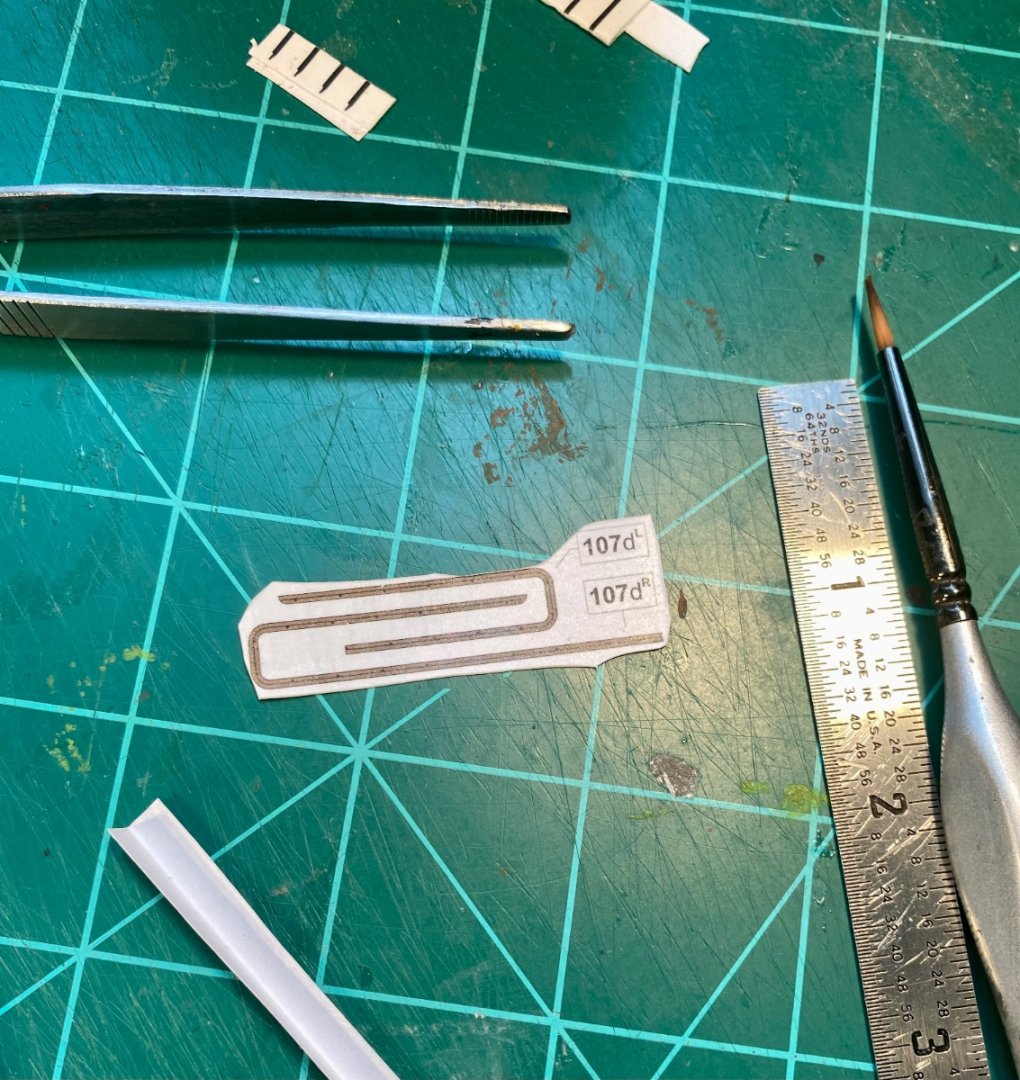
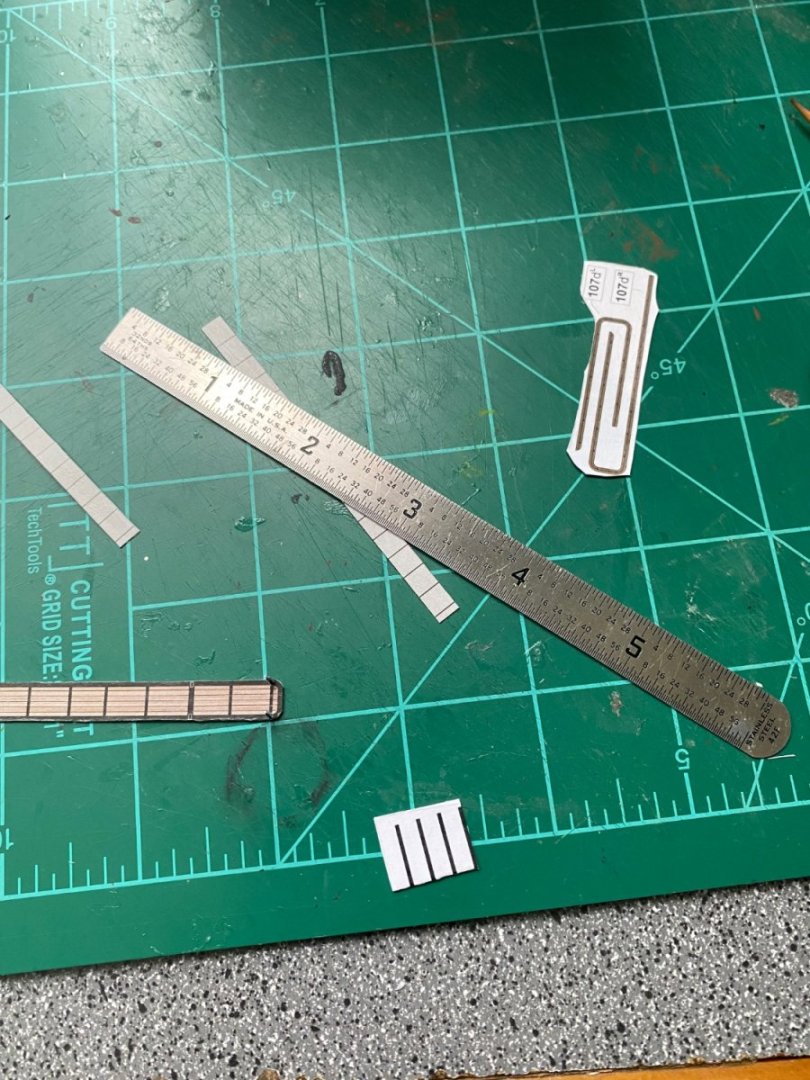
I’m currently working on cutting out the main deck bulwarks, which includes the gunports.
- clearway, BenD, Bill Morrison and 14 others
-
17
-
-
On 5/30/2022 at 3:24 PM, KeithAug said:
Phil
Every time I look at this build I am struck by the quality and detail of the plans. Given the era of the vessel I think the plans are remarkable.
The detail of the plans are amazing!
I like going from the original plans. It is a lot of fun for me.
I’m paying very close attention to the construction of my Mercury kit on how I’m going to design the actual building of Magenta.
The outer skin may be very thin with thicker frames/bulkheads.
I may end up covering the hull in a very similar fashion to the Mercury.
The lower hull covering only goes to the main deck.

I may do likewise and then make the gun deck covering in one sheet to make it easier to align gunports (also like the Mercury).
Chris Watton did that with the Revenge kit he designed for Victory Models, too.
- ccoyle, Paul Le Wol, Edwardkenway and 8 others
-
11


New member intro
in New member Introductions
Posted
Welcome!