

HardeeHarHar
-
Posts
576 -
Joined
-
Last visited
Content Type
Profiles
Forums
Gallery
Events
Posts posted by HardeeHarHar
-
-
-
Andrew, you are too kind! I do like the color scheme, having "pilfered" that from @Timmo too. Also, I appreciate your kind suggestion. I just had a gander at @Moonbug's work. Holy Moly his build of the Pegasus is stunning. Just scanning through to find how he did his taffrail was educational and inspirational to say the least!!! Super recommendation and reference, and I thank you very much!
-
So, I have attached the transom decoration over the stern lights with the light frames painted black. The decorative rail is running across the bottom, having painted it walnut with a dark highlight in the middle. Getting it attached securely was a victory, but upon close inspection, I see a lot of areas where I could have done a better job. I realize it isn't great work (or even good work), but I am learning a lot on the Granado as my second model ship build, and will try to apply my "lessons learned" in the future. I still need to put the 1x4 mm walnut taffrail capping in place over the transom decoration, after it is shaped and painted dull black, then I will do some touchup and cleanup of the whole area. It is amazing how dust gets everywhere. I am also working on the quarterbadges, and have usurped @Timmo's approach, where I am going to make frames for the lights out of scrap brass wire from the kit. I will take some more pictures as I proceed. Finally, thanks for visiting the build and offering sage advice. It is encouraging to know people are watching and willing to help the novices!

- AJohnson, Archi, GrandpaPhil and 5 others
-
 8
8
-
Wow, you did that build justice. It looks SUPER!
- Knocklouder, Canute and mtaylor
-
3
-
On 10/16/2022 at 9:31 AM, Ab Hoving said:
Which one would you like Brian? I can send you the file, take it to the print shop and have it printed. 150 100 cm is possible. You can even have it printed on perspex.
Ab
Ab, I really do appreciate your kind offer!!!! It is a most difficult decision, seeing that each and every image is so stunning in its visual impact and nautical accuracy. It would be an absolute delight to receive a PDF of The Amsterdam Port at Nightfall or Kaag. Do you have a favorite or an opinion based on all of your historical knowledge? I am not that familiar with perspex prints, so I would also appreciate your opinion on that as well. When I receive the PDF file, I will ensure it is printed at the highest resolution and in the highest quality based on the information I can gather, and then display it in a place of honor with a waterfront view in our home on Roanoke Island in North Carolina. I will also make sure that you see the end result. I really can't thank you enough. My wife and I are really excited and happy to display your work, and if there is any way possible, we would like to make sure you and your son are fairly compensated. Thanks again!
- Canute, mtaylor, hollowneck and 1 other
-
4
-
I am simply stunned at your wonderful work and generous gift to the MSW community. I would love to have one of your images printed and framed in my home on the Outer Banks of North Carolina! Knowing where they came from, and that they are a father son collaboration just makes it all very special, which is like a bonus beyond belief considering the talent that served as the raw material! Thank you thank you thank you for sharing.
- mtaylor, Canute and hollowneck
-
3
-
@glbarlow Thanks amigo! I thought that I had seen someone attempt to make the whole quarterbadge sit relatively flush by removing some of the wood from both the wale and the side of the ship, which SCARED ME TO DEATH. The instructions read to just file it down where it sits on the wale as you have done, which looks nice and tidy to me, and seems to be the most straightforward approach with minimal chance for a "OH S**T." I do think it is in my best interest to get these installed, and all the items requiring extensive "handling" of the ship done first, before I start to glue down things that stick out and can easily get broken during handling. I am dreading the gun port lids.... Apparently I like to worry a lot. =(
-
I was thinking of making it a port decanter, to hold a “tawny nectar” 🙂
- Peanut6, AJohnson and Knocklouder
-
2
-
 1
1
-
-
-
-
Thanks for the build drop ins, kind words of encouragement, advice, and the thumbs up from kind colleagues @The Gimps Chimp @Peanut6 @AJohnson @barkeater @VTHokiEE @glbarlow @ccoyle @hollowneck. I was back on the Island for a few days, so I was able tp work a bit more on the Granado. I got the window frames for the stern lights painted and in place. Alignment of the frames looks surprisingly good (I will post some pictures as time permits). I ordered some Dullcote to spritz on the painted transom and the decorative rail the transom sits on, then I will glue them in place, and put the taffrail capping over the top of the transom. I'm pretty happy with the alignment and appearance of the parts as I have dry fit them in place... I've still got to paint the two little cannon-ball holding crew that stand on each side of the transom, and glue them in place as well, but then the transom will be done. I also made the grating for the quarterdeck and stained its coaming a dark walnut color, and gave the whole thing a coat or two of wipe-on poly. I also painted the stove vent and have it ready to be secured to the deck. I have been hesitant to glue the mortars and other deck hardware (windlass, belfry, quarterdeck rail, quarterdeck rough tree rail, etc.) into position so I kept as much room for cannon installation and rigging free for my big fat fingers and thumbs. However, I believe I can move forward soon and get things glued into position as I wish them to be displayed. On the other hand, does it make more sense to get the quarterbadges and anchor linings in place prior to glueing the relatively fragile parts to the deck? Inquiring minds want to know your opinions! Also, I am wondering how hard it will be to get the quarterbadges to fit nicely over the wales. Anyone have any thoughts on these matters, I am all ears!
As usual, I am pleased to make any progress at all, particularly progress that doesn't have to be undone and redone 😃 . Thanks again for stopping by and offering your thoughts and opinions.
Brian
- AJohnson, hollowneck, Peanut6 and 3 others
-
6
-
People like you set the bar so high. Your work is incredible, and the diorama is so realistic. Epic job.
- Glen McGuire, mtaylor, Jack12477 and 1 other
-
4
-
Greetings Shaun,
Glad to have you as a new member to MSW. I hope you find the forum to be fun and informative. There are a lot of talented individuals here, and it sounds like you certainly have had an interesting life on which you can rely upon to give you (and others) some inspiration. You should fit right in!
Best regards,
Brian
-
I have never seen a paper kit like that. Impressive to say the least. Well done Chris!
- ccoyle, Egilman, Edwardkenway and 8 others
-
11
-
-
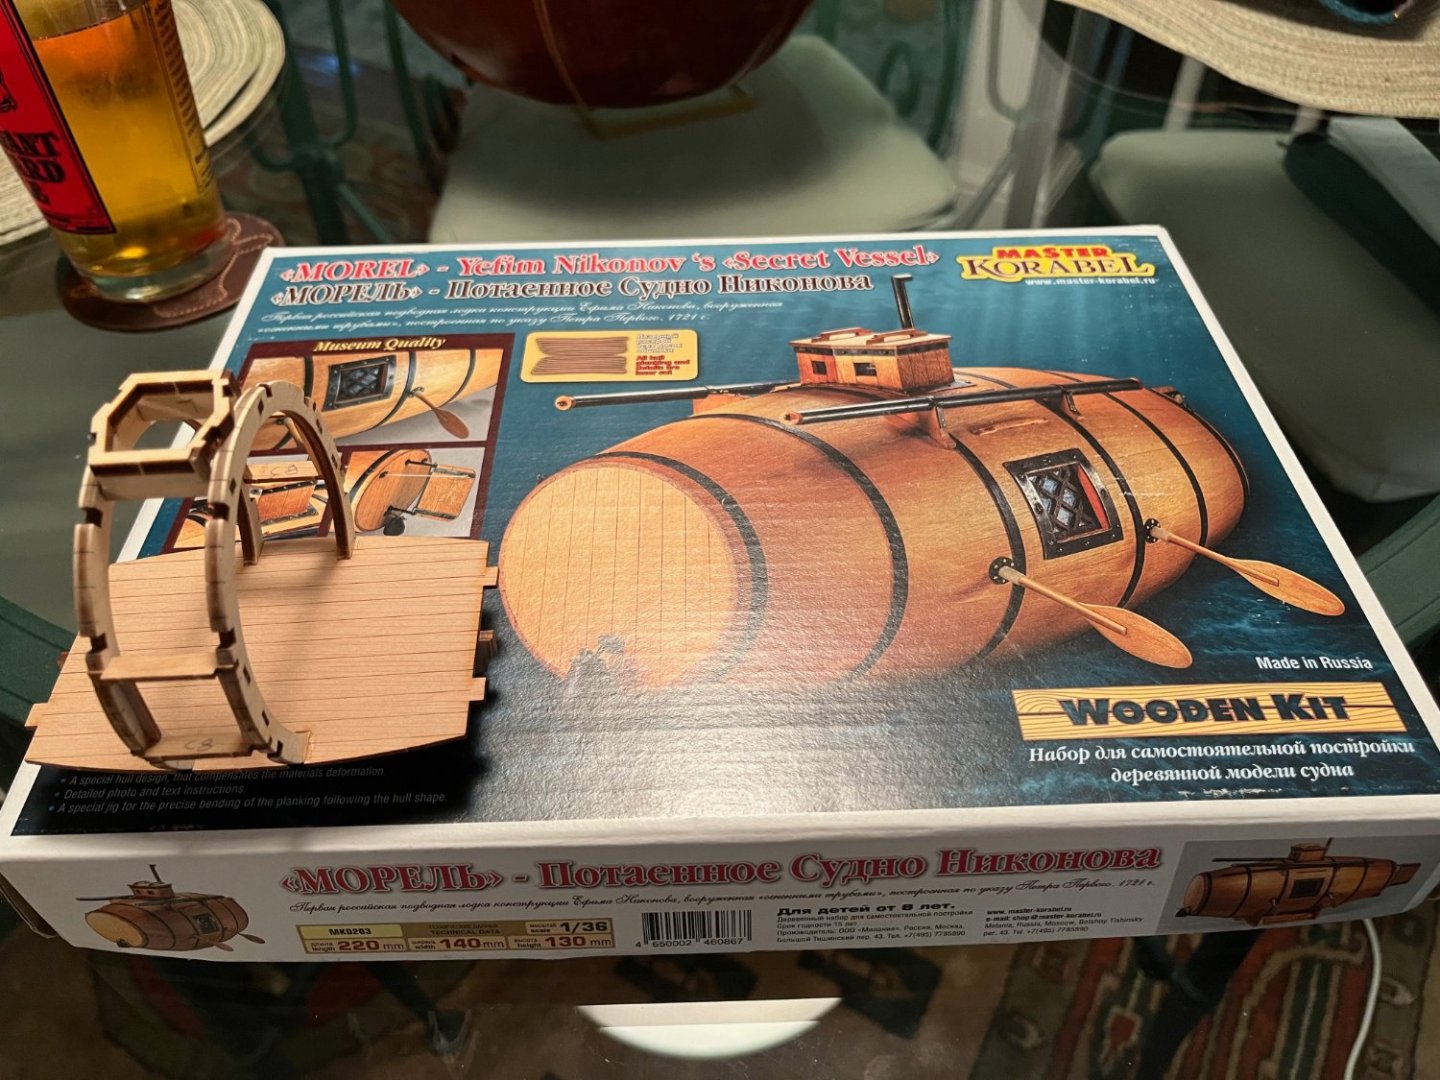
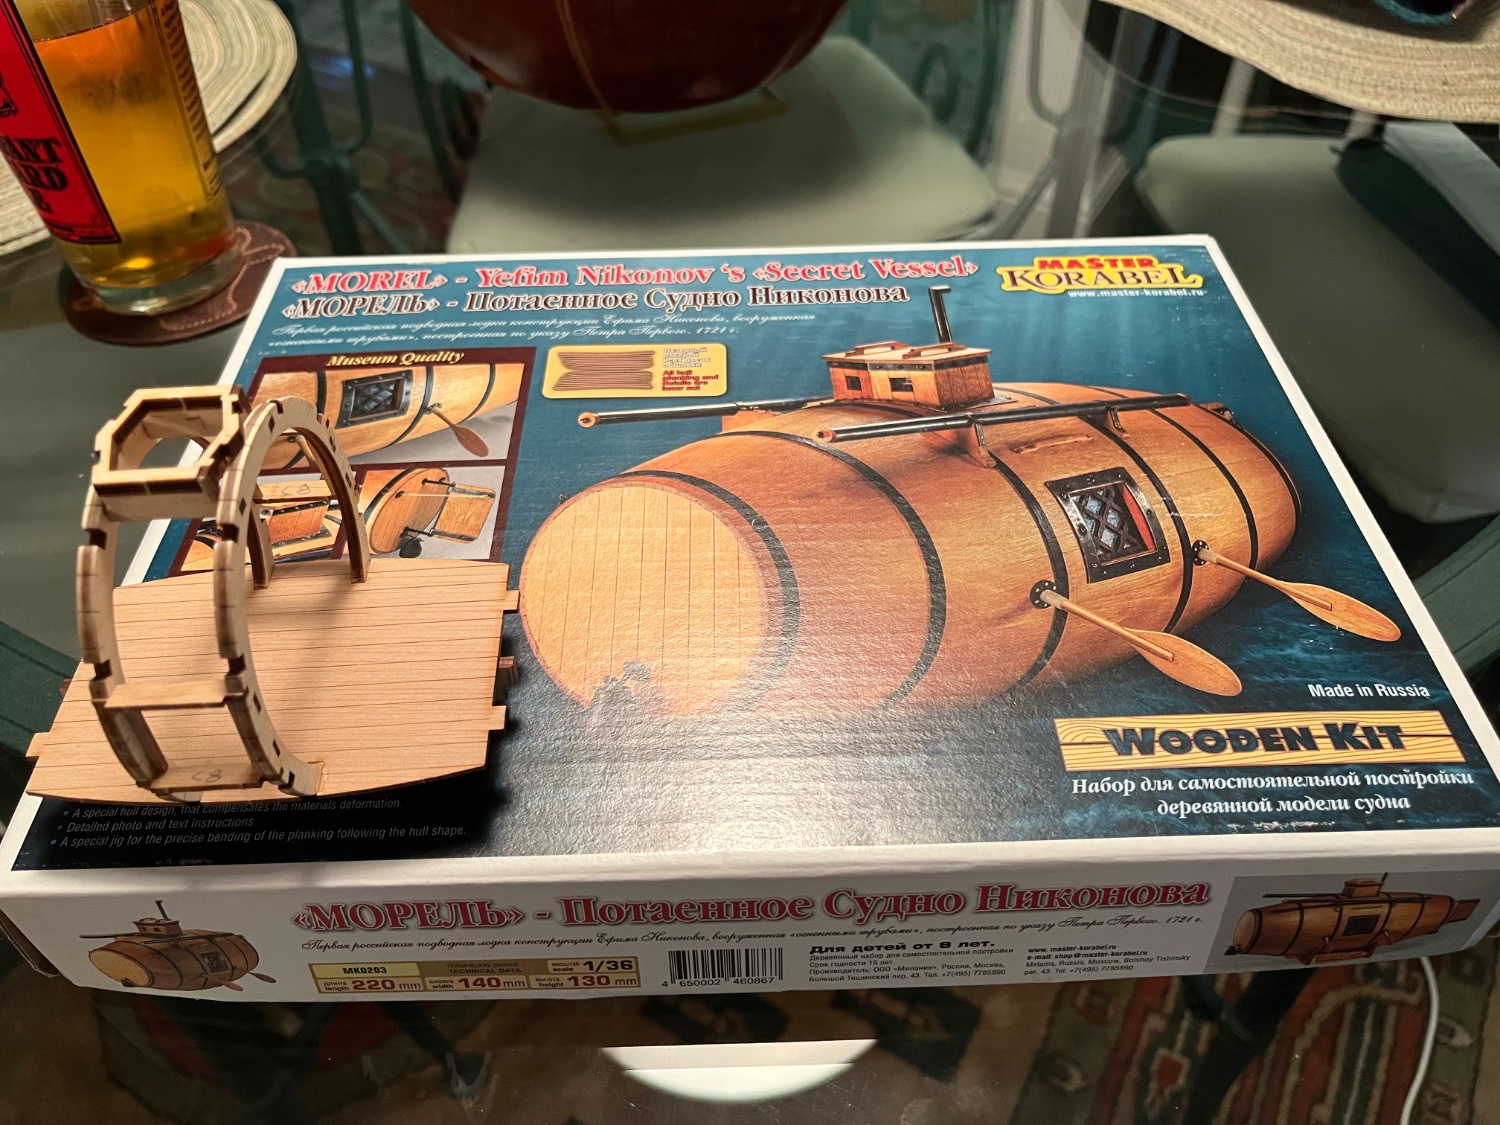
Alas, I am currently away from the Granado build at the "Roanoke Island Shipyard" on the coast (sigh), so I have established a mini-secondary-shipyard to occupy my free time and irritate the Admiral. Because of the limited resources available at this inland location, I have elected to build the little wooden submarine "Morel". It is a kit made in Russia, but I had purchased it before Russia's/Putin's egregious land grab in the Ukraine had begun. Regardless of its origin and global politics, it appears to be a nice simple kit that will be a lot easier to build and less time-consuming to finish than the Granado build. There are also lots of good build logs out there for me to benefit from (e.g., Secret Vessel "Morel" by John Gummersall - FINISHED - Master Korabel - Scale 1:36). Because of the existing and outstanding build logs already out there, this one will be abbreviated at best, so please forgive my abruptly jumping in with both feet and a photograph of the build and a beer already in progress:
-
Derek, Thanks so much! Big time helpful, I really appreciate it!
-
Sorry to ask a lame question, but do you use half hitches on your ratlines? Can you share how you go about doing them, or point me in the direction of a good description. I am still a long way off from starting the ratlines on my build, but a guys got to worry about something, right?!? 😃
-
-
-
-
Guess who finally finished the installation of all the cannons on the Granado?!? I will do some touch up work on the gun tackle, but it will soon be done and I can then move forward with some of the remaining deck equipment, etc. YAY.

- Geowolf, The Gimps Chimp, James G and 8 others
-
11
-


HMS Granado by HardeeHarHar - Caldercraft - 1:64 - Bomb Vessel
in - Kit build logs for subjects built from 1501 - 1750
Posted · Edited by HardeeHarHar
So, how on earth are some items that seem relatively trivial so HARD. Taffrail capping for instance. I had read where someone used the sheet that held the transom as a means to bend the 1x4 mm walnut to the perfect shape. So, I was like "that will make it easy". So I cut it out, and tried to use it, and it wasn't that easy. Of course, I made it extra difficult by making sure to spray the walnut with primer, and then paint it black. In other words, I made it harder to bend. So, I just dunked the painted strips in water to make them more pliable. Because the frame I was trying to use was 1 mm, and the walnut strip was 4 mm, it was not going to work. Me being me, I ended up trying to use two paint bottles to try to shape it. It ended up not even close to the right shape, but it got the wood to bend a little in the right direction. I then tried to glue this horribly misshapen strip of wood over the decorative transom SLOWLY (adapting the advice I had received from @hollowneck to look at @Moonbug's build), and then gradually bend and glue it into the appropriate configuration. EPIC FAILURE, embarrassing even. So, I wet the painted and semi curved walnut strip some more while I made "Frankenrig", an entirely too crude (and again embarrassing) attempt to make a deeper jig that would make the job "easier". Lightning struck, and it kind of worked!!! Then the overly worked walnut strip was able to be glued in place (slowly) with only a few gaps, and those gaps I believe I can fill in later and they won't even be noticeable. I touched up the taffrail capping with black paint, and have moved on. Because I used boxwood strips for planking, and I don't have anything other than boxwood strips, I have decided I will use the walnut fenders and the stairs provided in the kit, and stain them dark as is my habit. However, the instructions say to make the anchor lining using three (3) 1x10 mm walnut strips, and I decided I am not going to have walnut anchor lining overlaying on boxwood planking. So, I created "Frankenlining" by gluing eight (8) 1x4 mm boxwood strips together, and then cutting and sanding them to the correct shape. And that is where I am going to leave this post.....
With best regards to all build visitors,
The Mad Professor (Brian)
Here is the frame that held the transom:
and here it is cut out of the parts sheet with the tabs removed...
and since you can't bend a 4 mm wide strip of walnut using a 1 mm thick jig, here are the bottles I thought I could use as a jig =(
I might have a PhD, but clearly, I am not too intelligent. So, I went back to the original idea and made "Frankenrig" that was 3 mm high....
And then I jammed the wet, fully painted walnut strip into the rig and clamped it down tight.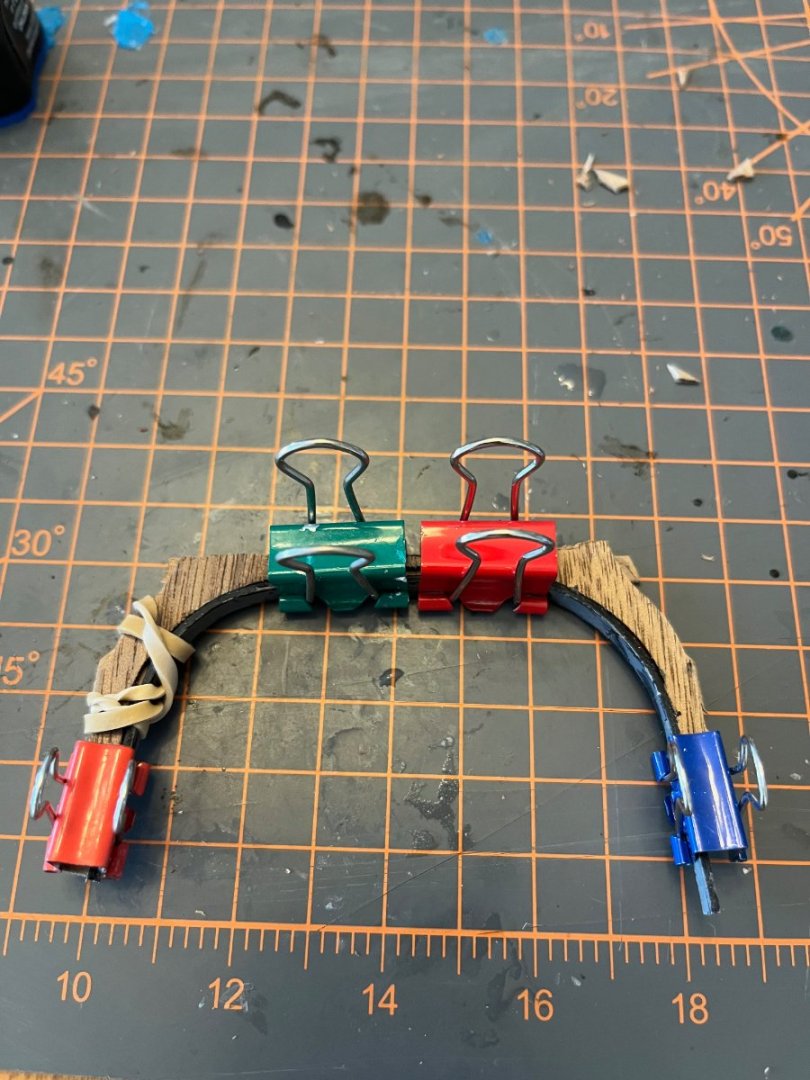
And it actually kind of worked. Close enough for this novice at least. I think I can fill in the holes with some glue, which will then serve two purposes.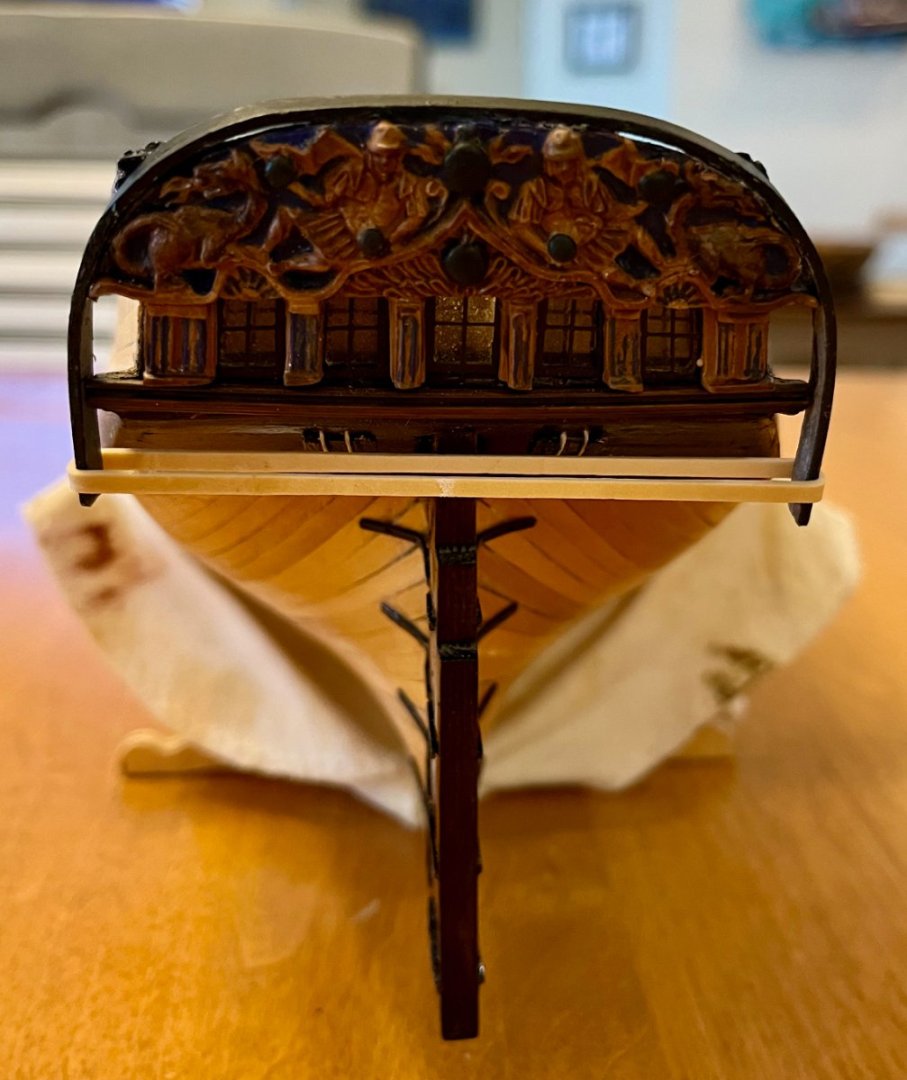
Lastly, here are my "Frankenanchorlining" creations.
Muahahahahaha. Sigh.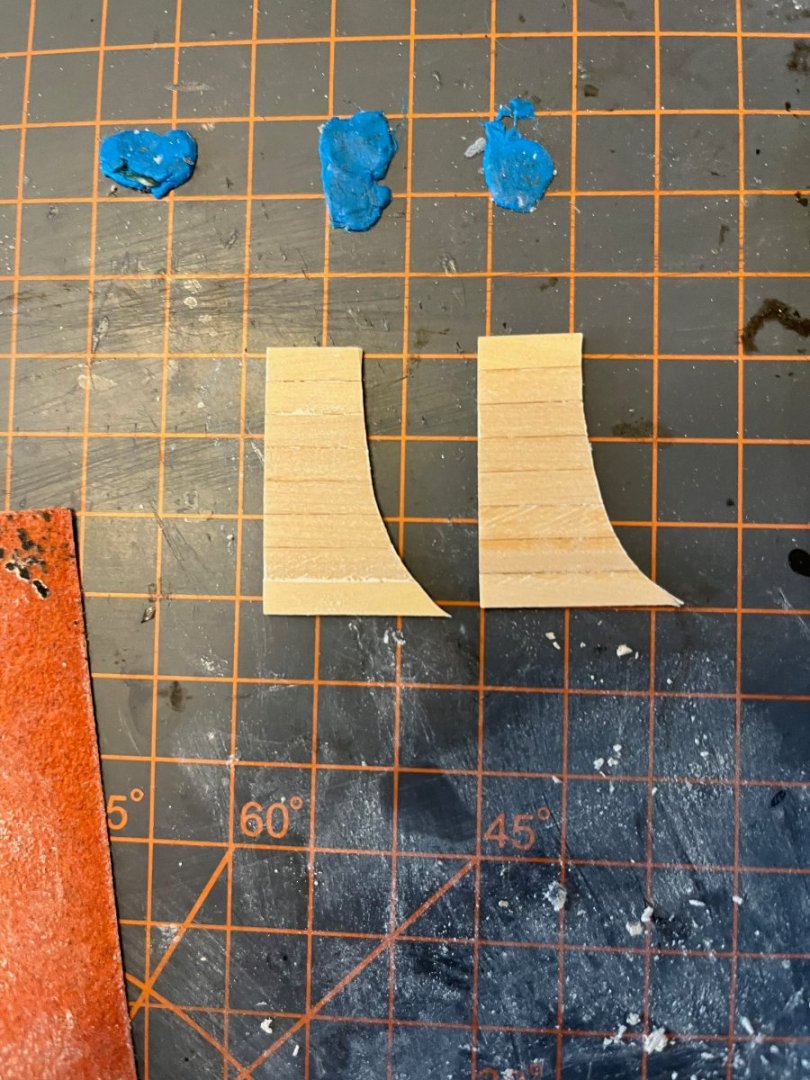
Happy Halloween Peeps! I know I just scared you A LOT.
😃