ScottRC
-
Posts
559 -
Joined
-
Last visited
Content Type
Profiles
Forums
Gallery
Events
Everything posted by ScottRC
-
 I'm enjoying your build here Jonathan and I am taking notes. I built this kit in 1991 and it got dismasted in a cross-country move. The model is packed up and stored in a closet and I plan to build all new masts and spars and re-rig it. I was in my third year in college and the local Woolworths was closing. I got my Alabama kit for $14 and the Revell America kit for $9. Looking at those ebay prices makes me glad that I didn't throw my wrecked Alabama out. This build log gave me the ambition to pursue and rebuilt it. Scott
 -
Mark, I would support your decision to shelve this project. We all know that we use this hobby to help us during times of duress. There had been a project I had worked on in troubled times, and when things got better, whenever I looked at that project, it brought back bad memories, so like you, I had to put it away. It was for the best. Time to start a new project to help you remember these times that are seeming to get better. Scott
-
You are coming along very well.
-
Great work Rob and I'm glad the arm is doing better. All detail and research on the stunsail booms is very interesting. Scott
- 1,208 replies
-
- 2
-

-
- great republic
- clipper
- (and 1 more)
-
Man Rob, I hope things get better, they do say that working the areas that hurt helps with recovery, so maybe trying to work on the GR will speed up your healing.
- 1,208 replies
-
- 3
-
-
- great republic
- clipper
- (and 1 more)
-
Try your local auto parts store and ask for a flexible mechanical parts retriever. They come in two types, one is magnetic, the other has a set of claws you work with your thumb. Some even have lights. I have one that is 1/4" in diameter that I have used many time in retrieving stuff I dropped into tight, enclosed areas.
-
The crimping tubes are great. I learned of them when rigging the control wires on a 1/32 WW1 biplane. Saved me a lot of pain and frustration.
- 227 replies
-
- 3
-
-
- BlueJacket Shipcrafters
- Stephen Hopkins
- (and 2 more)
-
Welcome back Vivian and congrats on the marriage. I'm excited to see how these sails turn out. They are looking very nice. Scott
-
Hi Rob, My mother, who got me into ship modeling, bought a Scientific Sea Witch back around 1976 and never built it. I now have it and really think it would be a good candidate to try some small scale scratch building. It computes to 1/158th. I just need to get two other projects completed and then I can start the Sea Witch. Scott
- 1,208 replies
-
- 2
-
-
- great republic
- clipper
- (and 1 more)
-
Hi Rob, Your documentation of your rigging process is going to be invaluable for me since I am interested in working in the smaller scale. Everything is looking very refined. Scott
- 1,208 replies
-
- 3
-
-
- great republic
- clipper
- (and 1 more)
-
I agree about priming under just about any paint. I build a lot in 1/700 and use acrylics. I will do a light base coat primer, usually Krylon flat white or Tamiya gray primer, then will either brush or airbrush light coats of thinned base color. It's important to keep the coats light and thinned because it's so easy to get the paint thickness to appear out of scale and cover up details. Priming does a number of positive things; it brings out any blemishes that can be corrected, it gives a good biting surface for the paint to adhere to, and it allows you to adjust your base color hue from light to dark.
- 140 replies
-
- 6
-
-
- the sullivans
- trumpeter
- (and 2 more)
-
Your idea using cardboard and making a cover is making me wonder why I didn't think of that. I have a 1/96 Constitution on my workshop shelf that is 98% complete and waiting for funds to build a case for it. I will put our idea to work this weekend.
- 1,351 replies
-
- 2
-
-
- constitution
- model shipways
- (and 1 more)
-
Many years ago, I took a class in fly tying and acquired the tools. To this day, I have tied maybe six flies, but the vise, thread bobbin, and head cement has been excellent for seizing and threading on small parts. The bobbin is a must to keep the thread manageable.
-
Smart move on laying down good primer coat, it will make your overall finish much more easier. About the decks, I chose to fill and sand the gaps, and then re-scribed the deck lines with a small strait edge and . If I was to do it again, I would probably re-plank the decks with a thin veneer. Scott
-
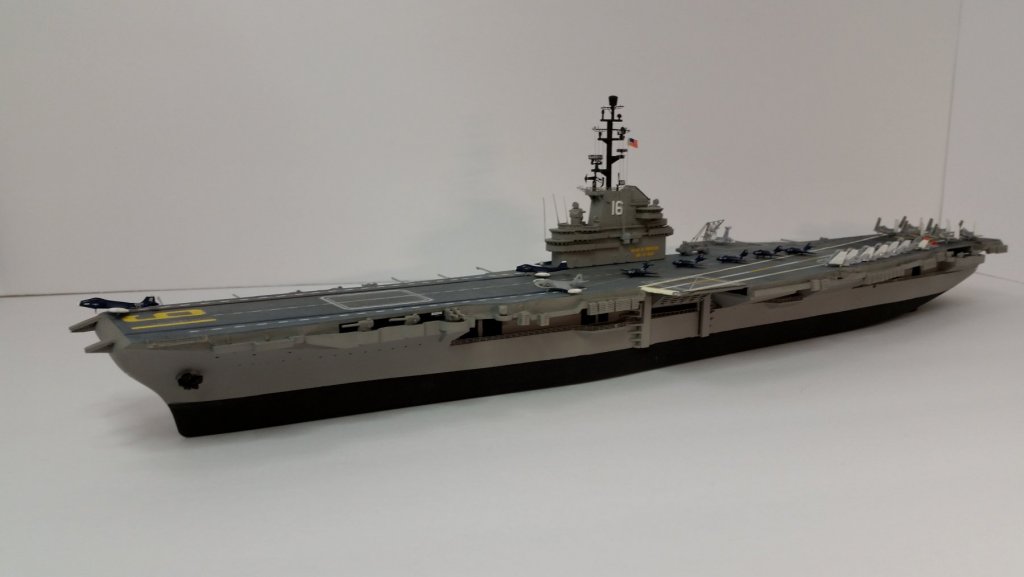
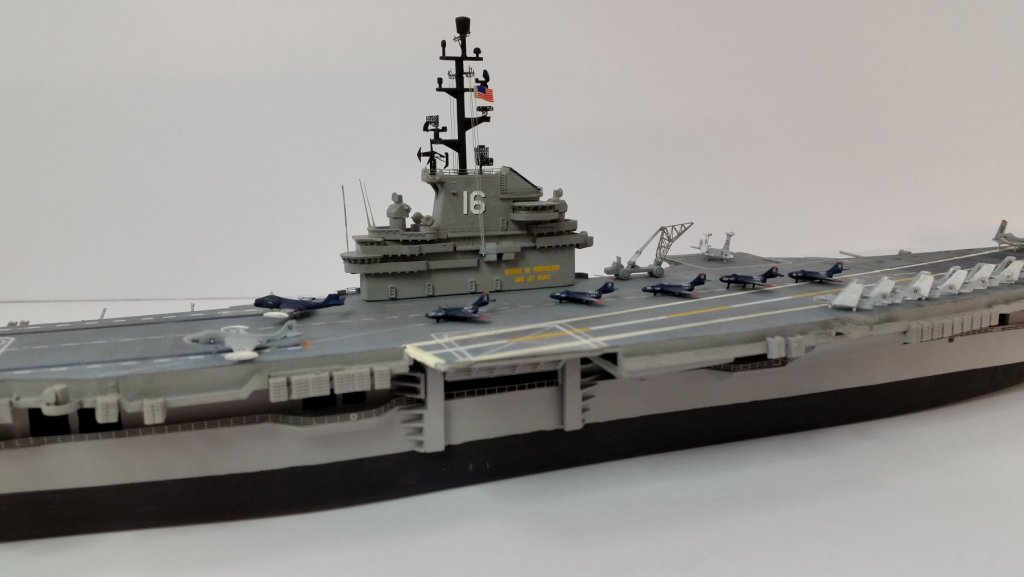
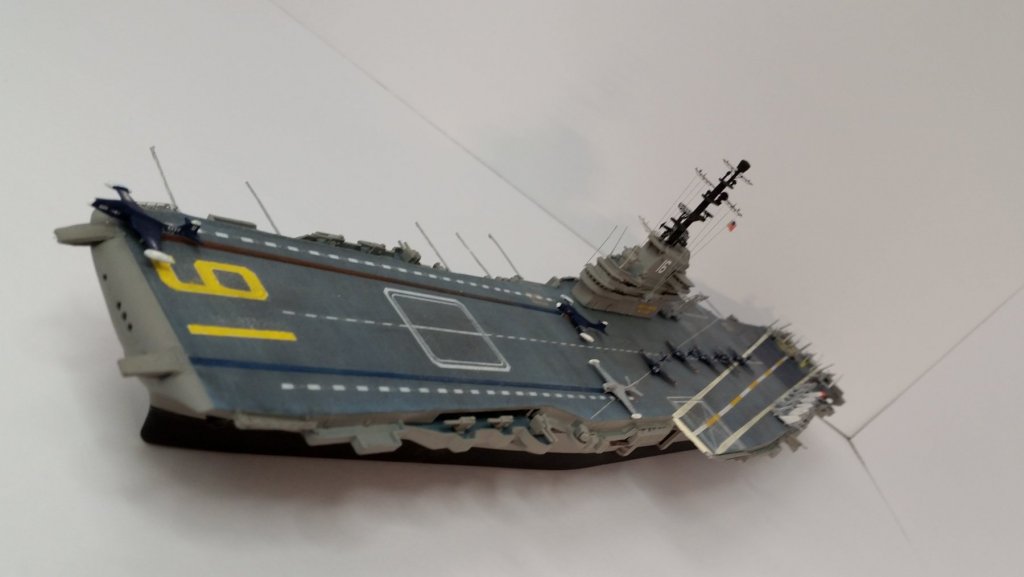
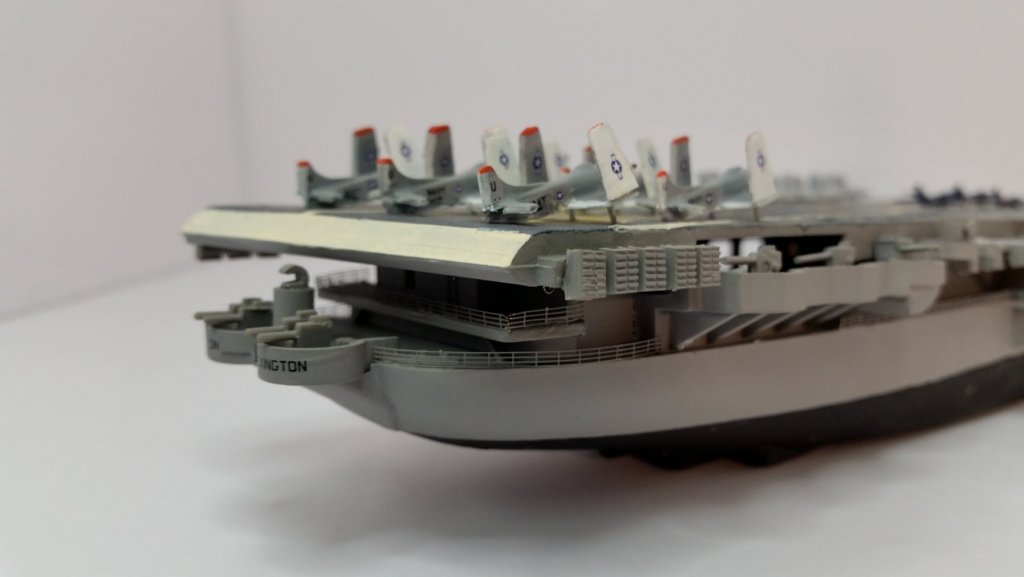
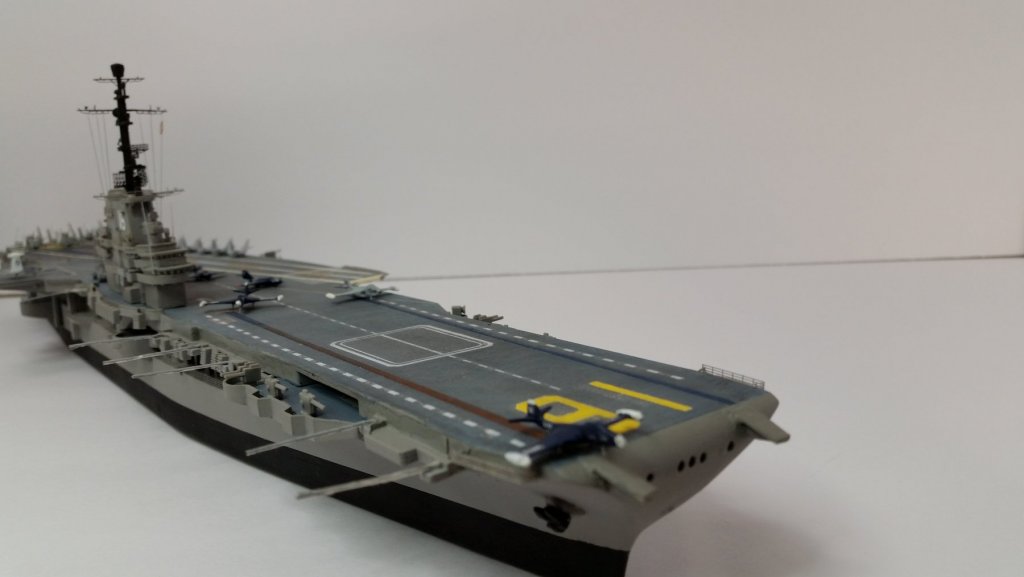
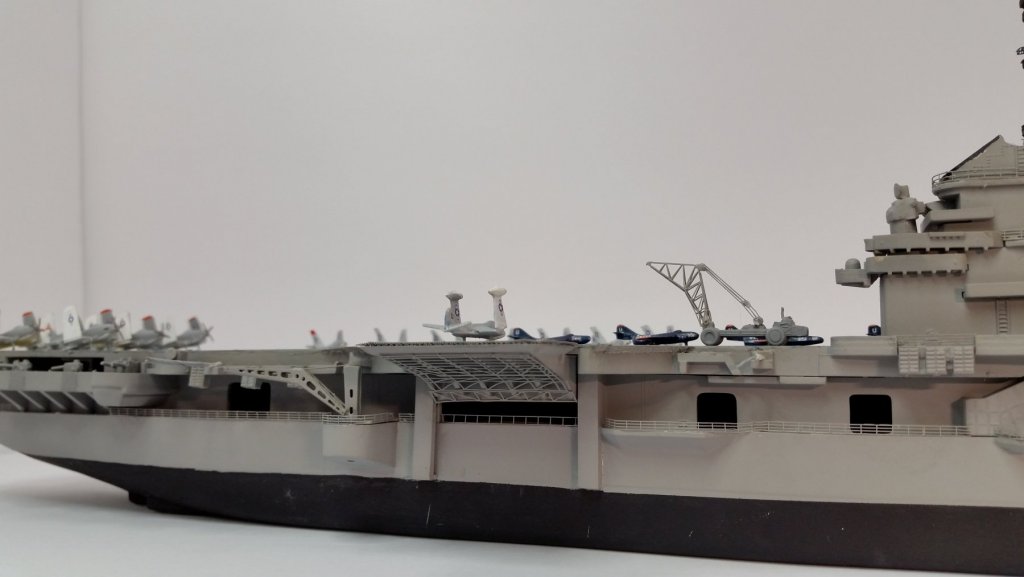
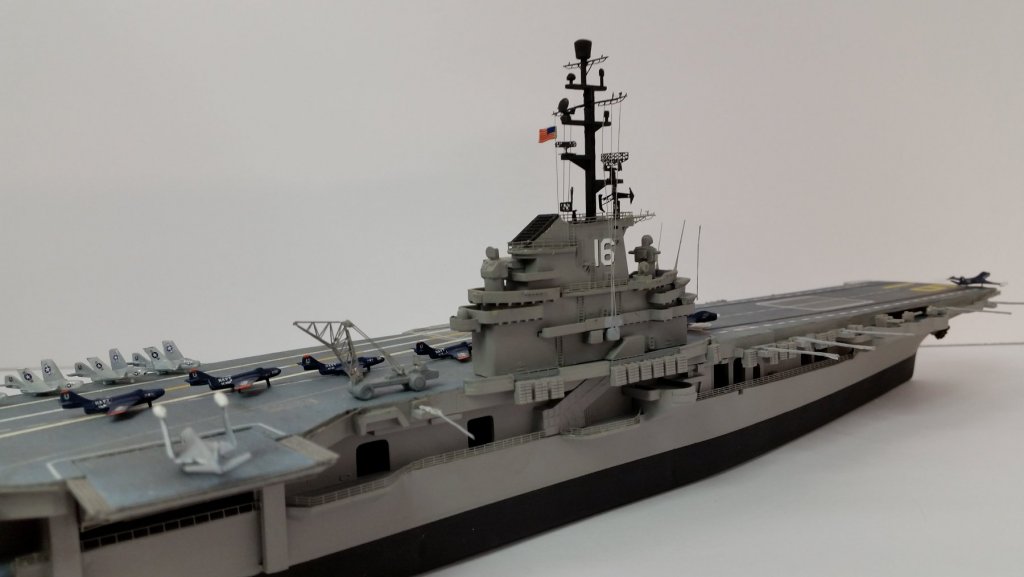
I also completed a 1/700 CV2 Lexington this year, and for Christmas, received a 1/700 CV16 in WW2. So now my goal is to have a model of all the ships called Lexington. Here is a pic of all three. Scott
-
Its been almost four years ago and I forgot about this build log. I did finish the Lex and hopefully get a display cabinet built in the future for it and all my Dad's certificates and burial flag. Here are the completed pictures. I hope I can say that I actually completed my first build log.

-
Those boats look much better, very scale. Great work! Scott
- 188 replies
-
- 2
-
-
- cutty sark
- billing boats
- (and 1 more)
-
I have had the same problems with painting copper over gloss surfaces and vise versa until I was taught the following technique: - Spray a coat of matte clear over the entire model, including your topcoat, this will seal the topcoat and give both the tape and bottom paint a textured surface to "bite" into. - Lay your mask down, as was said, the Tamiya range of masking tape is the best. They now make tape that fits contours. - Spray a coat of clear over the mask at your demarcation line, this will add an additional seal. - Then spray your next color and let sit for at least a full 24 hours if its enamel. It takes a long time for this to cure. If not fully cured, it will peel off in sheets. - De-mask, inspect, wipe clean all mask residue with a mild solvent, then spray on a few light coats of clear gloss, let sit and enjoy the finish. Scott
-
This is an interesting subject you are building. I will want to follow along. Ironically, I grew up near Fort Benton MT and now live south of Kansas City. I someday would like to pursue building a model of a Missouri river packet someday. Scott
- 599 replies
-
- 3
-
-
- sidewheeler
- arabia
- (and 4 more)
-
Etubino, I will be following your build log as well, I am trying to start a Scientific Sea Witch. Scott
-
Jim, When I read you first post, it sounded like you just took up painting as a hobby for retirement, then I saw your work and thought man, you didn't retire, your on a career. You have all the chemistry for good nautical illustration than so many professional illustrators seem to struggle with. Most important, you have mastered perspective, depth of field, and scale. That is very hard for a lot of illustrators to do, for out of scale features stick out and throw the scene off balance. I really like your work. Scott
-
Sopwith F.1 Camel by jablackwell - Model Airways - WOOD
ScottRC replied to jablackwell's topic in Non-ship/categorised builds
Maybe only cover a small section of each wing, fuse, and tail? It would be a challenge, especially masking and painting the markings and adding the pinking so everything lines up and then the transition from the covered section to the exposed section looks balanced. -
Sopwith F.1 Camel by jablackwell - Model Airways - WOOD
ScottRC replied to jablackwell's topic in Non-ship/categorised builds
Good to hear that the ailerons actuate for its really looks great. Balsa USA will probably the kit I go with, they have a great reputation and support. In building for RC, I cheat go go with servos for I do not trust my rigging skills. At present I am building a 1/32 scale plastic SE5, my first one, and find that rigging a bipe is much more complicated than I thought as compared to a square rigged ship.