HOLIDAY DONATION DRIVE - SUPPORT MSW - DO YOUR PART TO KEEP THIS GREAT FORUM GOING! (Only 44 donations so far out of 49,000 members - C'mon guys!)
×


BANYAN
-
Posts
5,938 -
Joined
-
Last visited
Content Type
Profiles
Forums
Gallery
Events
Everything posted by BANYAN
-
 I cannot cite a source or otherwise for this Les, and this is pure speculation. I believe that these ships would have been just like any other warship, or even armed merchants for their gunnery practices. No use having a gun/cannon fitted if you cannot put it into action quickly when in 'some' waters; therefore, some form of ready-use ammunition (shot and cartrige) would have needed to have been made available. In these cases I believe, the shot would have been kept in shot racks just as in warships; whereas, I think cartridge may have been made-up (and refreshed regularly) ready for use but kept in the powder room???). I have seen shot-racks abutting hatches, hard against against the bulwarks and in triangular racks (similar to a billiards rack) - this would have been governed bythe practices for the period and nationality of the ship. Additionally, in less dangerous, or benign waters, the guns (and the shot) would have been secured below as attested in Capt. Cook's Log where on occasion he mentions the guns being stowed below. That said, if permanent shot racks were fitted they would have remained in-situ. i have fitted shot racks along the outer edges of the mid-ship hatches in my Endeavour build but that is only a guess and I cannot confirm this was actually their location or, even if fitted. cheers Pat
 -
A Lorch Micro-Mill that never was ...
BANYAN replied to wefalck's topic in Modeling tools and Workshop Equipment
Very nice machining Wefalck; these micro machines you create are miniature work of art in their own right! cheers Pat -
That winch looks great Denis. Talking of detail; I went to a model competition where a complete section was devoted to fishing craft (about 20 or so models) and the level of detail was superb. One 'cheeky' modeller even depicted the skipper and mate in the pilothouse along with the ship's dog whom had left a 'message' on the deck near the door cheers Pat
-
Thanks for looking in and all the likes and comments folks; I very much appreciate the feedback. B.E. Easily done mate, especially noting the many fine logs in this forum; I have missed many and bet there are still a few logs going that I would appreciate following - but there is only a finite amount of time in the day John, Popeye - That finish line is so close I can small the champers C.A - I am sure it will mate - perseverance is the name of the game (only 13 years for mine ) cheers Pat
- 517 replies
-
- 4
-

-
- Endeavour
- Artesania Latina
- (and 1 more)
-
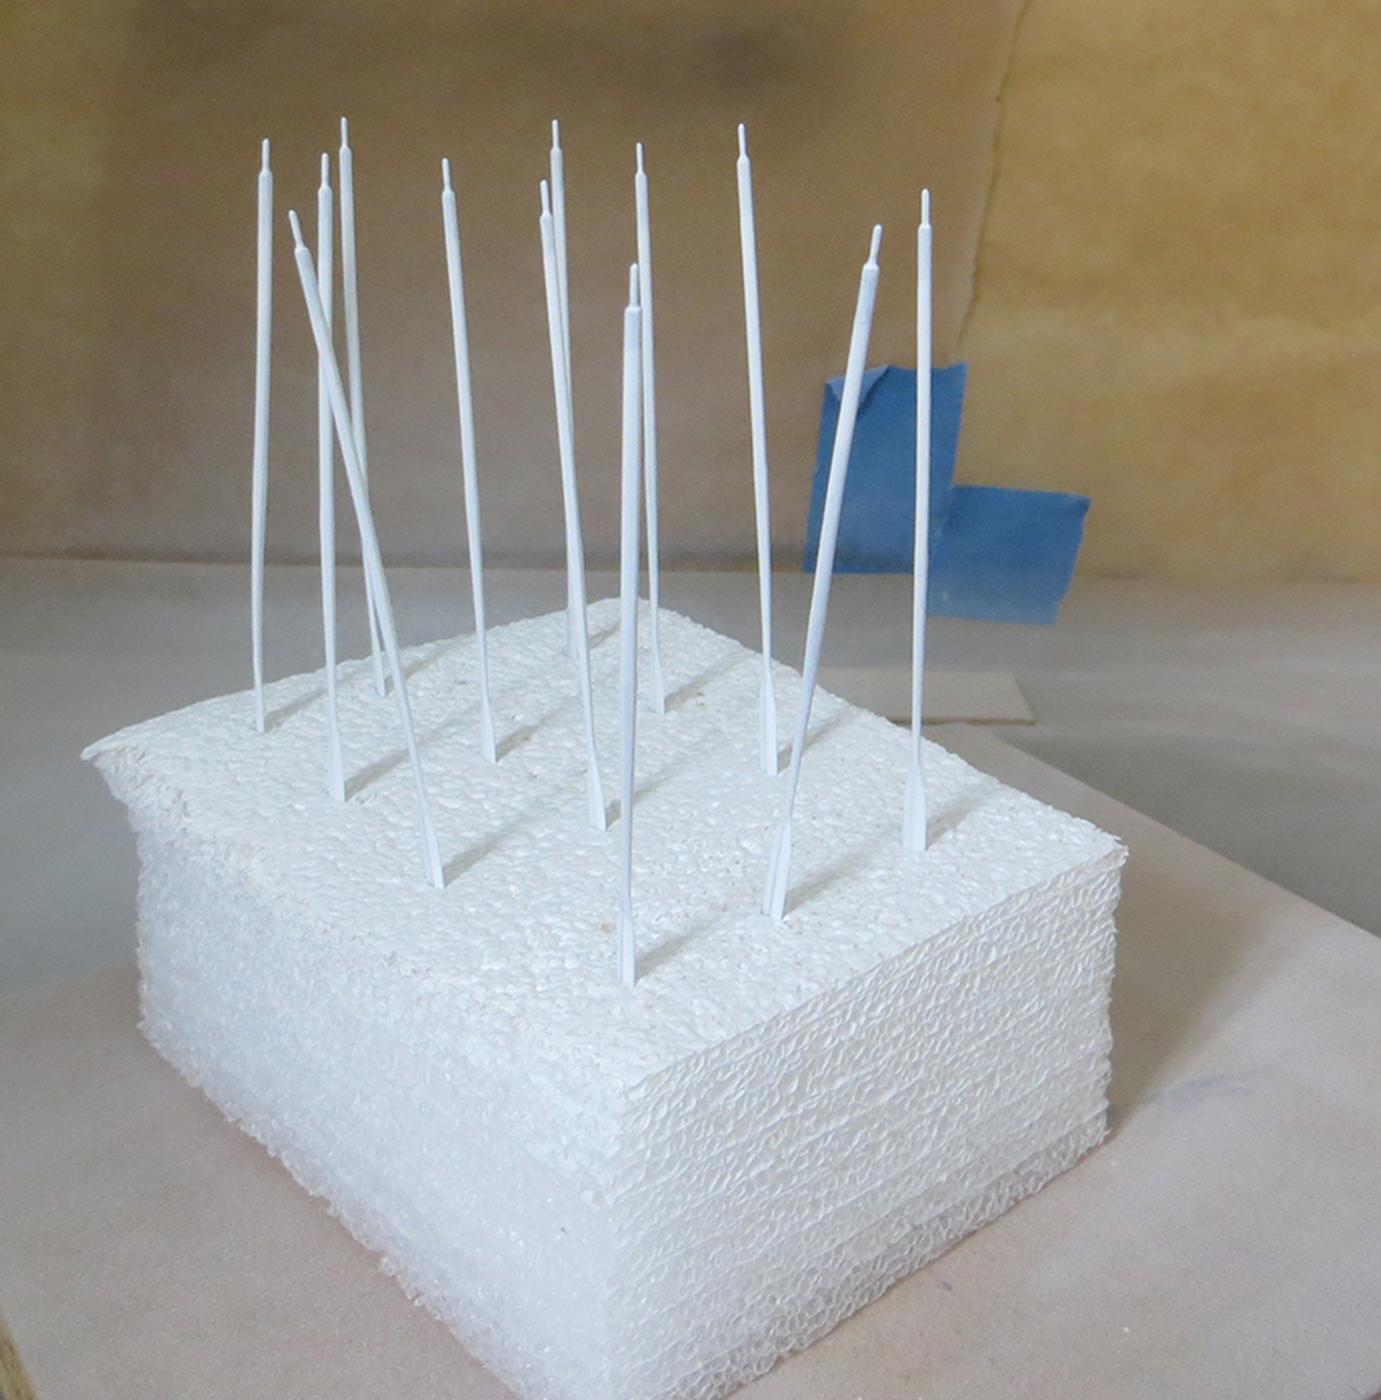
Hi folks, Another small update, and very near complete now. Could add a bit more - but as Greg pointed out - need to move on sooner or later. Still to go: 2 x boats, boat oars (started - see picture), some more rope coils and the commissioning pennant. cheers Pat
- 517 replies
-
- 13
-
-
- Endeavour
- Artesania Latina
- (and 1 more)
-
Nice work Dave; they look good. cheers Pat
-
Ah thanks BE and JB - that clears all of that up for me Common it will be then. cheers Pat
-
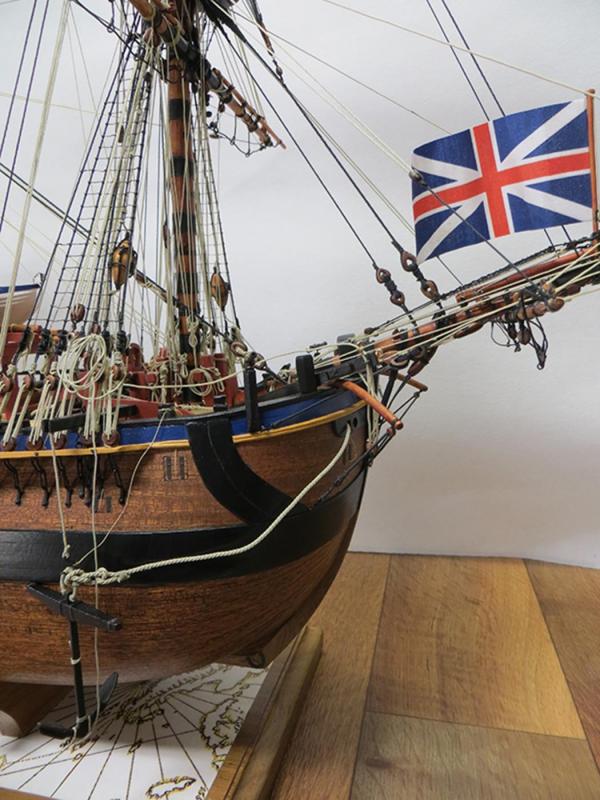
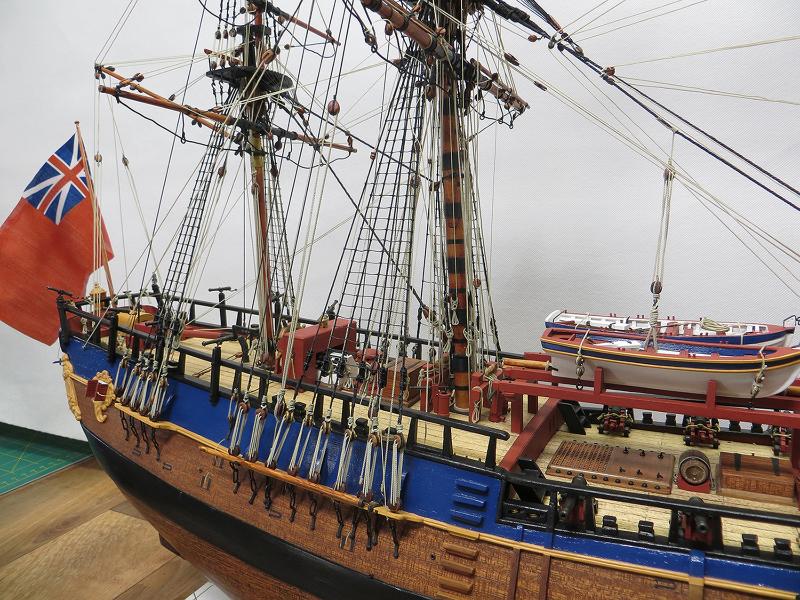
Wow, thanks folks some great info there. I will really need to sit and read that Wilson Book much closer as I missed some of the detail. I have the Ensign and Jack sorted (and fitted). It is the masthead pennants I am now trying to resolve . JB many thanks for the direct link (again I need to sit and work my way through this sit more thoroughlye). Spot on about the commissioning pennant, I think I will fit a commissioning pennant also which if I recall correctly, is simply a thin red cross (St George?) on white pennant, with the vertical leg of the cross biased well to the hoist edge of the pennant. These are still in use with the RAN also. We fly a very small version at all times but often not visible as they are flown from some inconspicuous places so as not to be misinterpreted as part of any signal hoist etc. The 'paying off/decommissioning' versions are huge (length wise), especially for ships that have been in service for some years. We sometimes held the tails of them aloft with helium filled (weather/wind finding) balloons. B.E. thanks for that info. I'll post a piccy of the fitted flags (Ensign and Jack I have used in Endeavour) later today or tomorrow. They are similar in size to what you have used as I am working at 1:60 - so will be about right. The common pennant looks a goer and I think I may fit that also. Thanks for the link to Robin's site as well. Chuck, that site has a lot of info but not the easiest to navigate - but your point is well taken. Any clues/comments re the masthead position of the common or commissioning pennants. Currently understand that both were flown from the main masthead, but which had precedence?
-
Thanks JB. I am assuming that the commissioning pennant you describe as being three equally distributed horizontal stripes in the order red, white blue? I am also assuming a standard (elongated triangle) shape and not a 'burpee [V end]) ? i have looked through that site but find it very difficult to find this sort of information (unless looking for a typical flag such as an Ensign for a particular country in a particular period). That could just be me being thick headed though is there a particular section to look in for this? I am protraying her at anchor/alongside with spars fitted but sails stowed away - so the at anchor positions for Ensign and Jack and now the commissioning pennant at the main mast truk will be my most likel;y configuration. .... Then to find one of these (at appropriate scale) cheers Pat
-
Thanks again B.E. - your logic and comments generally mirrors my thinking but you have alerted me to a new possibility . I have that book by Wilson, but I did not want to post my interpretation initially as I did not wish to influence any responses along any particular path. My initial thoughts were that perhaps the Common at the main (as you also interpret) and perhaps a commissioning pennant at the mizzen, but I do like the idea of the vanes (which had not occurred to me - many thanks). Are you aware of any size 'rules of thumb' for the pennants or vanes? I am also not aware (or more accurately yet to determine) when the use of commissioning pennant started. cheers, and many thanks again Pat [Edit] You are very correct in pointing out the lack of contemporary evidence of these for Endeavour. i have found one watercolour of Endeavour showing pennants at each mast head but it is a more modern interpretation. I'll take a closer look at this and see if I can contact the painter (unfortunately, I think it may have been Robin whom is no longer a member).
-
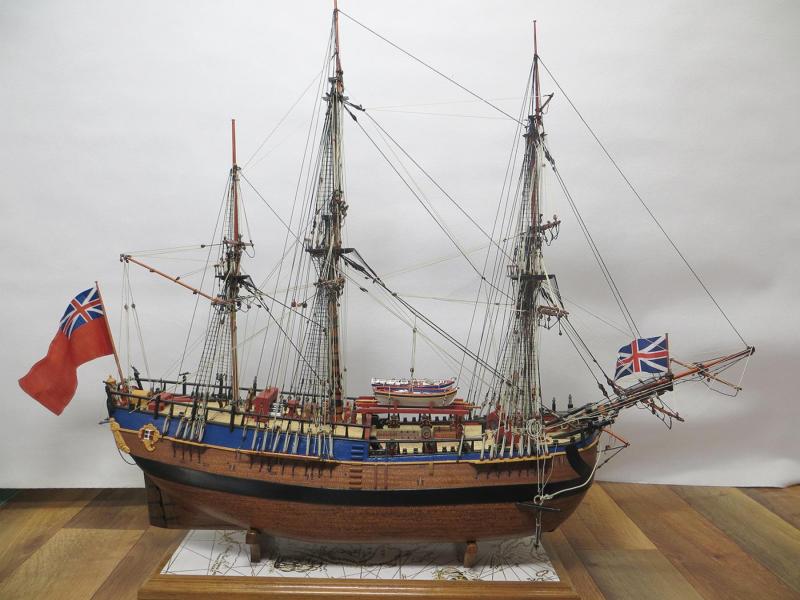
Thanks B.E. Yep agree and have established she had the Red Ensign and Jack forward - but it is the other pennants I am trying to determine. Do you think she may have also flown the common pennant (tricolour) if assigned to other duties (scientific exploration)? Interesting that the Commissioning pennant was at main mast - if nothing else i will consider fitting this one. The period is too late for Streamers, so it is possibly 1 to 3 pennants. cheers Pat
-
Hi folks, in trying to finish my HM Bark Endeavour c1770 (all the small things ) I am trying to determine what pennants would have typically been flown from the mastheads (in addition to the Jack forward and Ensign aft). I am assuming one would have been the commissioning pennant but I am unsure of its size and colours; this would probably have been flown from the mizzen? In a recent painting of Endeavour she is depicted with a pennant flying from each of the mastheads, with the mainmast pennant being fairly large (long). Any information re positioning, size, structure, colour etc would be most appreciated. cheers Pat
-
You have a real talent for micro blacksmithing Glenn; the stoves looks superb! Nice to see an update but we can understand that you have been a little distracted with the shadow-build. cheers Pat
-
Nice work on the rigging, especially the crows feet mate; it's a wonder you didn't turn to something a little stronger to drink cheers Pat
- 962 replies
-
- 6
-
-
- sovereign of the seas
- ship of the line
- (and 1 more)
-
Good to see you will be back soon Rusty, and a really nice workshop to hide in so all that hard work will be appreciated when you start back on 'Cheerful'. Nice restoration on that desk too mate; always nice to see the true properties of wood come back to life. cheers Pat
- 310 replies
-
- 2
-
-
- cheerful
- Syren Ship Model Company
- (and 1 more)
-
Nice work on those hinges mate; they came up very well. Almost ready for her launch now cheers Pat
-
Great to see this little lady again John. Pity the "helpful" staff weren't a little more careful. cheers Pat
- 745 replies
-
- 3
-
-
- francis pritt
- mission ship
- (and 1 more)
-
Looking great Dave; really nice work. Paulv makes some good points. If using the AOTS for rigging, check the blocks for the running rigging for the sails (if fitting them) on the pages just before the belaying plan (115?). these show some of the rigging in front of, and behind the sail and are not shown on the running rigging plan or on the mast drawings. I found I had missed a couple of blocks (eg halliards, down haulers etc) but have developed a "running" loop method of fitting these which, if careful has allowed me to retro-fit them. cheers Pat
-
Looks good Greg; nice "correction" with that syringe solution. Should look seamless when painted. cheers Pat
-
Know the feeling Alan; give it a good rest we can wait. cheers Pat
-
Looking good Denis - keep the eyes focused ONLY on the items you need (nah, I can't do that either - always come back with something in addition ) Gibbs? NCIS fan then? (sorry if already answered elsewhere) cheers Pat
-
You will have the characteristics for each genus and varying thicknesses all sorted by the end of this build Mark - looking good. cheers Pat
-
Mark if you can live with it all is good. The day I stop learning is the day they bury me Even on repetitive cuts using a stopper etc I seem to have minor error creep in so I don't think it ever stops. cheers Pat