BANYAN
-
Posts
5,950 -
Joined
-
Last visited
Content Type
Profiles
Forums
Gallery
Events
Everything posted by BANYAN
-
 Thanks Eduardo, keep the posts on this subject coming please as it is interesting to see what 3D printing can achieve and be used for in our hobby. cheers Pat
 -
Thanks Mark - it's been a while in the making cheers Pat
- 517 replies
-
- 3
-

-
- Endeavour
- Artesania Latina
- (and 1 more)
-
Thanks again to all the likes and comments; much appreciated folks. Keith - HMCSS Victoria (see earlier post and here) Thanks for looking in Ron, not just to keep the dust off but also to stop fiddling with it (adding more detail) Thanks John, appreciate the earlier feedback and constructive comments to keep the rigging on track. cheers Pat
- 517 replies
-
- 3
-
-
- Endeavour
- Artesania Latina
- (and 1 more)
-
Nice 3D print and a good example of what 3D printing can be used for. I am currently teaching myself 3D (TurboCAD) to generate some 3D prints of cannon etc for future products. I think creating figures is a little beyond my capability as I need to copy rather than create What software are you using to draw and then generate the 3D files? cheers Pat
-
DARPA will want to confiscate your "weapon" after all these mods Mark; better keep it in a safe place cheers Pat
-
HMCSS Victoria 1855 by BANYAN - 1:72
BANYAN replied to BANYAN's topic in - Build logs for subjects built 1851 - 1900
No problem Denis, quite a lot of room in the front row still . cheers Pat- 1,013 replies
-
- 4
-
-
- gun dispatch vessel
- victoria
- (and 2 more)
-
HMCSS Victoria 1855 by BANYAN - 1:72
BANYAN replied to BANYAN's topic in - Build logs for subjects built 1851 - 1900
Very many thanks E&T. Thanks for looking in and the compliments; as this is a club build (5 builders) I will pass them onto the respective builders of those parts; I can only claim a small contribution to the hull and the doing the channels though. regards Pat- 1,013 replies
-
- 6
-
-
- gun dispatch vessel
- victoria
- (and 2 more)
-
HMCSS Victoria 1855 by BANYAN - 1:72
BANYAN replied to BANYAN's topic in - Build logs for subjects built 1851 - 1900
Thanks Russ, yes she was a truly beautiful vessel with a 'royal yacht' fit-out internally and cutting-edge (for then) equipment - at one point, Lang and the build over-seer [Lockyer], bemoaned the fact they could not get even more ventilation into the crew spaces . Lang, who designed her on the proviso he had a free-hand did the design for no cost to the Government. I think he was trying to prove a point to the Admiralty at the time of how to achieve the most efficient hull form for a vessel of this type. Although like the Arrow/Vigilance class, she had a slimmer profile for speed, and shallower draft to allow her to work in shallow waters but maintained great blue-water sea-keeping performance.- 1,013 replies
-
- 6
-
-
- gun dispatch vessel
- victoria
- (and 2 more)
-
HMCSS Victoria 1855 by BANYAN - 1:72
BANYAN replied to BANYAN's topic in - Build logs for subjects built 1851 - 1900
Thanks for all the likes and comments folks, much appreciated: - thanks Albert - Mark, a bit of a pity but this is the second ship we have done in the Colonial Navy series which is being displayed in the HMAS Castlemaine Museum ship. They are both the same scale, and the other was painted so to be consistent ... cheers Pat- 1,013 replies
-
- 7
-
-
- gun dispatch vessel
- victoria
- (and 2 more)
-
There is a drawing in Marquardt for the D-Block. While it is for the lifts etc, reimposing it onto the hull for the anchor would probably work. It is a simple line drawing which, I am sure if you cite the original there would not be a problem? I know Karl Marquardt quite well and I am happy to ask him for permission to use it on your behalf if you would like? regards Pat
-
That's a nice looking result on the rudder Ulises and an interesting technique. cheers Pat
- 786 replies
-
- 3
-
-
- Royal Louis
- Finished
- (and 1 more)
-
Hi Pete, Marquardt shows one on page 250 of his "18th century rigs and rigging - not sure if this would be the same though. He describes it as "D-blocks were lumps of oak, formed in the shape of the letter D, from 12 to 16 inches long and 8 to 10 inches wide(see figure 184j). They had a sheave fitted and were bolted to the ship's sides in the channels, to take the lifts etc. The D-block was English and came into use at the end of the century, mainly in men-of-war." This does not tie in with your period but could they have been similar in concept but positioned at the bow? cheers Pat [Edit - Falconer gives the same description; Goodwin does not mention them at all.]
-
Mike, was that the post where a spacer block was used between steps; having carefully placed the first step? If so that may have been the Endeavour build by Dashi I think? cheers Pat
-
Keith, I think the easy answer to your question would be replacement/upgrade parts for all those cheap (mostly very poor quality) white-metal / britannia metal parts you find in kits including decorations, cannon, figureheads, etc. If these are done with more care for the detail there may be a market especially if packaged as 'detail up packages" for various ship kits (*much as the PE you find for some ships and many plastic aircraft models). I have just had a whole ship done (at 1:350) and the level of detail that can be achieved using the right printing medium is incredible. cheers Pat
-
Thanks Denis, Dave and Per - much appreciate you all looking in and leaving a comment. Thanks also for the many likes. I haven't tried to fix the scratch yet but will try the car polishing compound. Denis - nail polish? more clues please I am intrigued
- 517 replies
-
- 2
-
-
- Endeavour
- Artesania Latina
- (and 1 more)
-
HMCSS Victoria 1855 by BANYAN - 1:72
BANYAN replied to BANYAN's topic in - Build logs for subjects built 1851 - 1900
Thanks for looking in, the likes and comments folks; I am very happy to see the interest in this vessel. cheers Pat- 1,013 replies
-
- 7
-
-
- gun dispatch vessel
- victoria
- (and 2 more)
-
Thanks Greg and UTS; and for all the likes. Greg, I am preparing the space for the next one cheers Pat
- 517 replies
-
- 3
-
-
- Endeavour
- Artesania Latina
- (and 1 more)
-
HMCSS Victoria 1855 by BANYAN - 1:72
BANYAN replied to BANYAN's topic in - Build logs for subjects built 1851 - 1900
Thanks Druxey; it has proven a great method to date. the real test will come when it is time to open the ports etc We did think of using false risers as well but this proved a little easier according to the gent who did this part of the build. cheers Pat- 1,013 replies
-
- 5
-
-
- gun dispatch vessel
- victoria
- (and 2 more)
-
and I thought my rigging project was complicated - nice job Dave! cheers Pat
- 962 replies
-
- 4
-
-
- sovereign of the seas
- ship of the line
- (and 1 more)
-
HMCSS Victoria 1855 by BANYAN - 1:72
BANYAN replied to BANYAN's topic in - Build logs for subjects built 1851 - 1900
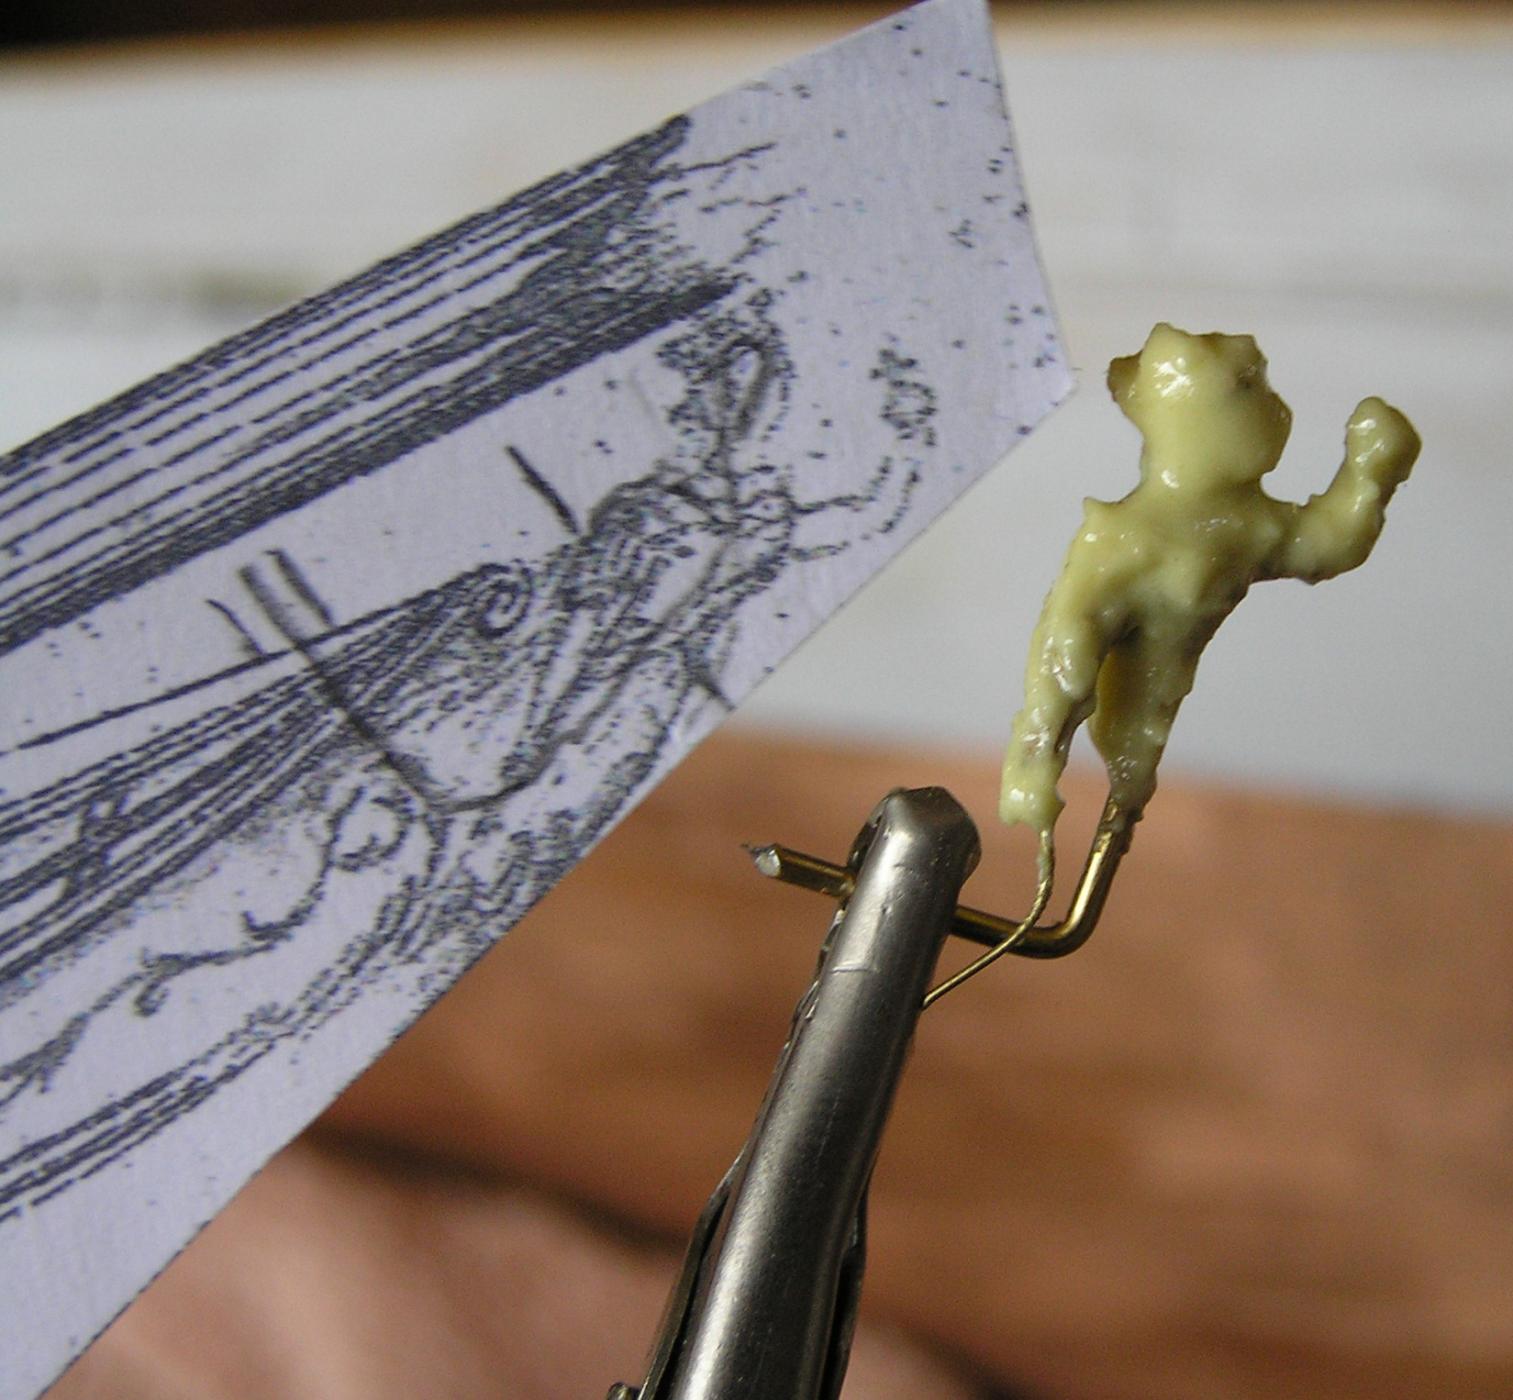
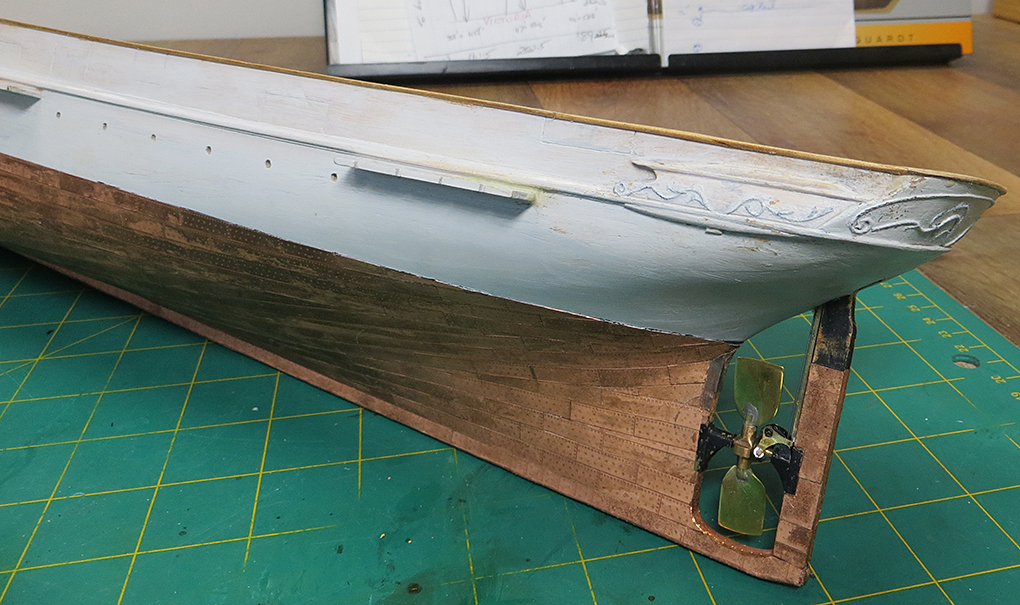
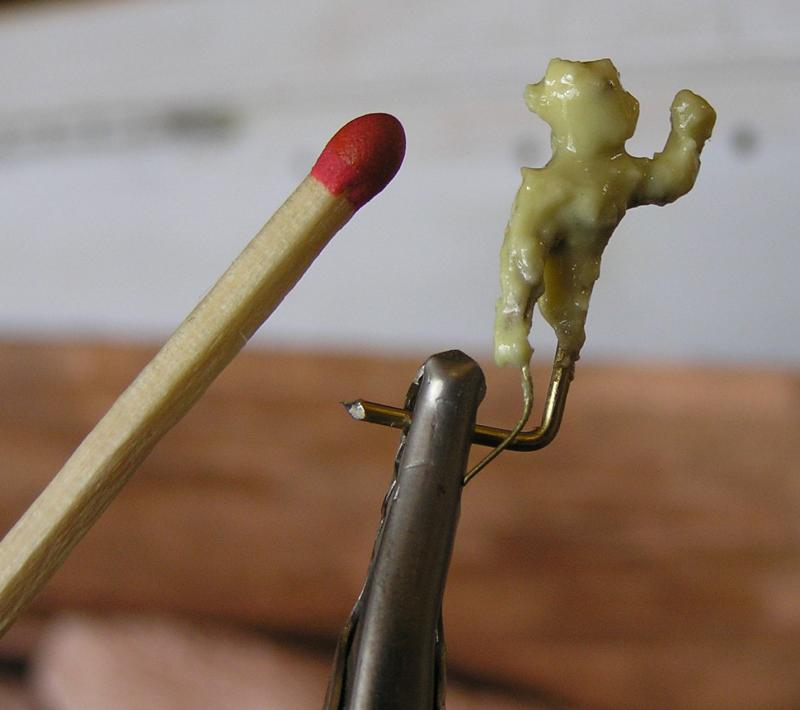
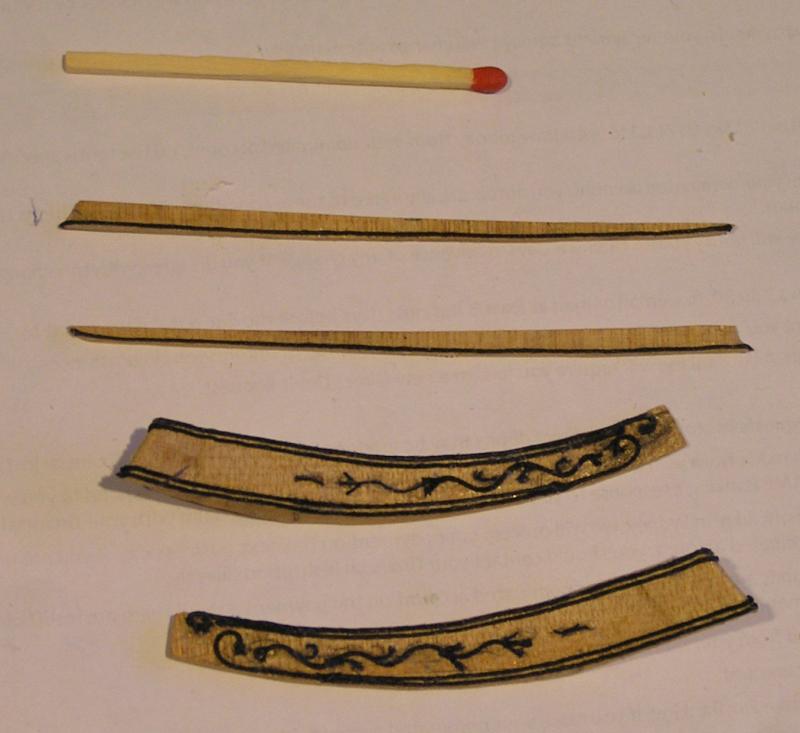
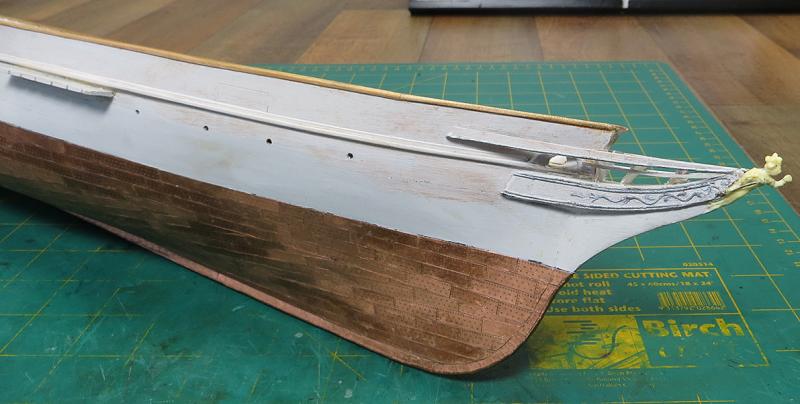
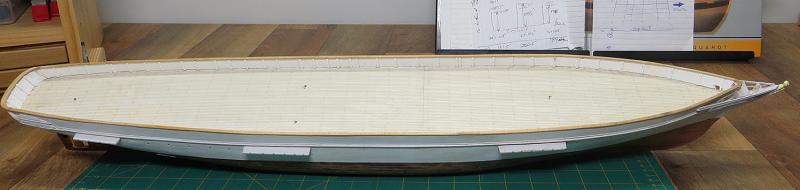
The current level of completion has seen the figurehead and channels added. The decorations have been largely completed and the figurehead was built up and refined by club member Geoff Martin (who also designed and built the bulwarks jig, and completed most of the hull construction) - this figurehead is only just over 18 mm total. Another member (Geoff Peters completed the copper plates and I have added the channels and about to embark on adding the remain deck and hull fittings. I have also opened the holes for the Tube Scuttles which were a combination airing port and light port designed by Oliver Lang. This brings us up to date with her current status. cheers Pat

- 1,013 replies
-
- 30
-
-
- gun dispatch vessel
- victoria
- (and 2 more)
-
HMCSS Victoria 1855 by BANYAN - 1:72
BANYAN replied to BANYAN's topic in - Build logs for subjects built 1851 - 1900
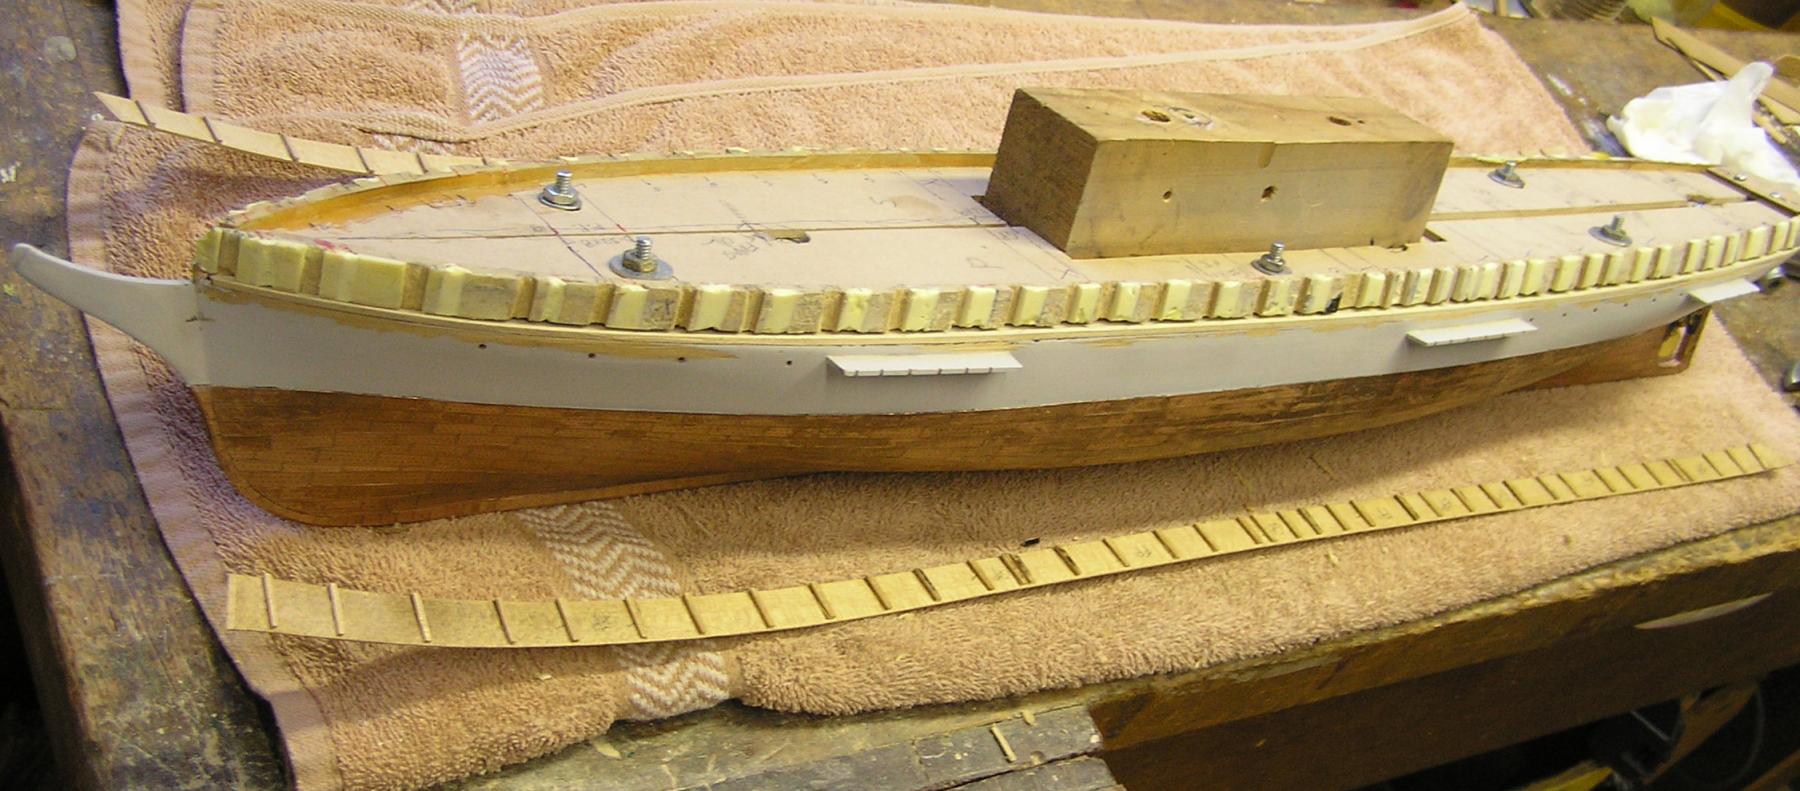
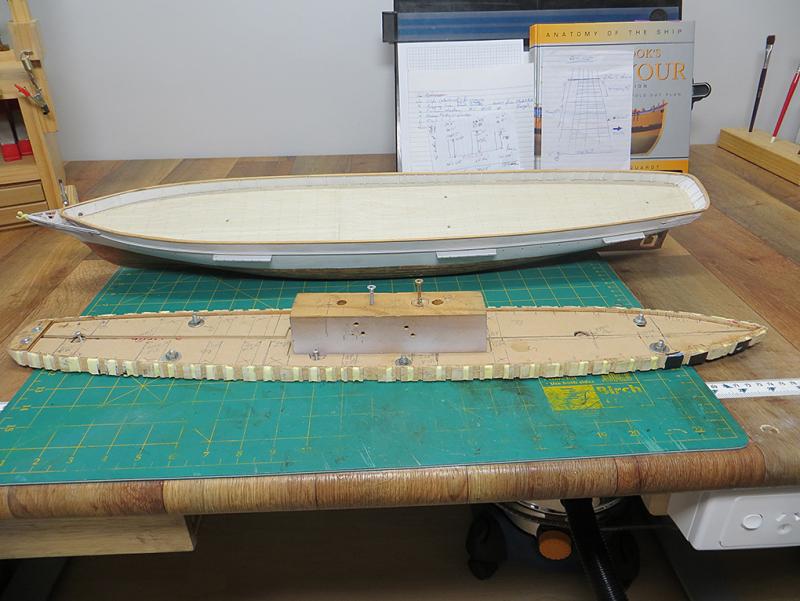
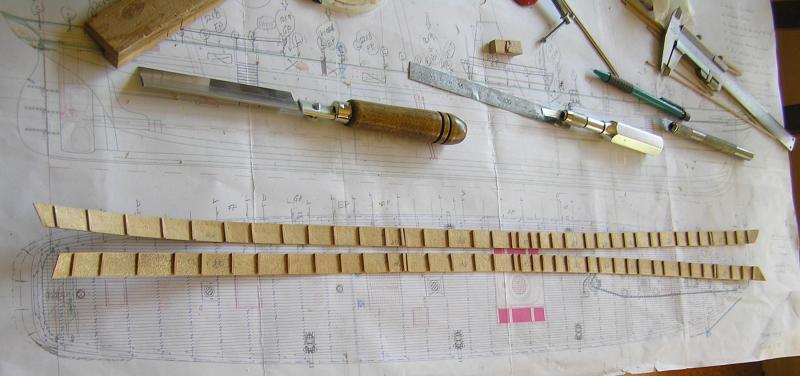
The bullwarks, roughtree timbers etc at this scale are very thin, and also as this ship was constructed without full frames (no projected timbers), we needed to develop a jig which is shown in the photos below. The jig screwed to the deck (in locations that will be covered later) and expands outwards. The bulwarks were then built up against this jig which supported them during construction. The jig will be fitted again soon to allow us to cut out the various ports and access gates. We decided to experiment with the deck as the scale size of the 6 inch wide deck planks would have proved to be a nightmare in planking. The deck arrangements were drawn up in CAD and then printed on timber veneer which was then glued down to a false deck. This has proven to be a reasonable approach for this model (cost and time); although, we have yet to deal with the glue joint . cheers Pat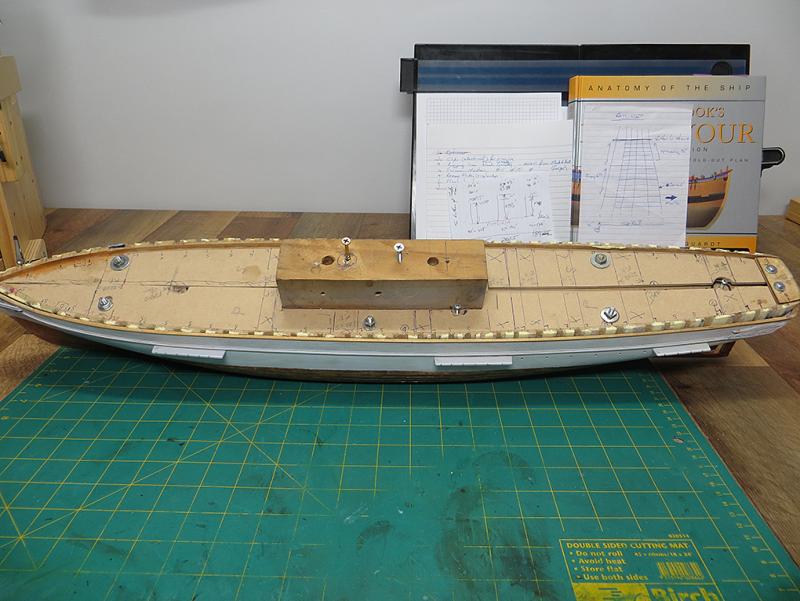

- 1,013 replies
-
- 27
-
-
- gun dispatch vessel
- victoria
- (and 2 more)