

Gregory
-
Posts
2,738 -
Joined
-
Last visited
Content Type
Profiles
Forums
Gallery
Events
Posts posted by Gregory
-
-
-
I hate to be discouraging, but laser cutting is not generally considered 3D.
You could get some 3D effects with a combination of engraving and cutting but it is a very complex process that would
take multiple steps to produce useable parts.
3D renderings would have to come from 3D printers, CNC machines or a combination of these along with some possible laser cutting.
If 3D drawings/ files of Titanic exist they would be in-house at some model manufacturing company.
I do not expect you to find such drawings available to the general public.
However, if anyone here is aware of such drawings/files, I'm sure they will let you know about what would be possible in acquiring them.
-
Just a thought..
Those rails will really get in the way when you start doing some rigging; particularly the bowsprit gammoning..
You might think about getting all your parts ready and mounting them permanently at a later time..
-
I'm sure Chuck may have other sources, but I have received very good wood and service from Ocooch..
They show a lot of thicknesses, but Chuck says if you don't see what you want they will help with custom orders.
I have always found their email response to be very prompt..
They have accommodated me when I requested lighter or darker sheets.
Color can vary quite a bit, but when I have placed an order for several sheets, they matched up pretty good within the order.
-
Henry, here is a snip from a model that is very similar to Mary, but way superior..
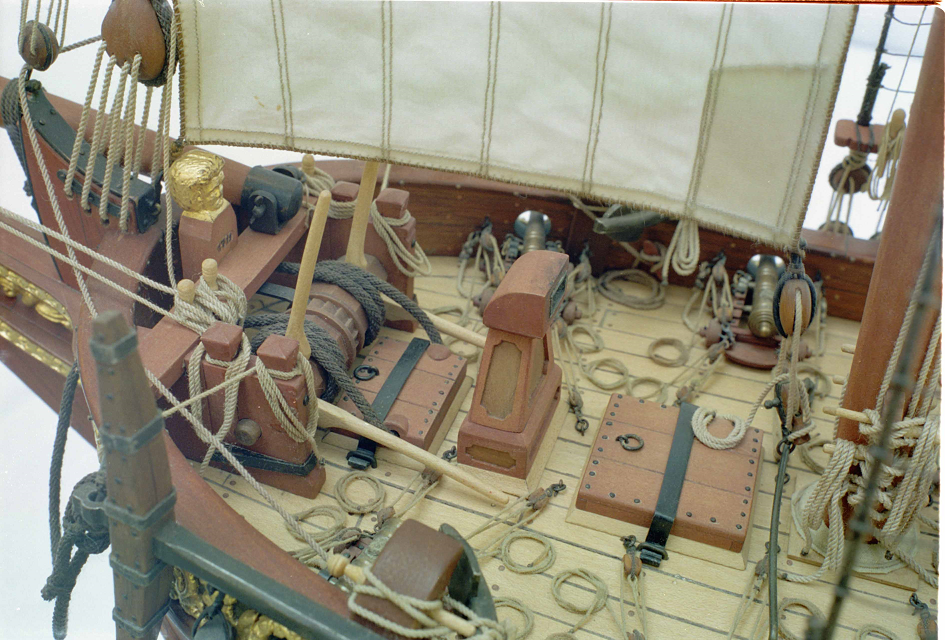
You can see here how the builder chose to secure the bowsprit..
Here is a link to more pictures of this model. Be prepared to be blown away. I have often used it as a reference to try to improve my skills.
Here is the story about the model: Historical background of the yacht Max Emanuel
-
1 hour ago, henry x said:
i think there was a bracket of some sort holding the bowsprit hoping one of you out there can help.
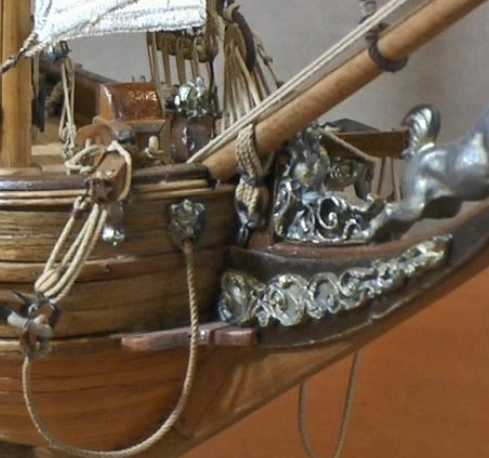
I don't know if this will help, but on the Mamoli Yacht Mary, the bowsprit is set up to the side of the stem with gammoning going to a metal fitting that should be easy to fabricate. I will get you a shot of the plans later where it will be easier to see.
- mtaylor, henry x and Keith Black
-
 3
3
-
I really can't say much more than has already been said.. You have made an attention to detail that I am not ready to tackle yet, but I will be referring to your methods often, in an effort to improve my skills.
Something that caught my attention is the grain detail on your planking. It wasn't as obvious on the long shots of the hull, but now with the closeups of your channels, it really pops.
It reminds me of curly maple. Beautiful !
- glbarlow and Edwardkenway
-
2
-
1 minute ago, ah100m said:
My wife is a retired math teacher. I stand by my calculations!
See my edit!
You are correct. Mondfeld obviously has an error in the print..
- flying_dutchman2 and mtaylor
-
2
-
OOps.. Let me recheck my work! You sound right.
I have it now.. Its not .166 percent, its .166 period..
You are absolutely correct. I apologize for questioning you..
- mtaylor and flying_dutchman2
-
2
-
Are you saying the mainstay would be 498 inches in diameter?
That doesn't sound right.. Whereas 5" sounds about right..
Even 49 inches ( 1.66% ) doesn't sound right either..
- flying_dutchman2 and mtaylor
-
2
-
1 hour ago, flying_dutchman2 said:
I am still interested in how to read the rigging tables in Montfeld's book.
Mondfeldt says that the thickness (diameter ) of the mainstay shall be .166% of the diameter of the main mast at the deck . ( which deck? )
The percentages in the tables are a percentage of the mainstay as measured.
So if the diameter of the main mast at the deck is 2'6" ( 30" ) then the main stay should be .166 x 30 = 4.98 ". The bowsprit gammoning should be 40% of this = .40 x 4.98 = 1.992 ", and so on.
Obviously you can't proceed without the main mast measurement, and the confidence that it is correct.
Someone else would have to establish if Mondfeld has a reliable basis for making these claims.
I think someone could give this a go on a few ropes and see if it looks good as discussed above..
- mtaylor and flying_dutchman2
-
1
-
 1
1
-
@shipman
You are a far braver man than I am, but I guess I am exposing myself to unpopularity as well; but how bad can it get?
I am fully with you when it comes to " how it looks "..
" Establishments " were established so that government contracts would have a basis for going forward, and being audited at a later time.
Civilian contractors would also need to meet similar requirements.
They didn't want to be billed for 2 inch cable when half inch cable would have got the job done..
The size of the rope depends on the job being done, and in many respects is intuitive; this applies to the blocks as well, however, the size of the rope will determine the size of the block..
I may be oversimplifying, but maybe someone else will have more to say.
I think if the builders here take a good look at the models; good ones and bad ones, they will get a good sense of what looks right..
- mtaylor, toms10 and flying_dutchman2
-
2
-
1
-
I'll have to look at my Mondfeldt later, but meanwhile here is something that may help.
At a scale of 1:37.5 your scale rope will be easier to determine than some smaller scales.
Most of the tables you find will be in inches rather than metric, so you may find yourself with another level of conversion,
however, to determine the size ( diameter ) of the scale line I am working with I wrap the line around a dowel of about 8mm diameter for 10 turns. The diameter of the dowel doesn't matter in this case . Make sure the 10 turns are touching but not compressed. I then measure the length created by the 10 turns. You then dive the distance by ten, and you will have the diameter of your scale line.
Example: 10 Turns of your scale line = 8.5mm. Divide by 10 = .85mm. The diameter of your line is .85mm = approx. .03 inches.
Obviously, if you are using very small line, like for ratlines and lanyards, you may want to use 15 or twenty turns and divide by the appropriate number..
I use a calculator like this: Length calculator , for my conversions..
Depending on your resources, getting scale rope in the exact size you need may be a challenge.
You will have more control if you are making your own rope, but it will still take a lot trial and error to get the sizes you are satisfied with.
-
-
4 minutes ago, James H said:
I have a bottle of this. I presume it's suitable?
That looks like it is what you want!
For application, depending on the surface, I keep it in a plastic squeeze bottle and put a little directly on the surface and spread it around with a soft cloth, eventually wiping off all the excess. For smaller parts, and stuff like masts and spars, I will brush it on and let it sit a few minutes before wiping off.
-
-
31 minutes ago, Ab Hoving said:
This model is a bad example of how people can turn beautiful ships into lousy objects.
Some models are good examples of how people can turn lousy kits into beautiful objects.. ( Eye of the beholder, and all that...)
You could spend all day for the next ten years pointing out the shortcomings in thousands of build logs.
I don't think that is what we are here for.
It's not very becoming to come into someone's log and lecture them about the futility of their efforts based on your superior knowledge.
I'm looking forward to the piece of art that Henry makes out of this salvaged model..
It has been really interesting so far.
Perhaps a moderator can tidy up the log and get it back to the excellent subject it is..
- mtaylor, davyboy, Keith Black and 2 others
-
5
-
-
I wouldn't worry about getting a perfect match beyond having the two pieces in a straight line.
I assume there are going to be some trestle trees or other fittings covering up or hiding most of the joint.
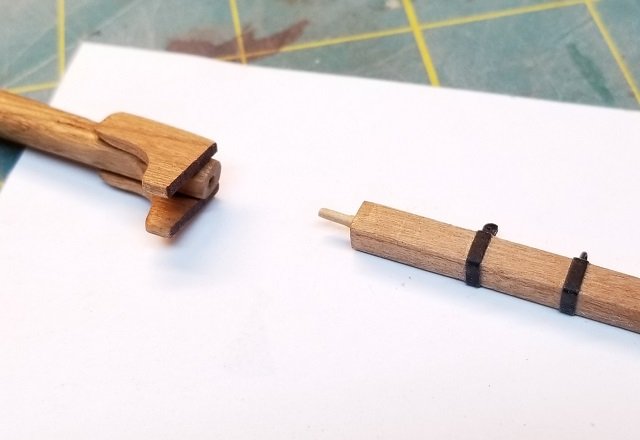
If you can, use a small wood dowel instead of the brass rod.. This will give you some play while setting up and a better joint when the glue dries.
The seam does not have to be perfect or invisible. Once you build up the rest of the mast and add rigging it will not show. You can also do some fine tuning of the appearance after the glue dries.
I often use this method to build up a mast from smaller pieces.
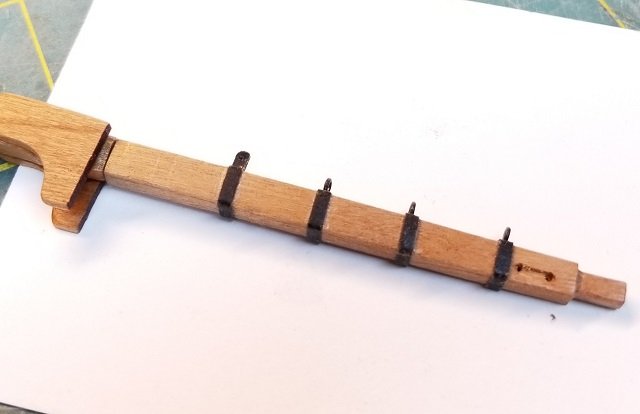
Here is a mast I am working on but haven't glued yet.. The joint will not be visible when I am done.
I hope this is what you are referring to.. If not will try to clarify..
Gregory
-
-
-
I'm having trouble visualizing dimensions of this.
Would 1.5 w by 1/2 h by 9" l work?
Hobby Lobby online has 1/2 x 3 x 24
-
2 minutes ago, Roger Pellett said:
The typical blocks that Syren furnishes are the older pattern blocks intended for external rope strops but the do offer laser cut kits that can be assembled into the internally stropped blocks that you require.
I provided a link to Syren's internally stropped blocks.
- Keith Black, mtaylor and Roger Pellett
-
3
-
- mtaylor and Keith Black
-
2
Dutch yacht by henry x - RESTORATION
in - Build logs for subjects built 1501 - 1750
Posted
I got side tracked last night, but later today I will show you the plans from Mary as to how the bowsprit is stepped.
I think you will find it doable as well..