


Rustyj
-
Posts
2,441 -
Joined
-
Last visited
Content Type
Profiles
Forums
Gallery
Events
Posts posted by Rustyj
-
-
Very innovative and nice work Derek. I’ve switched to almost always using heat and pressure to bend now and not soak in water. Well done!
- Ryland Craze, DelF and hollowneck
-
 2
2
-
 1
1
-
-
Nice work and recovery. Test fit the PE over the window. I believe it will cover up the replacement nicely.
-
-
Like Mike said very light coats and gently buff it off. I think I used a finger, not sure which one, and also dry brushed it. Two coats sounds right.
- Ryland Craze, Saburo and FrankWouts
-
3
-
Ah the first of several sore arm moments!
 Very nice and also dusty shop is a happy shop!
- glbarlow, FrankWouts, scrubbyj427 and 2 others
-
5
-
Thanks Maurice. It's all to the excellent design.
Well I must say I had more time in the workshop these last three days than I did in the last two months. It was wonderful!
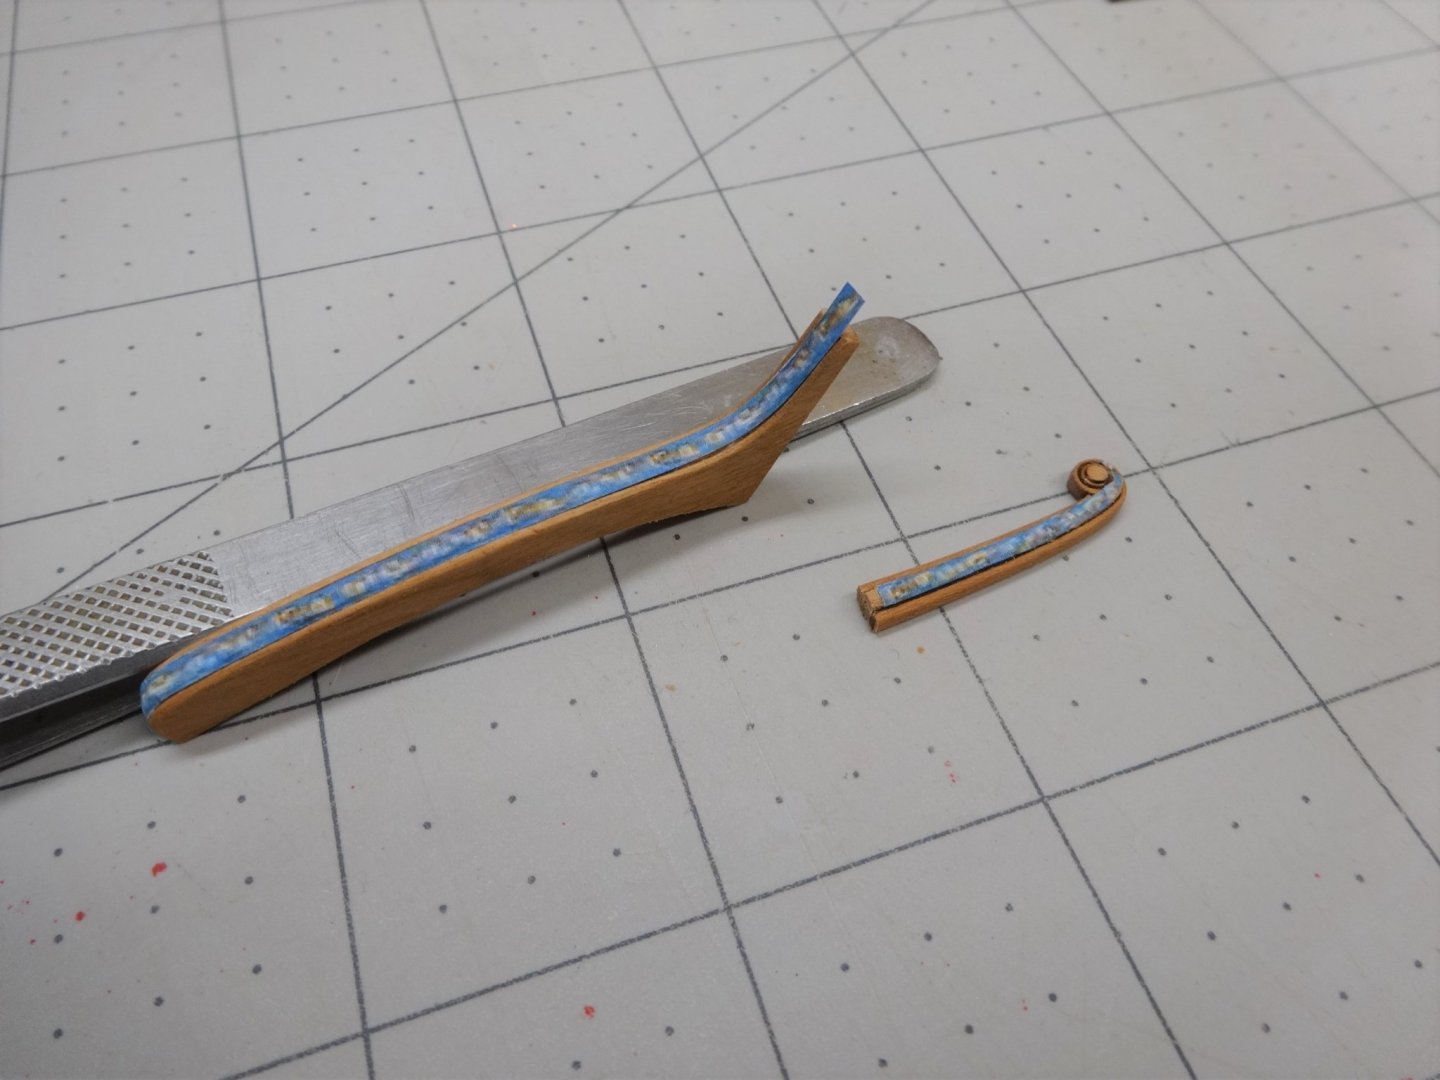
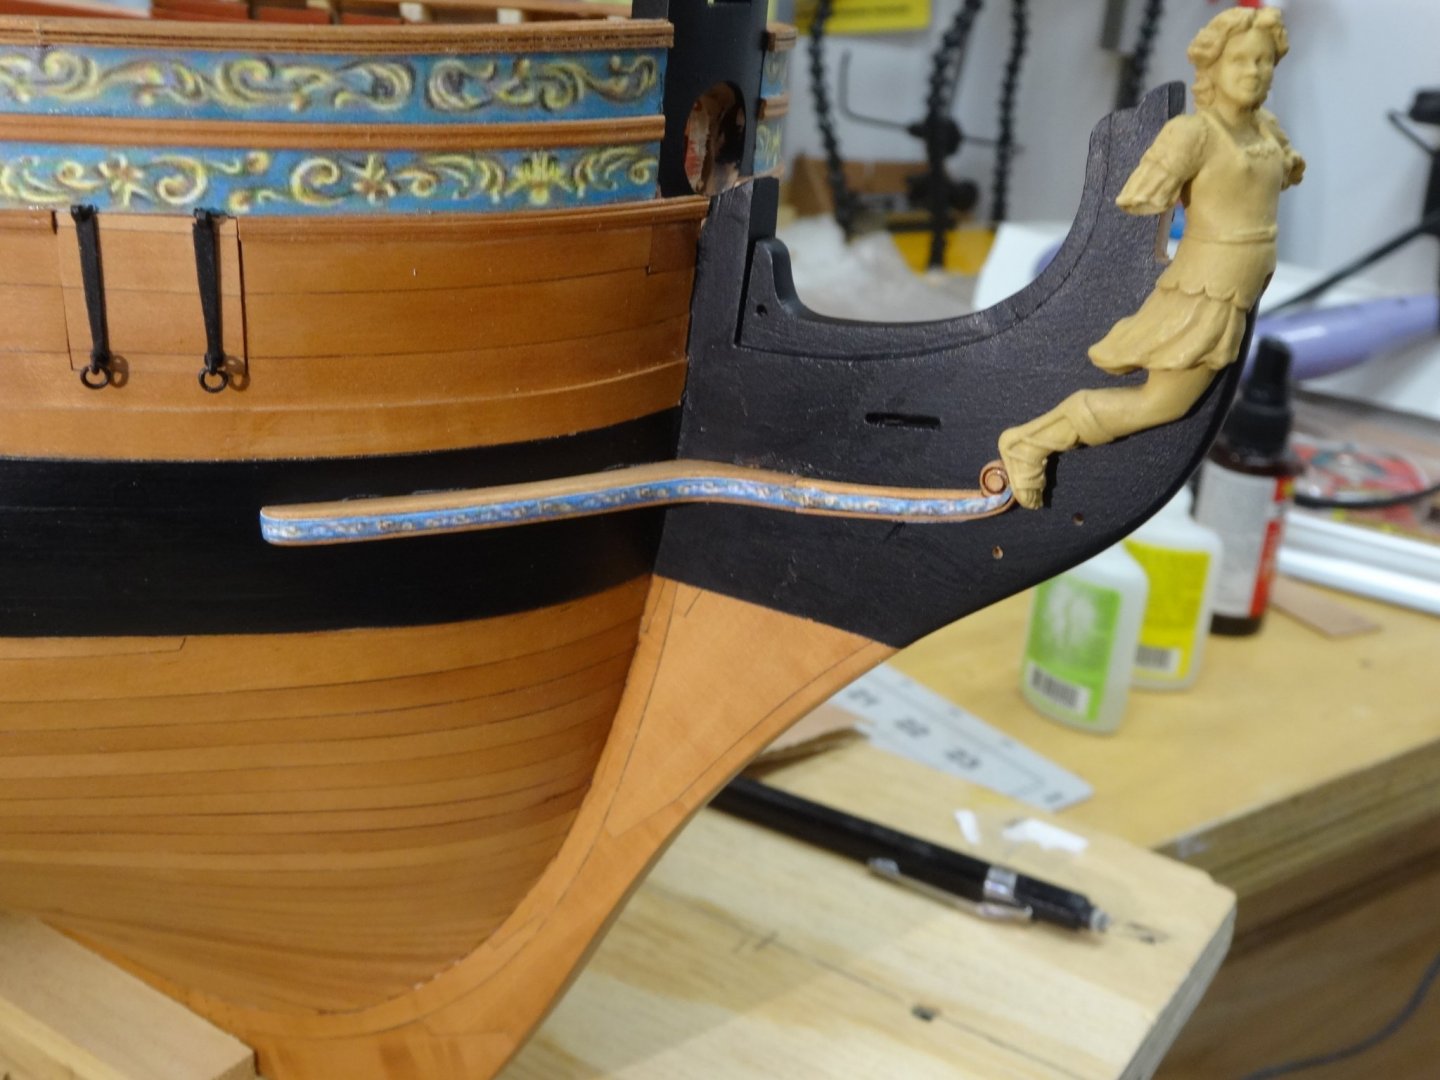
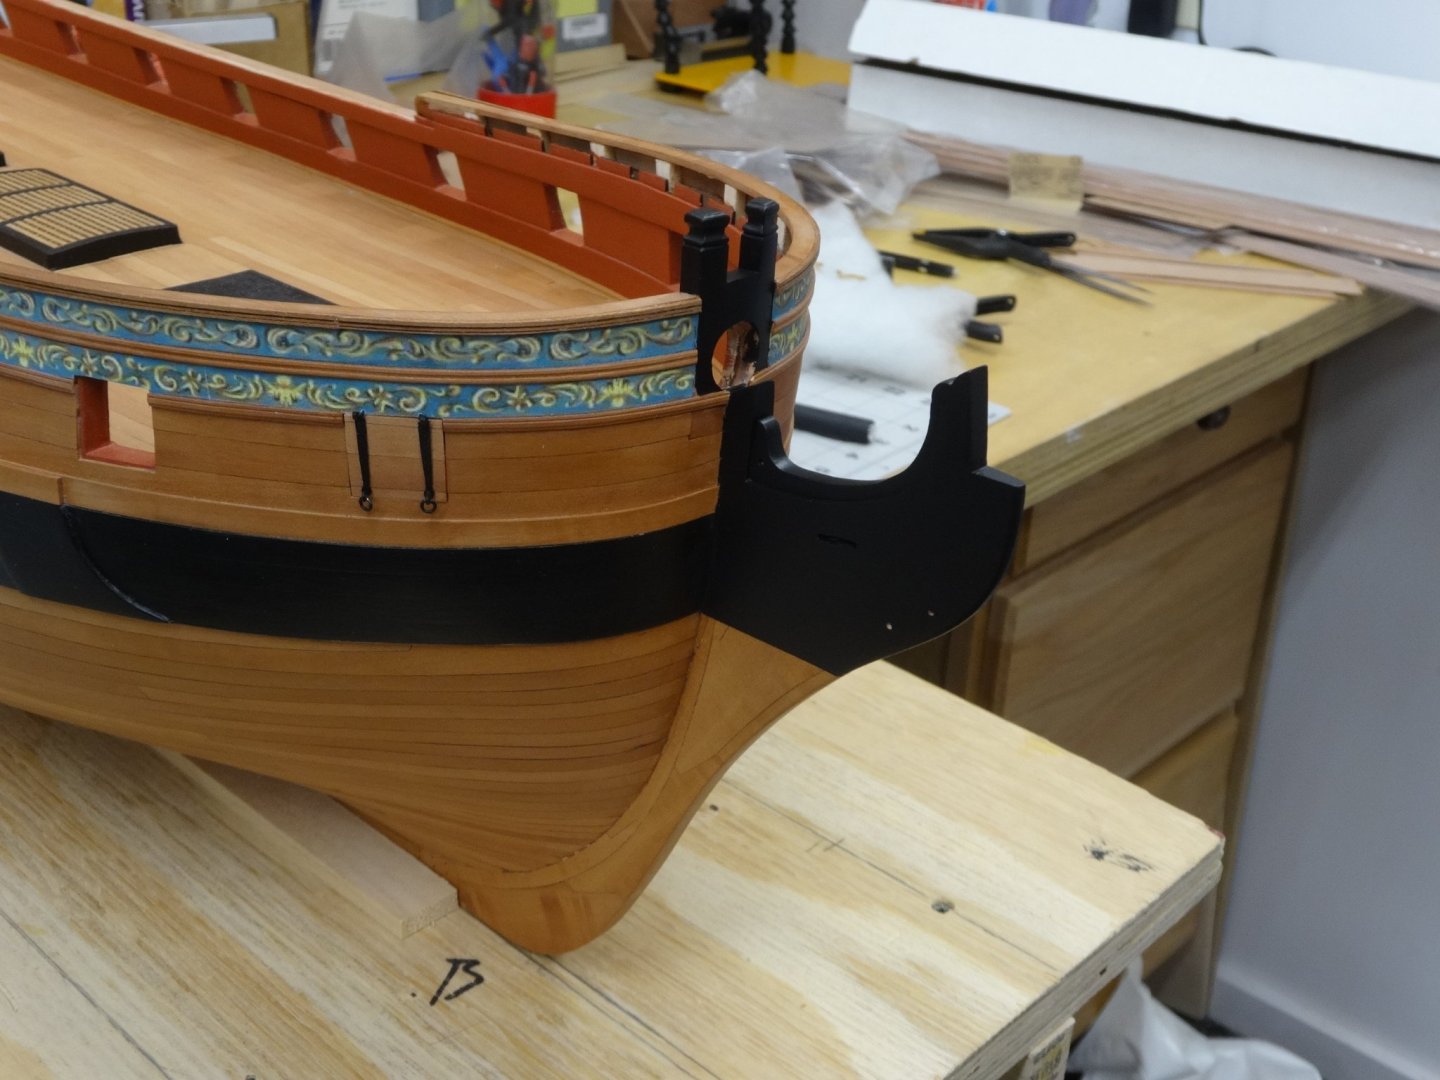
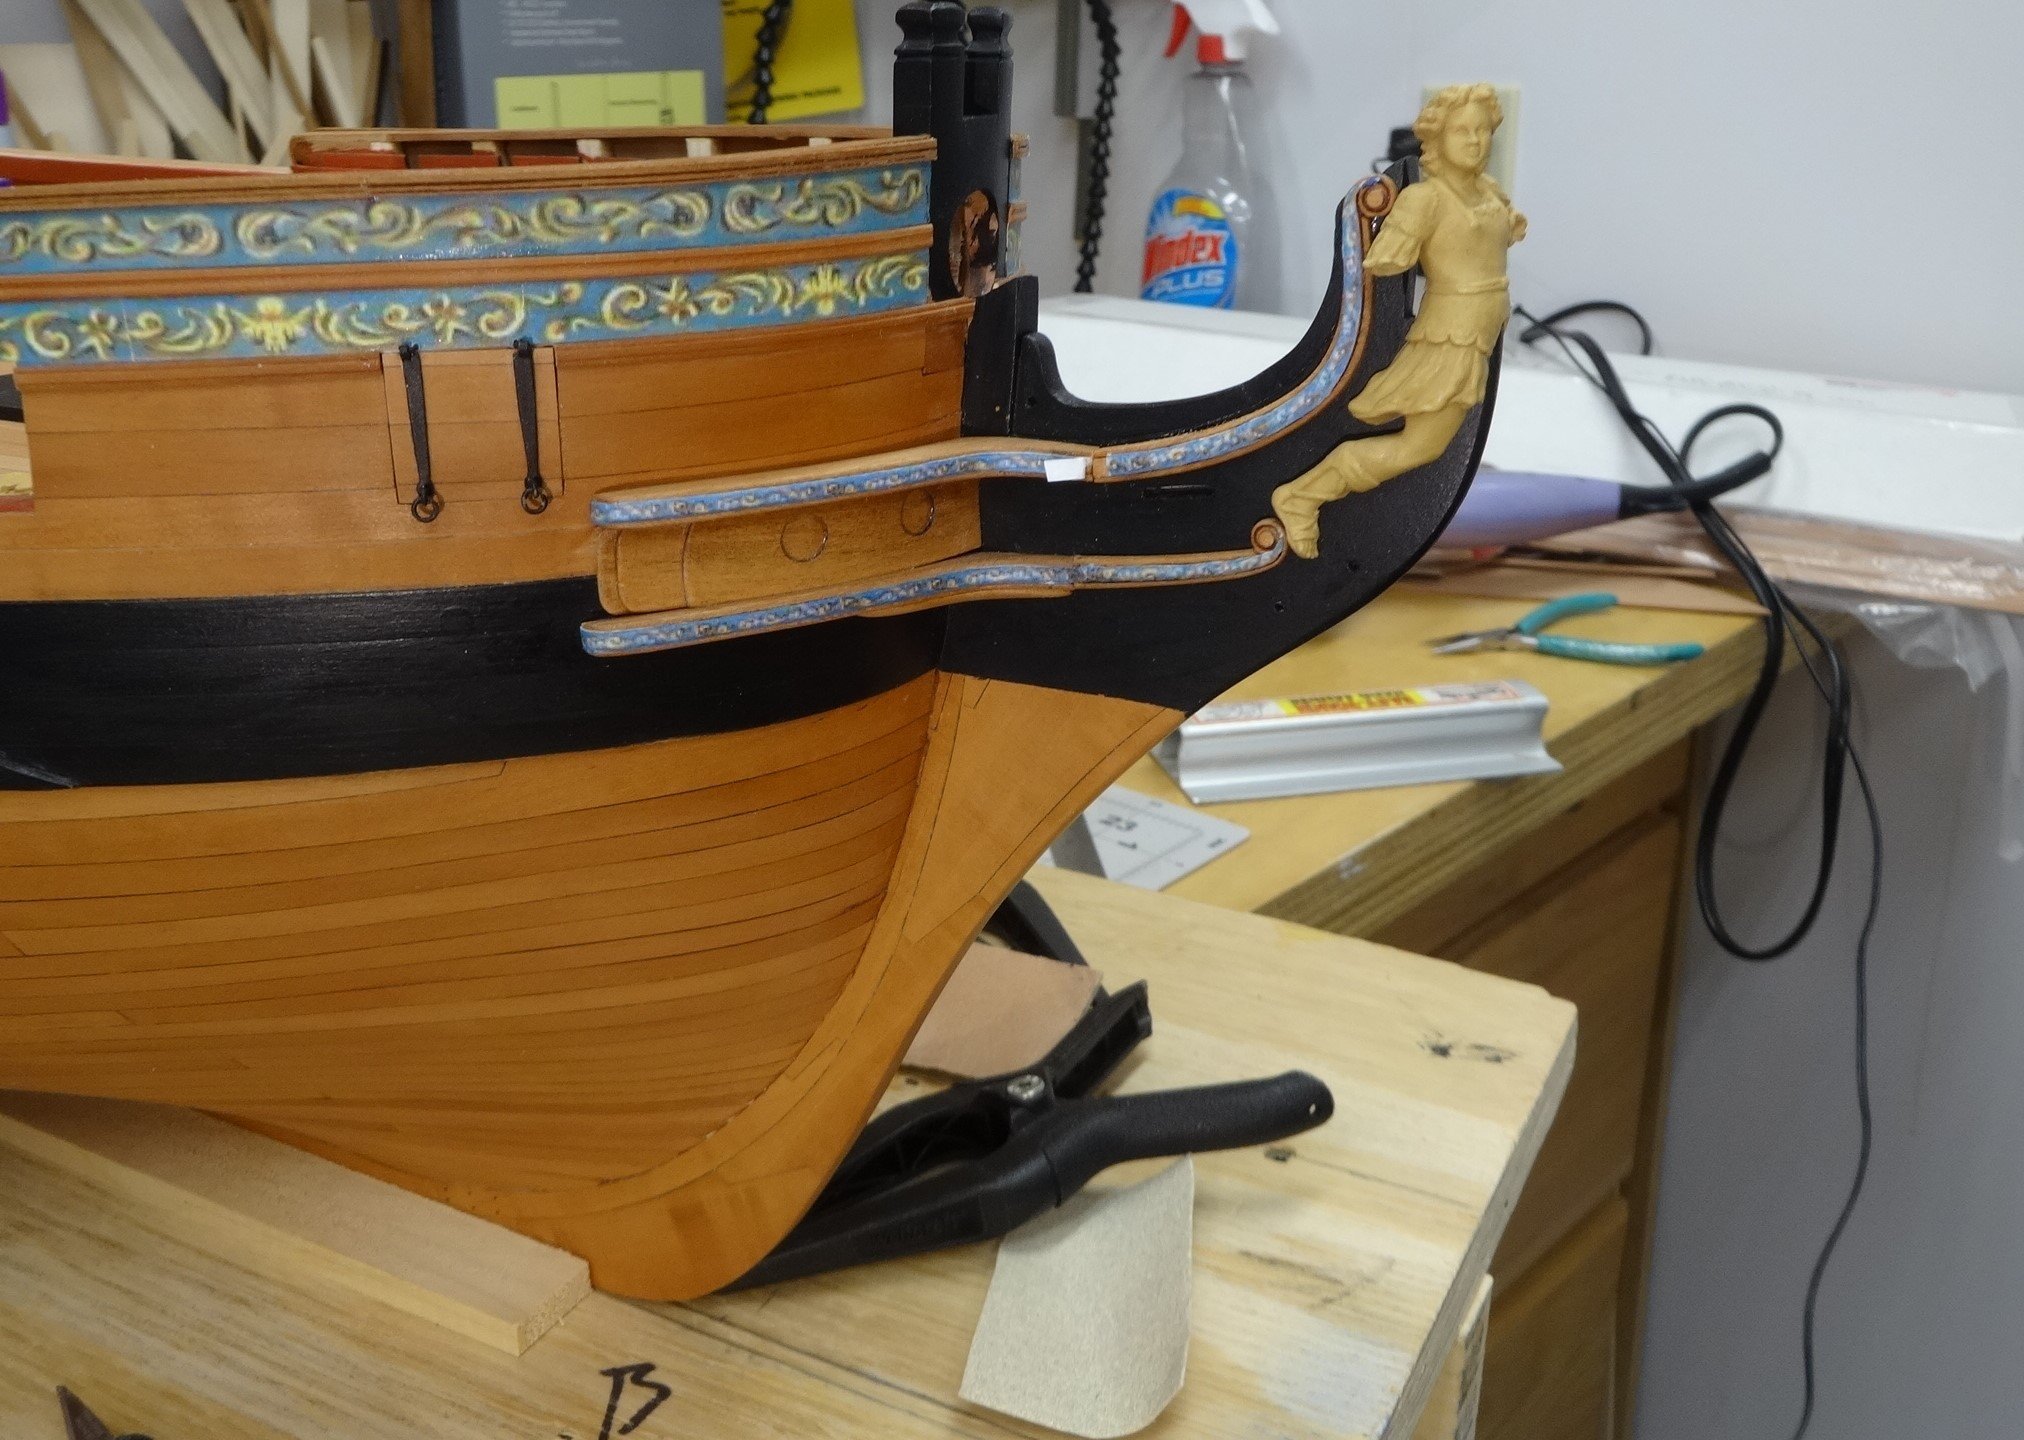
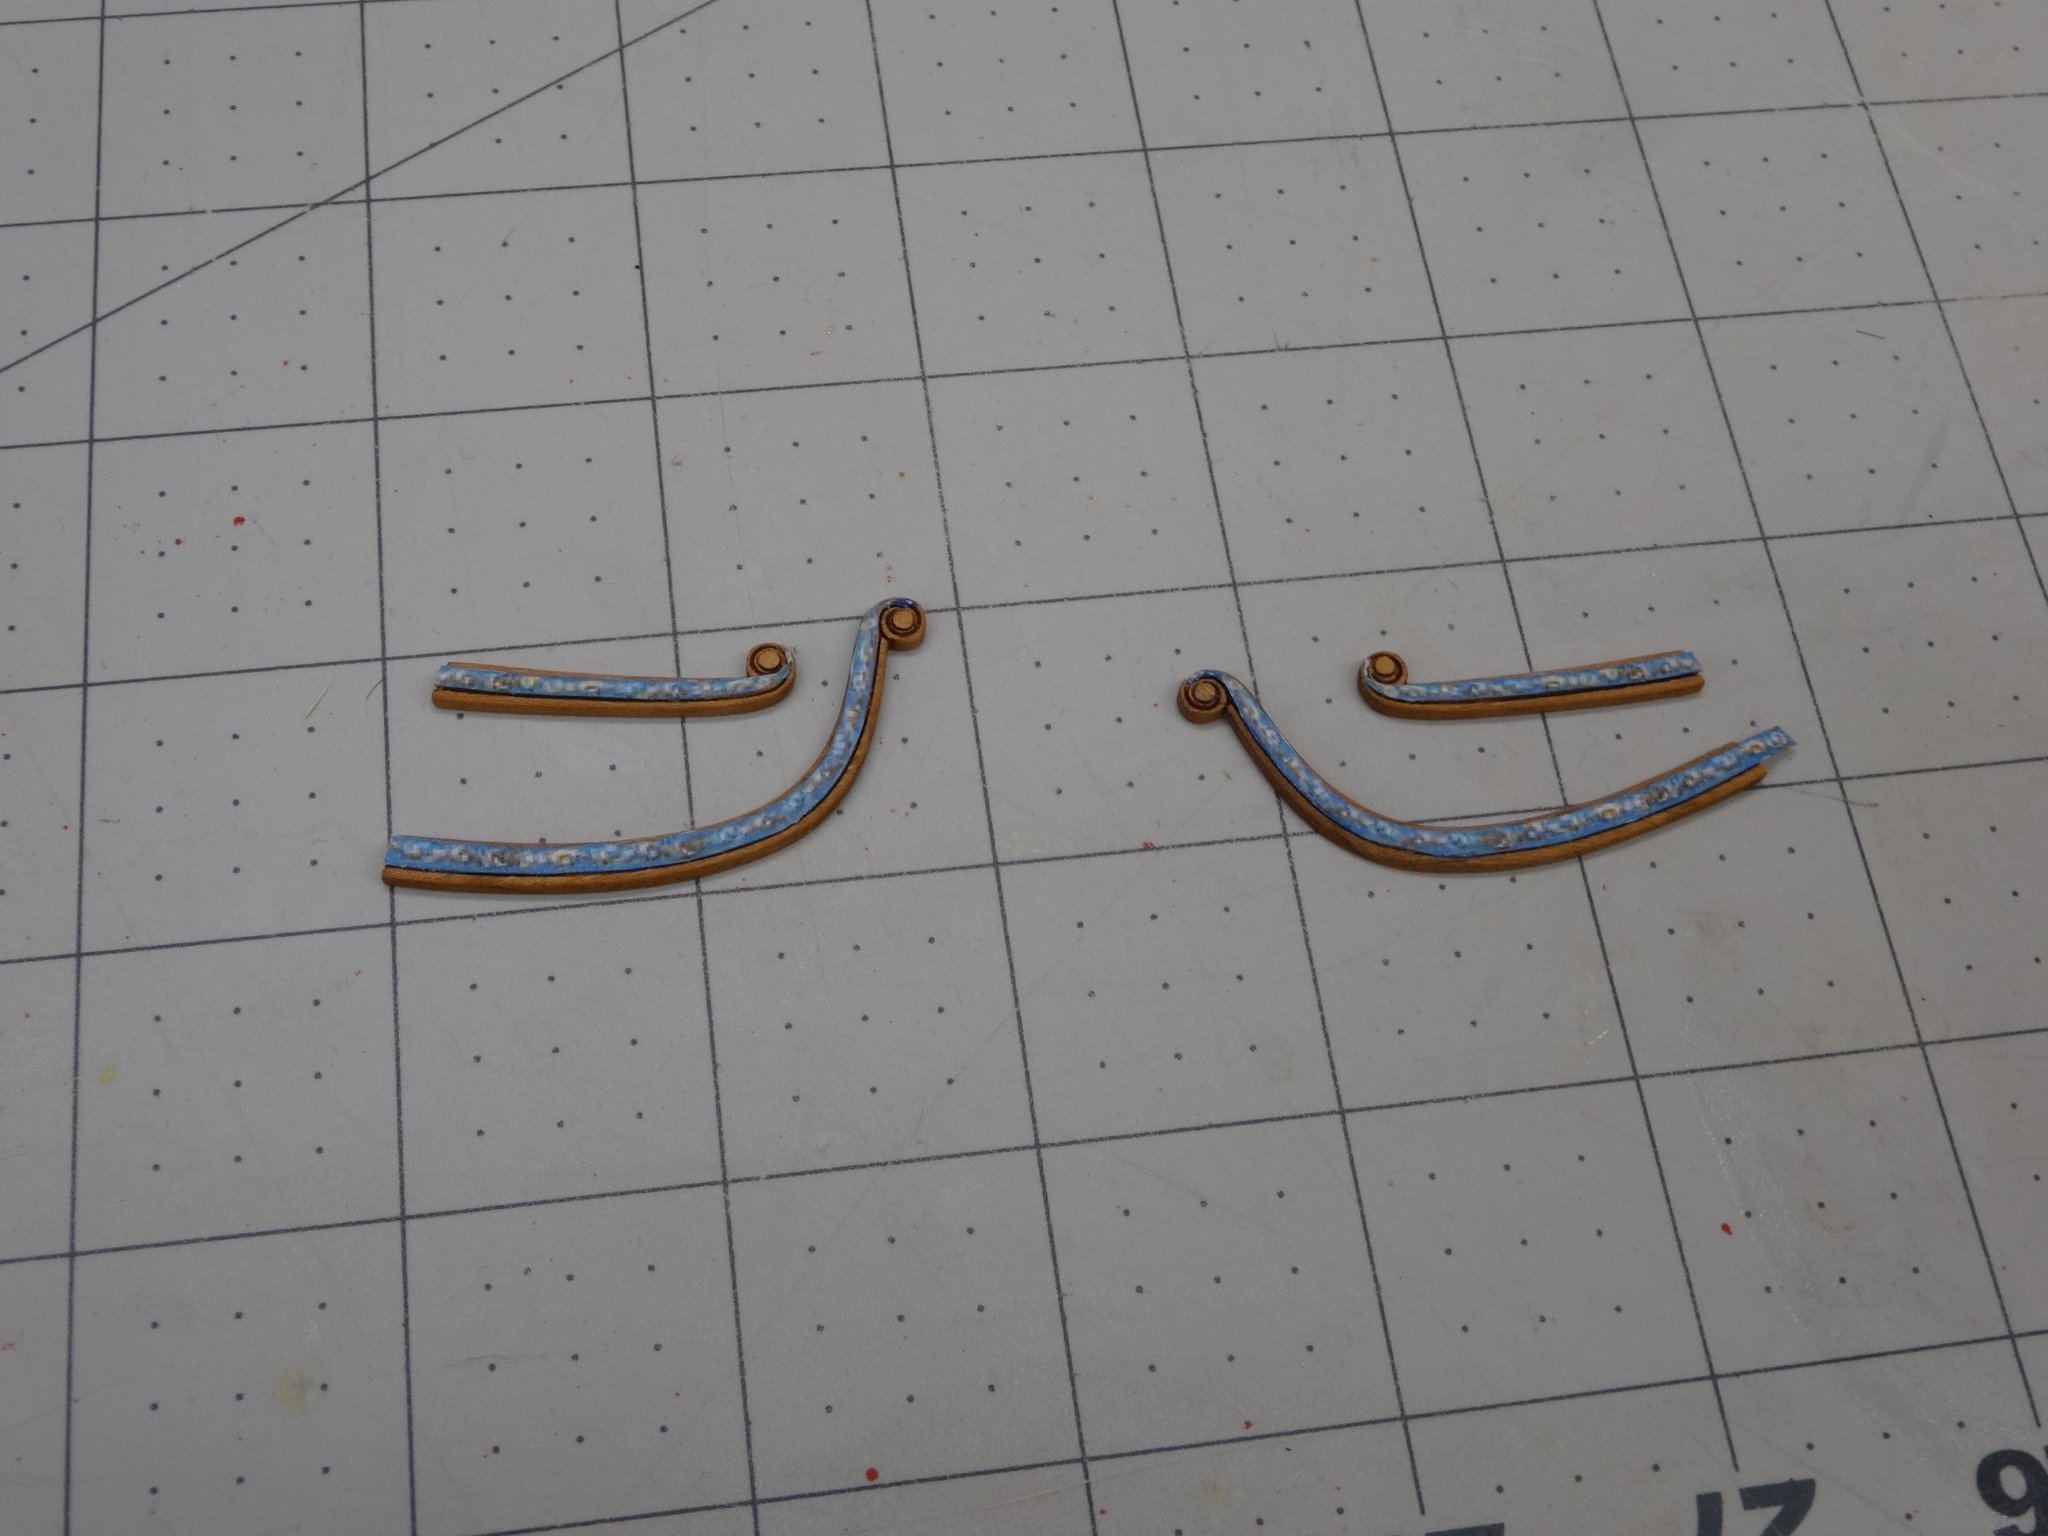
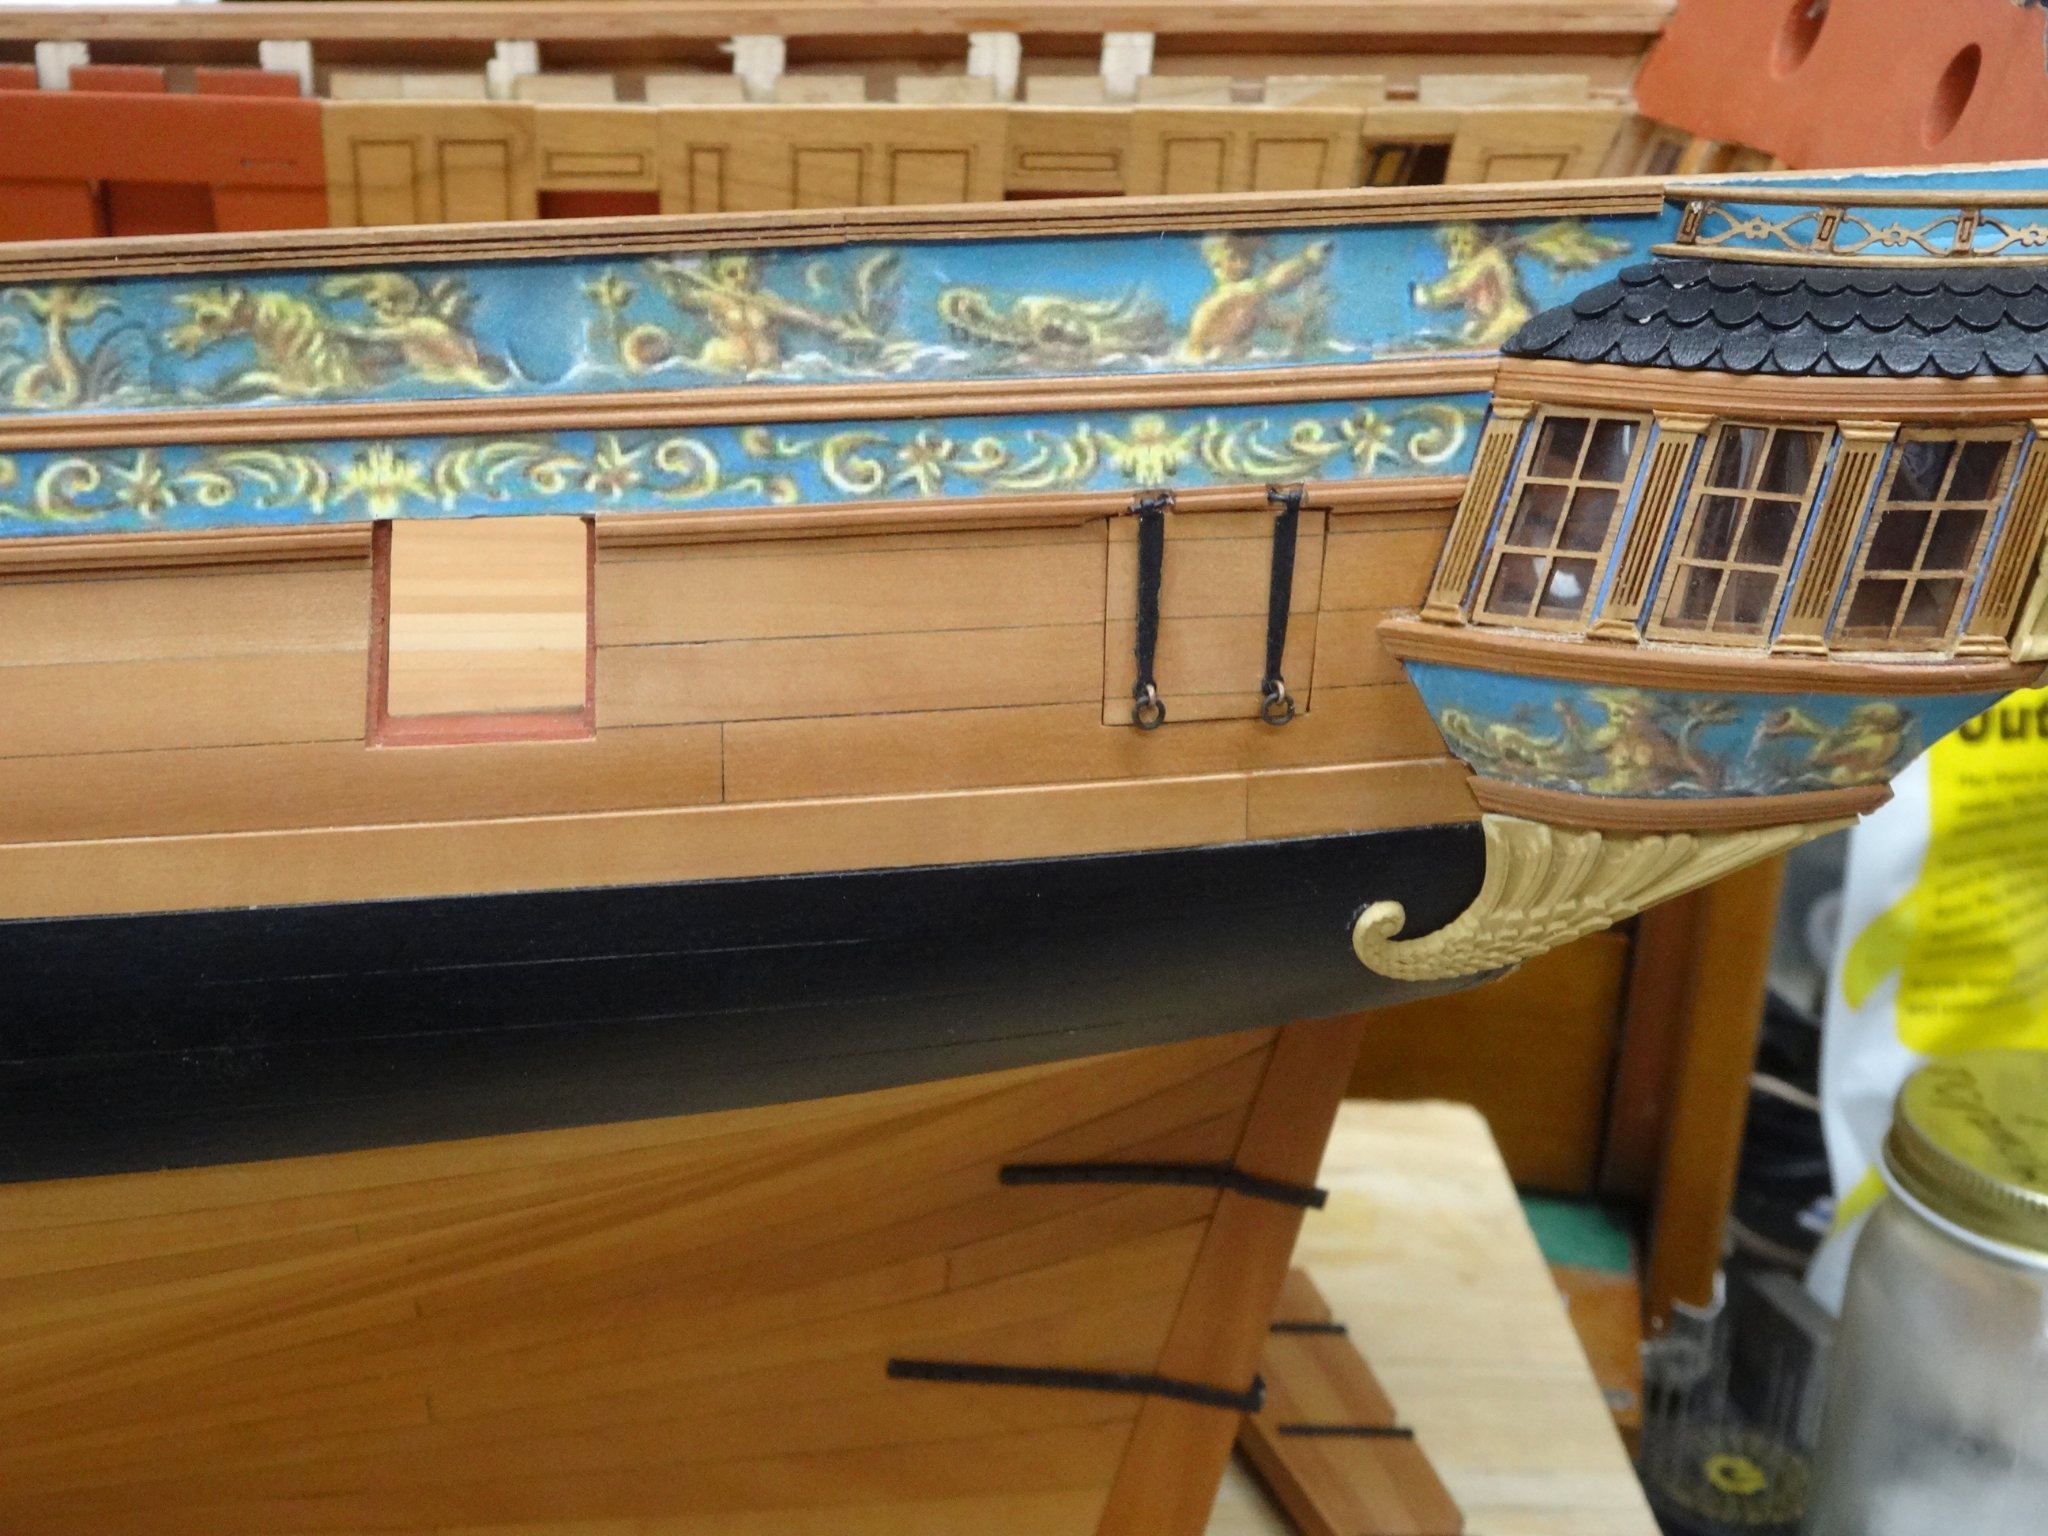
There are 3 layers to the hawse hole area. They were clamped on the model and heated to set the curve.
After shaping and gluing them in place I sanded the upper cheek and hair bracket to fit the hull curve. You can see how I left the frieze longer than needed. I then over lapped it and using a sharp scalpel blade cut it to match and glued it in place.
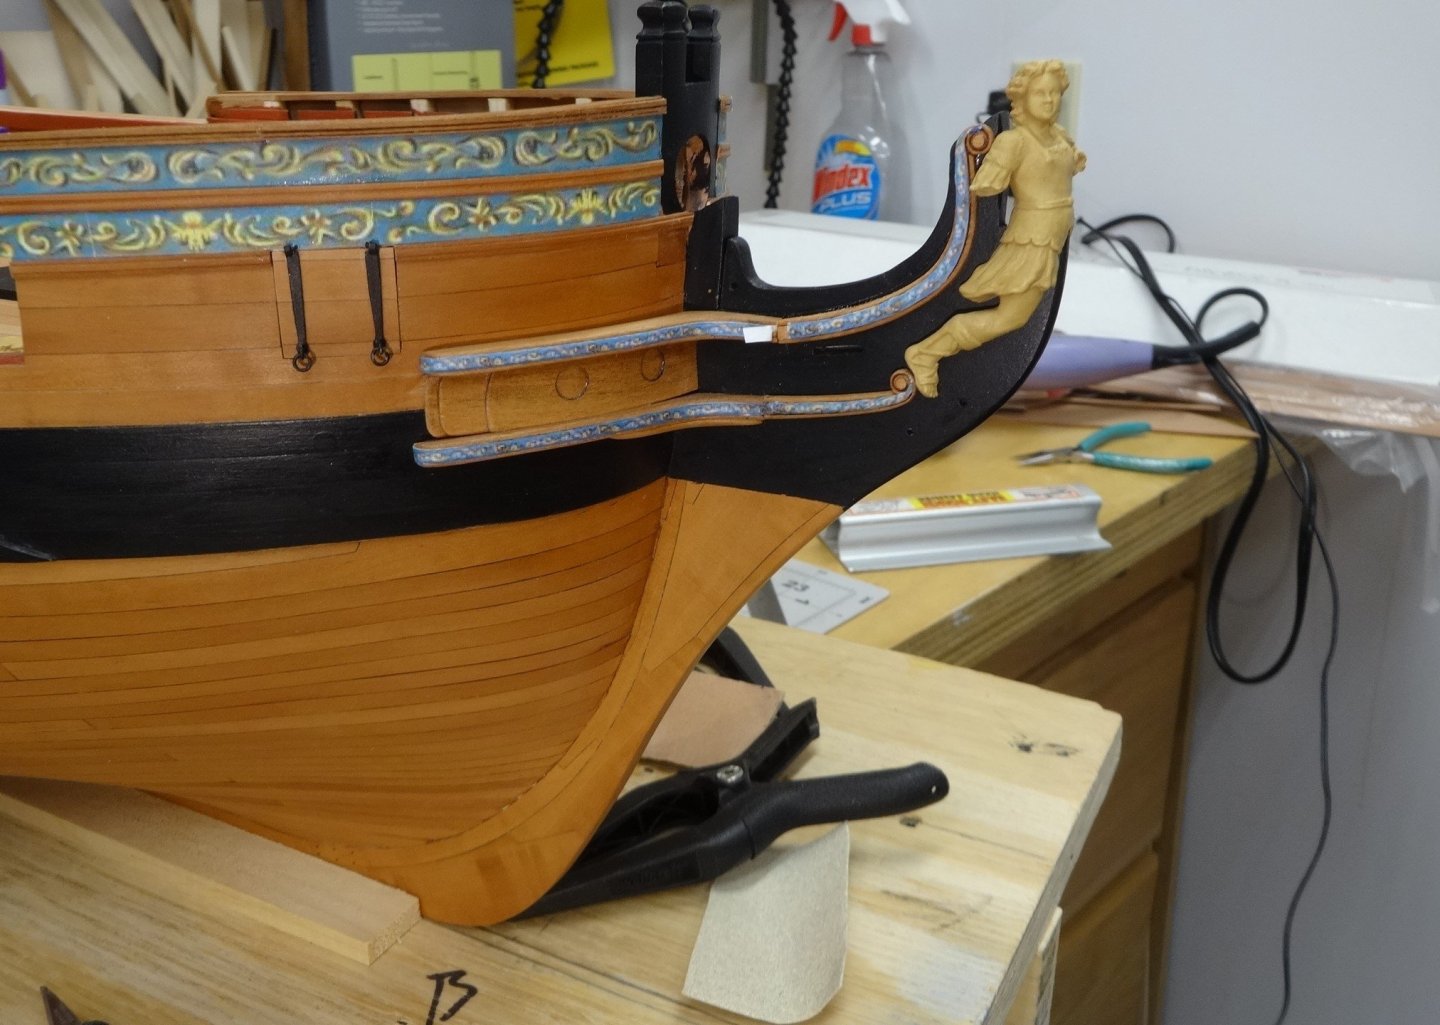
You can see the completed overlap and the scroll also added.

I have to yet permanently attach the figure head as I'm worried I'll do some sort of damage to it. Next I'll shape the bolster, drill out the hawse holes and add the knee above the hawse holes.
What a great weekend!
")
-
Yes Chuck slow and steady it is!
Also thanks, JJ and Vladimir ands all the likes.
- Ryland Craze and FrankWouts
-
2
-
Oh man that's a tough one Tom. Take your time and I'm sure you can get it back in shape.
-
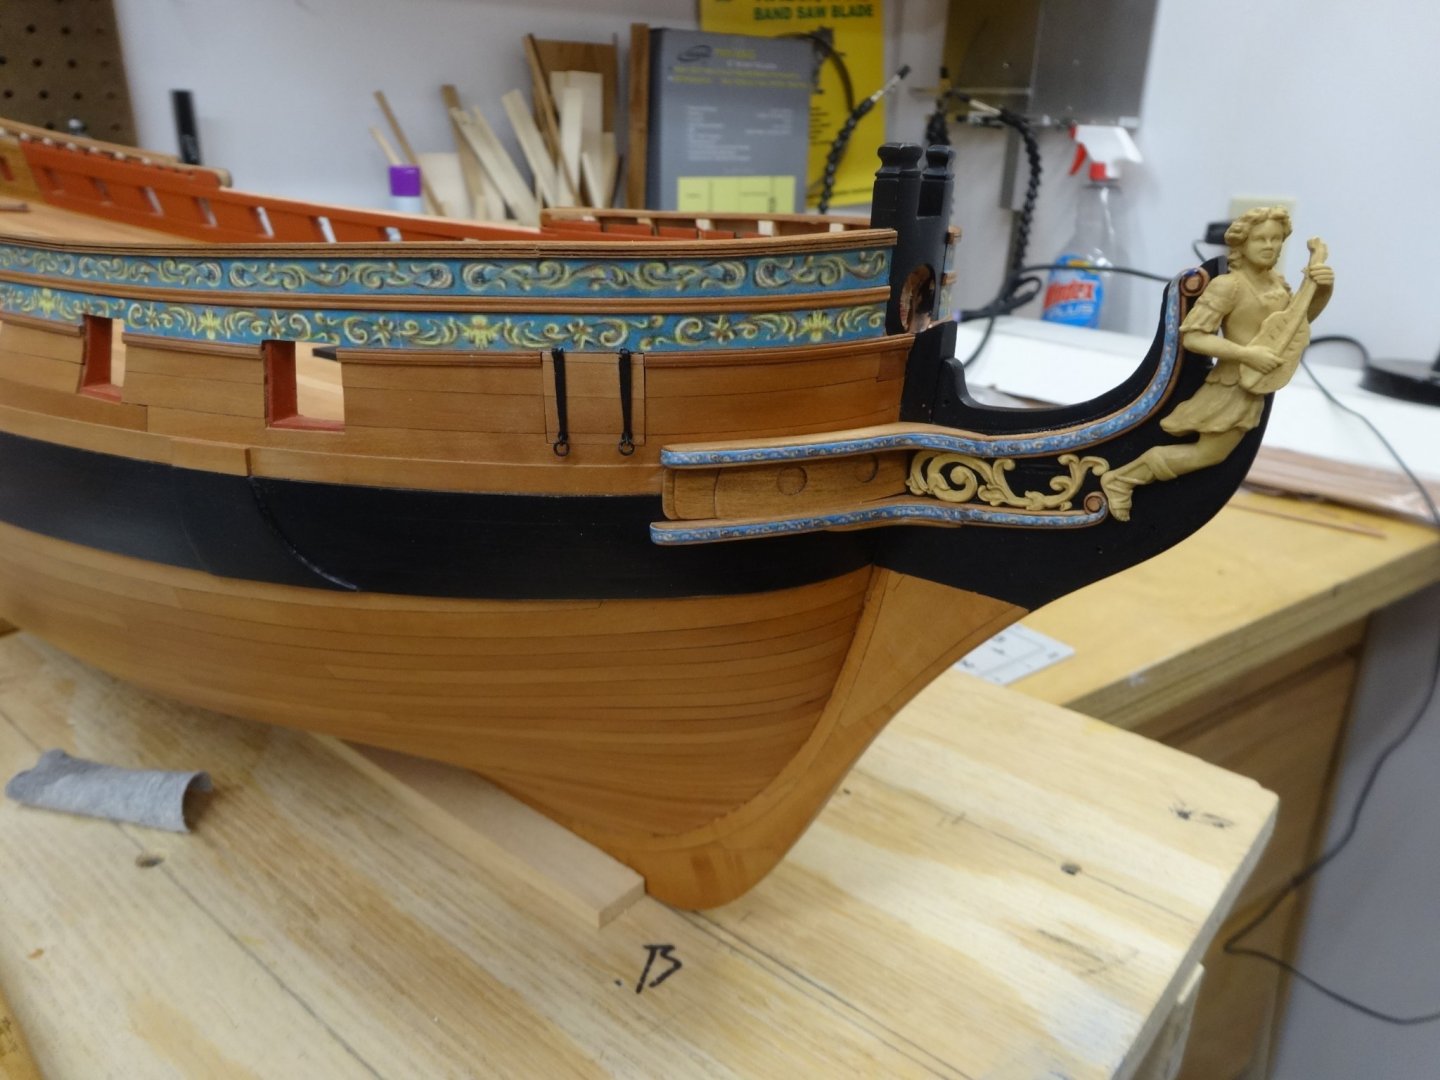
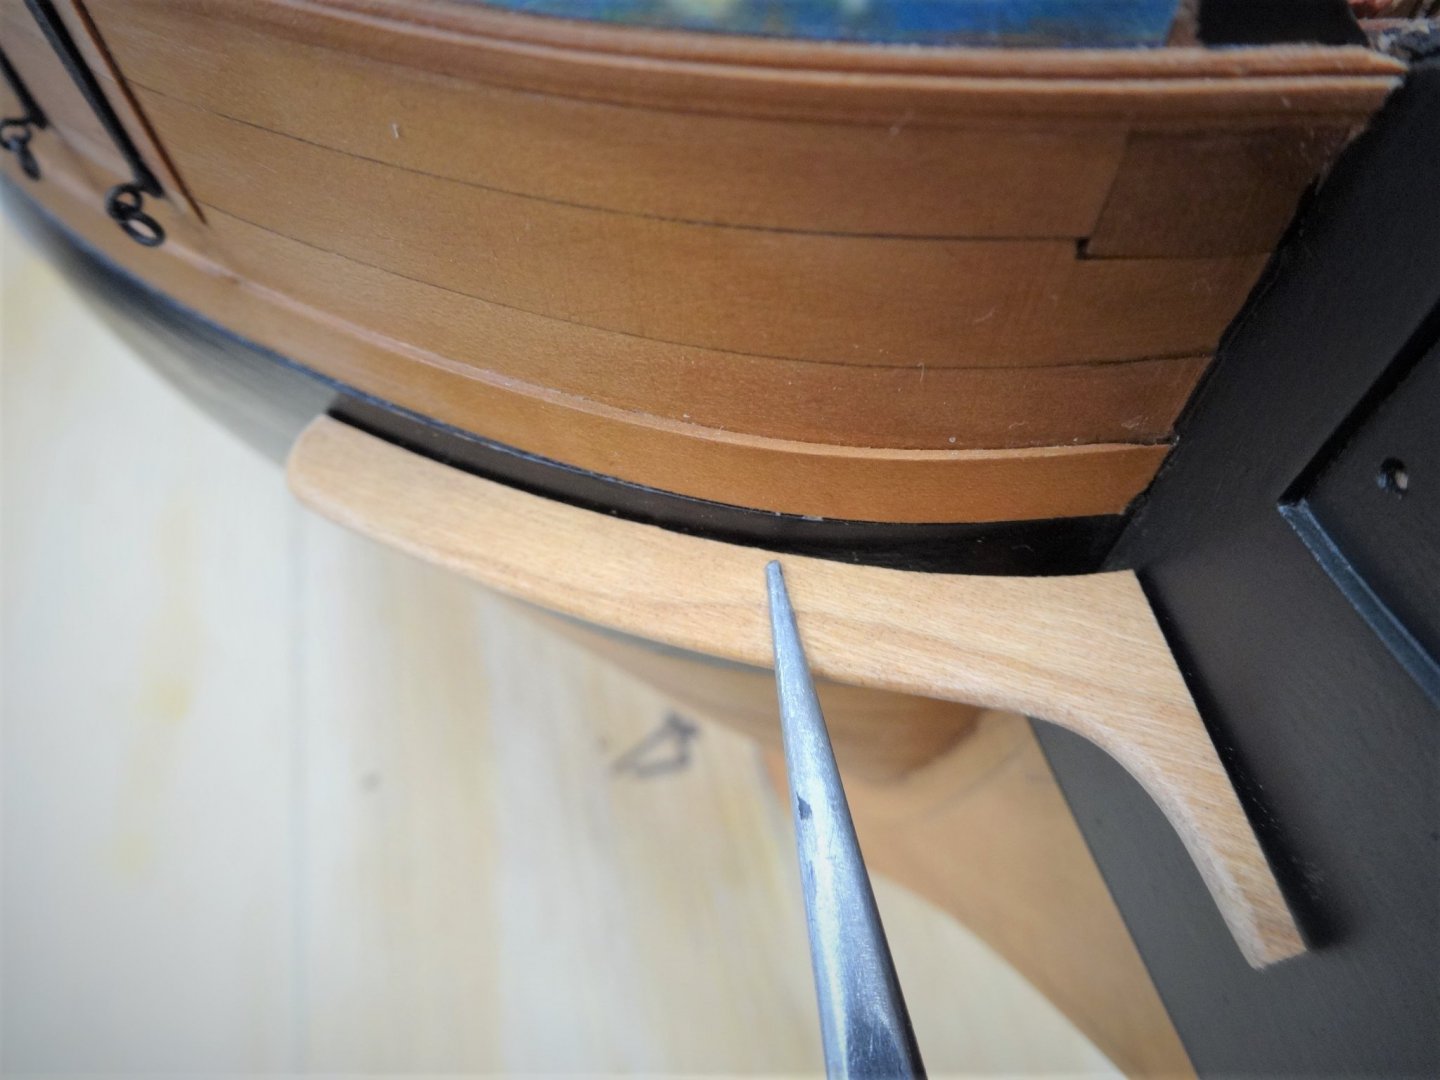
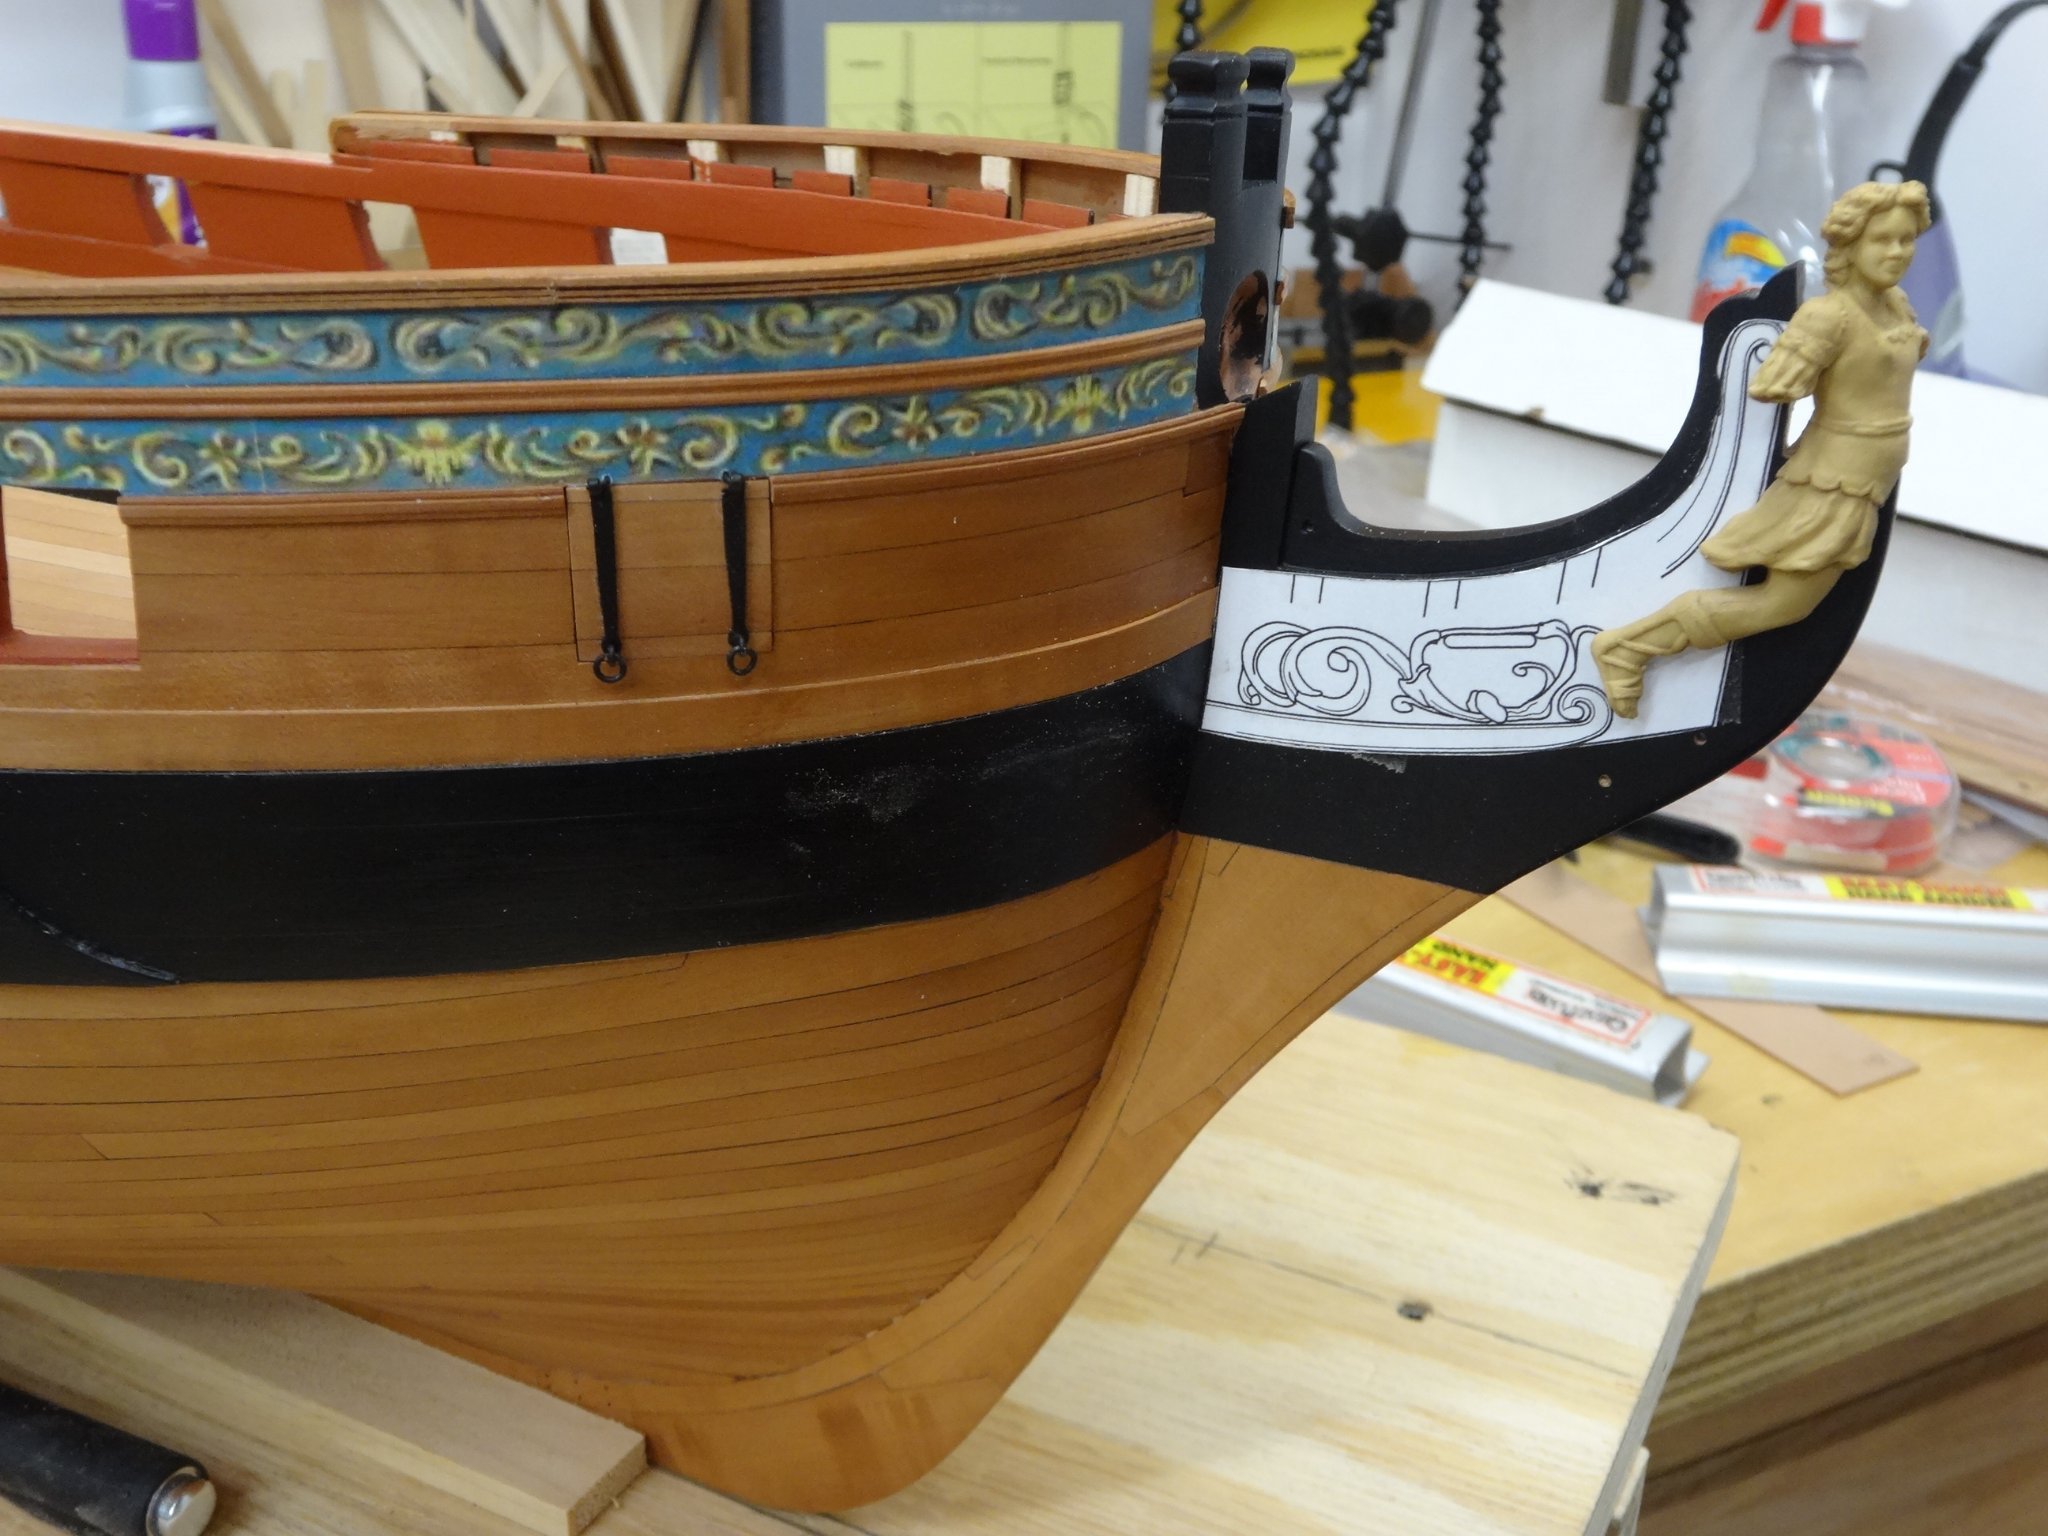
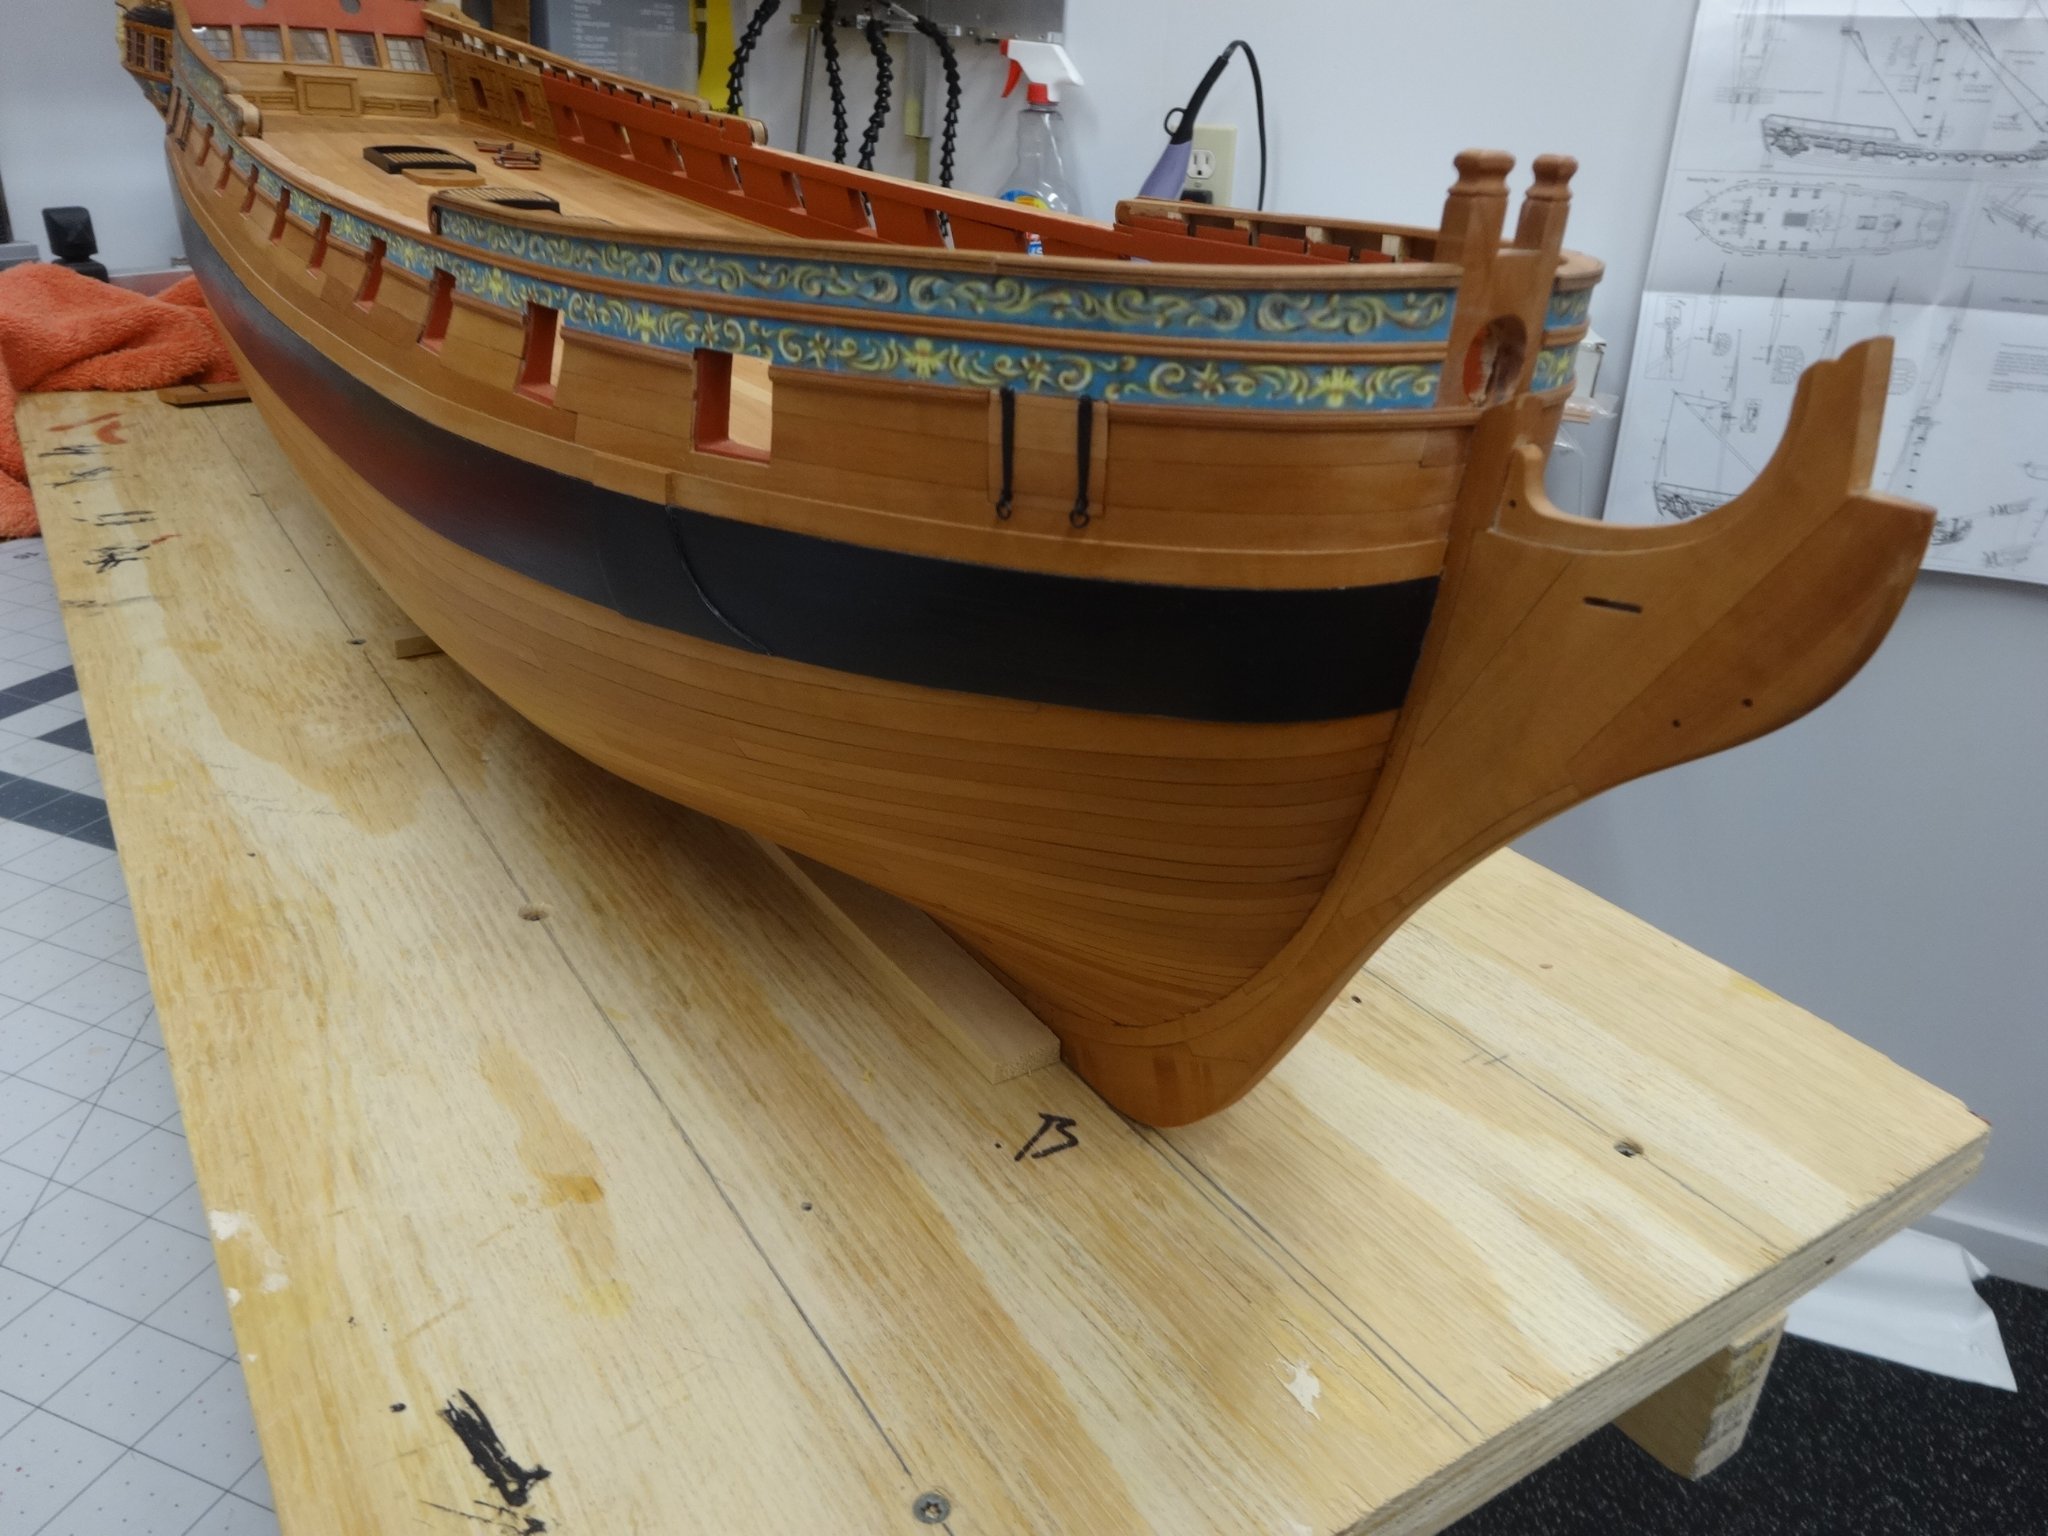
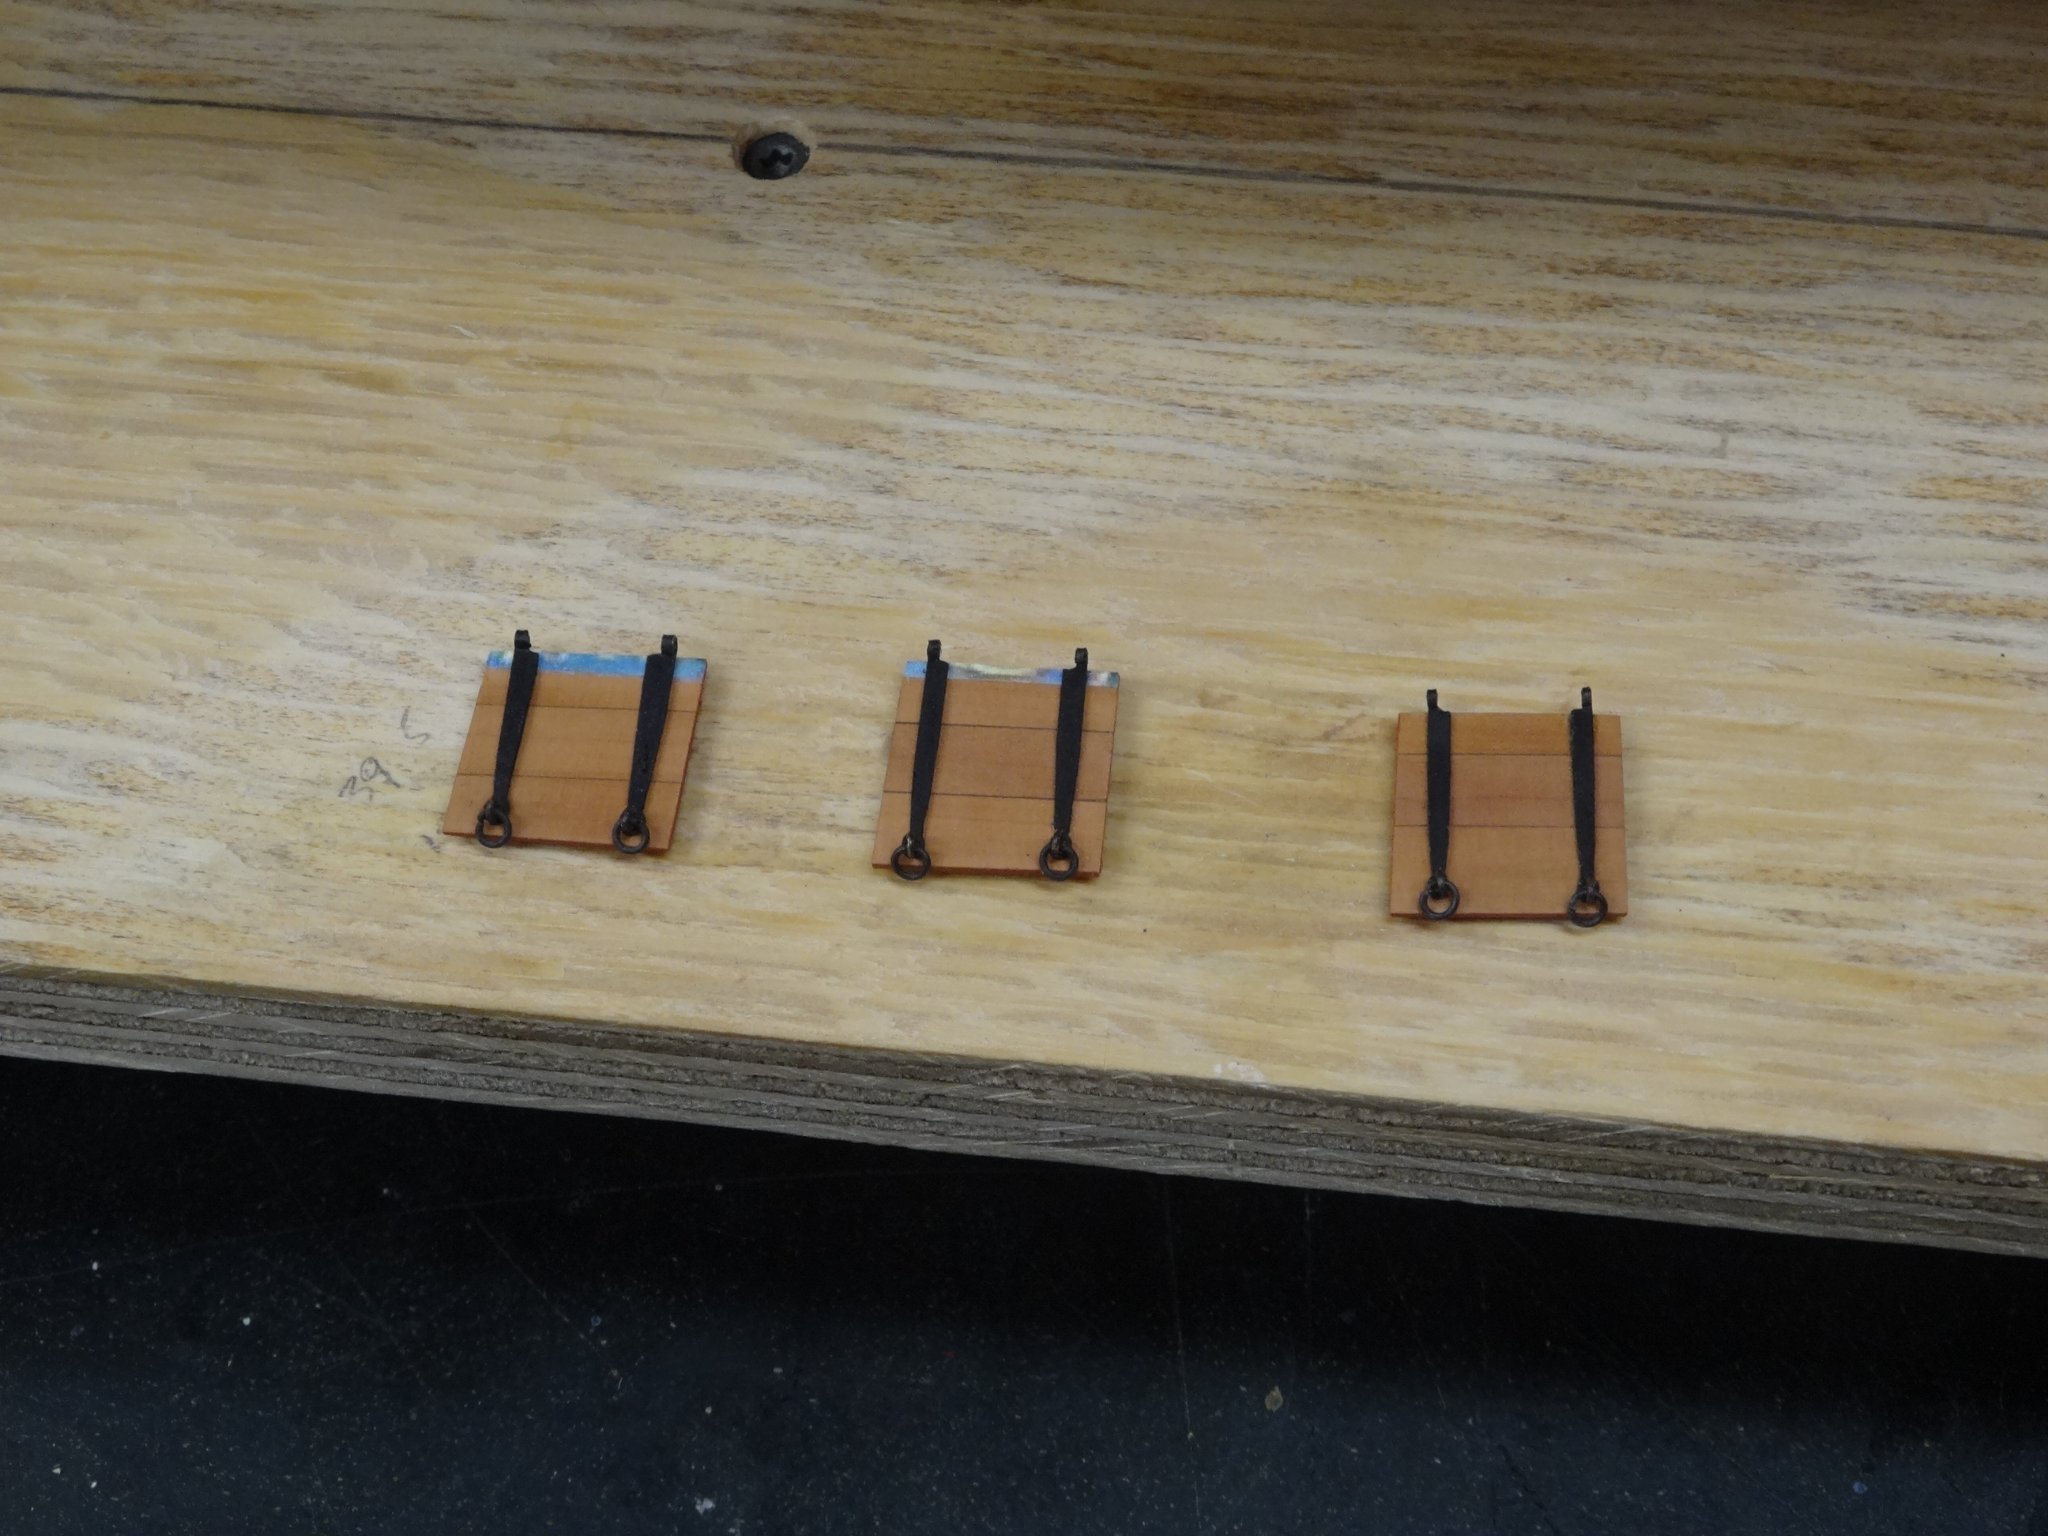
So far so good I think. On the starboard side I used temporary double sided tape to attach the template.
With this I was able to mark off the location of the cheeks and hair bracket. I had to make some minor
adjustments to the stem and figurehead to get everything in an alignment that I liked.

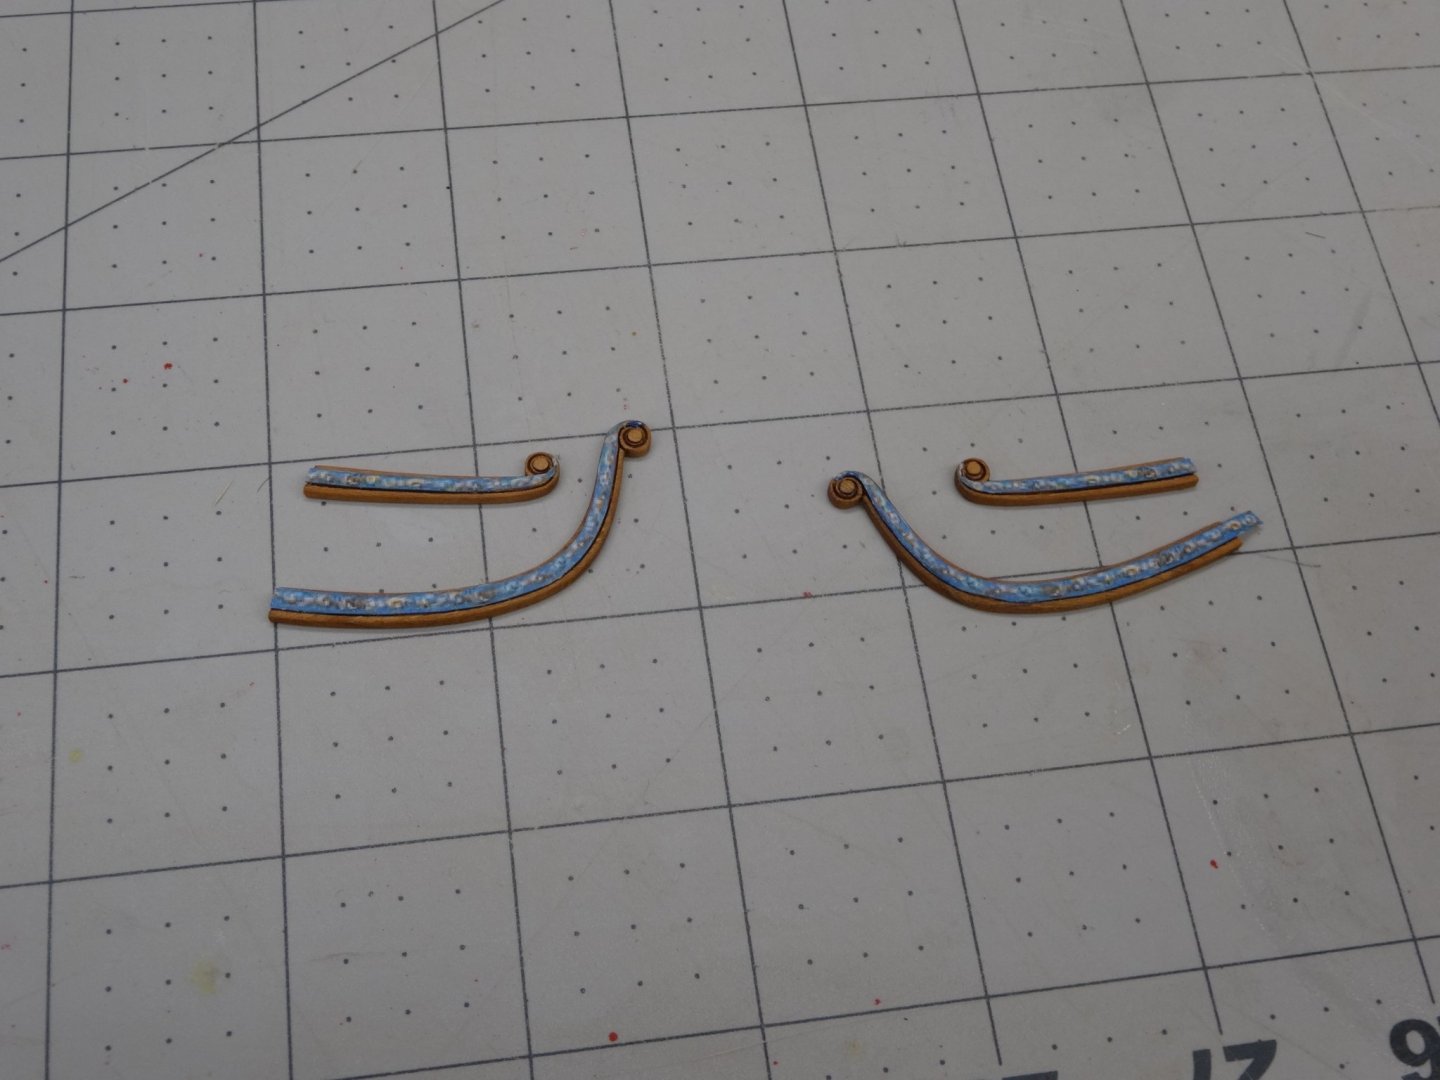
The frieze on the checks was left a little long to overlap onto the hair bracket.
Once the hair bracket was in place I used a sharp scalp blade to cut the frieze.
There will be a lot of cleaning and paint touch up once I'm finished. On to the port side now.
- Matt D, Nunnehi (Don), Chuck and 16 others
-
19
-
-
Thanks Chuck, Its all been fun but now it's onto more fun!
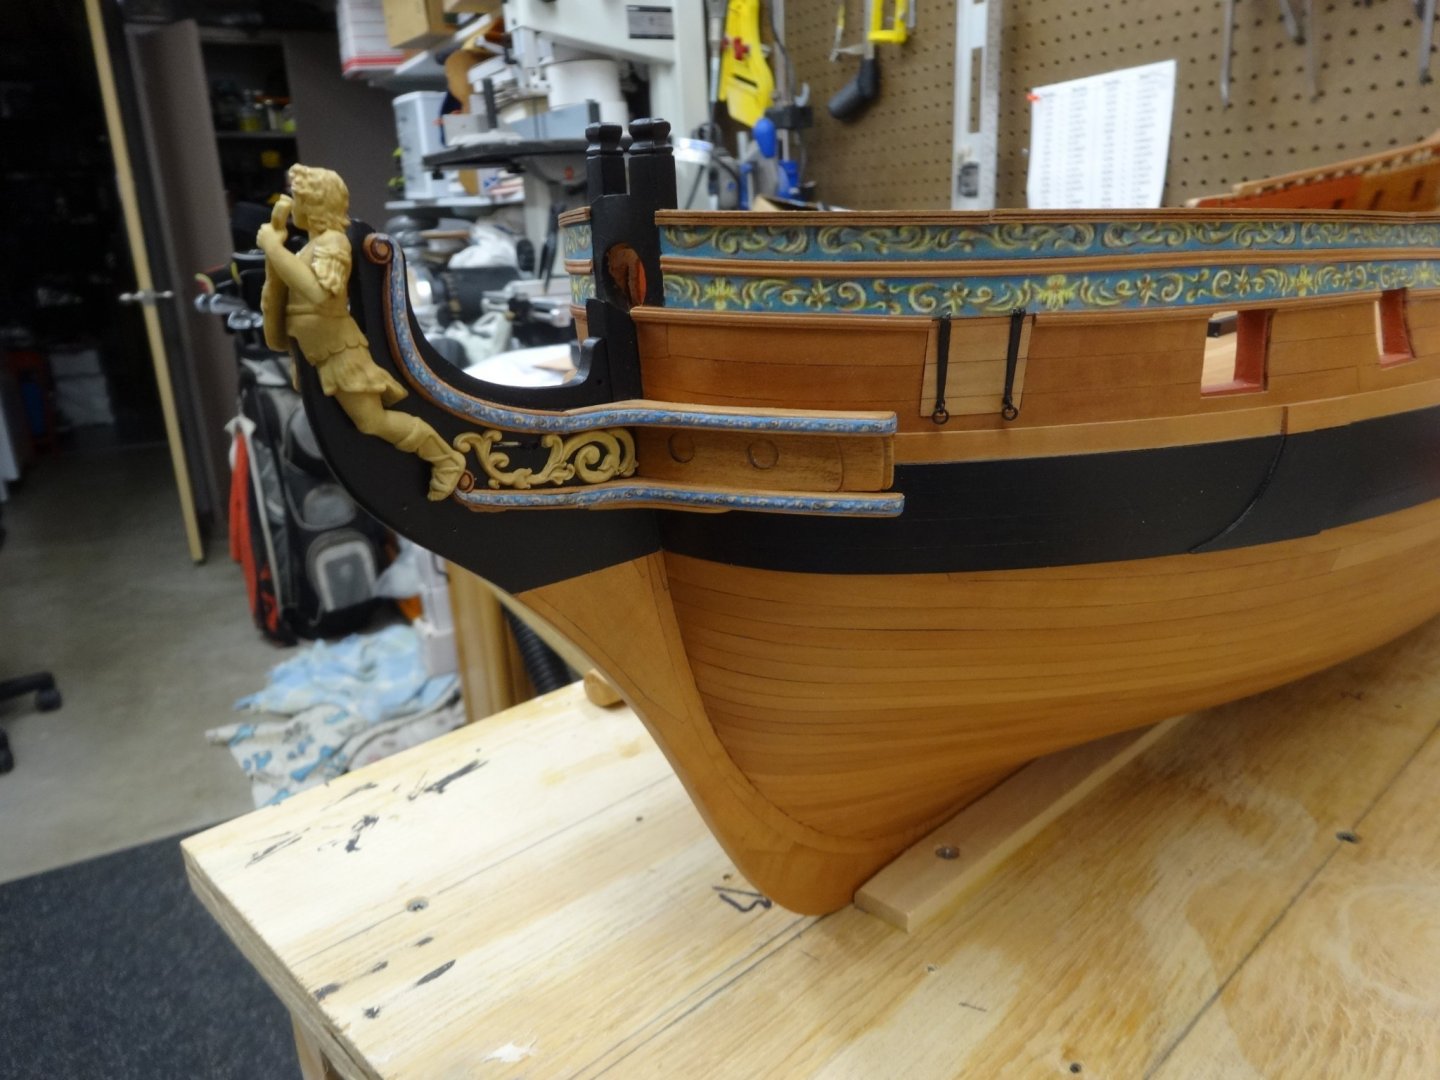
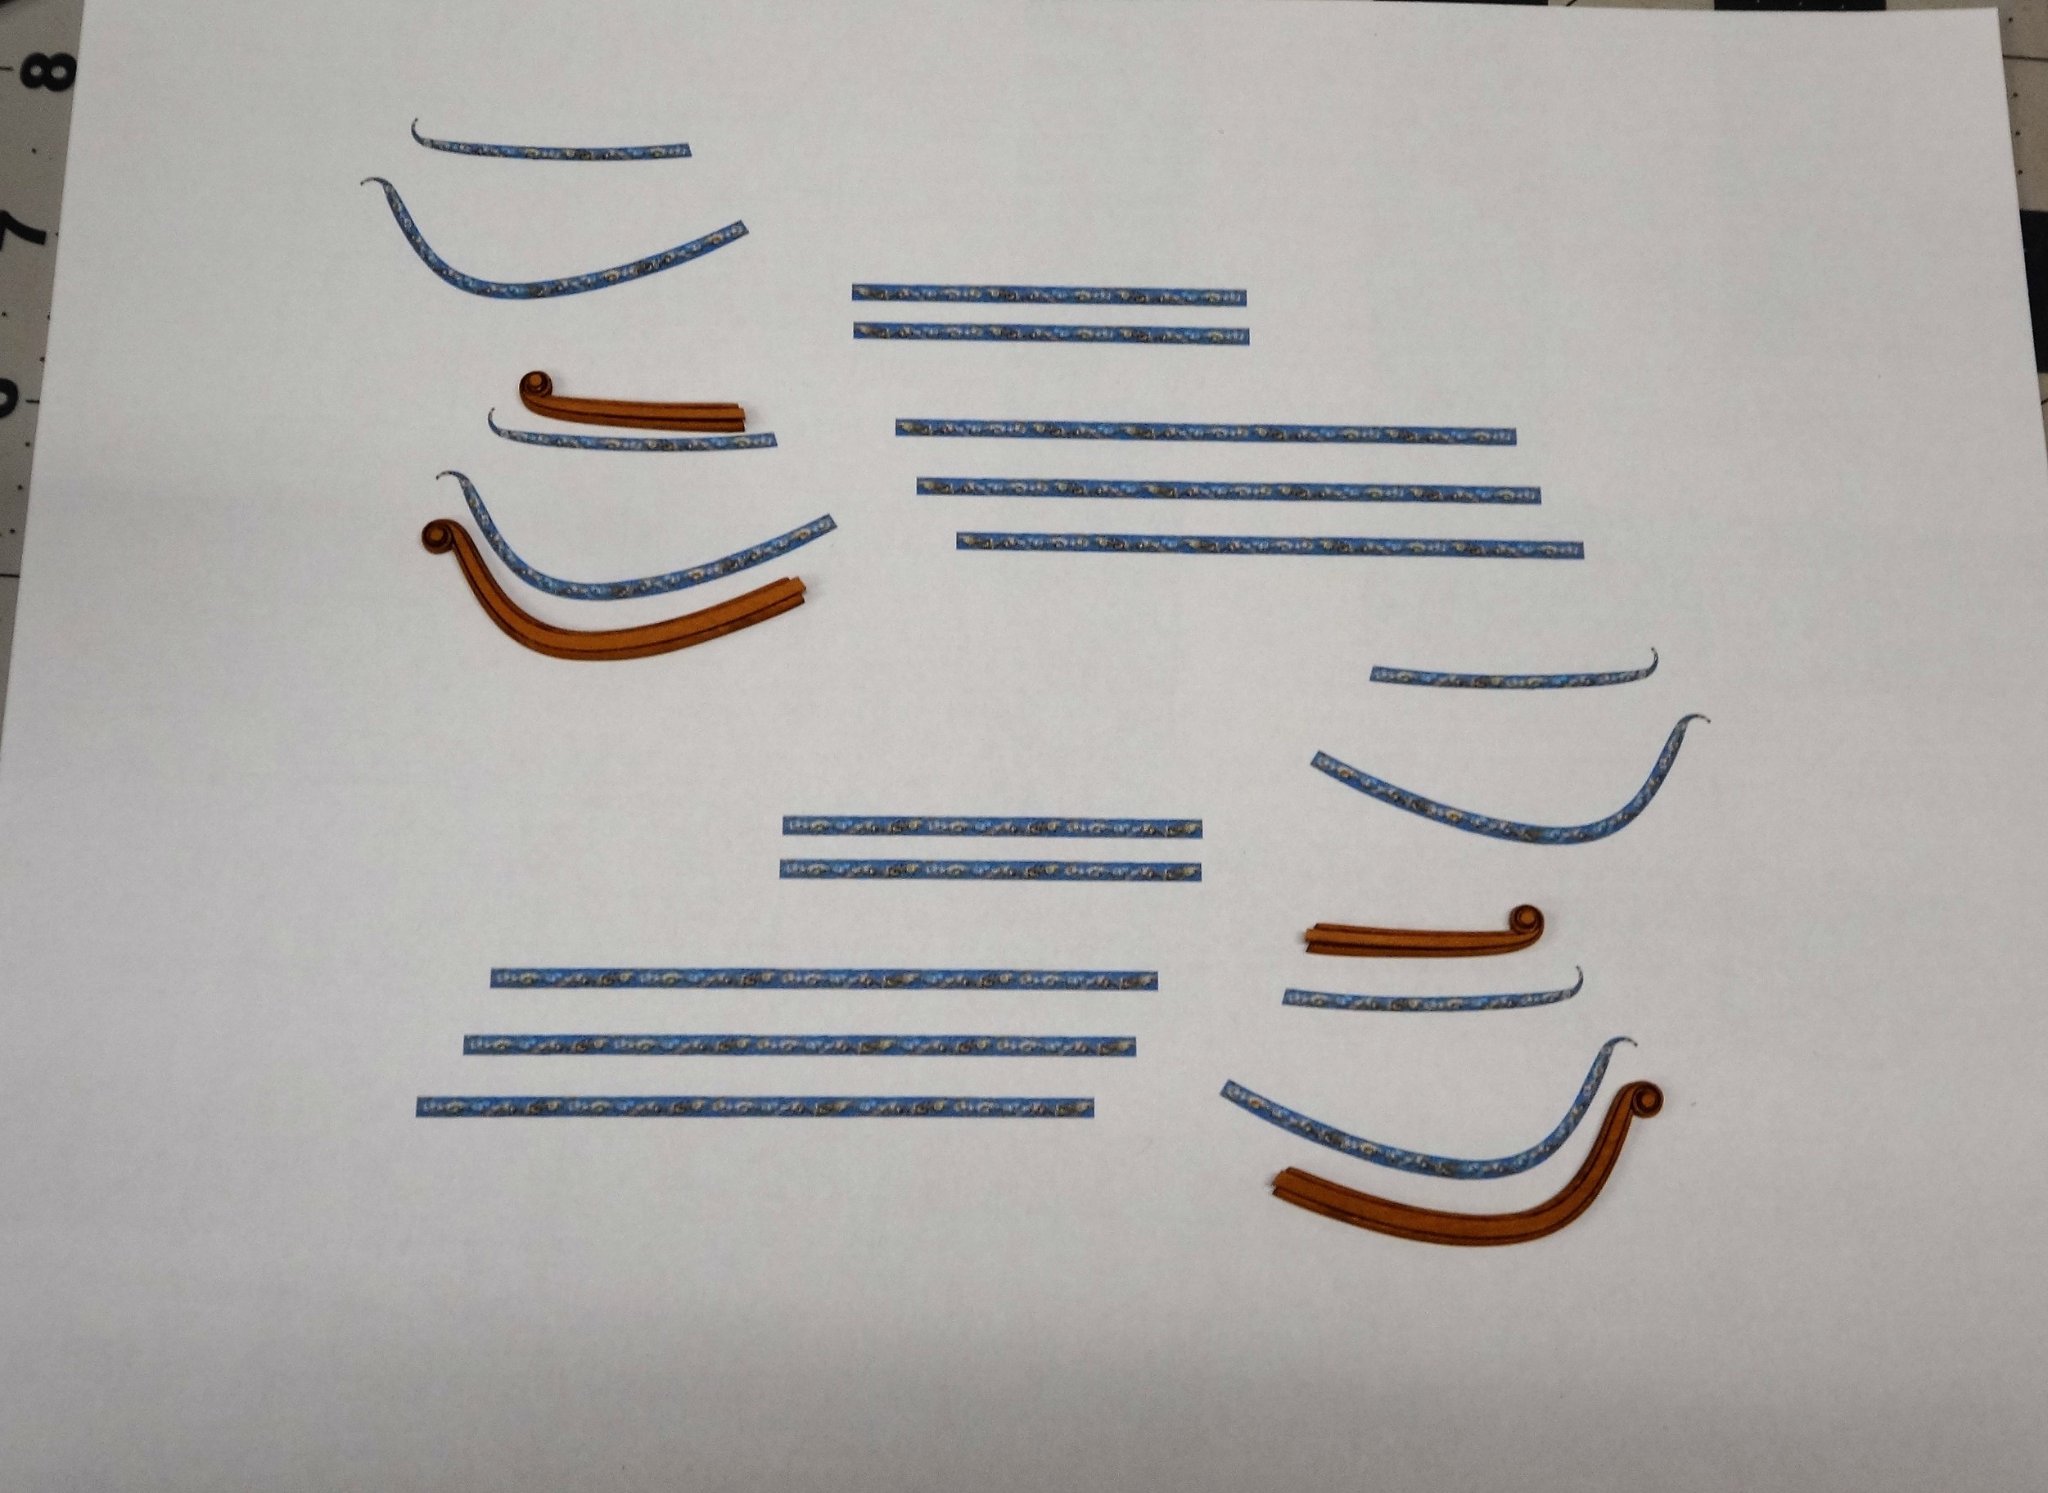
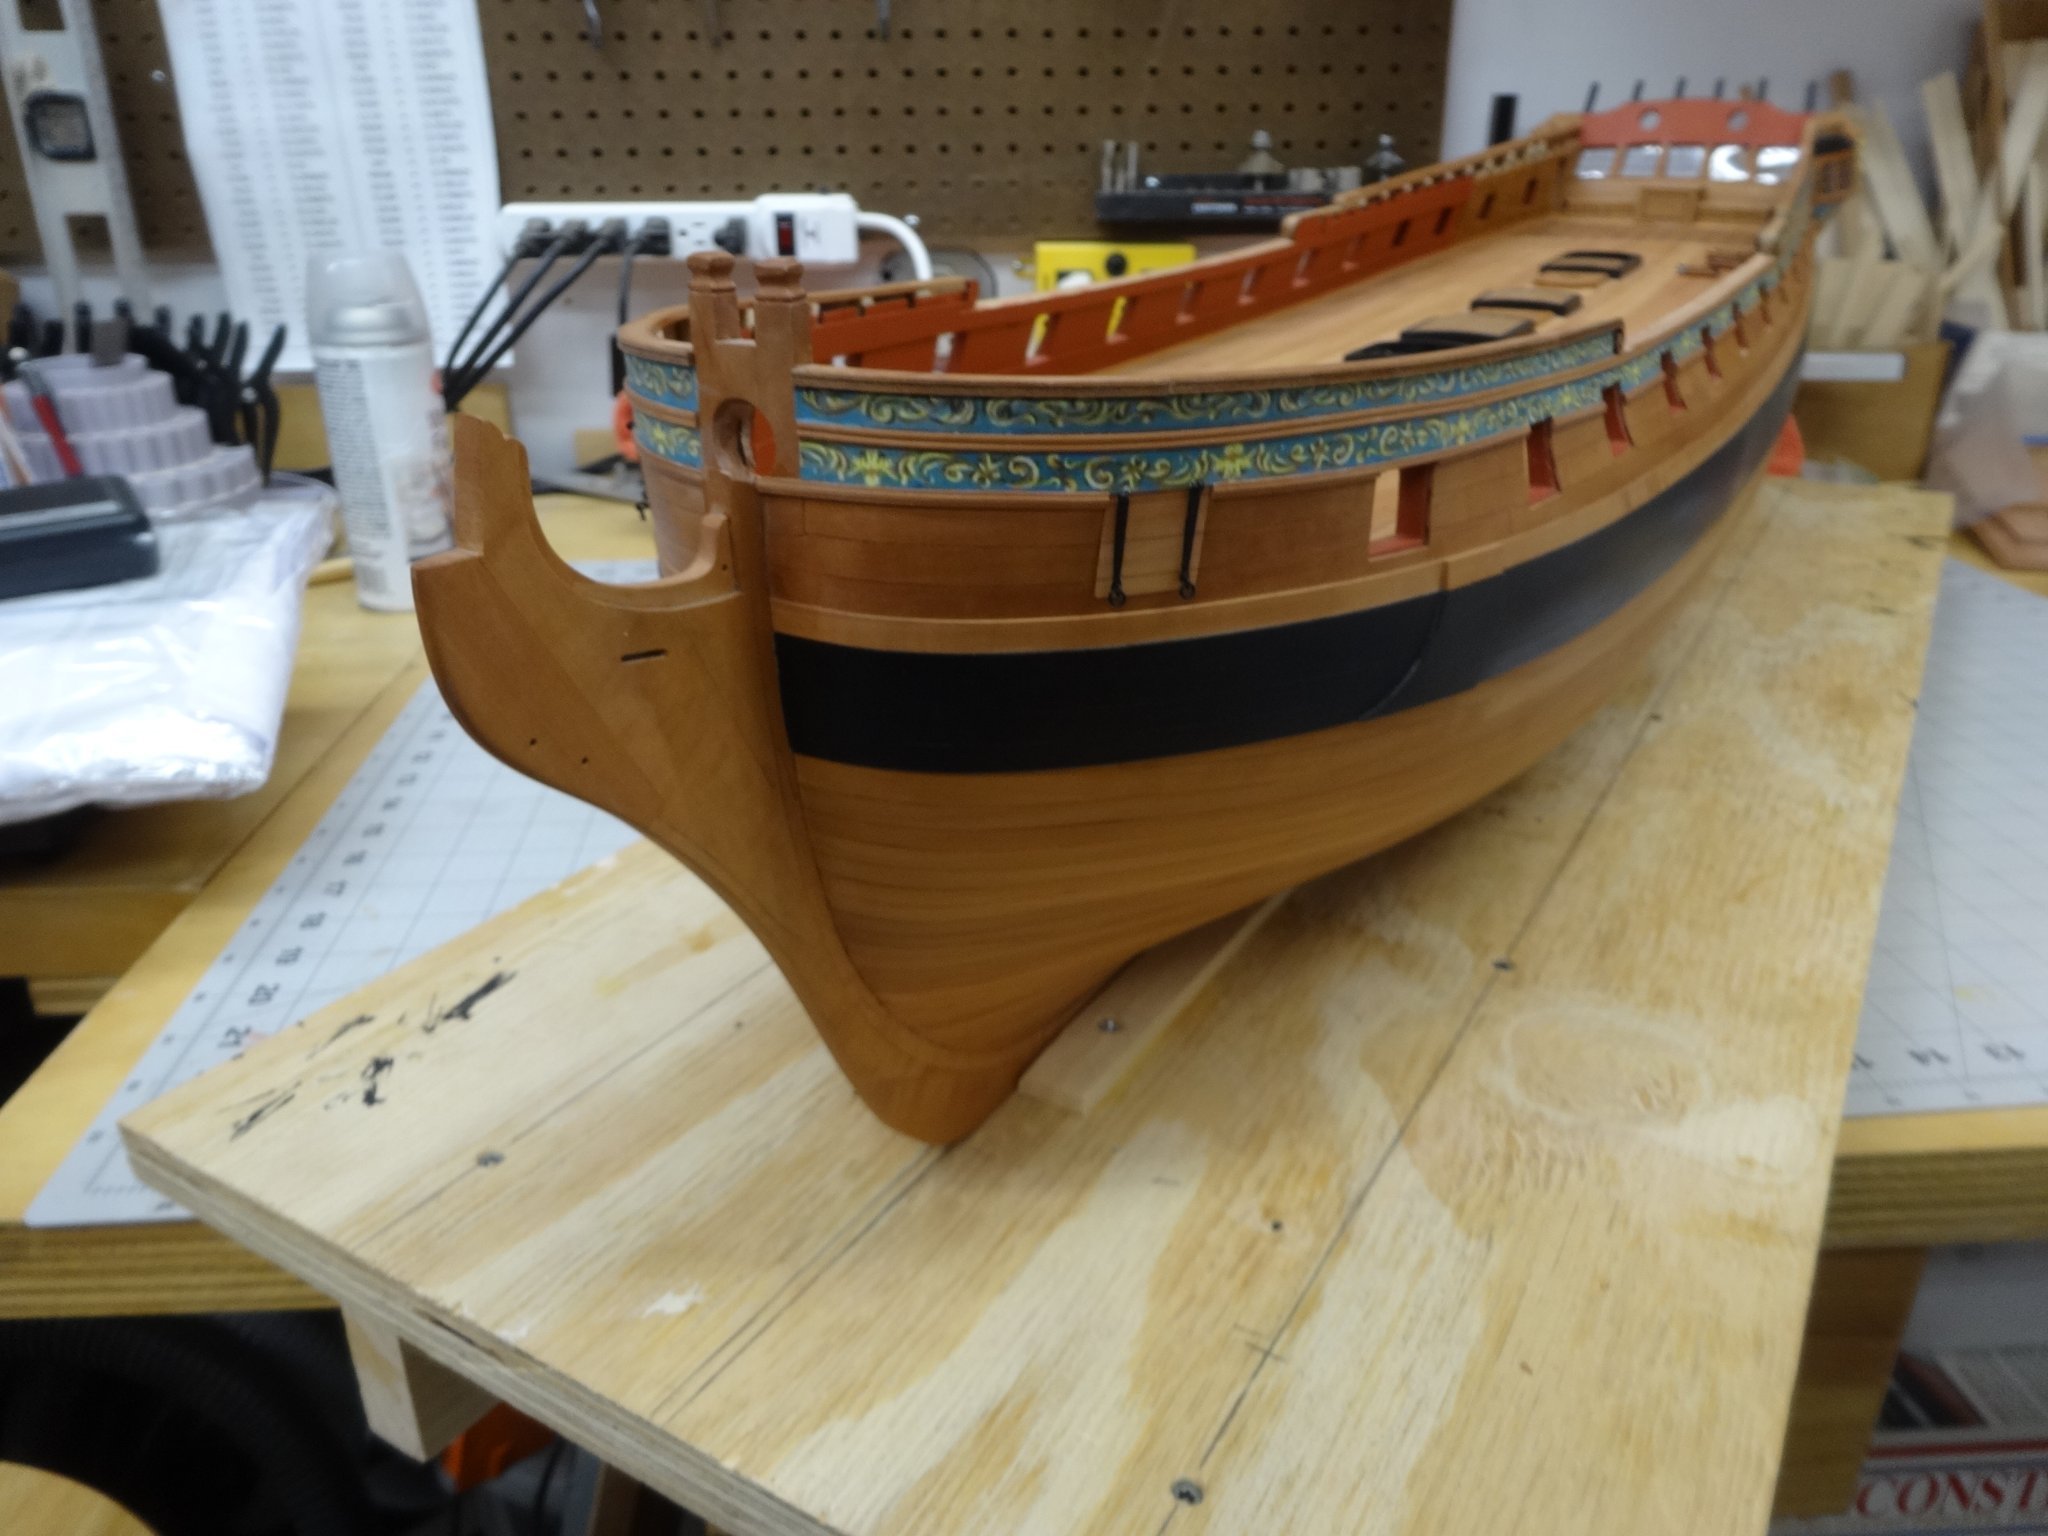
I shaped and added the frieze to the checks.

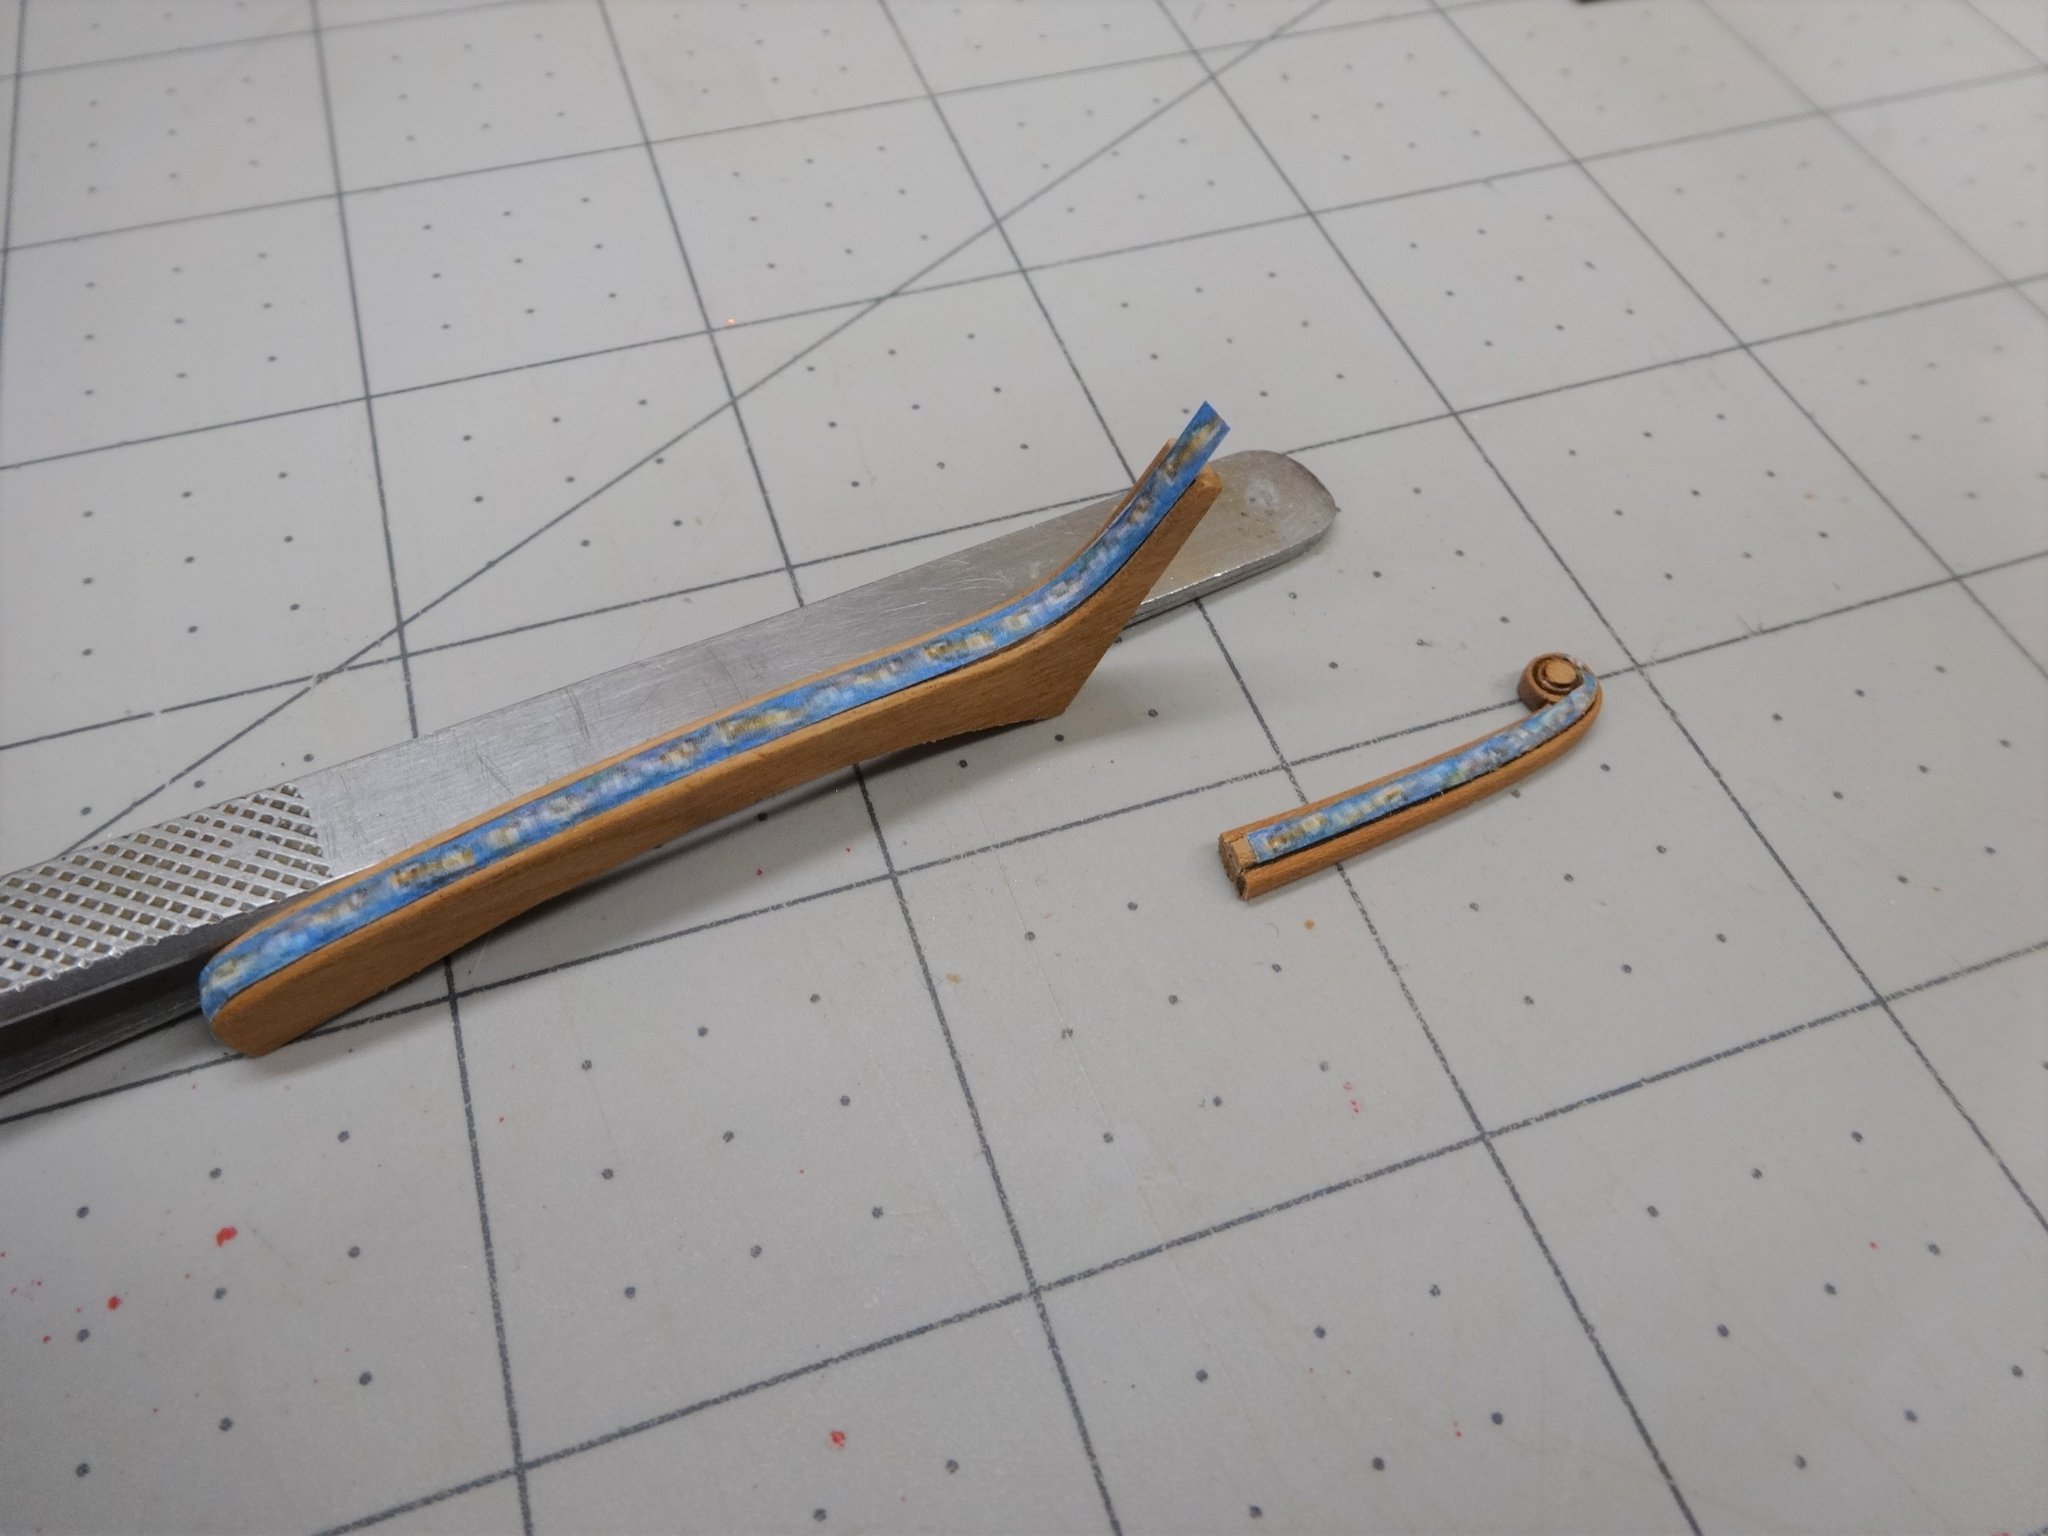
I then started shaping the hair brackets. There are three layers and I started with the center one. I removed the char and rounded the edges. Next I have to shape it to fit snug against the hull and stem. It's hard to see in this picture but I've got a good bit of adjusting to do.
Once the inner piece is shaped to fit the two outer pieces will be glued on. There is an etched line in the top piece that will hopefully give me the correct angle for when attaching the hair brackets. Lots of different angles and planes. Gulp. Here I go!
- Matt D, Nunnehi (Don), VTHokiEE and 12 others
-
15
-
Thanks Tim and Glenn!
Also thanks for the likes!
-
Very nice job planking the hull B.E.
- mtaylor, Blue Ensign and hollowneck
-
3
-
The bridle ports are now finished and permanently in place. I'm glad there aren't any more to do.
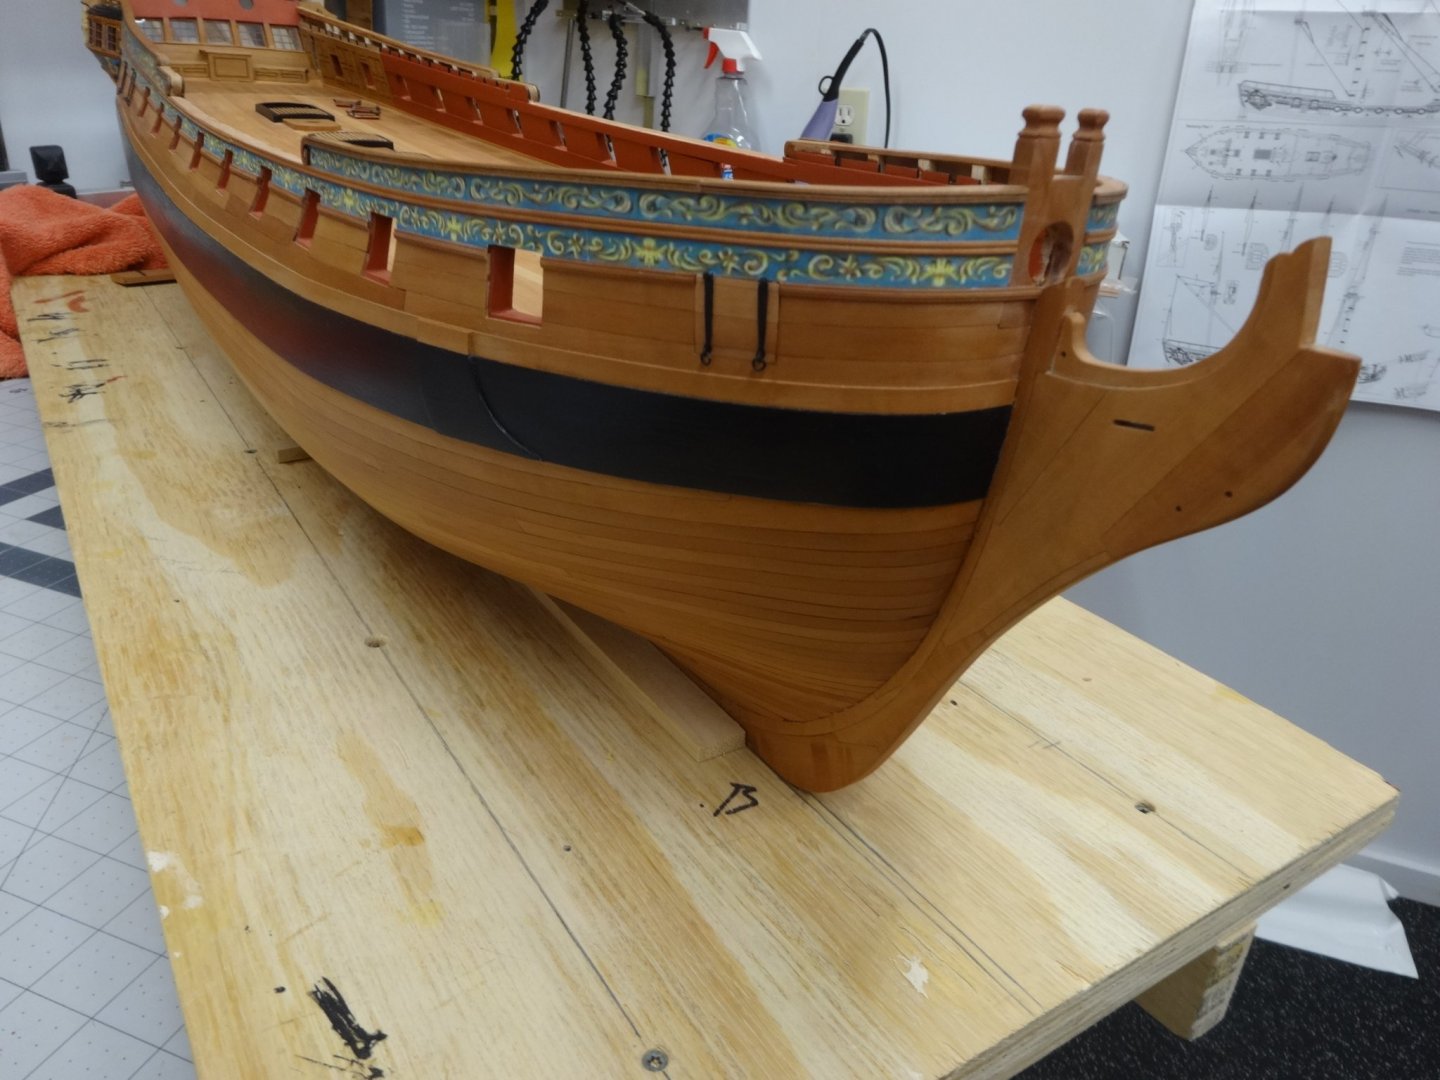

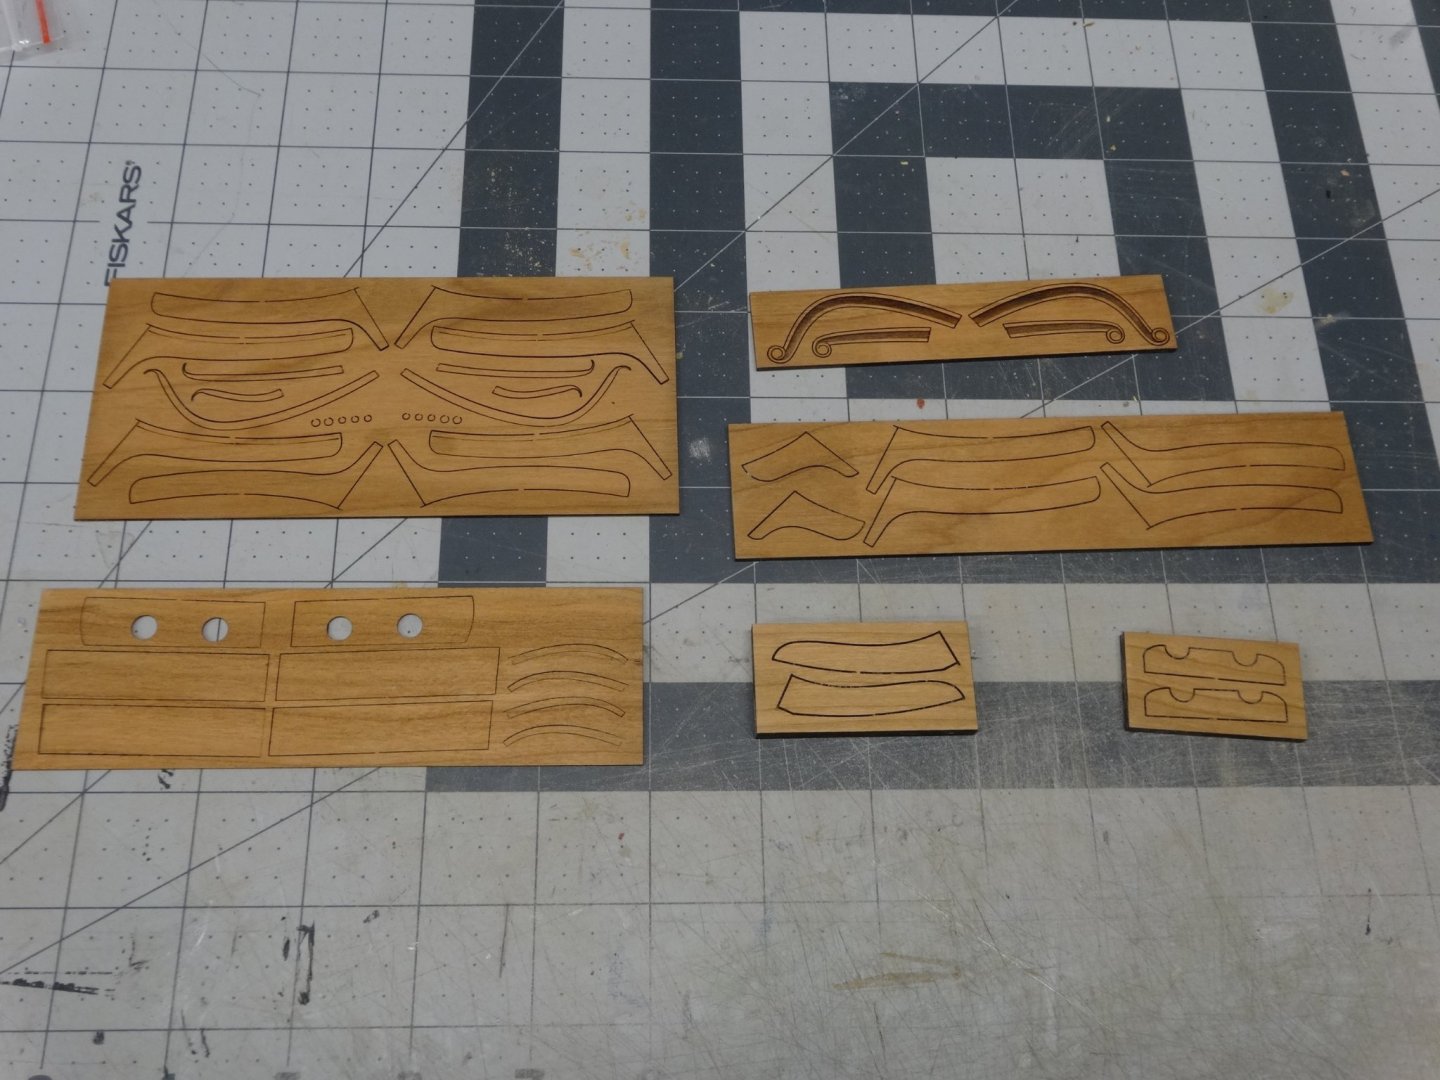
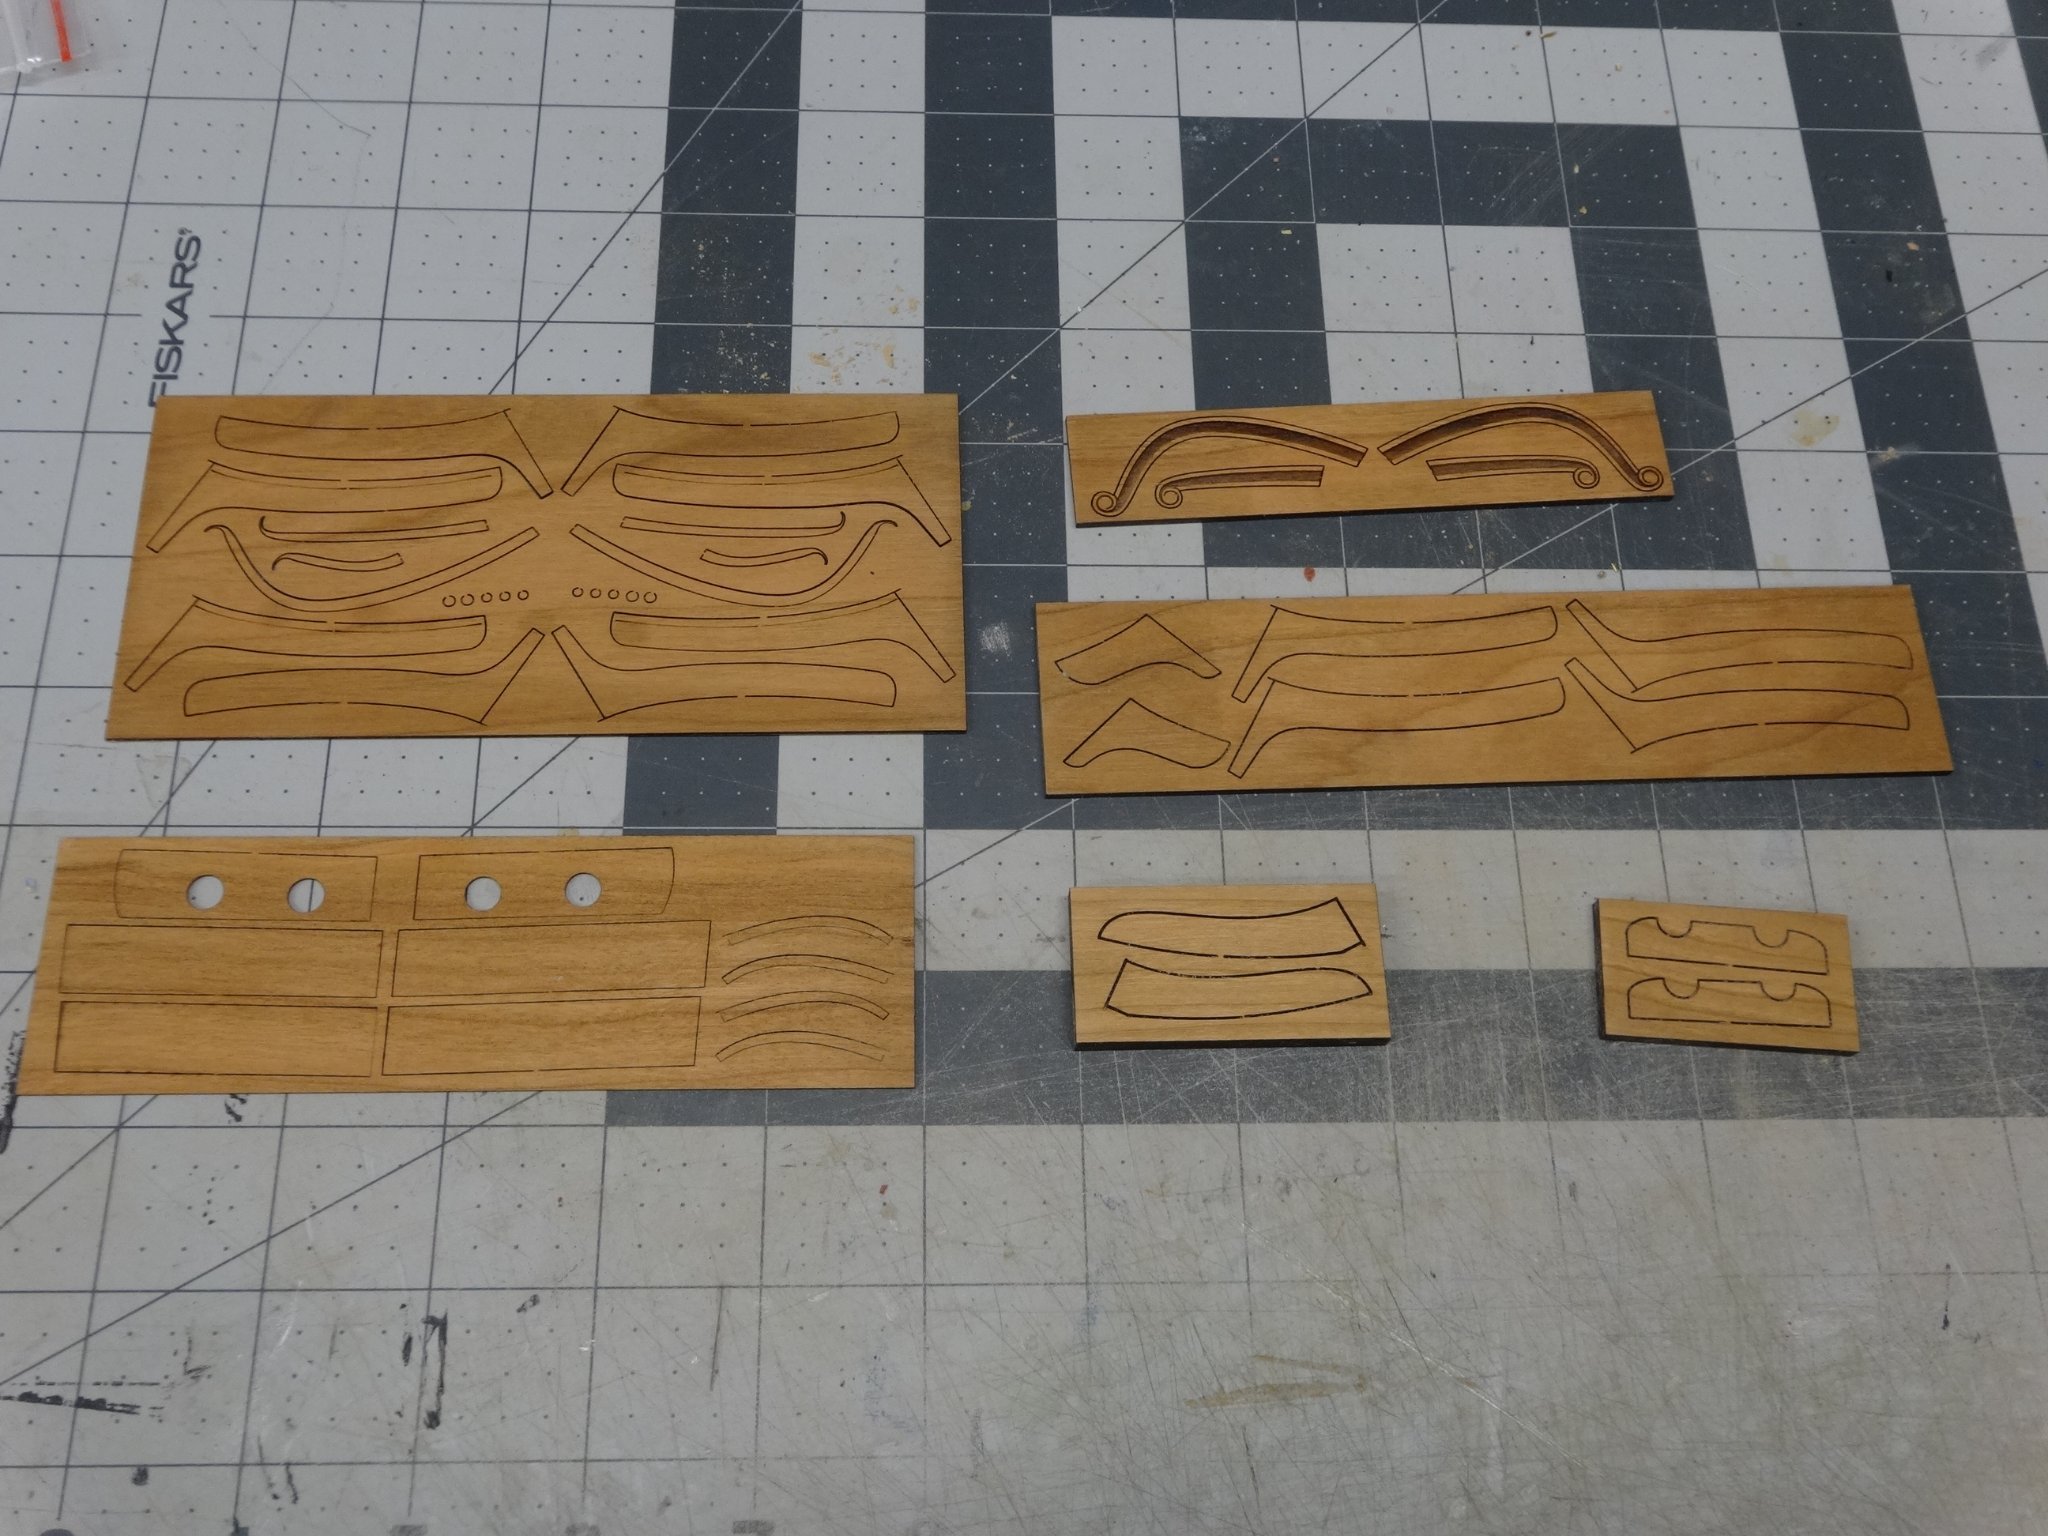
Next I'll start on checks, hair brackets and hawse holes but first I had to paint the upper portion of the stem.
Between coats I sanded the faces of the multiple pieces with some 320 grit sandpaper.
These pieces are all cut from Cherry wood and part of the chapter 5 package.
- Trussben, ccoyle, scrubbyj427 and 11 others
-
14
-
Very nice work Derek. Just like you anywhere there were laminations that would end up painted I coated them with wood filler just in case.
- Ryland Craze, VTHokiEE and DelF
-
3
-
Thanks Chuck.
Hi Glenn, I found fitting the lids more challenging than the brass so no problem!
Also thanks for the likes!
- FrankWouts and VTHokiEE
-
2
-
-
That looks nice especially for your first attempt. If you have the wood and the
desire doing a second one won't hurt. I think I did three on mine.
- VTHokiEE, Old Collingwood, mtaylor and 1 other
-
4
-
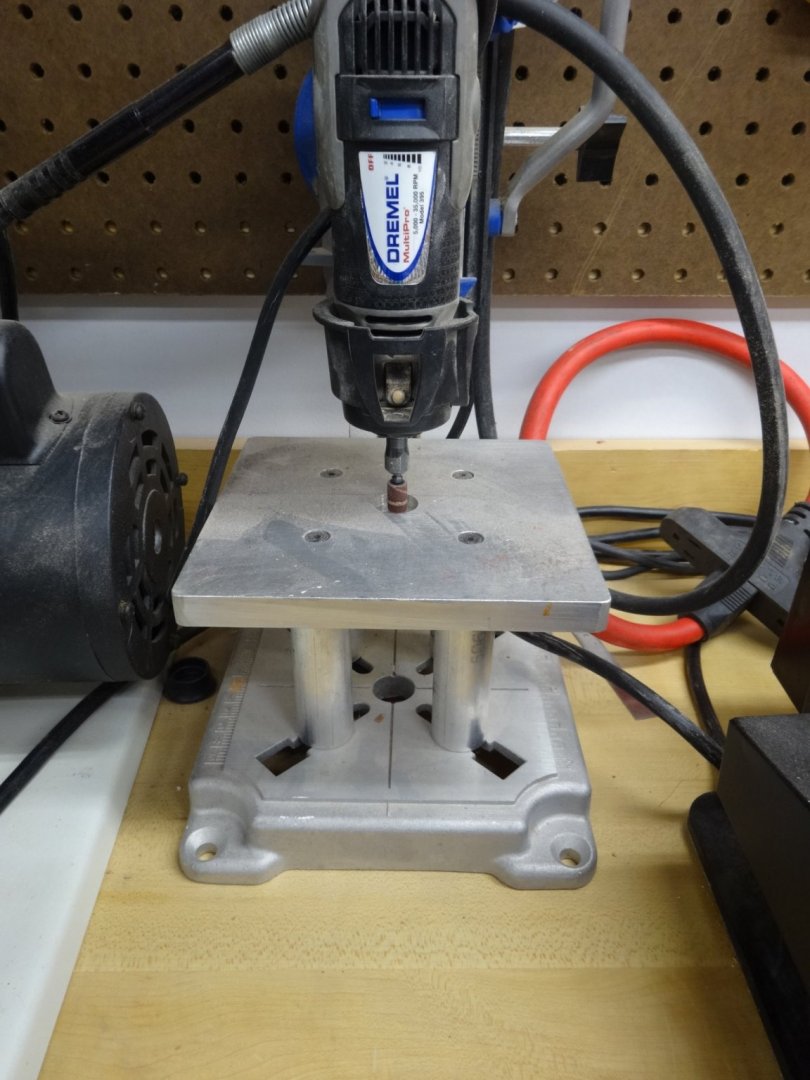
Hi Tim,
I have the MF 70 and agree with Justin P. Great little mill but I don't think spindle sanding would be good.
At the time I didn't have a drill press but I did have a Dremel drill press. I built a stand and it worked real well on something as small as the echo. If you do have a drill press then chucking a sanding spindle in it works real well too.
-
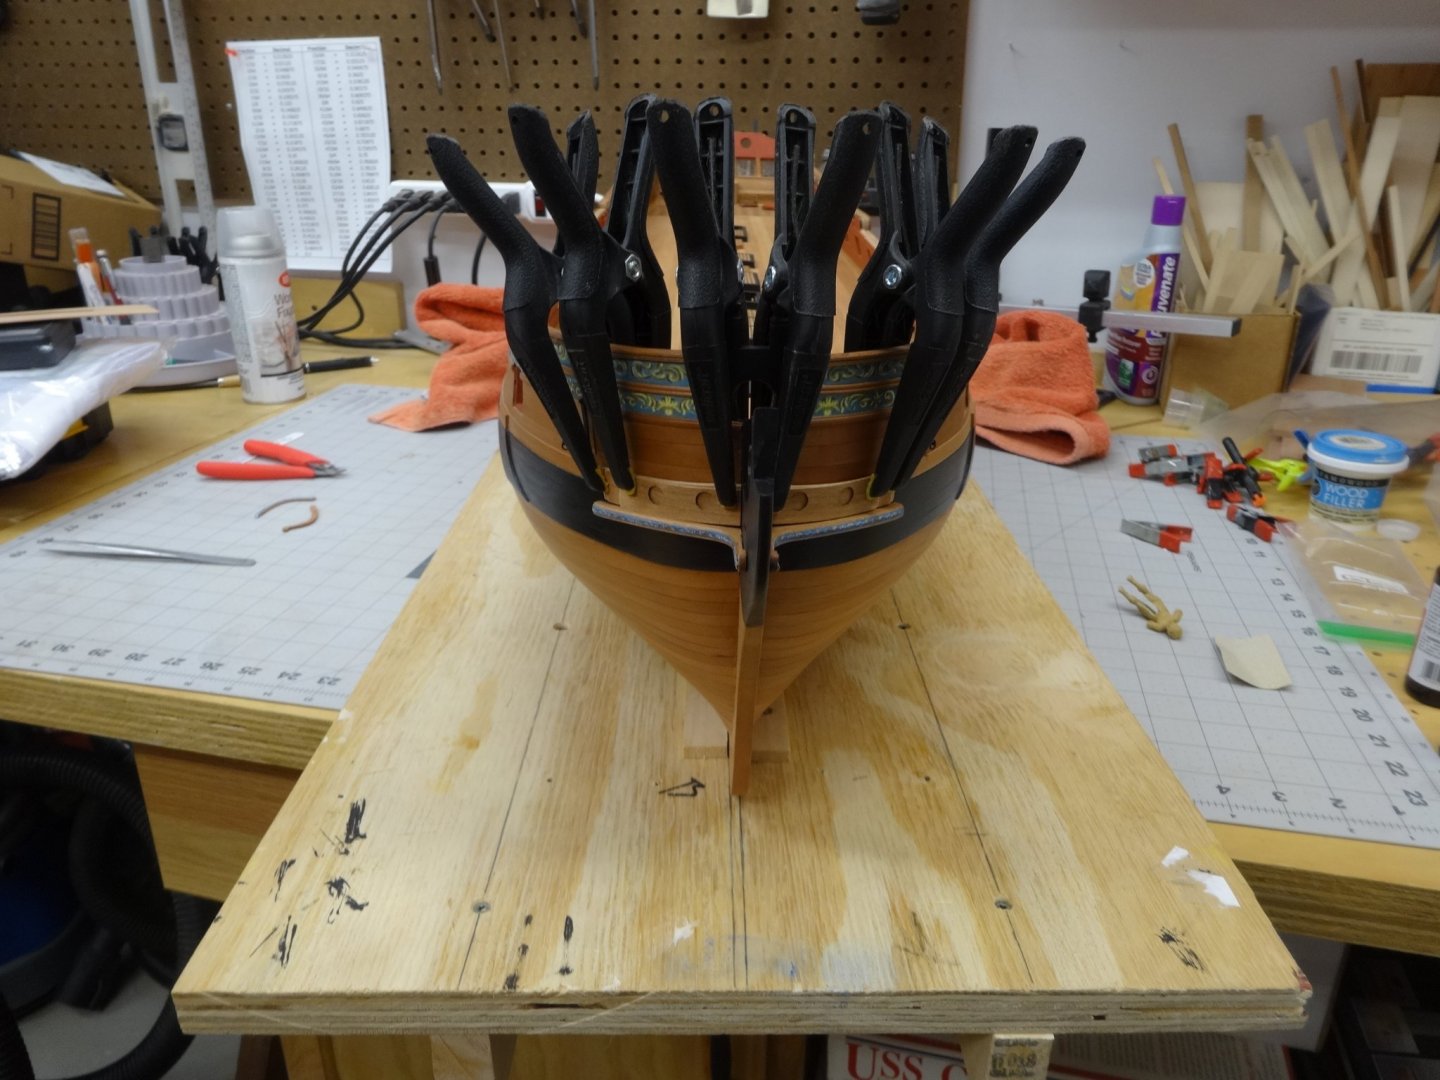
I've been trudging along with the gun ports on the starboard side. They are set in place but the
hinges have not been attached yet. I will remove the three port lids that will be open and attach
them later. Until I make the stand I'll be knocking them off every other day!
On to the port side now.
.thumb.JPG.9e950a9df9711eb06812f1421219dde9.JPG)
-
Great explanation and execution Mike!
- Stuntflyer and FrankWouts
-
2
-
-
That is simply stunning!
- FrankWouts, KentM, BobG and 1 other
-
4


.JPG.54e04786099d6346c08b8ed599f5b4f5.JPG)

HMS Winchelsea - FINISHED - 1764 - by Chuck (1/4" scale)
in Member Build logs for the HMS Winchelsea
Posted
I already have the Speedwell book and plans and is on my to do so I'm very interested.
Binnacle looks great too!