


Rustyj
-
Posts
2,440 -
Joined
-
Last visited
Content Type
Profiles
Forums
Gallery
Events
Posts posted by Rustyj
-
-
Very nice workmanship B.E. The lining up of the pumps, stanchions and gallows looks spot on.
- hollowneck, mtaylor and Blue Ensign
-
 2
2
-
 1
1
-
-
21 hours ago, scrubbyj427 said:
What a great shop.. one can only dream
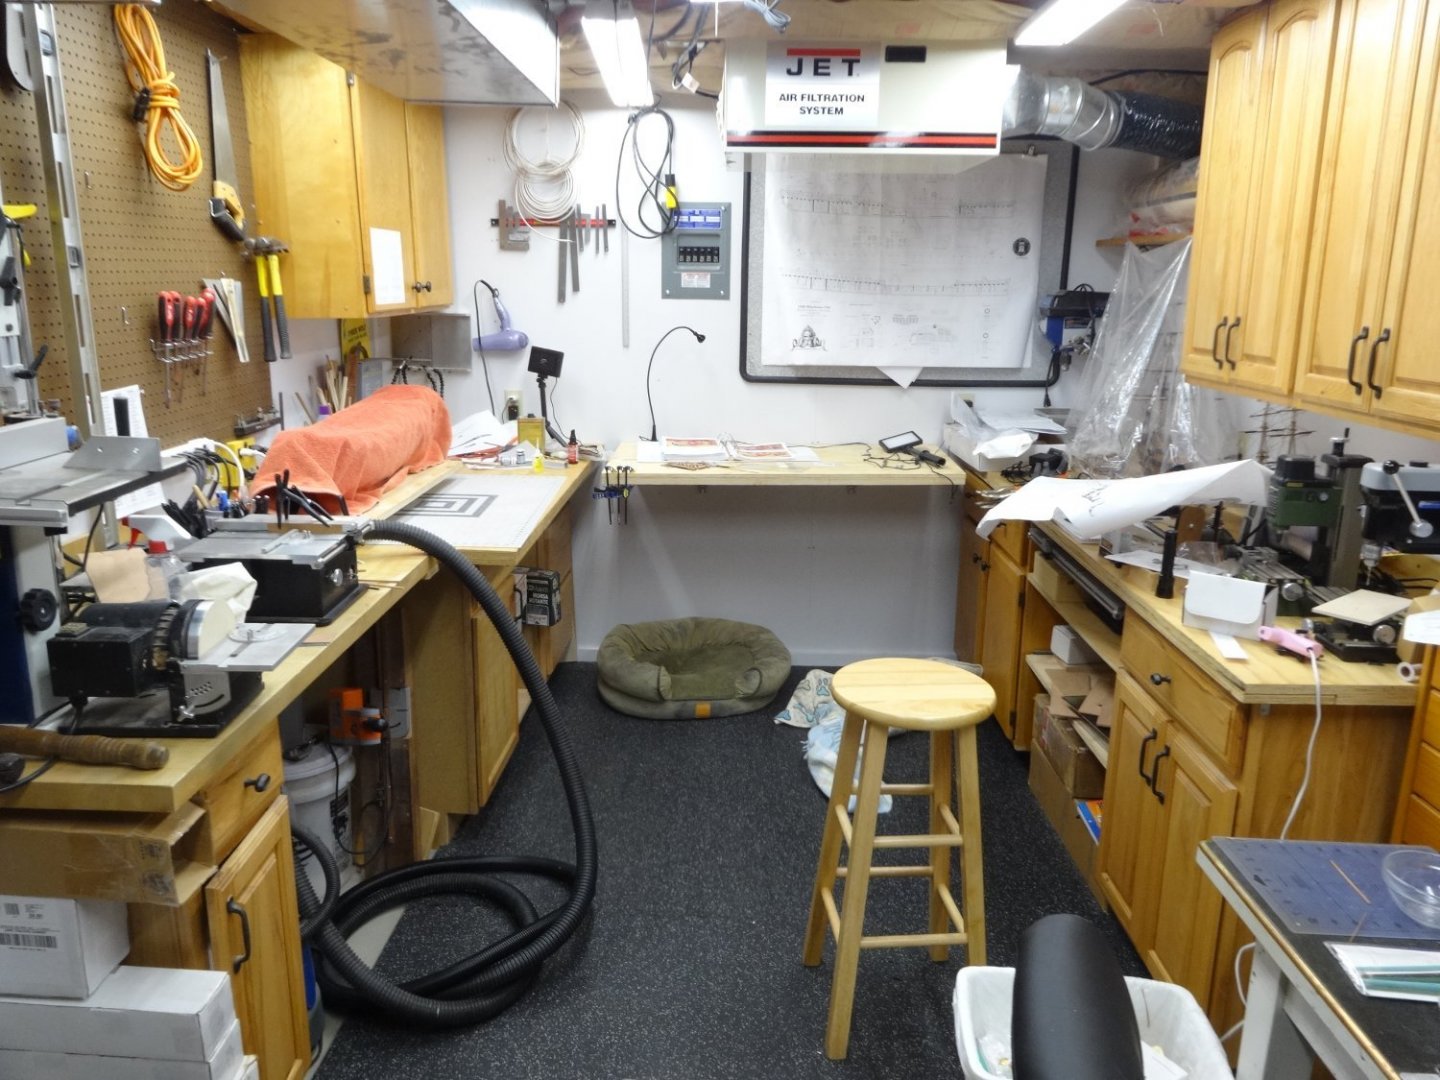
Thanks JJ. In my last house I had a small corner of the basement. When we moved here I took a bigger corner of the basement. The curse of a bigger corner is more area for "stuff" to accumulate and then longer to clean!
Thanks Bob. I always take inspiration from following along behind you.
Also thanks everyone for all the likes.
- CiscoH, FrankWouts, scrubbyj427 and 1 other
-
4
-
As you might remember I paused chapter 7 and finished chapter 8 while waiting for my 1mm brass rod order. Also my grandsons volleyball team was very busy the last 10 days as were we driving many miles to all the games. They won the league, sectional and regional championships finishing the season undefeated.
Well the rod is here and onward I go, finally back to the workshop and finishing chapter 7.
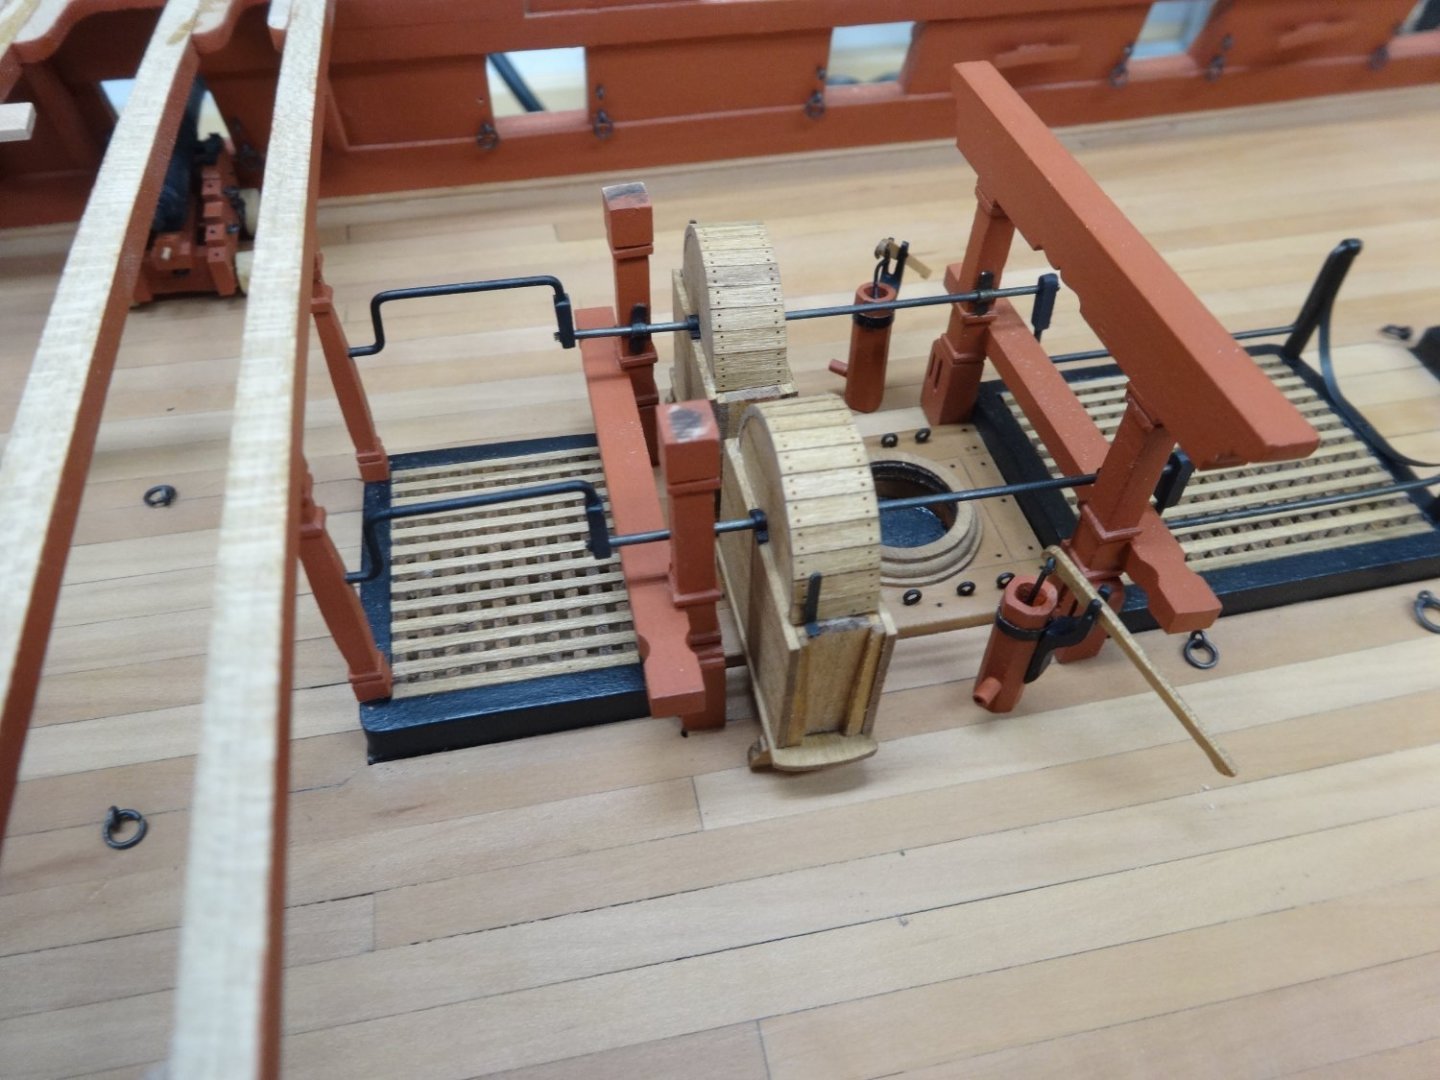
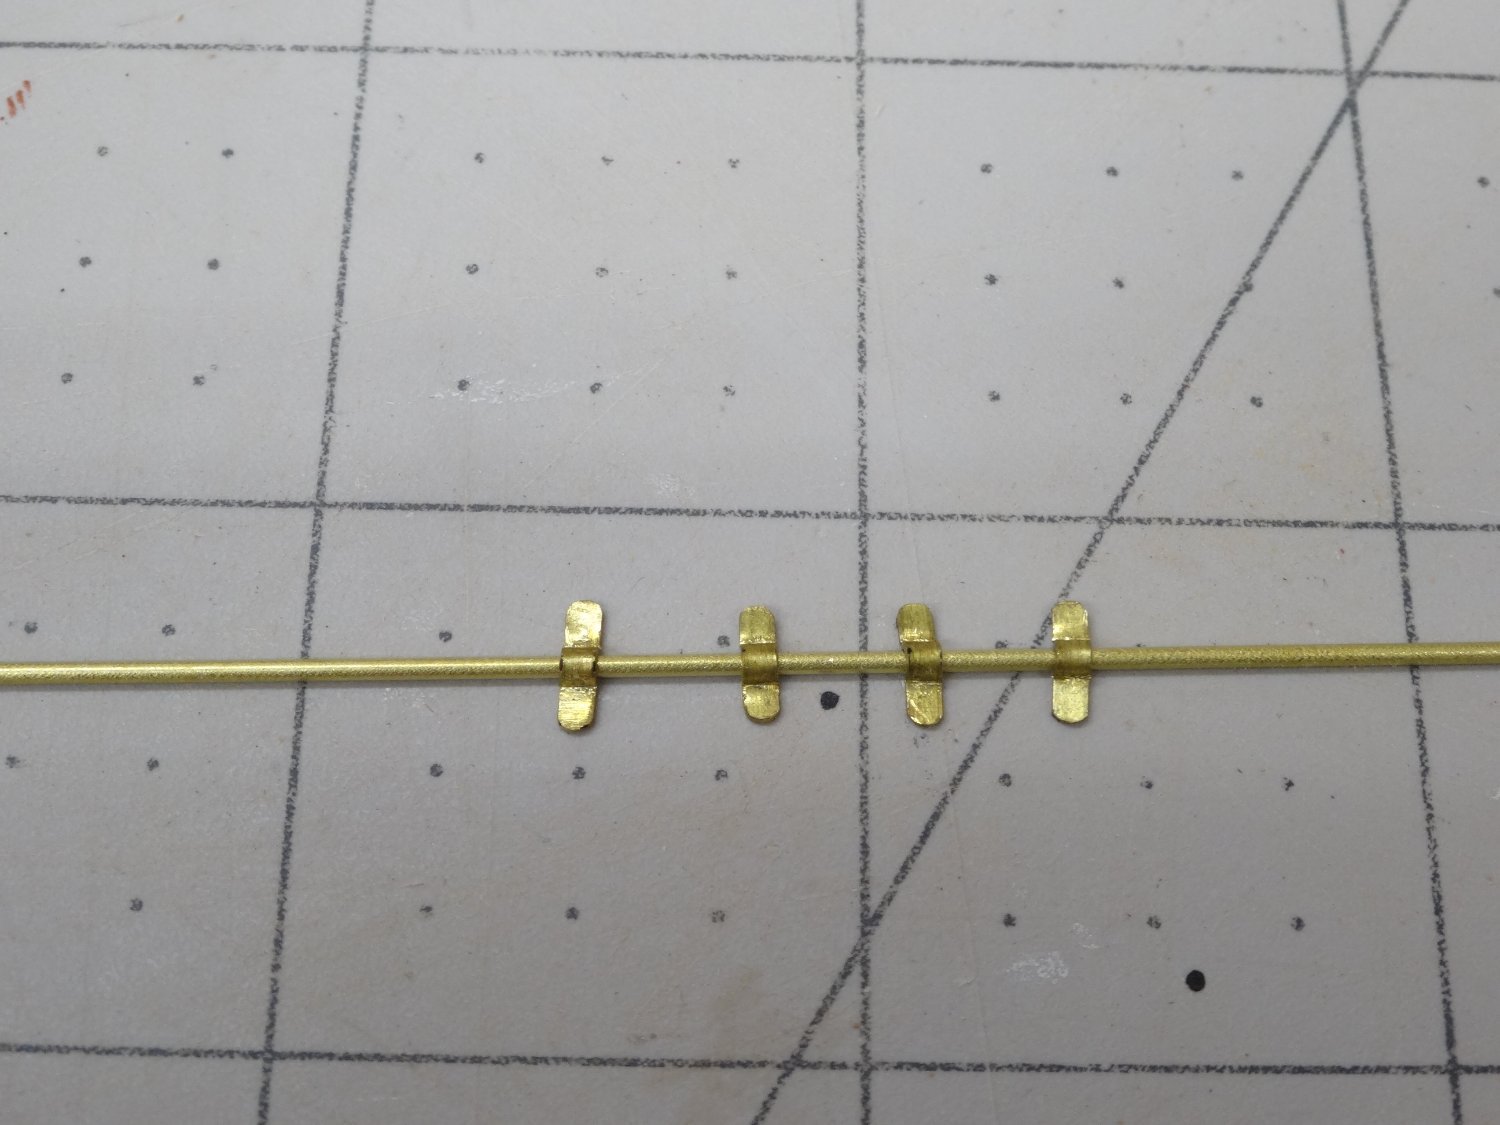
First off I made the rhodings out of brass. I formed them over a piece of brass rod and blackened them.

After that is was just a matter of bending the rod to the correct lengths, fit the forward stanchions and shape the wooden connectors. No super secret to assembling the handles. Just careful measurements, test and tweek as needed. Then reproduce a duplicate for the opposite side. Also the elm tree pumps were finished.
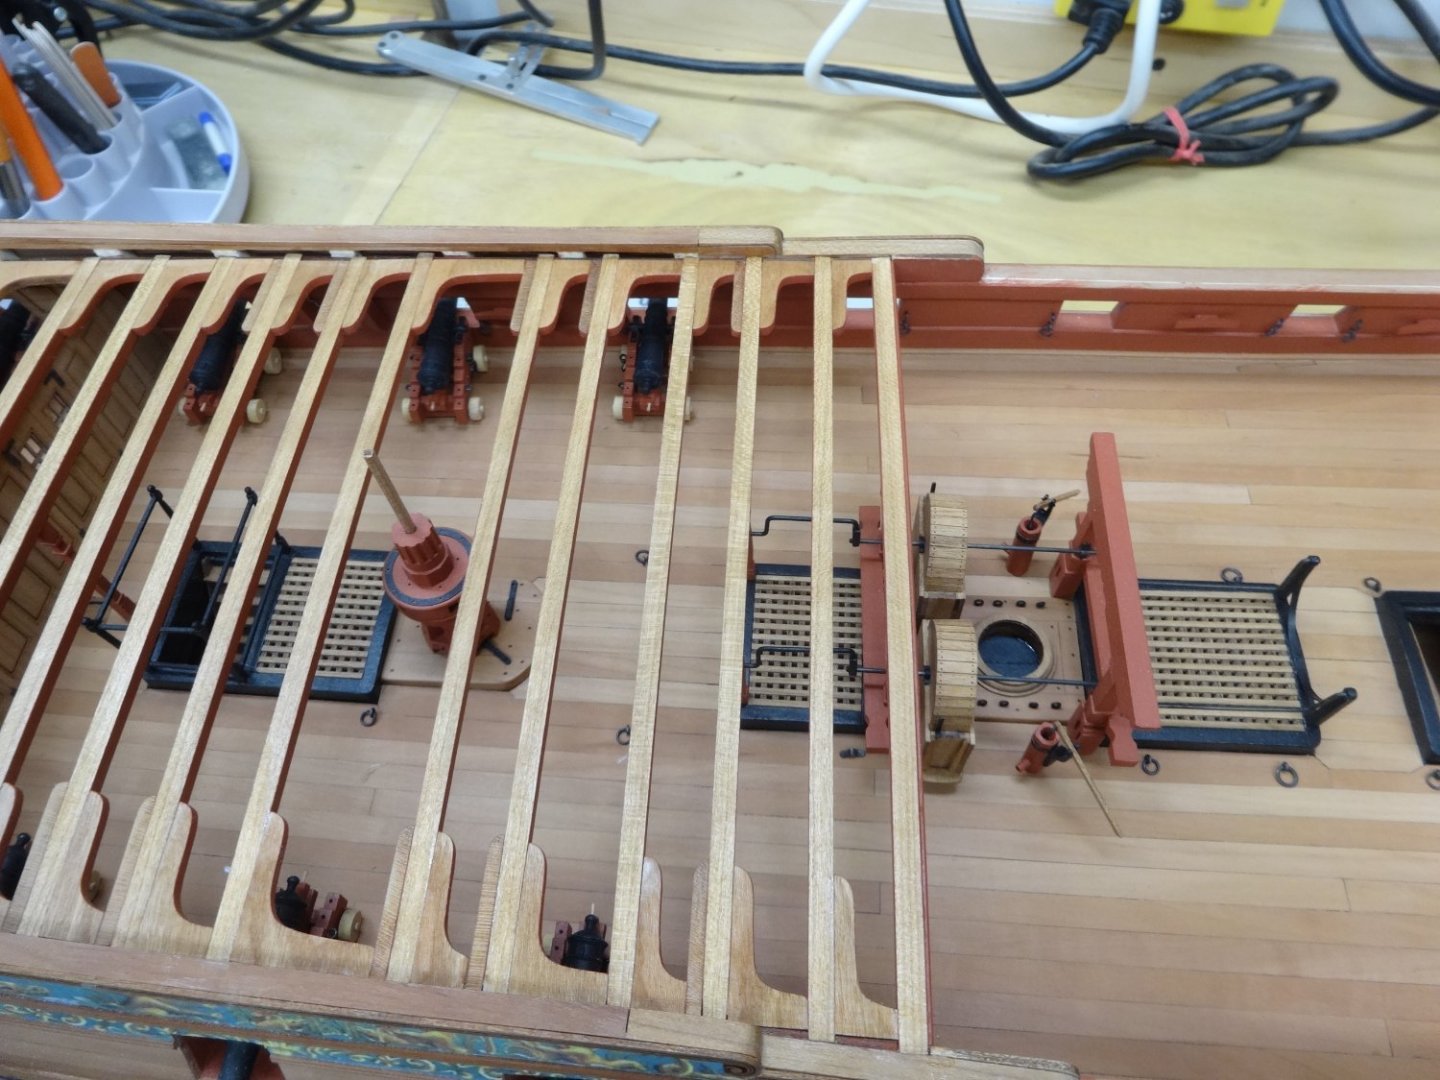
After that the last two deck beams were placed as well as the last of the knees. I really enjoyed these two sections. A lot of fun!

Now that chapters 7 & 8 are finished it's time for a deep cleaning of the workshop! Tools everywhere except where they belong. 😂
- FrankWouts, rafine, scrubbyj427 and 17 others
-
20
-
Wonderful work Bob.
-
Congratulations Ryland. That's a great award for a wonderfully done model!
- Jack12477 and Ryland Craze
-
2
-
-
Thank you JJ, Glenn and Vladimir for the kind words. It's very much appreciated. Also thanks for all the likes!
- FrankWouts and scrubbyj427
-
2
-
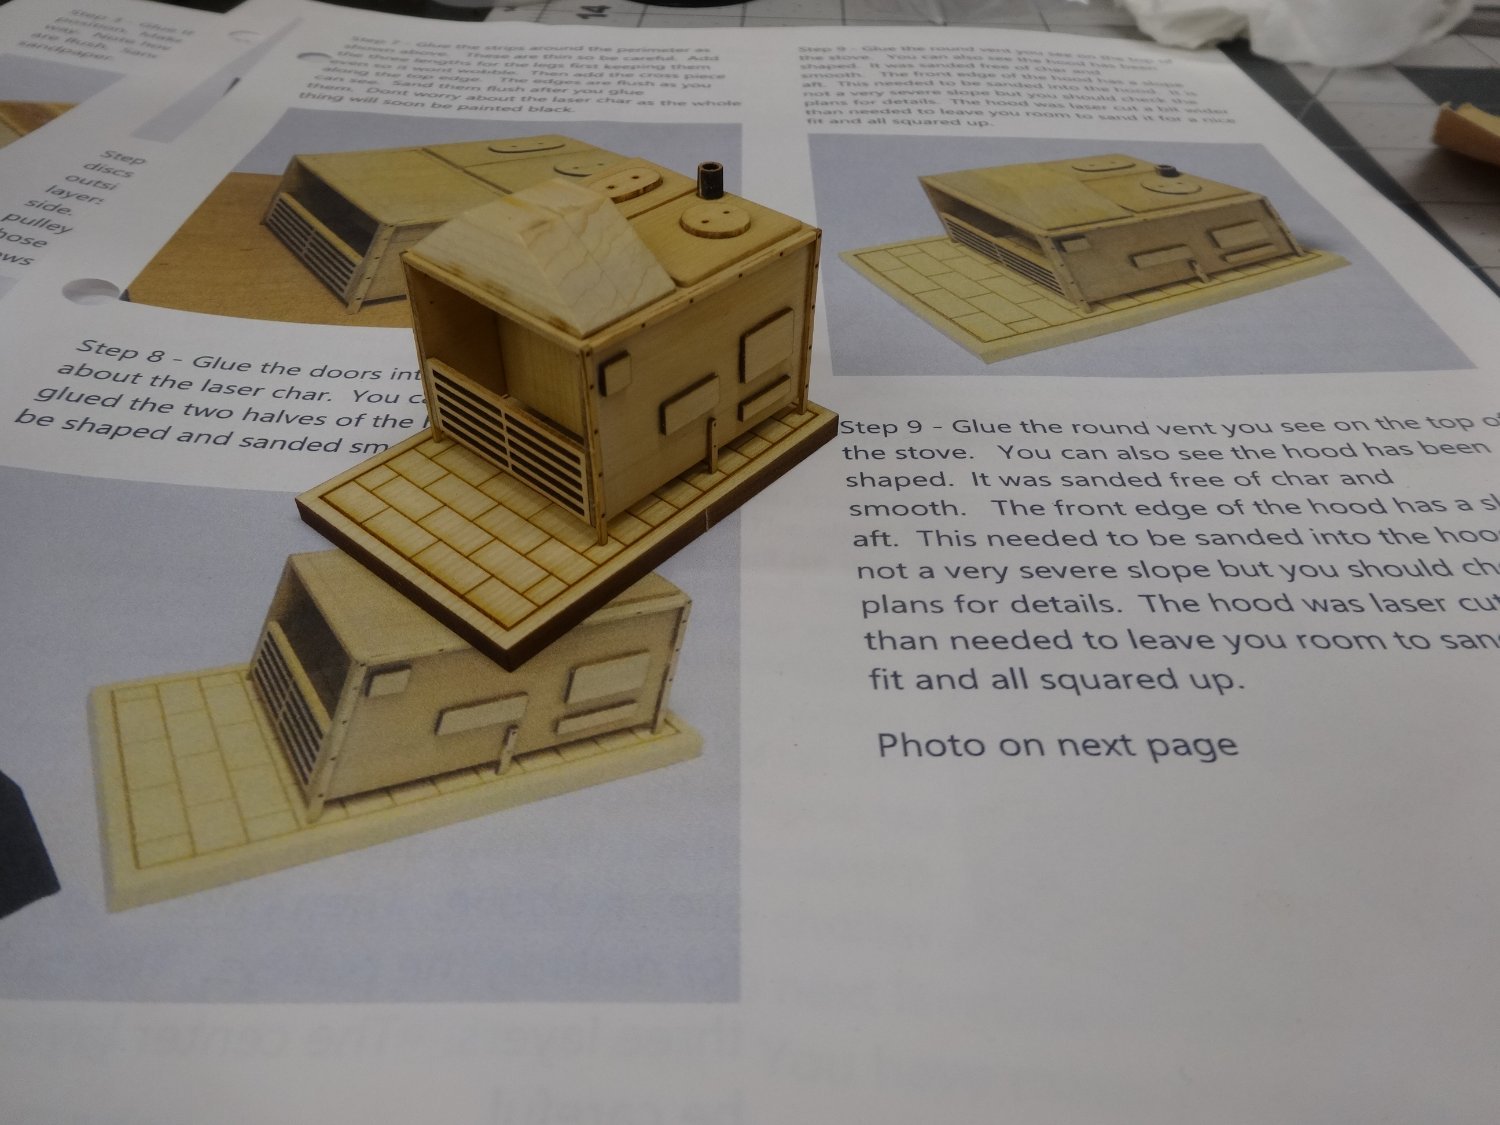
While waiting for the brass rod to arrive I continued working on the forecastle. The bowsprit step and manger boards were placed at the fourth beam. Then the rest of the forward beams, knees and lodging knees were added. Also the cat tails were added.
Then the forward bits and mast partner were added and additional beams and knees.


Lastly, I added the stove, riding bits, bulkhead panel and the remaining beams and knees.
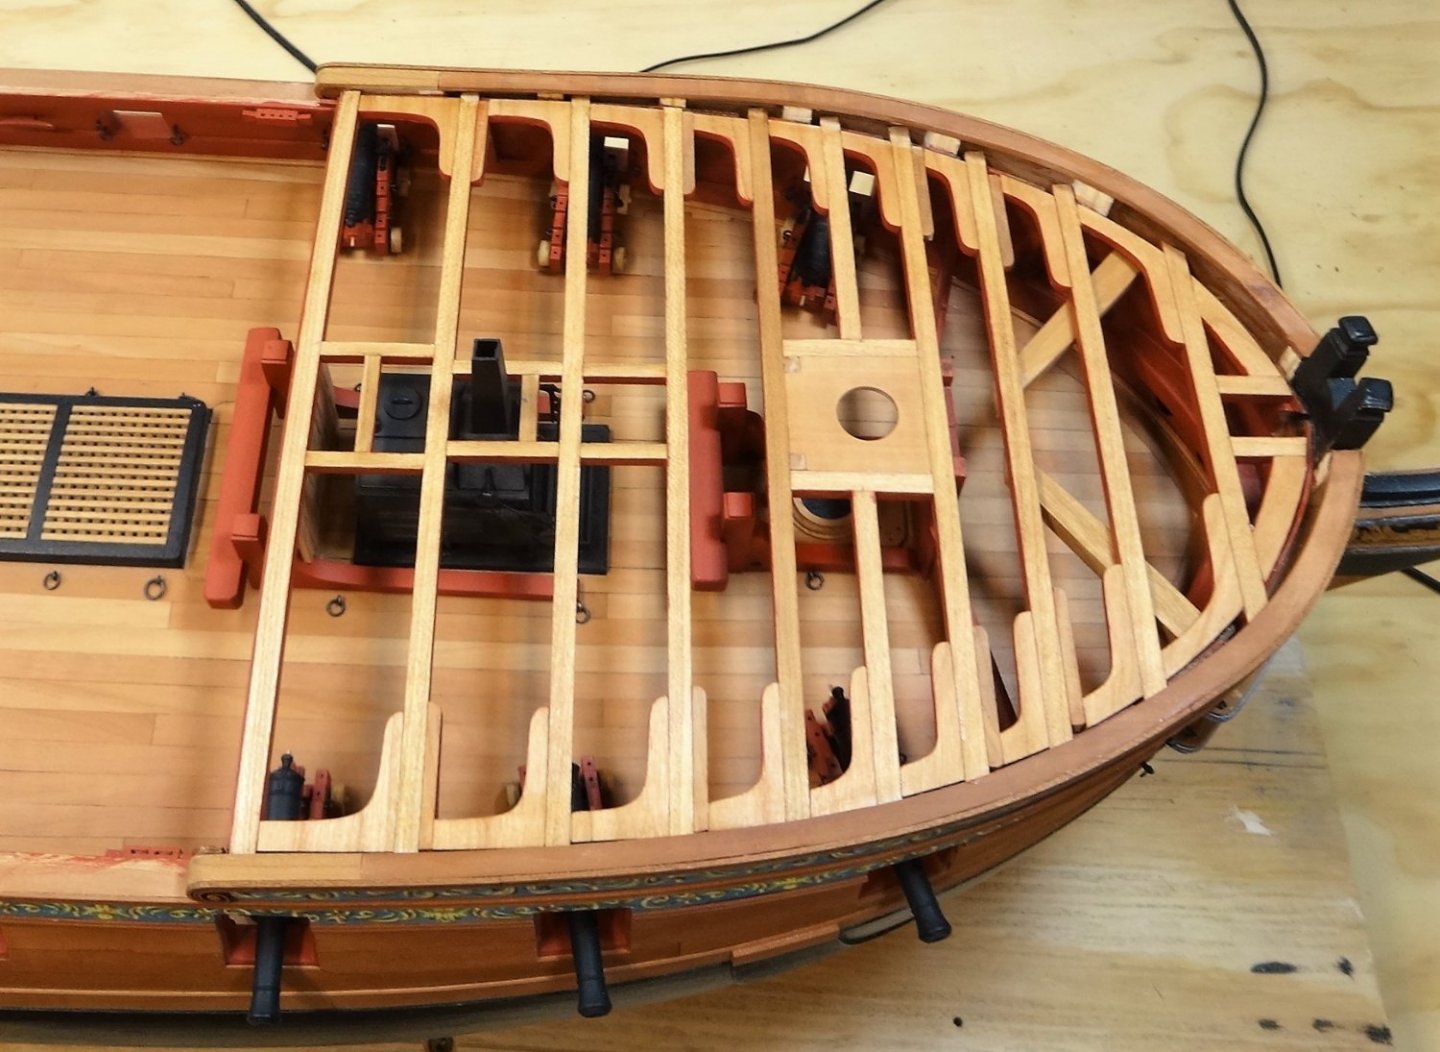
Now that I received the 1mm brass rod I'll go back aft to finish the chain pumps and the rest of chapter 7.
-
That is some great work!
-
Glenn, I just got caught up on your work and I echo everyone else's comments. It's more of your usual excellent workmanship.
- BobG, FrankWouts, AlleyCat and 1 other
-
4
-
-
19 hours ago, Chuck said:
its a shame it will be mostly hidden.
It was so much fun I'm thinking of getting a second one to display with the Winnie.
Thank you all for the kind words and likes. It is a marvelous little project and even if you're not building the Winnie you would enjoy it.
- VTHokiEE, FrankWouts, Saburo and 1 other
-
4
-
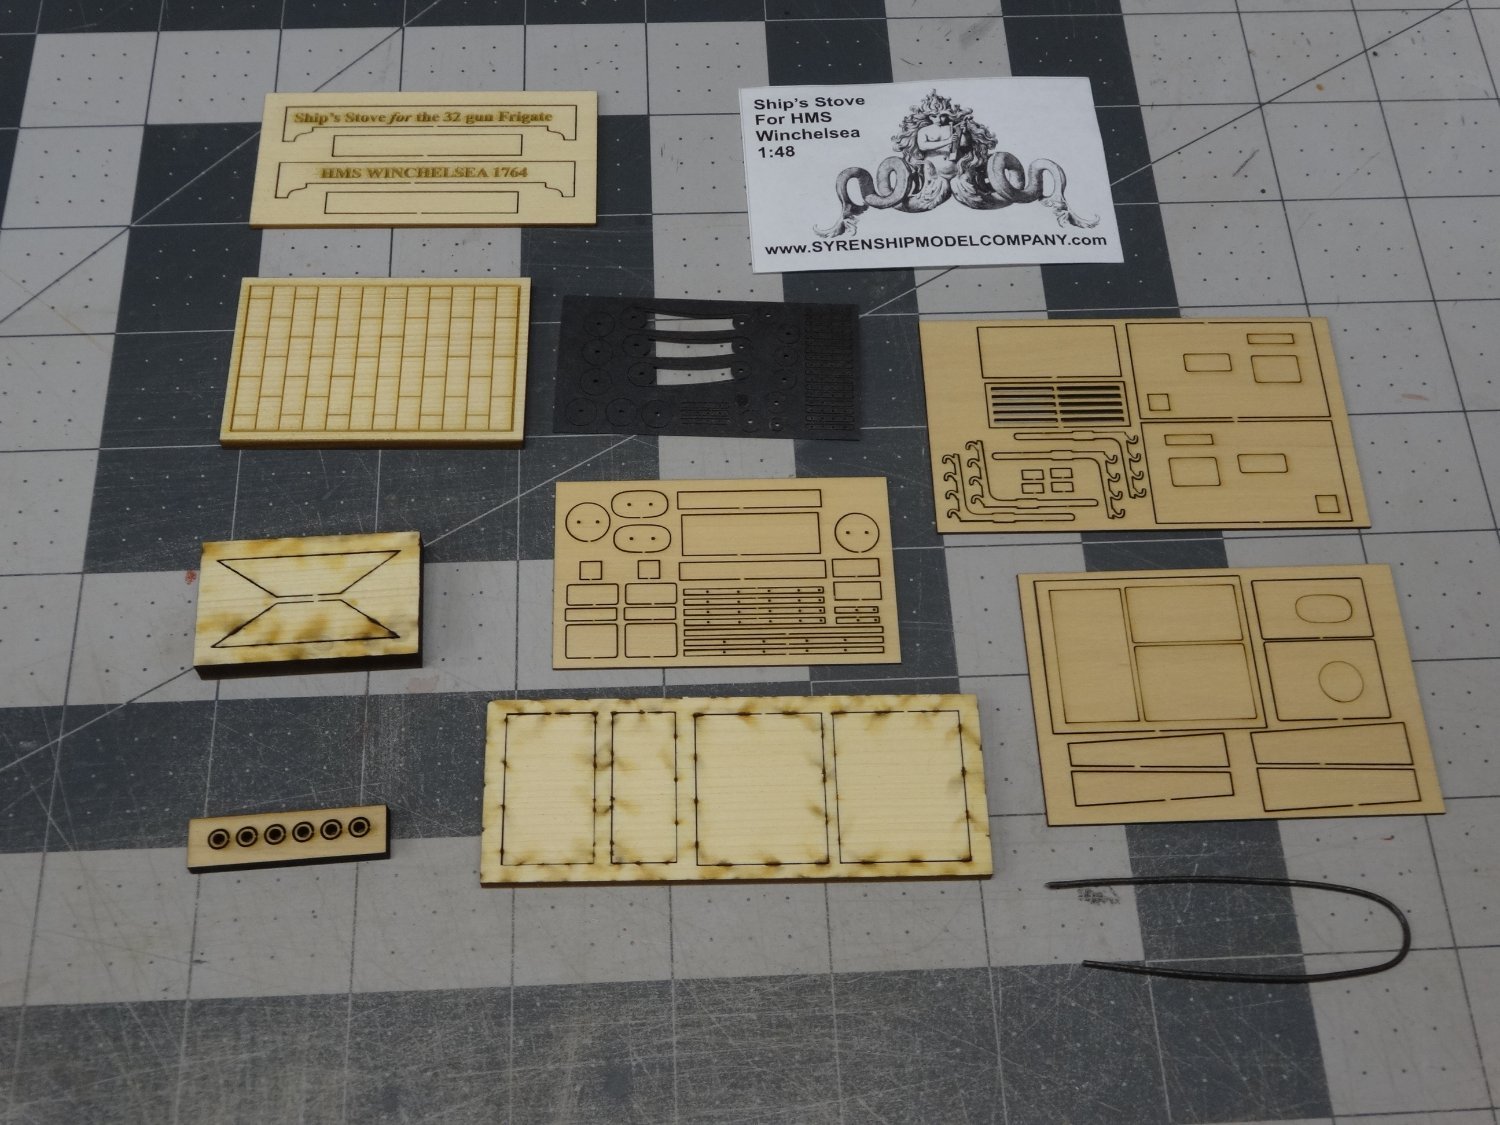
Hi All,
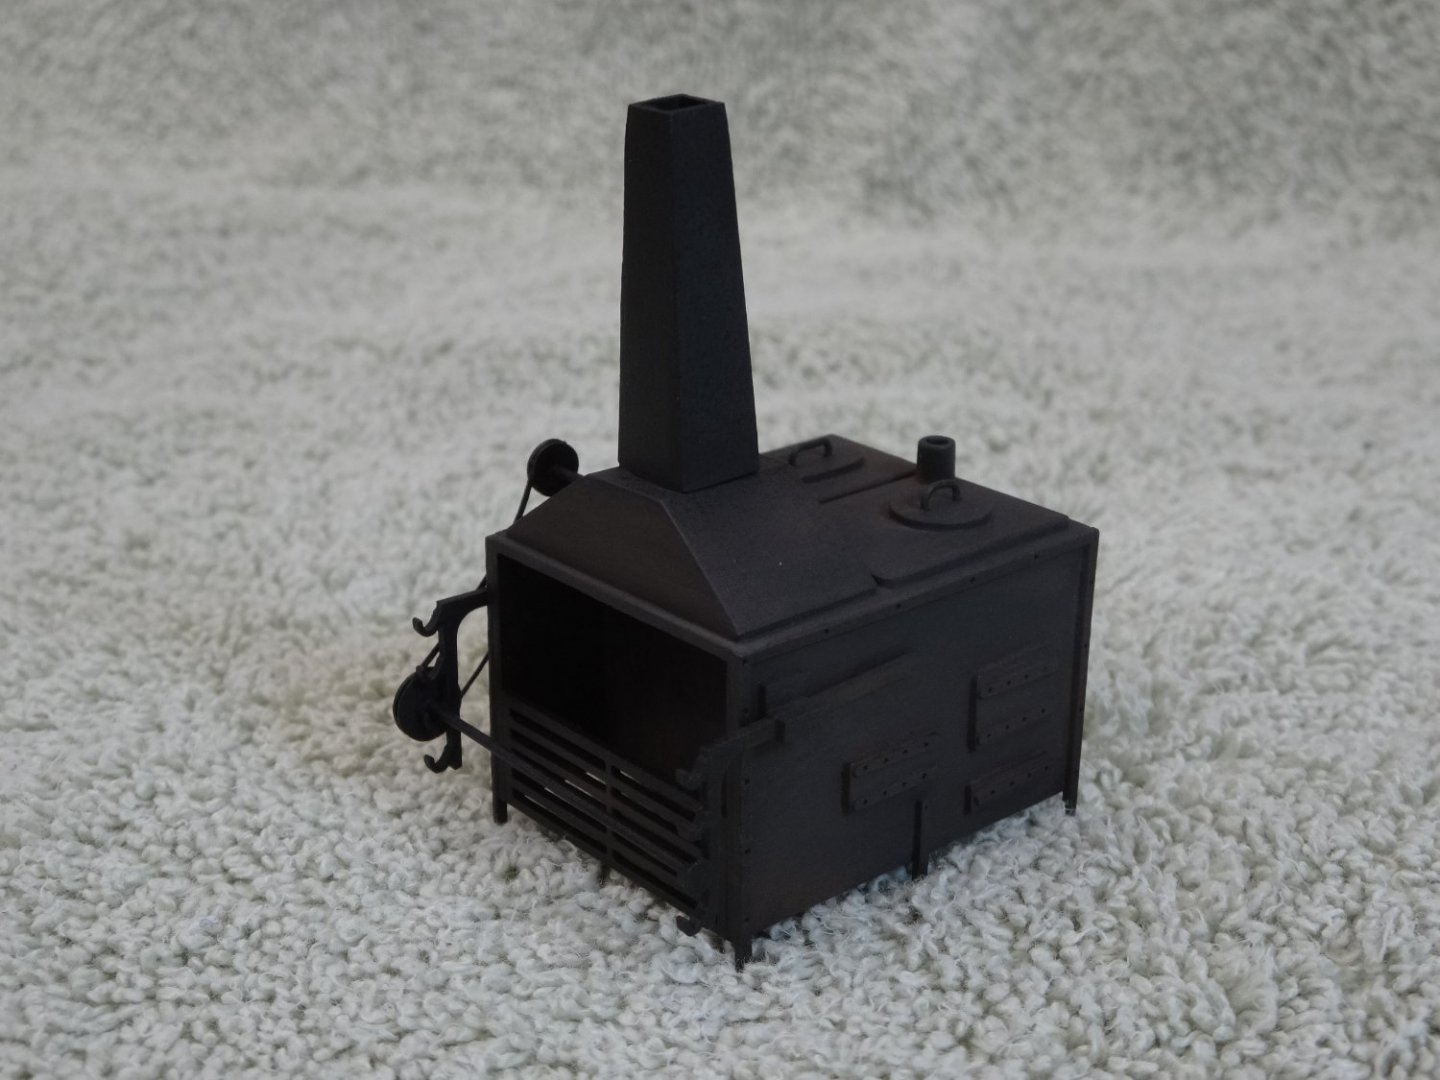
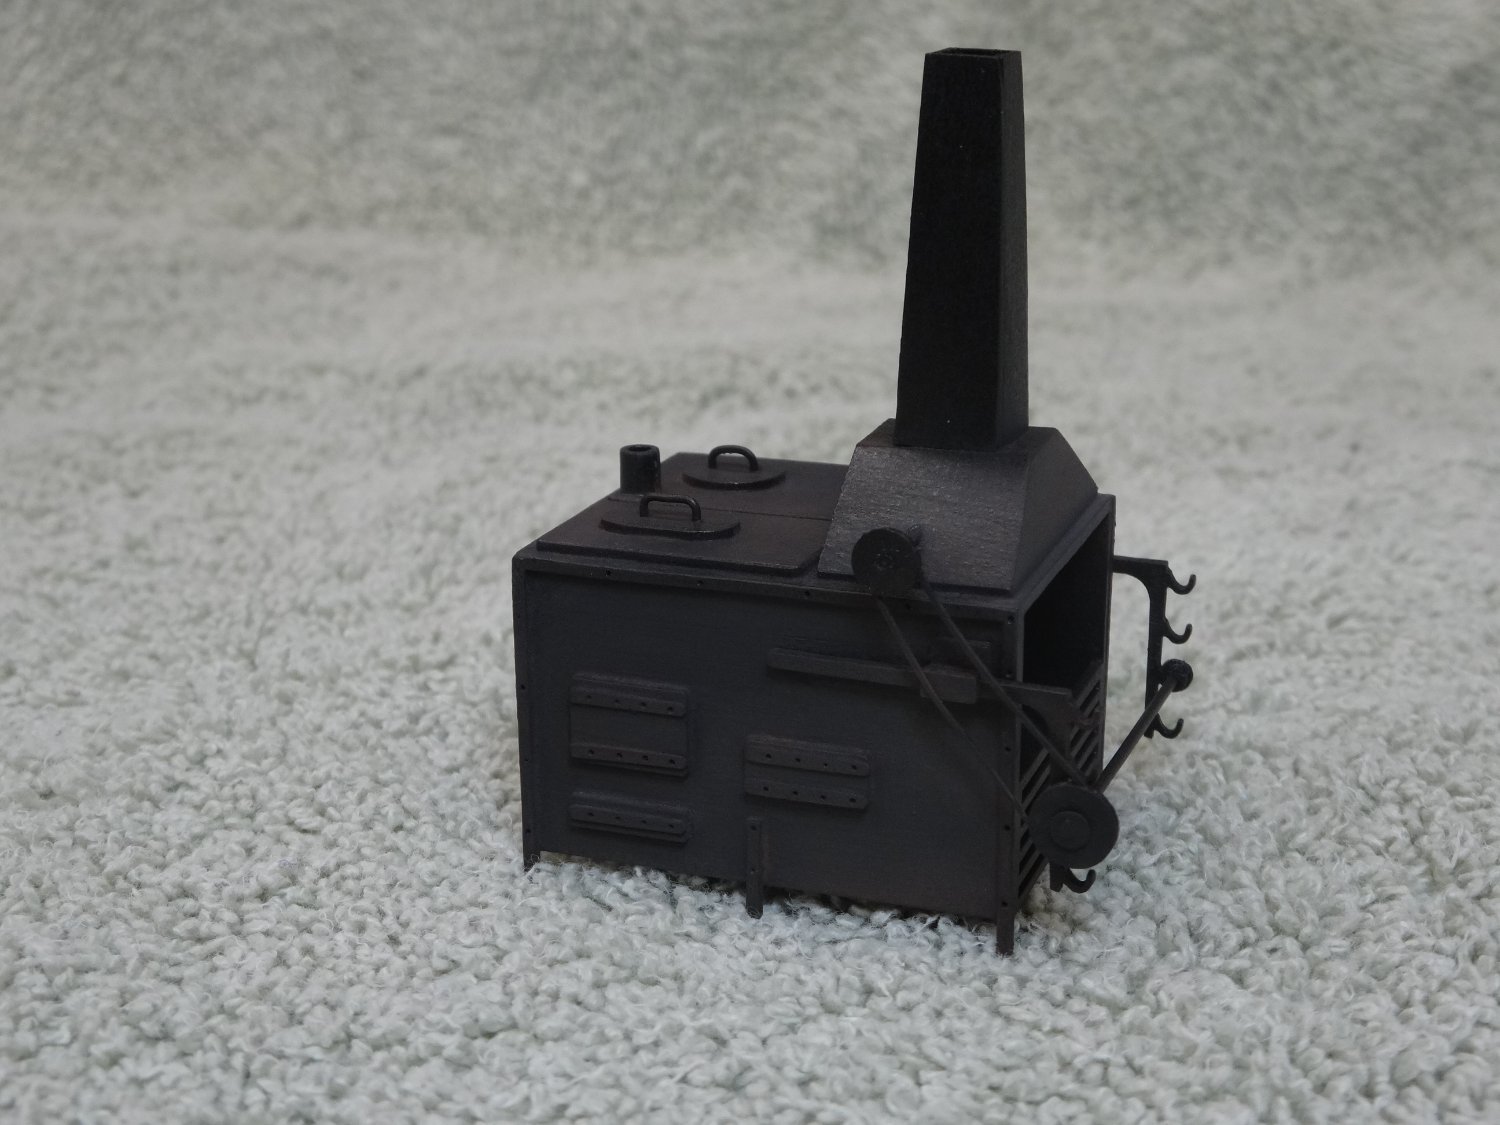
Well, I've diverted a bit. I thought I had the 1mm rod needed to do the chain pump crank handles. Come to find out I have .89mm or 1.19mm rod. Either too small or too large. Of course, the local hobby store did not have any in stock either. So, I ordered some online and have to wait for them to arrive. I could have started on chapter 8 but the stove was calling me so I listened.

The parts all fit perfectly.

Here is the stove all assembled and painted. No weathering powders have applied yet.
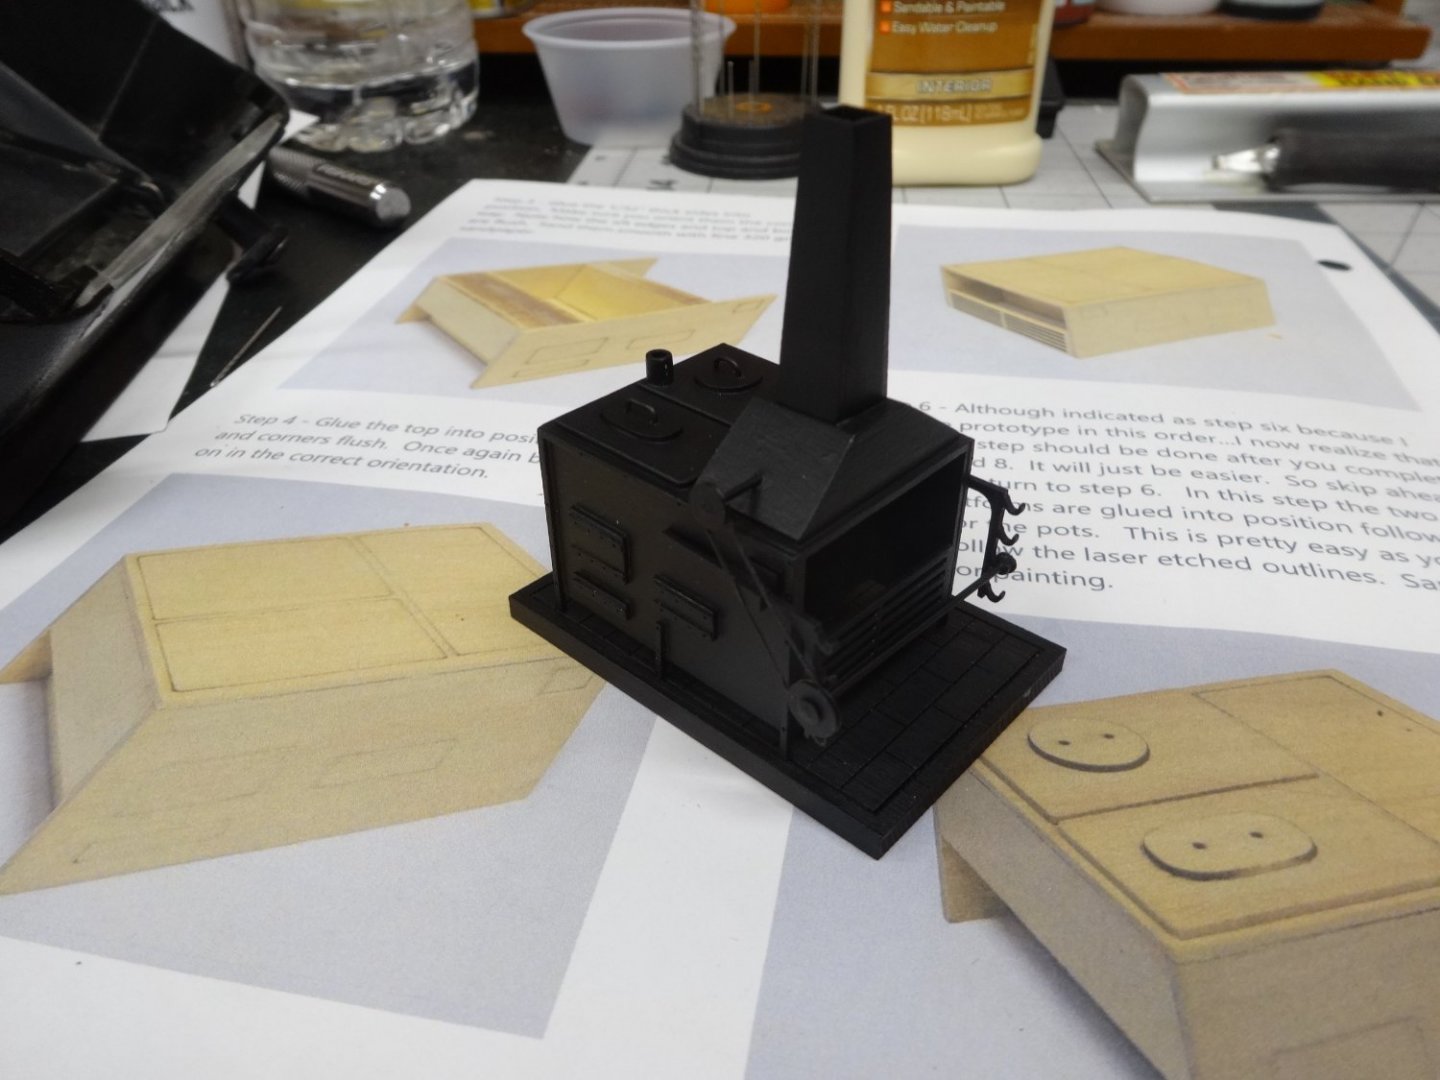
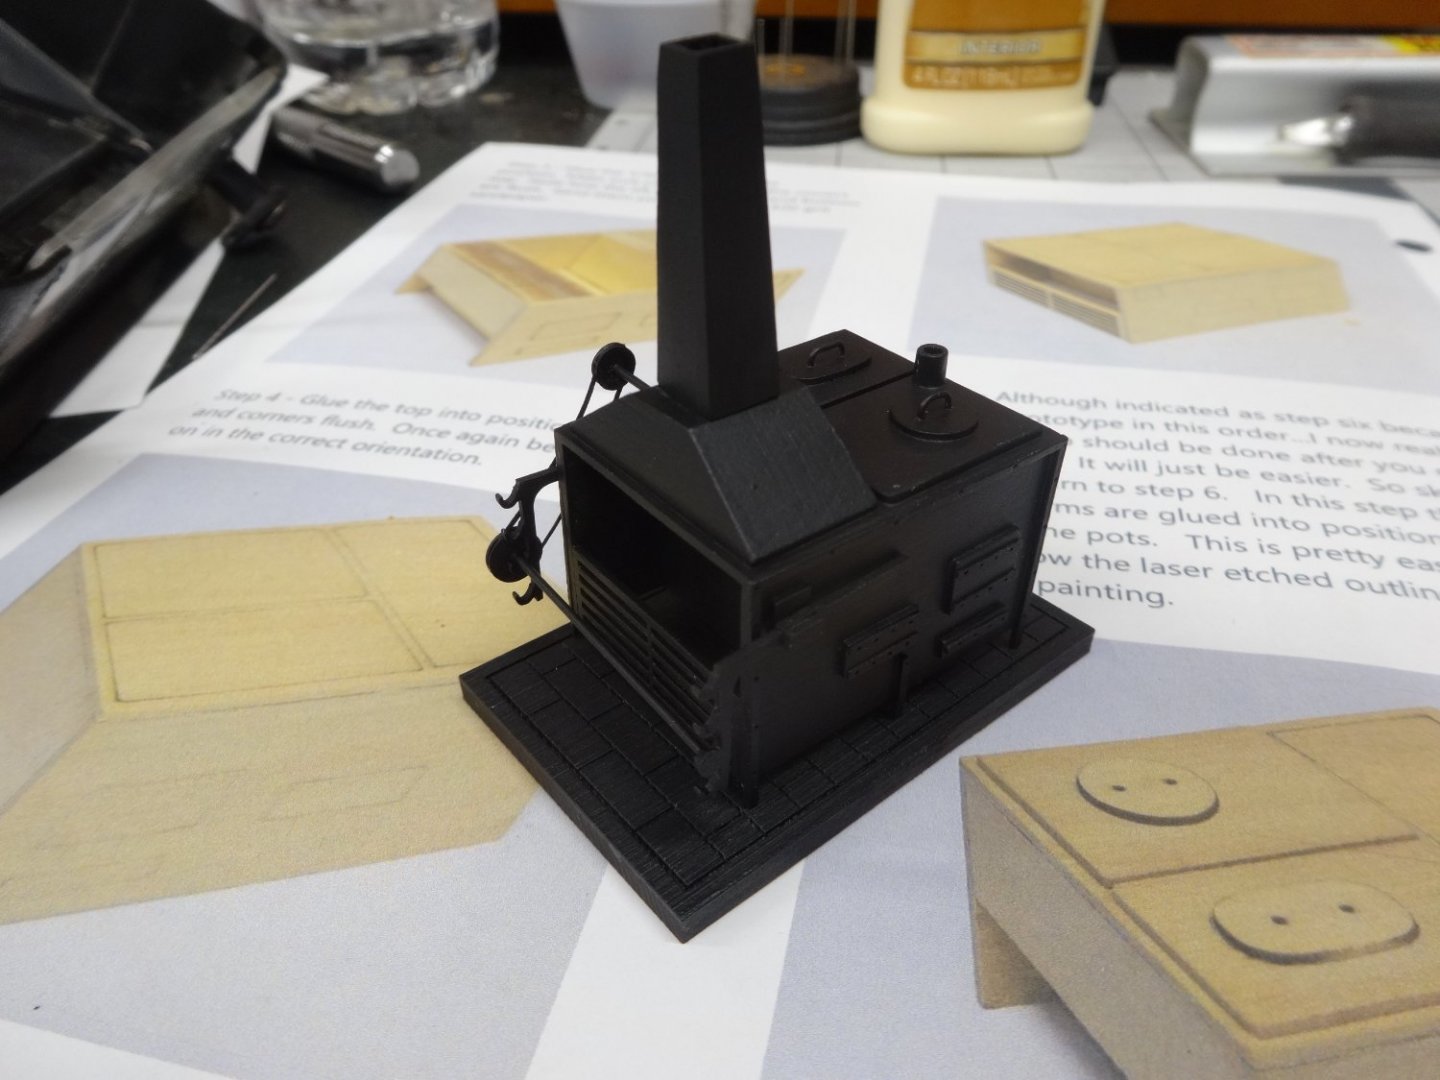
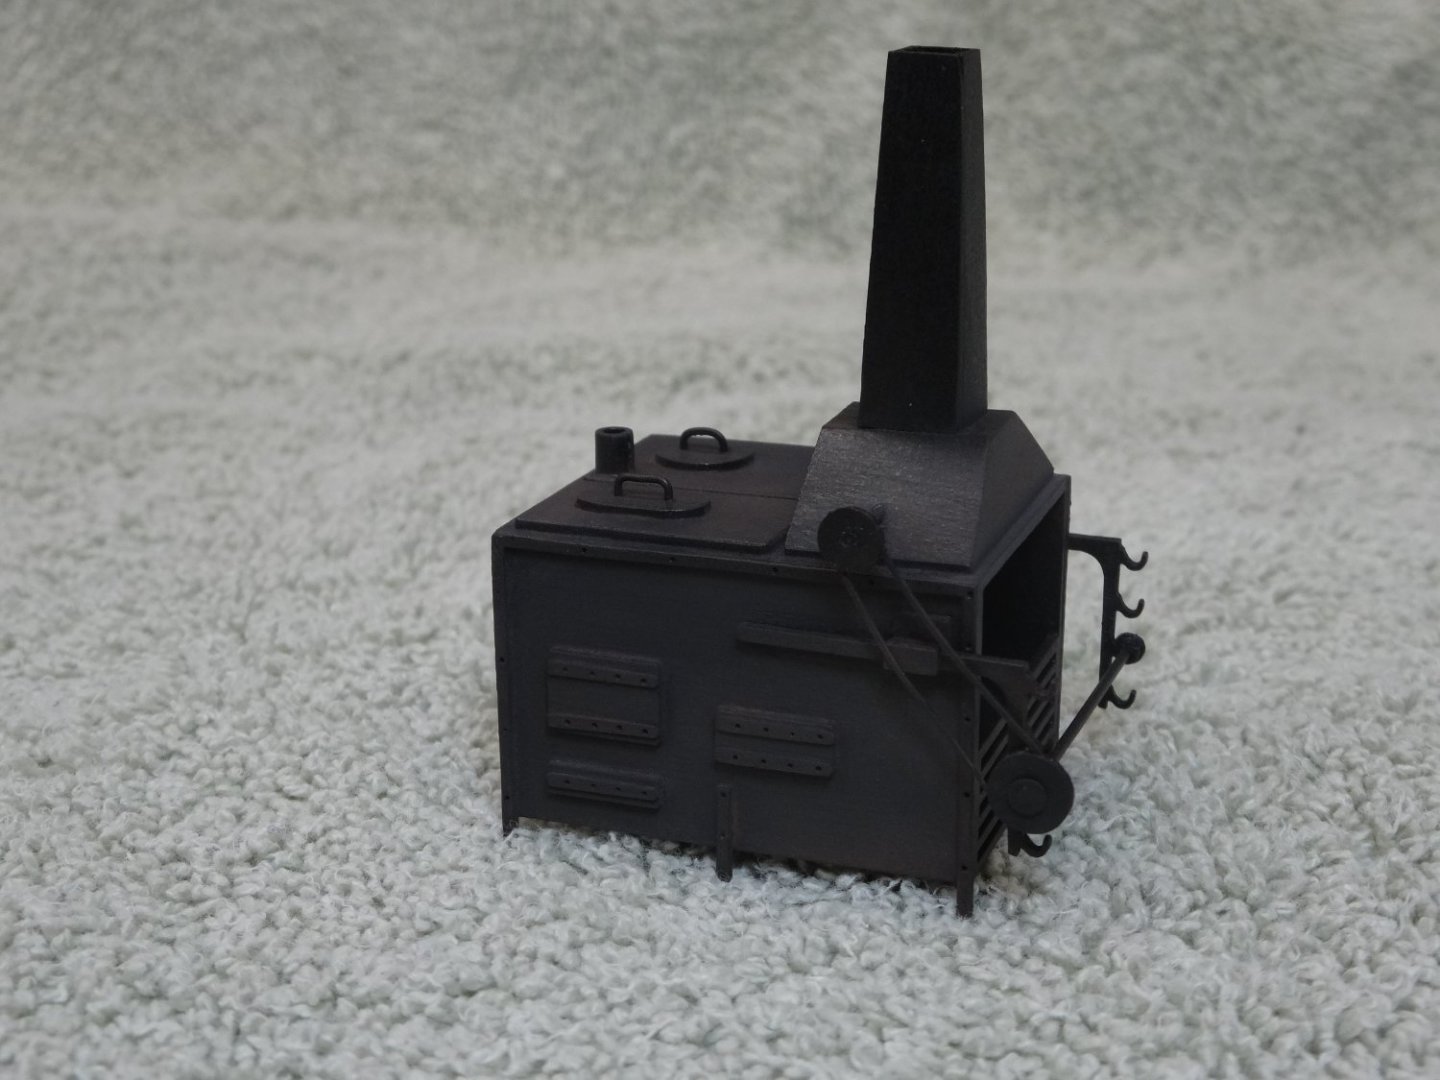
And here is the finished stove. I first applied a grimy black powder, sprayed it with a matt spray. I then applied some rusty brown powder. It was a little strong for my taste, so I went over it with a light coat of grimy black to tone it down just a bit. It was then sprayed with dull coat.
Until the brass rod arrives I'll start on chapter 8.
- Blue Ensign, gjdale, Jorge Diaz O and 20 others
-
22
-
 1
1
-
I also agree with everyone that is some fine planking!
-
Thanks Matt. This is the fun stuff now.
6 hours ago, Chuck said:That is really coming together. I hope to see it again in person at the CT show in April.
Thanks Chuck. I really hope I can make it again this year!
Also, thanks everyone for stopping by and all the likes!
-
-
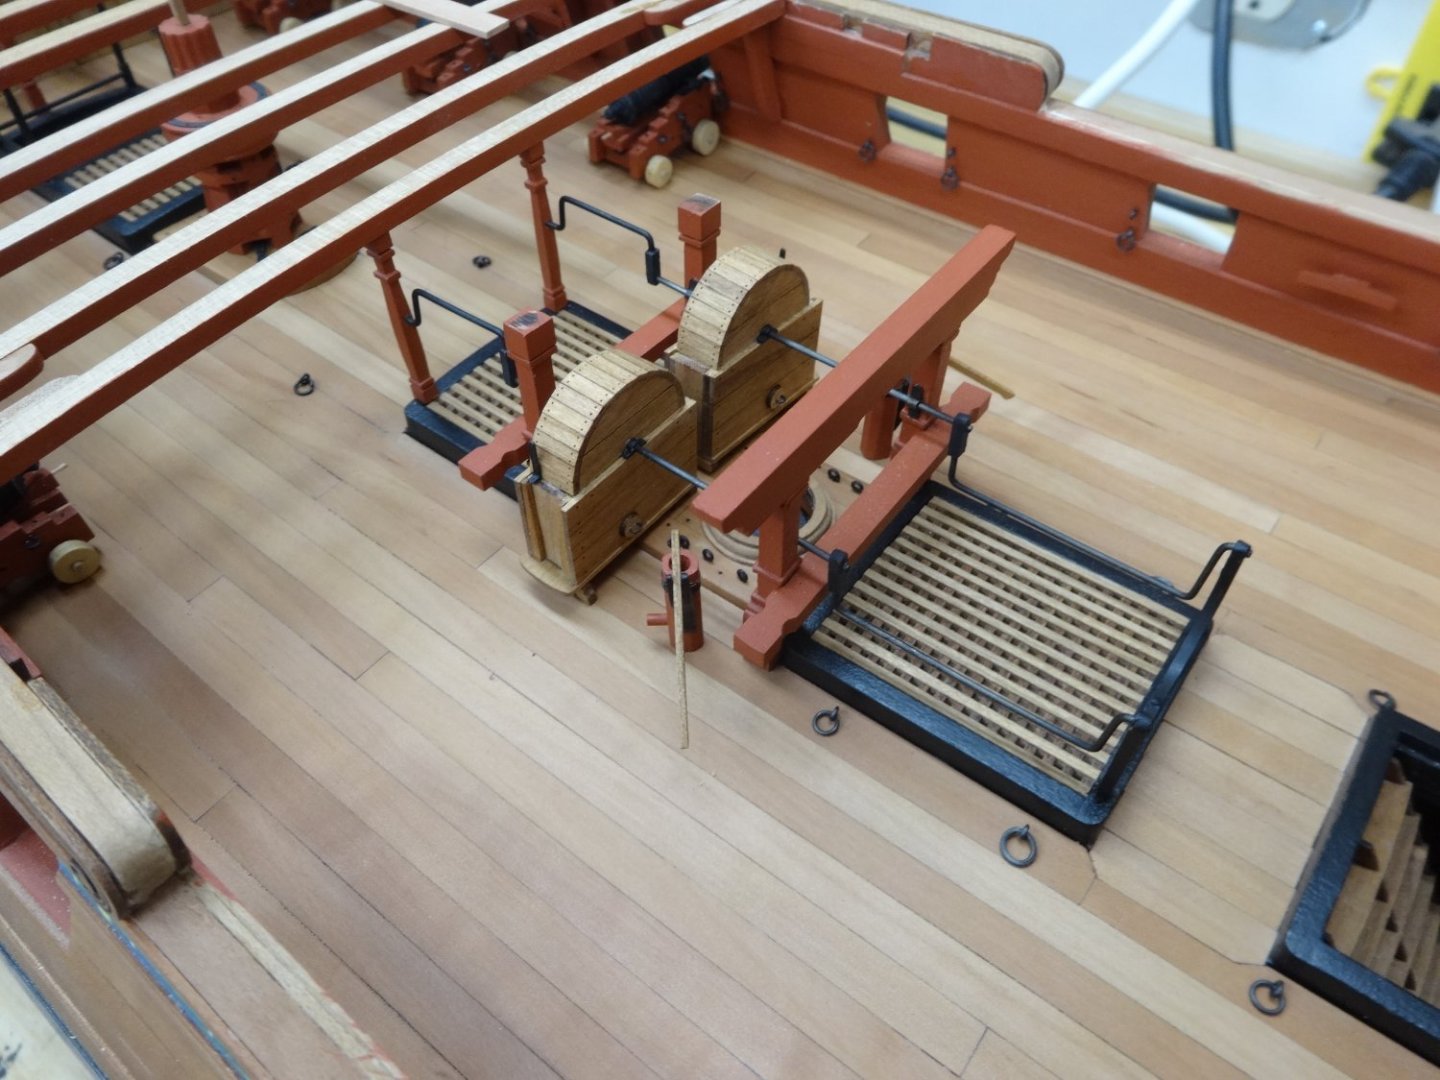
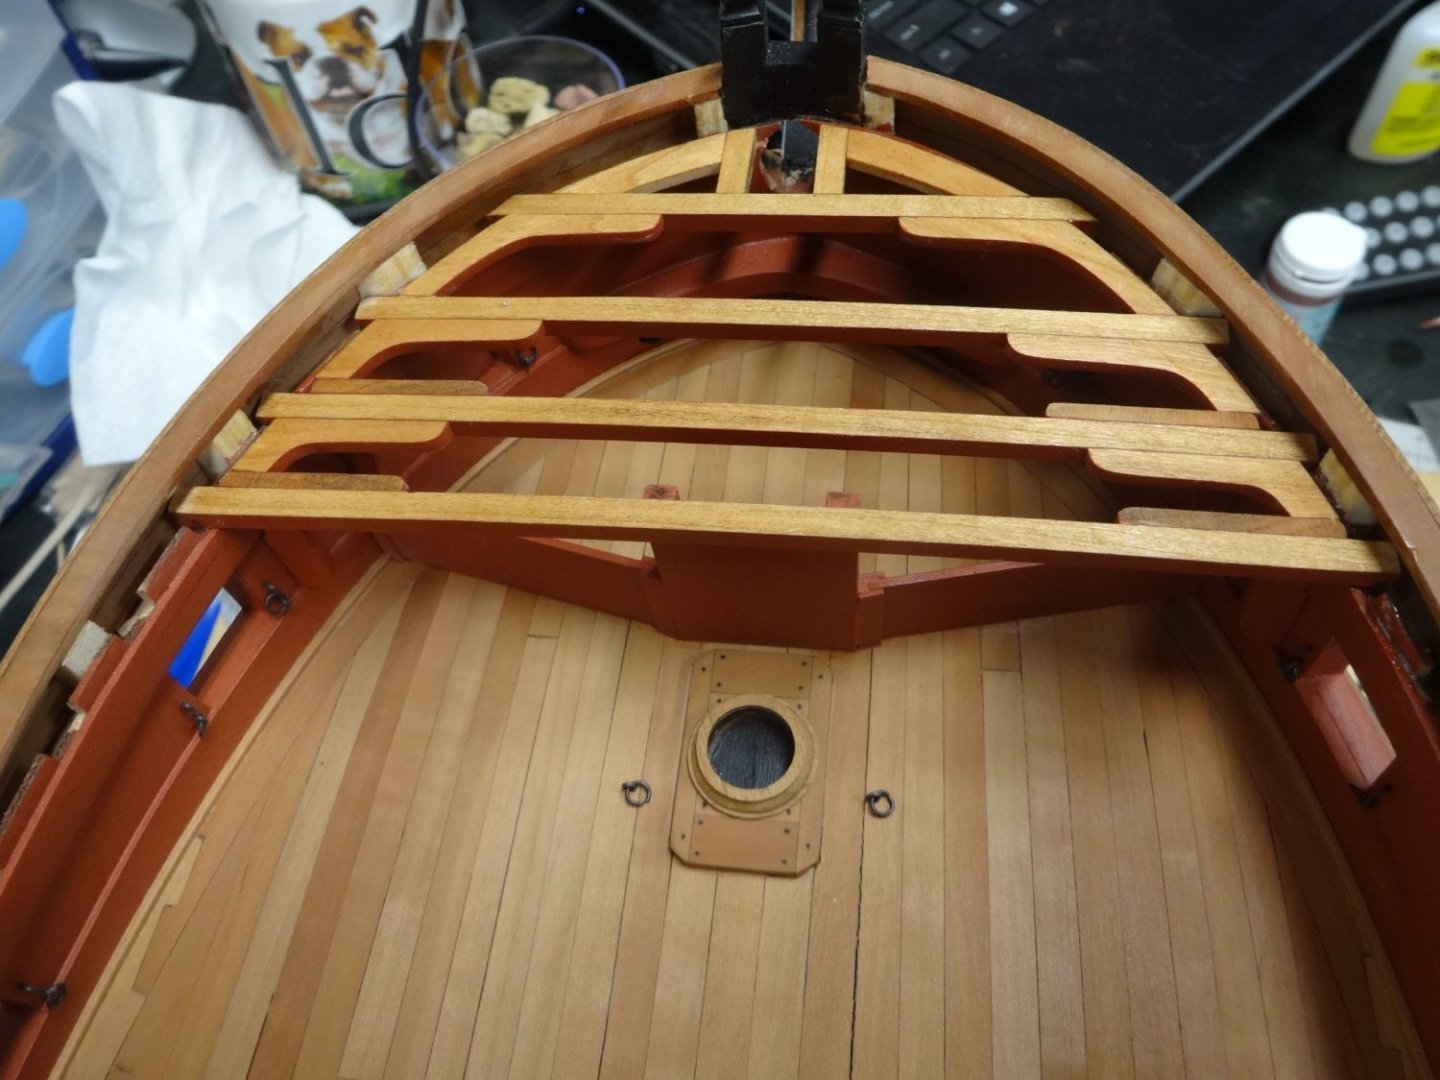
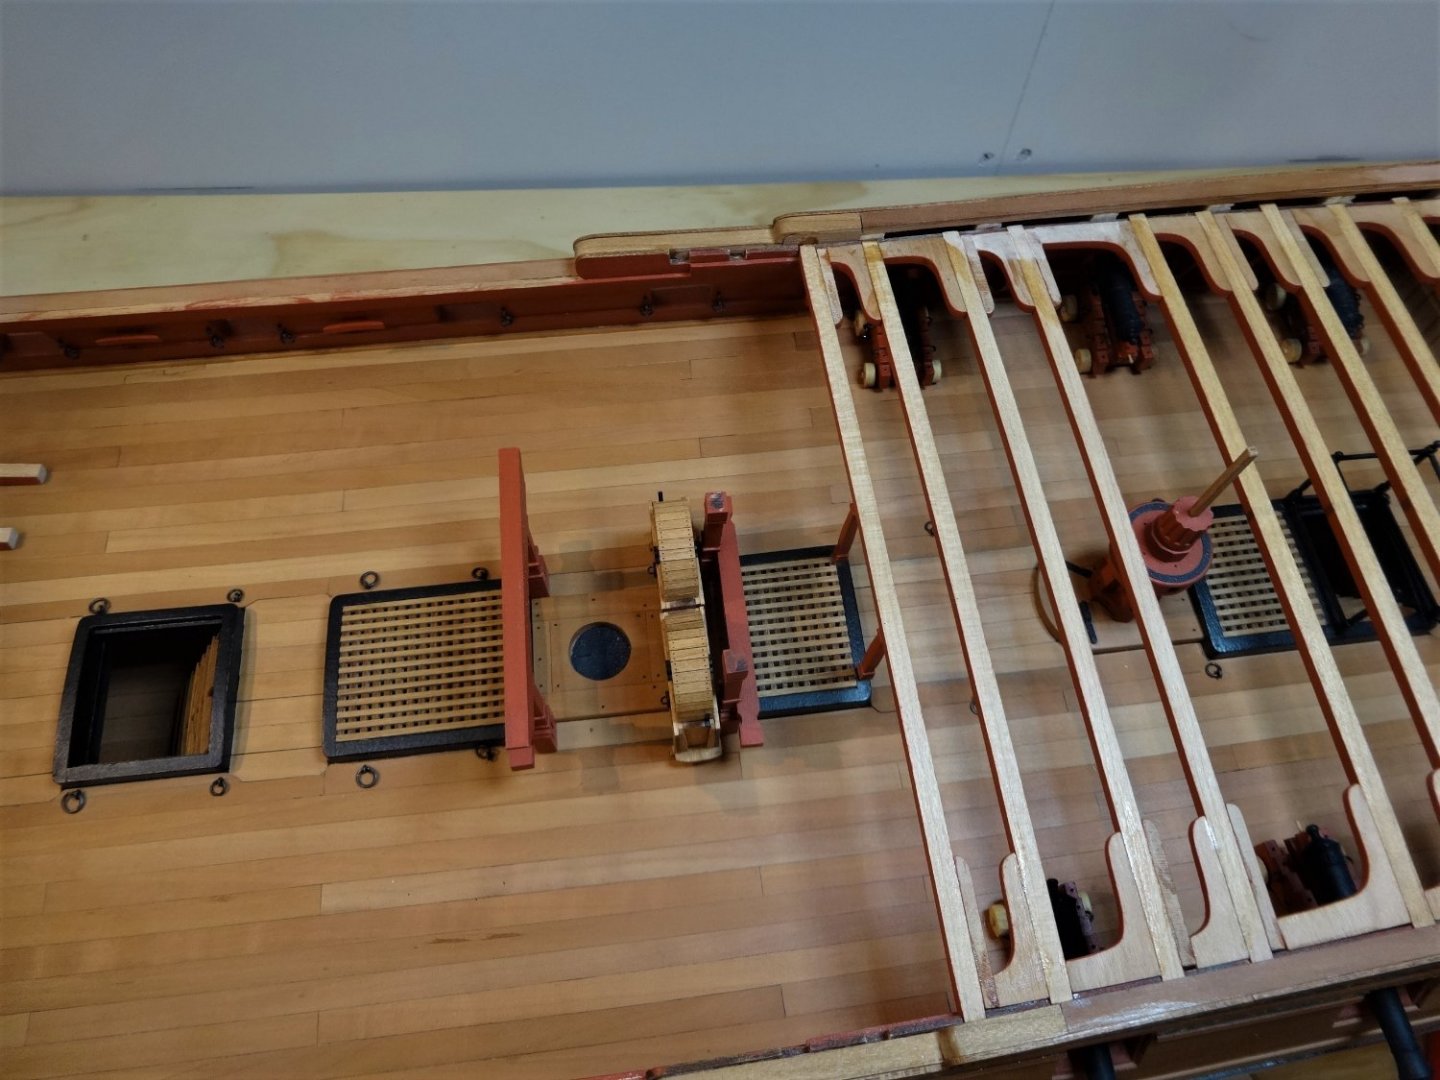
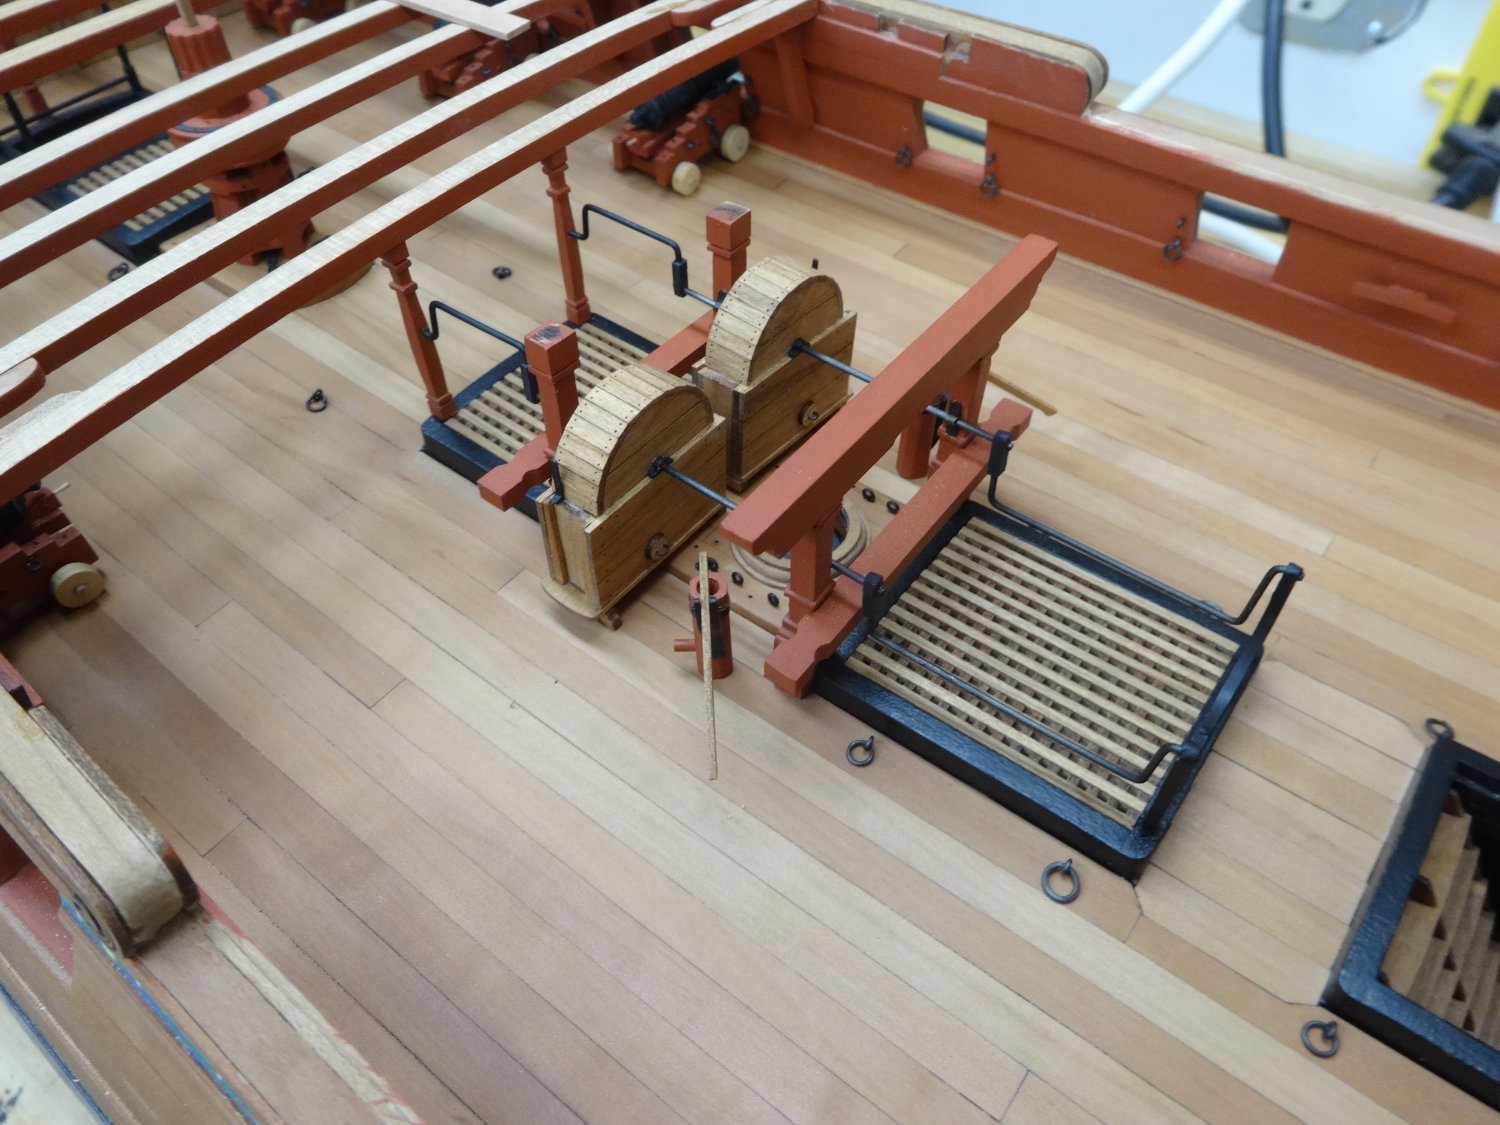
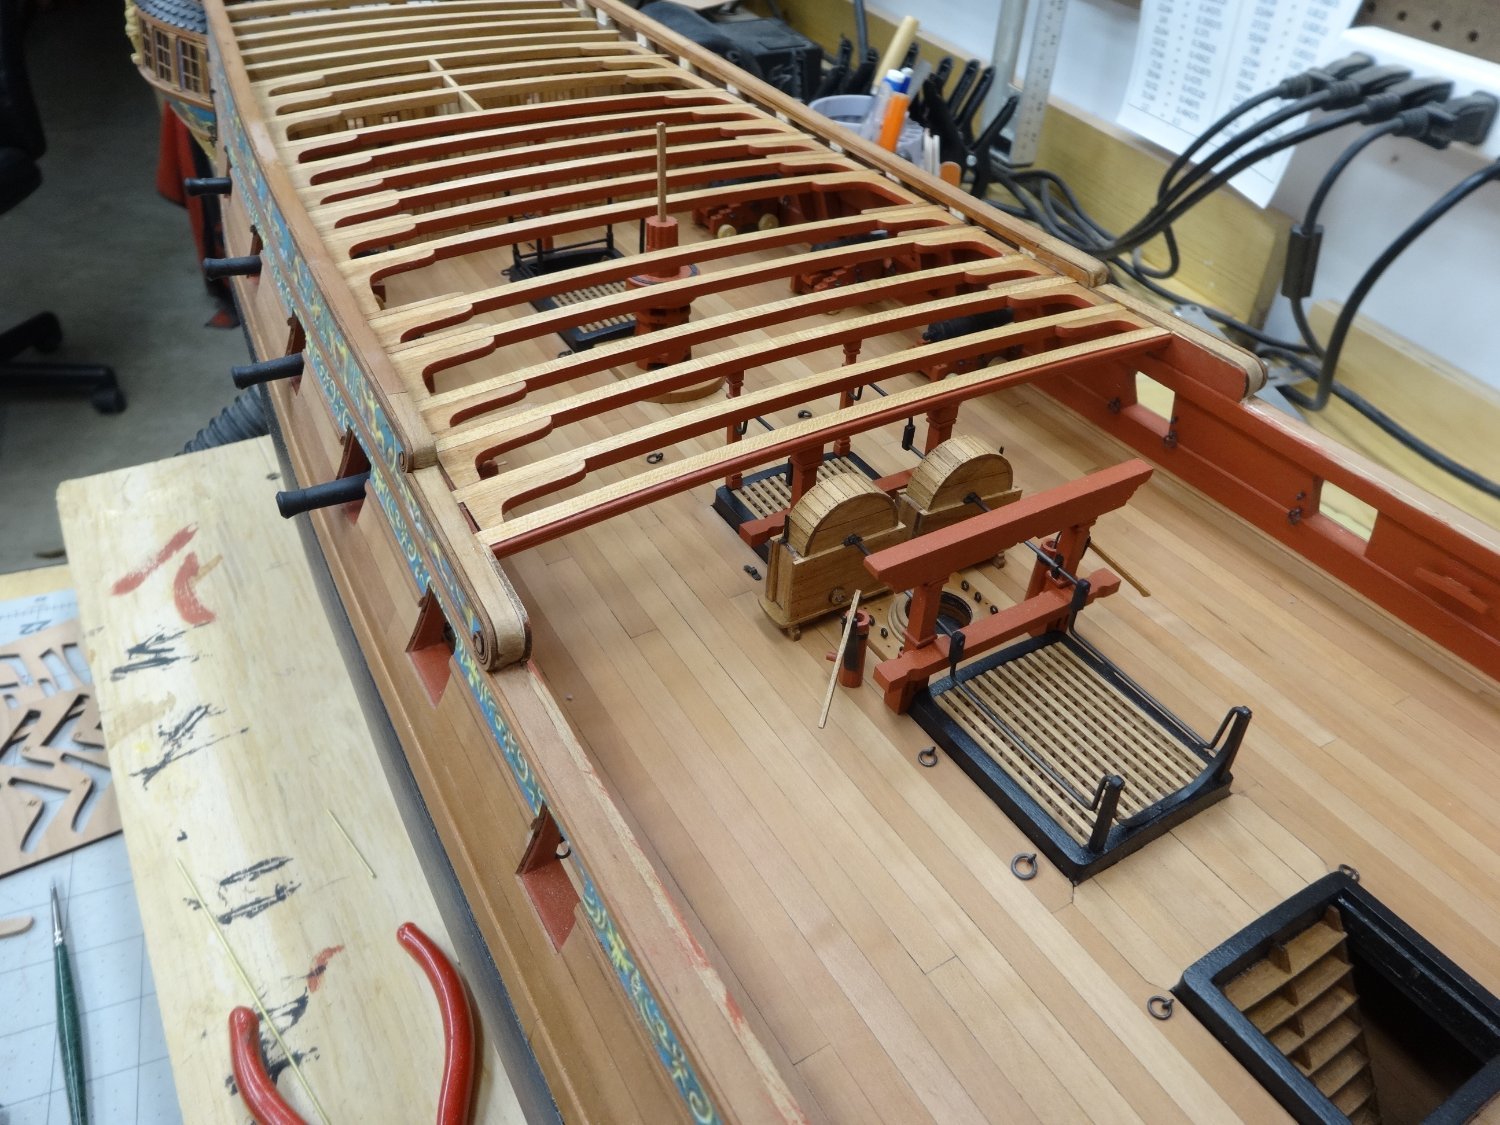
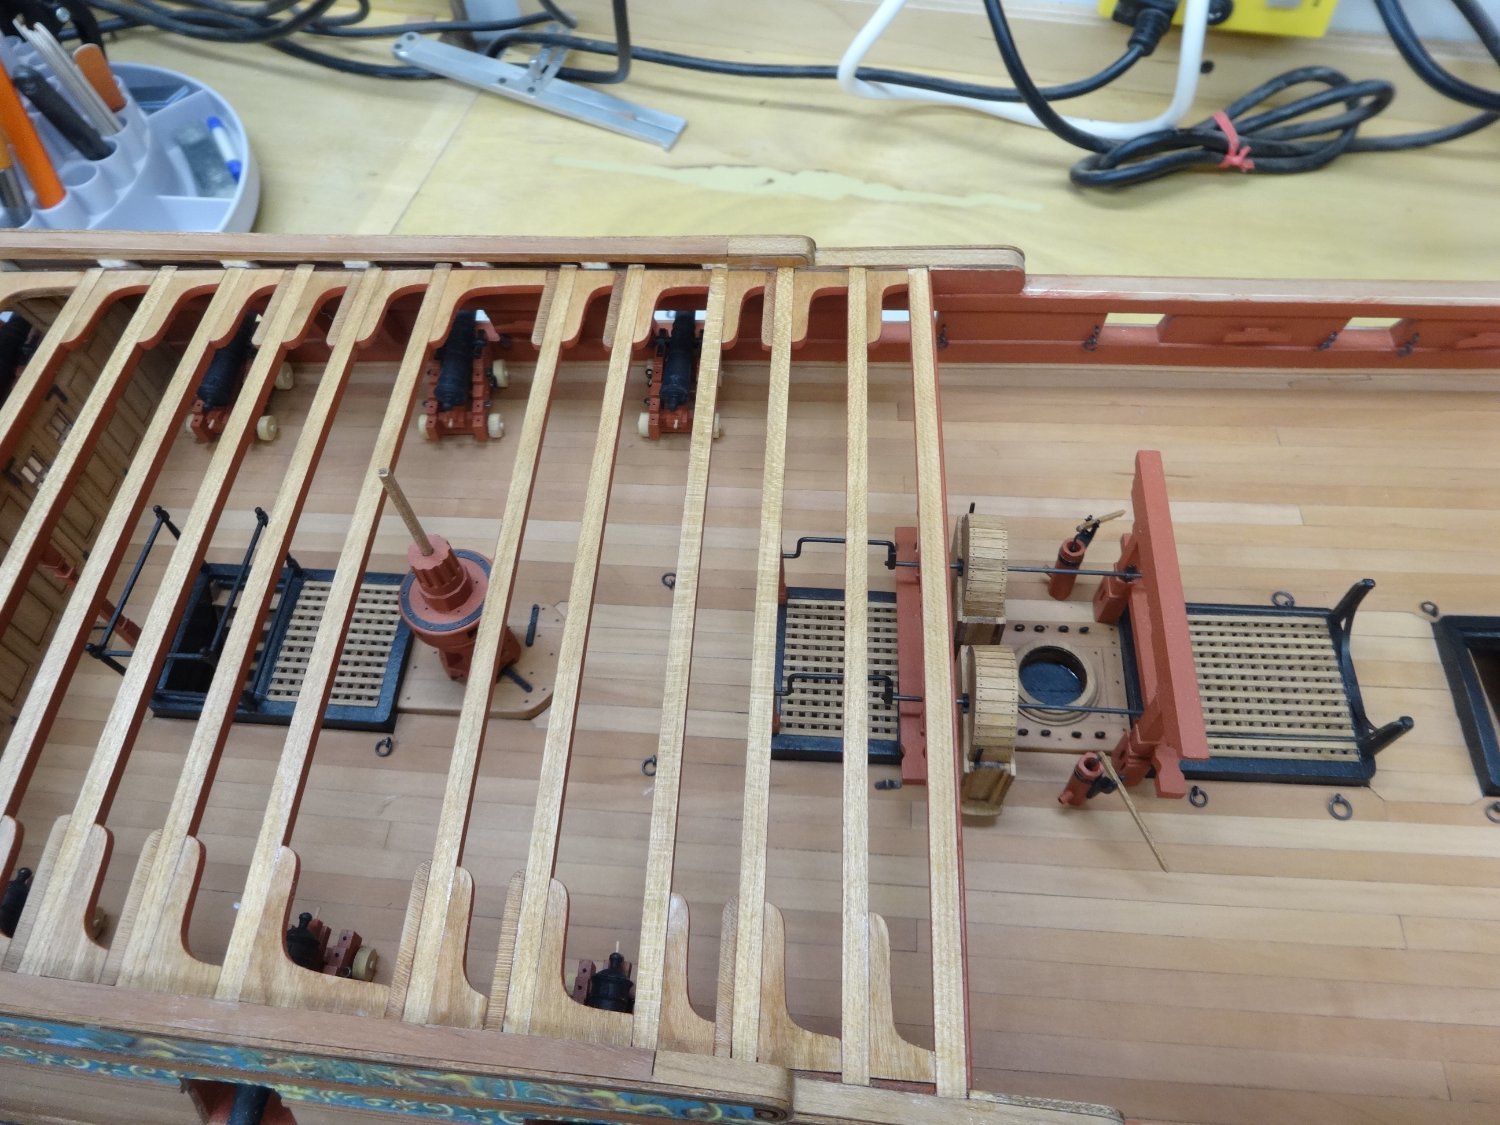
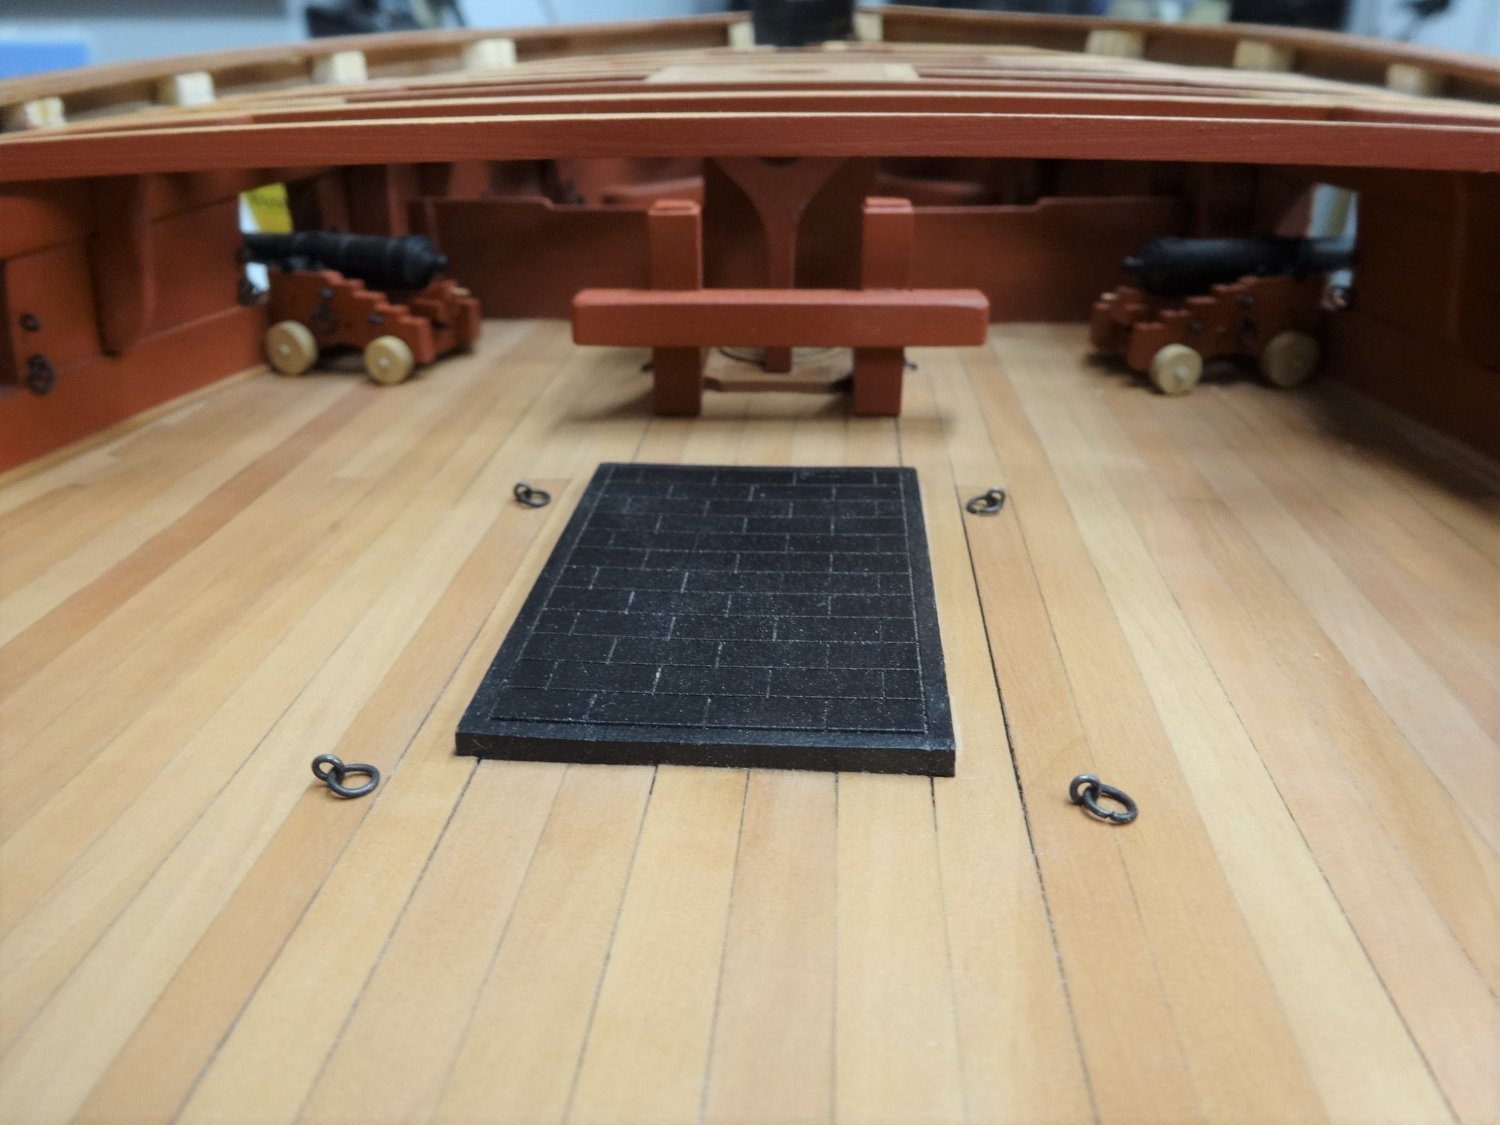
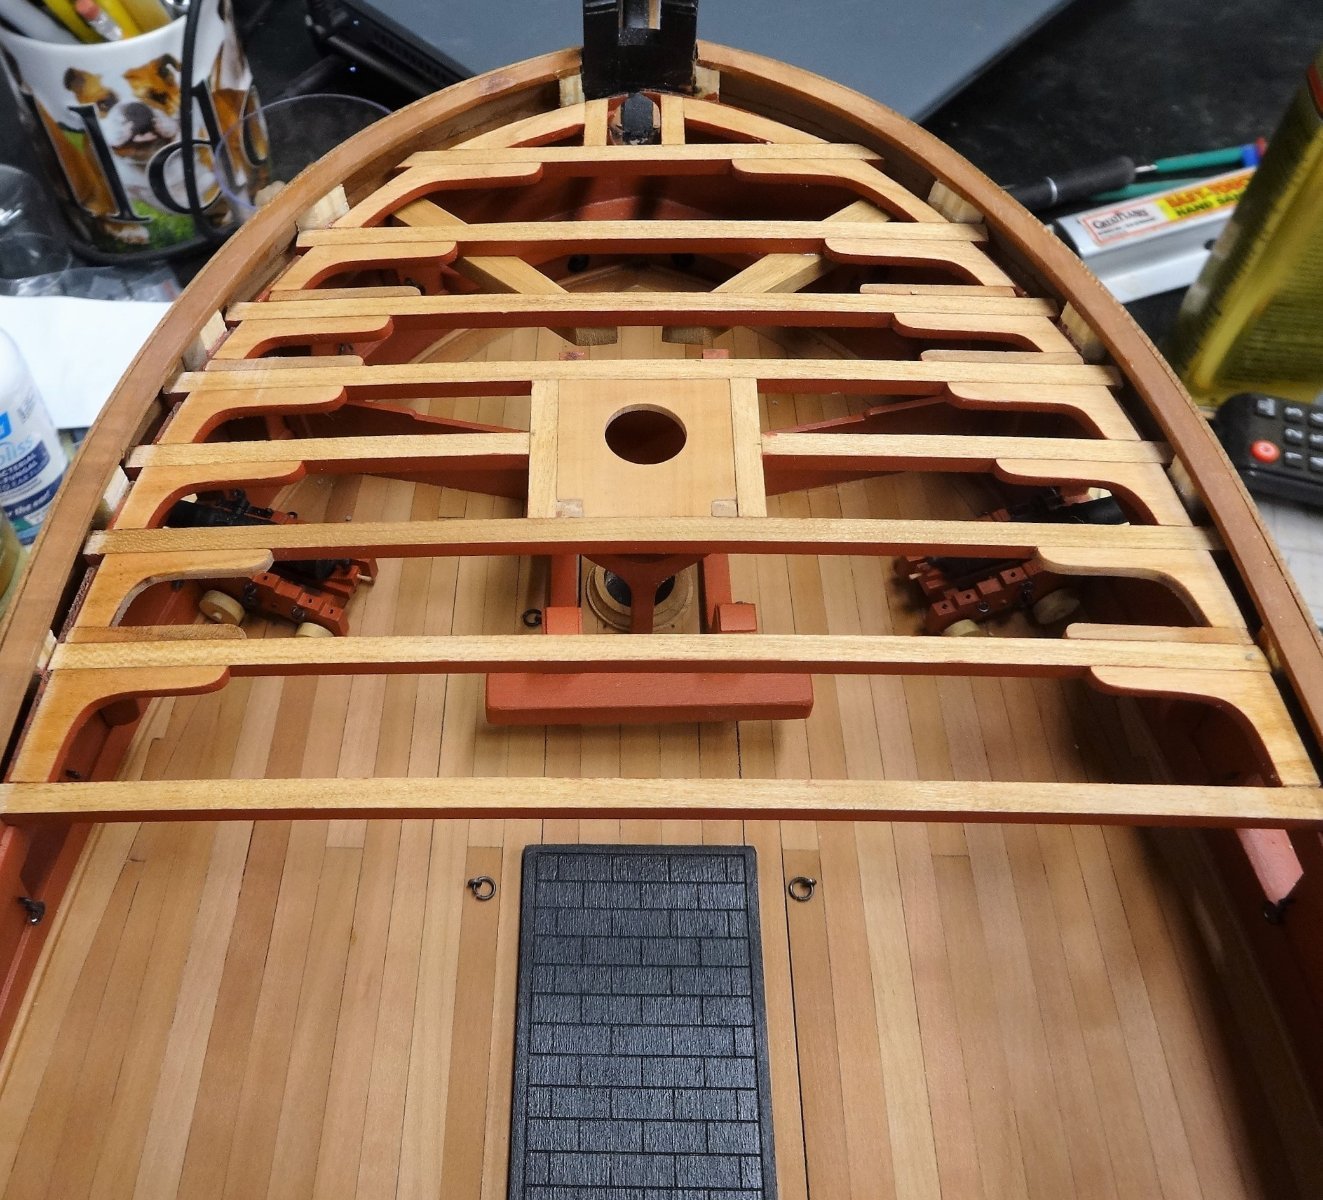
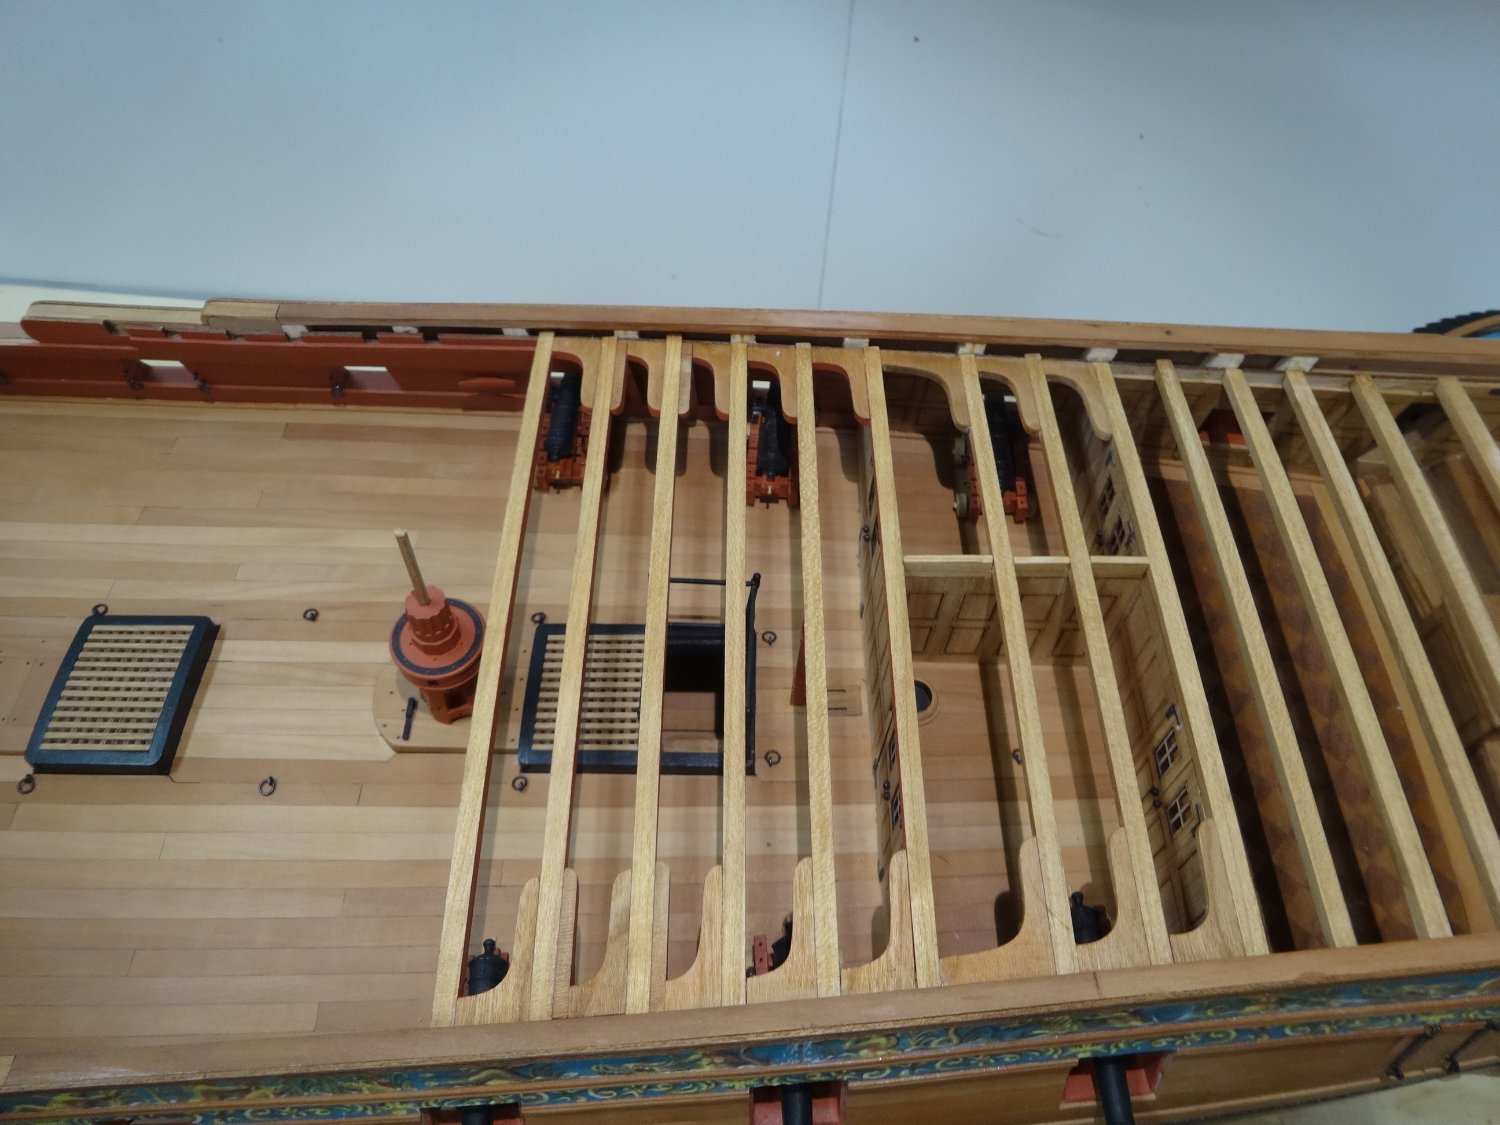
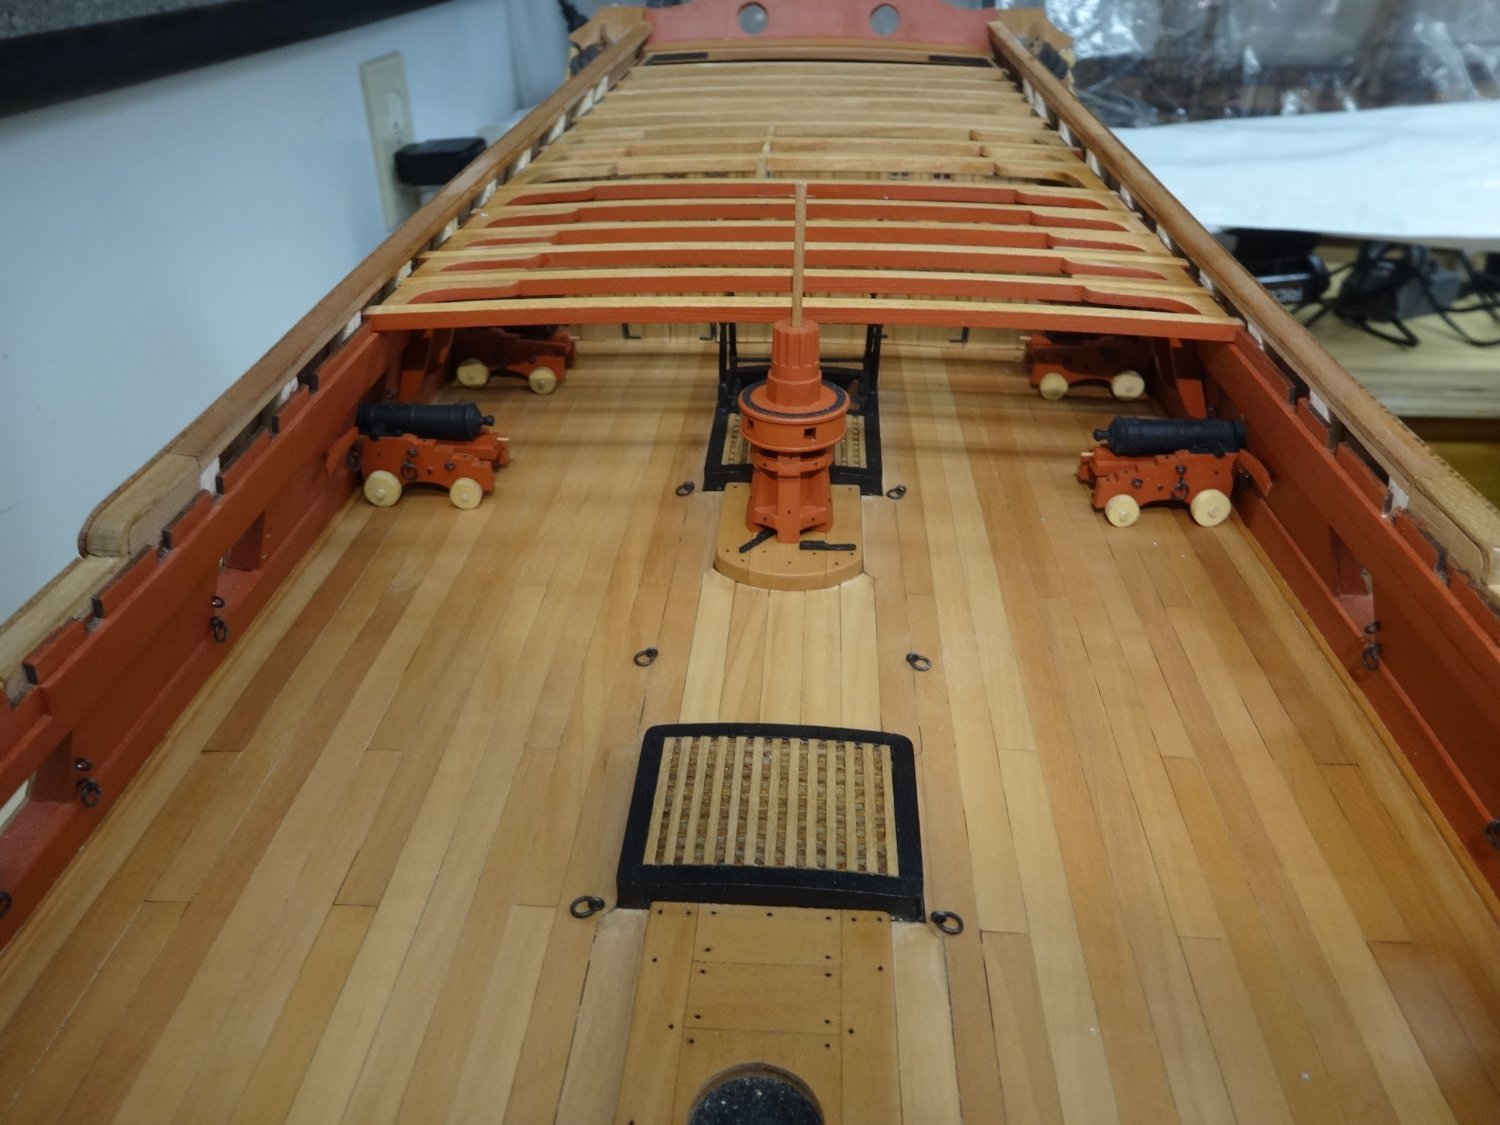
I spent the weekend completing the main jeer bits and the gallows as well as the chain pumps.
They are just set in place for the picture. I have also fit all the beams but removed the last
two as adjustments and alignments will follow. The shop LED lights washed out the color
but it is the same red ochre as used on the bulwarks. Next it will be aligning the pump crank
handles and permanently placing the jeer bits, gallows, chain pumps and columns.
-
3 hours ago, Blue Ensign said:
It is a slow and precise business fitting the rails, I’ve spent two days on the forward sections, but I think cleaning them up is worth the effort, for me at least.
Definitely well worth it! That looks so nice.
- mtaylor and Blue Ensign
-
1
-
1
-
-
11 hours ago, glbarlow said:
Guess your Winnie will be carrying cargo from here on…miscellaneous ship parts
Yep! When they break a railing stanchion they can just go into the hold and retrieve it.
Also thank you everyone for stopping by and all the likes. Much appreciated.
- Mldixon, glbarlow and FrankWouts
-
3
-
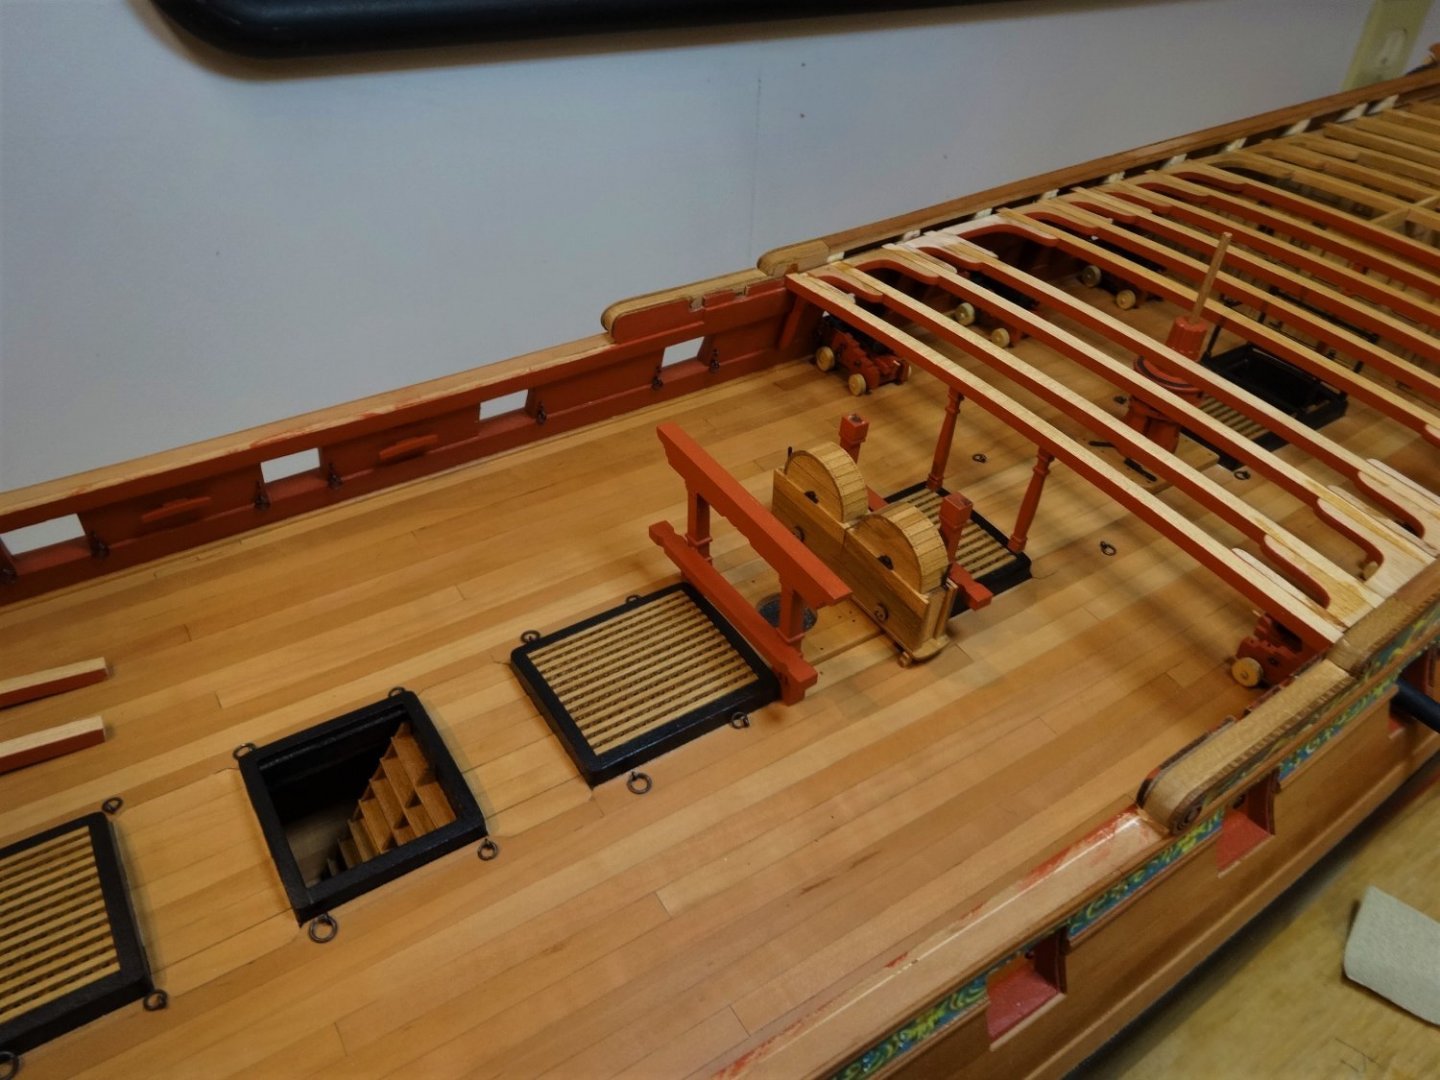
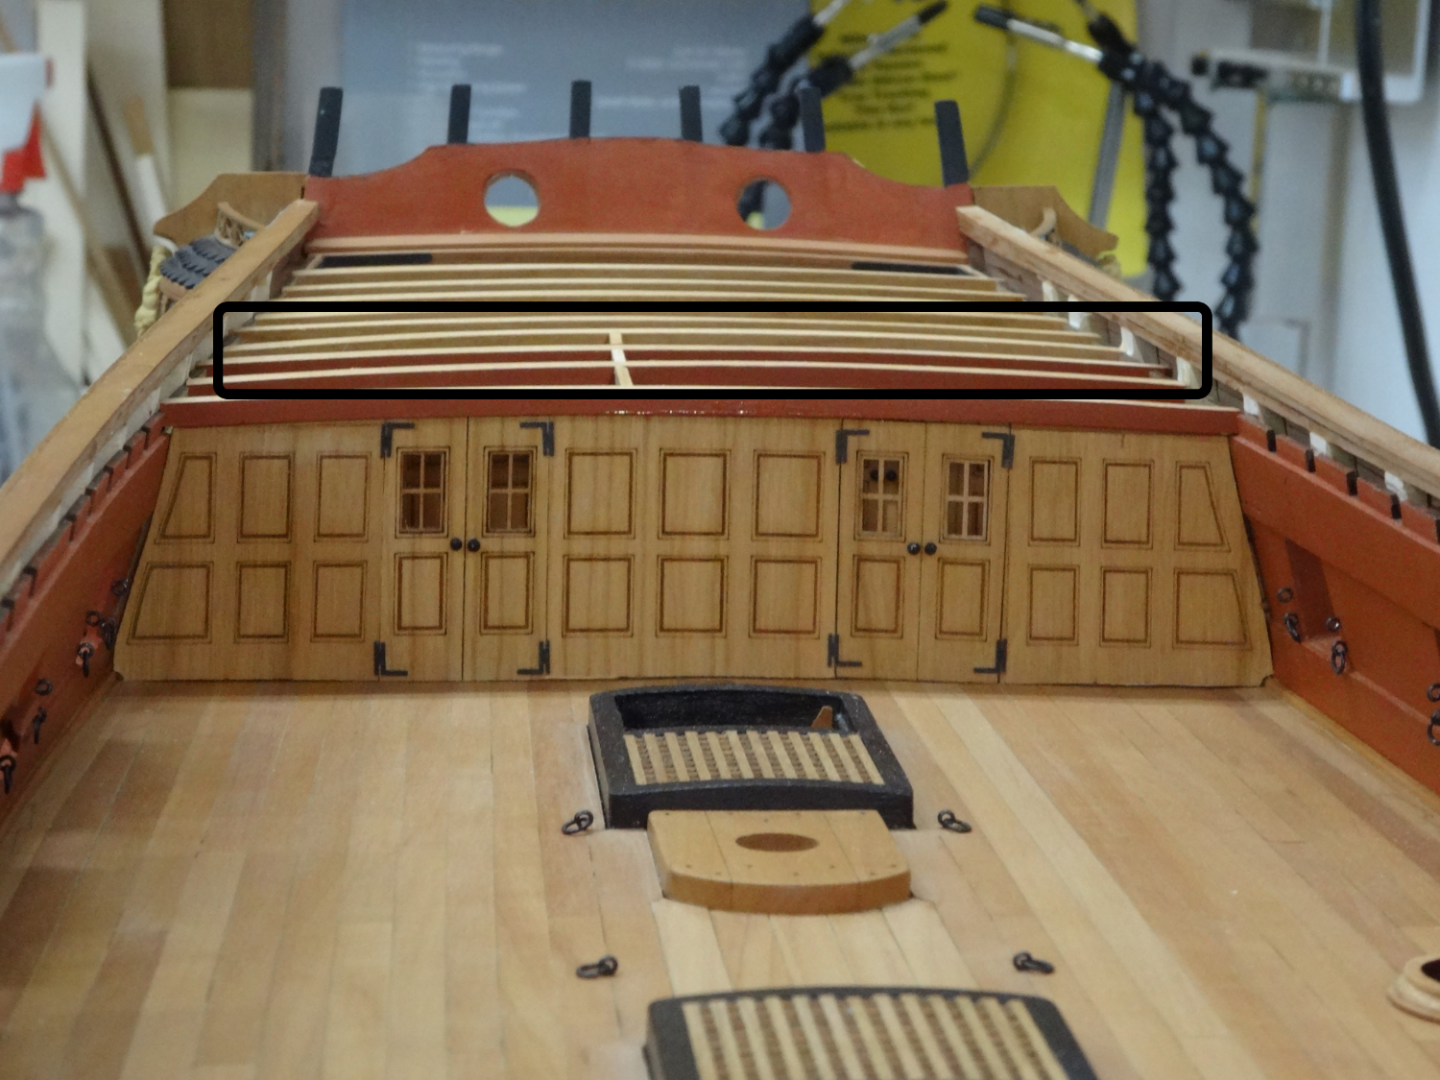
As I was working along I notice an error I had made. I painted some of the beams circled below which were in the outer cabin and I shouldn't have. So I removed the paint so they were unfinished like the captains cabin.
I then moved along adding more beams and knees. Also I added the stanchions and railings around the companionway. A word of warning. If you drop one of the stanchions down the companionway you can tip the model over and shake all you want but it isn't going to come out! The lower capstan and pawls have also been added.


- hollowneck, Edwardkenway, dvm27 and 15 others
-
16
-
2
-
-
Very nice! Ah the headworks, so much fun but I'm sure you will master it very well.
- mtaylor, Blue Ensign and BenD
-
2
-
1


HMS Winchelsea 1764 by Trussben - 1:48
in Member Build logs for the HMS Winchelsea
Posted
Everything is looking very nice Ben. Good choice going "whole hog".