-
Posts
3,607 -
Joined
-
Last visited
Content Type
Profiles
Forums
Gallery
Events
Everything posted by yvesvidal
-
Planking of the deck is almost complete. I proceeded symmetrically, as much as possible: And finally. Just one more plank on the edge, to customize a little bit: Nice intricacies on the stern, which will unfortunately, be all covered. The maple wood is extremely smooth to the touch after being sanded. A very sensual experience for the hands.... almost better than skin... Yves
-
I have managed to connect front and rear parts of the ship together. It is a real puzzle and I had to mark each plank with numbers. If you ever assemble this kit, make sure to take your time and label everything. Very easy to make a mistake at that stage. This is how I approached it: From the mid-section, the planks have not been glued and are floating. This will allow us to position them correctly with the rest of the mid-rear planking. After a few hours of focused work: Half of it is done!! It seems to work. And now, from the center, I built the other side (starboard): Still a lot to do... Yves
-
Very eerie atmosphere for sure..... The ship will hit the harbor wall for sure..... Yves
-
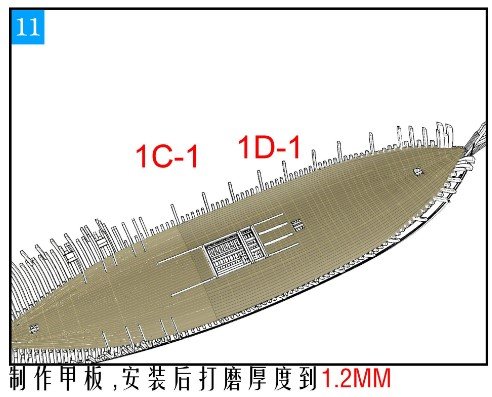
I started the deck planking. WOW, that is not easy, despite all the planks being pre-cut by CAF Model. As a matter of fact, I would have preferred at times, that it was not pre-cut.... This is how it looks out of the kit. You have two symmetrical sheets, including the entire planking of the main deck. If you think you can slap this massive piece on the deck and call it over, you are totally mislead. In fact, it becomes a very complex puzzle that needs to be addressed with respect and patience. It is important to keep all the planks in the proper location and order, if you want to match the defined curves. I started by the center as most people do and I am developing symmetrically as much as possible. Once the front center is done, I will try to position the long curvy planks that will also drive the stern planking. Measure ten times, and cut once as they say.... At this stage, I can place the long curvy plank (on both sides) that will also locate and allow me to plank the stern correctly. Note that the plank are made with Maple wood of 1.8 mm thick. That stuff is hard, stiff and really hard to cut. I wish they went with 1.2 mm or something of that kind. For sure, with such thickness, you can sand and polish the deck a lot. The laser charring provides a nice separation and caulking illusion between the planks. Each plank is detached, sanded a little bit and glued separately. I will try to use a pencil to correct the lack of caulking where the laser did not cut. Tree nailing? Hell no! I will just simulate with a pick and some pencil graphite as I did near the center of the deck. Overall, not easy and almost as hard as planking the real ship. 1.8 mm x 48 ... that is almost 4 inches thick planks in real life. Yves
-
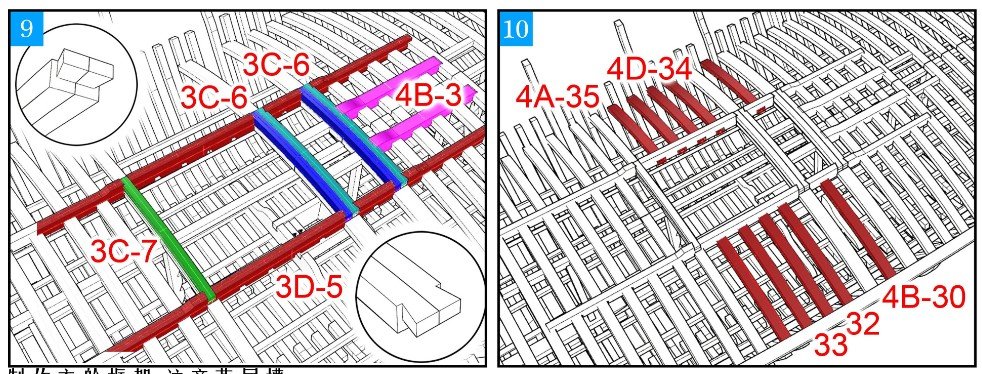
Finishing the deck beams around the mast. I looked for all kinds of information, regarding the colors of the Chebec features. In the end, I have decided to recreate an old model (more than 200 years ago) which is owned and displayed by the Museum de la Marine in Paris. A lot of the features on the deck are painted in red (ocre red), according to the Monograph. It will also provide a nice contrast with the clear wood of the deck. And no, I am not cutting the central support.... it will be covered, anyway. Next massive step is the planking of the deck..... Yves
-
Nice kit. I had never seen it before. I will be following with a lot of interest. Yves
- 71 replies
-
- Miss Adventure
- Model Shipways
-
(and 2 more)
Tagged with:
-
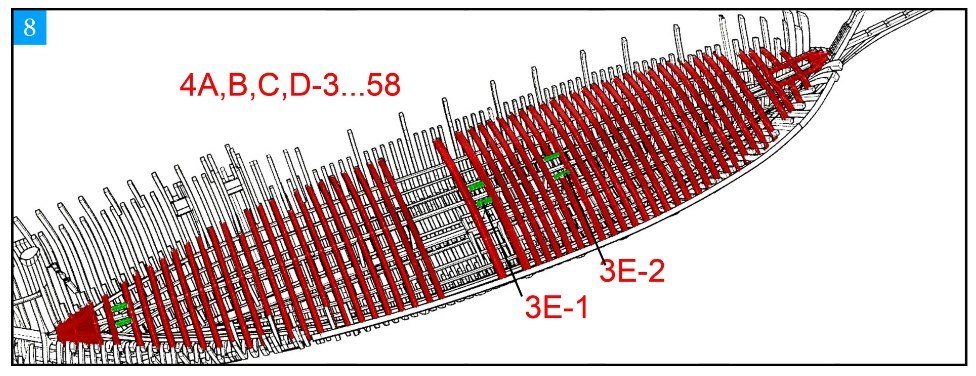
After a good indigestion of deck beams, I have finally completed this stage of the assembly: The piece provided in the kit for the stern is way too thick and I have replaced it with a few scraps. I am still missing a couple of small pieces. Close to 58 deck beams.....sighs!! The variations in colors comes from the fact that the beams are not made with exactly the same wood, and are cut on different plates. Not a big deal, since this will all be covered. I am not cutting the central support quite yet. We will see when some additional deck beams will be installed. Last picture of the inside....The camera won't fit anymore. You can see a mistake I made by positioning the main support for the deck beams, a couple of millimeters too low. I had to use small shims to compensate in the rear and avoid too much tensions on the beams. Everywhere else was perfect. I just hope that the beams do not swing back up as it would destroy the planking. I have used a good amount of CA glue to secure everything and I am crossing my fingers. With the shims, the tension on the beams is very small. The inside of the hull is really dirty. I need to perform a good vacuuming and blowing of the dust. A few more pictures about some details: Ready to go down the monkey ladder? At this point, technically I "could" remove the assembly from the cradle. The problem is very simple: it will never go back into it. Therefore, I am going to keep it inside a little bit longer, for the planking and the construction of the bulwarks. Everything is cozy right now and this cradle is very convenient to move around the model without much risks of breaking anything. The cradle gives me the perfect position of the bulwarks supports, which is a big plus. Extraction postponed for a few more weeks !!! Yves
-
So true, Amazon is pure stealing. It is about half the price at your local Hobby Shop. Yves
-
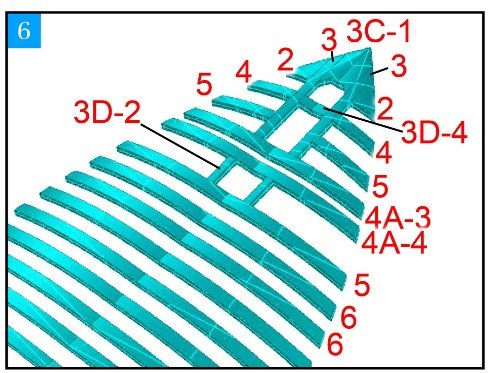
Implementation of the forward mast base and deck beams. Not really easy and requiring a lot of fine adjustments to position it correctly. I glued the deck beam #3to come as close as possible, before cutting the central support beam. After cutting (below): I would strongly recommend not installing any more deck beams, as you need the access with your fingers to position the base. The installation of the base must be done after filing the base of the front mast, for a correct and still tight fit: The base is now glued strongly as much as possible: According to the Monograph, the front mast is leaning by 20 degrees from the vertical (70 from horizontal). CAF Model does not provide much instructions on this subject. Pretty close to the 20 degrees. Below, both masts installed: Next is the big puzzle of the bow deck beams: Here, a lot of fine adjustments are necessary. I do one side at a time: Then the other side and the front plate, still checking with the mast and its inclination: All these beams will be covered by the deck planking. Note that the middle cross-over beam was not fitting in the original position. I re-positioned it a little bit behind. And a final verification with the mast: Now, we can proceed with installing all the remaining deck beams in the bow. Yves
About us
Modelshipworld - Advancing Ship Modeling through Research
SSL Secured
Your security is important for us so this Website is SSL-Secured
NRG Mailing Address
Nautical Research Guild
237 South Lincoln Street
Westmont IL, 60559-1917
Model Ship World ® and the MSW logo are Registered Trademarks, and belong to the Nautical Research Guild (United States Patent and Trademark Office: No. 6,929,264 & No. 6,929,274, registered Dec. 20, 2022)
Helpful Links
About the NRG
If you enjoy building ship models that are historically accurate as well as beautiful, then The Nautical Research Guild (NRG) is just right for you.
The Guild is a non-profit educational organization whose mission is to “Advance Ship Modeling Through Research”. We provide support to our members in their efforts to raise the quality of their model ships.
The Nautical Research Guild has published our world-renowned quarterly magazine, The Nautical Research Journal, since 1955. The pages of the Journal are full of articles by accomplished ship modelers who show you how they create those exquisite details on their models, and by maritime historians who show you the correct details to build. The Journal is available in both print and digital editions. Go to the NRG web site (www.thenrg.org) to download a complimentary digital copy of the Journal. The NRG also publishes plan sets, books and compilations of back issues of the Journal and the former Ships in Scale and Model Ship Builder magazines.


