yvesvidal
-
Posts
3,639 -
Joined
-
Last visited
Content Type
Profiles
Forums
Gallery
Events
Everything posted by yvesvidal
-
 You are building a "rare collectible" as the company no longer exists. I love these small boats. I will be following your Build log with interest.
- 16 replies
-
- 2
-

-
- bon retour
- artesania latina
- (and 2 more)
-
Beautiful boat Kevin. I know this is slightly different, but it reminds me of the movie Fitzcarraldo, with the crazy Klaus Kinski and the gorgeous Claudia Cardinale: Yves

-
We are all very glad that you did not burn it 🙂 Superb little boat. Yves
-
Fantastic work and great details. Yves
-
It is so nice to see another one of these rare projects. You are moving along quite well. Yves
-
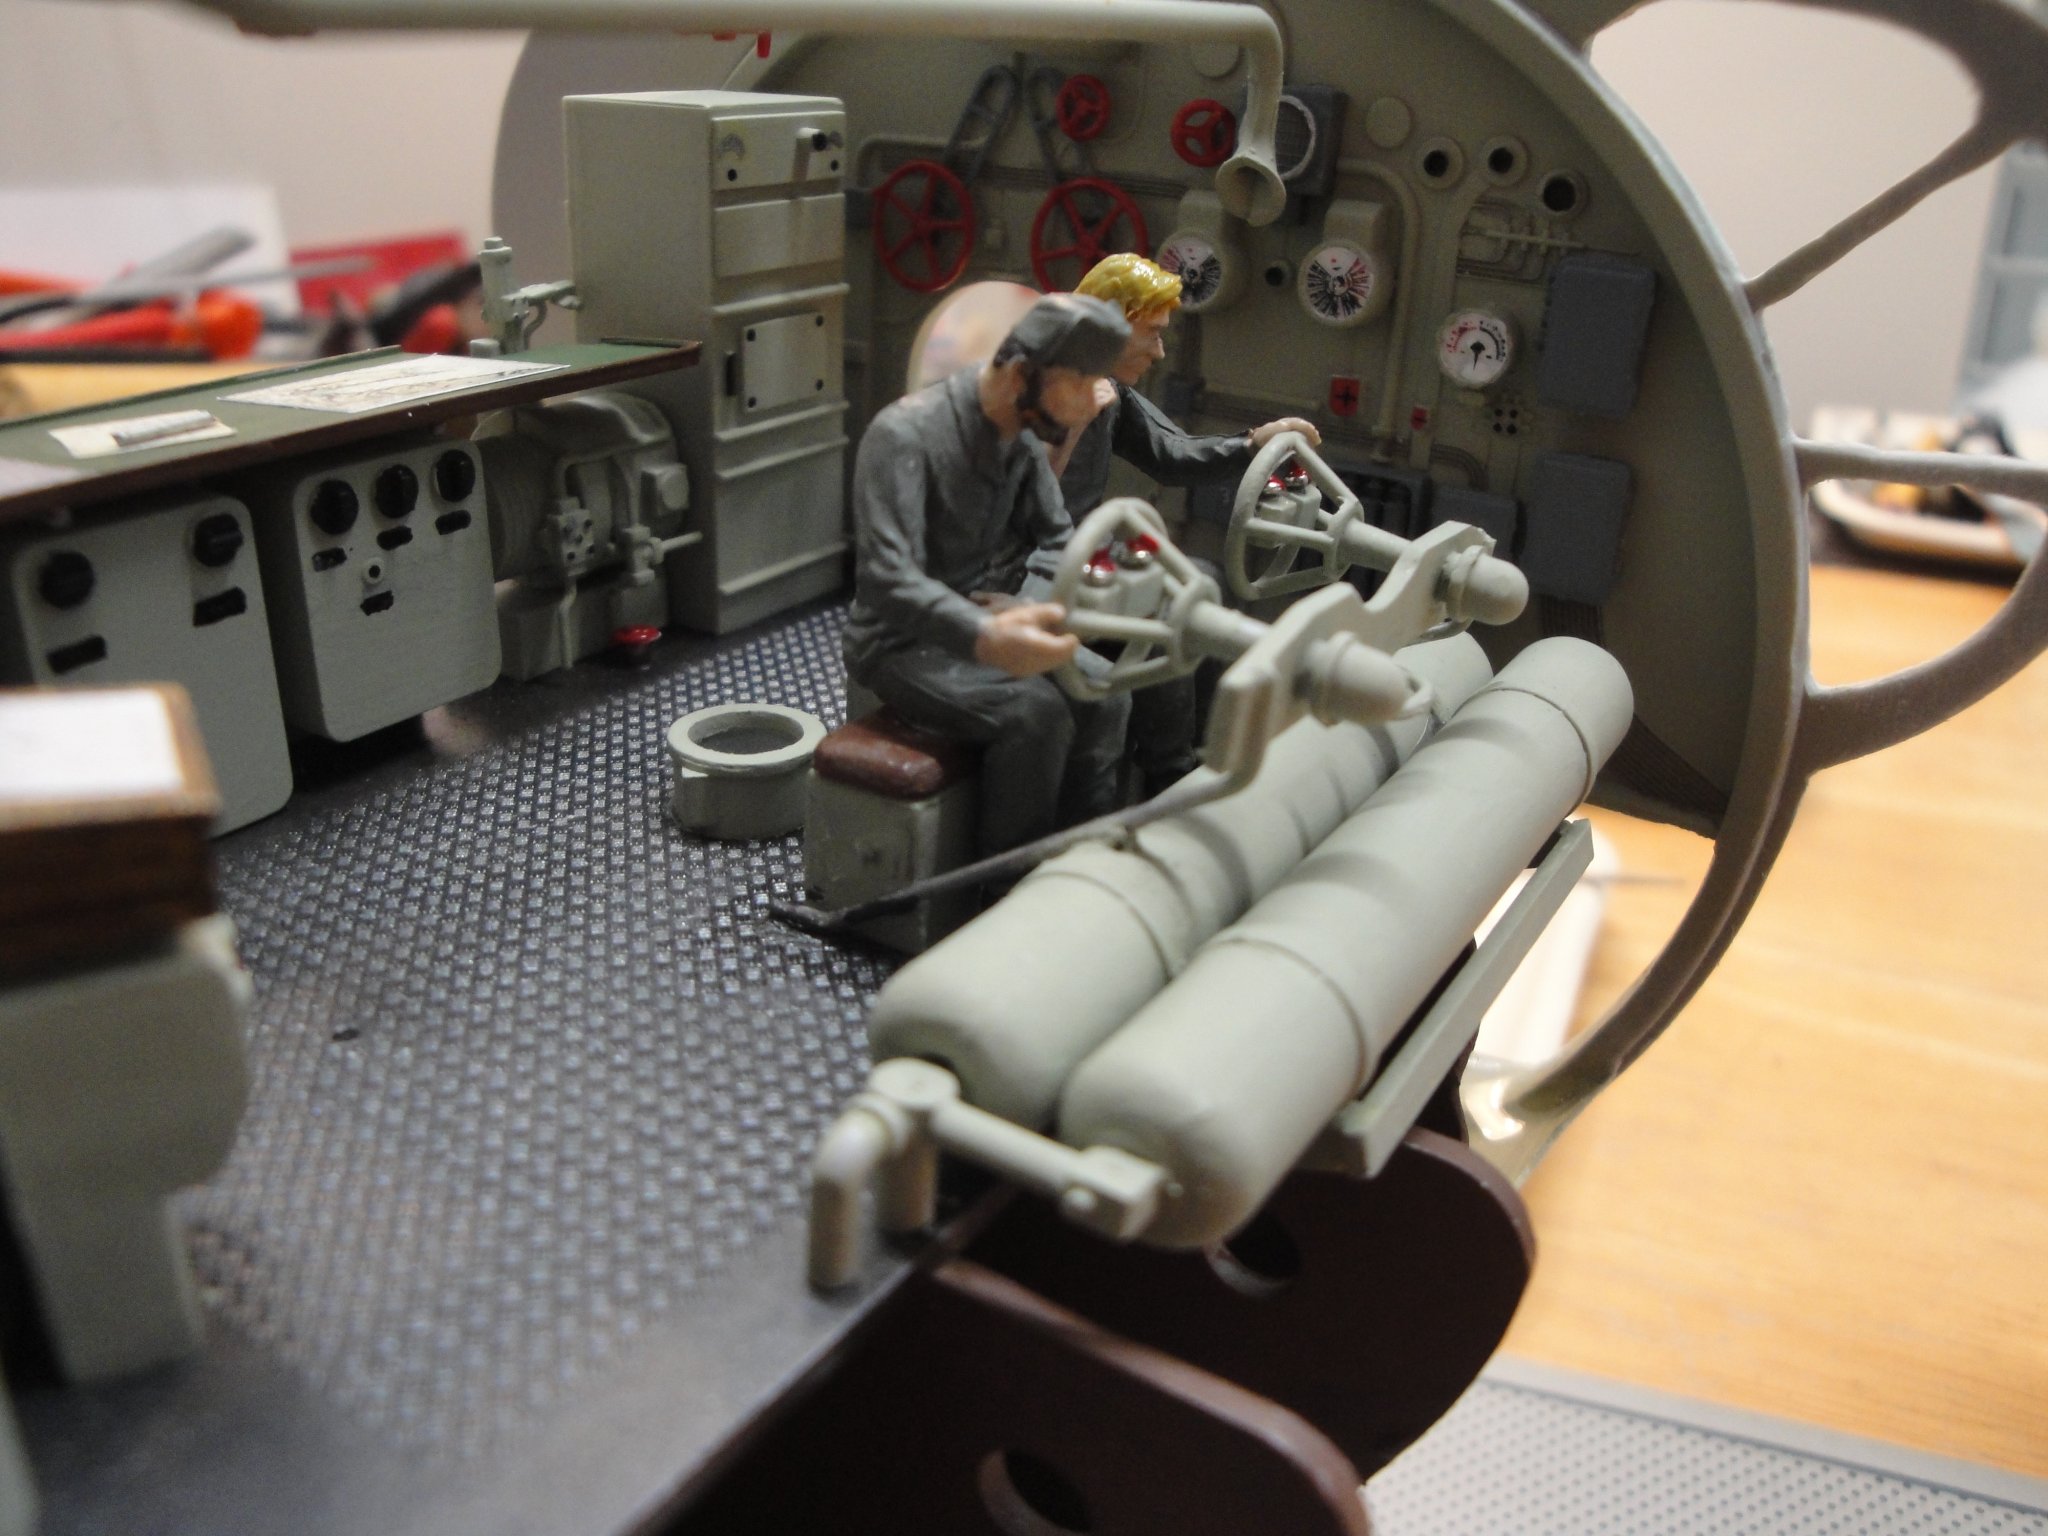
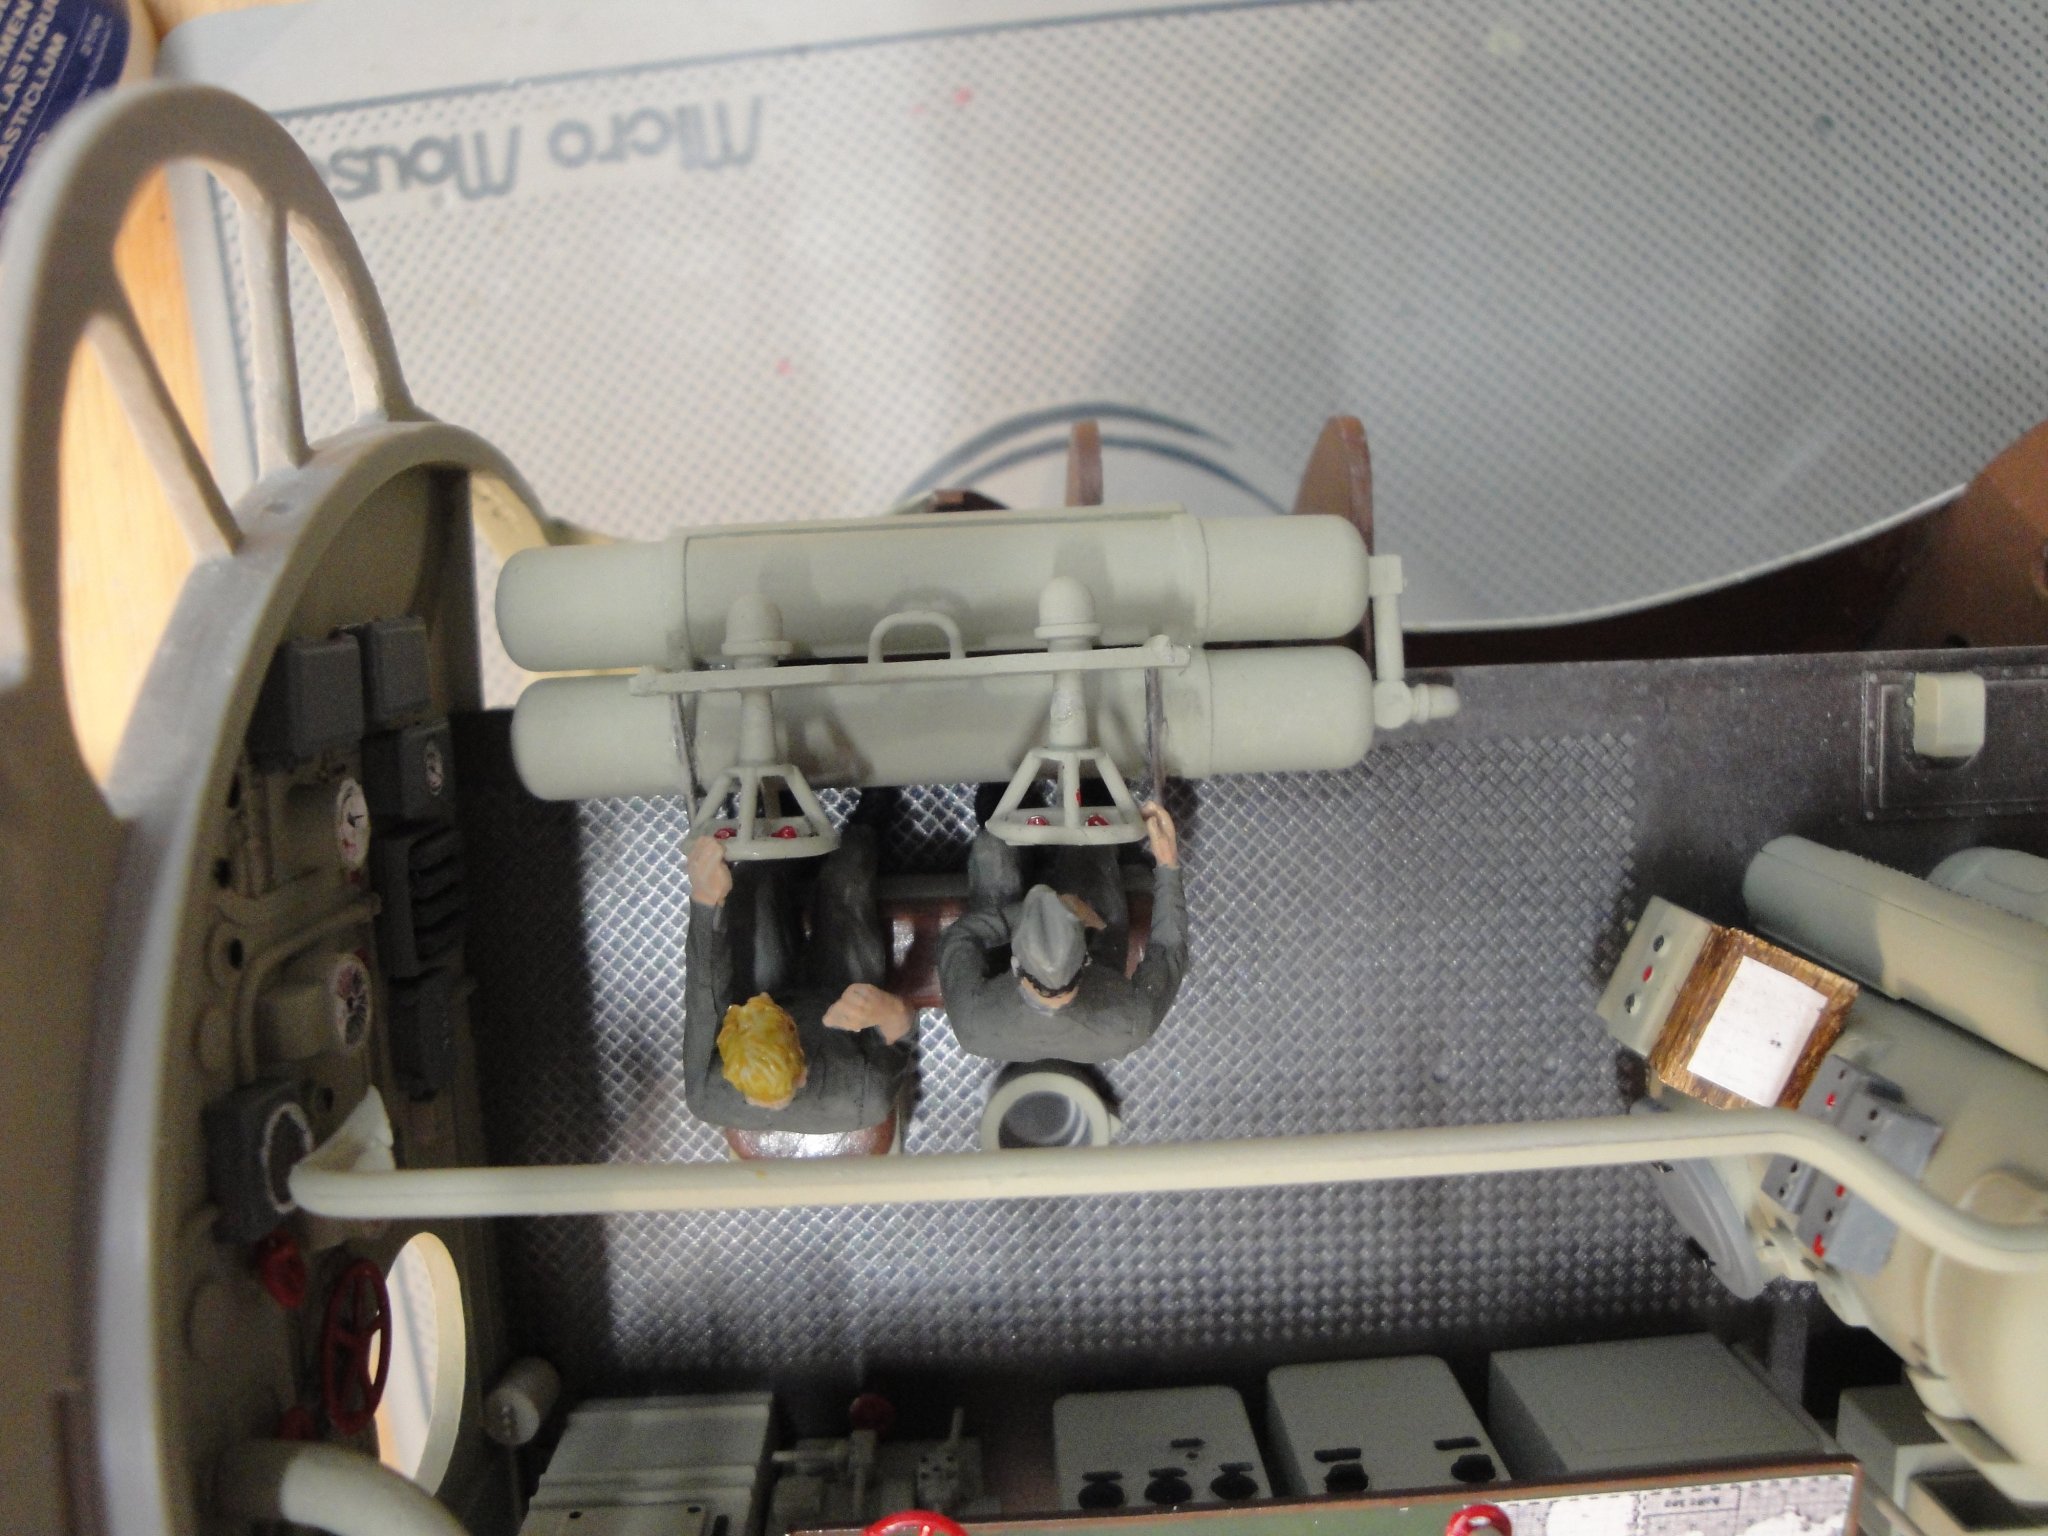
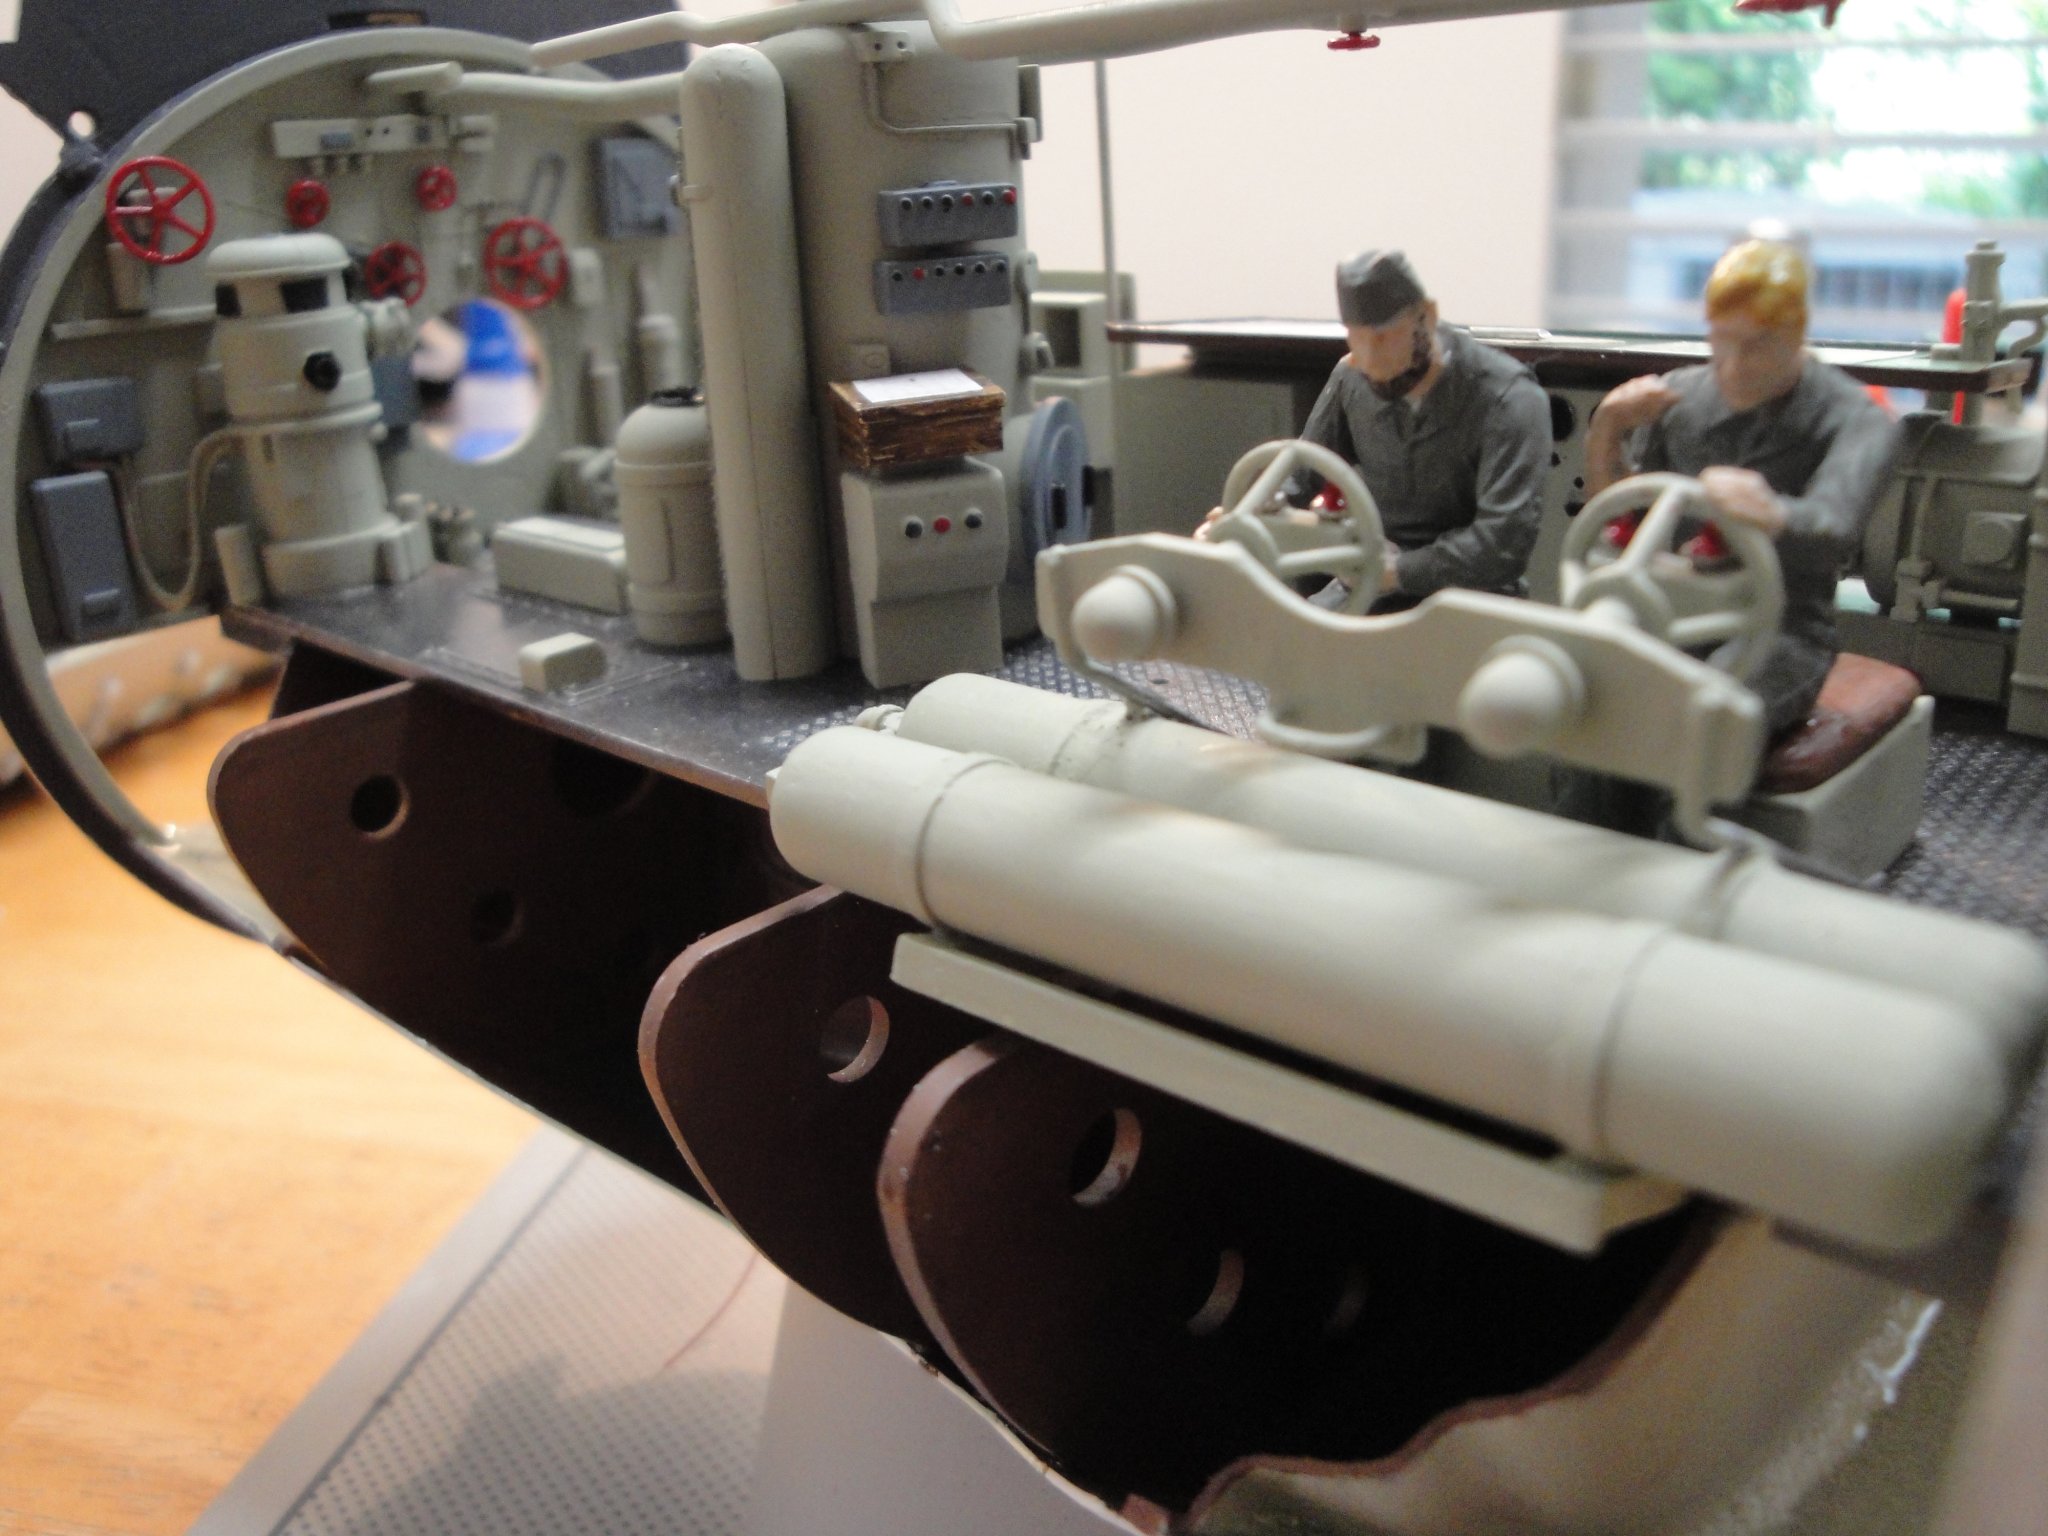
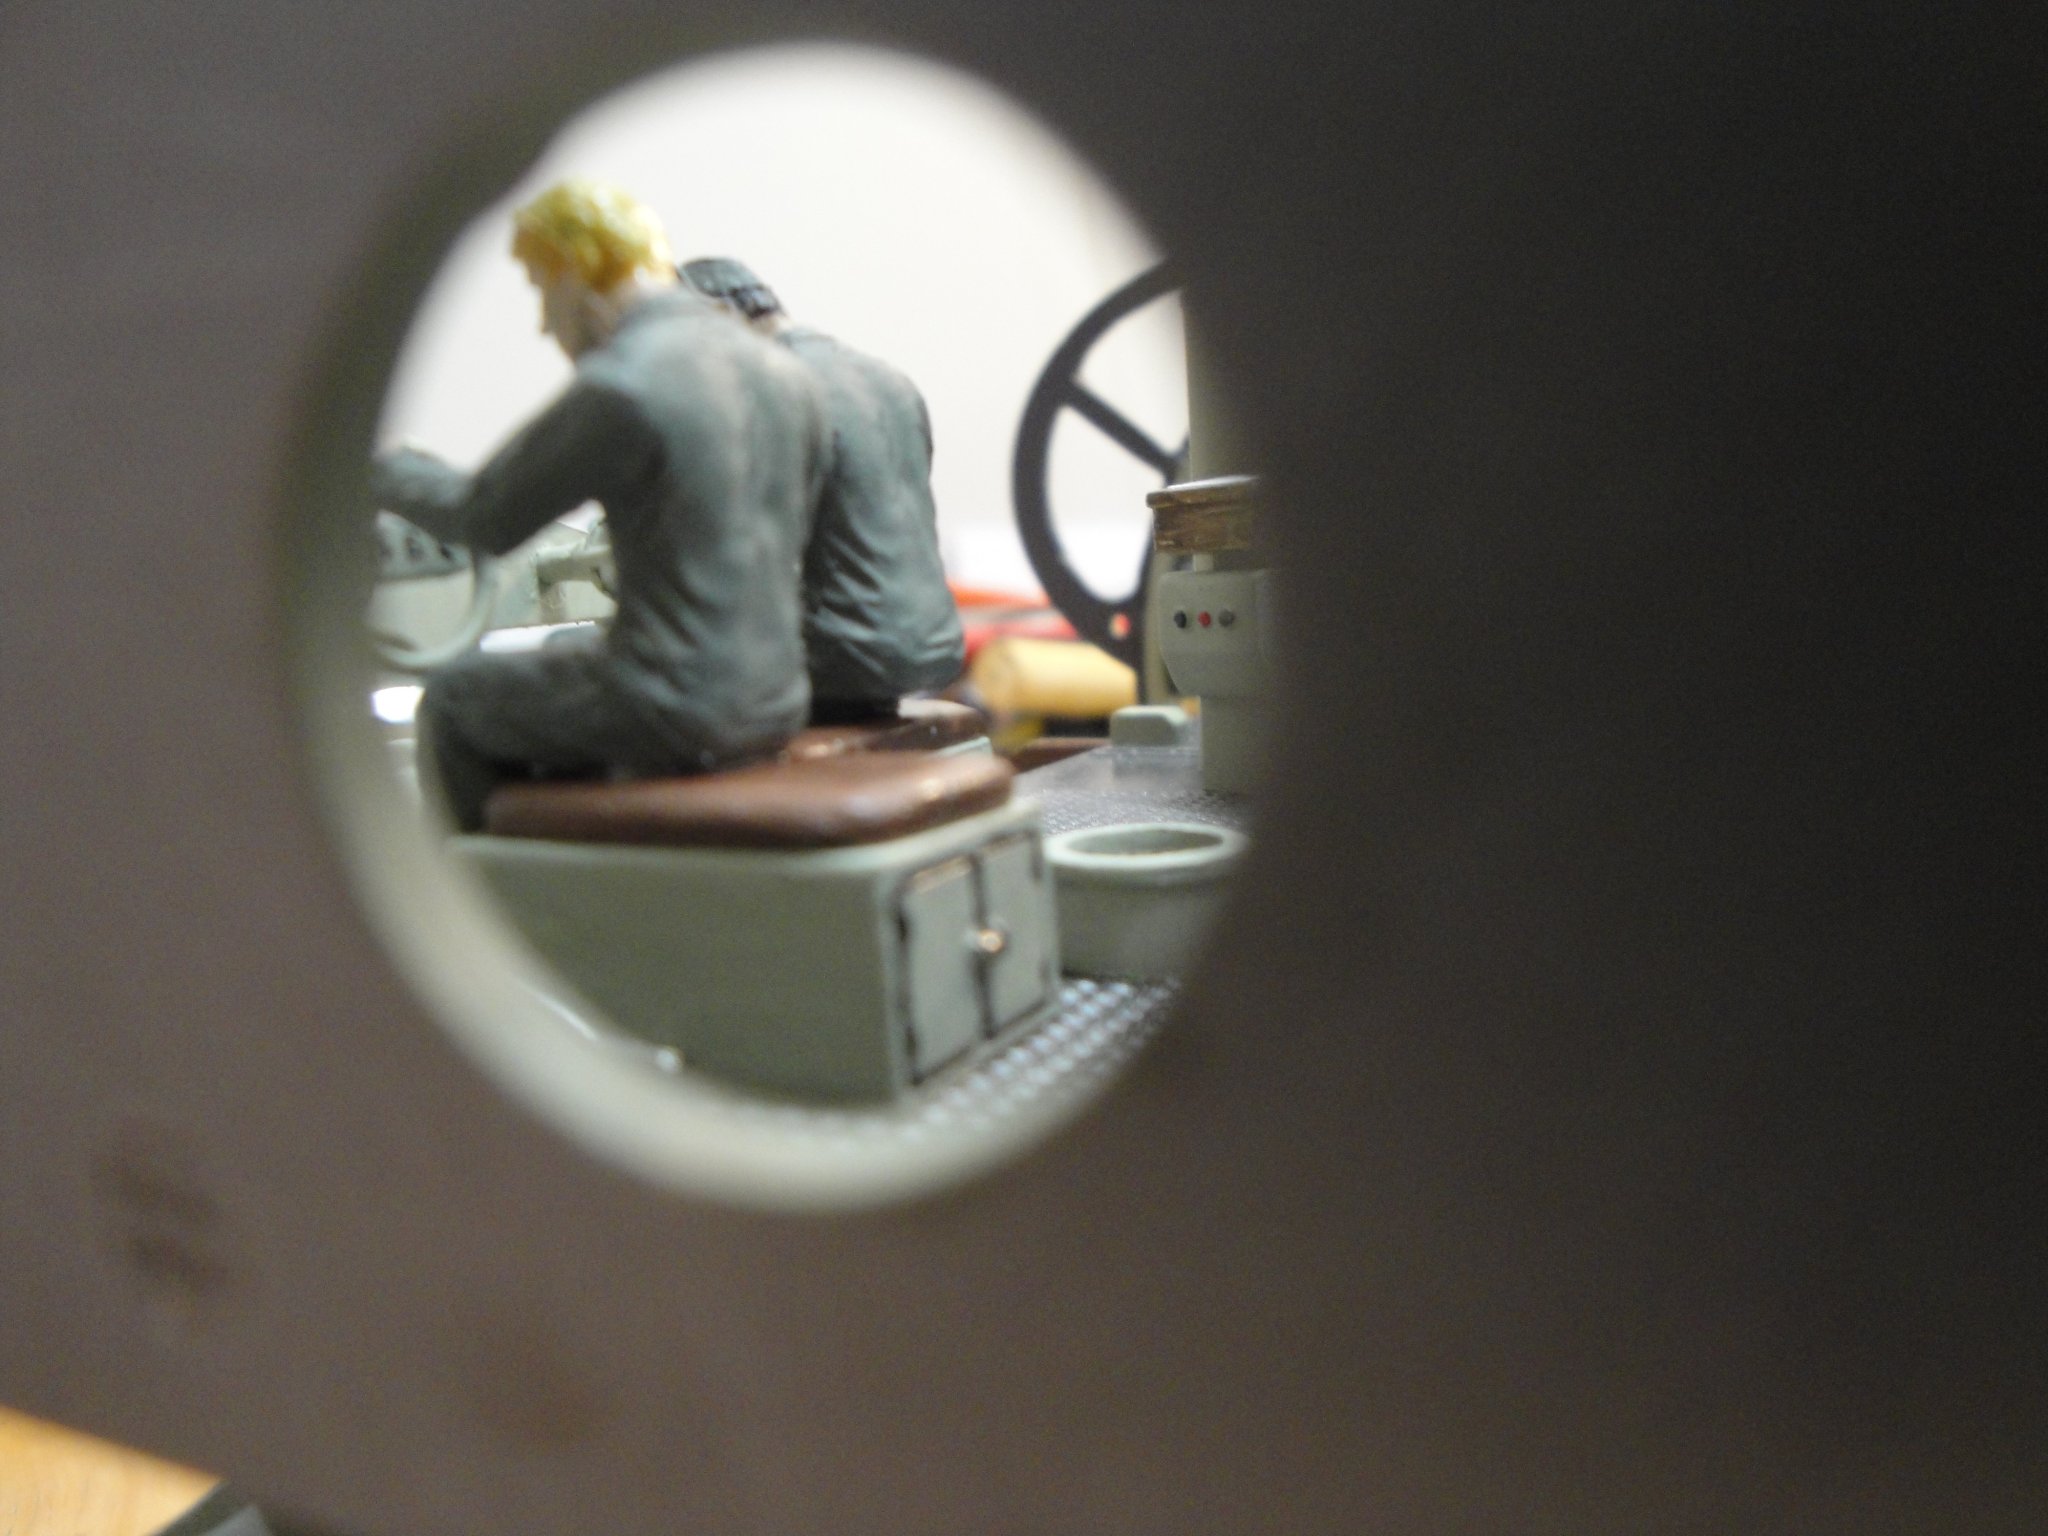
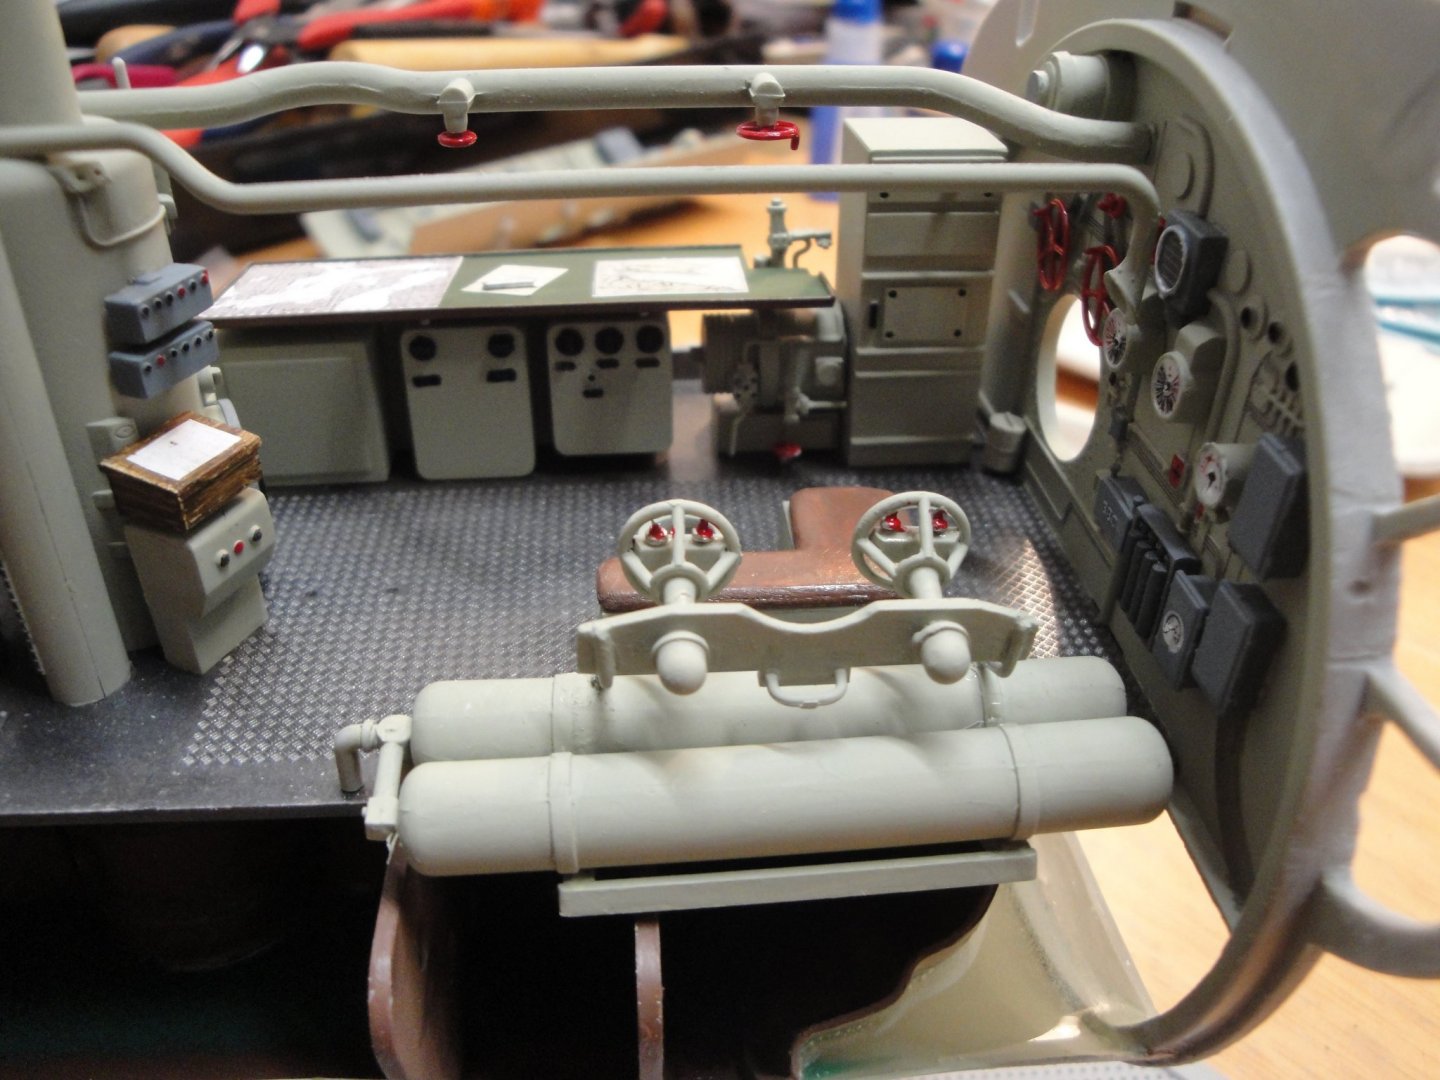
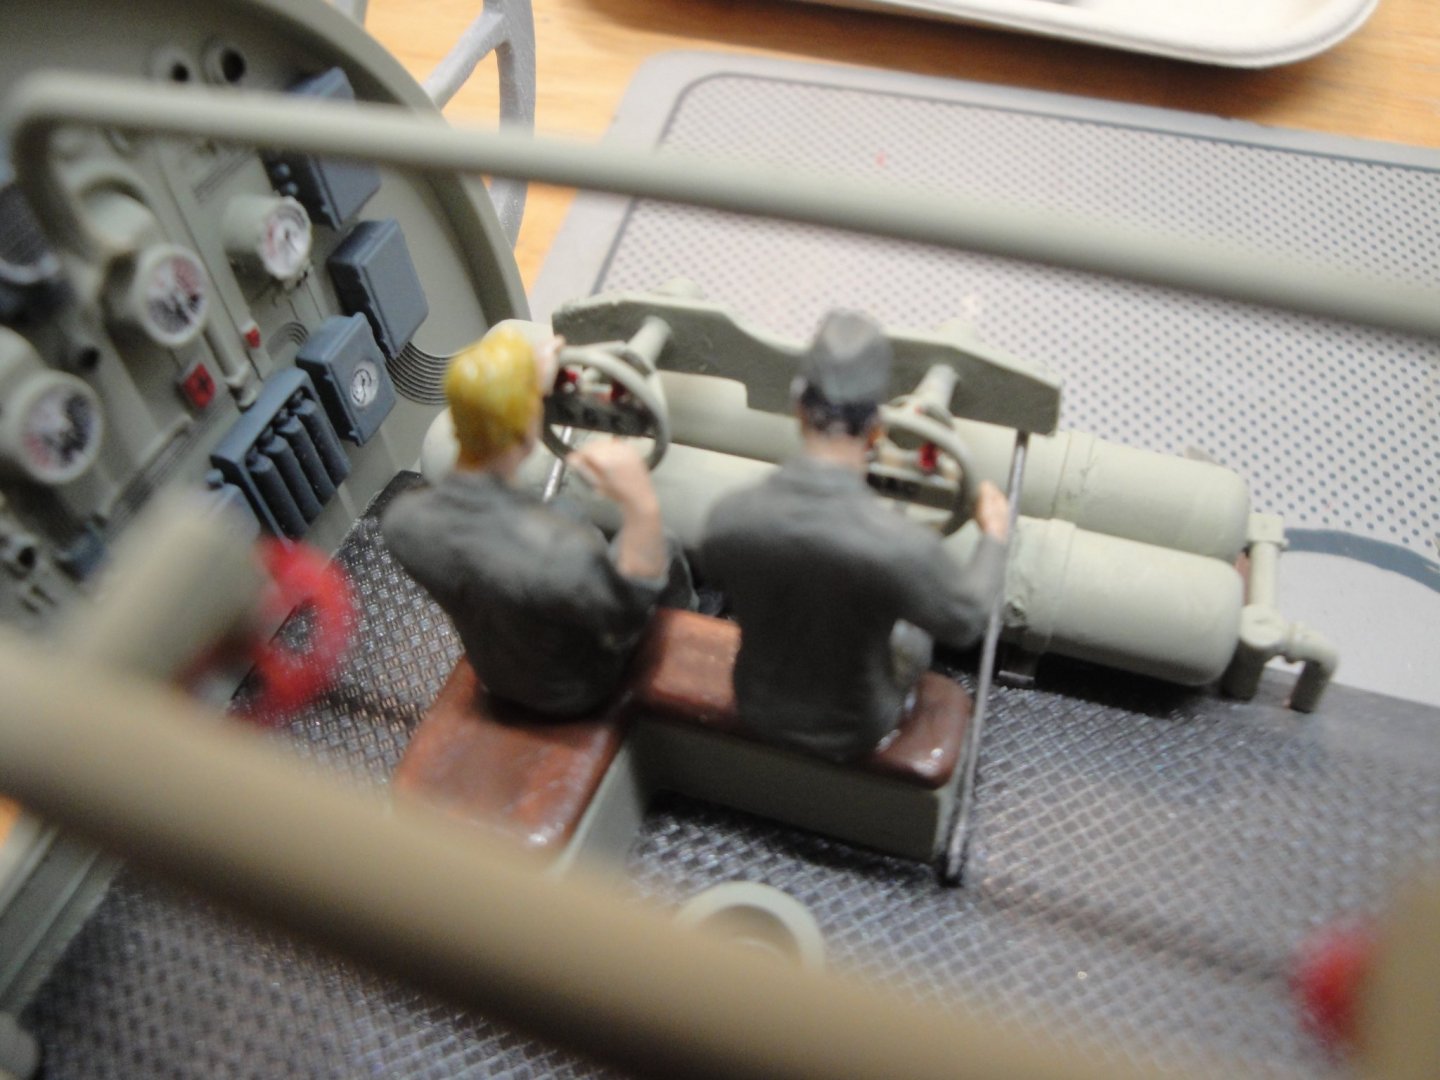
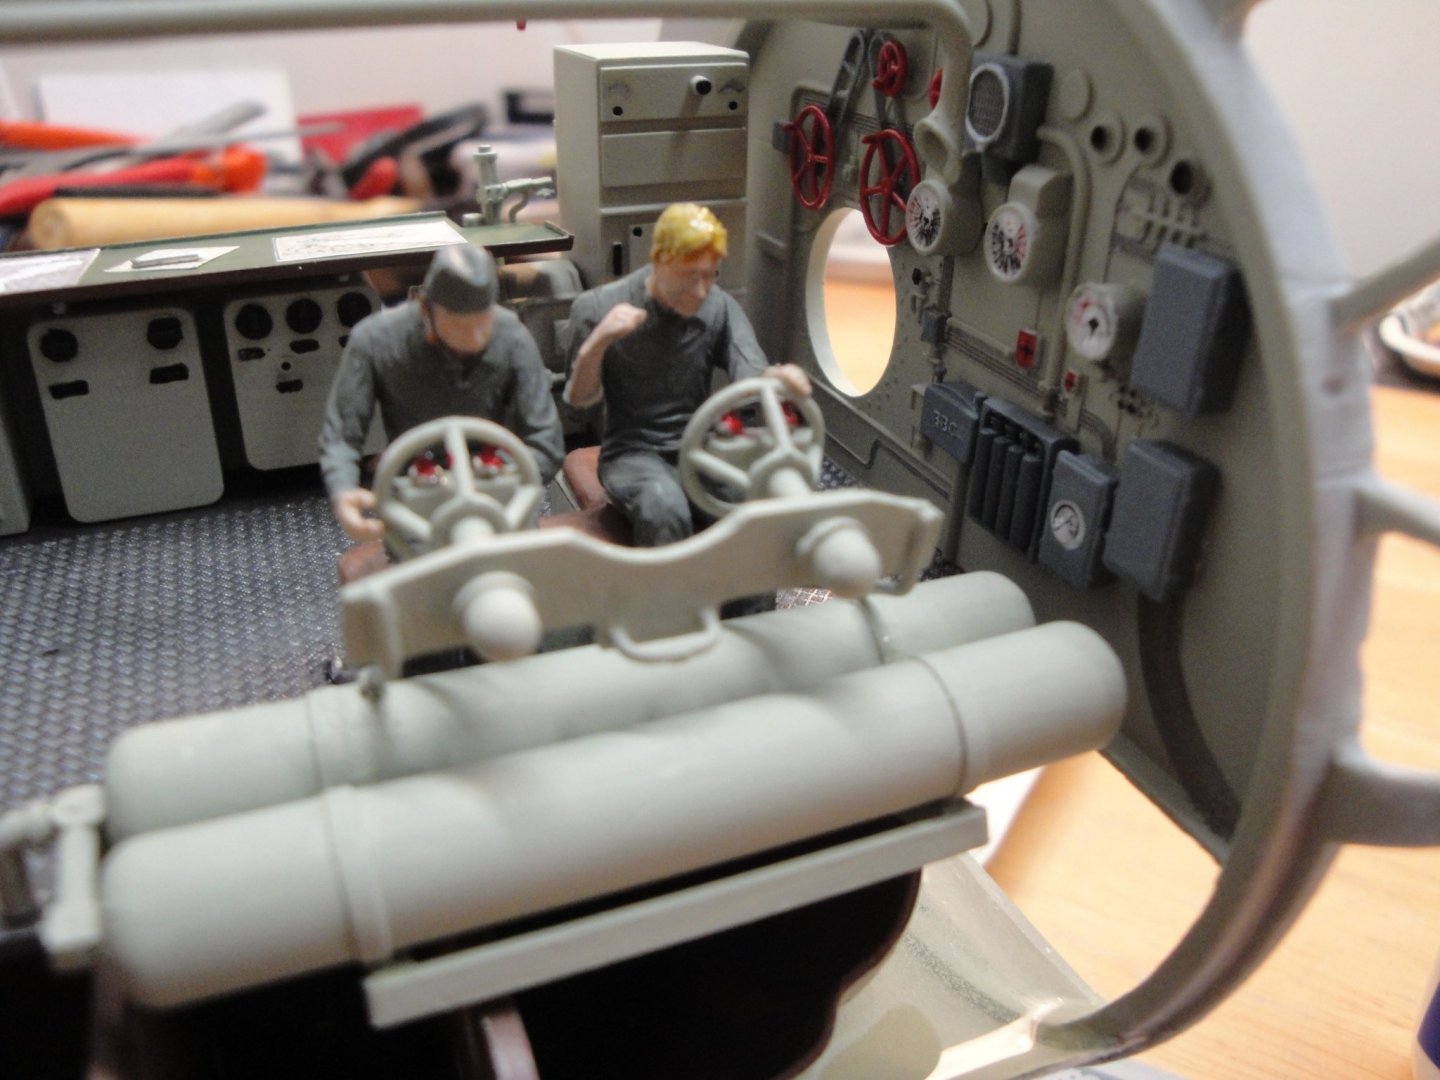
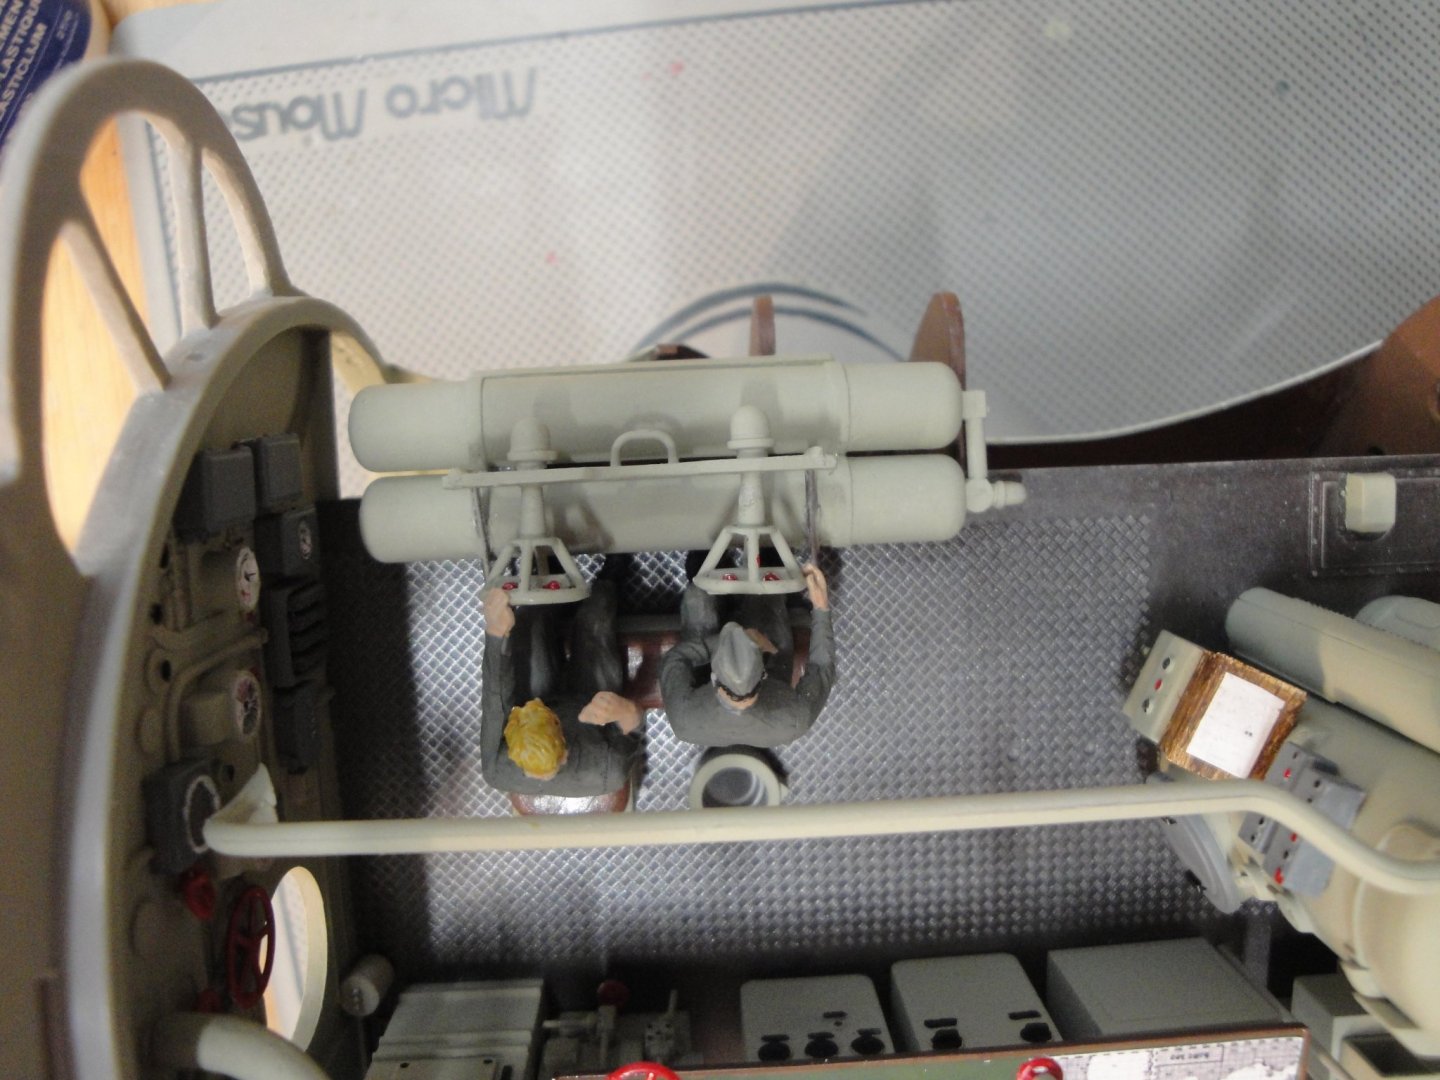
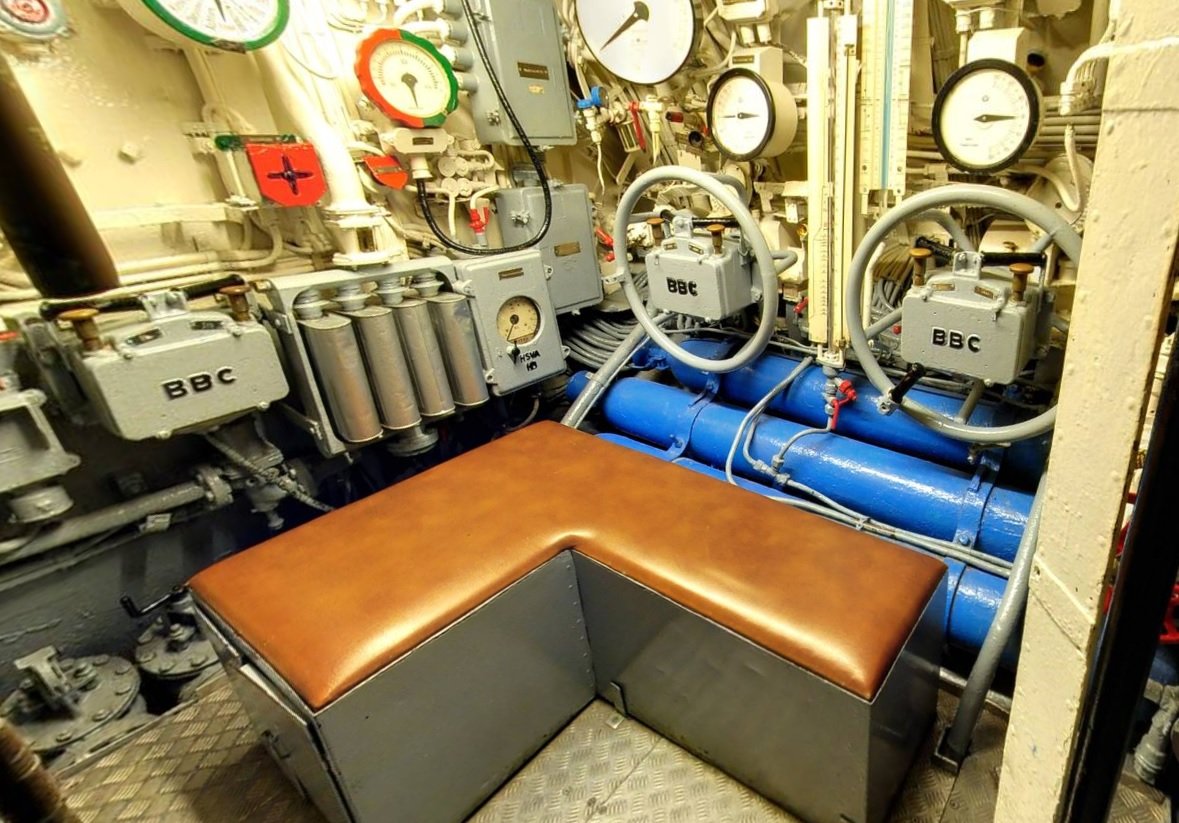
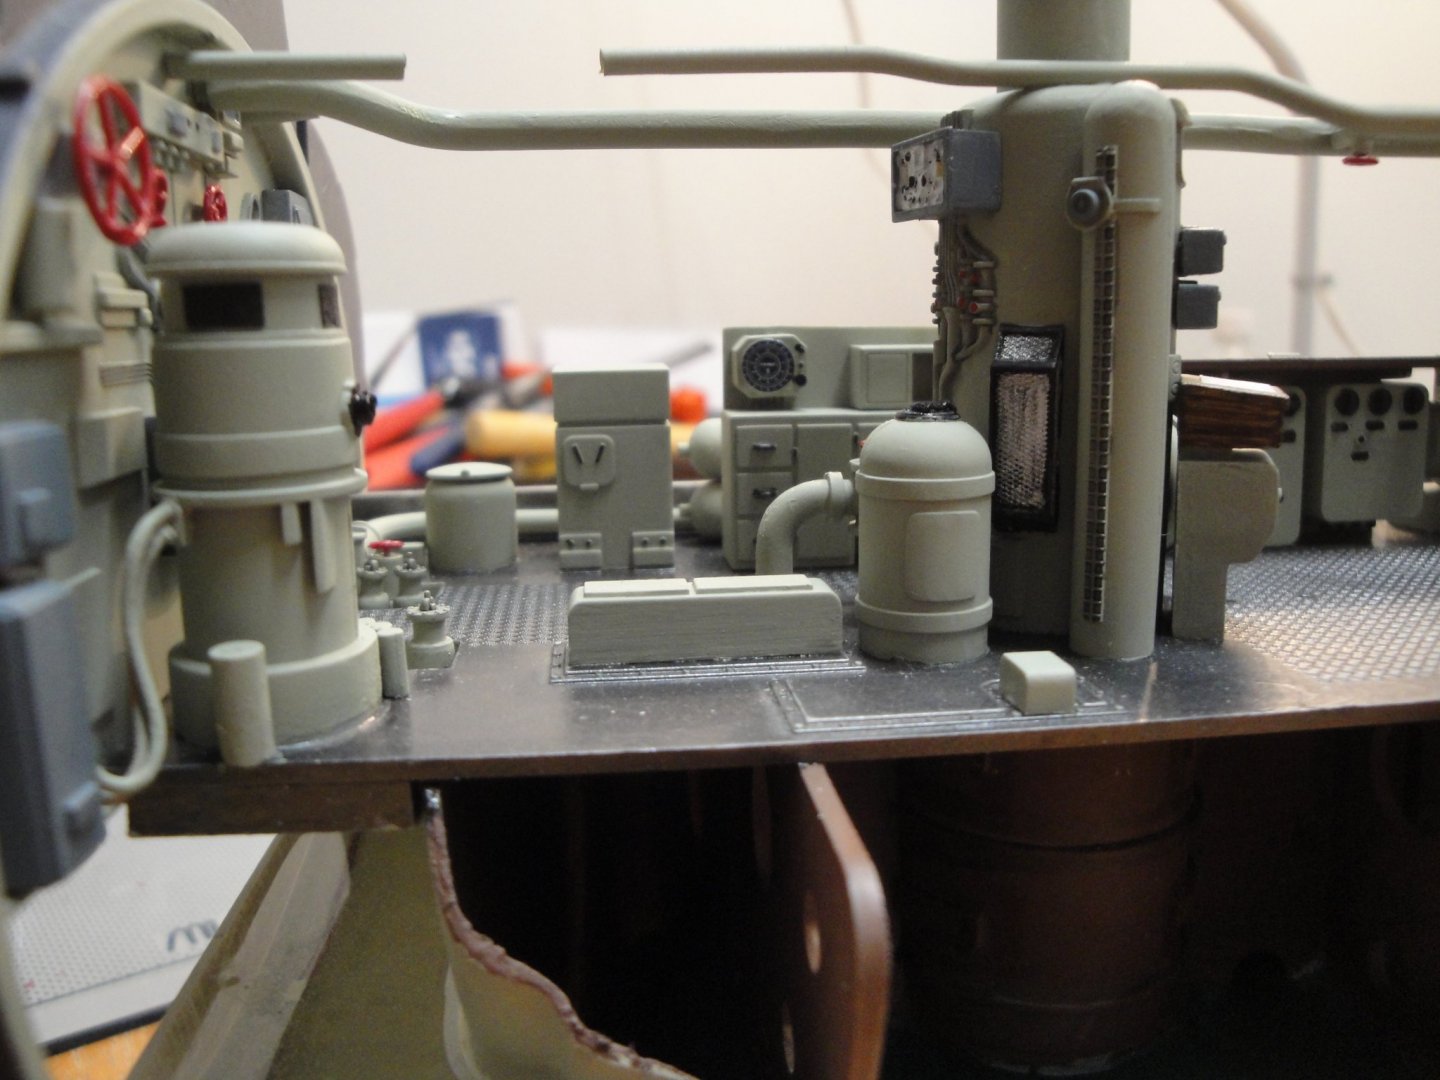
Folks, I just could not cope with that empty front part of the KontrollRaum. Something had to be done. It is a real shame that Trumpeter did not come up with a better plan, especially in light of the fact that most of the controls of the vessel are done on the starboard side of the room. Thus, I have tried to make it a little bit more interesting by building from scratch and spare parts (from the original kit), a semblance of the two control wheels, used to steer the front and rear diving planes. Also note the two big push button valves, located inside the wheels (on top of the BBC box). I basically used two spare wheels, two extra tanks and scratch-built the other parts, to resemble as much as possible the diving station, while still providing a full view on the compartment and attack periscope: Adding two sailors (planesmen) at the 'helms': I know that this assembly is not exactly prototypical, far from it. However, it has the advantage of filling up that empty space, brings more realism and will push the observers to ask questions about that specific aspect of the operations. The planesmen were using two major valves located inside the wheels, to move the diving planes of the submarine. The wheels were only used in case of failure of the main hydraulic system and probably required a lot of strength and many turns before getting any results. The tanks located at their feet, contain the compressed air (or liquid - Please Katuna, I need your help) to move the massive diving planes. Yves


- 760 replies
-
- 18
-
-
Wow, lighting coming from the floor... That is a modern boat. The result is quite nice. Yves
- 337 replies
-
- 3
-
-
- finished
- mountfleet models
- (and 1 more)
-
Speechless ! What a Display of perfection and order. Yves
-
Hawker Typhoon by Asat - Airfix- 1/24
yvesvidal replied to ASAT's topic in Non-ship/categorised builds
24 cylinders...! That explains why it needed that massive radiator. Yves -
In HO scale.... CONGRATULATIONS!! Your work is amazing. Yves
-
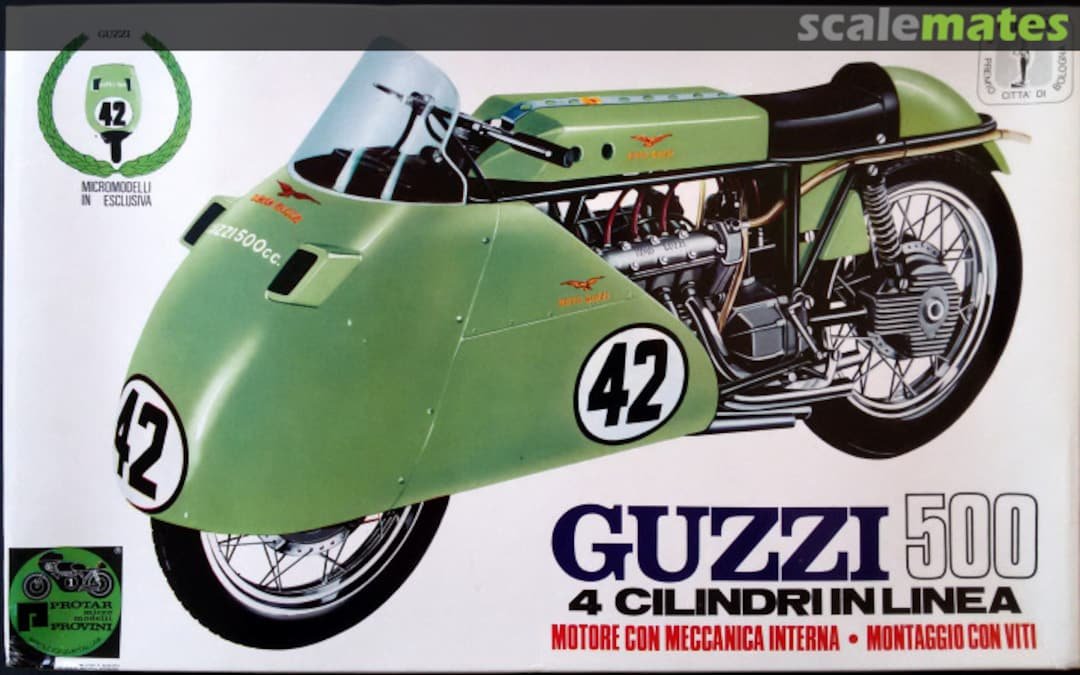
Pocher, Rivarossi and Protar (all Italian companies more or less linked) in the 70's liked to create plastic models with working internals. I remember assembling a Moto Guzzi 500 4 in-line cylinders which had all engine parts moving and connected to the rear wheel, through a transmission shaft. What a terrific kit it was. I wish I could rebuild it today, but these kits are almost impossible to find and cost an arm and a leg. Yves
- 224 replies
-
- 11
-
-

-
Beautiful ensemble of lights. Really stunning. I would dim or suppress the light in the helm cabin though..... Not sure how the Captain can see anything outside.... Were red light used in that era? Probably not. Yves
- 133 replies
-
- 1
-
-
- chaperon
- model shipways
- (and 2 more)
-
Yes, good catch. There is a large piece of machinery attached to the ceiling (go back a few posts). The cut in the pipe is to allow that large piece to slide down. The ceiling has to be inserted vertically/parallel to the floor because of the periscope wells and towers. Once in place, you will not be able to see the cut in the piping. Yves
-
Hawker Typhoon by Asat - Airfix- 1/24
yvesvidal replied to ASAT's topic in Non-ship/categorised builds
Kudos to Airfix for designing and manufacturing those big kits. Yves -
What a beautiful little kit. It is adorable!!! How much did you pay for that kit? Yves
-
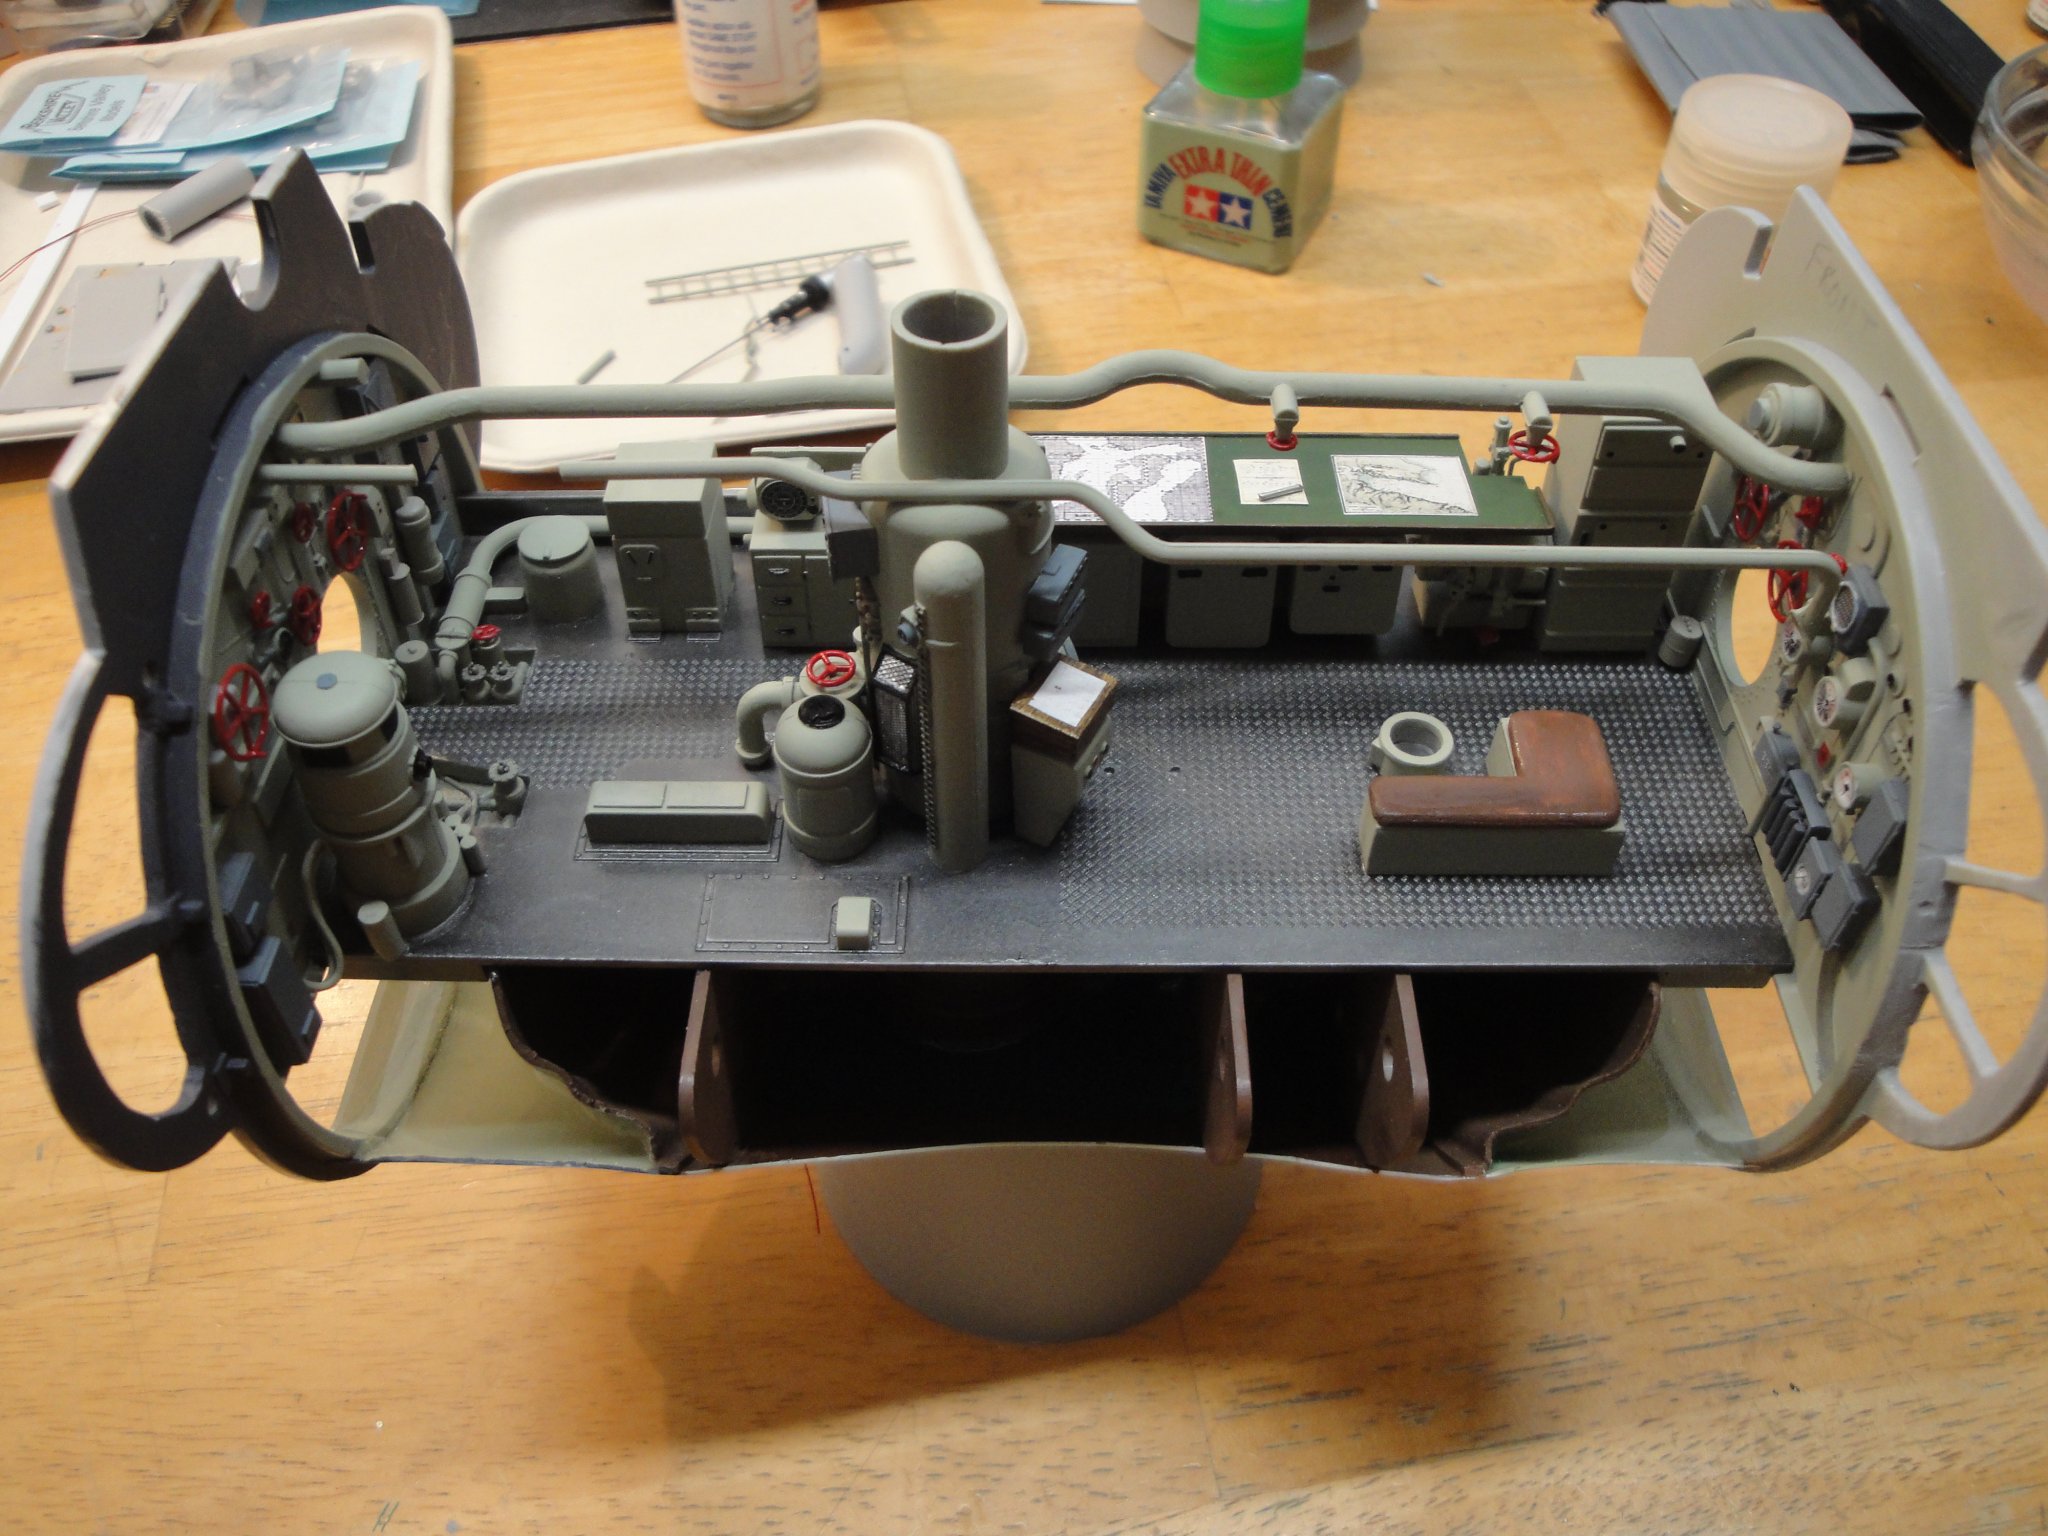
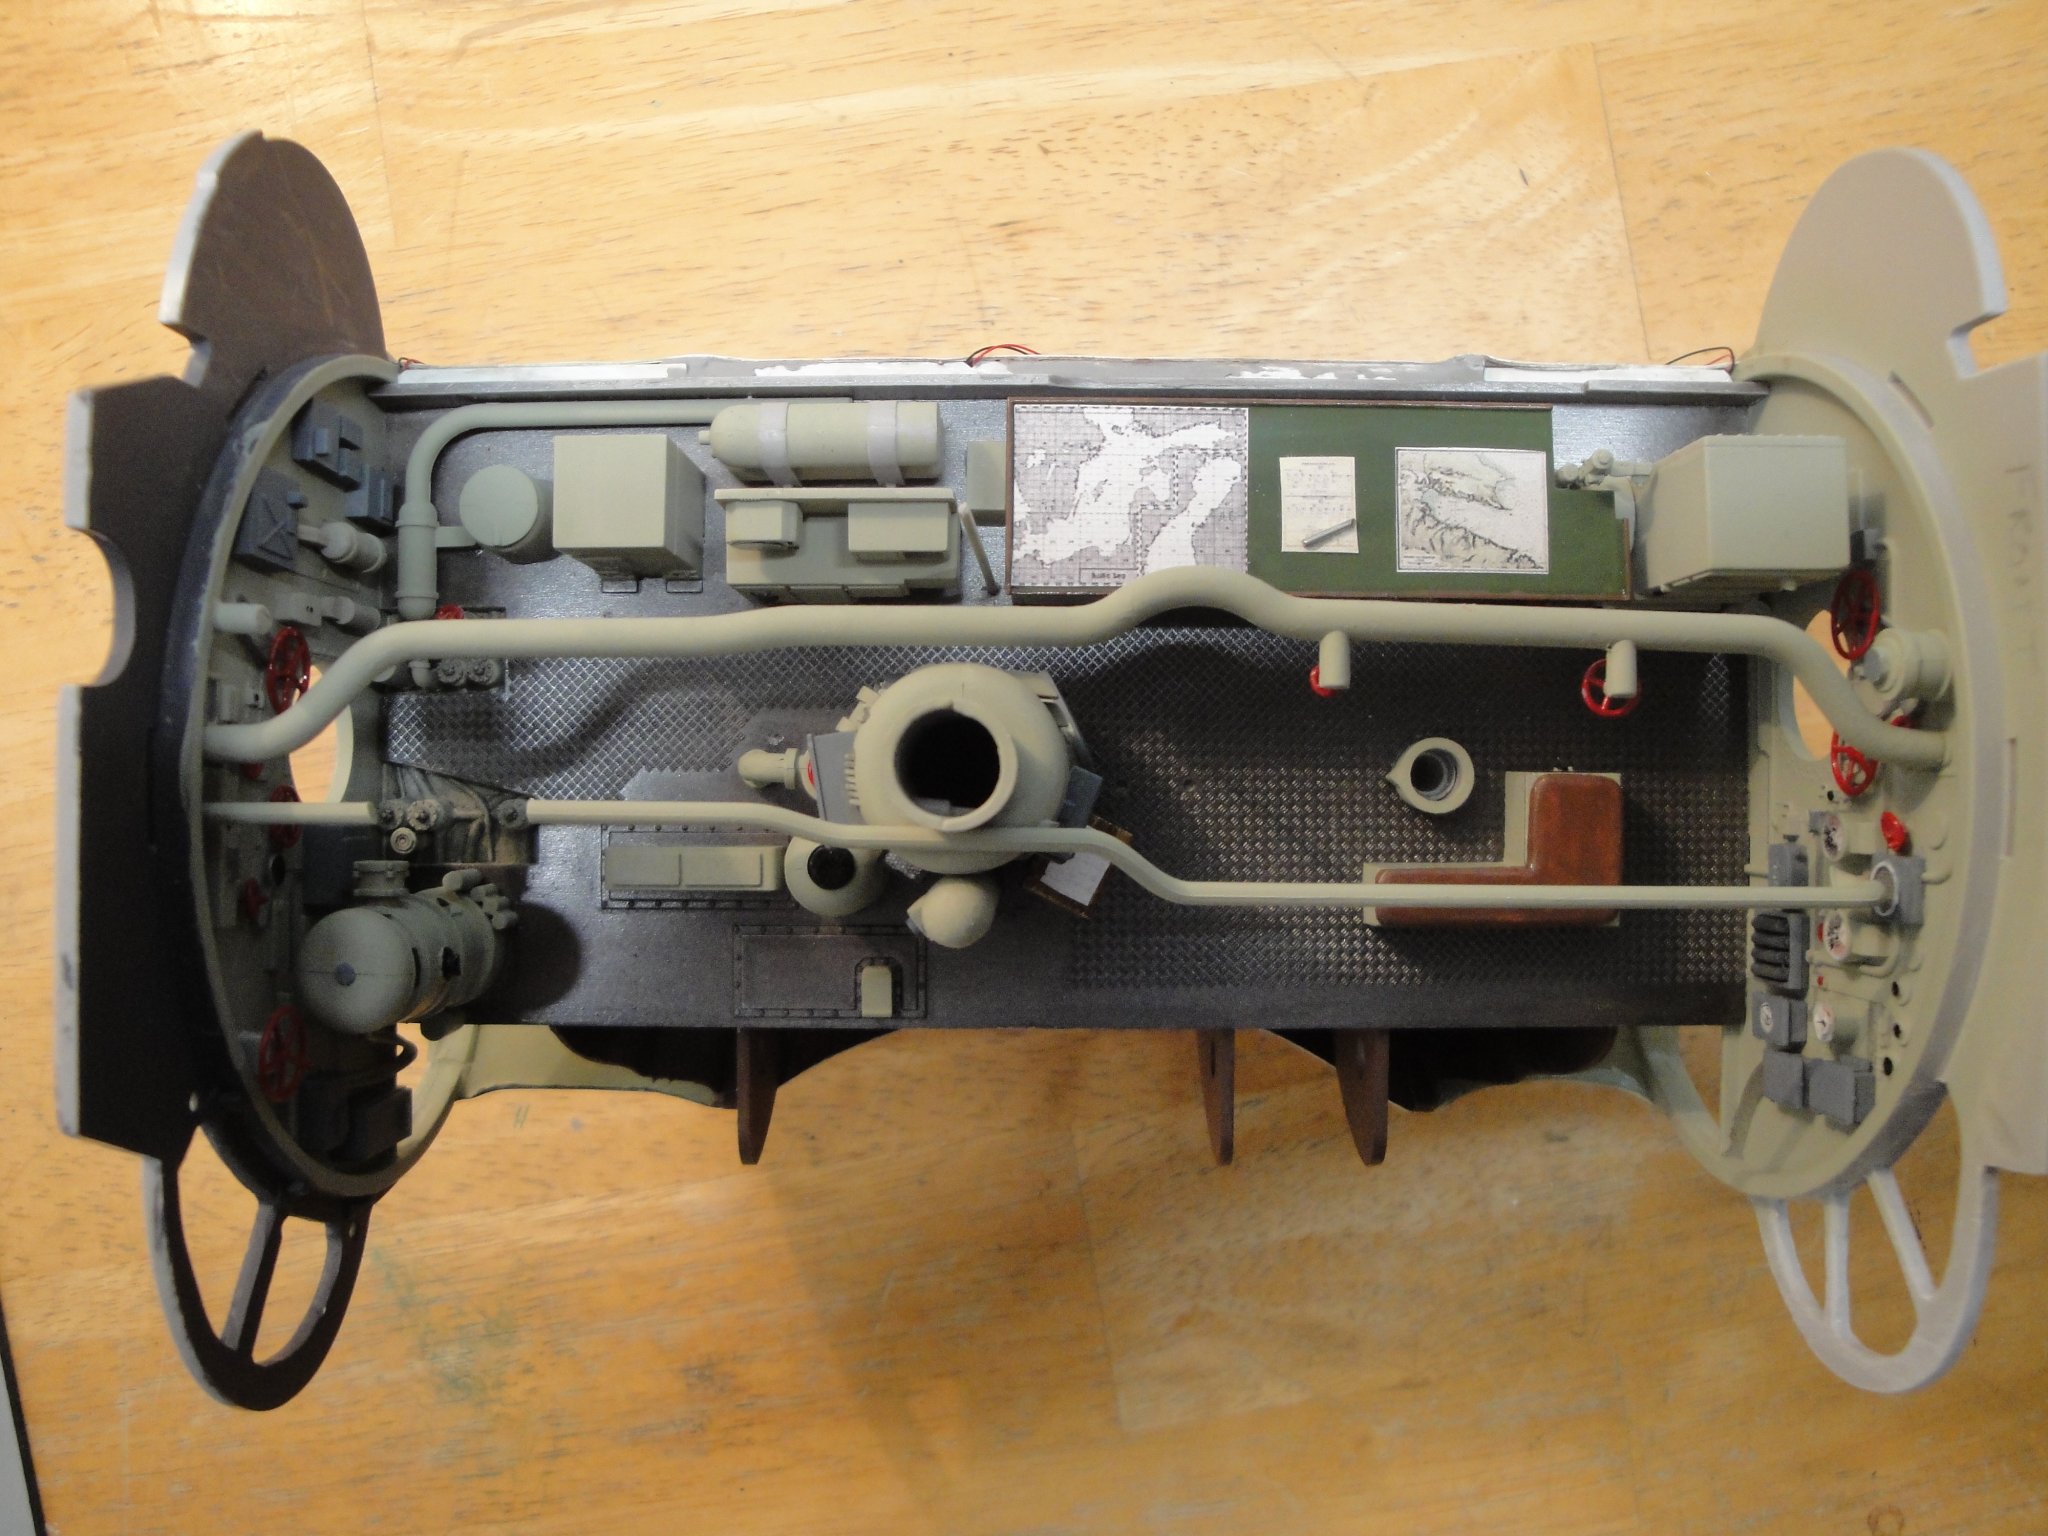
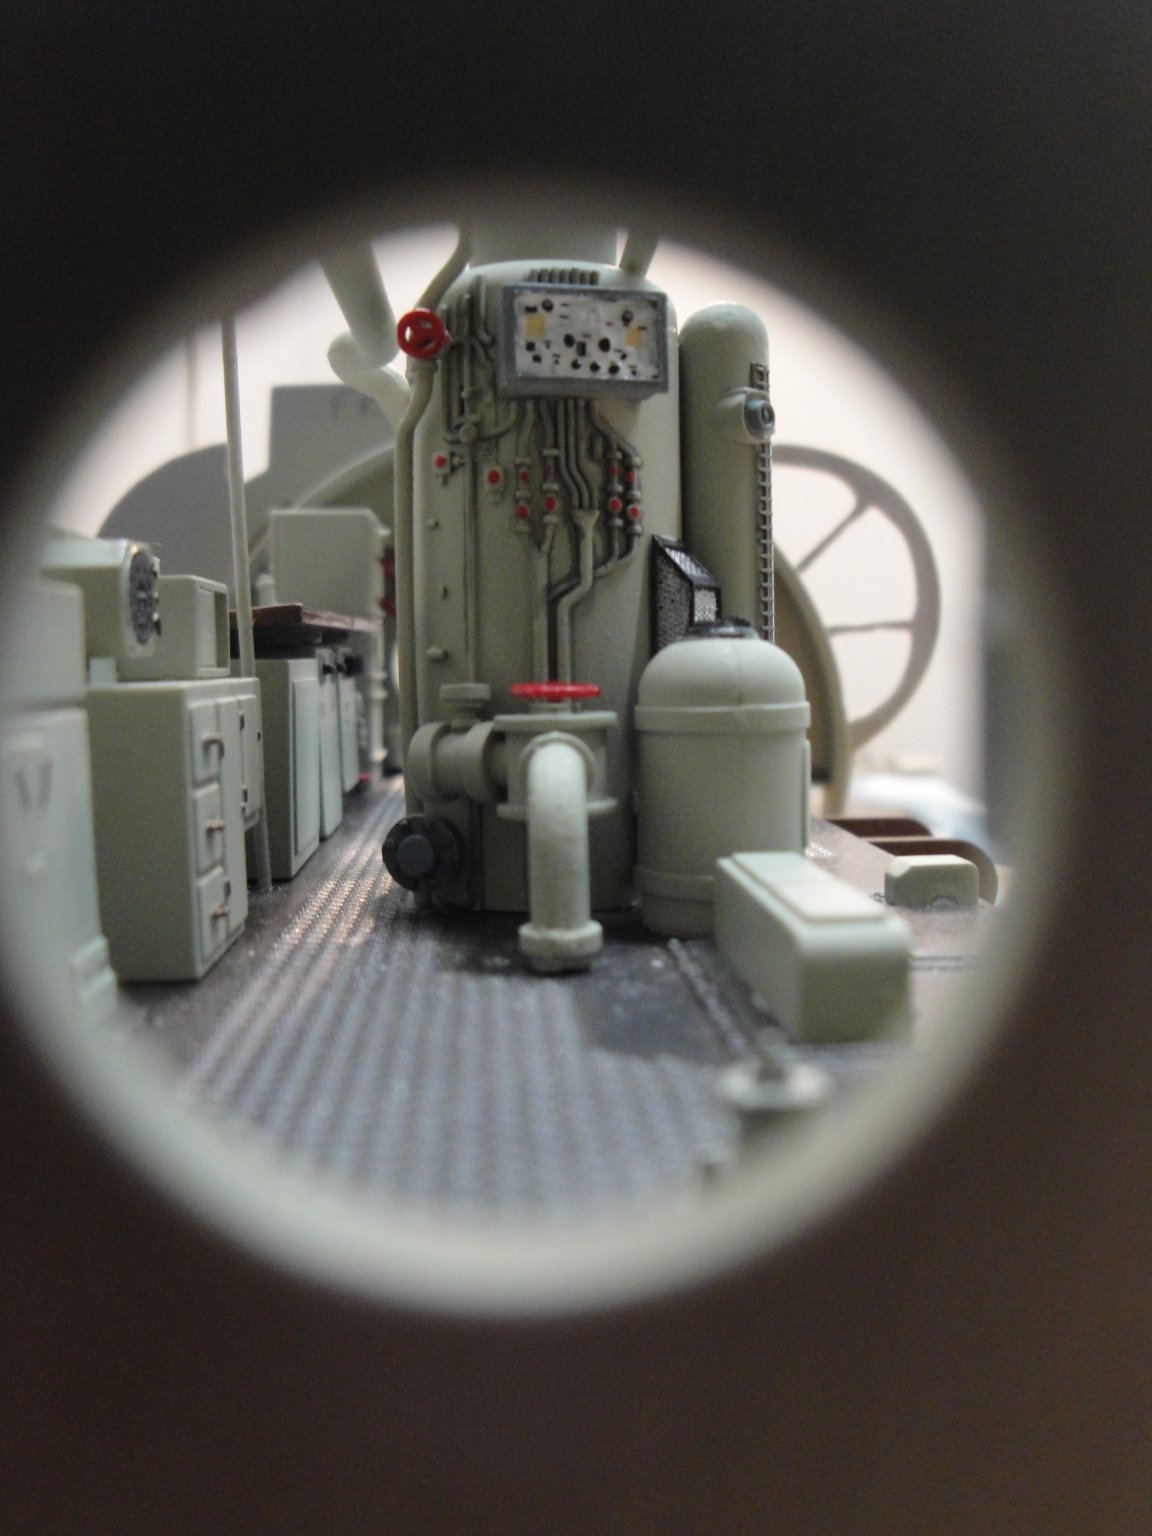
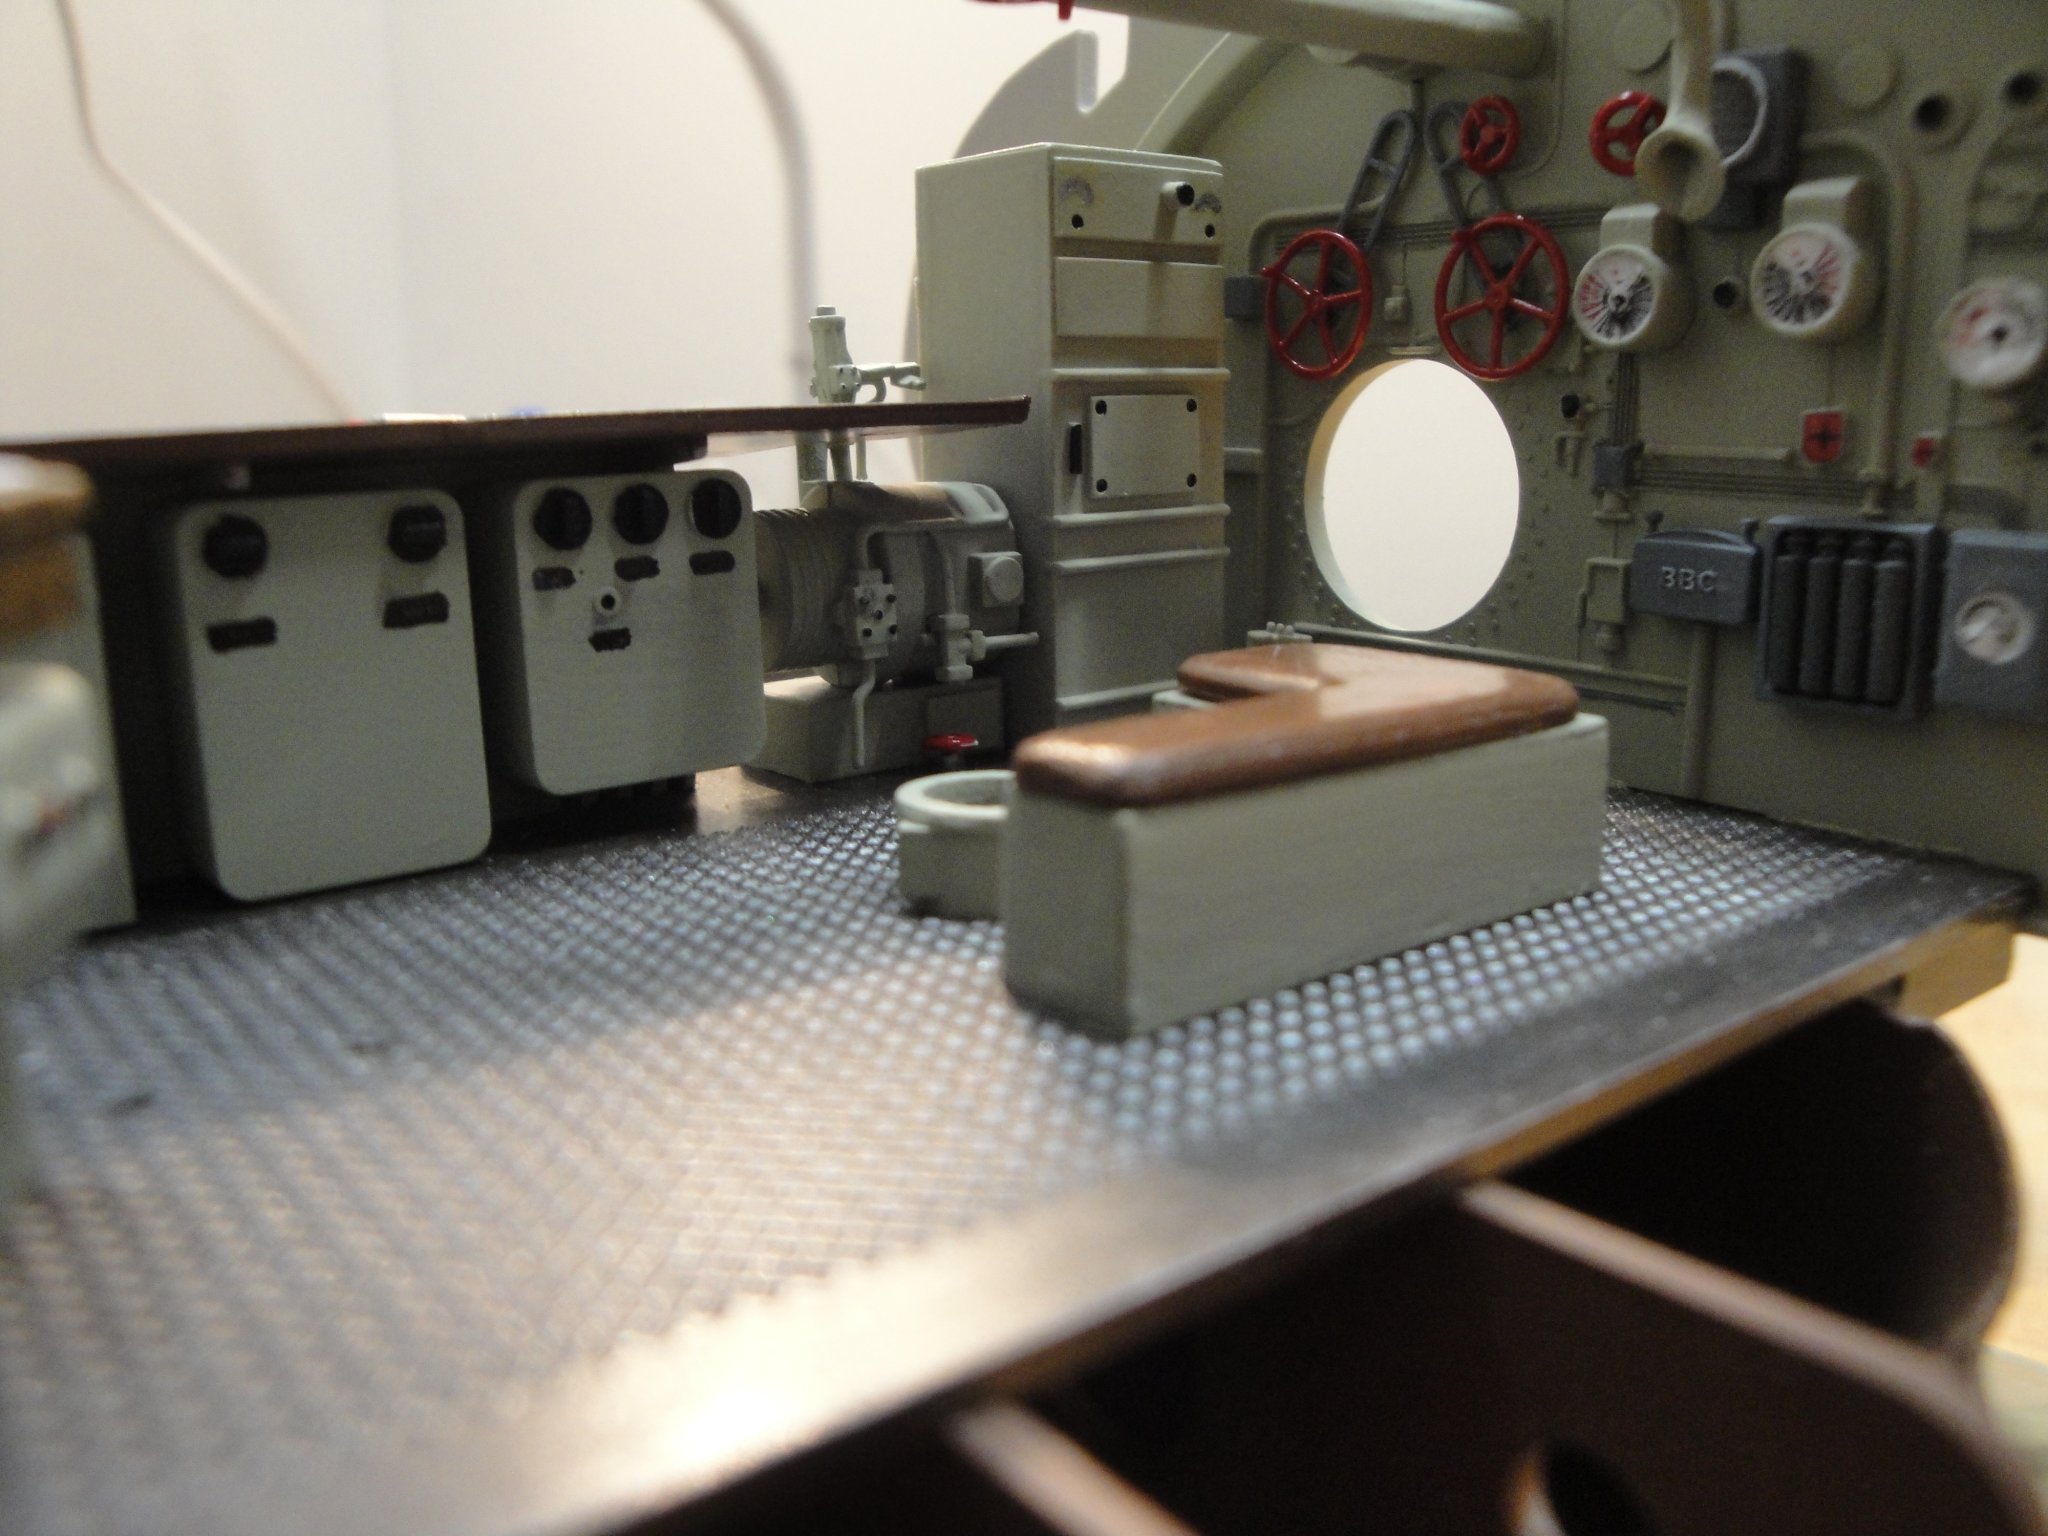
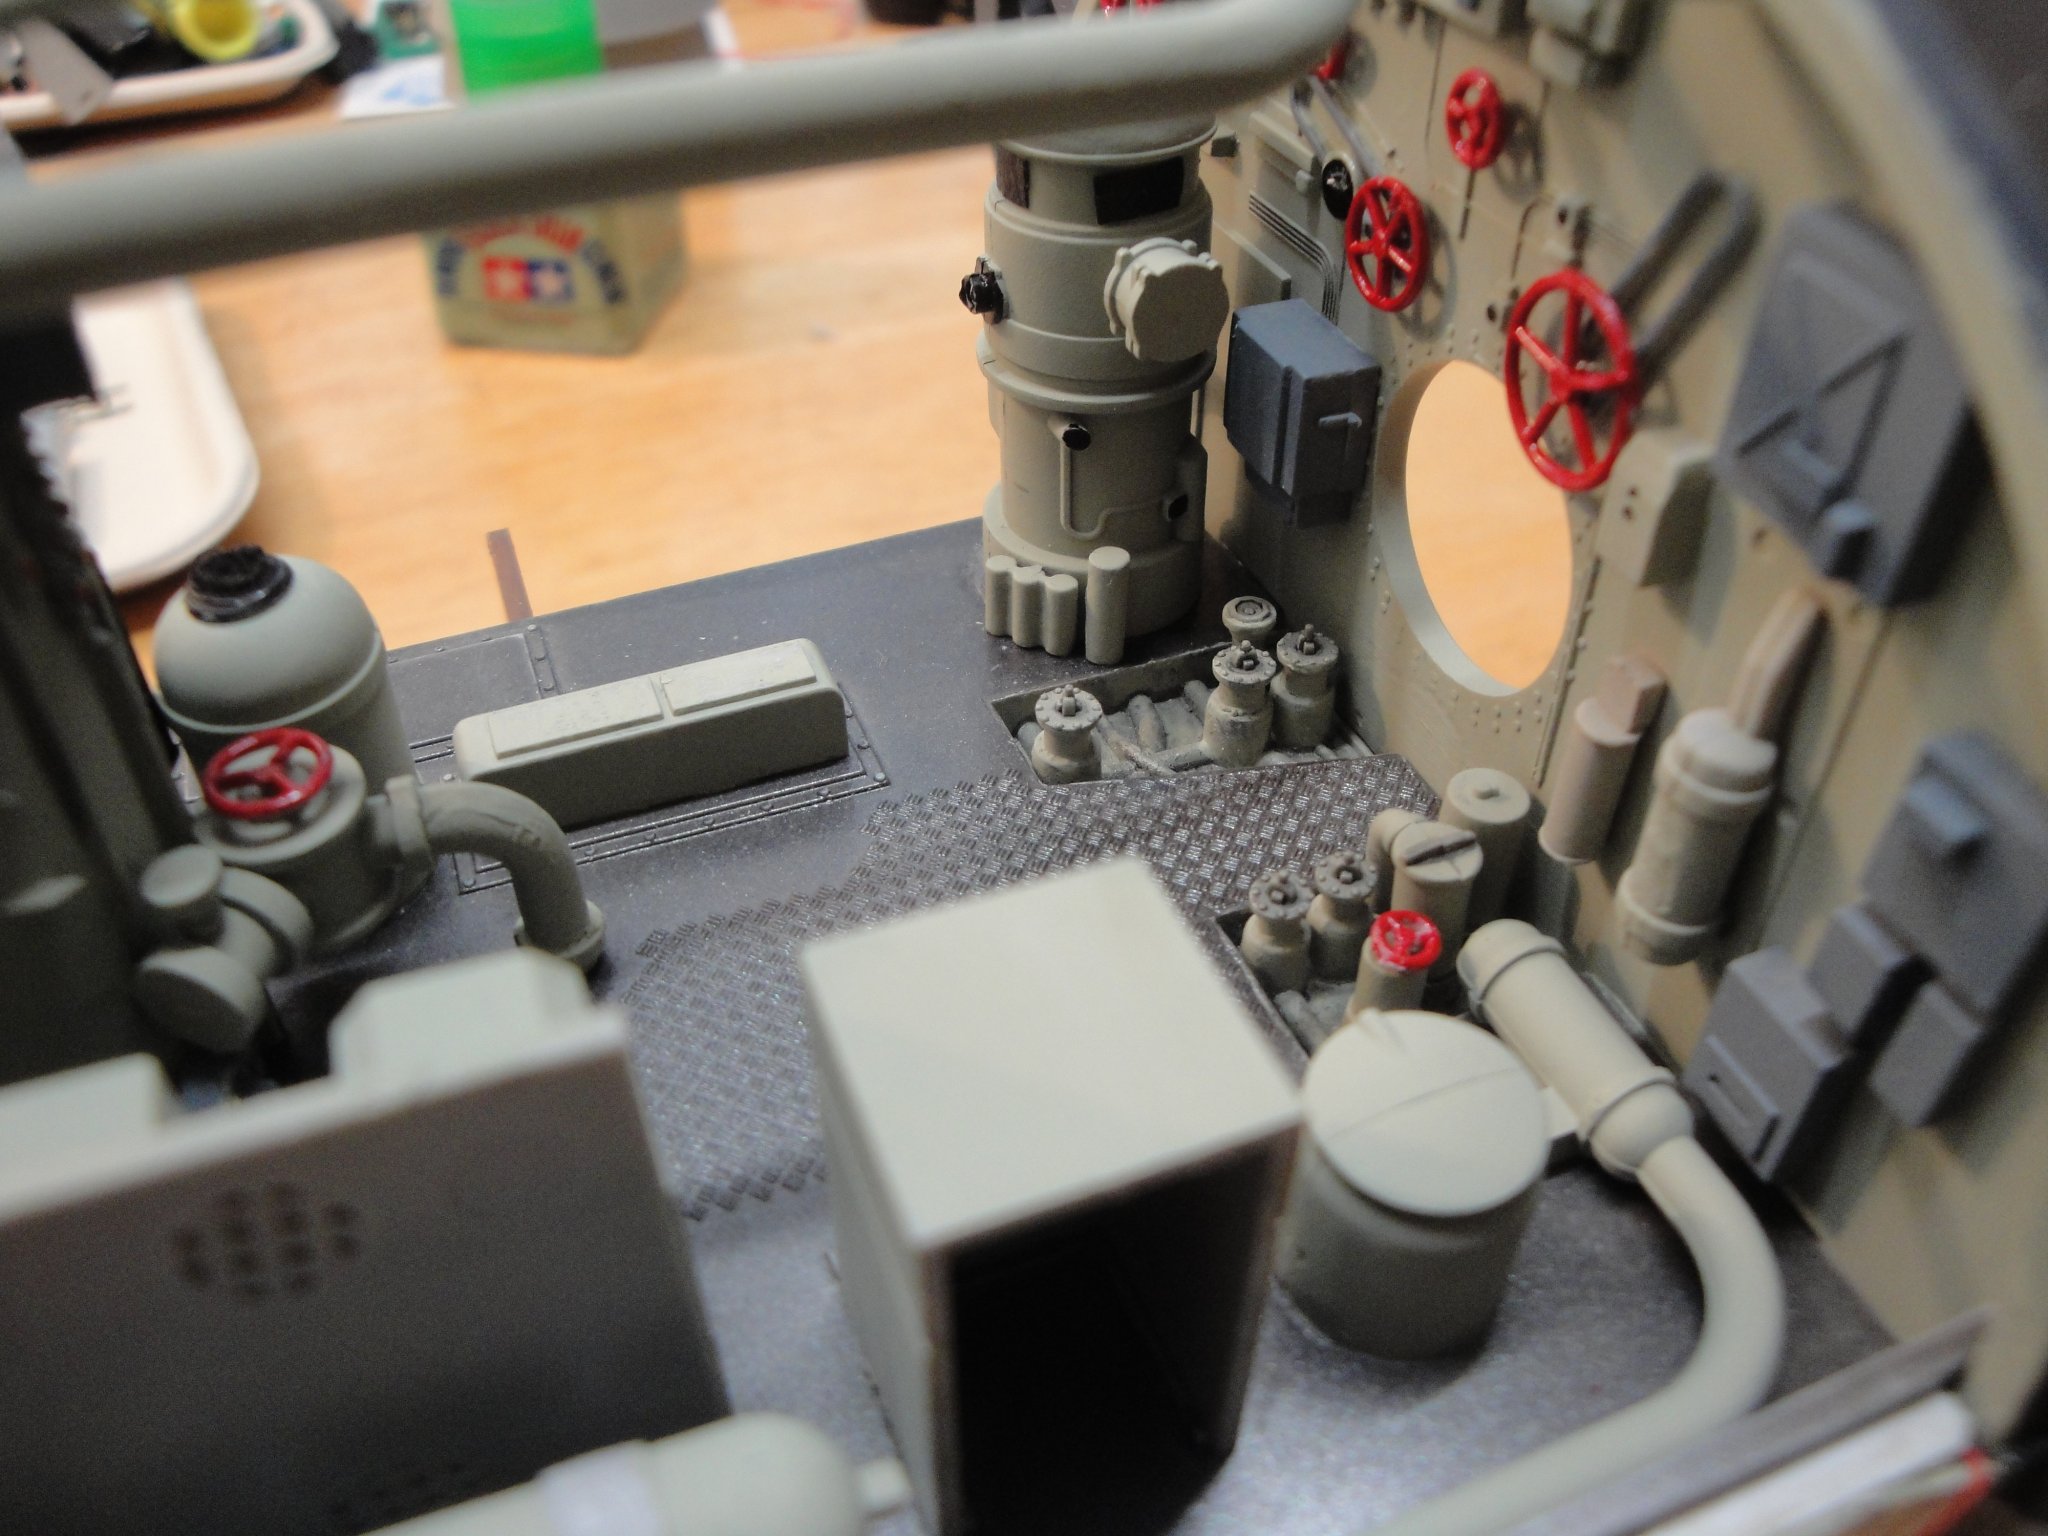
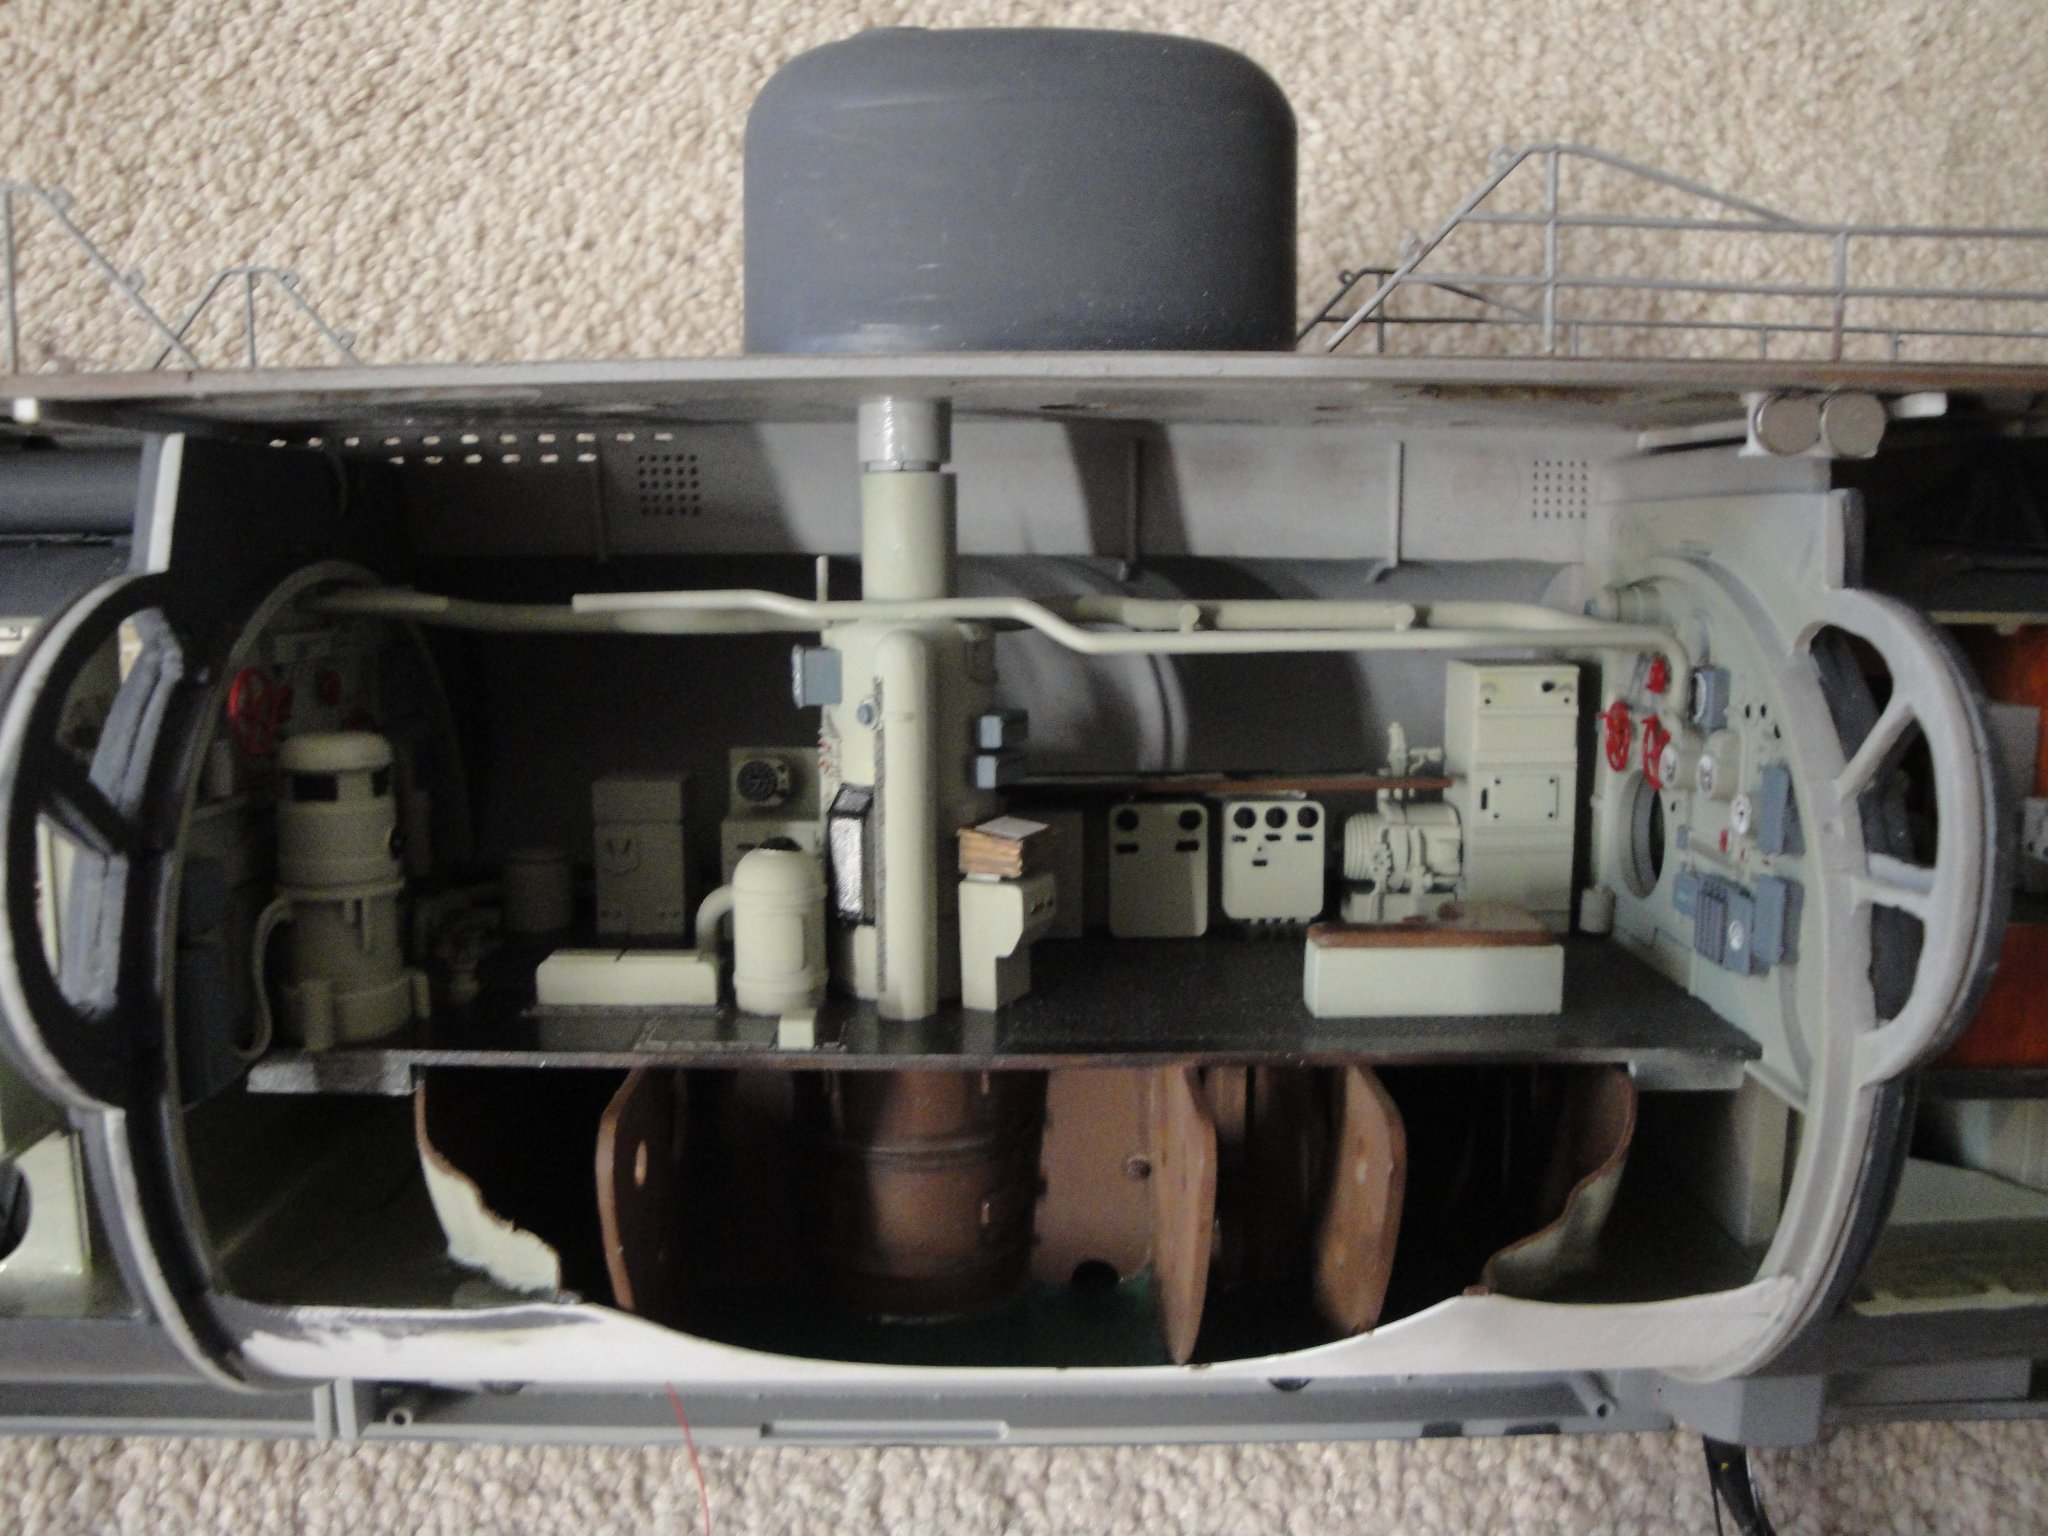
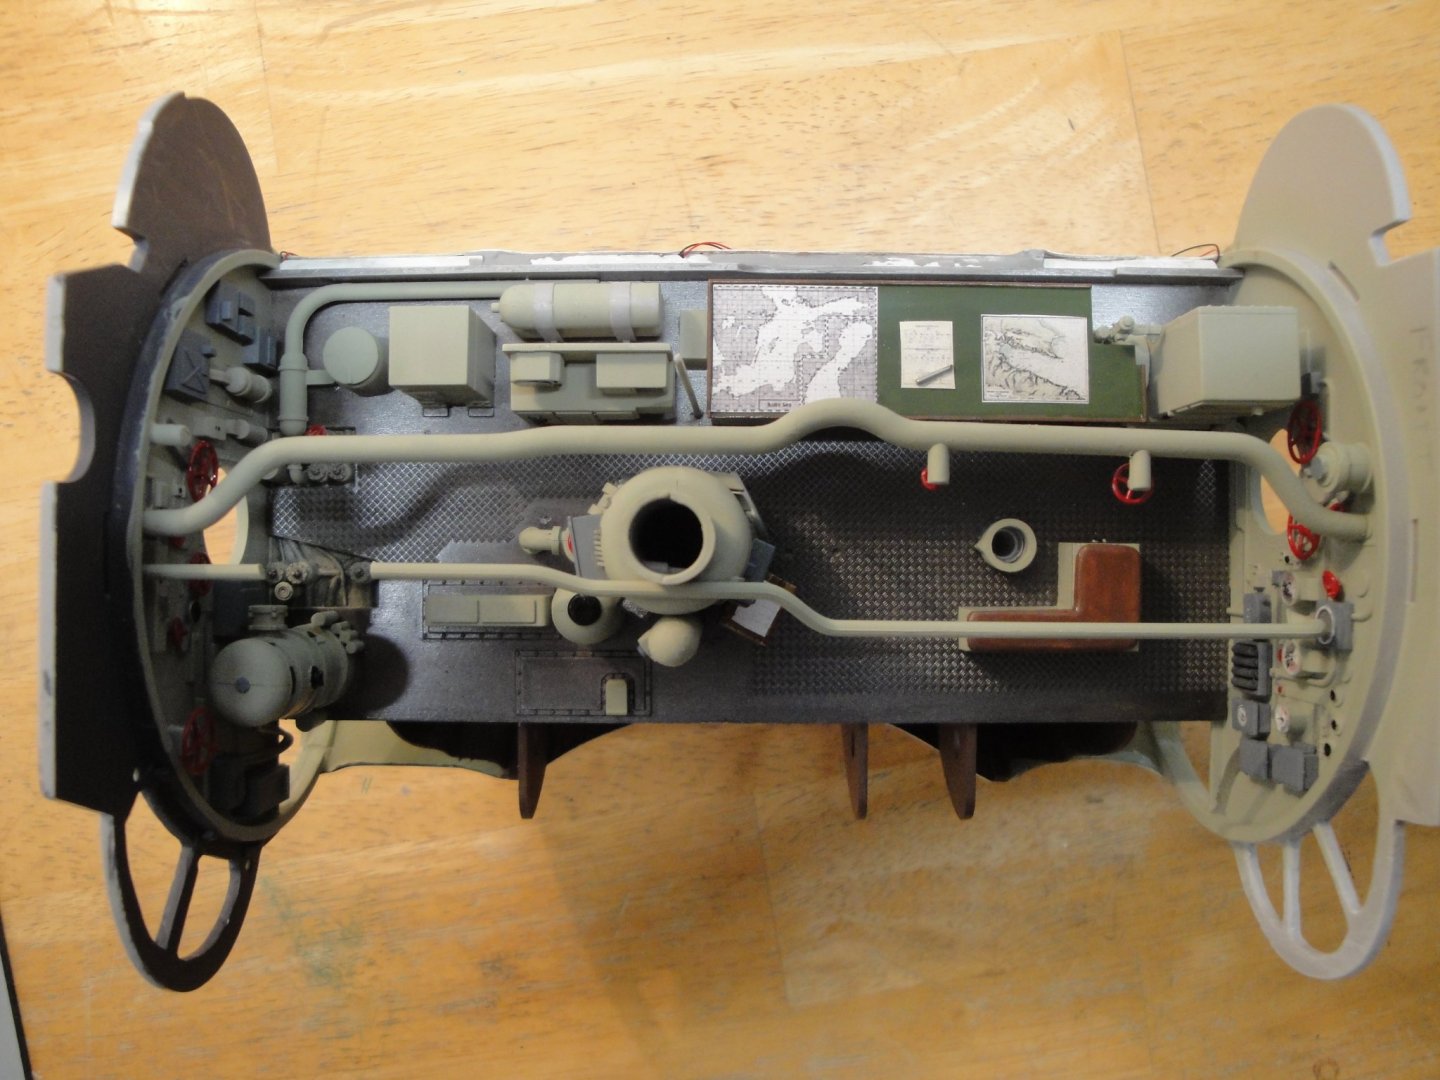
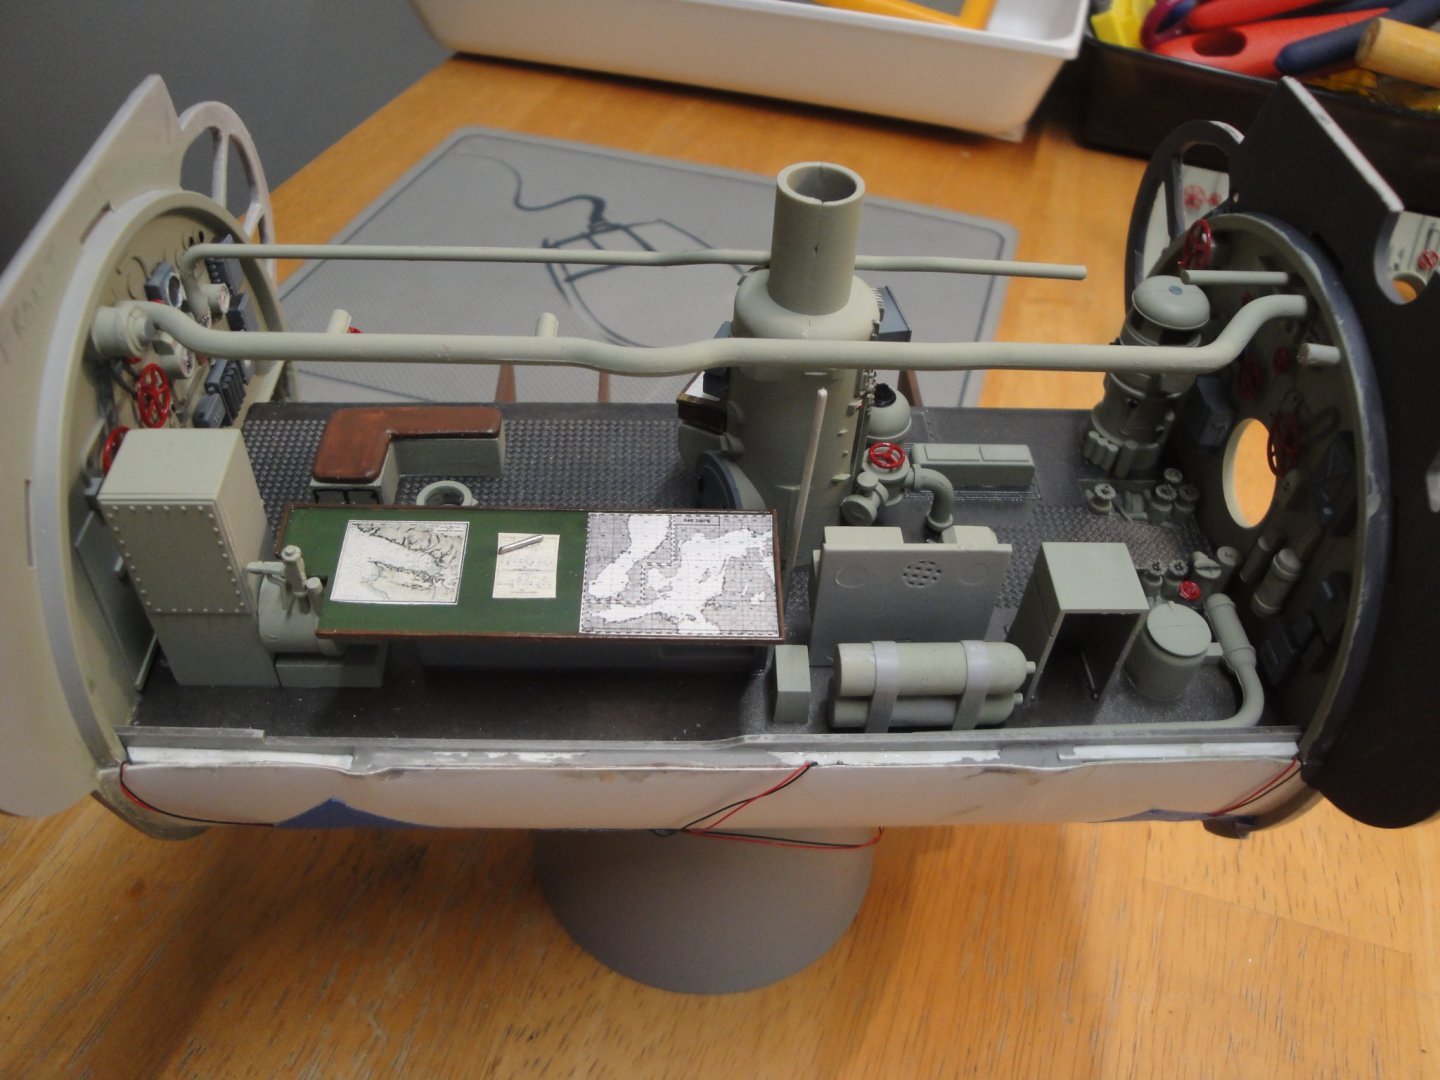
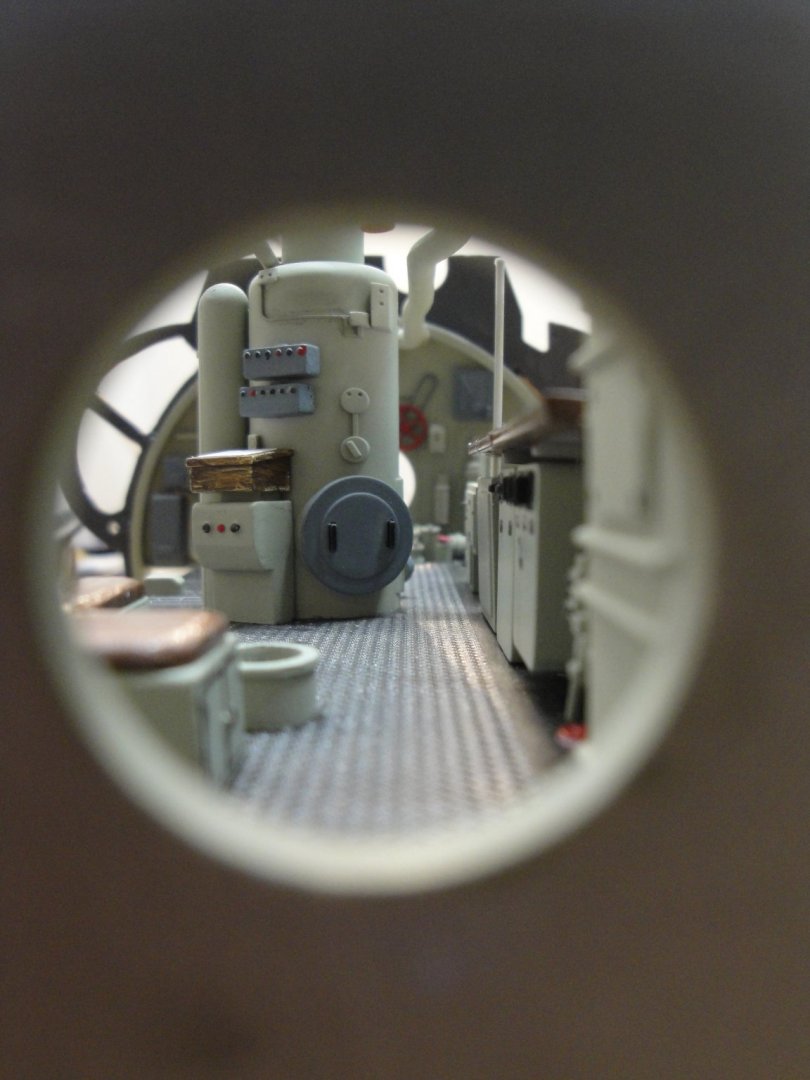
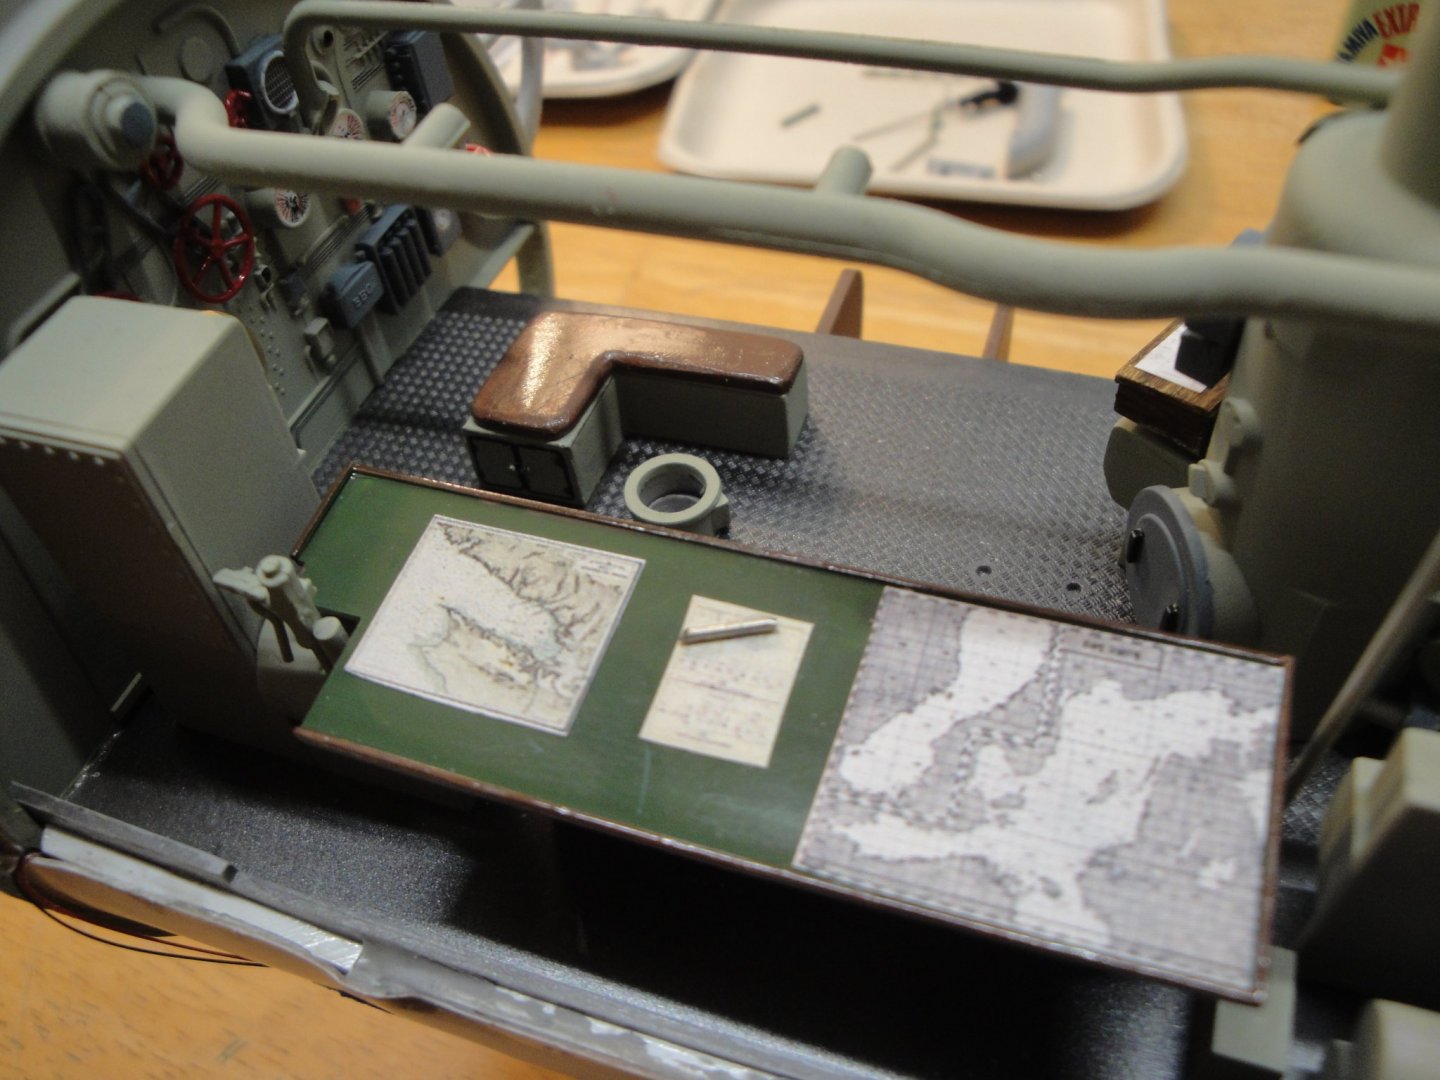
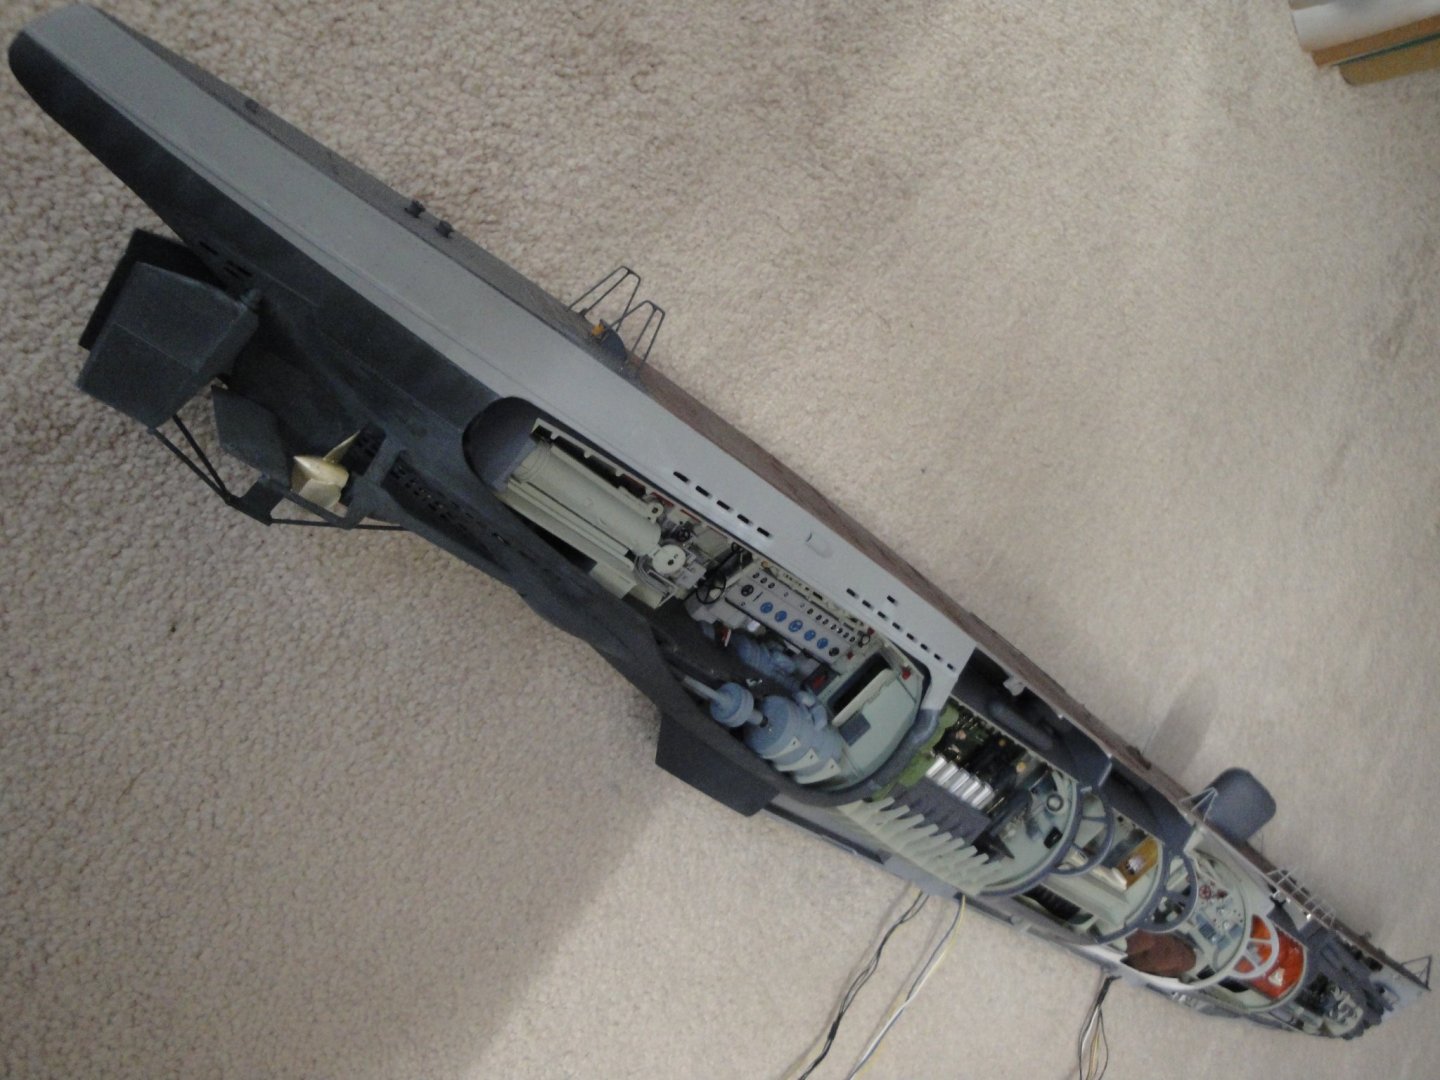
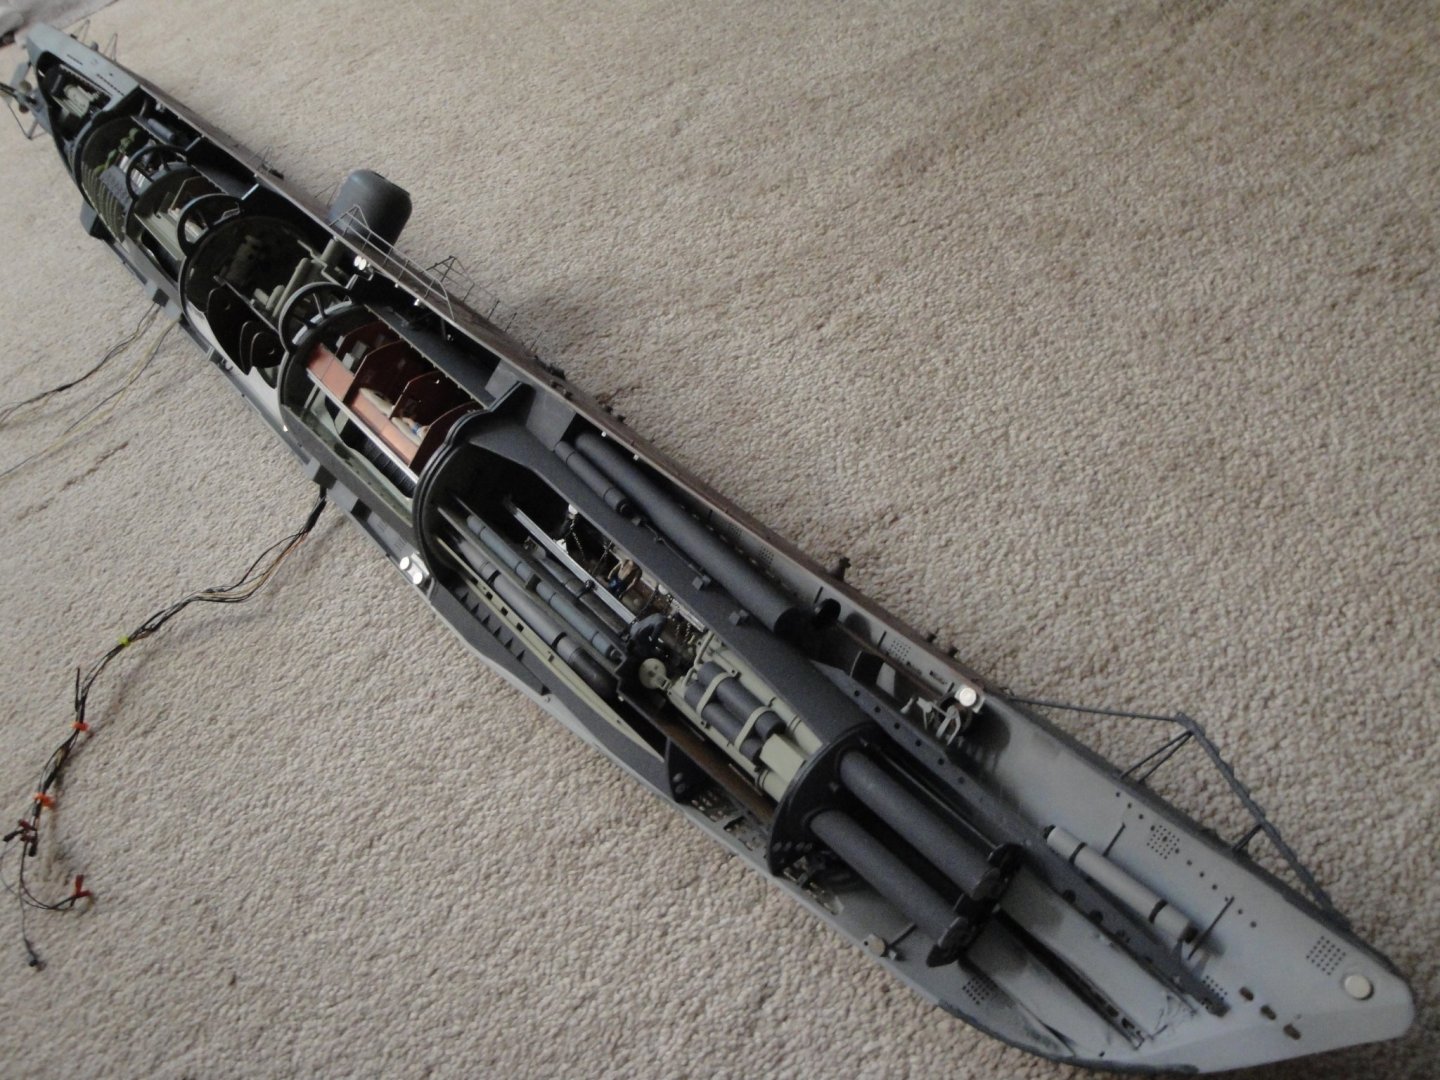
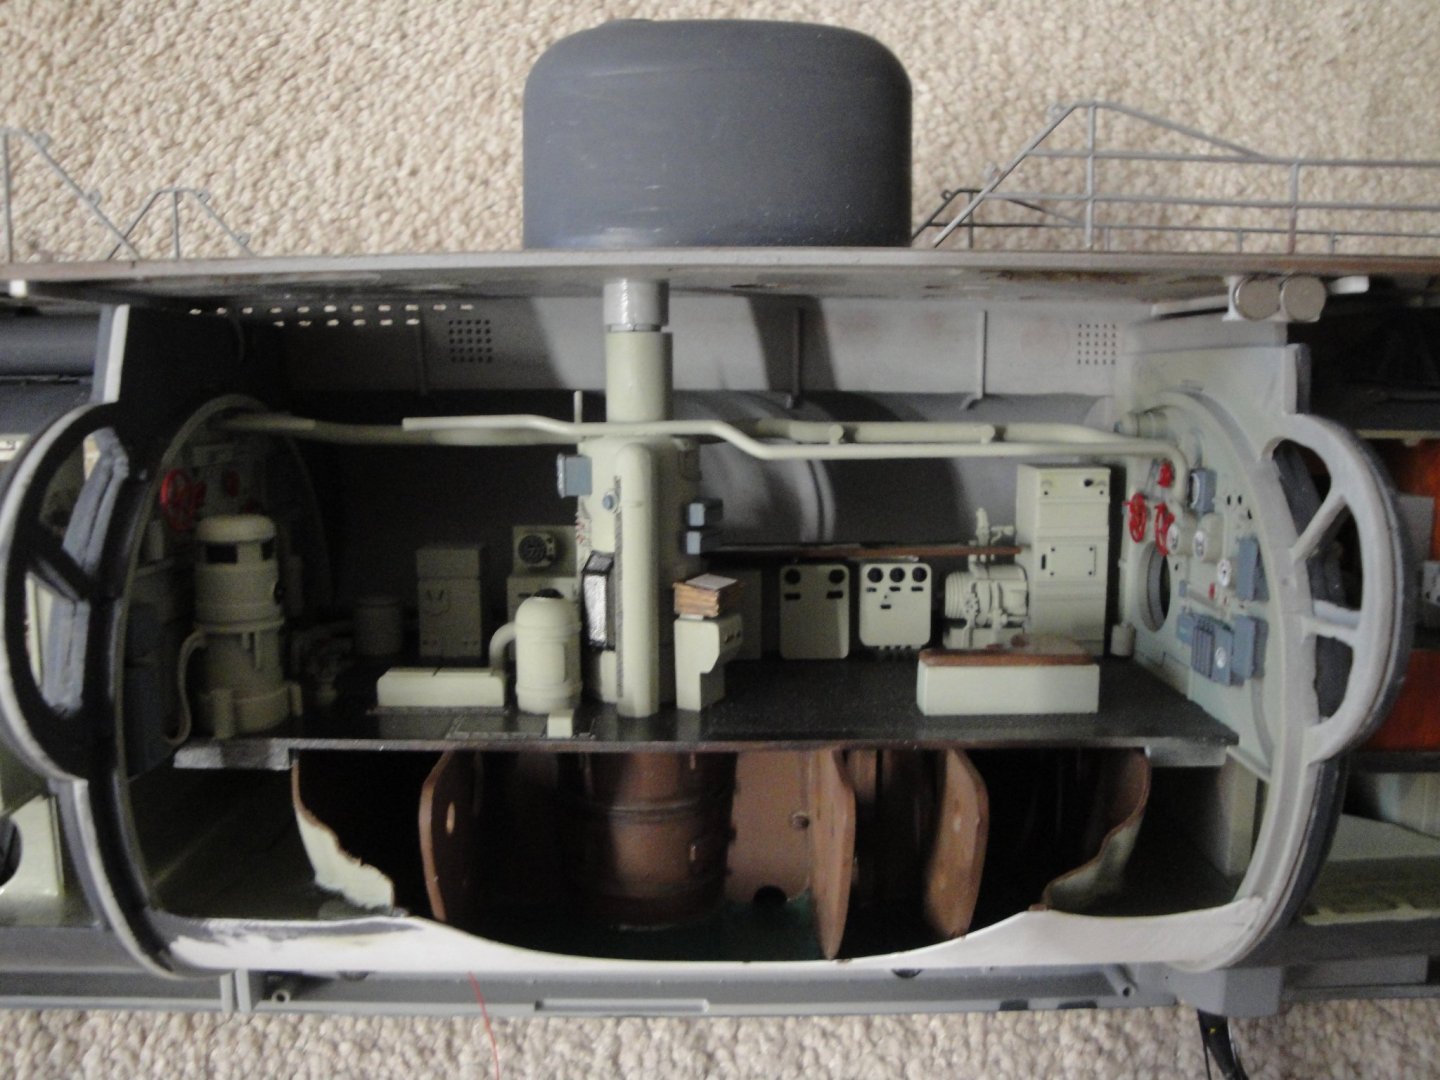
The Kontrollraum is pretty much finished. I just need to populate it with a few sailors. In the meantime, here are a few pictures of it: As you can see, the front of the compartment is completely devoid of details, to allow some view into the back wall. It is a little bit unfortunate that Trumpeter did not push the efforts to include the diving stations (two sailors sitting on the bench) and the Christmas tree of valves. A couple of views through the hatches: What you see in the center, is the computer used to calculate and program the torpedoes trajectory. In fact the computer is composed of a lot of parts, but the keyboard to enter the data is what is being shown here. More pics of details and what will no longer be visible, once the roof/pressure hull is assembled: The bench is covered with fine lamb skin.... just kidding. The two cabinets under the navigation table, are also part of the Torpedo Trajectory calculation computer. Picture above: The equipment seen on the top right corner is nothing more than the compressor to produce cold for the fridge on the other side of the wall. Verification that all compartments fit into the hull: As you can see, the fitting is not too bad for such a large and complex model: Yves


- 760 replies
-
- 23
-
-
Nice touch with "le Cadran Solaire". Yves
-
The rocks are so realistic. Excellent work. Yves
-
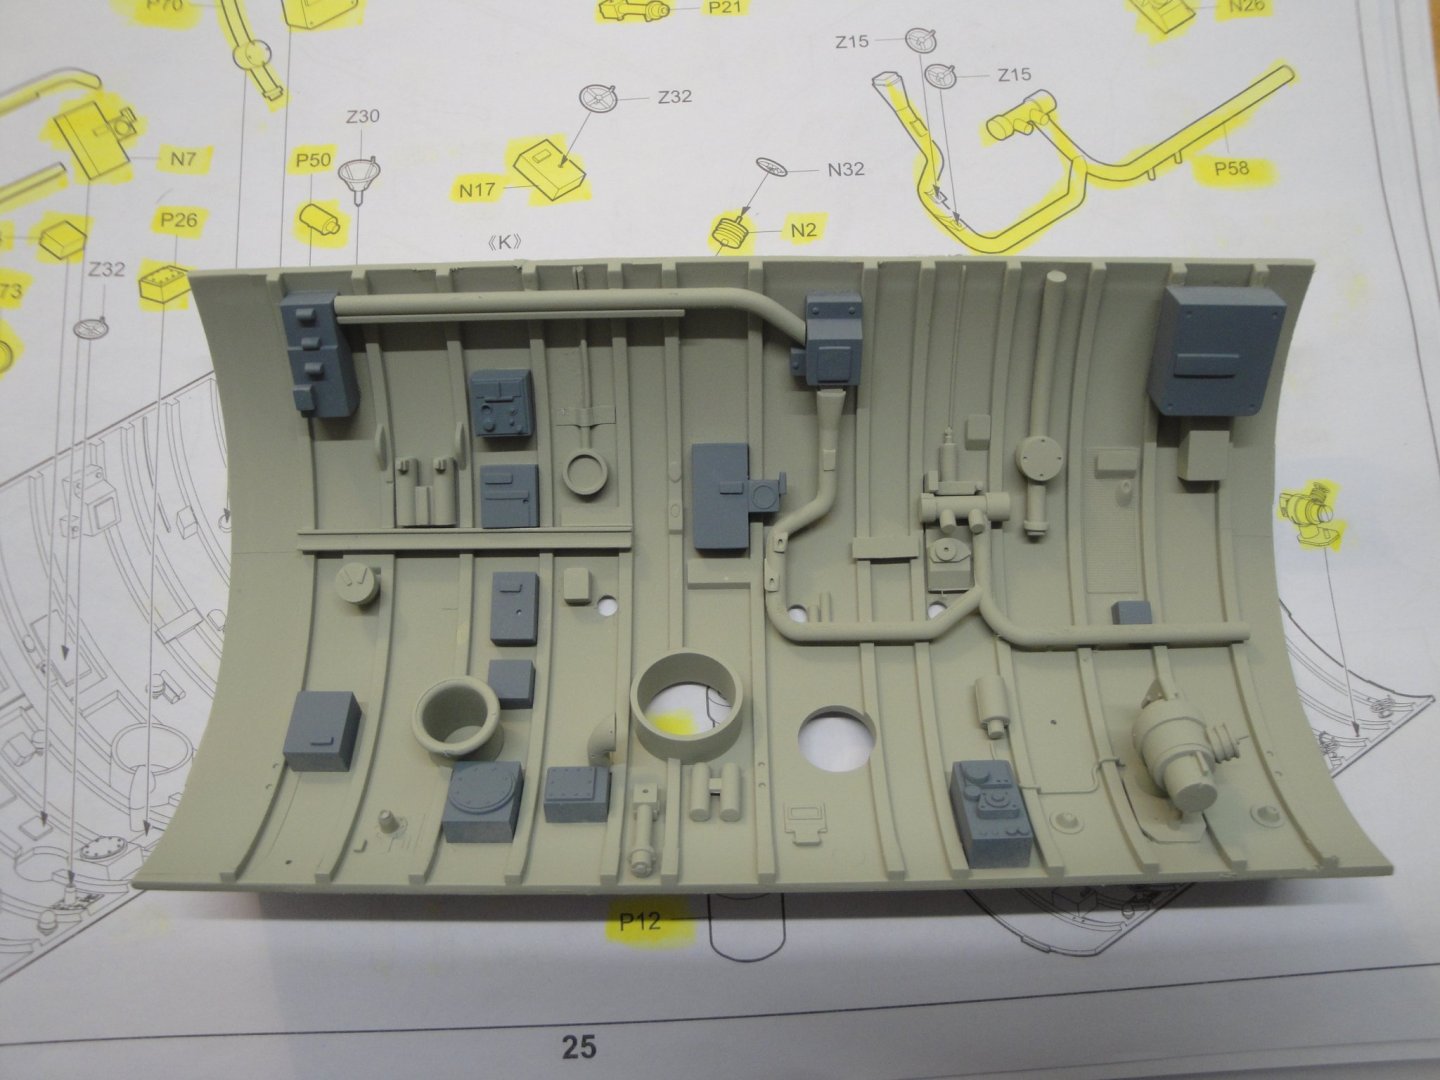
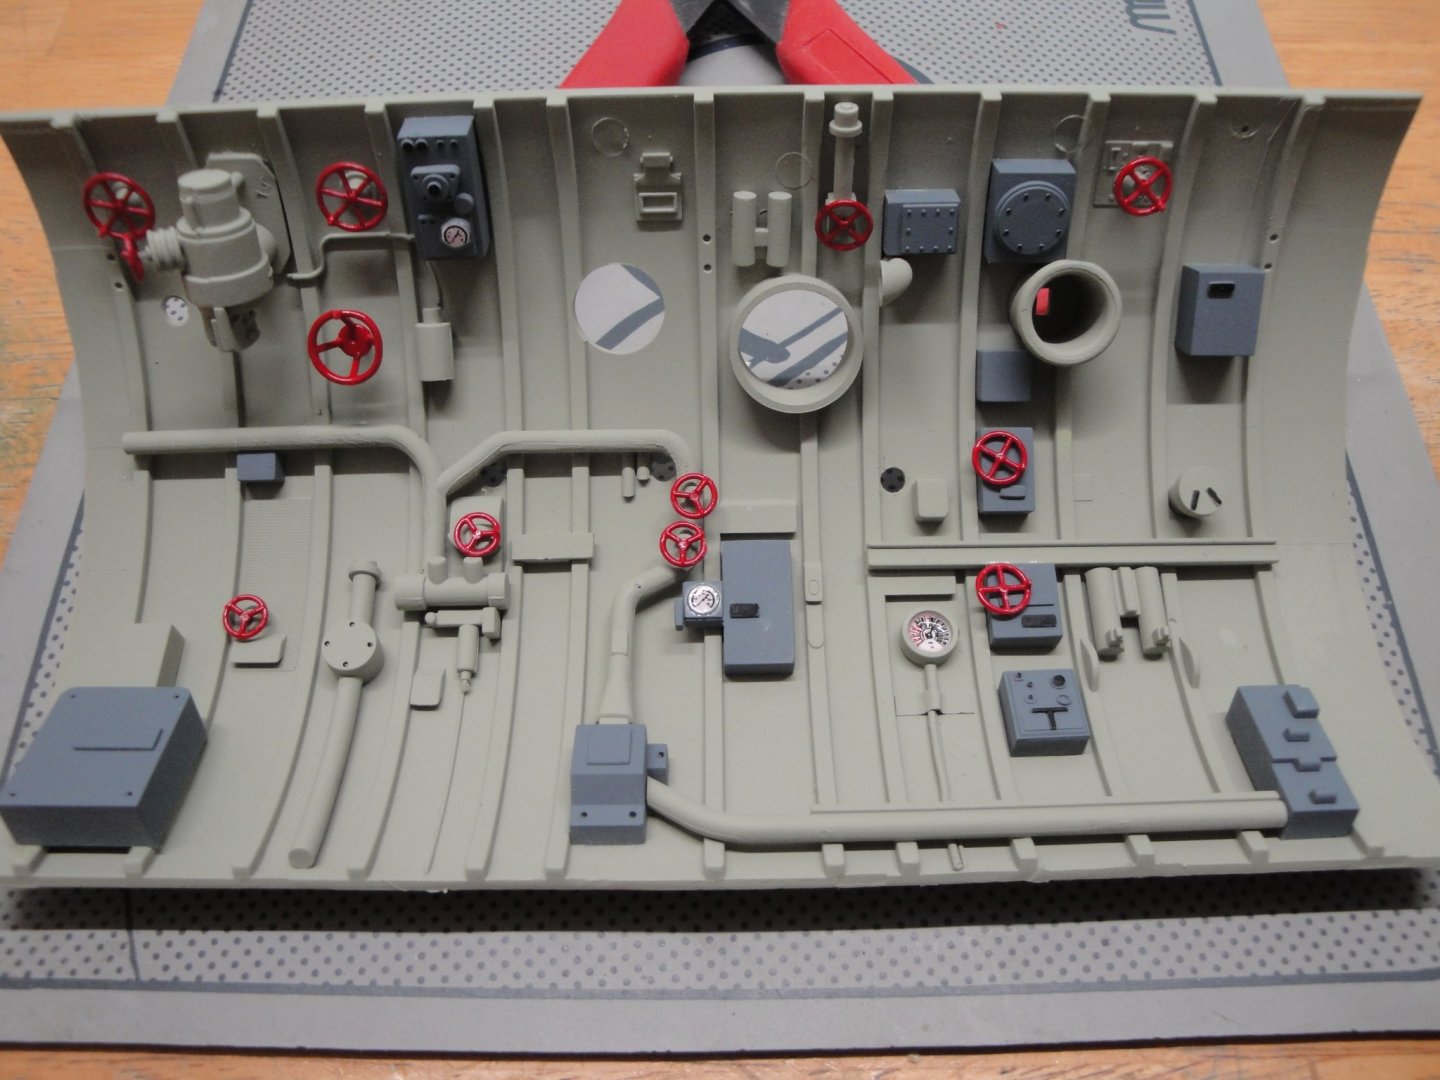
The ceiling/hull pressure is finished. Lots of small details which unfortunately will be very hard to see, once the lid is on. I suppose that if I wanted to display some work, I would have not chosen to build a submarine... Et voila. Yves
- 760 replies
-
- 21
-
-
EG, How do you remove chrome from the sprues/parts? Do you use some chemicals or do you sand it away? Yves