
HOLIDAY DONATION DRIVE - SUPPORT MSW - DO YOUR PART TO KEEP THIS GREAT FORUM GOING! (Only 72 donations so far out of 49,000 members - Can we at least get 100? C'mon guys!)
×


popeye the sailor
-
Posts
16,007 -
Joined
-
Last visited
Content Type
Profiles
Forums
Gallery
Events
Everything posted by popeye the sailor
-
 hello Glenn.........sorry to hear......condolences to you and your family. as for everything else.....a model builder's life is never dull I know how you felt....I've got one model in the hallway that has hit the floor twice. both times, never breaking any of the masts or bow spirit......but the stern has some damage. one of these days I'll fix it and complete it....it's on the list. the hull is look'in good so far hope you get to find more time to work on her.
 -
..........I didn't even notice! in French, Denis is spelt that way.......and pronounced Deni' I've become accustomed to it due to my French Canadian Grandmother. no harm...no foul I did get to do a little on the T.D. yesterday, in spite of the interruptions........I started to make the front part of the first level railings, as well as the second level they are a tad too high......I will need to trim them down. I'll use the scroll saw to do that. for the second level railings, I really wish they would have marked the part out.......I hope I chose the right ones. I also started to assemble the third level deck. I will use tulle to cover the openings from the inside. I still have an errand to run a bit later, but I will try to get more done. thanks for look'in Mike...always a pleasure thanks to all who hit the like button.
-
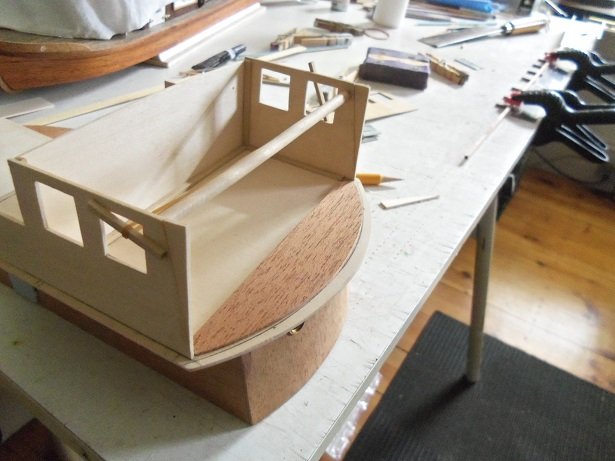
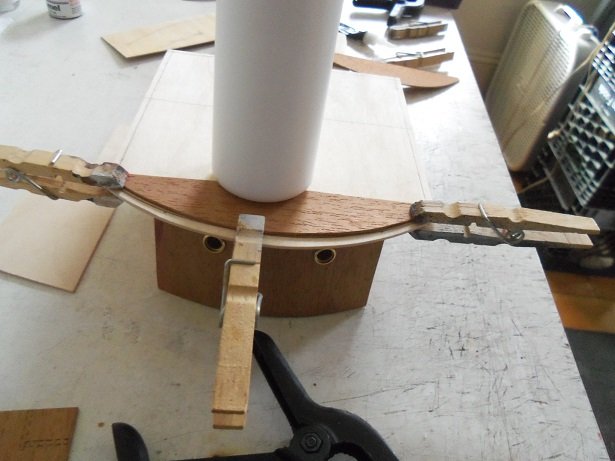
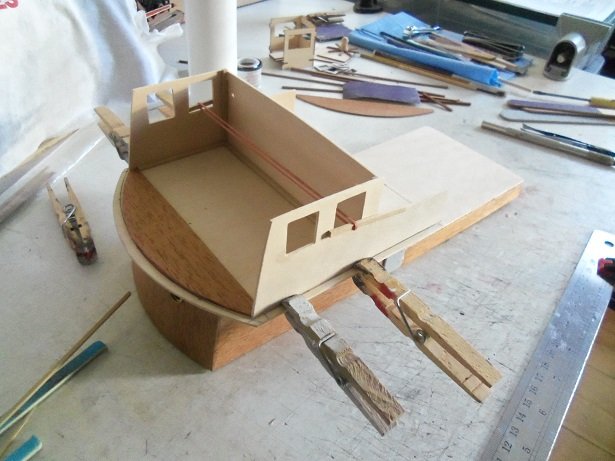
I just got back from Christmas shopping with my son.........we do this every year. we have fun anyway....the current dilemma with the helm room. I'm not going to make another part...........I simply made a couple of triangular parts and added them to the side walls, this will allow the front fascia to be more vertical, eliminating the curvature problem at the base, and from eclipsing the windows as it wraps around the front. they will be close to the edge, but I don't think it'a a big deal. the side parts were cut on an angle for the fascia....... the bar in the front is just there to keep both side vertical.
-
yea.......you just have to experiment and come up with a strategy that works for you. it still a bit of a bear for me.......I do think that the type of cement you depends a lot on the outcome. CA can be troublesome........seeping everywhere in a tight space. I do wish that regular model cement {testor's} would work.......I have the tube and the bottle. both are different thicknesses. another option to Mark's suggestion, can be found at Billing USA. they are called pick 'n place. they look like a pen with a sticky substance on the end. to clean them, you simply press them on the sticky side of tape. I have one of every size.........I know it's not the problem your having, but these little guys work well for what they do. just something I thought I'd throw out there
- 140 replies
-
- 4
-

-
- the sullivans
- trumpeter
- (and 2 more)
-
oh......I'm sure they were {and probably} still are.......die cutting was the early process before laser cutting came into use. there are likely old kits out there......like old plastic models, they show up on E-bay and such. I mostly use a box cutter to cut out my parts. I'm glad the balsa aircraft are starting to get away from die cutting........my Fokker Dr1 was so much better I don't use too many power tools either, but the scroll saw has been a godsend. I may look into other stuff, but I'm in no hurry.
-
hello Greg........was wondering where you got off to. I was hoping to see progress you might have made, but yes........I'm reminded that this kit is hot off the presses, and not everything id available yet. gee, I figured it would have been available in the US by now. have you made any more progress with the hull? sorry about the Vendetta.........she still sits on my desk, waiting for me to continue. I figured you and Carl were disappointed. I have my modeling behavior, and thinking how to proceed to blame. the wood bug gave me a rash Feb sounds like a good goal
-
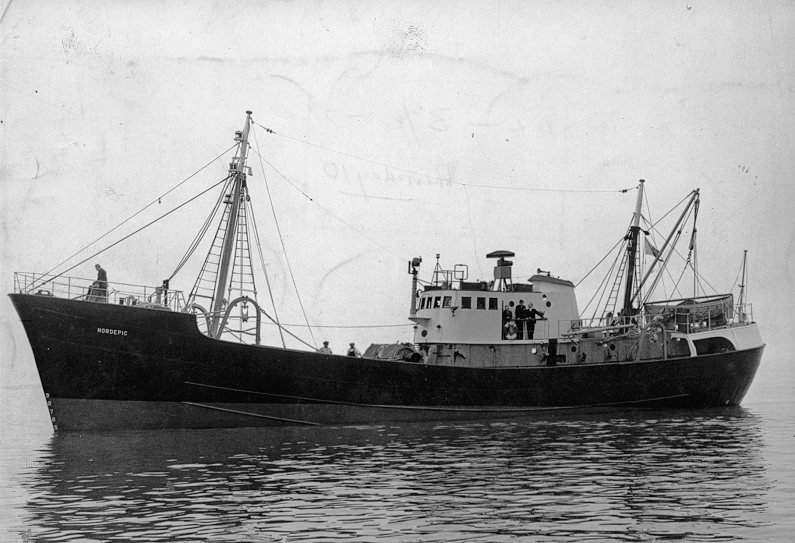
Hi there CDW........mahogany is a brittle wood to start with.........add 30 to 40 years to it and it does tend to compound it. I've had surprisingly good luck with the scroll saw thus far....I cut out the cap rails this morning without incident. I haven't seen one of these die cut yet.......most are laser cut. this one is not cut out at all....one of the earmarks in being an older kit. I am a bit in question about the 'fit' quality of this kit..........I didn't find it too bad on the first Nordkap. it's normal to sand and trim parts to fit on any kit really.......but even making the part from scratch shouldn't have made that much of a difference. I pretty much copied the kit part. oh well.......doesn't really matter and don't particularly care. as long as I can get the hull, I'll scratch build the rest, if I have to. let it be written....let it be done! what I have is an older model Craftsman scroll saw......it takes the shorter blades. It came to me with a {how do I describe them}........a band type blade..........has a wider body. what I got for it are some that are really narrow, so I can do tighter radius curves. if I were to try it with the blade I had on there, it would have twisted, broke, or bogged it down........a lot more resistance. it had a wire like guard that put pressure on the wood being cut, but it was too tight, so I took it off, having to guide the wood freehand. in spite of all this nonsense, I can do some pretty straight cuts........I hold down the wood with one hand and push with the other, guiding it as I go. I've ruined a few parts, but I've gotten better these blades I bought are fine blades.......gonna be harder to find, now that Sears is on the outs. scoring is a good idea.........but so far, I haven't felt like I needed to do it. the sheets are 1/16"......pretty easy stuff. thanks for suggesting it
-
thanks Rob......very kind to say!
-
thanks Rob for as old a kit as it was, it was a fun build to start me off. this kit is no different.......I just got done cutting the cap rails out with the scroll saw. it was kind of a nail biter, since the parts for this kit are on mahogany sheet. another fellow on the site had the same obstacle doing a Billing kit that he had....very old and the wood kept splitting on him. he also succeeded though, so there is hope. I still have a strong urge to purchase a newer kit of this vessel.......they are now laser cut, and I'm sure it allows for a few extra bells and whistles. I wouldn't build another Nordkap though, but I would do a different ship. one that I think most, if not all the parts could be used. appreciate ya follow'in along thanks for the kind comment.
-
gotta have a sense of humor hello there! welcome to the forum ........and the log.... is your name not Bruce? no, it's Michael...... that's gonna cause a bit of confusion........mind if we call you Bruce to keep it clear?! so far, so good........the staircases were terrible to do......but they are done. I'll be working on her today {barring any distractions} thanks for the kind word and look'in in.......more on the horizon is that rat tart...........disgusting!
-
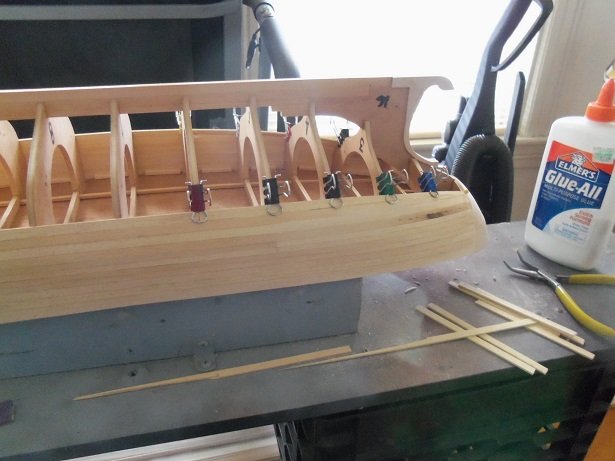
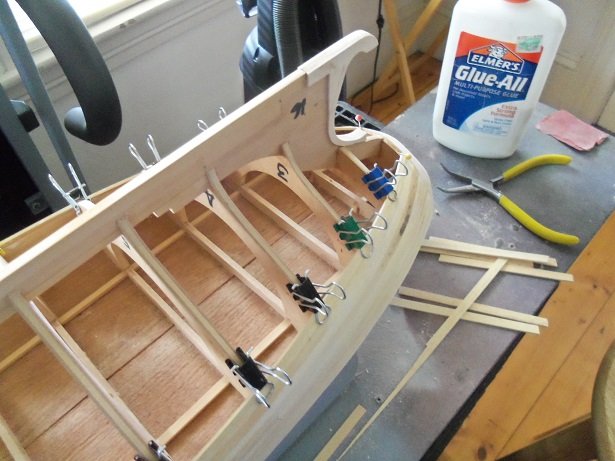
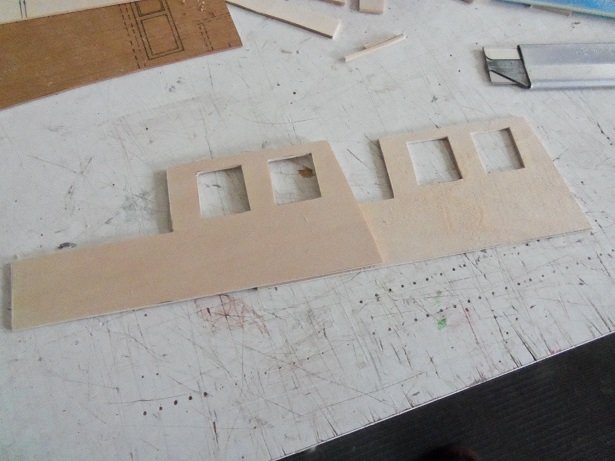
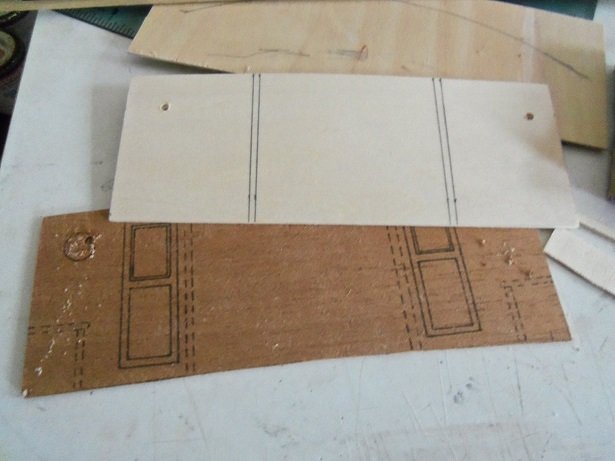
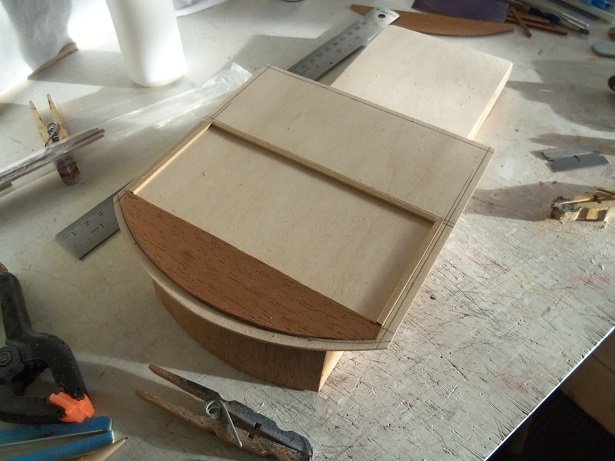
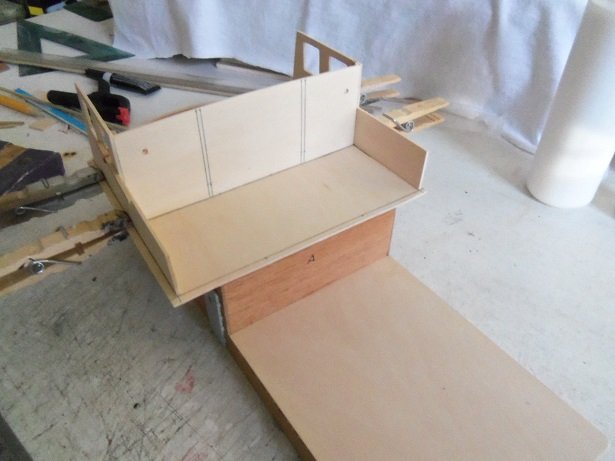
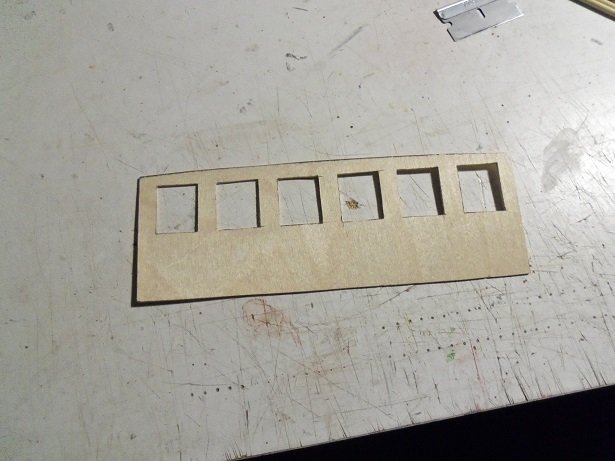
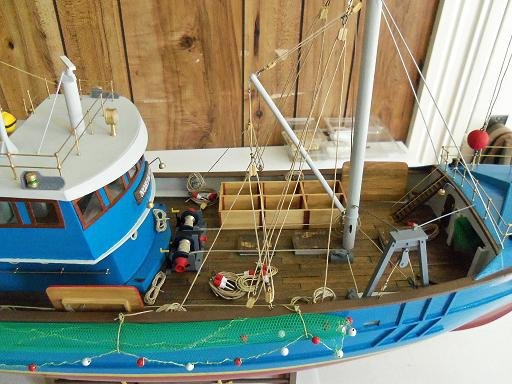
planking continues on the Progress. tapering the planking at the stern is going pretty good, although I'm having to play 'catch up' to decrease the curvature of the hull counter. while it appears that tapering might be starting to exceed the line I'm looking for, an overview shows that tapering is still needed. I think by the time I reach the stern rabbit, I might be able to lessen the tapering, but not until. it's a work in progress. having some free time, while waiting for glue to set, I thought I'd spend some time on the structure some more. I'd work on the T.D. but I'm really worn out from the stair fiasco {say after me.....poor sweet baby} don't worry.........the admiral beat you to it gathering together the parts that will make up the helm room, I began to find that I will need to make some changes, as well as parts. two half moon looking parts make up the front fascia rabbit {floor}, and the dash top. after sanding them equal to one another {two identical parts}, the floor rabbit was cemented in place. earlier, I had made two side panels, making adjustments for the two aft casements, that {on the Nordkap} wrap around the entrances to the helm room. on the Progress, these casements are to be straight........I'm also thinking to do a bit more modification to them. they were made from basswood flat stock and needed the windows to be cut out. the bottoms of the original part were curved, as though the entire structure was based on the deck camber. I have taken most of it out when I assembled the bottom section of the structure........and so, this will translate to the top section as well. the bottoms on the new parts are flat. I also noted the extreme camber along the bottom of the aft helm room wall. to alter the part would have affected the fit, so I made a new part of the wall too. the engine room structure was marked out, as well as the portholes. the doors will be added, like I did with the lower section, cutting out any windows if needed. the wall boundaries were marked out on the deck floor. the base was then framed in to cement the walls to. the sides and the aft wall were cemented in place, cleaning up any glue that might have oozed out {I like a clean joint}. I might add a curvature to the casements, leveling them to a lower height, as it reaches the end. I want to add a short piece at the ends, closing them off, but allowing for a ladder, preferably on both sides. having to make all these parts is knock'in the heck out of my intentions, of using most of the kit parts. the front fascia was no exception. I cut out the windows with a case cutter, my 'go to' tool for things like this. believe me, I thought of using the scroll saw........but thinking of how I would have to set up the scroll saw for every window, changed my mind. I dry fitted the part, and found that it's much larger than needed..........the two end windows are really close to the side walls too. I may have to make another part and eliminate a window. I want to do more fitting to get a better picture of what my alternatives are. the absence of the bottom curvature might pose another problem, since it has to wrap around the front, rather that sit flat against the side walls. I also notice that the slant of the mating edges of the side parts, may also pose a problem too. on the Nordkap, the front fascia has the slant and curvature that is presented here, but for some reason, it doesn't want to work out on this model it has all six windows...........and note how wide the helm room is. the aft casements can be seen here too. another update soon

-
sorry can't help you with that.....you gotta work that voodoo on your own. try the Jedi mind trick what's next.......why, keep going I guess. still got a few thing on the first level to do, as well as the railing enclosure. I can go upwards too. I been spend'in the morning on the Progress....ran a couple of errands already. this afternoon, we are off to my oldest grandson's birthday party. I didn't get all the particulars, but the admiral got saddled with making the cake. what can I say, it's a normal weekend for me .
-
...calls a voice from the rabbit hole...........come and play one of these days I'll update my dry dock signature......it will amaze you
-
https://www.polygon.com/2018/8/3/17649192/dark-tower-board-game-kickstarter-restoration check this out Lou thanks for the like all.......I'm glad you folks kept me look'in at it
-
she's look'in really sweet Patrick.........quite a maze you'v got going on. you've probably heard this question before.......have you though about adding figures to your projects?
-
perhaps it's because the screws are closer to the hull.......blade radius. the hull looks super.
-
foremast looks great Rob........amazing the mount of rigging there is. real nice job on the shrouds too. never tried the alligator clips....did you judge the lanyard spread by eye?
- 1,208 replies
-
- 1
-
-
- great republic
- clipper
- (and 1 more)
-
so good to see more of your block and metal work Michael........fantastic job on the rigging
-
another hull frame?..........what one is that? really nice work on the carvings.......look good on the ship
-
what game was that?........mousetrap? only game I know of that has a tower. nope....the New Jersey came to New Hampshire without a single scratch on her! .......another big thanks for think'in 'bout me can't wait to build her......as mentioned, the work that has been done on her looks really good, not too much back tracking to do....even the paint. I will have to touch up the outer hull though.......few scratches. there's about 15 of those paints, so I'll run through those first. I was trying to find out the exact size of the tins........they are all 1/2 oz. there was one other Pactra paint in the larger bottle......Artillery Olive.......have to see if it's viable.......it's a very common military color. cripes, back then, Pactra was the go to paint.......they had many interesting colors and I liked how they were labeled.....right on the cap! they are old...........but they dry just fine another huge thanks.......a deal well struck! I'm not a huge fan of E-Bay..........a 'buy it now',....sure, but I don't gt into bidding wars. be wary that in some cases, there has been a hidden bid that inflates the ceiling, causing the buyer to bid more than the item is worth {a friend from Hawaii told me about this}. you'll bid only to find that you've been outbid.......so you raise your bid.....and you've been outbid again! that's what happened when I bought my second Cutty Sark, before my friend told me......I paid $85.00 plus shipping. using my friend's advice, when I bought my second U.S.S. United States, I waited till the time was almost done {1 min}, to post my bid.......I got it for $45.00 including shipping! yea.......I'm glad the stairs are done too. I think my problem was that I was putting too much thought into them. if I try to plan or think like that, it doesn't work out right {goes for just about everything}. but, if I just do it.....without dwelling on stuff, I have no problems. it's probably the reason why I have so many projects.......I get an idea and go do it it's fine with me........I hear think'in keeps ya young thanks for the good word keep me in your loop BTW.......the Artillery Olive is viable........just needs some thinner
-
another thing to take into consideration, is to be sure that the yard isn't floating......meaning that it has a raised or lowered position. if they are floating yards, then they need to have a block tied to the mast and the lift line is rigged and terminated either at the deck level, or at the top {first mast step}. I haven't seen any tied off at a cross tree {clarification needed}. in most instructions, you can easily see which one moves or is stationary.
-
you have it right.......you tied them to the cap. when tying blocks to yards or the mast, most are tied close to the place your tying them, with no lead line at all. when I prepare my blocks, I wrap the thread around them and knot it, so it doesn't come loose. this gives you the two thread 'tails' enabling you to tie it to the yard......or the mast, wherever your fastening it. for lifts, I go almost to the end of the yard.......at the cap, if I can do it, I have very small eye bolts that I install to tie the blocks to. I drill a tiny hole, small enough to insert the eye bolt...and there ya go if I have enough yard to work with {thick enough}, I will drill a hole there to and feed the thread through it.......a jot of glue before you pull it through the rest of the way, and after tying it, you can be sure that it will never come loose on you. it also makes tying it a lot neater too. I'm not a sports nut......but your correct........everyone learns at their own speed. seeing some of the fine work by others here on the site...heck, I'm not even in the ballpark looking at others and how they handle problems and tasks, will only make you better. I think we've all been where you are right now.......your making great strides. as I've said, I'm no expert.......but I will help you as much as you like. there is no such thing as a silly question.
- 105 replies
-
- 1
-
-
- thermopylae
- sergal
- (and 2 more)