
HOLIDAY DONATION DRIVE - SUPPORT MSW - DO YOUR PART TO KEEP THIS GREAT FORUM GOING! (Only 72 donations so far out of 49,000 members - Can we at least get 100? C'mon guys!)
×


popeye the sailor
-
Posts
16,007 -
Joined
-
Last visited
Content Type
Profiles
Forums
Gallery
Events
Everything posted by popeye the sailor
-
 I'm not sure on it since I use the diluted glue too. I would think that varnish or anything similar might erode the fabric over time, making it brittle. not only that, if you were to use anything to weigh them down for shaping, there would be a kink that might be hard to remove. as with most things, if you have a good method for doing something, it's best to stick with it. do some testing if your unsure nice looking yards by the way..........
 -
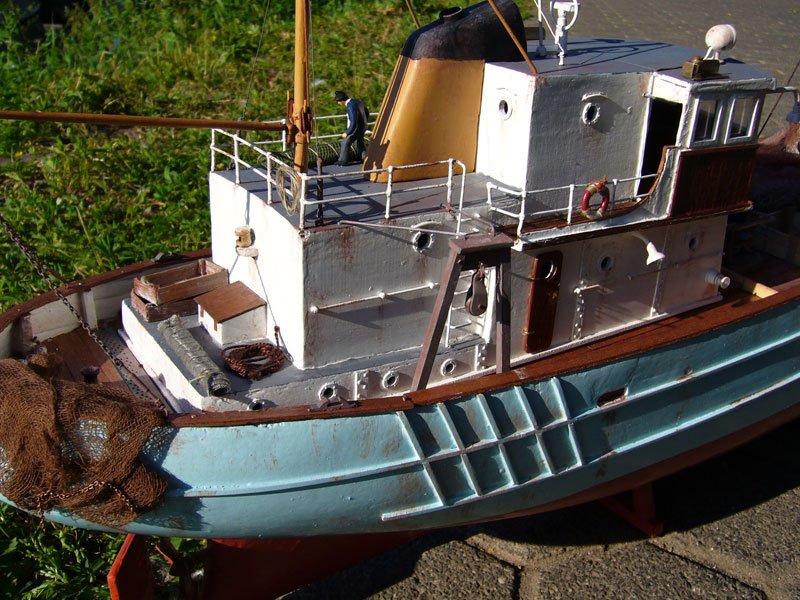
hello J........hope Santa was good to you I don't seem to be the weathering type........tried it before. one day I do it.......the next day it looks terrible, and I end up fixing it. I did it on the Maine Lobster boat.....I left it, but I still wasn't happy with it. we have folks here that make it look like child's play.........but it's not........it is truly an art form. then again.........when I paint it, something might strike me........I do have those three life color kits lay'in around gathering dust I see a lot in the photos I have........things I want to improve on. I'm certain that it was from the actual kit thanks for the good word........and thanks to all who hit the like button
-
having started out with one of these non laser cut kits......I actually thought it was rather interesting. the funny thing of it was though, that the bulkheads in the first Nordkap kit.......as well as this second one I have now {which is even older}, were cut out already. the instructions mention and list the sheet numbers that they were printed on, but no sign of the cast off wood in the kit boxes. my friend Harold, who owned the first kit, had most of the hull frame assembled, so I thought that he cut them out. the second kit proved that theory wrong. I think that's what I enjoyed most....having to cut out and shape the parts. of course, at that point in time, I didn't even own a scroll saw.......had to do it all by hand tool. I still would like to try a laser cut kit of this model though.........mainly, just to see how much easier it would be, and to save the parts panels, so I can clone other hulls
-
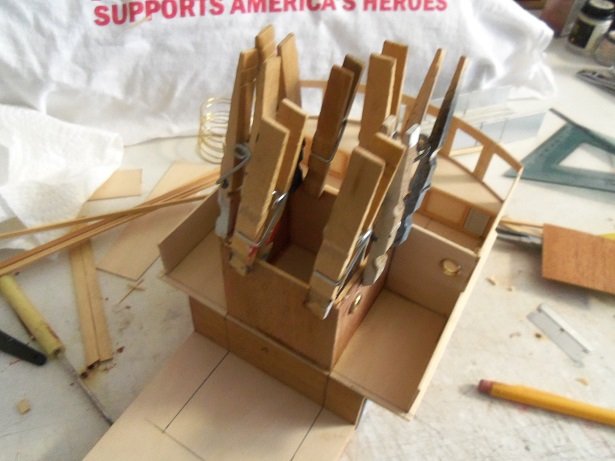
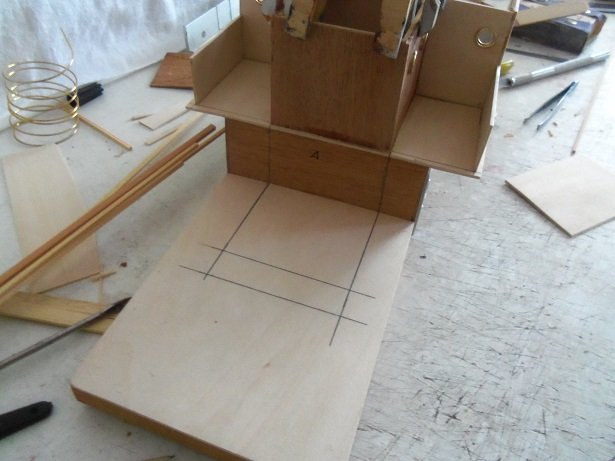
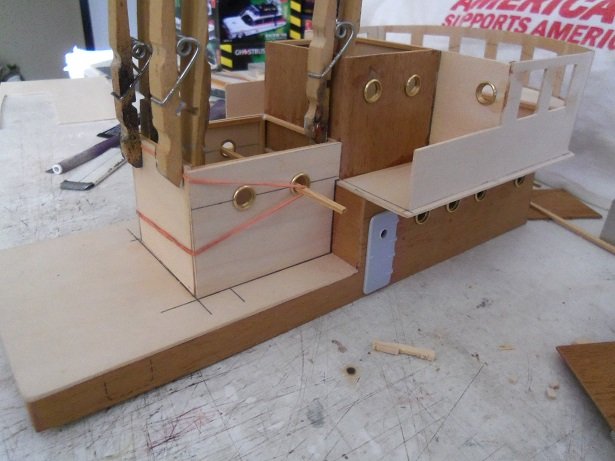
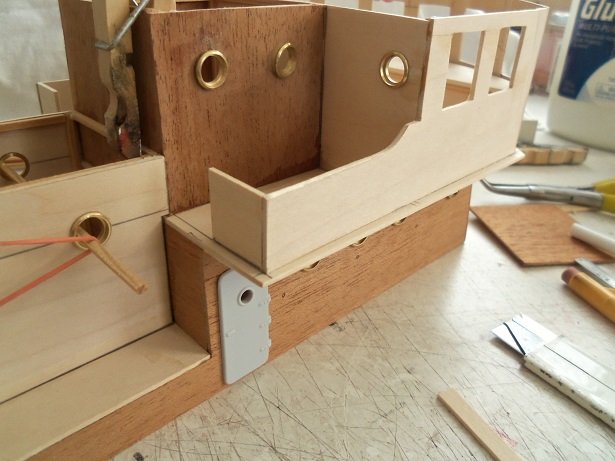
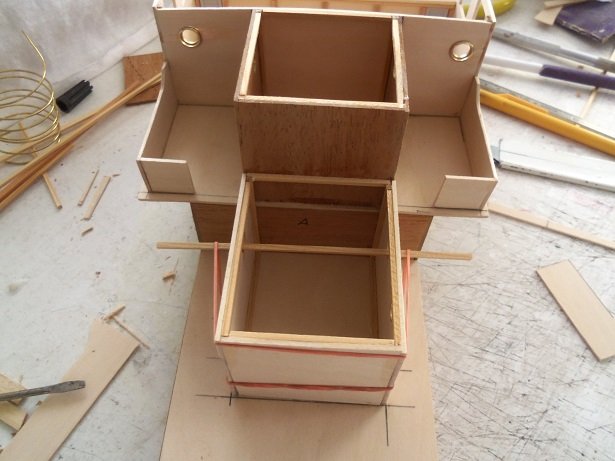
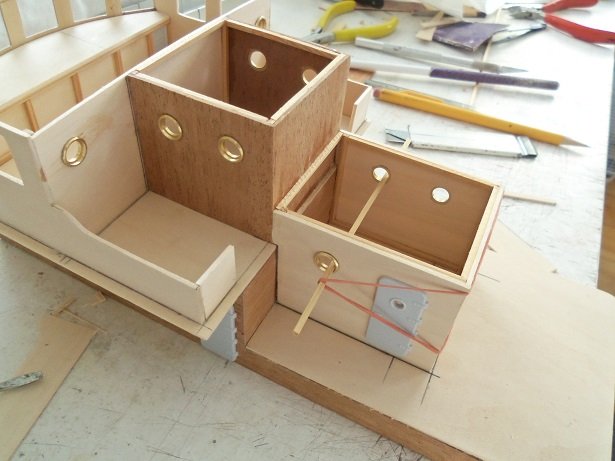
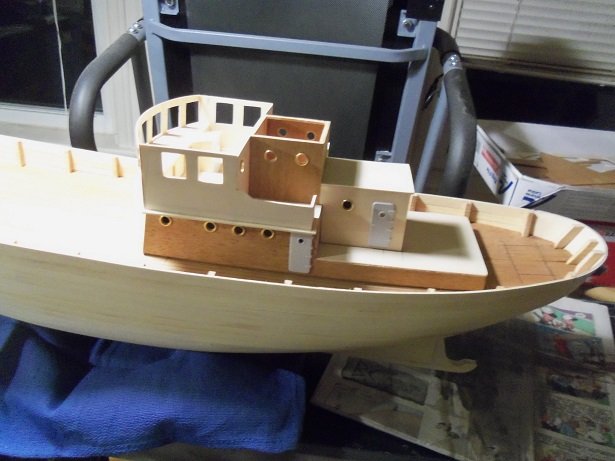
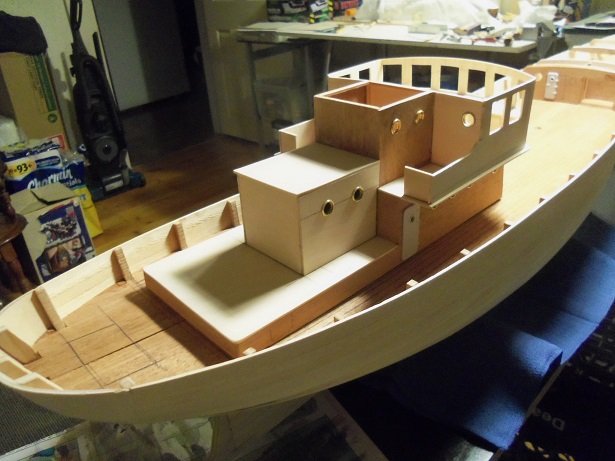
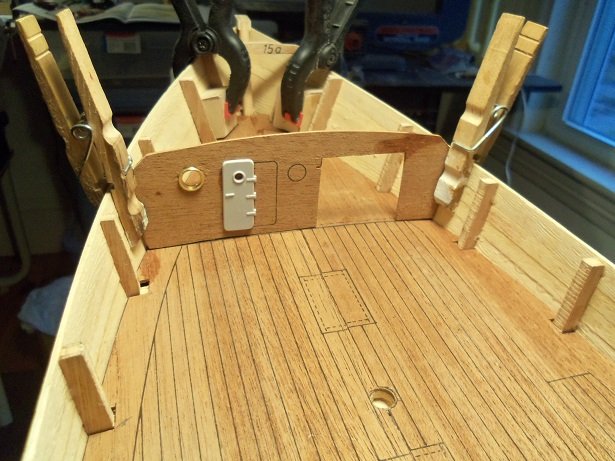
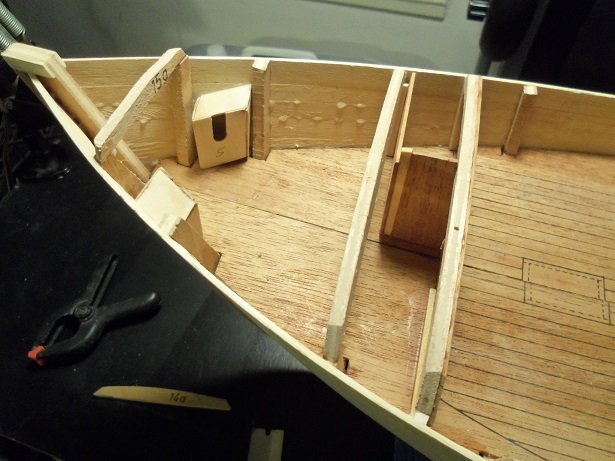
the snowman has left the front yard............just about all of the outside decorations have been taken down. tomorrow........"operation tree stuff".........we de-ornament the tree and stuff it through one of the living room bay windows! of course, it's a lot more fun, once ya get a snoot-full.......but for this year, I'll be doing it without a net..........I'll be sober naturally, there will be massive needle loss.........but, depending on which bay window I use, it can cut down on the collateral damage {there are three sizes of bay window in our living room}. it doesn't damage the window........it goes out stump first.......rather comical if ya think about it. ........... but I ramble.............there was some progress today, worthy of an update being away from the table for a couple days, I kinda snuck up on it....did some easy stuff..........like adding reinforcements to the aft cabin, behind the helm room. basically, just some 1/16 squared pine strip along the edges to straighten any warped wall panels, squaring them up and making them stronger. ......ran some up the corners too. as can be seen, I mapped out where the lower cabin is to be. but lo...........the more I looked at all the excess room on the deck pad, the more I became unsatisfied. it could be a bit bigger, I thought to myself........... roughly, 15 mm was added to the length of the cabin........couldn't do the width though........don't want to block any potential stairways. the sides and back walls were cut from 1/16 basswood sheet, and they were given some portholes and a door {the only one I had left}. there are none on the back wall, although, I still have a few portholes left over.........I could add some. but for the time being, it will be left blank.........I can do other things, still locked away in the back of my mind {scary}. as the back wall was being held in place by a rubber band, 1/16 square strip was being added, just as I did with the aft cabin. as I mentioned I was going to do with the entrance way casements, I gave them a curved sculpt and added the adjoining casement, leaving an opening for a stair way. the pit for the companionway was adjusted.......trimmed for the proper swing of the doors. then there was the task of sanding some of the depth away from it........should have used narrower plank strip to make the box {live and learn}.......{remember whose think'in this up }. I found this out when I marked how deep into the pit, the doors went. when it was shallow enough, the floor was cemented into place. the floor will be planked next........I'm think'in .05 mm, so not to add too much depth to the pit. I'm not too sure if anything more needs to be added before paint. as I recall, I added two control panel in the Nordkap helm room......one on each side wall. we'll see so now........here's another dry fit on deck..........keep in mind that it is still missing some key detail.......hand rails, railings, conduits and piping........other small fixtures. I may round off the adjoining casements.......some sanding........but this is the gist of the cabin structure assembly. difference #2 to the original Progress is the entrance casements Ok.....OK.......the amount of portholes is difference #3............I can see how many I have left, and add them accordingly {note also that those are the old portholes....they are plastic, like I had in the first Nordkap kit}. but, I need to keep in mind that this is an updated Nordkap fittings kit, and the use of brass, wood, and plastic, was tossed into total upheaval! but then again.......I can't build a kit without bashing and adding stuff, so why would a semi scratch be any different.......whoa....is that possible? bashing a scratch build? what a concept!!! wrestling with the snowman this afternoon kinda wore me out..........I was going to open up the anchor boxes......and start to fit the margins. should I continue, I will try and post the update.......if not, it will be the goal for tomorrow. the last thing I did was to add the last bow beam....sanding and fitting the outer skin, will be next to do in this part of the ship. thanks to all who hit the like button.........hoping that I'm not boring the bejebbers out of ya more to come soon that glue bottle was almost 3/4 full when I started!

-
glad to see your still building..........been following the S.R. hope your doing well and they had good news for you. hugs for Anja!
-
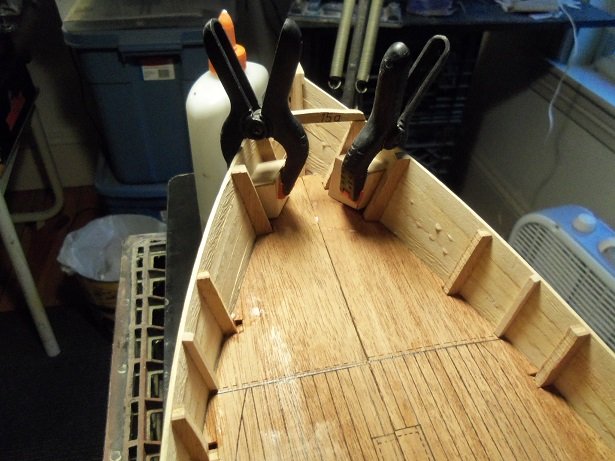
spacers are good..........I've sen a lot of folks use them........especially at the bow and stern where the planking flex is pretty aggressive. I've never used them though........if you intend on pre bending your planking, you likely can forego doing it. but I would anyway if it's what you usually do. it will give more surface to cement to. the hull looks super hope you and your family had a great Christmas!
-
so you built this one when {back in the day}, it wasn't laser cut..........the two Nordkap kits I have {had}, were {are} like that. old kits are fun though nice job on the frame........you seem to be moving right along. no ABS hull................I thought it did I must be thinking of the Nederland........the Zwarte Zee does too. in any case..........she's look'in good so far
-
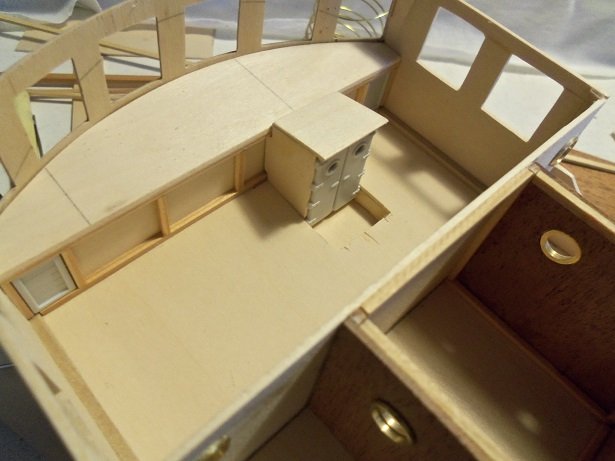
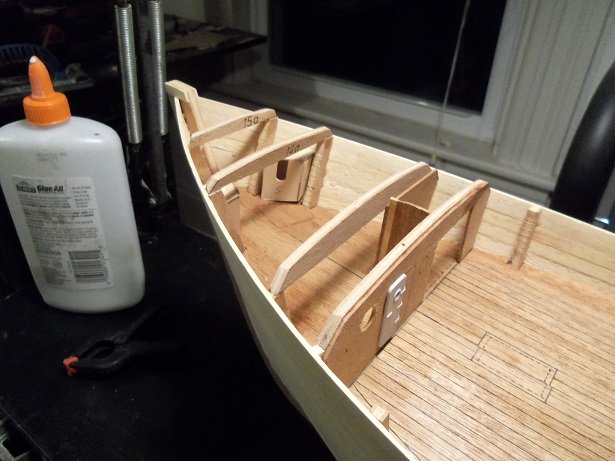
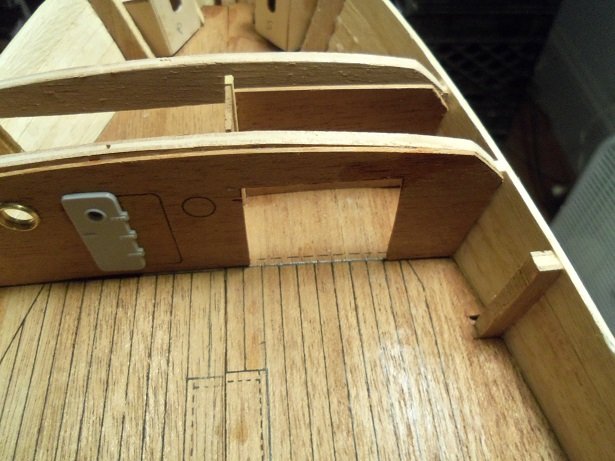
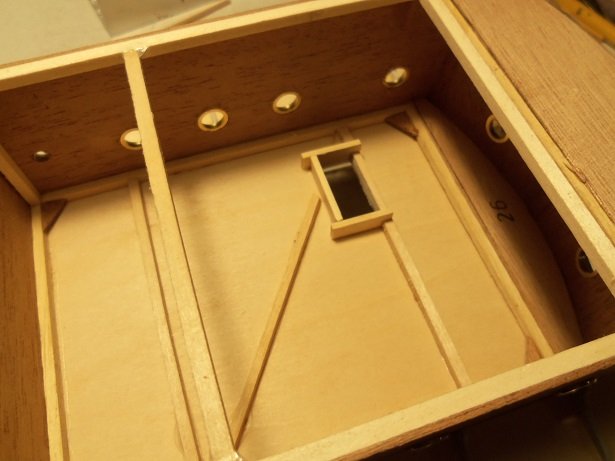
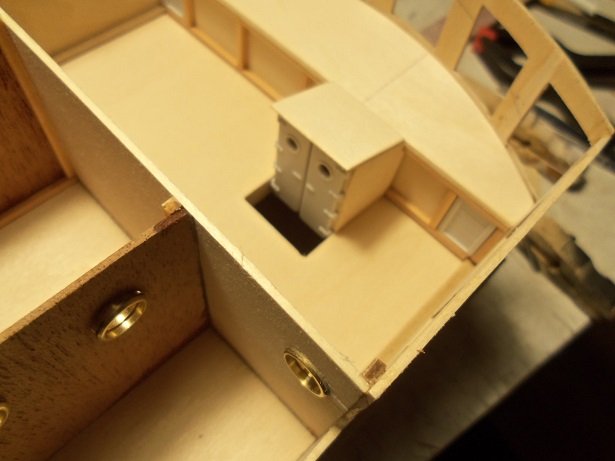
now that the hull is upright again.........I can do a little on the deck I was on the right track when I made the second bow bulkhead fascia.......too bad I didn't stick with it. well.......anyway, first thing I did was cement the anchor boxes in place. I still need to cut them out. I was amazed that the bow beam I cemented on earlier didn't break off in the planking process..........at one point, I was using it as a grab handle! it just shows how well it's cemented in place had I referred to the diagram, I would have seen that I memory was correct.........two ladders and the opening at the bulkhead was in the middle. I have plans of making sliding doors for it........much like the ones seen in the intro to the old Popeye cartoons. I was amazed at one of my Christmas gifts....... a DVD collection of Popeye cartoons! in it, is the cartoon where Popeye rescues Olive Oyl from Ali-baba and the forty thieves.......I believe that is the one that shows Popeye's ship {either that, or it the one about Sinbad the Sailor}...... at any rate, that is the boat that I still plan on basing the S.S. Olive Oyl on. I have just the hull........I just have to clone it first anyway,........I stuck with the Nordkap bulkhead fascia, but with a twist. I moved the door more to port and reversed the porthole opening. next was to assemble the compartment for the opening.......in hindsight, I shoulda made it larger. the bulkhead beam and the next one was added. I still need to clean it up a bit more. I then turned towards making the pit for the companionway. after cutting out the opening, it was boxed in. some sanding will need to be done to cut down on the depth of the box. I think I need to remove the end piece and make the opening wider....the doors might not be able to make a full swing the portholes were cleaned out..........open the pit just a little bit more and it will look better....then I can cement the floor in. I'll then need to mark where the entrance windows are, so I can cut them out. I thought I had made a mistake with the structure, but in looking at the diagrams and pictures, I'm good so far. the lower cabin will be added for the next update......I really want to stay with the general looks of the vessel. the bow bulkhead fascia will hopefully be the only pho-par........I'm not going to bother changing it.
-
thanks OC........it was a very nice Christmas for us {I think I made out like a bandit } my movie collection grew immensely, and I got three more models.......plastic {much to the admiral's lament}....she'd rather see me working with wood. thanks for the good word thanks for the Christmas wishes Lawrence........we all have that curse.......with all the projects I look at, if I was to be up to date on all the progress, I'd never have build time no need to apologize.......I'm just as guilty we had a great holiday, here at the wharf.....I'm certain that you and your gang at the shipyard had as equally a good time! oh.......I've been looking Vossie........that disc sander is something I'm looking at next since I seem to have the habit of buying these older kits, that tool is gonna make life a lot easier. I intend on sprucing up the wharf next year icky-mae I also bought an accessory kit for my Dremel......i'm planning on using it more than I have been {which is next to zero} I've always been a hands on guy. this past week was horrible.........no time to devote to the projects. I'd no sooner start play'in around, when I'd have to go do something else. now that the major part of the holiday has past, I hope things go back to normal..........but I'm still faced with packing decorations up for another year {but it goes a lot quicker }. I know it's a bit late, but I hope that everyone had a great and merry Christmas! there was an update for the prior week...........not too big, but fun to do
-
hope you had a great Christmas Jesse given the way your Syren looks, the addition of the yards will make her look even more impressive!
- 1,306 replies
-
- 5
-

-
- syren
- model shipways
- (and 1 more)
-
rats look awesome BoB! merry belated Christmas.......hope you had a super one!
- 359 replies
-
- 3
-
-
- prince de neufchatel
- model shipways
- (and 1 more)
-
looking great EJ.............those deck railings with the sheave holes look especially good! simply awesome! merry belated Christmas!
-
looking really good Greg........knocking things off is part of the territory ........just as long as things aren't destroyed in the process! love the way you handle paint merry Christmas......even though I'm a bit late.
-
thanks Tom..........you betcha! first Christmas in your new home...........you two must be psyched about that! have a wonderful Christmas .....and have a wonderful Christmas to all!
-
count me in! I've been waiting to see the start of this one Sjors! so cool! you should insure it though............
-
thanks John if you want to hear a really good tongue twister, rent or buy the movie 'V for Vendetta' the guy that plays 'V' does a good one
-
thanks Carl.........I did get to play when I got back.......ha ha. the dentist visit was the first alignment.......I have another one to go, but that's a couple of months away barring any other problems. most of the issues were with the lower dentures...........the way they feel now, he fixed most of them they feel much better!
-
the cut is snug and neatly done........I see no problems with the scarfs. great job on the deck..........my compliments
-
thanks Piet, Robert, Patrick, and Vossie for your kind comments I used an aggressive grit to get past the roughness, and shape the hull. I'll use a finer grit to smooth it out. not sure if I'll give 'er a coat of resin yet........not sure if the weather will permit me to do it. I do it out in the garage due to the smell. when I did the Nordkap hull, and it was revealed to me that it was a bad thing not to cement between the planking, I sanded down the hull and gave it three or four coats of diluted white glue. this produced as smooth a hull, as I would have gotten using resin........which was the other option I had to remedy the problem. I posted pictures of the hull after painting.........the splits were everywhere! another thing I did here, was to fill in the small cracks with white glue. now dry, the gaps can be seen......but id I were to give it a coat of primer, they would disappear, because they are filled in and sanded smooth. I do notice a few that I missed.........filler of the white glue method will make they go away this is the rough sanding........the finer sanding is next. as for the companionway, I do like the idea and I have seen them on smaller vessels......I'm sure they are fairly common on larger vessels too. it's the probability aspect that convinces me to go forward with it. there will be other furnishings in the helm room as well. large windows means good visibility.........I've redone pilot houses before to enlarge the windows for better visibility......the Mary Ann was one of them. I went to the microMark website........very impressed with what I saw. so far I bought one of those elongated tweezers.......the 12 inch has some good reach .....and I bought a 'chop it'. no more manually cut deck planking for me.......I hope to get consistent butt joints in the future I was also drawn to an item that I saw in Hobby Lobby, and kicked myself for not buying it..........it was a bag of odds and ends brass pieces. off cuts, odd pieces of tubing and flat pieces.........something to really get the imaginative juices flowing I'm sure other things will tickle my fancy. I have a dentist appointment this morning..........then it's playtime thanks again to all who hit the like button