
HOLIDAY DONATION DRIVE - SUPPORT MSW - DO YOUR PART TO KEEP THIS GREAT FORUM GOING! (Only 72 donations so far out of 49,000 members - Can we at least get 100? C'mon guys!)
×


popeye the sailor
-
Posts
16,007 -
Joined
-
Last visited
Content Type
Profiles
Forums
Gallery
Events
Everything posted by popeye the sailor
-
 those pirates.......they thought of everything! too bad it didn't catch on........could have as common place, as the faucet
 -
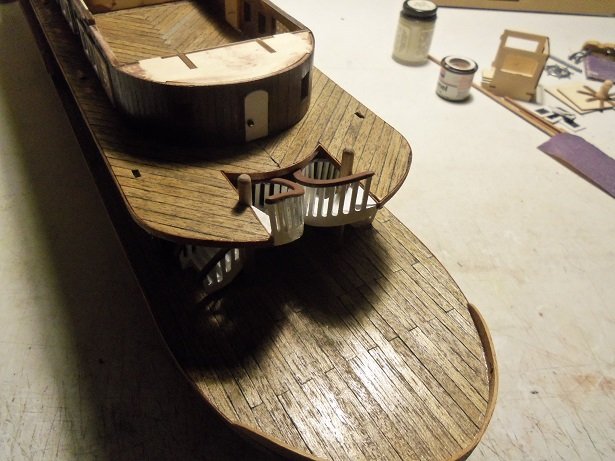
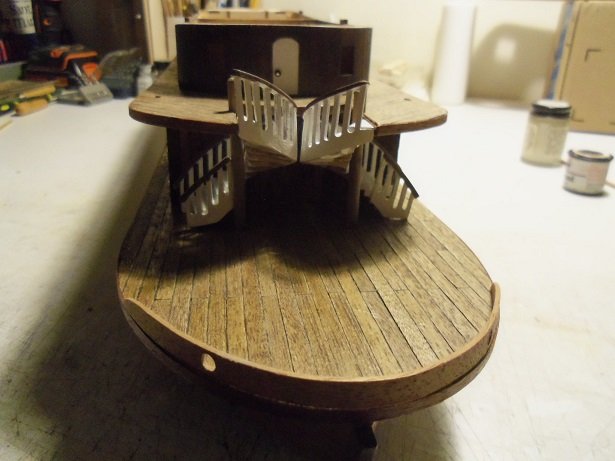
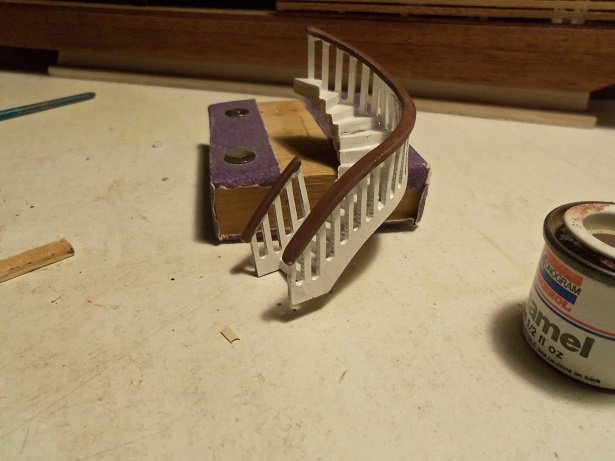
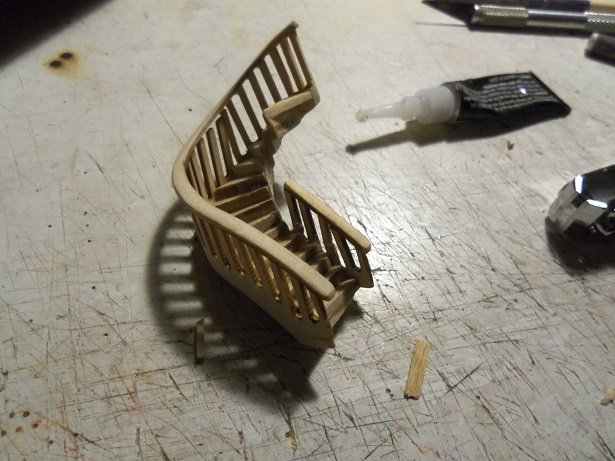
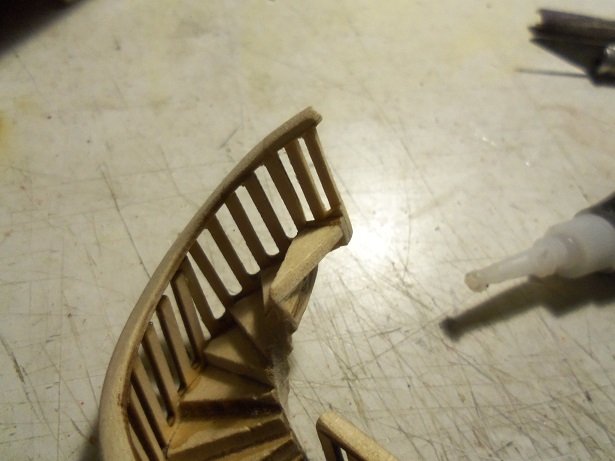
guess what! 😤.........too small.......... you'll be pleased to see.......... OK......OKKKKKK! the stairs were dry..........I cemented them in place already...........jeeze! they are not perfect, but they pass muster. the only thing I'll need to do is elongate the port side a little......I can do that with them in place. you can see the port side is missing a couple spindles. it will bring the handrail to the same height as the starboard side. the landing didn't come out too bad.......glad I didn't even it out any more though. it would have ruined it and I would have had to start over. th white treads don't look too bad either when I fit the port side, there wasn't any problem here.......but you can see a tiny bit of unevenness at the landing. I tried to straighten it out, but I think I'd need to alter it...... after what I did to the starboard side........nawwww, it's fine I'll have to flip it over to paint underneath though.....I can see the underside as you peer in the front. small deal........tomorrow.


-
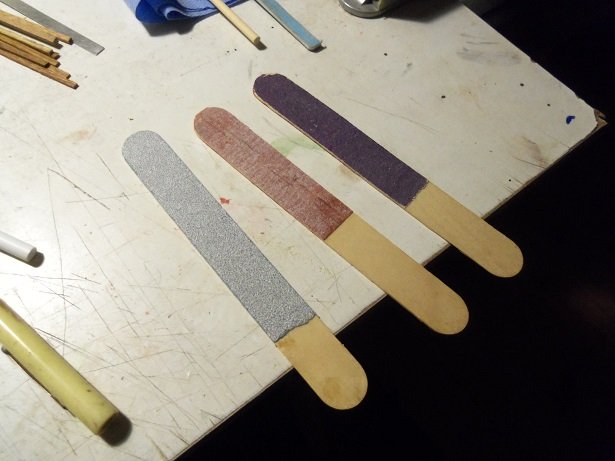
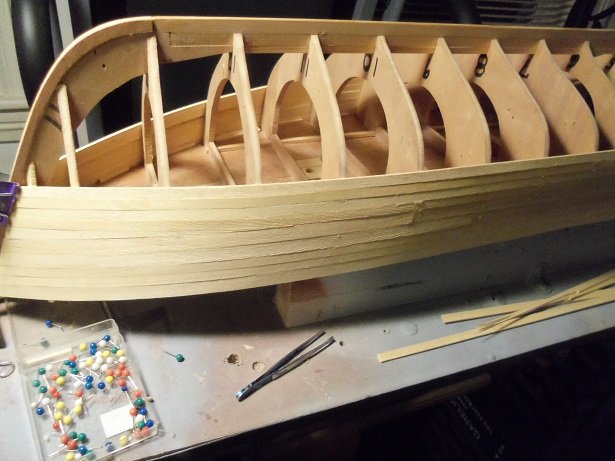
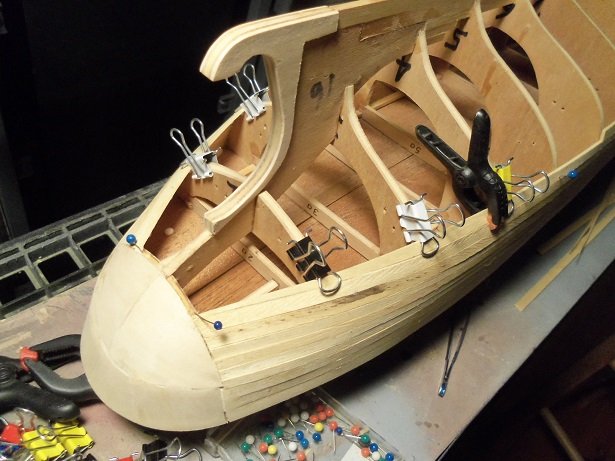
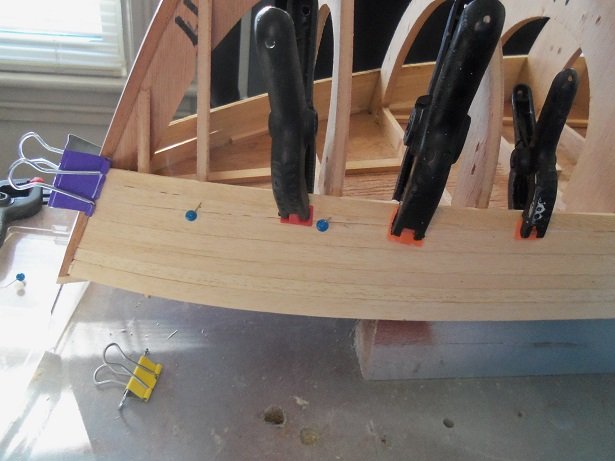
a little time was spent on the Progress today. I needed sanding sticks to clean and fare the bulkheads close to the rabbits.......mainly at the bow. I usually take planking and cement sandpaper on it for a home made version. the admiral had left me some wide sticks that she uses to mix her hair color.....perfect! cementing on three different grits, I now have some pretty nifty sanders the gray one is some pretty heavy grit......when I need to do an evasive mod ..........OK, two strakes were laid, staggered. notice the three bow bulkheads where they met the rabbit..........gone! I still need to do the rabbit along the keel, joining the bow rabbit to the stern rabbit. I will wait till I do the garboard, it will cover better. I probably should have begun the tapering sooner back here........guess it's time to pay the piper the first pair of tapered plank segments are in place. after the second pair are in place, I will continue in this fashion, since it's better to trim a shorter length, than the entire strip. I'll just continue with the butt staggers........I'll better utilize the wood too.
-
thanks Jack..........if only you said that eight mins ago
-
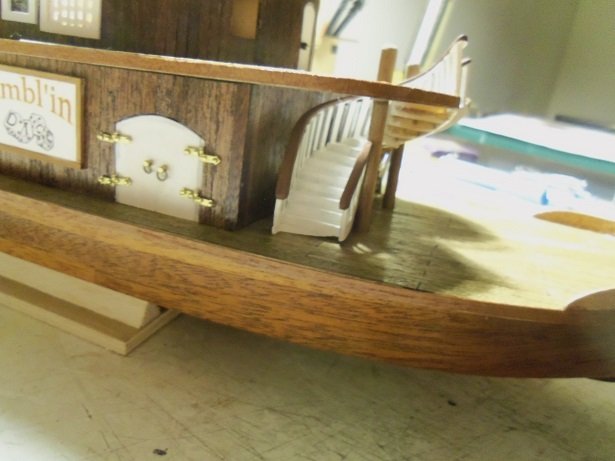
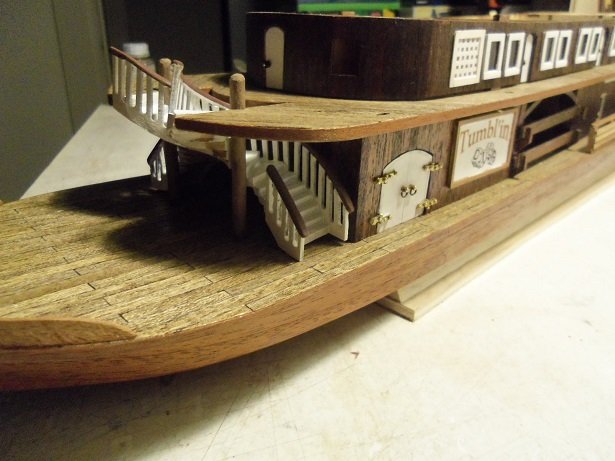
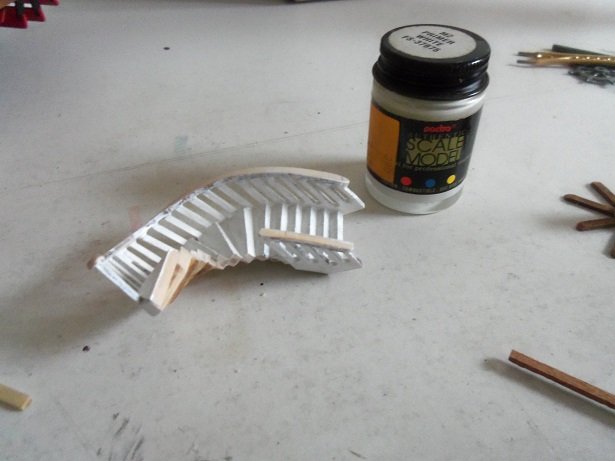
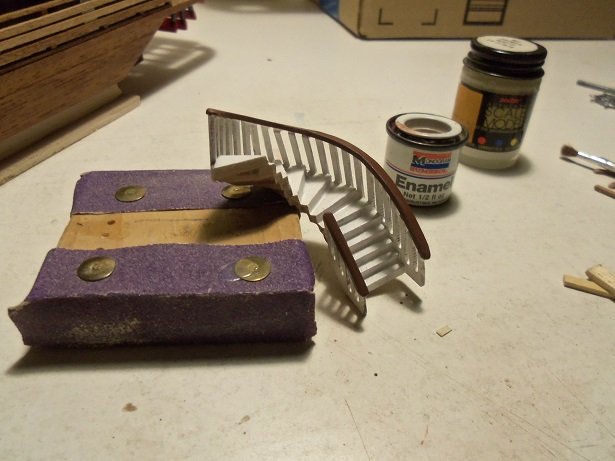
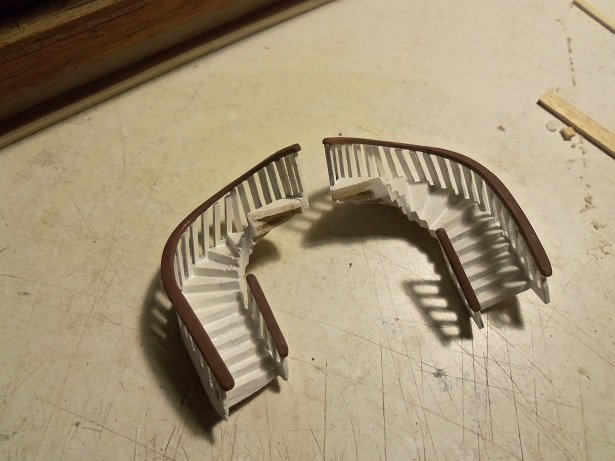
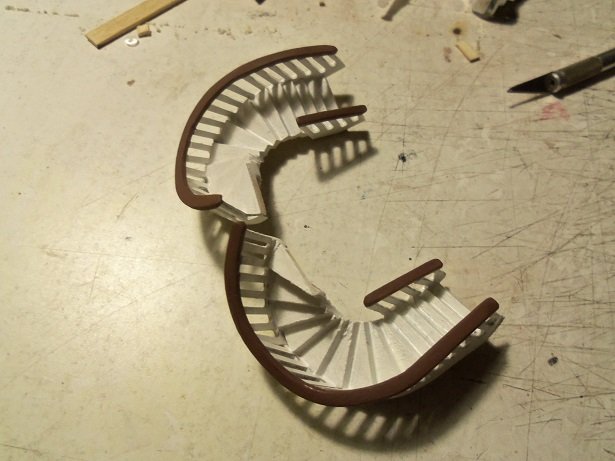
over here in the states, we cal it on pins and needles.......or......in suspense {gotta have the face or it doesn't look right}. even I don't even know what a tenterhook is....if it looks anything like the folks who like to hang from hooks.........I think I'd rather lie on a bed of nails towards the end of last week, since the Thanksgiving holiday broke my week end up, I decided to clean up the table and give myself more room. the starboard stairs as I mentioned, has some problems with it. I added the inboard railing {the small one} and began to assess what to do with it. after fitting it a couple of times, I knew I had to add another step to the top. I had already cut it off though........the thought was long gone, if not stale. then came the major sanding and fitting on the port side staircase. feeling like I had it where I wanted it, it got the white base coat. yes, that's Pactra paint........gotta be some old stuff. took a bit of doing to get the lid off! in that collection of paint that I got was some Monogram brand Humbrol paint.........I never even knew that this brand of paint existed. I got around 15 tins of this brand...different colors......some are actually quite bizarre. this color here is what they call hull red........it looks brown to me, and that's what I used it as. as far as the treads go.......I may do something with them; but if not, I'll leave them as they are. the starboard staircase took a bit of doing, but I think this will work. I had to add a slight wedge at the foot of the stairs.......it tilts on a slight angle.......I tried to get it out with no avail. I also added another step at the top and added to the railing....two spindles. with that, I had to add to the handrail. this staircase, after more sanding and fitting, got it's coat of paint too. now they are a matching pair.........as close as I can get them I'll let these dry for a spell........the paint seems to have retained a normal drying time, but is still tacky at the moment. I also drilled the holes in the bow fender, so that's done and out of the way. hoping to get them installed tonight.......but it may carry over till tomorrow. boy.......making stairs certainly has it's ups and down.........don't they?!?!?!
-
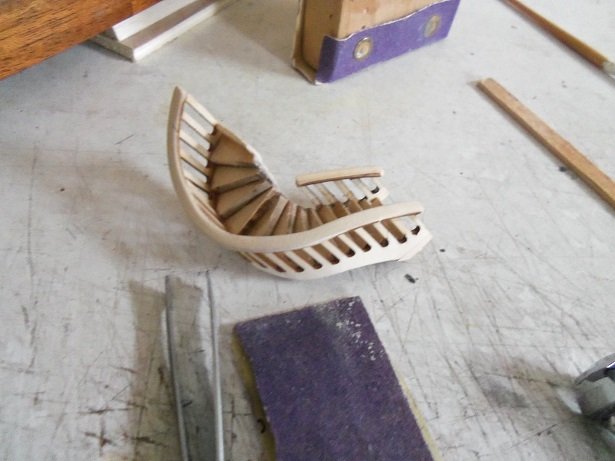
if I were to say one word..........I'd perk up all who are waiting to see the day................stairs! 👀 yep! I'd say I made some head way on them. the one for the starboard side does have a problem though.........it's twisted and won't sit flush. I'm having to make some gyro adjustments on it........so far, so good. the port side is faring better though.......I've had to do quite a bit of sanding to get it over enough to accept the port side. pictures are being compiled as we speak did ya miss me.............I just put a coat of paint on the starboard stairs. I'm using the paints for the first time Lou...........should be particularly interesting for you. I'll be right back.......
-
I knew you would enjoy it........speaking of Vendetta......she's still sitting on my desk. I really need to get back to her.......you and Greg must be disappointed ....too many interesting builds..........nawwwww, it's just my insanity showing.........does it make me look fat?
-
sorry........thanks for the head's up
-
I used to go in the cellar to paint.......I open the window above the work bench. but second floor brings her grand kids down there to do her laundry ....afraid they might get into something, in case I leave a hull down there {for example}. they don't vent the dryer either.......the cellar's a mess. the admiral was kind enough to allow me to bring my scroll saw into the spare room........it's been there ever since if I can vent one out a window, perhaps I can come up with a booth or something. the weather has definitely thrown us all a curve.......these past few days has been wet, our snow is almost gone. dunno........depending on what I'm going to paint, I may chance it in the cellar
-
she's look'in good Carl........remarkable job on the paint and camo I see your still dogged with the same demon that I am.....we can still dream of retirement
-
I would think it depends on what you used to thin or enhance the drying time for acrylic. I've heard from folks who had the undercoat curdle when spraying a second coat. it's always best to stay with the type of paint your using.......saves a lot of lamenting afterwards
-
your making some really great progress OC..........and doing a great job with the paint to, I might add did the actual ship have that gun lid set up? it's very unique
-
......oh......sorry 'bout that. I'm sure that the Cutty take a lot more concentration though........with all the good stuff your pack'in into the project, she's gonna be one fantastic model I also found out what's worse than watch'in paint dry.........fill'in glue bottles one of our members gave me a good tip about glue bottles, so I went out and bought an eight pack. a couple of days later, we were in Staples, and we stumbled onto a gal of Elmer's glue. wondering what an office would do with a gal of glue, I bought one, and filled three bottles. now I have one for each table.......no more carrying the glue bottle around for me.....have glue will travel...... got a couple more planks on her.....toy'in with the Thermopylae and the T.D. yea.......add another model to my revolving list. I'll get'em all built sooner or later thanks for the good word my friend hello John..........thanks
-
thanks Nils and CDW.......shucks......I'm no expert. I do have some knowledge of this hull though, so it may help me over what problems there are. I looked at some of my old log pictures.............you mean, I did it like that?!?!?! more to come
-
the similarities between these two ships are much more than their differences....sister ships would be a good analogy I started looking into the yards....although I have a few other things to add before I can really begin on the masts. I assembled them....I just love how there are no measurements.. .....that bugs me to death! so now she is on the table with the masts dry fitted....the admiral comes in and asked what ship is that? I had to laugh of course she'll be OK........you built her I admire your determination.........there are folk more experienced than we are, who are hesitant to build her.....they know that the kit is not that good but here we are.........half way through it.......silly to run scream'in out of the room I'll post it if I do anything on her
- 105 replies
-
- 1
-

-
- thermopylae
- sergal
- (and 2 more)
-
I meant to get back here with more progress on the planking, but the work week took over. I took today off.......had to get away from the insanity. I did make the filler plank for the gap. looking at the hull as I passed by the spare room, I though to myself that another stealer will be needed. this will be later though.........I'll lay some clean planking first, and give the stealers some space. I added another strake to the starboard side, but my aim now will be to straighten the line out at the stern. by the time I reach the stern rabbit, I should have a straight line to the transom / counter. I really like how I did the counter, but not how soaking and contorting the wood to fit caused some rippling to occur. it's really minor.....and I should thank my lucky stars that it worked as well as it did. some filler should round it out nicely. I'll have more soon.
-
if you do attempt to build her again.......it might be good to find a kit in a larger scale. I was going to try and build both the Thermopylae and the Cutty Sark {clone a hull from this kit}......but due to the scale, I'm glad I didn't. the only kits that I can think of are the Revell kits.........but both these kits utilizes the same molds, being plastic kits. I recall reading complaints from folks inquiring about decals, because the wrong ones were placed in the Thermopylae kit {they got the Cutty decals}. if you can keep the lines as tangle free as possible, it will enhance the looks of the model...........planning the rigging logically will help as well. your doing a good job so far........your finding what works and what don't. never down yourself.......your learning and that all that matters. practice serving blocks and lines.......the wraps should be evenly wound......three or four times is good. I remember back in the day when all I did was knots
-
nice job with the window alignment they look really good! you'll really see the impact, when all the parts are joined together on deck
-
hello there! glad to see your back at the table I believe that on these ships, some of the dead eyes are for back stays, and are not included in the ratline rigging of the shrouds. in some cases, back stays can even be done in a pendant and pulley assembly fashion, not utilizing a dead eye. when I plank a deck, I'll leave openings for structures and holds, but not for anything else. hope to see more of your project........the hull looks really good
- 714 replies
-
- 1
-
-
- lady nelson
- victory models
- (and 1 more)
-
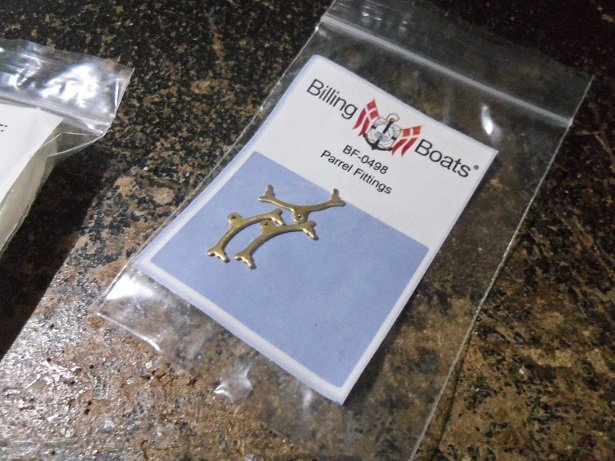
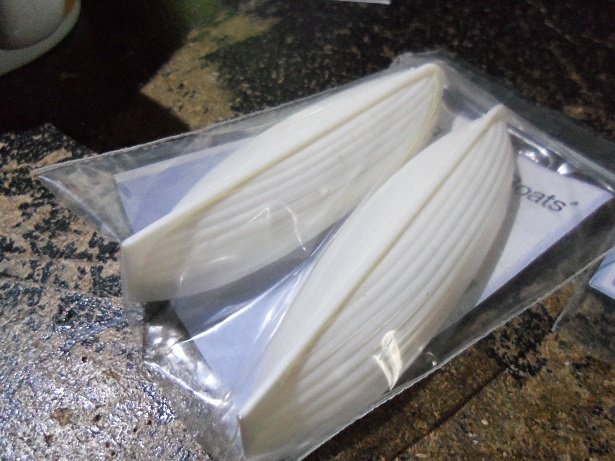
oh.............I'm going to pull out the rigging diagram for 'ole Thermie and start sizing the yards.........I want to see just how out of scale the fitting I got are. I also got a couple more life boats. I'm still working on getting some that are clinker planked.........but these are 25 x 95 mm and clearly too large to use I'll likely stick to what I have.....at least they are somewhat in scale
-
those are some neat tools..........I myself have very little to work with. I mostly rely on tweezers. what line is that for? depending on what your rigging, will dictate where it will terminate at. the Revell diagrams are a good source to reference, but do have their discrepancies.......but not as bad as the Sergal diagram. some lines....lift, clew, and related, will run through the tops {some even through the crosstree}, along the mast and to the deck, where they will either be belayed at a ring of pins around the mast, or at the fife rails. your picture is what I refer to as a pulley assembly........they are usually rigged as a pendant {longer rope with the block at the end, that is clear from any obstructions}. I'm thinking that this particular assembly is for the upper topsail yard lift............if this is the case, it would have been better to have the assembly at the yard and use that block {at the crosstree}, to route the line down to the deck. one thing to bear in mind as your rigging, is to route the line, so it is not interfered with of rubbing on anything. I know it's hard.........and it will get even harder as you add lines. some will even terminate at the 'first step' top...........these will tie off at a railing or cleats. due to the scale of the model, it's almost impossible to add some of the more detailed lines, so it's best to stick with the basic lines.....lifts, sheet, and maybe clew lines. since your not doing sails.......don't bother with the bunt lines and leech lines. I hope I'm correct here..........a bit difficult to describe........ good that you found the Cutty diagrams........I posted them with good reason. these are the most lost or mislaid instructions in the modeling world! I can't even count how many folks have downloaded those instructions. I also have the instructions there for the U.S.S.United States 1:96. have a look at those as well......some of the rigging is similar, even though they are different types of ships. some of the line serve different purposes, but the way the routing and assemblies look, are all characteristically the same. this reminds me.........now that I have the U.S.S.Constitution 1:96, I should post the complete instruction sheets too {thinking out loud}. looking at the picture, you can see where you used Ca to cement the ties..........it seeps away from where you applied it, freezing the thread. white glue won't do that or discolor the thread. while it does take more time to dry, you will never know that you used it. flexibility of how you tied your blocks can turn out to be very important.........the blocks will conform to the tension you've assigned them to