
HOLIDAY DONATION DRIVE - SUPPORT MSW - DO YOUR PART TO KEEP THIS GREAT FORUM GOING! (Only 72 donations so far out of 49,000 members - Can we at least get 100? C'mon guys!)
×


popeye the sailor
-
Posts
16,007 -
Joined
-
Last visited
Content Type
Profiles
Forums
Gallery
Events
Everything posted by popeye the sailor
-
 Holy Molly.........ya did it! congratz to you.........you did an amazing job I like how you redid the railings.....they look much better than what the kit suggested it was my pleasure to help ....and I hope you stick with it and continue. now if I can get off my duff and get back to mine, there will be another for someone to follow. this is not a kit for the beginner......and yet, you finished it.....your determination and effort that you put into the model is to be commended!
- 105 replies
-
- 2
-

-
- thermopylae
- sergal
- (and 2 more)
-
thanks Carl, John and J..........shoulda seen my face when it happened. but ya........a little filler and a bit of sanding will straighten them out. the doors have a small rectangular window.........once they are cut out and the structure is painted, I can add them. there's a lot more to be added to the structure to be sure. I was going to make an effort to get more done when I got home, but with everything going on 'round here.........it was a lost cause. too bad.........I wanted to make the stand for her and get more planking done. I'd really like to finish the planking, so I can play on the deck a bit. there's always tomorrow thanks to all who hit the like button
-
kinda makes ya wonder if the task would be any better if it were a larger scale. nawwww, would probably mean more holes
-
I'm forever comparing diagrams to the model............it's nice when they do get it right you'll do a great job anyways........who needs a map????
-
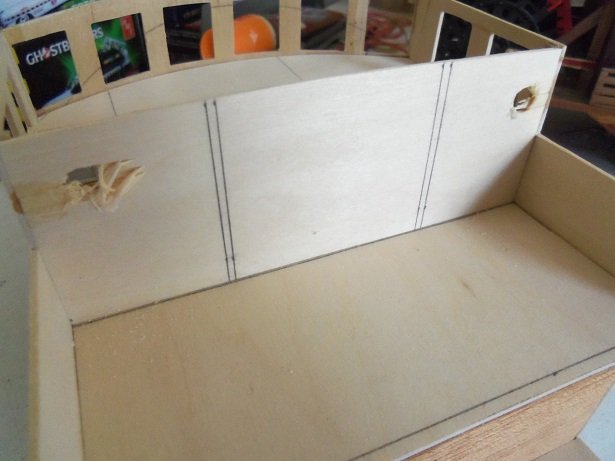
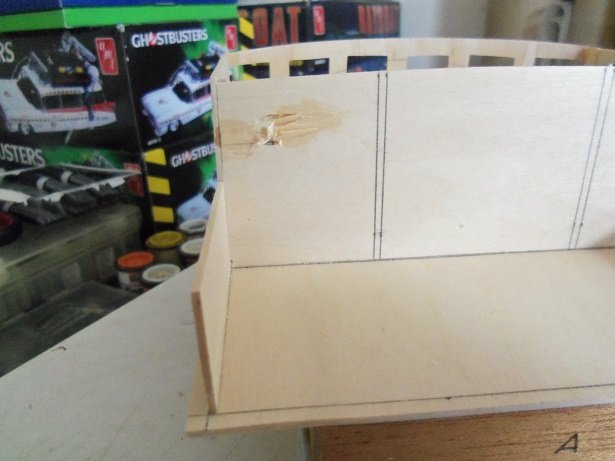
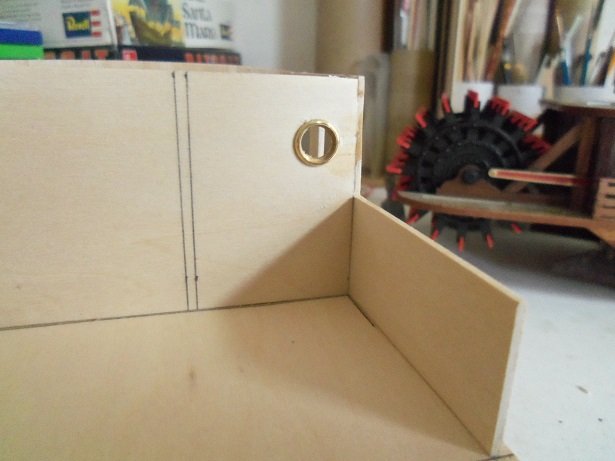
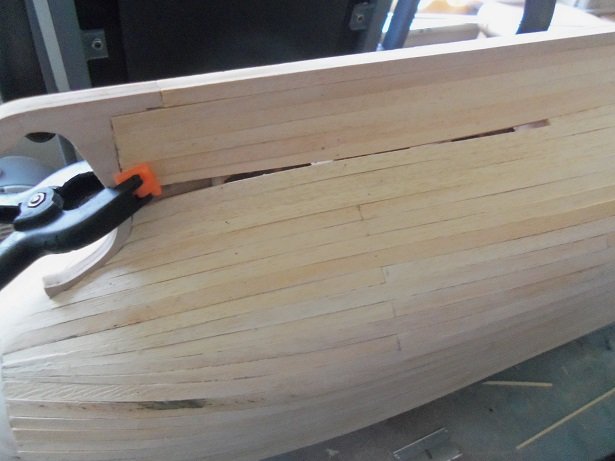
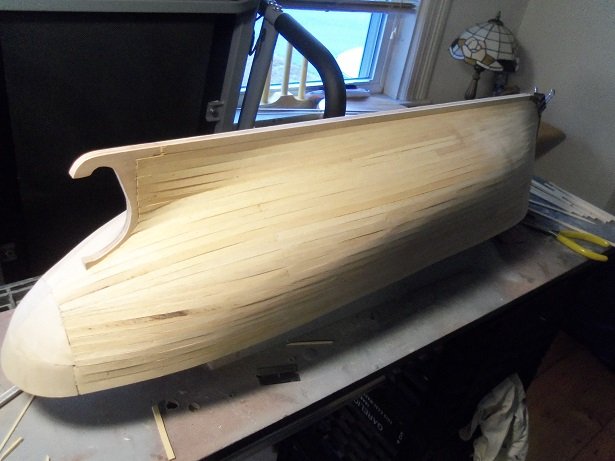
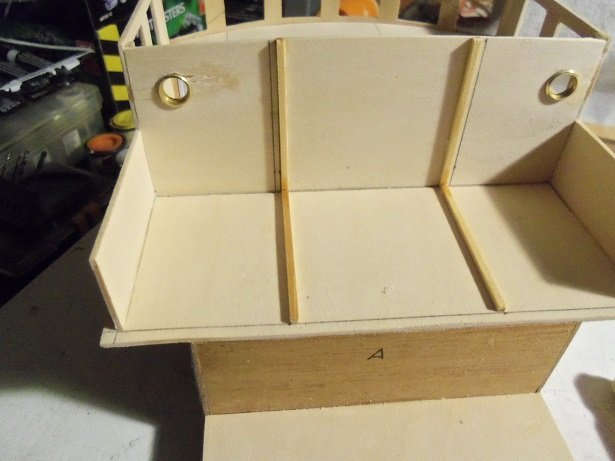
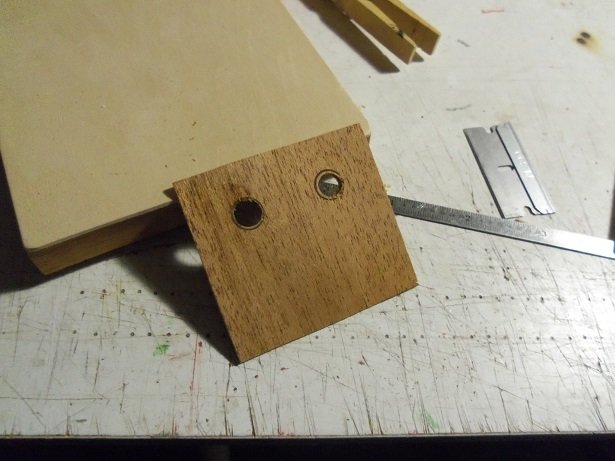
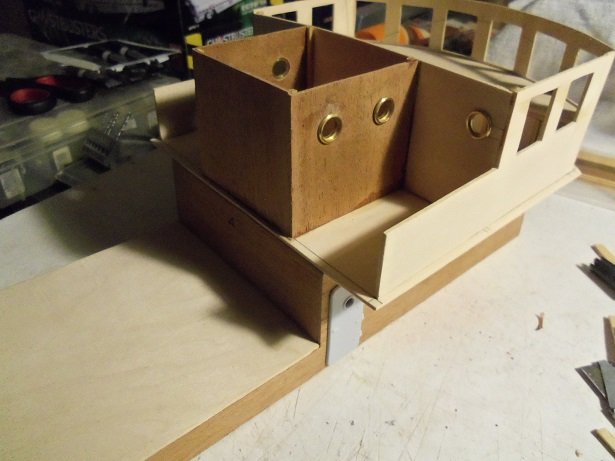
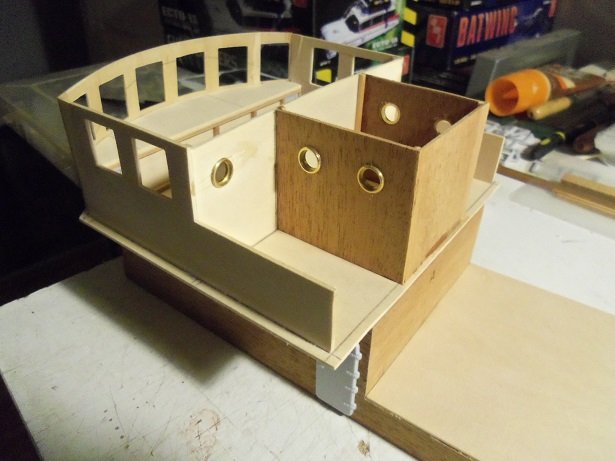
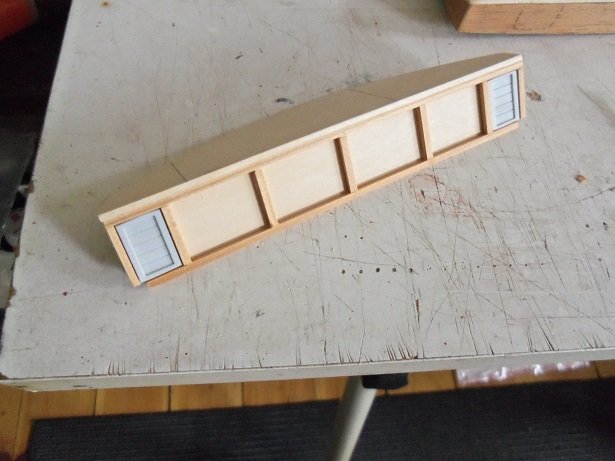
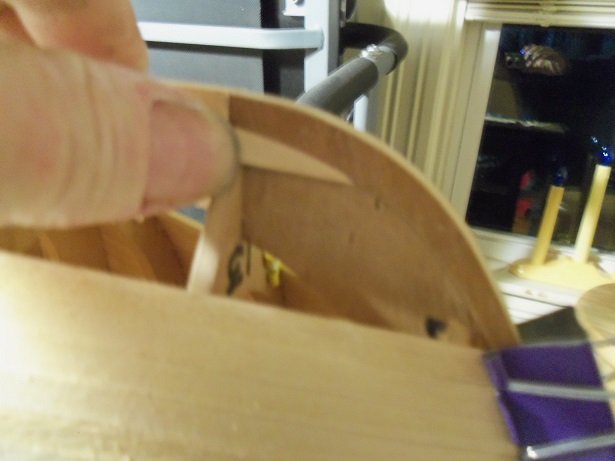
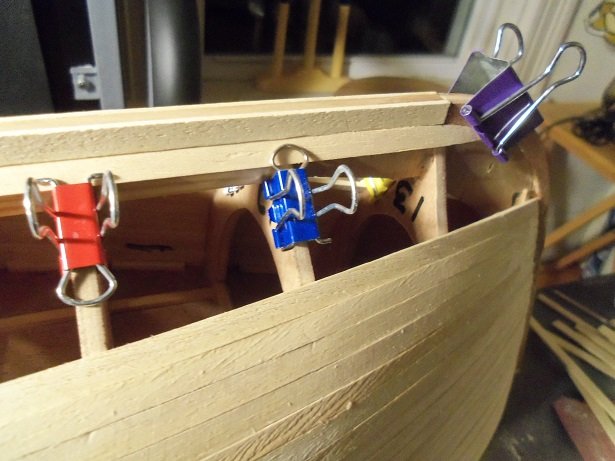
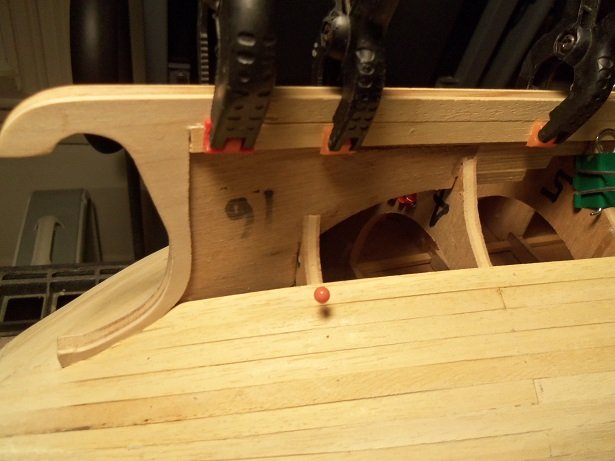
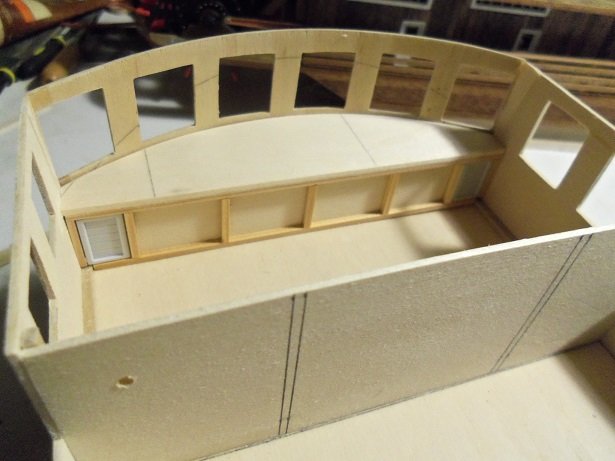
here is the update I promised......got off to a bad start when I got back to work'in on her. drilling out the portholes on the back wall of the helm room didn't go so good......the bit was very hungry. the right side isn't too bad......and I even drilled pilot holes, larger than the ones I made beforehand..........but the left side is pretty nasty. I'm flipp'in a coin if I should just rip the wall out. as mentioned, the right side cleaned up fine..... ....I'll get back to the left side later. the port side is almost closed........just this odd opening is all that's left. I filled in the last strake with cut offs, starting at the bow and working my way to the stern. it didn't take very long to finish. I did some sanding....you might be able to tell.........the bow came out pretty good, with regards to the rabbit. at this point, I went back to the structure and cleaned up the left side porthole.......it was a little tough, but I managed to save it. it may need a little filler. while I was at it, I began to frame out the aft cabin. I though I had done a bad job cutting out these parts.......I was able to use them after all. I thought it best to open up the portholes first, before assembling it. I may do something with the roof part.......I'm not putting it on at this time. I'm not adding the doors yet either.......I need to cut out the windows in the doors. there will be another cabin on the lower level......I will need to scratch make the parts........some ladders too, I think. going back to the hull, to do the starboard side now........I added the garboard strake and and the next one. I added one on the bottom too, but not all the way aft........I need to fit the plank to the stern rabbit and get around the curvature. not too much more to go............an' then I kin flex me muskles....AK-k-k-k-k-kk-k!
-
Tom..........ha....I thought so is that your new project .......the Santa Lucia? we'll be seeing her brother soon.........get it?!.....Santa Clause thanks John.........I got a 7 foot inflatable snowman on my front lawn!!!! it's like I'm pray'in to the snow gods, for cry'in out loud! insanity hath no bounds! I'll have some pictures soon...........doing the last bit of damage control. it's not as bad as it looks
-
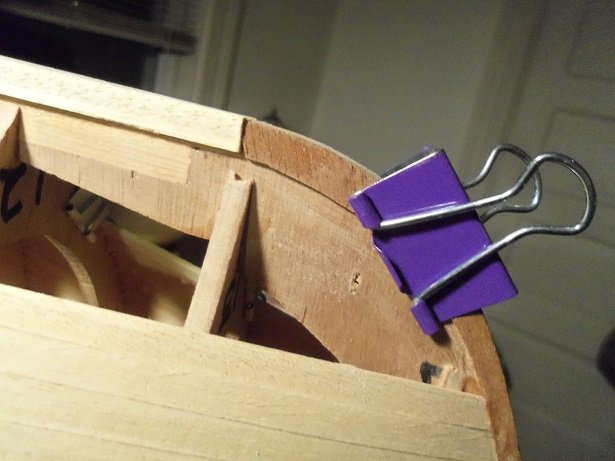
rabbits make it easier Tom.......for sailing ships, they provide a nice nitch to trap the planking under. most times, no type of clamping is needed. in this case, as long as the planking is kept flush with the rabbits, it usually turns out looking pretty good. where rabbits are not supplied, cutting a groove along the outer edge of the keel, is a great alternative {I'm sure you've done it}. thanks for the good word thanks Patrick.......of course!.....I may not get everything into her {a lot of after thoughts}, but I intend to give her some character. the hull is pretty straight forward.......the same as the Nordkap, but when I get on deck, that's when the fun can really begin at this point, the port side is close to being closed up. I tried to drill out the portholes on the back wall of the helm room, but ran into a nasty problem when the drill had a mind of it's own. now I'm on damage control......I'll show ya later. thanks to all who hit the like button
-
wow Rob.....that fore mast looks awesome! the sails look great and the rigging is mind blowing ! such a beautiful job
- 1,208 replies
-
- 2
-
-
- great republic
- clipper
- (and 1 more)
-
thanks OC here's that pitc're of me.........

-
gee OC........I'm not sure I have a picture of me before I had the work done......I'll snap one of the after for you ......... cheeky! hello Piet........very glad to see your out and about! when are we going to see another one of your projects? thanks and welcome to one of my latest projects {some are even later}. never a dull moment here at the Wharf yea, my teeth were beginning to cause me some major problems, so I finally had enough. once my lower jaw heals and I go through the adjustments, I should be in fine shape......that is, once I also learn to adapt. don't be a stranger.........and let me know, the first sign of you glu'in two sticks together........I want a front row seat!
-
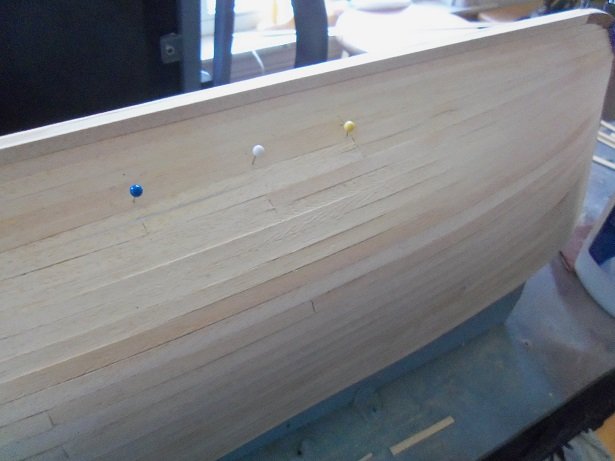
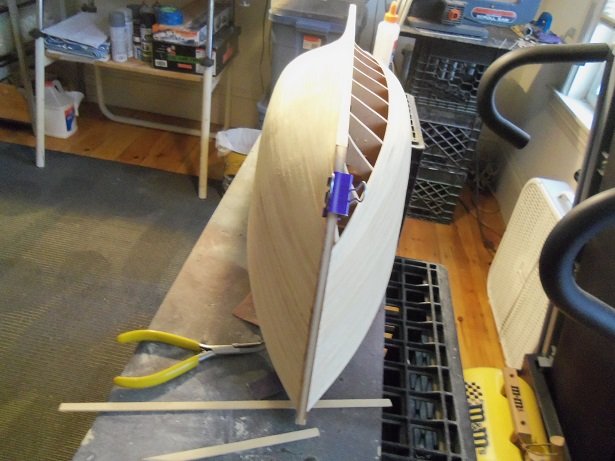
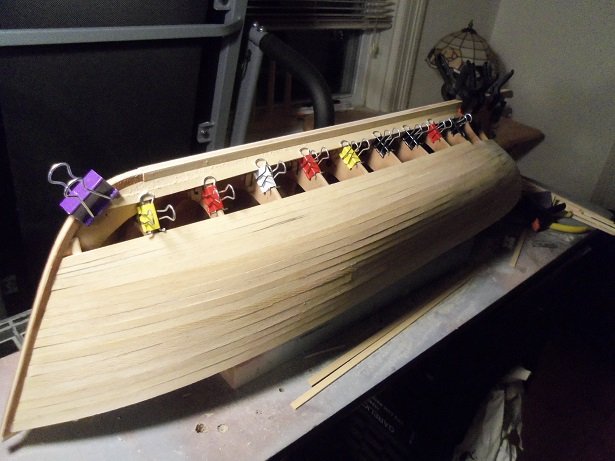
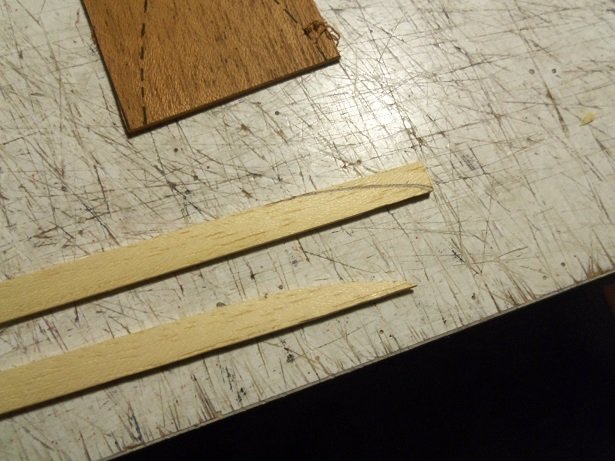
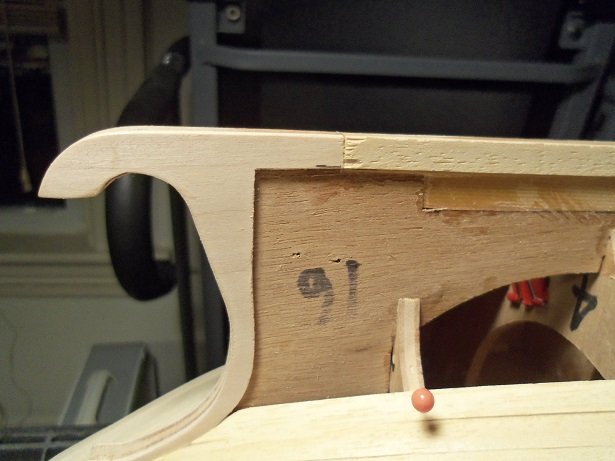
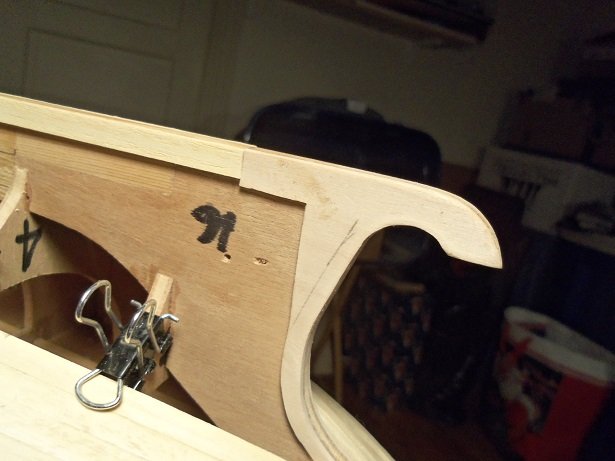
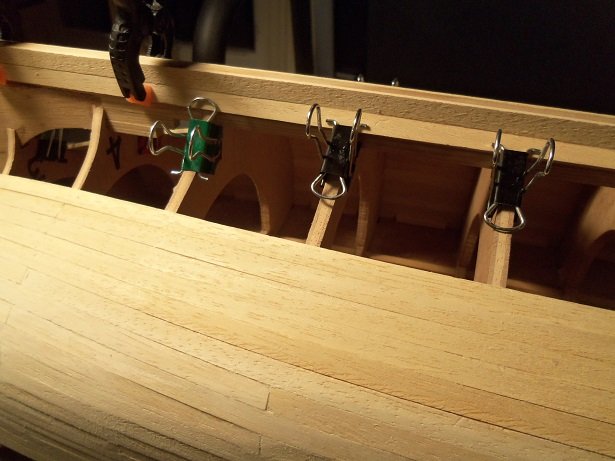
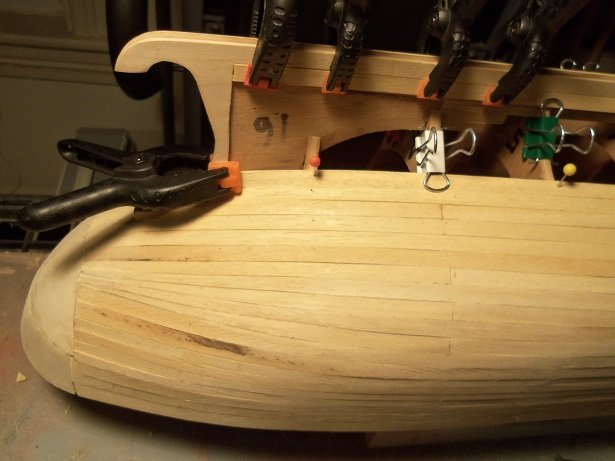
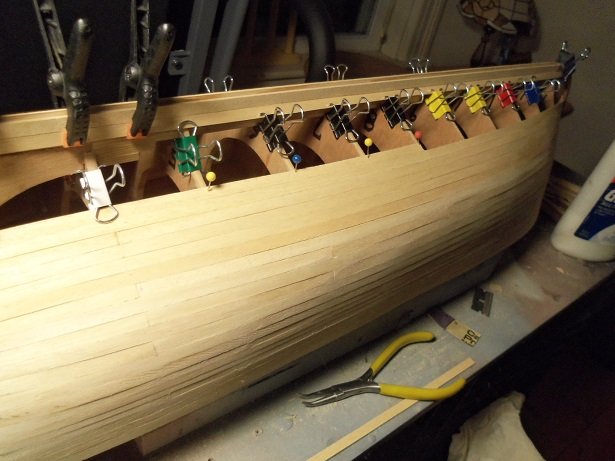
I made a bit more progress on her.............an errand here.........put up an inflatable snowman.......wrap presents, and I was good to go {still have to wrap the admiral's though.......I have plenty of CA to keep her in her seat } after visiting here for a little bit, catching up on some of your logs {mighty fine work too....I might add}, I checked to see if the dash had dried enough. taking it out of the helm room, it was refined here and there, and more was added to it. there was a pair of vents that will mimic the printed part nicely. I had an after thought.........but I will save it for another project...I think it would look really neat the 1/16 strip I used is some of the pine supplied in the kit. then I began to think of the garboard strakes........these were going to be interesting. the bow has a curve I need to replicate, and the stern rabbit will need to be trimmed. once the curve was created to the planking strip, it was copied onto another strip, so I would have a reference for the other side. I was a bit late for the stern rabbit......I had already trimmed it. I had used a 7 mm plank strip for the keel rabbit......as the garboard plank runs along it, it will tuck itself under it, creating a fine mating edge......hopefully with no gaps. the port side is already done here........wait! did I say port??? I think I broke my habit of always starting something on the starboard side! whooo-Hoo! here is what it looked like earlier......... ghastly! this is not a mistake.....actually, the instructions say to use a 10 mm strip. but, looking at the bow rabbit, a 10 mm strip would not have worked very well, and the garboard would not be able to tuck under it....so I compromised. the fit at the bow is good....... the underside of the tip was sanded down to 1 mm to match the thickness of the bow rabbit.....I've beveled all of the planking for this reason, all the way up the stem. it made the planking flush with the rabbit.....saving me a lot of extra sanding. then it was cemented into place. there's that silly .05 mm.........kinda hard to get rid of it here. a small problem near the bow, where it wasn't allowed to tuck under.......it won't interfere with anything. while this was drying, I thought to get a picture of the dash back in the helm room........should look good when the floor is planked and the interior painted. I'll create a tunnel for the ship's wheel.......I think I did that for the Nordkap. now that the garboard is laid, I need to get the planking past the turn of the stern rabbit. the shaping here needs to have that curved contour......if not, then there will be a flat spot that needs filler. I know there will be some, but I'm trying to limit how much. I really haven't had to soak any of these strips.......this small area of the stern is the worst part of it. I had to fashion another length of planking to fit the curvature.......one more should put me on the flat edge of the rabbit, and then I won't have to deal with it. this length of planking only runs forward to bulkhead #8.......I'll finish it off when this section is dry. I know I'll need to fill in an odd shaped opening to finish the hull planking...I'd like to bring it up higher, so it's far enough away from the turn {chine}, mid ship. it can be seen how level the plank line is..........it came out better than I thought there is a little narrowing at the bow......and to think......I tapered a couple of strakes rather than add another stealer. the stern might not be so easy.......where it flattened out on the dead wood, it widens there. perhaps I didn't need to do that much tapering at the stern. it is as I once said.........you can plank the same hull and it will come out different. one can see little flat spots on the hull.........my stupidity of spot sanding......should have left well enough alone. they will be gone when I get to the major stuff
-
your work is amazing......the metal work is awesome......those casements look superb. it must have taken some time to master these techniques. really impressed with your work!
-
getting caught up with your progress Michael is always a treat! you have amazing metal skills rigging looks great!
-
wow! you've covered some ground........just caught up to all the bits you've added. she's a real modern art masterpiece! she's a splendid model Patrick......your doing some seriously super work
-
an attempt I made was to stack 1/16 square strips on top of one another, then cut wafers with a miter saw {hobby}. way too much work in my opinion. your approach gives a better result
-
nifty way to make gratings.....wonder if a scroll saw would fare better? I would have to look up the speed on mine......how fast is your band saw?
-
I just caught up with your project Doris........I'm in awe! it's always a pleasure to look at your amazing work
- 1,035 replies
-
- 5
-
-
- royal katherine
- ship of the line
- (and 1 more)
-
I just came in the scratch build forum.........what do I see?!?!?! you started your new project! very good beginning.......pretty much how I clone my hulls, but I use the kit parts panels as templates look'in good so far. it's OK if I watch? 👀
-
you forget Vossie...........he has to LOOK where he's throwing it
- 359 replies
-
- 3
-
-
- prince de neufchatel
- model shipways
- (and 1 more)
-
thanks OC...........hope you can get the admiral on an even keel I'm not a water person either, but I'm getting used to it. thanks J..........yea....time I did something about it. I've had the dentures for a little over a week now........I still have to undergo a few adjustments. I like how I look though 😀 welcome ..........you haven't missed much
-
not sure what happens when the sugar is too high, but if it's too low, it can cause those symptoms. we had a guy at work that was diabetic, and a few times, we had to pull him out from under the trailer, because he was hitting bottom.........get him into the break room and eat a candy bar. then his doctor changed his meds and he got all messed up........very easy to screw up the balance. you just have to find it and stick with it. true about bacon........fat is converted to carbs, but it's the wrong kind
-
thanks Bob.........