
HOLIDAY DONATION DRIVE - SUPPORT MSW - DO YOUR PART TO KEEP THIS GREAT FORUM GOING! (Only 20 donations so far - C'mon guys!)
×


popeye the sailor
-
Posts
16,007 -
Joined
-
Last visited
Content Type
Profiles
Forums
Gallery
Events
Everything posted by popeye the sailor
-
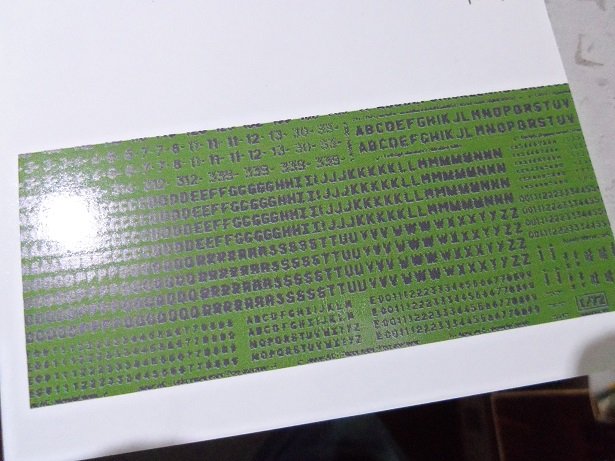
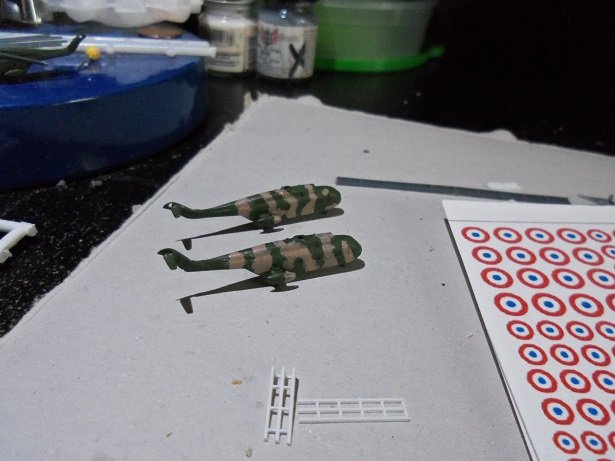
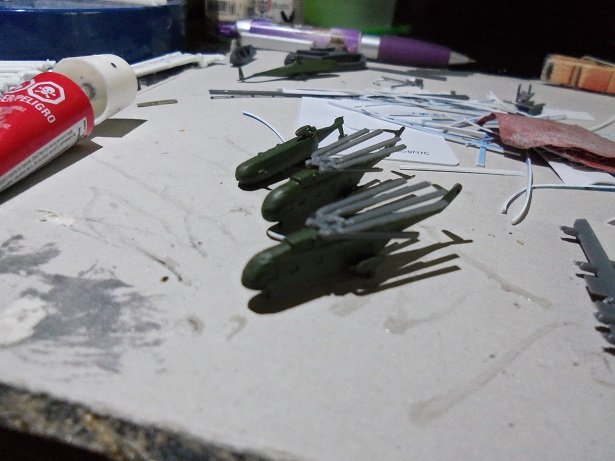
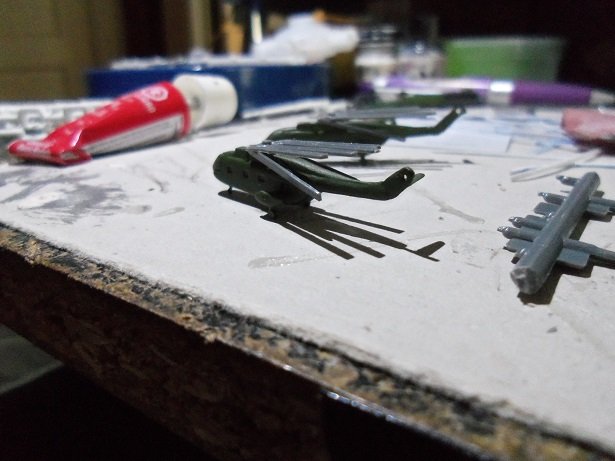
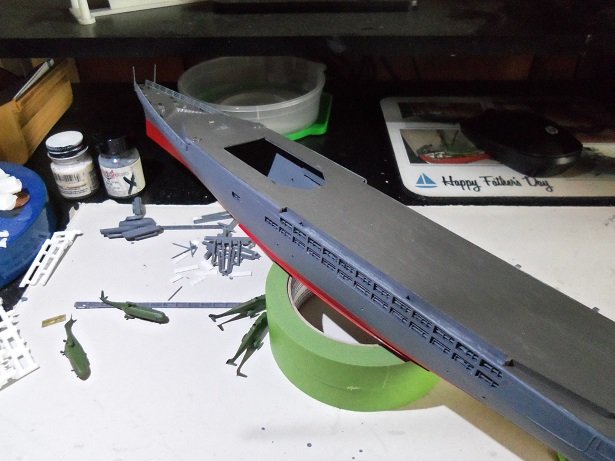
 here it is again........Friday......tomorrow I go back to work if I didn't loath the place so much, it wouldn't be so bad. but big changes are com'in down the pike......changes that may have me look'in for another job. they're keep'in it a secret....and allowing the rumor mill to go full tilt. such as the way of life >shrug< between yesterday and today, quite a bit has been done. I even went as far, as to cement some of the finished sub assemblies in place. really put some distance in the progress dept. I mentioned that I had made decals for the Helicopters......I used white decal paper, so I could get the white in the decals. I'll just have to cut the decals a lot closer to the images. basically, all I do is save the images of decal sheets and reproduce them with the decal maker. I did these, changing the background color........I think I have some tiny letters and numbers that I can use. these didn't look too good. I started the camo on the 'choppers...I haven't done this in a while, so they didn't come out the way I wanted them to. I'll be touching them up, once I get them all done. the props were all painted flat black by this time.......the folded ones were left to do. the railings and the aft decks were painted at the stern of the ship. the two end walls were done as well. after a few touch ups, the stern's lower railings were created. they had to be bent enough to make the curvature, broken by that short section of solid bulwark {or whatever it's called}. the fun got broken up again by another trip to the stores. it wasn't totally a drudge-day......I got to buy some paints and a few other neat items I'd continue with the events of today, but the admiral is hungry, and she wants burgers on the grill. pretty soon, I'll be grill'in in snow.......if things keep going the way they are.......it will be sooner than later. I'm so sorry to hear that some of you folks in the Midwest, are already deal'in with it
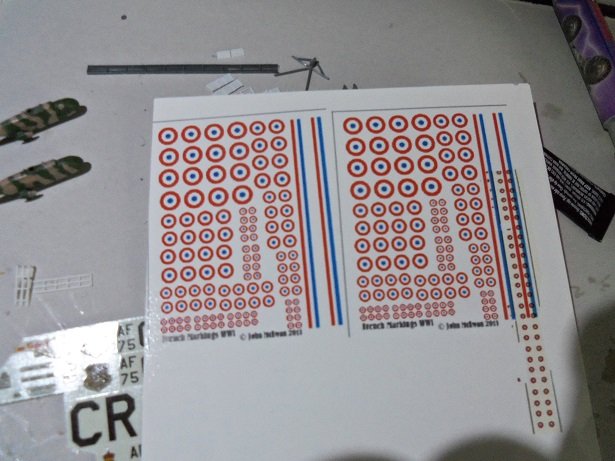
- 133 replies
-
- 10
-

-
- jeanne d arc
- heller
- (and 2 more)
-
look'in good Floyd.......glad to see you recovered nicely from the stern dilemma I notice the four drawer work bench......did you get that from Harbor Freight? I was at the local store buying some tools, and I saw the same one for sale......looks just like the one you've got there. got it on my list as a Christmas present
-
looks to be a really fun build........ should be fun to watch as well
- 91 replies
-
- 3
-
-
- kolderstok
- duyfken
- (and 1 more)
-
nice jog on the ship's boat Mark......do you have more to do?
-
awesome progress Jilian........she looks super! very well done indeed!
-
I won't lie........I giggled a bit when I saw you stood up in a chair for the overhead shot .......and you still didn't get a full shot of the mast. she's a tall one wonderfully done Gil.......the fittings and detail in the cockpit is really nice. paint work and sheer design is to die for. recover well my friend........and I'll keep my eyes open for another project. do you have one in mind?
-
I went looking at images........I saw a blackish gray to black with orange hooding. I also saw a ghost gray, to off white {tinge of gray} hopefully, there is an article or something in there that will steer you in the right direction
-
the hull looks super J.........nice color and tone never heard of cardboard blocks........but then again, what else do you use on a paper model? what do they supply for blocks in the Pinta kit?
-
check here: http://www.kbismarck.com/ look in the scale model section.....it might be in there
-
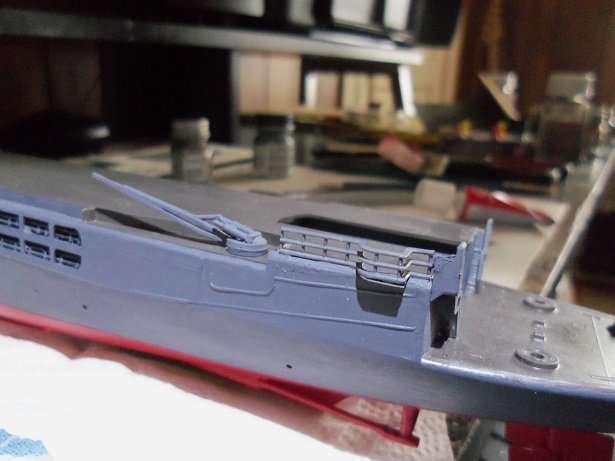
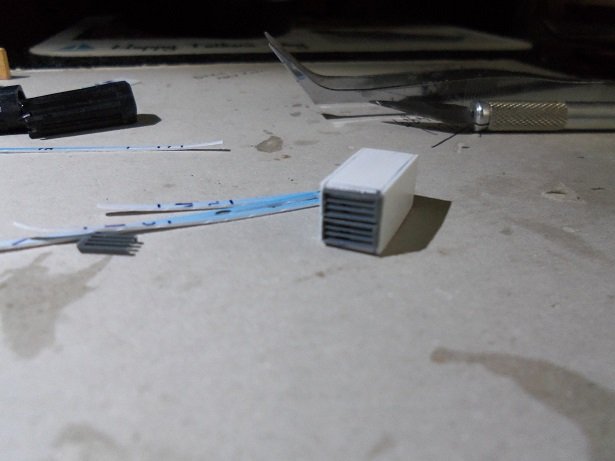
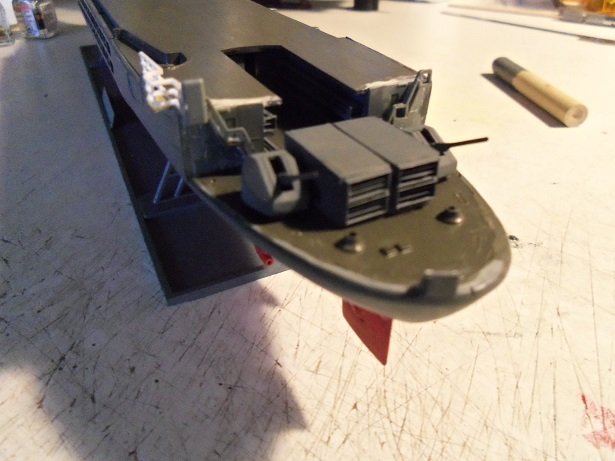
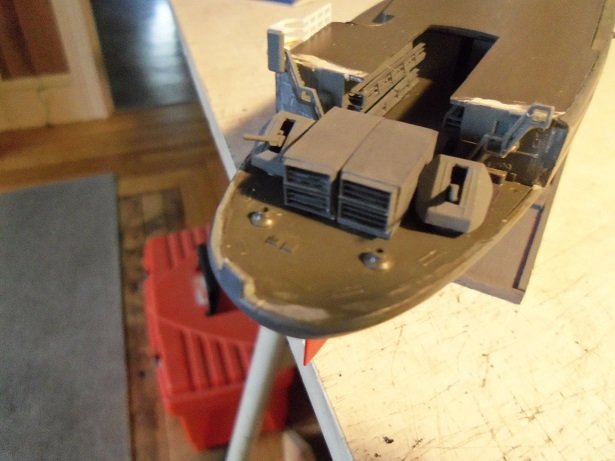
I just finished the DRBN - 34A radar units......not too bad for wing'in it the CA worked better, but if I got too rough with them, a seam would come apart and I would have to repair it. I got the top on one of them......the other one was going through a repair job. in between this, I assembled the folded props for a couple of the helicopters. the other two will sport the extended ones. they have all been painted by this time. the other two helicopters then got the light tan added for the camo.........could have done better with it, but their OK I guess. I came up with a good way to make the vents on the aft end of the radar units.......better than I first though of......making the vents from thin strips of the card. I used some clippings from the railings. then added a tiny rectangle of brass for the door.... inside the vents were painted with flat black........then the outer parts and the box itself was painted with battleship gray. now........are you ready for the big bummer? I wasn't both of them together are too wide for the 100 mm guns. perhaps I'll just go with a single one........in other pictures, they are not on deck. so, perhaps they are stored below deck when not in use. a small section of railing was added to the aft port side, along with a sort of shield for the stairway. what can I say......I gave it a shot
- 133 replies
-
- 12
-
-
- jeanne d arc
- heller
- (and 2 more)
-
yea.......changing the concept of a kit can have it's problems.......I'm sure you'll figure something out and bounce back a plank on frame would be easier though, since there are no bulkheads to modify. take care of yourself
-
thanks for the tips gents the super glue seems to be doing the trick......I have two rectangular boxes made! one of them already has the top done.....the other one is still in sanding phase. now I'll have to figure out how to do the large vents at the rear, and of course, a couple of doors perhaps. basically, there some more painting being done......I should have another update soon thanks for look'in in and the likes!
- 133 replies
-
- 5
-
-
- jeanne d arc
- heller
- (and 2 more)
-
hello Andy! so glad to see the build moving forward again not so glad though to hear what kick started it......I too am very sorry to hear of your misfortune. perhaps there is something in your field that may interest you...but as Grant said, take the time to think well of your next step I really enjoy the extra detail your putting into this project. the boom alone is a marvel to behold I look forward in seeing more great progress!
- 382 replies
-
- 3
-
-
- stadacona
- sylvan scale models
- (and 1 more)
-
there use to be a hobby shop where I used to get plastruct and evergreen products. they moved out of town and I haven't made it out to their new location. I've been able to find everything I need at Hobby Lobby. I will have to hunt that place down one of these days......either that, go online and buy it I think the CA is working.......at least I can handle it a little bit {I've only made one so far}. I like this stuff.......it's only about a 32nd thick thanks for look'in in Robin
- 133 replies
-
- 5
-
-
- jeanne d arc
- heller
- (and 2 more)
-
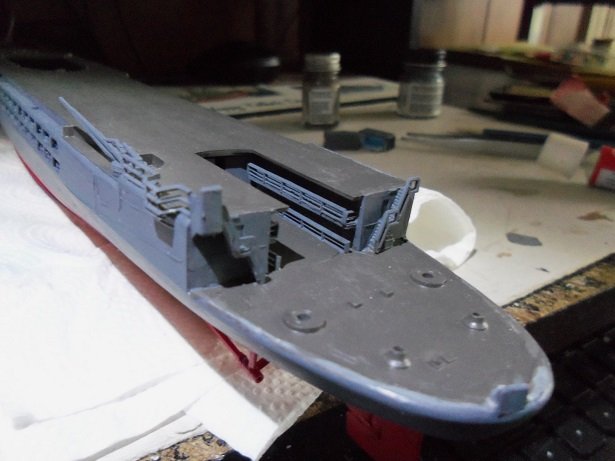
early catapults were steam.......the more modern ones are electromagnetic. images I saw of dual pontoon aircraft on a catapult, shows them on a cradle of sorts, and thrusted forward by steam operated pistons. I surmise it is like throwing a paper airplane having never detailed a catapult myself....I don't blame you for not moving ahead with fitting planes on them....sad that the kit or photo etch doesn't supply anything either. from what I read, the aft catapults didn't last long anyway.....they were removed to improve the effectiveness of the aft turrets. I also saw an artist's drawing of the 1944 refit....the opening that I asked about wasn't there. perhaps it was an elevator of sorts, below deck before the refit......ammo for the turrets was likely moved to them from below deck, so they would be pre detonated by stray fire or bombs. sounds logical to me anyway
-
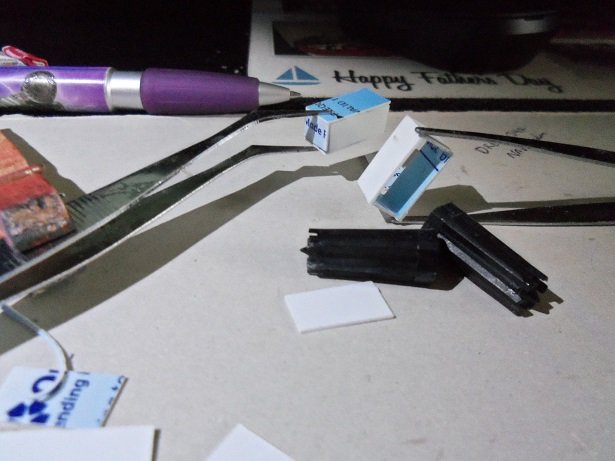
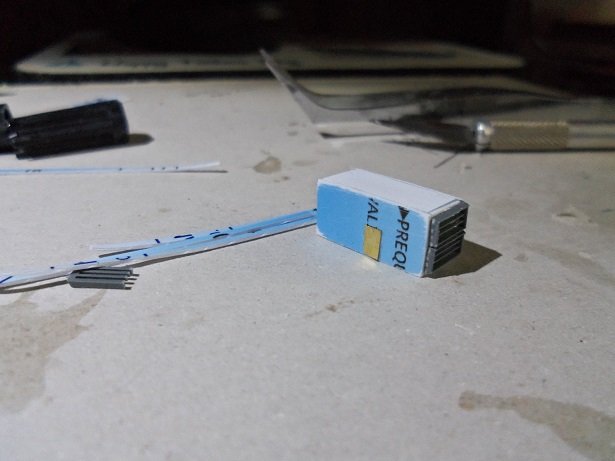
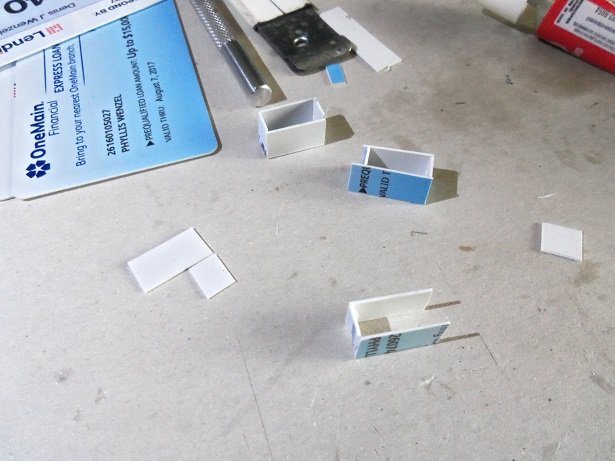
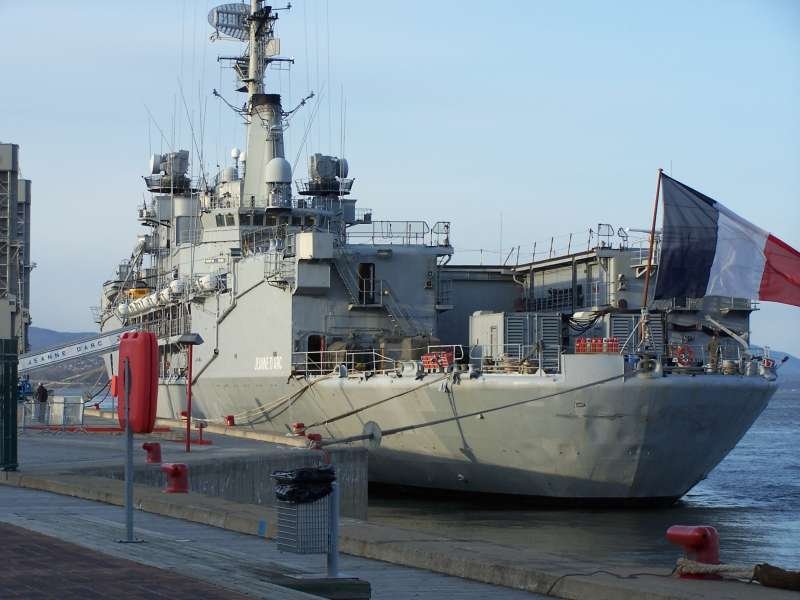
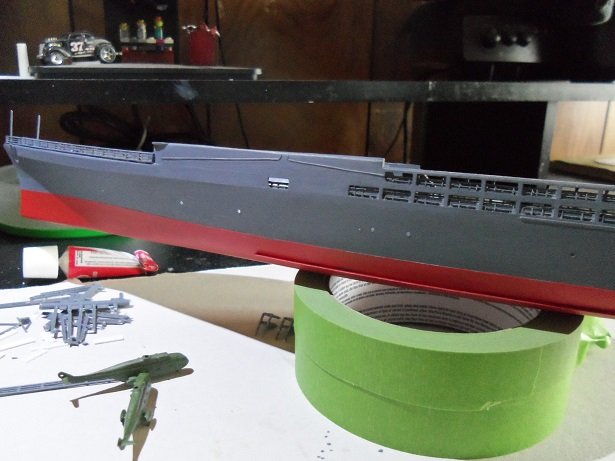
thanks OC and John......I thought it was about time the hull got painted. I didn't use an air brush though......my extensive use of one in the past has made me rather lax in replacing old brushes, so I had to work with what I have. I'm not totally pleased with the quality of the paint job, but it's good enough to pass muster. the items that I mentioned that I would have to make from scratch, is a pair of DRBN - 34A navigation radar units that locate at the stern of the ship. for some reason, the kit does not include them.....can't see why not, they are quite visible....even in the picture above. I have been collecting these plastic replica credit cards, that you'd get in mailings for credit advertisement....I and the admiral get quite a few of them. some are paper, but the plastic ones I keep. there's a couple that show signs that I tried to rip them up....I'm no Hercules cutting them into strips......cut to size.......I used model cement to assemble them. after a bit of trial and error, I got a pair that were fairly identical. I went to sand them so I could add the tops to them, and they fell apart rather easily......the glue did not work on them. I was able to salvage the parts....the glue comes off very easily with the finger nails. I will try CA to see if it will work thanks for the good word and also the likes I've also been working on decals for the helicopters.

- 133 replies
-
- 10
-
-
- jeanne d arc
- heller
- (and 2 more)
-
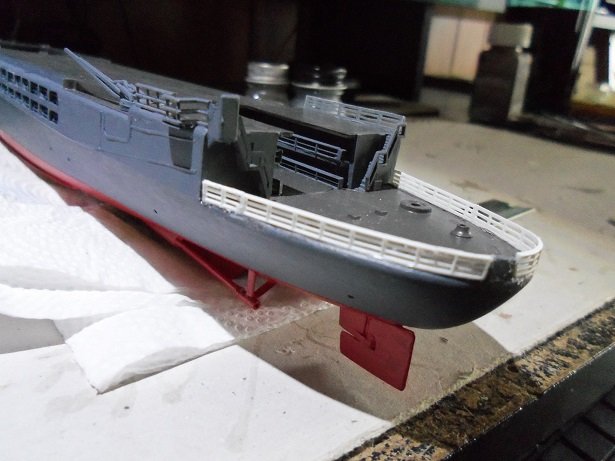
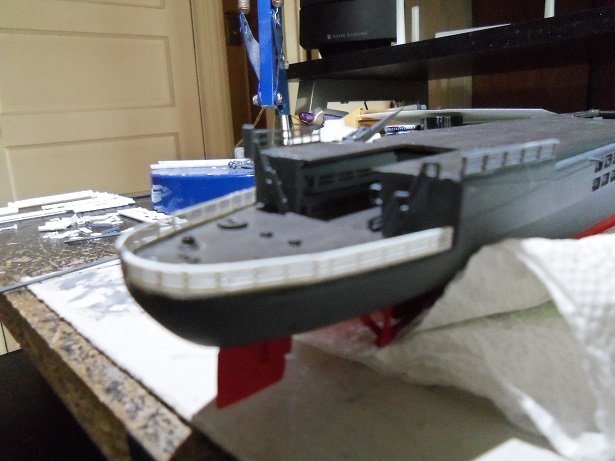
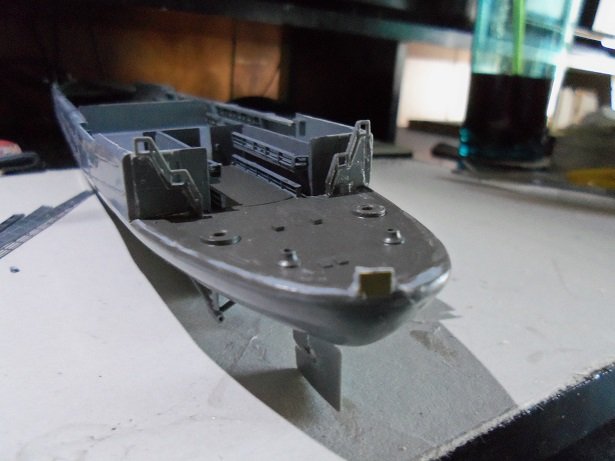
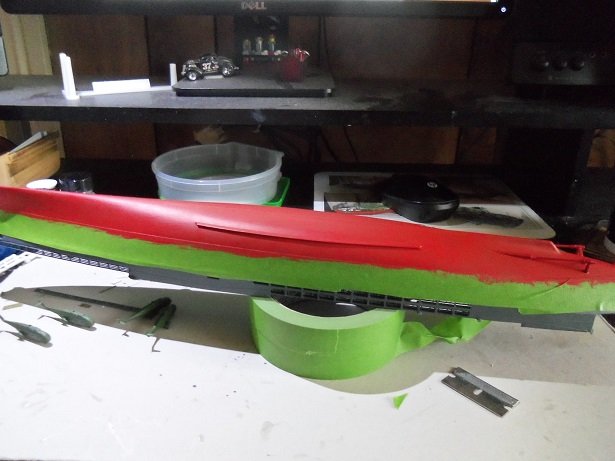
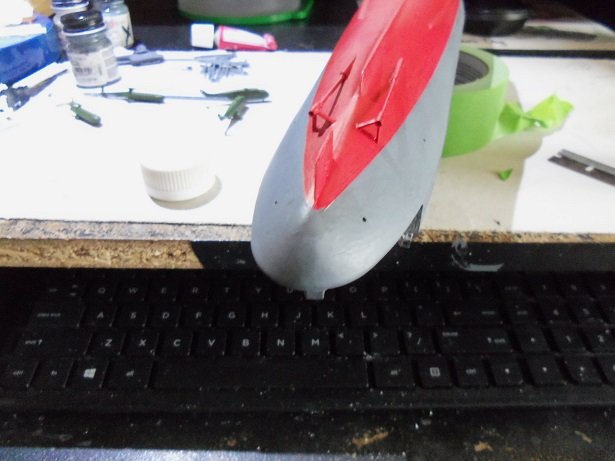
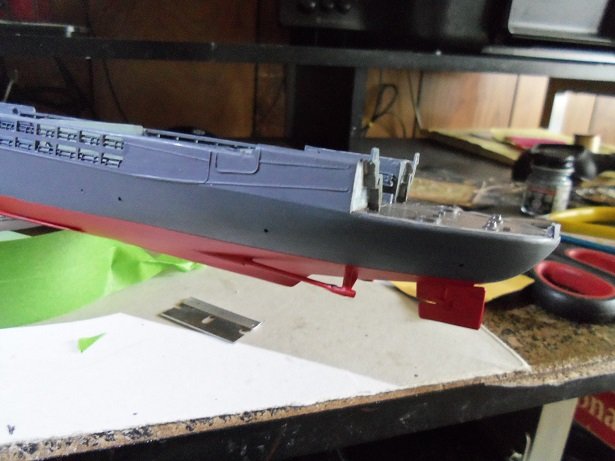
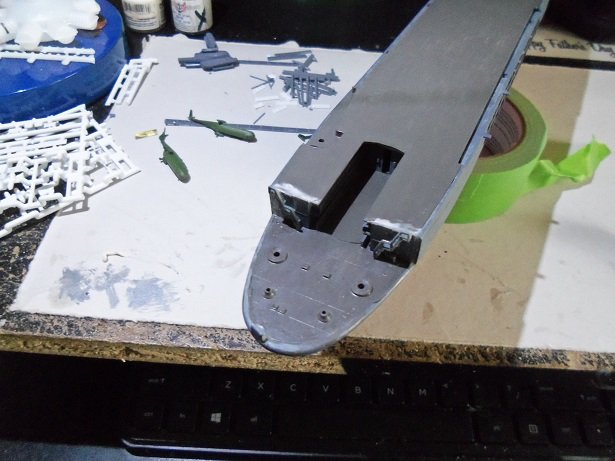
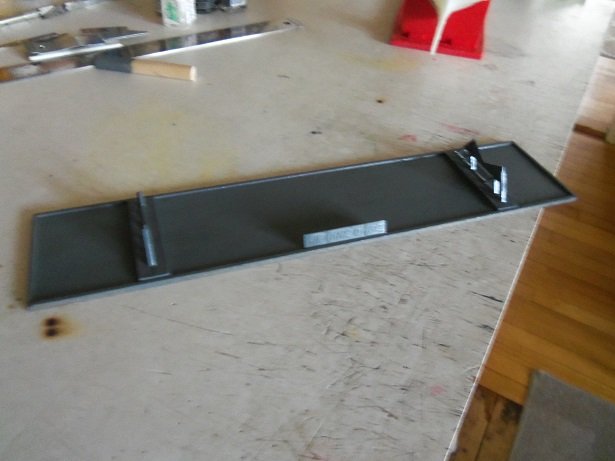
I took Sunday and today off from work.......kinda worked out, since it was the premier of the Walking Dead, season 8, and our youngest grandson's birthday. the only thing I got done yesterday, was the hull painting {finally}. of course, I had to do a couple of thing that made it harder to do........but I managed to get 'er done. Friday was when I did the stupid stuff. there was a reason for my madness.....I did them along the lines of painting the upper hull and painting them along with it. this was adding the railings on the fore deck. I later added insult ti injury, by adding the two antennas that locate near the tip of the bow. I had also added a part to the stern that needed to go somewhere else. glued down pretty good, I had to slice it off with a razor, and repair the damage. the part was salvageable and was relocated to where it was to go. I used a small piece of brass to cover where I had sliced it off the hull, making it look smooth again. once painted the hull color, it should look Ok. looking at the pictures, this bit of bulwark {I believe it's what it is} can be clearly seen..........along with something else too, that I will address. the brasswork is hard to see...I still need to clean it up the rest of the way in this picture. I went to work on Saturday..........but on Sunday, I got to do a little on her......even if it was just the hull painting. after cleaning up the stern....ie, the nonconformity, the upper hull was painted. later, before leaving to go to our youngest grandson's birthday party, the bottom paint. I have to say......and I shouldn't because I'll jinx it.........the rudder and the prop parts have stood very well, being cemented on earlier in the assembly.......Murphy must be on vacation, or something?!?!? anyway........ I ran the masking to a point at the stern and rounded it off afterwards. the upper paint has been done and dried..... I did some more clean up at the stern. this morning.......I said the heck with it. the main deck is now cemented in place. I wanted to fill the gaps at the two aft sections and get them prepped up, to be touched up. then I can finally paint those two walls. I had also painted the stand too........I dded the name plate to it and painted it a pale gray..a Billing's color. I'm really going to make it a point to go through the rest of those paints and find out what is good or not. I've had these paints since Billing USA closed shop. more to update soon..........thanks for look'in in

- 133 replies
-
- 13
-
-
- jeanne d arc
- heller
- (and 2 more)
-
I would think that once you achieve the patina you desire, you could spray it with a flat clear coat. then it would be OK to handle. great job on the hull planking!
-
all this and a sub too???? your not letting your eyes return to focus for a second, are you some very nice work there mate
-
the inflatable looks good Glenn.......I would think the ropes should have a little sag to them {look alright to me} nice bit of progress though.......the planning always takes the longest. Billing has a habit of supplying the plastic bits.......I have quite a few parts in my inventory {I don't use them either}. I'm sure I'll find a use for them somewhere