
HOLIDAY DONATION DRIVE - SUPPORT MSW - DO YOUR PART TO KEEP THIS GREAT FORUM GOING!
×


popeye the sailor
-
Posts
16,007 -
Joined
-
Last visited
Content Type
Profiles
Forums
Gallery
Events
Everything posted by popeye the sailor
-
 I go to the porch or the garage as well........the admiral is tired of cleaning my desk {I do it, but I tolerate it longer than she can stand} {'cuz she can't stands n'more! AK-K-k-k-k-k!} the foam sounds like a viable option.....it can be shaped very easily looks nice.
- 91 replies
-
- 4
-

-
- kolderstok
- duyfken
- (and 1 more)
-
superb job Greg.......a wonderful addition to your collection unbelievable how much detail your put into her...........very fun to watch
-
WOW Nils........she 's coming along nicely! in my neck 'o the woods, it's called a coping saw. I have one, but never got into using it......that's why I have a scroll saw I'm too rough....keep break'in the blades! really nice progress since I last looked in.......
- 692 replies
-
- 4
-
-
- eagle of algier
- chebec
- (and 2 more)
-
you definitely came back rested..........the cabin looks awesome! the windows look perfect minor problem on the hatch......it happens......but it still looks very good. I would have been clueless if you didn't point it out. she's look'in super Frank...glad your back!
-
the bow rigging looks great........not too crowded at all. super job! really nice to see the masts complete
- 1,348 replies
-
- 2
-
-
- constitution
- model shipways
- (and 1 more)
-
very true Lou. it depends greatly where and how a kit is stored. the box showed some wear........likely stored in a cellar or attic, and shuffled around quite a bit. I keep mine in the closet near my desk. there are hot water pipes in there that go up to the other apartments.......this keeps it warm in there, which in turn, keeps the humidity at bay. I keep my wood projects in there. I do take the decal sheets out of them though, put them in seal-able plastic bags and store them in a drawer at my table. heat can be a problem...it can make them dry and crack. unknown how these were kept...they were with the kit, so they definitely weren't taken out. good thing too!
- 133 replies
-
- 4
-
-
- jeanne d arc
- heller
- (and 2 more)
-
considering that there are no dates at all anywhere on the kit.......or even a date stamp on the parts, that may be the case. I'm more familiar with Revell and other older companies, than I am with foreign manufacturers. I did purchase a couple of kits from ICM at one point in time.......thought the planes were so cool. they were the only kits I ever threw away. I enjoy building the older kits....love the nostalgia they bring to the table. I have a Revell Santa Maria that was produced sometime back in the '60's. that was back when they were using the odd scales......this one. I believe is about 1:89 scale. one day I'll get into it. thanks for the good word....appreciate you like my feeble attempt
- 133 replies
-
- 4
-
-
- jeanne d arc
- heller
- (and 2 more)
-
that's progress! I see your not using a build slip. until I got one, I use a pine board and jury rigged a way to set up the frame. I use the deck platforms to set the bulkheads. as said earlier........your off to a great start
- 91 replies
-
- 3
-
-
- kolderstok
- duyfken
- (and 1 more)
-
that's the thing about this kit........it's not an old kit. the condensed information that they say about the model {found at the beginning of the first page}, includes her decommission dates........if this was an older kit, this info wouldn't have been there {it hadn't happened yet}. I estimated the kit was produced sometime after 2010.......2011, or 2012 perhaps. I have had maybe a few kits, that the decals were less than perfect. they are very thin, and I believe the use of flat colors {ink}, accounts for them being such a bear. I have a couple more left to do. here is a question I should have posed earlier.........I'm thinking of using flat black for the helicopter windows. I do recall other colors being used......light blue, white, or even yellow. what would you think would be the appropriate color? I've run into many problems with decals in the past........the Cutty Sark that I got off E-bay was my classic. the decal sheet was no good, so I sent a missing parts request to Revell to get another sheet. I got one..........went to use it and found that the sheet was too old, resulting in it breaking up into thousands of micro cracks. this is when I found out about decal bonder. I had bought the Testor's decal it decal maker system....sprayed on suspected older decals, this problem was averted, and I have been able to use old decals with no fear of it happening again I had contacted other companies that made decals, and I either got the run around, or they couldn't do it, due to the use of metallic colors {gold}. I ended up making a passable copy of the decals for the Cutty, but had to use a paint pen to make the water marks, since an ink jet printer won't do white. this was a PITA! this decal system isn't perfect though........there is a transparency issue with it, but can be easily worked around. the plus side, is that I've been able to make decals that I never thought possible, so it kind of balances it out. thank you gents for chiming in..........and thanks to all who hit the like button
- 133 replies
-
- 4
-
-
- jeanne d arc
- heller
- (and 2 more)
-
awesome job on the boats Greg......the aerial shot looks so good really nice looking model!
-
I was hesitant posting a comment......you have so many already that voiced my sentiment I follow that rule...grain is everything. used in your favor, you can get the wood to bend, creating a nice curved appearance. but there are the times that it cannot be helped, and it makes the part very brittle your lamination approach is really neat too........I'll have to file that one away really wonderful work Bob.......if I'm quiet, don't be concerned....it's because I'm speechless
- 682 replies
-
- 4
-
-
- halifax
- lumberyard
- (and 1 more)
-
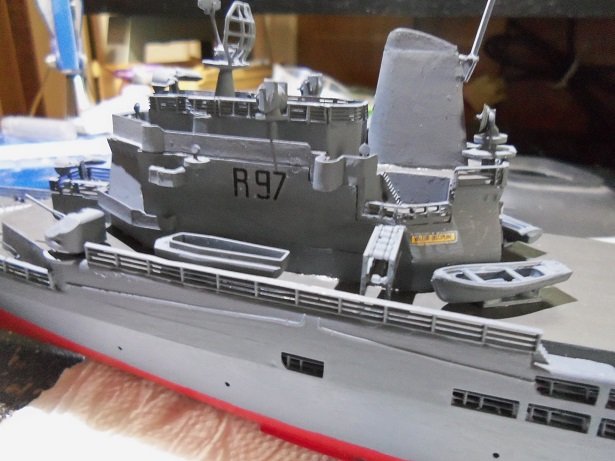
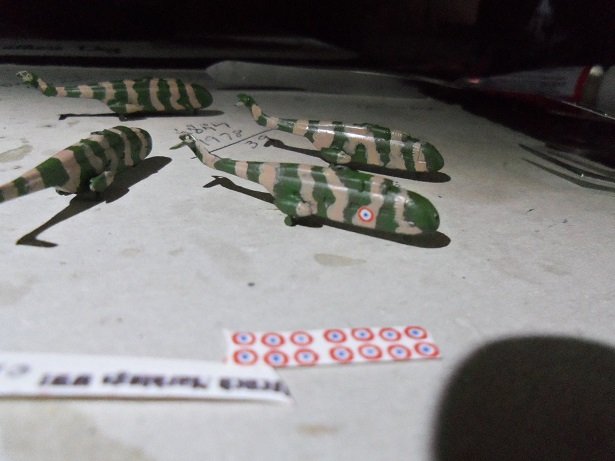
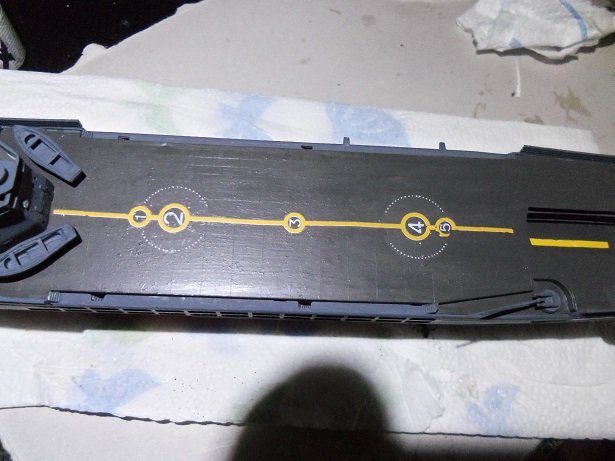
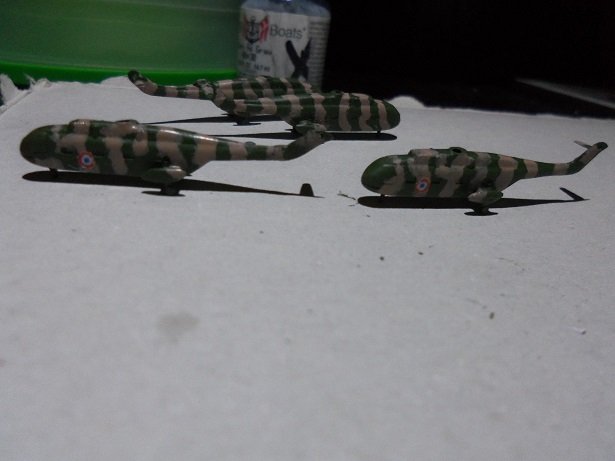
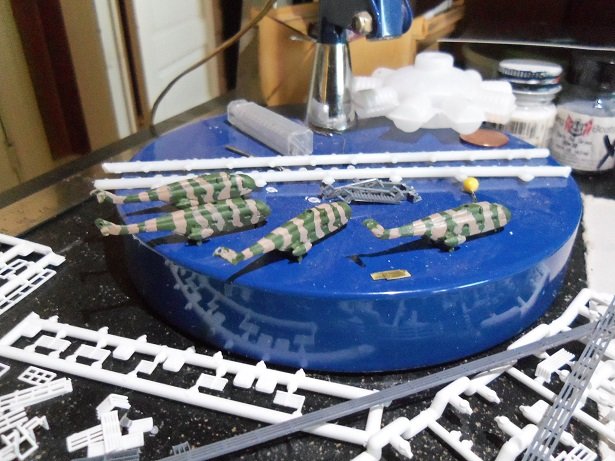
the life boats were added first........ then the depth charge racks and the decals that are near to them........ the clock decal crapped out.......I ended painting the clock on there {white}. the decal on the starboard side suffered a tiny bit of damage, but not enough to matter. the ship's boats along the railings will have a davit over them.....painted the parts at this time. it took some time to cut the decal out, but I got one on one of the 'choppers......I like the way it looks. the next pair of decals to go on, were the name along the stern....port and starboard. then.........the decal I dreaded the most........the one that goes lengthwise on the helipad. as I thought it would, it broke into segments........I did them the best way I knew how. then the second segment........which went as well as the first. it wasn't until the last segment....somehow, it became stuck to the underside of my hand......near my little finger! I don't know how..........perhaps during my fidgeting with the second segment, my hand rested on the decal. pulling it off, I had wet the decal paper in order to make it easier to straighten out the crumpled decal.........the damage was done I managed to lay most of it.......I'm hoping that either paint, or cut up decal can fix it. yea........I was not happy. I'll do what I can meanwhile, back at the 'choppers, I got the other side done on the first 'chopper, and started the second one. having to cut out these decals is going to be a pain......but the other decals I'm going to use will be a lot more user friendly.......they're from a Revell kit. for now, I'll continue with the helicopters..............OH WOW!!!!! I found it! I had lost one of the French markings I cut out earlier.......I just found it....it was tucked under the cardboard I have here on my desk {the box top....I took the sides off of it}. it doesn't take much to make me happy.....good thing
- 133 replies
-
- 15
-
-
- jeanne d arc
- heller
- (and 2 more)
-
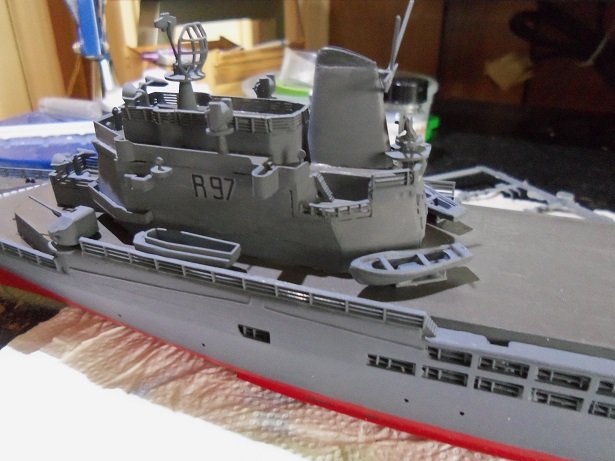
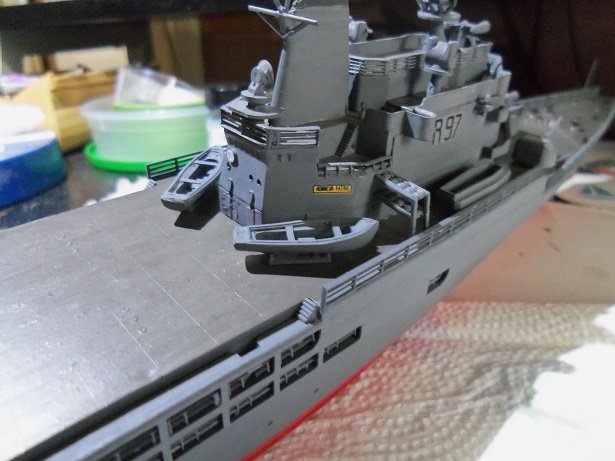
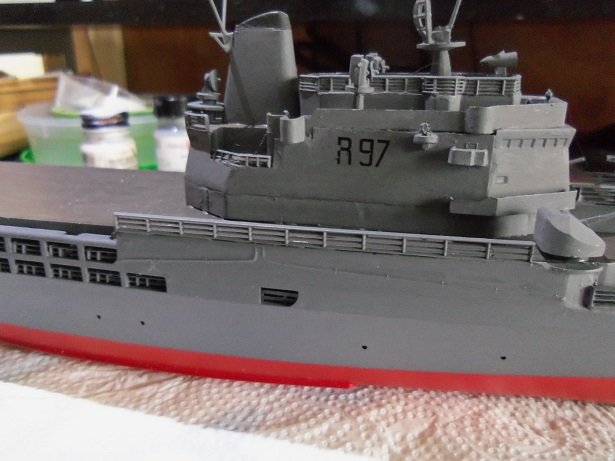
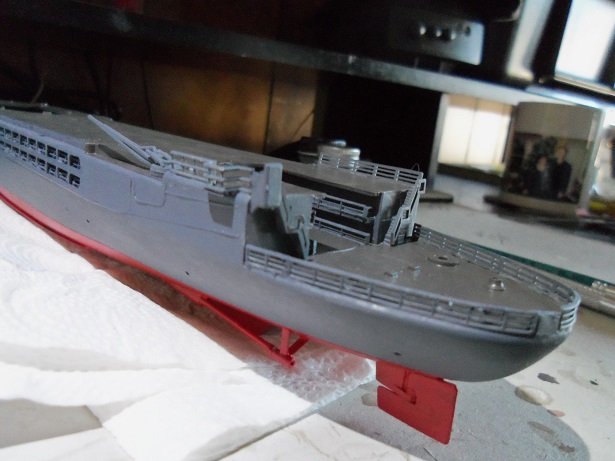
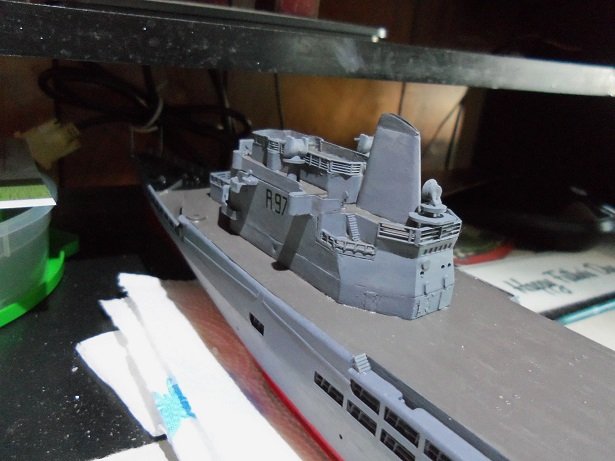
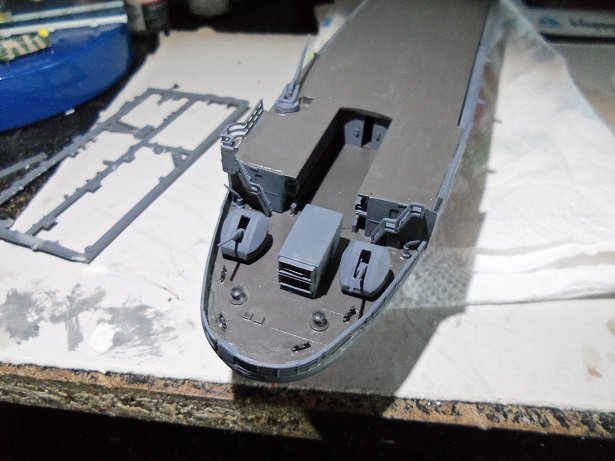
I'm not happy..........the afternoon didn't go as well as I had hoped. what I feared has come to pass. no.......the model didn't end up hitting the wall, but I do have some fixing to do. anyway......yesterday had a lot more optimism with the ship. I got the railings along side the superstructure done, the funnel antenna on, and the couple of pieces on the fore deck. you can see where I need to fix the number decal.......these decals are really delicate. nothing sharp can be used to position the decal.....I'm having to use a soaked toothpick. soaking it makes the tip soft....tried a Q-tip, but the decal wants to stick to it. I picked back up on the model by adding more of the decals, along with the life boats and depth charge racks. I had sprayed the decal sheet I printed up with bonder...it should be pretty dry about now.....I can also start on the 'choppers.
- 133 replies
-
- 7
-
-
- jeanne d arc
- heller
- (and 2 more)
-
look'in good......I'm going to need to follow the same procedure. the model I got was damaged and I had to cut all the bulkhead post off
-
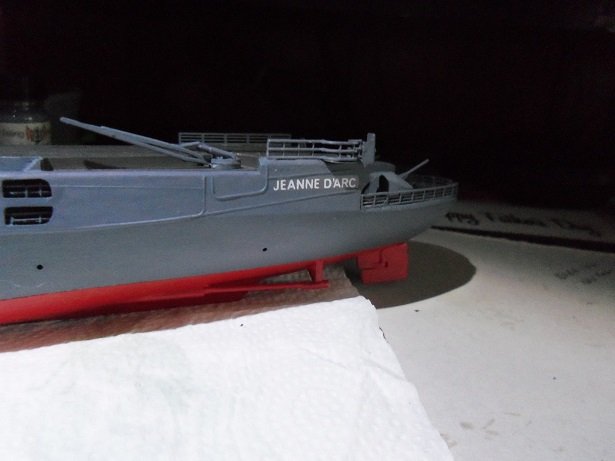
thanks Mobbsie your too kind. I didn't do a whole lot yesterday.......suffered from a bit of work-lag. but I did manage to get the bulwark railings along the superstructure on, as well as a few more bits on the fore deck, and the antenna on the funnel. the depth charges are painted and almost ready to be added to the deck.....that had to wait due to the railings. I should get a few more of the smaller decals on, before I add something that's gonna make them harder to do. the other thing I forgot about actually....was the windows in the superstructure. if I do them, I'll need to be very careful...especially since I haven't done windows like these for quite a while now. I planned on doing the 'chopper windows...they should prove to be a challenge enough, but perhaps I can use them for practice I have pictures........I'll include them with the update I'll be posting soon. thanks again and thanks for the likes.......you're ALL too kind
- 133 replies
-
- 5
-
-
- jeanne d arc
- heller
- (and 2 more)
-
looking really good Mobbsie......deck looks great too. most go from a light color deck to a darker color for the tree nails......they tend to stand out better. looks like you've done the opposite, so you may not get the effect you desire. while it may not be seen too well in your pictures, a closer look may show them better. it's definitely a nice bit of detail to add well done so far
-
cap rails look great Julian looks good with a mild sheen to the finish........something I've often toyed with. I use semi gloss quite a bit, and by the time it soaks into the wood and dries, it flattens out quite a bit. a shiny finish might look nice, but a flatter finish seems to add more realism to the model. very nice bit of progress there! you've got the ship's boats dry fitted..........if you cemented them in place, you would have lashed them down. next thing on the 'to do' list?
- 179 replies
-
- 1
-
-
- santa maria
- mamoli
- (and 1 more)
-
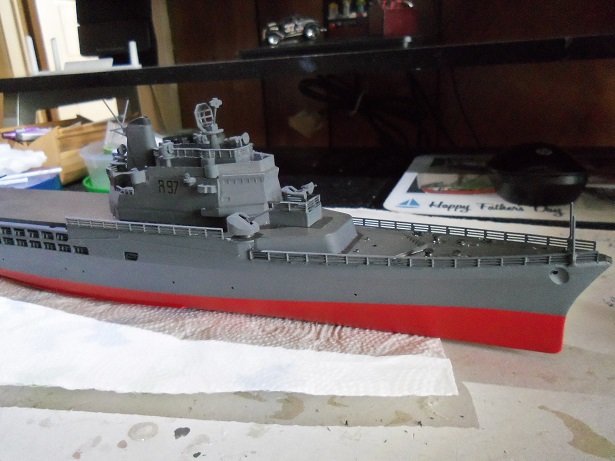
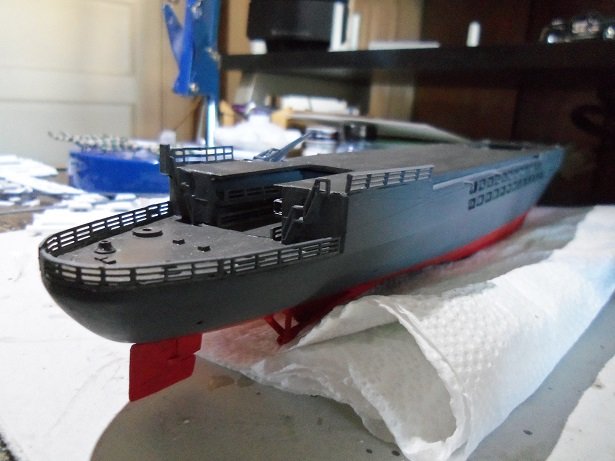
thanks OC I figured it was about time I started to populate the deck. like all models, it looks like the build is going nowhere.......until all of the sub assemblies are added now it looks like something! I still have a few tiny parts to add yet, along with the rest of the sub assemblies.....the mast, life boats, and of course the helicopters. now that the work week is over......as well as that nasty wind and rain storm we had last night {caused a lot of headaches 'round here}, I can get back to work on her. I should have more on her soon thanks for the likes as well folks!
- 133 replies
-
- 4
-
-
- jeanne d arc
- heller
- (and 2 more)
-
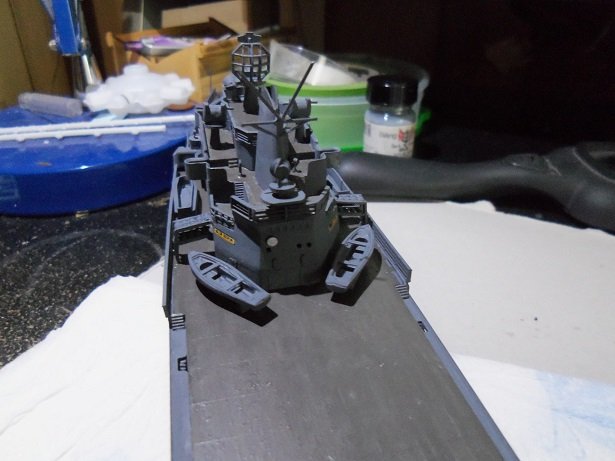
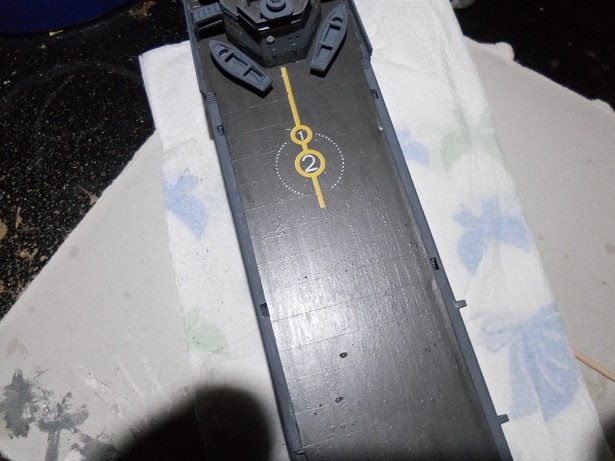
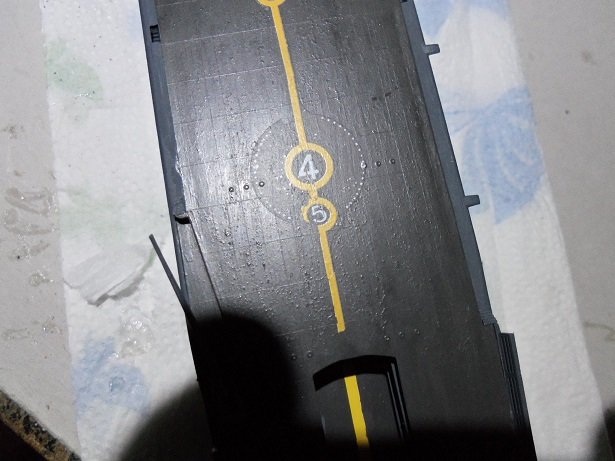
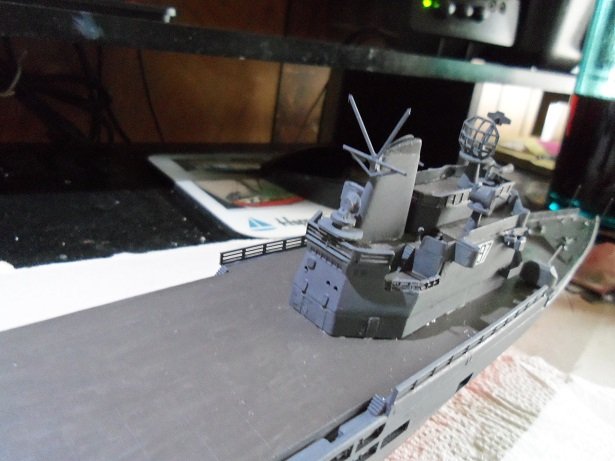
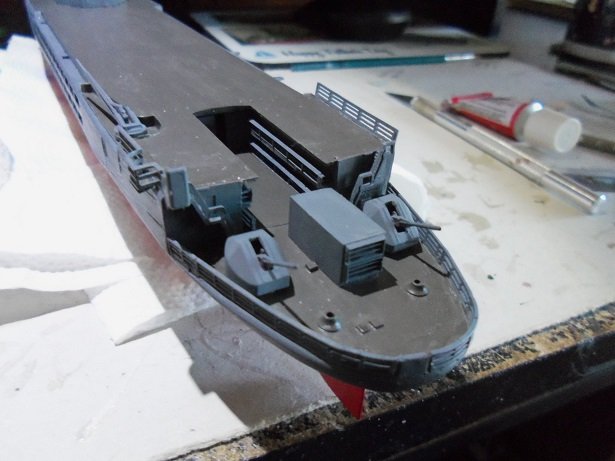
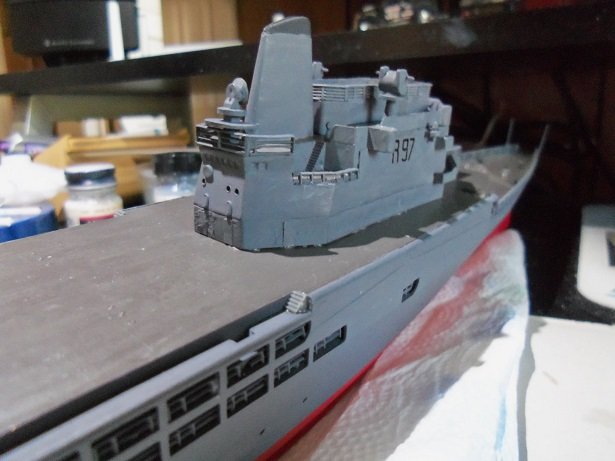
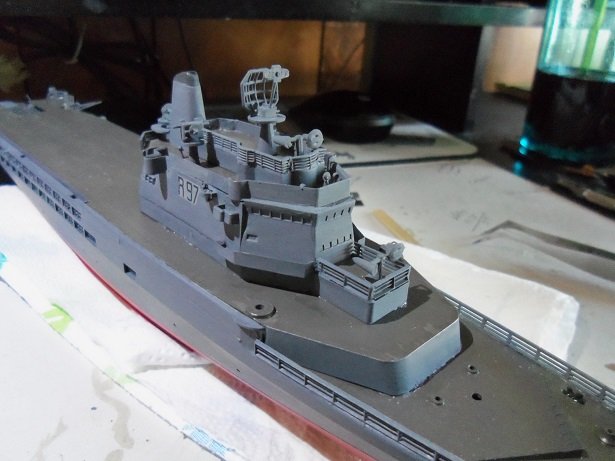
......and we're back! the burgers were swell ........watched a movie with Gibbs while I ate jes' don't get no better than that! thanks for the good word John......things aren't going my way 100%, but, it's passable. yea, today had it's let down......but I'll get to that. but first......the stern after the railings got painted. then the 'choppers got the rest of the camo paint... some of the completed sub assemblies were added to the stern section. as mentioned, I used only one of the DRBN - 34A navigational radar units......I think it will suffice, considering the kit didn't have them in the first place. I wasn't going to waste the effort I put into them either I then remembered that I still needed to do a decal on the elevator platform......a caution border with a yellow stripe down the length of the platform. that's when I found out how thin and delicate the decals were. you guessed it........it ended up breaking apart when I tried to position it. it's nice that Heller used flat colors in making the decals.....I'd hit them with the bonder, but then they would have a glossy appearance. I did me best to use only flat paints on this model.....there is no such thing as a shiny military ship to remedy the missing decal, I'll run a yellow stripe down the center of the platform, and call it good. the numbers on the superstructure suffered some damage as well.....pretty minor....I can try to fix them with some flat black paint. the superstructure is now cemented on the deck. the tops of the capstans and bollards were added to the stern section......along with a couple of short antennas. these parts are so small......they are hardly seen in the grand scope of things. you just notice that the locator holes are gone. I didn't put the yellow stripe on till a bit later on......even that was a feat of blunders.....but I managed to fix it so it would pass muster. the superstructure got some of the other sub assemblies added to it, along with some touch ups. I added the forward pair of 100 mm guns when the admiral mentioned that we needed to go to the store..........food shopping. will this madness ever end? thanks again for the good word John.......and thanks to everyone else for the likes
- 133 replies
-
- 12
-
-
- jeanne d arc
- heller
- (and 2 more)