Supplies of the Ship Modeler's Handbook are running out. Get your copy NOW before they are gone! Click on photo to order.
×


popeye the sailor
-
Posts
15,993 -
Joined
-
Last visited
Content Type
Profiles
Forums
Gallery
Events
Everything posted by popeye the sailor
-
 good to see your back at the table Jan........don't take the frequency of the build to heart.....no one said these models we build should be done in a day. a lot of folks don't have the time to devote to their builds......it's important to take care of the world around you. this is , after all, a hobby I can't wait to start mine......I have all three hull frames assembled. 1:64 scale sounds about right for them, since I didn't take out the extra 10 mm from the length of the hull. I haven't planked anything......since your finding so many mistakes in the plans....I'm glad I haven't. take your time my friend.....it will pay you back ten-fold when you gaze at the finished ship
- 127 replies
-
- 1
-

-
- Bluenose
- Billing Boats
- (and 1 more)
-
nice work on the sails Ron. I did reef lines on my America build. can't remember exactly how I did it........take a peek there and I'm sure I showed how I did it
-
gee Den........been wondering where your at........find anything good so far? I'll have to check on your revenge build.......I assume you have a build log
-
nice looking hull! looking forward in seeing more
-
you really moved your keister in turning all that around! wonderful job to bad you got one more hurdle to get over though..........piece of cake for you !
- 1,616 replies
-
- 6
-
-
- caldercraft
- agamemnon
- (and 1 more)
-
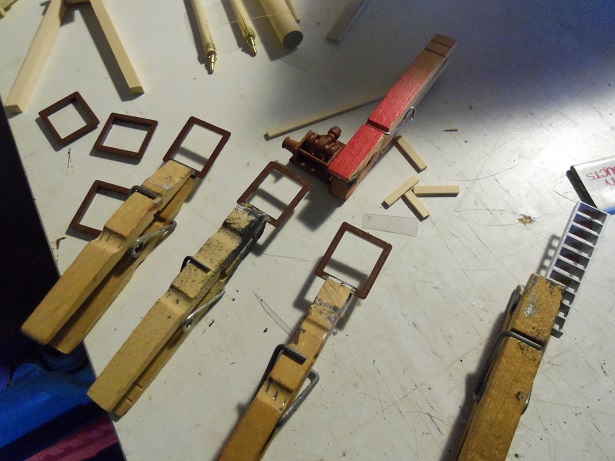
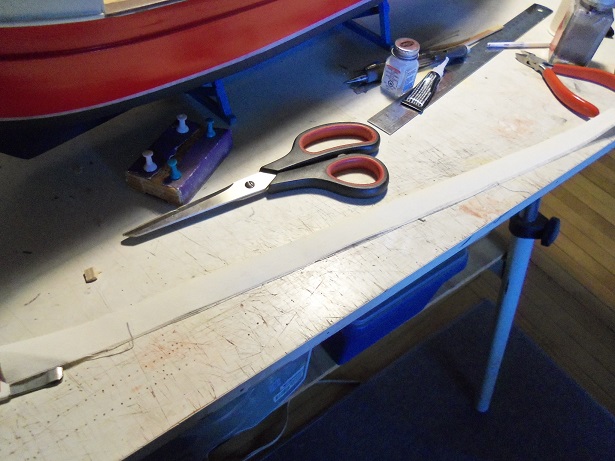
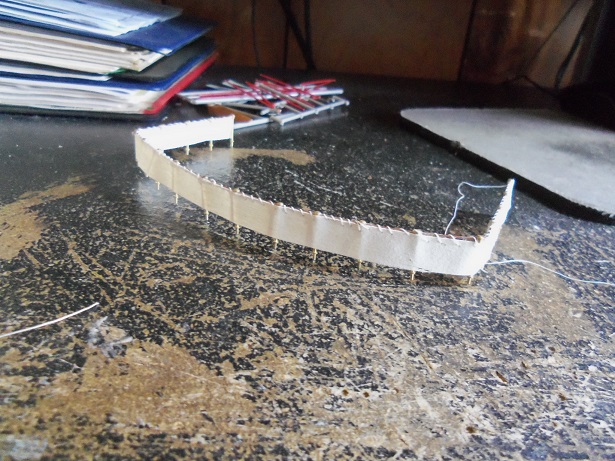
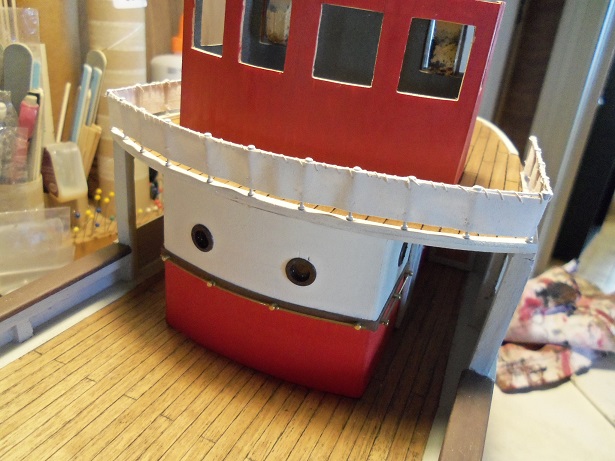
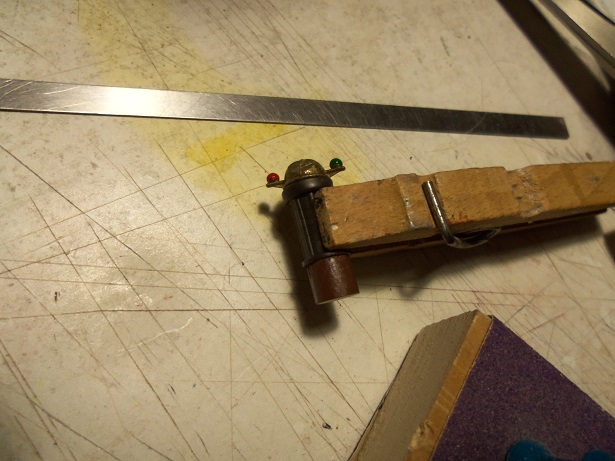
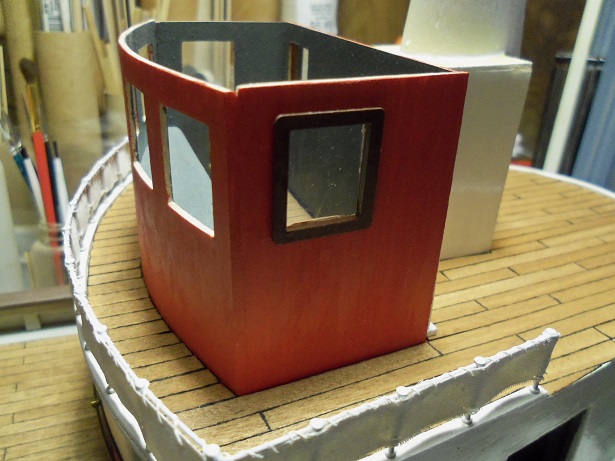
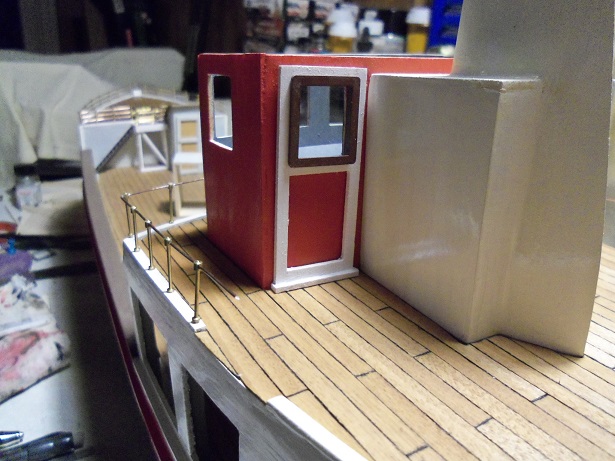
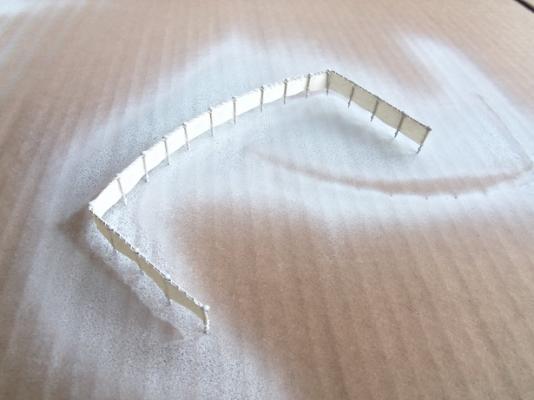
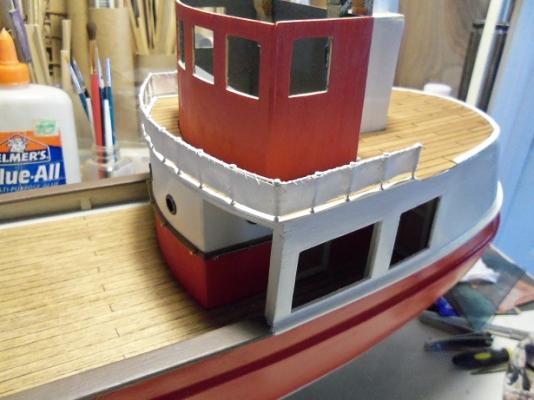
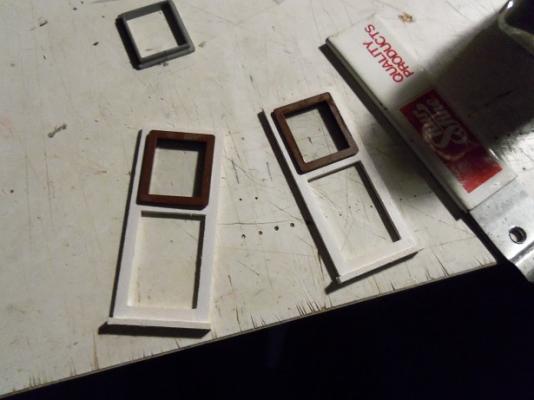
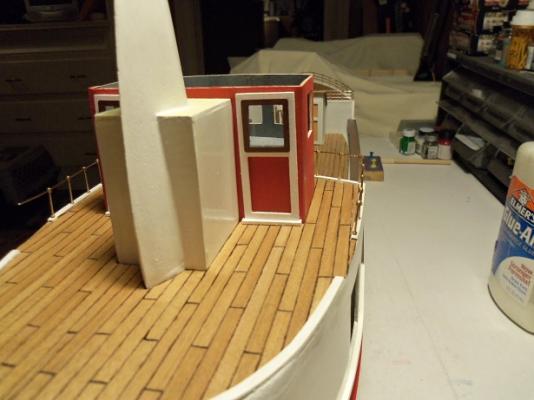
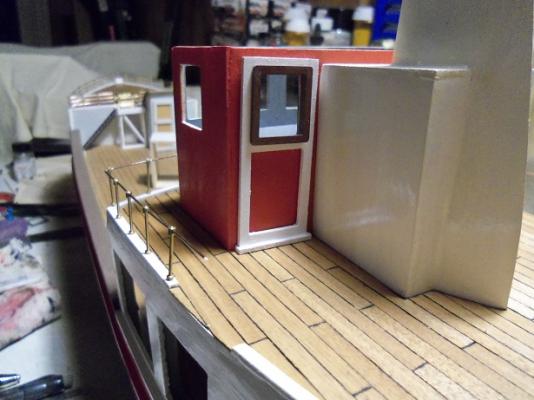
thanks Mobbsie.........yes, I'm feeling better appreciate the concern. your not missing too much......I've been bouncing around on two projects at the moment. even if I had a room with nine tables.........I could still only work on one at a time I'd be saddened if you didn't follow along to get something going yesterday, I started off by painting the other window frames. the ladder and the anchor winch also got a coat of paint a few days ago, I painted a strip of sail material with white primer. this cloth had a good canvas look to it. after trimming it and cutting it down to a usable width, it was sewn to the upper aft deck railing along the bottom edge, it was then sewn to each of the stanchions. from here it was brought out to the porch, where it got another couple coats of white primer some of the stanchions were still movable........I was worried that they may have shifted on me.......but it wasn't the case. it was then dry fitted back onto the model. the doors were cemented in place at this time. the ship's wheel was also cemented in place. I won't be going too crazy in here, but I have a few bits to add to it. the binnacle was painted......I added some height to it as well I settled on the window maker to cement the frames to the clear cello. I'm hoping that the adhesion is strong enough cutting and trimming them isn't too bad.........that is, until I got to the point of fitting them in the helm room. it's a tight fit, so I'll have to trim them some more to get them to fit better. I did get the first of six in place so far.......... still much more to go Mobbsie..........got some scratch building in mind should get more interesting from here.


- 747 replies
-
- 16
-
-
thanks Mobbsie I wish the wood supply was that easy..........I still buy it, like most folks. although I did try my hand at a Birch bark canoe.....got a good supply of bark from a tree out where I walk Gibbs. it's not much......just a half frame covered with the bark.....I still need to make the ribs for it. I did it about a year or so ago........stored away in the template box. at the moment, the tree boat is somewhat slathered in a light coat of filler........waiting for a nice day, to bring her out to the garage. silly me, I thinned out the filler too much. it won't hurt it......it's water based so, I'll need to adjust the consistency. as soon as I can get the hull squared away, I can start bringing her up to speed with the Jingle Belle. your suggestion has been put in the hat........
-
stumbled onto your build........very glad I did fantastic process and very well done! very nicely detailed too
- 154 replies
-
- 4
-
-
- colin archer
- lifeboat
- (and 2 more)
-
Cutty Sark by NenadM
popeye the sailor replied to NenadM's topic in - Build logs for subjects built 1851 - 1900
awesome looking wheel house and wheel Nenad..........ya done good!- 4,152 replies
-
- 8
-
-
- cutty sark
- tehnodidakta
- (and 1 more)
-
welcome to the log Bill sometimes, I do wish I had some of the cool tools.......but I think how well I've gotten on without them, and a lot can be accomplished with a box cutter and miter box / saw. one of these days........maybe thanks for the good word!...pop in anytime... thanks Bob........I enjoy fitting the layout...all the fiddly bits and stuff. thanks for the good word! yes Kees.......I've made the gallows out of wood....still need to flesh out the mast and booms a bit more. I have a double spool winch which is the last bit from all the extra Nordkap parts I had. the port holes and window frames came from that kit as well. I also want to put a single gallow on the port side, so I'm looking into scratch building some smaller winches. still more to go.......still more parts that I've already made to go on still. hopefully, I can add some of the detail that you do very nice work you do had to work Tuesday night, and wasn't feeling well during the day.......so not a lot got accomplished. perhaps today will be better
-
heard you were making sawdust again.........had to pop in to see what your up to. I must say......it was worth the read! she looks super......the different woods really look sweet.......some poly is gonna make the grains pop! very nice indeed!
- 129 replies
-
- 6
-
-
- armed launch
- panart
- (and 1 more)
-
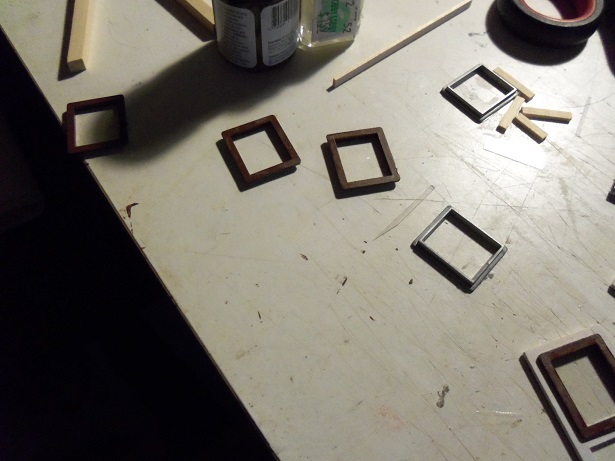
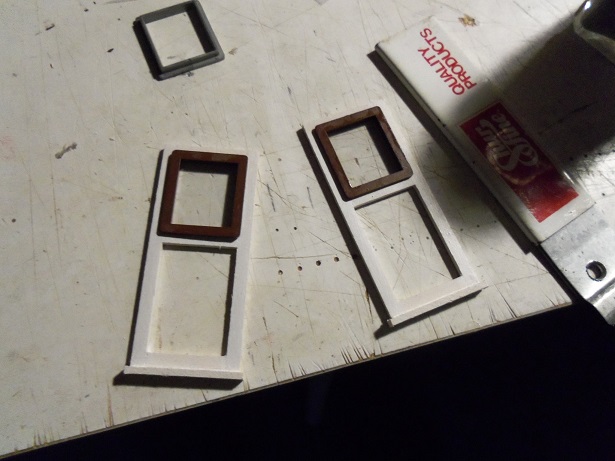
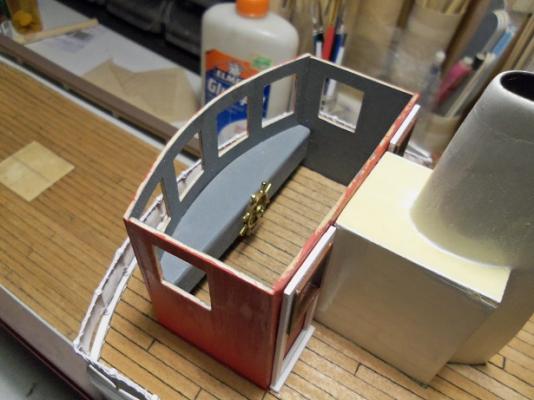
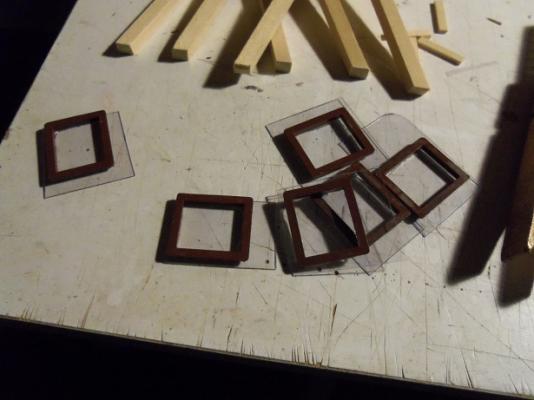
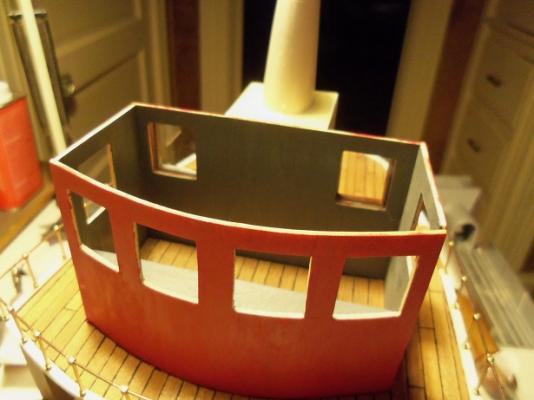
thanks Piet...I've been lucky {if you can call it that} these last couple of weeks. I haven't had to work at my part time job. it's given me more time to devote to my builds. this week is going to be a busy one.......the night guy is out sick, and I'm going to be covering a couple nights. I took the weekend off at wally for the admiral's birthday though, so that should even it out. thanks for the kind word I did do a little bit over the week end.......rare for me to do modeling during the Wally work week. usually, I'm too tired, but this was a small bit of progress, and I was curious to see how it would look. while I was working on the two doors for the helm room, I painted most the window frames. I would need two for the doors. the thresholds were added to the doors......sanded a bit more, and then painted. I was trying to find the cello that would not cloud up, using CA.......but I must have used it up. I gave up the search and used the window maker to cement the cello in place on the doors. seeing that the lip of the frames were as thick, as the wood that I used, they were cemented in afterwards. the rest of the frames, I'm going to have to cement the cello on and trim them. I didn't fill in the bottom opening.......liking the looks of them in the last dry fit, I'll see if this will cause a problem now that I added the thickness of the cello. the one thing I do need to be careful about though, is the alignment of the window openings.

- 747 replies
-
- 16
-
-
did you get a CD to install the program? even without an update, it should still work. I have a slot for the SD card in my computer, but I can dock it as well. for some reason, my computer won't recognize the card any more, so I use an adapter for USB. we gonna see some pictures Walt?
- 208 replies
-
- 1
-
-
- meridea
- repair ship
- (and 1 more)
-
excellent progress Sjors...........remember, it's not the frequency, it's the quality! top notch snake........very well done.....
- 1,616 replies
-
- 6
-
-
- caldercraft
- agamemnon
- (and 1 more)
-
I haven't done any armor in quite a while........I'd think further, but that's how I get into trouble I think you'll have a lot of fun with a fishing boat....with the weathering you like to do, and all the extra detail you can add, I can see you with a ship to be proud of! I'll look forward to the start of your new project
-
beautiful progress on the Bounty........hope it's nothing serious with Jerry. get better soon my friend!
-
thanks john for the kind words.......just got through with my work week, so I should be able to get something done. I wouldn't know where to start in setting up an R/C perhaps one day
-
thanks Stuart...I wish I did.........I might have more that one of them finished I'm glad you like them
-
I formed mine using a like size dowel. I do believe I cemented the hull edge in place and folded it inward after it was dry. when the rudder was set in place, it gave the appearance that it was connected to the rudder. good idea to occupy yourself with something else.........it will give you more time to think of a solution. you'll come up with something......I'm sure of it
-
wish I could get mine to look like that I can see that I've also been trying too hard to make stairs. the threesome look awesome Kees!
- 434 replies
-
- 6
-
-
- pelikaan
- beamtrawler
- (and 2 more)
-
thanks Pat........and all who hit the like button. yepper.......there is some interior decorating in the future. it won't be as detailed as the M&M boat, but I'll do what I can. I still have the roof to do too thanks for the good word........I will try not to disappoint