popeye the sailor
-
Posts
16,007 -
Joined
-
Last visited
Content Type
Profiles
Forums
Gallery
Events
Everything posted by popeye the sailor
-
 thanks Greg........interesting thoughts. I didn't give any thoughts about the poke stick, but I did think about the dispenser and hose. I never went any further than that. I really have no idea where the fill access is on this vessel, but you are right..........how does one get fuel from point A to point B? I'll give it some thought thanks for the good word!
- 956 replies
-
- 5
-

-
- andrea gail
- trawler
- (and 1 more)
-
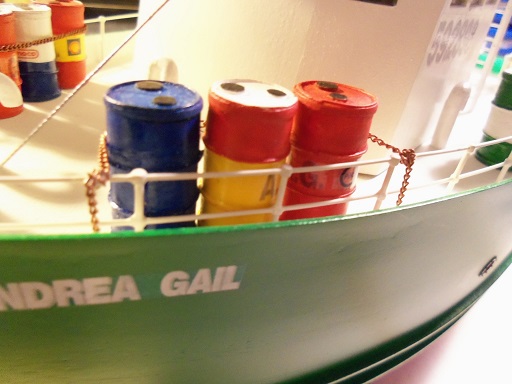
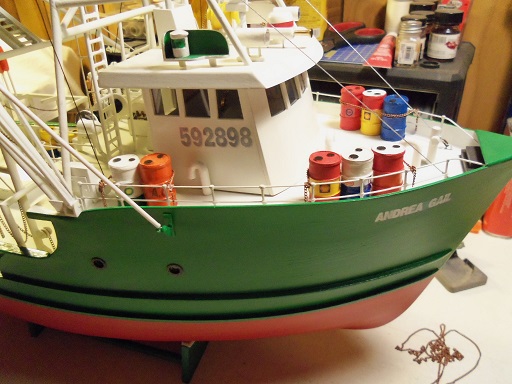
thanks George, Gerty, and Augie yea...........there's color........but I think just having gray and white drums on the deck looked a bit dull.....that's what the kit called for. I think there's realism here.......not a lot, but enough. thanks for the good word thanks also for the likes
- 956 replies
-
- 5
-
-
- andrea gail
- trawler
- (and 1 more)
-
planking looks awesome Mark........neat how you left a pre measured gap for the ebony in respect to your next step.......I guess it boils down as to how you want the stern planking to lay. do you want it to butt over the hull planking, or do you want the hull planking to case in the stern planking. V2 has been Very good to you
-
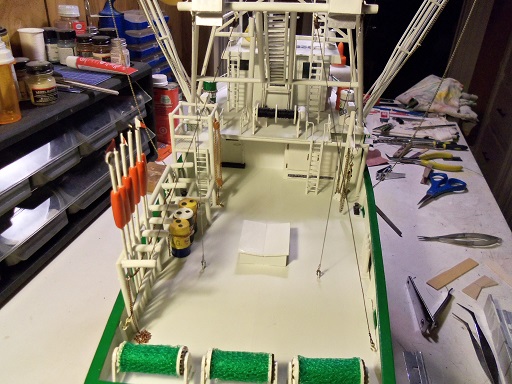
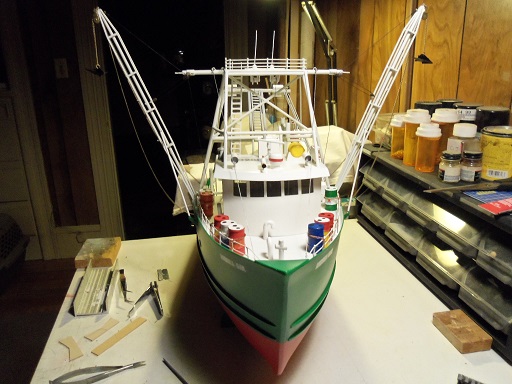
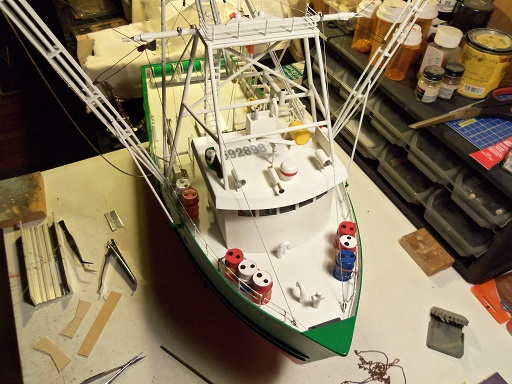
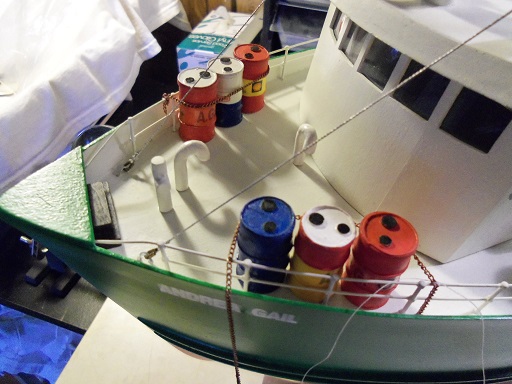
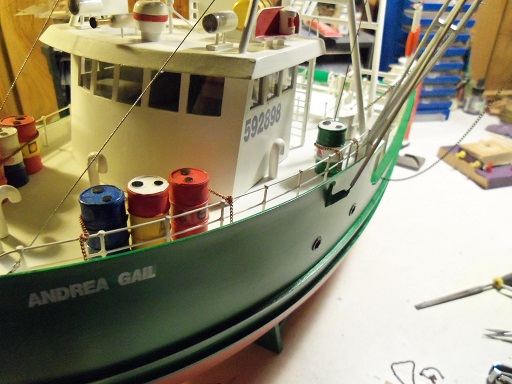
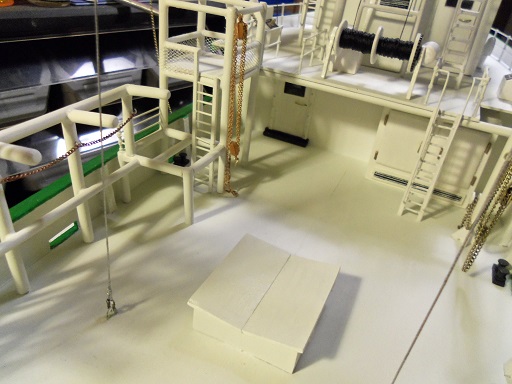
not much Patrick.......as mentioned, I was saving this for the last step. the reason is that with them on the deck, they actually gave me the feeling that it was finished......I've already done a dry fit, plotting which ones to show together and where. so....I held off on showing any pictures of them on the deck.......even kept them out of sight, so they would be forgotten. it worked well.......no one has mentioned anything about them I'm talking about the fuel drums. I was thinking about the rack......I wanted to put a few there, so I drilled a couple holes and made up a couple of those small hooks. after painting them white, allowing them to dry a bit, the small copper chain was used to lash them in place {cemented in place as well, of course}. OK........that was enough for me.........the bow was set up. after deciding which ones to pair up, these too were cemented in place and lashed. a little forethought here would have been nice......perhaps soldering some eyes to the railings or something, but since I didn't do that, I decided on a simpler approach. the chain was tied to the railing with white thread, and the excess was wrapped around the railing........works just as well in my book I started with the starboard side, and then moved to the port side after. now, on the port side, you see two further back on the fore deck........I changed that. there were going to be too many on the port side.........may make her list, so I moved the extra to the other side. so now, other than adding some rope coils and a few bobbles, all that need to be done, are the life preservers, and what I call the floatation boundary lines. they are in the kit, so I will add them. something I want to add to these lines {I may make two of them}, is something I believe 'probablynot' asked in his Bluenose thread.......a thing called 'baggywinkles' . don't quote me....I haven't even looked into his thread, if his is the actual thread.....but I'll be checking this out. I'll be simply tying short pieces of thread to the line and combing the ends out so they become loose and hairy. I'd do this now.......but I have to wait till I get paid before I can go off on the scavenger hunt to buy the size beads I'll need. I do still have those beads that I like to make the small floatation buoys....like the ones I made for the Nordkap, the Cux 87, and the Mary Ann. but, I voted it down, since these should be a round float, rather than oval thingies. I thought I had some already made still, but I must have used them all.

- 956 replies
-
- 20
-
-
- andrea gail
- trawler
- (and 1 more)
-
Yepper........more playtime with Andrea {make the admiral jealous!} I did something today, that I told myself I wouldn't do until the end. so, don't be scared, it's not the end just yet
- 956 replies
-
- 5
-
-
- andrea gail
- trawler
- (and 1 more)
-
ohhhhh, your using acrylic.......I have the enamels! the bottles are different too.
-
that's a fairly large hull Jesse.......how long is the hull? looks big in the picture I use archive pen for the calking......India Ink. used to use the black crayon, but it was very messy {blended in nice when sanded though}. moving along at a decent pace........nice color for the decking
- 1,306 replies
-
- 4
-
-
- syren
- model shipways
- (and 1 more)
-
the board your working on is a good idea.........harder to tell if the pictures are upside down or not >just had to drop a subtle hint< your concept is an interesting one, but it has it's dangers. do you want to build the "Will", or do you want to enhance it into oblivion? believe me, I've done it........added so much, that I killed the subject. {check out my Maine Lobster boat build} not too many folks here have ever calked the hull......I think the problems will come when you sand the hull smooth. some of it may be lost, or as a worse case, you may end up with some visible plank lines. I've built many Billing's kits........only one has been with this split hull method.......can't say that I liked it. I didn't want to see a separation line up the bow or stern, so I joined the two halves together before it was planked. made it easier to clamp the two halves together {evenly distribute the cement}. a good suggestion would be to look up images of the actual boat, and see if it fits what you plan to do. I'm not trying to dump on you or anything like that.......it would be sad to see you get half way through the build, and find that the subject went out the window
-
the academy kit is 1:400.....gonna be a fairly large build when I get to it mass producing rope coils is fun....huh ....and man!....you have a lot of them to do. that jig will get them done in no time flat!
-
glad to hear your feeling better..........some nice progress you made there! that big cannon on the deck means business...deck fittings looks super!
-
really looking nice Larry........well done on the rigging!
-
there's no easy solution to safeguard those bulwark posts. your handling it well.......heck, I've even used brass rod! nice progress so far!
- 1,306 replies
-
- 6
-
-
- syren
- model shipways
- (and 1 more)
-
love it Daniel!.........wonderful imagination!
-
I have a good selection of Billing's paints........they cover nice and have a really hard finish. I'm not too happy with the way they are bottled though......some I have opened went bad {dried or gelled}....mainly due to the caps.......the ones that have those stupid plastic cones in them. after shaking them, I end up having to wipe the cap out, before the paint gets into the inner lip. have you had any problems with this?
-
I just caught up with your progress Nils.....the rigging you've done on Peg is phenomenal! the ship's boat looks great........such an amazing build all the way around. being so close to finishing her, I'm sure that the next build you decide on will be just as fantastic! you have tremendous skill at both ends of the spectrum I've got the Academy Titanic in the closet...the admiral got it for me, for Christmas. of course, I've been putting it off in order to catch myself up, but the subtle hints are starting to surface. how much longer it will stay in the closet.......I cannot say love the work you do with these ships........really nice brass work
-
thanks Carl appreciate the kind word! the work week is done.......time for play
- 956 replies
-
- 6
-
-
- andrea gail
- trawler
- (and 1 more)
-
the museum is going to really like what you've done with her.........she looks great! deck came out really nice......calking and butt staggers really show up nice! ........like the detail too.......superbly done!
- 62 replies
-
- 2
-
-
- harwich bawley
- fishing boat
- (and 2 more)
-
are you making a separate template for the port side, or make up both sides on it {reverse procedure, of course}?
-
thanks to everyone......this has been such a positive project, and you have been wonderful folks to share it with. I had my doubts with adding another build to my roster, but when I look over at my table, and read all your comments, this tangent that I went on has been worthwhile. one more day at work and then I can get back to the table. sincere comment......sure.......but it's one way to show how much I appreciate all you folks following along
- 956 replies
-
- 12
-
-
- andrea gail
- trawler
- (and 1 more)
-
we call those 'bobbers' Sjors, if your referring to the ones in our tackle boxes. I really appreciate all the kind comments and likes........my god...so many I got my printer problem fixed finally, so I was able to bring some pictures in to show the folks at work. my friend from Maine was very impressed with how she looks. still a bit more to add.......even another sub assembly that I had forgotten about. another scavenger hunt is in order. but again, I want to thank you all for following along.....you've helped to make Andrea what she is
- 956 replies
-
- 12
-
-
- andrea gail
- trawler
- (and 1 more)
-
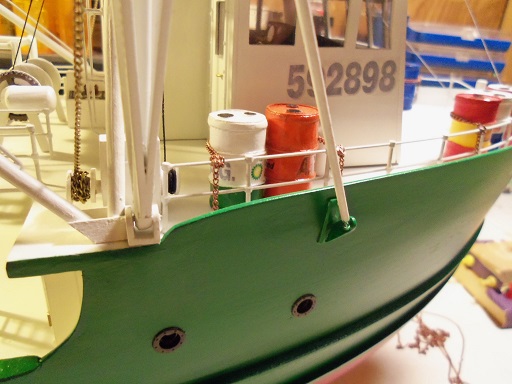
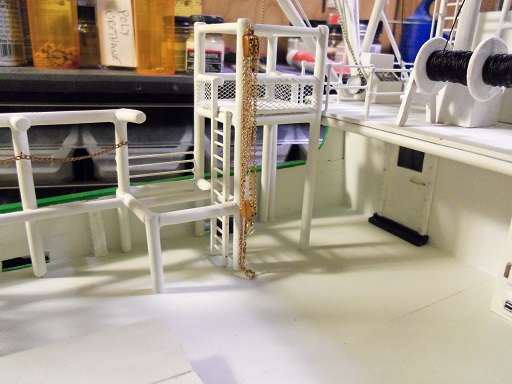
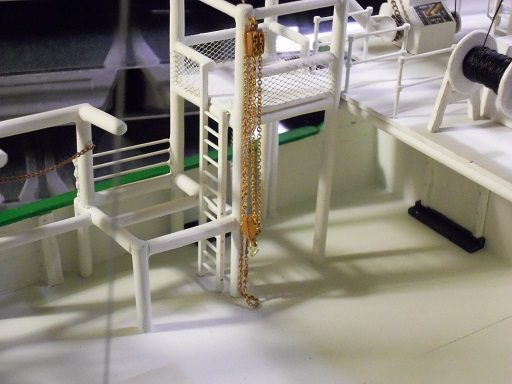
thanks to you all..and those who hit the like button! the only flaw is that the chain starts at the bottom and terminates at the top. but, with the way it's hanging there, it's hidden and you can't really tell. it's just a crazy idea.......glad I was able to pull it off thanks again!
- 956 replies
-
- 5
-
-
- andrea gail
- trawler
- (and 1 more)
-
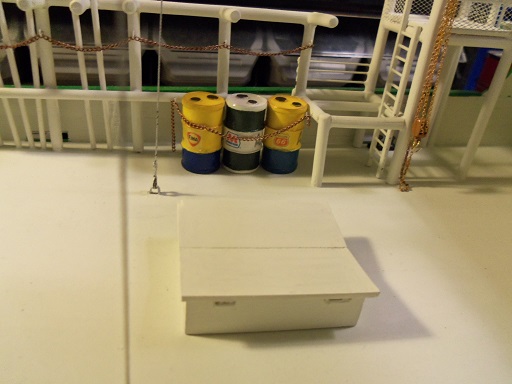
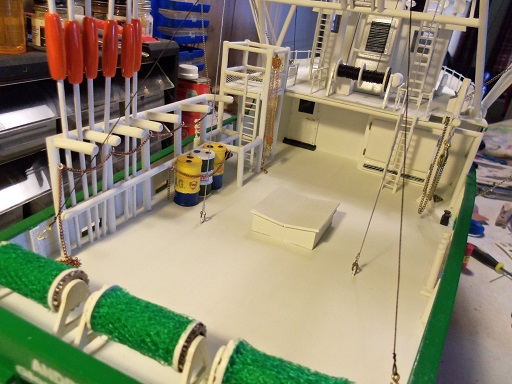
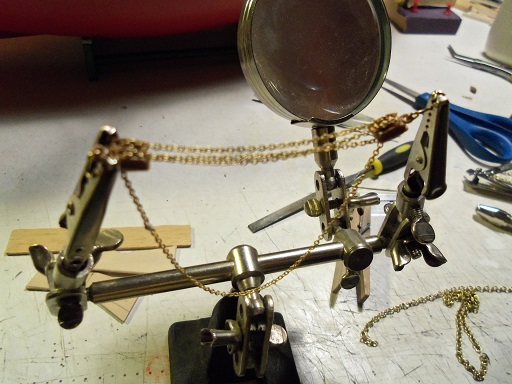
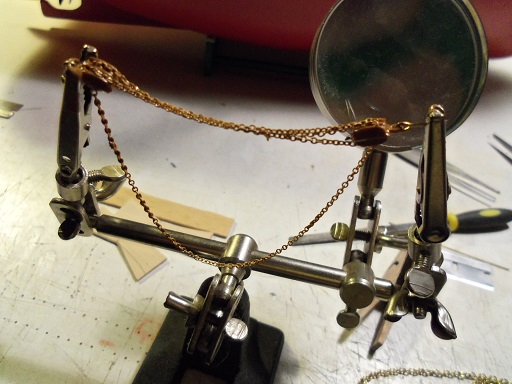
this could be a new phase of insanity for me........... OK......this assembled quick, but it was very delicate......the chain broke on me once. you'd never notice it though. it all started with this hole I drilled into the podium upright post. hard to see.....I know. I had the idea earlier, but the copper chain I have here is too large......I would have to drill the holes way too big. then I thought......I have a container of chain......take a look see. all I have is this real thin gold chain....it's enough, but the gold color is what throws me. I decided to use it anyway. drilling out the holes in the blocks, one I fastened an eye bolt, the other a hook. setting the blocks up on my helping hands, I tied thread to one end of the chain and began to thread it through the blocks. at one point it broke, but I repaired it with thread {tiny knot}. taking it out of the helping hands, it was kinda flimsy.......the bottom block wanted to twist. since it is gold chain, I decided to match the paint with the color of the blocks and paint the chain, making sure I got some on the blocks. the chain adhered to the blocks and prevented the twisting. once I let it dry a bit, a pick was used to separate the chains, so they follow their paths. it was then cemented in place, in the hole I had drilled. I tried to get a close up...... anyway......there's my big idea.......a 'chain fall'. it can even be called a 'come along', depending what the application is it's being used for.

- 956 replies
-
- 19
-
-
- andrea gail
- trawler
- (and 1 more)