
HOLIDAY DONATION DRIVE - SUPPORT MSW - DO YOUR PART TO KEEP THIS GREAT FORUM GOING! (Only 36 donations so far out of 49,000 members - C'mon guys!)
×


popeye the sailor
-
Posts
16,007 -
Joined
-
Last visited
Content Type
Profiles
Forums
Gallery
Events
Everything posted by popeye the sailor
-
 it's why I love bombers Ken
 -
we could do that Lou..........dueling Ospreys I wonder if the germans captured any B 24's..........lemme look...........the first B 24 was captured in 2/20/43.......she was named the Blonde Bomber II , 41-23659. soon after.........42-52106, named Sunshine in March of 1944. not that I would desire to do another like the Wulfe Hound.........but it would be interesting to see what they would look like in insignia and code. B 25's were captured as well. another interesting model would be a P 38........there were two known captured.
-
appears to be a fairly clean hull are you going to order the wood decks for her? PE perhaps?? following along.........should be a fun jaunt
-
hey there!........just poked in to see how you've progressed you've come a long way........some really nice detail! the 20mm looks awesome...can't wait to see the 50's! decking looks nice too....see your fitting the smalls bit on it. dash looks great as well.........super nice job!
-
told you I'd look up to see what this V thing was..............Niles built one as well. those figures look really neat.......check out these folks if you need more Preiser Figures and Minatures - Bring Your Layout to Life
-
now let me get this straight..............you lead us into the bedroom........so you can finish the kit and spring it on us?!?!?! my friend......with as long as you took, you'd have done better to show us to the refrigerator! ......a fella gets hungry waiting for you whippersnappers ta git your butt in gear but really........you did a splendid job!! I don't see anything wrong with the fenders.........must have been your imagination the only thing I see, is that you didn't rough up the tread on the tires. the finish looks awesome.......better than what I can do ........I hope one day, I can get it right! now.......don't go and put it in that bedroom of yours...........this one deserves to be put out in a proper place........where it can be seen! there is no doubt that you couldn't turn out another beauty, no matter what medium you chose..........I'll have to look up what that V thing is your talk'in about, so I'll know where your next log will be great looking Bentley...congratz and very well done!
- 65 replies
-
- 10
-

-
my brother in law had it done...........he went through it quite well. we'll chat later in the week. I go back to work on Monday.......two days.....and then it's back to banking up some time I thought about making the part........went to Hobby Lobby today and was going to pick up some sheet plastic. but thinking about the complexity of the part, I thought better of it. as for the choice of part to lose..........I would have to be a bumbling idiot to have lost a wing.....and a landing gear part would have been no big deal. I'm hoping to find the part by sheer chance I had a thought the other day to look in the monster's cave...........but I did not see it under the bed..........the fact that it got chewed up would have at least put my mind at ease. ........I dropped it........he grabbed it.........end of story. unfortunately, Hobby Lobby didn't have another kit for me to buy.........but at 40% off all kits, I couldn't resist I could have picked up another Lindberg B 17........another Memphis Belle..........or a 1:48 scale B 17G, but I kept my sights simple. a couple of Atlantis kits caught my eye.......one is a B 25 that could very easily be built into one of the Doolittle planes...it has the 'plug' for the belly turret. it might be hard to find the decals though, since it is in 1:64 scale.........odd though {yet again} because it's smaller than the Lindberg kit of the B 17. I would think scale relations, would be the same for all manufacturers........then again, the question here is: is a B 25 smaller than a B 17? this might account for the size difference in same scales {probably getting too analytical for my own good} the kit was only $20.00, so I chose a second, after the admiral pointed out the sale that was going on. there was a B 24 Liberator by Atlantis.........sure......why not.........I've wanted to do one of these as well. it was the same price. this one was boxed the same........I couldn't read the scale anywhere on the B 25...{come to find out, the price sticker was over the label depicting the scale}.........but the Liberator is at 1:92 scale. yes......it's a bit smaller than 1:72, but I don't thing by a whole lot. they are boxed the same........even appear to be part of a series. of course, I couldn't help myself.......I peeked into the boxes........I'll save any further introductions until I start a log. now while this was going on, the admiral was looking elsewhere....like along the bottom shelf {that's where they keep the 'gold'}. she was naming off the kits..........I was lending comments for each one {positive ones}.........she then picked up a kit and said that it looked really cool. I'm like.........WOW.......never heard her say that about aircraft before. I was told to consider it a belated birthday present this kit is impressive! even the decals are done in flat finish. I could have gotten a tank........I've been wanting to do a chopper..........plane/chopper.....this is the best of both worlds! gonna need a table for this one I got a few other things while we were there....thinner, glue, and some basswood. the Devil dog will prevail.......hopefully I'll find the part. I've got research to do for the other two


-
decent size model............1:48.......especially if you compare it to your Vic the finish is gonna be tough.......I wish I had an idea for ya. but as Egilman said, he's been look'in for the holy grail too 🔍 great start........look'in forward in seeing more
-
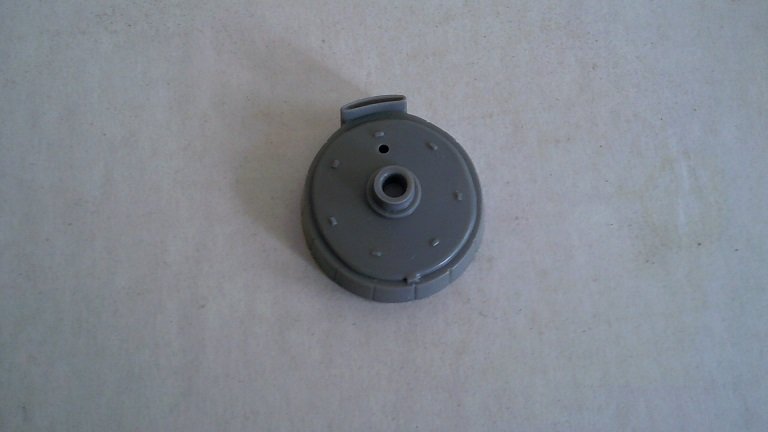
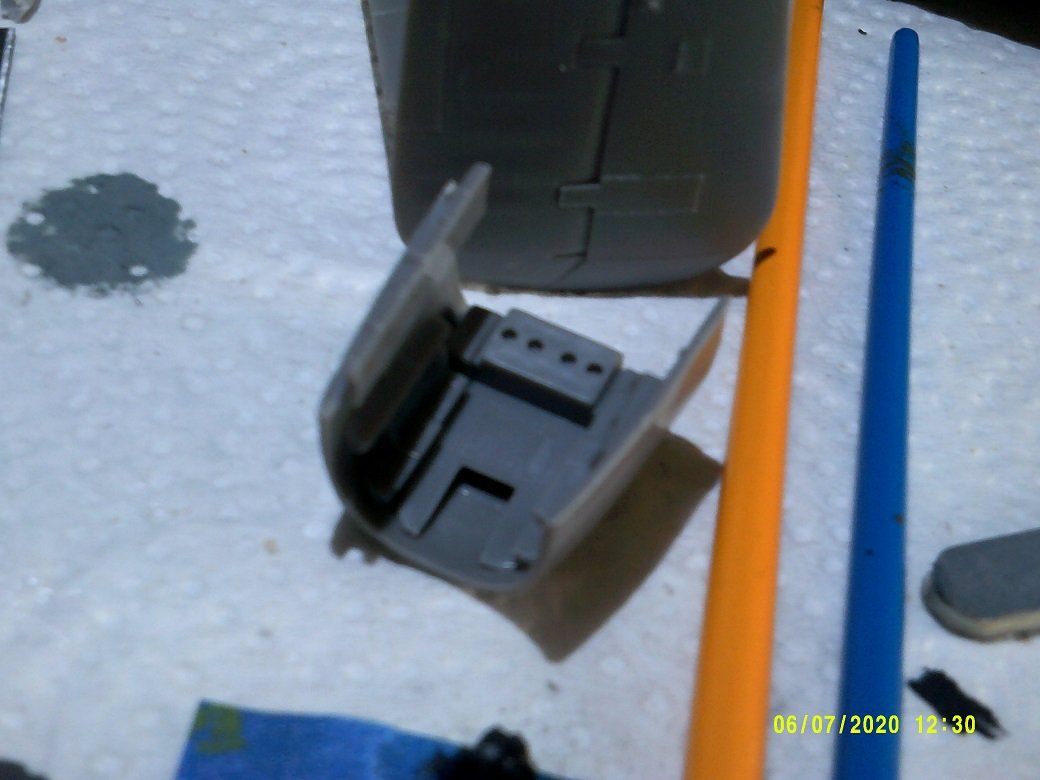
I've seen that somewhere.........I've seen at least three monogram/Revell kits on OMK. I'm sure there are others, with Accurate Minitures....and I think I saw a Tamiya kit. I know.......and I appreciate the suggestion, but the narcelles might be too far back from the fulcrum. the more forward, the better. with the gun arrangement at the nose, the cavity will be totally hidden, and if more is needed, the gun cavity can also be used {there will be a little bit of room there to use as well}. we are going on errands soon........if lucky, I will be able to get another kit. here is the part I'm missing......... I learned a bit more about the camera.........getting rid of the date and time was interesting. I looked in the physical manual I got with the camera........it told me that setting the date and time was done in the initial set up. I installed the CD that was included and found that it can be accessed anytime by pressing the set button twice........this brought up the settings. as you can see, they are gone......but I think I should adjust the picture size. I like to keep my pictures under a meg. I'll get used to it I miss my first camera........the Sanyo.........took great photos and I didn't even need to be smart did you have your surgery yet?
-
hey there Tom gee........you got me thinking how I did the whipstaff................so I brought the model down to look. the kit has a frame that fits over the slot........I just glued it in the slot. look'in forward in how you do the bulwark posts
- 135 replies
-
- 1
-
-
- billing boats
- half moon
- (and 1 more)
-
hello there Mike...........I see you've made some really great progress looking forward in seeing her on the water! the grim reaper is a nice touch
-
I can't seem to put a like to that last picture...........done too much of that stuff myself at the moment, I'm on the lookout for an engine mount for a B 25 project that I started...........can't for the life of me figure out where it got off to......the part is big enough! amazing work your doing with this project........really nice PE detail! your idea of the water diorama look super.......to be honest.....it looks great just the way it is.............will look even better with the break waters keep it up....your doing great!
- 211 replies
-
- 3
-
-
- prince of wales
- tamiya
- (and 2 more)
-
nice progress on the figures OC.......enamel flats are the same.........always seem to dry with a slight sheen. what I do is add enough thinner to deaden it. one drawback to it though, is it opens the door to ghosting. with the airbrush it's not to noticeable........but with a brush, it's terrible. not too sure about acrylics....I've not in the habit of using them. the figures look really good....your doing a stellar job with them hope your knee is better!
-
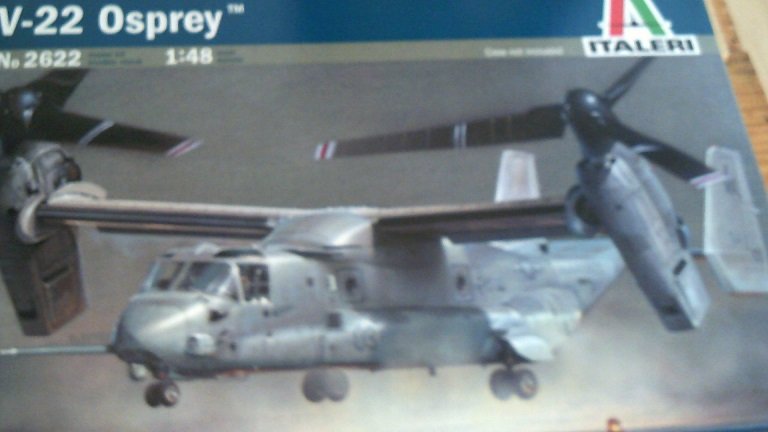
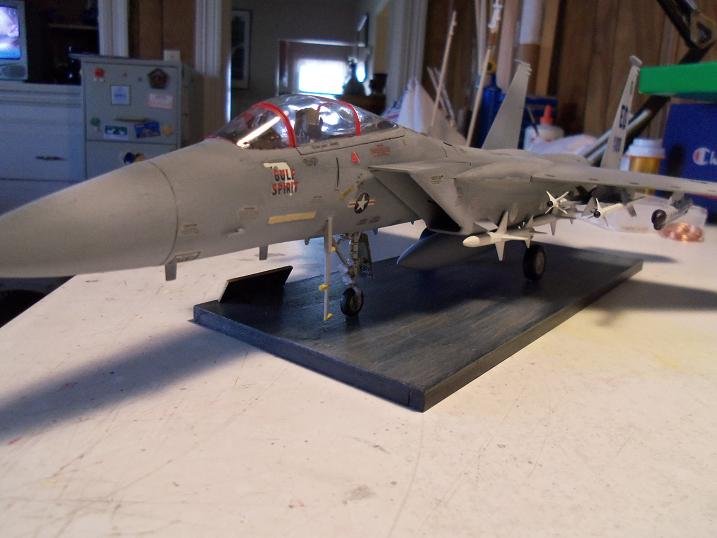
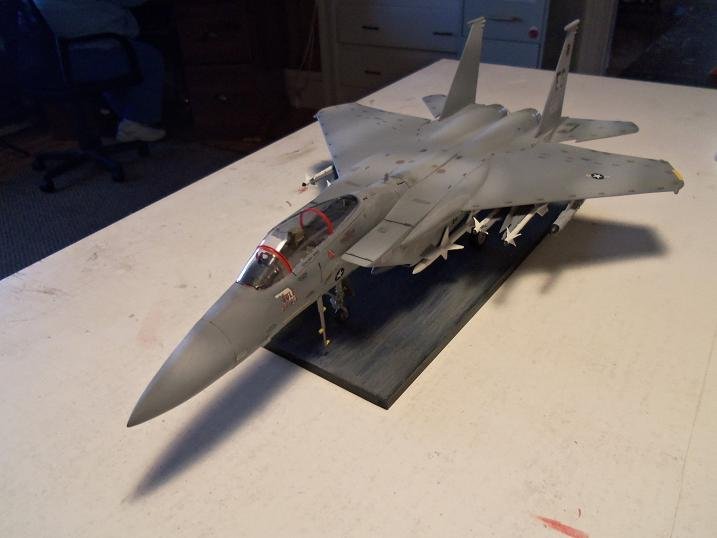
hey there folks ...still hang'in in there! I had a follow up on Thursday and everything looks good.........happy times! I've taken Sat & Sun off from work to give me a little more time..........work doesn't like it, but I don't care. I have been wearing knee high compression socks up to the procedure date........now that it is done, I have to wear thigh high compression socks.........very strange. I'm glad that this is temporary....it feels very weird. I don't usually put the weight in the narcelles Lou........the more frontal the weight is, the better it will do the job. there is the cavity at the nose, under the cockpit........I have a 2 1/2 oz wheel weight {for cars} that will be perfect. I'll just cut it to the amount I'll need, and go from there. this kit has the flatted tires {detail}..........another method I like to use, is to make a stand {platform}, and glue the plane to it. I did that with my F15 Eagle I don't think I have a log on this one........it's a willy-nilly camo job. this does the trick if all else fails I suppose that an 'aerial' stand can be made for it.....eliminate the gears altogether. been there, done that too as mentioned, I've always seen the gear doors open on most planes.........this one must be the exception to the rule. I do have a number of the Devil dog pictures, and none have these doors open.........just the side band door and the nose door, so that is how I will build it. if these doors were in the open position, it would make the model look quite bland........there is no real detail in there to speak of. there is just a hole for the gear root to locate in....it would need some serious aftermarket I don't think there would be a difference.........early or late production........I think this is the nature of this beast I'm still looking for the part.......darn thing is about the size of a half dollar for pete's sake....it couldn't have gone far. there is one place I haven't looked though........I just thought about it now
- 103 replies
-
- 10
-
-
look'in superb Ekis! the more you add, the more detailed it looks again, the melding of stone and wood is fantastic......gives it so much realism and visual appeal! great job !
-
nice finish on the church are you going to modify the roofs for the cloisters? looking really good!
-
the dreaded sprue injection points.........some of these point can be very intrusive! these remind me of the 'five and dime' kits I used to pick up when I was younger.........then again, I've built a few of the more refined kits, that gave me just as many fitz!
-
superb job on these two Mike! your progress is really nice. they really bring me back to the monogram kits I built long ago........>I've seen them.............>temped to pick them up. I noticed those tabs that need to be cut off the cabane struts.........did you use them to handle the fuselage halves? super silvery finish
-
nawwww.........a bit of trouble to paint the stripes, but they look darn nicer! good you were able to correct the glazing problem for the windshield...........I had that problem a loooooong time ago! ever since, I've never done anything for clear parts. sweet look'in model.......love the way she came out! luv the detail........well done
-
it's something I'm looking into Ken. on most planes though, these doors are open........I've not seen any that require the doors to open for the gears to go up. {long pause here}..........I did some looking........I have picture of the Devil Dog and none show the doors open. I went on line and looked through a number of images.......I found only two with these doors open to some degree. and then this one........could be landing........could be taking off........but it appears that on the ground, these doors on the narcelles are closed. I've never seen them work like this before. they will stay closed....just as well, since I really didn't feel like hacking up the model anyway

-
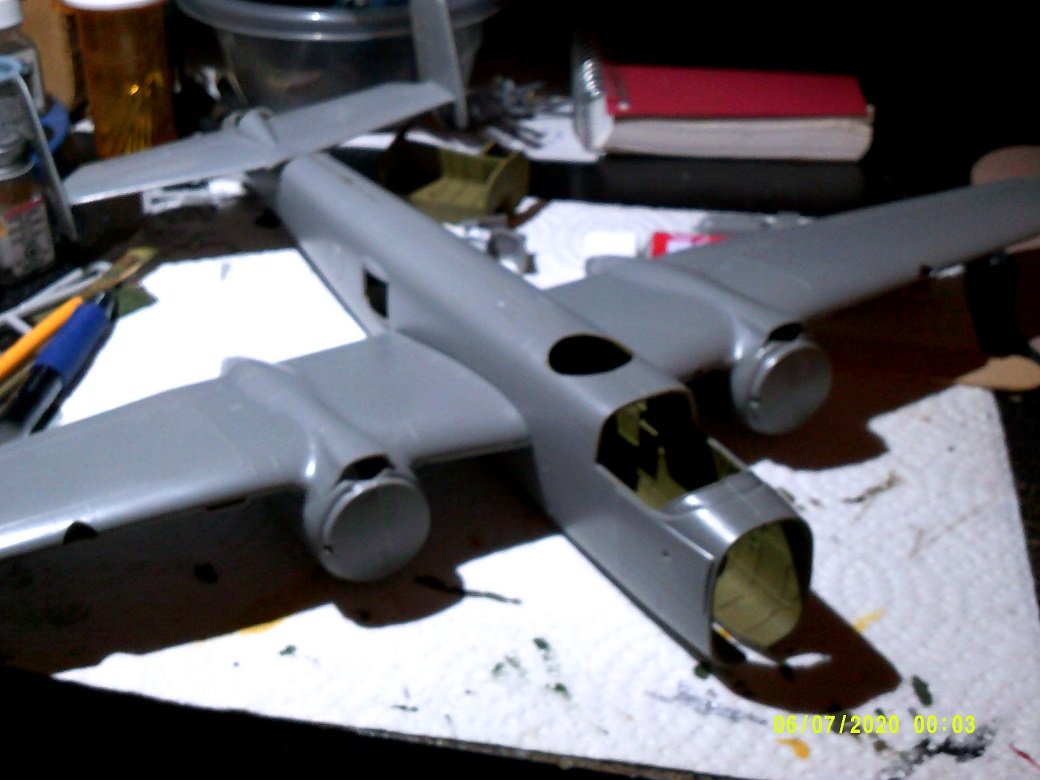
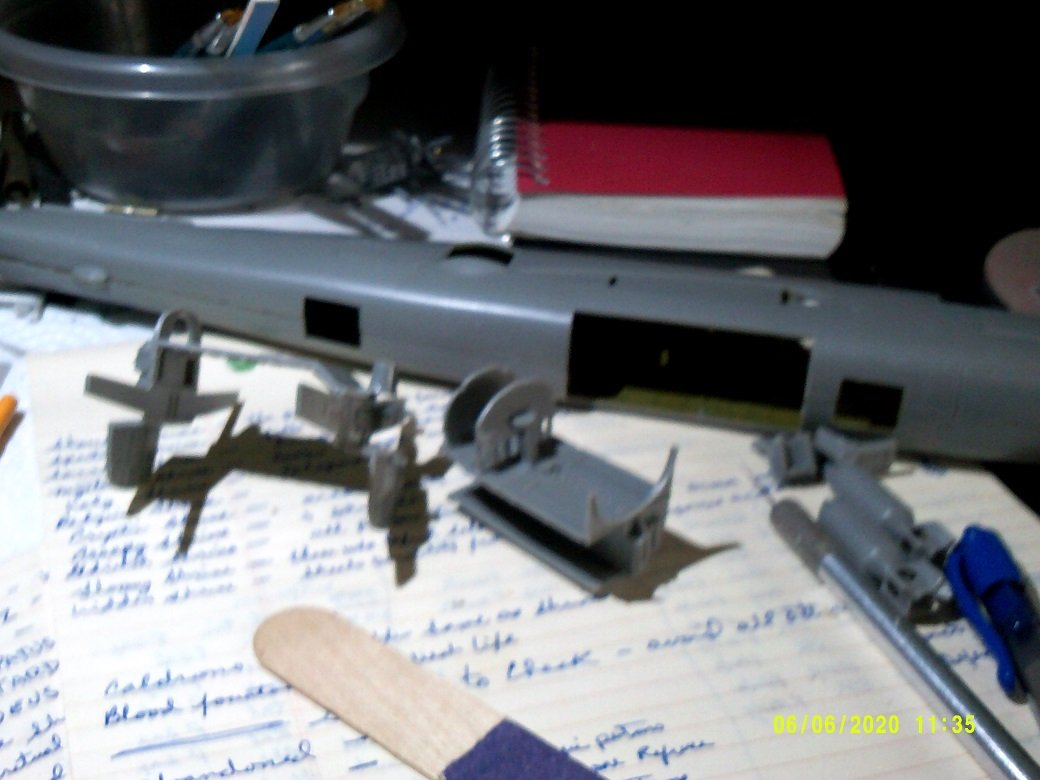
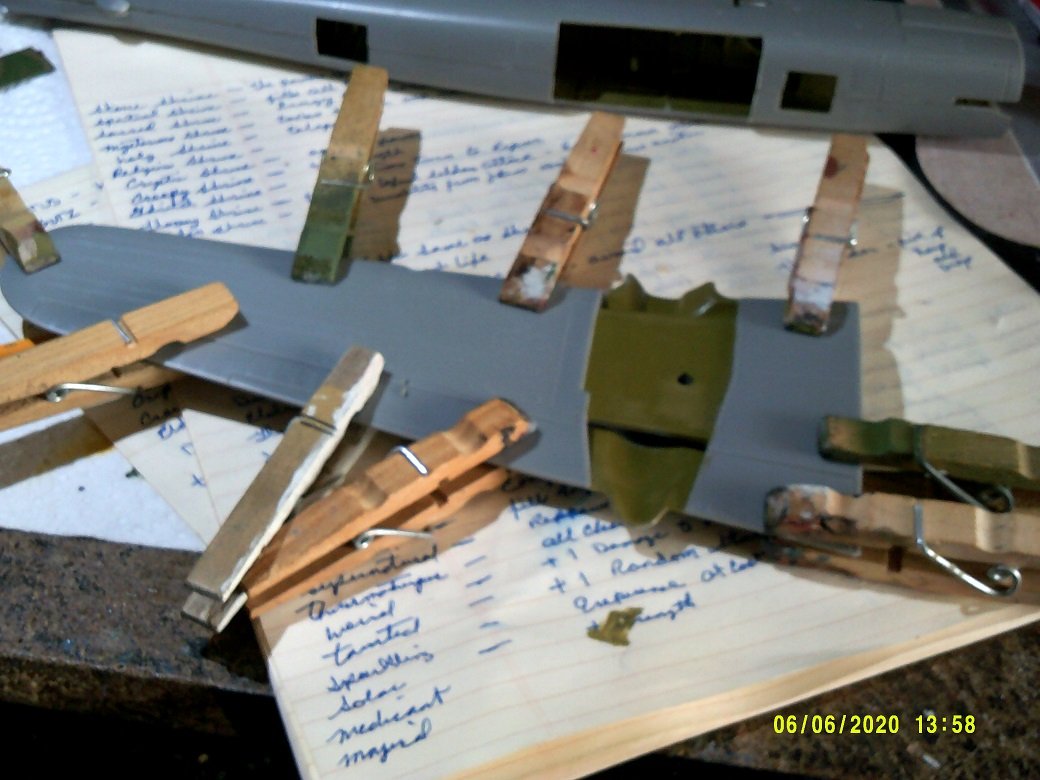
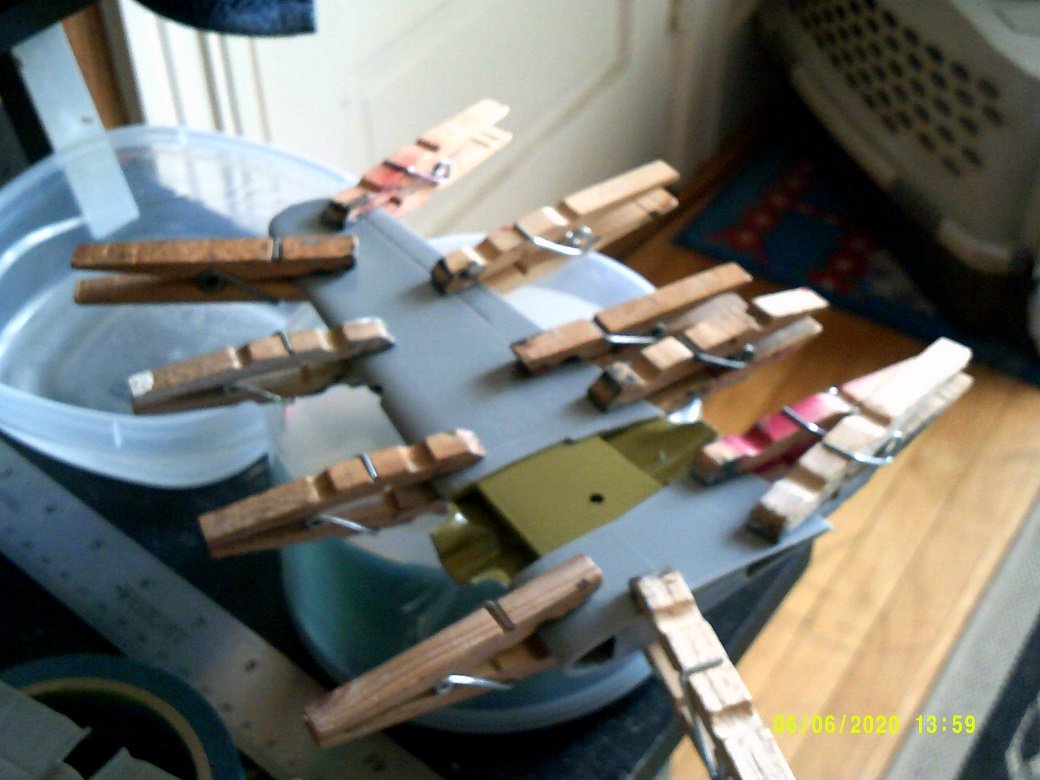
the narcelles were added to the wings once dry and painted. a dry fit was in order the seats were added to the cockpit. I later found that the seat on the front bulkhead can't be used.........to be used in the windowed version B 25J. since it wasn't cemented in place for any great length of time, it was removed and relocated to the waist gunner position on the starboard side....there are two on the port side. assembly of the nose guns was also done....the flooring and the side gun mounts. I will need to sand the detail off the nose and upper glass to create the 1J nose all this is to be closed in. I would have gone further on the model, but I found that one of the engine mount parts {#6} is missing darned if I know where it went.........this is not a small part. there are only two rooms where I have had this box open..........I am still looking for it. the sprue clearly shows that the part was on it.........held in place in four spots. I may have removed it for some reason......I hope this was the case and I put it somewhere.........it not making it back in the box. if I can't find it, I may have to buy another kit. I ordered the decal set before I knew of this..........I hope to have news on this one soon
- 103 replies
-
- 10
-
-
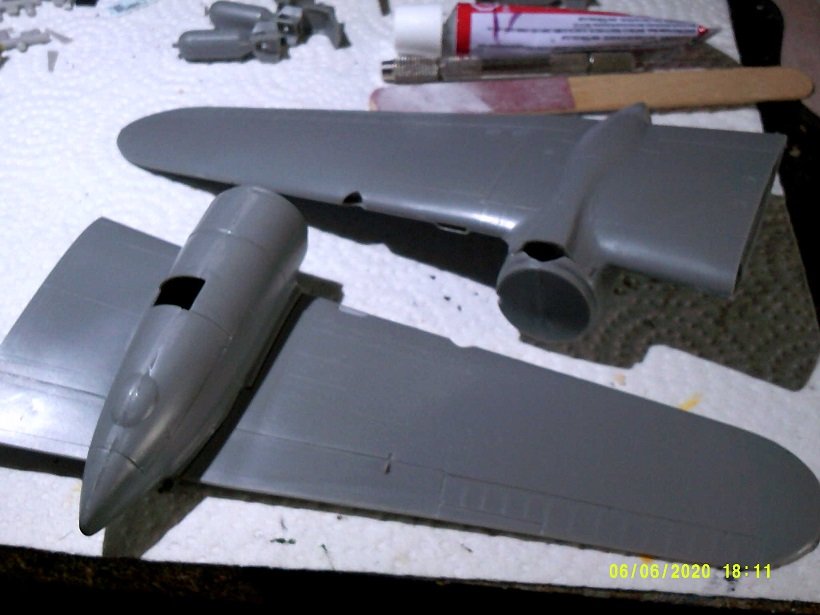
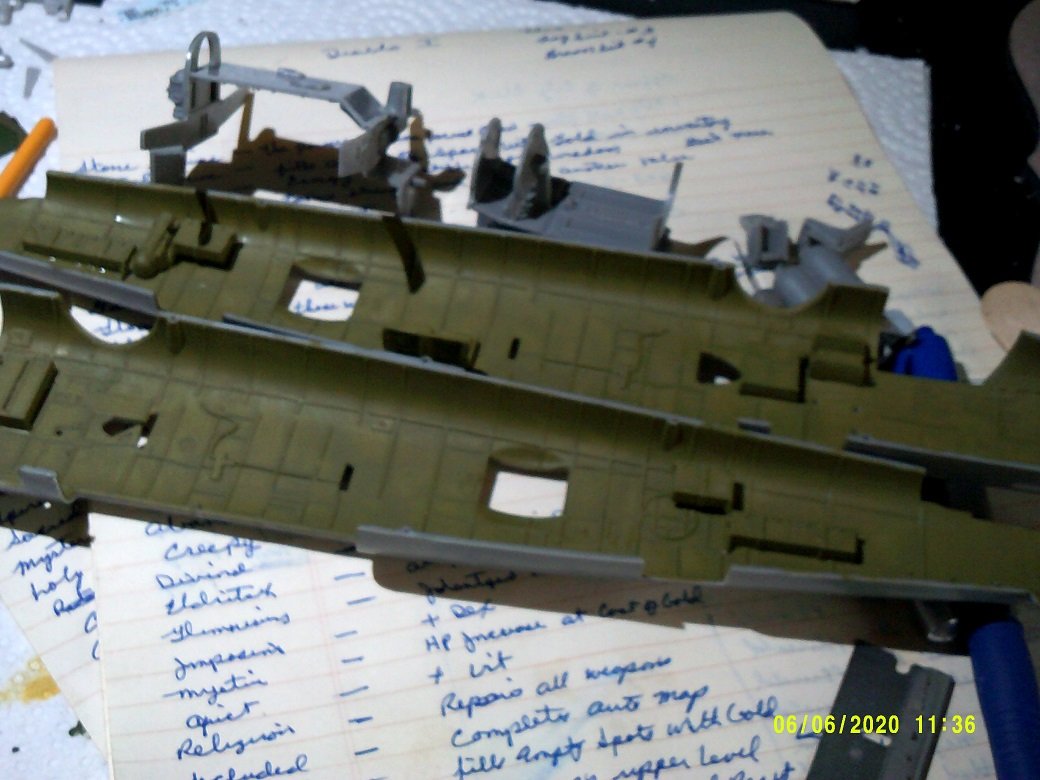
in a blurry photo..........it shows that the inner walls of the fuselage has been painted. I used the Chromate green, used in the Memphis Belle project, but I greened it up a bit more. the narcelles were assembled.....since the majority of the plane will be done in the Navy Blue, they will be assembled along with the wings. there is a bit of hind sight here......if the landing gears are in the down position, the gear doors should be in the open position. with this model, the two main door are closed.........strange and a cause for thought. the tail section was assembled as well........ the cockpit and bomb bay sections were painted in the chromate green...

- 103 replies
-
- 12
-
-
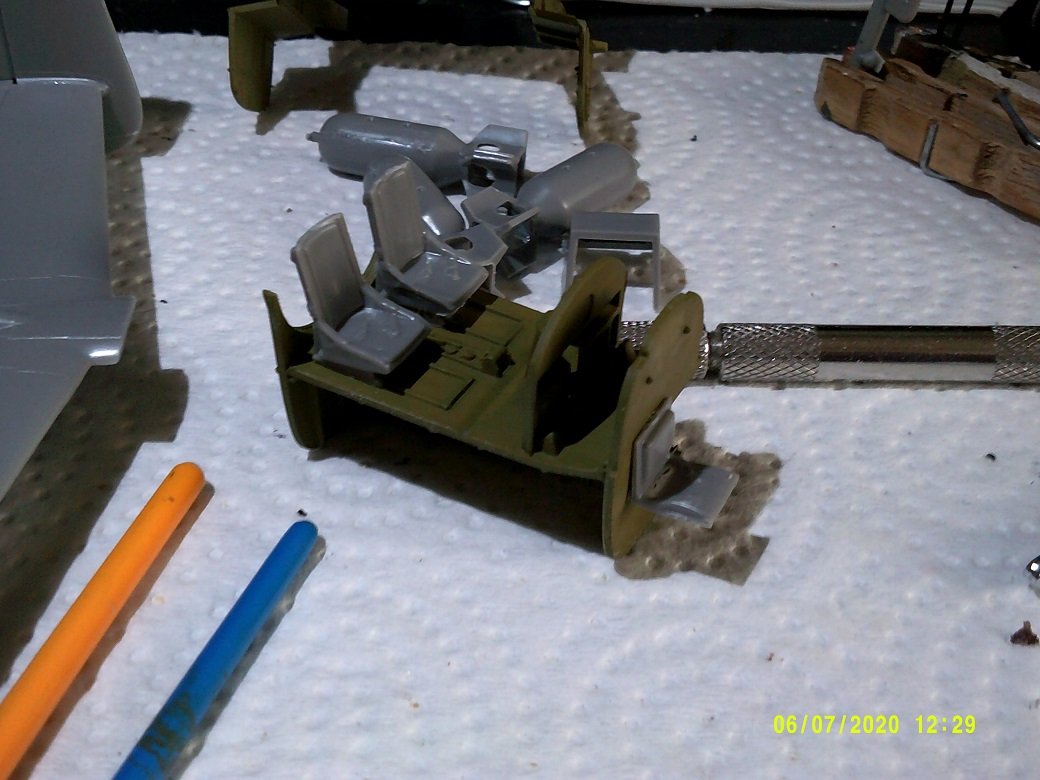
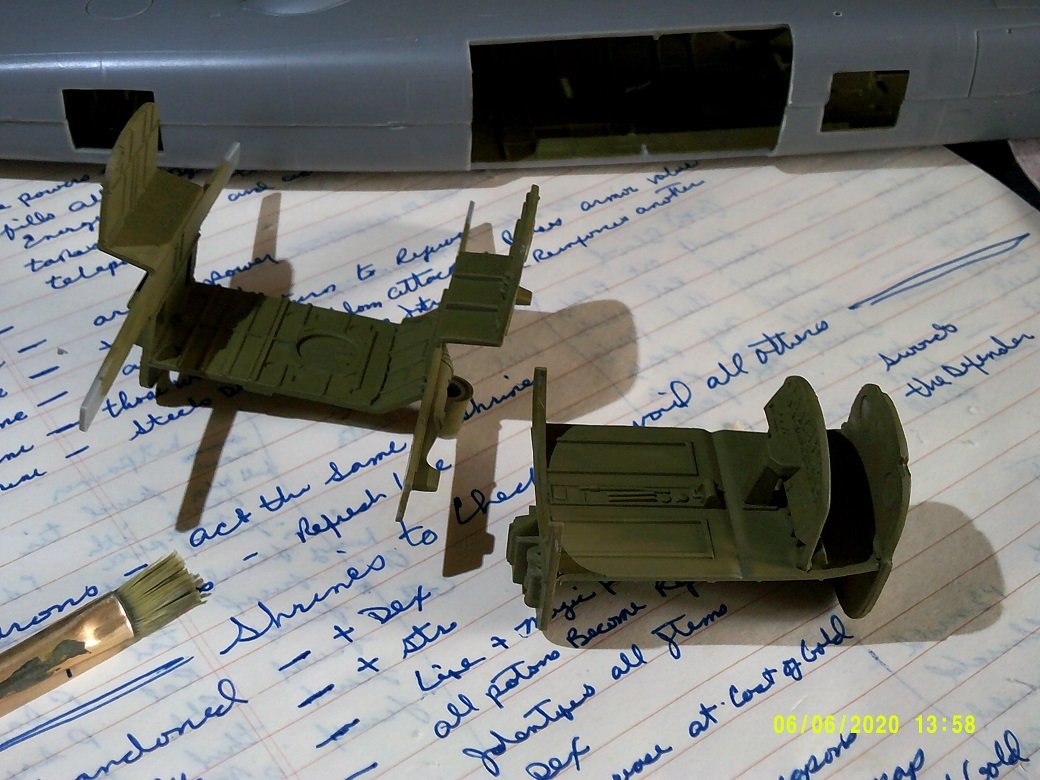
the next section to assemble was the bomb bay, which also serves as the wing roots. it was assembled and then sandwiched in the fuselage halves to allow it to set. the bombs were assembled next........ there is some fairly decent detail in the bomb bay compartment as well.........paint will accent it. a cross section shows the arrangement I did add most of the inner fuselage parts as well.........ammo boxes and communication equipment. this is not a new kit..........it has been around for quite a few years. Monogram put out a few kits around 1981.......a B 25H, and B 25J. there is also one that can easily be modified into one of the Dolittle planes. it was produced in 1965, as part of the Pacific Raiders series by Revell........the big difference though, is that it was moulded in 1:64th scale. Accurate Miniatures put out a B 25C/D which would also be a good candidate. this Revell kit is from the Monogram moulds.
-
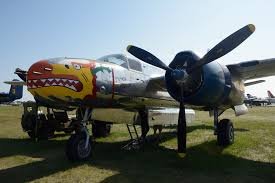
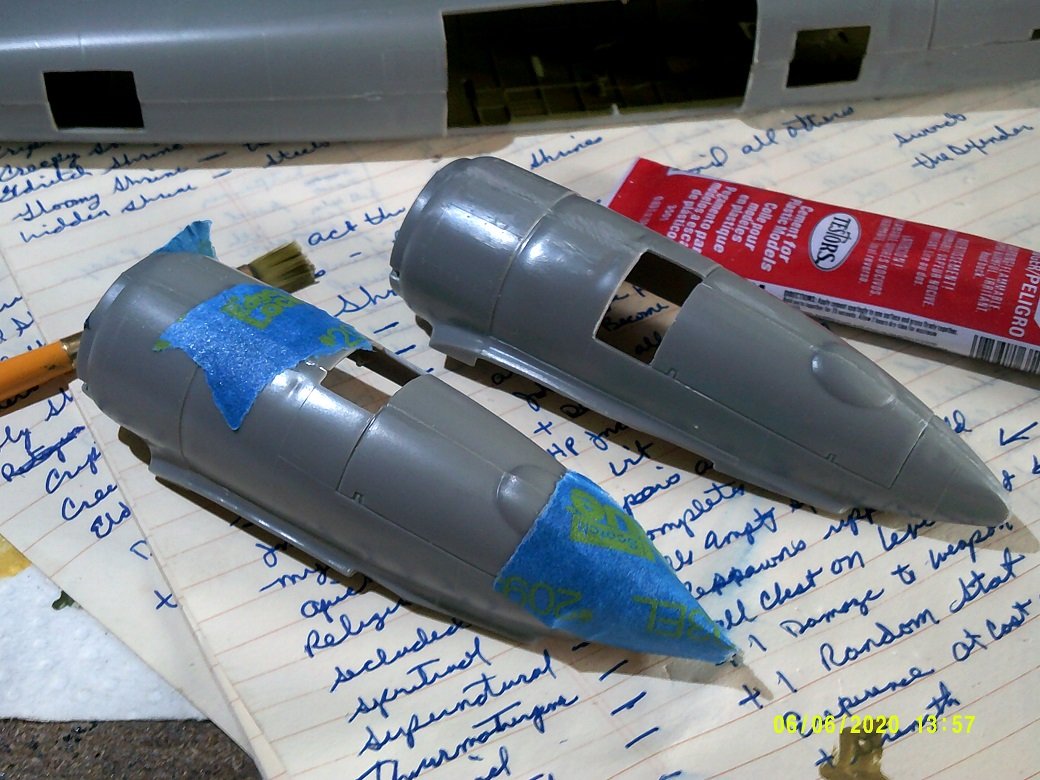
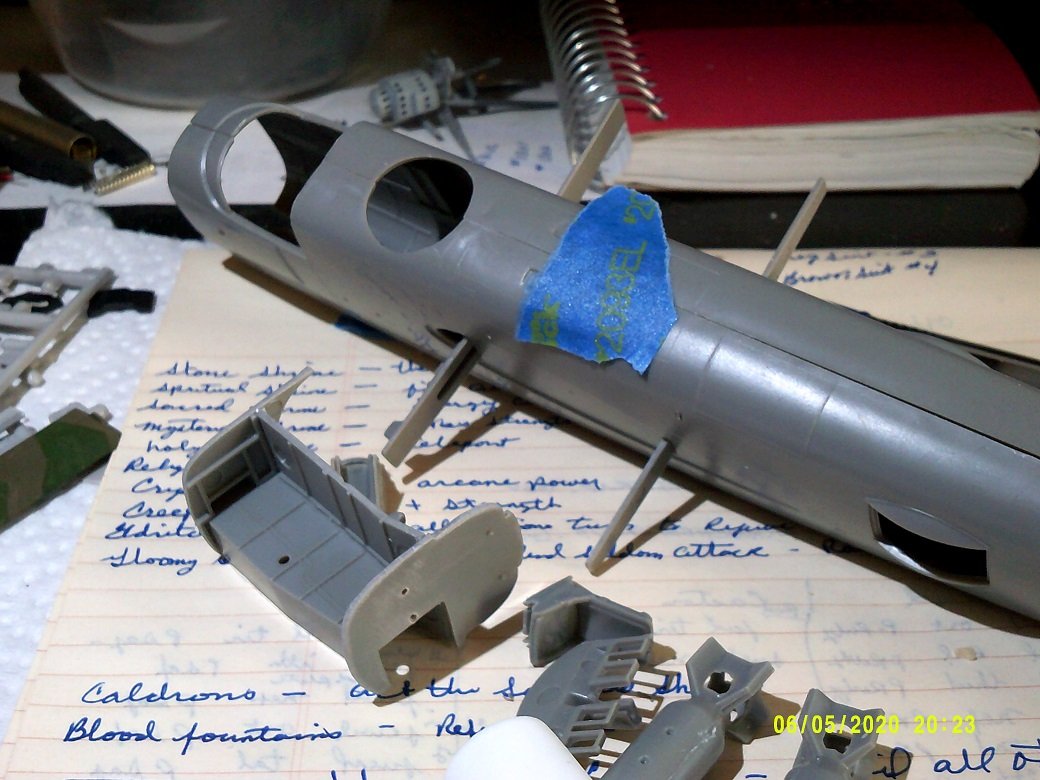
I have been scant with updates lately.........there are a few reasons for it, but one is the procedure I have scheduled on my legs. that has come and past my friends........I had it done yesterday. we removed the wraps that were on my legs this morning and it was a huge relief.......I felt like a freak'in mummy! there is very little residual pain.......the procedure wasn't bad either..........I actually feel pretty good. I think the more I walk now, the swelling that still shows will disappear and I should see marked improvement. now I hope the ulceration on the side of my left heel will go away. we shall see. I have a follow up appointment on Thursday........I expect to get a clean bill of health I do feel lucky that this is all I've ever had to endure.......others I know have had worse I have the same kit as Tom does........did......he already built his not feeling like doing other things to the planes I have going, I decided to bring this one out. I have a different angle I want to do on it..........I decided to do it as a PBJ 1J. this particular aircraft gets away from the Olive drabs and Army/Air Force colors, and do this one in a cool naval blue. during the time I've been tinkering with it, I ordered the decals from Mega Hobby........I got them with in three days! For the Gipper throws me back into the Olive color, so I will pass on that one for the time being. the US Marine Corps received surplus B 25's and used them for their missions and support of beachhead landing of Marine forces. this was nothing new for the Marines.......they often were the depository for obsolete and unwanted hardware from the other branches. originally, I wanted to go with a plane used in the Doolittle raid.........I still may in the future.......I did find a decal set that covers all 16 of them. I started to work on it a couple of days before my birthday.......pay no mind to the date on the pictures.....it's wrong......I know. I need to install the CD that came with the new camera, so I can read the manual........the paperwork I got with the camera says nothing about it. I assembled the cockpit section. it has some decent moulded detail.........I will paint it in later

- 103 replies
-
- 11
-
-
I notice there are no tabs....the first things to go in a poor fit situation filler can be a big help here. look'in good in spite of the fit.