


glbarlow
-
Posts
3,854 -
Joined
-
Last visited
Content Type
Profiles
Forums
Gallery
Events
Posts posted by glbarlow
-
-
-
1 hour ago, chris watton said:
what else to tell you other than I used a set of plans drawn and researched by people more expert than me for this type of vessel.
I don't think any more needs to be said. As you noted there were many variations and many conversions, its not a military vessel subject to exacting standards, just a simple fishing vessel. I would think it would be easy enough for a modeler to modify the size of the steering house to what suits them and be not less or more accurate than the design. I would have thought this was long resolved and fairly simple to follow.
I agree, this is not the place to debate the merits of wheelhouse design.
Moderators are welcome to delete my post. I don't mean to be argumentative, just a bit frustrated we can't seem to accept the model for what it is - a model.
- mtaylor and DelmerModels
-
 2
2
-
Glue by the gallons...🤪
-
-
-
18 hours ago, bartley said:
On the subject of beveling -
Those are good drawings and show what I inadequately was trying to say.
My comment though is don’t be drawn in by the sharp angles shown. It is a feel thing, as I mentioned for the most part it’s more about knocking off that top back edge. I see no need for a hard angle.
I actually tried to bevel one using my Byrnes sander. It did no go well.
btw, I don’t have an endless supply of cedar. Pretty sure I’m going to have to order more. I’d just rather be happy with the result.
- Mike the Maxx, RichardG, mtaylor and 1 other
-
4
-
45 minutes ago, VTHokiEE said:
subforum
That’s a good idea.
- mtaylor, VTHokiEE and Ryland Craze
-
3
-
12 hours ago, DelF said:
interested to see your post on this.
I’m a bit hesitant on doing this. There are so many different ways and no doubt better ways I’m not sure my new experience is worth sharing. I don’t want my log to become a debate platform for alternative practices. I may just go about my new found method quietly sawing away.
-
-
19 minutes ago, Blue Ensign said:
what a fine model Chuck has designed.
Thanks BE, i appreciate your saying so. Indeed it is a nice model. Hopefully I’m still saying that after I sort out the square tuck.
-
5 hours ago, mugje said:
that yellow tone
Thank you. Yes the yellow cedar with wipe on poly produces a nice color. I’m Always surprised at how much the wop adds to the wood, and to how smooth the cedar becomes with sanding.
29 minutes ago, Matt D said:If the extra 1/64”
Thank you for saying so. Actually the imperial measurement is still 3/64ths on my calipers. The amazing thing to me is how much variance, the 1.18-1.32mm, is still 3/64ths. The finish is Wipe On Poly, it really adds to the wood.
1 hour ago, MEDDO said:and think problems through.
I appreciate your comments. I feel like I give myself ample problems to have to think through 🤣
-
-
2 hours ago, Ryland Craze said:
when I start my Cheerful.
Glad to be of help as I’ve been helped by others. I’m sure you’ll enjoy building Cheerful, it’s a fun challenge
- Ryland Craze, mtaylor and Saburo
-
3
-
Taking on Winnie, that’s a big (literally) step up.
-
19 hours ago, VTHokiEE said:
does the micrometer stop help
I think I’ll next try to write a post on what I’ve learned on ripping planks.
I have the micrometer but in this instance it’s no help. I’ll expand on this later but I set the cut depth either with some brass gauges I have or in this case with one plank already cut the proper width between the blade and the fence snugged up tight, but no so tight I can’t pull it through.
Step one is having a great saw with the right blade - In my opinion the Byrnes saw has no peer. Though I’m new to ripping planks, I’ve had this saw for ten years and used it for countless things in building my models.
- Nunnehi (Don), VTHokiEE, MEDDO and 4 others
-
7
-
-
-
In my last post I said if my model had 3 sides the third side would be better.
Turns out I elected to prove that point. After finishing the port side I looked to finish the remaining 4 rows on starboard. I was already concerned because I had a thin spot where I had over-sanded. I looked, thought about it, looked some more, shook my head a few times, looked again, thought about it. Then ripped off the whole side (after doing two more rows, only two from being finished) all the way to the bottom of the wales, including those first two rows I’d put on multiple times already.
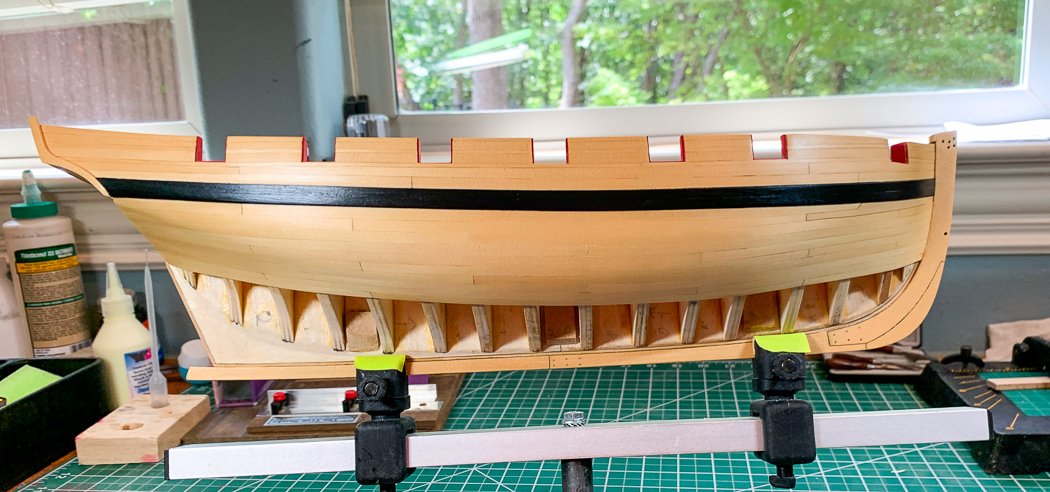
So I did the starboard side again, all 10 rows including the drop plank (which fortunately Chuck provides a couple of extra). I’m much happier with the result, I will not be seeing if I get better if my model had four sides. There are still imperfections, but I’m wrapping that up as character and the acceptance that as I am an imperfect person, so then should be my ship.
Here, at least for me, is what I found made the difference. It may seem small but in my work I found it to be important. First, as I mentioned at the beginning of the log I had no experience ripping planks prior to starting Cheerful. Now with the help of others and doing a lot of it I’ve gotten better. The key difference now is I can rip planks a consistent thickness. I’ll show what my steps are in a future post. It’s not that they were wildly different in fact all measured 3/64th with my digital caliper. But as I mentioned the difference in millimeters ran from about 1.18 - 1.32. Clearly that’s not much but it meant more sanding to get them evened up, hence the thin spot.
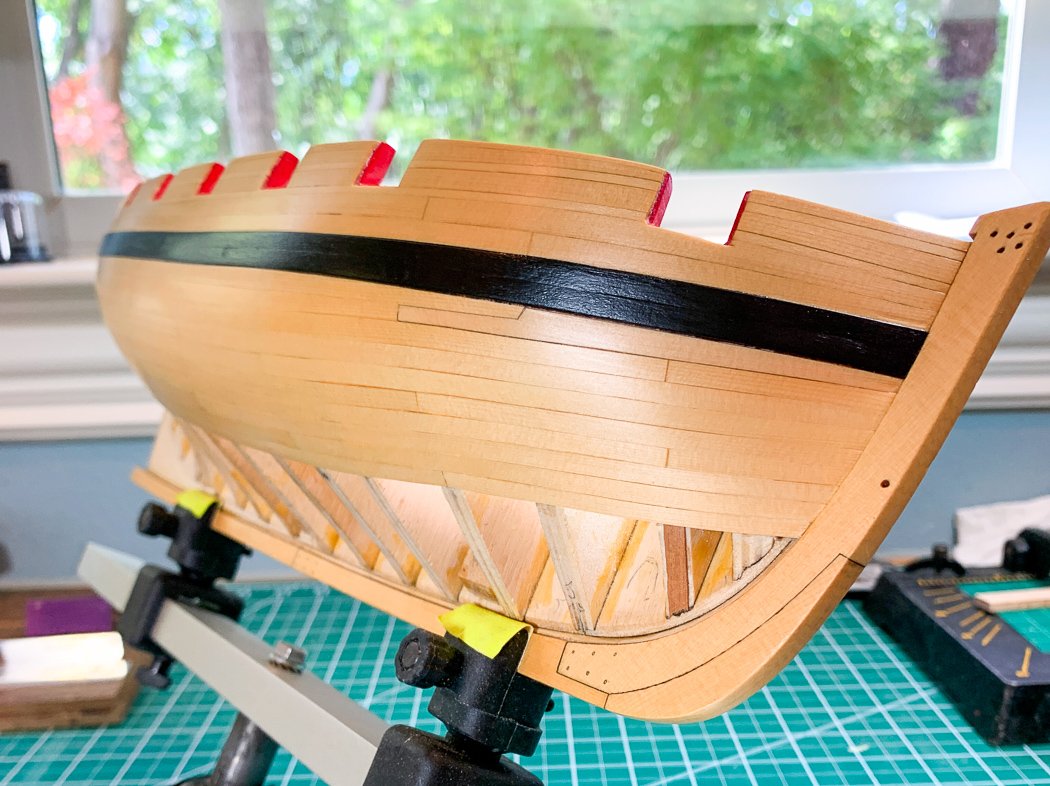
Secondly, I determined I was happiest with thicker planks. With plank bending the thickness wasn’t a problem - so I cut a batch of about 48 planks (enough for the remaining rows on the bottom too) at about 1.38. - almost 1/16th thick. With them all being much closer to the same width and thicker I got better results with much less sanding. This is probably because I’m just an average modeler and certainly because in my life I’ve now single planked three sides of a ship, but it’s what worked.
This may all seem obvious to most, my discovery is that if I’d only measured it using imperial, they were all 3/64ths, perhaps my digital caliper may not be as precise in imperial as it should be. By cross checking that in millimeters, and the variance in thickness that showed, sent me on an unrecoverable need to start the starboard side over. And here I am. I’m really hoping I’ve solved this. It would be much more difficult to rip off the bottom rows, I don’t want to do that again. In case you’re wondering - it wasn’t fun.
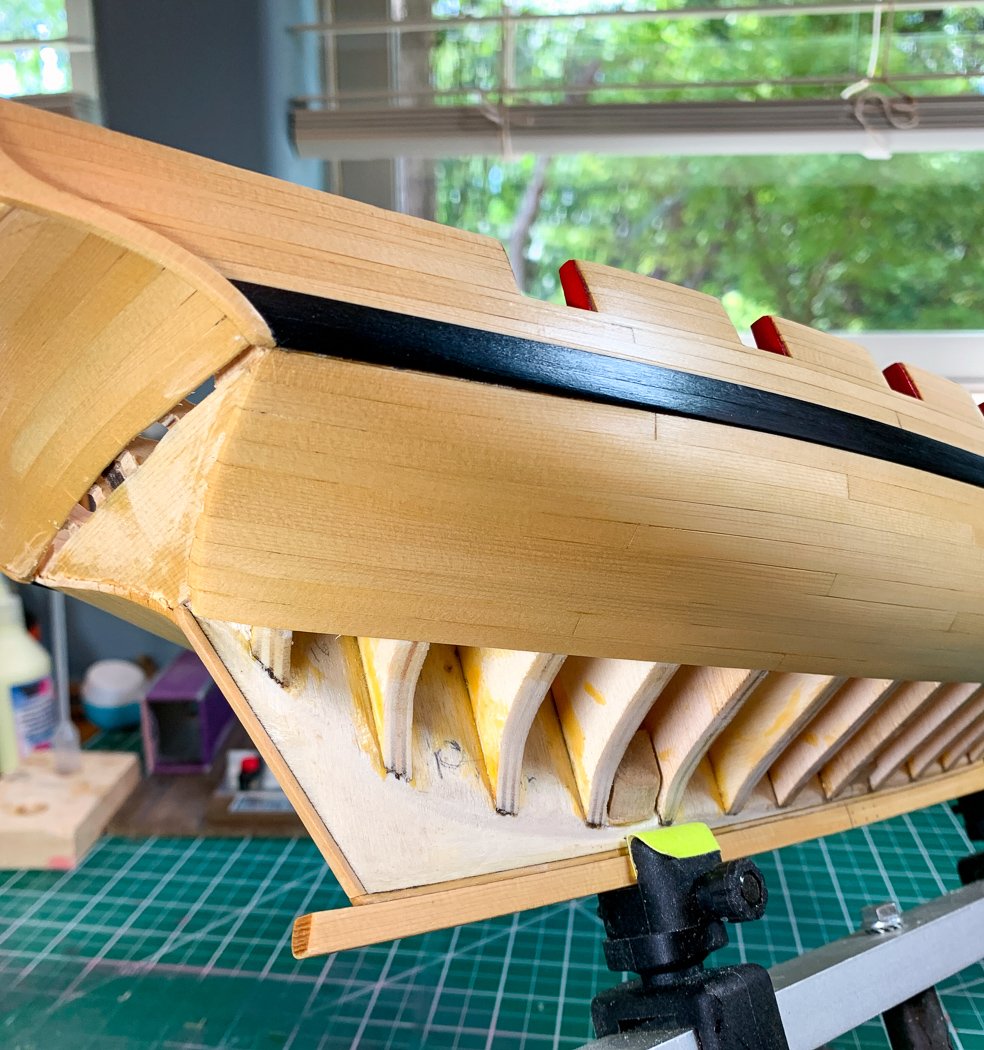
Now I get to figure out why a square tuck is actually a triangle - this may take a while. Oh, and I’m going to need more 3/16ths wood for the deck…:-)
-
Thanks! I appreciate you're remembering. I don't have an immediate need now but I'll try getting some to see how it looks. It would be nice to have a US source.
-
Thank you, it is one of my best results and took a couple of years to build (working almost every day), just the frames took 6-8 months. It was a semi-kit, I got the basics from Bob Hunt of Lauck Shipyards, but bashed it heavily with woods from Jeff of Hobbymill (I miss that guy) and other parts here and there. Unfortunately he sort of went under (he still sells practicums) and none of his ship models are still in production. Actually he sold the rights to some plastic modeling company then they never did anything with them. The cannon were my true test of no paint and no blackening, because that's kinda paint. I debated a while before leaving them just as they were.
I appreciate your looking - and compliments from someone of your skill are appreciated.
- DelF and Ryland Craze
-
2
-
On 7/23/2020 at 11:09 AM, garthog said:
very thin pencil lead
.7mm 😊 I think the planking fan Chuck provides must take that into account somehow. It was surprising to me it comes out as well as it does. It isn’t perfect, I’m not that perfect in transferring them, but it’s close.
-
39 minutes ago, chris watton said:
it was their son,
Which is why they have so many new designs since you left, as in none. Whatever happened to HMS Surprise for example.
I liked Caldercraft,...until their factory operative left 😂🤣
- chris watton, mtaylor, rusty b and 2 others
-
5
-
-
If you’re thinking about it at 2am, welcome to the obsessive modelers club
I recommend planking your deck in the usual way, on the ship a plank at a time. Fit for one reason, but the bigger one is that edge gluing generally isn’t a good idea, hard not to wind up with glue stains
You should try to true up the frame. Would putting thinner wood blocks close to the bulkhead frame do it? The way you have it, warping a bulkhead would likely cause an asymmetrical hull once it’s plank and a far less desirable look than the bow being off 1\16th. The bow being off that little probably won’t matter, definitely not as much as the hull not being equal.
The rabbet at the keel should be enough that the first planking fits flush, but you’ll probably need to bevel the second planking to fit at the bow and keel. I’d leave the keel and stem on for planking but not the sternpost, much easier to run the planks bow to stern and cut them flush at the stern.
The key step for the rabbit is at the stern. It needs to be thin enough so both first and second planking fit flush to the sternpost. Of course some of that is achieved by thinning the planks.
Since you bought it used, if you haven’t already it would be a good idea to go through the parts list to make sure your not missing anything. I don’t recall any reference marks on my kit so I can’t help you there.
I built this ship a long time ago, it’s a nice learning exercise, I hope you enjoy your build
Pride of Baltimore II by Brewerpaul - Model Shipways - 1/64
in - Kit build logs for subjects built from 1801 - 1850
Posted
I’m concerned your used kit may be missing parts, POB was one of my earliest models, I didn’t have to scratch build anything. The plans should include a sheet that shows all the parts boards and the instructions should include a list of parts, Have you done a complete inventory?
Photos in other build logs should give you an idea about the stern, I know my completed model is not that square. One thing about models, no matter the plans every stern winds up being unique
For the first planking you should start at the top and work your way down. I stop with 4-5 rows to go and instal from the garboard up. That area between isn’t visible once mounted so mistakes and filler can be handled there. For the second planking you can also start at the top, but common practice is to first place the first layer of the Wales (those reference marks maybe?) work up to the sheer, then down. The cap rail shouldn’t go on until all planking is complete and you’ve sanded the sheer smooth. I don’t add the cap rail until the inner bulwarks are also complete and to cap it all off, see what I did there.
You’ll appreciate filler between the 1st and 2nd bulkhead, it will make planking easier.
Hope that helps.