druxey
-
Posts
13,371 -
Joined
-
Last visited
Content Type
Profiles
Forums
Gallery
Events
Everything posted by druxey
-
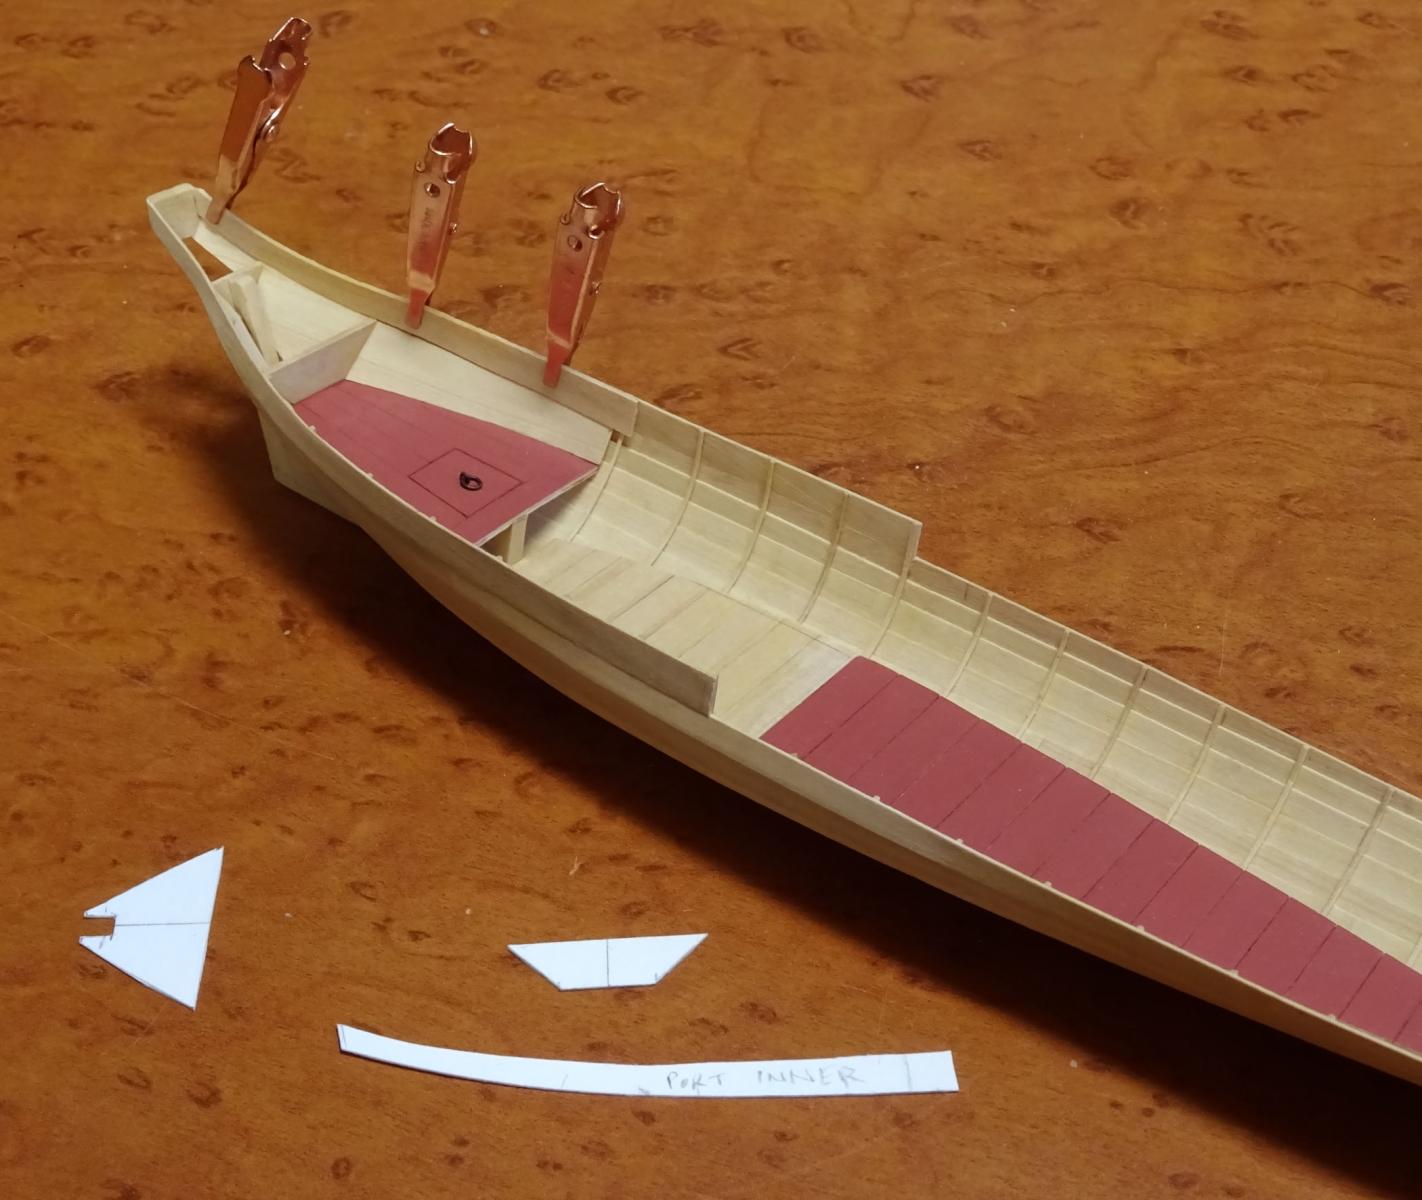
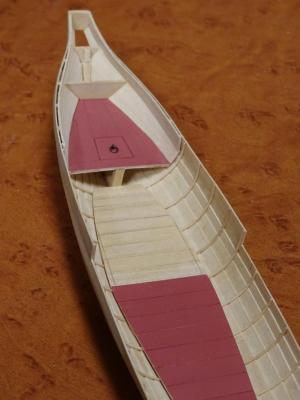
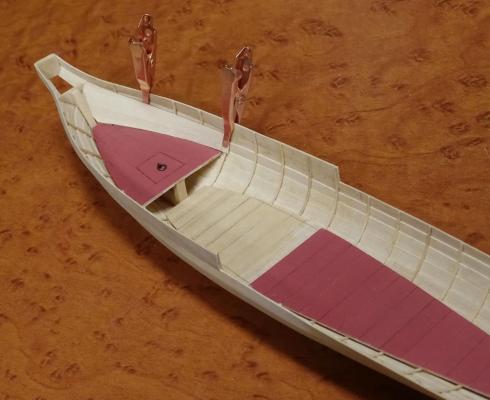
 The inner bulwark sheathing proved interesting. It took several pattern pieces to figure out the developed shapes of the planks. The first photo shows one plank being wet-bent into position. The card pattern for this is in the foreground, as well as patterns for the steersman's bench. The second photo shows both inner sides complete and the vertical portion of the steersman's bench in position. The top of this has been made and painted. The same strategy as for the other horizontal surfaces was used to build it. The paint is in the process of drying and I'll install the top tomorrow. There are several possible items I could now tackle, but I think that the risers (horizontal planks that support the ends of the thwarts) should be next.
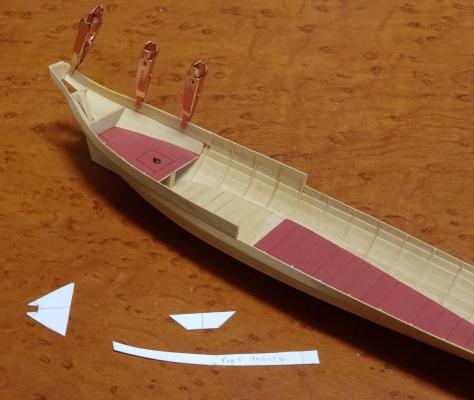
- 641 replies
-
- 43
-

-
- greenwich hospital
- barge
- (and 1 more)
-
Mechanical Solar System by jim_smits - Eaglemoss
druxey replied to jim_smits's topic in Non-ship/categorised builds
Just found this thread - your project is sooo cool! I guess that the company don't export to N. America, or I'd be tempted. I remember seeing orreries in museums when I was young, and being fascinated. All the best with moving and your upcoming nuptials, Jim. -
Congratulations on a fine model, Vaddoc. Very nice indeed.
- 253 replies
-
- 2
-
-
- ketkch
- gaff-rigged
- (and 1 more)
-
Superb work, Johann! Those boats look exquisite.
-
Whew! Exhausting and exhaustive. Thank you for taking the time to take us step by step through the whole process, Ron. I've learned a lot reading this thread, which should be 'pinned' by the moderators as a valuable resource.
-
Hopefully the end of your nomadic period, Dan? Nice looking main mast partners. See you when you return.
-
Well, a start has been made on the inner sheathing of the bulwark. The compound curves involved make this an interesting exercise!
- 641 replies
-
- 33
-
-
- greenwich hospital
- barge
- (and 1 more)
-
The simplest and most foolproof 'water' would be plain glass, as it's the least distracting and avoids a huge learning curve. Perhaps others may have other opinions. If you wish to try for realistic water, perhaps consult some of the model railway fraternity: they are very good at landscaping.
-
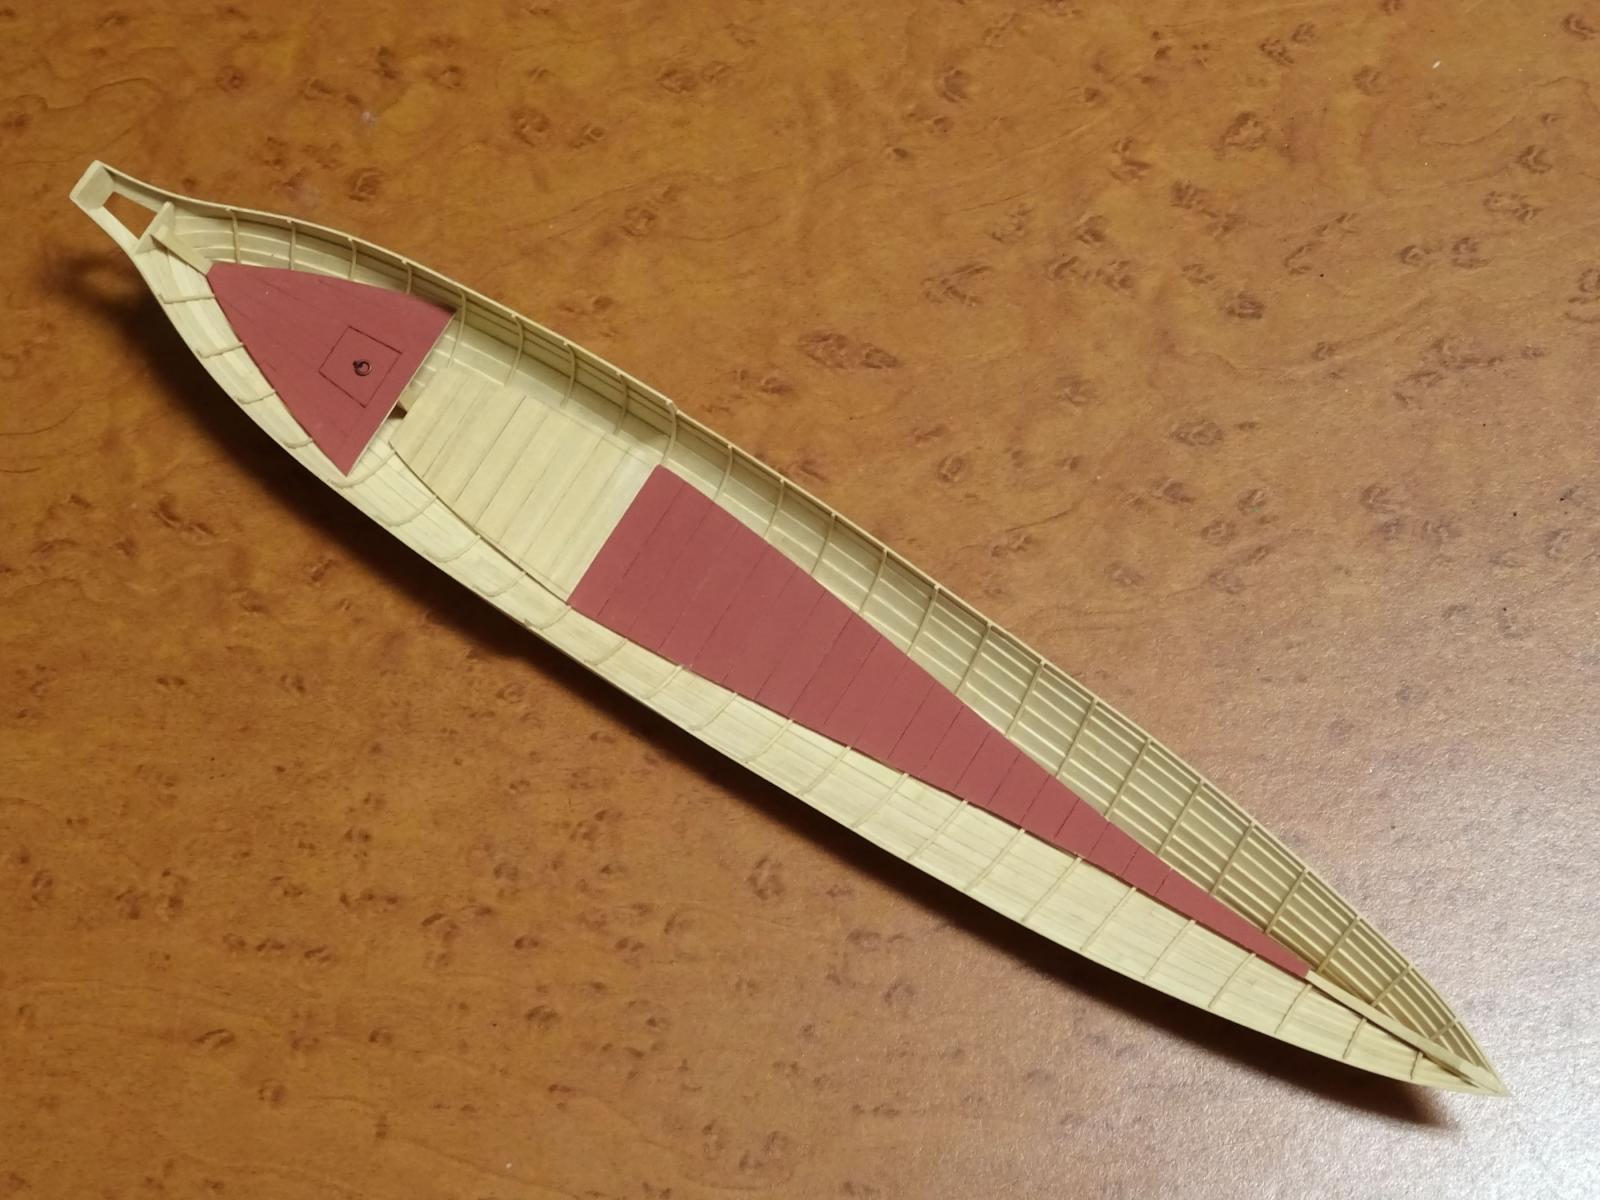
Again, thank you for the kind compliments. 'Precision' is merely taking sufficient time and care, plus accurate marking out. These come from experience; you know, the 10,000 hour thing. The aft platform has been made, painted and installed. The next challenge is covering the compound curved surface above this platform up to the height of the topside.
- 641 replies
-
- 32
-
-
- greenwich hospital
- barge
- (and 1 more)
-
If I'm visualizing your description correctly, the display idea sounds very good. Do you have a sketch or rendering of this presentation for us to see?
-
HMS Naiad 1797 by albert - FINISHED - 1/48
druxey replied to albert's topic in - Build logs for subjects built 1751 - 1800
That's an interesting mix of wood and iron standards! Beautiful work, as usual, Albert. -
Thanks for everyone's continued interest. More pattern making is required to define the shape of the aft deck. I've modified the design of Prince Frederick's barge to suit this vessel. On this deck, furthest aft, will be a raised area for the steersman, but that cannot be defined yet. The aft deck with its scuttle needs to be made and installed first, as well as a thin panelled lining on the inner sides of the bulwarks.

- 641 replies
-
- 20
-
-
- greenwich hospital
- barge
- (and 1 more)
-
Good progress, Paul, and interesting artifacts.
-
That second photograph (https://blog.firedra...015/01/7531.jpg) should answer your own question, Siggi. Thanks for the link: that particular image hadn't turned up for me when I searched.
- 641 replies
-
- 2
-
-
- greenwich hospital
- barge
- (and 1 more)
-
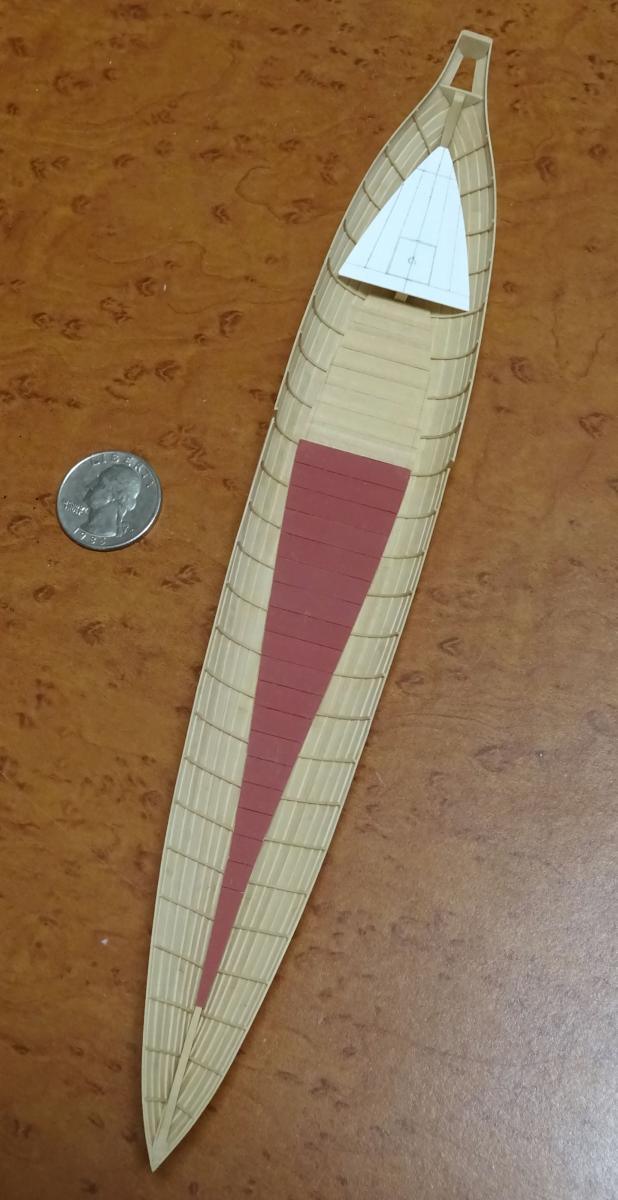
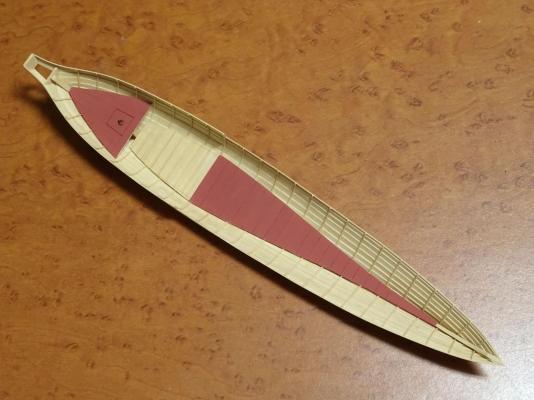
Time for a small update. The cabin floor was made in the same way as that for the forward section of the footwaling. In this case the wood was left 'bright' and the joints slightly enhanced using pencil lead. The finish was dilute sanding sealer. The footwaling aft of the cabin will be installed at a higher level, with a small scuttle for access. Some pattern-making will first be required, though.

- 641 replies
-
- 30
-
-
- greenwich hospital
- barge
- (and 1 more)
-
Somehow I missed the last few months' updates, so just caught up with you. Lovely work there on such a small scale, Clare!
-
I'm sure that there would have been battens of some sort to support the footwaling plank ends in the actual boat, Carl and Joel. As these would be hidden (as are the floor/futtock joints), I omitted them. Thanks, everyone, for your continued interest and likes.
- 641 replies
-
- 5
-
-
- greenwich hospital
- barge
- (and 1 more)
-
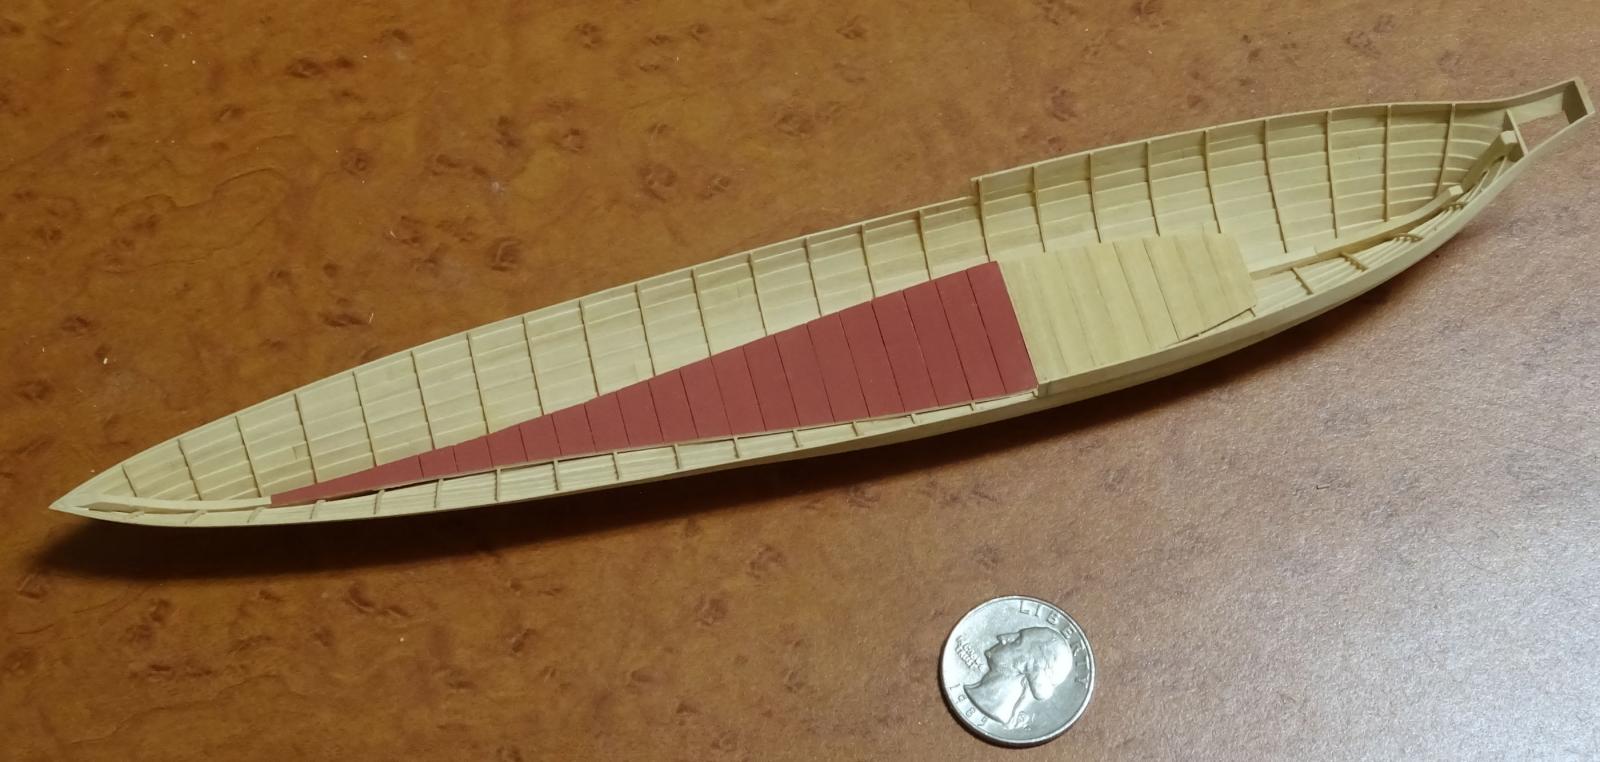
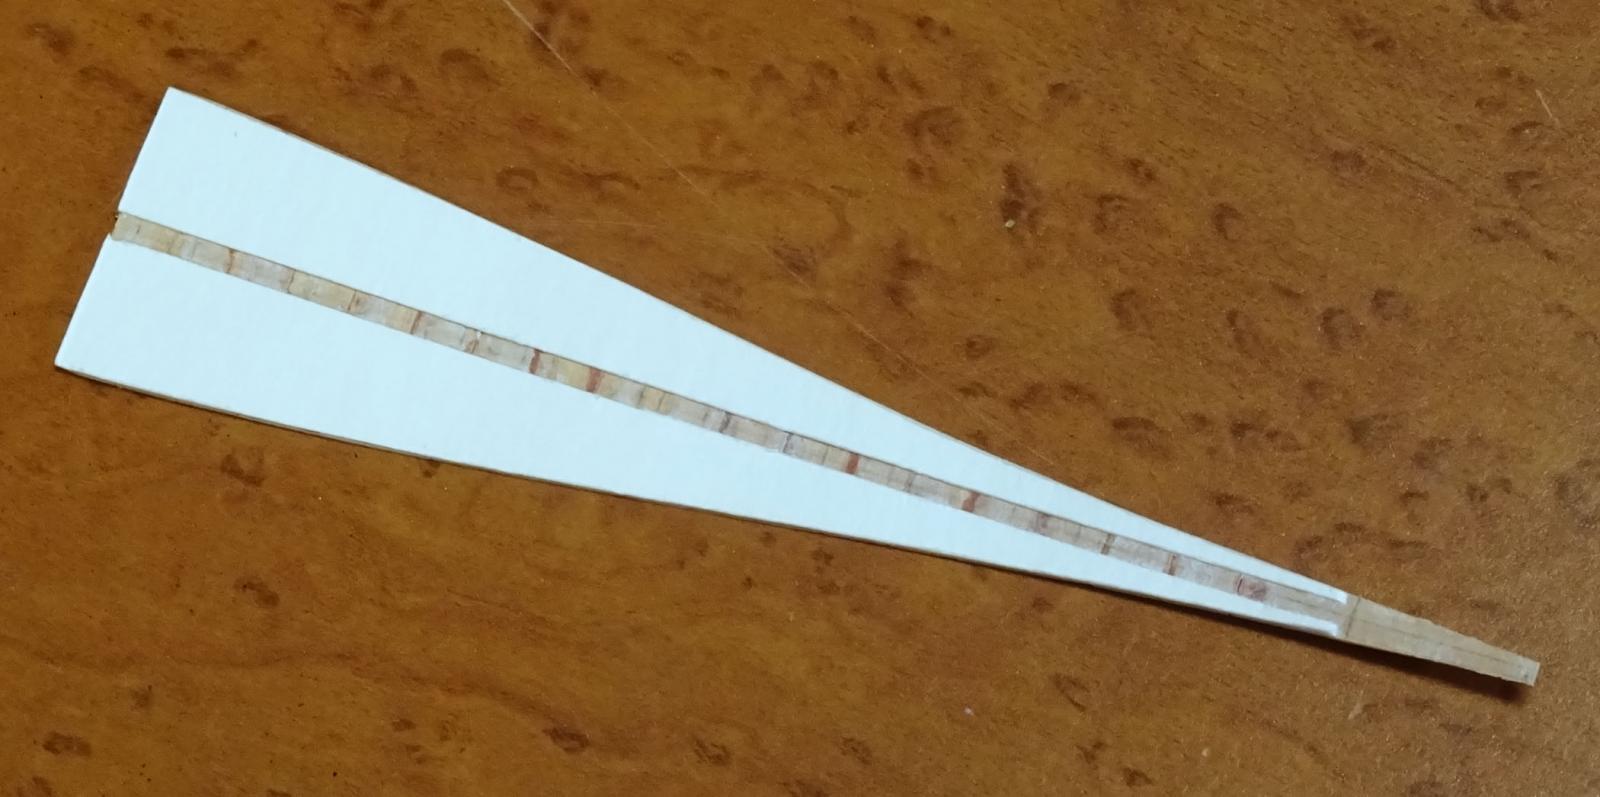
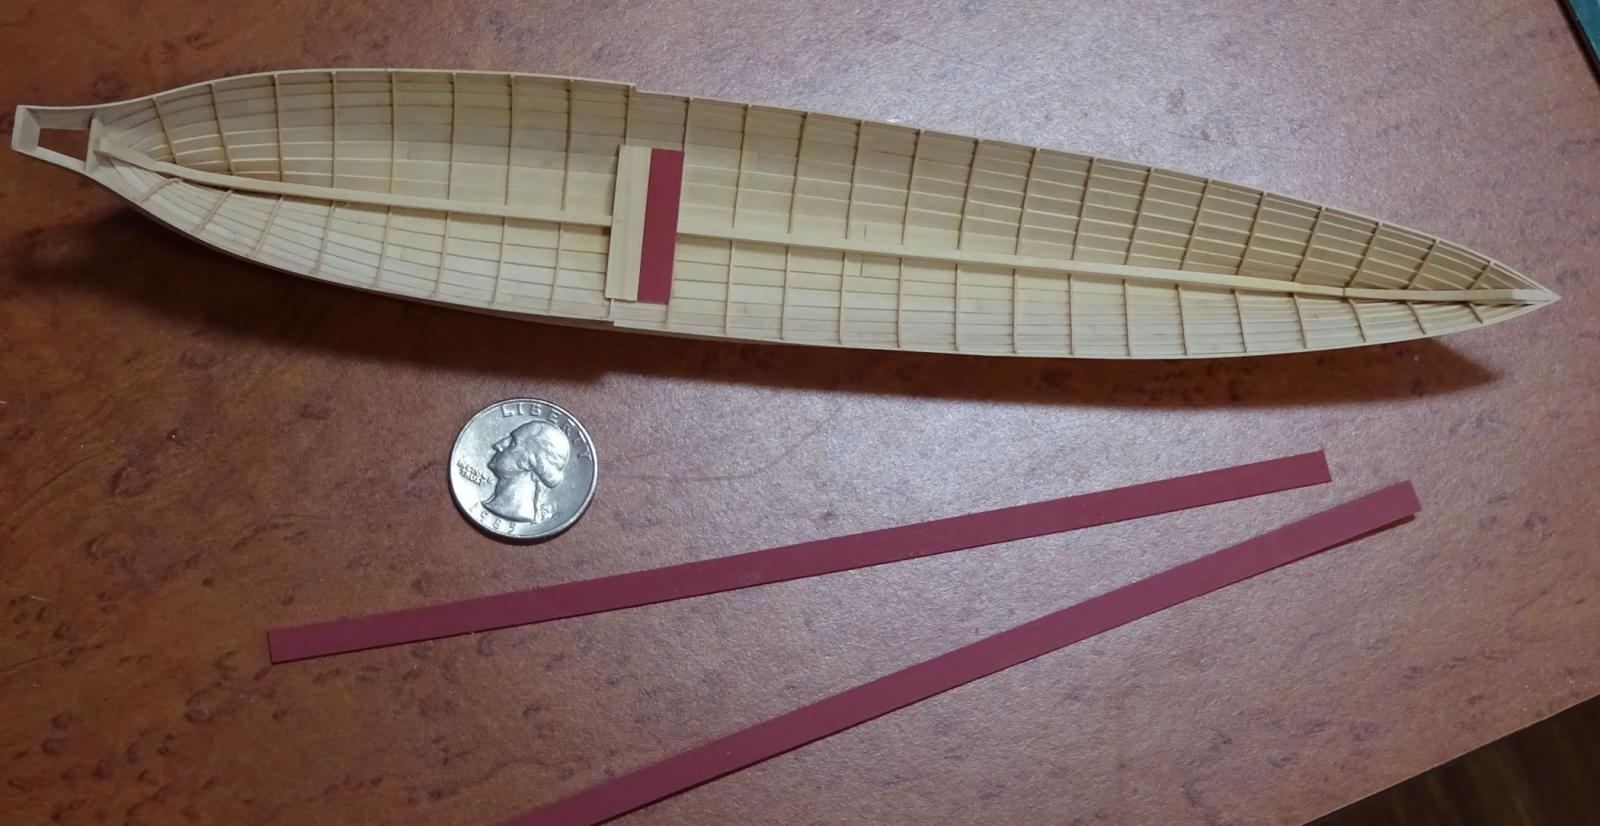
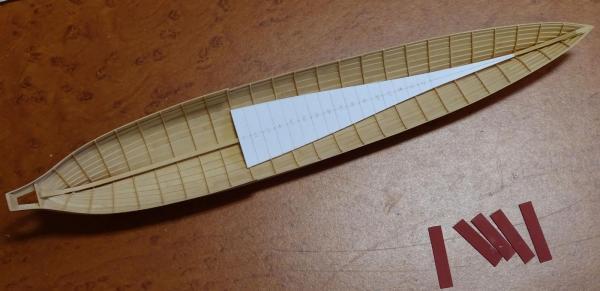
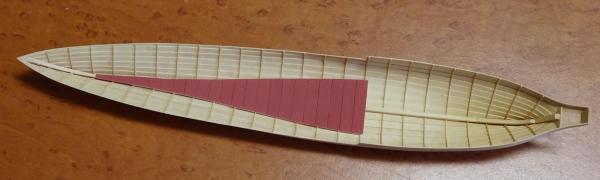
The footwaling is now complete, after making a false start. I initially tried cutting and bevelling each board to length in situ. The result, as you can see, was not pretty. Having thought things through, I then made a card template which was used to actually attach the boards to. When complete, I channelled out the card so that the boards would sit at the correct height on the keelson, then glued the assembly in. This gave a much improved result.


- 641 replies
-
- 34
-
-
- greenwich hospital
- barge
- (and 1 more)
-
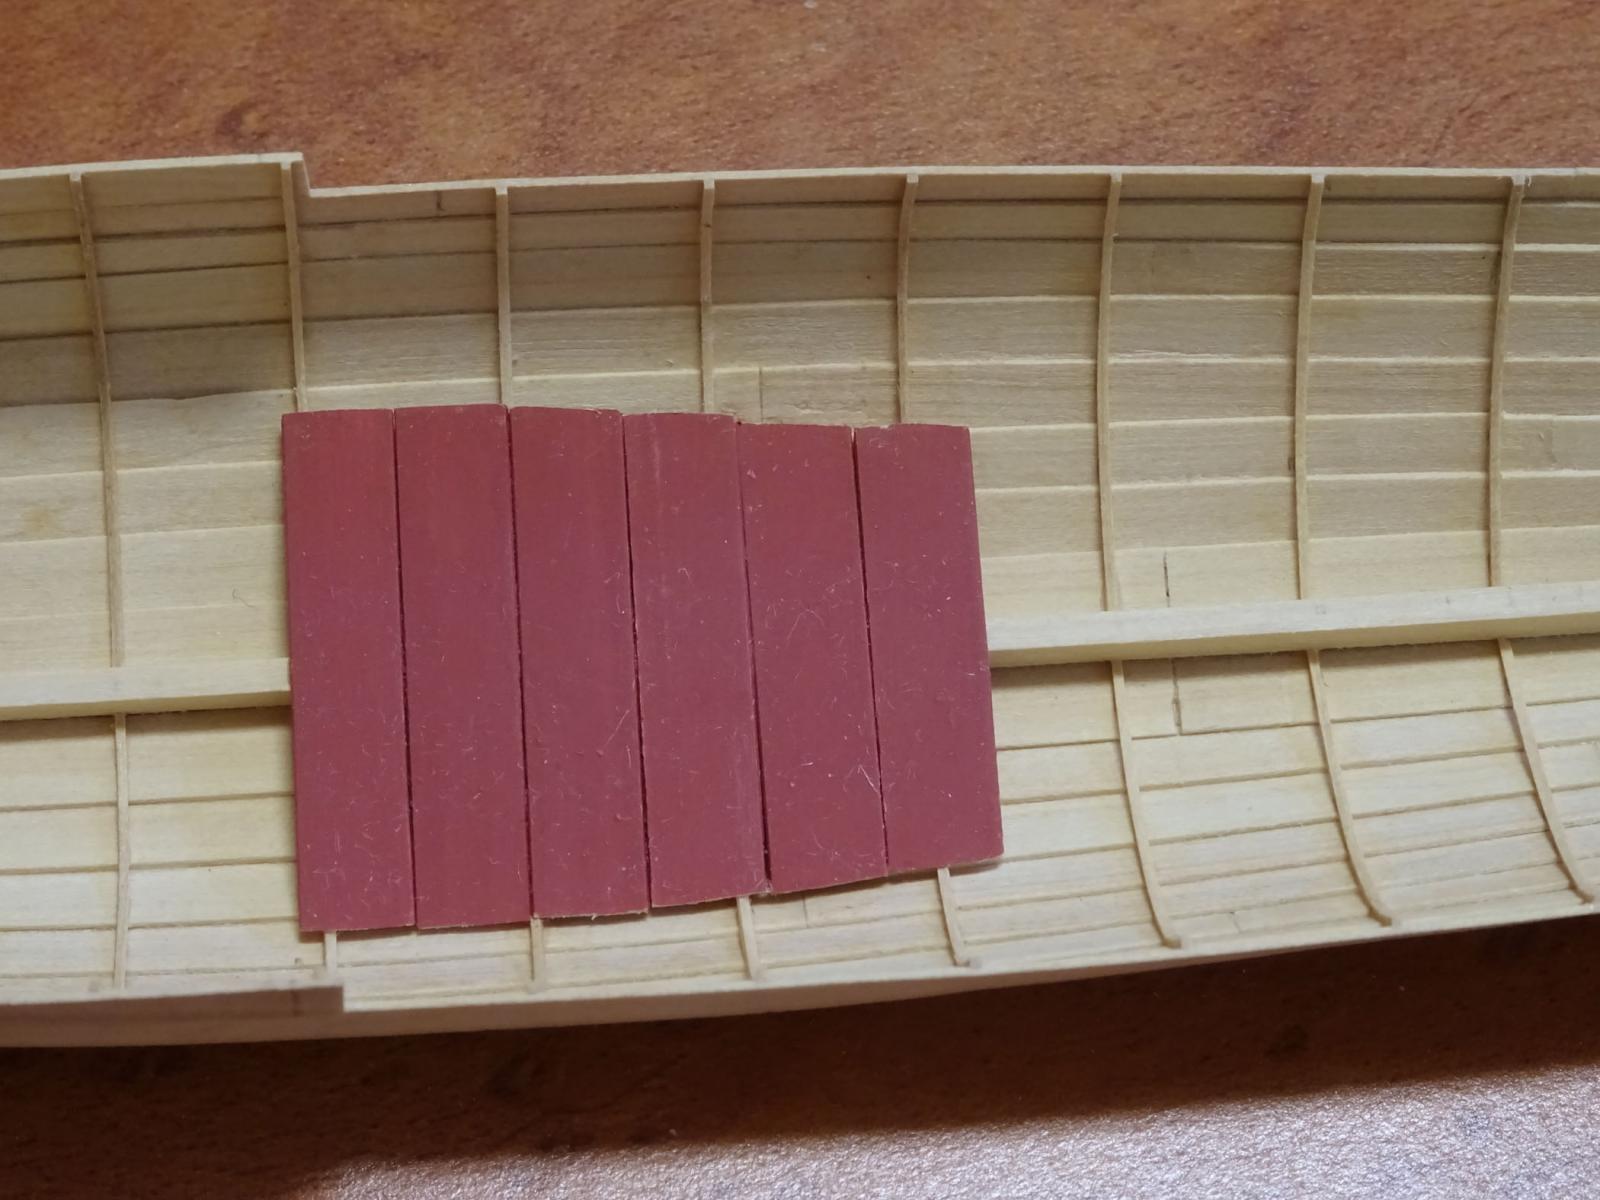
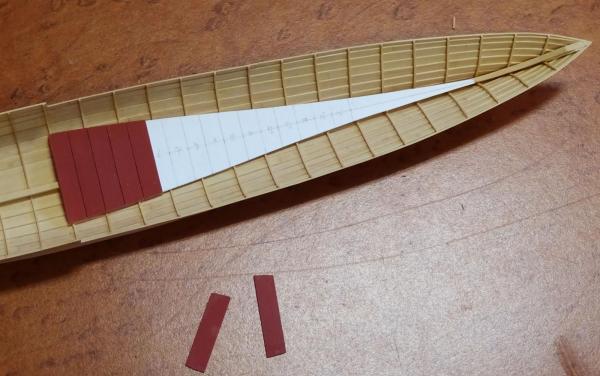
Time for a progress photo. It shows a 'stand-in' footwaling piece positioned so that the first pre-painted board is correctly placed. The pre-painted strips, 10" wide and ⅝" thick are also shown in this photo.

- 641 replies
-
- 32
-
-
- greenwich hospital
- barge
- (and 1 more)
-
No worries, Paul. I hope you continue to recover. Thank you for your interest and contributing to this thread.
- 641 replies
-
- 4
-
-
- greenwich hospital
- barge
- (and 1 more)
-
I had the privilege of attending the NMM course a few years ago and it was very informative and thought-provoking. Thanks for flagging this new offering. I wish I could go!
- 1 reply
-
- 2
-
-
Thanks, Gerhard. I've already seen all those images. The Greenwich Hospital barge is not as elaborate - thank goodness!
- 641 replies
-
- 3
-
-
- greenwich hospital
- barge
- (and 1 more)
-
Frégate d'18 par Sané , la Cornélie
druxey replied to JohnE's topic in CAD and 3D Modelling/Drafting Plans with Software
Odd that the rake of the stern in that Justice draught is so elegantly raked, but the headwork looks like a turned-up nose!