


rlb
-
Posts
650 -
Joined
-
Last visited
Content Type
Profiles
Forums
Gallery
Events
Posts posted by rlb
-
-
Thanks for the video, Dziadeczek. He looks like he is tapping harder and with a bigger hammer than I did, so I will probably try this again. The mill sat unused for many years, which might make the chuck harder to dislodge. I did try with a wooden wedge, but the wedge broke apart.
Ron
-
Thanks everyone for your advice.
Sherline does sell a "knockout bar" as described by Roger Pellet, so perhaps they expect light tapping (with a soft hammer) would not be harmful? I do take mnl's caution seriously though, and I have also looked into the Jacobs chuck wedge sets. With shipping and tax one of those would be around $30, not the end of the world, but it would be easy enough to make a similar "U" shaped hardwood wedge that I think I will try first.
- Canute, thibaultron and mtaylor
-
 3
3
-
Thanks Pat and Alan.
I was able to find a draw bar in the box of accessories, and thread it into the top of the chuck through the spindle assembly.
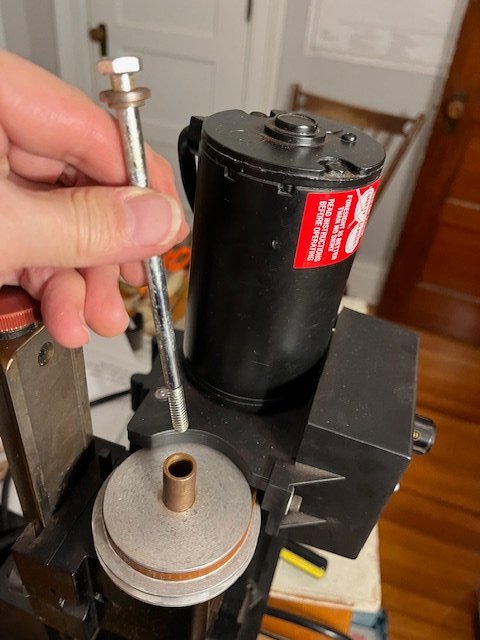

I gave it a few taps with a small hammer but it didn't budge. I'm nervous of hitting it too hard. But am I on the right track?
Ron
- thibaultron, Canute and mtaylor
-
3
-
Hello all,
Today I had the opportunity to buy a used Sherline lathe and mill, so I did.
I have no prior experience with them so I am reading the online manual from the Sherline website, and trying to familiarize myself with the basic nomenclature and basic operation of these machines. From what I have learned so far, they are somewhat older machines, (probably pre 1999) but still model 4000 for the lathe, and 5000 for the mill.
I have one roadblock immediately. The jacobs chuck is stuck in the mill spindle--
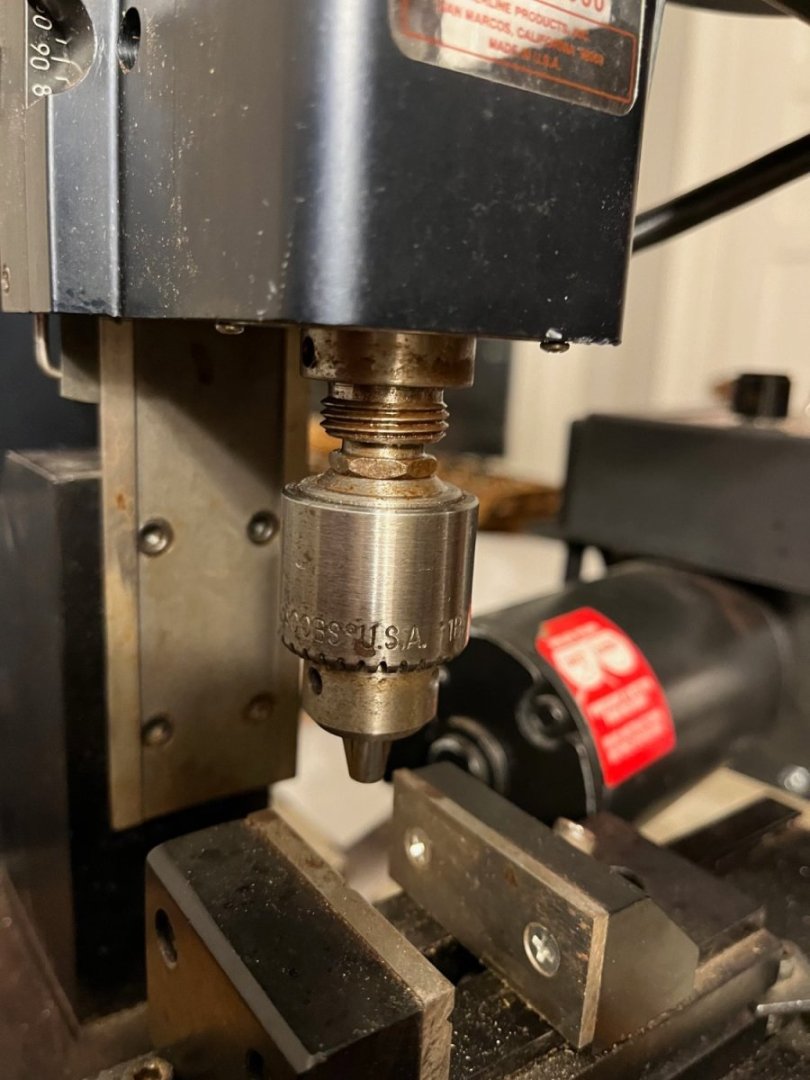
Am I right that this should be just a friction fit? What is the best way to loosen/remove this? I ask this knowing that some may be thinking "if he can't do this, these machines are wasted on him".
Any advice is appreciated.
Ron
- thibaultron, Canute and mtaylor
-
3
-
Thanks, JJ.
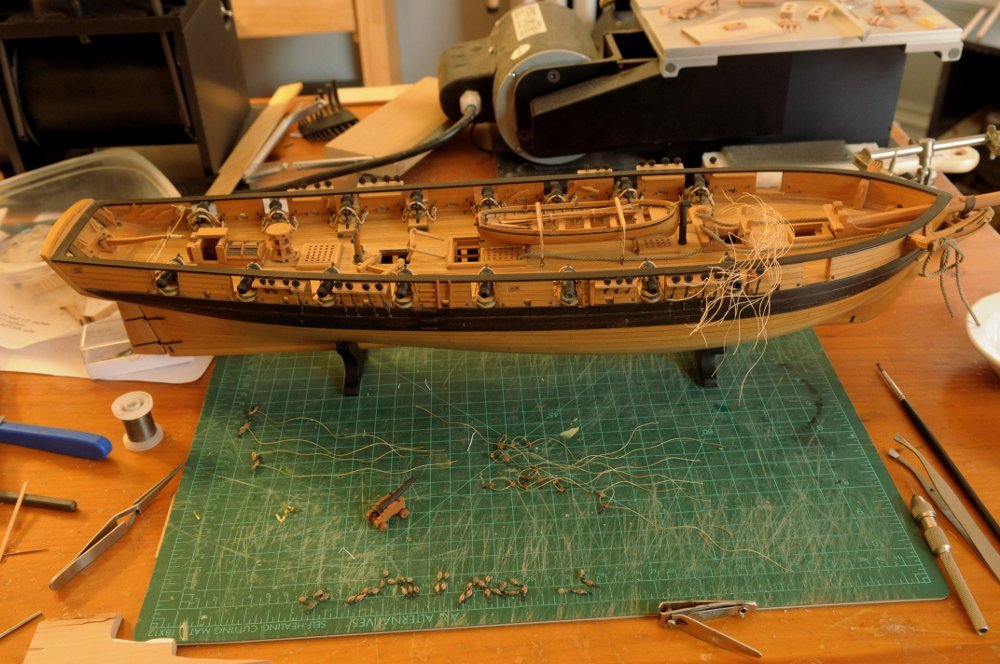
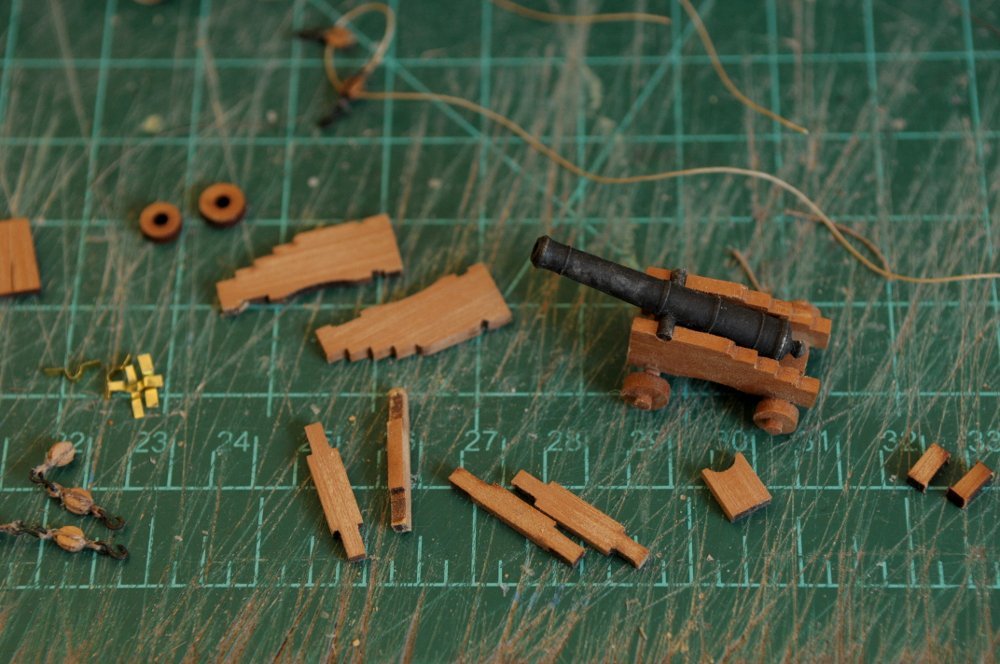
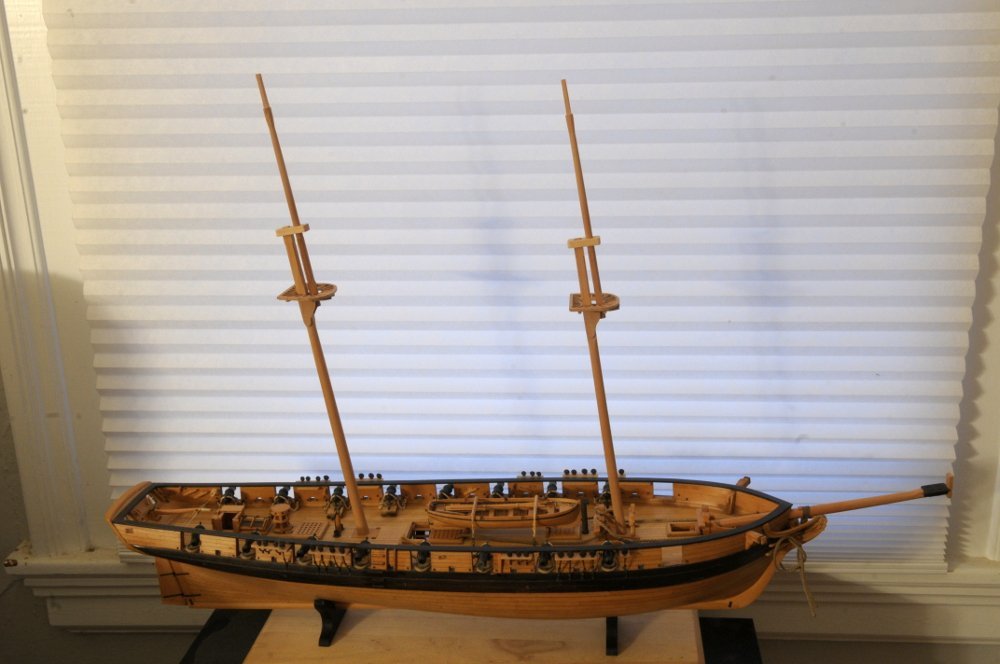
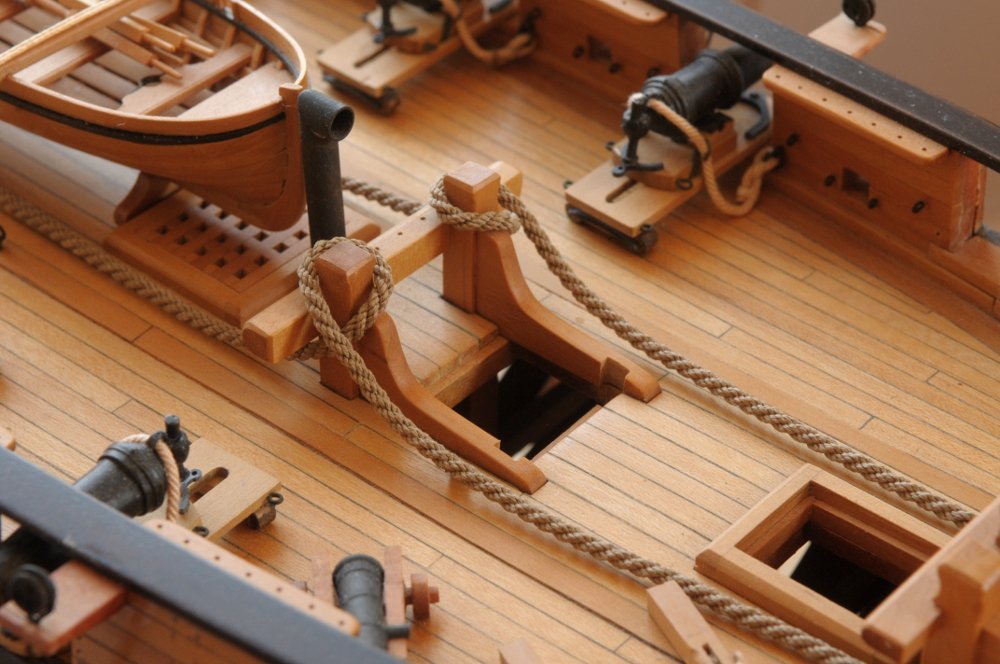
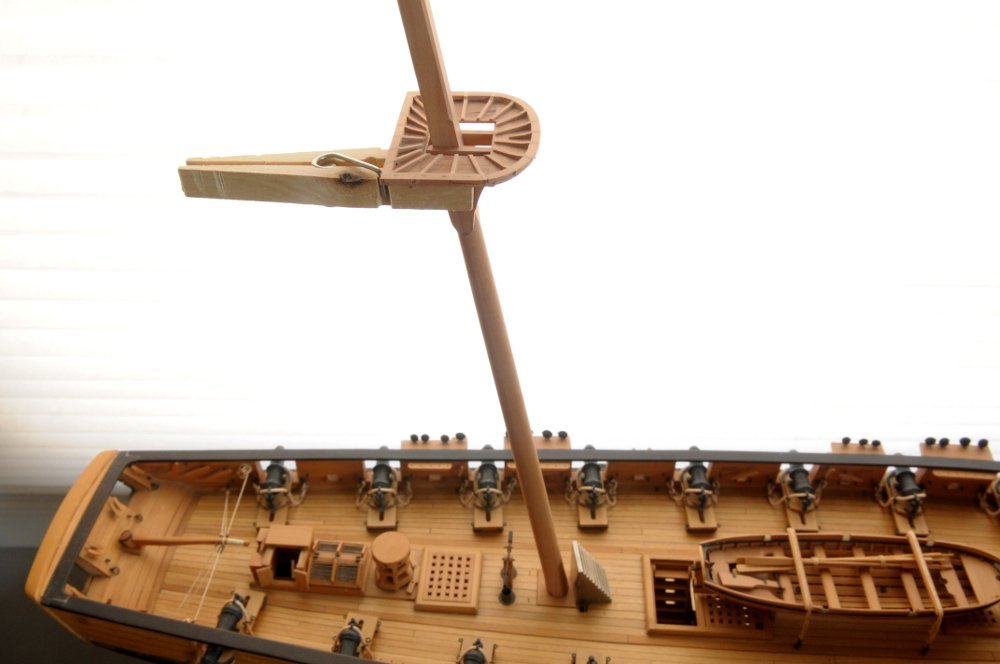
Now that I have finished stropping the blocks, the ship comes out on to the table for rigging the carronades, and two 6-pounder cannon--
 .
.
Tackle lines have been cut, dyed a little darker, and are in process of tying to an eyelet in one of each pair of blocks--
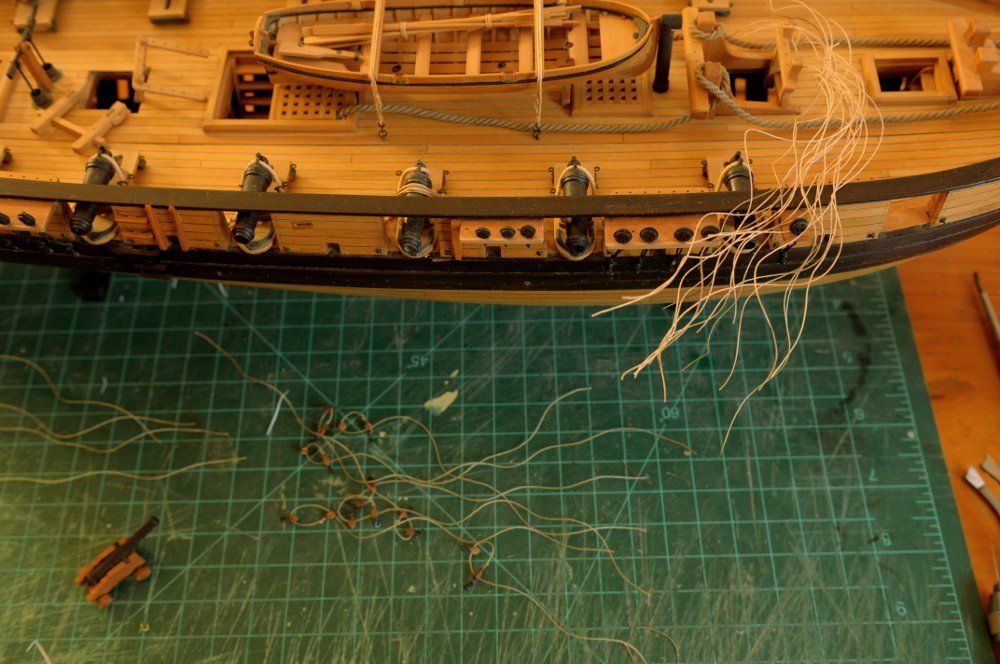
I had assembled one of the 6-pounder cannon carriages a while ago, now I need to assemble the other one, as well as finish the first with cap-squares, breeching rings and other eyelets. I have two extra axles pieces here!--
All for now,
Ron
-
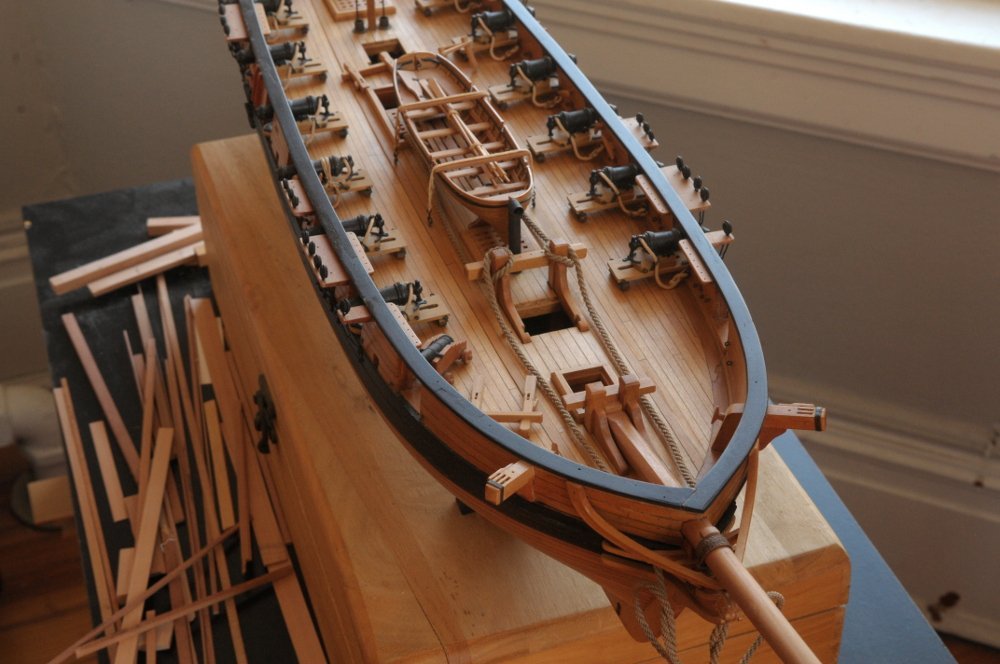
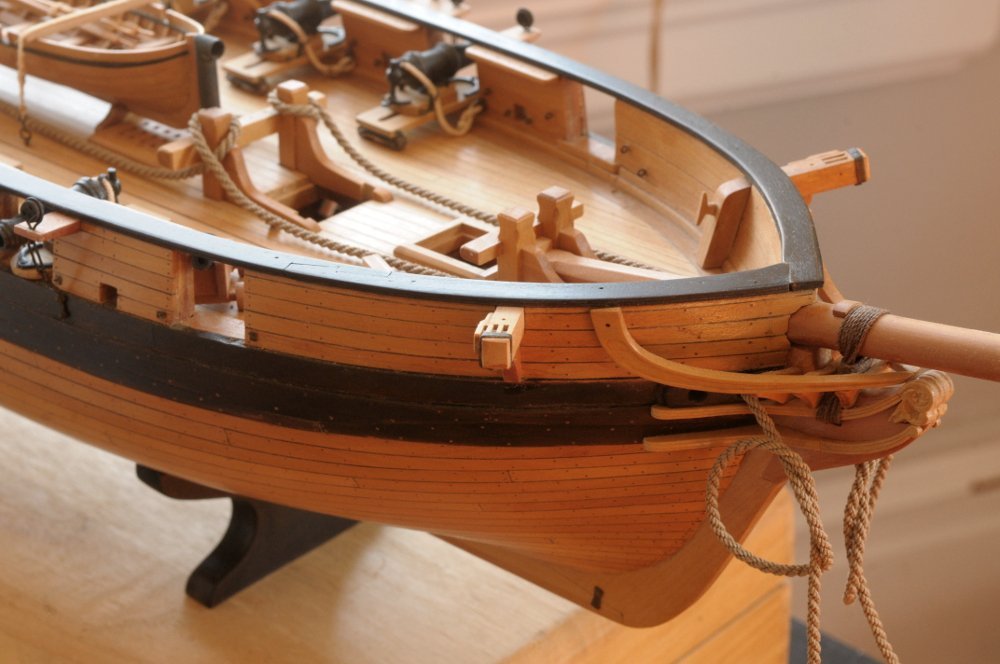
Hello 2024! Time to work some more on Euryalus!
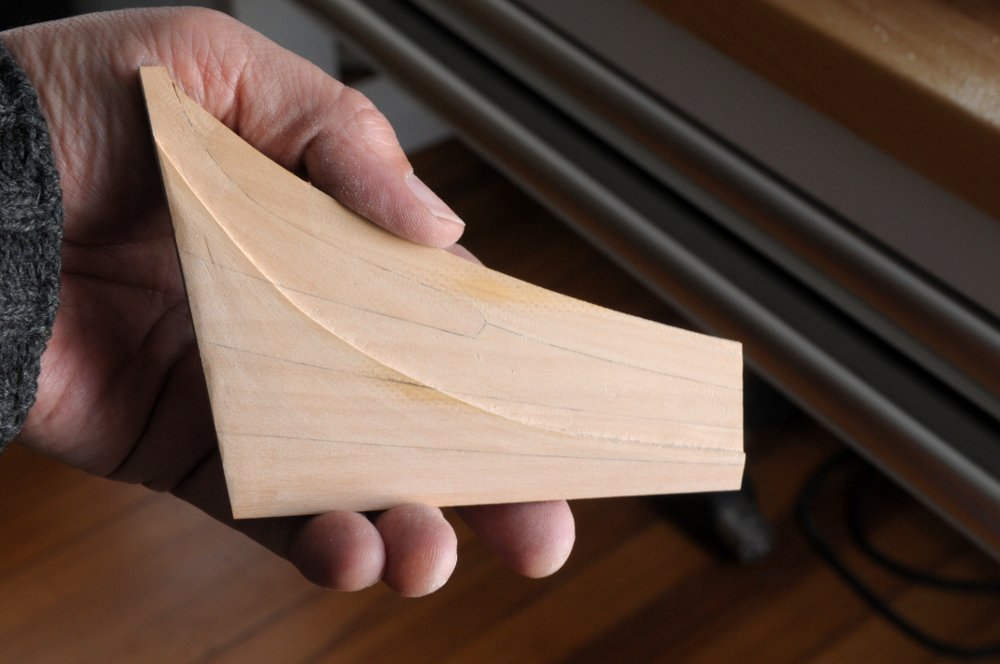
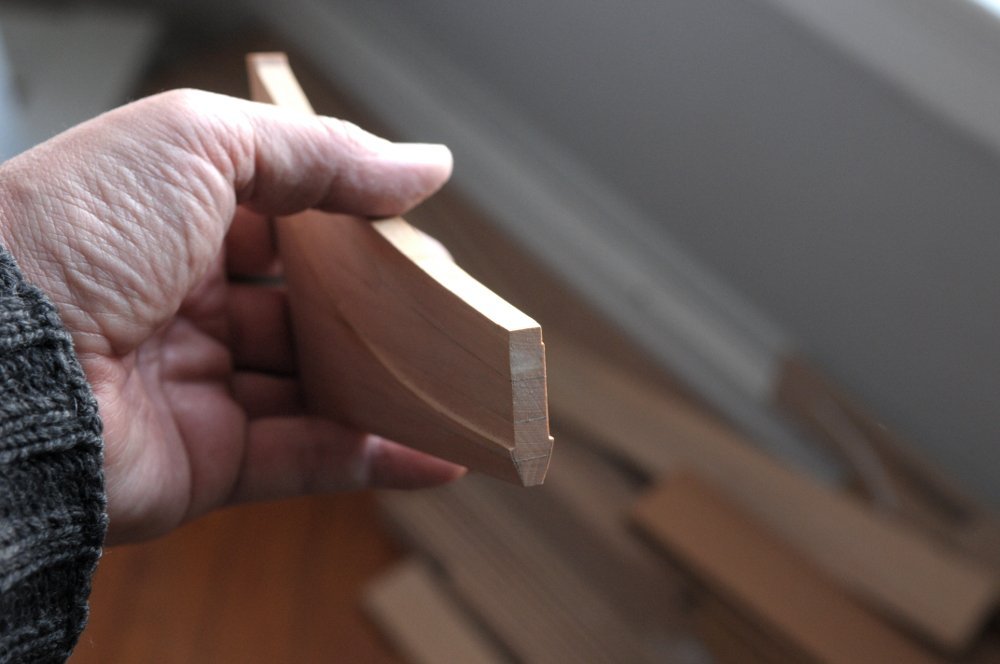
In preparation for assembling the stern framing and aft cant frames, the deadwood assembly piece needs a great deal of shaping, which I had started before my long hiatus, and I now continue--
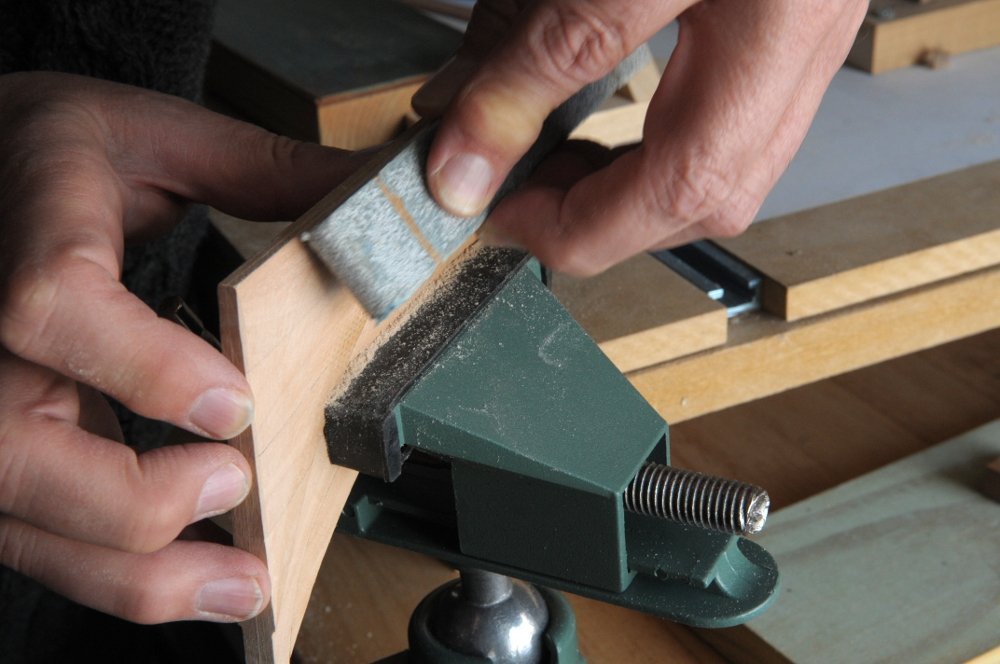
Perhaps I am 75% done. The goal is to get close to the correct concavity in the area between the bearding line and the keel and sternpost, so that a minimum of additional fairing need be done when the frames are on--
 .
.
All for now,
Ron
-
Thanks Håkan.
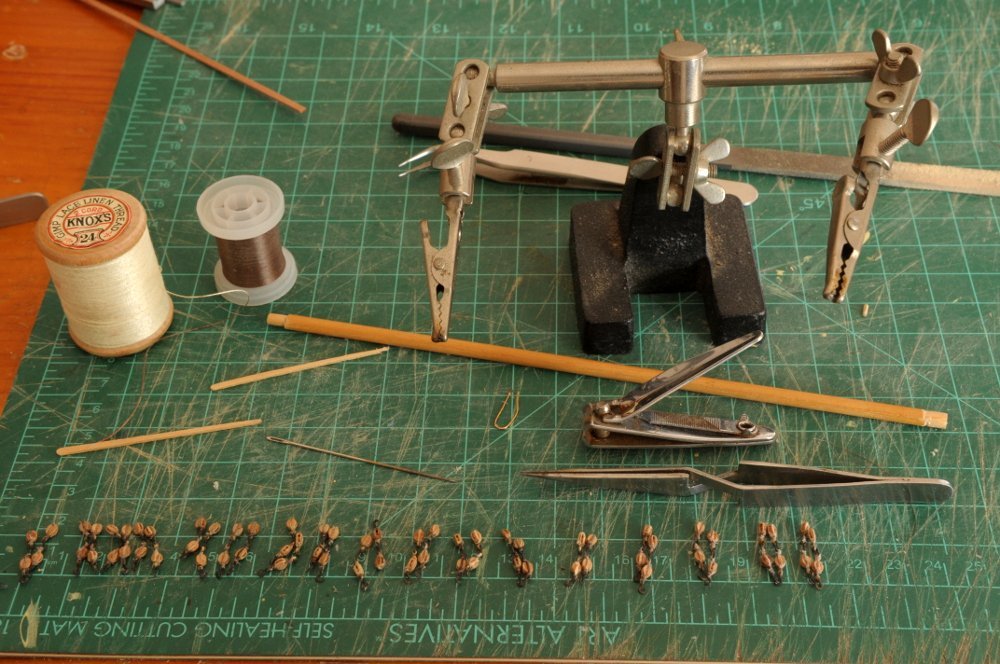
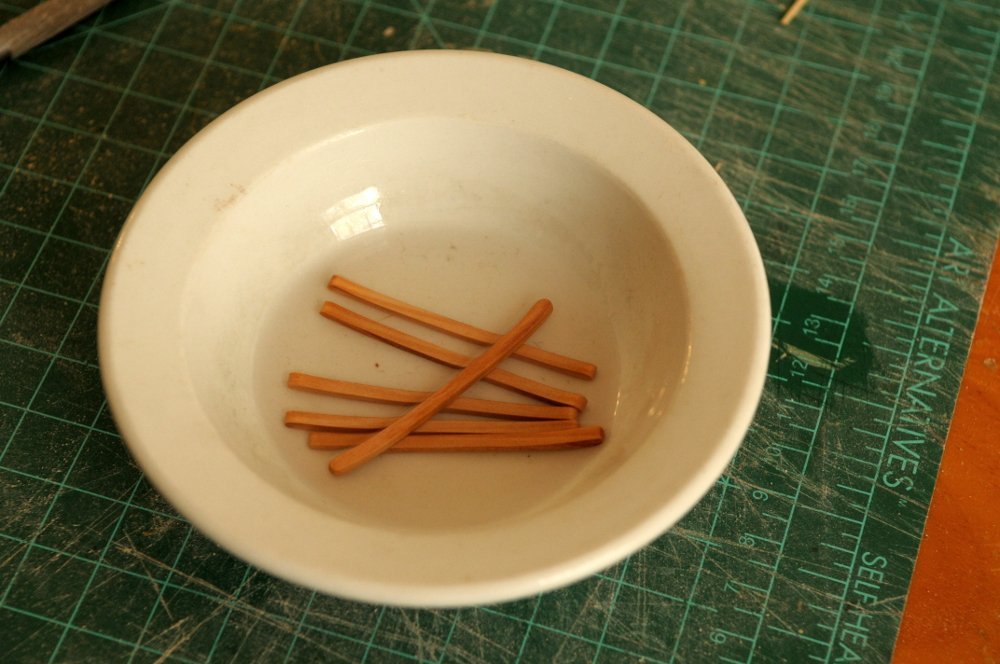
Only a few photos today, but I'm happy to report that I worked up the motivation to finish the carronade tackle blocks. This shows the 13 sets that were done, and last four sets (16 blocks) I still needed to do--
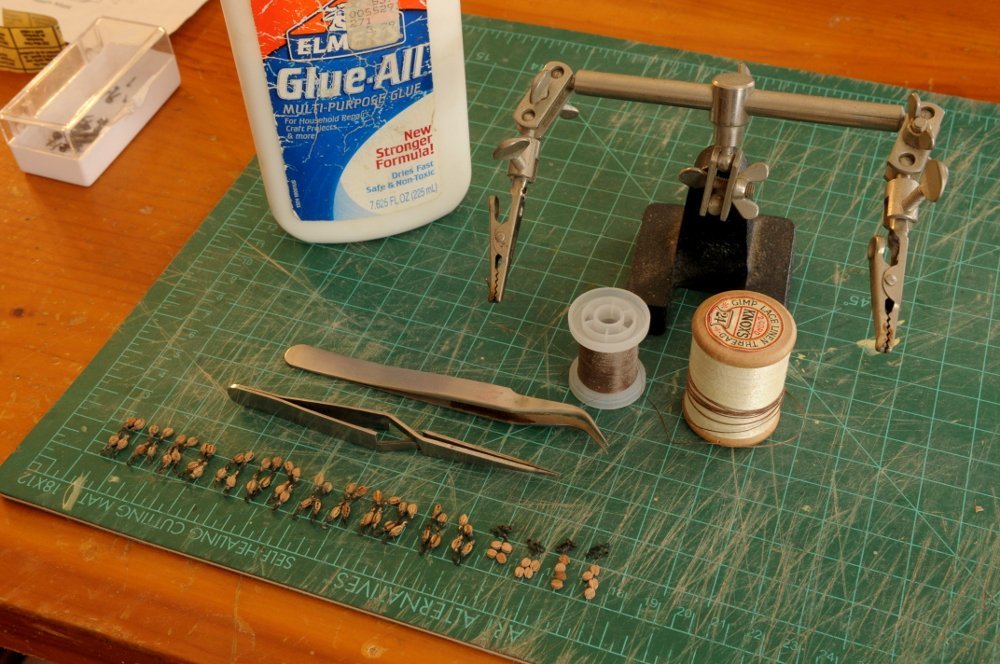
The total here is 17 sets, because one is on the already rigged carronade that has been on the ship for years. And here they are done--
That was probably the least pleasant task I have had to do on the build so far (literally taking me years of off and on work), and I'm glad they are finished!
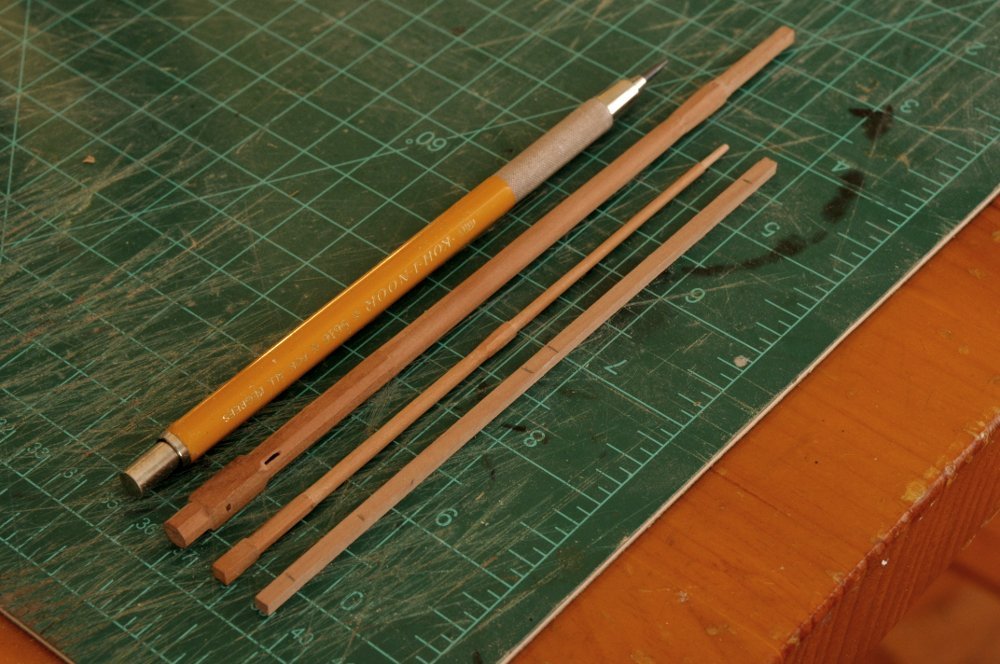
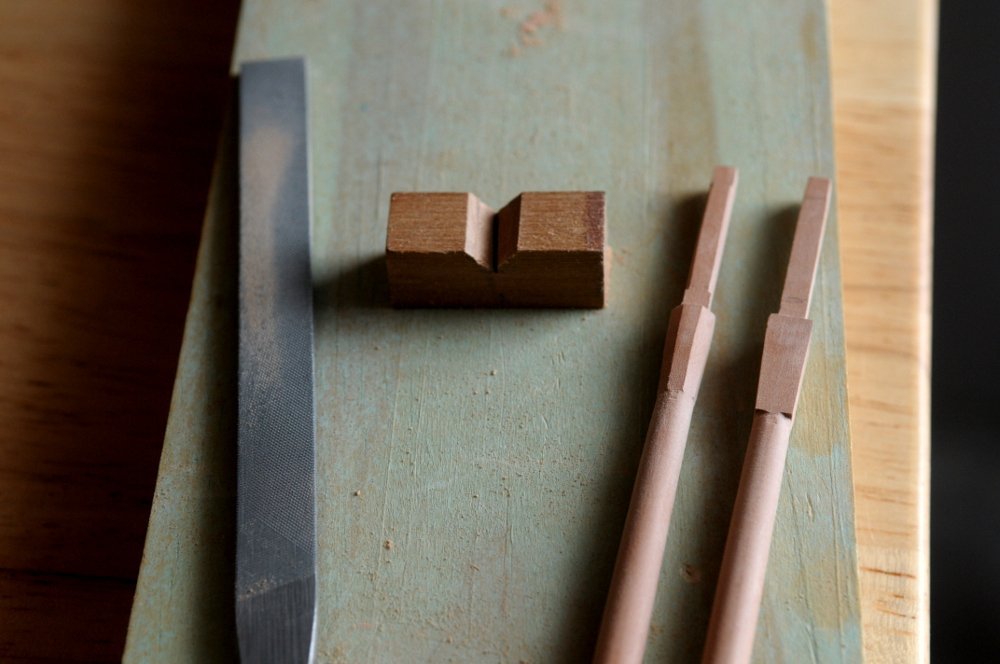
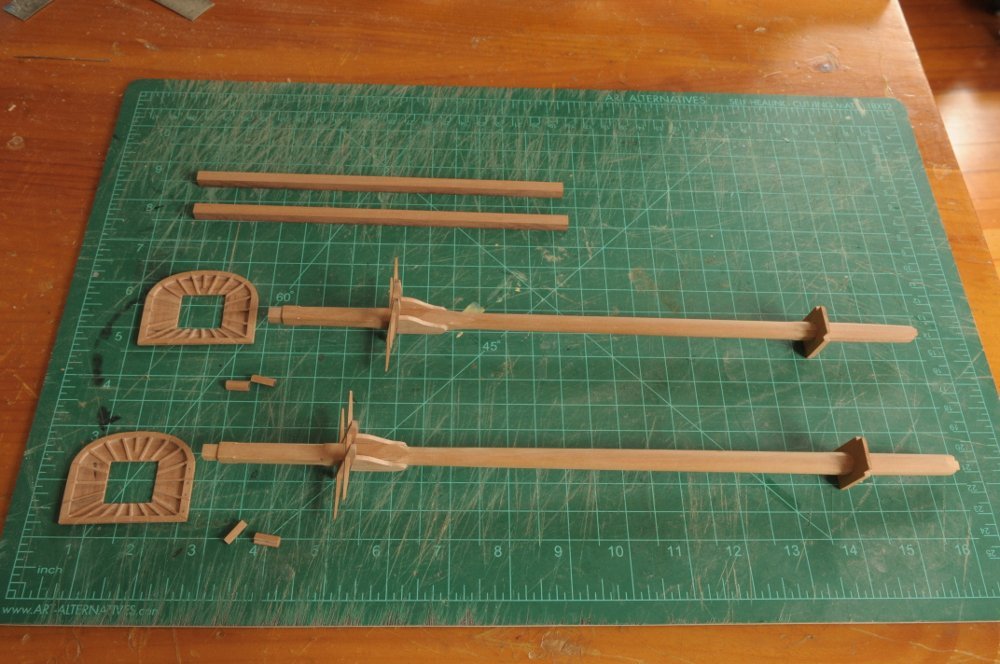
And here is one of the topgallant masts roughed out, next to a topmast, and the other topgallant blank--
Next is rigging the carronades, and continuing work on the masts.
All for now,
Ron
-
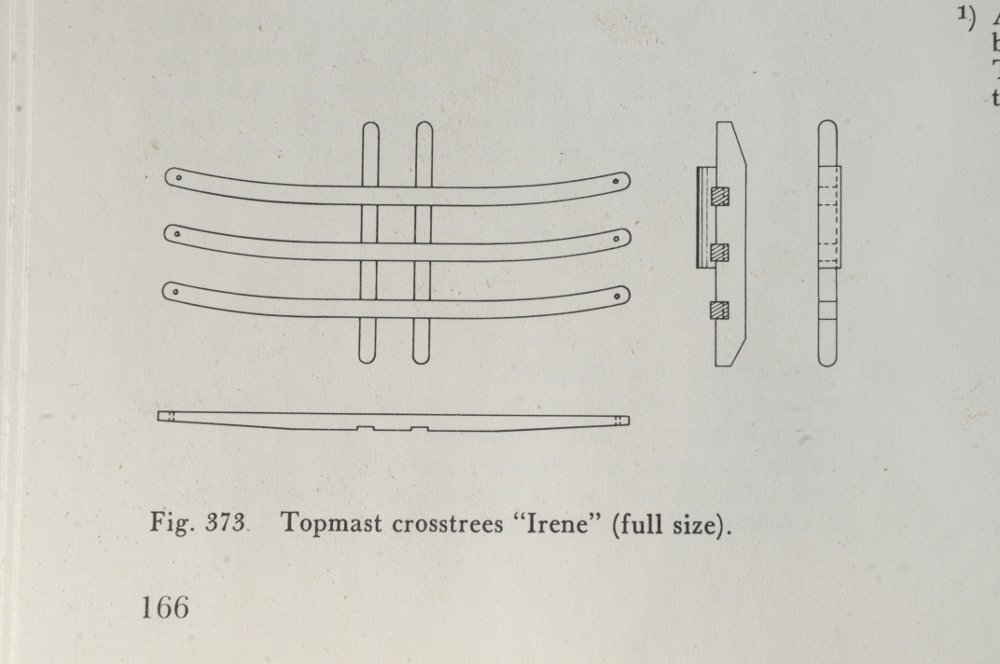
Thanks Håkan. I can only guess that when they were assembling that page of the book, the true scale illustration just looked too small on the page, so they enlarged it and didn't change the caption. Who knows?! Hopefully I will remember to always double check the illustrations.
I finished the trestletrees, and test fit the pieces, checking to make sure they would also fit on the topmast--
Then I made a rudimentary jig to hold the trestle pieces, for gluing the crosstrees. I rarely make these kind of jigs, because I am too impatient and lazy, but it was a good idea to do this, and it only took a few minutes--
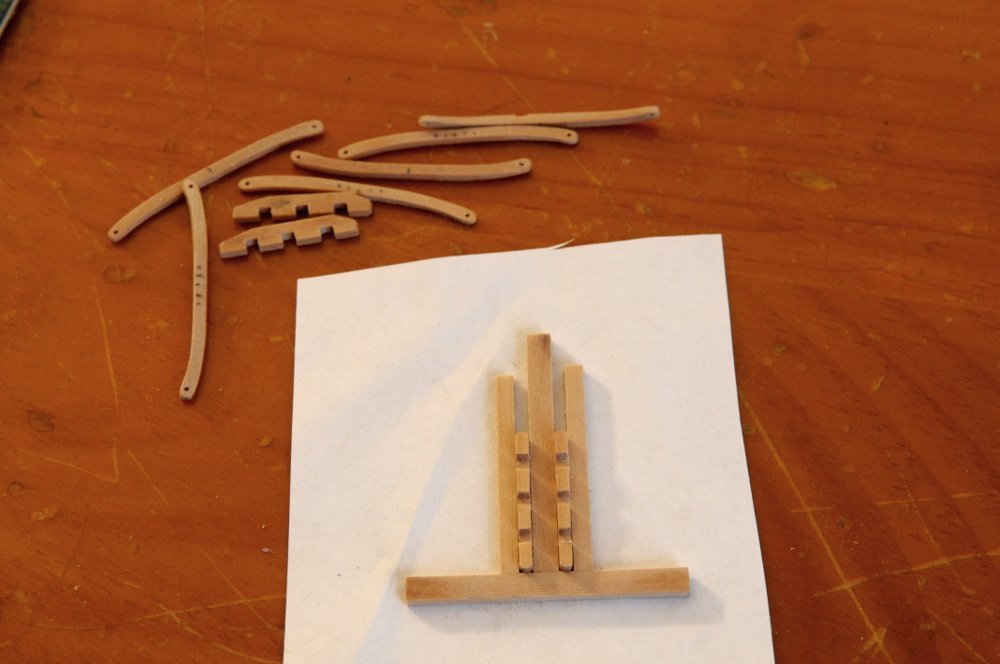
I ended up making deeper notches in the trestletrees, and none in the crosstrees, though you can see I had marked some, and even started to cut a couple notches in one of the crosstrees, before deciding it would be wiser to just notch the trestletrees even though not historically accurate. I test fit the crosstrees many time, adjusting the notches in the trestle trees for depth, and to make sure the crosstrees were parallel to each other, and perpendicular to the trestletrees. I then glued the crosstrees in--

The photo makes that first set of notches look very bad. It's not so noticeable in person, but I'll fill the gaps and all will be stained black when done--
There is more work to do now on the topmast: filing a tenon on the end, for the cap, and angling the top of the octagonal haunch so the trestletrees sit parallel to the water line--
Now it's on to the topgallant masts.
Ron
- scrubbyj427, usedtosail, bhermann and 6 others
-
9
-
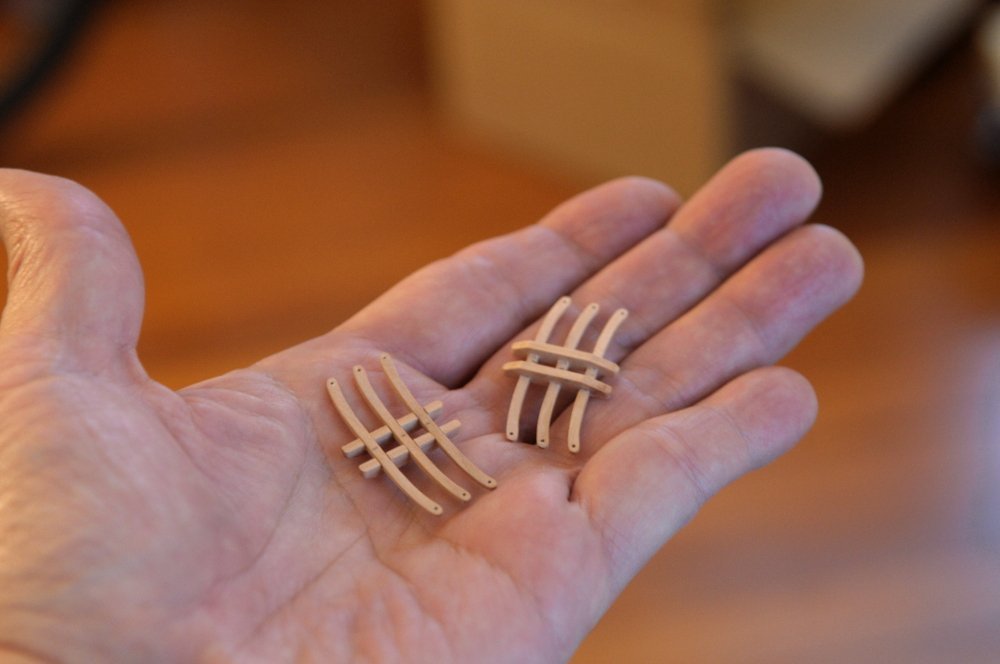
Yes, Håkan, more practice!!
I had cut out the trestle trees, and glued the crosstrees down to a piece of paper, to "hold' them while I filed the tapered undersides. But a nagging feeling that they were too big wouldn't go away. After holding the topmast close to them, I was pretty sure of it. I looked at some photos of other models and then got out Lee's "Masting and Rigging", and calculated the length of the crosstrees according to that source. Sure enough, it appeared that I had made them about 50% too long. While I love Petrejus' book, this is the second time I've gotten burned using his illustrations without checking the scale accuracy. Although the caption for the crosstree illustration read "full size" (meaning full scale size), it was actually quite a bit larger.
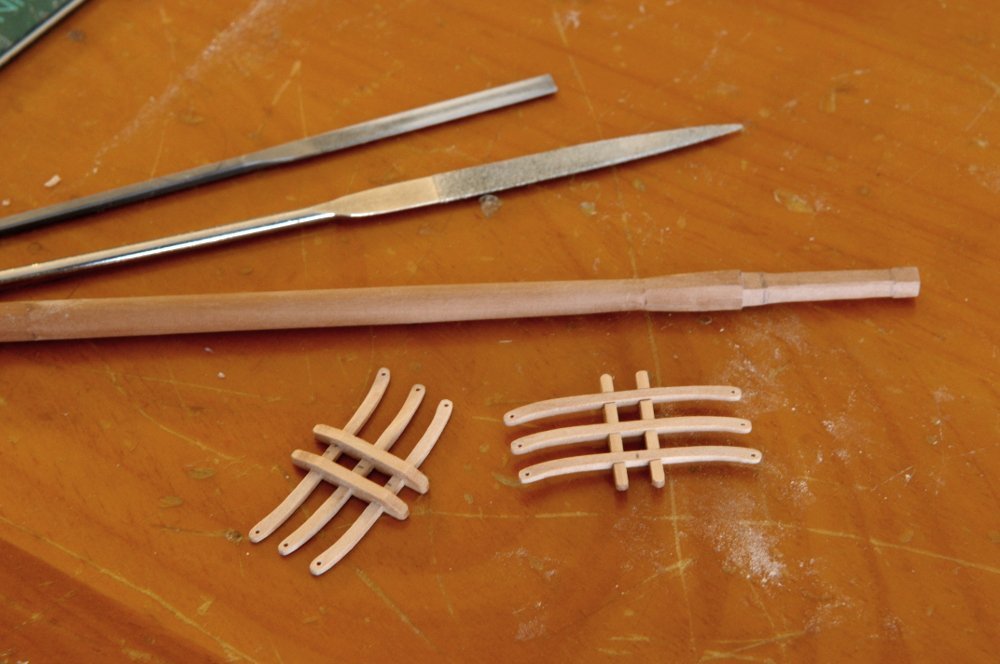
Here are the new crosstrees, roughly shaped, compared to the previous ones--

I glued them down and tapered the undersides--
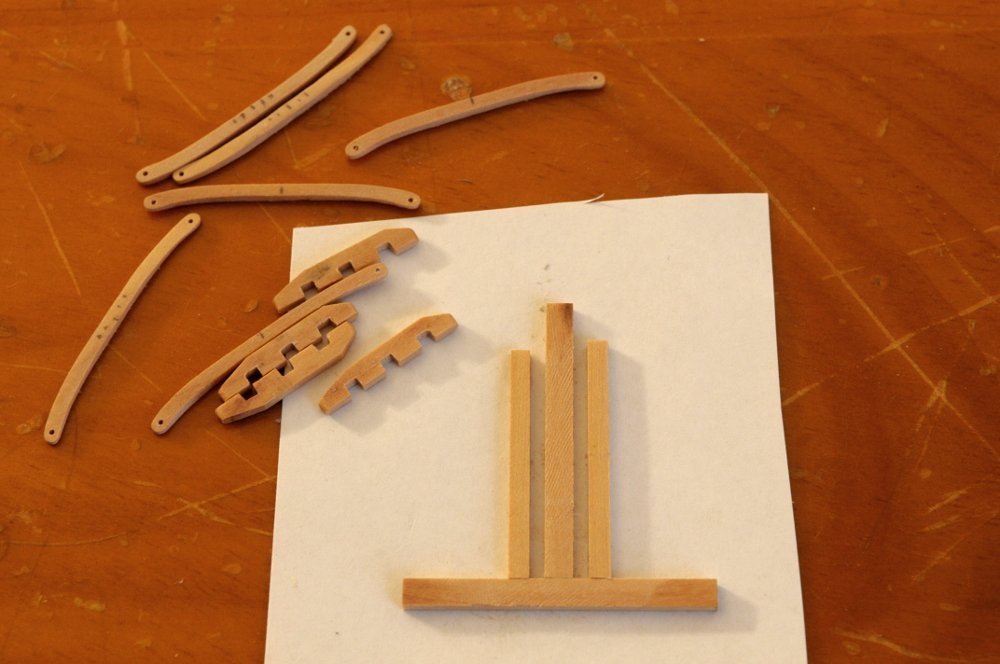
I cut out new trestle trees, and here they are along with the crosstrees, and a wrong sized trestle tree and crosstree--
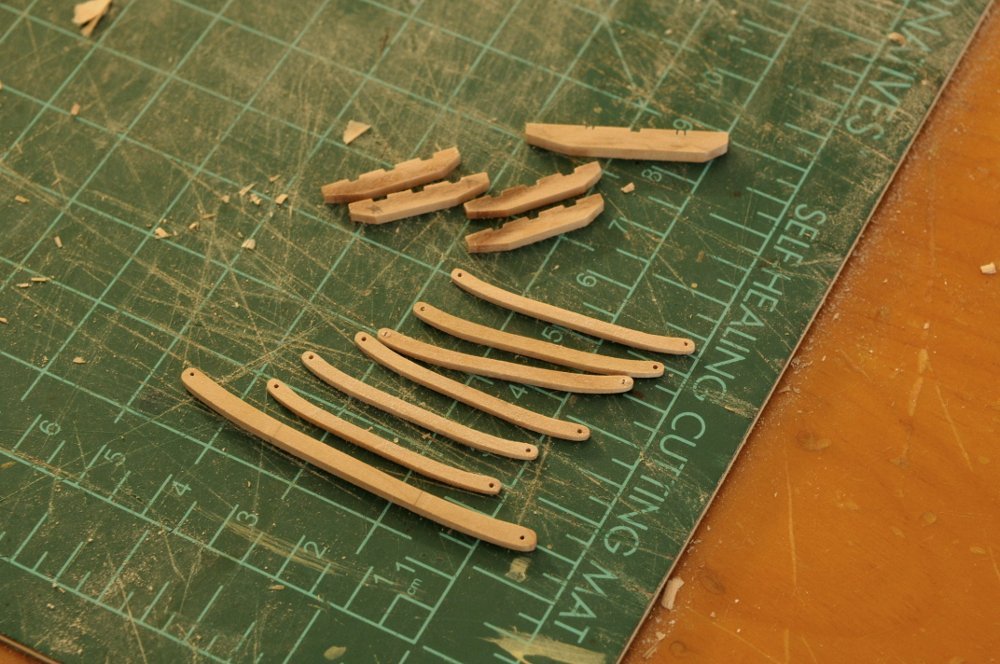
The crosstrees need some more work, generally narrowing the depth and breadth a bit, and cutting notches for the trestle trees. The trestle trees need deeper notches, and some further shaping, then I'll try assembling them and see how they look on the topmasts.
Ron
- schooner, Mike Y, Thukydides and 6 others
-
9
-
Thanks bigcreekdad and Håkan.
I have used that technique often, anytime I need a number of identical parts that have some kind of non-square shape, such as cleats, or even the anchor stock planking of the wales. They are glued together with a bare minimum dab of white (PVA) glue, as the iso alcohol does take time to do soften the glue. In fact, hot water works better for that. A few posts back, JJ (scrubbyj427) suggested that denatured alcohol works much faster than iso, and I will be trying that soon, since I need to redo the crosstrees!
Ron
-
Happy New Year! Thanks CiscoH and jereramy, and those liking and looking in.
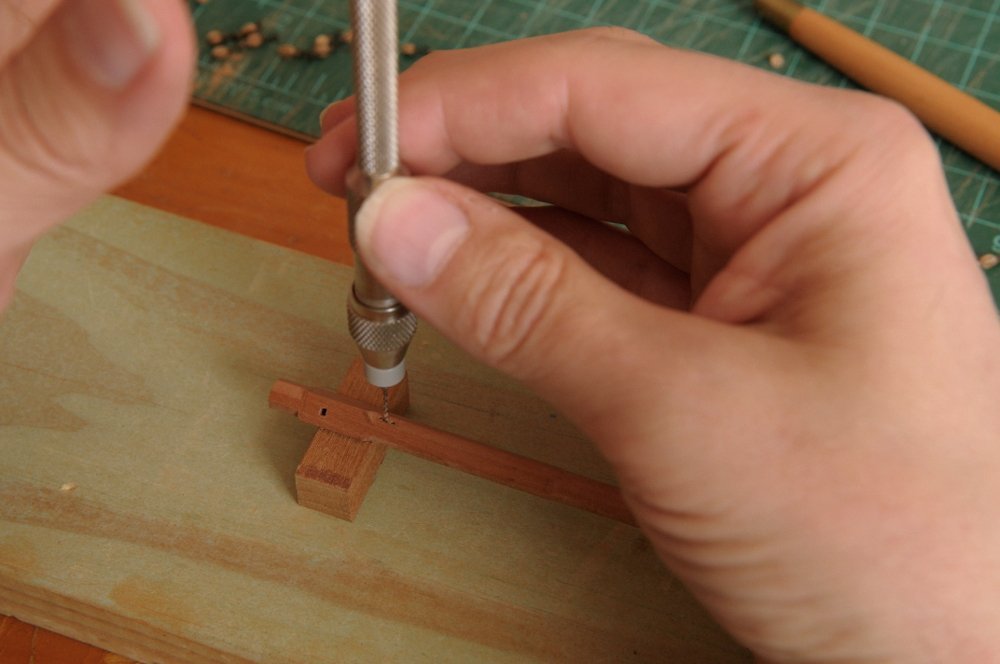
To replace my toothpick topmast fids, I filed a pair from brass--
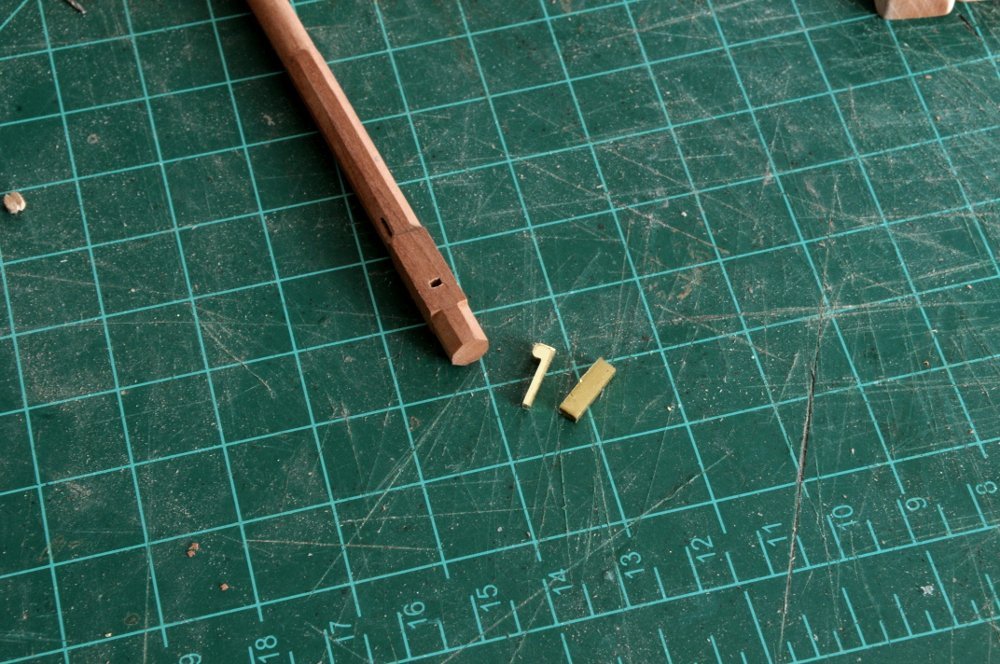
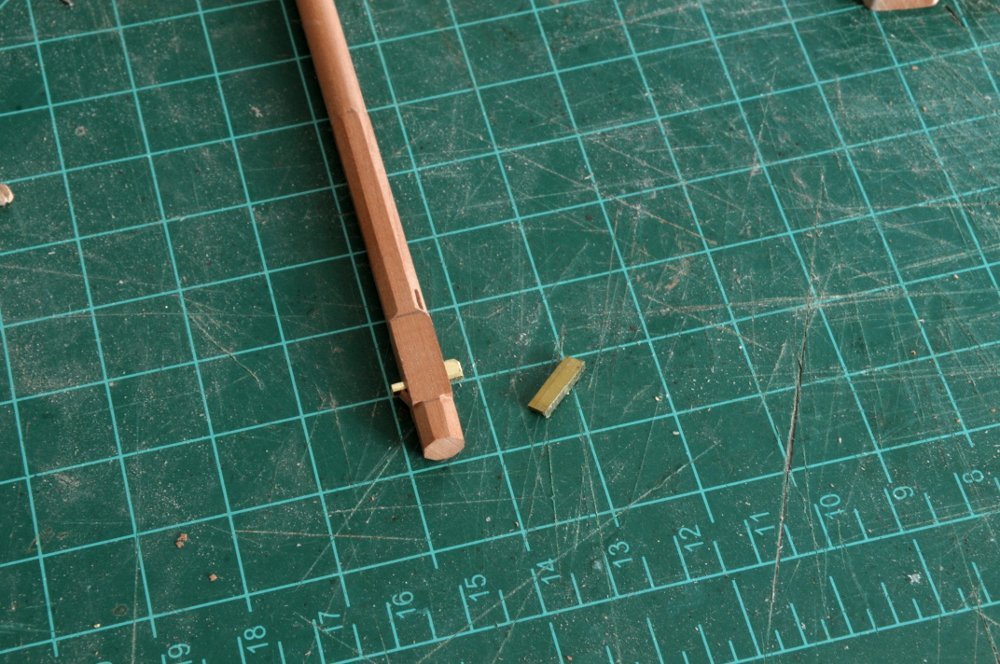
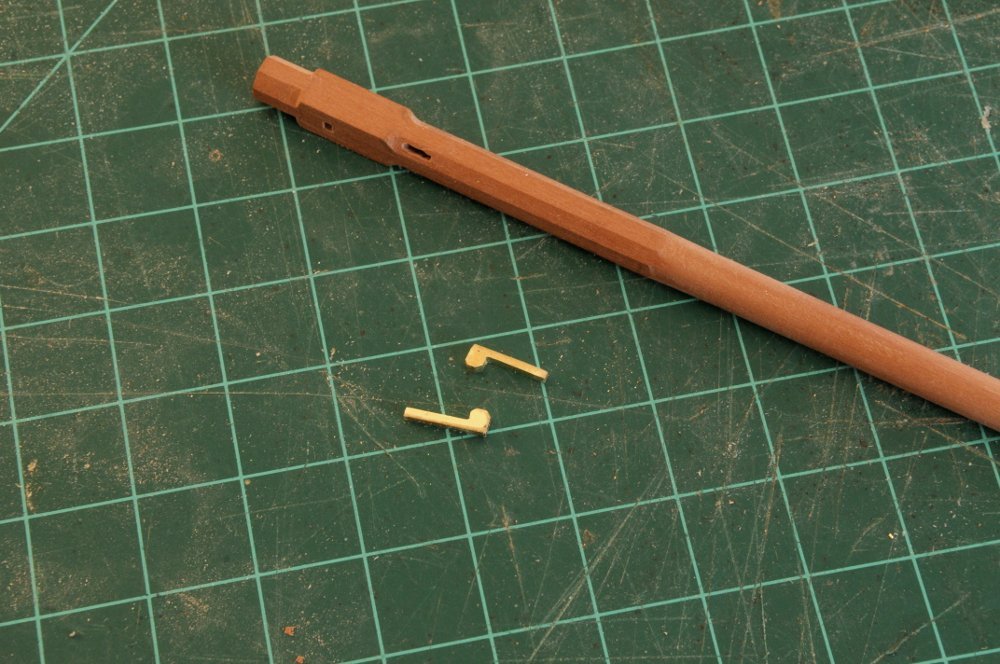
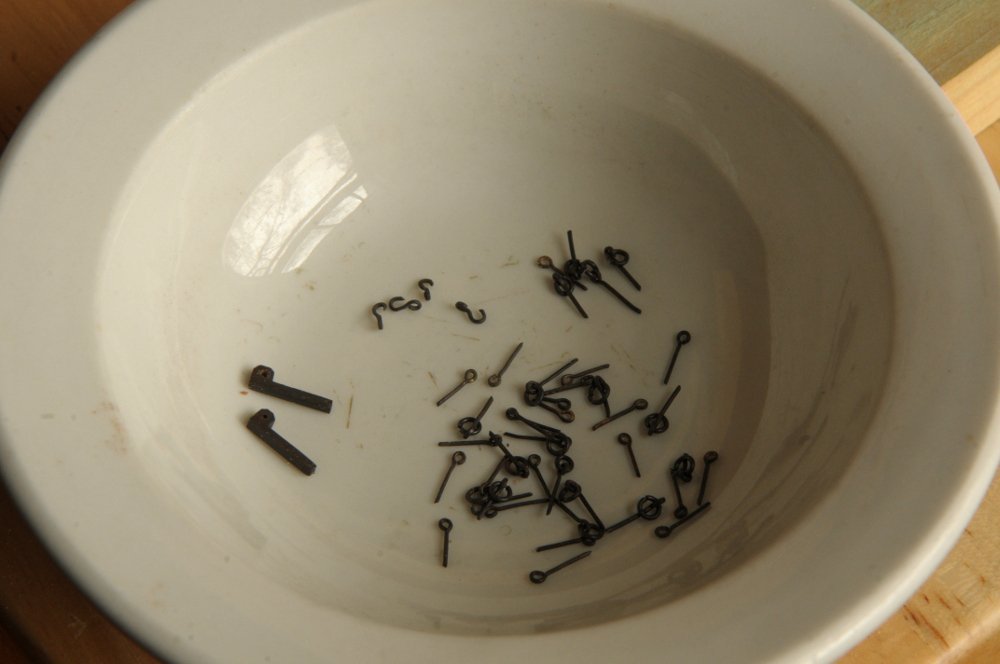
Next these were blackened, along with some eyebolts, ringbolts, and four hooks that I need to finish the carronade tackle blocks--
Next task is the topmast crosstrees, following the illustration in Petrejus' book "Irene"--
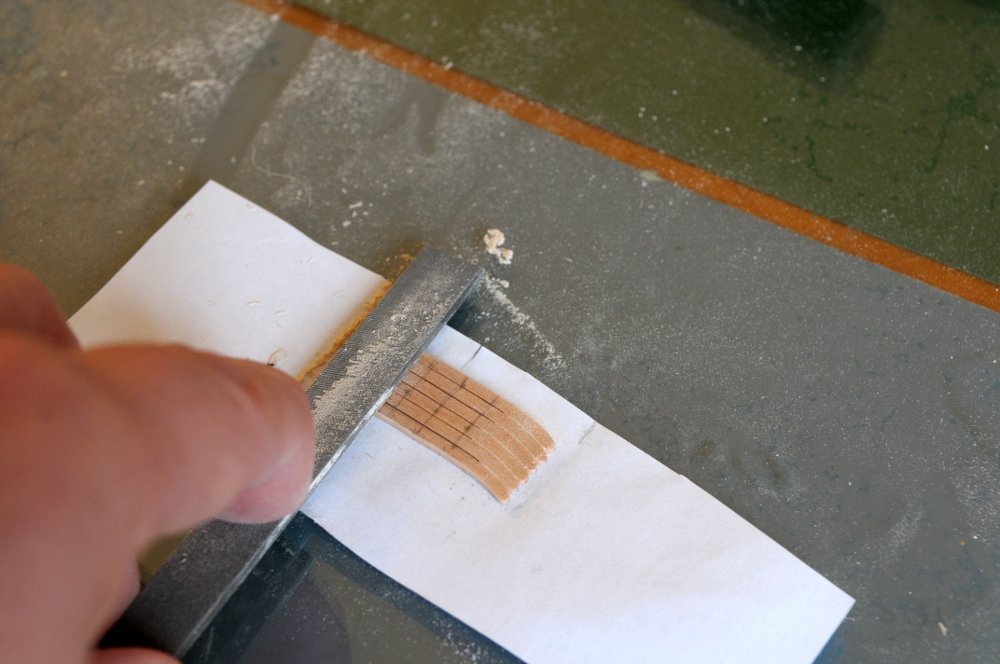
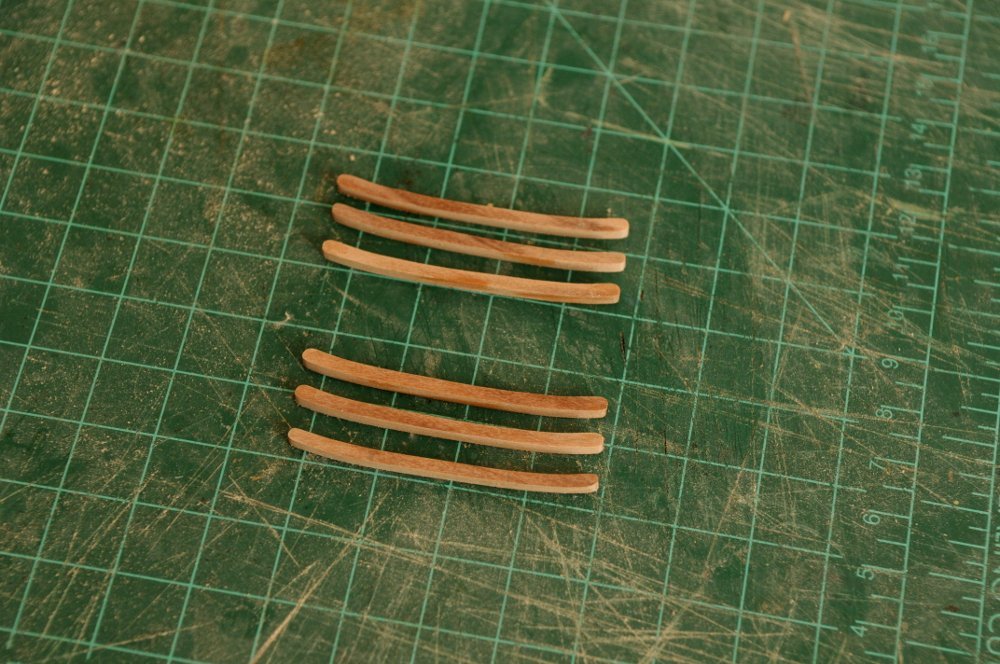
I glued six blanks together so I could do the rough shaping for all of them at once--

When I was satisfied that the rough shape was close, the block was given an isopropyl alcohol soak to separate the pieces--
I notice some irregularities, mostly the right side end is a little "bulbous", and they look just a bit chunky to me, but there is still a lot of work to do on these: drilling holes in the ends, notching for the trestle pieces, tapering the underside, and refining the overall thickness and curves--
All for now,
Ron
-
Thanks Hamilton and all who hit the like button.
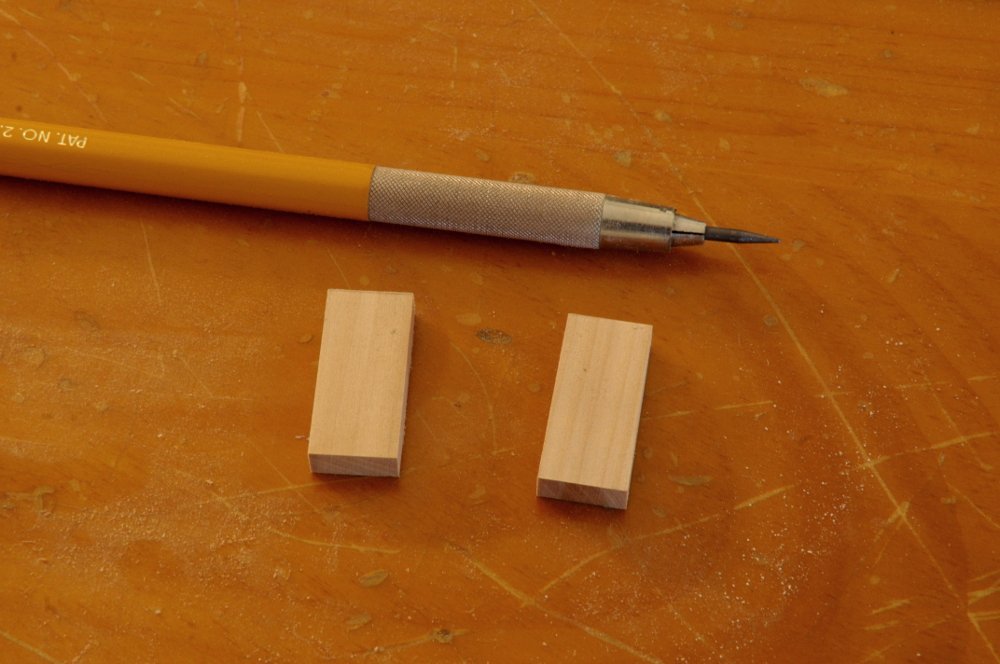
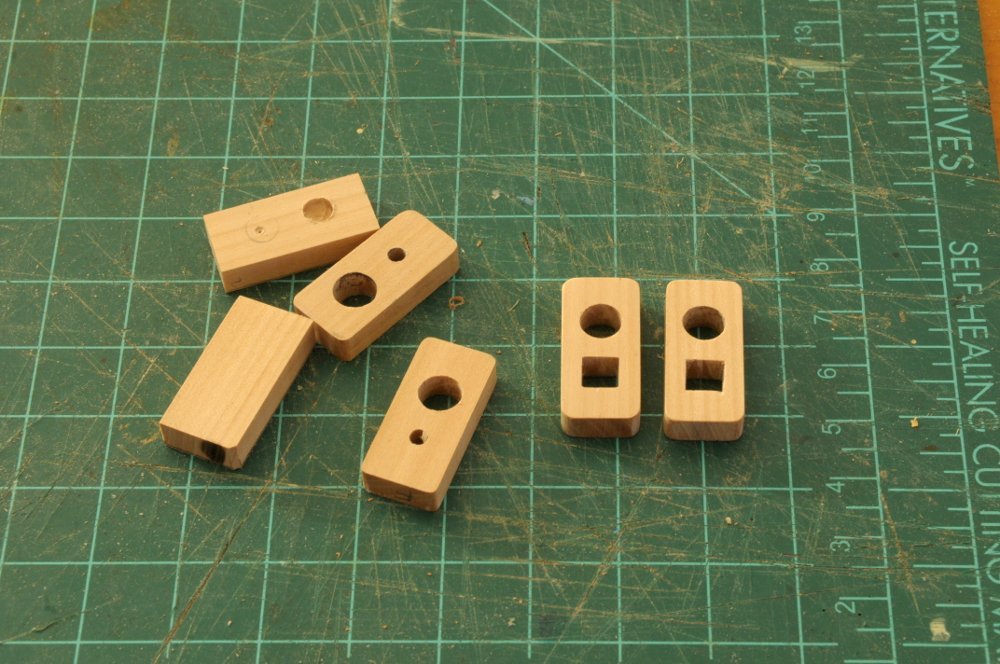
Two blanks for the mast caps--
A few tries later, I got two good ones. The problems were various--inaccurate spacing of the holes, holes being filed out too big, or out of round--
Here are the masts and topmasts temporarily on the ship--
And disassembled again. I have temporary fids made from a toothpick, I'll make a couple from brass. To the right are two blanks for the topgallant masts--

All for now.
Ron
- Roger Pellett, bhermann, tlevine and 10 others
-
13
-
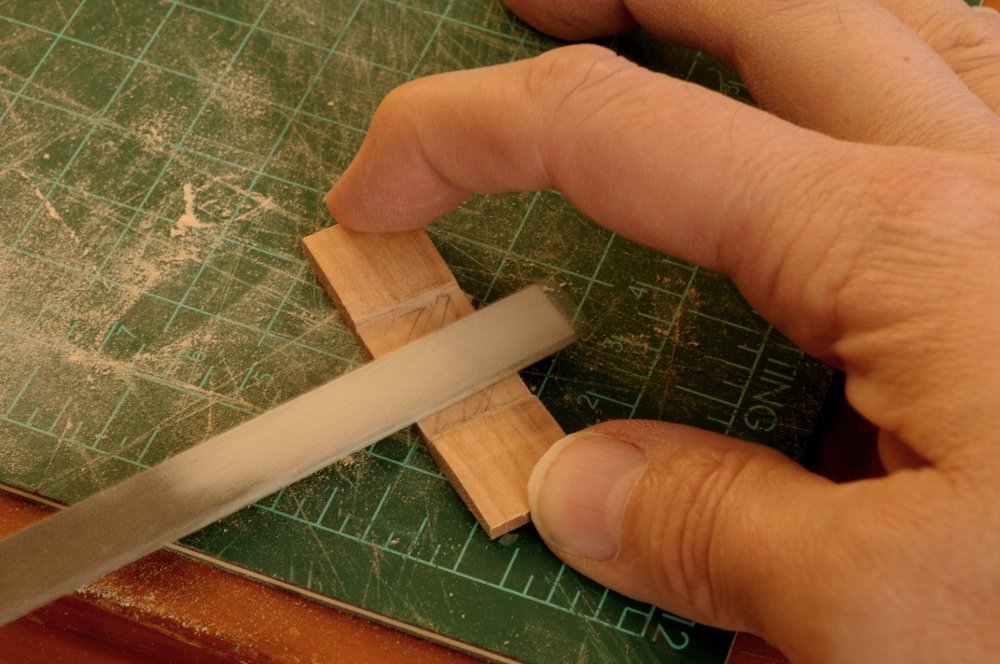
Thanks JJ and Dowmer. The wood is Swiss Pear.
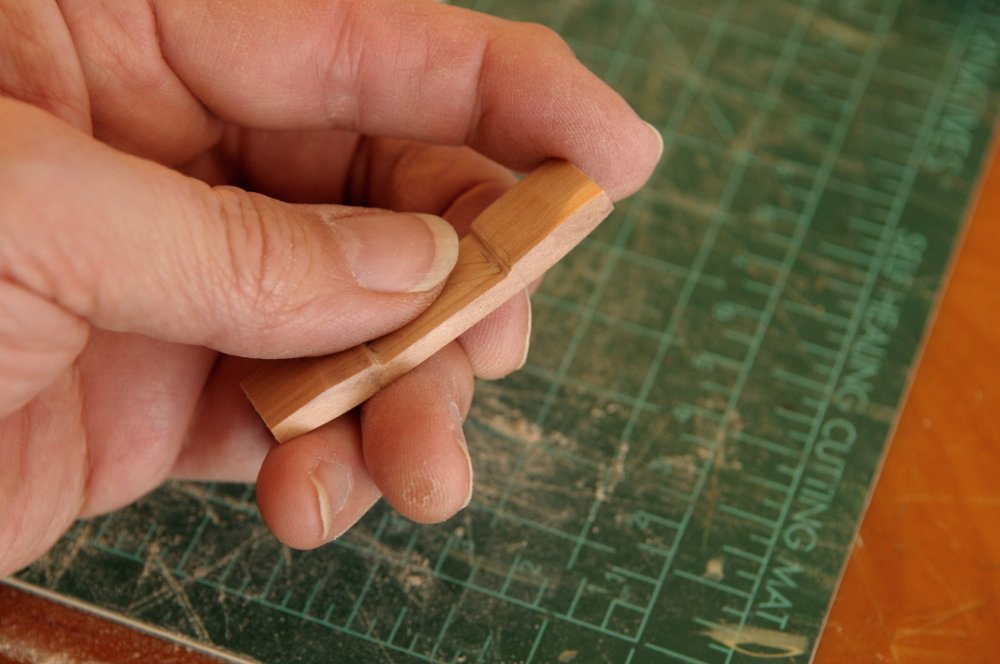
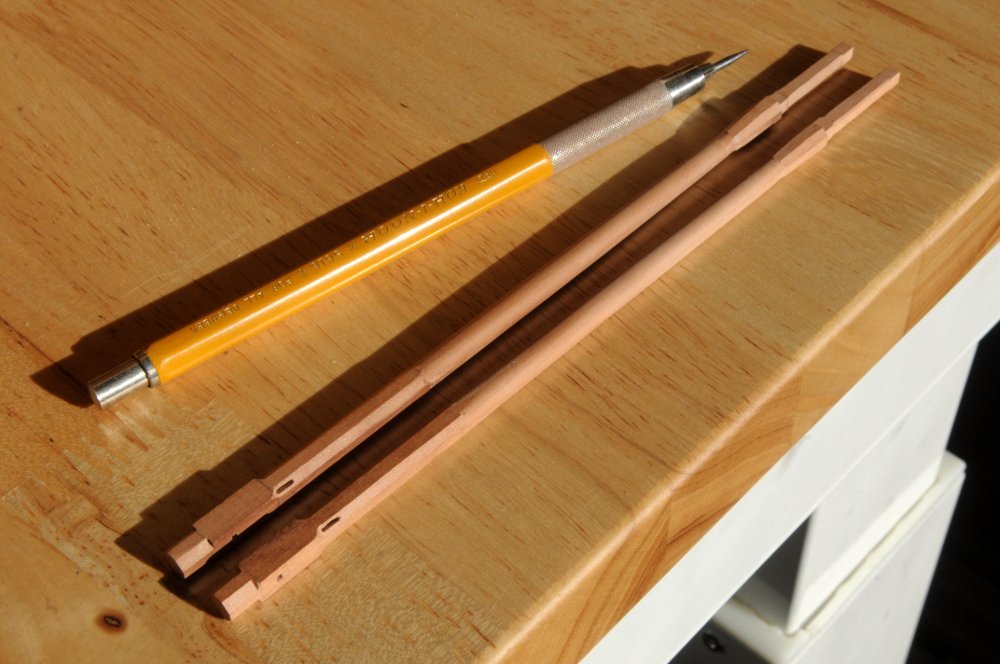
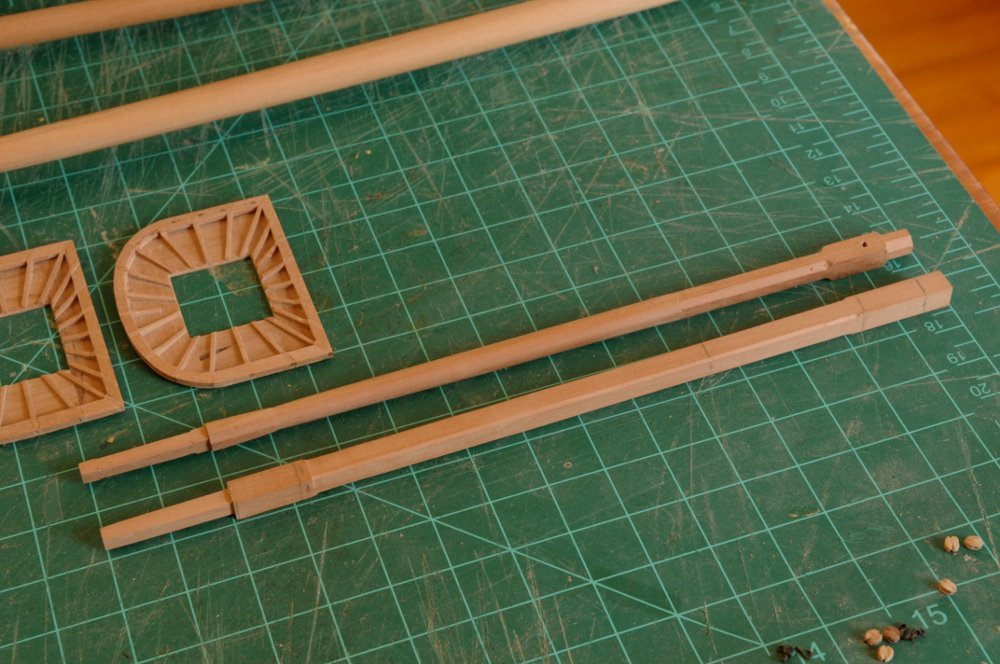
Filing the tricky tapered octagon at the top of the topmasts-
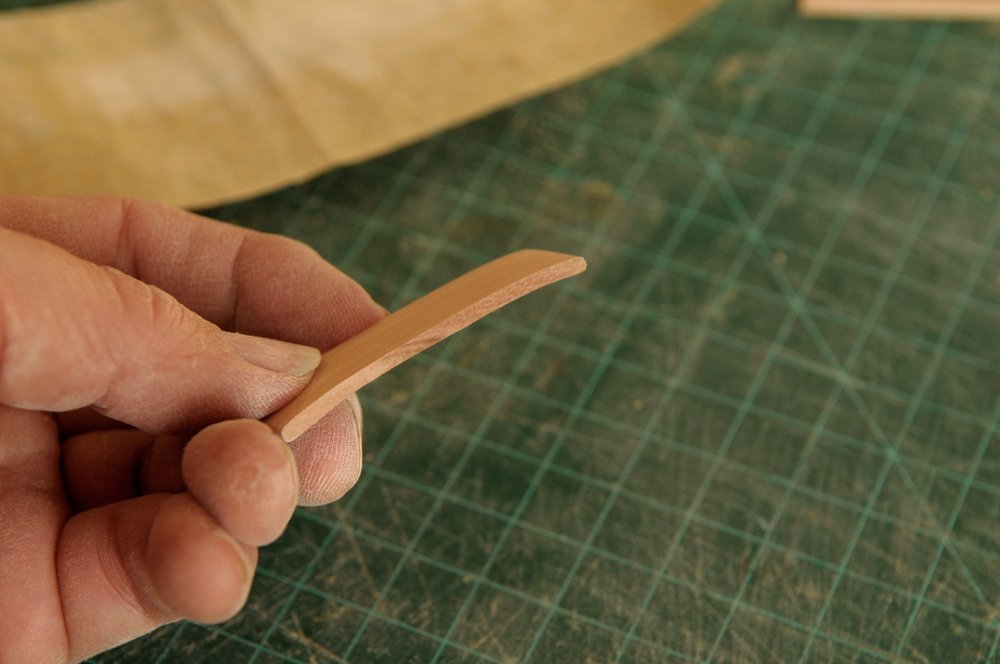
All that's left at this point is making the hole for a sheave near the base--
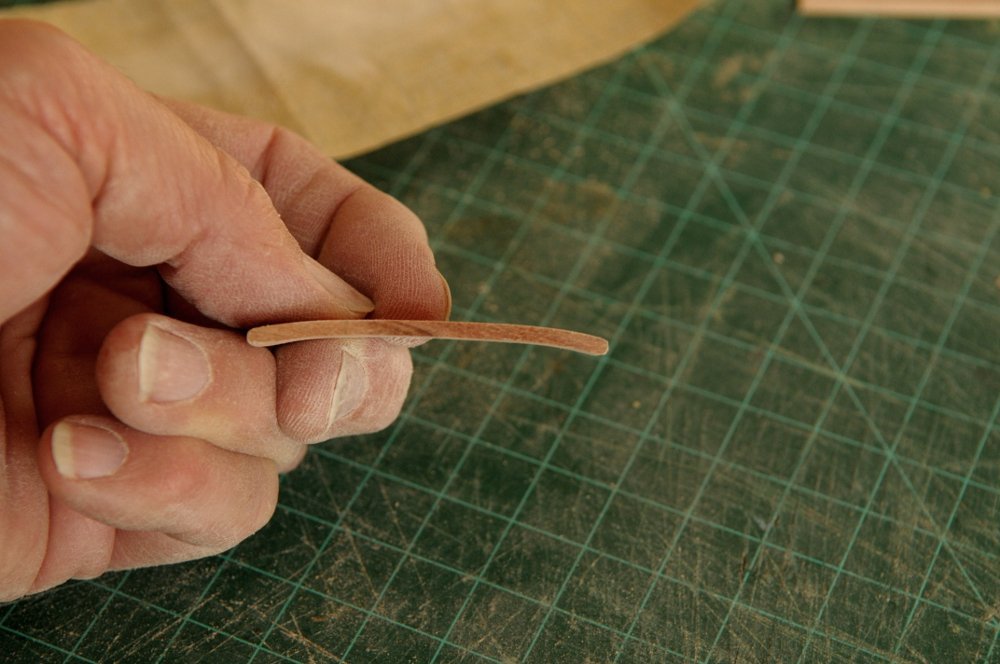
And, pretty much done on the two topmasts--
Next will be the mast caps, and then I'll be able to set the masts, tops, and topmasts up (temporarily) on the model!
Ron
-
-
Here we are with 2023 almost done, and I have finally felt like working on Oneida again.
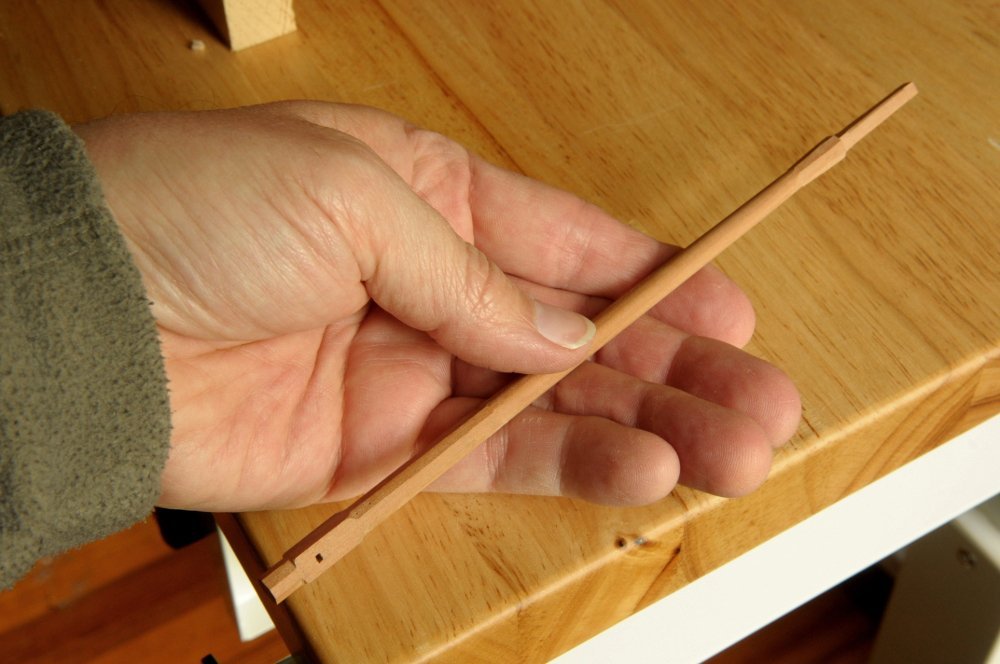
Continuing with the main topmast (which is identical to the fore topmast), I roughly marked the various transition locations, and began roughing out the shape with a file--
With the top reduced to the correct dimensions (minus some chamfering which will come at the end) I began filing the taper into the main part of the topmast--
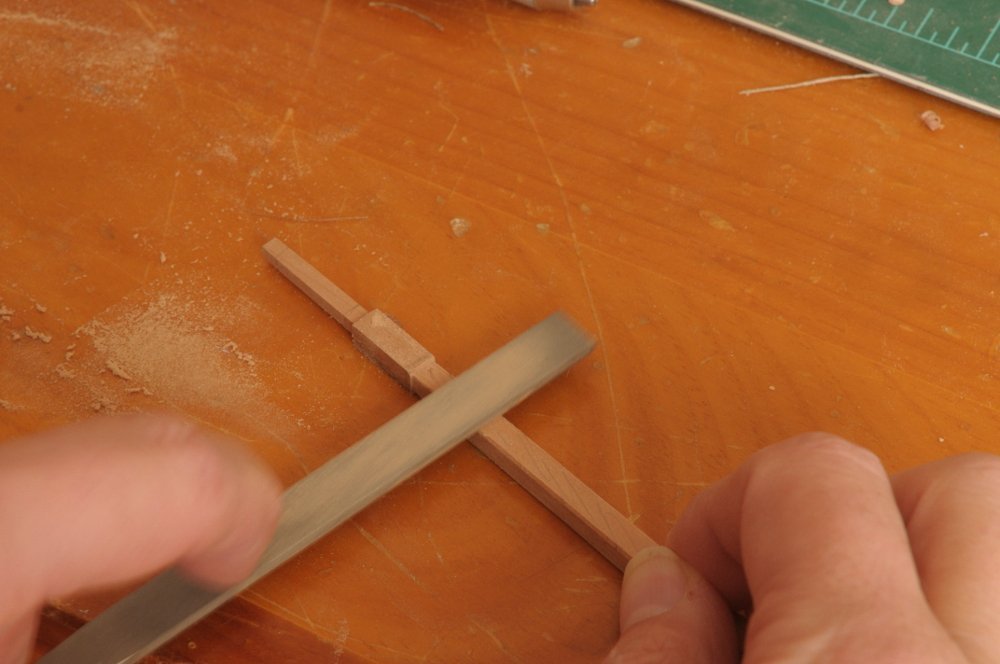
Once the taper along the topmast was correct, I then filed the corners, turning this section into an octagon--
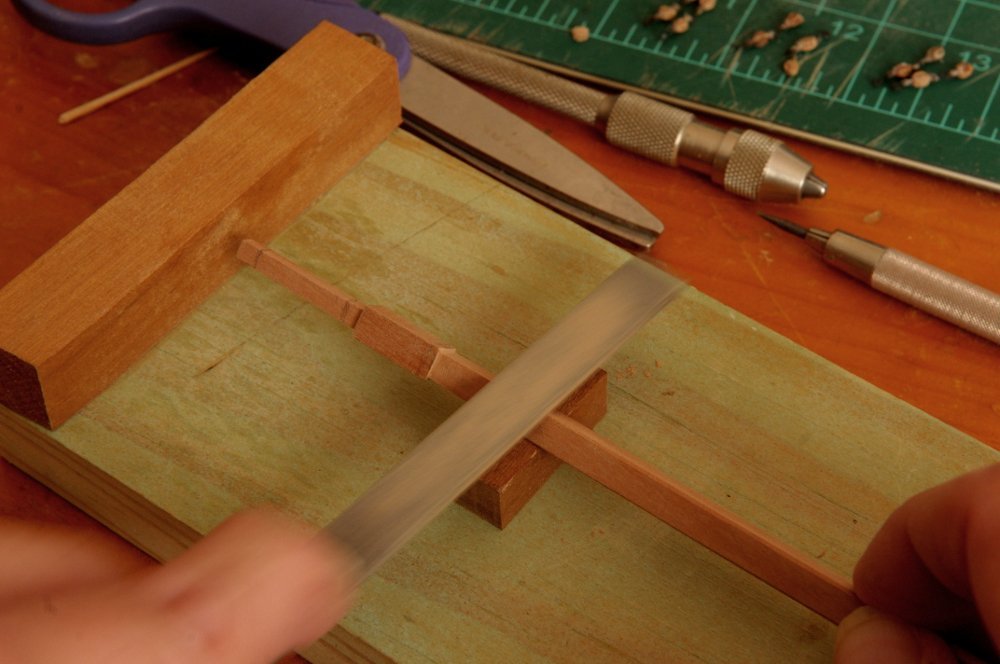
At this point I filed the eight edges of the octagon on the center section of the topmast, masked off the upper and lower areas for protection, and began sanding that central part round--
Hopefully more updates soon!
Ron
-
Back to the masts:
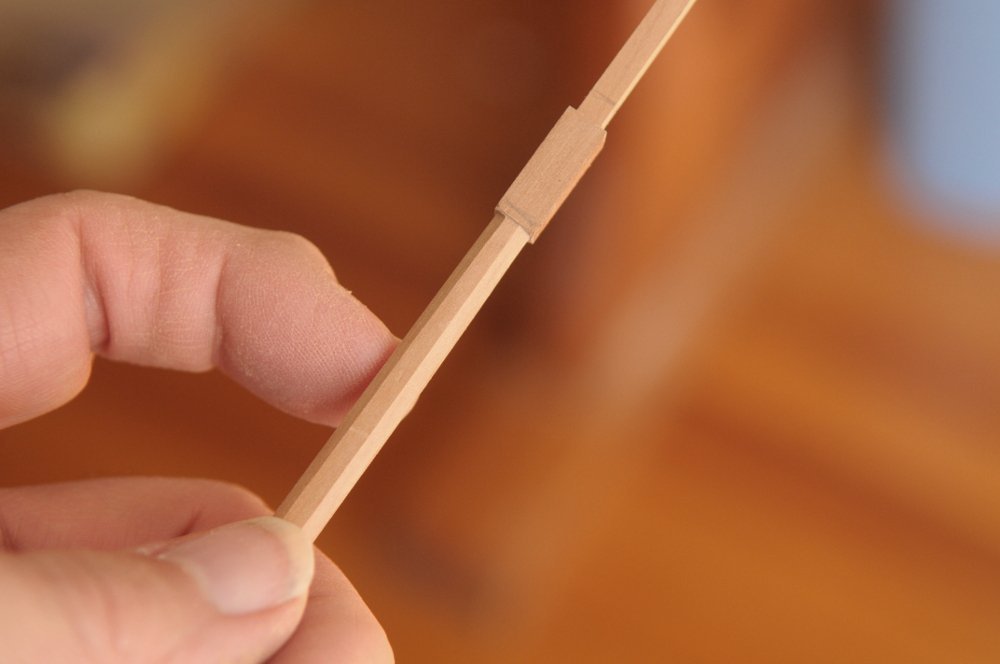
The fore topmast is shaped--
The main topmast will be identical--
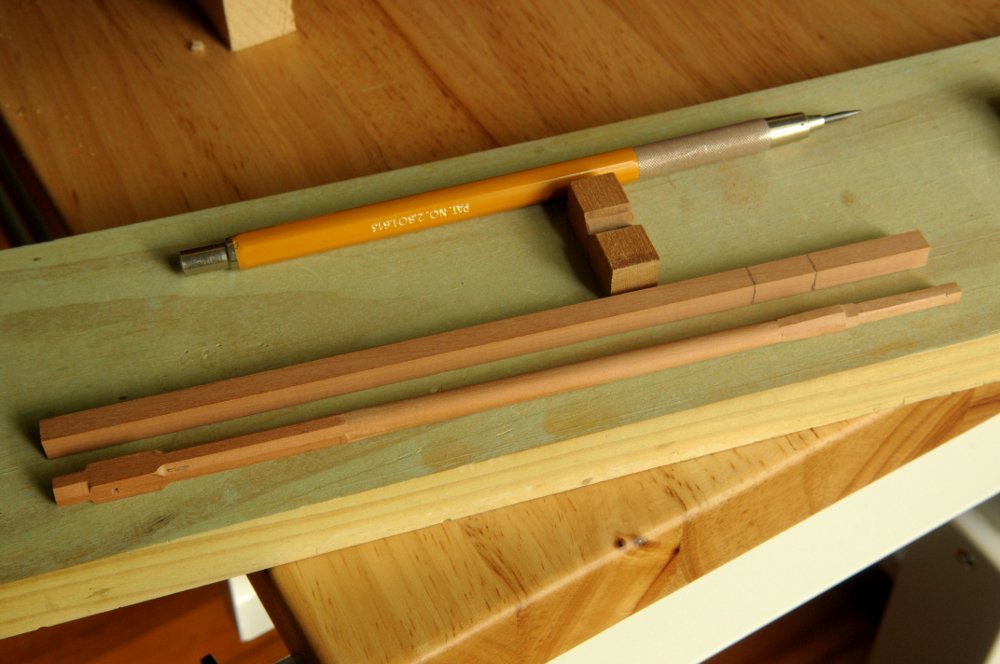
I have made a few more pairs of carronade tackle blocks. I'm more than half done now, and getting a little better/faster at it, but I still don't enjoy it!
Ron
- bhermann, chris watton, BETAQDAVE and 6 others
-
9
-
Thanks, JJ.
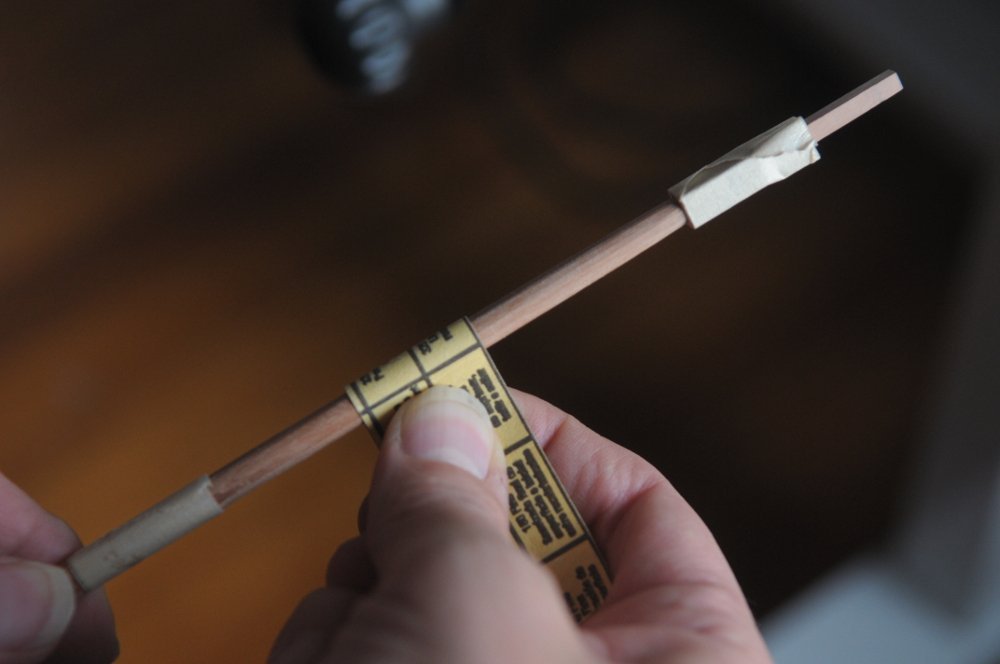
After a couple of tests with different numbers of threads, I was able to make a cable of the right size for Oneida's larger anchors--
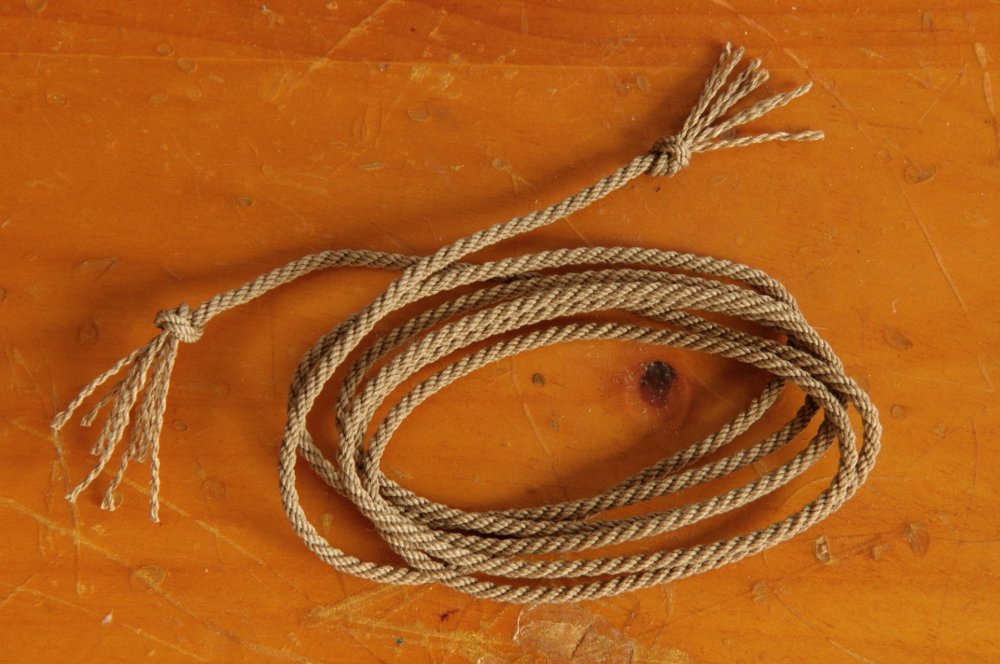
The anchors won't be attached until near the end, but I wanted to get the cable on board before getting heavy into the rigging, and access to the deck becomes more difficult.
Ron
-
-
JJ, the mast work is all Swiss Pear. Parts of it will be stained black. Most of the model is Swiss Pear. The Carronade carriages are Castello Boxwood. The decking is Maple. The few carvings and and the head rails are Castello. I have been applying a Tung Oil finish, which seems to take some of the pink out of the Pear. All the wood looks almost the same color in the photos. In person the difference is more discernable, but it is not pronounced. Over the years the Castello and Maple have oxidized, and with the Tung Oil finish, they're not far off from the Pear.
- mtaylor, scrubbyj427 and tlevine
-
3
-
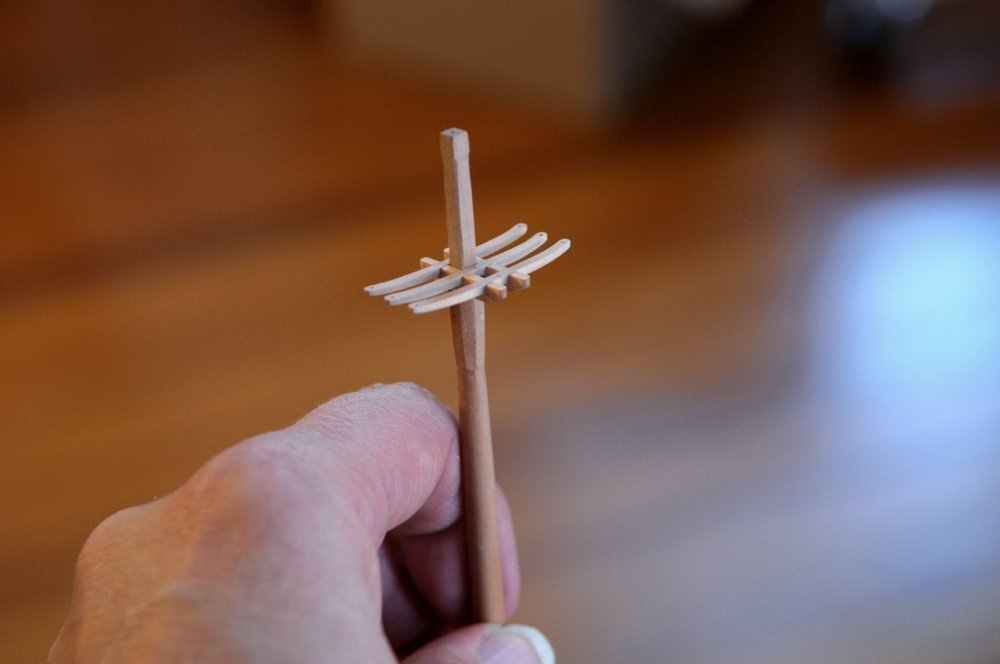
In over 15 years, I may never have made a post with only one photo. Here it is, the current state of the mast work--
The hounds/bibs have been shaped and glued onto the masts. The trestle/cross trees are not glued. Chamfers and tenons have been cut into the mast tops. The small loose pieces are the bolsters which will be glued to the trestle trees, and the two pieces at the top are the topmast blanks.
I have neglected the carronade tackle blocks, and will have to buckle down and put some time in to get caught up to my one set a day goal.
- Matt D, chris watton, Paul Le Wol and 7 others
-
10
-
Thanks Joe!
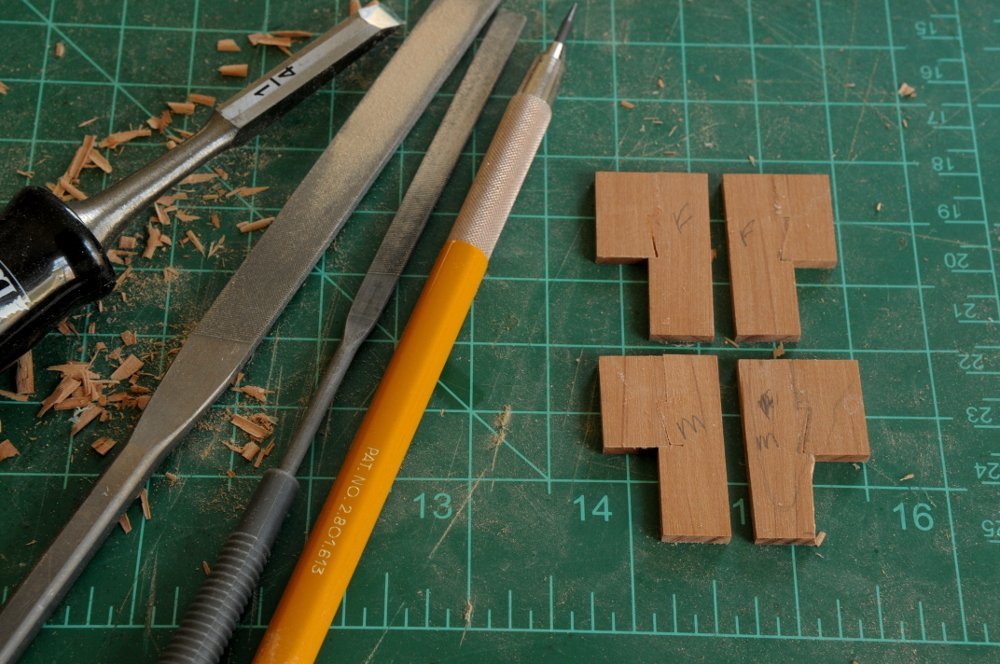
More unanticipated issues! I had to redo the trestle trees. If you look at this photo from my previous post, notice the location of the aft cross tree.
There is a slight gap between it and the aft opening of the floor, whereas the forward cross tree is just about even with the forward opening of the floor. Look also at this photo of my previous post--
This is exactly how Petrejus shows it. However as I began test fitting the bolsters on the trestle trees, and blanks for the topmasts, I began to realize that it wasn't going to work. There simply wasn't enough room between the cross trees for the mast and topmast to fit correctly, and the bolster to be in the right position on the mainmast. I thought at first this might be due to the substantial rake of the mast. But Petrejus' Irene is raked also. Ahhh, I realized my error. I had scaled the top down, based on Chapelle's drawing, and the photos of the Jefferson model, whose tops, though I don't have measurements, looked by eye to be slightly on the smaller side. My mistake was in also scaling down the cross tree spacing. I had previously been puzzled that the Petrejus' trestle trees seemed too close together for the mast to fit through, and I had adjusted them for my masts. This should have tipped me off, but I didn't change the cross tree spacing at that time. Fortunately, the trestle trees were easy to remake, and I could reuse the cross trees. Here is the new arrangement--
Testing this with the mast, bolsters and topmasts, I think this will work. I could now move on to the hounds/bibs. Blanks are cut and the joints cut. These need to be thinner than the trestle trees, but I used the same stock, as I don't have any thinner at the moment. Rather than sand it thinner now (actually it also needs a slight taper), I'm going to assemble them, and then do the final sanding to thickness--
Petrejus says that all tops should be parallel with the load water line, though, curiously, Chapelle's drawing shows the tops not at all parallel to the waterline, and not quite perpendicular to the mast--somewhere oddly in between. I cut the hounds parallel to the waterline and did some rough shaping, testing it against the mast. Here it is clothes pinned to the mast, and supporting the trestle trees and top, with my template for the rake--
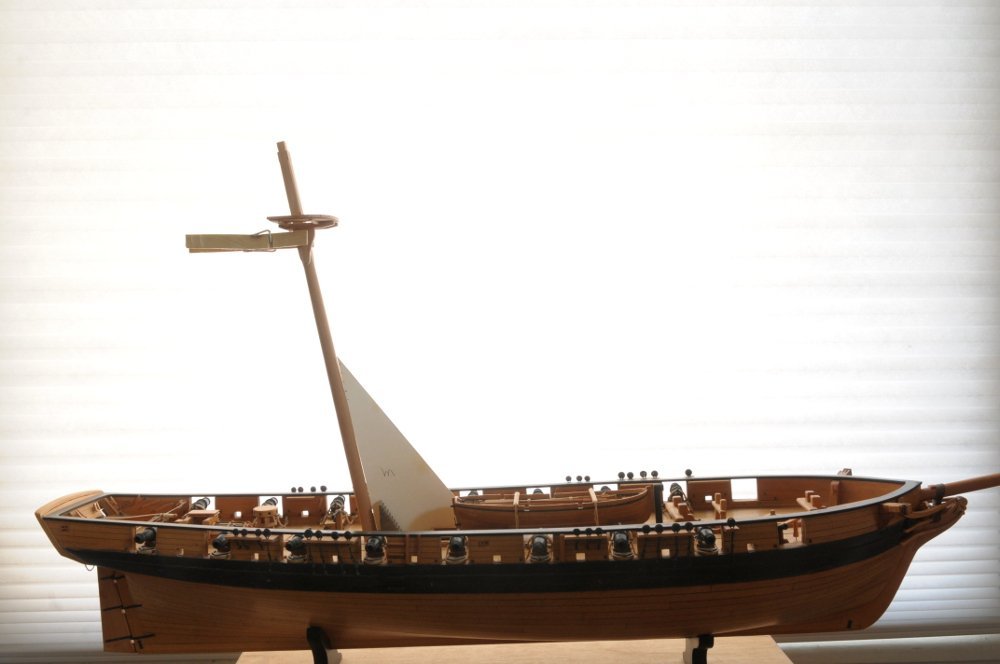
The top looks very slightly pitched back, but I think it's actually due to my camera not being exactly level. That also makes the rake look just a bit more than it really is-

Satisfied, I now have a pattern to roughly shape the other pieces. The rake of the fore mast is less, so that top angle on the hounds will be different--

The others will be roughly shaped, tested, and then the contours finalized, along with sanding them to the correct thickness.
Ron
- Paul Le Wol, usedtosail, bhermann and 4 others
-
7
-
Looking great, JJ!
Ron
- FrankWouts and scrubbyj427
-
1
-
 1
1
-
Congratulations James!
And whatever was the impetus, I am deeply indebted to you for starting this site. Thank you.
Ron
- Freebird, hollowneck, Dave_E and 5 others
-
8
-
Thanks Dan, and thanks for looking in.
With the tops basically formed, I set about making the cross trees and trestle trees. After the complexity of the tops, they were pretty straightforward. The main and fore set do need to be slightly different, as the dimensions of the fore mast are very slightly less than the main mast. Here the main mast trestle and cross trees are temporarily assembled. There will need to be some adjustments to the length of the pieces--

The main top assembly was then checked on the main mast to make sure the trestle tree spacing fit the mast. The mast top was measured before the notches were cut into the cross trees--
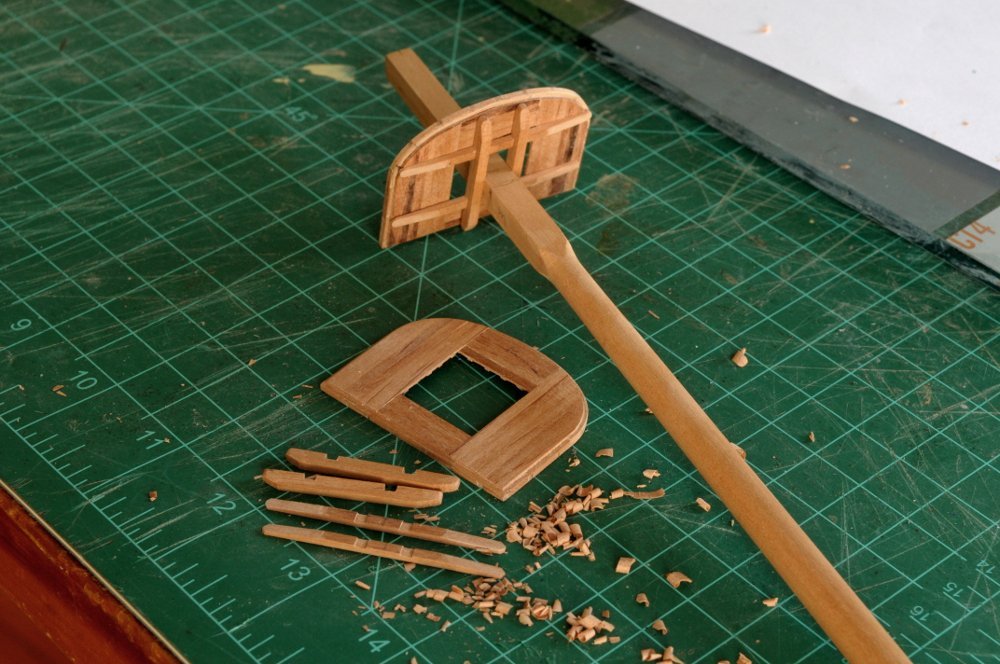

The foretop assembly will be checked as well. You may notice that I worked on the top cleats. The break of the slope is better when the cleats leave the rim.
I am working backwards from the tops, to the trestle/cross trees, to the mast. The bibs will be made and shaped soon. All is still in progress. The shroud futtock plate holes need to be mortised into the tops, as well as some other rigging preparations. Bolsters need to be added to the trestle trees, and refinements need to be made to the masthead above the top.
On most ships there is a railing on the aft end of the top. I am omitting it, based on the US Brig Jefferson model by Glenn Greico, which is a similar Great Lakes ship from the same time period.
Ron
- bruce d, Gahm, Paul Le Wol and 4 others
-
7

How to "unstick" this chuck from the mill spindle?
in Modeling tools and Workshop Equipment
Posted
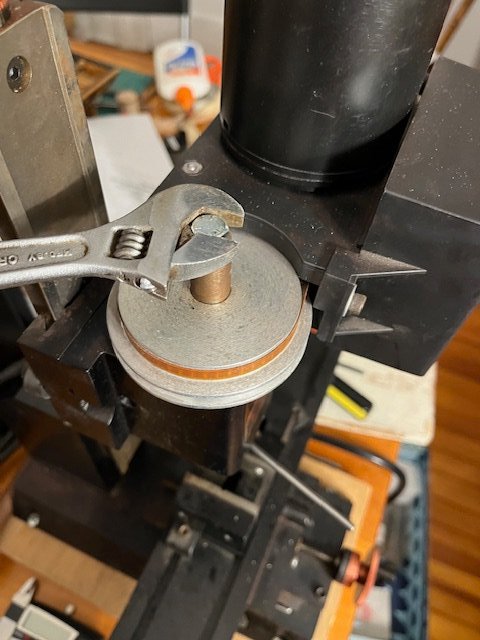
Got it!! After a few more vigorous taps (still with a very small hammer) it came loose--
Thanks everyone for your help--this case is now closed.
Ron