


Glenn-UK
-
Posts
3,005 -
Joined
-
Last visited
Content Type
Profiles
Forums
Gallery
Events
Posts posted by Glenn-UK
-
-
Looking forward to buying the Sphinx, once it is released.
-
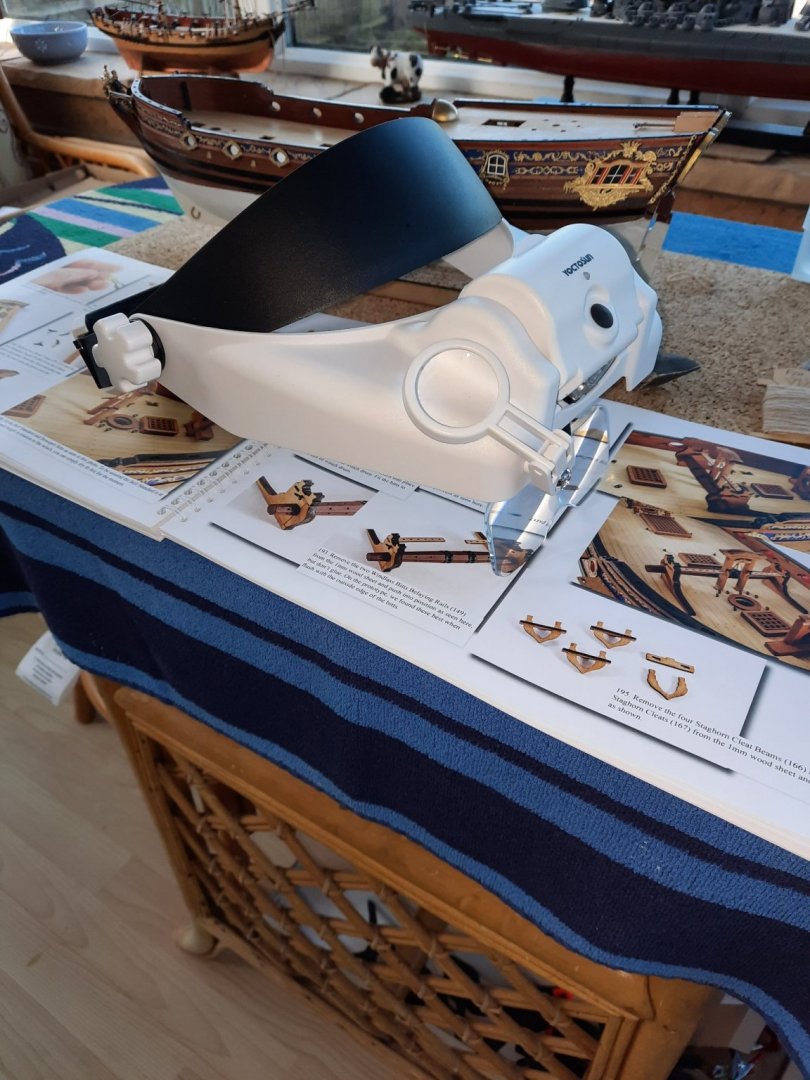
I have found the LED light magnifier headset to be a real help when doing the close up work, such as the seizing of the blocks and eyebolts.
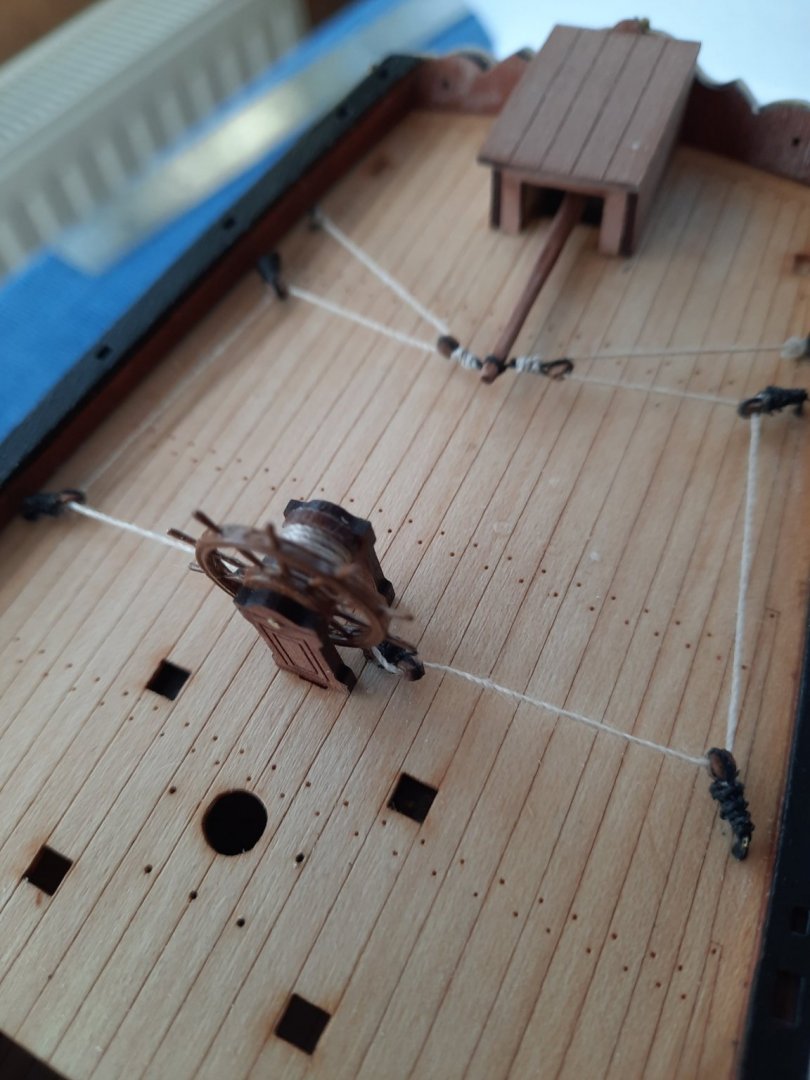
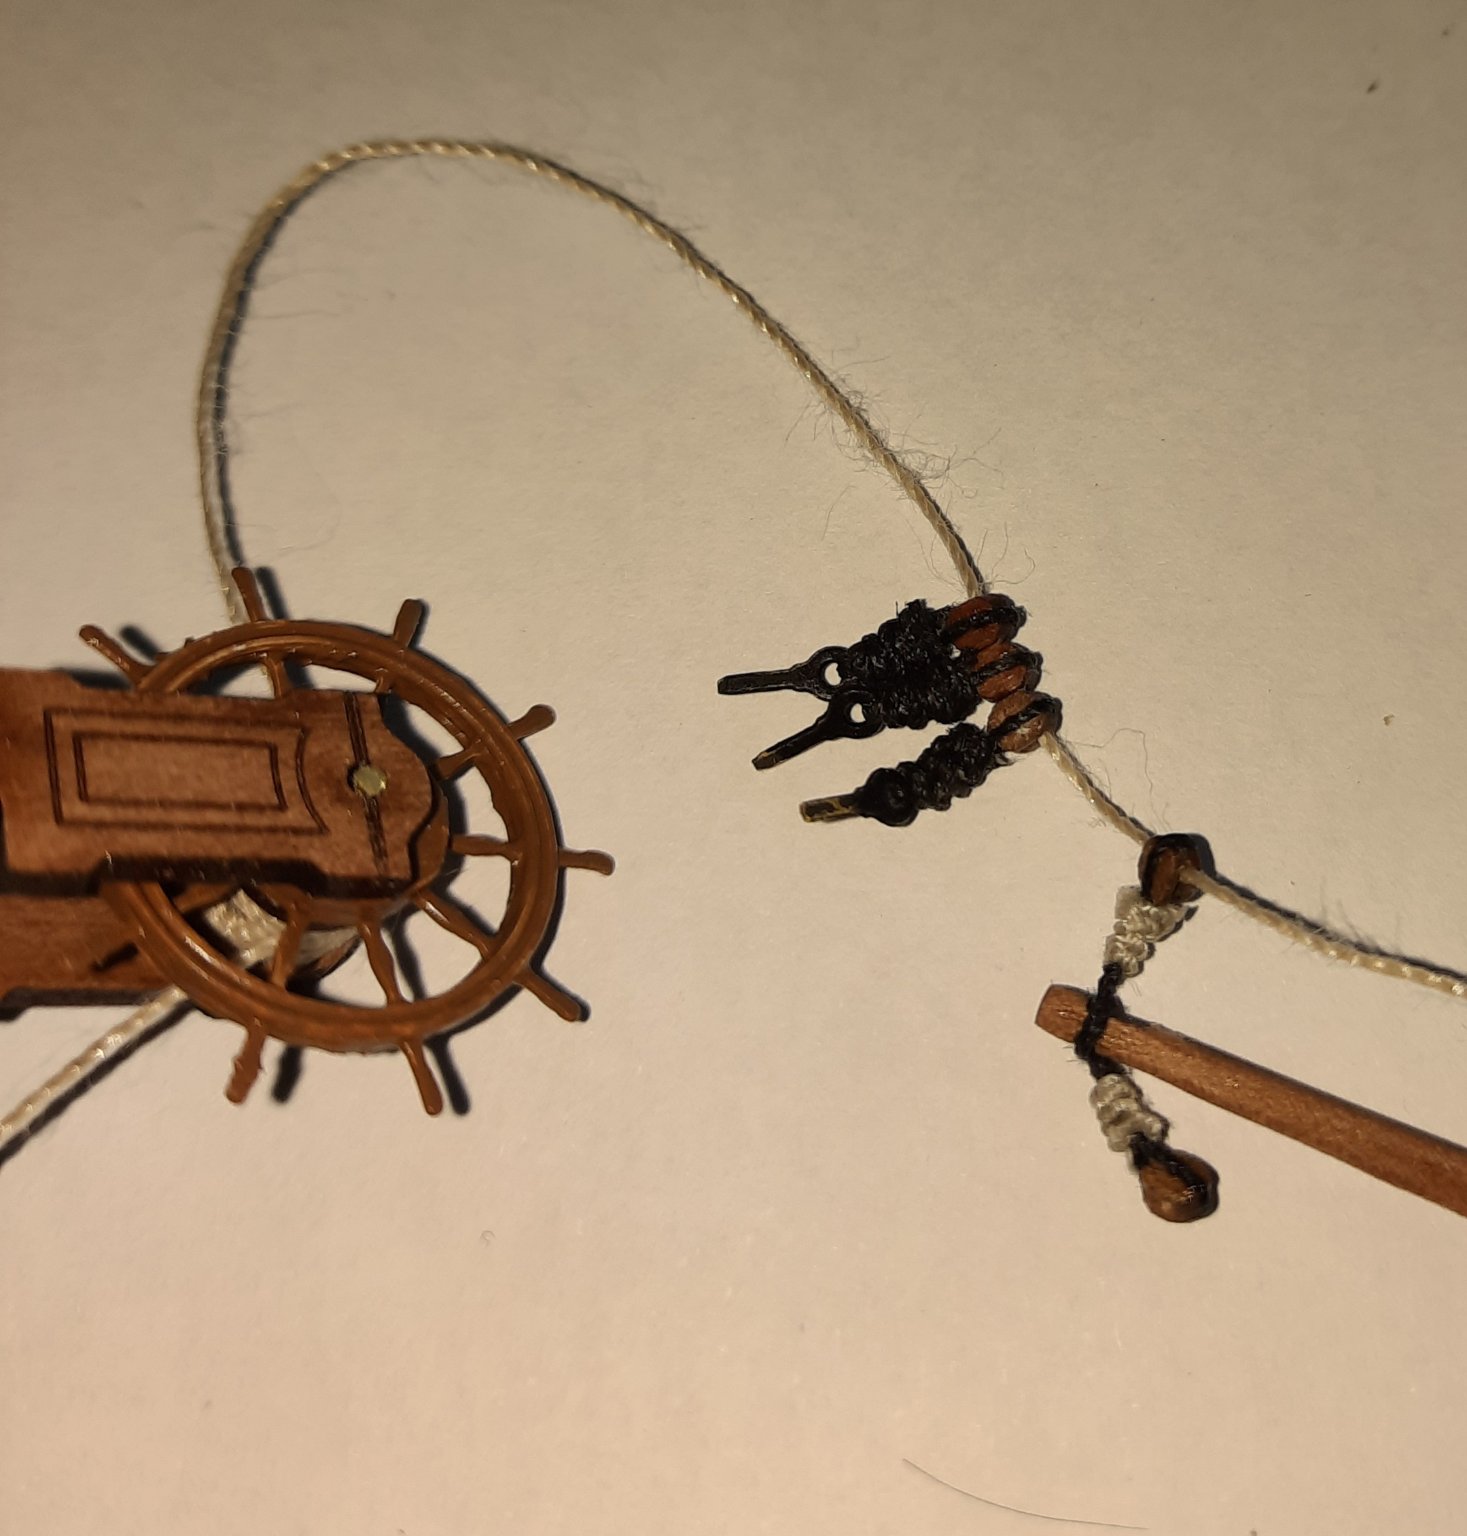
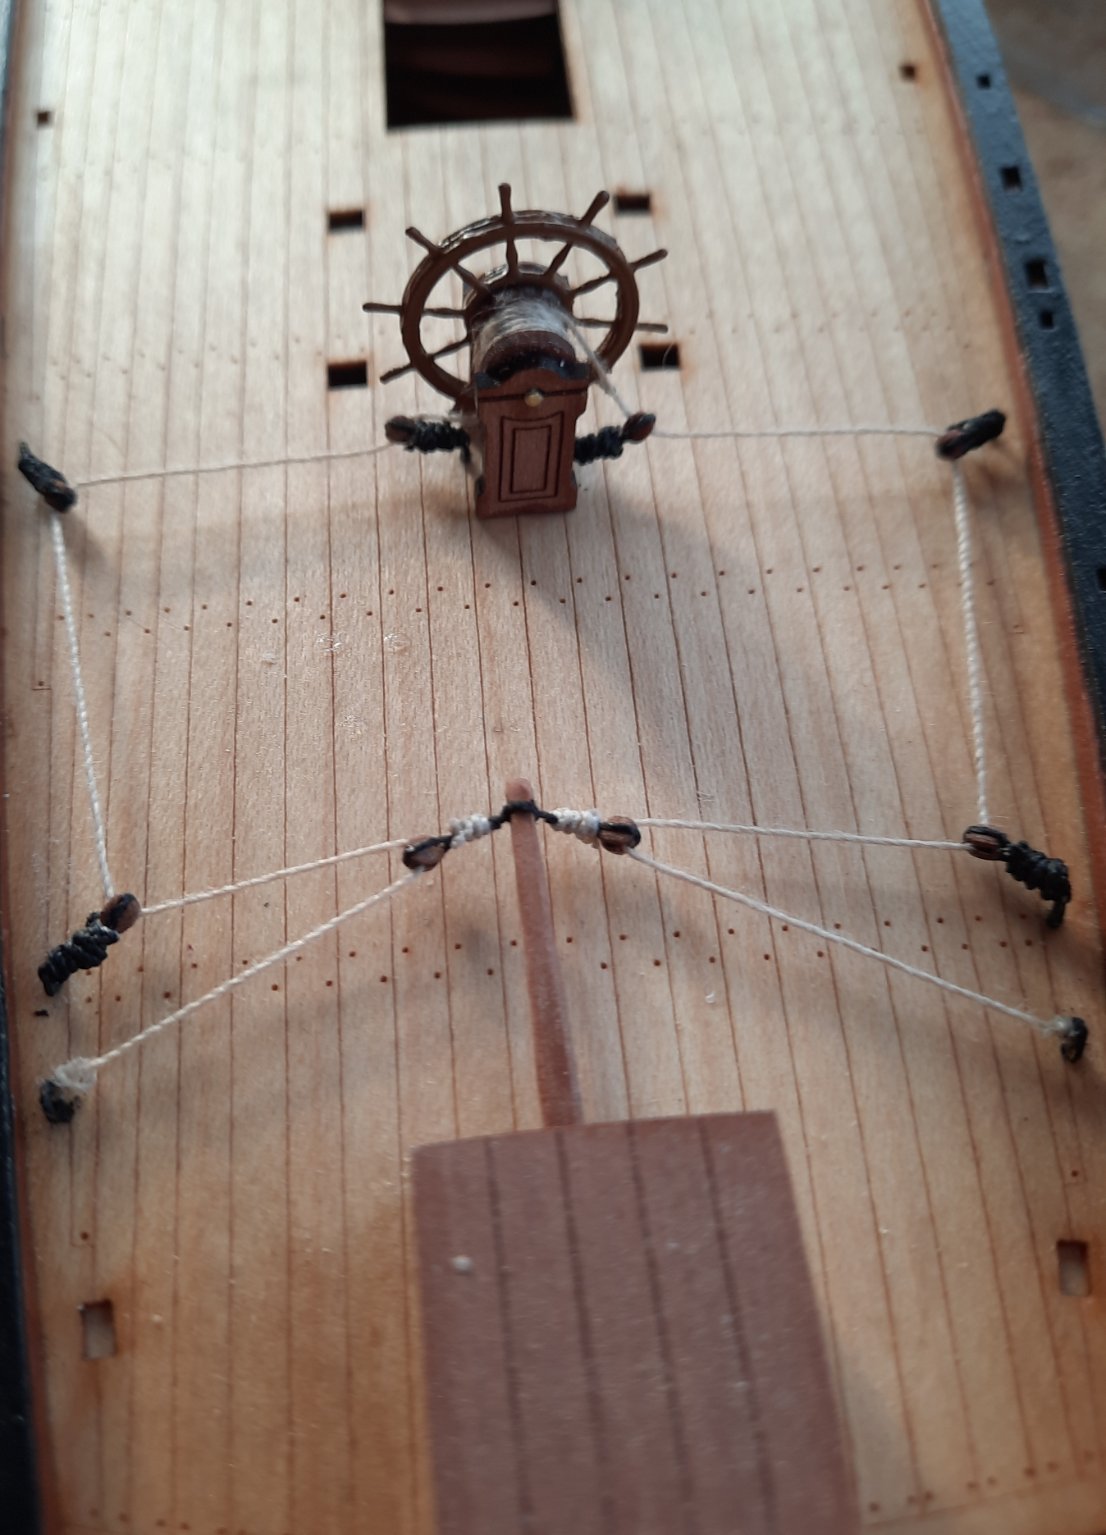
Moving on from this morning work I have now fully rigged the ships wheel. I started off by cutting a 600mm length (this was a tad too long) of 0.25mm natural thread and starting with the centre point I wrapped this thread round the ships wheel assembly.
Once this was completed I threaded the 2mm blocks / eyebolt and tiller assemblies to the rigging line. It took a steady hand and the magnifier headset to complete this activity.

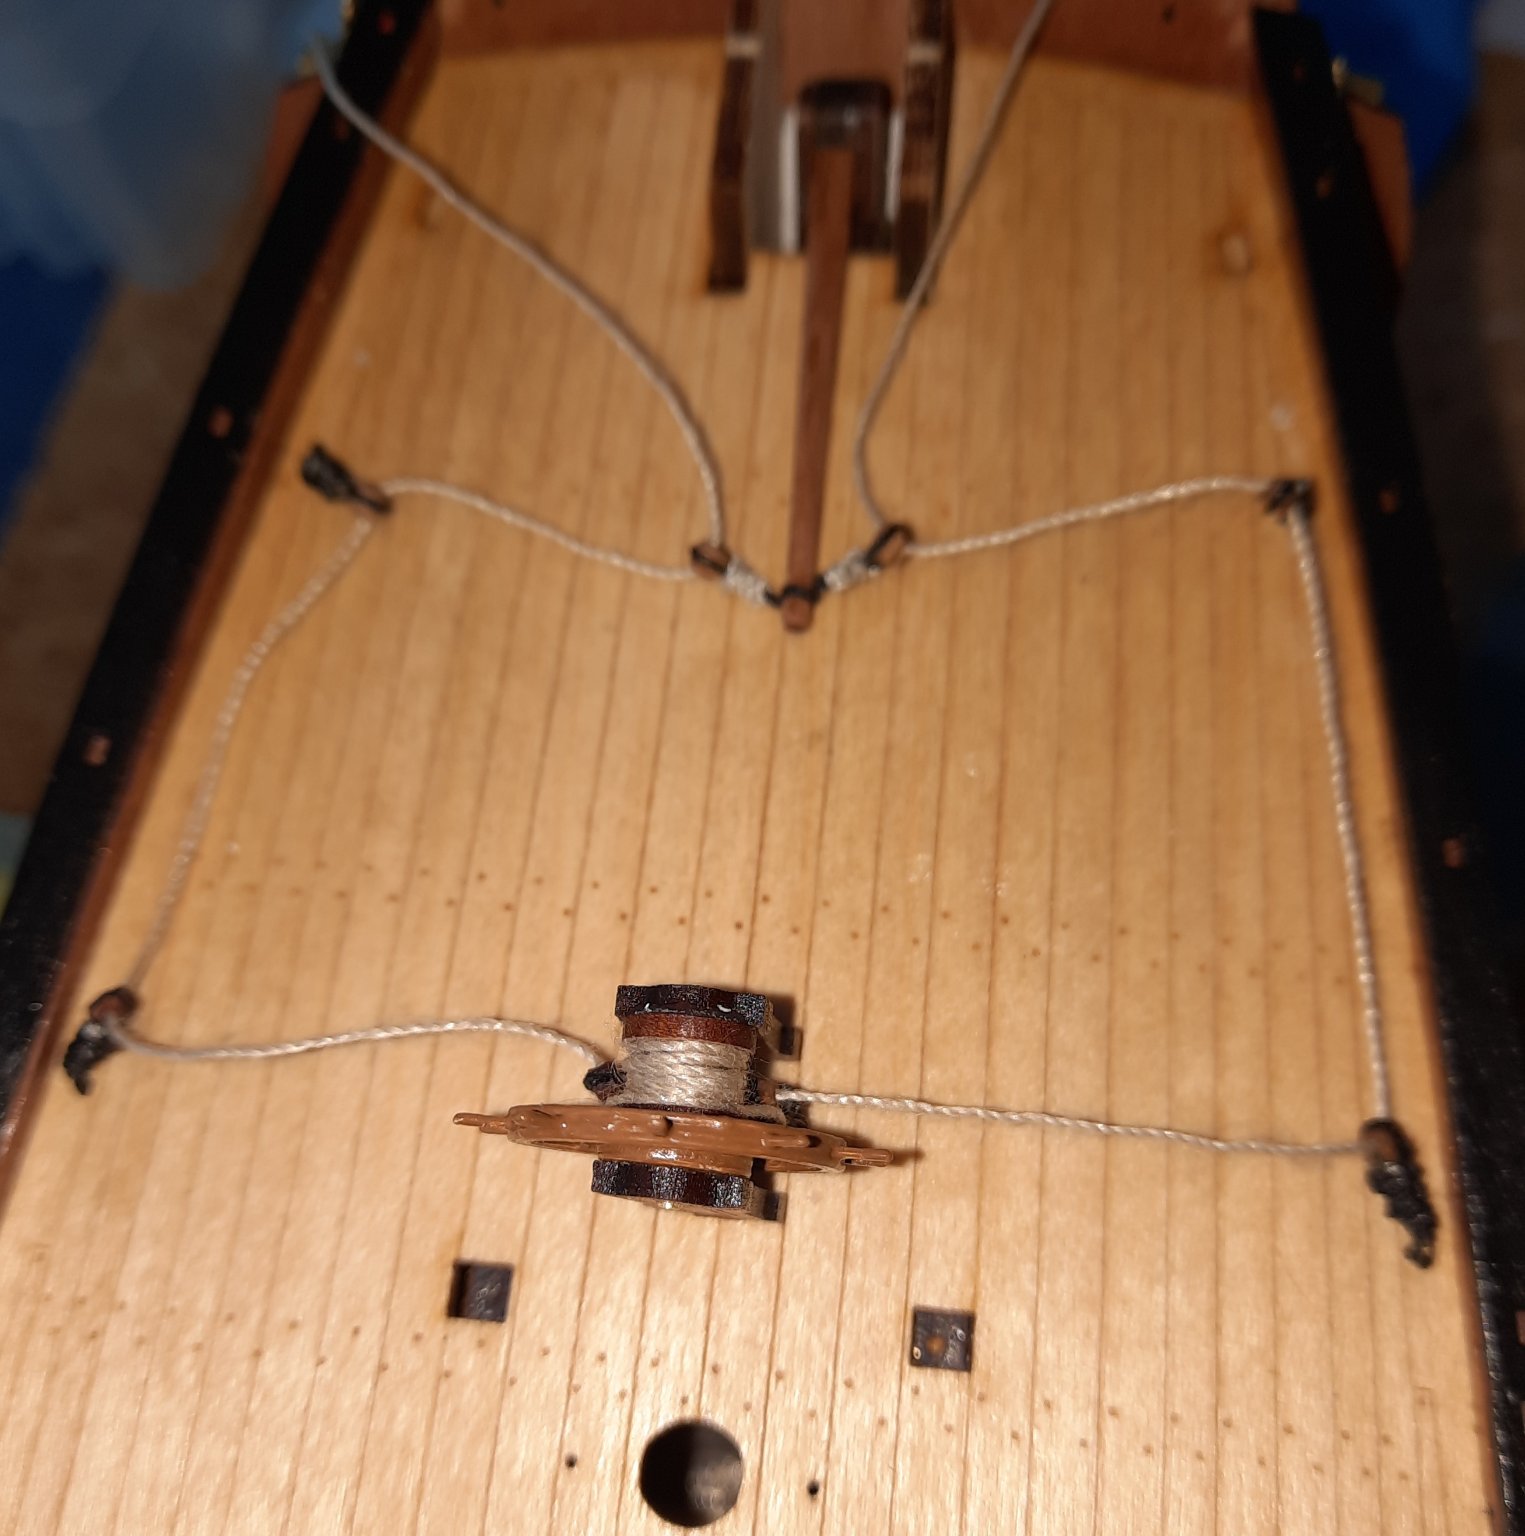
Next I dry fitted the ships wheel, eyebolts and tiller to make sure everything would locate correctly.

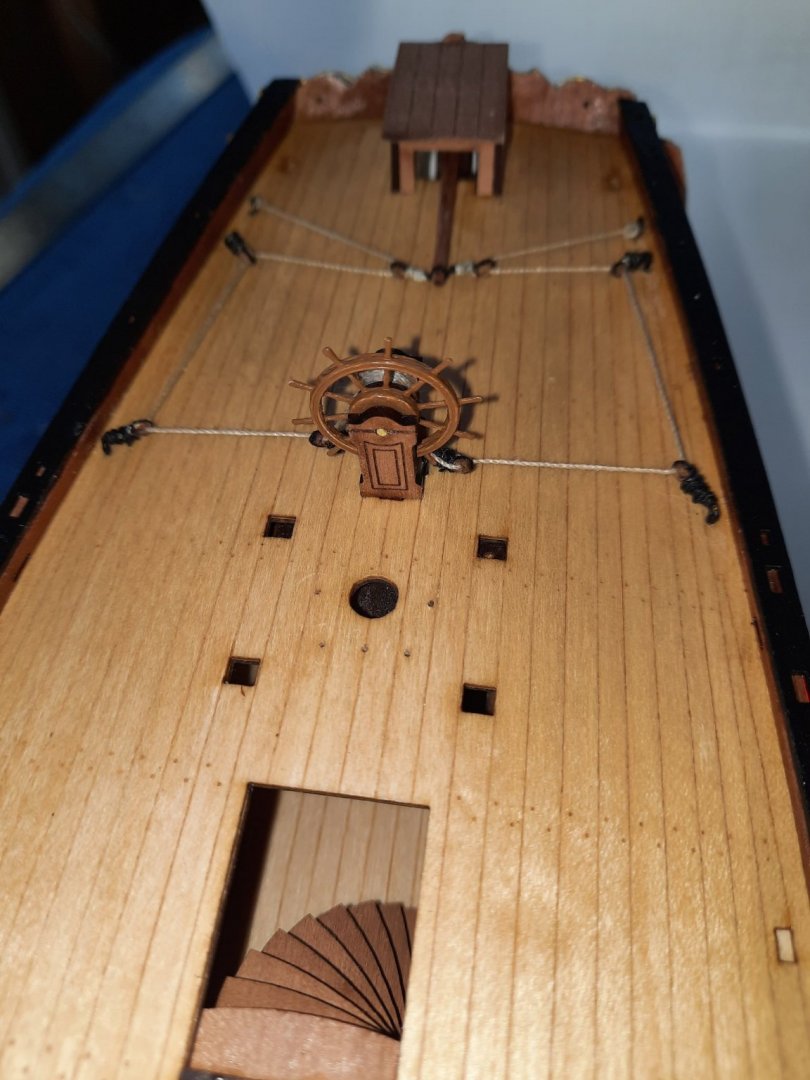
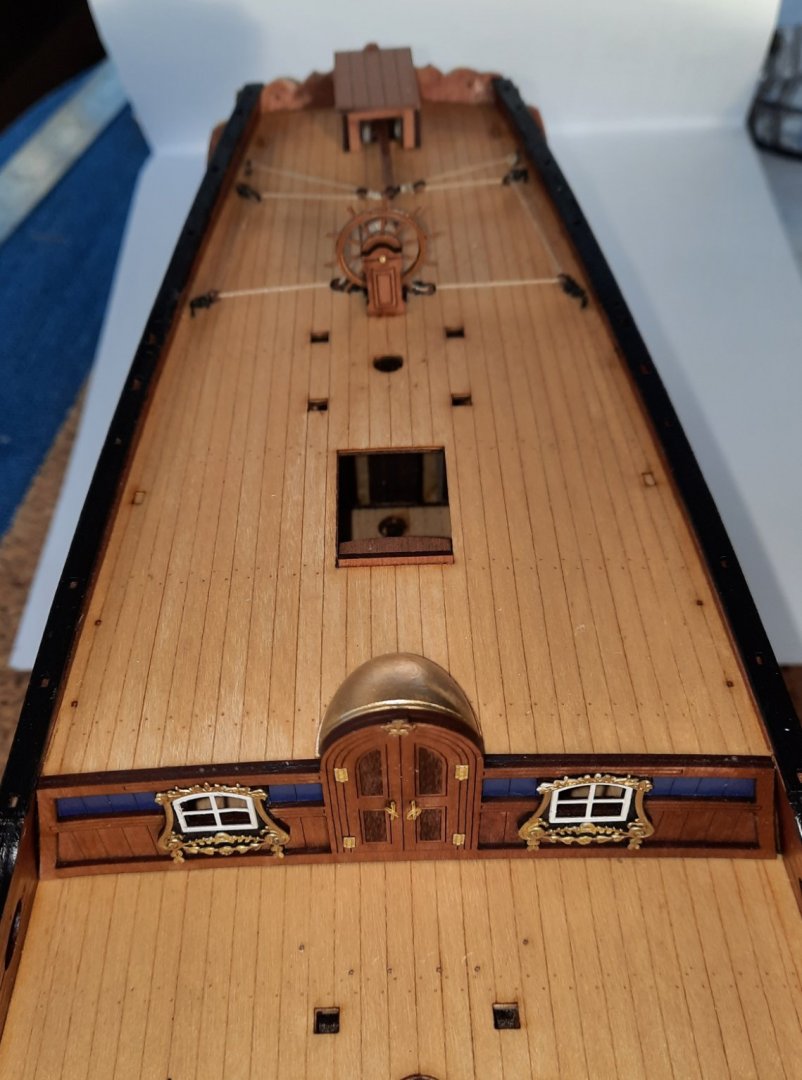
A touch of ca gel was then applied to each eyebolt and then they were inserted in the deck one by one followed by the tiller and the ships wheel. I also added the final two eyebolts where the rigging ends are tied off. I continued to feed the rigging lines through the blocks until there was some tension on the lines. Once I was happy I tied off the two ends. I also added tiller house fascia panels and roof and spiral staircase. It would have made more sense to fit the spiral staircase prior to the mid ship bulkhead so I could actually see to insert the staircase bottom tab in the slot provided, but I was able to locate the tab in the slot.

- p.hoek, BobG, ObviousNewbie and 5 others
-
 8
8
-
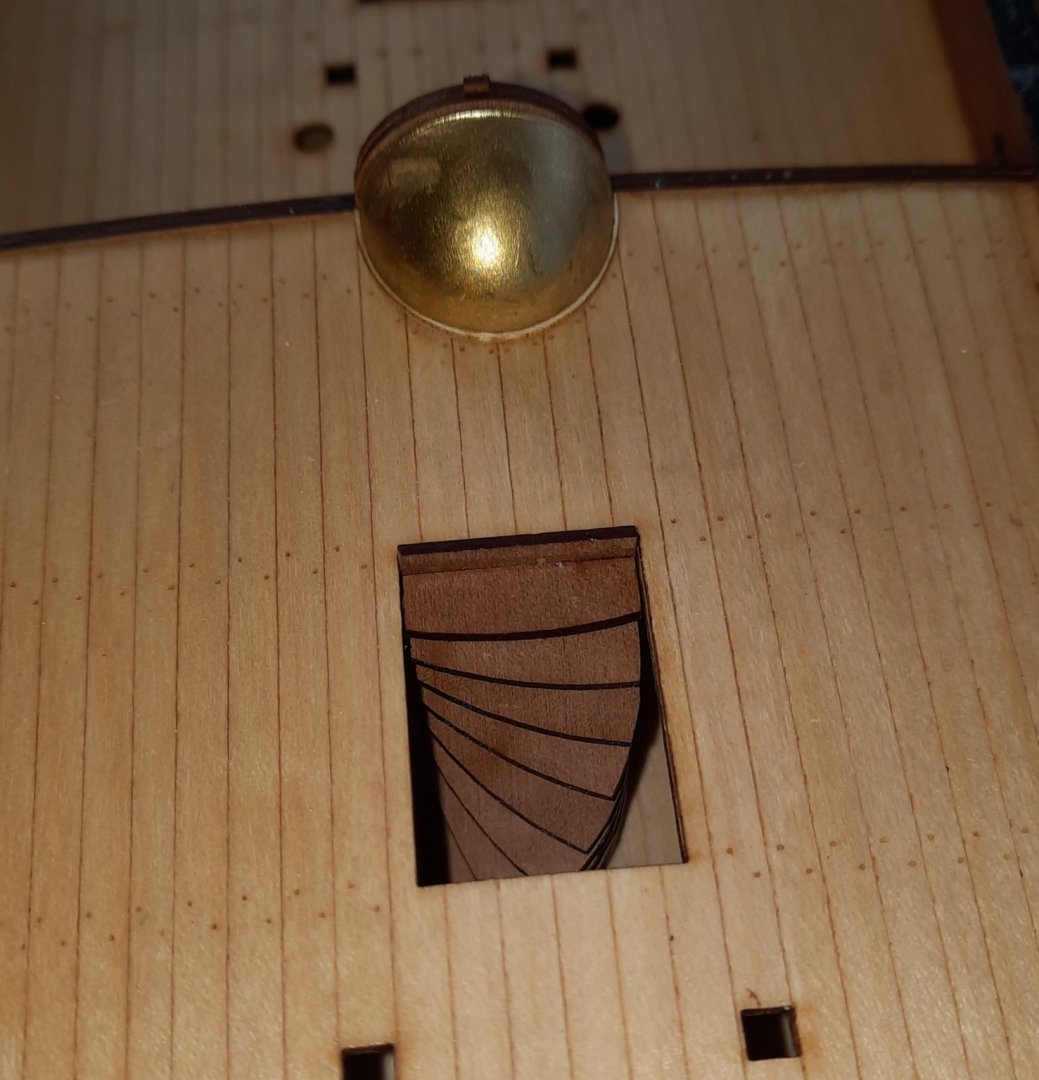
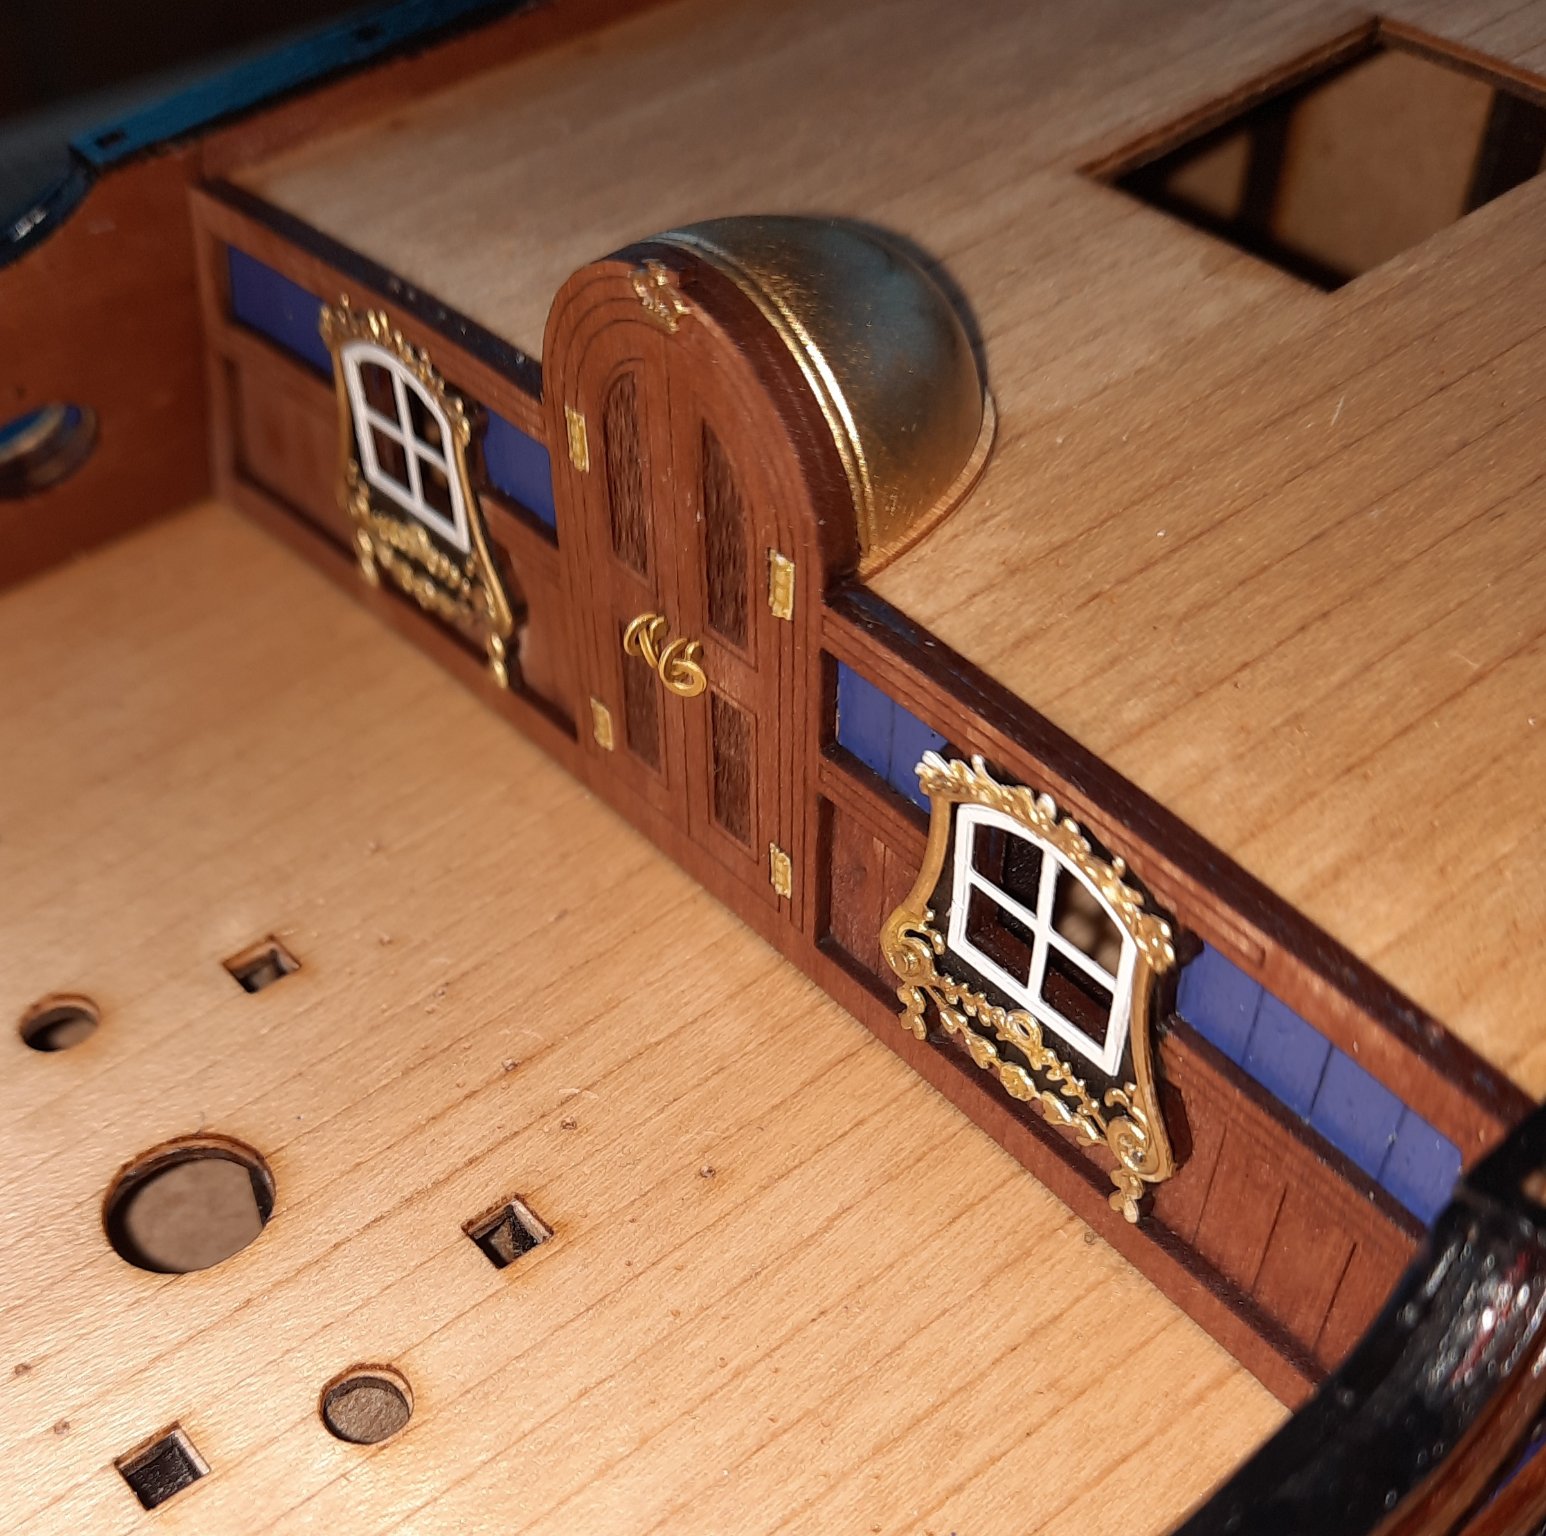
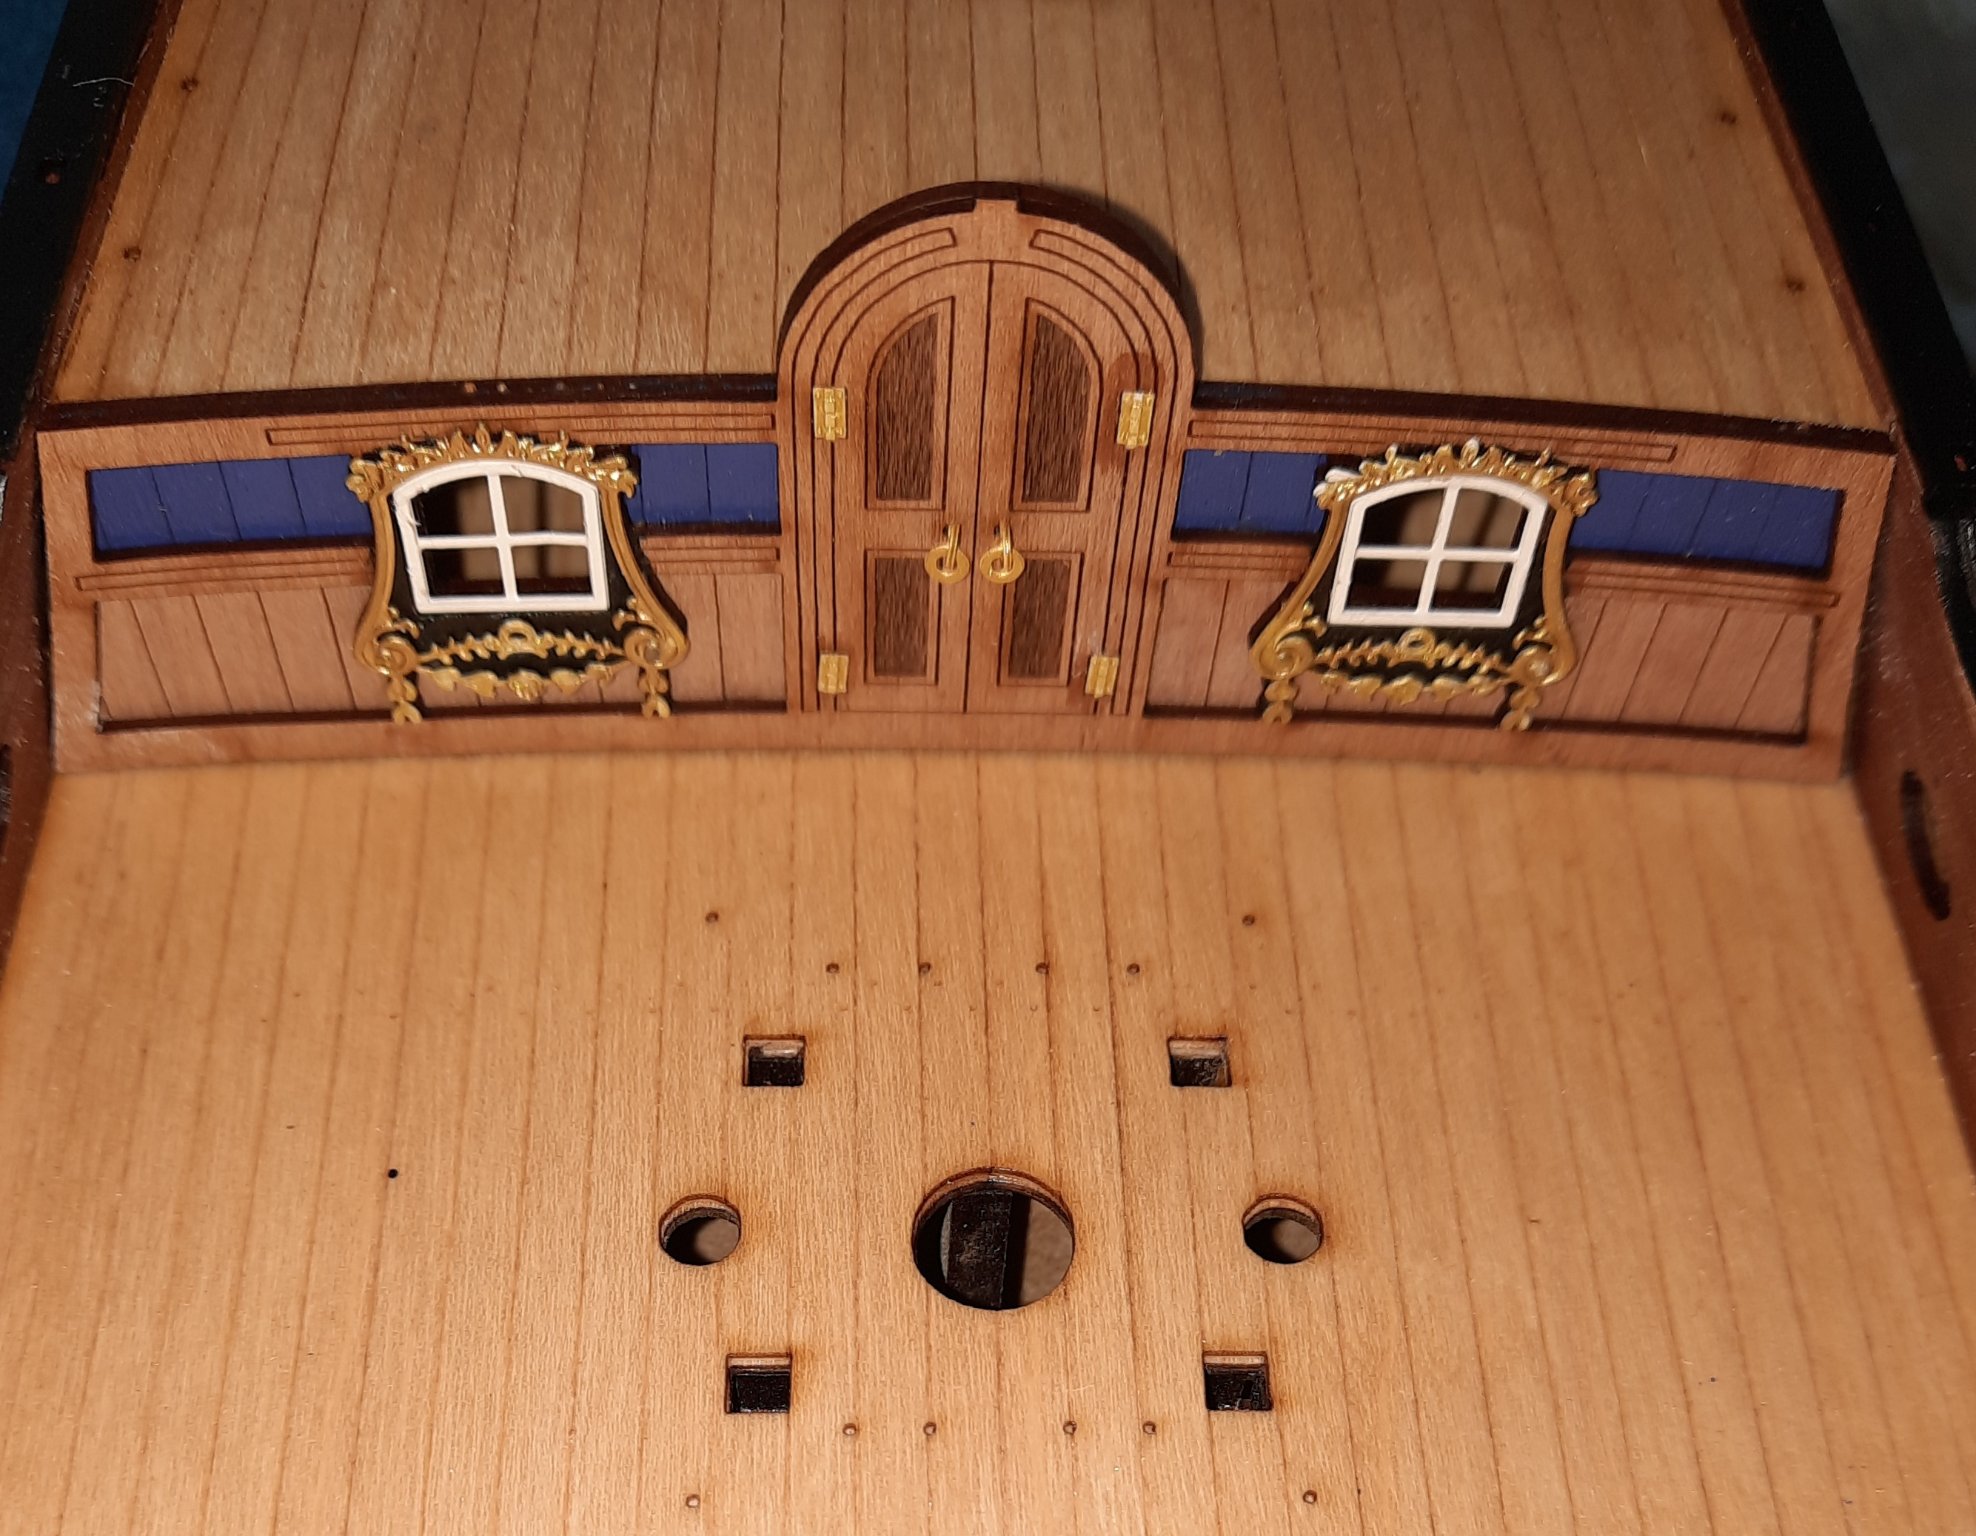
I thought I would start this post with a picture of the mid cabin bulkhead, complete with the mid deck bulkhead door canopy which has now been glued in place. Do not make the same mistake as me which was to remove the resin door canopy from the excess resin before it was painted gold. It makes much more sense to paint the dome and then once dry remove the excess resin.

As indicated in a previous post I have been working on seizing the 2mm blocks for the ships wheel. This consists of seizing a very small 2mm block and then attaching an eyebolt, a total of 6 blocks with eyebolt attachments are required for the ships wheel rigging, plus an additional two off 2mm blocks attached to the tiller (as covered in a previous post.) I thought would detail how I have seized and then attached an eyebolt to the 2mm (very small) blocks. In terms of time it took me around 20 mins to complete each block and eyebolt assembly. The method I have used is much better described, much better implemented and much better illustrated on page 15 (post 433) of Derek's (DELF) excellent Speedy build log.
According to the manual the ships wheel rigging should be done using 0.25mm natural thread. The first thing I did was to carefully run a 0.4mm drill bit through each of the blocks hole. I have two drill bits set up in separate mini drills (with different drill bits) and I did inadvertently try to run a 0.6mm drill through one block which split in two as a result.

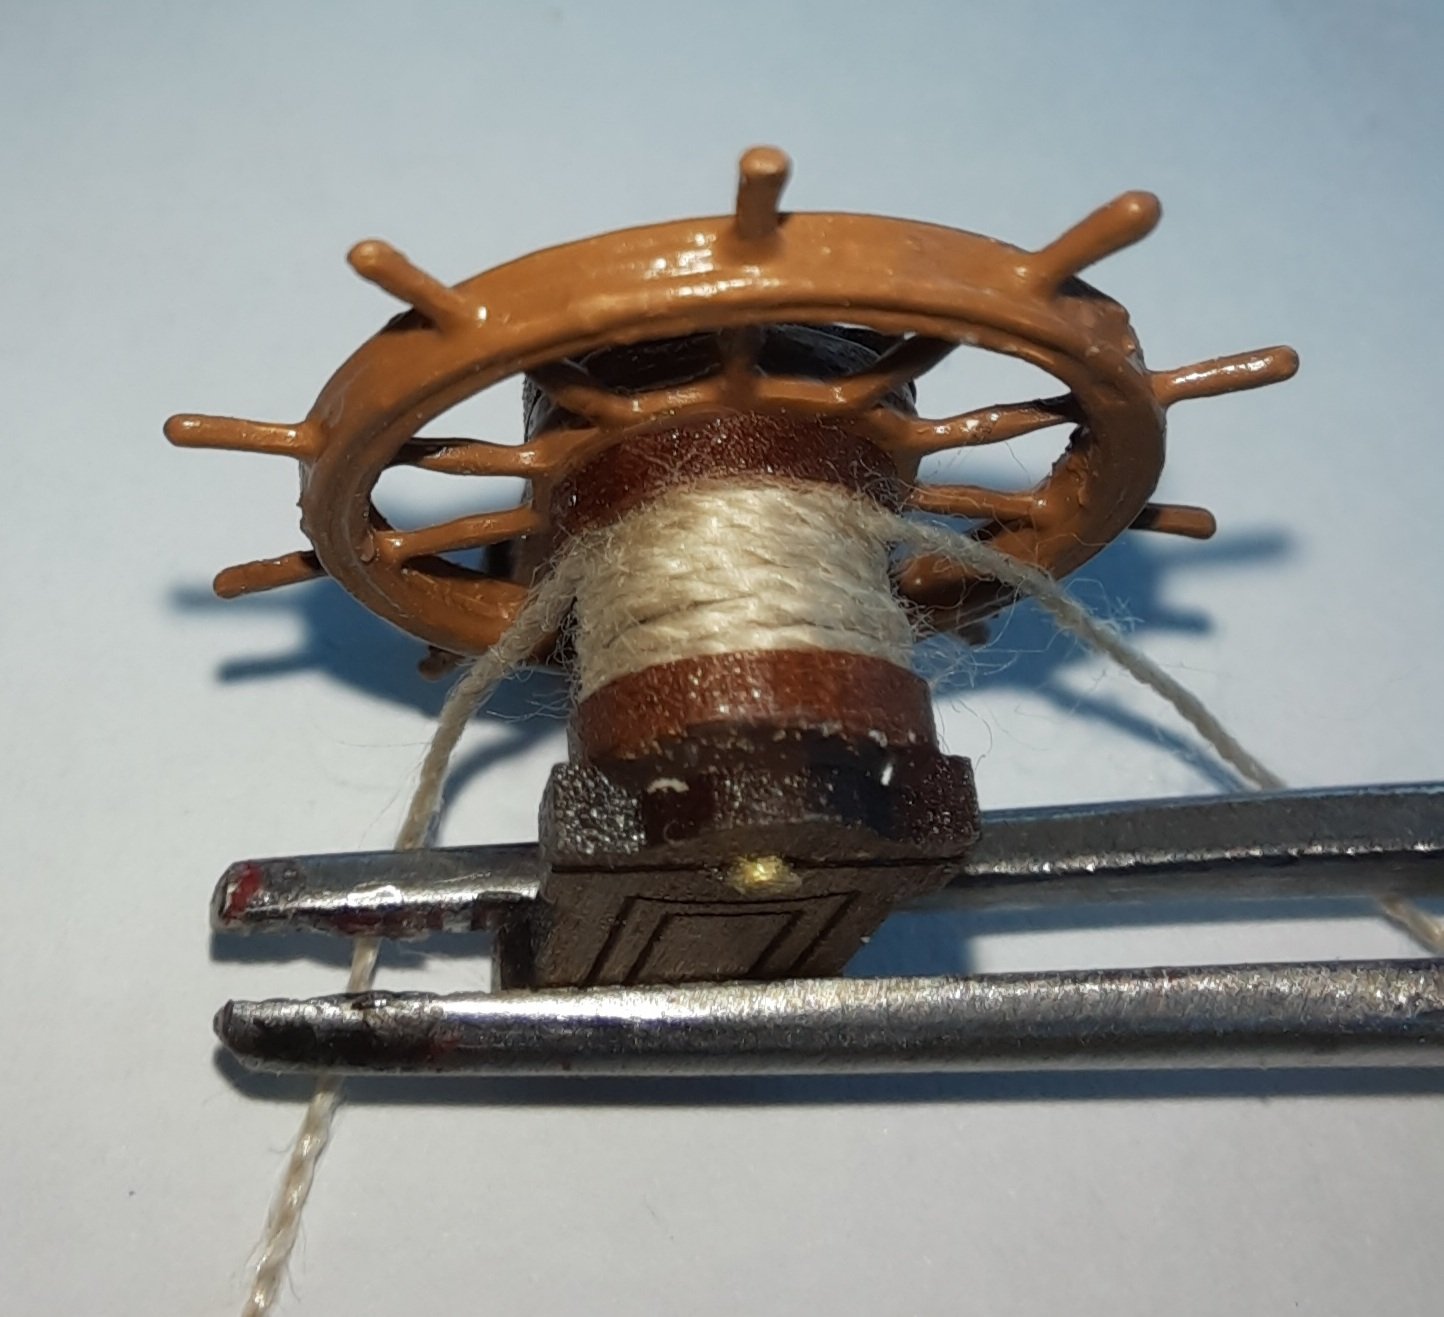
Once I had enlarged the blocks holes I then set about seizing the 2mm blocks using my quad hands. With the 2mm block held in place I cut and positioned a length of 0.25mm black thread and then using 0.1mm natural thread I started the seizing process with a half hitch knot. Working toward the block the seizing was completed using a series of half hitch knots top and bottom. I was pretty consistent with 4 to 5 knots on the 6 blocks seized. A touch of ca was used on the final knot and the excess thread trimmed. I agree with comments made that I should be using even thinner thread for the seizing. To that end I have ordered some fly tying thread for use on future seizing's.
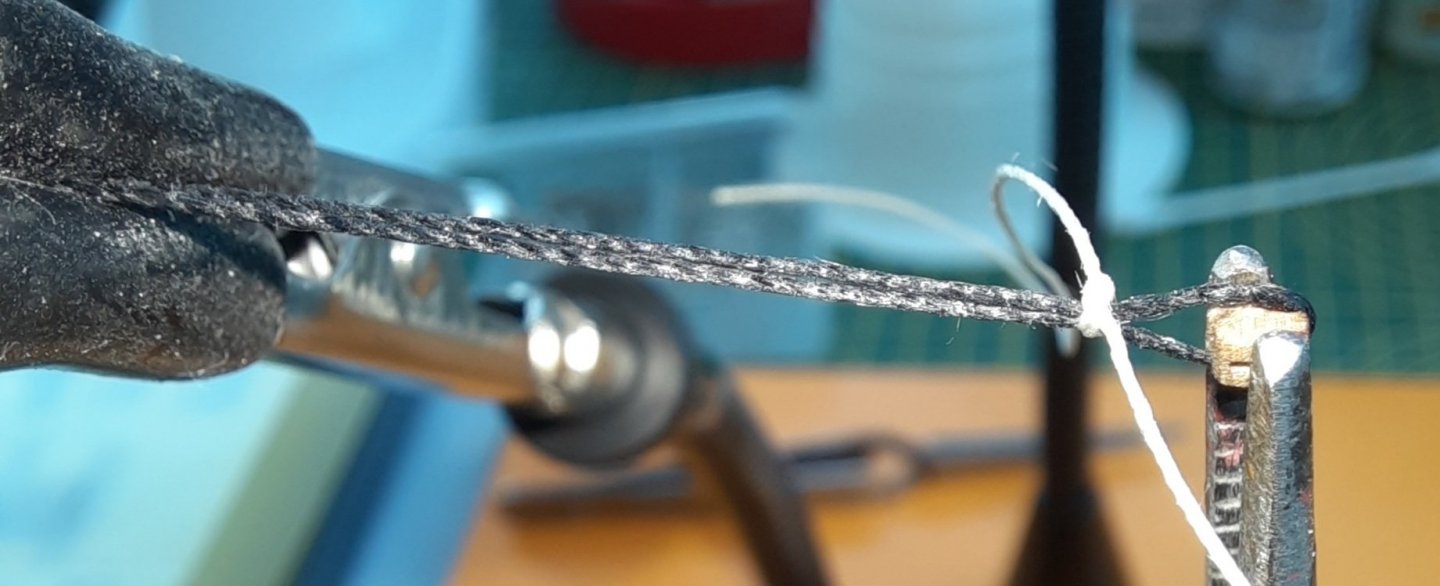
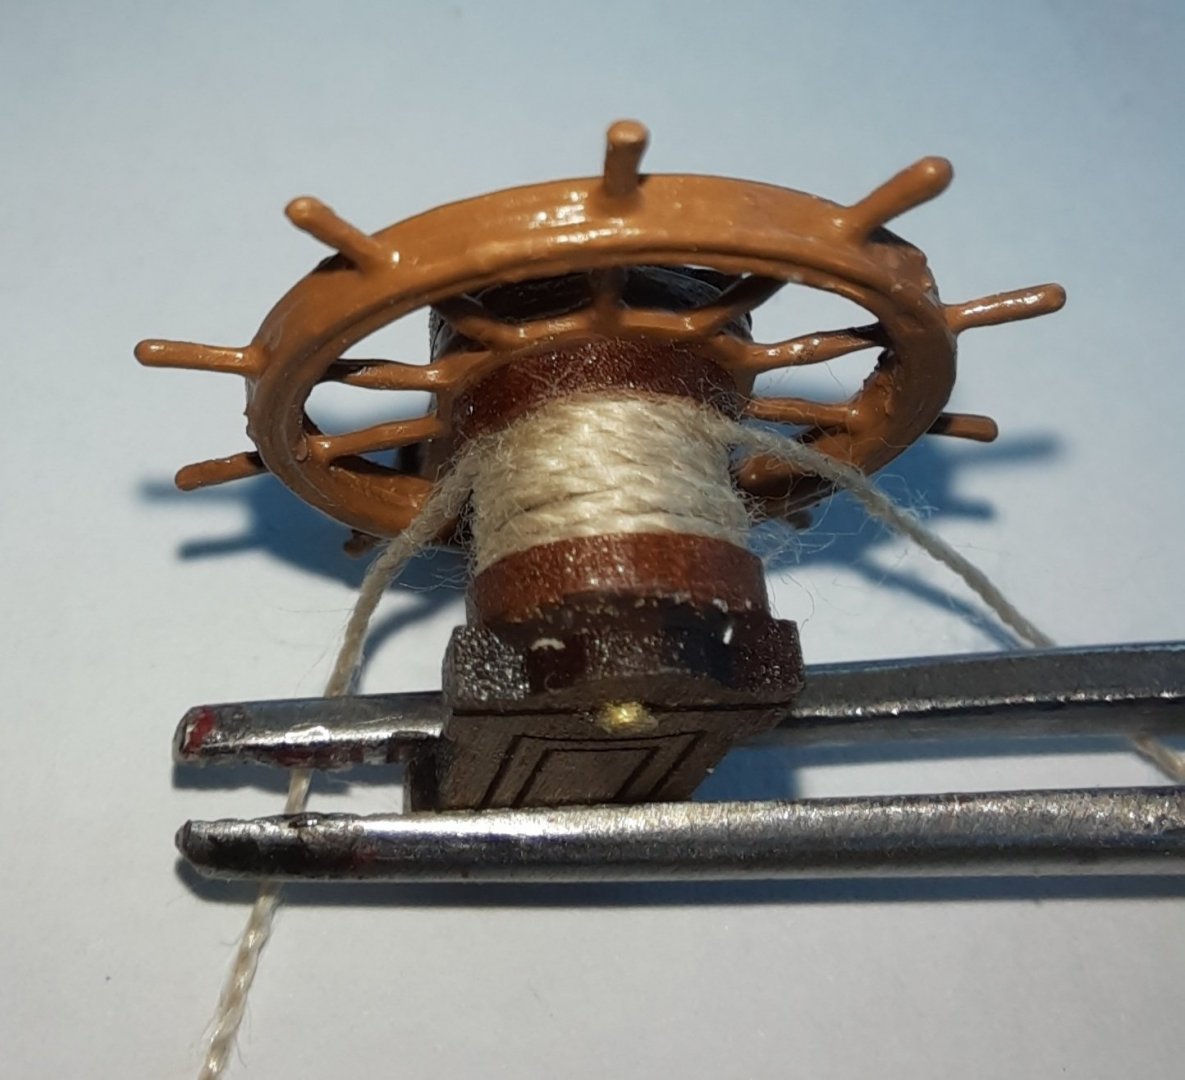
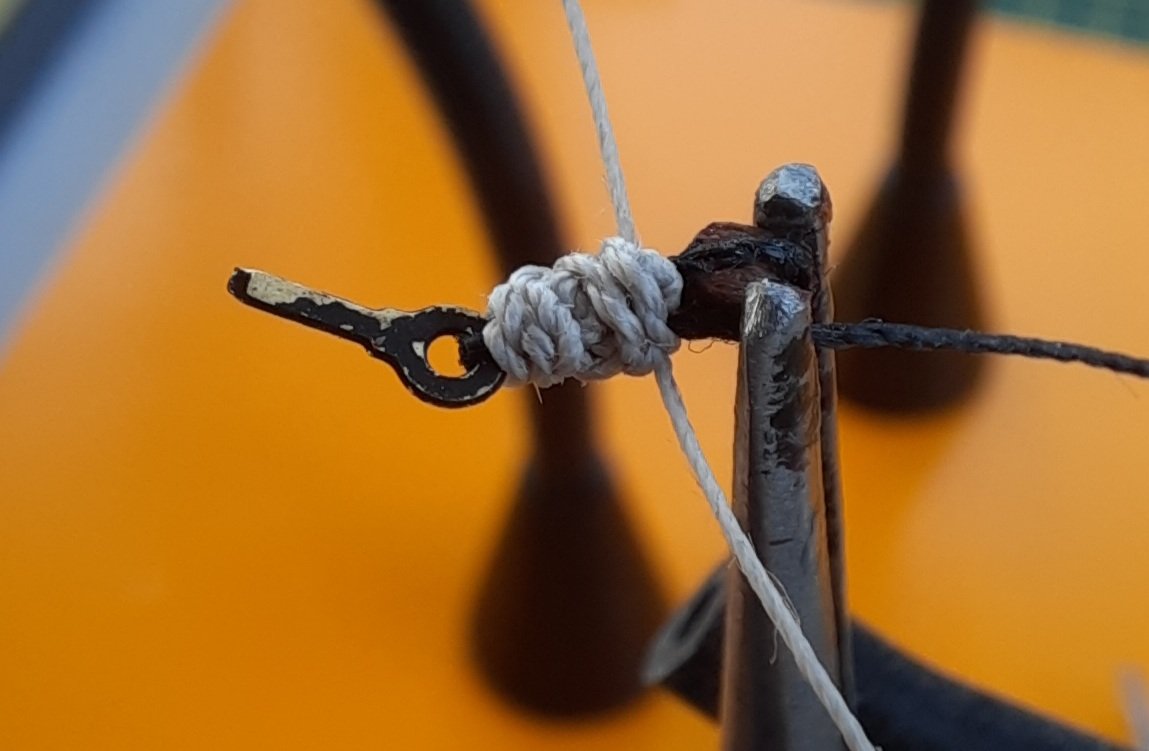
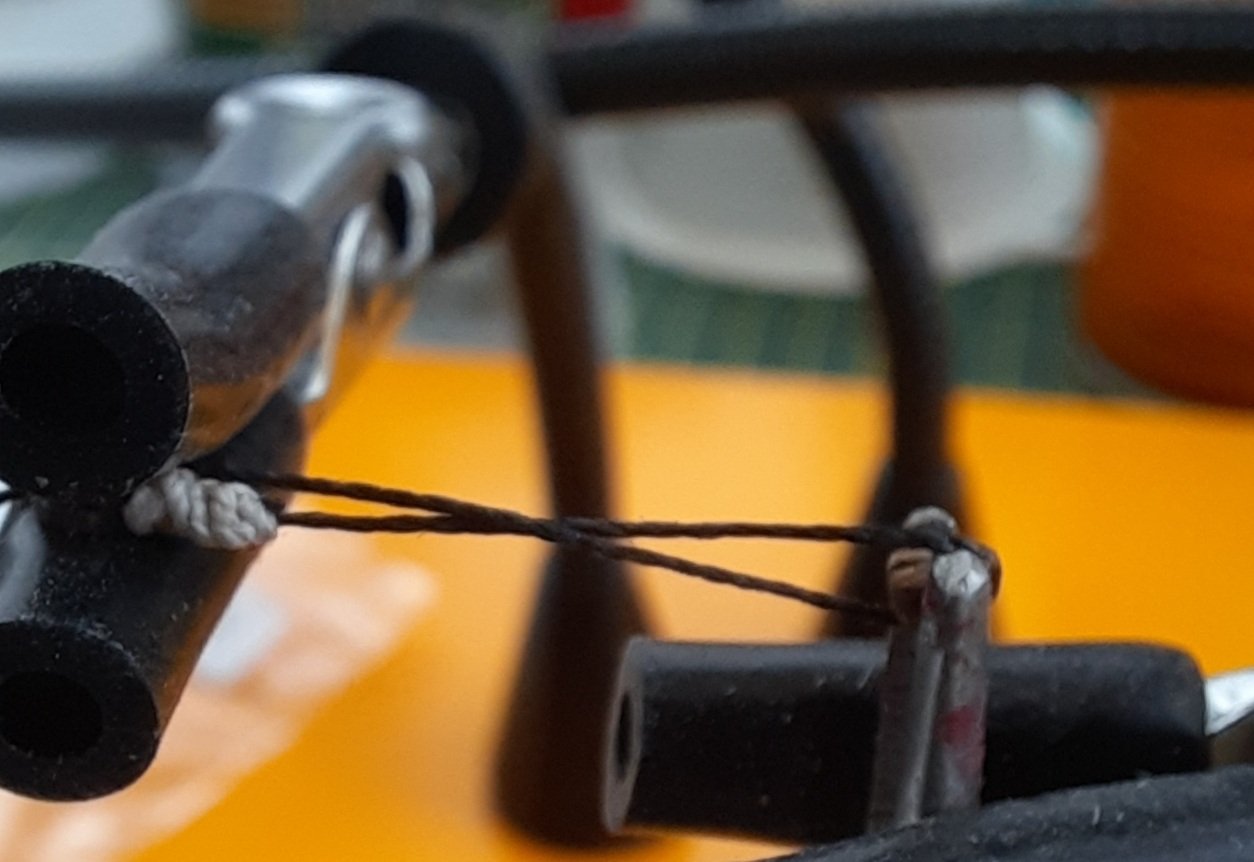
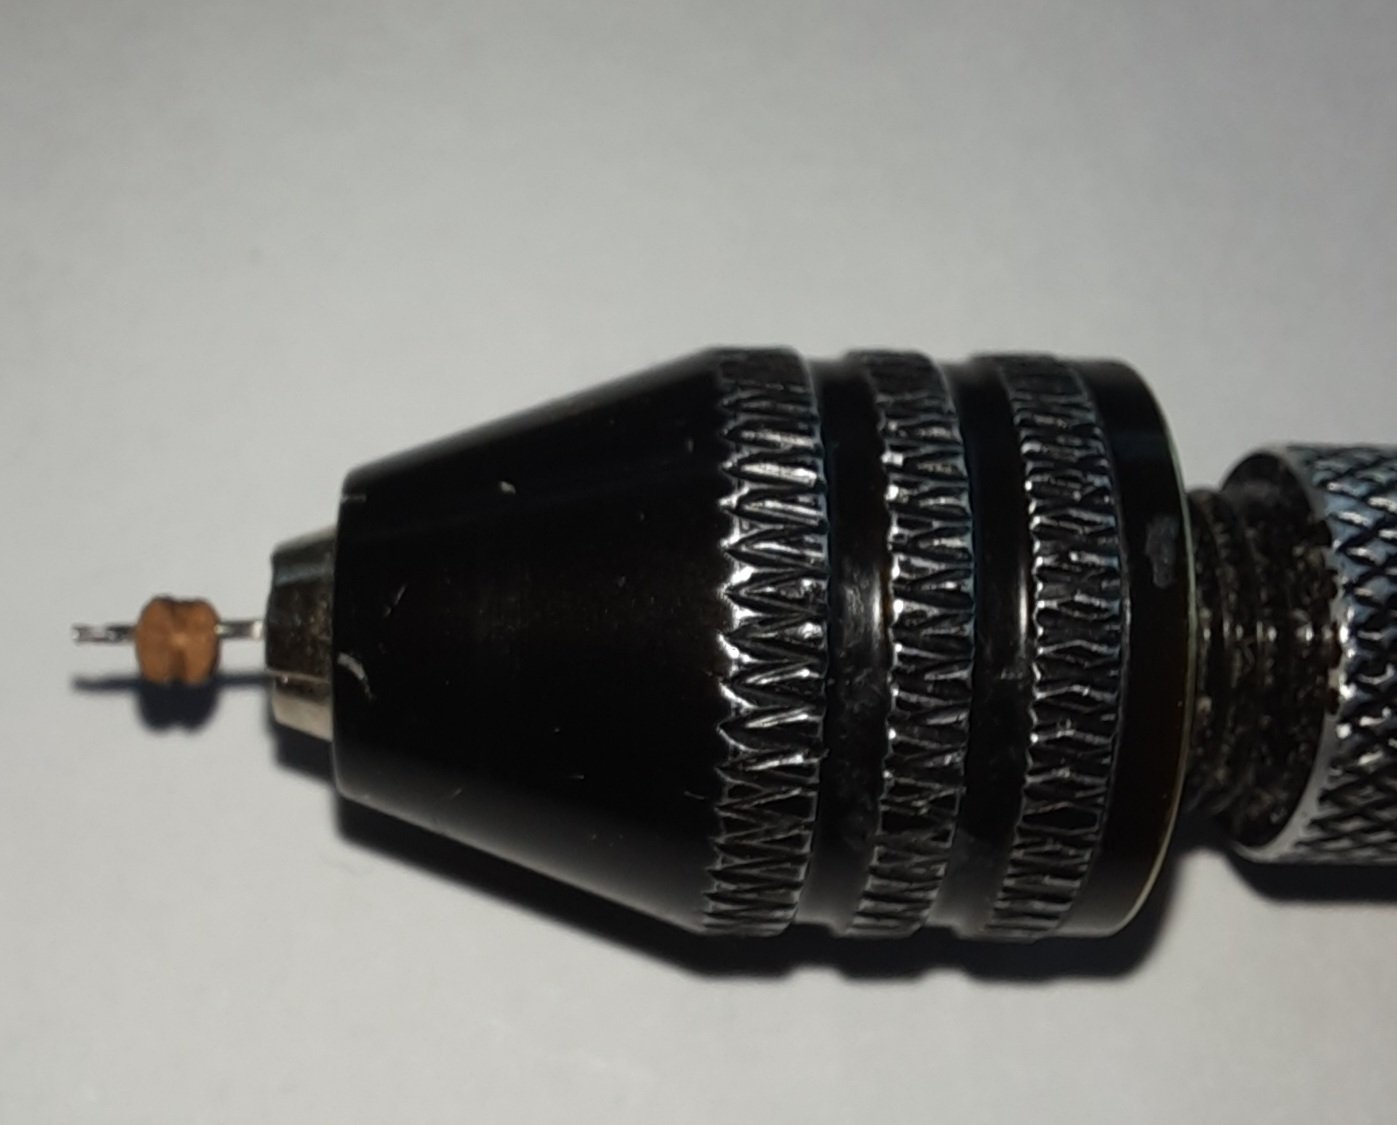
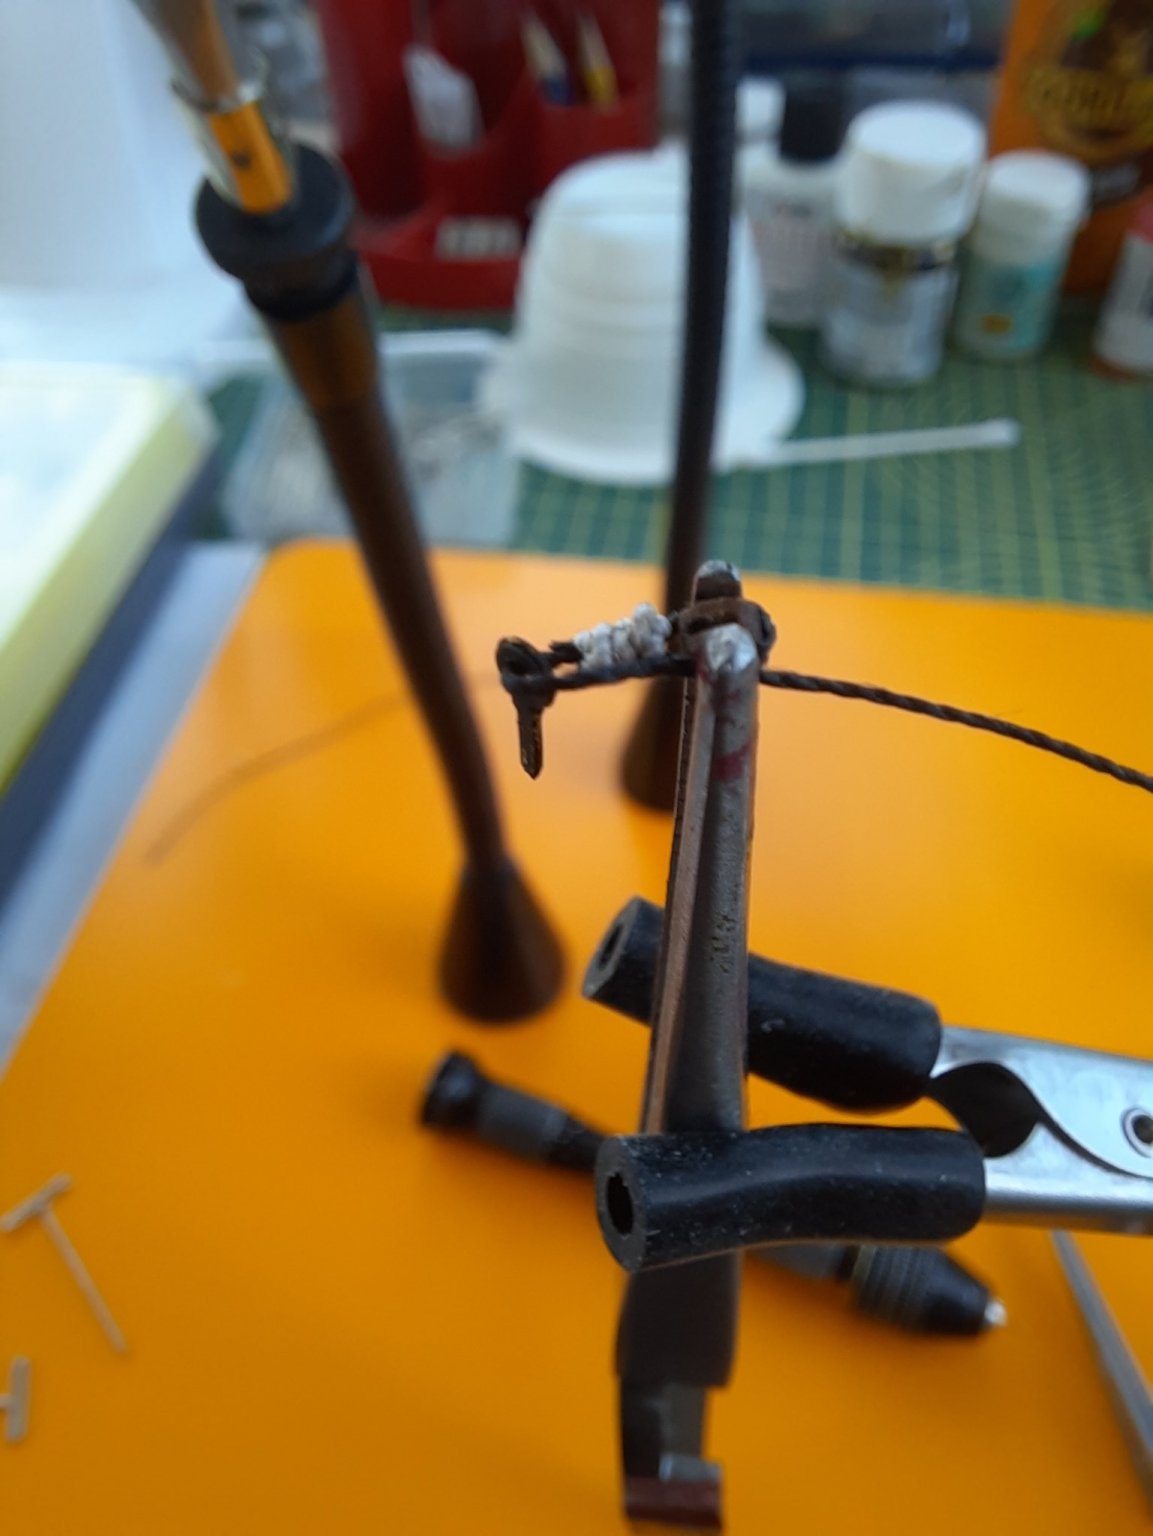
An eyebolt was then attached to the 0.25mm black thread tail and the block was clamped in place along with the thread, as shown in the photo below.

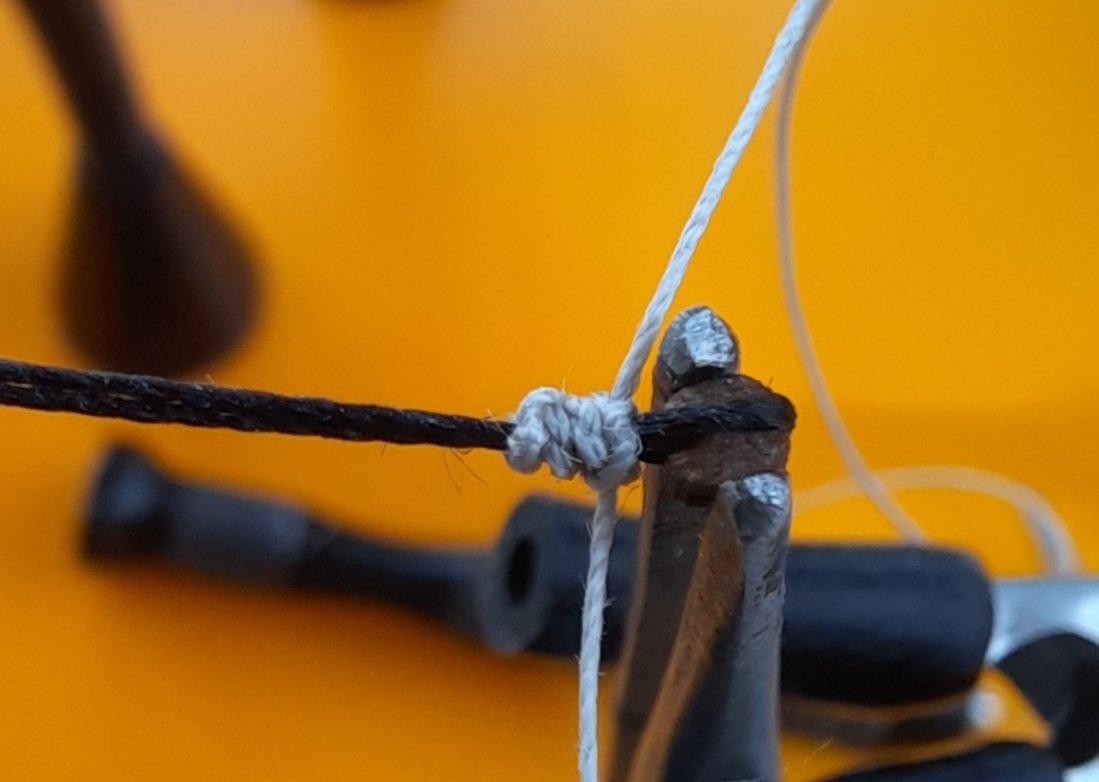
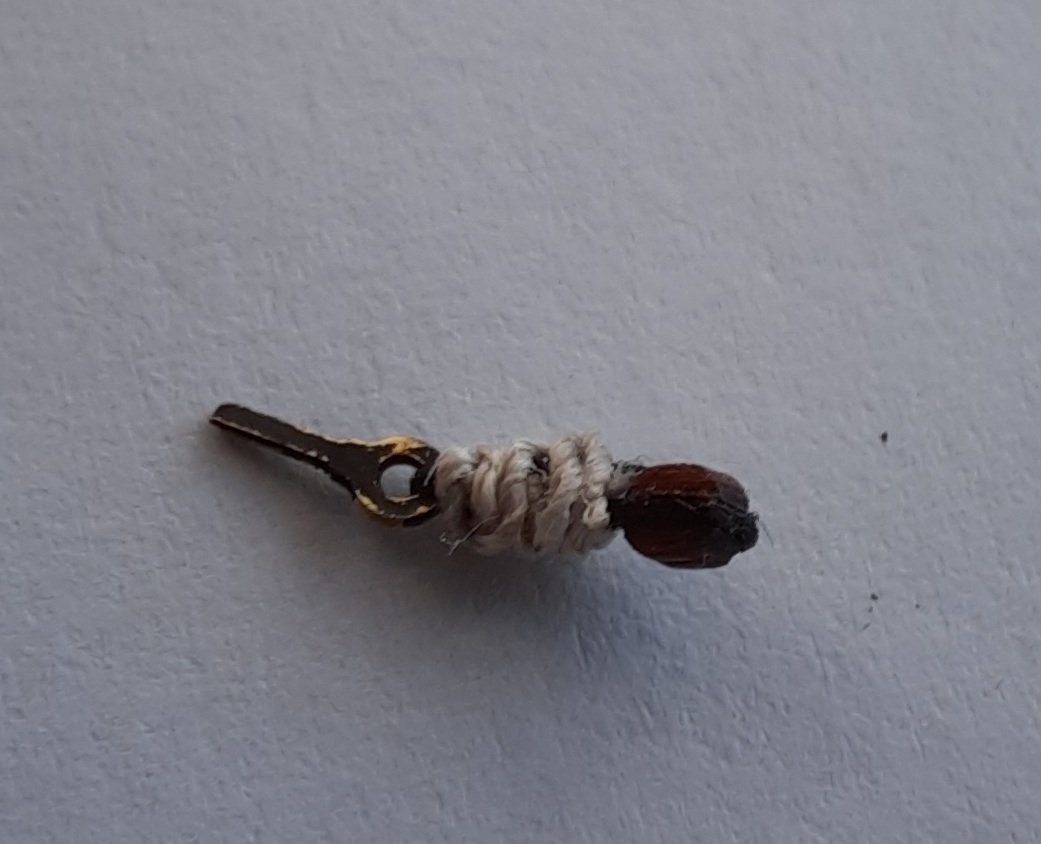
It was then a case of repeating the seizing method of alternate top and bottom half hitch knots. As can be seen with the attached close up macro photo it can look a bit cumbersome, but compared to my previous projects this is a marked improvement on my seizing ability. Undoubtedly this would have looked so much better with thinner seizing thread.
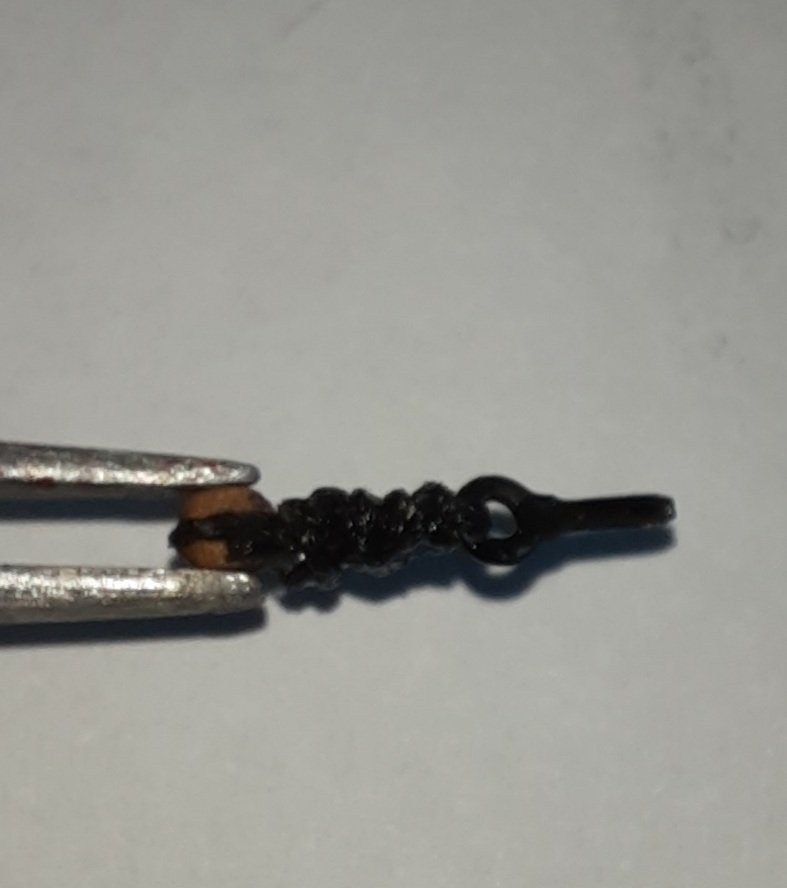
Once the eyebolt had been seized a touch of ca glue was applied to the final knot and the excess thread trimmed away. I completed the process by applying a thin coat of black paint to the seizing and also touching up the eyebolt.
I will now move on to install the ship wheels rigging, which will be covered later on, once the task has been completed.
-
-
HELP PLEASE
Yesterday I soaked 20 eyebolts in an acetone solution to clean the PE parts. I then put the eyebolts in a solution of the AK Interactive photoetch burnishing and after a few minutes all the eyebolts had turned black, as expected.
Today, when I started to handle the eyebolts the blacken effect started to disappear, and simply rubs off when touched.
Am I missing as step with regards to sealing (or cleaning) the blackened effect prior to handling the eyebolts?
Any help or guidance will be greatly appreciated
-
1 minute ago, DelF said:
You might want to try the fly tying thread I used on tiny blocks in my Speedy log.
Thanks, I had noted that in your log and is something I need to look at.
-
Today I have been working on the ships wheel and tiller.
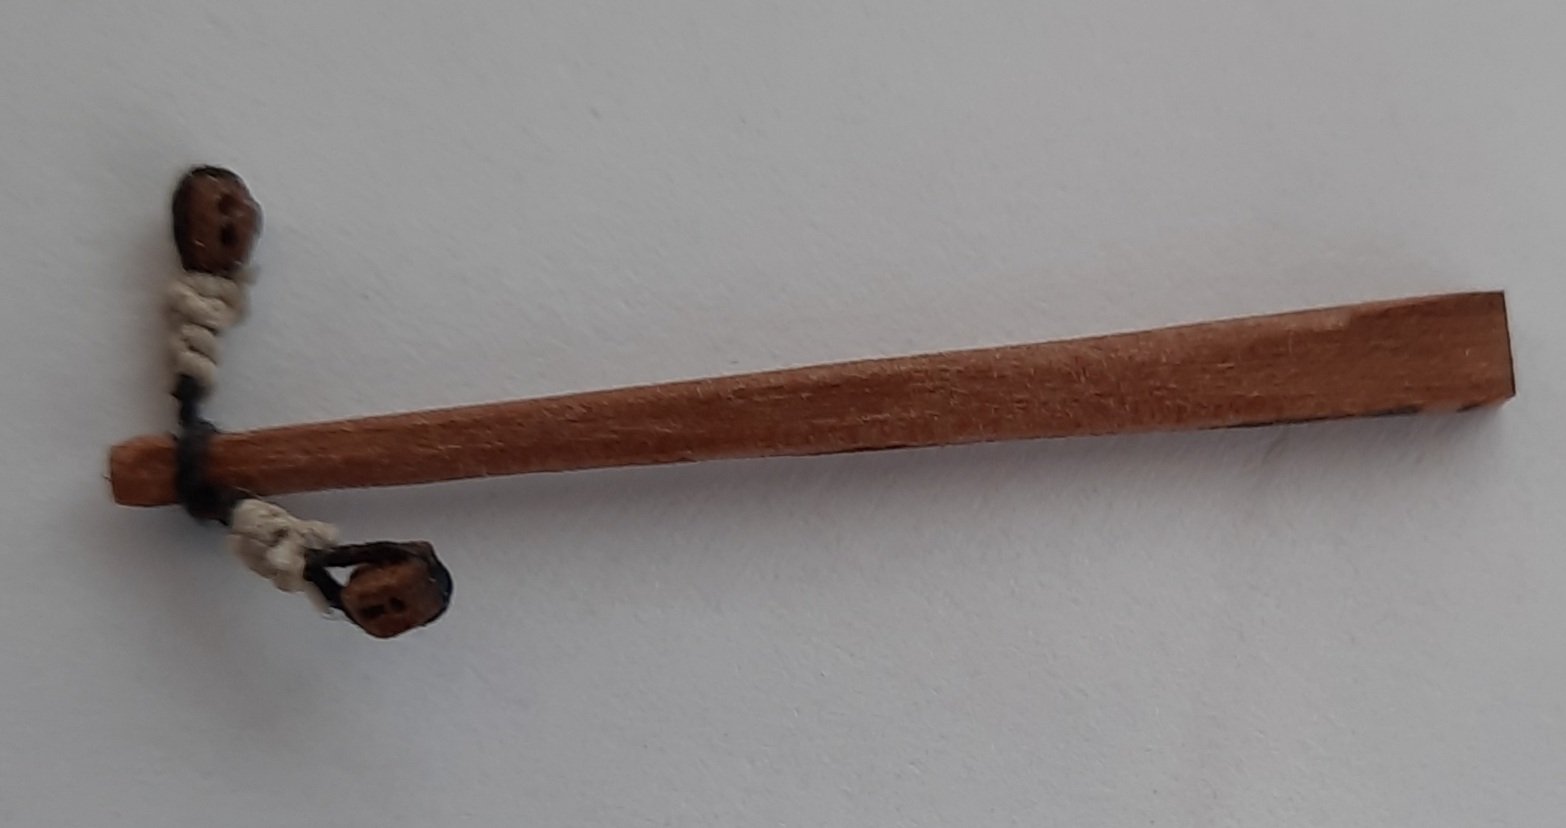
First task was to shape the tiller by rounding off the square edges. Once this was done I set about adding the 2 x 2mm single blocks. The first thing I did was to carefully run a 0.4mm micro drill through the blocks holes and then test fed some 0.1mm thread through the blocks.
Next, using the quad hands, I started to seize the first 2mm block using 0.25mm black thread.
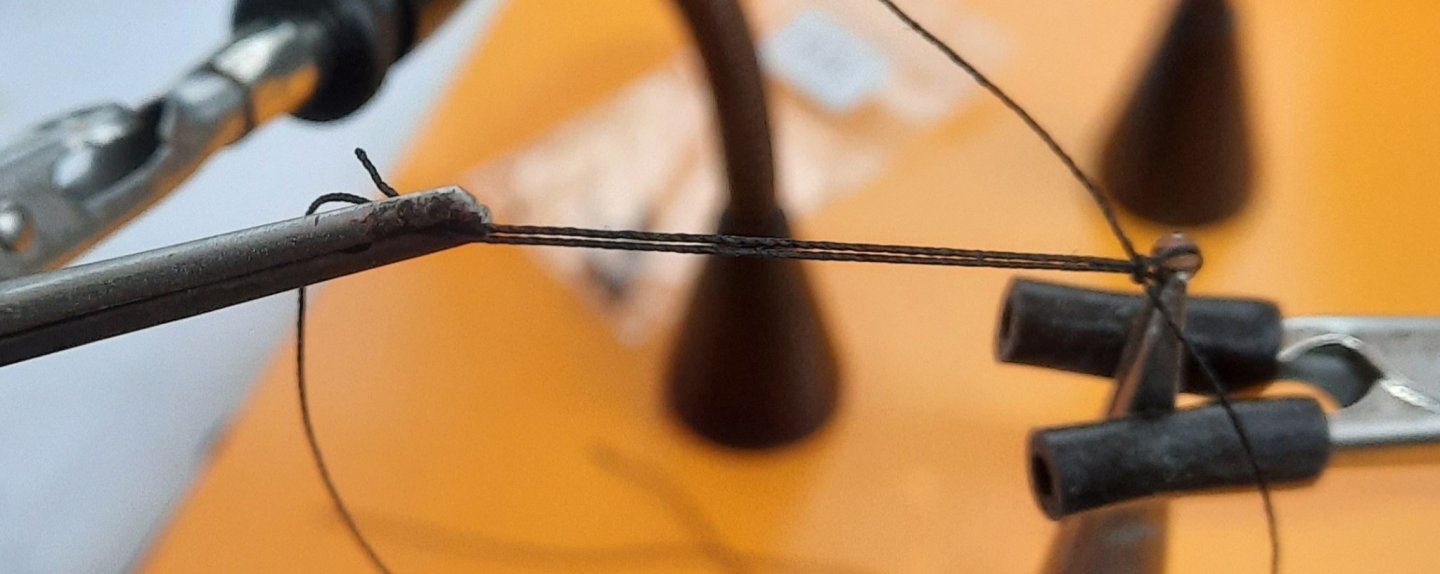
Once I had completed the seizing I thought it looked a bit bulky so I then started again, this time using 0.1mm thread. I think this produce a better result.
I used the seizing method suggested by Derek (DELF) which was to use alternate half hitches top and bottom and I worked toward the block, and this proved to be a very good method. Eventually had the two blocks seized to one length of thread which was then secured to the tiller.
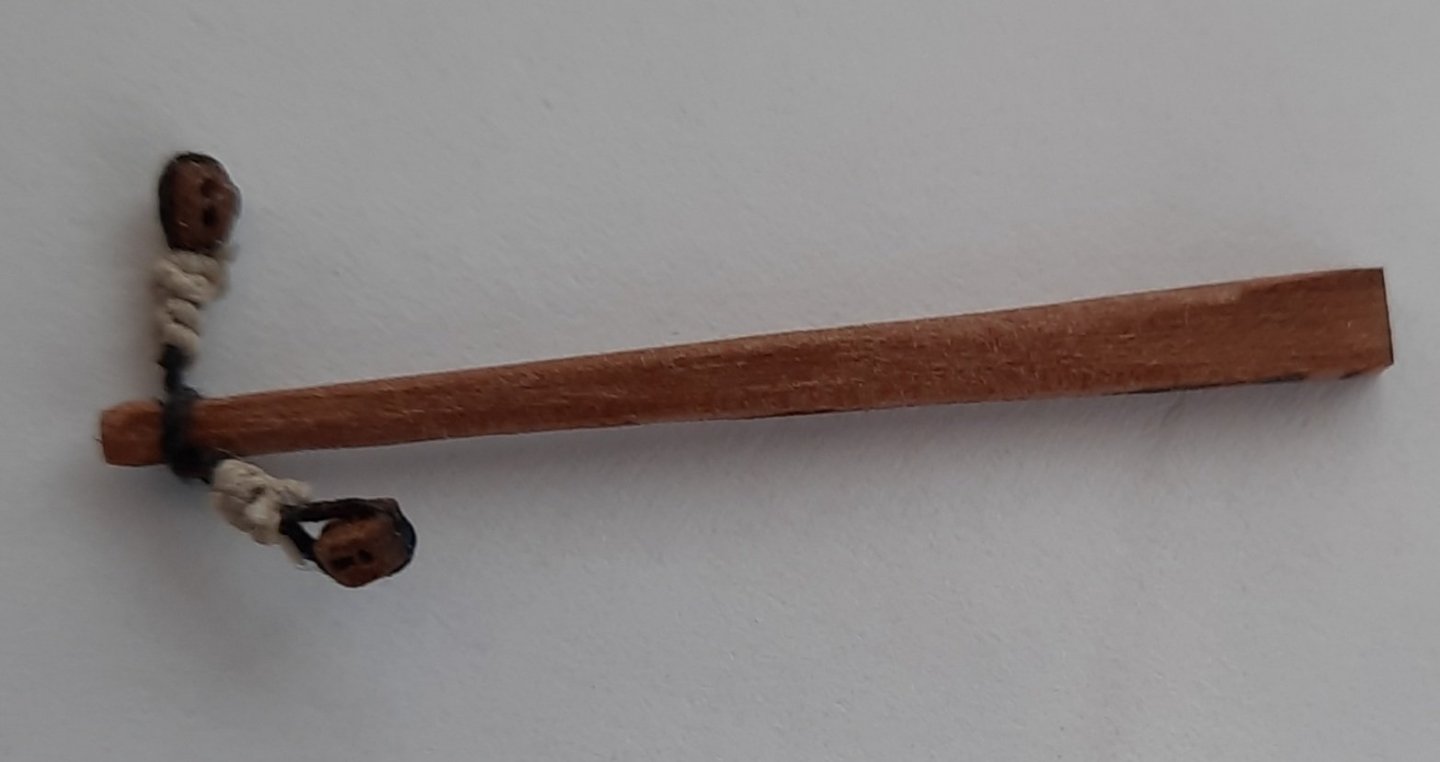
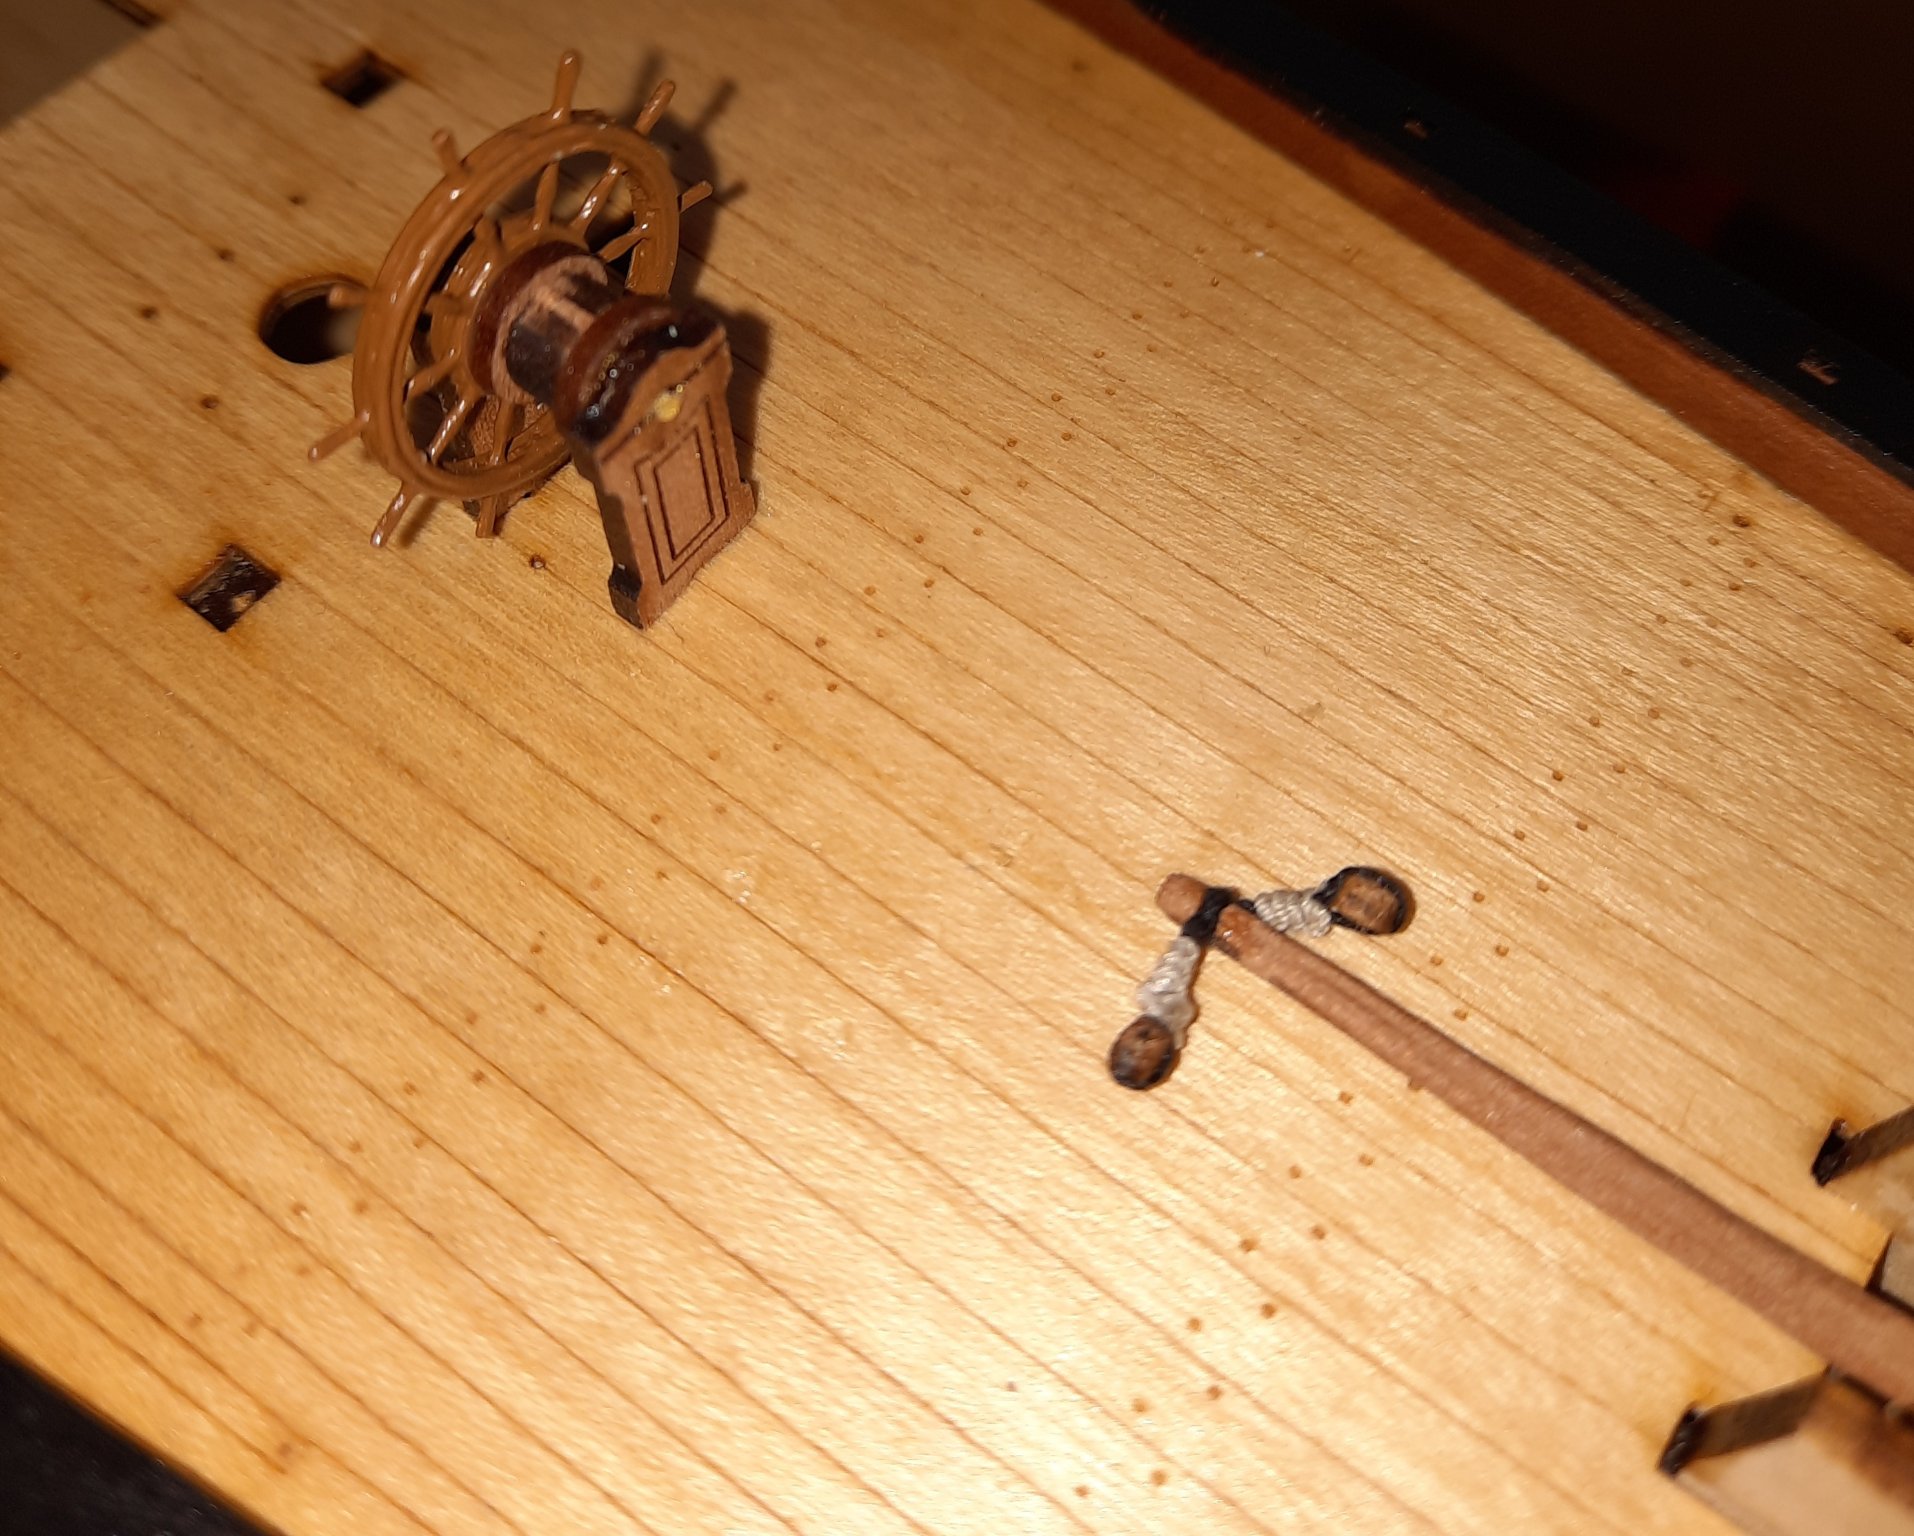
I had already primed and painted the brass ship's wheel PE parts so it was a very straightforward task assemble the items. In the picture below the ships wheel and tiller have both been dry fitted to check everything fits ok.

My next task will be to seize 6 off 2mm blocks to their respective eyebolts, once again I will follow the seizing method outlined by Derek (DELF) in his Speedy build log. I will use a blacking solution on the eyebolts prior to the seizing. I then plan to run the rigging thread through blocks in turn and once each block has been threaded I will secure the ship wheel and eyebolts in there respective positions and then tension and tie off the rigging using two more blackened eyebolts. I have already dry fitted the Tiller Housing which I will glue in place once the rigging has been completed.
- p.hoek, Edwardkenway, Bossman and 7 others
-
10
-
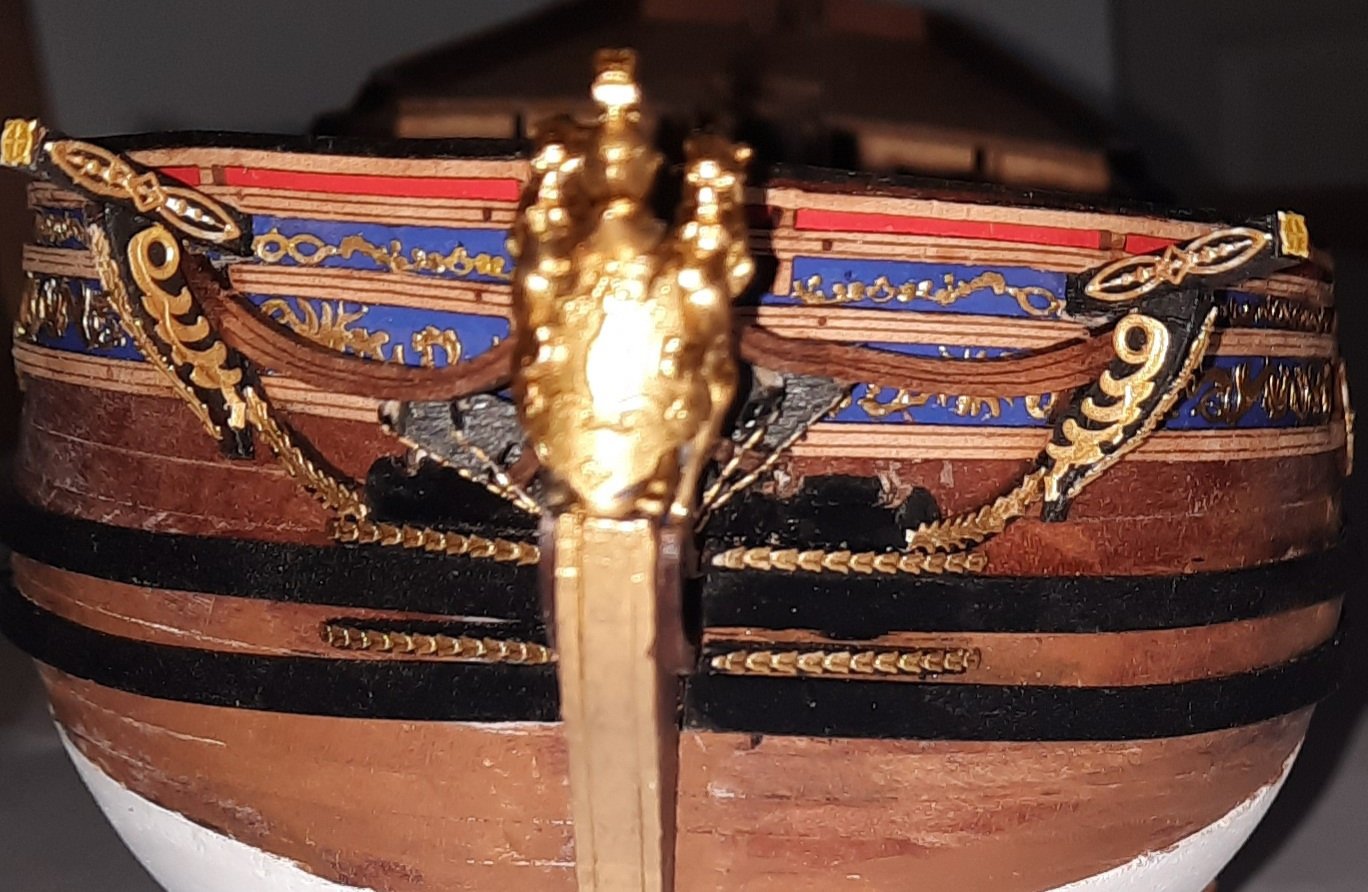
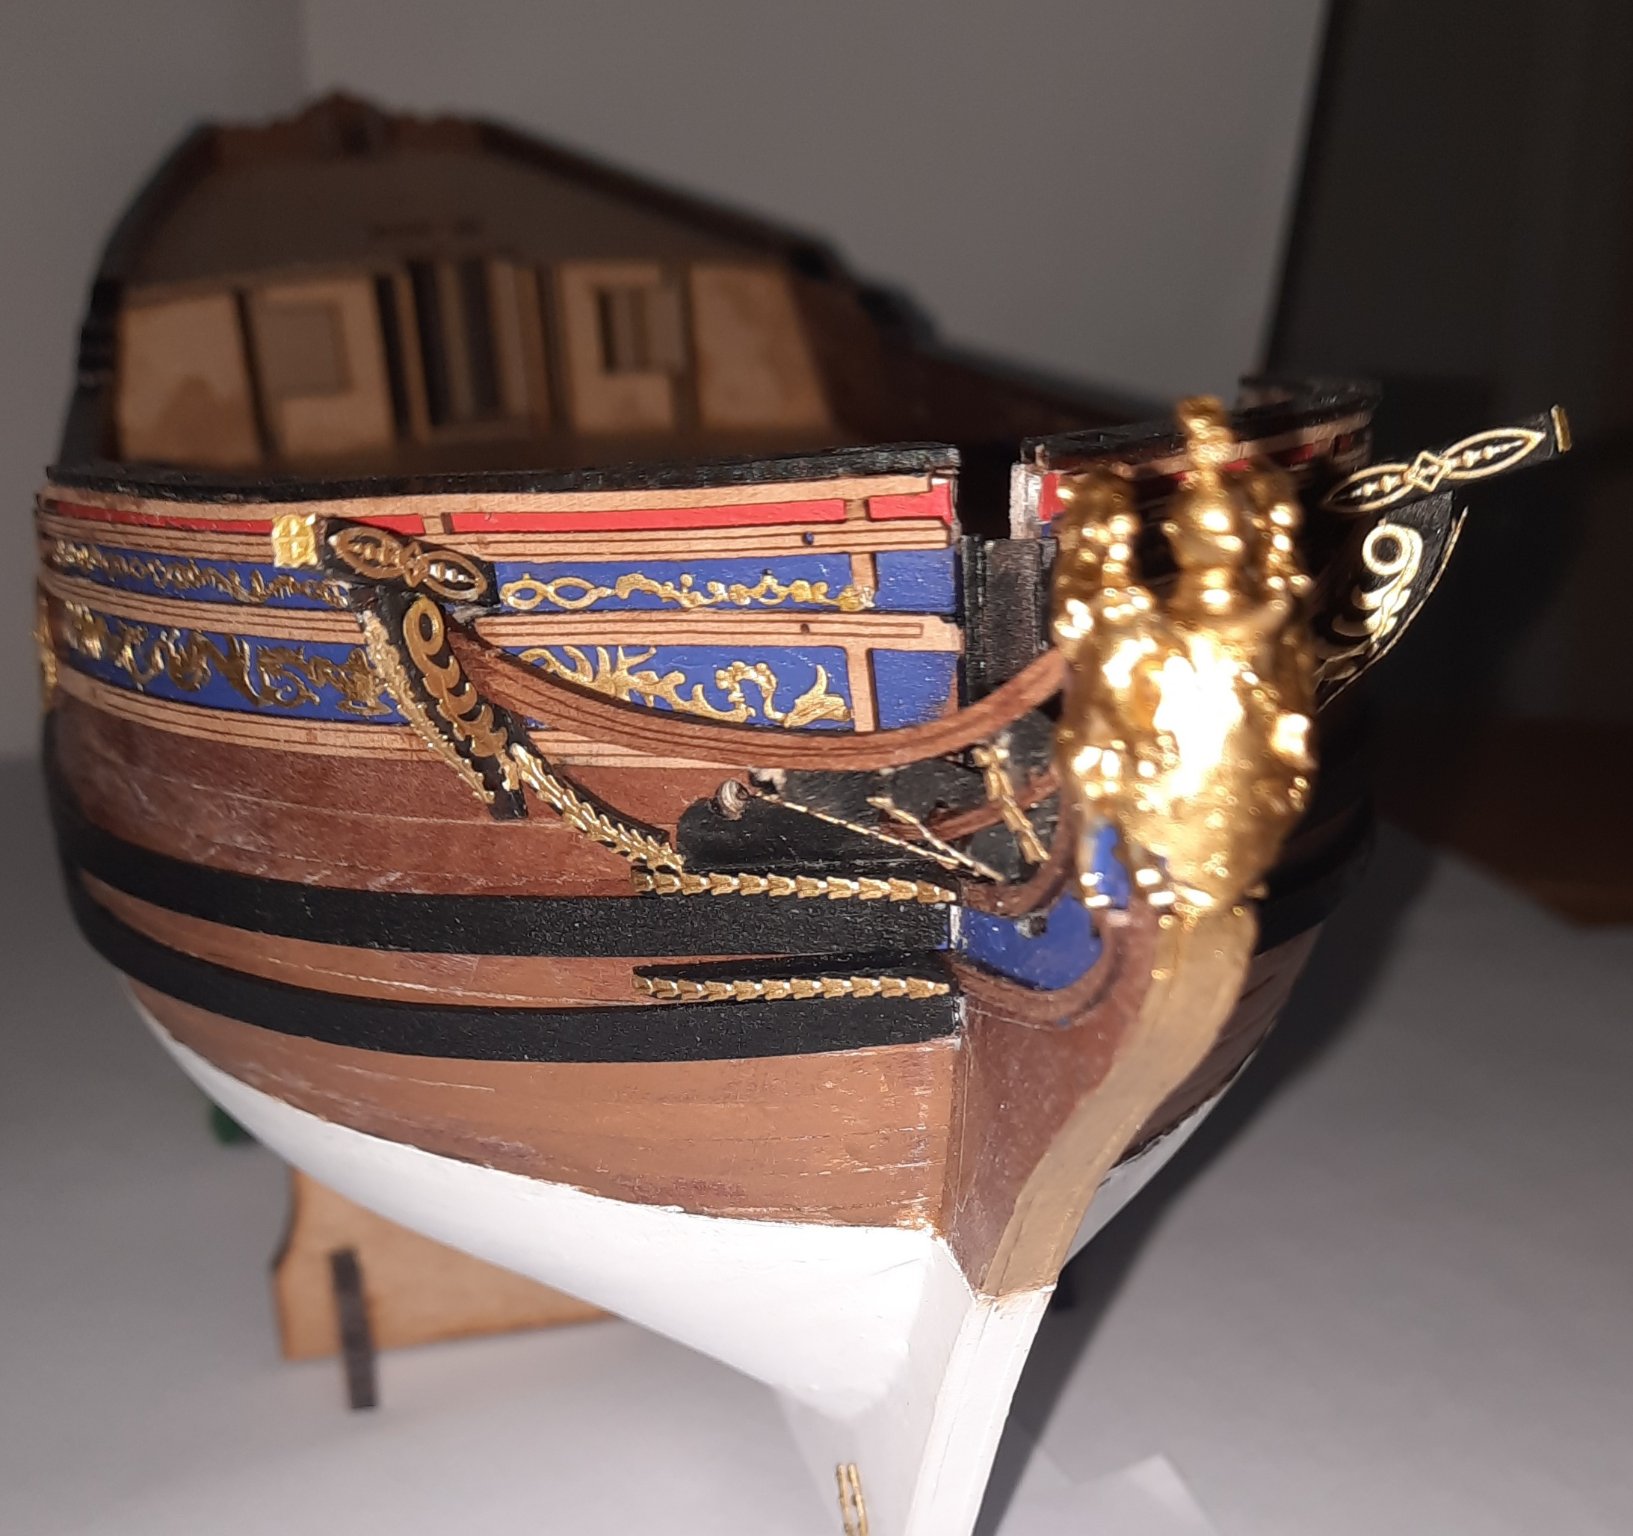
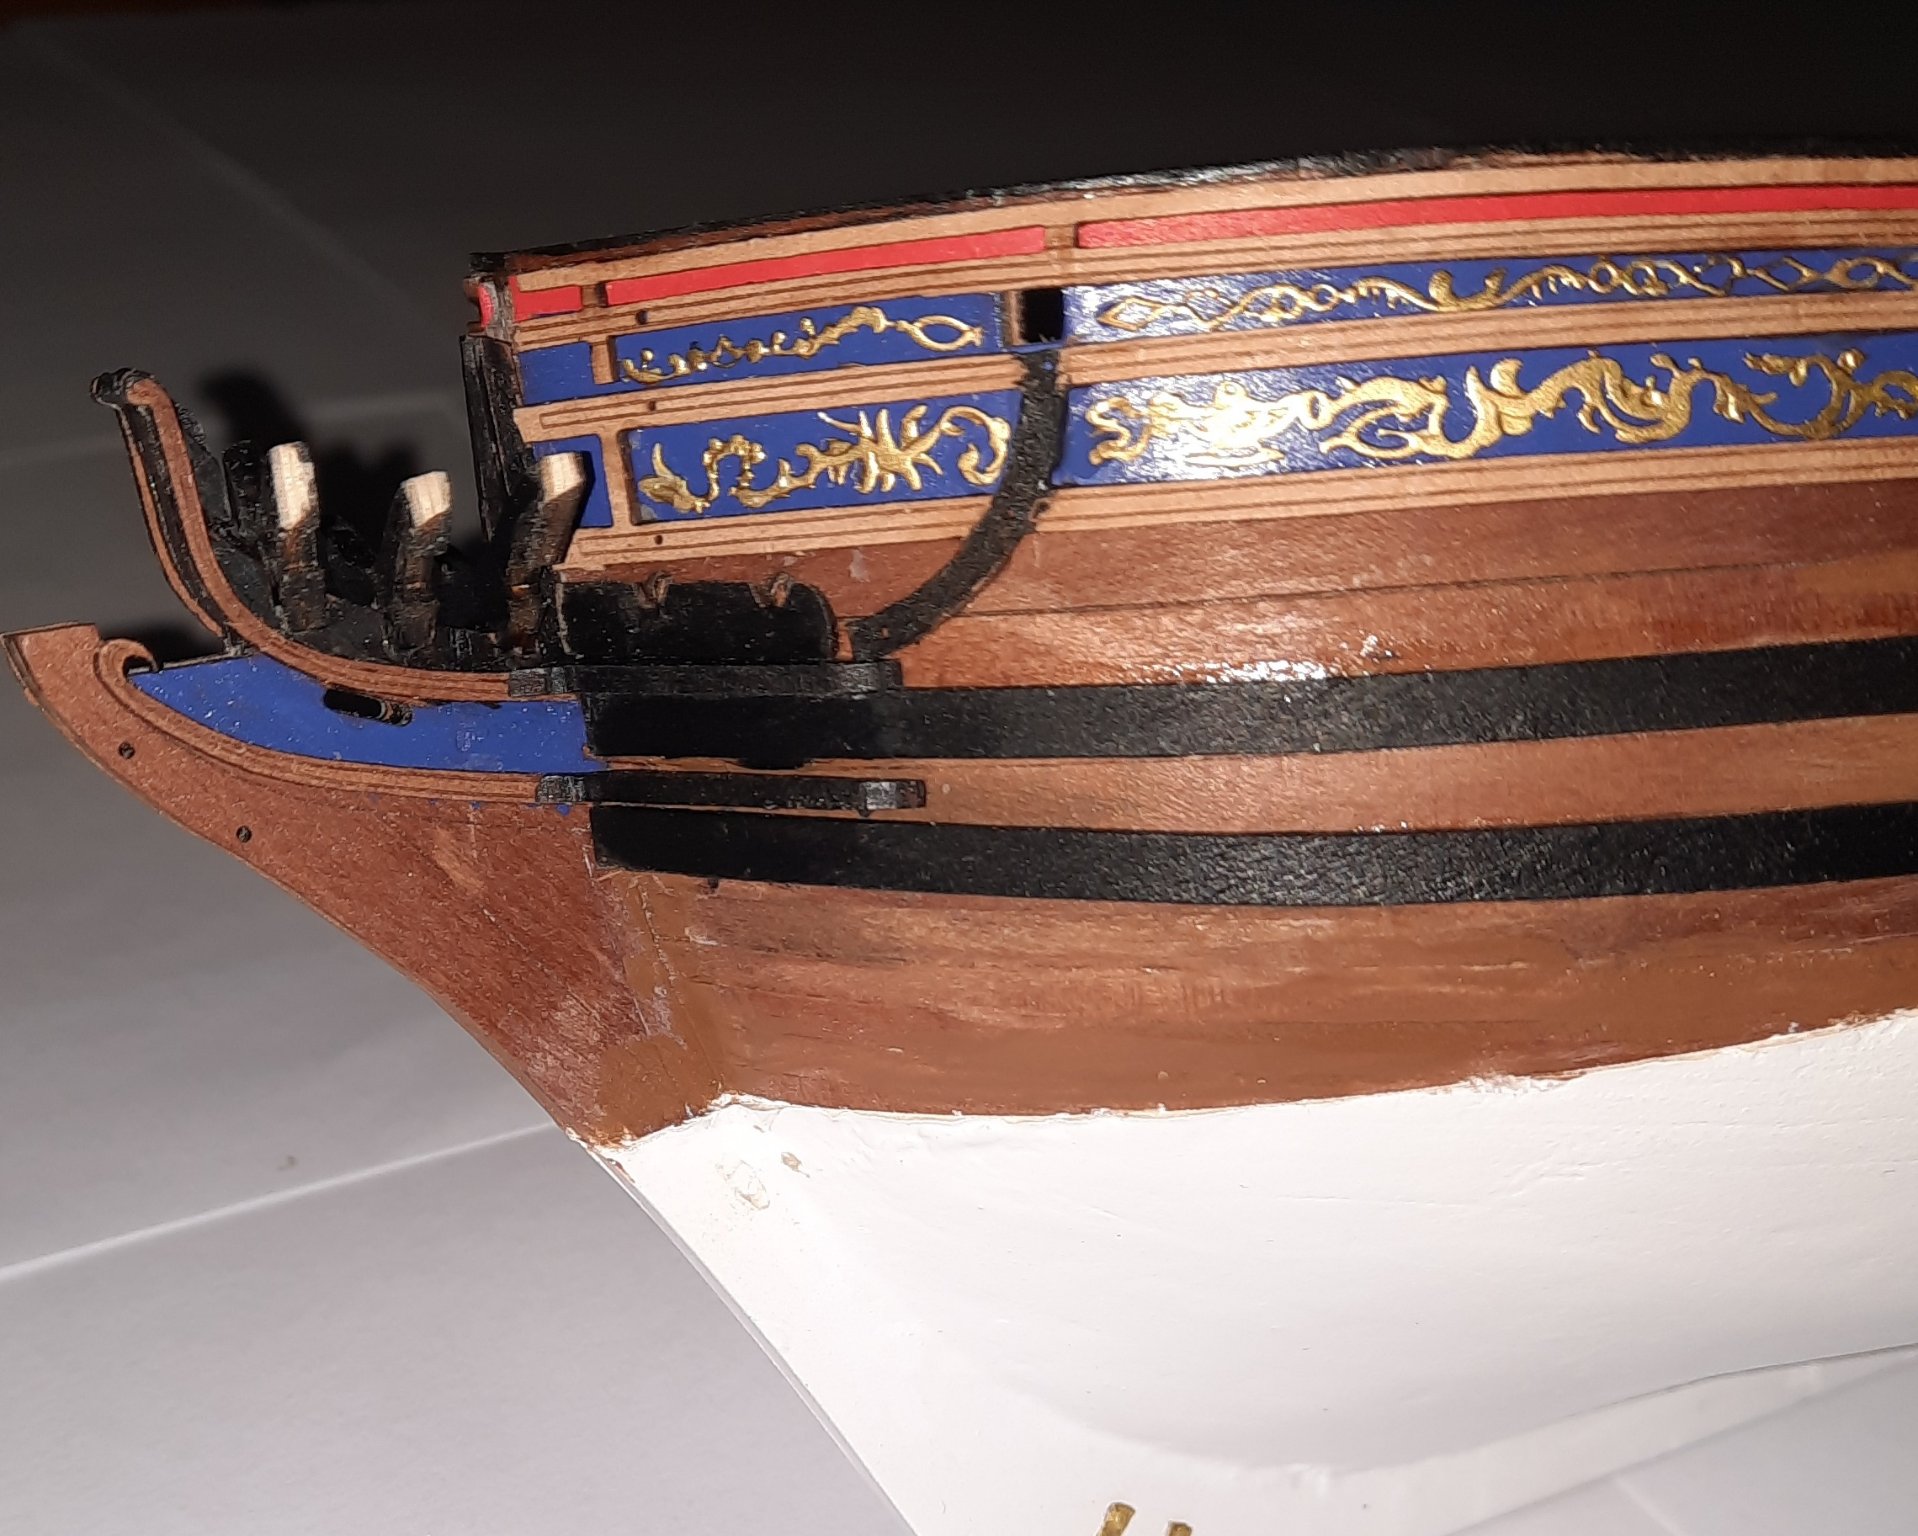
This morning work as progressed well. The painted figurehead as now been installed and the lower cheek rail was put back in place without any problems.
Prior to painting the figurehead I did try a dry fit and found in necessary to remove some of the excess resin casting bits from the base and back of the main figurehead part. I did manage to knock of the feathers from the top of the helmet however. Thankfully I was able to find the very small piece and using a touch of CA gel I was able to reattach without any problems.
I have added the final PE decorations to the Bow ‘V’ Frames, cathead assembly, Bow Bracket and Hawse Bolsters.
The cathead decorations and bow bracket with the decorations added, with an out of focus figurehead

- Edwardkenway, rafine, Rustyj and 8 others
-
11
-
-
-
I have noted that the Lower Cheek Rail leading edge (the curly bit) prevents the installation of the figurehead. I have been able to release the Lower Cheek Rail on one side and I have now test fitted the figurehead without any problems. I noted on the pictures in the build manual the curly bit has been removed.
I have also fitted the Catheads, the Cathead Support Brackets and the bow upper and low rails.
I have now started painting the figurehead, the blue background is now complete and the paint is now drying. I will paint the gold bits in the morning. I have been using my latest gadget, the LED hands free magnifier headband visor and this is going to be an excellent addition.
-
30 minutes ago, GuntherMT said:
As long as you are happy with it, doesn't really matter if the closeups look bad!
Thanks, overall I'm reasonably happy with the build. I'm slowly getting better with each build I do.
- GuntherMT and chris watton
-
2
-
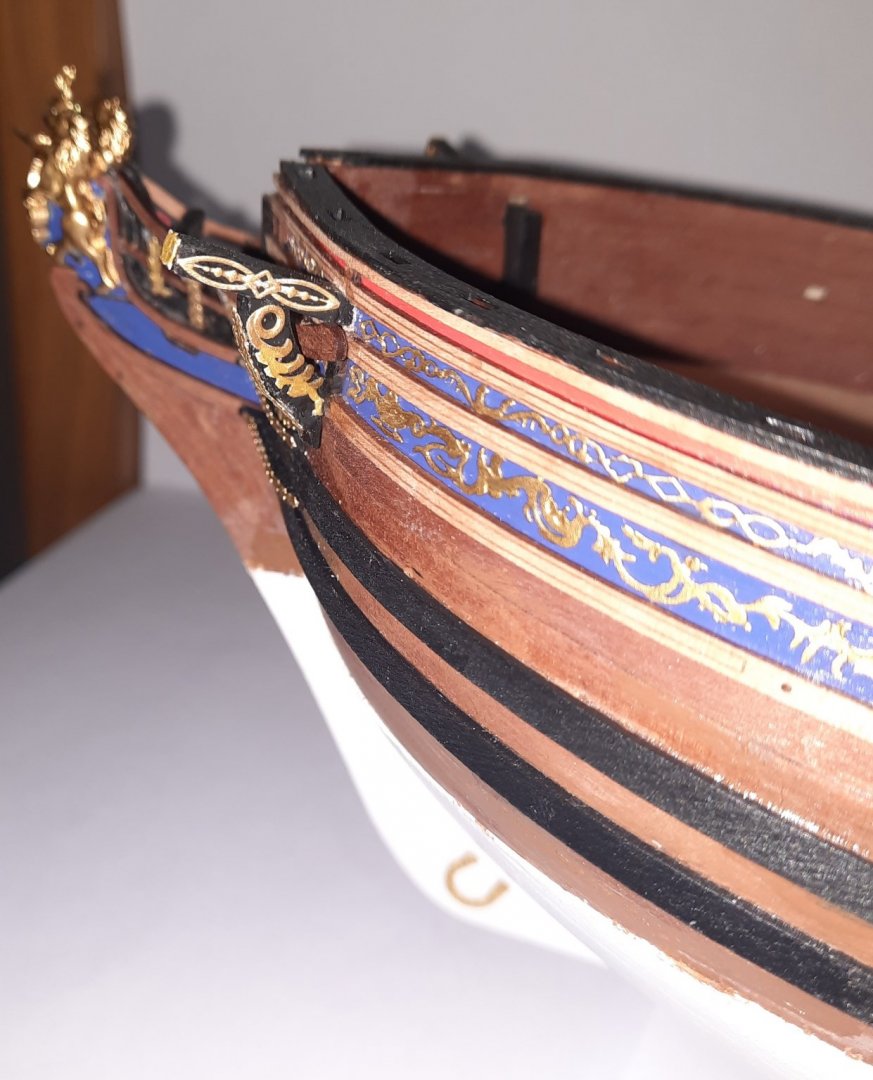
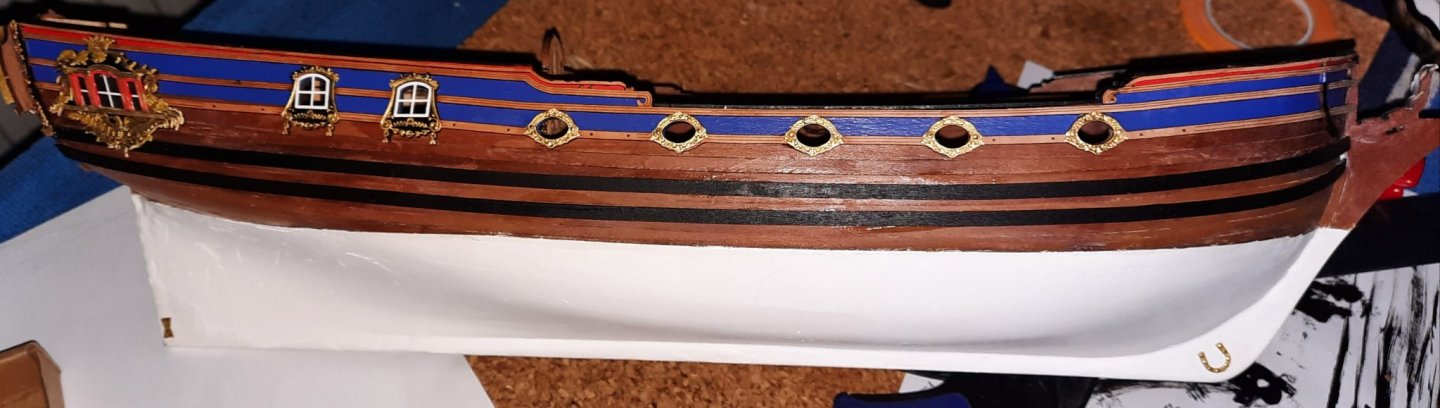
Time for another update in my progress. The two attached close up photo's show just had badly I painted the hull, thankfully it is not that noticeable to the naked eye when viewed from distance😂.
I have now fitted the rudder assembly. I took my time in shaping the upper stem of rudder so that there was sufficient clearance to allow the Rudder Pintles to be seated in the stern post. Looking ahead at rigging the wheel and tiller the 2mm single blocks look very small so I will need my LED hands free magnifier headband visor to see what I'm doing.
I then proceeded to fit the Lower Cheek and Upper Cheek Rails followed by the 3 Bow ‘V’ Frames which I had tapered in readiness for the upper Bow Rails. I also fitted the Bow Brackets and Hawse Bolsters. Once the glue had had time to cure I will fit the both the upper and lower Bow Rails patterns.

- ObviousNewbie, BobG, chris watton and 9 others
-
12
-
5 minutes ago, gjdale said:
Looking really nice Glenn!
Thanks Grant
-
6 hours ago, Rustyj said:
Well done. She's looking great!
Thanks Rusty
-
11 minutes ago, DelF said:
Looking good Glenn!
Many thanks
-
19 minutes ago, rafine said:
You're setting a high bar for the rest of us, Glenn. Great work.
Bob
Thanks Bob, I think everyone is building to an amazing standard. I have made a few mistakes but overall I'm happy with the result so far.
-
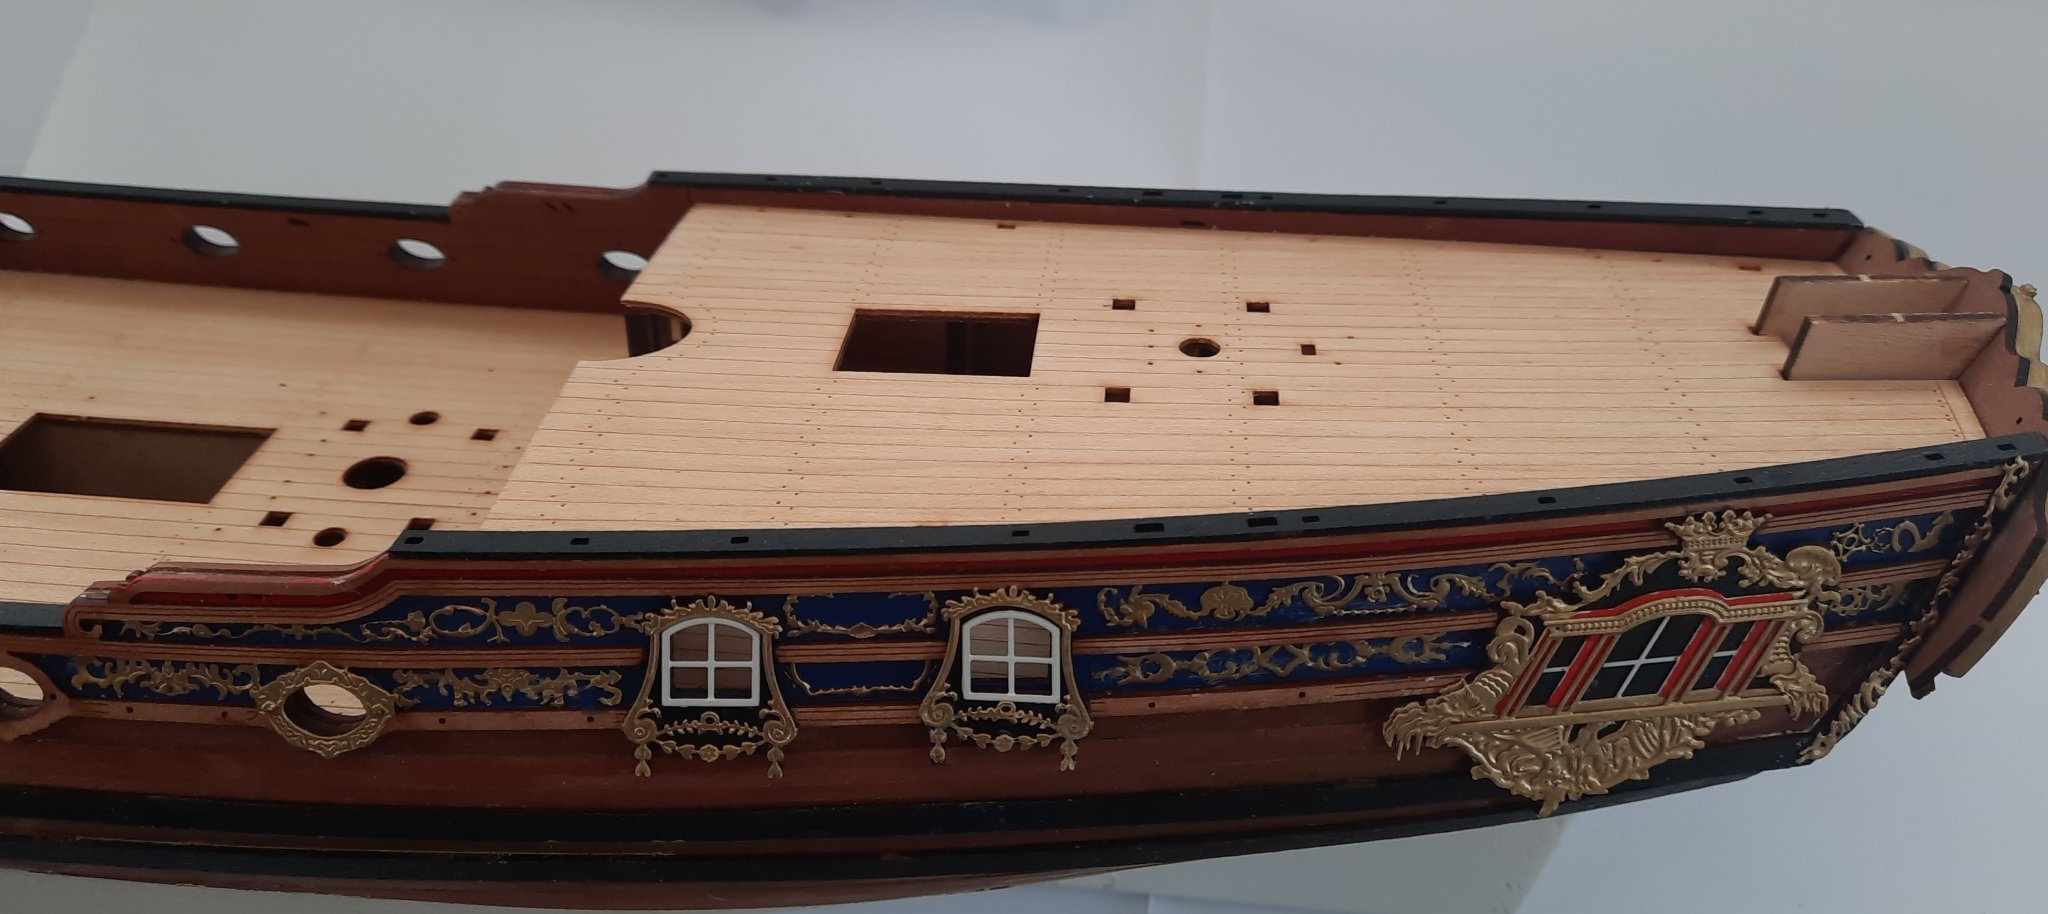
I have had a good day in the shipyard. I started off by adding the missing decorations to the port side. I also added the horseshoe and fish plates to the hull.
I then decided to build and dry fit the mid ship bulkhead assembly. This was a nice task and fits really well. A really nice bit of design work by Chris.

I then added the window and gun port decorations to the starboard side. I just need to add the decorations patterns to complete this task. I did add a black backing sheet behind the quarter gallery window.
-
21 hours ago, DelF said:
I used the tried and tested pins-in-a-plank method to try to make sure the deadeyes were all at the same level:
Hello Derek
As always I have found your post(s) very informative and full of plenty of great advice and detailed methods. I have always used a jig to set the distance between the deadeyes but never seem to have a level set of deadeyes once rigged. The problem I have is setting the same amount of tension to each lanyard line. Do you have any tips? I have an idea on my current build to use a small weighted item (e.g. my normally closed tweezers) to the lanyards so each line so I know each line will have the same tension applied. I can then to use your method of using a white thread to mark the position at the bottom of the deadeye.
-
1 hour ago, Barbossa said:
it's recommendable to progress with an interval of 5 positions and later on fill up the gaps to avoid any deformation.
Never heard of that before. Thanks for the info
-
9 minutes ago, DelF said:
I'll follow on with a quick note on how I rigged the deadeyes.
Derek
Great work. I'm eagerly waiting for the follow up note
-
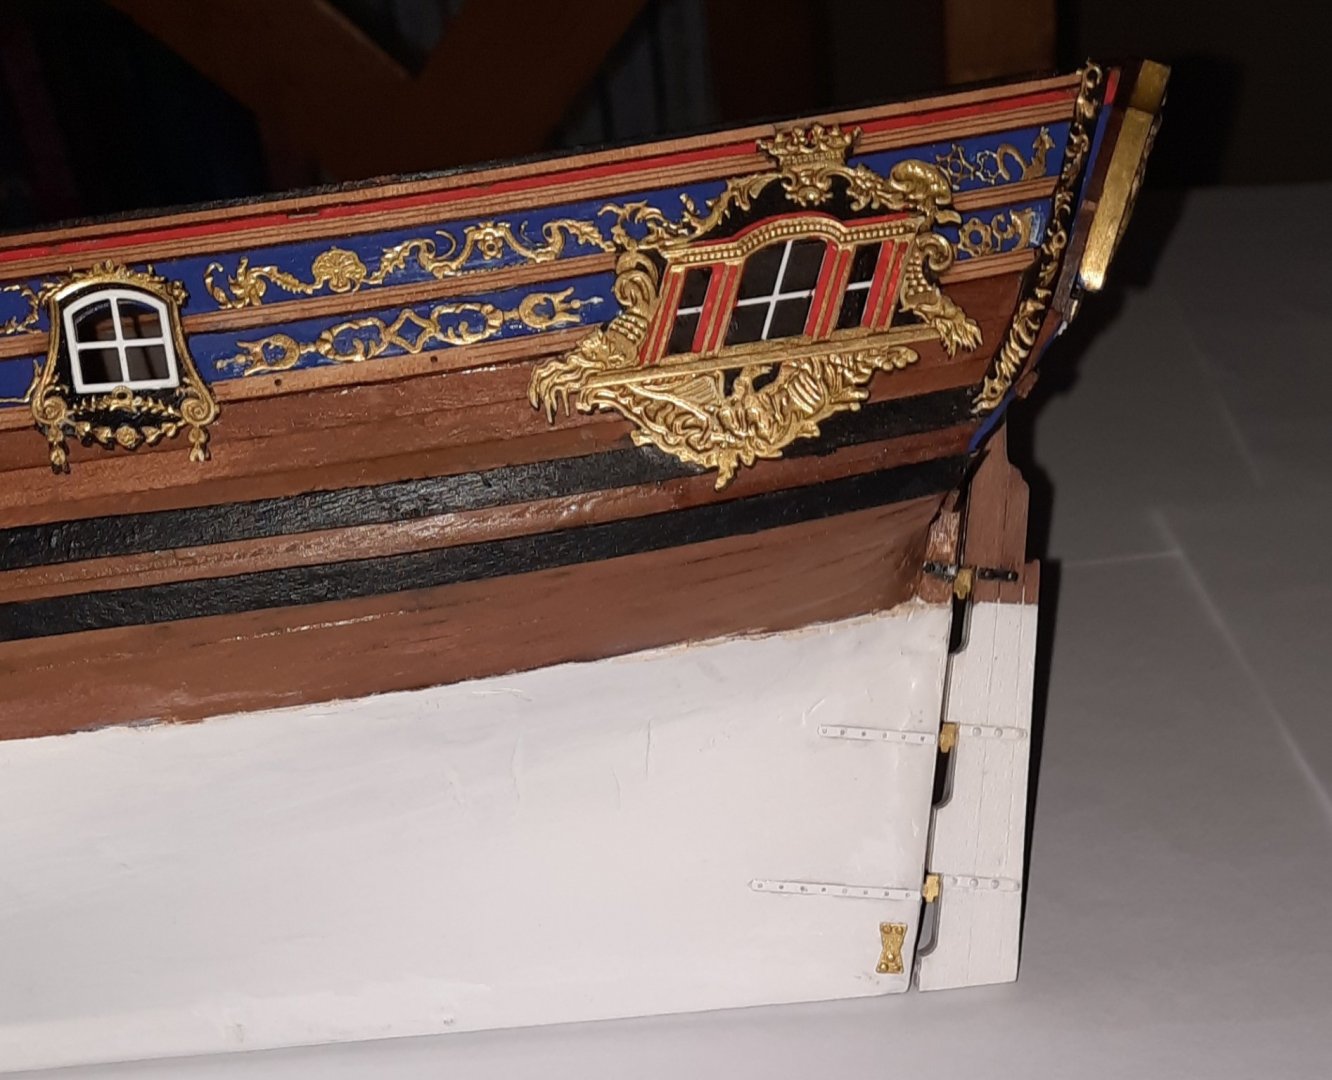
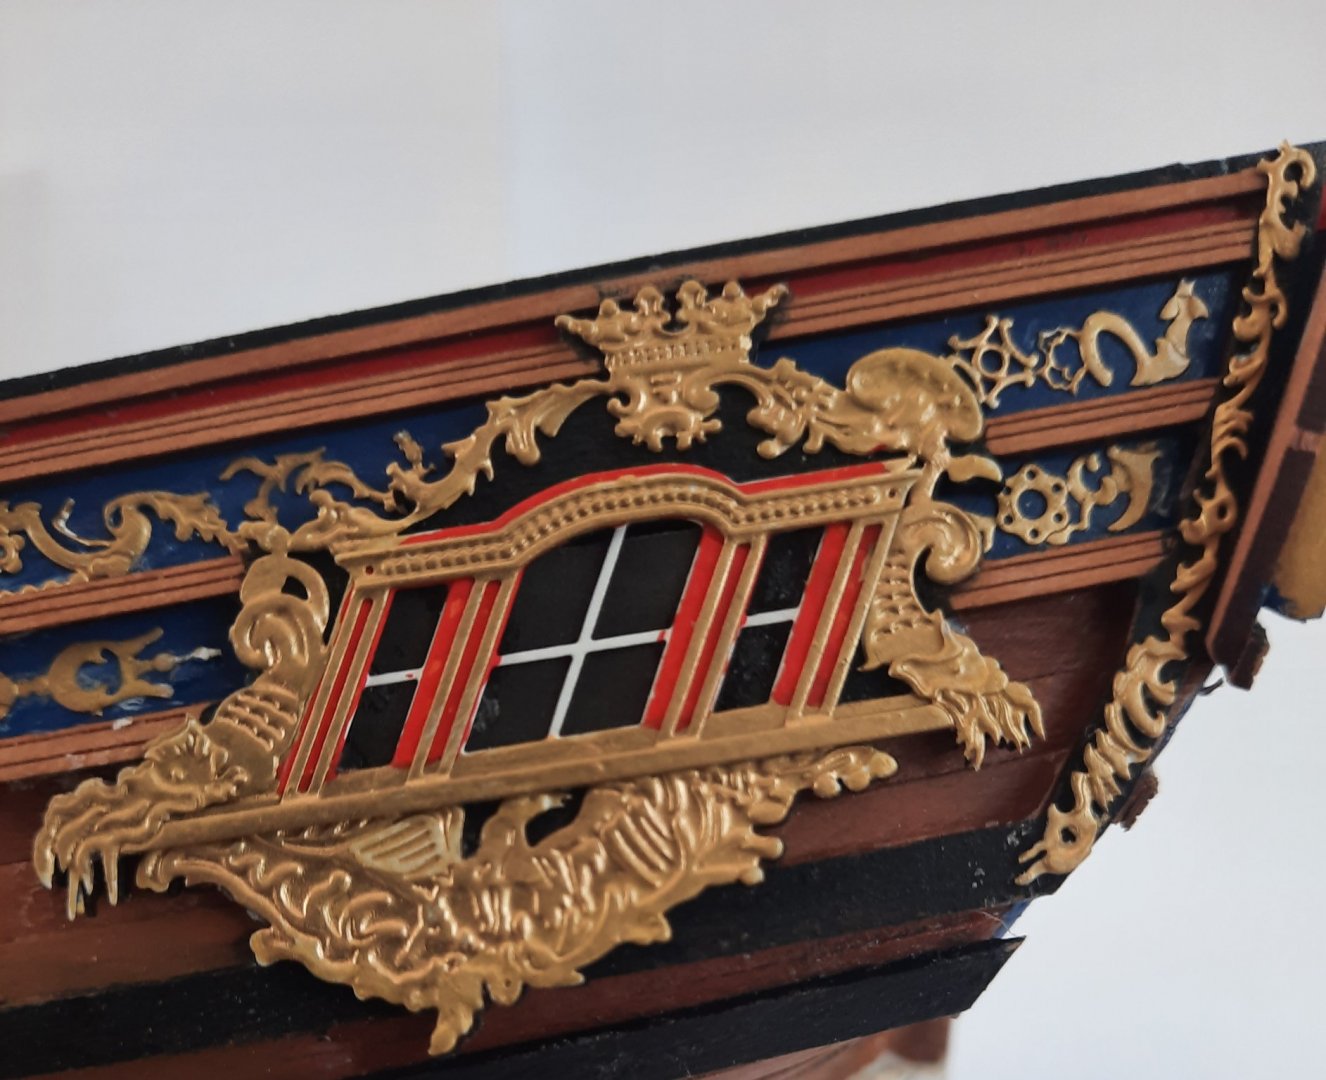
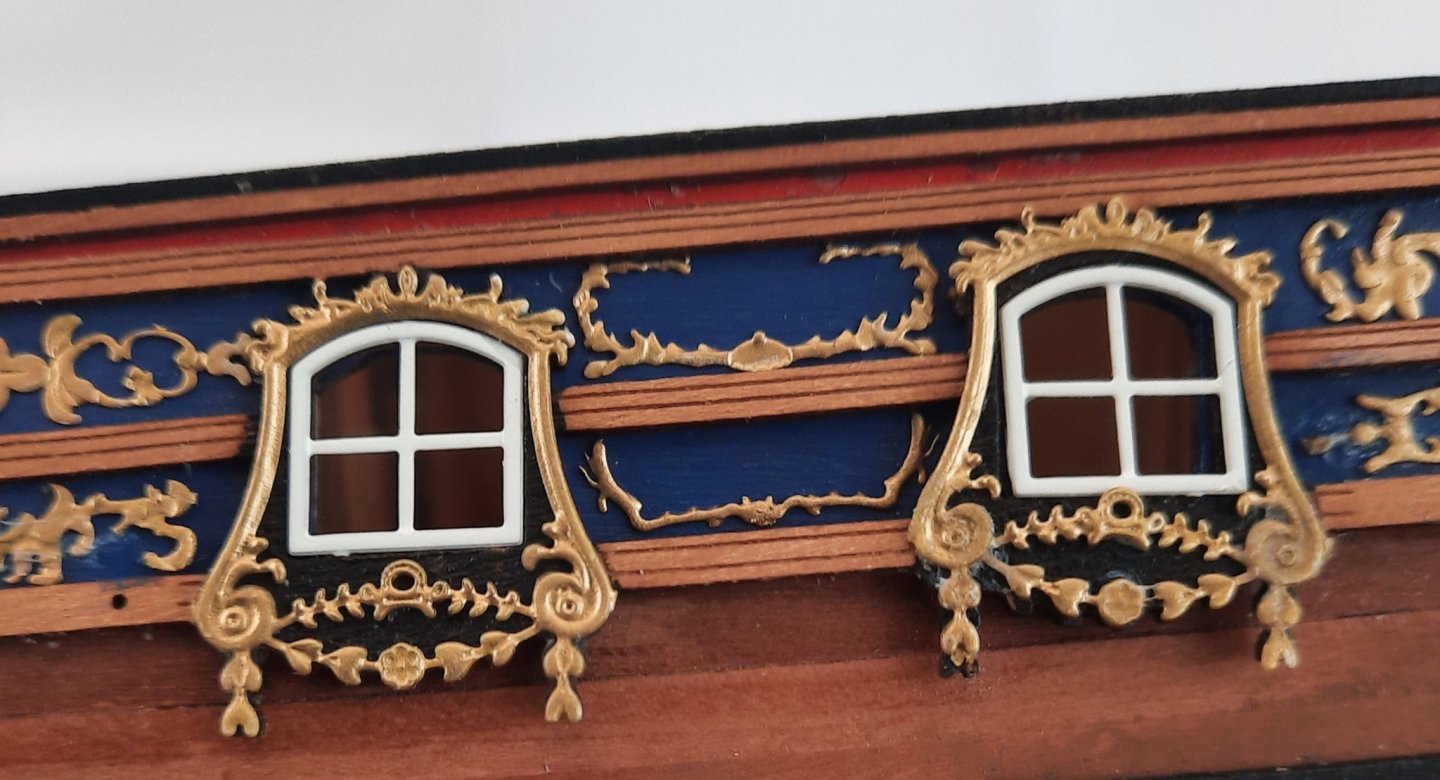
I painted the lower stern panel blue. I painted the transom red which looks really nice with the blue, gold and white. I painted the quarter galleries as shown in the manual, black background with red infills and gold decorations and white window frames.
-
1 hour ago, chris watton said:
Looks fantastic Glenn!
There are locating holes for these, when matched up with a pin, should fit perfectly.
Thanks Chris. The holes suffered paint clog and I did not notice them. I will remove, clean and pin as per the instructions. The mis-alignment actually looks far worse in the picture.
- Rustyj and chris watton
-
2
-
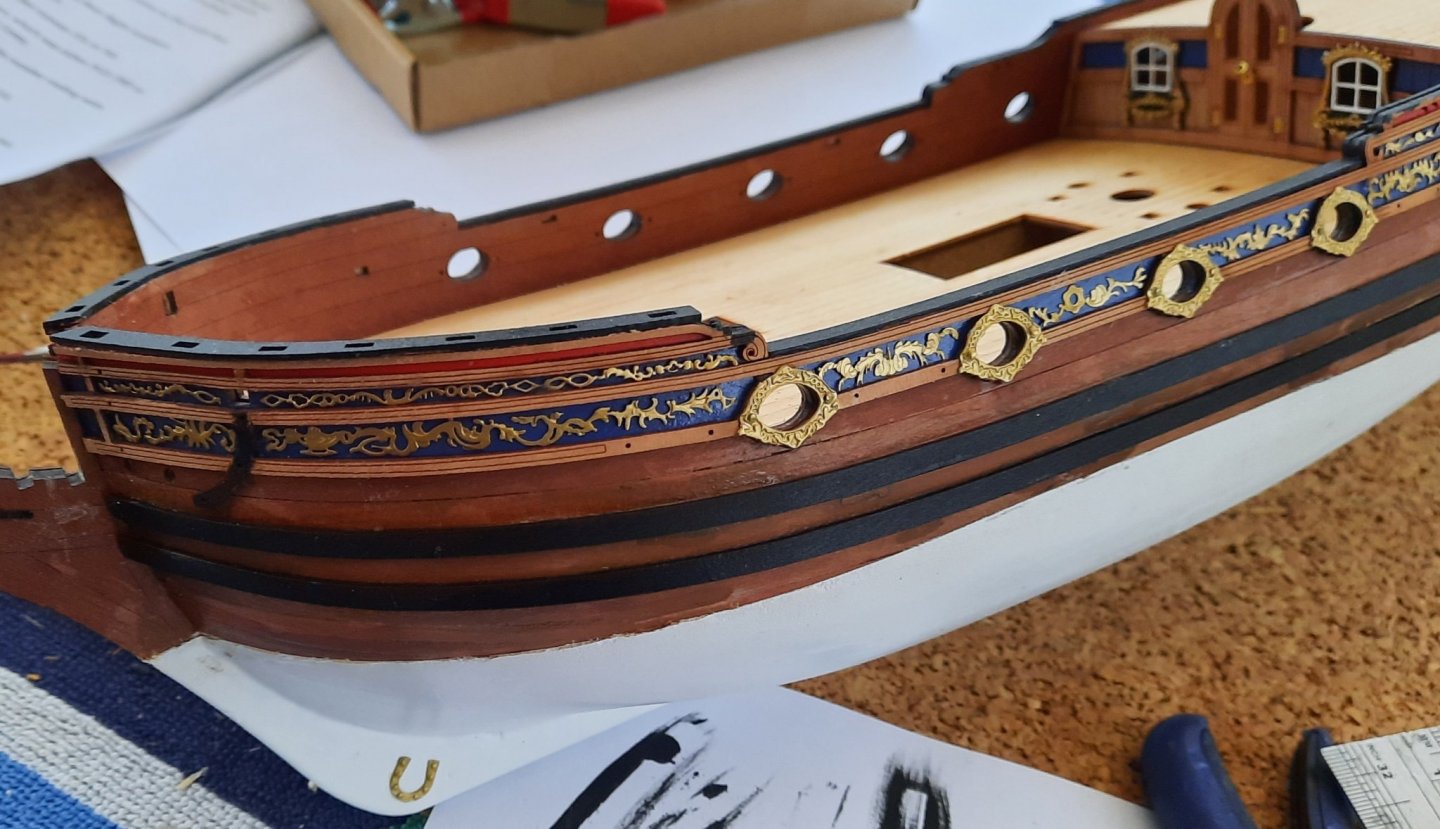
I decided to start adding the decorations to the hull. I have worked on the port side from stern to midships. The patterns have really added another dimension to the hull. Over the next couple of days I should be able to complete this task for both the port and starboard sides.
Picture of port side decorations

Picture of Quarter Gallery Window. I added a black sheet behind the window frame. With a steady hand I will touch up the paint work around the window frame.
Picture of the two side windows. The left hand frame should have been positioned better I have only noted the error when looking at the photo. I might apply some acetone to remove it and to then reposition. There was no need to add a black sheet as the deck is visible through both windows.
- DelF, GrandpaPhil, chris watton and 11 others
-
14


Duchess of Kingston 1798 by glennard2523 - FINISHED - Vanguard Models - 1:64 - Royal Yacht by Glenn Shelton
in - Kit build logs for subjects built from 1751 - 1800
Posted
The upper aft rail has been assembled and I am currently waiting for the glue to fully cure. Please be aware the aft rails are very delicate. I have managed to snap off one of the support beams. It is not a major issue as it can be fixed very easily.
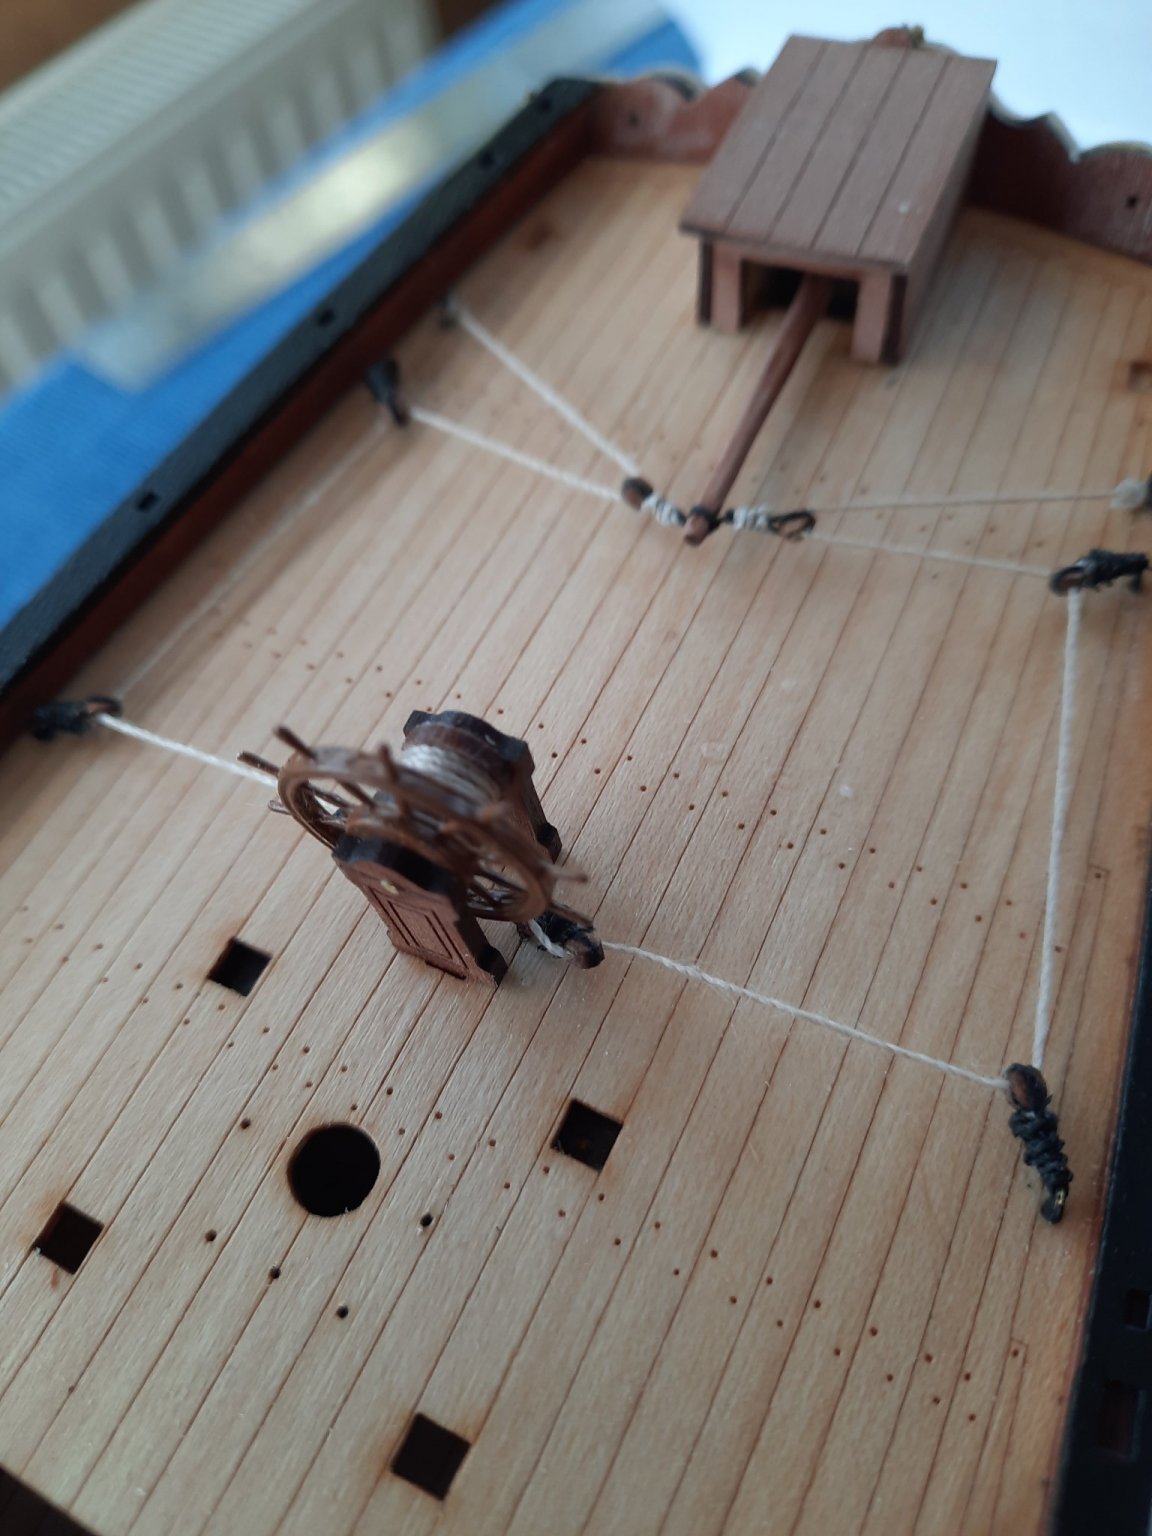
In the meantime I have now added all the items to the upper deck, including all the cleats and eye bolts, excluding the belay pins for the mizzen bitts, which I will fit during the rigging phase. I have now started work on building the various items required for the main deck, which should keep be busy for a few days.
I did prime and paint the spiral staircase PE rails gold.
The tiller housing
Binnacle, mizzen bitts and spiral staircase.