mtaylor
-
Posts
26,273 -
Joined
-
Last visited
Content Type
Profiles
Forums
Gallery
Events
Everything posted by mtaylor
-
So the little sabot goes on the big one... at least is not an undersabot.
-
HMCSS Victoria 1855 by BANYAN - 1:72
mtaylor replied to BANYAN's topic in - Build logs for subjects built 1851 - 1900
Well done and looking good, Pat.- 1,013 replies
-
- 3
-

-
- gun dispatch vessel
- victoria
- (and 2 more)
-
Animated video of useful model rigging knots
mtaylor replied to Bob Cleek's topic in Masting, rigging and sails
For those not on Facebook... there's this site: https://www.animatedknots.com/ -
Keep an eye on Crown as he's planning on re-opening as soon as he's caught up. As for Wood Project Source, I have no idea what happened there.
-
Welcome back home, Halbaby.
-
HMCSS Victoria 1855 by BANYAN - 1:72
mtaylor replied to BANYAN's topic in - Build logs for subjects built 1851 - 1900
I didn't realize the holes were pre-drilled. Have you thought of small pliers (needle nose type) with on jaw that round? I recall seeing them used. The ones that have, the rounded part is tapered but I've also seen some here that non-tapered. Not sure if they're custom made or can be bought.- 1,013 replies
-
- 1
-
-
- gun dispatch vessel
- victoria
- (and 2 more)
-
Cutty Sark by Cuda1949
mtaylor replied to Cuda1949's topic in - Build logs for subjects built 1851 - 1900
Al, Get yourself some white glue. Mix the glue with water in about a 50-50 mix and brush the ratlines. You can then use a small tool (a nail is what I've used) and give the rats a nice, gentle, downward curve. But to test first as not all threads are equal. -
Correct. It's in the good inches and not this new fangled stuff called metric.
-
Looks like you even got the serial number tags on the motor, Craig. Sweet.
-
Hello Henrik, Welcome to MSW. If you look in the Kits section, there are 14 Agamemnon logs. Not all are finished though. But they will be a help to you with your model. We have an index in the Kit area of all the build logs. I'm attaching a copy so you can find the Agamemnon logs. I and others recommend that you open a log as it's the best way to get help when you need it, make some friends, and it will also help other builders. Wooden Ships.pdf
-
HMCSS Victoria 1855 by BANYAN - 1:72
mtaylor replied to BANYAN's topic in - Build logs for subjects built 1851 - 1900
Pat, can you do the bending first and then drill the holes? Maybe use some CA to hold things together and then after the holes are drilled, soak in acetone.- 1,013 replies
-
- 4
-
-
- gun dispatch vessel
- victoria
- (and 2 more)
-
True, it does degrade in the body. We used it in Vietnam to patch guys before and during a Medivac. Here's a bit of history: https://www.popularmechanics.com/technology/a25067/the-surprising-military-history-of-superglue/ The catch was, it wasn't a fix all for most of them. Even so, the medics had it and so did some of us door gunners.
-
No problem......
-
Are those MSW kits or should they be "MS"?
-
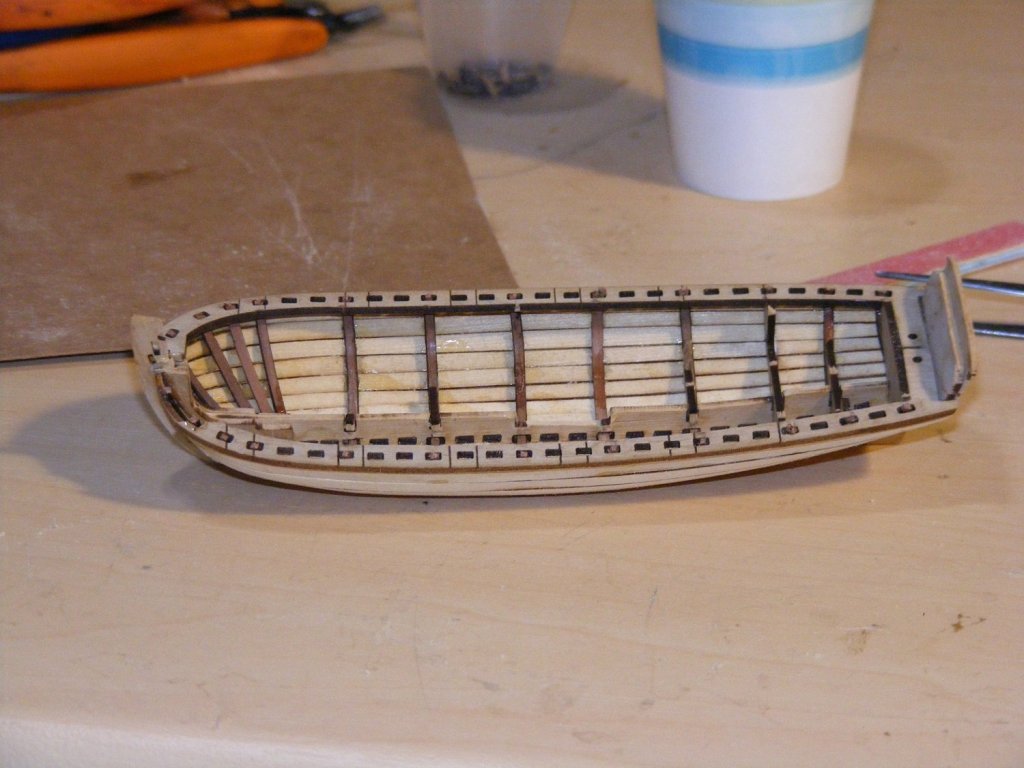
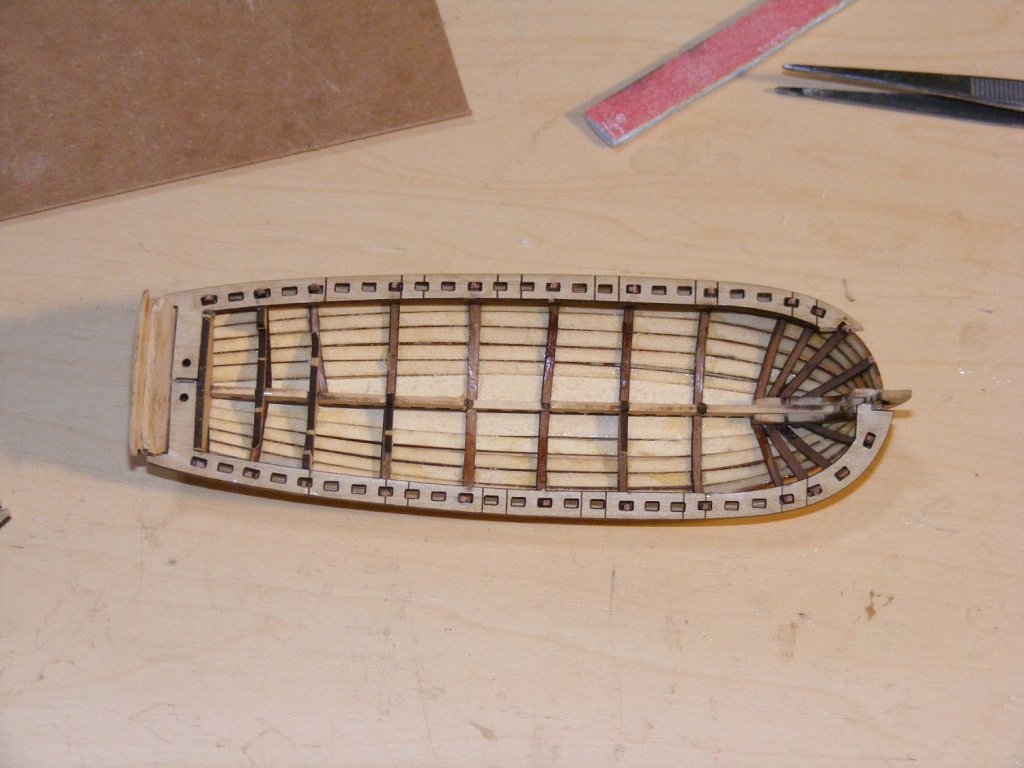
I hope not to need to paint. I'm just more partial to the wood look. This boat is 'big' one, Sam and is about 6" long.
-
But then he couldn't use power tools.
-
I do understand where you're coming from. When I made my comment I added the little icon to make sort of a joke. Oh boy, lost wax casting is a whole different critter as I understand it.
-
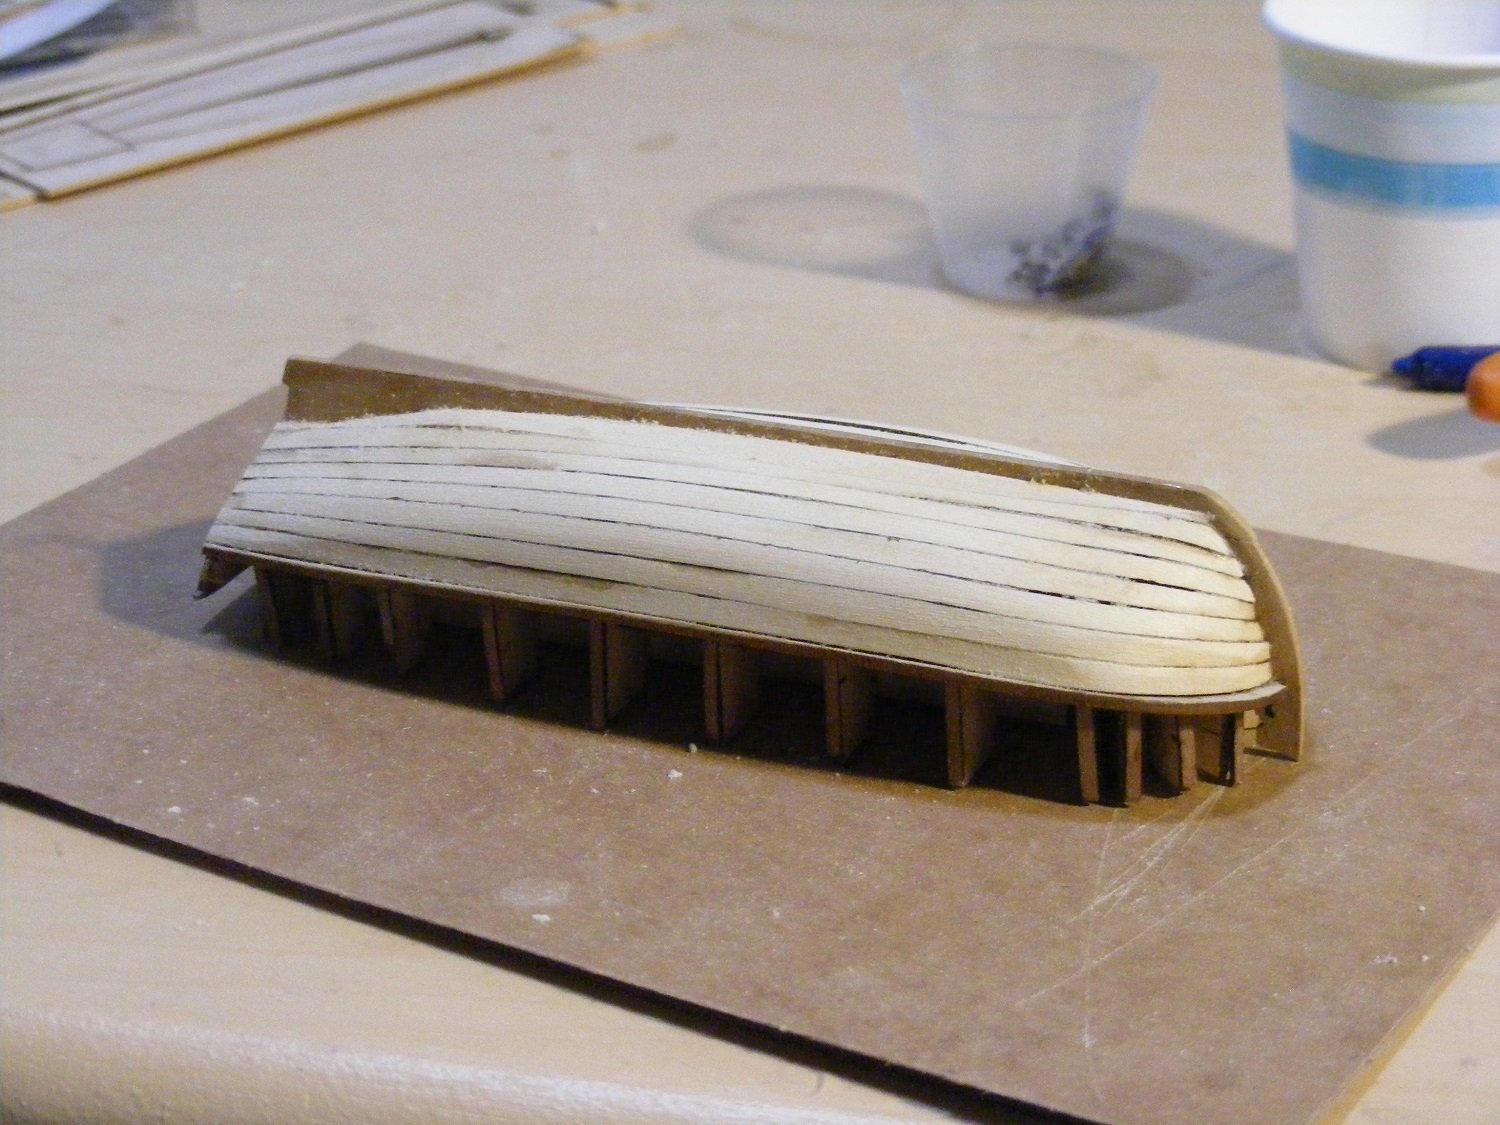
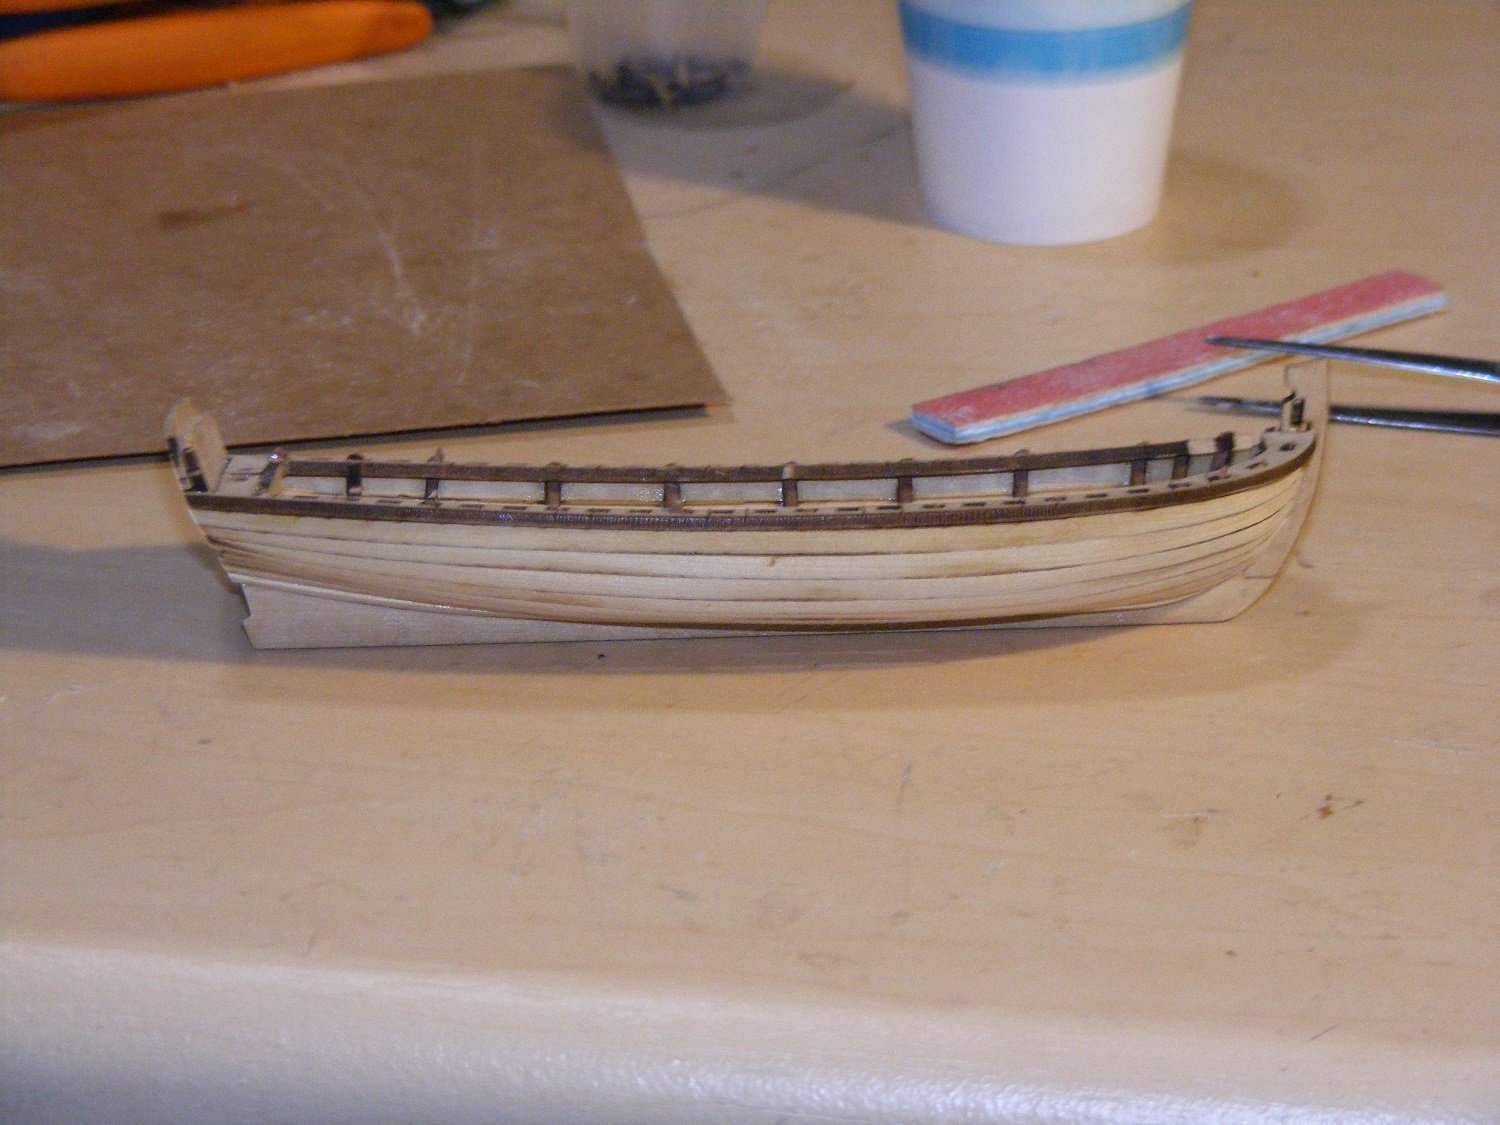
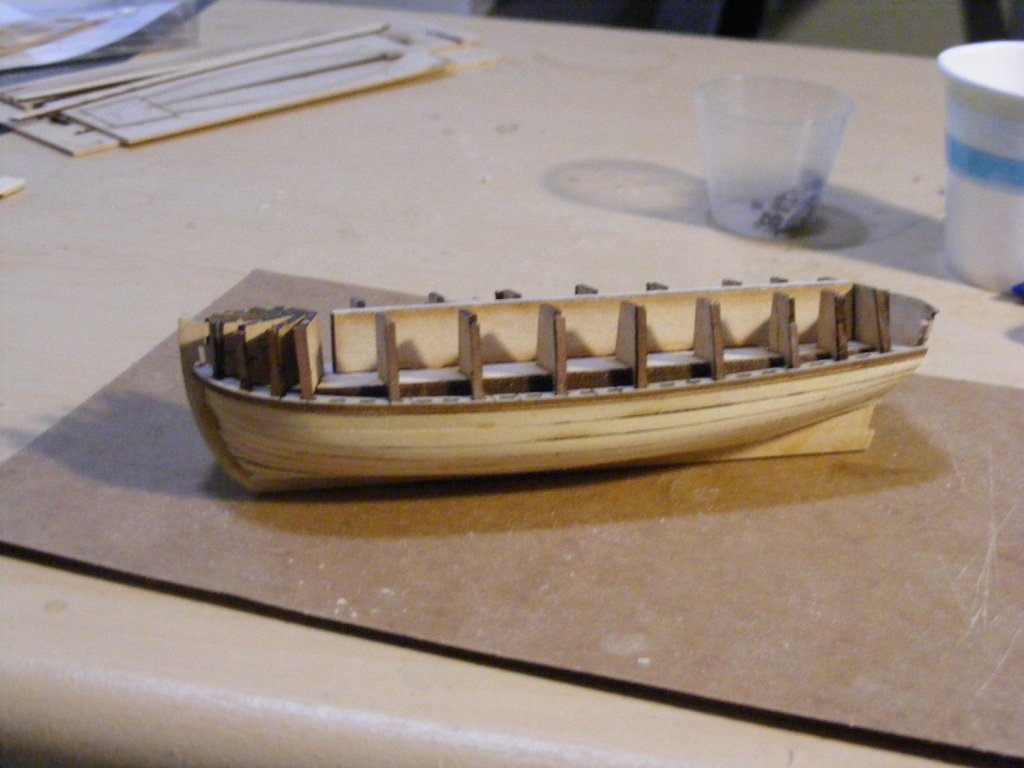
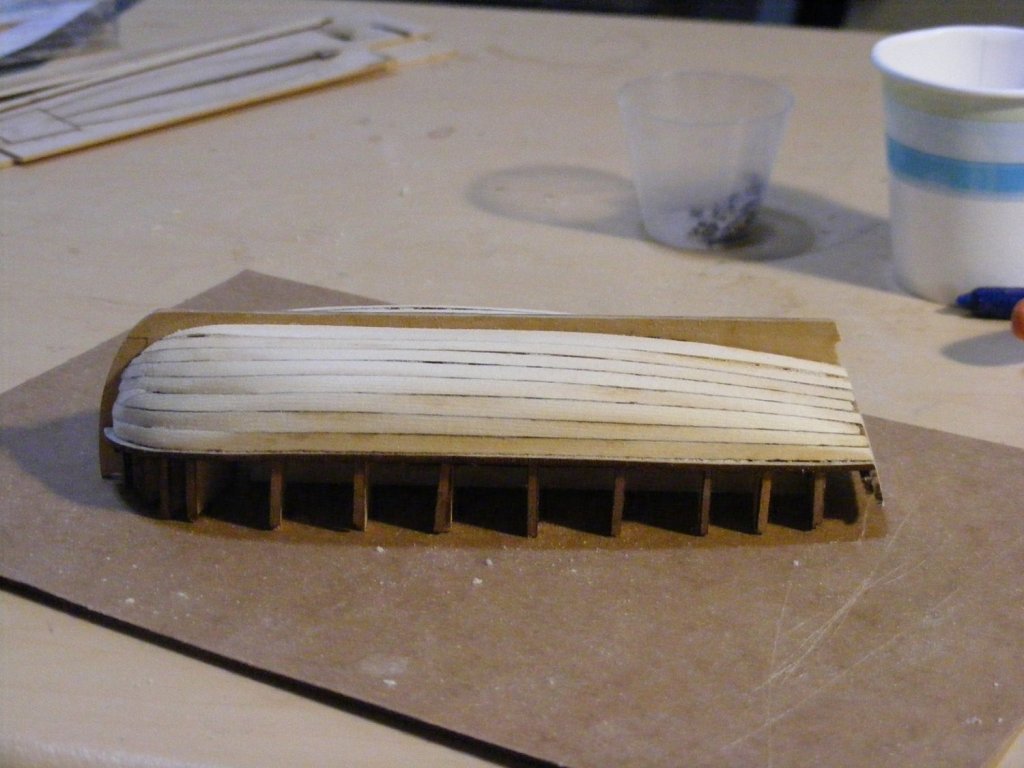
Time for an update on Licorne. "Yippee!" he says. The longboat has been planked and removed from the building jig. Overall, I pretty happy with it. It's not perfect but can be fixed. Worst case is bin it and the next one will be better but for now, I'm going to attempt the "fixes". I needs more sanding, perhaps a bit of filler. I go with filler, I'll find some stain or paint to resemble the planking wood. I need to finish cleaning it up inside and out, adding the rest of the internal ribs and the decking. I'm not adding too much internal detail as this one is on the bottom of the stack of 3 ship's boats. What's a bit scary is they get smaller... Here's the photo's before and after removing it from the jig. Yes, there's a bit of damage, but after finding the bits in the trash pile, it's been fixed. The first three on "on jig" and the second three are after the jig has been removed.


-
Sweet work indeed, Mark, and a very impressive arsenal. So don't think you want to take commissions for cannons?
-
Check my edit as I added a printing comment.
-
The 0DoubleFrame64 is for a baseline if you were to build this at 1:64. The 3 numbers at the end of the drawings "481" are for the 1:48 build which this project was designed for. The "64" is for reference only as such. For 1:48, there's basically two drawing for every frame: a "DoubleFrameComponent481" and "DoubleFrameAssembly481" is used. Edit: Print not at 100% but "Actual Size". After printing, use the scale bar at the "bottom" or "side" of the plans to verify. I hope this helps.